Monday, December 28, 2020

Low Carb Gingerbread Spice Granola

Low Carb Gingerbread Spice Granola
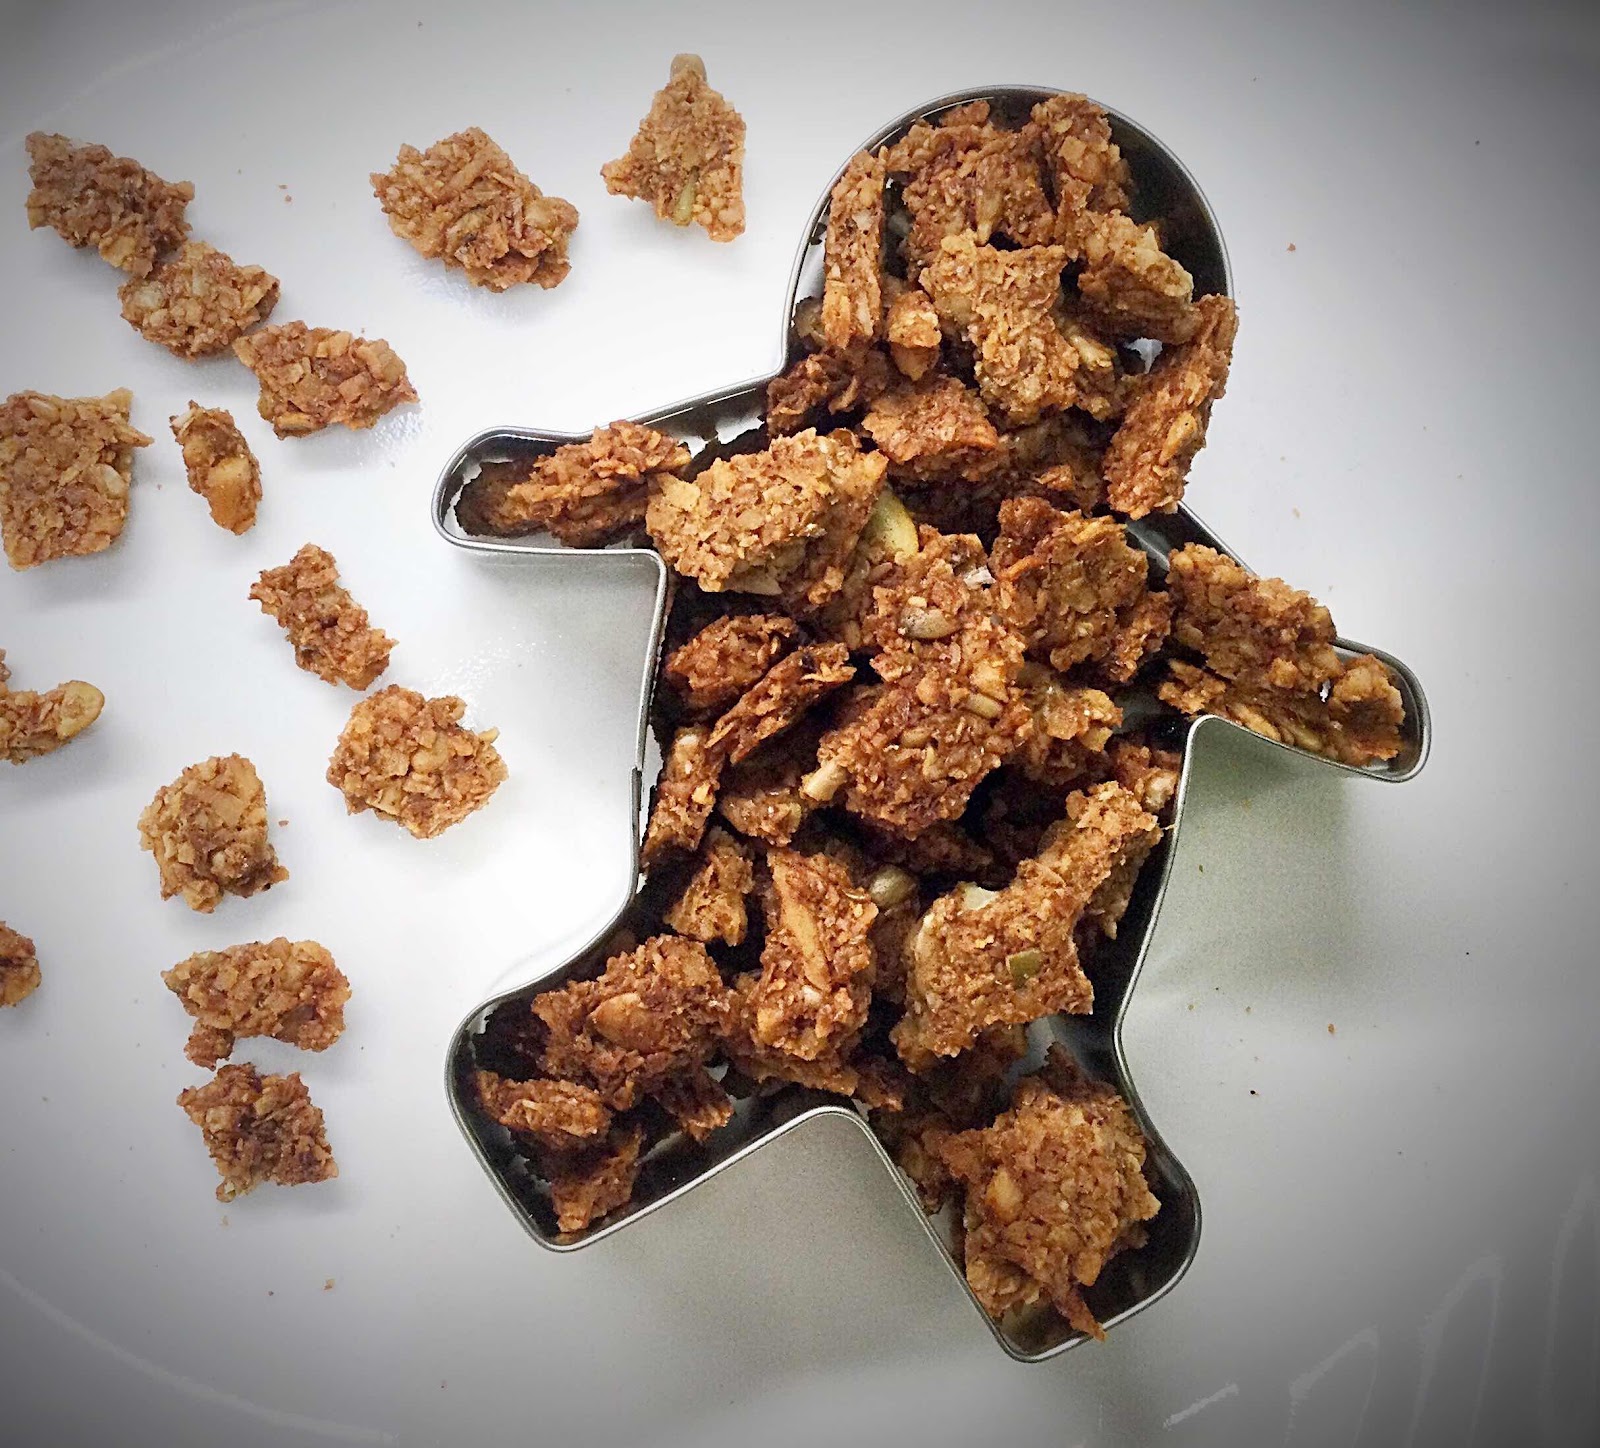
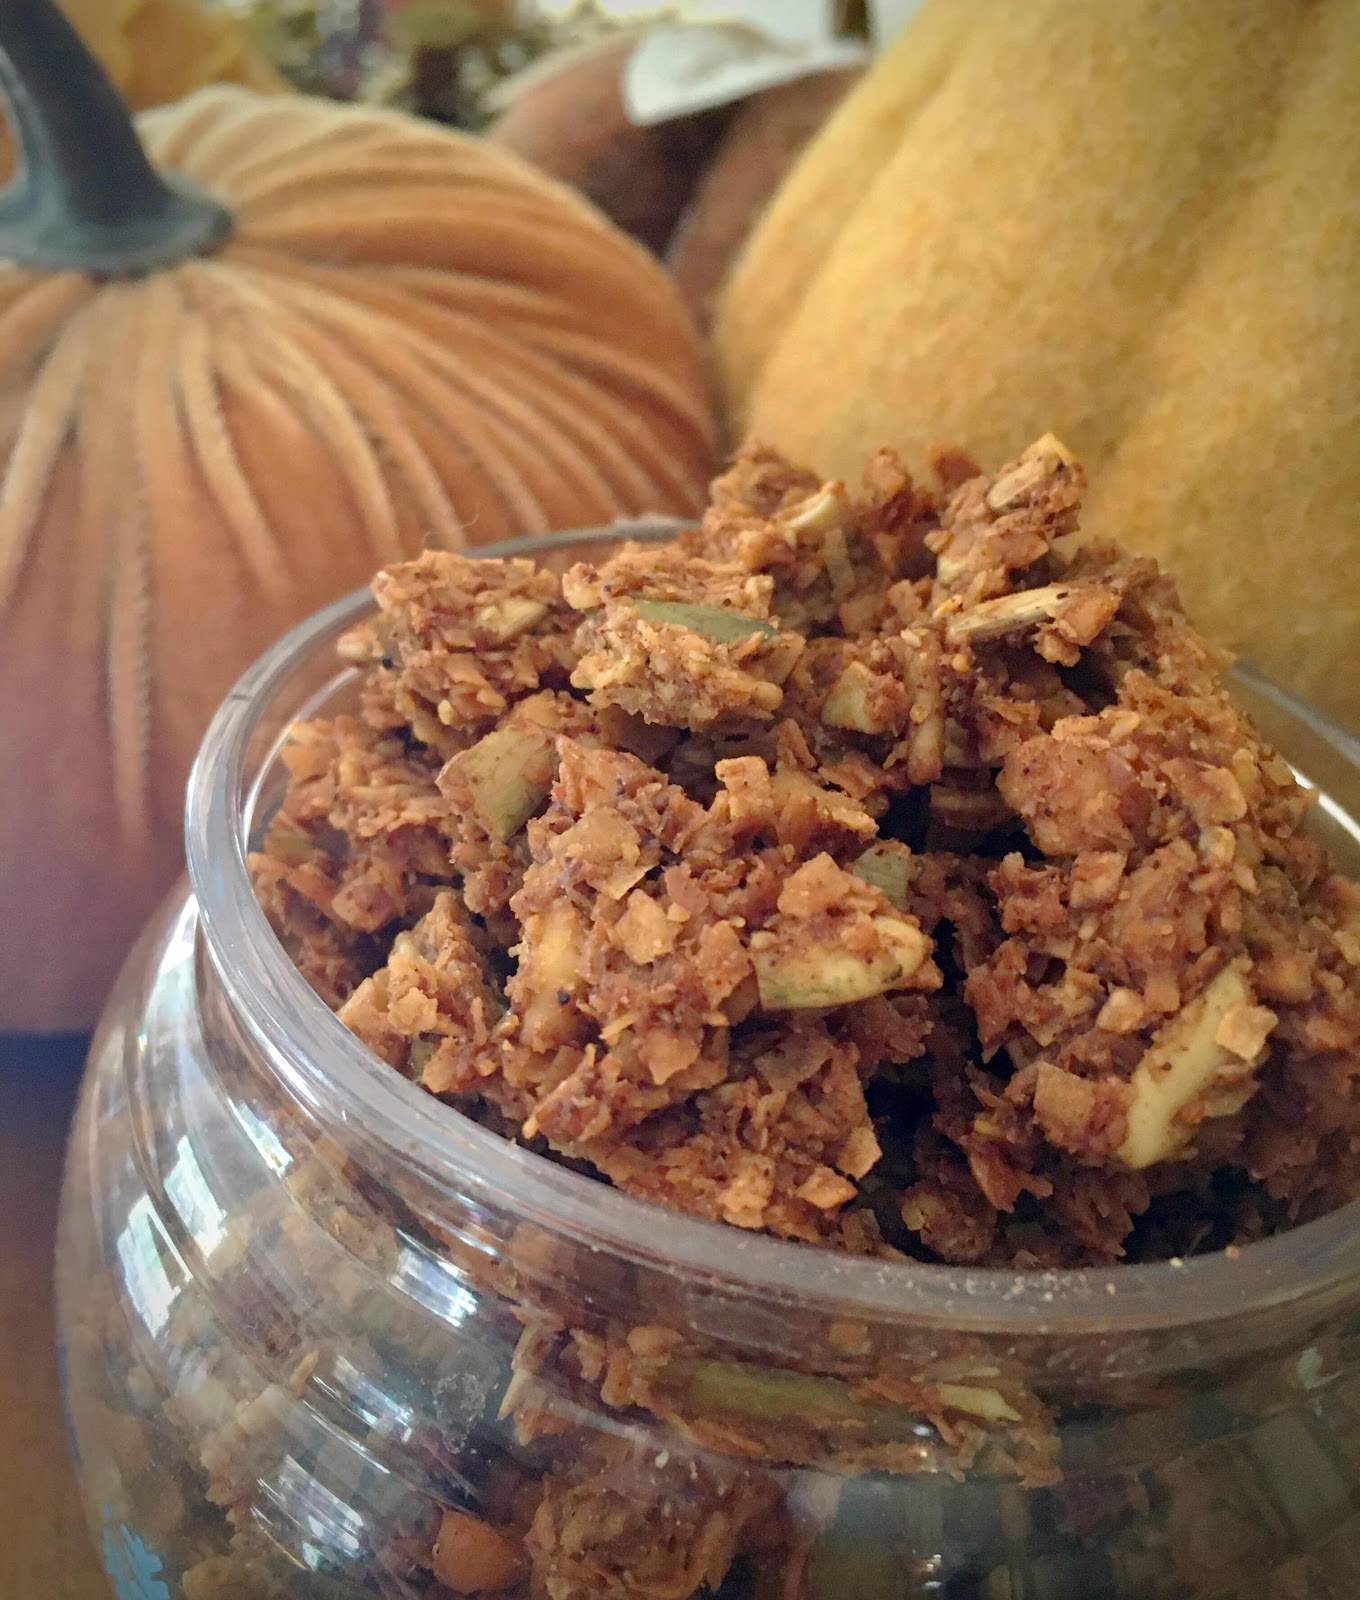
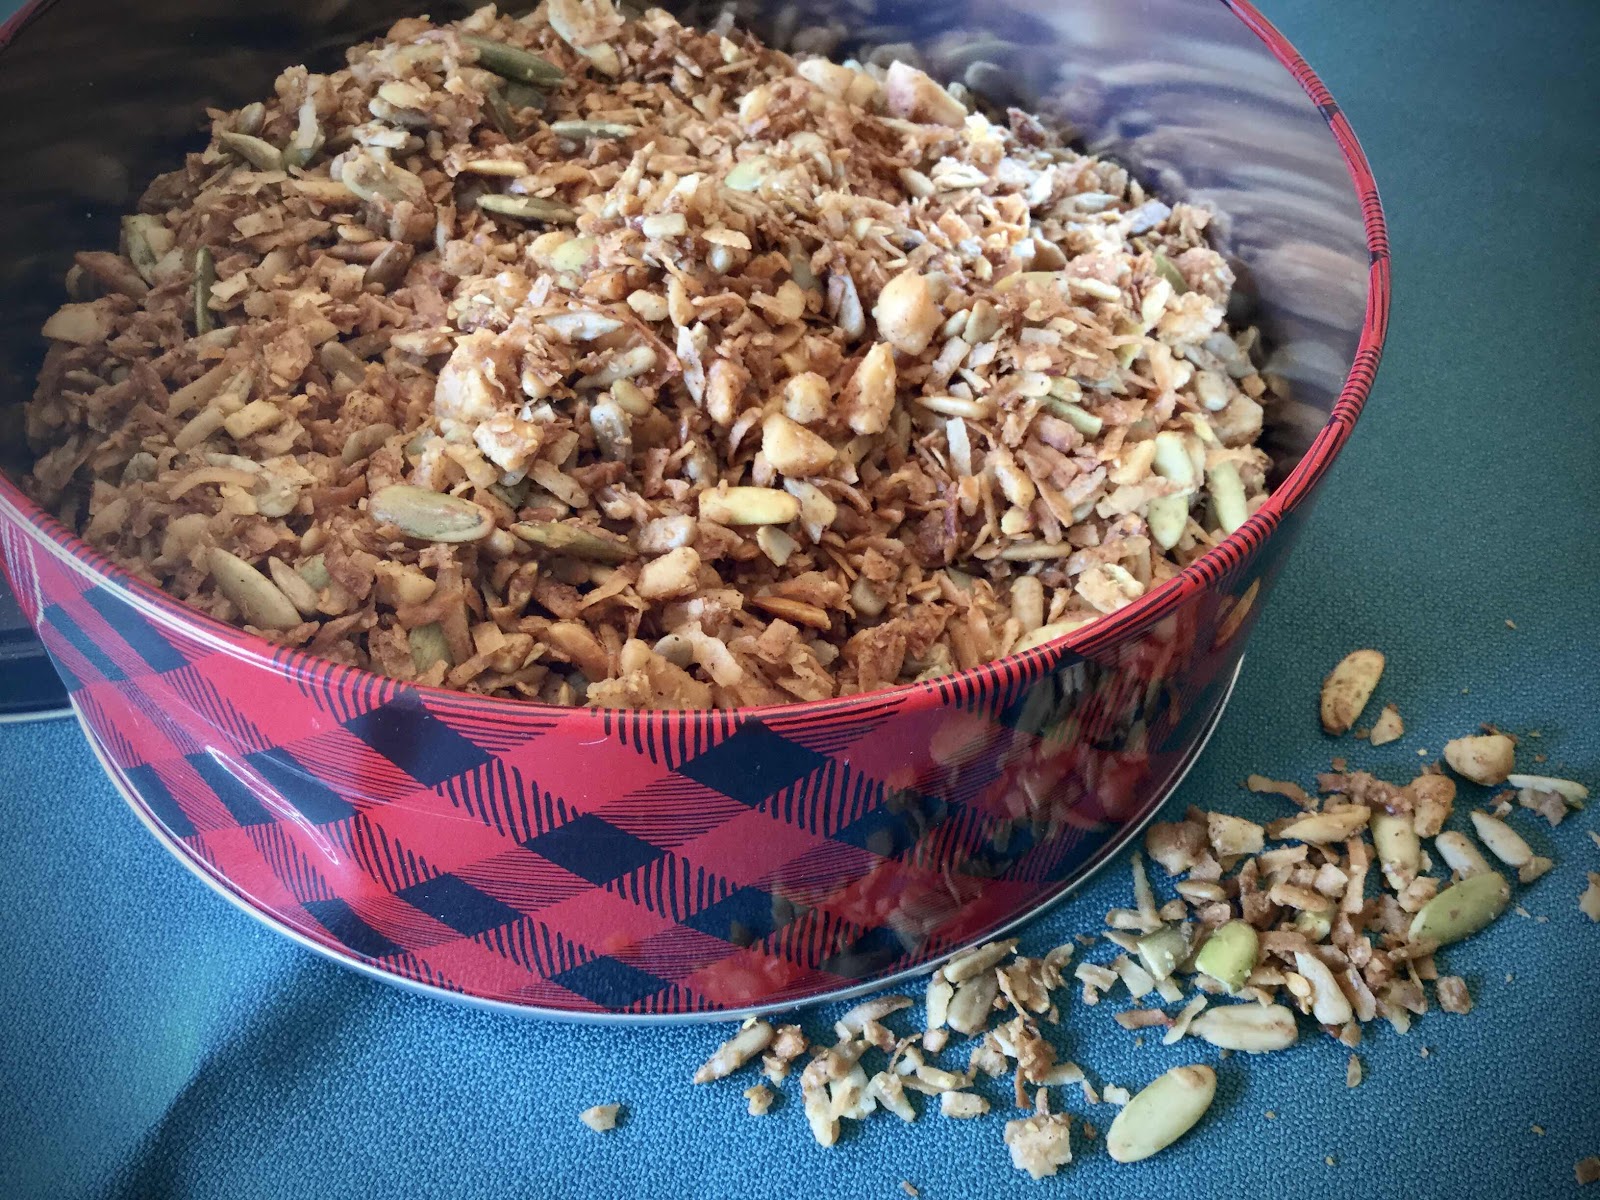
Spice up your low carb granola with the traditional flavor of gingerbread! Like all granola, this recipe is very easy to make and will fill your house with the irresistible aroma of holiday baking. 

Note: To make this granola truly low oxalate, substitute 1/2 teaspoon of both ginger and cinnamon extracts with a few drops of clove oil for the dried ground gingerbread spice mix (which is shockingly very high in oxalates!). If you need to be nut free, simply omit the macadamia nuts and substitute with more sunflower seeds and pepitas in their place (this will lower the oxalates further, too). That’s the best part about making homemade granola, you can customize it to your own personal taste and preferences!

Low Carb Gingerbread Spice Granola
Makes about 14 servings (1/4 cup each)

1-1/2 cup unsweetened shredded coconut 
1/3 cup sunflower seeds
1/3 cup pepitas (pumpkin seeds)
1/2 cup macadamia nuts or pecans
1/2 cup golden flaxseed meal
1/2 cup Golden LaKanto Monkfruit sweetener (or Swerve Brown)
1 teaspoon gingerbread spice (or substitute extracts for low oxalate and add to liquid ingredients, see note in description above)
1/2 teaspoon salt
2 egg whites (1/4 cup)
2 teaspoons finely minced ginger (fresh or from a jar)
2 tablespoons melted butter
2 tablespoons sugar free simple syrup (or SF maple syrup)
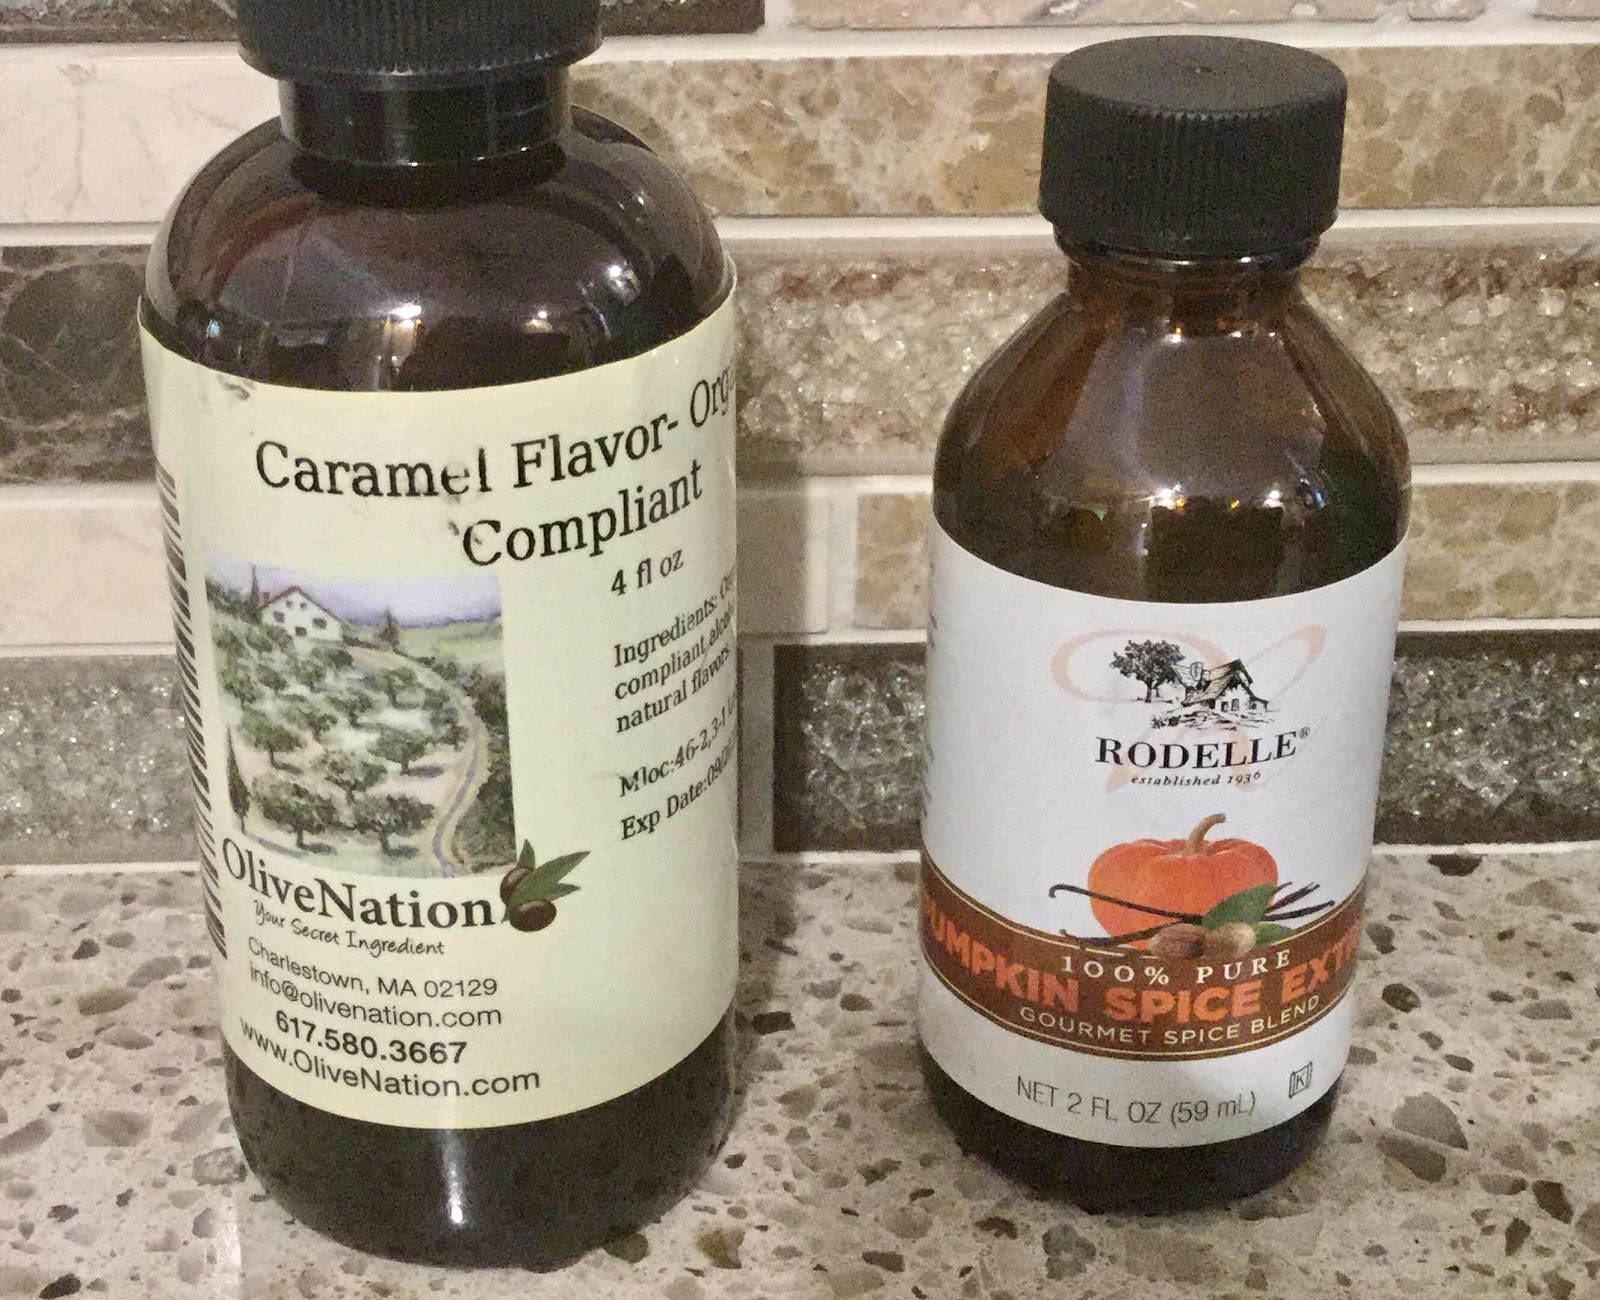
3/4 teaspoon molasses extract (or substitute 2 teaspoons molasses, but will add some carb)
24 drops OOO Gingerbread Cookie flavoring (or more gingerbread spice, if not concerned about oxalates)
1/2 teaspoon vanilla extract
1/2 teaspoon cinnamon extract (or ground cinnamon, if not concerned about oxalates)

1. Preheat the oven to 250 degrees Fahrenheit. Prepare a large cookie sheet by lining with parchment paper; set aside.

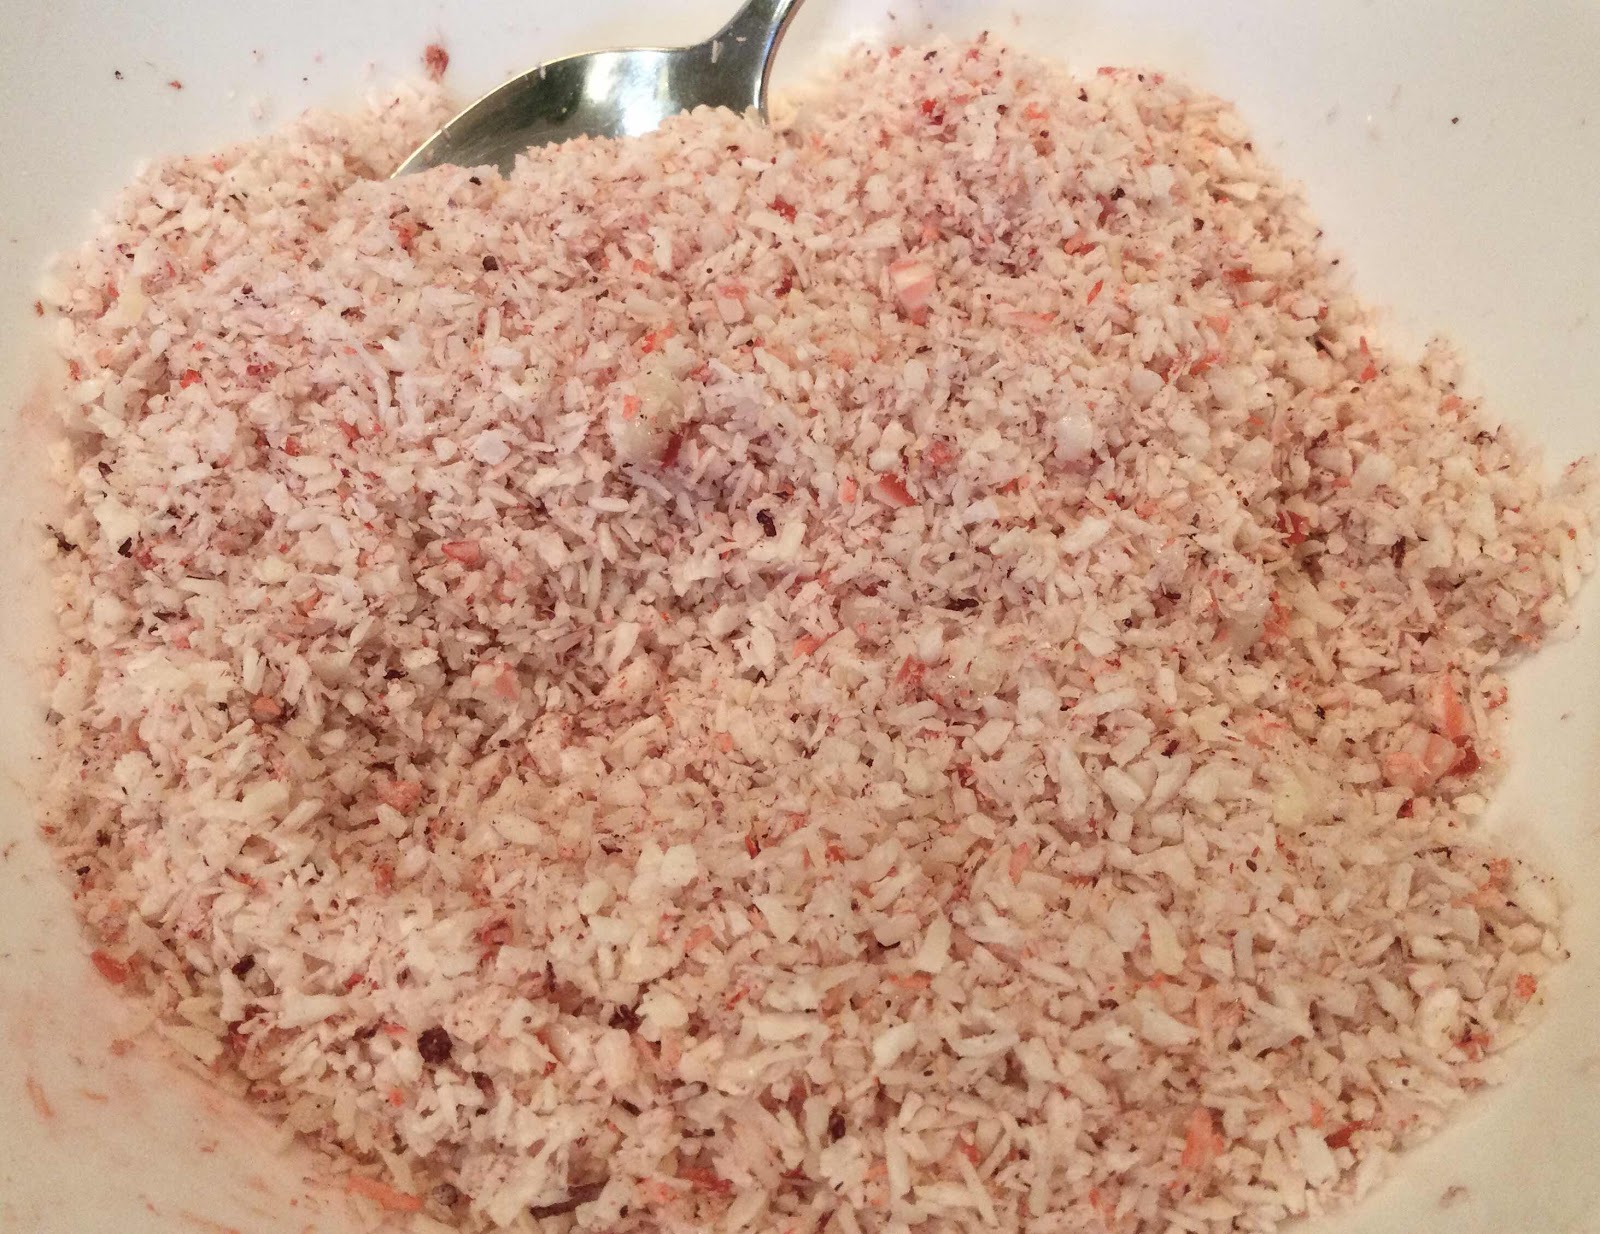
2. Place the coconut, sunflower seeds, pepitas and macadamia nuts in a food processor and pulse until the mixture resembles rough-cut oatmeal. Pour into a large mixing bowl and add the flaxseed meal, sweetener, gingerbread spice and salt. Stir to combine.

3. Whisk together the egg whites and minced ginger until frothy. In another small bowl, whisk together the melted butter, sugar free simple syrup, extracts and OOO Gingerbread Cookie flavoring. Pour the egg white mixture and the butter/syrup mixture into the dry ingredients and stir until well distributed and all of the dry ingredients are well coated.

4. Pour the granola onto your parchment-lined cookie sheet and spread out and press down into a thin layer. (I put my hand into a plastic sandwich bag to prevent my hands turning into a sticky mess. Another suggestion is to cover the granola with plastic wrap and use a rolling pin.) You want the granola in a thin layer, about 1/4” to 1/2” thick.

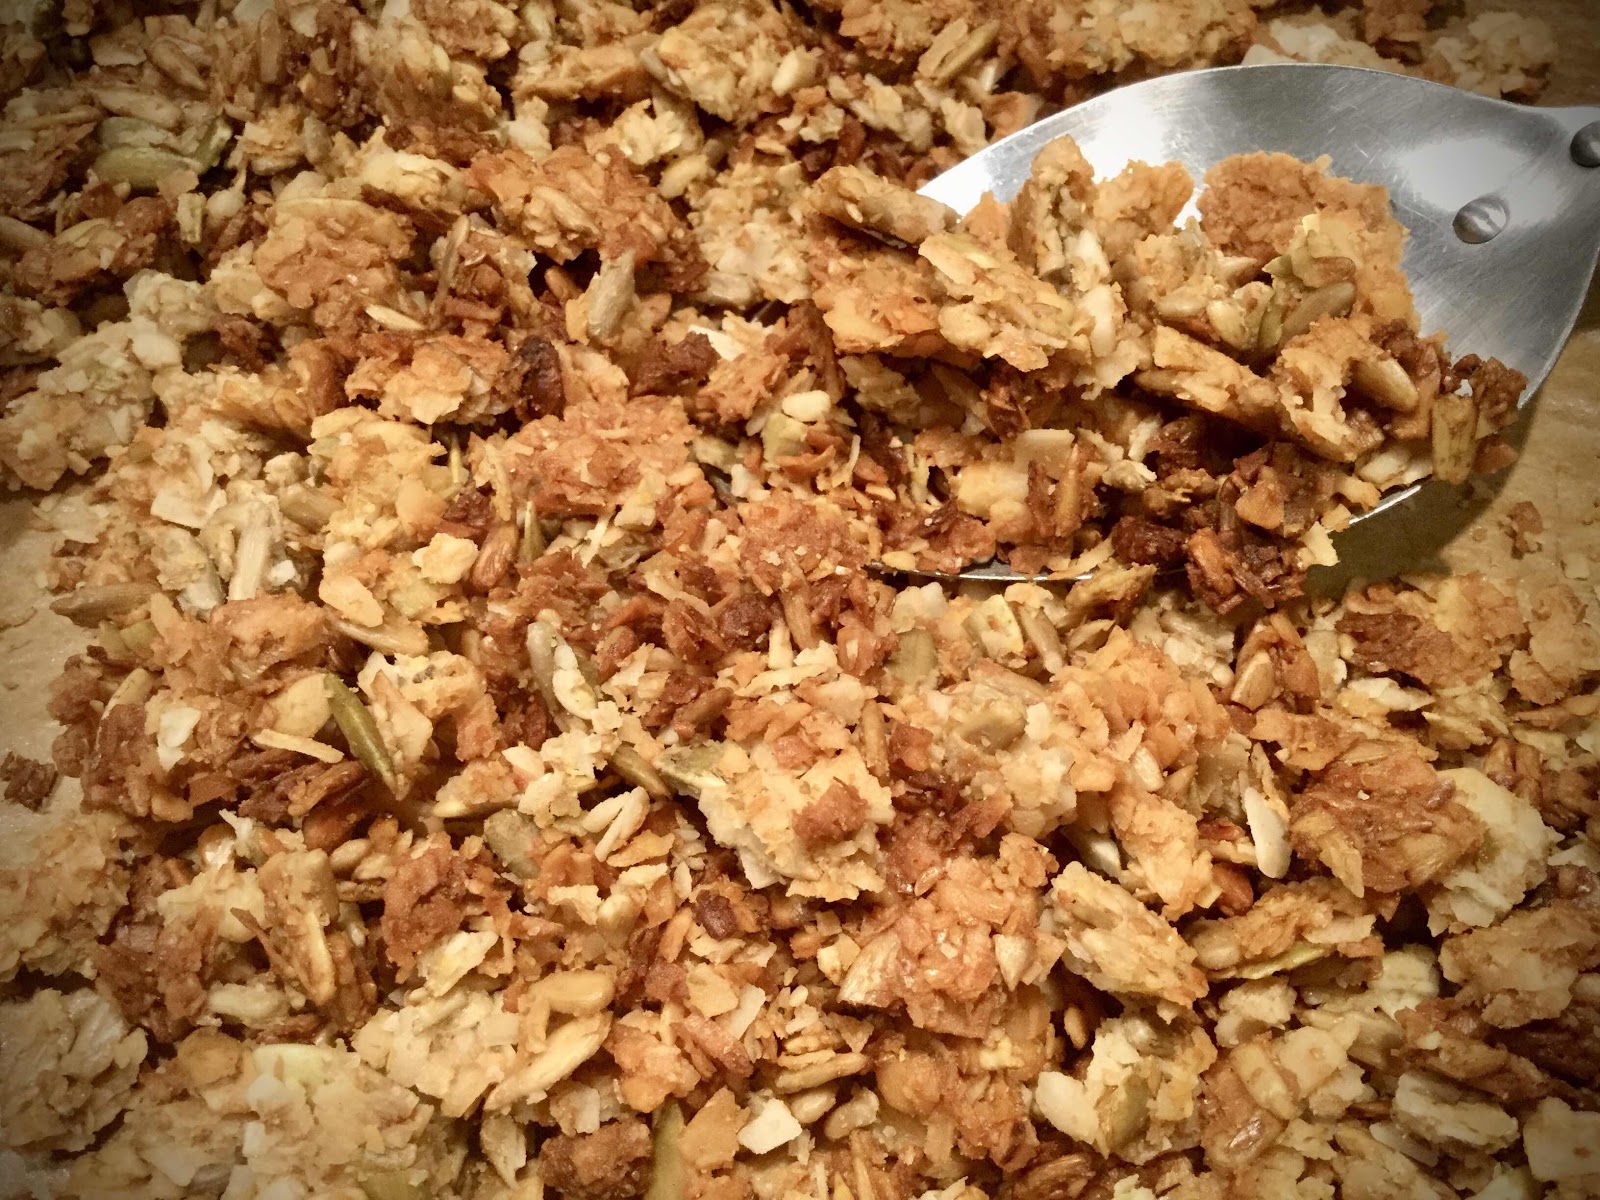
5. Place the baking sheet into the preheated oven and bake for 1 hour. Then use a spatula to break up and turn over the granola. Return to the oven and continue baking for 15-30 minutes or until deep golden brown in color. Remove from the oven and allow to cool completely on the baking sheet. The granola will crisp up as it cools.

6. Once it has cooled completely, break into bite-size pieces and store in an airtight container at room temperature for up to 3 weeks. This granola can be served as a breakfast cereal, sprinkled over yogurt for a bit of crunch or eaten plain as a snack or dessert.

Nutritional Information per 1/4 cup: 171 calories, 6.1 g carbohydrate (3 g dietary fiber, 0.9 g sugars, 0.9 g sugar alcohols), 15.1 g total fat (7.4 g saturated fat, 0 g trans fat), 4 mg cholesterol, 139 mg sodium, 8 mg calcium, 29 mg potassium, 1 mg iron, 18 IU Vit A, 3.8 g protein. Net carbs per serving: 3.1 grams

Total Oxalate per serving (made with dried spices): 6.1 mg; Soluble Oxalate: 3.1 mg. (Made with dried spices, this is a Medium Oxalate food.)

Total Oxalate (if made with extracts only, no dried spices): 3.9 mg; Soluble Oxalate: 2.4 mg

Recipe and Photo by Kathy Sheehan, copyright 2020
All rights reserved. Please do not duplicate without the author’s permission. 

Wednesday, December 23, 2020

Low Carb Hot Chocolate Bombs

Low Carb Hot Chocolate Bombs
Hot Chocolate Bombs are all the rage and will be found in many stockings of my family and friends this year! They are a lot of fun, easy to make with the right supplies and can be made sugar free and keto too. When you place one in a mug and add hot milk, the outer coating of chocolate melts and the cocoa mix and marshmallows burst forth to make the most delectable, rich hot cocoa ever! 

Supplies needed:
2.5” to 2.75” round silicone candy mold
A variety of sugar free baking chips (I used Lily’s)

Low Carb Hot Cocoa Mix:
Yields about 1 cup (8-9 servings of 2 tablespoons each)

1/2 cup unsweetened cocoa powder
1/4 cup heavy cream powder (or powdered milk, but will add some carbs)
6 tablespoons granulated erythritol sweetener 
1 teaspoon stevia powder (I used SweetLeaf brand)
1/4 teaspoon salt
1/2 teaspoon vanilla powder (optional)

1. Mix all of the Low Carb Hot Cocoa Mix ingredients together. Stir until well combined and no lumps remain; set aside.

2. Melt sugar free baking chips by microwaving in a microwave-safe bowl for 15 seconds. Allow the chips to sit for a few minutes and stir. If additional melting is needed, microwave for 6 second intervals.

Spread melted chocolate in the mold
3. Spoon about 1 tablespoon or so of melted chocolate into each cavity of the round mold. Using the back of a spoon, spread the chocolate around and up the sides of the mold. Refrigerate until set. (I put mine in the freezer for 5-10 minutes.) Using the back of a spoon or pastry brush, add a bit more of the melted chocolate around the top edge and any weak spots that were not adequately coated previously. Refrigerate again until set. Carefully remove the half spheres from the mold. (If you want a demonstration of how to make the chocolate spheres, I suggest you check out YouTube. There are many videos showing how this is done. Just search for Hot Chocolate Bombs.)

4. Heat a ceramic or heat-safe plate in a low oven (about 160 degrees F). Very carefully invert a chocolate half sphere onto the warm plate and twist briefly, just long enough to smooth out the edge.

Fill one half sphere with cocoa mix
5. Fill the half sphere with 2 tablespoons of the hot cocoa mix and, if desired, add sugar free mini marshmallows and any other ingredients to create unique flavors (see list below).

6. Take the remaining empty half sphere, hold the edge to the warm plate to begin melting the chocolate and quickly place on top of the filled half sphere to create a ball. Refrigerate until the seam has set.

Place an empty chocolate sphere on top to make a ball

7. Decorate the Hot Chocolate Bomb as desired. (When I drizzled chocolate on the top to decorate, I turned the chocolate bomb so the seam was up and drizzled the chocolate over the seam to strengthen it.)

Drizzle melted chocolate over the top and add sprinkles to decorate
8. To make hot chocolate using a Hot Chocolate Bomb, place the bomb into a mug and carefully pour very hot milk of your choice over the bomb (try to concentrate the hot liquid in one spot, if you can, to hasten the melting of the outer shell). Stir until the melted chocolate and hot cocoa mix is thoroughly incorporated and enjoy! (Check out my YouTube video below to see the bomb in action!)


Seven different keto flavors

7 Different Keto Flavor Ideas:

Peppermint Bark: I used Lily’s White Chocolate Peppermint baking chips to make the outer shell. I filled it with 2 tablespoons of hot cocoa mix, 3 drops of peppermint extract and some crushed sugar free peppermint candies.

Chocolate Peanut Butter: I used Lily’s milk chocolate baking chips for the outer shell. I filled it with 1 tablespoon + 1 teaspoon of hot chocolate mix and 2 teaspoons peanut butter powder (no sugar added).

Mexican Chocolate: Milk or dark chocolate outer shell. Fill with 2 tablespoons hot cocoa mix, 1/4 teaspoon ground cinnamon and 3 drops of cinnamon extract.

White Chocolate Ginger: Use Lily’s white chocolate baking chips to make the outer shell. Fill with 2 tablespoons of my white chocolate powder (click here for the recipe), ground ginger and a few drops of pumpkin spice extract or gingerbread candy flavoring drops.

Black and White: I made the outer shell with 1/2 white chocolate sphere and 1/2 dark chocolate sphere. Fill with 1 tablespoon hot cocoa mix and 1 tablespoon white chocolate powder.

Mocha: Chocolate outer shell. Fill with 2 tablespoons hot cocoa mix and 1 teaspoon instant coffee.

Chocolate Mint: I used Lily’s Chocolate Mint baking chips to make the outer shell. Fill with 2 tablespoons hot cocoa mix and a couple of drops of mint extract.

Nutritional information will vary, depending on the ingredients you use.

Photos and video by Kathy Sheehan, copyright 2020
All rights reserved. Please do not duplicate without the author’s permission.

Friday, December 18, 2020

Keto White Chocolate Powder

Keto White Chocolate Powder
I’ve been on the lookout for white chocolate powder online. The one gourmet brand I found was full of sugar and included maltodextrin, soy and other questionable ingredients. I knew I could do better and started experimenting in my kitchen. I am so pleased with how this mix turned out! It makes the best, creamiest Hot White Chocolate drink, but it also can be used to flavor coffee, smoothies or protein shakes and in any recipe where you want a rich, complex white chocolate flavor that is unforgettable!

Keto White Chocolate Powder
Yields 3/4 cup (12 servings)

1-1/2 ounces of cocoa butter (wafers or chopped)
1/4 cup heavy cream powder (I used Anthony’s brand)
2-3 tablespoons powdered erythritol sweetener, or to taste
A tiny pinch of salt
1 teaspoon vanilla powder

1. Place all of the ingredients into a food processor at the same time and process in pulses until the cocoa butter is finely chopped into minuscule bits and all of the ingredients are well combined. Store in an airtight container or glass jar at room temperature. (Note: Take your time while processing and pulse the mixture. The heat of the food processor blades could begin to melt the cocoa butter, if you process too vigorously. If you see this happening, stop the food processor and stir. Allow the mixture to cool off for a while before you continue pulsing.)

2. To make hot white chocolate, place a tablespoon of the mix into a mug and add 3/4 cup hot, low carb milk of your choice. (For low oxalate, choose coconut milk.) Stir until the mixture has incorporated and the hot cocoa is smooth.

3. You can jazz up the flavor your hot white chocolate by adding a drop or two of peppermint extract, strawberry extract, chocolate extract or orange extract.

4. Other uses: Stir into coffee, a smoothie or protein shake. Use as the powdered cocoa mix when making sugar free Hot Chocolate Bombs. Add to low carb cake or cupcake batter for a richer flavor. It’s also delicious when added to pancake batter!

Hot White Chocolate made with powder
Nutritional Information per 1 tablespoon: 46 calories, 1 g carbohydrate (0 g dietary fiber, 0.3 g sugars, 0.7 g sugar alcohol), 5 g total fat (2.5 g saturated fat, 0 g trans fat), 4 mg cholesterol, 3 mg sodium, 6 mg calcium, 8 mg potassium, 0 g protein. Net carbs per serving: 0.3 grams

Photos and recipe by Kathy Sheehan, copyright 2020
All rights reserved. Please do not duplicate without the author’s permission.

Saturday, December 12, 2020

Low Carb White Chocolate Peppermint Cake

Low Carb White Chocolate Peppermint Cake
It is official. This is one of the best sugar free, low carb cakes I’ve ever made! Upon tasting it, my daughter declared, “It tastes like peppermint ice cream but in cake form!” Every year, I make a special dessert to go with our simple dinner of Christmas Eve Soup...the votes have been counted and this cake is the winner!

Low Carb White Chocolate Peppermint Cake
Makes 12 servings

Cake Ingredients:
96 grams coconut flour (about 3/4 cup + 2 tablespoons)
2/3 cup granulated erythritol sweetener 
1/3 cup unflavored whey protein powder
1 tablespoon baking powder
1/4 teaspoon salt
4 large eggs, room temperature 
4 egg whites, room temperature
1/4 cup unsalted butter, melted and cooled
4 ounces sugar free white chocolate baking chips (use Lily’s peppermint flavor, if possible)
1/4 cup heavy cream
1/4 cup coconut milk, room temperature 
1 teaspoon vanilla extract 
1/2 teaspoon peppermint extract (add 1/4 tsp if not using peppermint chips)

Peppermint Frosting Ingredients:
8 ounces cream cheese, room temperature 
3/4 cup unsalted butter, room temperature (1-1/2 sticks)
8 ounces plain mascarpone cheese, room temperature 
1 cup powdered erythritol sweetener (confectioner’s)
1 teaspoon vanilla extract 
1 teaspoon peppermint extract 
2-4 tablespoons heavy cream (only if needed)

1. Preheat the oven to 325 degrees Fahrenheit. Grease two 8” round cake pans (or three 6” round cake pans). Line with parchment paper and grease the parchment paper. (Optional, but for best results, wrap the outside of the pans with homemade cake bands made from wet newspaper strips wrapped in foil or use commercially available cake pan bands. Using cake pan bands are not necessary, but will keep the edges from browning too much and results in a softer, more tender cake. To learn more about using cake pan bands, click here.)

2. In a small saucepan, heat the heavy cream until simmering. Remove from heat and add the 4 ounces white chocolate baking chips. Allow to sit for a few minutes, then stir until smooth. Set aside to cool a bit while you make the cake batter.

3. In a medium bowl, whisk together the coconut flour, sweetener, whey protein powder, baking powder and salt until no lumps remain. In a large bowl and using an electric mixer, beat the eggs, egg whites, melted butter, white chocolate mixture, coconut milk and extracts until well combined. Add the dry ingredients and beat just until there are no lumps and the batter is smooth.

4. Divide the batter evenly between the prepared cake pans and smooth to the edges with an offset spatula or back of a spoon. Bake for 30-35 minutes until lightly browned around the edges, the tops are slightly firm to the touch and a toothpick in the center comes out clean. (If using 6-inch pans, check the cakes after 20-25 minutes.)

5. Remove from the oven and allow the cakes to cool in their pans for 10-15 minutes before running a sharp knife around the edges and turning out onto wire racks to cool completely before frosting. (Note that coconut flour cakes are very delicate when warm, so cooling in the pans for a while makes them easier to handle.)

6. To make the frosting, beat together the softened cream cheese, butter and mascarpone cheese until fluffy. Add the powdered erythritol sweetener and extracts and continue beating. If your frosting is too stiff, add one tablespoon of heavy cream at a time until the desired consistency is reached. Frost your cake and decorate as desired. Store your cake in the refrigerator, but the taste is best if allowed to sit at room temperature for at least 20 minutes before cutting and serving.

Keto White Chocolate Peppermint Cake
Nutritional Information per serving (1/12th of cake, no frosting): 130 calories, 6.9 g carbohydrate (3.2 g dietary fiber, 1 g sugars, 2 g sugar alcohols), 9.3 g total fat (5.7 f saturated fat, 0 g trans fat), 79 mg cholesterol, 203 mg sodium, 108 mg calcium, 53 mg potassium, 86 IU Vit A, 1 mg iron, 5.6 g protein. Net carbs per serving, without frosting: 3.7 grams

Nutritional Information per serving (1/12th of cake with frosting): 394 calories, 10.1 g carbohydrate (3.2 g dietary fiber, 1.6 g sugars, 2.7 g sugar alcohols), 35.6 g total fat (22.5 g saturated fat, 0 g trans fat), 157 mg cholesterol, 321 mg sodium, 130.6 mg calcium, 56 mg potassium, 258 IU Vit A, 1 mg iron, 9 g protein. Net carbs per serving, with frosting: 6.9 grams

Photos and recipe by Kathy Sheehan, copyright 2020
All rights reserved. Please do not duplicate without the author’s permission. 

Tuesday, December 8, 2020

Low Carb White Chocolate Peppermint Cookies

Low carb White Chocolate Peppermint Cookies on Santa Plate
This holiday season, I’m having so much fun creating recipes that highlight my favorite white chocolate peppermint flavor! These cookies are so light, elegant and delicious. My low carb peppermint candy sprinkles (see recipe here) make them festive and fun, adding beautiful color and the distinctive taste of candy canes!

Low Carb White Chocolate Peppermint Cookies
Makes 24 cookies

1-1/2 cups finely ground almond flour (substitute sunflower seed flour or finely ground macadamia nut flour for low oxalate)
1/4 cup coconut flour
1/2 teaspoon baking powder
1/2 teaspoon xanthan gum powder
1/8 teaspoon salt
1/2 cup unsalted butter, softened (1 stick)
2/3 cup powdered erythritol sweetener
1 large egg, room temperature 
1 tablespoon coconut milk, room temperature 
1 teaspoon vanilla extract
1/2 teaspoon peppermint extract (add an additional 1/4 tsp if not using peppermint baking chips)
2/3 cup sugar free white chocolate baking chips (if you have Lily’s peppermint flavor, that’s even better, see photo below)
1/2 cup Low Carb Peppermint Candy Sprinkles (see separate recipe here), divided

White Chocolate Glaze:
1 cup sugar free white chocolate baking chips
2 teaspoons refined coconut oil
1/8 teaspoon peppermint extract (omit if using peppermint flavored chips)

Lily’s sugar free white chocolate baking chips
1. Before making the cookie dough, make a batch of Low Carb Peppermint Candy Sprinkles (recipe here); set aside. Preheat oven to 325 degrees F and position the racks in the center of the oven. Line two cookie sheets with parchment paper or silicone baking mats.

2. In a medium bowl, whisk together the almond flour (or low oxalate flour substitute of your choice), coconut flour, baking powder, xanthan gum powder and salt; set aside.

3. Using an electric mixer, cream together the softened butter and powdered sweetener until light and fluffy. Add the egg, coconut milk and extracts and continue mixing until well combined.

4. Add the flour mixture and continue mixing until the dry ingredients are incorporated. Fold in the sugar free white chocolate chips and 1/4 cup + 2 tablespoons of the Low Carb Peppermint Candy Sprinkles until evenly distributed. (Save the remaining sprinkles to decorate the cookies later.)

5. Using a small cookie scoop, create 24 balls of dough and space them at least 2 inches apart on your prepared cookie sheets. Press down and flatten each ball with your hand until about 1/4 inch in thickness. (The cookies will not spread during baking.)

6. Bake in the preheated oven for 12-13 minutes, turning and switching the position of each cookie sheet in the middle of baking time. Bake until the edges are golden. Remove from the oven and allow the cookies to cool on the cookie sheets for at least 10-15 minutes before transferring them to wire racks to cool completely.

7. To make the glaze, place the baking chips and coconut oil in a microwave safe bowl and microwave for 15 seconds on high. Allow the chips to sit for a few minutes and then stir. If additional melting is needed, microwave in 6 second intervals. (You may also melt the baking chips in a double boiler over barely simmering water.)

8. Dip 1/2 of each cookie into the glaze and/or drizzle the glaze over the cookies. While the glaze is still wet, sprinkle with the remaining Low Carb Peppermint Candy Sprinkles. Allow the glaze to set before serving. (To hasten the process, you may refrigerate the cookies for 10 minutes.) Store cookies at room temperature for up to a week.

Low Carb White Chocolate Peppermint Cookies with Glaze
Note: This recipe, without the sprinkles and chips folded in, makes an excellent dough for rolling out and cutting with cookie cutters!

Nutritional Information per cookie: 120 calories, 3.8 g carbohydrate (1.7 g dietary fiber, 0.9 g sugars), 11.9 g total fat (4 g saturated fat, 0 g trans fat), 18 mg cholesterol, 55 mg sodium, 12.2 mg calcium, 40 mg potassium, 38 IU Vit A, 1.2 g protein. Net carbs per cookie: 2.1 grams

Photos and recipe by Kathy Sheehan, copyright 2020
All rights reserved. Please do not duplicate without the author’s permission. 

Monday, November 30, 2020

Keto Hot White Chocolate Peppermint Cocoa

Keto White Chocolate Peppermint Cocoa
The mornings and evenings are colder, which puts me in the mood for hot chocolate! This version uses white chocolate chips (either in peppermint flavor or plain) to create a delicious warming beverage that has a flavor reminiscent of Peppermint Bark. Perfect for any time of day, but especially at night, because there’s no caffeine...just pure, delicately sweet white chocolate and peppermint!

Keto Hot White Chocolate Peppermint Cocoa
Makes 1 serving

1-1/4 cups unsweetened coconut milk
2 tablespoons heavy cream
A tiny pinch of salt
2 tablespoons sugar free white chocolate chips (I used Lily’s Peppermint baking chips, see below*)
2-3 drops peppermint extract, or to taste
1/4 teaspoon chocolate or vanilla extract
6-7 drops monkfruit extract or liquid stevia, or to taste

1. Heat the coconut milk, heavy cream, pinch of salt and white chocolate chips in a small saucepan over medium-low heat, stirring constantly until the chips are melted and the mixture is hot and bubbly around the edges.

2. Remove from heat and add the extracts and sweetener. Stir to combine.

3. If you have one, use a frothing tool to create foam and pour into a mug. If desired, top with whipped cream and a sprinkle of crushed sugar free peppermint candies. Serve immediately. 

*Note: I used Lily’s sugar free Peppermint Flavor baking chips, which are available for a limited time at WalMart. If you can’t find them, just use any sugar free white chocolate chips and add enough peppermint extract to achieve the peppermint flavor you desire.

Lily’s Peppermint Baking Chips
Nutritional Information: 168 calories, 4.4 g carbohydrate (1.5 g dietary fiber, 0.6 g sugars), 17 g total fat (8.3 g saturated fat, 0 g trans fat), 42 mg cholesterol, 215 mg sodium, 572.6 mg calcium, 19 mg potassium, 120 IU Vit A, 1.4 g protein. Net carbs per serving: 2.9 grams

Photos and recipe by Kathy Sheehan, copyright 2020
All rights reserved. Please do not duplicate without the author’s permission. 

Wednesday, November 25, 2020

Duchess Cauliflower Casserole

Duchess Cauliflower Casserole
I saw an intriguing recipe on America’s Test Kitchen a few weeks ago for Duchess Potatoes. I immediately thought how delicious it could be made with cauliflower! This low carb recipe is super easy because I started with frozen riced cauliflower. Once baked, a golden brown crust forms on the top of the casserole creating a contrast to the creamy, buttery cauli-mash inside. This side dish is going to be a favorite on my Keto Thanksgiving Buffet this year.

Duchess Cauliflower Casserole 
Makes 6 servings (1/2 cup each)

20 ounces frozen riced cauliflower
2 tablespoons heavy cream 
1 tablespoon unsweetened almond or coconut milk
1 large egg, separated
1/2 teaspoon salt
1/8 teaspoon black pepper
A pinch of nutmeg
4 tablespoons melted unsalted butter, divided

1. Preheat the oven to 450 degrees Fahrenheit. Heat riced cauliflower in a large saucepan until thawed and most of the excess liquid has evaporated. Remove from heat and puree in a food processor until a mashed potato consistency is reached.

2. Whisk together the heavy cream, almond or coconut milk, egg yolk, salt, pepper and nutmeg. Stir this mixture into the mashed cauliflower along with 2 tablespoons of the melted butter until well combined.

3. Grease a small casserole dish and spread the cauliflower mash evenly in the dish.

4. Whisk together the egg white, remaining 2 tablespoons of melted butter and a pinch of salt. Pour 1/2 to 3/4 of the egg white mixture on the top of the cauliflower mash. Tilt the pan and allow the egg white mixture flow into the corners and all over the top until evenly coated. Use the flat side of a sharp knife to carve a diamond pattern into the top of the casserole, pressing only about 1/4 inch into the surface.

5. Place in the preheated oven on the middle rack and bake for 25-30 minutes, turning 1/2 way through cooking. Bake until the crust is a nice golden brown. Remove from oven and allow to rest for about 15-20 minutes before serving.

Nutritional Information per serving (1/2 cup): 120 calories, 4.6 g carbohydrate (2.2 g dietary fiber, 2.3 g sugars), 10.6 g total fat (6.4 g saturated fat, 0 g trans fat), 58 mg cholesterol, 234 mg sodium, 31 mg calcium, 14 mg potassium, 1 mg iron, 47 mg Vit C, 107 IU Vit A, 3.4 g protein. Net carbs per serving: 2.4 grams

Photo and recipe by Kathy Sheehan, copyright 2020
All rights reserved. Please do not duplicate without the author’s permission.

Saturday, November 21, 2020

Low Carb Peppermint Candy Sprinkles

Low Carb Peppermint Candy Sprinkles
I’m getting ready to make some holiday and winter desserts that call for crushed peppermint candy as an ingredient or decoration. There are sugar free peppermint candies available, but they contain a type of sugar alcohol (isomalt, mannitol, sorbitol or maltitol) that causes painful and embarrassing digestive issues! That’s not the kind of holiday gift I want for myself or to share with family or friends, so I avoid all sugar free candies with these offending sweeteners. Because I need peppermint candies in recipes, I decided to create a suitable substitute. This recipe is the result of my experimentation and, because it contains a small amount of real crushed candy canes combined with the coconut, it really does taste like crushed peppermint candies! I am so pleased with these sprinkles and look forward to the many delicious creations I’ll be making with them. 

Low Carb Peppermint Candy Sprinkles
Makes 1/2 cup (24 servings)

1/2 cup finely shredded unsweetened coconut (I used Bob’s Red Mill)
4 drops red food coloring
4 drops monkfruit extract or liquid stevia, or to taste
5 drops pepperment extract, or to taste
2 mini peppermint candy canes, crushed (I used candy canes made with real sugar)

In a small bowl, stir together all of the ingredients until well combined. Store in an airtight container at room temperature. 

Low Carb Peppermint Candy Sprinkles
Nutritional Information per 1 teaspoon: 14 calories, 0.8 g carbohydrate (0.2 g dietary fiber, 0.4 g sugars), 1.1 g total fat (1 g saturated fat, 0 g trans fat), 1 mg sodium, 0.1 g protein. Net carbs per serving: 0.6 grams

Photo and recipe by Kathy Sheehan, copyright 2020
All Rights Reserved. Please do not duplicate without the author’s permission. 

Saturday, November 14, 2020

Low Carb Yellow Cake

Low Carb Yellow Cake
I love to bake and decorating cakes has become a fun and creative hobby. It’s been difficult to find a really good low carb, gluten free, sugar free and low oxalate cake recipe, until now. I have made this cake several times and the result has been good, but the edges sometimes dried out before the center was done. After hearing about cake pan bands, that insulate the edges so the cake bakes more evenly and the edges don’t over-brown, I tried baking with them this time and the cake was PERFECTION! A tender and soft crumb throughout with no tough, dried out edges! My entire family loved it, whether they’re low carb or not! Comments all around were that this might be the best low carb cake I’ve ever made. To learn how to make your own cake pan bands out of newspaper and foil, watch this video by America’s Test Kitchen: https://youtu.be/1eU6UpHH3-s

Low Carb Yellow Cake
Makes 12 servings

96 grams coconut flour (about 3/4 cup + 2 tablespoons)
3/4 cup granulated erythritol sweetener 
1/3 cup unflavored whey protein powder
1 tablespoon baking powder
1/4 teaspoon salt
6 large eggs
1/2 cup unsalted butter, melted and cooled
1/2 cup unsweetened coconut milk
1-1/2 teaspoons vanilla extract

1. Preheat oven to 325 degrees Fahrenheit. Prepare two 8-inch baking pans (or three 6-inch pans) by wrapping with cake pan bands (optional, but results in a more tender cake, see link in the description above to learn how to make them with newspaper and foil.) Next, grease pans, line with parchment paper and grease the parchment paper; set aside.

Homemade Cake Pan Bands
2. In a medium bowl, sift or whisk the coconut flour, sweetener, whey protein powder, baking powder and salt. (If you can’t weigh the coconut flour, scoop and level with a light hand, do not pack down.)

3. In a large bowl and using an electric mixer, beat the eggs until light and lemon yellow in color. Add the melted butter, coconut milk and extract. While the mixer is on low, slowly add the dry ingredients and then switch the mixer to medium and beat just until the dry ingredients are incorporated and a smooth batter forms. It will be thicker than traditional cake batter, but that’s okay.

4. Divide the batter evenly among the prepared cake pans, spread to the edges and smooth the tops with an offset spatula or back of a spoon. Bake for about 30 minutes if using 8-inch pans until lightly brown around the edges, the tops are slightly firm to the touch and a toothpick in the center comes out clean. (If using 6-inch baking pans, test cake after 20-25 minutes.) Do not overbake.

5. Remove from the oven and allow the cakes to cool in their pans for about 10-15 minutes. Coconut flour cakes can be delicate while hot, so let them cool a bit before turning them out onto a wire rack to cool completely before filling and decorating them with the cake frosting of your choice.

Nutritional Information per serving (1/12th of recipe, no frosting): 148 calories, 6.4 g carbohydrate (2.9 g dietary fiber, 1 g sugars), 11.5 g total fat (7 g saturated fat, 0 g trans fat), 113 mg cholesterol, 194 mg sodium, 112.6 mg calcium, 43 mg potassium, Vit A 118 IU, 1 mg iron, 5.5 g protein. Net carbs per serving: 3.5 grams

Photos and recipe by Kathy Sheehan, copyright 2020
All rights reserved. Please do not duplicate without the author’s permission. 

Friday, October 16, 2020

Low Carb Caramel and Spice Granola (Low Oxalate too)

Low Carb Caramel and Spice Granola
Here’s another great granola recipe! This caramel and spice flavor is perfect for the fall. It is baked at a lower temperature for a longer time resulting in a very crunchy granola. One thing I often miss on a low carb/keto diet is something crisp and crunchy! This granola satisfies that craving. Serve it for breakfast or enjoy it as a snack.

Low Carb Caramel and Spice Granola (Low Oxalate too!)
Makes 12 servings (1/4 cup each)

1-1/2 cups unsweetened shredded coconut
1/3 cup sunflower seeds
1/3 cup pumpkin seeds (pepitas)
1/2 cup macadamia nuts (or pecans)
1/2 cup golden flaxseed meal
1/2 cup LaKanto Golden Monkfruit sweetener (or Swerve Brown)*
1/2 teaspoon salt
2 egg whites
2 tablespoons butter, melted (use coconut oil for dairy free)
3 tablespoons sugar free maple syrup
1/2 teaspoon Pumpkin Spice extract (or 1-1/2 tsp pumpkin pie spice, if not concerned with oxalates)
1 teaspoon caramel extract (see photo below)
1 teaspoon vanilla extract

1. Preheat the oven to 250 degrees Fahrenheit. Place the coconut, sunflower seeds, pumpkin seeds and macadamia nuts (or pecans) into a food processor. Pulse until the mixture resembles coarse oatmeal. Transfer to a large mixing bowl.

2. Add the flaxseed meal, monkfruit sweetener, pumpkin pie spice (if using in place of extract) and salt. Stir to combine.

3. In a separate bowl, whisk the egg whites until frothy. In another bowl, whisk together the melted butter, sugar free maple syrup and extracts.

4. Add the egg whites and butter/syrup mixture to the nut mixture and stir until well coated.

5. Once the granola is evenly coated, spread it into an even, thin layer in a large rimmed baking sheet. Bake for 90 minutes to 115 minutes, turning and mixing half way through cooking and again at the end of cooking (moving the darker pieces into the center). It is ready when the granola has reached a deep, golden brown color.

6. Turn off the oven and leave the baking sheet in the oven until it cools; stirring occasionally. The granola will crisp up as it cools. Once completely cooled, break into small pieces and place in an airtight container. Store at room temperature for up to two weeks.

*You’ll want to use an erythritol-based granulated sweetener to achieve a crispy texture. Other sweeteners may not crisp up as well.

Extracts
Nutritional Information per 1/4 cup: 164 calories, 6 g carbohydrate (3.1 g dietary fiber, 1.3 g sugars), 14.6 g total fat (6.3 g saturated fat, 0 g trans fat), 2 mg cholesterol, 113 mg sodium, 10.4 mg calcium, 31 mg potassium, 1 mg iron, 8 IU Vit A, 4.2 g protein. Net carbs per serving: 2.9 grams

Total Oxalate per serving: 3.81 mg; Soluble oxalate 2.13 mg

Photos and recipe by Kathy Sheehan, copyright 2020
All rights reserved. Please do not duplicate without the author’s permission. 

Tuesday, October 6, 2020

Keto, Nut Free Cowboy Cookies (Low Oxalate too!)

Keto, Nut Free Cowboy Cookies
Cowboy Cookies are a throw-back recipe from the 1950’s that has become popular again. Traditionally, they are big cookies with big flavor and a lot of different textures coming from rolled oats, shredded coconut, nuts and chocolate chips. In this recipe, the delicious flavor and crunchy/chewy texture replicates the original without the sugar and carbs, making this cookie one of my all-time favorites! There may be other low carb Cowboy Cookie recipes out there that call for almond flour, pecans and dark chocolate chips that are so high in oxalates that I feel a kidney stone forming just thinking about them! But with my nut free recipe, you can enjoy the same crispy-on-the-bottom and chewy-in-the-middle decadent cookie you love without worrying about the after-effects of oxalate overload.

Keto, Nut Free Cowboy Cookies (Low Oxalate too!)
Makes 24 generous-sized cookies

1/4 cup coconut flour
1/4 cup flaxseed meal
1 cup sunflower seed flour
1 tablespoon unflavored dry gelatin powder
2 teaspoons baking powder
1/2 teaspoon salt
3/4 cup unsalted butter, softened (1-1/2 sticks)
1/2 cup erythritol brown sweetener (such as Swerve Brown or LaKanto Golden)
1/2 cup granulated erythritol sweetener
2 large eggs, room temperature
1-1/2 teaspoons vanilla extract
2 teaspoons lemon juice (*see note)
1 cup unsweetened shredded coconut
1 cup pumpkin seeds, roughly chopped (you can pulse in a food processor)
1/3 cup + 1/4 cup sugar free milk chocolate chips

1. Preheat the oven to 325 degrees Fahrenheit. Set your upper oven rack in the second from the top position and your lower rack in the second from the bottom position. Line two cookie sheets with parchment paper or silicone baking mats; set aside.

2. In a medium bowl, whisk together the coconut flour, flaxseed meal, sunflower seed flour, gelatin powder, baking powder and salt; set aside.

3. In a large bowl, beat the softened butter and two sweeteners with an electric mixer until light and fluffy. (It’s important to use erythritol-based sweeteners in this recipe for a crispier cookie. Allulose or xylitol will cause the cookies to be softer and more cake-like.) Add the eggs, vanilla and lemon juice and beat until well incorporated. Add the dry ingredients and beat on medium until just combined and a soft dough forms.

4. Using a wooden spoon, fold in the shredded coconut, pumpkin seeds and sugar free milk chocolate chips. (It’s important to use milk chocolate chips, not semi-sweet or dark, for lower oxalate. You can substitute white chocolate chips and reduce the oxalate further by 3 mg per cookie, if you prefer. Personally, I like using the milk chocolate chips for a more authentic taste.)

5. Form the dough into 2-inch round balls and place them about 2-3 inches apart on the prepared cookie sheets. Using the palm of your hand, gently flatten each ball until it’s a 1/2 inch thick, round circle. Place your cookie sheets in the oven and bake for 10 minutes. Switch the position of each cookie sheet and rotate them around and continue to bake for an additional 8-10 minutes or until the cookies are well browned around the edges and bottom (but not burned). Remove from the oven and let the cookies cool on the pans for at least 10 minutes (they will firm and crisp up as they cool). Transfer them to a wire rack to finish cooling completely before serving.

*Note: It may seem odd to include lemon juice, but sunflower seed flour tends to turn a slightly green color in baked goods, unless an acid is included in the dough or batter. The lemon juice is important to prevent that from happening.

Nutritional Information per cookie: 121 calories, 3.9 g carbohydrates (1.6 g dietary fiber, 0.3 g sugars), 10.5 g total fat (6 g saturated fat, 0 g trans fat), 31 mg cholesterol, 118 mg sodium, 37 mg calcium, 10 mg potassium, 60 IU Vit A, 4.2 g protein. Net carbs per serving: 2.3 grams

Total Oxalate per cookie: 5.98 mg; Soluble Oxalate: 3.83 mg. This cookie is considered a medium oxalate food.

Photo and recipe by Kathy Sheehan, copyright 2020
All rights reserved. Please do not duplicate without the author’s permission.

Wednesday, September 30, 2020

Low Carb Candy Corn Glazed Donuts

Low Carb Candy Corn Glazed Donuts
Fall is here! Pumpkins, potted mums and Halloween decor are already decorating the lawns and porches in my neighborhood and bags of Halloween candy line the store shelves. One autumn favorite is Candy Corn.  These donuts mimic the classic three-banded candy with its colors of yellow, orange and white glaze. These festive donuts are great fun to serve for breakfast or to bring to a party!

Candy Corn
Low Carb Candy Corn Glazed Donuts
Makes about 12 donuts (more or less, depending on the size of your pan)

Donuts:
1/2 cup + 2 tablespoons coconut flour, lightly scooped and leveled
6 tablespoons granulated erythritol sweetener
1-1/2 teaspoons baking powder
1/4 teaspoon vanilla powder (optional)
1/4 teaspoon salt
5 large eggs
1/4 cup unsalted butter, melted
1/2 cup unsweetened coconut or almond milk
1/2 teaspoon butterscotch extract
1/4 teaspoon caramel extract
1/4 teaspoon vanilla extract

Candy Corn Glaze:
2/3 cup heavy cream, divided
1/2 cup sugar free white chocolate chips
1/2 cup sugar free butterscotch baking chips (or substitute more white chocolate chips and tint with orange food coloring)
Gel Food Coloring: yellow and orange

1. Preheat the oven to 325 degrees Fahrenheit. Spray a donut pan with non-stick cooking spray or grease well; set aside.

2. In a large bowl, whisk together the coconut flour, sweetener, baking powder, vanilla powder (if using) and salt until no lumps remain.

3. In another bowl, beat the eggs, melted butter, coconut or almond milk and extracts. Add the wet ingredients all at once to the dry ingredients and whisk quickly and vigorously until a smooth, but thick, batter forms and all of the dry ingredients are incorporated. 

4. Fill each well of your donut pan 3/4 full and bake 16-18 minutes or until the tops are firm to the touch and the edges are just golden brown. Remove from oven and cool 5 minutes in the pan, then flip them out onto a wire rack to cool completely. 

5. Widely space your cooled donuts on a wire rack with parchment or plastic wrap underneath to catch the drips. (It’s easier to glaze the donuts if there is a little space between them.)

Sugar Free Lily’s Baking Chips
6. First, heat 1/3 cup of heavy cream in a small microwaveable bowl for 30 seconds or until the cream is bubbly. (You can also heat the cream in a small saucepan on the stove.) Add the 1/2 cup butterscotch chips, allow to stand for a few minutes, then whisk until smooth and all the baking chips have melted. If desired, you can add a couple of drops of orange gel food coloring and stir. Allow the glaze to stand for 5-10 minutes until it has thickened, but is still pourable. With a spoon, drizzle the glaze in the middle and on both sides of the hole of the donut to create the middle orange band of color.

How to Glaze a Candy Corn Donut
7. Next, repeat with the remaining 1/3 cup of heavy cream and 1/2 cup white chocolate chips. Once melted and smooth, pour this mixture into two small bowls, equally dividing it as best you can, and tint one with a couple of drops of yellow food coloring. Allow the glaze to stand for 5-10 minutes until thickened, but still pourable.

8. With clean spoons, drizzle the top third of each donut with white glaze and the bottom third of each donut with yellow glaze. Allow the donuts to sit until no longer dripping. Place them, while still on their wire racks, into the refrigerator for about 25 minutes to set the glaze before removing them to a serving plate. Enjoy and Happy Fall!

Nutritional Information per donut: 139 calories, 5.3 g carbohydrate (2.6 g dietary fiber, 0.7 g sugars), 12.3 g total fat (7.3 g saturated fat, 0 g trans fat), 98 mg cholesterol, 134 mg sodium,  59.4 mg calcium, 56 mg potassium, 1 mg iron, 120 IU Vit A, 3.3 g protein. Net carbs per serving: 2.7 grams

Recipe and donut photos by Kathy Sheehan, copyright 2020
Stock photo of Candy Corn candies
All rights reserved. Please do not duplicate without the author’s permission.

Saturday, September 19, 2020

Low Carb Parmesan Radish Gratin

Low Carb Parmesan Radish Gratin
I dislike raw radishes, but LOVE roasted and cooked radishes! In the keto world, radishes and turnips make great substitutes for potatoes in soups and other recipes. The first time I saw a casserole recipe similar to this, it was created for potatoes and contained several high carb ingredients, such as flour and whole milk. I thought it would be worth a try to make a few ingredient substitutions and make it low carb—the result was wonderful! You can make this delicious side dish with red or daikon radishes (or maybe even turnips) and I think you’ll be quite pleased too.

Low Carb Parmesan Radish Gratin
Makes twelve 1/2 cup servings

8 oz. Parmesan cheese
2 slices cooked bacon, crumbled
1 green onion, thinly sliced
1 tablespoon snipped fresh chives
1/2 tablespoon fresh chopped thyme (or use 1 teaspoon dried)
1/2 tablespoon fresh chopped rosemary (or use 1 teaspoon dried)
2 tablespoons unsalted butter, cut into small cubes
6 cups thinly sliced radishes (about 2 lbs, leaves removed)
Salt and pepper
6 tablespoons coconut or almond milk
6 tablespoons heavy cream
1/2 teaspoon xanthan gum
Snipped fresh rosemary and thyme for garnish (optional)

1. Preheat the oven to 325 degrees F and grease a 1.5 quart casserole dish; set aside. Using a wide vegetable peeler, shave the Parmesan cheese (about 2 cups) or use pre-shaved Parmesan; set aside.

2. In a small bowl, combine the crumbled bacon, green onion and chives. Stir to combine. In the prepared baking dish, arrange 1/2 of the radishes to cover the bottom of the dish. Sprinkle with 1/2 teaspoon salt and pepper, half of the bacon mixture and half of the herbs. Top with 1/2 of the Parmesan and dot with half of the butter cubes. Repeat layers.

3. In a medium bowl, whisk together the coconut or almond milk, heavy cream and xanthan gum until the xanthan gum is incorporated and dissolved (you can use a stick blender to make this easier). Pour the cream mixture evenly over the radishes.

4. Bake, covered for 1.5 hours. (If using foil to cover, spray the underside with non-stick cooking spray.) Increase oven temperature to 400 degrees F. Bake, uncovered for 15-20 minutes more or until the radishes are tender and the top is golden brown.

Parmesan Radish Gratin
Nutritional Information per 1/2 cup: 168 calories, 3.7 g carbohydrates (1.3 g dietary fiber, 1.7 g sugars), 14 g total fat (8.5 g saturated fat, 0 g trans fat), 40 mg cholesterol, 400 mg sodium,  264 mg calcium, 206 mg potassium, 1 mg iron, 131 IU Vit A, 12 mg Vit C, 8.3 g protein. Net carbs per serving: 2.4 grams

Photos and recipe by Kathy Sheehan, copyright 2020
All rights reserved. Please do not duplicate without the author’s permission.

Friday, September 11, 2020

Low Carb, Low Oxalate Maple Cinnamon Granola

Low Carb, Low Oxalate Maple Cinnamon Granola
Granola is the easiest thing to make! Simply mix all the ingredients together, spread onto a baking sheet and bake...it’s really that simple! I have other granola recipes on my blog but, now that I have to reduce the oxalate in my diet (due to reoccurring kidney stones), the nuts most often used to make granola are extremely high in oxalates and are no longer an option (almonds are the worst!). I love sprinkling granola on my homemade yogurt, eating it as a snack or even as breakfast cereal, so I was perplexed as to how I could still have granola without the oxalates...thus this recipe was born! Macadamia nuts are moderate oxalate, but when you divide the amount called for into 12 servings, you’re really getting very little. Pumpkin seeds, sunflower seeds and coconut are all low oxalate. The other trick is to use cinnamon extract, not ground cinnamon which is shockingly high in oxalate. The result is an excellent and delicious granola that I can feel good about eating!

Low Carb, Low Oxalate Maple Cinnamon Granola
Makes 12 servings (1/4 cup each)

1-1/2 cups unsweetened shredded coconut
1/3 cup pumpkin seeds (pepitas)
1/3 cup sunflower seeds
1/2 cup macadamia nuts, roughly chopped
1/4 cup flaxseed meal
1/2 teaspoon ground ginger
A pinch of salt
1 egg white
2-3 tablespoons granulated erythritol sweetener, to your taste
2 tablespoons sugar free maple syrup
1/2 teaspoon vanilla or pumpkin spice extract
3/4 teaspoon cinnamon extract, or to taste
2 tablespoons coconut oil, melted

1. Preheat the oven to 350 degrees F. Place all of the coconut, pumpkin seeds, sunflower seeds and macadamia nuts in a food processor and pulse until coarsely chopped and the mixture has the texture of oatmeal. Place the mixture into a large bowl and add the flaxseed meal, ginger and salt. Stir to combine.

2. In a separate small bowl, whisk together the egg white, sweetener, sugar free maple syrup and extracts until frothy. Add the coconut oil and whisk again to combine. 

3. Add the egg white mixture to the nut/coconut mixture and stir. Mix thoroughly, making sure all of the mixture is lightly coated. 

4. Pour the mixture onto a cookie sheet (lined with parchment paper for easier clean up) and spread into an even, thin layer. Bake for a total of 15-18 minutes, turning and lightly breaking up with a spatula after about 10-12 minutes. Continue baking, but watch carefully for the last 5-8 minutes because it can turn dark and burn quite quickly. It is ready when the granola is toasty brown in color. 

5. Remove from the oven and cool completely on the cookie sheet. The granola will crisp up as it cools. Break apart any larger chunks and store in an airtight container at room temperature for up to 2 weeks. 

Low Carb, Low Ox Granola
Nutritional Information per 1/4 cup serving: 177 calories, 5.1 g carbohydrate (2.8 g dietary fiber, 0.7 g sugars), 16.5 g total fat (9 g saturated fat, 0 g trans fat), 0 mg cholesterol, 18 mg sodium, 12 mg calcium, 70 mg potassium, 1 mg iron, 3.2 g protein. Net carbs per serving: 2.3 grams

Total Oxalate per serving is 3.71mg, Soluble oxalate is 2.03mg

Photos and recipe by Kathy Sheehan, copyright 2020
All rights reserved. Please do not duplicate without the author’s permission. 

Monday, August 31, 2020

Low Carb Banana Pudding Donuts with Whipped Cream Topping

Low Carb Banana Pudding Donuts with Whipped Cream Topping
The versatility of a donut baking pan is that it can be used to make more than donuts. In this case, these donuts are really more like cupcakes. (As a matter of fact, you can make these in a cupcake or muffin tin instead.) The reason I like using a donut pan is that when I deliberately overfill each cavity, so that the cake rises and fills in the center hole, it leaves the ideal space to spoon the filling! The result are dainty little cakes perfectly proportioned into individual servings. If you like banana pudding, you’ll love these pudding-filled cakes!

Note: If you don’t want to make homemade pudding, you could certainly use a sugar free boxed mix. The most popular brand has some questionable ingredients, namely modified cornstarch and maltodextrin, both of which will raise blood sugar as high or higher than regular sugar! That’s why I prefer to make my own. You can make the pudding several days ahead and store it in the refrigerator.  That way it’s set and ready to go when it’s time to fill the cakes. The best part is that the pudding part of this recipe will make much more than you’ll need...so you’ll have plenty leftover for snacking!

Low Carb Banana Donuts with Whipped Cream Topping
Makes 10 servings (depending on the size of your donut pan)

Pudding Ingredients:
3/4 cup heavy cream
1/2 cup almond or coconut milk
3 large egg yolks
3 tablespoons powdered erythritol sweetener
A pinch of salt
1-1/2 tablespoons unsalted butter, cut into pieces
1-1/2 teaspoons banana extract
1/2 teaspoon vanilla extract
8 drops monkfruit extract or stevia, to taste
1/2 to 3/4 teaspoon xanthan gum (as needed for thickening)

Donut Ingredients:
1/2 cup + 2 tablespoons coconut flour
6 tablespoons granulated erythritol sweetener 
1-1/2 teaspoons baking powder
1/2 teaspoon vanilla powder (Optional, but adds nice vanilla flecks to the batter. If not using, increase vanilla extract to 1/2 teaspoon.)
1/4 teaspoon salt
5 large eggs
1/2 cup unsweetened almond or coconut milk
1-1/4 teaspoons banana extract
1/4 teaspoon vanilla extract

Whipped Cream Topping Ingredients:
2 tablespoons cold water 
1 teaspoon dry unflavored gelatin powder
1 cup heavy whipping cream
2 tablespoons powdered erythritol sweetener (or 6-8 drops monkfruit extract or stevia)
1/2 teaspoon vanilla extract

1. Pudding Directions (can be made several days ahead): In a medium saucepan over medium heat, combine the heavy cream and almond or coconut milk. Heat until hot and bubbles can be seen around the edges. Meanwhile, whisk together the egg yolks, sweetener and salt in a heat-proof bowl or glass measuring cup until light and thoroughly combined. 

2. Slowly ladle about 1/2 cup of the hot mixture into the egg yolks, whisking continuously, to temper them. Then slowly whisk the tempered egg/milk mixture back onto the saucepan, whisking continuously. Continue to stir and heat until the pudding thickens and will coat the back of a spoon. If the mixture starts to simmer, remove it from the heat and continue whisking (you don’t want scrambled eggs!). Once it has thickened, remove from heat and add the butter, extracts and monkfruit or stevia. Stir until the butter has melted. Sprinkle the xanthan gum over the surface of the pudding while whisking vigorously until it has incorporated and there are no lumps. Pour into a glass bowl or storage container and place in the refrigerator to set up and cool completely.

3. To make the Donuts: Preheat oven to 325 degrees F and grease your donut baking pan well; set aside.

4. In a medium bowl, whisk together the coconut flour, sweetener, baking powder, vanilla powder and salt until no lumps remain (you may sift this mixture, if desired). In a large bowl, whisk the eggs, almond or coconut milk and extracts. Add the dry ingredients to the wet ingredients and whisk vigorously until well incorporated, no lumps are visible and the batter is smooth.

5. Fill each donut cavity until nearly full. Bake for about 15 minutes or until firm to the touch and the edges are golden brown. (You want the center of the donut to puff up and cover the center hole once the donuts are baked to create a well for the pudding filling, see photo below.) Remove from oven and allow the donuts to cool in the pan for 5-10 minutes. Turn them out onto a wire rack to cool completely before filling.

Baked donuts showing well for filling
6. To make the stabilized whipped cream topping: Pour the cold water into a small bowl and sprinkle the dry gelatin powder over the top and allow to sit for a few minutes to “bloom.” Heat in the microwave for about 5 seconds on high, then stir until the gelatin is dissolved; set aside to cool for 5 minutes while you whip the cream.

7. Place the heavy whipping cream, sweetener and vanilla extract into a large bowl. With an electric mixer, beat on high until the cream forms soft peaks. Slowly add the gelatin/water mixture and continue whipping until moderate to firm peaks are achieved. 

Photo showing filled donuts and finished donuts
8. To assemble: Spoon a tablespoon or so of the banana pudding into the center well of each donut, mounding it slightly. Spoon or pipe the whipped cream over the top, making sure to cover the pudding completely. Because the whipped cream has been stabilized by the gelatin, these donuts will store well in the refrigerator for 2-3 days. When it’s time to serve, allow the donuts to sit out at room temperature for about 15 minutes. Enjoy!

Banana Pudding Donut showing filled center
Nutritional Information per donut with pudding and topping: 228 calories, 4.8 g carbohydrates (2.5 g dietary fiber, 0.8 g sugars), 21.6 g total fat (12.5 g saturated fat, 0 g trans fat), 172 mg cholesterol, 188 mg sodium, 91.5 mg calcium, 95 mg potassium, 1 mg iron, 220 IU Vit A, 4.7 g protein. Net carbs per serving: 2.3 grams

Photos and recipe by Kathy Sheehan, copyright 2020
All rights reserved. Please do not duplicate without the author’s permission. 

Tuesday, August 25, 2020

Hot White Chocolate

Hot White Chocolate
It may be a bit early to be thinking about hot chocolate but, because of recurring kidney stones, my doctor tells me that I need to cut back on oxalates in my diet. Sadly, dark chocolate and cocoa powder are very high in oxalates and can encourage the development of kidney stones. The good news is that white chocolate is very low in oxalates! I live in Maine and need some type of hot chocolate beverage to get through the long, cold winters. I developed this recipe that is creamy, rich and just as satisfying. Low carb AND low oxalate, this recipe will be one of my favorite treats as the weather gets cooler!

Hot White Chocolate
Makes 1 serving

1-1/4 cups non-dairy nut milk of choice (coconut milk is lowest in oxalate)
2 tablespoons heavy cream
6 drops monkfruit extract (or stevia)
1/8 teaspoon vanilla extract
1/4 teaspoon chocolate extract
A tiny pinch of salt
1 tablespoon sugar free white chocolate chips (see note below)

1. Heat the milk, cream, monkfruit extract or stevia, extracts and salt in a small saucepan until it comes to a simmer. Remove from heat and add the white chocolate chips, stirring until they are completely melted and incorporated into the hot milk. 

2. If you have a frothing wand, give it a whisk to create foam and to make sure the chips are well incorporated. If you don’t have a powered frothing tool, you can use a hand whisk. Serve immediately. 

Sugar Free Chocolate Chips
Note: There are several brands of sugar free white chocolate chips available. I used Lily’s, which I bought at Whole Foods, but WalMart carries Bake Believe brand which can be found in the baking aisle. Another company that sells sugar free white chocolate chips is Choc Zero, which you can buy online. 

Nutritional Information per serving: 223 calories, 3.9 g carbohydrates (1.9 g dietary fiber, 0.8 g sugars), 24.4 g total fat (13.8 g saturated fat, 0 g trans fat), 66 mg cholesterol, 60 mg sodium, 12.3 mg calcium, 29 mg potassium, 195 IU Vit A, 0.3 g protein. Net carbs per serving: 2 grams

Photos and recipe by Kathy Sheehan, copyright 2020
All rights reserved. Please do not duplicate without the author’s permission. 

Tuesday, August 18, 2020

40 Second Keto Dark Chocolate Cupcakes

40 second Dark Chocolate Cupcakes
Here’s another quick and easy cupcake recipe that you “bake” in the microwave for 40 seconds! This recipe is a favorite of my chocolate-loving husband. He freely admits that these cupcakes are as rich, decadent and fudgy as a traditional cupcake. He doesn’t miss the sugar at all and neither will you! This recipe yields three cupcakes, so it’s perfect when you want to satisfy a chocolate craving, but don’t want too many extras hanging around to tempt you.

40 Second Keto Dark Chocolate Cupcakes
Makes 3 cupcakes

Cupcakes:
2 tablespoons almond or pecan flour
2 teaspoons coconut flour
1 tablespoon unsweetened dark cocoa powder 
1/4 teaspoon instant coffee powder (optional, but enhances chocolate flavor)
1-1/2 tablespoons granulated erythritol sweetener 
A pinch of salt
1/2 teaspoon baking powder
1 tablespoon butter, melted
1 large egg
5 drops dark chocolate stevia or monkfruit extract, or to taste
1/4 teaspoon vanilla extract
1 tablespoon unsweetened almond or coconut milk (or strong brewed coffee for a mocha flavor)

Dark Chocolate Frosting:
1 oz. unsweetened baker’s chocolate, chopped
3/4 teaspoon refined coconut oil
1 tablespoon unsalted butter, room temperature 
2 oz. cream cheese, room temperature 
4 oz. mascarpone cheese, room temperature 
1/3 cup powdered erythritol sweetener 
1 tablespoon unsweetened cocoa powder 
1/4 teaspoon vanilla extract
1-2 tablespoons heavy cream (or as needed to reach the desired consistency)

1. In a small bowl, combine the almond or pecan flour, coconut flour, cocoa powder, instant coffee powder, granulated sweetener, salt and baking powder. Whisk to combine and remove any lumps.

2. Add the melted butter, egg, stevia or monkfruit drops, vanilla extract and milk or coffee; whisk until well combined.

3. Evenly divide the batter between three silicone muffin cups and microwave on high for 40 seconds or until the cakes have risen, look dry and spring back when touched near the center. (The time needed for cooking may vary, depending on the wattage of your microwave.) Alternatively, you can bake them in a 325 degree Fahrenheit oven for 15-18 minutes. Move to a wire rack and cool completely.

4. To make the frosting, in a medium, microwave-safe bowl, combine the chopped baker’s chocolate and coconut oil. Microwave on high in 15 second intervals to melt the chocolate. Let it sit for a minute or two and then stir until smooth. (If you would prefer, you can melt the chocolate and coconut oil in a heat proof bowl over barely simmering water.) Set melted chocolate aside to cool to lukewarm. 

5. In a large bowl, using an electric mixer, whip the butter, cream cheese and mascarpone cheese together until smooth. Beat in the powdered sweetener and cocoa powder, scraping the sides of the bowl as needed.

6. Add the melted chocolate and vanilla extract and beat until combined. Add the heavy cream, one tablespoon at a time, until a spreadable consistency is achieved. (Note: This icing recipe makes enough to frost 6 cupcakes, so more than you will need. Store any leftovers in an airtight container in the refrigerator for up to a week.)

Microwave Keto Dark Chocolate Cupcake
Nutritional Information per one cupcake with 3 Tbsp frosting: 234 calories, 6.5 g carbohydrate (2.2 g dietary fiber, 0.7 g sugars, 2.1 g sugar alcohols), 21.5 g total fat (12.1 g saturated fat, 0 g trans fat), 102 mg cholesterol, 127 mg sodium, 93.8 mg calcium, 95 mg potassium, 1 mg iron, 106 ug Vit A, 5.9 g protein. Net carbs per serving: 4.3 grams

Photos and recipe by Kathy Sheehan, copyright 2020
All rights reserved. Please do not duplicate without the author’s permission. 

Saturday, August 8, 2020

Taco Salad with Quest Protein Chips

Taco Salad with Quest Protein Chips
Here’s an easy dinner that is entirely satisfying and tastes just like a higher carb version. The secret is to use Quest Protein Tortilla-Style Chips in place of corn tortilla chips (I chose Nacho Cheese flavor, but you can substitute your favorite). This delicious salad has become a hands-down favorite on my keto diet, especially when I don’t feel like cooking!

Taco Salad with Quest Protein Chips
Makes 1 serving

3 oz. ground beef
1-2 teaspoons taco seasoning, to taste
1 tablespoon water
1 tablespoon chopped onion
1 bag Quest Protein Tortilla-style Chips, Nacho Cheese (see image below)
1 cup lettuce, torn into bite-size pieces
1/4 cup chopped tomato
1/2 oz. shredded cheddar cheese
2 tablespoons sour cream

1. In a skillet over medium heat, brown the ground beef. Add the taco seasoning to taste. Add the water and chopped onion; stir to combine.

2. Pour the entire bag of Quest Protein chips into a large serving bowl. Top with the seasoned beef, lettuce, chopped tomato and shredded cheese. Dollop with sour cream and serve.

Quest Protein Chips
Nutritional Information: 445 calories, 9.6 g carbohydrates (2.2 g dietary fiber, 2.9 g sugars), 28.5 g total fat (12.2 g saturated fat, 0 g trans fat), 93 mg cholesterol, 498 mg sodium, 335 mg calcium, 505 mg potassium, 2 mg iron, 614 ug Vit A, 12 mg Vit C, 38.8 g protein. Net carbs per serving: 7.4 grams

Photos and recipe by Kathy Sheehan, copyright 2020
All rights reserved. Please do not duplicate without the author’s permission. 

Tuesday, July 21, 2020

Brunch Green Bean Salad with Perfect Soft-Boiled Eggs

Brunch Green Bean Salad with Perfect Soft-Boiled Eggs
Right now, I’m harvesting a lot of green beans from my garden and am always trying to come up with delicious and varied ways to enjoy them. This breakfast or brunch salad is a great way to start the day! The addition of soft-boiled eggs puts this dish over the top, in my opinion. The tender-crisp green beans and creamy eggs topped with a sweet and sour dressing and crispy bacon go so well together. The method of boiling the green beans and eggs together in the same pot is a clever one, making this a very quick and easy meal. It makes two servings, but can be either halved to serve one or doubled and tripled to serve many.

Brunch Green Bean Salad with Perfect Soft-Boiled Eggs
Makes 2 servings

4 white button mushrooms, sliced
4 slices bacon, cut into small pieces
2 tablespoons onion, minced
1-1/2 tablespoons white wine vinegar
1/2 teaspoon dried thyme
1/2 teaspoon granulated erythritol, or to taste
Salt and black pepper to taste
1-1/2 cups fresh green beans, trimmed
4 eggs, room temperature 

1. Fill a large saucepan or pot 1/2 to 3/4 full of water (enough water to cover the eggs completely as they boil). Add salt and bring to a boil over medium to high heat.

2. Meanwhile, sauté the mushrooms in a small dry skillet over medium heat until they release their moisture, about 3 minutes. Remove the mushrooms to a plate and set aside. In the same skillet, sauté the bacon until crispy. Remove with a slotted spoon to a plate lined with paper towels; set aside.

3. Reserve 2 tablespoons of bacon drippings in the skillet. Add the onion and sauté until translucent. Add the vinegar, thyme, sweetener, salt and pepper. Whisk to combine. Return the mushrooms to the skillet and stir to combine. Keep the dressing warm while the green beans and eggs are cooking.

4. Drop the green beans into the salted, boiling water and set a timer for exactly 8 minutes. At the 5-1/2 minute mark, add the eggs and continue boiling. Drain and rinse under cold running water to stop the cooking. Set the eggs aside in cold water while you pat dry the green beans with a paper towel and divide them evenly between two serving dishes. Toss each serving with 1/2 of the warm dressing and top each portion with crumbled bacon. Carefully peel the eggs, placing two in each serving dish. Cut the eggs in half and season with salt and pepper to taste. Serve immediately.

Nutritional Information per serving (1/2 recipe): 277 calories, 10.8 g carbohydrates (3.5 g dietary fiber, 2.6 g sugars, 1 g sugar alcohols), 17 g total fat (5.5 g saturated fat, 0 g trans fat), 391 mg cholesterol, 506 mg sodium, 107.2 mg calcium, 453 mg potassium, 3 mg iron, 364 ug Vit A, 10 mg Vit C, 21.4 g protein. Net carbs per serving: 6.5 grams

Photo and recipe by Kathy Sheehan, copyright 2020
All rights reserved. Please do not duplicate without the author’s permission.

Friday, July 17, 2020

40 Second Keto Lemon Cupcakes

40 Second Keto Lemon Cupcakes
You don’t have to wait for a special occasion or dirty the entire kitchen to enjoy a few cupcakes! These light and delicious cupcakes bake in the microwave in about 40 seconds. Normally, I don’t think about the microwave when I want to bake a cake, but I have found that keto mug cakes made in a microwave rise beautifully and have a light, tender crumb. Just be sure you don’t overcook them or they can become tough. Silicone cupcake liners are microwave-safe, come in a variety of fun colors, are non-stick and hold their shape during cooking, so that’s what I use. (You can use paper liners, but you’ll need to support them in a microwave-safe cup so the cupcakes retain their shape during the cooking process. If you decide to use paper liners, make sure there is no metal in the liner or its printed design.) This quick recipe makes only three cupcakes, which is just enough to share with one or two friends. There’s no reason not to have a little party tonight!

40 Second Keto Lemon Cupcakes
Makes 3 cupcakes

Cupcake Ingredients:
1/4 cup almond flour
2 teaspoons coconut flour
1 tablespoon granulated erythritol sweetener
1/2 teaspoon baking powder
A pinch of salt
1 large egg
1 teaspoon lemon juice (or almond milk)
1/2 teaspoon lemon zest (or 1-2 drops of food grade lemon essential oil)
1/2 teaspoon vanilla extract
5 drops monkfruit extract (or liquid stevia)
1 teaspoon melted butter or ghee

Lemon Cream Frosting:
2 ounces cream cheese, room temperature 
2 tablespoons unsalted butter, softened
4 ounces plain mascarpone cheese, room temperature
1/4 cup powdered erythritol sweetener 
1 teaspoon vanilla extract
1/4 to 1/2 teaspoon lemon extract, to taste
1-2 tablespoons heavy cream

Sugar free sprinkles (optional)

1. In a small bowl, combine the first five dry ingredients (almond flour through salt) with a fork until thoroughly mixed; set aside.

2. In a separate bowl, whisk together the egg, lemon juice or almond milk, lemon zest, vanilla extract, monkfruit extract or stevia and melted butter.

3. Add the dry ingredients to the wet ingredients and whisk until just combined. Divide the batter equally among three silicone cupcake liners (or small greased ramekins). Microwave on high for 35-40 seconds or until the cakes have risen, look dry and the tops spring back when lightly touched in the center. Do not overcook! (Note: Cooking time may vary depending on the wattage of your microwave. Instructions for baking in the oven are provided below.*) Remove the cupcakes from the microwave and cool on a wire rack completely while you make the frosting.

4. To make the frosting: Whip together the room temperature cream cheese, butter and mascarpone cheese with an electric mixer until light and fluffy. Add the powdered sweetener, extracts and beat until combined. Add the heavy cream, one tablespoon at a time, until your frosting reaches the desired consistency. Taste and adjust sweetness to your liking. If desired, spoon the frosting into a piping bag with a decorating tip and frost your cupcakes or spread about 3 tablespoons of frosting onto each cupcake.

5. This frosting recipe yields more than you will need for 3 cupcakes, which allows for dividing into batches and coloring each differently using gel food colors (as shown). Store any leftover frosting in an airtight container in the refrigerator and save for another use. It will keep well for 4-5 days. Bring to room temperature and rewhip if needed to restore spreading consistency. 

*To bake the cupcakes in the oven, bake in a preheated 325 degree F oven for 16-18 minutes or until a toothpick comes out clean when tested and the tops spring back when lightly touched near the center.

40 Second Keto Cupcakes
Nutritional Information per 1 cupcake with 3 TB frosting: 210 calories, 5 g total carbohydrates (1 g dietary fiber, 0.4 g sugars, 2.7 g sugar alcohols), 20.3 g total fat (.8 g saturated fat, 0 g trans fat), 77 mg cholesterol, 278 mg sodium, 217.8 mg calcium, 19 mg potassium, 97 ug Vit A, 2 mg Vit C, 3.6 g protein. Net carbs per serving: 2 grams

Recipe and photos by Kathy Sheehan, copyright 2020
All rights reserved. Please do not duplicate without the author’s permission.

Saturday, June 20, 2020

The Best Low Carb Chocolate Fudge Frosting

Best Low Carb Chocolate Fudge Frosting
Lately I’ve enjoyed learning about cake decorating. I bought an inexpensive kit that includes a lot of fun decorating piping tips and a cake turntable, so now my keto cakes can look more professional. My first few attempts have turned out remarkably well! The biggest problem about making low carb cakes or cupcakes is that it can be difficult to get the frosting just right. I’ve tried many recipes, but have finally come up with the very best! It has the taste and consistency of a true buttercream, but only 4 carbs (3 net carbs) for a generous 1/4 cup serving. This chocolate frosting is fudgy and so rich and delicious that my non-keto family really cannot tell this is sugar free. My husband is a serious chocoholic and gave this frosting his enthusiastic nod of approval when I made him this Chocolate Peanut Butter Cake for Father’s Day.

The Best Low Carb Chocolate Fudge Frosting
Makes about 12 servings

2 ounces unsweetened baker’s chocolate, chopped
1/2 tablespoon refined coconut oil
2 tablespoons unsalted butter, room temperature
4 ounces cream cheese, softened 
8 ounces mascarpone cheese, room temperature 
2/3 cup powdered erythritol sweetener (LaKanto or Swerve)
2 tablespoons unsweetened cocoa powder
1/2 teaspoon vanilla extract
2-3 tablespoons heavy cream, room temperature (or as needed to reach the desired consistency)

1. Place the chopped baker’s chocolate and coconut oil in a microwaveable bowl. Microwave on high in 15-20 second increments until chocolate has melted. Stir until smooth. Set aside to cool to lukewarm.

2. In a large bowl and using an electric mixer, whip together the butter, cream cheese and mascarpone cheese until combined and fluffy. Add the sweetener and cocoa powder and continue beating until well combined. You may need to scrap down the sides of the bowl occasionally. 

3. Add the vanilla extract and melted chocolate and beat again to combine. Add one tablespoon of the heavy cream at a time and beat until your frosting reaches the desired, spreadable consistency. (If you’re using piping tips, make sure your frosting isn’t too stiff or thick because it may be difficult to pipe it through the tip.)

4. This recipe makes enough frosting for 16-18 cupcakes, a single layer 9” round or 13”x9” sheet cake or a double layer 6” cake. The frosting can be refrigerated but, for best results, allow to come to room temperature before frosting your cake.

Low Carb Chocolate Fudge Frosting
Nutritional Information per 1/4 cup: 186 calories, 3.7 g carbohydrates (1 g dietary fiber, 0.4 g sugars, 1 g sugar alcohols), 17.8 g total fat (11.5 g saturated fat, 0 g trans fat), 39 mg cholesterol, 47 mg sodium, 7.3 mg calcium, 1 mg potassium, 58 ug Vit A, 3.2 g protein. Net carbs per serving: 2.7 grams

Recipe and photos by Kathy Sheehan, copyright 2020
All rights reserved. Please do not duplicate without the author’s permission. 

Friday, May 29, 2020

Halibut in a Sour Cream Sauce with Buttery Onions (or Salmon)

Halibut in a Sour Cream Sauce with Buttery Onions
When fish is steamed in a pouch, it comes out perfectly cooked, tender and delicious! This recipe utilizes the fragrant moisture and natural sweetness of the onions to permeate the fish, giving it wonderful flavor. You can use any type of fish that you like, but I suggest a “meaty” fish, such as halibut, salmon, swordfish or tuna steaks, as they work particularly well with this cooking technique.

Halibut in a Sour Cream Sauce with Buttery Onions
Makes 2 servings

1 tablespoon cold butter, cut into 4 thin slices
2 (1/4”) onion slices from a large onion (or 4 slices from a small onion)
2 (5 oz.) halibut steaks, or fish of your choice
1/4 cup mayonnaise 
1/4 cup sour cream
1/4 teaspoon garlic powder
1/4 teaspoon dried basil
1/4 teaspoon seasoned salt
1/4 teaspoon dried thyme
1/8 teaspoon black pepper
2 tablespoons sliced almonds, coarsely chopped
2 tablespoons shredded or grated Parmesan cheese 

1. Place each onion slice on a 12” or 14” square of heavy duty foil (or a double thickness of regular foil). Place two slices of cold butter on top of each onion. Season the fish with salt and pepper on both sides and place one piece of fish on top of each onion.

2. In a small bowl, mix together the mayonnaise, sour cream and seasonings. Set aside a couple of tablespoons for serving. Divide the remaining sauce between the two pieces of fish and spread to cover. Sprinkle each with one tablespoon of the almonds and one tablespoon of Parmesan cheese. Fold the foil around each piece of fish, sealing tightly, to create two puffed pouches, allowing for a little space over the fish so the steam can circulate and the sauce won’t be disturbed during cooking. (This step can be done ahead and the pouches refrigerated, if desired. Before cooking, remove the pouches from the refrigerator and allow to sit at room temperature for at least 20 minutes.)

3. Grill Method: Grill, covered, over indirect medium heat for 15-20 minutes or until the fish flakes easily with a fork and the internal temperature of the fish reaches 135 degrees Fahrenheit.

4. Oven Method: Preheat the oven to 350 degrees Fahrenheit. Place foil pouches on a baking sheet and bake for 22-24 minutes or until the fish flakes easily with a fork and the internal temperature reaches 135 degrees.

5. If desired, at the end of cooking, you can open the top of each pouch and broil for a few minutes until the almonds turn golden brown and the Parmesan cheese bubbles. With a spatula, carefully remove the onion and the fish onto serving plates. Drizzle the accumulated liquid from the pouch over the top of the fish and serve immediately. (I like to serve this over sautéed spinach.) Serve the reserved sour cream sauce on the side.

Nutritional Information per serving (made with halibut): 565 calories, 7.2 g carbohydrate (1.8 g dietary fiber, 2 g sugars), 40 g total fat (11.9 g saturated fat, 0 g trans fat), 98 mg cholesterol, 536 mg sodium, 213.6 mg calcium, 924 mg potassium, 2 mg iron, 192 ug Vit A, 3 mg Vit C, 42.5 g protein. Net carbs per serving: 5.4 grams

Photo and recipe by Kathy Sheehan, copyright 2020
All rights reserved. Please do not duplicate without the author’s permission. 

Wednesday, May 27, 2020

Keto Cinnamon Applesauce

Low Carb Applesauce
I have always loved applesauce! But, sadly, it’s so high in carbs and sugar that it is completely off limits on my low carb, ketogenic diet. Ordinary applesauce that you buy in the store is 16 carbs for a 1/3 cup serving, all of which is sugar! (That equals 4 teaspoons of sugar!) This “applesauce,” made with chayote squash, tastes just like the real thing and has only 5 carbs per serving (3 net carbs) and is a good source of calcium and potassium! Honestly, you and your kids will not be able to tell the difference. You can make it chunky or smooth and add as much cinnamon as you like. It can be used in recipes, enjoyed over low carb ice cream, in yogurt or eaten by itself. It’s a treat you can feel good about!

Keto Cinnamon “Applesauce” (made with Chayote Squash)
Makes 3 servings

1 tablespoon butter (can be omitted for dairy free)
2 cups chayote squash, peeled, cored and diced fine (2-3 squash, depending on size)
1 tablespoon LaKanto Golden or other brown erythritol sweetener 
1 tablespoon granulated erythritol sweetener (or use all brown)
1 teaspoon ground cinnamon or apple pie spice
2 tablespoons lemon juice
3/4 teaspoon apple extract, or to taste (see photo below)
6-8 drops monkfruit extract or stevia, to taste
3/4 cup water + 2-4 tablespoons water, divided

1. In a non-stick, 10 inch skillet, combine the butter, chayote squash, sweeteners, cinnamon or apple pie spice, lemon juice, apple extract and 3/4 cup of water. Simmer over a low heat, covered tightly, for about 35 minutes or until softened. Stir occasionally and, if the mixture is drying out, add a bit more water and continue simmering until most of the liquid has evaporated and the squash is fork tender, very soft and no longer has any crunch. Add the monkfruit extract or stevia, taste and adjust sweetness, if desired.

Cooking Chayote Squash 2. Remove from heat and allow the squash to sit covered in the warm skillet for at least 10 minutes to allow the flavors to blend. 

3. Spoon the warm “apples” into a food processor. Pulse and then process on low until finely chopped, scraping down the sides of the bowl with a spatula occasionally. Add 2-4 tablespoons of water, one tablespoon at a time, and continue to process until the sauce is smooth and has reached the consistency you desire.

4. The applesauce can be eaten immediately, warm or cold, or can be stored in an airtight container for up to a week. This recipe makes about 1 cup.

OliveNation Apple Extract
Nutritional Information per 1/3 cup: 56 calories, 5 g carbohydrates (2 g dietary fiber, 2 g sugars), 4 g total fat (2.5 g saturated fat, 0 g trans fat), 10 mg cholesterol, 29 mg sodium, 26.3 mg calcium, 129 mg potassium, 1 mg iron, 51 ug Vit A, 12 mg Vit C, 0.8 g protein. Net carbs per serving: 3 grams

Photos and recipe by Kathy Sheehan, copyright 2020
All rights reserved. Please do not duplicate without the author’s permission.