Showing posts with label desserts. Show all posts

Friday, April 3, 2026

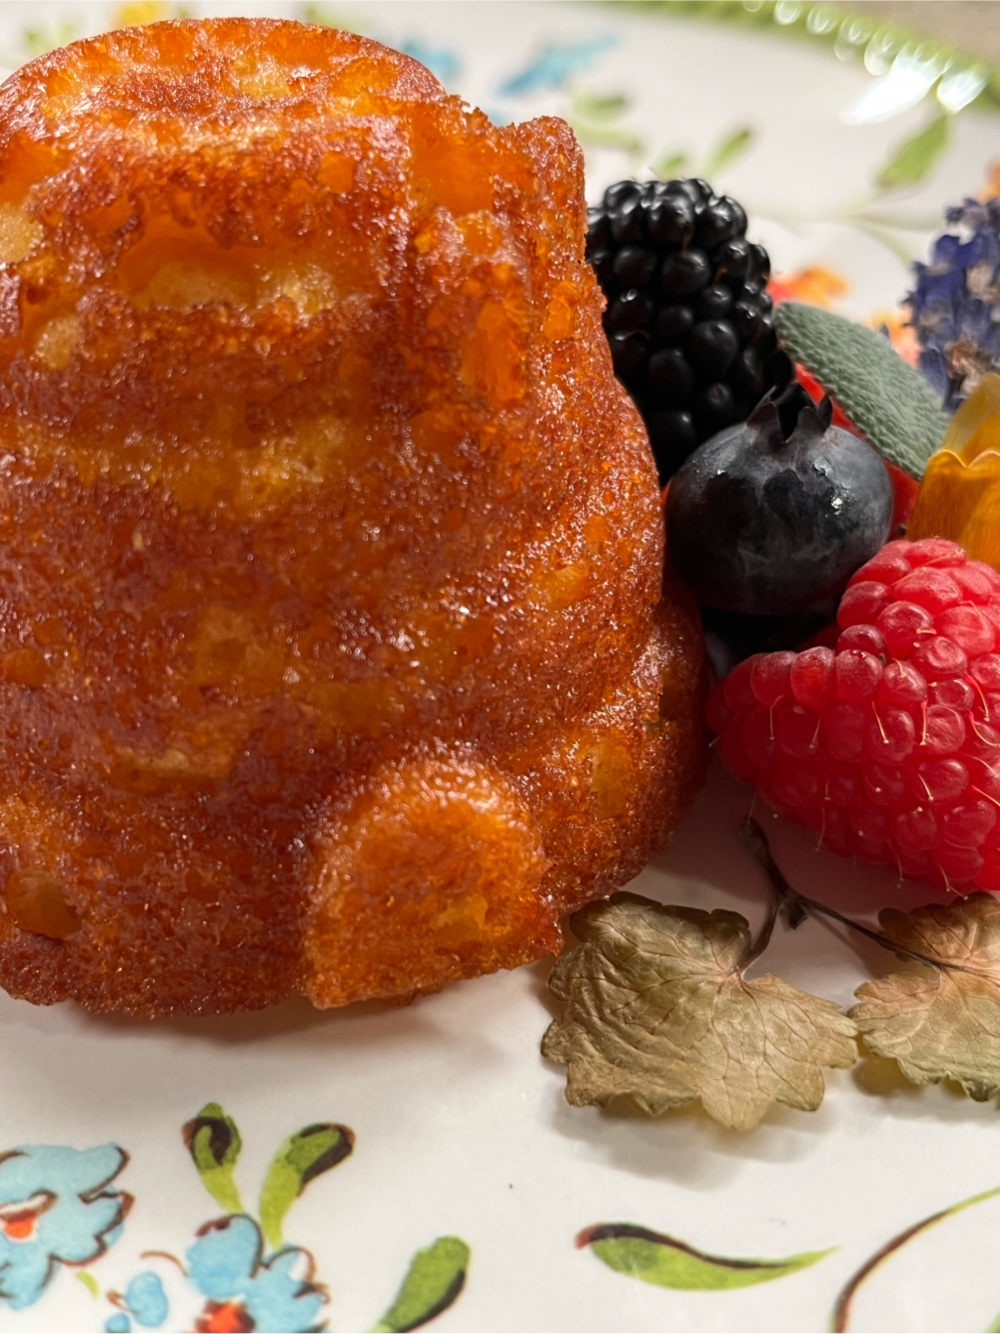
Low Carb Mini Honey Lemon Cakes

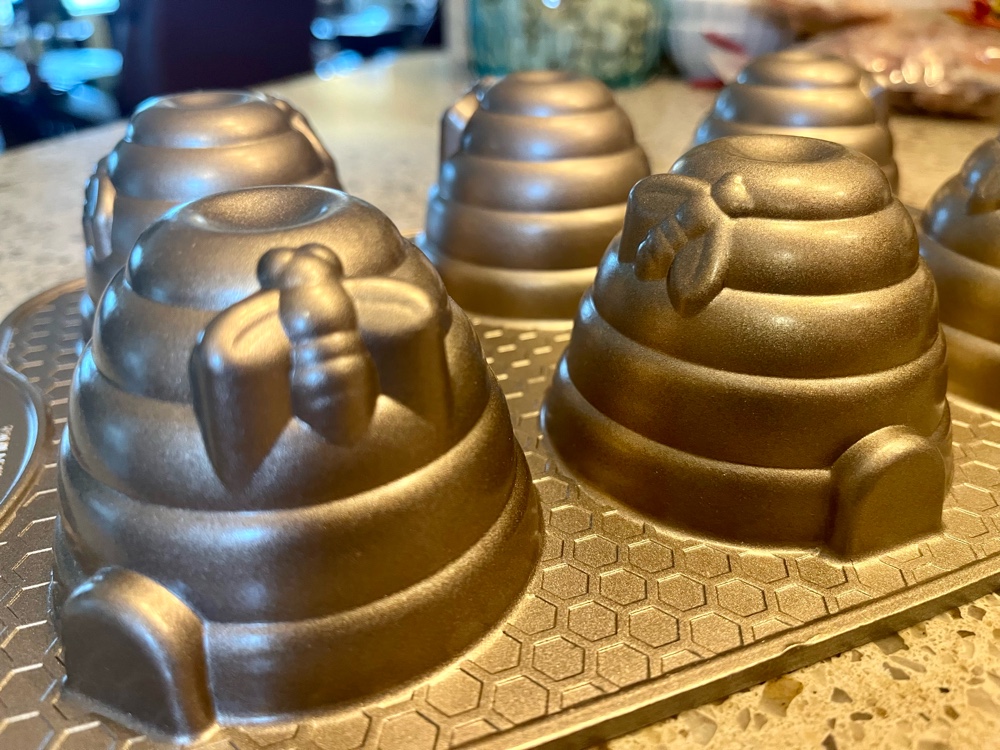
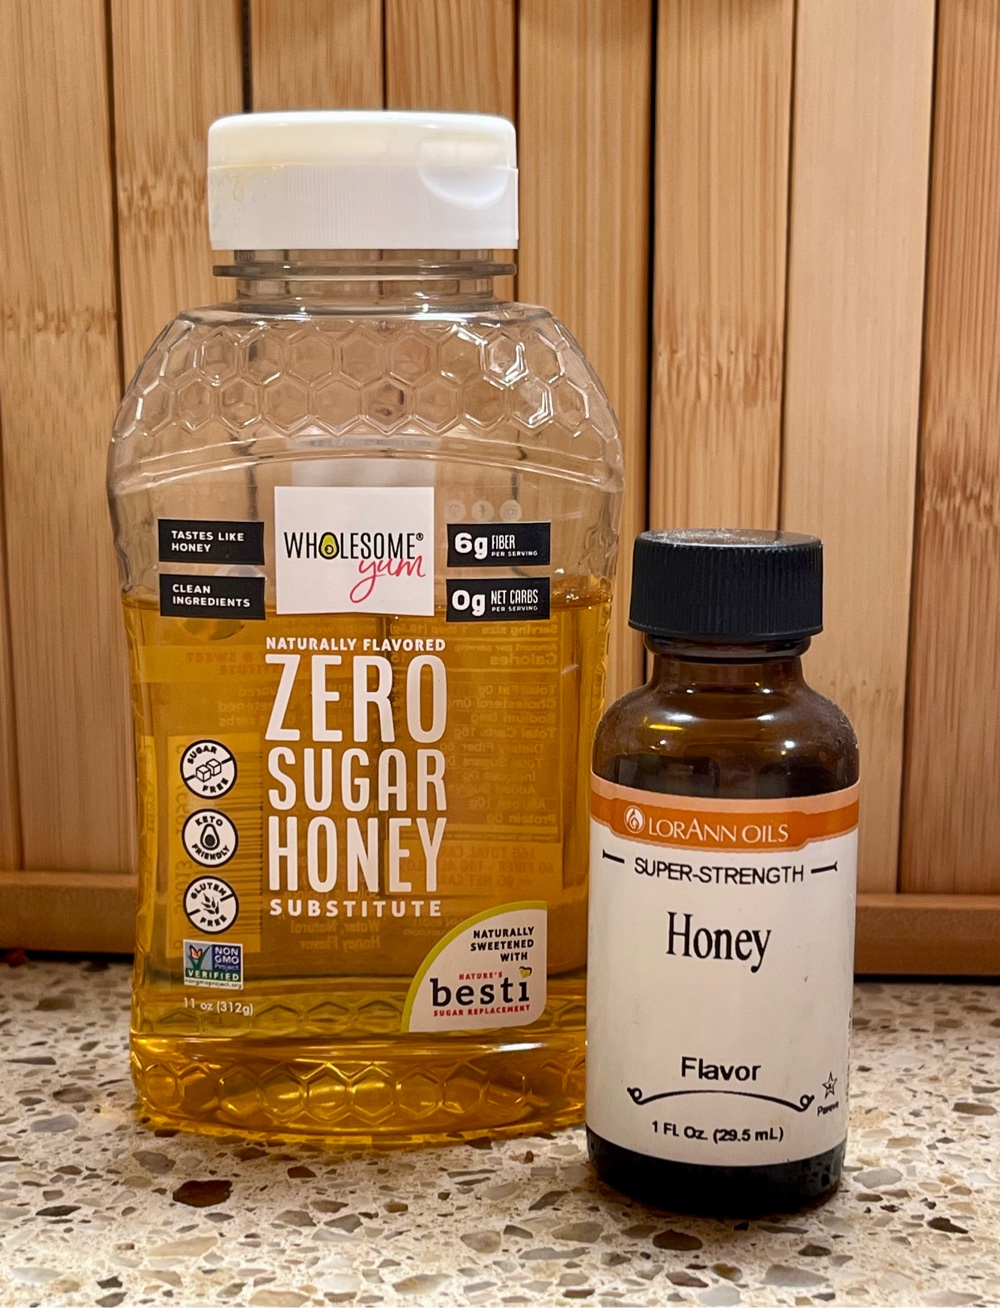
I got an adorable Nordic Ware mini cakelette baking pan in the shape of little beehives, so honey flavored cakes immediately came to my mind. If you’ve never tried sugar free, keto allulose honey, I highly recommend it. It really does taste like honey, but zero carbs! The brand I used is from Wholesome Yum, but you can find other honey flavored liquid allulose online, which would work equally as well in this recipe.


Low Carb Mini Honey Lemon Cakes
Makes 6 cakelettes (or cupcakes)

Cake Ingredients:
7 tablespoons coconut flour
1/4 cup granulated allulose sweetener
3 tablespoons unflavored whey protein powder
1½ teaspoons baking powder
1/8 teaspoon salt
3 large eggs, room temperature 
1/4 cup liquid allulose honey
2 teaspoons lemon zest
1/4 cup unsalted butter, melted and cooled a bit
1/4 cup unsweetened low carb milk of choice
1/4 teaspoon honey flavored extract (or vanilla extract)
1/4 teaspoon lemon extract

Glaze Ingredients:
2 tablespoons liquid allulose honey
1 tablespoon unsalted butter
1½ teaspoons fresh lemon juice

1. Preheat the oven to 325°F. Grease the mini beehive cakelette pan or six wells of a muffin tin, making sure to grease well all the nooks and crannies of the mini cakelette pan.

2. In a medium bowl, sift together the coconut flour, granulated allulose sweetener, whey protein powder, baking powder, and salt and whisk until no lumps remain. In a large bowl and using an electric mixer, beat the eggs and liquid allulose honey on high until light in color and increased in volume. Add the lemon zest, melted butter, low carb milk, and extracts and whisk on low until well combined. Add the dry ingredients and beat on low just until there are no lumps and the batter is smooth.

3. Divide the batter evenly among the prepared pans and tap the pan on the counter to help settle the batter into the bottom of the cake molds and remove any air bubbles. Smooth the tops. Bake for 18 to 22 minutes, until lightly browned, the tops are just firm to the touch and a toothpick comes out clean. (The internal temperature should read between 200°F and 206°F.)

4. Remove from the oven and let the cakes cool in the pan for five minutes. Then flip the cakes out onto a wire rack before glazing.

5. To make the glaze: Combine the 2 tablespoons allulose honey, 1 tablespoon butter and lemon juice in a microwave-safe bowl or in a small sauce pan set over low heat. Heat until the butter is melted and whisk until smooth. Brush the glaze onto the warm cakes. The cakes can be stored at room temperature in a sealed container for up to 3 days, or can be stored in the refrigerator for longer. Serve cakes at room temperature or slightly warmed for the best flavor and texture.

Nutritional Information per serving: 193 calories, 7.5 g carbohydrates (3 g dietary fiber, 1.6 g sugars), 13.9 g total fat (8.5 g saturated fat, 0 g trans fat), 133 mg cholesterol, 260 mg sodium, 70.8 mg calcium, 78 mg potassium, 136 IU Vit A, 1 mg iron, 10.5 g protein. Net carbs per serving: 4.5 grams

Photos and recipe by Kathy Sheehan, copyright 2026
All rights reserved. Please do not duplicate without the author’s permission.

Saturday, February 14, 2026

Low Carb Clotted Cream Ice Cream


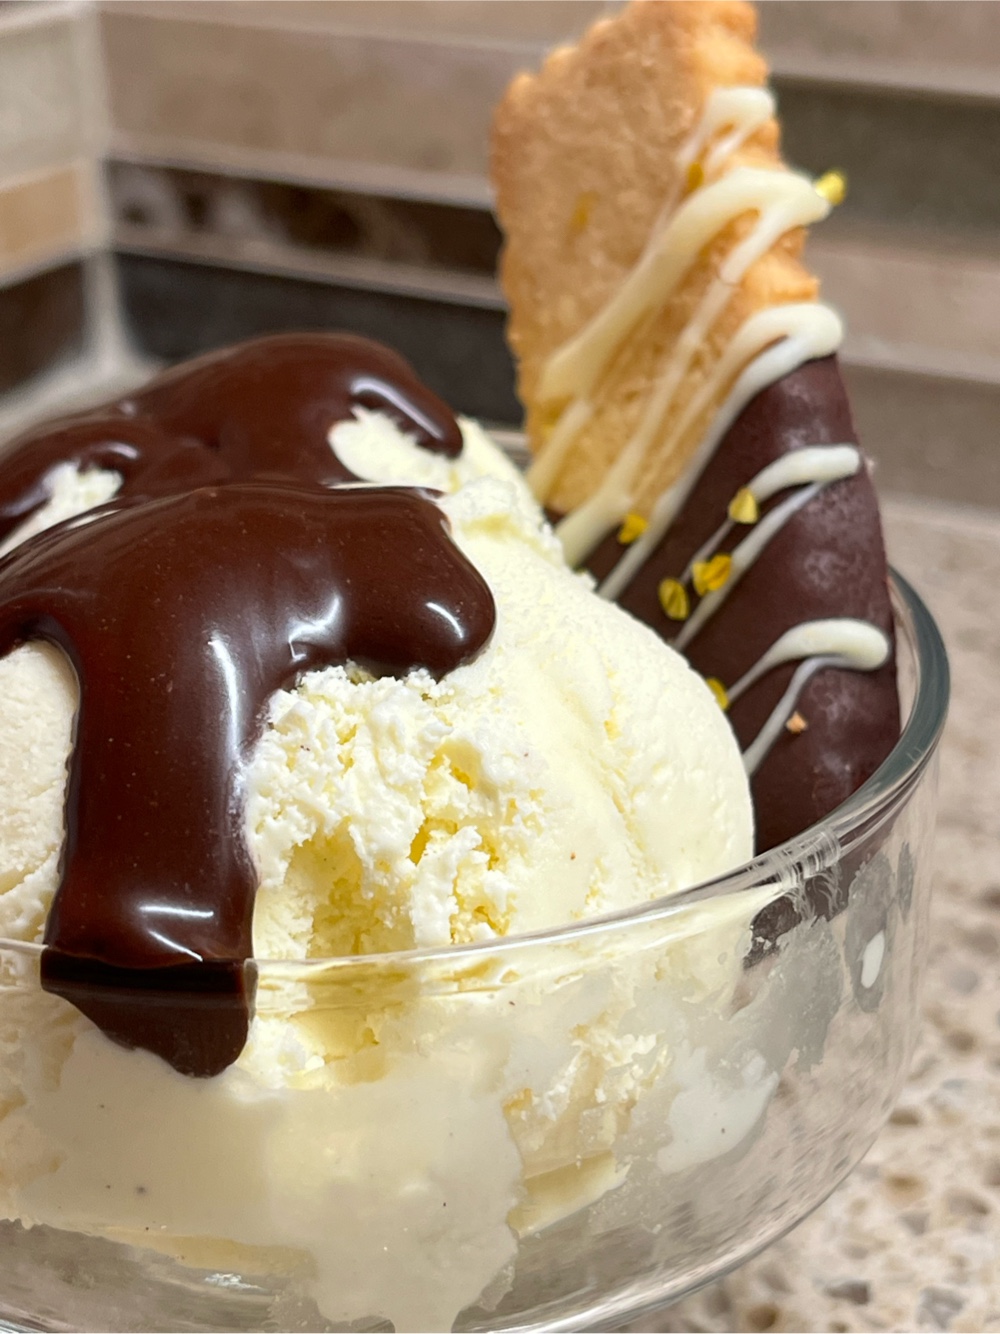
Low Carb Clotted Cream Ice Cream with sugar free chocolate sauce

I was browsing the internet and learned there was such a thing as Clotted Cream Ice Cream! Of course, I had to give this a try, but sugar free and low carb. The final result is the BEST frozen custard ice cream I’ve ever had! If you want a low carb vanilla ice cream that is decadent beyond belief, this is the recipe for you.

Low Carb Clotted Cream Ice Cream
Makes 10 servings

1 cup whole milk (I used Fairlife brand, which is half the carbs of regular whole milk)
1 ½ cups heavy cream
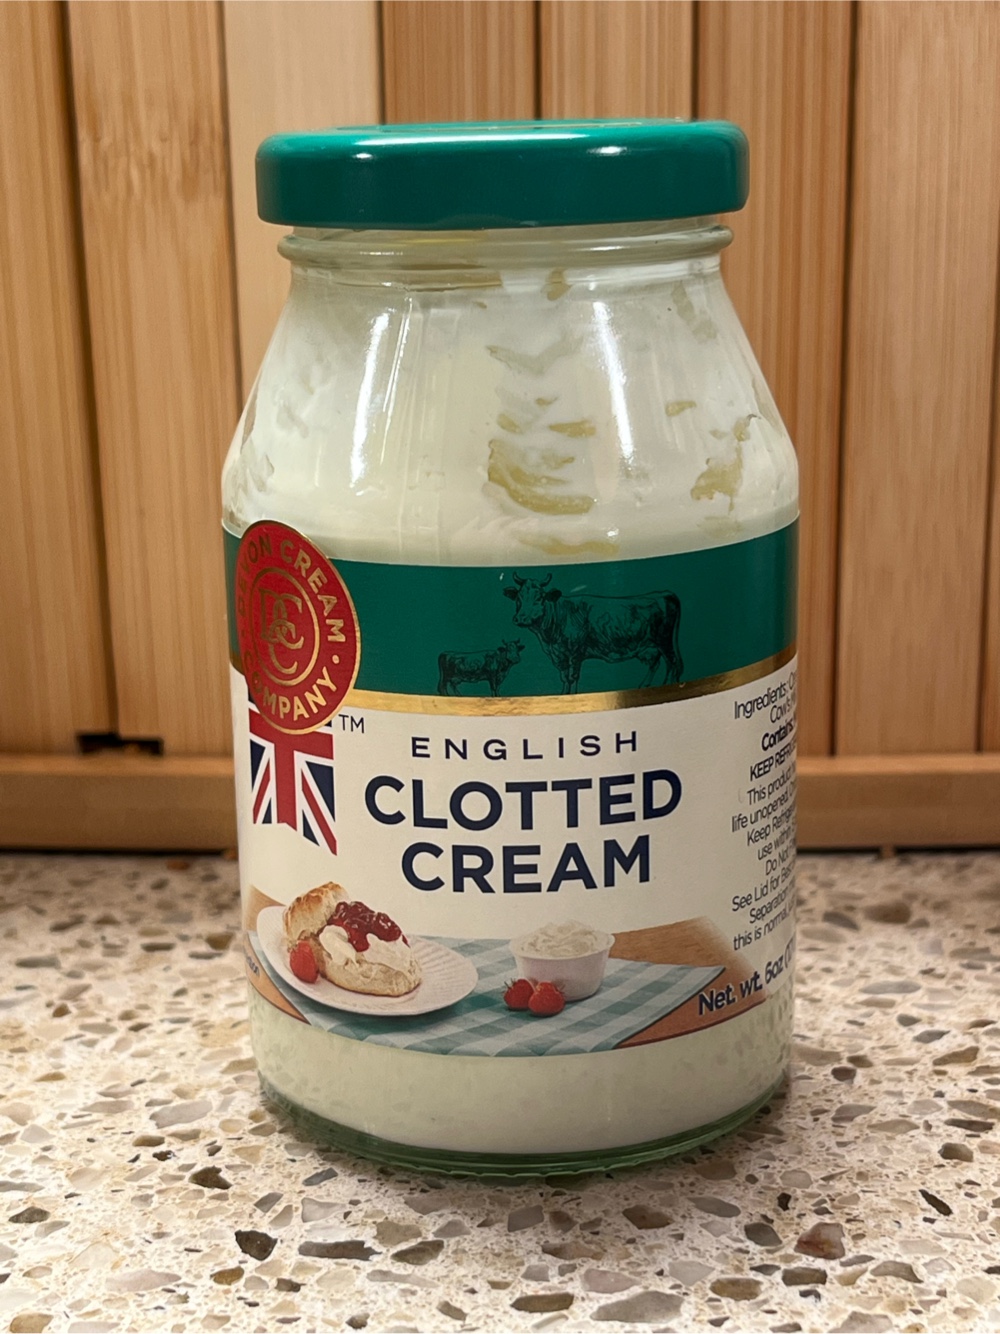
6 oz. English Clotted Cream*
3 tablespoons powdered monkfruit/erythritol sweetener (I used LaKanto Monkfruit sweetener)
A pinch of salt
4 egg yolks
6 tablespoons allulose sweetener
1 tablespoon vanilla extract

English Clotted Cream
In a heavy saucepan, whisk the milk, heavy cream, clotted, cream, powdered monkfruit sweetener and salt over medium heat until the sweetener and clotted cream are dissolved.

In a small bowl or glass measuring cup, whisk together the egg yolks and allulose sweetener.

When the milk and cream mixture begins to bubble at the edges of the pan, ladle about 1/2 cup of the warm liquid slowly into the egg yolks while whisking to temper the yolks. Then slowly add the tempered egg yolk mixture into the hot milk and cream mixture while whisking continuously. Continue whisking gently until the custard reaches 170°F and coats the back of a wooden spoon. (Do not boil or the mixture may curdle.)

Remove the saucepan from the heat, add the vanilla and stir to combine. Pour the custard through a fine mesh strainer and into a medium/large bowl. Top with plastic wrap and refrigerate until cool, about two hours.

Churn according to the manufacturers instructions for your ice cream maker. Churn until thickened, about 20 to 25 minutes. The ice cream will have a soft, creamy texture. If a firmer consistency is desired, transfer the ice cream to an airtight container and place in the freezer for at least six hours or overnight.

*Clotted Cream is sometimes referred to as Cornish Clotted Cream or Devonshire Cream. Also, if using regular whole milk instead of Fairlife brand, add 1 ½ carbs per serving.

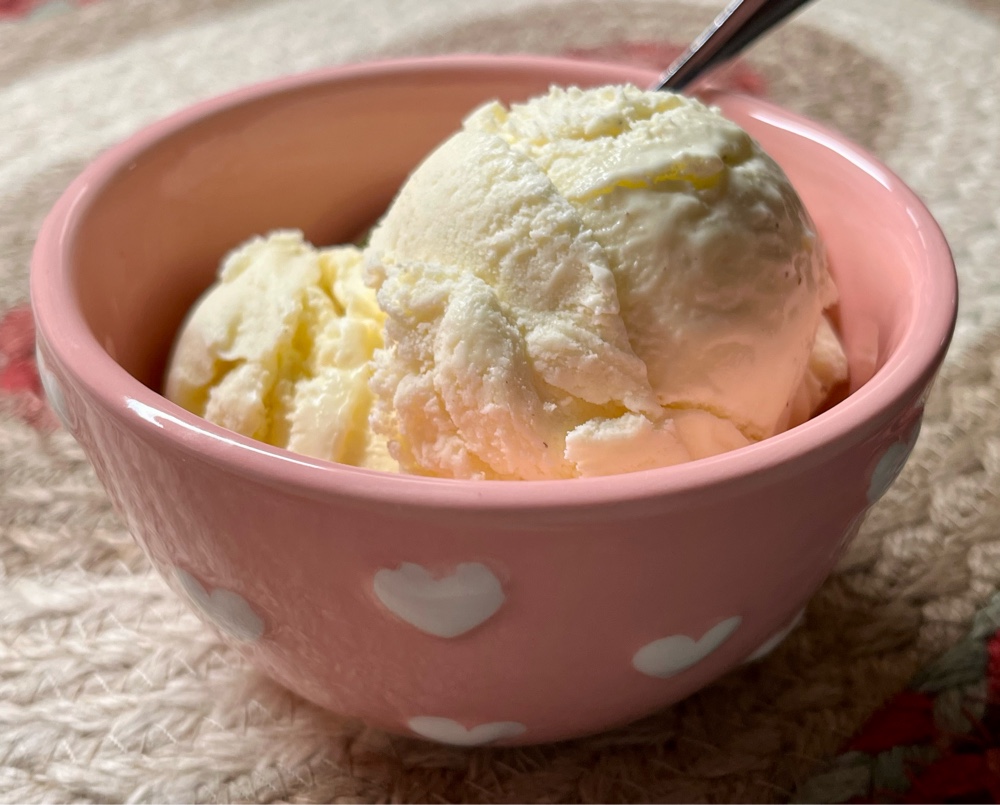
Clotted Cream Ice Cream in pink bowl

Nutritional Information per ½ cup serving: 252 calories, 2.7 g carbohydrates (0 g fiber, 0.8 g sugars, 0.5 g sugar alcohols), 24.8 g total fat (15.4 g saturated fat, 0 g trans fat), 166 mg cholesterol, 54 mg sodium, 72 mg calcium, 35 mg potassium, 202 IU Vit A, 3.1 g protein. Net carbs per serving: 2.7 grams

Recipe and photos by Kathy Sheehan, copyright 2026
All rights reserved . Please do not duplicate without the author’s permission.
Monday, October 27, 2025

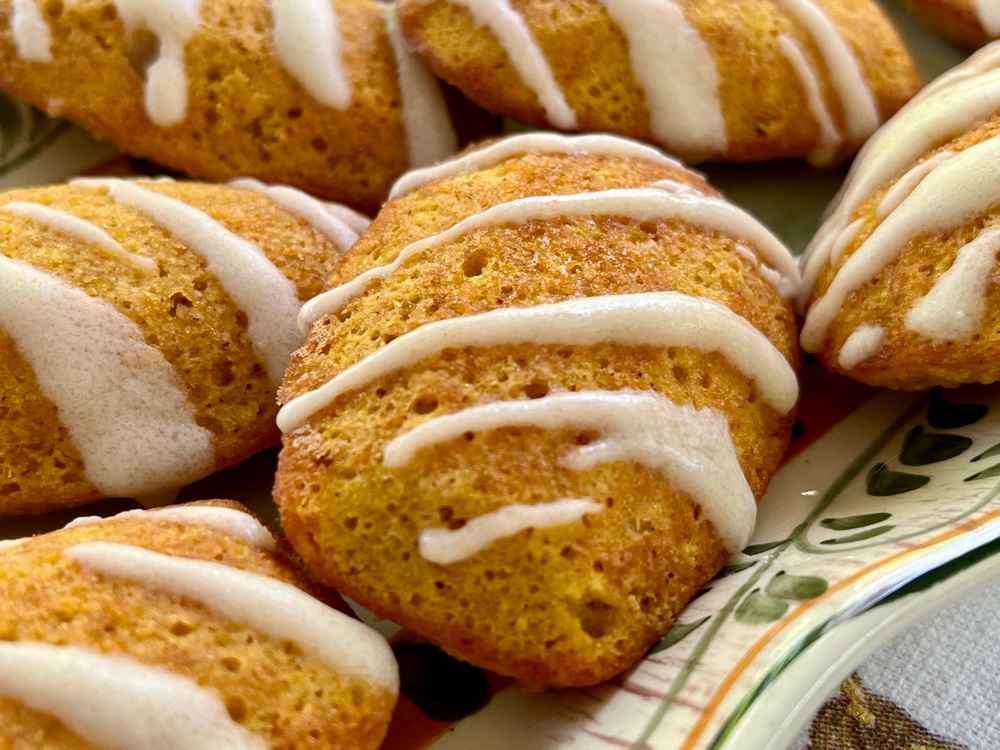
Keto Pumpkin Madeleines with Brown Butter Glaze

Keto Pumpkin Madeleines with Brown Butter Glaze
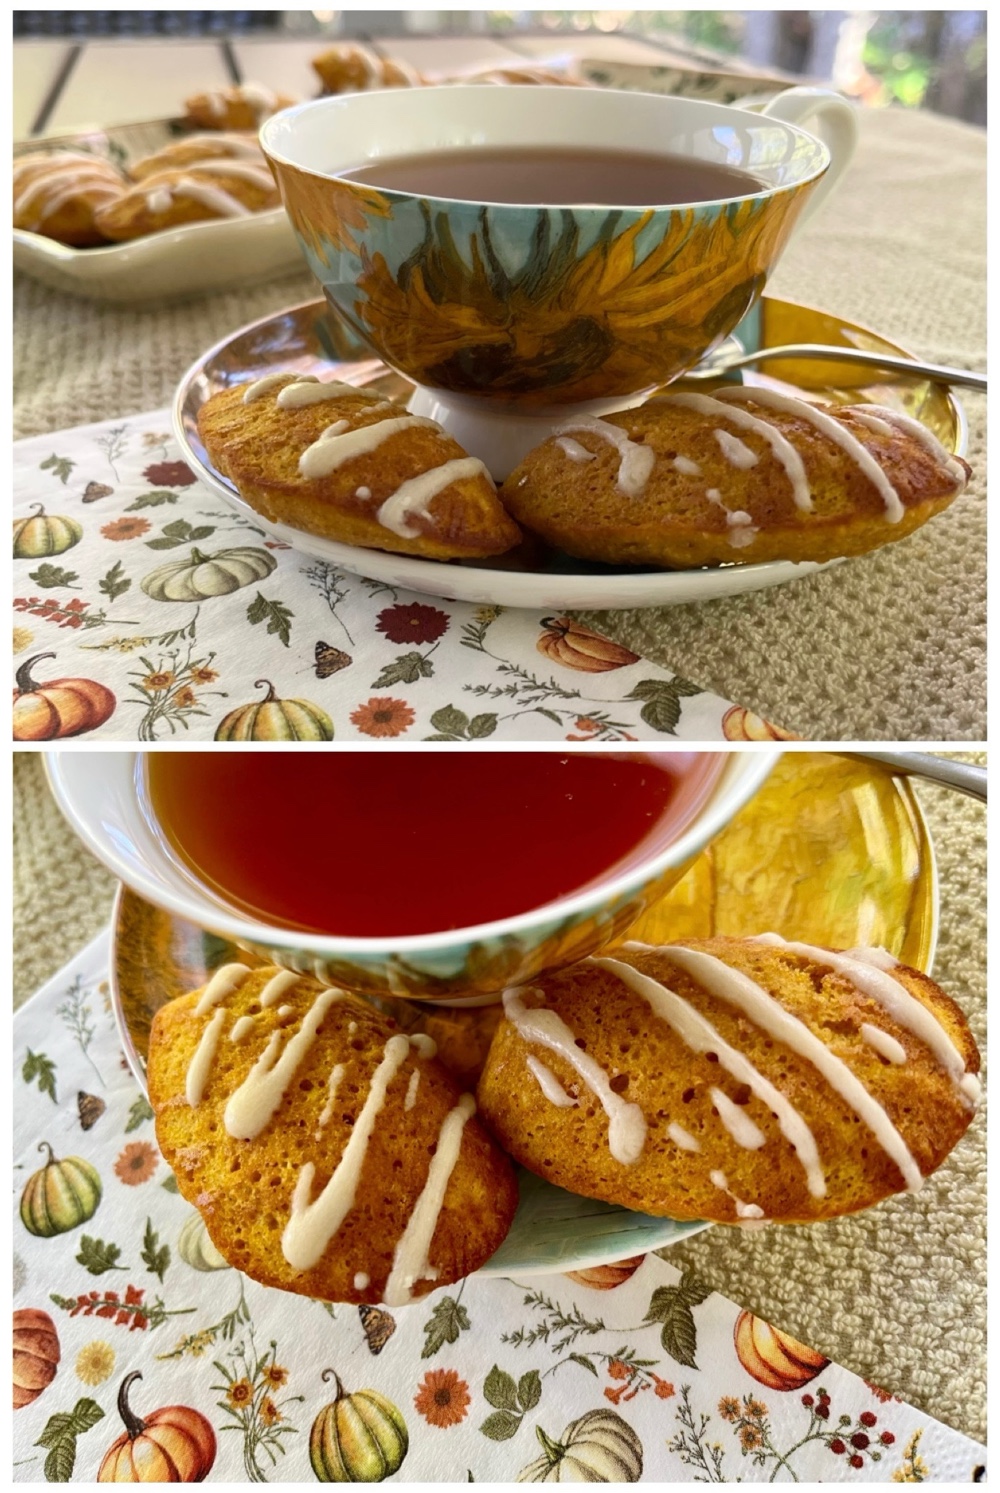
Madeleines are scallop-shaped, mini French Butter Cakes, often thought of as cookies, that are a delicious snack enjoyed with a cup of tea in the afternoon. This recipe is perfect at this time of year, when pumpkin and warm spices are most popular. You’ll need a madeleine baking pan to create that distinctive scallop shape but, if you don’t have one, a mini muffin pan will work too.

Keto Pumpkin Madeleines with Brown Butter Glaze
Makes 10-12 cookies

Madeleines:
½ cup almond flour
1 tablespoon coconut flour
2 tablespoons chickpea flour (or another 2 tablespoons almond flour)
1 teaspoon baking powder
½ teaspoon pumpkin pie spice
1/4 teaspoon salt
1/4 cup low carb brown sugar substitute sweetener 
2 large eggs, room temperature 
1 teaspoon vanilla bean paste (or extract)
1/4 cup pumpkin puree
2 tablespoons melted unsalted butter (plus 1 tbsp for greasing pan)

Brown Butter Glaze:
2 tablespoons unsalted butter 
2 tablespoons powdered erythritol-based sweetener* (see note)
½ teaspoon vanilla extract
2 teaspoons low carb milk of choice (more or less to reach proper glaze consistency)

1. Preheat your oven to 350°F. Brush the madeleine cookie pan very well with melted butter; set aside.

2. In a small bowl, whisk together the almond flour, chickpea flour, coconut flour, baking powder, pumpkin pie spice and salt; set aside.

3. In a separate bowl, add the eggs, brown sugar substitute sweetener, vanilla, bean paste or extract, pumpkin purée, and whisk vigorously until foamy, about 30 seconds. Add the melted butter and mix until well combined.

4. Add the flour mixture and whisk until while combined and the batter is smooth and creamy.

5. Spoon the batter into the madeleine baking mold just up to the rim so that it can rise and puff up nicely. Do not overfill.

6. Bake for 11 to 12 minutes, just until the sides are slightly browned and the tops are no longer moist to the touch. Do not overbake as they can crisp up like cookies. You want them soft and pillowy. While the cookies are cooling, make the glaze. 

7. These madeleines can be enjoyed immediately out of the oven and are best served freshly baked. They can be kept at room temperature for a few days or they can be refrigerated for up to a week or frozen (without glaze) for months. 

To make the Brown Butter Glaze:

1. Place the 2 tablespoons of unsalted butter into a light colored or stainless sauce pan. Heat over medium low heat until the butter is melted and stops sizzling, swirling the pan occasionally to prevent burning. Continue simmering and swirling the pan until the butter has turned a golden color. Watch carefully as it is too easy to burn the brown butter! Once the butter has browned, pour it into a small bowl

2. Add the powdered sweetener, vanilla extract, and stir until smooth. Add just enough milk, 1/2 teaspoon at a time, until the glaze has reached the proper consistency. If the brown buttered glaze ceases up, heat gently in the microwave for a few seconds and stir briskly until a smooth glaze has formed.

3. Drizzle about 3/4 of a teaspoon of glaze on each cookie in a loose striped pattern. Allow the glaze to set up for a while. The glaze will harden as it sets.

*Notes: An allulose sweetener will remain sticky and not set up properly.

Keto Pumpkin Madeleines with tea
Nutritional Information per cookie: 79 calories, 2.5 g carbohydrates (0.8 g dietary fiber, 0 g sugars), 6.6 g total fat (2.9 g saturated fat), 41 mg cholesterol, 96 mg sodium, 38.8 mg calcium, 22 mg potassium, 49 IU Vit A, 2.6 g protein. Net carbs per serving: 1.7 grams

Photos and recipe by Kathy Sheehan, copyright 2025
All rights reserved. Please do not duplicate without the author’s permission.

Tuesday, September 16, 2025

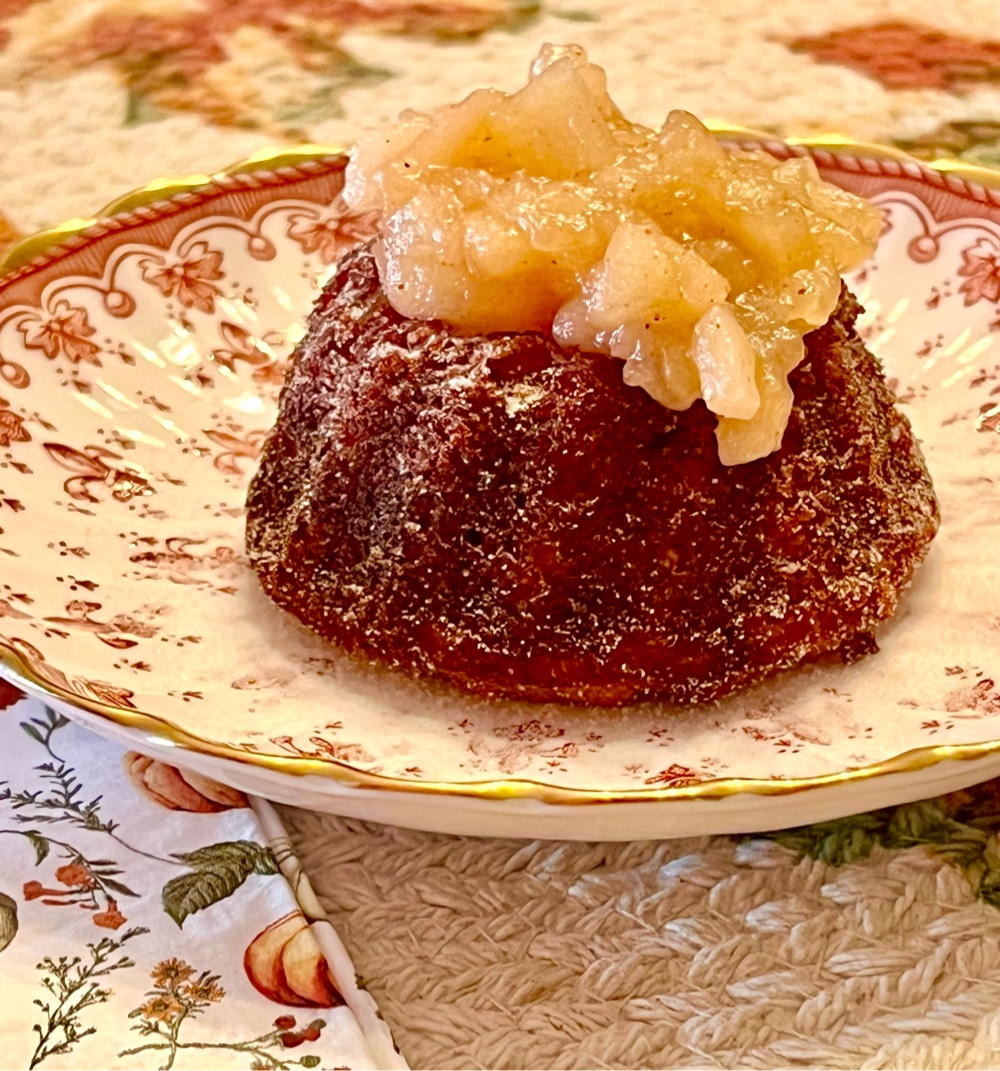
Keto Mini Ginger Cakes with Warm Apple Compote

Keto Mini Ginger Cakes with Warm Apple Compote
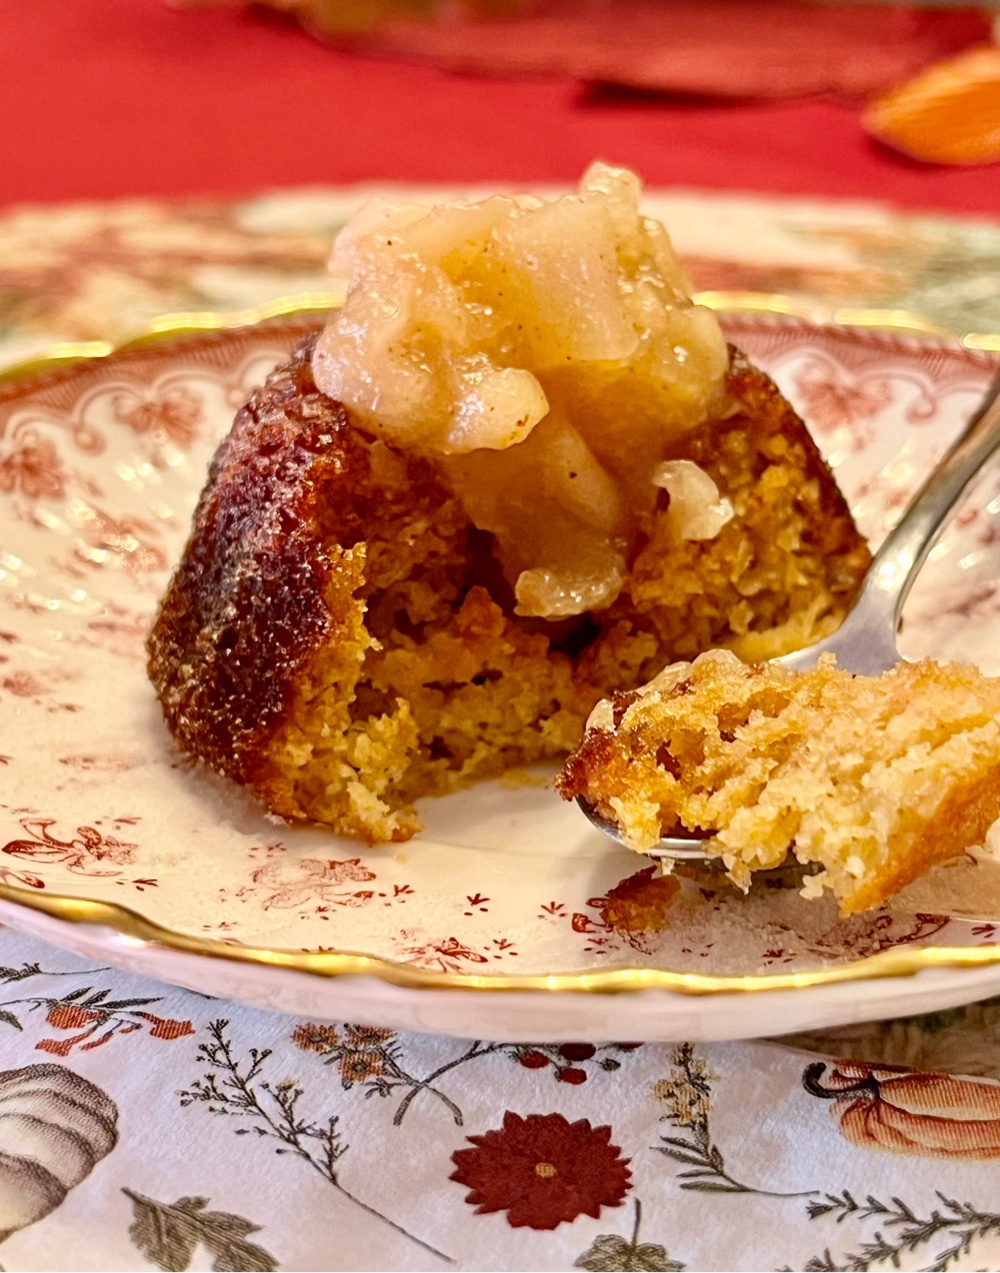
Autumn is in the air and warm spices, like ginger and cinnamon, are calling to me! These Mini Ginger Cakes make the perfect fall dessert. The warm, lightly spiced apple compote puts it over the top! The collagen peptide powder is a secret ingredient that keeps the cake tender and moist, even days later (no dry or stale cake!). That means they store very well. Also, the cakes can be made ahead, wrapped with plastic wrap and frozen too! Use a bundt mini cakes baking pan to make them extra special or, if you don’t have one, you can use a regular size muffin pan or even a donut pan.

Keto Mini Ginger Cakes with Warm Apple Compote
Makes 8 mini cakes and 8 servings of compote

Ginger Cakes:
1/4 cup strong Apple Spice Herbal Tea (any brand), brewed and cooled
2 tablespoons unsalted butter, softened
½ cup granulated low carb sweetener of choice 
2 large eggs, room temperature 
1 teaspoon apple cider vinegar
1 teaspoon vanilla extract
½ cup coconut flour
1 teaspoon baking powder
½ teaspoon baking soda
1½ teaspoons ground ginger
1/4 teaspoon salt
2 tablespoons unflavored collagen peptide powder (such as Vital Proteins brand)
2 tablespoons crystallized ginger, finely chopped

Apple Compote:
1 tablespoon unsalted butter
1½ cups Gala apples, diced small
2 tablespoons lemon juice
1/3 cup allulose sweetener 
1/4 teaspoon ground cinnamon (optional)
1/4 cup strong Apple Spice Herbal Tea (any brand), brewed

1. Preheat the oven to 350°F. Generously spray 8 wells of a mini Bundt pan with nonstick baking spray, especially the center post of each cake; set aside.

2. In the bowl of a food processor, add the softened butter and granulated sweetener and pulse to combine. Add the eggs, one at a time, pulsing after each addition. Add the brewed and cooled tea, vanilla extract, apple cider vinegar and pulse to combine. (If you do not have a food processor, you may do this in a mixing bowl using an electric mixer.)

3. In a small bowl, mix together the coconut flour, collagen peptides, baking powder, baking soda, ground ginger, and salt. Whisk to combine and to remove any lumps. Add to the wet ingredients in the processor and pulse to combine. Fold in the chopped crystallized ginger.

4. Divide the batter evenly among the prepared wells of the pan. Tap the pan forcefully on the counter several times to settle the batter and to remove air bubbles.

5. Bake until the edges are golden brown and a wooden pick inserted in the center of each cake comes out clean, 13 to 15 minutes. Let the cakes cool in the pan for 10 minutes. Transfer to a wire rack and let the cakes cool completely. Cooled cakes can be stored at room temperature for one to two days, or in the refrigerator for up to a week. (The cakes can also be frozen after being wrapped carefully in plastic wrap for up to two months.) Serve cakes at room temperature.

6. Just before serving, garnish cakes with a dusting of confectioners sweetener, if desired. Spoon the warmed apple compote into the well of each cake. Serve immediately.

To make the Apple Compote:

1. In a medium nonstick, sauté pan, melt the butter over medium high heat. Add the chopped apples, lemon juice, cinnamon (if using), and sweetener. Cook and stir for 2 to 3 minutes. Add the tea and cover the pan, reducing heat to medium low. Cook until the apples are just starting to be tender, approximately 5 to 10 minutes, stirring occasionally.

2. Using a slotted spoon, transfer the apple pieces to a bowl.

3. Increase heat to medium high and cook remaining liquid until reduced and slightly thickened and syrupy. Add the syrup to the apples, stirring to coat. Use immediately or transfer to a covered container and refrigerate for up to 3 days. Warm compote gently before serving.

Mini Ginger Cake with Apple Compote
Nutritional Information per serving of 1 mini cake and 2 TB apple compote: 100 calories, 10.5 g carbohydrate (4.6 g dietary fiber, 4.1 g sugars), 6.6 g total fat (4.1 g saturated fat), 58 mg cholesterol, 231 mg sodium, 56.2 mg calcium, 77 mg potassium, 1 mg iron, 65 IU Vit A, 1 mg Vit C, 4.8 g protein. Net carbs per serving: 5.9 grams

Photos and recipe by Kathy Sheehan, copyright 2025
All rights reserved. Please do not duplicate without the author’s permission. 
Saturday, May 31, 2025

Low Carb Shrewsbury Biscuits (aka Shrewsbury Cakes)

Low Carb Shrewsbury Biscuits

Shrewsbury Biscuits, also known as Shrewsbury Cakes, are a classic English dessert with a history stretching back to at least the 17th century. The first time these cookies were printed in a cookbook was in 1658. This Renaissance-era cookbook called The Compleat Cook included a recipe using sugar, flour, eggs, butter, and lemon zest. Shrewsbury Biscuits are still a popular cookie in the UK, and are especially enjoyed at teatime. In keeping with tradition, I have developed this low carb, sugar-free version that includes lemon zest, which is one of the most common flavorings. They are light, delicate, and buttery! I think you will agree with the British, these delightful and distinctive shortbread cookies are perfect with a cup of tea!

Low Carb Shrewsbury Biscuits
Makes 12-14 cookies

1½ cups almond flour, spooned and leveled
1/4 cup coconut flour, spooned and leveled
1/4 teaspoon sea salt
Zest of 1 lemon (about 2 teaspoons) 
6 tablespoons unsalted butter, softened
1/3 cup granulated erythritol sweetener (erythritol is needed for a crisp cookie)
1 egg yolk
½ teaspoon vanilla extract

1. In a small bowl, whisk together the almond flour, coconut flour, lemon zest, and salt. Set aside.

2. Add the softened butter and sweetener to a large mixing bowl and, using an electric mixer, cream together. Add the vanilla extract and egg yolk and beat on medium until combined.

3. Add the dry ingredients to the bowl. Mix together with the electric mixer until a dough forms. The dough may appear crumbly, but should come together when you press it between your fingers. Form the dough into a ball and wrap with plastic wrap. Place the dough in the refrigerator to chill for about 30 minutes.

4. While the dough is chilling, preheat the oven to 325°F. Line a baking sheet with parchment paper and set aside.

5. Once chilled, lay out a piece of parchment paper or plastic wrap on a working surface. Turn the dough out onto the parchment paper, flatten it, and place another piece of parchment paper or plastic wrap on top. Roll the dough with a rolling pin until it is about 1/4 inch thick.

6. Use a 2 inch round, fluted biscuit or cookie cutter to cut out your cookies. Place each cookie evenly spaced on the prepared baking sheet, leaving about 1 inch of space between each cookie. These cookies do not spread when they are baked. Repeat until all the dough is used. (This recipe yields about 12 to 14 cookies.) Decorate with a crisscross pattern, if desired (see notes below). At any time, if the dough becomes difficult to handle, place it in the refrigerator for 10 minutes. This dough is much easier to handle when slightly chilled.

7. Place the cookies in the preheated oven on the middle rack and bake for 12 to 14 minutes or until the edges turn golden brown. Do not overbake. You want the tops of the cookies to be just firm to the touch, but still light in color. Remove the cookies from the oven and allow to cool completely on the baking sheet before handling. The cookies will be soft and quite delicate when warm from the oven, but will crisp up on the pan and become firmer as they cool. Cookies can be stored in an airtight container at room temperature for a week.

Low Carb Shrewsbury Biscuits with tea

Notes: The crisscross pattern is traditional in this cookie. The interesting story behind this design is that sophisticated ladies sipping tea in a bygone era would never have considered picking up a whole cookie and biting into it, risking crumbs falling on their fine clothing! That would have been extremely lacking in good manners! Instead, the crisscross pattern provided score lines that made it easy to break the cookie into neat, tiny, bite-size pieces. Less mess and definitely more sophisticated. Although it may look complicated, this design can be easily made using a clean fine tooth comb and a toothpick! Here’s how to do it:

1.) Press the comb across the center of the cookie, then again about 3/4 of an inch from each edge, so there are three parallel lines. Don’t press all the way down, but just about halfway.  2.) Turn the comb 90° and repeat. You should end up with a diamond design, or little squares. 3.) Now use the toothpick to poke a hole into the center of each square. It’s okay to push it all the way down.

Crisscross Pattern Steps

Use toothpick to make dots

Nutritional Information per cookie: 121 calories, 3.8 g carbohydrates (1.6 g dietary fiber, 0.6 g sugars), 11 g total fat (4 g saturated fat, 0 g trans fat), 28 mg cholesterol, 41 mg sodium, 29 mg calcium, 72 mg potassium, 0 mg iron, 51 IU Vit A, 3 g protein. Net carbs per cookie: 2.2 grams

Recipe and photos by Kathy Sheehan, copyright 2025
All rights reserved. Please do not duplicate this recipe without the author’s permission.
Wednesday, February 19, 2025

Keto Peanut Butter Chocolate Chip Cookies

Keto Peanut Butter Chocolate Chip Cookies

These delicious cookies, loaded with chocolate and crunchy peanut bits, are a real treat! They come together quickly and easily. Perfect for dessert, snacking or to give as gifts. This recipe may become one of your favorites, as it is mine!

Keto Peanut Butter Chocolate Chip Cookies
Makes 20 cookies

½ cup coconut flour
2 tablespoons unflavored collagen peptide powder
1/4 teaspoon salt
½ teaspoon baking soda
1/4 teaspoon baking powder
1/4 cup unsalted butter, softened (½ stick)
1/4 cup creamy peanut butter (no sugar added)
1/4 cup allulose (or monkfruit-erythritol blend)
6 tablespoons brown sugar substitute 
1 large egg, room temperature 
1 teaspoon vanilla extract
2/3 cup sugar free chocolate chips
1/3 cup peanuts, chopped

1. Preheat the oven to 325°F. Line two cookie sheets with parchment paper; set aside.

2. In a small bowl, combine the coconut flour, collagen peptides, salt, baking soda and baking powder. Blend with a fork until no lumps remain; set aside.

3. In the bowl of a standing mixer fitted with a paddle attachment, cream together the softened butter, brown sugar substitute and allulose until light and fluffy. Add the egg and vanilla, beating to combine. Scrape down the bowl with a rubber spatula as needed. Add the dry ingredients and beat until combined and a smooth dough forms.

4. Using a rubber spatula, fold the chocolate chips and chopped peanuts into the cookie dough until well distributed.

5. Using a 1½ tablespoon cookie scoop, scoop the cookies onto the parchment lined cookie sheets and gently flatten the tops slightly with your fingertips. Bake for 12 to 13 minutes until light brown around the edges and golden on the top, rotating the pans halfway through the baking time. Allow the cookies to cool completely on the pans before removing them to a wire rack to cool completely.

Stack of Keto PB Chocolate Chip Cookies

Nutritional Information per cookie: 94 calories, 5.7 g carbohydrate (2.7 g dietary fiber, 1.7 g sugars), 6.8 g total fat (3.2 g saturated fat, 0 g trans fat), 15 mg cholesterol, 92 mg sodium, 4.4 mg calcium, 20 mg potassium, 25 IU Vit A, 2.8 g protein. Net carbs per cookie: 2.8 grams

Photos and recipe by Kathy Sheehan, copyright 2025
All rights reserved. Please do not duplicate without the author’s permission.
Friday, February 7, 2025

Strawberry Coconut Flour Scones

Strawberry Coconut Flour Scones

Scones served with a cup of tea or coffee in the morning is the perfect way to start the day! These Strawberry Scones are not too sweet, but the burst of real summer strawberries in every bite makes them welcome on a cold, winter day. I used a set of heart-shaped cookie cutters to make these extra special and a fun treat to serve at a Valentine’s Day afternoon tea! 

Strawberry Coconut Flour Scones
Makes 12 servings

1 cup coconut flour (122 grams)
1/4 cup granulated sweetener (I used a combination of powdered monkfruit sweetener and allulose), adjust to taste
1 tablespoon baking powder
1/4 teaspoon salt
3 large eggs, room temperature 
8 tablespoons (1 stick) unsalted butter, room temperature 
1/3 cup (23 grams) freeze dried, no sugar added strawberries, roughly chopped 
½ cup (126 grams) sour cream or plain Greek yogurt, room temperature 
½ teaspoon strawberry extract 

Freeze dried strawberries

1. Preheat the oven to 400° Fahrenheit. Line a large baking sheet with parchment paper; set aside.

2. Sift dry ingredients into a large mixing bowl until there are no lumps. Stir in the eggs until fully combined and dry ingredients are moist.

3. Cut in the butter until fully combined. Using a pastry cutter can be a helpful tool.

4. Stir together the sour cream and strawberry extract. Add the sour cream mixture to the dough and stir until fully combined and a smooth dough as formed.

5. Form dough into a ball and knead gently for about 1-2 minutes to allow the moisture to be absorbed into the coconut flour. Place the dough back into the mixing bowl and allow to sit at room temperature for about five minutes before proceeding.

6. Line a clean work surface with parchment paper or a silicone baking mat. Carefully press the dough out into a circle until about 1-1/4 inch thick. Using a round biscuit cutter (or any shaped cookie cutter), cut out 12 scones. (Alternately, you can use a pizza cutter and cut the circle of dough into triangles.)

7. Transfer the scones onto the prepared baking sheet. Leave space between the scones. If desired, brush the tops of the scones with melted unsalted butter. Bake in the preheated oven for 15 to 20 minutes or until golden.

8. Remove from the oven and allow to cool on the pan for about 10 minutes. Transfer to a wire rack and allow to cool completely. The scones may be served warm or at room temperature. Store any leftovers in an airtight container at room temperature for 3 days or in the refrigerator for up to a week.

Strawberry Coconut Flour Scones with butter

Nutritional Information per scone: 144 calories, 10.5 g carbohydrate (5.7 g dietary fiber, 2.9 g sugars), 12.2 g total fat (7.8 g saturated fat, 0 g trans fat), 71 mg cholesterol, 177 mg sodium, 107.3 mg calcium, 34 mg potassium, 1 mg iron, 112 IU Vit A, 8 mg Vit C, 4.7 g protein. Net carbs per serving: 4.8 grams

Recipe and photos by Kathy Sheehan, copyright 2025
All rights reserved. Please do not duplicate without the author’s permission. 

Monday, December 9, 2024

Low Carb Chocolate Dipped Peanut Butter Pretzel Bites (Gluten Free!)

Low Carb Chocolate Dipped Peanut Butter Pretzel Bites

These delicious Chocolate Dipped PB Pretzel Bites call for gluten free mini pretzels, making them gluten free, grain free and low carb! So easy to make and no baking involved. This is a fun activity to do with the kids. You can decorate them with sprinkles to customize them for any occasion. The pretzels stay crunchy, which pairs nicely with the creamy peanut butter filling and luxurious chocolate coating. Looking for a low carb food gift to share with friends? These pretzel cookies travel well and stay fresh for many weeks!

Low Carb Chocolate Dipped Peanut Butter Pretzel Bites
Makes 25 cookies

1/3 cup creamy peanut butter (no sugar added)
2 tablespoons unsalted butter, softened to room temperature 
1/3 cup powdered low carb sweetener of choice
2 tablespoons coconut flour
2 tablespoons peanut butter powder (no sugar added)
1/8 teaspoon salt
½ teaspoon vanilla extract
50 gluten free, mini pretzels (1 carb each*, see note below)
1 cup sugar free semi-sweet or dark chocolate chips (I like keto-friendly Guittard 72% cocoa chips)

1. Place the peanut butter and softened butter into a mixing bowl and beat until smooth. (This can be done using an electric mixer or by hand.) Add in the powdered sweetener, coconut flour, peanut butter powder, salt and vanilla. Continue mixing until well combined. Chill mixture to firm up so it can be rolled into balls more easily.

2. Portion the peanut butter mixture into approximately 1 inch balls, then press each ball between two mini pretzels. Continue until you have 25 pretzel bites.

Pretzel Bites Step by Step

3. Melt chocolate in the microwave in 15 second intervals, stirring well between each interval, until fully melted. (I like to do this at 50% power so the chocolate does not burn or seize while melting.) You can also melt the chocolate in a double boiler, if you’d prefer.

4. Dip one side of each pretzel bite into the melted chocolate, scrape the bottom along the rim of the bowl to remove any drips and then place each dipped pretzel bite onto a tray lined with parchment paper. If desired, while the chocolate is still wet, sprinkle with decorative sprinkles. Allow the pretzel bites to cool and set up before serving. To hasten this process, you may place them in the refrigerator for a few minutes until the chocolate is set.

5. These Pretzel Bites can be stored at room temperature, if you plan to eat them within a day or two. Otherwise, store them in a refrigerator for longer storage.

*Note: Snyder Gluten Free Mini Pretzels are 1 carb per piece. If you use a different brand of pretzel, the nutritional information and carb count in the final product may be slightly different.

PB Pretzel Bites in a Gift Tin

Nutritional Information per 1 pretzel bite: 52 calories, 4.5 g carbohydrate (1.3 g dietary fiber, 0.6 g sugars, 0.6 g sugar alcohols), 3.8 g total fat (1.5 g saturated fat, 0 g trans fat), 2 mg cholesterol, 57 mg sodium, 3.8 mg calcium, 11 mg potassium, 8 IU Vit A, 1.2 g protein. Net carbs per bite: 2.6 grams

Photos and recipe by Kathy Sheehan, copyright 2024
All rights reserved. Please do not duplicate without the author’s permission.

Monday, October 28, 2024

Low Carb Molasses Cookies (the real deal!)

Low Carb Molasses Cookies

The other day, my husband came home with a bag of molasses cookies from his favorite local cookie bakery. Needless to say, I was greatly inspired to create a real, authentic molasses cookie for myself that is both low carb and low sugar. I am happy to say that I have succeeded! This recipe calls for real molasses. The net carb count per cookie is less than 3 grams, of which 0.75 g comes from the molasses. I think it’s a carb-worthy ingredient because it imparts the unmistakable authentic flavor you expect. Without it, the cookie would no longer taste like a traditional, old-fashioned molasses cookie. So, don’t leave it out!

Low Carb Molasses Cookies (the real deal!)
Makes 20 cookies

½ cup coconut flour
2 tablespoons unflavored collagen peptide powder
2 teaspoons ground ginger
1 teaspoon ground cinnamon
½ teaspoon allspice
1/4 teaspoon ground cloves
1/4 teaspoon ground nutmeg
1/8 teaspoon ground black pepper
½ teaspoon salt
½ teaspoon baking soda
1/4 teaspoon baking powder
½ cup unsalted butter, softened
1/4 cup brown sugar substitute, packed
1/4 cup allulose or erythritol blend sweetener 
1 tablespoon molasses
1 large egg, room temperature 

1. Preheat the oven to 325°F. Line a cookie sheet with parchment paper or a silicone baking mat and set aside.

2. In a small bowl, combined the coconut flour, collagen peptides, spices, pepper, salt, baking soda, and baking powder. Mix with a fork until no lumps remain.

3. In the bowl of a stand mixer, fitted with a paddle attachment, cream together, the softened butter, brown sugar substitute, and allulose or erythritol sweetener until light and fluffy. Add the egg and the molasses, beating to combine after each addition. Scrape the bowl down with a rubber spatula as needed. Add the dry ingredients to the butter mixture and mix to combine into a thick dough.

4. Using a small cookie scoop or rounded teaspoon, scoop the cookie dough out onto the parchment lined baking pan and gently flatten the tops slightly with your palm. (These cookies do not spread much during baking.) Bake in the preheated oven for 13 to 15 minutes, rotating the pan halfway through the baking time. Remove from oven and allow the cookies to cool completely on the pan before transferring them to a wire rack.

Plate of Low Carb Molasses Cookies

Nutritional Information per cookie: 67 calories, 3.7 g carbohydrates (1.1 g dietary fiber, 1.6 g sugars), 5.6 g total fat (3.6 g saturated fat), 22 mg cholesterol, 105 mg sodium, 11.1 mg calcium, 23 mg potassium, 47 IU Vit A, 1.5 g protein. Net carbs per cookie: 2.6 grams

Recipe and photos by Kathy Sheehan, copyright 2024
All rights reserved. Please do not duplicate this recipe without the author’s permission.

Saturday, July 6, 2024

Instant Pot Keto Bread Pudding (or Oven Baked)

Instant Pot Keto Bread Pudding (or Oven Baked)

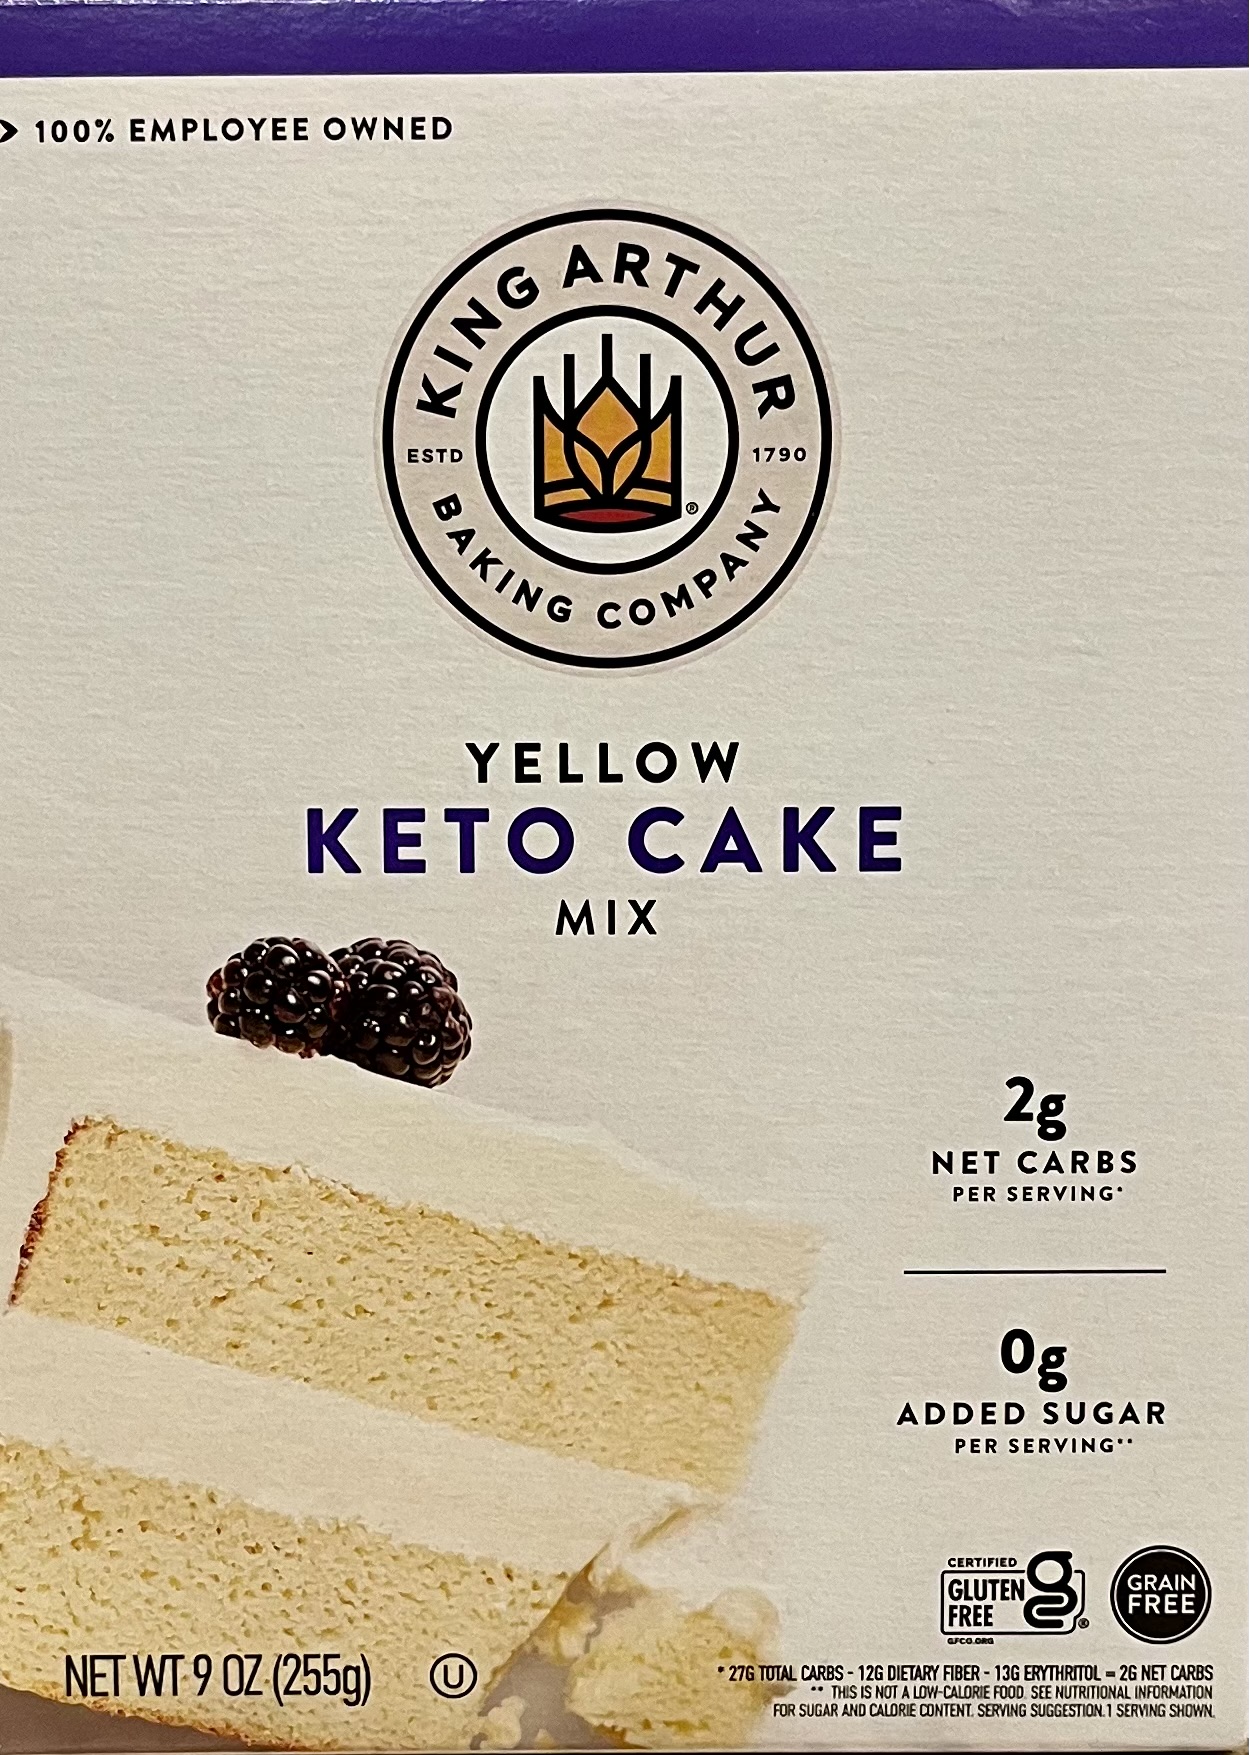
For as long as I can remember, Classic Bread Pudding has been a favorite comfort food of mine. This low carb, gluten free bread pudding is every bit as comforting as a traditional recipe! You can use any low carb bread of your choice, but I actually prefer using leftover keto yellow cake as a base, or a mixture of keto cake and low carb bread. My favorite boxed Keto Cake Mix is King Arthur’s brand, but any keto yellow cake (made from scratch or a mix) will work in this recipe. It’s very easy to make this pudding in an Instant Pot, but baking it in an oven works just as well. Instead of traditional raisins, I sprinkled one tablespoon of black Zante currants over the pudding before cooking. They only add 1 carb per serving, while maintaining that authentic flavor (feel free to leave them out, if you wish). Whether made in an Instant Pot or in the oven, this simple classic dessert will warm your heart!

Instant Pot Keto Bread Pudding (or Oven Baked)
Makes 6 servings

4 cups low carb bread (or leftover keto yellow cake), cubed and dried out
2 large eggs, beaten
1½ cups low carb milk of choice
1/4 cup low carb brown sugar substitute, packed (use only 2 tablespoons if using cake)
1/8 teaspoon salt 
1/8 teaspoon nutmeg
½ teaspoon ground cinnamon
A pinch of mace (optional)
½ teaspoon vanilla extract
1 tablespoon black Zante currants*

1. Spray a 7-inch (1½ quart) baking dish or Bundt pan with non-stick spray or grease well with butter; set aside. If bread or cake is fresh, break into pieces or cut into cubes and spread out on a cookie sheet. Bake in a 300° oven for 10 minutes to dry out a bit before proceeding.

2. Place the bread in the greased 7-inch baking dish or Bundt pan. Whisk together the remaining ingredients, except the currants. Pour the custard mixture over the bread and let it soak in for a few minutes. Sprinkle the currants over the bread. Cover loosely with a “tin foil hat” so condensation doesn’t build up on the pudding as it cooks in the Instant Pot. (If baking in the oven, do not cover with foil.)

3. Pour 1½ cups of water into the Instant Pot. Put the pudding on a trivet and lower it into the pot. Close the lid. Set controls to PRESSURE COOK on HIGH (or Manual) for 15 minutes. Make sure the seal valve is closed and press start.

4. When the cooking is done, leave it to release pressure naturally. When the pin drops, open the pot. Lift the pudding out and remove the foil. Leave it to cool on the counter for a few minutes and, if cooked in a Bundt pan, then you may invert it onto a plate. Serve warm or chilled with whipped cream, low carb ice cream or sugar free caramel sauce.

5. Oven Baking Directions: Follow steps 1 and 2. (Do not cover pudding with foil.) Place pudding in a preheated 350° oven and bake for 30 minutes, or until custard is set but still a little wobbly in the center. Remove from oven and cool on a wire rack.

*Note: If you choose to omit the currants, you may subtract 1 g of carb from the nutritional information per serving.

IP Keto Bread Pudding

Nutritional Information per serving (1/6th of recipe): 112 calories, 3.3 g carbohydrate (0.9 g dietary fiber, 1.8 g sugars, 2 g sugar alcohols), 8.2 g total fat (1.2 g saturated fat, 0 g trans fat), 115 mg cholesterol, 176 mg sodium, 137 mg calcium, 76 mg potassium, 1 mg iron, 95 IU Vit A, 7.7 g protein. Net carbs per serving: 2.4 grams

Recipe and photos by Kathy Sheehan, copyright 2024
All rights reserved. Please do not duplicate without the author’s permission.

Thursday, April 4, 2024

Low Carb Lemon Meringue Cake

Low Carb Lemon Meringue Cake

I’m a bit obsessed with King Arthur’s Keto Cake Mixes these days! They’re easy, because all of the dry ingredients are measured out, and they can be enhanced by the addition of other flavors. The other thing I really like about the cakes made from these mixes is that the cake is light and moist…and it stays flavorful and moist for days! In this cake, I simply exchanged butter for part of the oil called for and added lemon zest. Also, I baked it in a special Charlotte-style cake pan that gives the illusion that ladyfingers encircle the outside of the cake. The result is spectacular, but actually required very little effort! This Lemon Meringue Cake was a huge hit at a recent family celebration, enjoyed by everyone, whether they normally eat low carb or not. Looking for a fun spring dessert? This may be it!

Low Carb Lemon Meringue Cake 
Serves 8

Cake:
King Arthur Keto Yellow Cake Mix (use melted unsalted butter in place of half of the oil, otherwise follow box instructions)
And add the zest of one lemon to the batter

Lemon Meringue Filling:
1 1/4 cup water
2 ½ teaspoons dry gelatin powder (unflavored)
½ cup allulose/erythritol blend sweetener
Zest of 2 lemons
½ cup fresh squeezed lemon juice (3-4 lemons)
2 tablespoons unsalted butter 
4 egg yolks, beaten
1/4 cup heavy cream

Swiss Meringue Topping:
½ cup allulose
2 large egg whites

1. Cake: Preheat oven to 375° F. Set aside 2 teaspoons of the dry cake mix for dusting the pan. Brush the Charlotte cake pan with melted butter and dust with the reserved 2 teaspoons of dry cake mix; set aside.

King Arthur Keto Yellow Cake Mix

2. Follow the directions on the box of keto cake mix, except substitute melted unsalted butter for half of the oil and add the zest of one lemon. Optional, you can also add 1/2 teaspoon butter cookie emulsion for extra flavor or vanilla extract.

3. Spread the batter into the prepared baking pan. Tap the pan on a kitchen towel-lined counter several times to settle batter and release any air bubbles. Bake until golden and a wooden toothpick inserted in the center comes out clean, 30 to 35 minutes or until the internal temperature reaches between 190 - 200°. Let cool and pan for 10 minutes. Invert cake onto a wire rack and let it cool completely. (If you do not have a Charlotte cake pan, you may use an 8 inch springform pan.)

Charlotte Cake Pan

4. Lemon Filling: Place the water in a heavy sauce pan and sprinkle the gelatin over the water. Allowed to sit for five minutes until the gelatin is well hydrated. Whisk the gelatin and water over low to medium heat until the gelatin dissolves. Add sweetener, butter, zest and lemon juice. 

5. Temper the egg yolks by whisking, 1/2 cup of the hot lemon mixture slowly into them, whisking continuously. Off the heat, slowly add the tempered egg yolks back to the sauce pan of lemon mixture while whiskey. Return the saucepan to low heat for 4 to 5 minutes, do not boil. Add 1/4 cup heavy cream and whisk to combine. Taste and adjust sweetness as desired. 

6. While the lemon filling mixture is still warm, poke the center part of the cake with a chopstick and drizzle about 1/2 cup of the lemon liquid over the holes. Cover the cake with plastic wrap and refrigerate.

7. Allow the remaining lemon filling to cool in the refrigerator for a few hours to thicken into a soft gel before spooning it onto the cake.

8. Transfer the cake to a serving plate. Fill with the thickened gel filling, spreading with an offset spatula. Return the cake to the refrigerator, uncovered, to cool and completely set.

9. Swiss Meringue: In heat proof bowl of a standing mixer, whisk together the aulos and egg whites by hand. Place the bowl over a saucepan of simmering water. Cook, whisking frequently, until the aulos completely dissolves, and an instant thermometer registers 120 to 130°. Make sure that the bottom of the bowl does not touch the simmering water! 

10. Carefully return the bowl to the standing mixer. Using the whisk attachment, beat at high speed until stiff peaks form, and the bowl is cool to the touch, 2 to 3 minutes. Use immediately. Makes about 2 cups.

11. If desired, place, the Swiss Meringue into a large pastry bag fitted with a star piping tip. Pipe meringue as desired. If you do not have a piping bag, just dollop the Swiss Meringue onto the top of the set lemon filling. Using a hand held kitchen torch, carefully brown the meringue as desired. Serve immediately or refrigerate. (The meringue will stay in good shape for 4-5 hours, but will begin to deteriorate into a less firm foam the longer it sits, so it is best to serve the cake within several hours of piping the meringue.)

Keto Lemon Meringue Cake Sliced

Nutritional Information per serving: 291 calories, 18.3 g carbohydrates (12.3 g dietary fiber, 2.7 g sugars, 2 g sugar alcohols), 24.9 g total fat (10.8 g saturated fat, 0 g trans fat), 254 mg cholesterol, 337 mg sodium, 96.7 mg calcium, 200 mg potassium, 2 mg iron, 198 IU Vit A, 10 mg Vit C, 8.8 g protein. Net carbs per serving: 4 grams

Photos and recipe by Kathy Sheehan, copyright 2024
All rights reserved. Please do not duplicate without the author’s permission. 

Thursday, March 21, 2024

Keto Cake Boats

Keto Cake Boats

This cake was baked in a top-split, New England style hot dog bun baking pan! (Although you could use a 13” x 9” baking pan and cut into buns.) I made two flavors of Whipped Mascarpone Cream and laid out an array of toppings and my family had a blast making custom Cake Boats at a recent party. Whether you prefill these cakes or allow your guests to create their own, this dessert will be a BIG HIT with everyone! (I bought the hot dog bun baking pan on the King Arthur’s Baking Company website.)

Keto Cake Boats
Makes 10 bun-size cakes or 20 smaller cakes

Keto Cake Mix (I recommend King Arthur’s Keto Yellow or Chocolate Cake Mix)*
Ingredients called for on the box (eggs, milk, oil, etc)

Whipped Mascarpone Cream 
Makes about 3 cups of frosting

1 1/4 cups heavy whipping cream, cold
½ cup low carb powdered sweetener (I used LaKanto Monkfruit Confectioners sweetener)
1 teaspoon vanilla extract
8 ounces plain mascarpone cheese (not sweetened), softened but still chilled

Whipped Chocolate Mascarpone Cream
Makes 3 cups

1 1/4 cups heavy whipping cream, cold
½ cup low carb powdered sweetener (I used LaKanto Monkfruit Confectioners sweetener)
1/4 cup unsweetened cocoa powder
1 teaspoon vanilla extract
8 ounces plain mascarpone cheese (not sweetened), softened but still chilled

Garnishes: berries or other low carb fruit, sugar free sprinkles, chopped nuts, my sugar free Keto Chocolate Fudge Sauce (click here to see recipe)

King Arthur’s Keto Yellow Cake Mix

1. Make the cake according to the package directions and bake in the New England style hot dog bun pan or a 13” x 9” pan that has been sprayed with nonstick cooking spray. *NOTE: The King Arthur’s Cake Mix I used wasn’t enough to fill the hot dog pan or a 13” x 9” baking pan. I used two cake mixes and made a double batch of batter, which was more than I needed, so I made cupcakes out of the excess batter and froze them for another time. Fill whichever baking pan you use to about ½” below the rim and then bake according to directions or until a toothpick inserted in the center comes out clean. After 10 minutes, remove cake to a wire rack to cool completely.

New England Hot Dog Bun Baking Pan

2. Make the Whipped Mascarpone Cream: Add the heavy whipping cream, powdered sweetener and vanilla extract to a large mixer bowl and whip on high speed until soft peaks form. If making the chocolate version, also add the cocoa powder.

3. Add the mascarpone cheese to the whipped cream and whip until stiff peaks form. It will happen fairly quickly. (I prefer to use the mascarpone cheese when still chilled, but softened a bit, so that it will incorporate well without chunks. The warmer the mascarpone cheese is, the more likely it is to soften to the point that it won’t firm up well again, and can make too soft of a frosting. I suggest taking it out of the refrigerator about 15 minutes before using so that it softens a bit, but is still cool.)

4. Cut the cooled cake into buns and cut a V-shape along the top of each bun. Fill with mascarpone cream and garnish with berries or other toppings. Drizzle with sugar free chocolate sauce and serve.

Keto Cake Boat with toppings

Nutritional Information will vary, depending on the fruit and other toppings used. One full-size cake boat made from King Arthur’s Keto Yellow Cake Mix according to package directions is 168 calories, 15.6 g carbs (12 g dietary fiber, 2 g sugars), 14.4 g total fat (2.4 g saturated fat, 0 g trans fat), 92 mg cholesterol, 272 mg sodium, 10 mg calcium, 139.2 mg potassium, 1 mg iron, 4.8 g protein. Net carbs per cake (without toppings): 3.6 grams

Recipe and photos by Kathy Sheehan, copyright 2024
All rights reserved. Please do not duplicate without the author’s permission.

Wednesday, March 6, 2024

Keto Peanut Butter Thumbprint Cookies

Keto Peanut Butter Thumbprint Cookies

I am not a professional baker, but I do like to create delicious and beautiful desserts. For typical Thumbprint Cookies, you simply roll the dough into balls and press your thumb to make an indentation for the filling. I could have done that with this recipe but, recently on vacation, I visited my favorite cooking/kitchen store and found a set of thumbprint cookie presses that take these simple cookies to a new level of elegance. (I found these cookie presses at Williams Sonoma, but you can find similar presses online, in other stores or on Amazon.) Fill them with either sugar free jam or chocolate ganache. Both pair exceptionally well with the peanut butter cookie base. Peanut butter & jelly? Peanut butter & chocolate? Which will be your favorite?

Keto Peanut Butter Thumbprint Cookies
Makes 20 cookies

Cookies:
1 cup almond flour
1/4 cup peanut butter powder (no sugar added)
1 tablespoon unflavored whey protein powder
2 tablespoons oat fiber powder (not oat flour!)
2 tablespoons coconut flour
1/4 teaspoon salt
8 tablespoons unsalted butter, softened (1 stick)
½ cup erythritol-based granulated sweetener (I used LaKanto Monkfruit Classic)
1 large egg
1 tablespoon low carb milk of choice
½ teaspoon vanilla extract

Jam Filling:
Sugar free jam (any flavor)

Chocolate Ganache Filling:
1 ounce heavy cream
1 ounce sugar free chocolate chips (such as Lily’s brand or Guittard Keto Chips)

1. In a medium bowl, whisk together the almond flour, peanut butter powder, whey protein powder, oat fiber, coconut flour and salt until no lumps remain; set aside. In a large bowl, beat the softened butter and 1/2 cup of erythritol sweetener together until creamy, using an electric mixer with a paddle attachment, if you have one. Beat in the egg, milk, and vanilla extract, and then beat in the dry ingredients until the dough comes together. 

2. Turn dough out onto a silicone mat or parchment paper that has been dusted with coconut flour. Pat dough into a rough circle and then top with a large piece of parchment paper or plastic wrap. Roll out the dough to about 5/8 inch thickness. Place the rolled out dough on a cookie sheet and chill in the refrigerator for about 30 minutes or in the freezer for 10 to 15 minutes. The dough is much easier to handle and will not stick to the cookie presses when cold. 

3. Preheat the oven to 325°F and line one large baking sheet with a silicone baking mat or parchment paper.

4. Using cookie presses with indentations in the center, cut out cookies and lift carefully with a spatula or knife and place on the lined cookie sheet. (Or roll into balls and press into the center with your thumb to create a depression to be filled with jam or chocolate ganache.) These cookies do not spread or puff up during baking.

Williams Sonoma Thumbprint Cookie Presses

5. Re-roll your dough and cut out more cookies. If your dough gets too soft to work with or begins sticking to the cookie cutters, roll it out to the proper thickness and return it to the refrigerator or freezer for a bit to cool and firm up again.

6. If using jam, go ahead and fill the depression with sugar free jam before baking (see photo below). If using chocolate ganache, bake the cookies first and allow them to cool completely before filling the indentation with ganache.

Fill cookies with jam before baking

7. Bake the cookies for 14 to 16 minutes, or until they are golden brown around the edges. Remove from the oven and let the cookies cool on the pan until firm. The cookies will be quite soft when warm from the oven, but they will firm up as they cool. Remove to a wire rack to cool completely.

8. To make the chocolate ganache filling: Heat up the heavy cream until bubbles appear at the edges and the cream is quite hot and steamy. Remove from heat and add the chocolate chips. Allow the mixture to sit for several minutes undisturbed and then whisk until the chocolate is completely melted and the ganache is thick and creamy. Use a small spoon to carefully fill the center of each cookie. Refrigerate the cookies for 15 minutes or allow them to sit at room temperature until the ganache has cooled completely and firmed up. 

Notes: How many cookies you get depends on the size of your cookie cutters. It is best to use an erythritol-based sweetener for this recipe. Allulose can be substituted, or a combination of erythritol and allulose, but the cookies will be softer and more delicate when cooled. 

Keto Thumbprint Cookies

Nutritional information per cookie: 72 calories, 2.7 g carbohydrate (1.5 g dietary fiber, 0.2 g sugars, 1 g sugar alcohols), 7.1 g total fat (3.6 g saturated fat, 0 g trans fat), 23 mg cholesterol, 37 mg sodium, 5.8 mg calcium, 14 mg potassium, 50 IU Vit A, 1 mg Vit C (if using jam filling), 1.3 g protein. Net carbs per cookie: 1.2 grams

Recipe and photos by Kathy Sheehan, copyright 2024
All rights reserved. Please do not duplicate without the author’s permission. 

Saturday, February 3, 2024

Keto Two-Tone Valentine Heart Cookies

Keto Two-Tone Valentine Heart Cookies
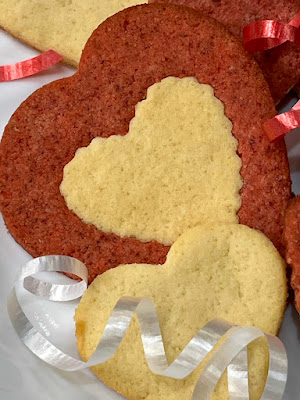
These two-tone Valentine cookies are made with one dough, that is then divided and one half flavored with strawberries! If you use a set of graduated sized cookie cutters, like I did, it’s fun to create small cutouts in the larger cookies and fill them with the same size cutout of a different color. Each heart cookie is a puzzle! Of course, if you don’t have a set of heart cookie cutters, you can make these cookies into any shape using any cookie cutter. These red and white cookies are the perfect Valentine’s Day treat!

Keto Two-Tone Valentine Heart Cookies
Makes approximately 12 servings (depending on the size of your cookie cutters)

1 cup almond flour
5 tablespoons coconut flour
1 tablespoon unflavored protein powder
1/4 teaspoon salt
8 tablespoons unsalted butter, softened (1 stick)
½ cup erythritol sweetener* (see note below)
1 large egg
1 tablespoon low carb milk of choice
½ teaspoon vanilla extract
1 tablespoon unsweetened freeze dried strawberry powder
1/4 teaspoon strawberry extract
1 teaspoon water
2 drops red food coloring
A set of heart cookie cutters in graduated sizes (optional, but that’s what I used. My set is Mrs. Anderson’s brand.)

Mrs. Anderson’s Heart Cookie Cutter Set

1. Before you begin, in a food processor, nut mill, or using a mortar and pestle, grind the unsweetened freeze dried strawberries into a fine powder; set aside.

Freeze Dried Strawberries

2. Prepare two work surfaces, each with a silicone baking mat or a large piece of parchment paper. Dust lightly with coconut flour.

3. In a medium bowl, whisk together the almond flour, coconut flour, protein powder, and salt until no lumps remain. In a large bowl, beat the softened butter and 1/2 cup of erythritol sweetener together until creamy using an electric mixer. Beat in the egg, milk and vanilla extract, and then beat in the dry ingredients until the dough comes together. Remove half of the dough from the bowl and set aside.

4. To the remaining dough, add the 1 tablespoon of strawberry powder, 1/4 teaspoon strawberry extract, 1 teaspoon of water and two drops of red food coloring. Beat until the dough is uniform in color.

5. Turn both doughs out onto the two prepared work surfaces. Pat each into a circle and then top with a large piece of parchment paper. Roll out each ball of dough to about 1/3 inch thickness. Place the rolled out dough and mat on a cookie sheet and chill in the refrigerator for about 30 minutes. (The dough is much easier to handle when cool.) 

6. Preheat the oven to 325°F and line a large baking sheet with a silicone mat or parchment paper. Using heart cookie cutters, cut out cookies and lift carefully with a spatula. For fun and variety, cut a small heart out of the middle of a larger heart, then fill the cut out space with a small heart of a different color, pressing gently to fuse the doughs together.

Keto Valentine Heart Cookies

7. Place cookies on the prepared baking sheet. These cookies do not spread as they bake, so space about 1” apart on the baking sheet. Re-roll your dough when necessary and cut out more cookies. (If your dough gets too soft to work with, you can return it to the refrigerator for a bit to cool and firm up again.)

8. Bake the cookies for about 12 minutes, or until they are just starting to brown around the edges. Remove from the oven and let the cookies cool for 10 minutes on the pan. The cookies will be quite soft right out of the oven, but will firm up as they cool. Remove to a wire rack to cool completely. 

Notes: How many cookies you get depends on the size of your cookie cutters. *I recommend using a sweetener that is erythritol based for a crisper, firmer cookie. Allulose will result in a soft and delicate cookie.

Low Carb Two-Tone Valentine Heart Cookies

Nutritional Information per serving (1/12th of recipe): 117 calories, 3.7 g carbohydrates (1.4 g dietary fiber, 0.9 g sugars, 1 g sugar alcohols), 11.4 g total fat (6.1 g saturated fat, 0 g trans fat), 36 mg cholesterol, 59 mg sodium, 9.1 mg calcium, 22 mg potassium, 78 IU Vit A, 1 mg Vit C, 1.7 g protein. Net carbs per serving: 2.3 grams

Photos and recipe by Kathy Sheehan, copyright 2024
All rights reserved. Please do not duplicate without the author’s permission.

Monday, January 22, 2024

Easy Keto Granola Bread

Easy Keto Granola Bread

This low carb bread recipe is so versatile! You can bake it in a loaf pan, an 8 x 8“ square pan, a muffin tin or mini bread baking pan. The streusel topping is nutty and crunchy, making this a delicious coffee cake or tea bread. You can make your own low carb granola or use one of the keto granola mixes already available commercially. You might even choose to make it nut free by choosing a nut free granola. Like I said, this recipe is versatile! The addition of flaxseed meal is optional, but it adds a wheat-like color and nutty flavor to the final product. The thing that makes this recipe so easy, is that you start with a boxed keto muffin mix. I highly recommend the King Arthur’s All Purpose Keto Muffin Mix. I have use this mix several times to create muffins and quick breads and it is excellent! Most of the dry ingredients are already included in the mix and measured out for you. Enjoy this as a delicious accompaniment to your coffee in the morning for breakfast or serve it as a dessert. Either way, I think that you will enjoy this quick bread. 

Easy Keto Granola Bread
Makes 12 servings

5 large eggs, room temperature 
1/4 cup neutral oil, such as avocado oil
1/4 cup unsalted butter, melted
1 cup low carb milk of choice (or substitute ½ cup water + ½ cup heavy cream)
½ teaspoon vanilla extract
1/3 cup low carb brown sweetener (such as Swerve Brown)
¾ teaspoon ground cinnamon
1 tablespoon flaxseed meal
½ cup low carb granola (chopped, if needed) see photo of different keto granola brands below
1 box King Arthur’s Keto All-Purpose Muffin Mix

Streusel Topping:
1/4 cup low carb granola (chopped, if needed)
1/4 cup erythritol-based brown or classic sweetener
2 tablespoons cold unsalted butter, cubed

Examples of Keto Granola available commercially

1. Preheat oven to 350°F. Spray an 8 inch loaf pan, mini bread loaf pan, 8 x 8” baking pan, or 12 cup muffin tin with nonstick spray; set aside.

2. Using a pastry cutter or two knives, mix together the streusel topping ingredients in a medium bowl until pea-sized crumbles form; set aside.

3. In a separate bowl, whisk together the keto muffin mix, 1/3 cup brown sweetener, flaxseed meal, cinnamon and low carb granola; set aside.

King Arthur’s Keto Muffin Mix and Flaxseed meal

4. In a large bowl and using an electric mixer, or a standing mixer with paddle attachment, mixed together the eggs, oil, melted butter, low carb milk, and vanilla extract. Blend very well.

5. Add the dry ingredients and mix until well combined and no dry pockets remain. Divide the batter evenly between the prepared baking pan or muffin tin that has been greased. Sprinkle the streusel topping on top of each muffin or loaf.

Sprinkle streusel on top

6. Bake at 350° for 32-35 minutes for mini loaves or about 24 minutes for muffins. For a large loaf, bake about 38-48 minutes. For an 8 x 8“ baking pan, bake for about 35 minutes. Bake until the internal temperature reaches between 200-205°F. 

7. Remove from oven and allow the loaves or muffins to cool in the pan for about 15 minutes. Turn out the loaves or muffins onto a wire rack to cool completely before serving.

Cool baked loaves on wire rack

Nutritional Information per muffin or 1/12th of recipe: 215 calories, 11.8 g total carbohydrates (2 g dietary fiber, 1.5 g sugars, 14 g sugar alcohols), 19 g total fat (8.8 g saturated fat, 0 g trans fat), 97 mg cholesterol, 201 mg sodium, 68.8 mg calcium, 141 mg potassium, 2 mg iron, 100 IU Vit A, 5 g protein. Net carbs per serving: 2.8 grams

Photos and recipe by Kathy Sheehan, copyright 2024
All rights reserved. Please do not duplicate without the author’s permission. 

Tuesday, January 16, 2024

Low Carb Chocolate Peppermint Ice Cream

Low Carb Chocolate Peppermint Ice Cream

I love my low carb, sugar free Peppermint Ice Cream! Peppermint has always been my favorite flavor of ice cream, going back as far as high school, when one of my first jobs was working at an ice cream parlor. My favorite way of eating it is with hot fudge sauce (see my low carb hot fudge sauce, it’s killer!) Knowing this, my husband asked, “Why don’t you make a Chocolate Peppermint Ice Cream?” I stared at him in amazement…Duh! Why haven’t I done this before? Now, THIS may become my new favorite!

Low Carb Chocolate Peppermint Ice Cream
Makes about 8 servings

1 cup whole milk (Fairlife Brand, see note below)*
3½ tablespoons powdered erythritol sweetener 
7 tablespoons allulose sweetener
4 tablespoons unsweetened cocoa powder
1/4 teaspoon instant coffee granules (optional, but enhances chocolate flavor)
A pinch of salt
1 teaspoon peppermint extract
1/4 teaspoon chocolate extract
2 cups heavy whipping cream

Add-Ins:
2-3 tablespoons sugar free peppermint candy, lightly crushed (I used my own recipe, click here)
1/3 cup sugar free white chocolate baking chips, chopped (I use Lily’s White Chocolate Peppermint Baking Chips)

1. Combine milk, sweeteners, cocoa powder, coffee granules, salt, and extracts in a blender. Process on low until smooth and cocoa powder is fully incorporated. Pour into a container and then whisk in the heavy cream by hand. Cover and refrigerate for at least two hours or until chilled. Whisk the mixture again just before churning.

2. Churn in an ice cream maker, according to manufacturer’s directions. Towards the end of the churning process, spoon in the add-ins. Remove to a container and place in the freezer for at least six hours to firm up.

Fairlife Whole Milk

* I recommend Fairlife whole milk because it is lactose free and has half the carbs of regular milk. If using regular whole milk, add 1½ carbs per serving.

Low Carb Chocolate Peppermint Ice Cream (no sauce)

Nutritional Information per ½ cup: 231 calories, 7.5 g carbohydrates (1.3 g dietary fiber, 1 g sugars, 5.5 g sugar alcohols), 25.5 g total fat (15 g saturated fat, 0 g trans fat), 83 mg cholesterol, 35 mg sodium, 56.1 g calcium, 53 mg potassium, 1 mg iron, 255 IU Vit A, 9 mg caffeine, 2.2 g protein. Net carbs per serving: 3.45 grams

Photos and Recipe by Kathy Sheehan, copyright 2024
All rights reserved. Please do not duplicate without the author’s permission.