Showing posts with label salads. Show all posts

Saturday, August 8, 2020

Taco Salad with Quest Protein Chips

Taco Salad with Quest Protein Chips
Here’s an easy dinner that is entirely satisfying and tastes just like a higher carb version. The secret is to use Quest Protein Tortilla-Style Chips in place of corn tortilla chips (I chose Nacho Cheese flavor, but you can substitute your favorite). This delicious salad has become a hands-down favorite on my keto diet, especially when I don’t feel like cooking!

Taco Salad with Quest Protein Chips
Makes 1 serving

3 oz. ground beef
1-2 teaspoons taco seasoning, to taste
1 tablespoon water
1 tablespoon chopped onion
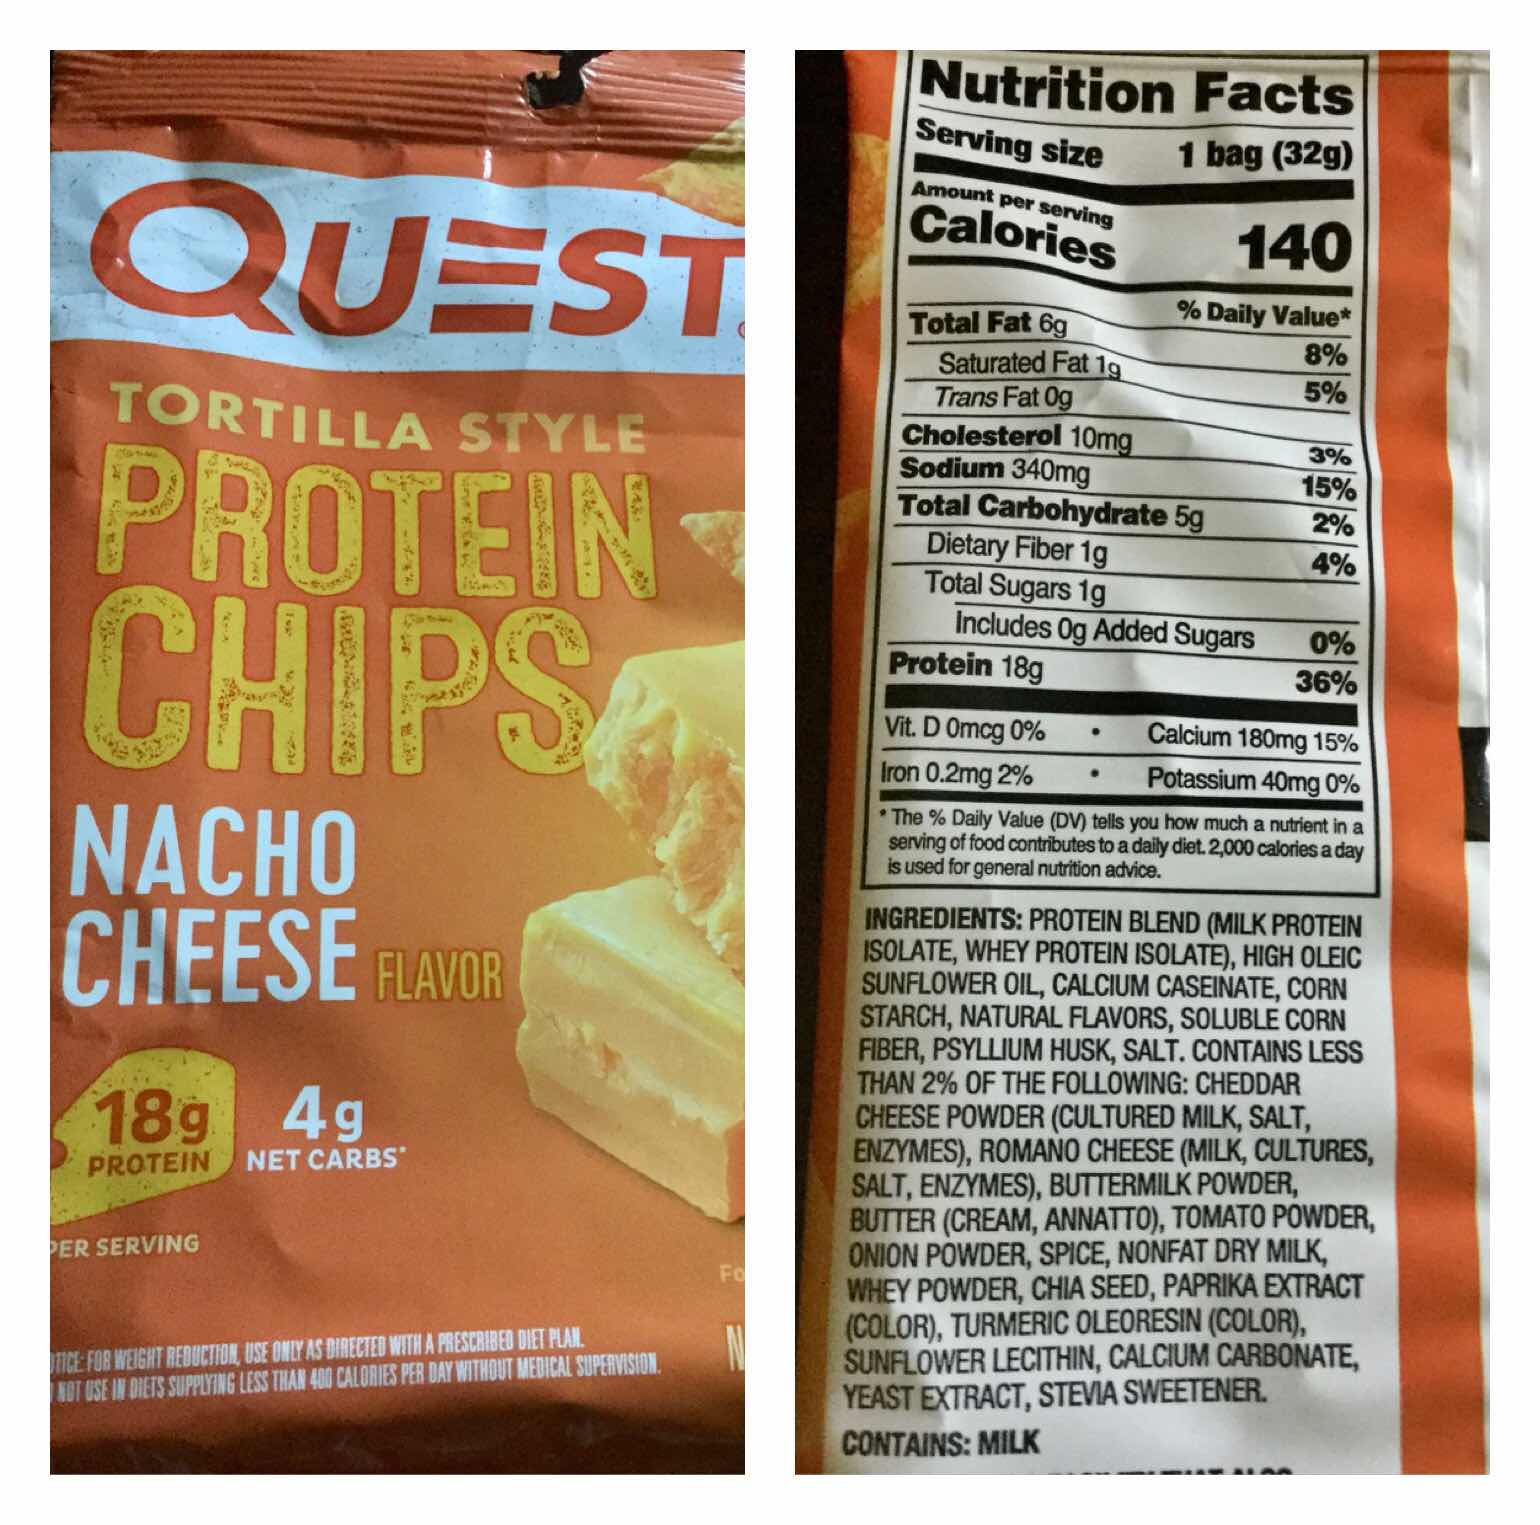
1 bag Quest Protein Tortilla-style Chips, Nacho Cheese (see image below)
1 cup lettuce, torn into bite-size pieces
1/4 cup chopped tomato
1/2 oz. shredded cheddar cheese
2 tablespoons sour cream

1. In a skillet over medium heat, brown the ground beef. Add the taco seasoning to taste. Add the water and chopped onion; stir to combine.

2. Pour the entire bag of Quest Protein chips into a large serving bowl. Top with the seasoned beef, lettuce, chopped tomato and shredded cheese. Dollop with sour cream and serve.

Quest Protein Chips
Nutritional Information: 445 calories, 9.6 g carbohydrates (2.2 g dietary fiber, 2.9 g sugars), 28.5 g total fat (12.2 g saturated fat, 0 g trans fat), 93 mg cholesterol, 498 mg sodium, 335 mg calcium, 505 mg potassium, 2 mg iron, 614 ug Vit A, 12 mg Vit C, 38.8 g protein. Net carbs per serving: 7.4 grams

Photos and recipe by Kathy Sheehan, copyright 2020
All rights reserved. Please do not duplicate without the author’s permission. 

Tuesday, July 21, 2020

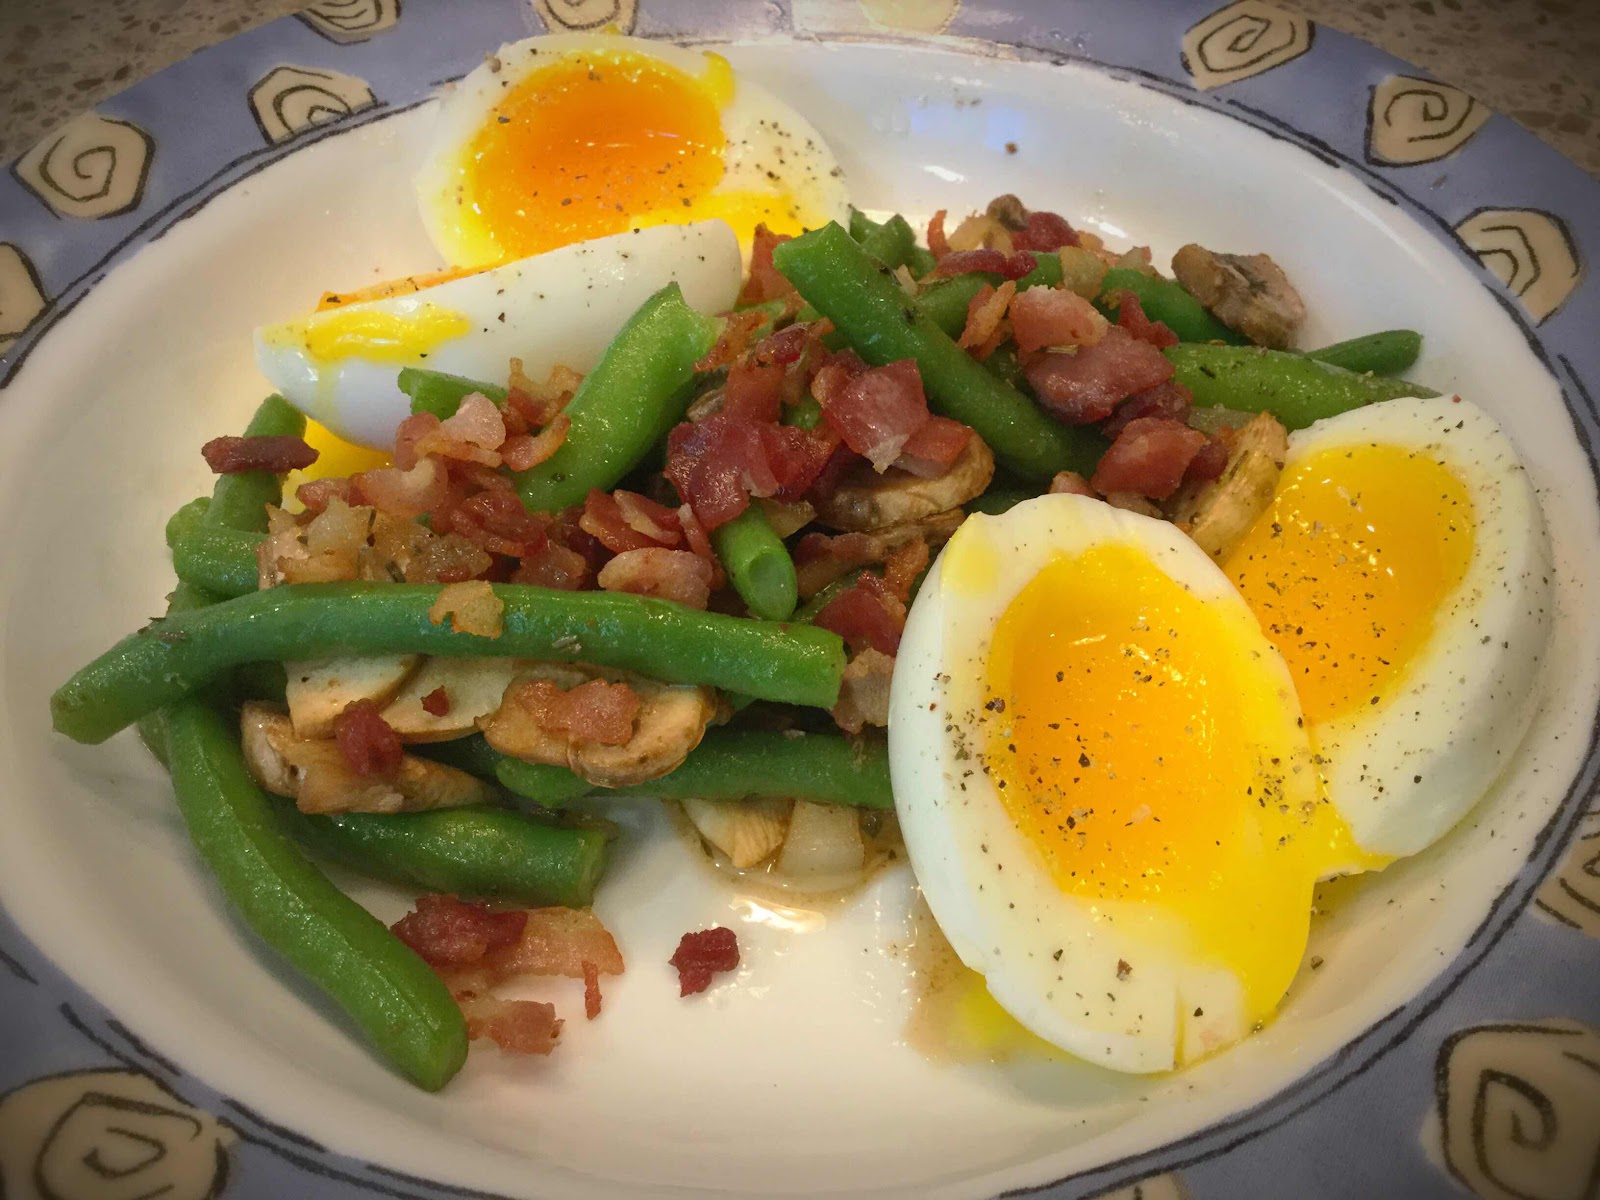
Brunch Green Bean Salad with Perfect Soft-Boiled Eggs

Brunch Green Bean Salad with Perfect Soft-Boiled Eggs
Right now, I’m harvesting a lot of green beans from my garden and am always trying to come up with delicious and varied ways to enjoy them. This breakfast or brunch salad is a great way to start the day! The addition of soft-boiled eggs puts this dish over the top, in my opinion. The tender-crisp green beans and creamy eggs topped with a sweet and sour dressing and crispy bacon go so well together. The method of boiling the green beans and eggs together in the same pot is a clever one, making this a very quick and easy meal. It makes two servings, but can be either halved to serve one or doubled and tripled to serve many.

Brunch Green Bean Salad with Perfect Soft-Boiled Eggs
Makes 2 servings

4 white button mushrooms, sliced
4 slices bacon, cut into small pieces
2 tablespoons onion, minced
1-1/2 tablespoons white wine vinegar
1/2 teaspoon dried thyme
1/2 teaspoon granulated erythritol, or to taste
Salt and black pepper to taste
1-1/2 cups fresh green beans, trimmed
4 eggs, room temperature 

1. Fill a large saucepan or pot 1/2 to 3/4 full of water (enough water to cover the eggs completely as they boil). Add salt and bring to a boil over medium to high heat.

2. Meanwhile, sauté the mushrooms in a small dry skillet over medium heat until they release their moisture, about 3 minutes. Remove the mushrooms to a plate and set aside. In the same skillet, sauté the bacon until crispy. Remove with a slotted spoon to a plate lined with paper towels; set aside.

3. Reserve 2 tablespoons of bacon drippings in the skillet. Add the onion and sauté until translucent. Add the vinegar, thyme, sweetener, salt and pepper. Whisk to combine. Return the mushrooms to the skillet and stir to combine. Keep the dressing warm while the green beans and eggs are cooking.

4. Drop the green beans into the salted, boiling water and set a timer for exactly 8 minutes. At the 5-1/2 minute mark, add the eggs and continue boiling. Drain and rinse under cold running water to stop the cooking. Set the eggs aside in cold water while you pat dry the green beans with a paper towel and divide them evenly between two serving dishes. Toss each serving with 1/2 of the warm dressing and top each portion with crumbled bacon. Carefully peel the eggs, placing two in each serving dish. Cut the eggs in half and season with salt and pepper to taste. Serve immediately.

Nutritional Information per serving (1/2 recipe): 277 calories, 10.8 g carbohydrates (3.5 g dietary fiber, 2.6 g sugars, 1 g sugar alcohols), 17 g total fat (5.5 g saturated fat, 0 g trans fat), 391 mg cholesterol, 506 mg sodium, 107.2 mg calcium, 453 mg potassium, 3 mg iron, 364 ug Vit A, 10 mg Vit C, 21.4 g protein. Net carbs per serving: 6.5 grams

Photo and recipe by Kathy Sheehan, copyright 2020
All rights reserved. Please do not duplicate without the author’s permission.

Friday, June 15, 2018

Low Carb Taco Salad in a Grilled Cheese Bowl

Taco Salad in a Grilled Cheese Bowl
There are many variations of similar recipes online, but this salad is so much fun to make and eat, I had to share my own experience. I’ve seen other intriguing posts describing how to make taco shells with cheese, so I had to try it for myself. I prefer a taco salad in a bowl because it’s less messy to eat. This is an easy, foolproof, stovetop method that takes less than 10 minutes start to finish! Fill it with whatever taco salad fixings you like and, I think you’ll discover as I did, that the delicious, crispy grilled cheese bowl adds a lot of flavor to this festive salad!

Grilled Cheese Bowl
Makes 1 edible bowl

1/2 cup shredded cheddar cheese, or a blend (I used a Mexican blend)

1. Evenly spread 1/2 cup of shredded cheese into an 8-inch non-stick skillet.
2. Heat over medium heat until the cheese is bubbly and turns a dark golden brown. (Do not stir or disturb the cheese during the cooking process.) Watch carefully so the cheese doesn’t burn, but you’re looking for a dark golden color that indicates it’s well done and will be crispy when cooled.
3. Meanwhile, place an inverted 8 ounce bowl onto a plate.
4. Remove skillet from the heat and allow the bubbling cheese to cool slightly, but not harden. Drape the still warm and flexible cheese disk over the inverted bowl and gently press down the sides to create a bowl shape.
5. Allow to cool for a few minutes until the cheese hardens. Remove the cheese bowl from your mold, fill and enjoy!


Low Carb Taco Salad in a Grilled Cheese Bowl
Makes 1 serving

1 Grilled Cheese Bowl (see above)
1 cup of chopped romaine or iceberg lettuce
3 ounces of cooked ground beef seasoned with 3/4 teaspoon of taco seasoning
1/4 avocado, cut into cubes
4 grape tomatoes, chopped
1-2 teaspoons of chopped red onion
1-2 teaspoons of chopped fresh cilantro or parsley
1 teaspoon shredded cheddar cheese
2 tablespoonfuls of sour cream

Place all of the salad ingredients into the Grilled Cheese Bowl and enjoy!

Nutritional Information per salad in cheese bowl: 534 calories, 12.9 g carbohydrate (4.7 g dietary fiber, 3.8 g sugars), 41.2 g total fat (20.8 g saturated fat, 0 g trans fat), 128 mg cholesterol, 588 mg sodium, 473.4 mg calcium, 661 mg potassium, 2 mg iron, 3345 mg Vit A, 20 mg Vit C, 30.3 g protein. Net carbs per serving: 8.2 grams

Recipe and photos by Kathy Sheehan, copyright 2018
All rights reserved. Please do not duplicate without the author’s permission. 

Saturday, August 12, 2017

Low Carb Creamy Coleslaw


Sometimes I forget about coleslaw, but it's really the perfect side dish for a cookout, family gathering, picnic or potluck. It's so quick and easy to throw together, it's a shame that I don't make it often. With the help of a food processor, I can shred my own cabbage and carrot in minutes, but you can use a bag of prepackaged coleslaw mix, if you prefer. This recipe is super creamy with just the right amount of tang from the apple cider vinegar. Replace the sugar in a traditional recipe with erythritol or stevia and you have a delicious, low carb coleslaw the whole family will love.

Low Carb Creamy Coleslaw
Makes about 8 servings

1 small head green cabbage, shredded
1 small carrot, finely shredded

Dressing Ingredients:

2/3 cup mayonnaise 
2 tablespoons sour cream
2 tablespoons minced onion
1-2 tablespoons powdered erythritol, to taste (I used Swerve Confectioners)
1.5 tablespoons apple cider vinegar
1/2 teaspoon celery salt
Salt and freshly ground pepper to taste

Combine the shredded cabbage and carrot in a large bowl. In a separate bowl, whisk together the dressing ingredients. Add to the cabbage mixture and stir to coat the cabbage. (Use only the amount of dressing needed to coat the slaw mix. You may have some leftover dressing, which can be stored in the refrigerator for up to 2 weeks.) Mix well to combine. Taste and adjust seasoning, adding more salt, pepper or sweetener if desired. Refrigerate for 45 minutes or more to allow the flavors to blend.

Nutritional Information per serving (about 1/2 cup): 155 calories, 6.4 g carbohydrate (2 g dietary fiber, 3.5 g sugars, 1.9 g sugar alcohols), 14.5 g total fat (2.5 g saturated fat, 0 g trans fat), 8 mg cholesterol, 236 mg sodium, 48 mg calcium, 246 mg potassium, 1230 mg Vit A, 1 mg iron, 1.5 g protein. Net carbs per serving: 4.4 grams

Recipe by Kathy Sheehan, copyright 2017
All rights reserved. Do not duplicate without the author's permission.

Tuesday, August 19, 2014

Bacon Wrapped Chicken with Cucumber in a Creamy Herb Sauce


Finally, after years of trial, some success, backsliding, and continual adjustments to my diet, I am hopeful that I've discovered my personal tolerance level for carbohydrate and protein, both of which act upon insulin and blood sugar.  For the past several months, my blood glucose has been steady, with a fasting BG in the mid-80's, which has prompted a further reduction of diabetic meds!  We all understand the effect of carbs, right?  But protein, you might ask?  You may think protein doesn't affect blood sugar, but an excess of protein does!  Through a process called gluconeogenesis, your body will convert excess dietary protein into glucose.  Have you ever wondered why your BG will rise, even after not eating carb?  Gluconeogenesis could be the culprit!  So, how much protein should a diabetic eat?  Actually, for each person, it is different based on body size, metabolism, diet, etc.  With guidance from my doctor, I determined my level to be around 45 grams a day, but I'm a small person.  For a taller woman or man, it would be different.  The formula for calculating the optimum amount of protein is 1 gram for every kilogram of lean body mass.  If you're an athlete, then about 2 grams. (Click here for an online calculator to determine the approximate amount of protein for your size & activity level.)  So, the ratio of carbs, protein and fat that have brought about normal blood sugar levels for me is about 10-15% carb (under 25 g net carbs), 15% protein and 65-75% healthy fats (about 100 grams), such as olive oil, ghee, coconut oil, avocados, nuts and seeds.  (By the way, even with all that fat, my lipid levels, triglycerides, inflammation markers and blood pressure have dramatically improved, along with my BG!  Based on test results, my risk for heart disease has gone down!)  But, as I said, every person is different and, as nice as it would be to be given the proper ratio for your body to reverse diabetes, it will take some experimentation on your part to discover your personal tolerance levels.  

A good place to start is to reduce carbs to under 100 grams per day (spread throughout the day) and eventually reduce them to under 50.  Eat no more than 20 grams of protein per meal (an excess of that is usually more than a body can use in 4-5 hours) and ramp up your fat intake.  I want to be very clear about one point: a low fat, low carb diet doesn't work!  (And neither does a high carb, high fat diet.) Without enough fat, you'll be hungry and crave carbs, which can sabotage your efforts.  If you cut carbs and moderate your protein intake, then you'll need to increase your fat.  The best gauge is to eat enough fat until you're satisfied and don't experience any hunger, cravings or discomfort between meals.  Also, because your blood sugar and insulin requirements will drop, you'll need to be under a doctor's care because a reduction in medication will likely be necessary.  Another caution is to Type 1 or insulin-dependent T2 diabetics: this type of diet adjustment needs close monitoring by a doctor.  To learn more, I highly recommend The Diabetes Solution by Dr. Richard Bernstein, who is himself a Type 1 diabetic.  His book explains this type of low carb diet in great detail and includes approved food lists and recipes.  Another good book to get you started is The New Atkins for a New You by Drs. Eric Westman, Stephen Phinney and Jeff Volek.

Now, on to my incredible new recipe!  Why is it that when you add bacon to a dish, it instantly becomes the best thing you put into your mouth? Well, that statement says it all.

Bacon Wrapped Chicken with Cucumber in a Creamy Herb Sauce
Makes 4 servings

12 ounces boneless, skinless chicken breasts, cut into 3 oz. medallions
4-6 slices of bacon
1 large cucumber, seeds removed and sliced into 1/8" quarter rounds
1/2 cup chicken stock*
2 tablespoons ghee (or butter)*
1/3 cup high fat coconut milk (or heavy cream)*
2 tablespoons chopped, fresh parsley (or 1 TB dried)
1 teaspoon fresh thyme (or 1/2 tsp dried)
Salt and pepper
6 cups spring mix lettuce, divided among 4 serving plates

1. Pat chicken with a paper towel and cut into 3 oz pieces.  Generously season chicken medallions with salt and pepper.  Wrap one piece of bacon around each medallion.  Heat a heavy skillet to medium and place chicken into the pan.  Meanwhile, heat oven to 350-degrees.  Cook chicken for 5 minutes, flip each medallion and cook for another 5 minutes.  Remove chicken from pan and place in a baking dish.  Continuing heating chicken in the oven while you make the sauce.

2.  Drain all but 2 tablespoons of bacon fat from the skillet.  Add the chicken stock and stir to deglaze the brown bits from the bottom of the skillet.  Add the ghee (or butter) and the cucumber.  Sauté until the cucumber is beginning to soften and the stock has been reduced by half.  Add the coconut milk (or cream) and stir to combine and until slightly thickened. Season with herbs, salt and pepper to taste.  Remove skillet from heat.  Remove chicken from oven and place a chicken medallion on each mound of lettuce.  Pour any drippings from the baking pan into the sauce and stir.  Divide sauce and cucumbers evenly over the four portions and serve immediately.

* For those with food allergies: To create a dairy, lactose and casein free version, use ghee and coconut milk.  To make it gluten free, be sure to purchase a certified GF chicken stock or broth.

Nutritional Information per serving: 292 calories, 5 g carbohydrates (1 g dietary fiber, 2.4 g sugars), 18 g total fat (10.1 g saturated fat, less than 0.1 g trans fat), 75 mg cholesterol, 739 mg sodium, 70.8 mg calcium, 456 mg potassium, 26.8 g protein.  Net carbs per serving: 4 g

Recipe by Kathy Sheehan, copyright 2014
Saturday, July 6, 2013

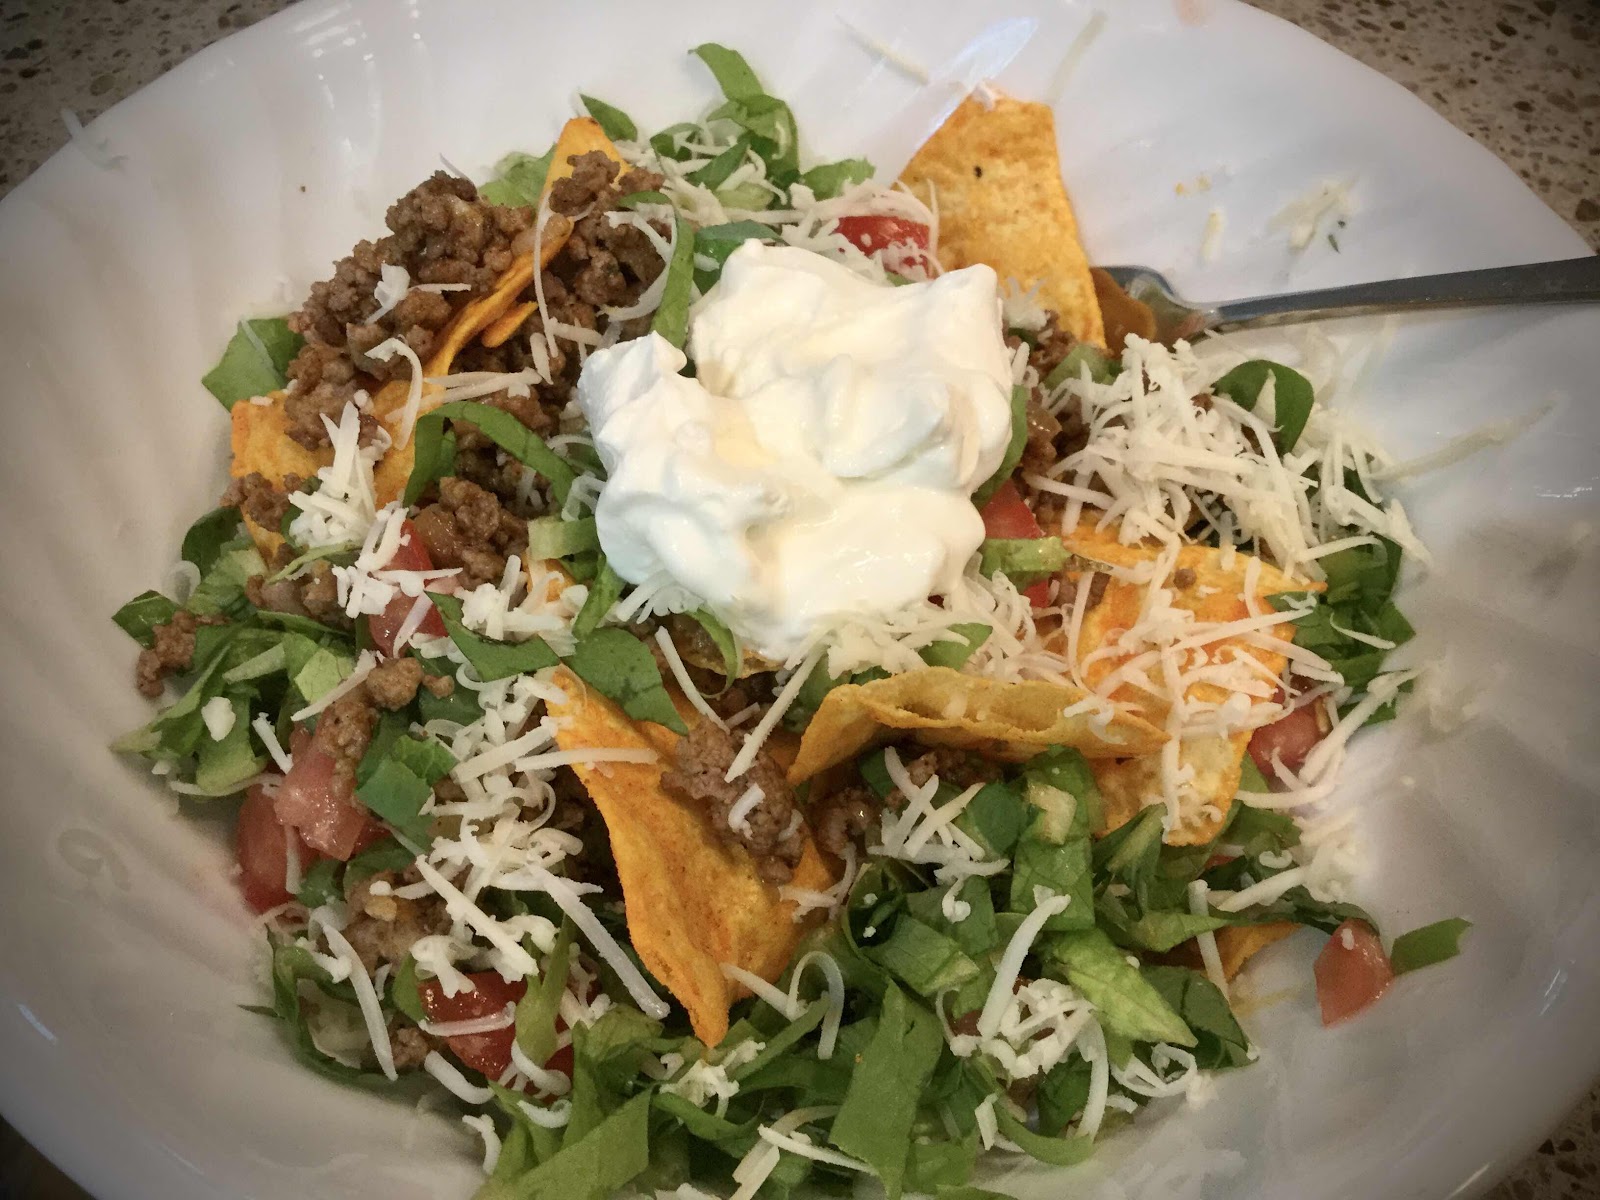
Fish Taco Salad


Tonight I had a craving for fish tacos.  I love them, but one single taco (which is all I will allow myself at a meal) sometimes just isn't enough to satisfy.  It would only leave me wanting more!  So, I created this huge, dinner-size salad that has all the same flavors.  It filled me up and left a happy smile on my face.  You can serve the toppings on any amount of your favorite greens, but when it comes to leafy greens, I say more is better!  One of the best parts of this salad is the delicious homemade dressing.  It is derived from the tangy sauce that normally accompanies a fish taco and it is YUMMY!  Make a note of it and file it away in your recipe box because I know you'll want to use it often.

Fish Taco Salad
Makes 1 meal-size serving

3 ounces frozen fish nuggets or fish sticks (I used Henry and Lisa's Gluten Free Fish Nuggets)
3 to 4 cups leafy greens or mixed greens, torn into bite size pieces
1/2 cup shredded cabbage (a coleslaw mix works well)
1 plum tomato, seeded and diced
4 or 5 corn tortilla chips, lightly crushed into small pieces (gluten free)

Dressing Ingredients:

2 tablespoons light mayonnaise (gluten free)
1/4 teaspoon tomato paste
1/4 teaspoon rice wine vinegar
juice from 1/2 lime (about 1 tablespoon)
dash of ground cumin
dash of cayenne pepper or hot sauce, to taste
dash of garlic powder
ground black pepper, to taste
dash of smoked paprika
2 teaspoons fresh chives, finely chopped
1 tablespoon fresh cilantro or parsley, minced
1 and 1/2 tablespoons original, unsweetened almond milk (or skim milk)

1.  Prepare the fish nuggets according to package directions, turning half way through cooking.  Bake until crispy.  Remove from oven and cool slightly.  Cut into bite-size pieces; set aside.

2.  While the fish is cooking, place the lettuce, cabbage and plum tomato on a serving plate or in a large salad bowl.  Crush the tortilla chips and set aside.

3.  In a small bowl, whisk together the dressing ingredients.  Add the herbs and spices in amounts according to your own tastes.  It should be somewhat thin so it can be drizzled easily over the top of the salad; set aside.

4.  To assemble, place the chopped fish nuggets over the lettuce, cabbage and tomato mixture.  Sprinkle the crushed corn tortillas on the salad and spoon the dressing over all.  Toss, if desired, and serve immediately.

Note: Other salad toppings you might include are chopped avocado and/or sliced black olives, although these optional additions are not included in the nutritional information below.

Nutritional Information per entire recipe (1 serving): 302 calories, 20.4 g carbohydrate (3.7 g dietary fiber, 3.6 g sugars), 17.8 g total fat (1 g saturated fat, 0 g trans fat), 50 mg cholesterol, 475 mg sodium, 121 mg calcium, 318 mg potassium, 16.2 g protein.

Recipe by Kathy Sheehan, copyright 2013

Wednesday, June 19, 2013

Fried Egg in a Red Pepper Frame


Amazing things have been happening since I last wrote, namely my blood sugar has remained in the normal range on the gluten-free/dairy-free diet for over five weeks and my bloated wheat belly is melting away.  My doctor has reduced my Metformin by half and, if my BG remains normal, I will be allowed to go off of it completely in a few weeks.  In one week, I can begin to reintroduce aged cheeses to my diet and evaluate if my intestines have healed enough to tolerate these lower lactose dairy products.  This is all very exciting news!  Reading and learning more about Celiacs disease and meeting with a dietitian have occupied much of my time lately but, as much trouble as it has been to make this adjustment, it has been worth it.

Another simple addition to my daily routine is drinking an adequate amount of water for my body size and weight.  I learned just how important adequate hydration is when I saw my blood pressure drop significantly just by drinking more water!  Although my blood pressure isn't perfect yet, I learned that being chronically dehydrated can raise your blood pressure.  I was instructed to drink 1/2 of my body weight in ounces every day.  So, if you're dealing with high blood pressure, just don't take a pill, have a drink of H2O!

While being on this highly restrictive elimination diet for the past several weeks, I must admit it has been a challenge in the kitchen.  Naturally, I've increased my intake of vegetables (I didn't really have a choice, if I wanted to eat!).  Below is one of my quick, go-to recipes that is perfect for breakfast, lunch or a light dinner.  I serve my framed egg over a salad that has been lightly dressed and sprinkled with roasted pepitas (pumpkin seeds).  If your diet allows, a sprinkle of cheddar cheese, lightly buttered toast points or crackers would be a nice addition, too.  (Note: If you have a gluten sensitivity and wish to add toast points or crackers, please be sure to choose gluten-free products.)

Fried Egg in a Red Pepper Frame
Makes 1 serving

2 eggs (at room temperature)
two 1/4" thick rings cut from a red pepper (any color pepper can be substituted)
1 TB extra virgin olive oil
salt and pepper to taste
sprinkle of cheddar cheese, optional

1.  Heat the olive oil over medium-high heat in a heavy skillet.  Place the red pepper rings into the pan and press down onto the hot surface with the back of a spatula for a few seconds (this may help the peppers to adhere to the pan).

2.  Gently crack an egg into the center of each pepper ring.  If necessary, again press down on each pepper ring with a spatula so the egg white doesn't seep under the ring, press only until the egg white solidifies a bit.  Season with salt and pepper.

3.  After about 1-2 minutes, carefully turn over each egg with its red pepper frame and continue cooking until the yolks are cooked as desired.  Sprinkle with cheese (optional) and serve immediately.

Nutritional Information per serving (doesn't include salad, cheese or any additional sides): 137 calories, 1.6 g carbohydrate (0.4 g dietary fiber, 1 g sugar), 11.8 g total fat (2.6 g saturated fat, less than 0.1 g trans fat), 186 mg cholesterol, 355 mg sodium, 29.4 mg calcium, 111 mg potassium, 6.5 g protein.

Recipe by Kathy Sheehan, 2013

Saturday, September 4, 2010

BLT Salad with Homemade Buttermilk Dressing

I made another batch of my delicious Blueberry Muffins the other day and have plenty of buttermilk leftover. I'm not one to throw anything away, so I came up with this creamy homemade buttermilk dressing. I also happened to have a variety of tomatoes in my vegetable basket gathered from the local farm stand and a generous neighbor's garden, so it made sense to star them in this recipe. If you can, use different colors and types of tomato to create a beautiful salad that will dazzle the eye, as well as the palette. Tomatoes come in many colors besides the classic red, such as yellow, purple and orange and each has it's own flavor. They are also a rich source of lycopene, one of the most powerful natural antioxidants, along with Vitamins C and A. This salad is the perfect venue for the delicious, ripe tomatoes so abundant in gardens and farmer's markets right now. It makes a wonderful side dish or main dish salad for a light meal. Enjoy the harvest!

BLT Salad with Homemade Buttermilk Dressing
(Makes 4 servings)

½ head iceberg lettuce
6 tomatoes, cored and cubed (about 1½-2 cups)
2 slices bacon, cooked and crumbled

Dressing:
2 tablespoons chives or scallions, minced
1 small shallot, minced
1 tablespoon parsley, minced
1 clove garlic, minced
¼ teaspoon black pepper
½ cup low-fat mayonnaise
1/3 cup fat-free buttermilk

1. Whisk all the dressing ingredients together and refrigerate. The dressing can be made ahead. Cook bacon until crispy, drain on paper towels and crumble into a small bowl; set aside.

2. Core the iceberg lettuce, cut in half and reserve half for another time. Take the remaining half and cut into ¼ inch strips, give the lettuce a rough chop to create bite-size pieces and place into a large bowl.

3. Core and slice tomatoes, then cut into cubes. Add to the lettuce and toss with the dressing and ½ of the bacon. Divide evenly among four serving plates and sprinkle the remaining bacon evenly over the top of each serving. Serve immediately.

Nutritional Information per serving: 153 calories, 12 g carbohydrate, 11.7 g total fat, 2.5 g saturated fat, 383.5 mg sodium, 1.2 g fiber, 3.6 g protein.

Original recipe by Kathy Sheehan, copyright 2010

Sunday, June 13, 2010

Harvest Tuna or Chicken Salad

I like tuna and try to eat it often to include more fish and Omega 3 in my diet, but something seems to happen to my creativity when I open that can so I end up making the same boring tuna fish salad with mayo, mustard and pickle relish. Today I challenged myself to come up with a different twist on my ordinary tuna salad and the end result was bursting with flavor! The idea of adding dried fruit came from a harvest salad I was recently served at a local restaurant (Rudy's in Cape Elizabeth). It adds texture and a hint of sweetness that blends perfectly with the homemade cherry-balsamic dressing. If you want variety, keep in mind that this recipe would be excellent with cooked chicken, as well. With warmer weather coming, I'll be glad to have another cool, main dish salad in my recipe box and this one is definitely worth repeating!

Harvest Tuna or Chicken Salad
(Makes 2 servings)

3 tablespoons balsamic vinegar
1 tablespoon cherry preserves or jam
Freshly ground black pepper to taste
2 tablespoons olive oil
5 cups romaine lettuce
2 tablespoons dried cherries, chopped
¼ cup dried apples, chopped
2 tablespoons almonds, chopped (or use slivered)
2/3 cup broccoli florets
½ cup cucumber or celery, quartered and sliced
5 ounces solid white tuna, drained & broken into small pieces (or ¾ cup chicken)

1. In a large bowl, whisk together the balsamic vinegar, cherry preserves, pepper and olive oil until well blended and emulsified.

2. To the bowl, add the remaining ingredients and toss until combined and well coated with the dressing. Equally divide among two serving plates and serve immediately.

Nutritional Information per serving: 382.5 calories, 33.4 g carbohydrate, 19 g total fat, 2.4 g saturated fat, 272.5 mg sodium, 5.4 g fiber, 19.2 g protein.

Original recipe by Kathy Sheehan, copyright 2010

Wednesday, April 28, 2010

Salmon or Chicken Salad with Strawberry Balsamic Reduction

Strawberries and balsamic vinegar are such a perfect combination of sweet and sour that I borrowed the idea from my earlier post (see Balsamic Strawberries with Mascarpone Cream) and took it in another direction to come up with this delicious main dish salad. The strawberries in particular give this salad a delightful Spring flavor, while the crunch from the crisp romaine and toasted almonds only adds to its freshness.

The following recipe describes how to make this salad using salmon, but it is equally delicious with boneless, skinless chicken breasts or tenders that have been quickly browned in a skillet in place of the salmon (see variation suggestion below recipe). I hope while strawberries are at their peak, you'll give this one a try.

Salmon Salad with a Strawberry Balsamic Reduction
(Makes 2 servings)

2 tablespoons slivered almonds
2/3 cup balsamic vinegar
2 teaspoons Splenda granular
1 teaspoon lemon juice
6 cups romaine lettuce
2 center cut salmon fillets (about 5 oz. each)
1 tablespoon canola oil or grapeseed oil (for high temp cooking, not olive oil)
Lemon pepper
10-12 strawberries, quartered

1. Heat a heavy skillet over medium heat (I use a small cast-iron skillet). Add almonds to dry pan and toast, stirring often, until golden brown. Pour almonds into a bowl; set aside.

2. In another small bowl, mix together the balsamic vinegar, Splenda, and lemon juice; set aside. Divide and arrange romaine lettuce on two serving plates; set aside.

3. Wipe out pan of any almond bits and increase heat to medium-high. Meanwhile, coat both sides of the salmon fillets with oil and sprinkle with lemon pepper. When skillet is very hot, place the oiled salmon in the pan and do not disturb for at least 2 minutes until a brown crust has formed. Turn salmon and sear other side for at least two minutes. Turn again and complete cooking to desired doneness. (If you like your salmon on the rare side, the 2 minutes per side should be fine. I like mine cooked through to flaky and no longer pink in center, which takes another 2-3 minutes. Do not overcook, or fish will be dry.) Place salmon on top of lettuce on serving plates and set aside.

4. Add balsamic vinegar mixture and strawberries to hot pan. Boil and cook, stirring occasionally, until reduced to ½ cup and thickened to consistency of syrup. Evenly divide balsamic reduction and strawberries over salmon and lettuce. Top each with 1 tablespoon of the toasted almonds and serve immediately.

Nutritional Information per serving: 367 calories, 20 g carbohydrate, 14 g total fat, 3.2 g saturated fat, 3.9 g fiber, 38.7 g protein.

Original recipe by Kathy Sheehan, copyright 2010

Variation: Try this salad with grilled chicken, instead of salmon. Pan-grill the chicken for about 3-4 minutes per side and cook until juices run clear. Allow chicken to rest before slicing and distributing over salad greens. If desired, add a chopped plum tomato with the romaine.

Tuesday, January 26, 2010

Multi-Use Spicy Turkey Tomato Sauce

My husband doesn't mind helping in the kitchen and enjoys cooking. One night, several weeks ago during the Christmas rush, I was so busy with my home-based business that I couldn't get away to make the spaghetti dinner I had planned. Happily, my husband stepped in and created the best, spiciest pasta sauce I've ever had. When I asked how he did it, he said he opened the spice cabinet and started adding whatever sounded good. His instincts were right on and the final result was a huge hit with my family. Since that evening, he's made his now-famous sauce a couple of times and tonight I stood by and took notes so I could share his fantastic recipe with you.

This is more than just pasta sauce with a kick. We've had it as Sloppy Joe's, over baked potatoes, and once as the base for a taco salad for lunch the next day! Because we start with lean ground turkey breast, it is extremely low in fat when compared with regular meat sauce made from beef. Normally, I find ground turkey to be bland or dry, but not in this recipe! So, open up your spice cabinet and be adventurous.

Multi-Use Spicy Turkey Tomato Sauce
(Makes 4 generous servings)

1 pound ground breast of turkey (99% fat free)
½ tablespoon olive oil
1 teaspoon oregano leaves, dried
¾ teaspoon garlic powder
1 teaspoon chives, dried
1 tablespoon parsley flakes, dried
½ teaspoon basil, dried
½ teaspoon chili powder
¼ teaspoon cayenne pepper
½ teaspoon garlic & black pepper
¼ cup chopped onions (or 1½ tablespoons dried chopped onion)
1/3 cup red wine
26 ounce jar spaghetti sauce (Marinara)

1. Heat olive oil on medium-high heat in a non-stick skillet. Add ground turkey and spices. Break up and stir often until meat is starting to brown. Add onions and continue cooking until meat is well browned. (If using dried onion, wait until marinara sauce has been added in next step.)

2. Add wine to deglaze pan and allow to simmer until almost completely evaporated. Add spaghetti sauce. Reduce heat to low and simmer until reduced and thickened, about 15-20 minutes.

Serving Suggestions (extras not included in nutritional information below): Serve sauce over pasta, cooked spaghetti squash or baked potato. It may be served on toasted hamburger buns as a Sloppy Joe. Add a can of drained and rinsed red kidney beans and it’s great as a topping on a taco salad.

Nutritional Information per serving of meat sauce (¼ of recipe): 262 calories, 20.4 g carbohydrate, 5.1 g total fat, 1 g saturated fat, 5.2 g fiber, 28.6 g protein.

Original recipe by Martin Sheehan, copyright 2010

Monday, January 25, 2010

Warm Chicken & Bacon Cabbage Salad

This main dish salad is quick to make and simply delicious! It came about because I had a leftover rotisserie chicken in the fridge and a head of Napa cabbage. If you've never tried Napa cabbage (also known as Chinese cabbage), please let me introduce you to this crunchy, yet tender, mild, wonderful vegetable! It is different from it's green or red cousin, without their pungent flavor or tough, leathery leaves. It a good source of vitamin C and makes a wonderful substitute for lettuce anytime.

Another time-saving ingredient in this recipe is ready-cooked bacon. It lends this salad it's delicious, smoky flavor without all the fat because it's already been cooked and drained. Simply chop, saute it for a few minutes in a hot pan and it's ready to go! (If you prefer, you may substitute turkey bacon, but it will have to cook a bit longer until crisp.) Another nice thing about this salad is that you can make the crunchy noodle topping and dressing ahead of time, so final preparation can be reduced to 15 minutes or less for when you want a healthy meal FAST!

Warm Chicken & Bacon Cabbage Salad
(Serves 4)

Crunchy Topping Ingredients:
1 package ramen noodles (any flavor)
3 tablespoons slivered almonds

Dressing Ingredients:
1/3 cup light mayonnaise
1/3 cup honey mustard
1/3 cup chicken or vegetable stock
1 teaspoon toasted sesame oil
2 teaspoons reduced sodium soy sauce
¼ teaspoon garlic powder

Salad Ingredients:
1 medium head Chinese or Napa Cabbage, quartered and thinly sliced
1 carrot, shredded
3 green onions, sliced (white and green parts separated)
8 ounces white mushrooms, sliced
4 slices pre-cooked bacon, chopped
2 cups cooked chicken, cut into small pieces or shredded
Freshly ground black pepper

1. Preheat oven to 350-degrees. Remove the ramen noodles from the package and discard flavor packet. Break noodle block into several pieces and place in a sealed plastic bag. Using the handle of a knife, gently pound until crushed into small pieces. Spread broken noodles onto a cookie sheet and toss with almonds. Bake for about 12 minutes, stirring once, until golden in color. Place toasted noodles into a small bowl to cool completely. (NOTE: For this salad, you will only need ½ of this mixture, so reserve the remaining portion in an airtight container to top future salads.)

2. While the noodles are toasting in oven, mix together the dressing ingredients in a small mixing bowl and whip with a wire whisk; set aside.

3. Place the sliced cabbage, shredded carrot and green part of onions into a large bowl and toss to combine; set aside.

4. Heat a non-stick skillet on medium heat (do not add oil to the pan). Place sliced mushrooms into the heated pan. Cook, stirring occasionally, until moisture has sweated out of them and evaporated from the pan. As soon as they begin to brown, add the bacon and white part of onion. Saute until bacon has rendered a small amount of fat and has begun to crisp. Add cooked chicken and stir to combine. Cook only until chicken is heated through. Add dressing and stir ingredients together. Continue stirring until dressing is hot and bubbly. Pour mixture over cabbage and toss to combine ingredients. Just before serving, add ½ of the toasted noodle and almond mixture into the warm salad and toss. Top with freshly ground pepper and serve. (If not eating entire salad in one sitting, remove only the amount to be eaten and add 2 tablespoons per serving of the noodle mixture to each portion. Remaining salad can be refrigerated and eaten as a cold slaw within 1-2 days, adding the toasted noodle mixture just before serving.)

Nutritional Information per serving: 290 calories, 27.1 g carbohydrate, 10.6 g total fat, 3.2 g saturated fat, 5.2 g fiber, 20.1 g protein.

Original recipe by Kathy Sheehan, copyright 2010

Tuesday, October 27, 2009

Pom-Pear Chicken over Spinach

Pomegranates are on special this week in my grocery, so I purchased a couple to play with. As I've mentioned before, they are a super fruit! The arils (seeds) are rich in antioxidants, vitamins, fiber and phytochemicals that can heal your body from within. Although they're a culinary adventure to eat fresh, pomegranates can be juiced and used in cooked recipes, as well. As in this savory dish, they can be combined with other mild tasting fruits, such as pear, which only enhances the best qualities of both.

I consider this a main dish salad because the spinach is fresh and uncooked. Pile it high on your serving plate then top with the warm chicken and sauce. It will only slightly wilt the spinach, so you'll be sure to get all the nutrients from this delicious green, including calcium, vitamins A, C and K, beta-carotene and folate. This dish is practically wearing camouflage--your family will have no idea how healthy it is!

Pom-Pear Chicken over Spinach
(Serves 2)

1 pomegranate
two (4 oz.) boneless and skinless chicken thighs (all visible fat removed)
Salt and pepper
1 teaspoon olive oil
1 shallot, chopped
2 tablespoons white or red wine vinegar
2/3 cup chicken stock
1 pear, peeled and chopped into small chunks
1 tablespoon seedless all-fruit raspberry jam
3 cups baby spinach leaves

1. Cut the pomegranate, not in half, but at the 1/3 mark (so one piece will be 2/3 of the fruit and the other piece will be 1/3). Take the 2/3 side and using a citrus juicer, juice the pomegranate until all the arils (seeds) have been drained of their juice. If necessary, strain the juice of pits or flesh and set aside. You should have approximately 1/3 to ½ cup juice. From the remaining piece, carefully spoon the arils into a small bowl: set aside.

2. Season the chicken thighs with salt and pepper. Heat the oil in a skillet on medium-high and cook the chicken until browned on both sides and almost cooked through, about 4-5 minutes per side. Meanwhile, divide spinach leaves between two serving plates and set aside.

3. Add the shallot to the pan and cook until soft, about 2-3 minutes. Add the vinegar, reserved pomegranate juice, chicken stock and stir to loosen any brown bits from bottom of pan. Cook for a few minutes until slightly reduced. Add the pear and jam and continue to cook until jam is melted and the liquid has reduced and thickened into a nice sauce.

4. Place a piece of chicken on top of each pile of spinach. Divide and spoon sauce evenly over chicken, allowing the sauce to spill onto the spinach. Over each serving, sprinkle about 2 tablespoons of the reserved pomegranate arils and serve immediately.

Nutritional Information per serving: 274.5 calories, 29.3 g carbohydrate, 10.3 g total fat, 3 g saturated fat, 3.9 g fiber, 16.9 g protein.

Original recipe by Kathy Sheehan, copyright 2009

Friday, October 23, 2009

Tangerine, Pomegranate and Cashew Salad

Last year, my daughter introduced me to pomegranate. I was surprised by its strange, seed-filled center (called arils) and delighted with its burst of floral, sweet and tangy flavor when you bite down on them. Pomegranate is being hailed as a super fruit because it is filled with antioxidants and phytochemicals that help the body fight infection and disease, including cancer. It is also a good source of Vitamin C, B5 and potassium. If you've never tried this exotic fruit, it is a unique and tasty experience I highly recommend.

Another fruit coming into season and available in the stores right now are Clementines, which are small tangerines that are most often seedless. They are easy to peel and perfect for packing into lunch boxes for a quick, Vitamin C rich snack. The origin of this light salad came about because I had a half bag of Clementines in my refrigerator that needed to be eaten. The addition of fruit to a green salad brightens the flavor and brings a sweet taste that is most appealing to children (and adults) that claim they "hate" vegetables. The Asian-style dressing was a spur-of-the-moment creation, using what I had on hand, that resulted in a delicious, low-fat topping that perfectly complimented the combination of fruits, vegetables and nuts. This recipe is a keeper and one I'll turn to often this winter while Clementines are so abundant.

Tangerine, Pomegranate & Cashew Salad
(Makes 2 meal-size servings or 4 side salads)

6 cups salad mix (I use Fresh Express Fancy Greens) or lettuce
¼ cup grated carrot (if not included in mix)
1 celery stalk, chopped
¾ cup fresh mushrooms, sliced
2 tablespoons pomegranate arils (seeds from inside fruit), rinsed
1 tablespoon dried cranberries
2 tablespoons cashews, chopped
2 Clementine tangerines, peeled, seeded and sectioned

Dressing ingredients:
3 tablespoons tangerine juice (squeezed from 2 Clementines)
2 teaspoons rice wine vinegar
2 teaspoons toasted sesame seed oil
2 teaspoons almond butter (or tahini paste can be substituted, if a stronger sesame flavor is desired)
Salt and freshly ground pepper to taste

1. In a large mixing bowl, combine the lettuce mix, carrot, mushrooms, pomegranate arils, cranberries, cashews and tangerine sections; set aside.

2. In a small mixing bowl, whisk together the dressing ingredients until well combined and emulsified. Pour over lettuce mixture and toss to coat.

Nutritional Information per meal size salad (½ of recipe): 218 calories, 27.2 g carbohydrate, 11.3 g total fat, 0.6 g saturated fat, 4.8 g fiber, 4.7 g protein.

Nutritional Information per side salad (¼ of recipe): 109 calories, 13.6 g carbohydrate, 5.6 g total fat, 0.3 g saturated fat, 2.4 g fiber, 2.3 g protein.

Original recipe by Kathy Sheehan, copyright 2009

Wednesday, October 7, 2009

Confetti Succotash Salad

Succotash is traditionally a corn and lima bean mixture that became popular in the American South and Midwest during the depression of the 1930's. Not being a lima bean fan, I usually substitute peas, but lately I am including edamame for the added fiber and protein they bring to the dish. In this recipe, I've taken it a step further to create a bountiful main dish salad that is perfect for lunch by itself, or pair it with grilled chicken for dinner. Because it is served cold and keeps well, take it to your next Pot Luck or picnic. The variety of colors and textures make it, not only delicious and satisfying, but also fun to eat! (If you need to avoid soy products, just substitute green peas or limas for the edamame and reduce the cooking time.) For the cheese, I simply cut four mozzarella cheese sticks that I always keep on hand in my refrigerator for a quick low-carb snack. Also, the convenience of using frozen vegetables reduces the preparation time and allows me to offer this bright, colorful salad any time of year. I'll have to remember this in February. I'm sure it will be a welcome reminder of long forgotten summer days when Maine is blanketed in snow a few months from now.

Confetti Succotash Salad
(Makes 6 servings)

1 cup frozen edamame, shelled
2 cups frozen corn
2 plum tomatoes, seeded and cut into bite-size cubes (or 1¼ cups grape tomatoes, halved)
¾ cup canned cannellini beans, drained and rinsed
4 ounces smoked mozzarella or Monterey Jack cheese, cubed
1½ tablespoons balsamic vinegar
1 clove garlic, minced
¼ teaspoon salt (or to taste)
Ground pepper to taste
3 tablespoons olive oil
2 tablespoons fresh basil leaves, torn into small pieces (or 1 tablespoon dried)

1. Boil 5 cups of water and add frozen edamame. Return to a boil and cook for 4 minutes. Add frozen corn, return to boil and cook for 1-2 minutes until vegetables are done. Pour in a colander to drain hot liquid and immediately rinse in cold water to stop cooking; set aside to drain completely.

2. In a medium bowl, place balsamic vinegar, garlic, salt and pepper. While whisking, stream in the olive oil and continue whisking until dressing is well combined and emulsified. Add drained vegetables, tomatoes, beans, cubed cheese and basil. Toss with a spoon to mix the salad and distribute dressing throughout. Serve at room temperature or cold.

Nutritional Information per serving: 201 calories, 16.9 g carbohydrate, 10 g total fat, 2.6 g saturated fat, 4.1 g fiber, 12.5 g protein.

Original recipe by Kathy Sheehan, copyright 2009

Wednesday, September 30, 2009

Mexican-Style Chicken and Bean Salad

I am always looking for more ways to bring vegetables forward to center stage, instead of putting them off to the side as if an afterthought. Main dish salads are a great way of doing just that! But when I tell my husband we're having a big salad for dinner, he puts on his skeptical face because he thinks he's going to starve tonight. I see him eyeing his chip and junk food cabinet (kept high out of my reach) even before I pull out the skillet to begin cooking. This hearty salad is far from skimpy. It contains high fiber beans and lots of chunky vegetables in a spicy sauce that more resembles a casserole than any salad. I included a few stone-ground tortilla chips to further the Mexican theme and provide a satisfying crunch that makes it a complete meal.

Mexican-Style Chicken and Bean Salad
(Makes 4 meal-size servings)

1 head of chopped or shredded iceberg lettuce
½ tablespoon olive oil
10 ounces chicken tenders (about 4 or 5), cut into 1-inch pieces
½ onion, sliced thin
1½ cups broccoli florets, fresh or thawed from frozen
¾ cup zucchini, quartered and sliced
15 oz. can of reduced sodium black beans, drained and rinsed
14.5 oz. can fire-roasted diced tomatoes, with liquid
½ cup frozen corn
½ teaspoon chili powder (or to taste)
½ teaspoon cumin seed
½ cup prepared salsa (mild or medium)
¼ cup chicken or vegetable stock
¼ cup sliced olives, drained
2 tablespoons fresh parsley or cilantro, chopped (or 1 tablespoon dried)
Salt and pepper to taste
24 tortilla chips (or substitute a gluten-free chip, if desired)

1. Divide the chopped lettuce equally among the four serving plates; set aside.

2. In large skillet, heat oil on medium high and brown chicken, stirring occasionally, until cooked through and browned. Add sliced onion to pan and cook until soft and translucent. Add ingredients listed from broccoli through olives and cook for 5-6 minutes until the broccoli is tender-crisp or cooked to your liking. Add chopped parsley and stir to combine. Check seasonings and add salt and pepper to taste.

3. Serve over lettuce along with 6 tortilla chips per serving. If desired, break chips over chicken-vegetable mixture and toss before spooning over lettuce. Serve immediately. (If storing any leftovers, do not add tortilla chips until serving time to retain crispness.)

Nutritional Information per serving: 330 calories, 46 g carbohydrate, 8 g total fat, 0.3 g saturated fat, 8 g fiber, 27.7 g protein.

Original recipe by Kathy Sheehan, copyright 2009

Thursday, August 6, 2009

Stuffed & Roasted Tomato Margherita Salad

I love the combination of tomatoes and fresh mozzarella cheese in traditional Caprese salad. This is a delicious twist on that classic that mimics my favorite Margherita pizza with the added fresh basil. In each bite, you'll taste the rich, creamy mozzarella with the smoky flavor of the roasted tomato and crunchy seasoned breadcrumbs - yum! I eat it slow with my eyes closed to truly experience this heavenly mix of flavors and textures. This recipe can be enjoyed by one person for lunch or share it with a friend to accompany a meal.

My Stuffed & Roasted Tomato Margherita Salad
(Makes 1 lunch-size serving or 2 side dish servings)

1 ripe tomato (I prefer a plum tomato)
½ tablespoon olive oil
1 minced garlic clove
Salt & pepper to taste
1 tablespoon Italian-style breadcrumbs
1 tablespoon grated Parmesan Cheese
2 cups green leaf lettuce
1 tablespoon fresh basil, torn into small pieces (or dried, if you don’t have fresh)
10 sprays of Wishbone Red Wine Mist Salad Spritzer (or 2 teaspoons balsamic vinaigrette dressing of your choice)
1 ounce of sliced, fresh mozzarella

1. Preheat oven to 350-degrees. Wash and pat dry tomato. Cut in half lengthwise, scoop out with spoon and discard pulp. Lay cut side down on paper towel to drain for 5 minutes or pat inside dry with paper towel.

2. In a small bowl, mix together the olive oil, salt, pepper and garlic. Add tomatoes and toss until well coated. Remove tomato halves to small baking pan with cut side up, leaving olive oil mixture in bowl.

3. To the oil mixture, add the breadcrumbs and parmesan cheese. Stir breadcrumbs and oil together until crumbs are coated and mixture resembles coarse crumbs. Divide evenly into tomato halves and bake for 15 minutes.

4. Meanwhile, tear lettuce into bite-size pieces, place on serving plate and add basil. Top with dressing and toss. Cut mozzarella into two slices, place on lettuce leaves and garnish with freshly ground pepper. When tomatoes are roasted and stuffing is golden brown, place on salad and enjoy!

Nutritional Information per lunch-size salad: 201 calories, 8.6 g carbohydrates, 15.2 g total fat, 4.5 g saturated fat, 2.5 g fiber, 7.8 g protein (If serving as 2 side salads, divide nutritional information in half to calculate per serving.)

Original Recipe by Kathy Sheehan, copyright 2009