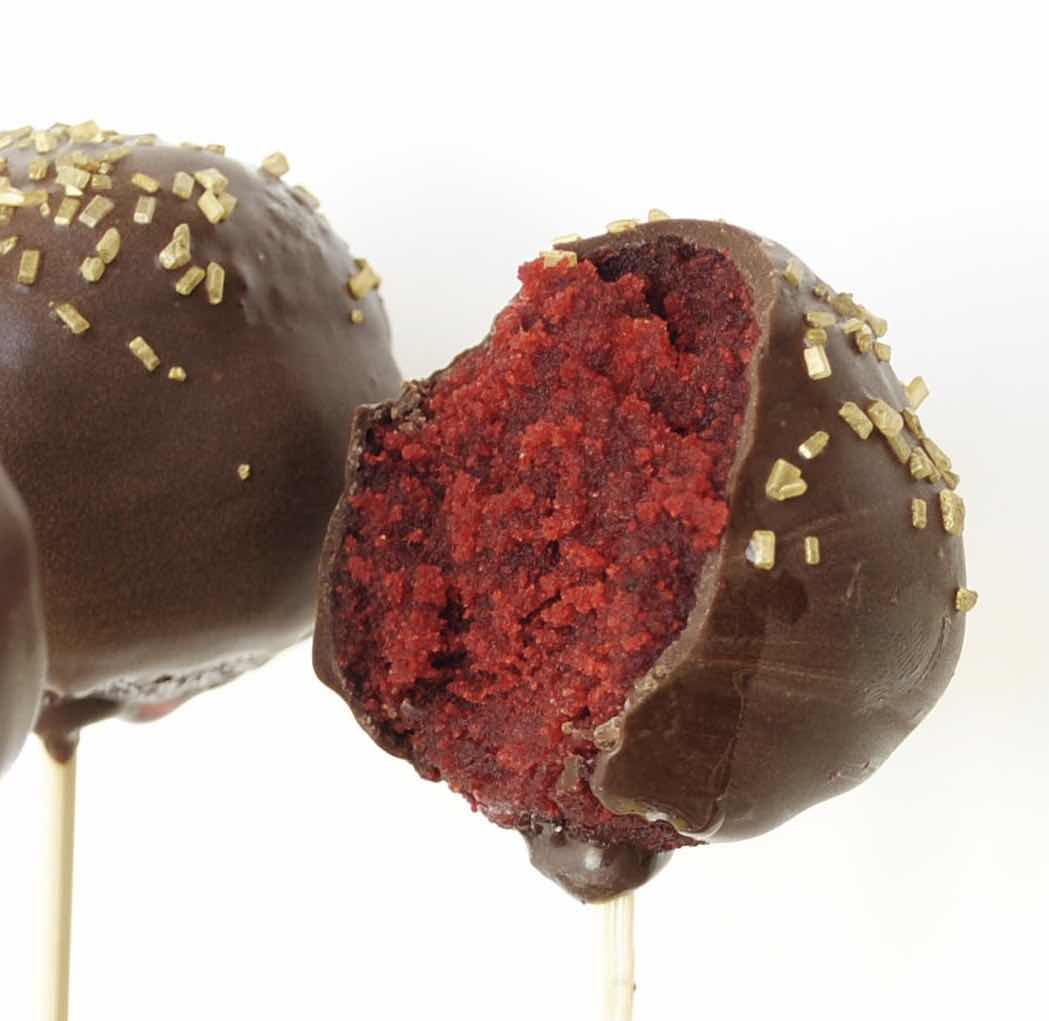
Oh boy! These Red Velvet Cake Pops are delicious and so much fun to make and eat! You can use any low carb cake recipe you like; the technique is the same for any flavor. I had some leftover Keto Red Velvet Cake from Valentine’s Day. It was a couple of days old, so I turned it into cake pops and I’m so glad I did. My daughter and I had a lot of fun one afternoon making, decorating and eating them. This would be a great project to do with young children and would be especially fun as a treat for parties.
Low Carb Red Velvet Cake Pops
Makes about 10 cake pops (more or less, depending on size)
Cake Ingredients:
48 grams coconut flour (about 7 tablespoons)
1 tablespoon unflavored whey protein powder
6 tablespoons granulated erythritol sweetener
1 tablespoon unsweetened cocoa powder
1/2 tablespoon baking powder
1/4 teaspoon xanthan gum
1/8 teaspoon salt
3 large eggs, room temperature
1/4 cup unsalted butter, melted and cooled a bit
1/4 cup coconut or almond milk, room temperature
1 teaspoon vanilla extract
5-6 drops red food coloring
Cream Cheese Frosting:
4 ounces cream cheese, softened
2 tablespoons unsalted butter, softened
1 teaspoon sour cream or plain yogurt
3 tablespoons powdered erythritol sweetener
1/4 teaspoon vanilla extract
Heavy cream, only if needed
Chocolate Coating:
3 ounces sugar free milk chocolate chips (or white chocolate chips for lower oxalate)
1 teaspoon refined coconut oil (you can also use unrefined or virgin, but it will lend a coconut flavor to the coating)
Decorative Embellishments:
chopped nuts or sugar free sprinkles
1. Make the cake (this can be done 1-2 days ahead of time). Preheat the oven to 325 degrees Fahrenheit. Prepare an 8 inch cake pan by greasing or spraying with nonstick spray. Line the bottom with parchment paper and set aside.
2. In a medium bowl, whisk together the coconut flour, whey protein powder, sweetener, cocoa powder, baking powder, xanthan gum and salt. Whisk until well combined and no lumps remain.
3. In a large bowl, beat the eggs until light and increased in volume. Add the melted butter, coconut milk, extract and food coloring. Mix on low to combine, trying not to deflate the eggs. All at once add the dry ingredients and mix on low just until combined and no dry pockets of the flour mixture remain.
4. Spoon the batter into the prepared cake pan and bake for 30-35 minutes or until no indentation remains when lightly touched in the center and a toothpick comes out clean. Remove from oven and allow to cool in the pan for at least 10 minutes. Turn out onto a wire rack and cool completely.
5. To make the frosting, beat together the softened cream cheese, butter and sour cream until fluffy. Add the powdered sweetener and vanilla extract. If your frosting is too stiff, add 1 teaspoon of heavy cream at a time until the desired consistency is reached. (Note: You will not need this entire batch of frosting to make the cake pops. Store any leftover in the refrigerator for another use.)
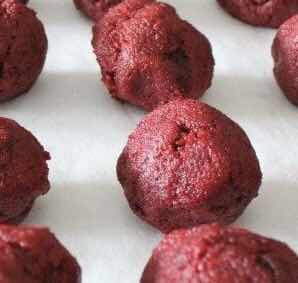
6. To make the cake pops, crumble the cooled cake into a large bowl and use your fingers to break up any large pieces. You want the mixture to be small crumbs. Add 1 heaping tablespoon of frosting and mix with your fingers or a fork to distribute it throughout the crumb mixture. You want the mixture to clump together and hold its shape when formed into a ball. If additional frosting is needed to reach the desired consistency, add it one teaspoon at a time. Do not add too much frosting, but just enough until it can be molded. Form the cake mixture into balls and place on a tray.
7. Melt 2 tablespoons of chocolate chips in a heatproof bowl or cup by microwaving for 15 seconds. Allow to sit for a minute or two and stir until smooth. Dip the end of a lollipop stick into the melted chocolate and push into a cake ball. Repeat with remaining balls and then freeze the balls for 20-30 minutes. (Note: You can shape the cake mixture into any shape! Try using cookie cutters or silicone candy or ice pop molds, the possibilities are endless.)
8. Heat the remaining chocolate chips and coconut oil in a heat proof bowl or cup by microwaving for 15 seconds, then allow the chips to sit for a minute or two and then stir. If additional heating is needed, microwave at 10 second intervals, allowing the mixture to sit and then stirring between each heating, until completely melted and smooth. (You may also melt your chocolate in a heatproof bowl over 1” of barely simmering water, but be sure to prevent any water from getting into your chocolate or it will seize.)
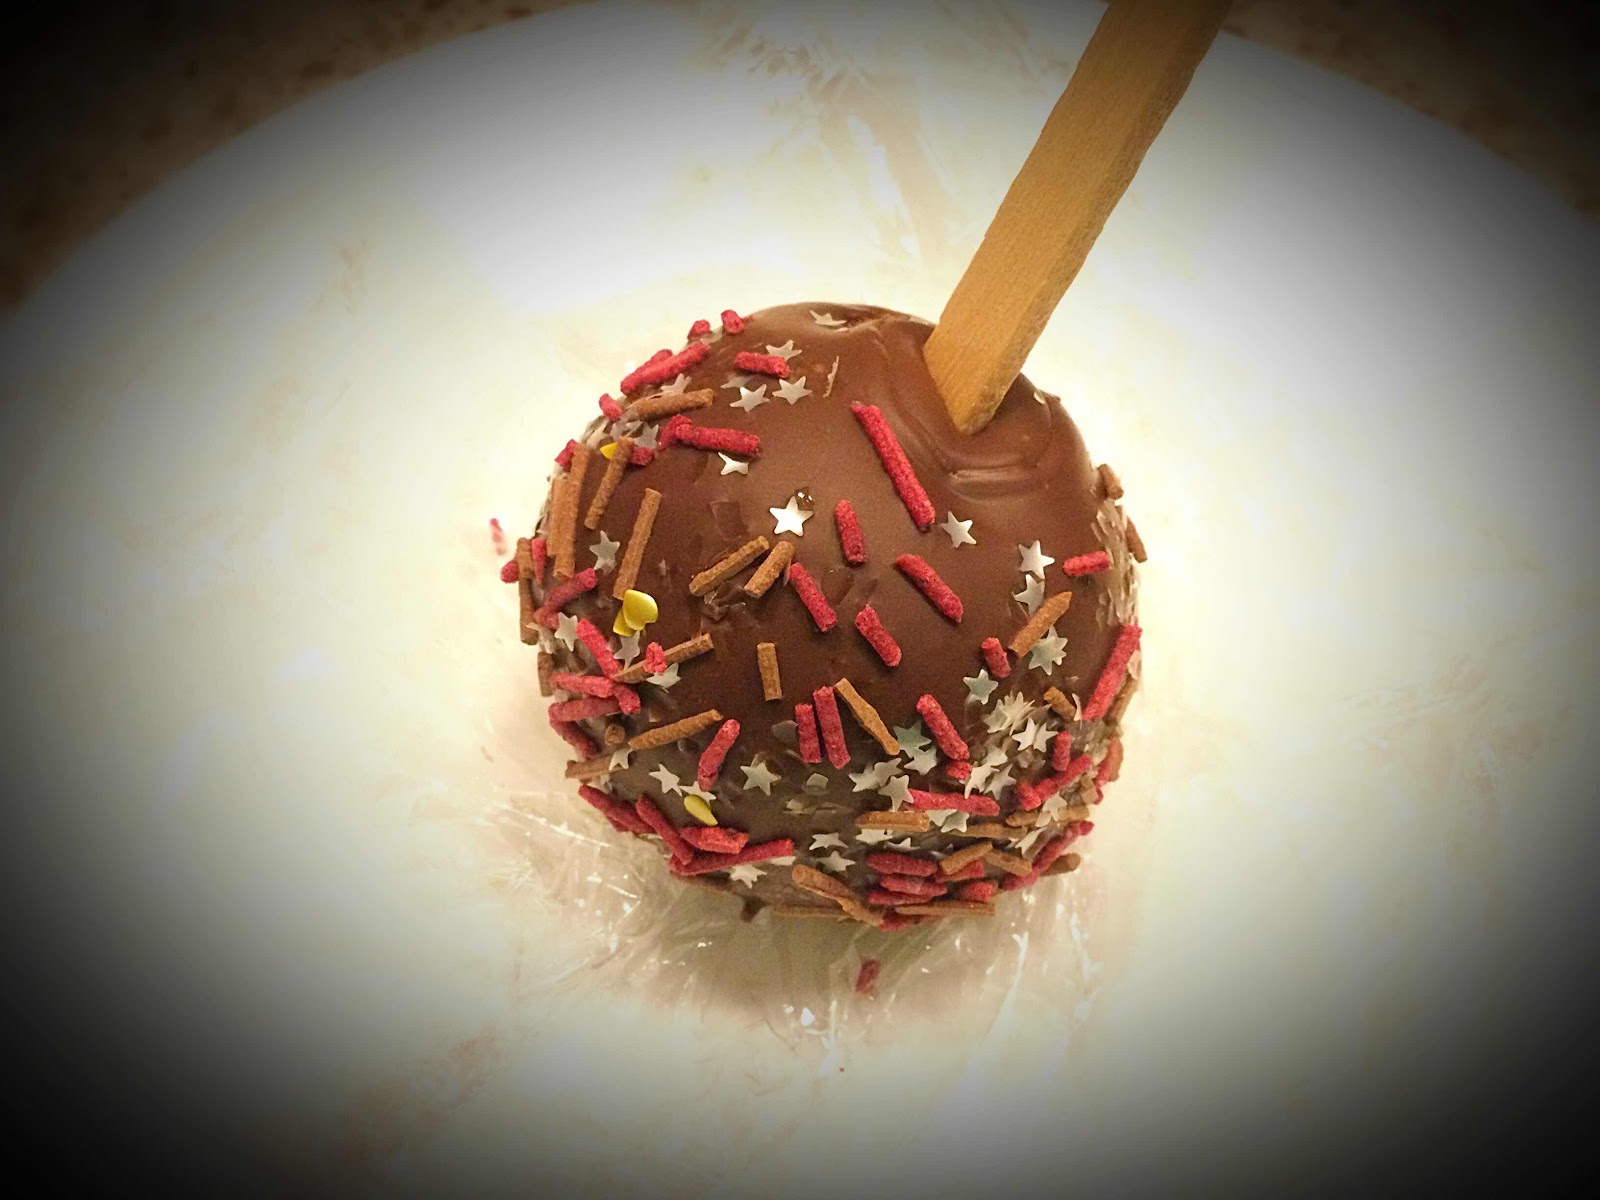
9. Get any chopped nuts, sugar free sprinkles or decorative garnish ready. Dip each ball into the melted chocolate, turning and coating the entire cake ball, then allowing the excess chocolate to drip off. Before the chocolate sets, sprinkle with decorative embellishments. Allow the chocolate to set before enjoying!
Nutritional Information per Cake Pop (based on 10 per recipe dipped in sugar free milk chocolate): 98 calories, 5.1 g carbohydrate (2.7 g dietary fiber, 1.1 g sugars, 1.2 g sugar alcohols), 8.4 g total fat (5.2 g saturated fat, 0 g trans fat), 73 mg cholesterol, 107 mg sodium, 69.6 mg calcium, 36 mg potassium, 1 mg iron, 83 IU Vit A, 3.6 g protein. Net carbs per serving: 1.2 grams
Recipe by Kathy Sheehan, copyright 2021
All rights reserved. Please do not duplicate without the author’s permission.