Sunday, November 3, 2013

Quick Broccoli Cheddar Soup


I love broccoli, but what can a person do with the thick, woody stalks?  I feel wasteful throwing them away.  So, I make soup!  Lately, this creamy, very easy soup has been my go-to favorite.  The taste is fabulous!  It makes a great lunch, snack or quick dinner.  I'm not kidding when I say it takes only minutes to prepare.  You'll have this soup on the table in about 20 minutes, with the help of a blender. A week ago, my in-laws dropped in unannounced and I offered to make them some lunch.  Honestly, I didn't have much in the fridge except two stalks of broccoli and a block of cheese.  Voila!  In a few minutes I was offering them some hot, fresh broccoli soup and grilled sandwiches.  Everyone was quite pleased and satisfied, as I'm sure you will be, too!

Quick Broccoli Cheddar Soup
Makes five (1 cup) servings

2 stalks of broccoli with stems, roughly chopped (or use 4 cups frozen broccoli)
2-1/2 tablespoons onion, roughly chopped
2 cloves garlic, peeled and roughly chopped
1-1/2 cups unsalted chicken or vegetable stock
1-1/2 cups unsweetened almond milk, original
1/8 teaspoon ground cayenne (red pepper) or to taste
1/2 teaspoon salt (or to taste, if using stock with added salt)
1/4 teaspoon ground black pepper
1/2 cup shredded very sharp cheddar cheese (I use lactose free cheese)

1.  In a saucepan, place the chopped broccoli, onion and garlic.  Add the stock and bring to a boil.  Lower heat and simmer for a few minutes until the broccoli turns bright green and the stalks begin to soften slightly.  If you want some chopped florets in your finished soup, take a few out now and chopped them; set aside.

2.  Pour the remaining vegetable mixture into a blender.  Add the almond milk, seasonings and cheese.  Blend on high until desired consistency is reached.  If necessary, stop the blender and push any unblended ingredients down and continue blending.  Taste and adjust seasonings, if necessary.

3.  Pour into a serving bowl, stir in the chopped broccoli florets and serve immediately.  This soup can be made ahead and refrigerated until needed.  Heat gently in a saucepan before serving.

Nutritional Information per 1 cup serving: 89 calories, 6 g carbohydrate (2 g dietary fiber, 1.8 g sugars), 4.8 g total fat (2.4 g saturated fat, 0 g trans fat), 12 mg cholesterol, 417 mg sodium, 253.4 mg calcium, 248 mg potassium, 6.4 g protein.

Original recipe by Kathy Sheehan, copyright 2013

Sunday, October 6, 2013

The BEST Gluten Free Apple Pie with Crumble Topping


It's apple time!  There's nothing quite as wonderful to usher in the autumn season than a homemade apple pie made from freshly picked apples.  This recipe is simply the best!  The fact that it's gluten free and drastically reduced in sugar are just healthy bonuses.  Honestly, you'd never know it was low sugar or GF; there's nothing lacking in taste here.  My gluten-eating, non-diabetic family members loved it!  Because of the crunchy, crumble topping, this pie is best eaten on the day it's made (although it will taste wonderful the day after, even though the topping will have softened).  Be sure to read the note about choosing apples for pie--it's important, you don't want to end up with a mushy, applesauce pie!  For ease, I used a ready-to-fill, frozen gluten free pie crust (Whole Foods has them), but you certainly could make your own using your favorite recipe.

The BEST Gluten Free Apple Pie with Crumble Topping
Makes 12 servings

one 9" gluten free, frozen pie crust, thawed (or make your own)

Filling:
5-6 medium cooking apples* (see note below)
1 tablespoon lemon juice
1 teaspoon ground cinnamon
1/4 teaspoon nutmeg
1/8 teaspoon allspice
1/4 cup Stevia or Splenda granular
1 tablespoon tapioca flour
1 teaspoon melted butter, butter substitute (Earth Balance) or ghee (clarified butter)

Topping:
1/4 cup light brown sugar
1/4 cup Stevia or Splenda granular
1/2 cup all purpose gluten free baking flour
1/8 teaspoon salt
1/2 teaspoon cinnamon
1/4 teaspoon nutmeg or mace
1/8 teaspoon ginger
1-1/2 tablespoons gluten free old-fashioned oats
3 tablespoons very cold butter or butter substitute, cubed

1.  Preheat oven to 400-degrees F.  Thaw pie crust.  Poke crust with fork on bottom and sides.  Place crust on a foil-lined cookie sheet; set aside.

2.  To prepare the filling, peel, core and thinly slice apples and place in a large bowl.  Add remaining filling ingredients and stir to coat apples evenly.  Spoon apples into the pie crust until quite full and heaped in the center (apples will reduce in volume as they cook).

3.  In another bowl, stir together the sugars, GF flour, oats, salt, and spices.  Add the cold, cubed butter and, with a pastry cutter or two knives, cut butter into the dry ingredients until butter is well distributed and mixture resembles coarse crumbs.  Spoon crumb topping evenly over apples.

4.  Bake in preheated oven for 40 minutes.  Topping should be nicely browned and the apples bubbly.  Cool for at least one hour before slicing.

*Note about choosing apples: The type of apples is important.  Create a mixture of several types, such as Cortland, Macoun, Granny Smith, Honey Crisp, Yellow Delicious or Macintosh.  Be aware that Macintosh apples are tart and impart a wonderful flavor, but when baked can turn soft or mushy (but in a good way, when combined with firmer apples).  I recommend using Macintosh sparingly in the mix and never use Macintosh by themselves.

Nutritional Information per serving: 185 calories, 30.5 g carbohydrate (2.3 g dietary fiber, 14.1 g sugar), 8.4 g total fat (4.9 g saturated fat, 0 g trans fat), 47 mg cholesterol, 236 mg sodium, 25.4 mg calcium, 106 mg potassium, 2 g protein.

Recipe by Kathy Sheehan, copyright 2013


Thursday, October 3, 2013

Roasted Squash with Rice, Spinach and Cranberry Stuffing


This is a fabulous autumn recipe!  This time of year, winter squash is abundant and a wide variety is available in farmer's markets or at the grocery.  To prepare as a side dish, I choose a small squash, such as Delicata.  If I want this to be the main course, I choose the slightly larger Acorn Squash.  The squash is easy to prepare: Simply cut in half lengthwise, scoop out the seeds, season with salt and pepper and roast with cut side down in a 375-degree oven for 30-45 minutes, depending on the size of the squash (until fork tender).  The stuffing can be made ahead of time and keeps well in the refrigerator for several days.  Also, any leftover vegetable-rich, rice stuffing is excellent on its own as a side dish or a quick lunch.  Your taste buds will be tantalized by the tangy flavors in the stuffing combined with the slightly sweet flesh of the squash.  This is a culinary experience of autumn's bounty at its very best!

Roasted Squash with Rice, Spinach and Cranberry Stuffing
Makes 2 servings

1 Delicata or Acorn Squash
2 teaspoons coconut oil or olive oil
3-4 cups fresh spinach, chopped (or 1/2 package of frozen chopped spinach, thawed and drained)
1/2 cup onion, chopped
1 carrot, julienne cut or finely chopped
2 cloves garlic, minced
2 tablespoons sweetened, dried cranberries (or chopped apple can be substituted)
1/2 cup leftover brown rice
1 tablespoon Apple Cider Vinegar
2 teaspoons Stevia in the Raw or Splenda
Salt and Pepper to taste
2 tablespoons gluten-free panko breadcrumbs (I used Ian's)
1 teaspoon melted butter or ghee (clarified butter)

1.  Preheat oven to 375-degrees F.  Cut squash in half lengthwise, scoop out and discard the seeds, season with salt and pepper and place cut-side down on a baking sheet.  Roast for 30-45 minutes until fork tender.  Remove from oven and turn cut-side up.

2.  Meanwhile, in a large heavy skillet with lid, heat the oil over medium-low heat.  Add the onion and carrot to skillet and saute until onion is translucent and carrot is beginning to soften, about 2-3 minutes.  Add the chopped spinach.  If using fresh, place lid on skillet and allow to steam for a few minutes or until wilted.  Add the garlic and saute until fragrant.  Add the cranberries and rice and stir to blend.  Add the apple cider vinegar and Stevia.  Stir to combine.  Add salt and pepper to taste.  Remove skillet from heat and rest until squash is ready to stuff (or cool to room temperature and refrigerate to use later).

3.  To make the crumble topping, combine the gluten-free panko breadcrumbs and melted butter or olive oil in a small bowl.  Stir with a fork until crumbs are moistened; set aside.

4.  Generously fill the scooped-out cavity of each roasted squash with about 1/2 cup rice mixture.  Sprinkle the crumb topping over the top and broil until topping is browned.  Serve warm.

Nutritional Information per serving: 208 calories, 44.3 g carbohydrate (7.5 g dietary fiber, 10.1 g sugars), 3.4 g total fat (1.7 g saturated fat, 0 g trans fat), 4 mg cholesterol, 667 mg sodium, 107.3 mg calcium, 726 mg potassium, 4.4 g protein.

Recipe by Kathy Sheehan, copyright 2013

Sunday, September 22, 2013

Orange-Pecan Encrusted Salmon


Many years ago, I had a wonderful dinner at a restaurant in Damariscotta, Maine.  Unfortunately, that restaurant has since closed, but the happy recollection of that delicious meal lives on in my memory.  I remember a salmon fillet topped with a crunchy topping that included pecans and brown sugar (and probably crumbled Ritz crackers, too).  This recipe was inspired by that dish and is just as satisfying.  The addition of fresh fruit really escalates the complexity of flavors and the orange pairs beautifully with the salmon.  The topping mixture can be prepared ahead of time, making this a quick, fool-proof meal to throw together at the last minute.  Turn a week night into something special or dazzle company; whenever you serve this dish, you will see smiles!

Orange-Pecan Encrusted Salmon
Makes 2 servings

1 navel orange (seedless)
2 (5 oz.) center-cut salmon fillets, skin removed
1 teaspoon fresh orange zest (from orange)
2 tablespoons pecans, finely chopped
2 tablespoons gluten-free panko breadcrumbs
1-1/2 teaspoons coconut sugar
1-1/2 teaspoons coconut oil (melted), plus more to coat pan
salt and pepper to taste

1.  Preheat oven to 375-degrees F.  Zest the skin of the orange into a small bowl.  Add the chopped pecans, panko breadcrumbs and coconut sugar.  Add 1-1/2 teaspoons melted coconut oil and stir with a fork until well distributed and mixture resembles coarse crumbs.  Set aside.

2.  With coconut oil, grease a baking pan or individual casserole dishes; set aside.  Cut orange into four to six 3/8" slices (depending on size of orange), reserving the two rounded ends for juicing.  Stack slices and cut away the rind.  Place two or three orange slices in a row on the baking pan and repeat with remaining orange slices to create a second row (or line the bottom of your individual dishes with the orange slices). 

3.  Season both sides of one salmon fillet with salt and pepper and place it on a row of orange slices; repeat with remaining salmon fillet.  Take the reserved orange ends and squeeze fresh orange juice over each fillet.  Evenly divide the crumb mixture and spoon over the top of both fillets and press down lightly with your hand.  Bake in the preheated oven for 18-24 minutes or until salmon flakes easily with a fork.  Garnish with any remaining orange slices (optional).  Serve immediately.

Nutritional Information per serving: 369 calories, 15.9 g carbohydrate (2.6 g dietary fiber, 9.4 g sugars), 22.3 g total fat (6.2 g saturated fat, 0 g trans fat), 71 mg cholesterol, 103 mg sodium, 54.5 mg calcium, 583 mg potassium, 26.5 g protein.

Original recipe by Kathy Sheehan, copyright 2013

Friday, August 9, 2013

Baked Eggs with Grilled Onions, Vegetables and Croutons


Eggs are a quick, easy and inexpensive go-to ingredient that makes an excellent meal any time of day.  This recipe is perfect for brunch or a light supper.  You can make the croutons, grilled onions and sauteed vegetables ahead of time, so this meal can be assembled quickly and baked just before serving.  Be sure to use gluten free bread, if that is a concern for you.  Since my diagnosis of celiac disease a few months ago, I must admit these little, buttered croutons are a wonderful treat that satisfies my cravings for bread.  Also, this is one of my famous "hidden vegetable" dishes.  (I'm known for hiding vegetables in nearly everything!)  If getting your family to eat vegetables is a challenge, then try this recipe and include their favorite vegetables in the saute.  I highly recommend including the sun-dried tomatoes for their rich, sweet flavor.  They add a lot to this dish and pair nicely with the eggs.

Baked Eggs with Grilled Onions, Vegetables and Croutons
Makes 1 serving

1 slice of gluten free bread, cut into small cubes
2 teaspoons olive oil (vegan butter spread can be substituted)
1/2 of a small Vidalia onion, thinly sliced
1 tablespoon julienne cut sun-dried tomatoes in oil with herbs
2 cups mild greens or spinach leaves, chopped (I use Olivia's Cooking Greens)
2 eggs
2 tablespoons unsweetened almond milk (any milk or cream can be substituted)
salt and pepper to taste
fresh chopped parsley, if desired
boiling water

1.  Preheat the oven to 375-degrees F.  Spray an 8-ounce ramekin with non-stick cooking spray; set aside.  Set a pan of water or kettle on to boil.

2.  In a large skillet, heat 1 teaspoon of the olive oil on medium heat.  Add bread cubes and stir until cubes are coated.  Cook and stir until cubes are golden brown.  Remove from skillet; set aside.

3.  Lower heat to medium-low.  Add the remaining oil to the pan.  Add sliced onions and grill until softened and beginning to turn a golden color.  Add the sun-dried tomatoes and heat thoroughly, stirring often and cutting tomato strips into smaller pieces.  Add the greens and cover skillet with a lid.  Allow to steam until leaves are wilted, about 1-2 minutes.  Season vegetable mixture with salt and pepper to taste.  Spoon vegetable mixture into prepared ramekin.

4.  Sprinkle the toasted bread cubes over the vegetables.  Gently crack two eggs into the ramekin, being careful not to break the yolks.  Season eggs lightly with salt and pepper.  Spoon one tablespoon of the milk over each egg.

5.  Place ramekin into a larger baking dish.  Carefully pour the boiling water into the baking dish until it reaches half way up the side of the ramekin. Place in preheated oven and bake for 16-22 minutes, or until egg whites are done and yolks are partially set (or cooked to your taste preference).  Remove ramekin from the water bath and garnish eggs with chopped parsley, if desired. Serve immediately.

Nutritional Information per serving: 340 calories, 31.5 g carbohydrate (6.1 g dietary fiber, 8.6 g sugars), 18.6 g total fat (3.6 g saturated fat, less than 1 g trans fat), 372 mg cholesterol, 819 mg sodium, 152.8 mg calcium, 248 mg potassium, 18.3 g protein.

Recipe by Kathy Sheehan, copyright 2013

Tuesday, July 9, 2013

Super Green Summer Soup


With the abundance of vegetables in gardens and available at farmer's markets, it's the right time to make this delicious summer soup.  It is a wonderful first course and can be heated gently or eaten cool.  It is refreshing and nutritious!  If you don't have fresh vegetables available, then substituting frozen vegetables is fine, too.  (I used the frozen California Blend of broccoli, cauliflower and carrots in place of some fresh vegetables called for in the recipe.  Also, frozen broccoli or sliced leeks can be substituted for fresh, if it is more convenient.) It's a very quick and easy to prepare meal and will keep well in the refrigerator for several days, making it easy to grab something nutritious to bag and go for a work day lunch.

Super Green Summer Soup
Makes 4 servings

1 teaspoon organic coconut oil or olive oil
1/2 medium onion, chopped
1 leek, sliced
3 cups broccoli florets
1 cup cauliflower florets
1/2 cup carrot, chopped
1 celery stalk, sliced
1 cup chopped kale leaves
2 cloves garlic, minced
2 and 1/2 cups chicken or vegetable broth
1/2 cup unsweetened coconut milk (or Coconut Almond milk)
salt and pepper, to taste
juice of 1/2 lemon (or dash or two of hot sauce or cayenne pepper, as desired)

1. Melt the coconut oil over medium heat in a large skillet.  Saute the onion, leek, broccoli, cauliflower, carrot, celery and kale until beginning to soften and kale leaves are wilted, about 4-5 minutes.  Add the garlic and cook, stirring often, until fragrant.  Remove from heat.

2.  Into a blender, measure the broth and coconut milk.  Add the vegetables, salt, pepper, lemon juice or hot sauce.  Blend until smooth.  Taste and adjust seasonings, if necessary.  Serve immediately or can be refrigerated for several days.  Serve warm or cool, as desired.

Nutritional Information per serving: 81 calories, 12.6 g carbohydrate (2.6 g dietary fiber, 4.7 g sugars), 1.8 g total fat (1.1 g saturated fat, 0 g trans fat), 0 mg cholesterol, 678 mg sodium, 116 mg calcium, 142 mg potassium, 2 g protein.

Recipe by Kathy Sheehan, copyright 2013

Saturday, July 6, 2013

Fish Taco Salad


Tonight I had a craving for fish tacos.  I love them, but one single taco (which is all I will allow myself at a meal) sometimes just isn't enough to satisfy.  It would only leave me wanting more!  So, I created this huge, dinner-size salad that has all the same flavors.  It filled me up and left a happy smile on my face.  You can serve the toppings on any amount of your favorite greens, but when it comes to leafy greens, I say more is better!  One of the best parts of this salad is the delicious homemade dressing.  It is derived from the tangy sauce that normally accompanies a fish taco and it is YUMMY!  Make a note of it and file it away in your recipe box because I know you'll want to use it often.

Fish Taco Salad
Makes 1 meal-size serving

3 ounces frozen fish nuggets or fish sticks (I used Henry and Lisa's Gluten Free Fish Nuggets)
3 to 4 cups leafy greens or mixed greens, torn into bite size pieces
1/2 cup shredded cabbage (a coleslaw mix works well)
1 plum tomato, seeded and diced
4 or 5 corn tortilla chips, lightly crushed into small pieces (gluten free)

Dressing Ingredients:

2 tablespoons light mayonnaise (gluten free)
1/4 teaspoon tomato paste
1/4 teaspoon rice wine vinegar
juice from 1/2 lime (about 1 tablespoon)
dash of ground cumin
dash of cayenne pepper or hot sauce, to taste
dash of garlic powder
ground black pepper, to taste
dash of smoked paprika
2 teaspoons fresh chives, finely chopped
1 tablespoon fresh cilantro or parsley, minced
1 and 1/2 tablespoons original, unsweetened almond milk (or skim milk)

1.  Prepare the fish nuggets according to package directions, turning half way through cooking.  Bake until crispy.  Remove from oven and cool slightly.  Cut into bite-size pieces; set aside.

2.  While the fish is cooking, place the lettuce, cabbage and plum tomato on a serving plate or in a large salad bowl.  Crush the tortilla chips and set aside.

3.  In a small bowl, whisk together the dressing ingredients.  Add the herbs and spices in amounts according to your own tastes.  It should be somewhat thin so it can be drizzled easily over the top of the salad; set aside.

4.  To assemble, place the chopped fish nuggets over the lettuce, cabbage and tomato mixture.  Sprinkle the crushed corn tortillas on the salad and spoon the dressing over all.  Toss, if desired, and serve immediately.

Note: Other salad toppings you might include are chopped avocado and/or sliced black olives, although these optional additions are not included in the nutritional information below.

Nutritional Information per entire recipe (1 serving): 302 calories, 20.4 g carbohydrate (3.7 g dietary fiber, 3.6 g sugars), 17.8 g total fat (1 g saturated fat, 0 g trans fat), 50 mg cholesterol, 475 mg sodium, 121 mg calcium, 318 mg potassium, 16.2 g protein.

Recipe by Kathy Sheehan, copyright 2013

Tuesday, July 2, 2013

Lemon Mug Cake


Cake from a microwave?  Can it really be good?  The answer is YES!  This is a very quick, easy and versatile recipe.  If served as a single serving, it's delicious as the main course for breakfast, brunch, a quick and light lunch or, when divided into two portions, it makes a perfect snack or dessert.  The addition of flaxseed boosts the nutritional complexity, making this cake an excellent source of dietary fiber, Omega 3 and 6 fatty acids, thiamine, magnesium, manganese and copper.  Who would guess that something that tastes so decadent would deliver such a healthy punch?  The cake is meant to be eaten warm, right out of the microwave or oven.  Top it with crushed raspberries, strawberries or blueberries for even more antioxidants, vitamins and fiber.  It's gluten free, sugar free, and low carb -- who could ask for more?

Lemon Mug Cake
Makes 1 meal-size serving (or 2 dessert servings)

1/4 cup almond flour (or finely ground almonds)
1 Tablespoon ground flaxseed meal
1 Tablespoon gluten free all-purpose baking mix
1/2 teaspoon GF baking powder
1 and 1/2 Tablespoons Splenda granular (or other sweetener of your choice)
1 teaspoon fresh lemon zest
1/2 Tablespoon salted butter, melted and cooled slightly
1 large egg
juice from 1/2 lemon (about 1 TB)

1. Spray an 8 ounce microwaveable or oven-proof ramekin or mug with non-stick vegetable spray: set aside.  (If making two servings, prepare two 1/2 cup custard cups or mugs.) 

2. In a small bowl, mix together the dry ingredients (almond flour through lemon zest).  With a fork, stir until well mixed.  In another bowl, beat the egg, melted butter and lemon juice until blended.  Add all at once to the dry ingredients and whisk with a fork until all the dry ingredients are moistened.  Pour batter into the prepared dish(es). 

3.  Microwave on high for 1 minute and check for doneness.  The cake will puff up and begin to release from the ramekin or mug along the edges.  The center should be puffed and almost set (the cake will continue to cook slightly after being removed from the microwave).  If the center is still sunken and soft, microwave for an additional 15 seconds.  The cake should spring back when touched slightly off center.  Do not overcook.  Remove from microwave and allow to cool for about 5 minutes before serving.  (Note: For two dessert-size servings, divide batter into two dishes and microwave on high for 40 seconds and then test for doneness.  If more cooking is required, microwave in 10 second intervals until desired consistency is reached.)

4.  For oven cooking: Preheat oven to 350-degrees. Bake for about 12-14 minutes or until center springs back when touched.  Cool for about 10 minutes before serving.

5.  Top with berries that have been crushed with the tines of a fork and sweetened with 1 teaspoon Splenda and whipped cream, if desired (optional).

Nutritional Information per entire recipe (1 meal-size serving, no toppings): 353 calories, 18.6 g total carbohydrate (6.1 g dietary fiber, 3 g sugar), 27.3 g total fat (6.1 g saturated fat, 0 g trans fat), 210 mg cholesterol, 298 mg sodium, 270.4 mg calcium, 35 mg potassium, 14.4 g protein.  (Note: For a dessert size serving, divide the batter into two dishes and cut the nutritional information by half.)

Recipe by Kathy Sheehan, copyright 2013

Wednesday, June 19, 2013

Fried Egg in a Red Pepper Frame


Amazing things have been happening since I last wrote, namely my blood sugar has remained in the normal range on the gluten-free/dairy-free diet for over five weeks and my bloated wheat belly is melting away.  My doctor has reduced my Metformin by half and, if my BG remains normal, I will be allowed to go off of it completely in a few weeks.  In one week, I can begin to reintroduce aged cheeses to my diet and evaluate if my intestines have healed enough to tolerate these lower lactose dairy products.  This is all very exciting news!  Reading and learning more about Celiacs disease and meeting with a dietitian have occupied much of my time lately but, as much trouble as it has been to make this adjustment, it has been worth it.

Another simple addition to my daily routine is drinking an adequate amount of water for my body size and weight.  I learned just how important adequate hydration is when I saw my blood pressure drop significantly just by drinking more water!  Although my blood pressure isn't perfect yet, I learned that being chronically dehydrated can raise your blood pressure.  I was instructed to drink 1/2 of my body weight in ounces every day.  So, if you're dealing with high blood pressure, just don't take a pill, have a drink of H2O!

While being on this highly restrictive elimination diet for the past several weeks, I must admit it has been a challenge in the kitchen.  Naturally, I've increased my intake of vegetables (I didn't really have a choice, if I wanted to eat!).  Below is one of my quick, go-to recipes that is perfect for breakfast, lunch or a light dinner.  I serve my framed egg over a salad that has been lightly dressed and sprinkled with roasted pepitas (pumpkin seeds).  If your diet allows, a sprinkle of cheddar cheese, lightly buttered toast points or crackers would be a nice addition, too.  (Note: If you have a gluten sensitivity and wish to add toast points or crackers, please be sure to choose gluten-free products.)

Fried Egg in a Red Pepper Frame
Makes 1 serving

2 eggs (at room temperature)
two 1/4" thick rings cut from a red pepper (any color pepper can be substituted)
1 TB extra virgin olive oil
salt and pepper to taste
sprinkle of cheddar cheese, optional

1.  Heat the olive oil over medium-high heat in a heavy skillet.  Place the red pepper rings into the pan and press down onto the hot surface with the back of a spatula for a few seconds (this may help the peppers to adhere to the pan).

2.  Gently crack an egg into the center of each pepper ring.  If necessary, again press down on each pepper ring with a spatula so the egg white doesn't seep under the ring, press only until the egg white solidifies a bit.  Season with salt and pepper.

3.  After about 1-2 minutes, carefully turn over each egg with its red pepper frame and continue cooking until the yolks are cooked as desired.  Sprinkle with cheese (optional) and serve immediately.

Nutritional Information per serving (doesn't include salad, cheese or any additional sides): 137 calories, 1.6 g carbohydrate (0.4 g dietary fiber, 1 g sugar), 11.8 g total fat (2.6 g saturated fat, less than 0.1 g trans fat), 186 mg cholesterol, 355 mg sodium, 29.4 mg calcium, 111 mg potassium, 6.5 g protein.

Recipe by Kathy Sheehan, 2013

Sunday, May 26, 2013

Cure for My Insulin Resistance & Diabetes?


This past week has been one of high emotion for me because I may have found the root cause of my insulin resistance and diabetes!  I discovered that I have probably lived my entire life with undiagnosed Celiacs disease, which is an allergy to gluten.  Gluten is found in bread products, cereal, crackers, bagels, any wheat-based baked good, and even found in sauces, some canned goods and salad dressing.  This has nothing to do with carbs!  The culprit is wheat, rye and barley in all their various forms, and oats (although to a lesser degree).  This discovery was not made by my doctor; it was made by me because I became determined to find the root cause of my diabetes after my last doctor visit in April where I learned from my blood test results that my A1C barely improved after months of eating almost entirely a plant-based, vegan diet and even after losing 10 pounds!  My doctor was puzzled and had to sit a while before he attempted to explain why there might be no noticeable improvement.  His solution? Increase my meds or restart insulin.  I said no, asked for 3 more months and then went home and cried, feeling confused and frustrated.

How did I make this discovery?  The story is a round-about one.  My daughter broke out with a serious case of hives.  As a result of my online research to help her explore the possibility of a food allergy and treatment options, I came across a book called The Blood Sugar Solution by Dr. Mark Hyman, MD.  Although this book sounds like it only refers to diabetes and blood sugar control, it actually is a guide to helping anyone with a chronic illness, from allergies, high blood pressure or high cholesterol to autoimmune disorders, such as diabetes, lupus or fibromyalgia. 

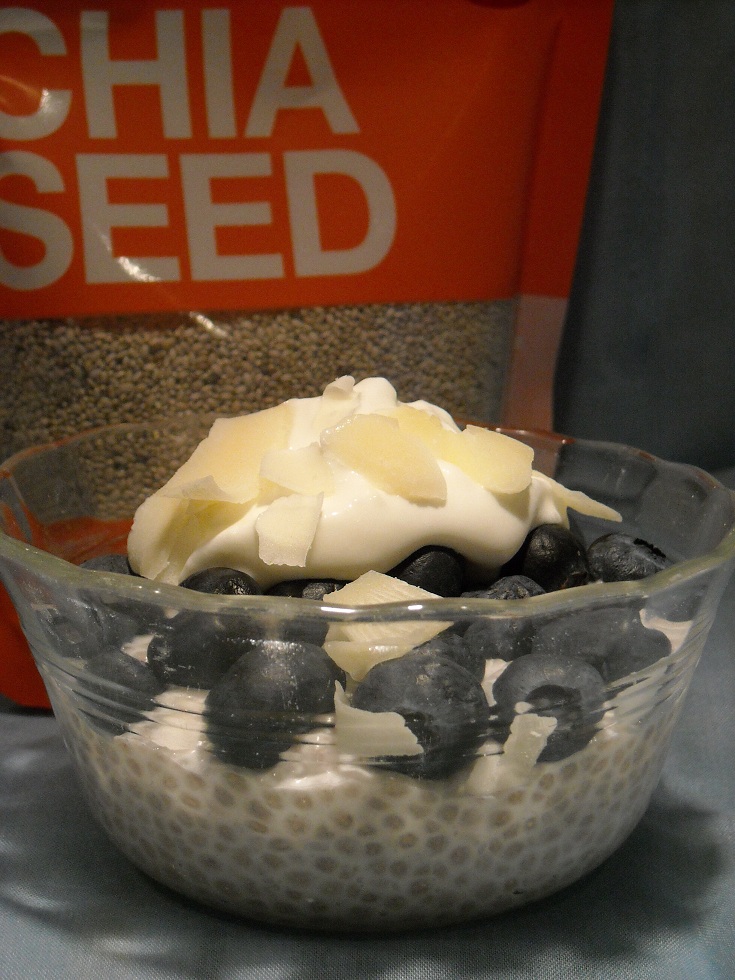
About the book: In the book, he challenges his readers to not just treat the symptoms of their condition, but to discover the root cause and correct it.  I read the book from cover-to-cover, took the questionnaire-style quizzes to discover any vitamin deficiencies or body imbalances I might have and discovered I scored quite high on the digestive system quiz, although I don't have any uncomfortable gastrointestinal problems.  As suggested, I began following the advanced diet plan outlined in the book.  This is a total elimination diet of no sugar, no gluten or grains of any kind, no dairy, no starchy vegetables or other starchy foods (like rice, corn, peas or potatoes) and even no fruit (except for 1/2 cup of berries per day) for a minimum of six weeks.  The point of this strict diet is meant to "reboot" my body chemistry.  I was intrigued and willing to give it a try.  To my amazement, within 3 days, my blood sugar readings fell dramatically into the normal range!  No matter when I take it, morning, noon, night, before or after meals -- my BG is perfectly normal!  When this dramatic and welcomed side effect occurred, I began to suspect a food allergy and was prompted to learn more.

My "Ahh-Ha!" Moment:  In my research about food sensitivities and especially celiacs disease, I came across the statement that untreated celiacs in young children can interfere with growth hormone.  Interesting!  I am an extremely short-statured person, but come from normal-sized parents and a family of normal-sized siblings.  (This is a curiosity that has baffled my doctors my entire life, but they either contributed it to my low birth weight or walked away scratching their heads.) This bit of information led me to recent studies in the Middle East and Italy that have found celiacs disease is the #1 cause of unexplained short-stature in children (even when no other symptoms are present), not a growth hormone deficiency!  For me, this was the last piece of my complicated puzzle and explained just about every chronic problem I have had from late onset of puberty, high blood pressure and reduced bone density at an early age to infertility problems and miscarriages...not to mention inflammation, early onset of arthritis and insulin resistance!  You might be saying, "I'm not short, so what does this have to do with me?"

About Celiacs disease:  Celiacs is an allergy to gluten that causes inflammation and damage to the intestinal lining.  This results in what is called "leaky gut syndrome."  When that happens, tiny digested food particles and waste products pass through the intestinal lining and into the blood stream.  These foreign particles are attacked by the body's immune system as toxic invaders, which in turn causes inflammation.  Chronic inflammation causes all kinds of problems, including insulin resistance (and everyone knows that insulin resistance is what starts the ball rolling downhill that can eventually lead to Type 2 diabetes). 

Celiacs is condition that often runs in families and can manifest itself at any time in a person's life.  You can be tall or short, skinny or overweight, young or old.  The most common symptoms are bloating (even mildly), gas after eating or the feeling that a war is going on in your gut.  These symptoms make it easy to detect but, unfortunately, most people with a sensitivity to gluten don't have gastrointestinal problems. Their symptoms are most often misdiagnosed as other illnesses or syndromes.  There are a myriad of symptoms that can be as a result of celiacs, but follow this link to read about the most common:  https://www.celiac.org/index.php?option=com_content&view=article&id=6&Itemid=12

Why am I telling you this?  I felt compelled to share my discovery and experience, just in case you may never have thought of a food allergy being the cause of your condition before.  If you're at a loss to why your diabetes treatment isn't working, even with meds, diet and exercise, going gluten free (and possibly dairy free, as well) for a couple of weeks or months may be something to try.  Read the book The Blood Sugar Solution by Dr. Mark Hyman, MD and learn about how our body systems are all connected and what happens when just one goes south!  It won't hurt and it might help, so what do you have to lose?  For me, only a few days on the elimination diet resulted in normal blood sugars!  My aches and pains have subsided and I have more energy.  I no longer have the spikes and crashes in my blood sugar that can be so uncomfortable and difficult to manage.  After one week, I lost 4 pounds (after being on a plateau for weeks) and, most importantly, nearly 4" melted away from around my waist.  The reduction of belly fat will definitely improve my insulin resistance.

Stay tuned!  My blog will be taking a turn from this day forward.  I'm in the kitchen reworking my favorite recipes right now to make them gluten free and even more healing for my body and yours.  I'm delighted to continue sharing my journey of discovery with you.  Blessings to all!

Monday, May 13, 2013

Beef & Vegetable Cottage Pie with Veggie Mash


I adore mashed potatoes!  Ever since I was a little girl, if you asked me to name my top ten favorite foods, mashed potatoes would be high on the list.  So, it's only natural that I would love Cottage Pie, a savory ground beef mixture topped with mashed potatoes.  Sadly, since my diagnosis of Type 2 diabetes, potatoes are rarely on the menu at my house.  In this wonderful recipe, the veggie mash that tops this healthy Cottage Pie can go solo as a side dish, too.  This recipe is an excellent make-ahead meal because it can be assembled and refrigerated the night before, then served the next day.  When I served this dish tonight, it got rave reviews from my family.  As my husband said, "This one is a keeper!"

Beef and Vegetable Cottage Pie with Veggie Mash
Makes 4 servings

2 teaspoons olive oil
1 large onion, chopped
8 oz. baby bella or button mushrooms, chopped
1/2 lb. lean ground beef (90% lean or higher)
8 oz. frozen chopped spinach, thawed
3 cloves garlic, chopped and divided
3 tablespoons tomato paste
1 tablespoon Worcestershire sauce
1 cup hot water
8 oz. yellow Yukon potatoes, large diced
8 oz. carrots, peeled and diced
8 oz. cauliflower florets
2 cups beef or chicken broth
2 tablespoons unsalted butter
salt and pepper to taste

1.  In a large, heavy skillet, heat the oil on medium heat and add the chopped onion.  Saute until translucent, about 5 minutes.  Add the chopped mushrooms and a little salt.  Continue to saute until the moisture is released from the mushrooms and evaporates.  Move the onion mixture to one side and add the beef to the pan.  Break onto small pieces and cook until no longer pink.  Mix together the ground beef and onion mixture, add the chopped spinach and continue cooking until most of the moisture is evaporated from the pan and beef is very well browned.  Add one clove of garlic to the pan and mix together.  Add the tomato paste, Worcestershire sauce and water to the pan and stir to deglaze the brown bits.  Continue cooking and stirring until liquid thickens into a gravy.  Season with salt and pepper to taste.  Remove from heat and set aside.

2. Place the potatoes, carrots and cauliflower into a large pot.  Add the broth and remaining garlic.  Add water until vegetables are covered.  Boil vegetables until soft and fork-tender, about 15 minutes.  Strain the cooked vegetables in a colander and allow them to sit and release steam for 5 minutes until all the excess liquid has evaporated.  Meanwhile, add the butter to the hot pot to melt.  Return the vegetables to the pot and mash well. (I suggest using a handheld mixer for a smoother mash.)  Add salt and pepper to taste.

3.  To assemble the cottage pie, first spread the beef mixture evenly into a 9" square baking pan that has been sprayed with canola oil spray.  Top beef mixture with the veggie mash and spread evenly to cover beef mixture completely. (If desired, you can refrigerate the assembled casserole for up to one day before cooking.)

4.  To cook, bake in a preheated 350-degree oven for 35-40 minutes or until heated through.  Remove from oven and allow to sit for a few minutes before serving.

Nutritional Information per serving: 294 calories, 30.4 g carbohydrates (7 g dietary fiber, 10.1 g sugars), 10.9 g total fat (5.3 g saturated fat, less than 0.1 g trans fat), 50 mg cholesterol, 817 mg sodium, 126.1 mg calcium, 1180 mg potassium, 18.4 g protein.

Recipe by Kathy Sheehan, copyright 2013.

How does this recipe compare with traditional Cottage Pie?  This recipe is considerably less in calories, carbs and fat, plus it contains two servings of vegetables!  For comparison, the nutritional information for the same size serving of traditional Cottage Pie is an astonishing 546 calories, 36 g carbohydrate, 34.5 g total fat, 16.5 g sat. fat, 6 g fiber and 27 g protein.

Friday, May 10, 2013

Light & Easy Mini Cherry Cheesecake


I love cheesecake, but even if you substitute reduced fat cream cheese for the full fat in a recipe, the calorie and fat count can be staggering!  In this makeover recipe, I used one block of lower fat Neufchatel cream cheese and combined it with 1 cup of fat-free cottage cheese, which reduced the fat and calories from a traditional cheesecake recipe considerably.  Also, by using Splenda instead of white sugar, the carb count dropped by over 50%.  I am so pleased with the result.  Topped with "no sugar added" cherry pie filling, I can have my cheesecake and eat it, too!

Light & Easy Mini Cherry Cheesecake
Makes 10 servings

8 ounces Neufchatel cheese (or reduced fat cream cheese in a block, not whipped)
1 cup fat-free cottage cheese
2/3 cup Splenda granular (or other sugar subtitute of your choice)
2 teaspoons vanilla extract
1/2 teaspoon almond extract (optional)
2 eggs
10 chocolate wafer or Nilla wafer cookies (I used Nabisco Famous Chocolate wafers)
1-1/4 cups no sugar added cherry pie filling (I used Lucky Leaf brand)

1. Preheat the oven to 325-degrees F. Place a paper cupcake liner into 10 muffin cups of a baking tin.  Place one wafer cookie into each lined cup; set aside.

2. In a blender, blend together the first six ingredients (cream cheese through eggs) and blend until smooth.  Pour into prepared muffin tins, filling each cup 2/3 to 3/4 full.  Bake for 22-24 minutes or until set. 

3. Remove from oven and allow to cool on a wire rack until room temperature.  Refrigerate for at least 2-3 hours or overnight.  Top each with 2 tablespoons of the no sugar added pie filling & serve.  (You may substitute fresh fruit as topping, if desired.)

Nutritional Information per serving: 137 calories, 10.3 g carbohydrate (0.2 g dietary fiber, 4.8 g sugars), 7.2 g total fat (4 g saturated fat, 0 g trans fat), 55 mg cholesterol, 236 mg sodium, 42.7 mg calcium, 41 mg potassium, 6.5 g protein.

Recipe by Kathy Sheehan, copyright 2013

Friday, April 26, 2013

Chocolate Zucchini Bread


Is chocolate cake a temptation for you? It's okay to give in, when you can indulge on this fudgy, moist, cake-like quick bread.  Last night, my husband and I sliced some ripe, fresh strawberries and created chocolate strawberry shortcakes out of it for a marvelous dessert! My husband (the true chocolate connoisseur of the family) gives this recipe five stars!  I got the idea from the spring issue of the North Atlantic Region Whole Foods magazine and made appropriate substitutions to make it diabetic-friendly.  I was able to reduce the carbs per serving by over 40% without sacrificing the rich, chocolaty flavor of the original.  If you like dark, chocolate, fudgy brownies, then you'll love this dessert bread. (Note: Try this bread with a cup of decaf coffee in the evening.  It is a heavenly combination!)

Chocolate Zucchini Bread
Makes 10 servings

3/4 cup all-purpose flour
1/3 cup plus 1/4 cup almond flour (or finely ground blanched almonds)
2 tablespoons granulated sugar
8-1/2 tablespoons Splenda granular
1/2 cup unsweetened cocoa powder
1 teaspoon ground cinnamon
1/2 teaspoon ground cloves
3/4 teaspoon baking powder
1/2 teaspoon baking soda
1/8 teaspoon salt
1/4 cup plus 2 tablespoons almond milk, unsweetened (soy milk or 1% milk can be substituted)
1 large egg
2 tablespoons canola oil
2 tablespoons agave nectar
1 teaspoon vanilla extract
1-1/2 cups shredded zucchini, patted dry (about 1 medium to large zucchini)
1/3 cup semi-sweet, mini chocolate chips

1. Preheat the oven to 350 degrees. Spray a 9" x 5" loaf pan with non-stick cooking spray; set aside.

2.  In a large bowl, whisk together the first ten ingredients (from flour to salt).  In a small bowl, whisk together the milk, egg, oil, agave nectar, and vanilla.  Stir the wet ingredients into the dry ingredients and mix with a wooden spoon.  Fold in shredded zucchini and chocolate chips.  Pour into the prepared pan and level with the back of the spoon.

3.  Bake until toothpick inserted into the center comes out clean, 40-45 minutes.  Cool for 10 minutes in the pan, then remove to a wire rack to cool completely before slicing.

Nutritional Information per serving (about 3/4 inch slice): 173 calories, 21.2 g carbohydrate (3.1 g fiber, 8.7 g sugar), 9.3 g total fat, 2.2 g saturated fat, 146 mg sodium, 19 mg cholesterol, 75.1 mg calcium, 137 mg potassium, 4.5 g protein.

This recipe is adapted from the North Atlantic Region Whole Foods magazine, Spring 2013 issue, pg. 69.  This made-over recipe is by Kathy Sheehan, 2013.

How does this made-over recipe compare to the original?  This made-over recipe is lower in calories and has over 40% fewer carbs.  For comparison, the nutritional information for the same size serving of the original recipe is 210 calories, 37 g carbohydrate, 7 g total fat, 141 mg sodium and 4 g protein.

Monday, April 15, 2013

Sautéed Pineapple with Rum-Spiked Creamy Topping


You will probably agree: Nothing is as delicious as fresh pineapple.  You can just taste the sunshine! Here is a spectacular spring dessert that you'll be pleased to offer to special weekend guests but, because its such a quick and easy recipe, you can enjoy it any day of the week.  I've tried to mimic the flavors of Pineapple Upside-Down Cake by warming the pineapple in a bit of butter and dark brown sugar, then topping it with a cool, creamy topping and crunchy toasted almonds.  It really satisfies my craving, and my husband and daughter were ooohhhing and awwwing after every yummy bite!  Of course, you can use canned pineapple (with no added sugar), but using fresh fruit makes this dessert an extra special treat.

Sauteed Pineapple with Rum-Spiked Creamy Topping
Makes 4 servings

Topping Ingredients:
1-1/2 cups skim milk
1/4 cup mascarpone cheese
4 teaspoons spiced or dark rum (or 1/2 teas. rum flavoring or to taste)
1/2 teaspoon vanilla extract
1 tablespoon Splenda granular
1 package of sugar-free, fat free white chocolate instant pudding mix

Using a wire whisk or handheld mixer, whip together the first five ingredients until well blended.  Add the pudding mix and whip for 2 minutes.  Refrigerate for at least 30 minutes.

4 teaspoons slivered almonds
1 tablespoon unsalted butter
3 cups fresh pineapple, cut into chunks
1 tablespoon dark brown sugar

Heat a non-stick skillet and gently toast the slivered almonds over medium heat until just beginning to brown; set aside.  In the same skillet, melt the butter.  Add the pineapple and saute until heated through.  Add the brown sugar and continue to saute, stirring often to coat the pineapple well until the sugar is bubbly.  Reduce the heat to low & remove the pineapple to serving dishes (3/4 cup per serving).  Place the toasted almonds back into the pan and stir to coat with the butter mixture.  Remove from heat before the sugar burns and set almonds aside.  Top each pineapple dessert with 2 tablespoons of the creamy topping and sprinkle with 1 teaspoon of the almonds. Serve immediately.

Nutritional Information per serving: 187 calories, 22.1 g carbohydrate (1.9 g dietary fiber, 15.9 g sugars), 10.4 g total fat, 6 g saturated fat, 0 g trans fat, 23 mg cholesterol, 102 mg sodium, 59.7 mg calcium, 203 mg potassium, 3 g protein.

Recipe by Kathy Sheehan, copyright 2013

Friday, April 12, 2013

Almond Joy "Green" Smoothie


There is a new almond milk product available from Almond Breeze called Almond Coconut Milk.  I've been using it this week in my morning smoothies and it has a very subtle coconut flavor that is not overpowering, but makes an excellent base for tropical fruit smoothies. One cup contains 450 mg of calcium, making this smoothie an excellent source of this vital mineral.  I purchase the unsweetened variety because it has net 0 carbs and then add my own sweetening to the blender.  The recipe below is a delicious and nutritious meal in a glass that has the flavors of a candy bar. It's a fun way to start the day that will keep you satisfied for hours. (You would never guess that it contains spinach!) You've got to give this one a try soon:

Almond Joy "Green" Smoothie
Makes 1 generous, meal replacement serving

1-1/2 cups unsweetened Almond Coconut Milk
1/2 small frozen banana
2 tablespoons unsweetened cocoa powder
1 cup baby spinach leaves (or other mild green)
4 teaspoons Splenda granular (or two packets, also you may substitute your own sweetener)
2 tablespoons unsweetened coconut flakes
1 tablespoon fiber powder (optional)
1/2 scoop whey protein powder (chocolate or vanilla, optional)
5 ice cubes

Place the first eight ingredients in the blender and slowly increase the speed of your blender until you reach high (#7 on a Vitamix). Blend until smooth.  Add the ice cubes through the top opening one at a time and continue to blend for a few seconds until smooth.  Serve immediately.

Nutritional Information (including fiber & protein powders): 284 calories, 37.8 g carbohydrate (18.5 g fiber, 9.4 g sugar), 12 g total fat, 6.9 g saturated fat, 0 g trans fat, 0 mg cholesterol, 251 mg sodium, 905.5 mg calcium, 545 mg potassium, 11 g protein.

Recipe by Kathy Sheehan, copyright 2013.

Monday, April 1, 2013

Spinach Dumplings in Marinara Sauce


Longing for a rich, Italian meal without all the carbs that come with spaghetti?  This meatless dish is satisfying and extremely quick and easy to prepare.  For convenience, it utilizes frozen chopped spinach that has been thawed and is full of nutrients, including vitamins A and K, folate, calcium, and potassium. This hearty meal will fill you up and make you think you've eaten spaghetti and meatballs.  Add a side salad and a small glass of red wine to complete this heart-healthy Italian feast!


Spinach Dumplings in Marinara Sauce
Makes 2 servings

8 oz. chopped spinach, defrosted
½ cup whole wheat  seasoned bread crumbs
¼ cup grated Parmesan cheese
2 Tablespoons fat free ricotta cheese
¼ teaspoon garlic powder
1/8 teaspoon nutmeg
1 Tablespoon fresh chives, chopped (or ½ TB dried)
1/8 teaspoon salt
1/8 teaspoon black pepper
1 egg white
½ cup broth or water
2 ¼ cups marinara sauce of your choice (18 oz.)

1.  Squeeze excess water from spinach.   In a medium bowl, mix together the spinach, bread crumbs, Parmesan cheese, ricotta cheese, spices, chives, and egg white.  With your hands, form into 16 balls, about 1” in diameter.


2.  Place dumplings  into a non-stick skillet and add the broth or water.  Cover with a tight-fitting lid and steam over medium-low heat  for about 5 minutes, gently turn over dumplings and continue steaming for another 2 minutes (if needed add a bit of water).  Remove lid and allow liquid to evaporate.

3.  Add marinara sauce and simmer uncovered for about 15-20 minutes, turning dumplings and stirring sauce every 5 minutes.  Continue simmering until sauce has thickened.  Serve immediately, sprinkled lightly with Parmesan cheese, if desired.

Nutritional Information per serving: 359 calories, 42.9 g carbohydrate (17.5 g sugars, 7.7 g dietary fiber), 14.3 g total  fat, 3.6 g saturated fat, 15 mg cholesterol, 2771 mg sodium, 413.2 mg calcium, 17.9 g protein.

Recipe by Kathy Sheehan, ©2013

Friday, March 15, 2013

Smoothies (They're Green, but don't tell!)


I'm making progress.  This morning, my BG was 113! Although it hasn't been consistently in the normal range, I'm encouraged because I'm seeing a downward trend.  For the past six weeks, my diet has been mainly vegetable-based soups, fresh vegetables or salad, fruit, yogurt, cottage cheese and, a few days a week, a lean protein such as fish or chicken for dinner.  It's not very exciting, but it seems to be working. Also, the most amazing part is that my sugar and carb cravings are gone! I don't plan to remain on this highly restrictive diet always but, for now and until I reach my goal, I am severely limiting all bread products, grains, potatoes, rice and pasta.

The most exciting and varied part of my day is the green smoothie I make for breakfast.  I love mixing the different fruit flavors and hiding two or more servings of vegetables and fruit in each glass!  I know that some people turn away from green smoothies because they can't get past the green color.  Even though the fruit flavors overpower the greens (if the combination is right), the smoothie may not have an appetizing appearance which can make it hard for some to swallow.  I wanted to share these two delicious recipes because they're not green!  If you're one who might benefit from green smoothies, but have been reluctant to give them a try, these might just change your mind.

Tips for introducing yourself to green smoothies:  At first, add a small amount of greens to an otherwise fruit-based smoothie.  Add a little more every week until you reach the suggested amount in a recipe or to taste.  Use frozen fruit for a refreshing, cool smoothie (or add ices cubes).  When I make one of these smoothies in the morning, I drink about 2/3 of the entire recipe for breakfast, then refrigerate and finish the remaining portion as a snack in the late afternoon.


Chocolate Cherry “Green” Smoothie
Makes 2 servings 

(If you add a few ice cubes, this smoothie becomes an unforgettable frozen dessert.)

1 cup frozen cherries, no sugar added
½ small banana (frozen)
1 ½ cups unsweetened or original almond or soy milk
2 Tablespoons unsweetened cocoa powder
1-2 Tablespoons Splenda or Stevia, granular (or to taste)
2 cups mild greens, such as spinach or kale
1 Tablespoon fiber powder (optional)
½ scoop protein powder (optional)

Place all of the ingredients in a blender and blend until smooth or desired consistency is reached.

Nutritional Information per serving (with fiber and protein powders):  175 calories, 34.6 g carbohydrate (10.6 g fiber, 18.7 g sugars), 2.8 g total fat, 0.5 g saturated fat, 0 mg cholesterol, 155 mg sodium, 280.1 mg calcium, 6.2 g protein.


Chocolate Cashew Peanut Butter Banana Smoothie
Makes 2 servings 

(The cashews add a rich creaminess to this awesome smoothie!) 

2 Tablespoons raw cashews (about 12-14 whole cashews)
1 ½ cups unsweetened or original almond or soy milk
½ small banana (frozen)
2 Tablespoons unsweetened cocoa powder
2 Tablespoons creamy peanut butter
1-2 Tablespoons Splenda or Stevia, granular (or to taste)
2 cups mild greens, such as spinach or kale
1 Tablespoon fiber powder (optional)
½ scoop protein powder (optional)
6 ice cubes

If necessary, soak the cashews in the almond milk for 30 minutes or overnight. (This is advisable for those using a normal household blender.  If you have a heavy-duty blender, such as a Vita-mix, it is not necessary.) Place the cashews and almond milk in the blender and blend until smooth.  Add the remaining ingredients and blend until smooth.  One by one, drop the ice cubes into the blender while on low speed through the lid opening and blend until desired consistency is reached.

Nutritional Information per serving (with fiber and protein powders):  300 calories, 34.7 g carbohydrate (11 g fiber, 11 g sugars), 14.7 g total fat, 3.1 g saturated fat, 0 mg cholesterol, 280 mg sodium, 345.9 mg calcium, 12.3 g protein.

Recipes by Kathy Sheehan, copyright 2013

Wednesday, February 27, 2013

Bad Numbers & Chia Seeds

A few weeks ago, I returned from my doctor, where he exclaimed, "What happened? Your sugars are through the roof!" I was stunned, but I don't know why I should have been. Since Thanksgiving, I haven't been eating healthy and, soon after Christmas, I took a 3-week vacation and ate my way from Florida to Maine!  I had gained 8 pounds.  I looked my doctor in the eye and told the truth. I didn't make excuses, admitted I'd been off my food plan for several months and hadn't been testing regularly, so I had no clue what my BG trends had been.  He gave me three months to get my A1C below 7 again, or he highly recommends that I go back on insulin.  I was devastated.  I went home, felt sorry for myself for having this horrible disease for the 100th+ time and, yes, I cried. 

Then I made a confession to myself: Perfectionist though I am, I am only human and, just like everyone else that struggles with diabetes, I make mistakes.  It took me a few days, but I have forgiven myself, I've begun to eat healthy consistently and have even begun to regain some enthusiasm for vegetables again.  My progress is slow, but I'm on track with my food plan again and some weight has been lost.  I hope my BG numbers will begin to go down but, so far, they remain high.


Now, what are Chia Seeds?  They are the tiny, edible "Chia Pet" seeds that are incredibly high in fiber, low in carbs, a good source of Omega 3 fatty acids, high in calcium and protein and help me to feel full longer and may aid in my weight loss!  I learned about them from a program I watched on Netflix called, "Hungry for Change."  (BTW, if you can watch this highly motivational documentary yourself, please do!  Try Netflix or check out the DVD from your local library.)  Since learning about this product, I purchased some Chia Seeds from Whole Foods and have begun experimenting.  Today I made two types of Chia Seed pudding using unsweetened Light Coconut Milk as a base and, although they're a bit different looking than traditional pudding, both are delicious!  The chia seeds act as the thickener, so no egg, cornstarch or other thickening ingredient is needed.  Also, both recipes are quick and easy to make because no cooking is necessary!  The pudding thickens and gels in about 30-40 minutes, but letting the mixture sit for about 4 hours or overnight allows the seeds soften and resemble tapioca pudding in texture.  Chia seeds come in black or white varieties.  Both have the same nutritional properties, so choose whatever you can find.  (They are pretty easy to find these days, I even understand WalMart carries them in some stores.  Check the grocery or natural food store in your area.)  Also, Chia Seeds can be tossed on salads, added to yogurt, soups or stews, smoothies and even baked in breads or other baked desserts!  They have no flavor of their own, but take on the flavors of the other ingredients in the recipe.  Note: They do thicken whatever liquid food or drink they are added to, so if you don't want that to happen, create a "chia gel" first by mixing 1/4 cup water and 1 TB. chia seeds.  Allow the mixture to sit for at least 30 minutes (stirring once or twice) or overnight.  If you add the already thickened and jellied chia seeds to liquids, the thickening effect will be greatly reduced or eliminated.

There are a lot of recipes out there, so experiment and enjoy the benefits!

Coconut Chia Seed Pudding
(Makes 3 servings)

1 cup light, unsweetened Coconut Milk
2 teaspoons Agave Nectar
2-3 teaspoons Splenda Granular (or to taste)
2 Tablespoons chia seeds
1/4 teaspoon vanilla extract

Mix together the coconut milk, agave nectar, and Splenda and stir together. (I use a combination of agave nectar and Splenda to reduce the carbs, but use any sweetener of your choice, keeping in mind it may change the nutritional information per serving.)  Add the chia seeds and vanilla extract and stir.  Allow to sit for about 15-20 minutes and stir again (so seeds don't settle on the bottom).  Refrigerate for 4 hours or overnight.  Stir before serving.

Nutritional Information per serving (without added toppings): 122 calories, 14.6 g carbohydrate, 7.8 g total fat, 4.3 g saturated fat, 0 trans fat, 0 cholesterol, 17 mg sodium, 4 g fiber, 4.7 g sugars, 73.4 mg calcium, 3 g protein.


Chocolate Coconut Chia Seed Pudding
(Makes 3 servings)

Add 1 Tablespoon unsweetened cocoa powder to the liquid ingredients in above recipe.  Heat the coconut milk just until the cocoa powder mixes thoroughly.  Add the sweeteners.  Add 2 Tablespoons plus 1/2 teaspoon chia seeds to mixture.  Add 1/8 teaspoon vanilla extract and stir.  Allow to sit for about 15-20 minutes and stir again (so seeds don't settle on the bottom). Refrigerate for 4 hours or overnight. Stir before serving.

Nutritional Information per serving (without added toppings): 135 calories, 11.4 g carbohydrate, 8.6 g total fat, 4.5 g saturated fat, 0 trans fat, 0 cholesterol, 18 mg sodium, 5.2 g fiber, 4.8 g sugars, 86.7 mg calcium, 3.7 g protein.

Recipes by Kathy Sheehan, copyright 2013.