Showing posts with label icing. Show all posts

Thursday, March 21, 2024

Keto Cake Boats

Keto Cake Boats

This cake was baked in a top-split, New England style hot dog bun baking pan! (Although you could use a 13” x 9” baking pan and cut into buns.) I made two flavors of Whipped Mascarpone Cream and laid out an array of toppings and my family had a blast making custom Cake Boats at a recent party. Whether you prefill these cakes or allow your guests to create their own, this dessert will be a BIG HIT with everyone! (I bought the hot dog bun baking pan on the King Arthur’s Baking Company website.)

Keto Cake Boats
Makes 10 bun-size cakes or 20 smaller cakes

Keto Cake Mix (I recommend King Arthur’s Keto Yellow or Chocolate Cake Mix)*
Ingredients called for on the box (eggs, milk, oil, etc)

Whipped Mascarpone Cream 
Makes about 3 cups of frosting

1 1/4 cups heavy whipping cream, cold
½ cup low carb powdered sweetener (I used LaKanto Monkfruit Confectioners sweetener)
1 teaspoon vanilla extract
8 ounces plain mascarpone cheese (not sweetened), softened but still chilled

Whipped Chocolate Mascarpone Cream
Makes 3 cups

1 1/4 cups heavy whipping cream, cold
½ cup low carb powdered sweetener (I used LaKanto Monkfruit Confectioners sweetener)
1/4 cup unsweetened cocoa powder
1 teaspoon vanilla extract
8 ounces plain mascarpone cheese (not sweetened), softened but still chilled

Garnishes: berries or other low carb fruit, sugar free sprinkles, chopped nuts, my sugar free Keto Chocolate Fudge Sauce (click here to see recipe)

King Arthur’s Keto Yellow Cake Mix

1. Make the cake according to the package directions and bake in the New England style hot dog bun pan or a 13” x 9” pan that has been sprayed with nonstick cooking spray. *NOTE: The King Arthur’s Cake Mix I used wasn’t enough to fill the hot dog pan or a 13” x 9” baking pan. I used two cake mixes and made a double batch of batter, which was more than I needed, so I made cupcakes out of the excess batter and froze them for another time. Fill whichever baking pan you use to about ½” below the rim and then bake according to directions or until a toothpick inserted in the center comes out clean. After 10 minutes, remove cake to a wire rack to cool completely.

New England Hot Dog Bun Baking Pan

2. Make the Whipped Mascarpone Cream: Add the heavy whipping cream, powdered sweetener and vanilla extract to a large mixer bowl and whip on high speed until soft peaks form. If making the chocolate version, also add the cocoa powder.

3. Add the mascarpone cheese to the whipped cream and whip until stiff peaks form. It will happen fairly quickly. (I prefer to use the mascarpone cheese when still chilled, but softened a bit, so that it will incorporate well without chunks. The warmer the mascarpone cheese is, the more likely it is to soften to the point that it won’t firm up well again, and can make too soft of a frosting. I suggest taking it out of the refrigerator about 15 minutes before using so that it softens a bit, but is still cool.)

4. Cut the cooled cake into buns and cut a V-shape along the top of each bun. Fill with mascarpone cream and garnish with berries or other toppings. Drizzle with sugar free chocolate sauce and serve.

Keto Cake Boat with toppings

Nutritional Information will vary, depending on the fruit and other toppings used. One full-size cake boat made from King Arthur’s Keto Yellow Cake Mix according to package directions is 168 calories, 15.6 g carbs (12 g dietary fiber, 2 g sugars), 14.4 g total fat (2.4 g saturated fat, 0 g trans fat), 92 mg cholesterol, 272 mg sodium, 10 mg calcium, 139.2 mg potassium, 1 mg iron, 4.8 g protein. Net carbs per cake (without toppings): 3.6 grams

Recipe and photos by Kathy Sheehan, copyright 2024
All rights reserved. Please do not duplicate without the author’s permission.

Monday, December 19, 2022

Keto Decorative Snack Cakes with Ganache Topping

Keto Decorative Snack Cakes with Ganache Topping
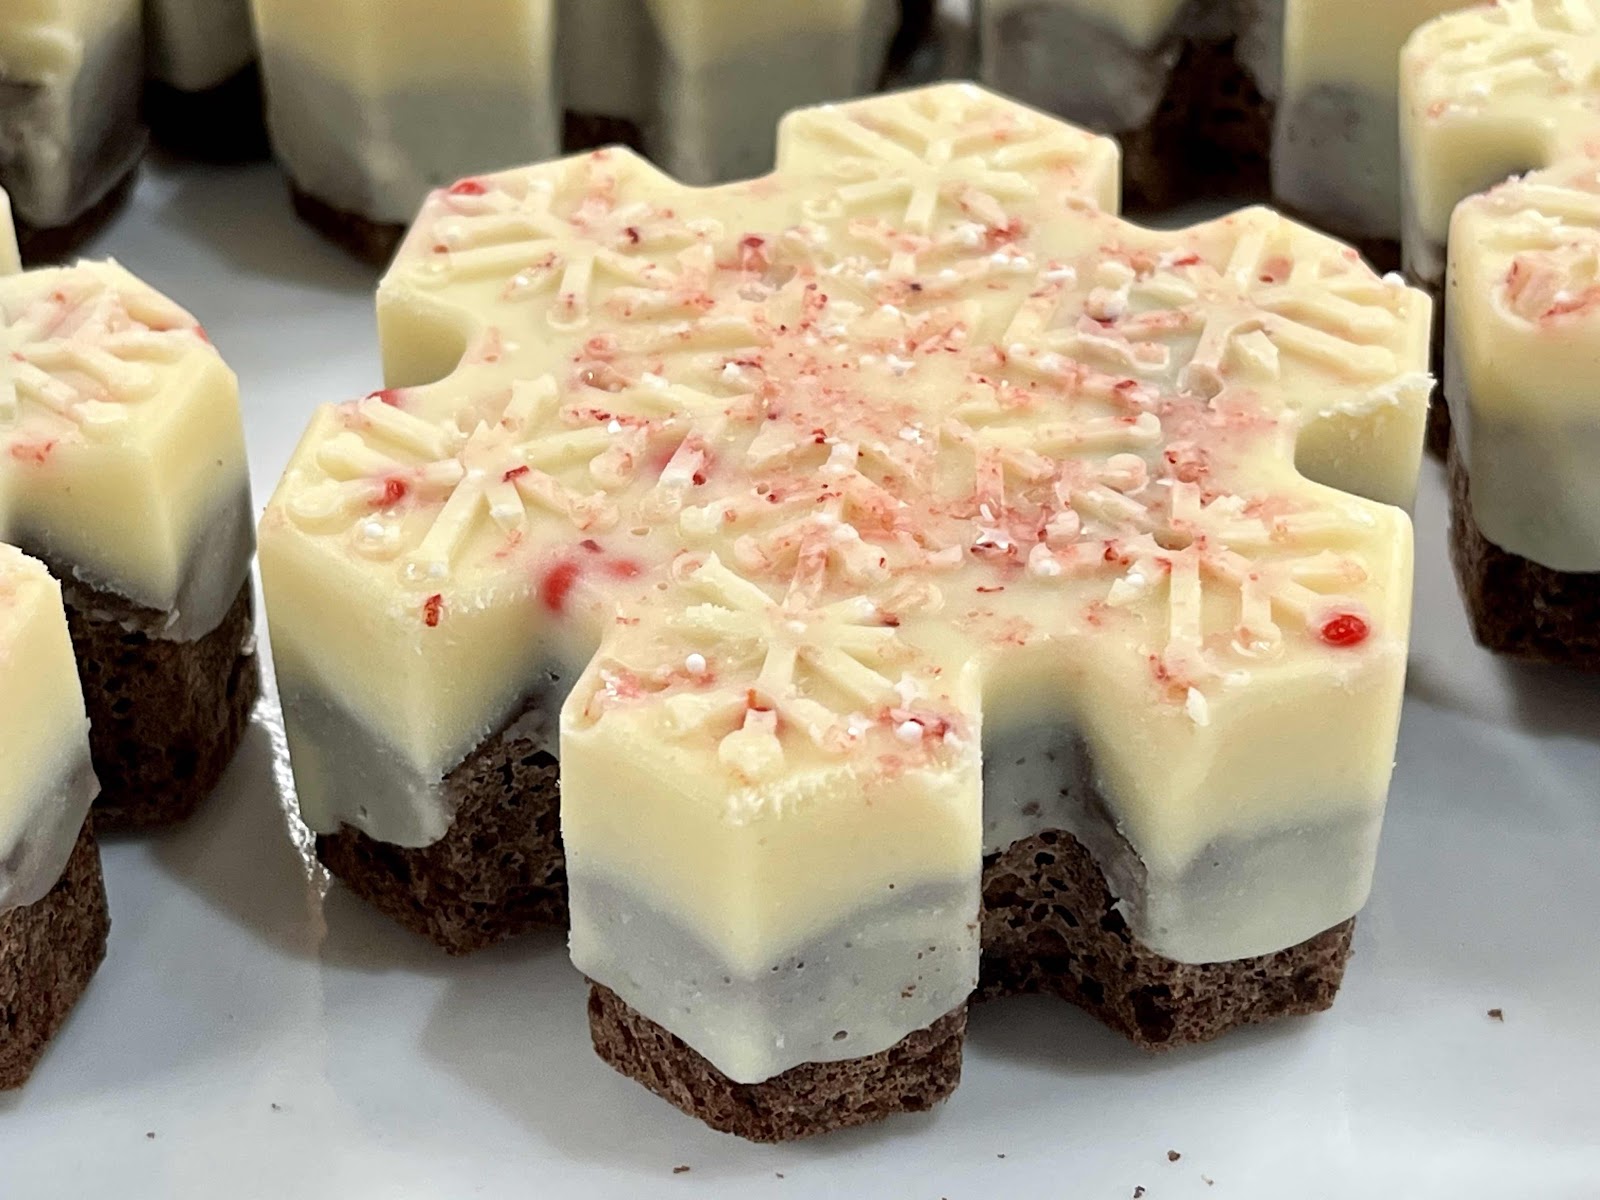
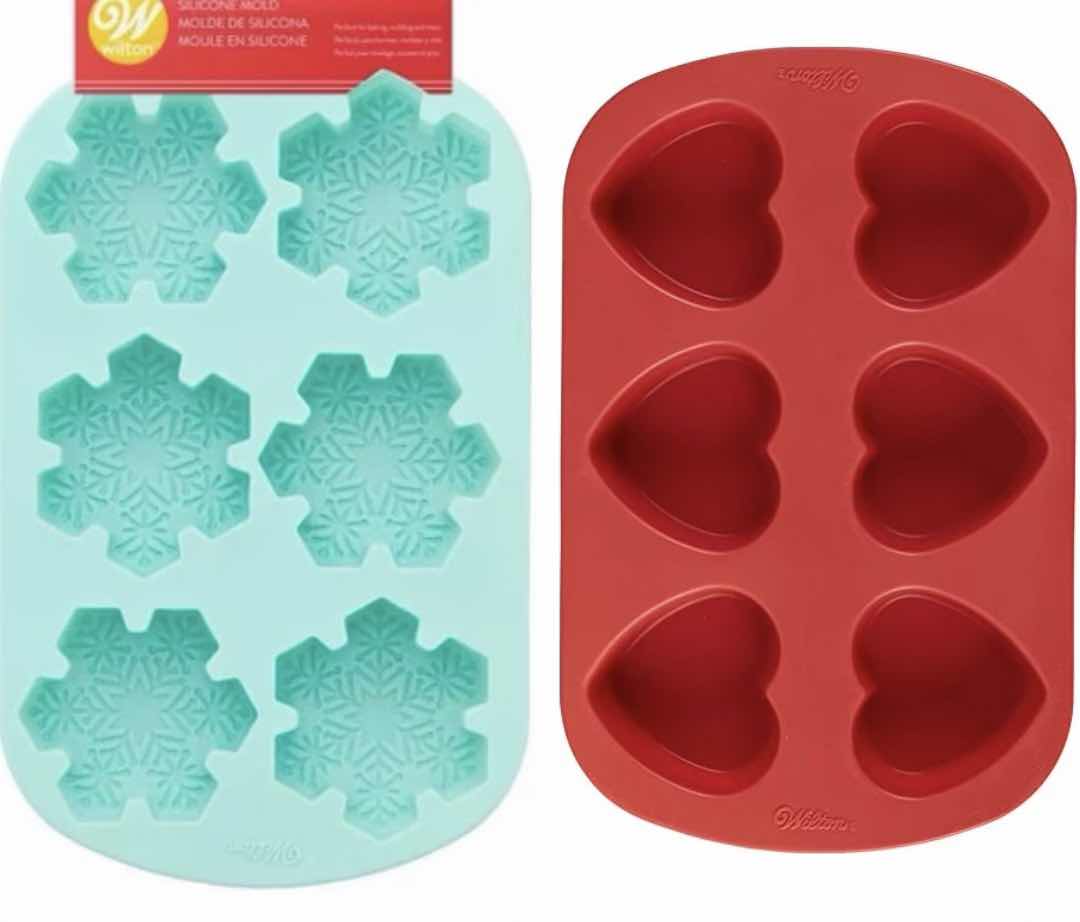
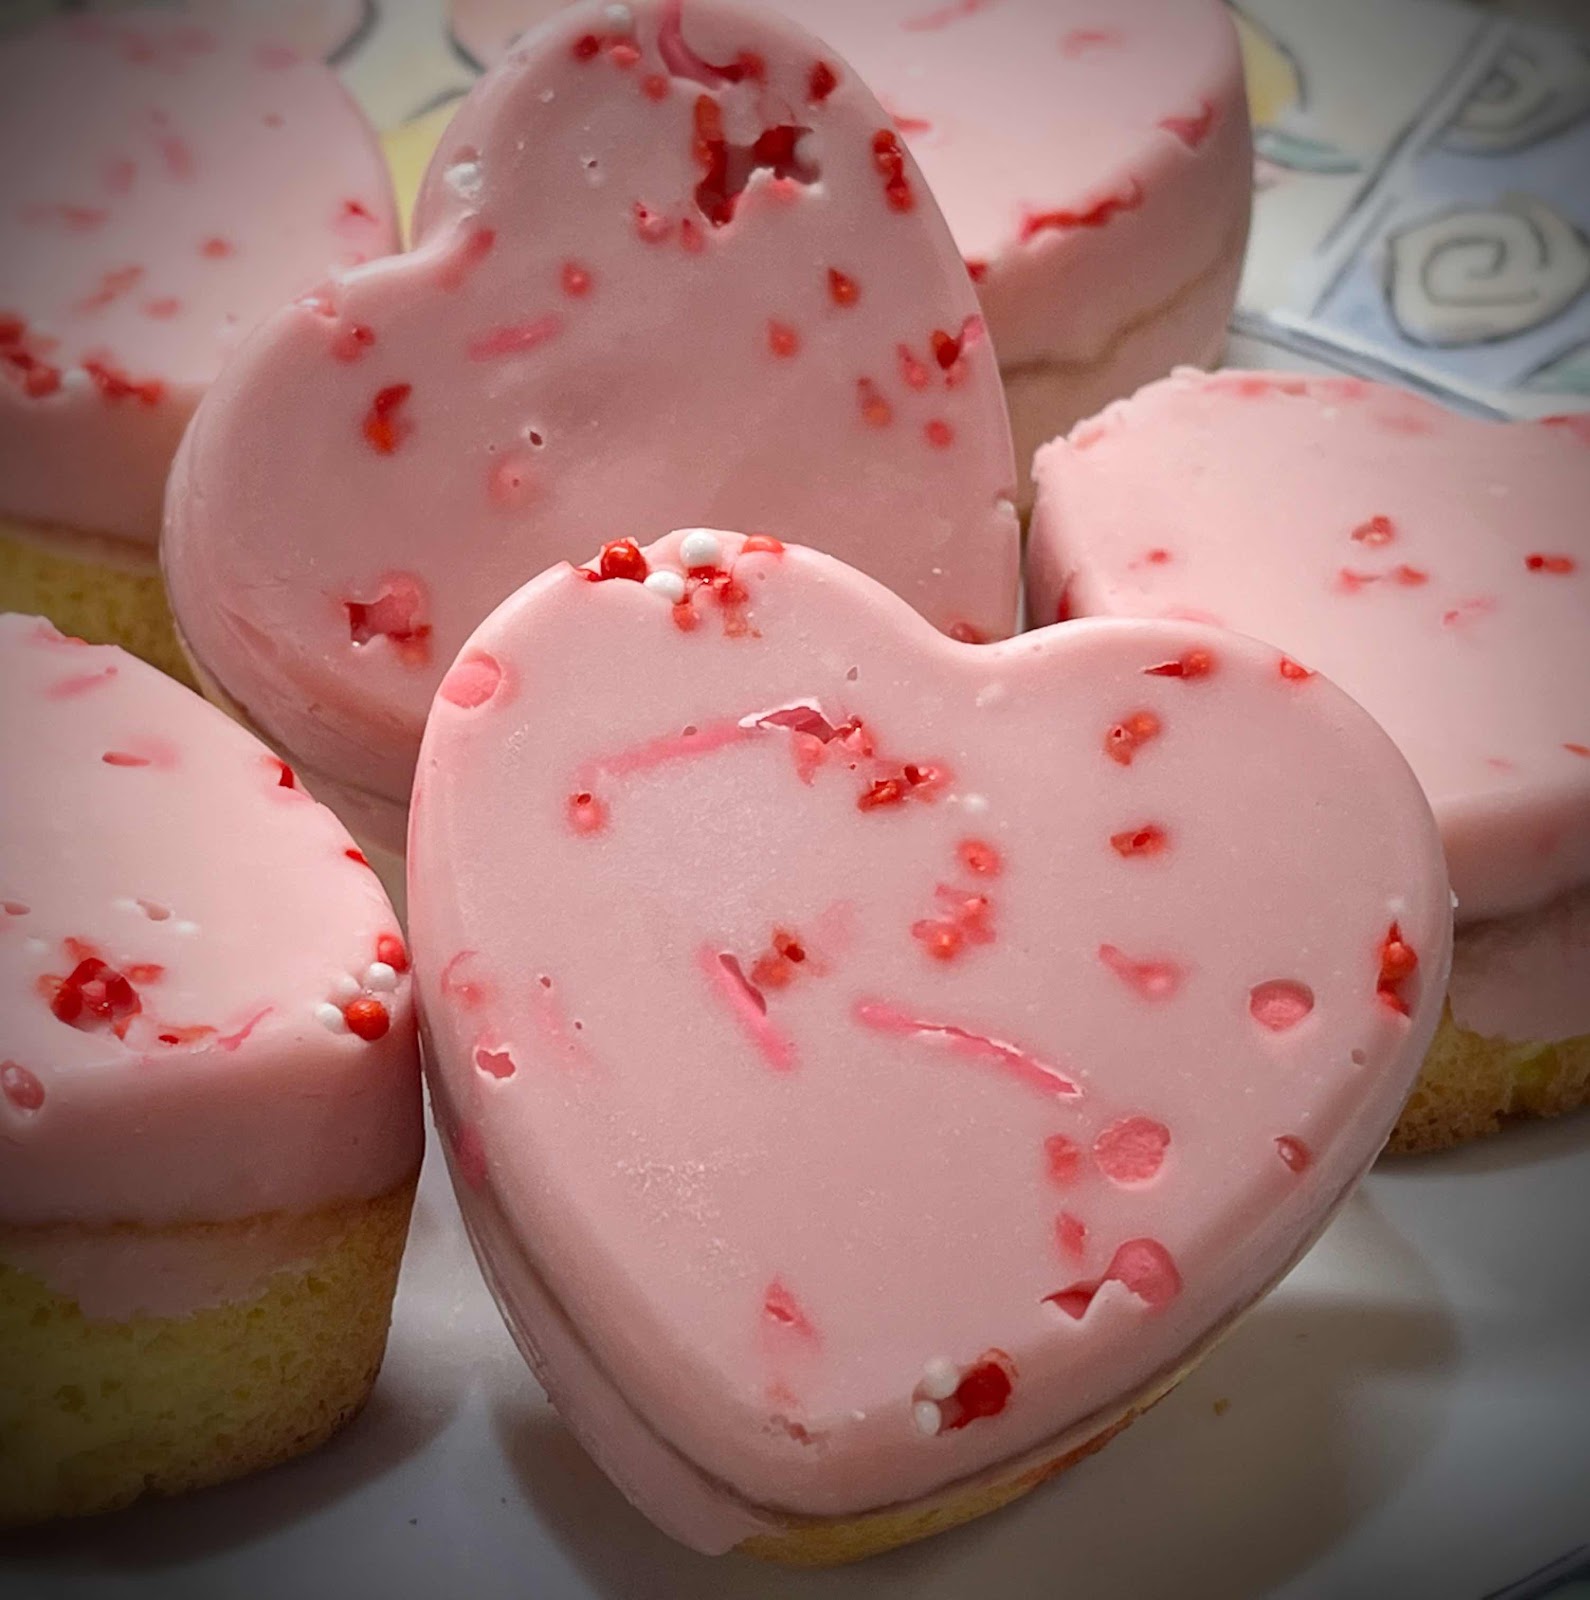
This post describes a technique for making adorable, miniature snack cakes using a decorative, silicone baking mold. You can use any low carb, sugar free cupcake recipe or boxed cake mix. I recently bought the Wilton Winter Snowflake Baking and Candy Mold and Heart Mold and, as you can see, the results are impressive! The warm ganache icing is poured into the mold, topped with a previously baked and cooled cake and then placed in the freezer to set. Later, when the cake is unmolded, the ganache topping is beautifully embossed!! These snack cakes may look fancy, but they’re really quite easy to make. Try this same technique with any silicone baking mold for a healthy, sugar free, low carb dessert that can be customized for any occasion!

Silicone Baking Molds
Keto Decorative Snack Cakes with Ganache Topping
Number of servings depends on your baking mold

Directions:

1. Use any low carb, sugar free cupcake or cake recipe or boxed cake mix to make the mini cakes. Depending on the number of cakes in your mold, the recipe may need to be halved. Since my molds have six snowflakes or hearts, I halved my recipe to make six cakes. Follow the recipe, but be aware the baking time may need to be shortened. Bake until the top springs back when touched and a toothpick comes out clean. Do not make the frosting, if included in the recipe, because it’s not needed. Here are a few links to my favorite recipes I’ve tried in the past and can recommend:


Other Ingredients:
Decorative sprinkles
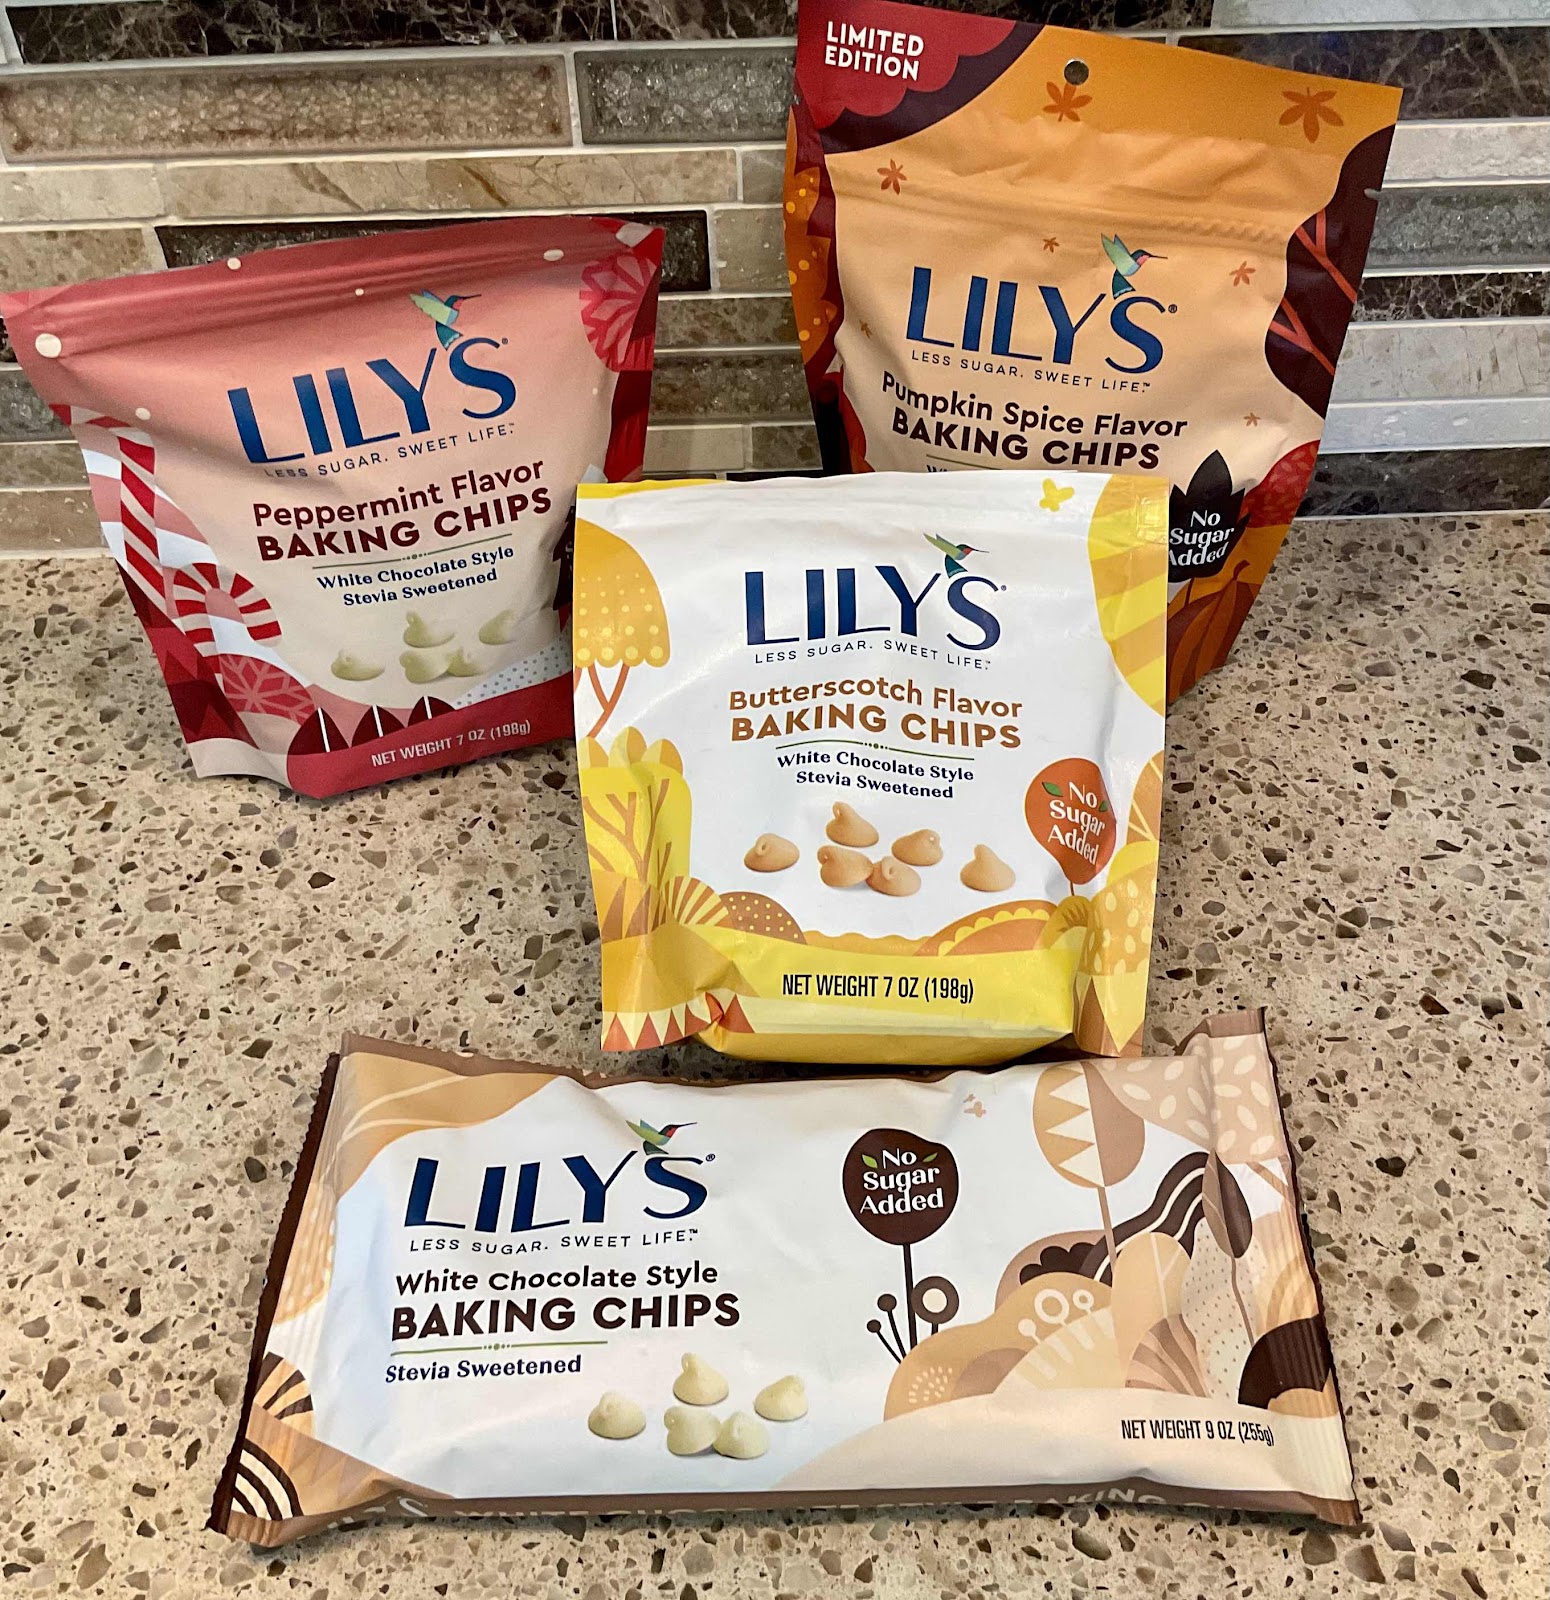
1 cup Lily’s sugar free baking chips (any flavor)
2½ ounces heavy cream (6 tablespoons)

Bake the cakes in your baking mold
2. Spray the silicone baking mold with non-sticking baking spray. Follow the directions in your recipe or on the box to make the cake batter. Spoon batter into each cavity until 3/4 full. Tap the mold on the counter to level out the batter and remove any air bubbles. Bake according to recipe or package directions, until the tops spring back when lightly touched in the center and a toothpick comes out clean. After the cupcakes are baked, take them out of the baking mold and cool completely on a wire rack before proceeding. 

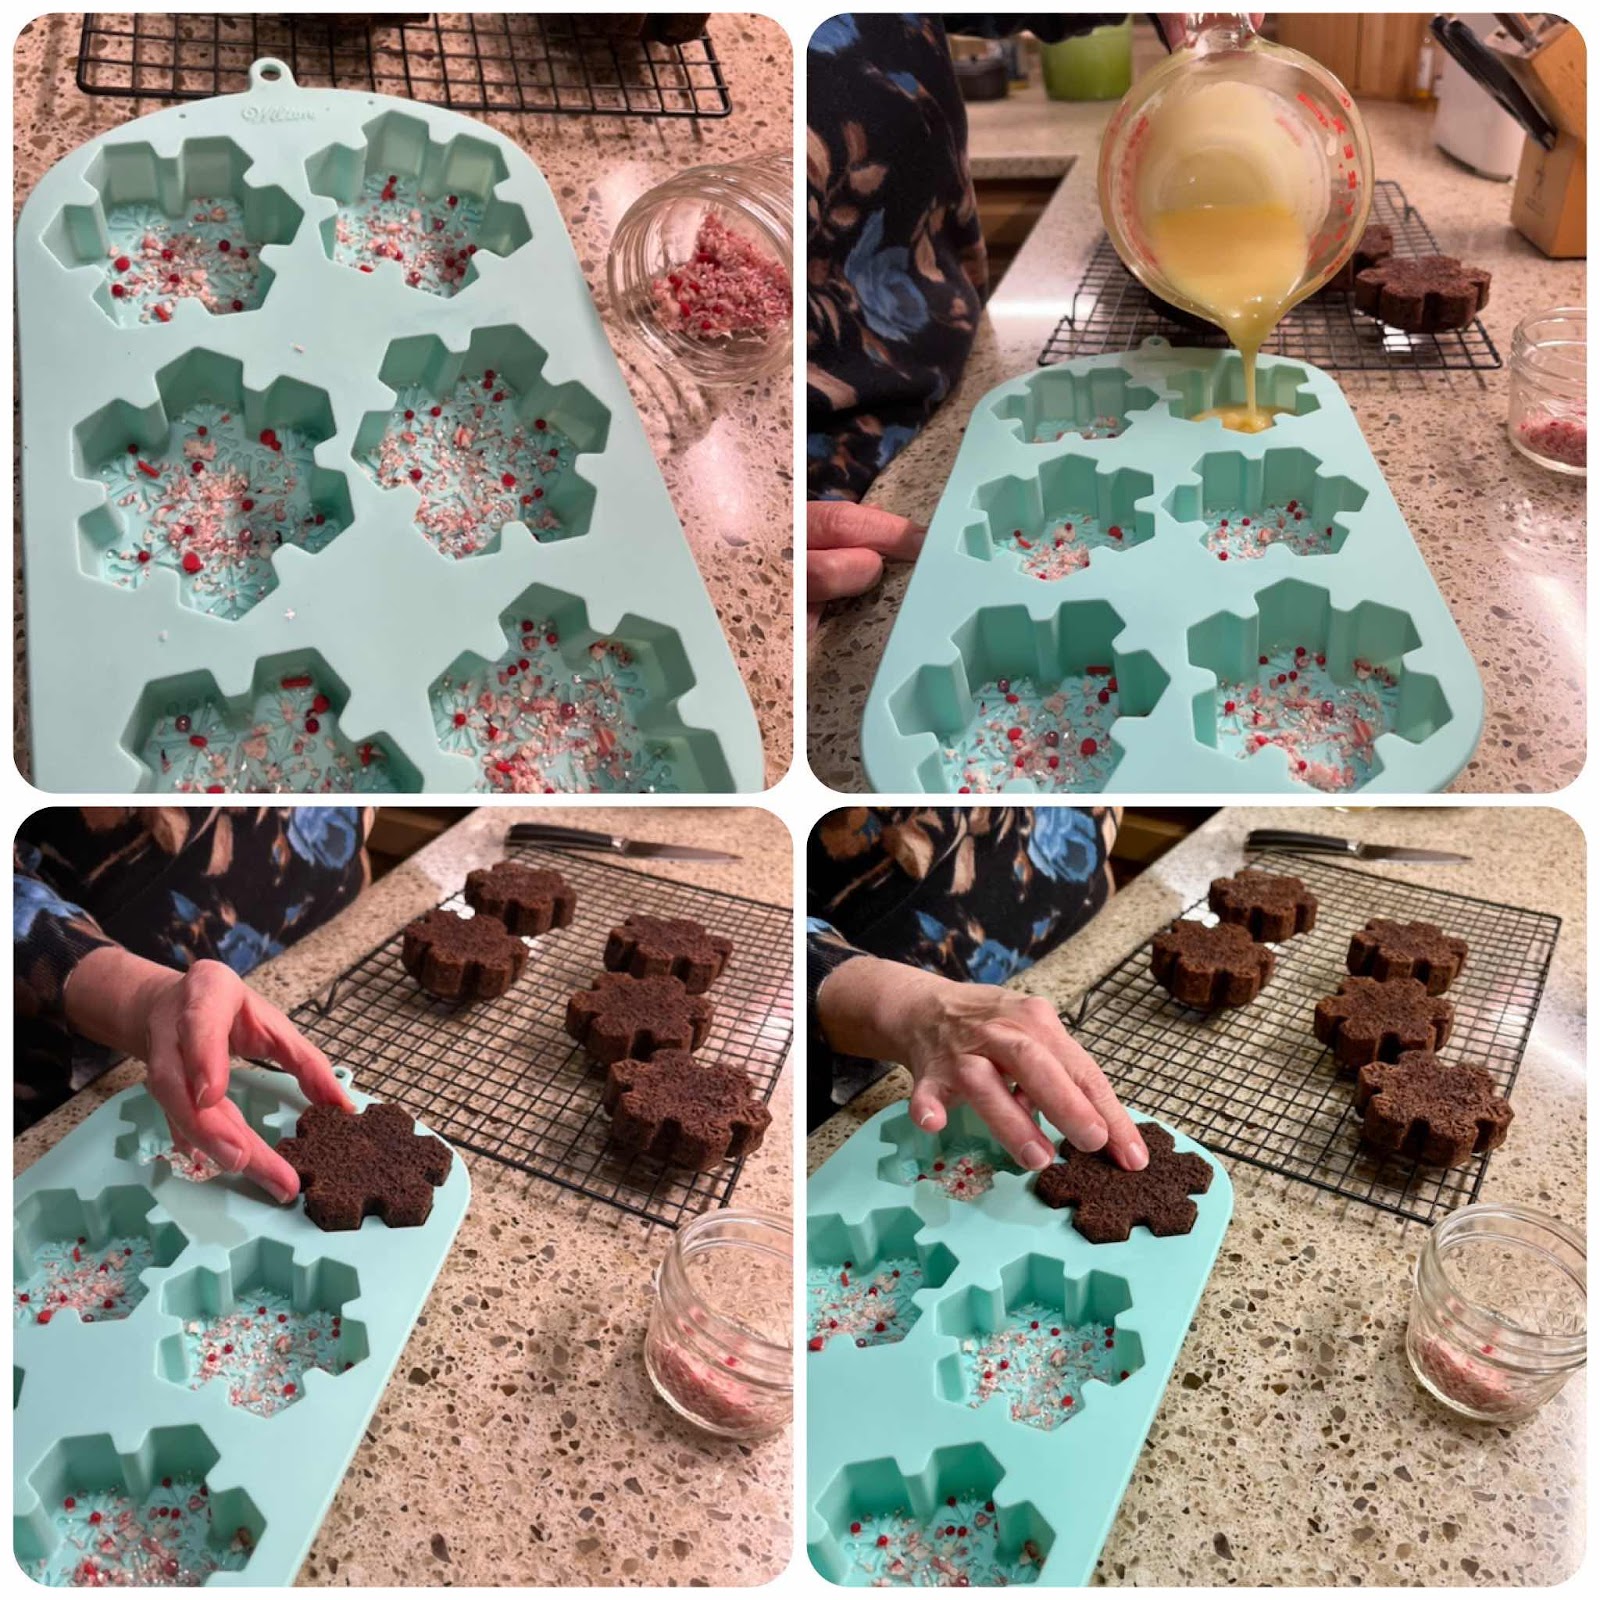
3. Once the cakes are cooled, wash the baking mold to remove any crumbs or oil and dry thoroughly. Spoon 1/8 to 1/4 teaspoon sprinkles into each cavity and set aside. 

Add sprinkles, pour in ganache and top with a cooled cake
4. Make the Chocolate Ganache: In a small saucepan, heat the heavy cream until beginning to simmer. Stir to make sure all of the cream is heated through and bring to a gentle simmer again. Meanwhile, place the sugar free baking chips into a heat-proof bowl. Once the cream is hot, pour over the chocolate chips and allow to sit for 5 minutes. Whisk until smooth. (Note: Lily’s Sugar Free Baking Chips come in a variety of flavors. If you use plain white chocolate, you can add ½ teaspoon of any flavor extract to the ganache to create your own flavor. For example, add caramel extract to make a caramel flavored white chocolate ganache! Also, you can color the ganache with a drop or two of gel food coloring.)

Lily’s Sugar Free Chocolate Baking Chips
5. Carefully, pour the chocolate ganache into the baking mold, covering the sprinkles, until about 1/4 - ½ inch deep (see photo above). Take one of the cooled cakes and insert it into the mold (like a puzzle), on top of the warm ganache, and press down gently. Repeat with the remaining cakes. Place the baking mold on a flat tray or baking sheet and tap on the counter to help settle the warm ganache into the grooves and lines of the mold’s design.

6. Place the mold into the freezer and allow to set for a minimum of 3 hours, and 4 hours is even better. (This is important! You want the chocolate ganache to be completely frozen to make unmolding the cakes easier.)

Heart Cakes
7. Remove from freezer and, while the cakes are frozen, unmold them and place them, cake side down, on a platter. The cakes can be stored in the refrigerator for up to a week. For the best flavor and texture, remove from the refrigerator and allow the cakes to come to room temperature before serving.

Easter Egg Shaped Snack Cake


Flower Shaped Snack Cake

Nutritional Information per cake varies, depending on the recipe used.

Photos and recipe by Kathy Sheehan, copyright 2022
All rights reserved. Please do not duplicate without the author’s permission. 

Monday, September 5, 2022

Keto Peach Melba Loaf Cake

Keto Peach Melba Loaf Cake
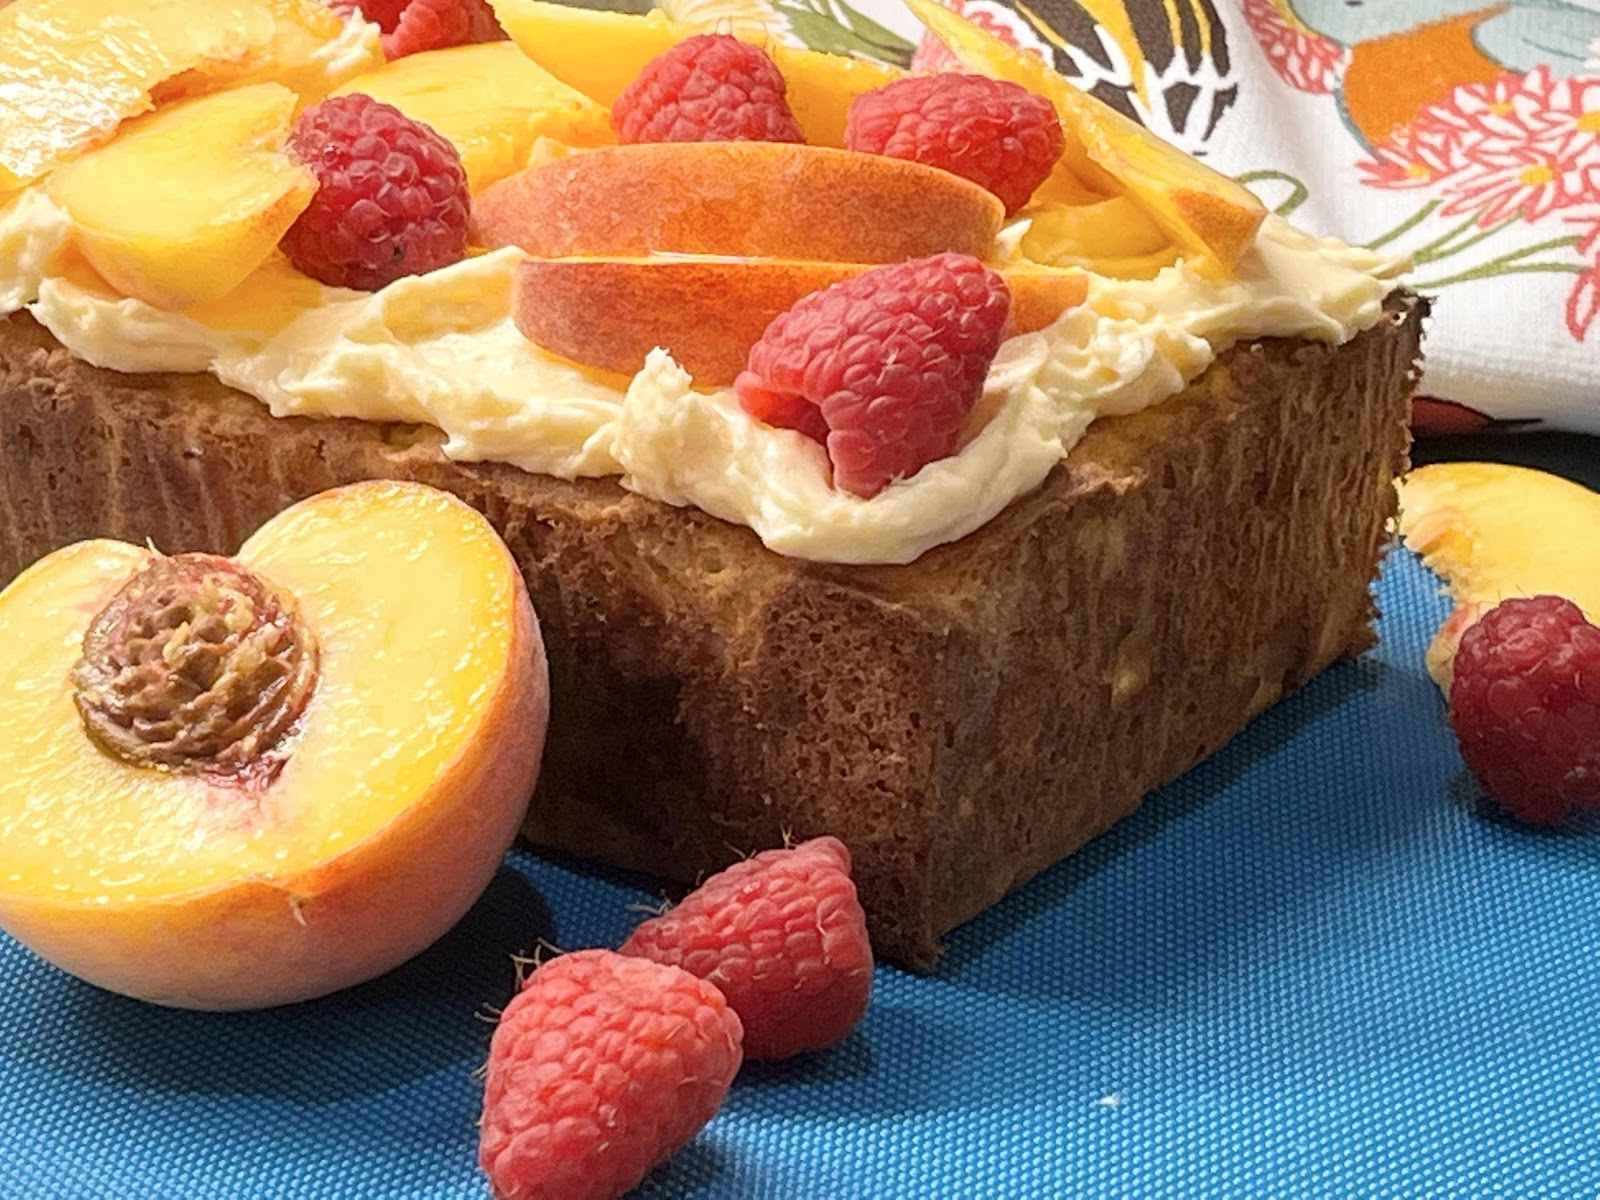
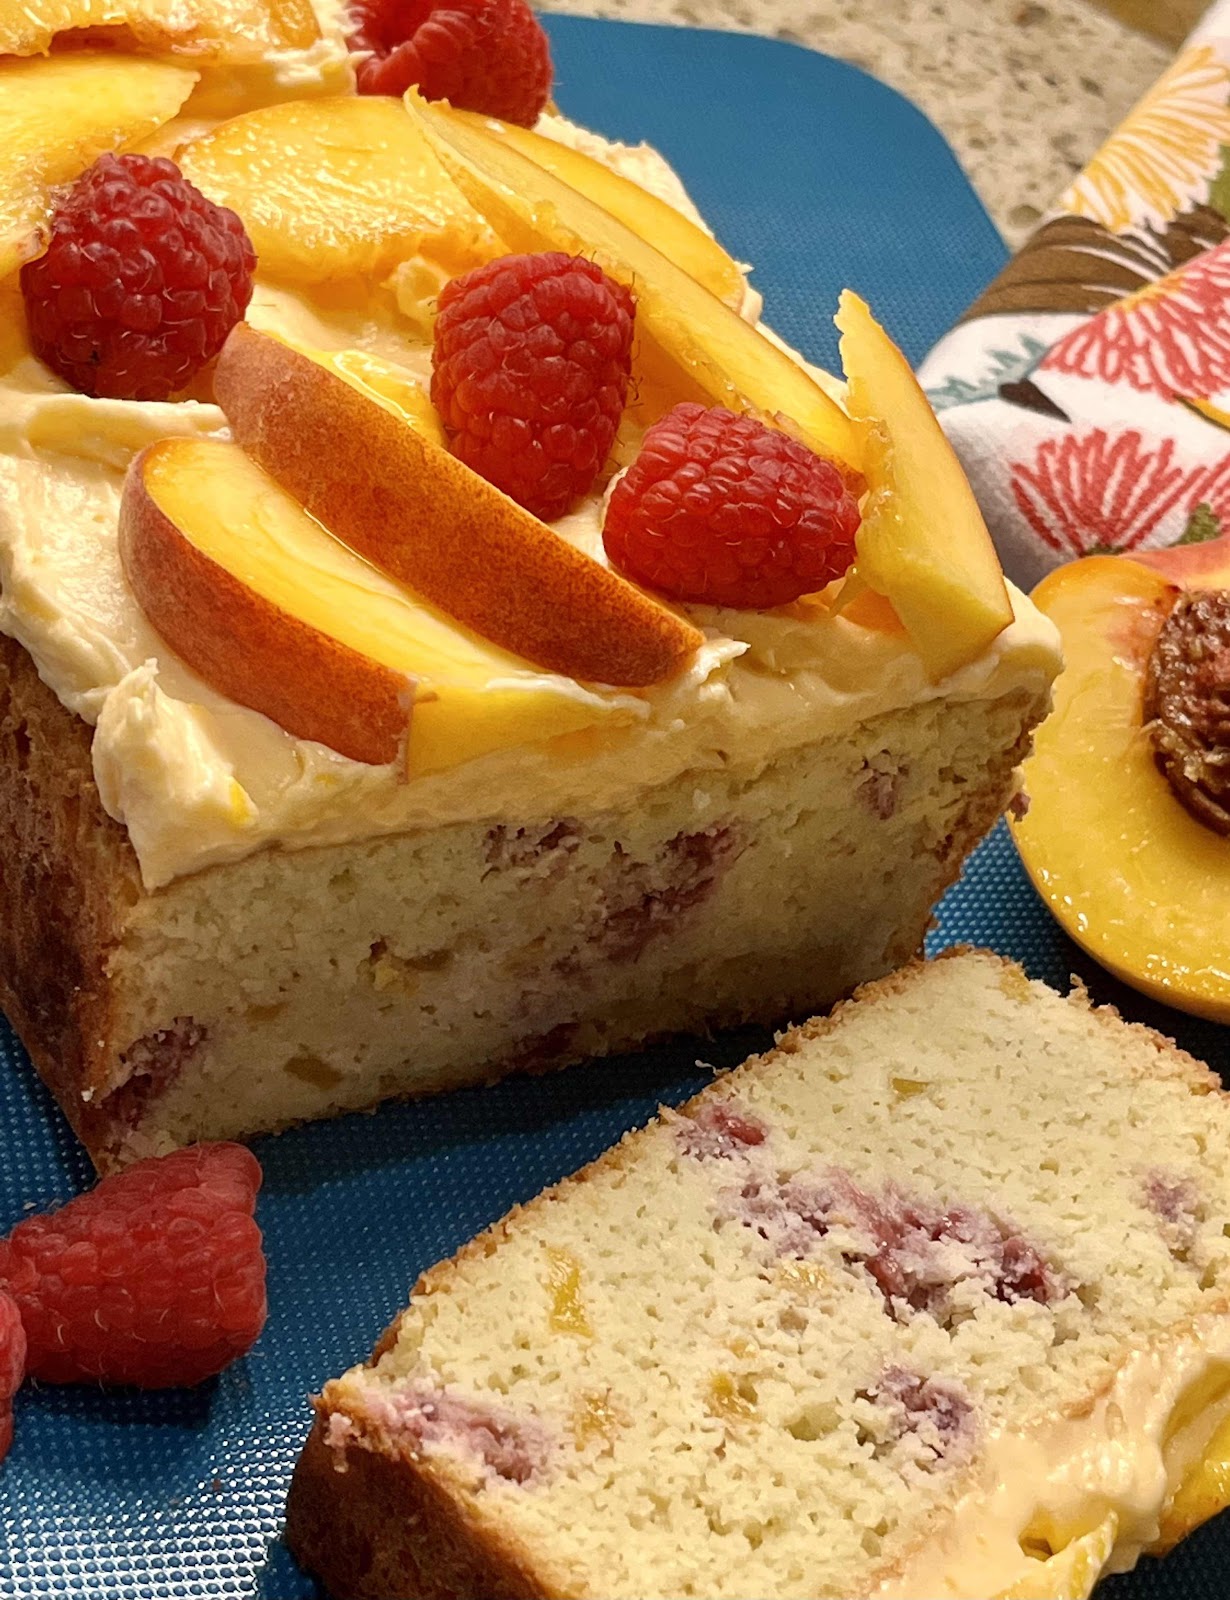
With my birthday coming up, I wanted to create a cake that highlighted my favorite seasonal fruits: peaches and raspberries! This cake is so easy to make and decorate. No need to fuss with layers. It is baked in a loaf pan, topped with a delicious peach buttercream frosting and then decorated with fresh fruit. What a beautiful and delicious way to end the summer!

Keto Peach Melba Loaf Cake
Makes 12 servings

Cake Ingredients:
3/4 cup + 2 tablespoons coconut flour (96 grams)
3/4 cup erythritol-based sweetener (I used LaKanto Monkfruit sweetener)
1/3 cup unflavored whey protein powder 
1 tablespoon baking powder
1/4 teaspoon salt
4 large eggs, room temperature 
4 large egg whites, room temperature 
1/2 cup unsalted butter, melted and cooled a bit
1/4 cup unsweetened coconut milk (or low carb milk of choice)
1 teaspoon vanilla extract
1 teaspoon almond extract
3/4 cup fresh peaches, skins removed and diced
1/3 cup fresh raspberries, cut into small pieces

Peach Buttercream Frosting:
4 tablespoons unsalted butter, room temperature 
1/2 cup erythritol-based confectioners sugar (either LaKanto Powdered or Swerve Confectioners)
4 ounces full-fat cream cheese, softened
2 tablespoons sugar free peach preserves (or apricot, if you can’t find peach)
1-2 drops yellow or orange food coloring (optional)

Garnish:
Raspberries and peach slices to decorate

Directions:

1. Preheat the oven to 325°F. Line the bottom and sides of a large loaf pan with parchment paper and grease the corners or any place not lined with the parchment paper sling.

2. In a medium bowl, whisk or sift together the coconut flour, sweetener, whey protein powder, baking powder and salt. Set aside.

3. In a large bowl with an electric mixer, beat the eggs, egg whites and extracts until light and fluffy. Add the melted butter, coconut milk and beat on medium-low until just incorporated. All at once, add the dry ingredients and beat until well blended. Fold in the chopped peaches and raspberries. The batter will thicken up as the coconut flour absorbs much of the liquid, which is normal.

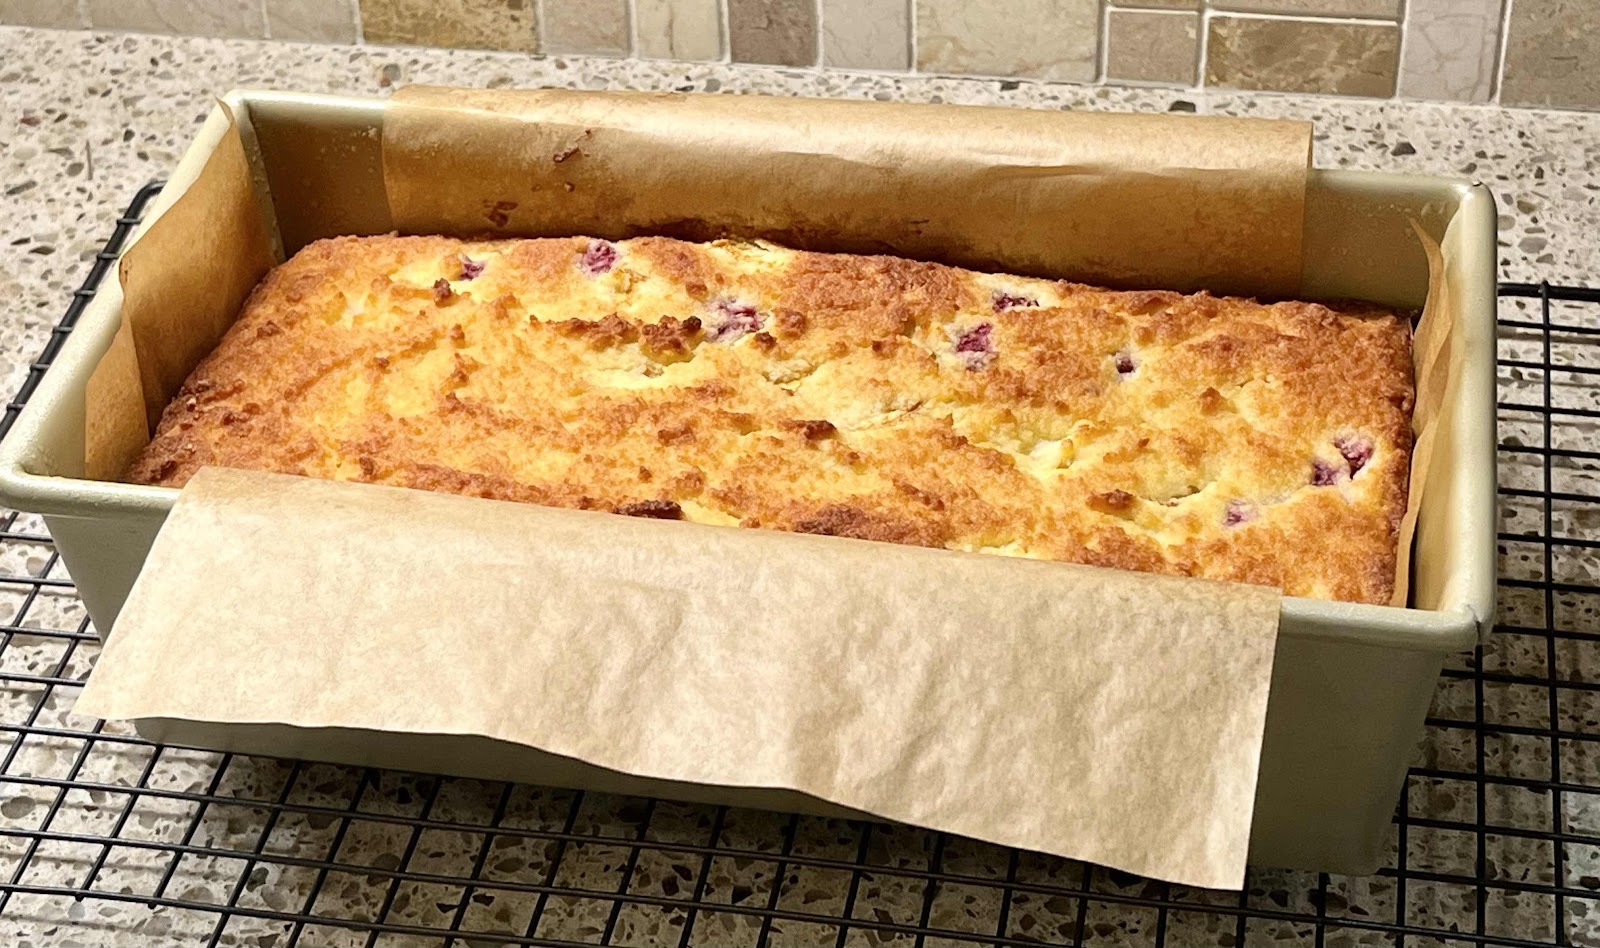
4. Spoon the batter into the prepared loaf pan and spread to the edges and level the top with the back of a spoon or small offset spatula. Bake for 50 to 55 minutes in the preheated oven until top is golden brown and firm to the touch. It’s always a good idea to test the internal temperature of keto cakes and breads to better determine doneness. It should read between 206 to 210°F.

Loaf Cake in pan with parchment paper sling
5. Remove from the oven and let cool for 25 minutes in the pan. If needed, run a sharp knife around the insides of the pan and lift the loaf out using the parchment paper sling. Remove and discard parchment paper. Cool cake completely before frosting.

6. For the icing, put the softened butter in a bowl with the confectioners sugar and beat with an electric mixer until very soft and smooth. Add the softened cream cheese and beat again until thick and pale. Add the peach or apricot preserves for a fruity flavor, if you like, and add a drop or two of yellow or orange food coloring if you want to turn it a pretty peachy color. This frosting can be kept at room temperature for about an hour, or you may chill the icing until it has firmed up a bit or for longer storage. Return to room temperature and stir before spreading over the top of the cake. Decorate the cake with extra fresh raspberries and peach slices. (It’s best to do this just before serving because the peach slices can discolor if added too far in advance.)

Decorate top with fresh fruit
Tips: Ripe peaches work best in this recipe. If your fruit is under ripe, try keeping it in a brown paper bag with a banana to speed up the ripening process. The unfrosted cake keeps for a couple of days in an airtight container. Use a serrated bread knife to slice.

Nutritional Information per serving (1/12 of cake), with frosting, but not counting fruit garnish: 200 calories, 10g carbohydrates (3.9 g dietary fiber, 3.9 g sugars, 3 g sugar alcohols), 17.3 g total fat (10.8 g saturated fat, 0 g trans fat), 104 mg cholesterol, 231 mg sodium, 123 mg calcium, 73 mg potassium, 1 mg iron, 178 IU Vit A, 1 mg Vit C, 7 g protein. Net carbs per serving: 3.1 grams

Photos and recipe by Kathy Sheehan, copyright 2022
All rights reserved. Please do not duplicate without the author’s permission.

Saturday, January 16, 2021

Low Carb Hot Cocoa Cake

Low Carb Hot Cocoa Cake
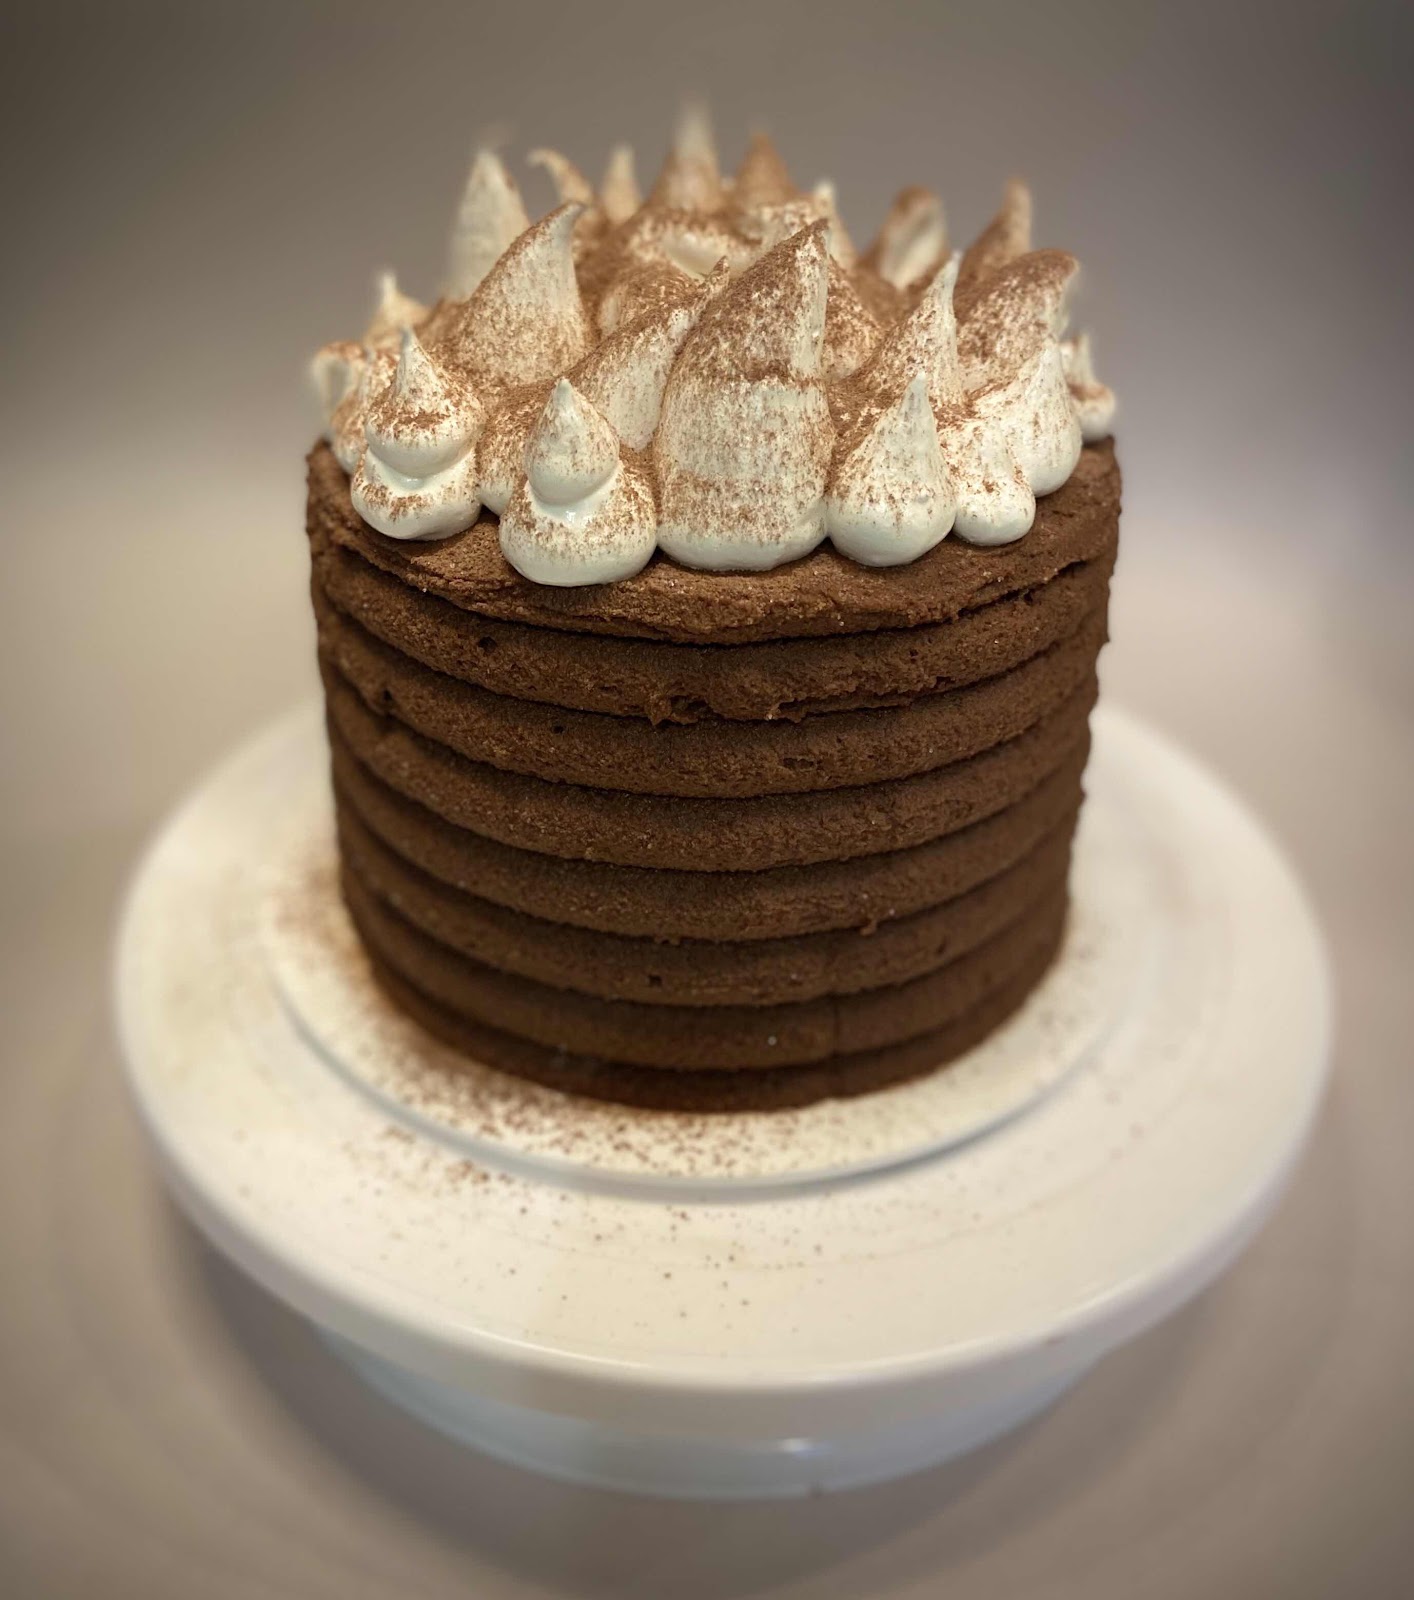
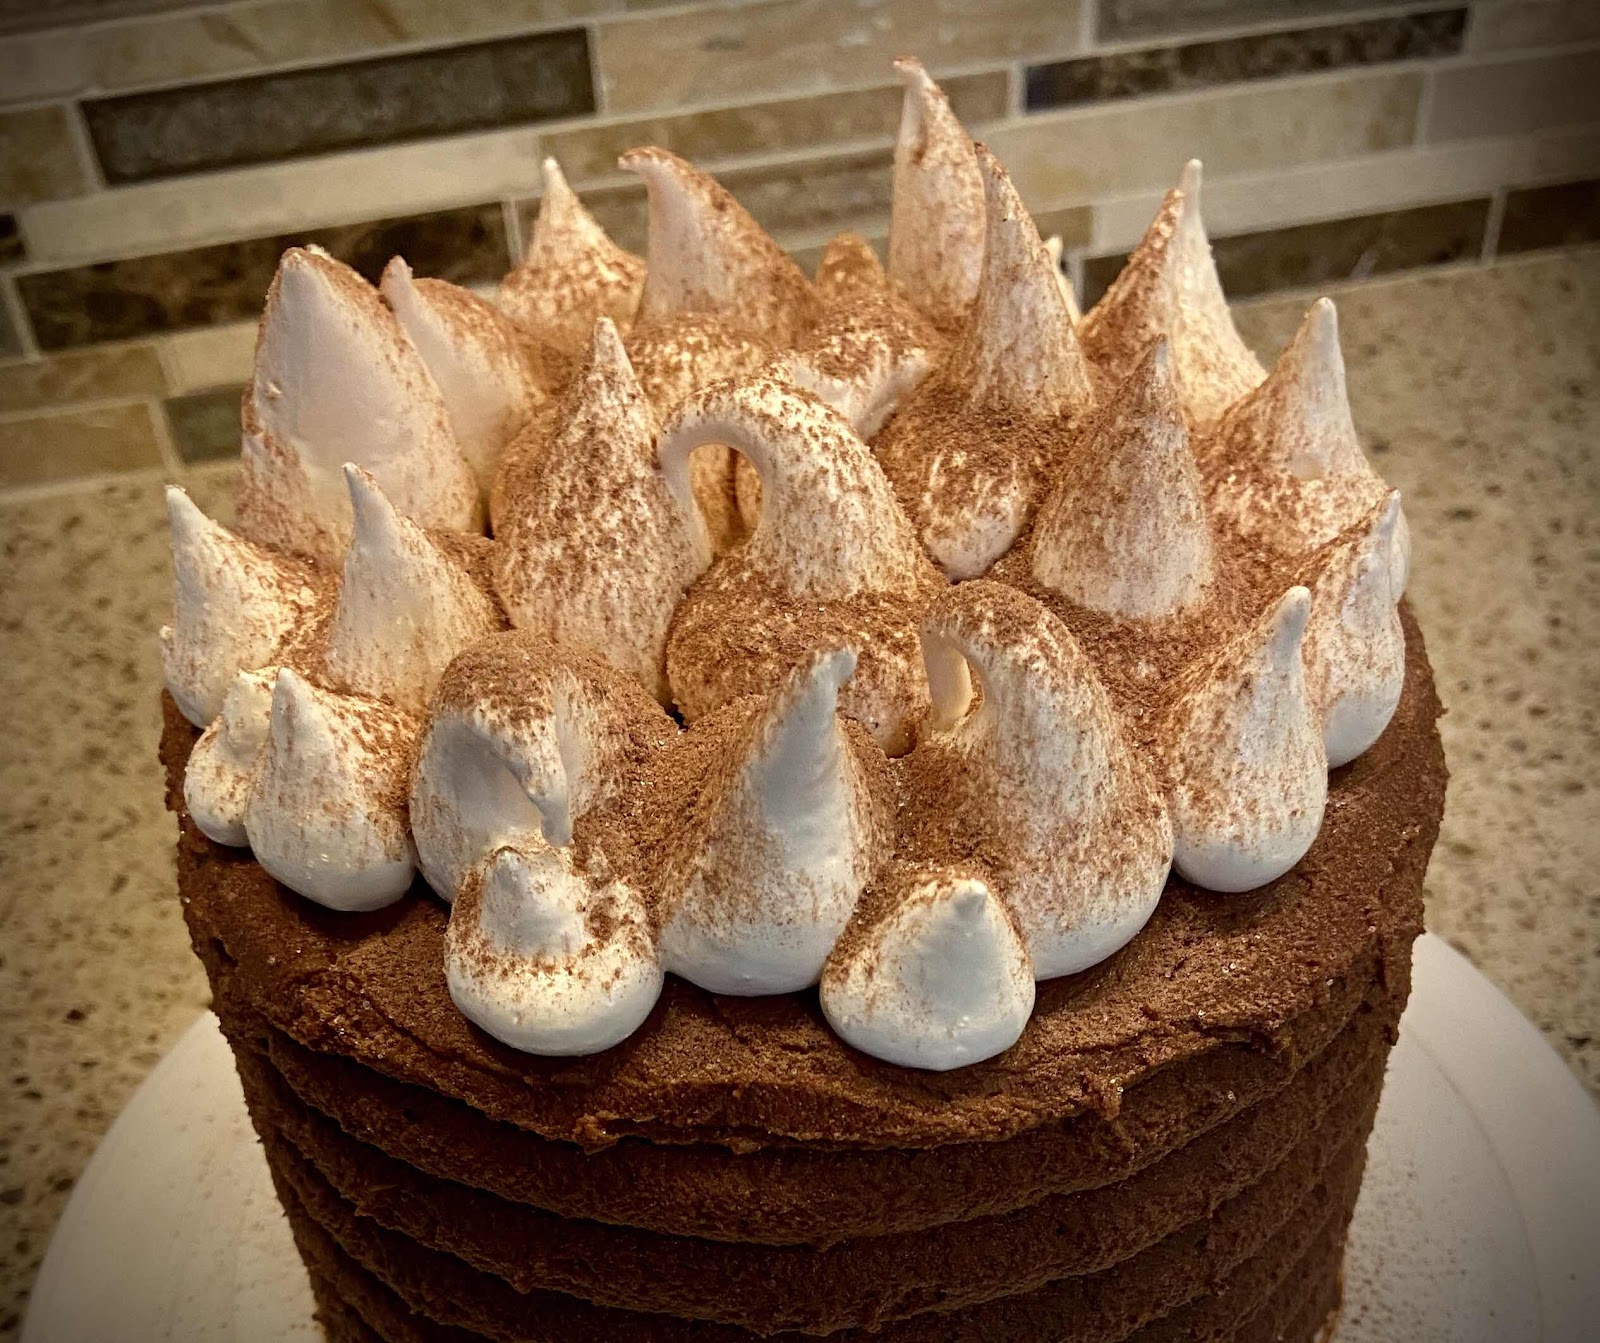
My grown daughter had a birthday last week and I quickly volunteered to make her a birthday cake. I had seen a similar cake online (see the inspiration for this recipe here), but it is made with flour and lots of sugar, and I couldn’t resist making it over using low carb, sugar free and gluten free ingredients. The results were absolutely spectacular! My family has declared that this cake may be the very best to come out of my keto/low carb kitchen, so far! 

The puffs of marshmallow fluff on the top calls for a different sugar alternative called allulose  As much as I dislike purchasing another product to try and fit into my already overstuffed keto baking drawer, in this case, allulose is the best sugar alternative for the job. It won’t recrystalize upon cooling, like erythritol can, leaving the marshmallow puffs soft and pillowy. You can leave them off and still make the best low carb chocolate cake ever!

Low Carb Hot Cocoa Cake
Makes 12 servings

Cake Ingredients:
96 grams coconut flour (about 3/4 cups + 2 tablespoons)
3/4 cup granulated erythritol sweetener 
1/3 cup unsweetened dark cocoa powder
1 tablespoon baking powder
1/2 teaspoon xanthan gum
1/4 teaspoon salt
6 large eggs, room temperature 
1/2 cup unsalted butter, melted and cooled
1/2 cup brewed coffee, cooled to room temperature (regular or decaf is fine)
2 teaspoons vanilla extract (or 1 tsp vanilla and 1 tsp chocolate extract)

Chocolate Frosting:
3 ounces unsweetened 100% cacao baker’s chocolate, chopped
3/4 tablespoon coconut oil (I used refined)
3 tablespoons unsalted butter, room temperature 
6 ounces cream cheese, room temperature 
12 ounces mascarpone cheese, room temperature 
1 cup powdered erythritol sweetener 
3 tablespoons unsweetened cocoa powder 
3/4 teaspoon vanilla extract 
3-4 tablespoons heavy cream, room temperature (or enough to reach desired spreading consistency)

Whipped Marshmallow Topping:
3/4 cup allulose sweetener 
1/3 cup water
1 large egg white
1/2 teaspoon vanilla extract 
A tiny pinch of salt

To Make the Cake:

1. Preheat your oven to 325 degrees Fahrenheit. Prepare two 8” or three 6” baking pans by spraying with non-stick cooking spray and line the bottoms with parchment paper. Spray the parchment paper; set aside.

2. Whisk together the first six ingredients (coconut flour through salt) in a medium bowl. (If you’re not able to weight the coconut flour, use a very light scooping and leveling method to measure.) Set aside.

3. In a large bowl and with an electric mixer, beat the eggs until light, lemon yellow in color and the volume has increased, about 3-5 minutes. Try to beat as much air as possible into the eggs. (If you have standing mixer, you can use a whisk attachment to make this easier, but remove it and replace with your paddle attachment before adding the remaining ingredients, so as not to deflate the eggs too much.) Add the melted and cooled butter, coffee and extract, mixing on low only to combine.

4. Add the dry ingredients all at once and mix on low to medium just until the dry ingredients are incorporated. Divide the batter evenly between the prepared baking pans and spread to the edges and level the batter using an offset spatula or back of a spoon. Bake for 30 minutes or until the tops are just firm to the touch and a toothpick in the center comes out clean. (If using 6-inch pans, check after 25 minutes.)

5. Remove from the oven and allow the cake to cool in their pans for about 10-15 minutes before turning them out on a wire rack to cool completely.

To Make the Chocolate Frosting:

6. In a medium microwave-safe bowl, combine the chopped baking chocolate and coconut oil. Microwave in 15 second intervals to melt the chocolate. Allow to sit for a few minutes before stirring until smooth. (You may also place the chocolate in a heat-proof bowl over barely simmering water to melt.) Set aside to cool to lukewarm.

7. In a large bowl with an electric mixer, beat the butter, cream cheese and mascarpone cheese together until well combined and no lumps remain. (I used my paddle attachment to do this.) Beat in the powdered erythritol and cocoa powder until blended. Add the melted chocolate and extract and beat until smooth. Add 1 tablespoon of the heavy cream at a time until the desired spreading consistency is reached.

To Make the Marshmallow Topping: (This can be made a day ahead and refrigerated. Bring to room temperature before decorating the cake.)

8. To a medium saucepan, add the allulose and water and very gently stir to combine. (The allulose will not dissolve at this point.) If any allulose has gotten on the sides of the pan, use a wet pastry brush to wipe down the sides.

9. Over medium-low heat, bring the allulose and water mixture up to 260 degrees Fahrenheit. DO NOT STIR. Bring the mixture up to temperature slowly, it may take 15 minutes or so. If you see it starting to turn brown, reduce the temperature, you don’t want the allulose to burn. 

10. Using an electric or standing mixer, whip the egg white with a tiny pinch of salt until foamy and soft peaks form. Slowly, and very carefully, while the mixer is on low, pour the hot allulose mixture into the egg white. (This mixture is VERY HOT, so use a potholder and stand away from the mixing bowl as you pour so the hot liquid doesn’t splash on you.) 

11. Turn the mixer to high, add the vanilla extract and whip for 5-6 minutes or until the marshmallow fluff is glossy and holds a stiff peak.

Dollop Marshmallow on top
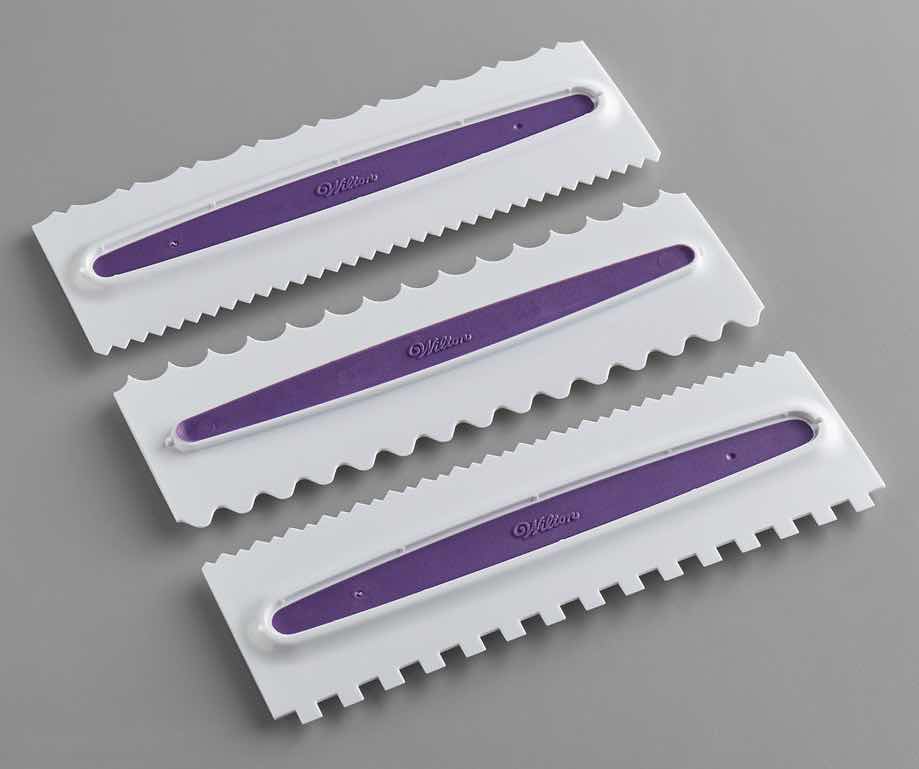
12. Assemble your cake by placing one layer of your cooled cake on a plate, spread with a generous amount of chocolate frosting, top with the second layer and then spread frosting on the top and sides. (To achieve the banded look in the photo, I used a design scraping tool to create a scalloped edge, but this is optional. See photo below of the tool set by Wilton for adding texture to cakes.) Finally, dollop mounds of the marshmallow on the top, creating puffs. You can do this with a large spoon or place the fluff into a piping or gallon plastic bag and snip off the end and pipe the marshmallow. Dust with cocoa powder.

Wilton Design Tools
13. This cake should be stored in the refrigerator. Remove and allow the cake to sit at room temperature for 30-45 minutes before slicing and serving.

Nutritional Information per serving (1/12th of cake): 333 calories, 9.3 g carbohydrate (4.6 g dietary fiber, 1.2 g sugars), 29.3 g total fat (18.4 g saturated fat, 0 g trans fat), 152 mg cholesterol, 249 mg sodium, 111.4 mg calcium, 78 mg potassium, 2 mg iron, 170 IU Vit A, 8.4 g protein. Net carbs per serving: 4.7 grams

Cake photos and recipe by Kathy Sheehan, copyright 2021
All rights reserved. Please do not duplicate without the author’s permission. 
Tuesday, August 18, 2020

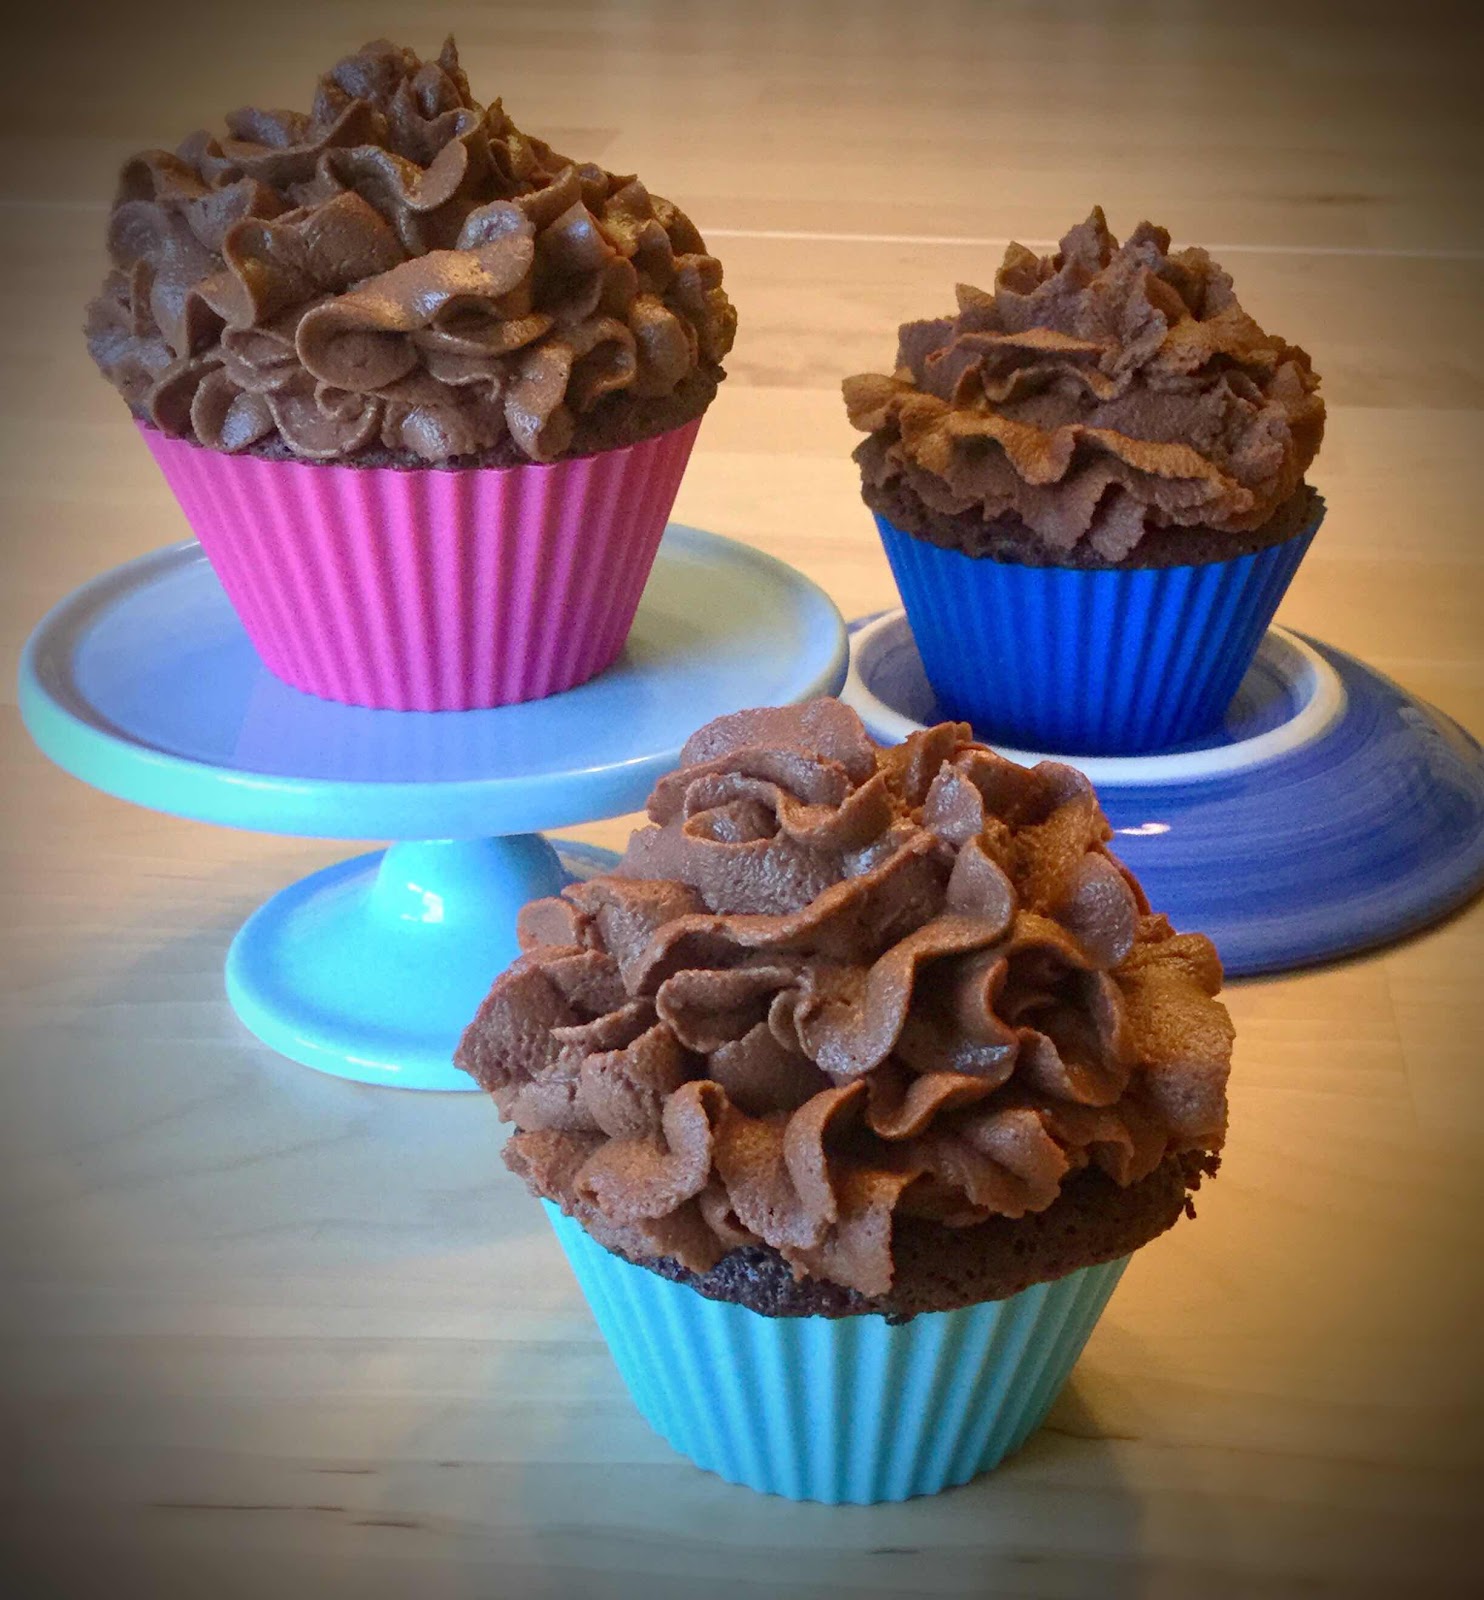
40 Second Keto Dark Chocolate Cupcakes

40 second Dark Chocolate Cupcakes
Here’s another quick and easy cupcake recipe that you “bake” in the microwave for 40 seconds! This recipe is a favorite of my chocolate-loving husband. He freely admits that these cupcakes are as rich, decadent and fudgy as a traditional cupcake. He doesn’t miss the sugar at all and neither will you! This recipe yields three cupcakes, so it’s perfect when you want to satisfy a chocolate craving, but don’t want too many extras hanging around to tempt you.

40 Second Keto Dark Chocolate Cupcakes
Makes 3 cupcakes

Cupcakes:
2 tablespoons almond or pecan flour
2 teaspoons coconut flour
1 tablespoon unsweetened dark cocoa powder 
1/4 teaspoon instant coffee powder (optional, but enhances chocolate flavor)
1-1/2 tablespoons granulated erythritol sweetener 
A pinch of salt
1/2 teaspoon baking powder
1 tablespoon butter, melted
1 large egg
5 drops dark chocolate stevia or monkfruit extract, or to taste
1/4 teaspoon vanilla extract
1 tablespoon unsweetened almond or coconut milk (or strong brewed coffee for a mocha flavor)

Dark Chocolate Frosting:
1 oz. unsweetened baker’s chocolate, chopped
3/4 teaspoon refined coconut oil
1 tablespoon unsalted butter, room temperature 
2 oz. cream cheese, room temperature 
4 oz. mascarpone cheese, room temperature 
1/3 cup powdered erythritol sweetener 
1 tablespoon unsweetened cocoa powder 
1/4 teaspoon vanilla extract
1-2 tablespoons heavy cream (or as needed to reach the desired consistency)

1. In a small bowl, combine the almond or pecan flour, coconut flour, cocoa powder, instant coffee powder, granulated sweetener, salt and baking powder. Whisk to combine and remove any lumps.

2. Add the melted butter, egg, stevia or monkfruit drops, vanilla extract and milk or coffee; whisk until well combined.

3. Evenly divide the batter between three silicone muffin cups and microwave on high for 40 seconds or until the cakes have risen, look dry and spring back when touched near the center. (The time needed for cooking may vary, depending on the wattage of your microwave.) Alternatively, you can bake them in a 325 degree Fahrenheit oven for 15-18 minutes. Move to a wire rack and cool completely.

4. To make the frosting, in a medium, microwave-safe bowl, combine the chopped baker’s chocolate and coconut oil. Microwave on high in 15 second intervals to melt the chocolate. Let it sit for a minute or two and then stir until smooth. (If you would prefer, you can melt the chocolate and coconut oil in a heat proof bowl over barely simmering water.) Set melted chocolate aside to cool to lukewarm. 

5. In a large bowl, using an electric mixer, whip the butter, cream cheese and mascarpone cheese together until smooth. Beat in the powdered sweetener and cocoa powder, scraping the sides of the bowl as needed.

6. Add the melted chocolate and vanilla extract and beat until combined. Add the heavy cream, one tablespoon at a time, until a spreadable consistency is achieved. (Note: This icing recipe makes enough to frost 6 cupcakes, so more than you will need. Store any leftovers in an airtight container in the refrigerator for up to a week.)

Microwave Keto Dark Chocolate Cupcake
Nutritional Information per one cupcake with 3 Tbsp frosting: 234 calories, 6.5 g carbohydrate (2.2 g dietary fiber, 0.7 g sugars, 2.1 g sugar alcohols), 21.5 g total fat (12.1 g saturated fat, 0 g trans fat), 102 mg cholesterol, 127 mg sodium, 93.8 mg calcium, 95 mg potassium, 1 mg iron, 106 ug Vit A, 5.9 g protein. Net carbs per serving: 4.3 grams

Photos and recipe by Kathy Sheehan, copyright 2020
All rights reserved. Please do not duplicate without the author’s permission. 
Saturday, June 20, 2020

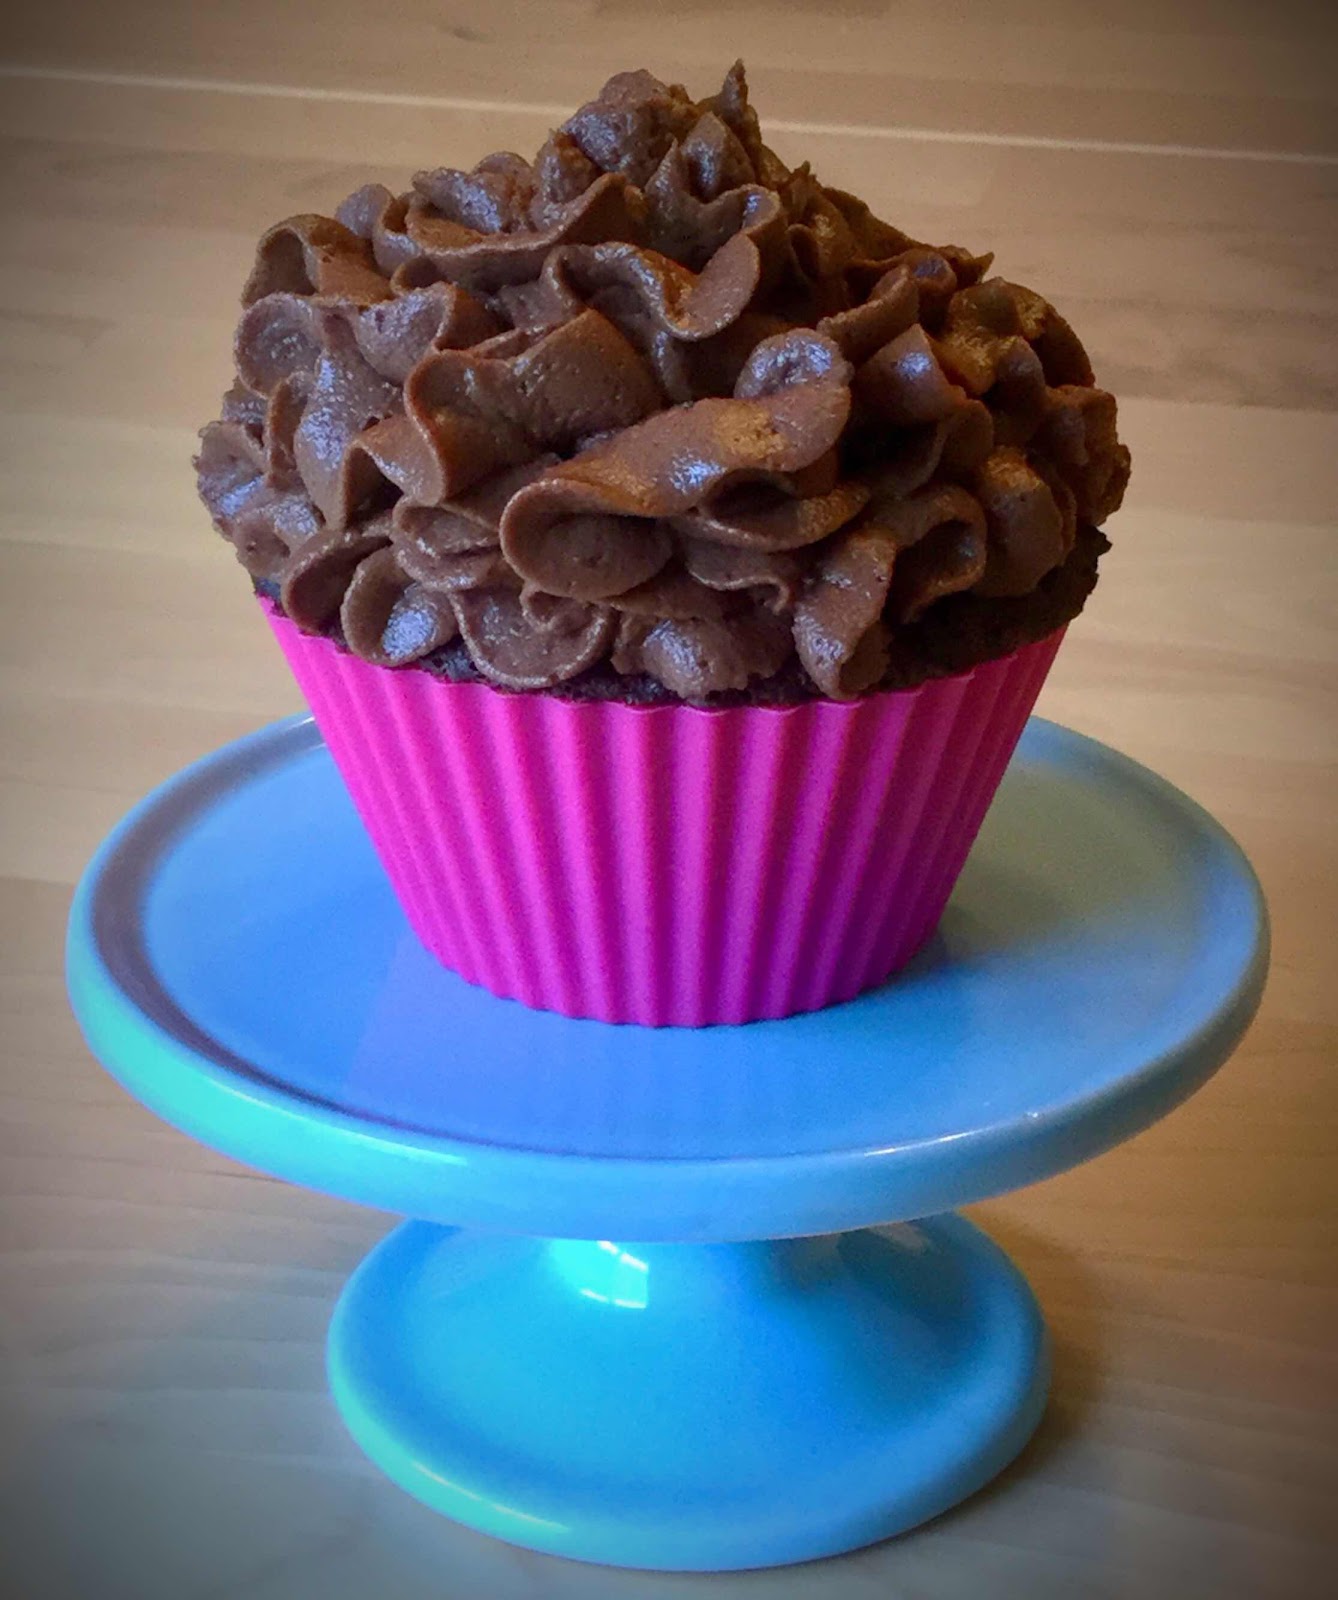
The Best Low Carb Chocolate Fudge Frosting

Best Low Carb Chocolate Fudge Frosting
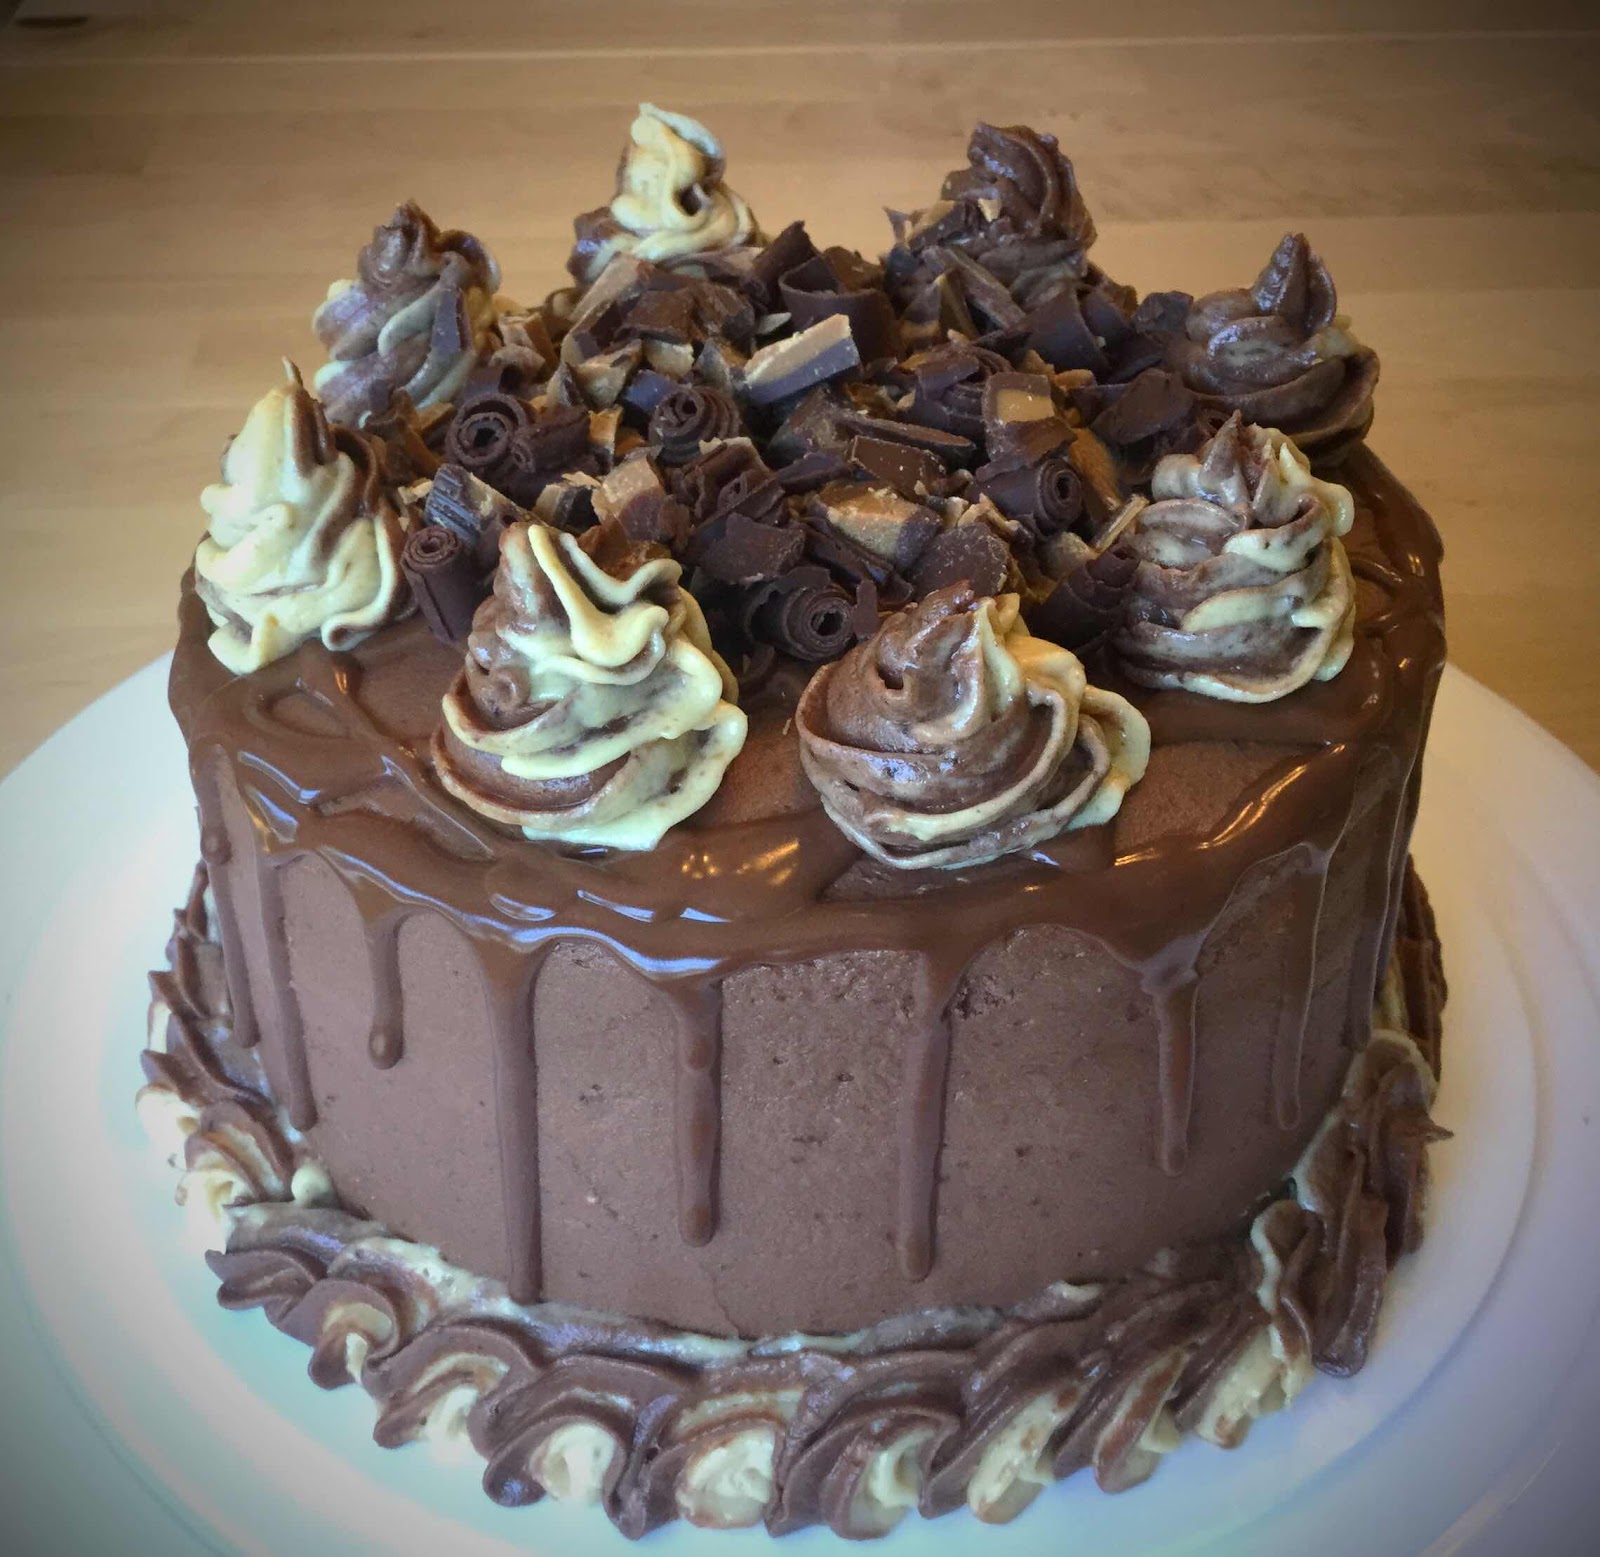
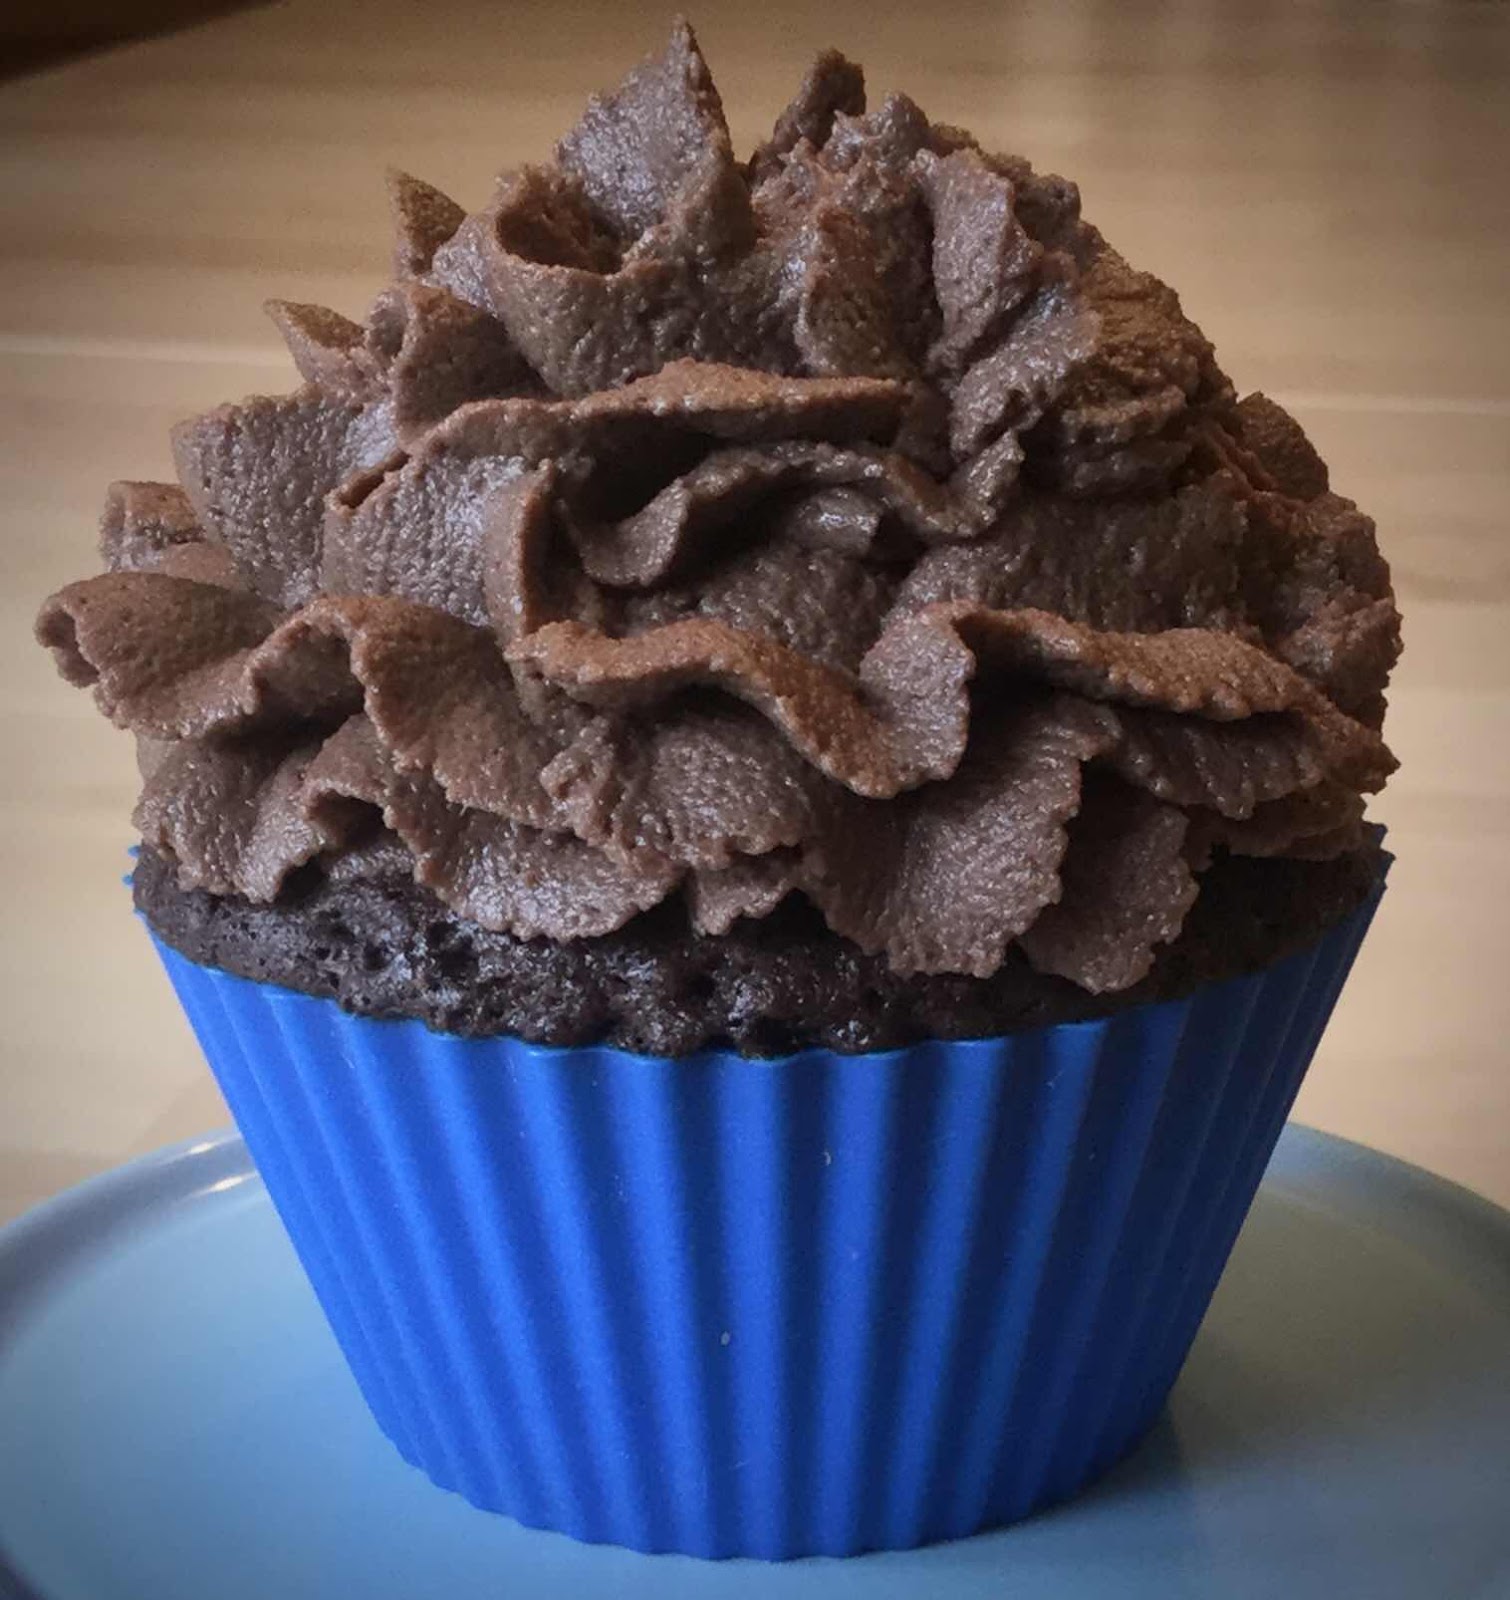
Lately I’ve enjoyed learning about cake decorating. I bought an inexpensive kit that includes a lot of fun decorating piping tips and a cake turntable, so now my keto cakes can look more professional. My first few attempts have turned out remarkably well! The biggest problem about making low carb cakes or cupcakes is that it can be difficult to get the frosting just right. I’ve tried many recipes, but have finally come up with the very best! It has the taste and consistency of a true buttercream, but only 4 carbs (3 net carbs) for a generous 1/4 cup serving. This chocolate frosting is fudgy and so rich and delicious that my non-keto family really cannot tell this is sugar free. My husband is a serious chocoholic and gave this frosting his enthusiastic nod of approval when I made him this Chocolate Peanut Butter Cake for Father’s Day.

The Best Low Carb Chocolate Fudge Frosting
Makes about 12 servings

2 ounces unsweetened baker’s chocolate, chopped
1/2 tablespoon refined coconut oil
2 tablespoons unsalted butter, room temperature
4 ounces cream cheese, softened 
8 ounces mascarpone cheese, room temperature 
2/3 cup powdered erythritol sweetener (LaKanto or Swerve)
2 tablespoons unsweetened cocoa powder
1/2 teaspoon vanilla extract
2-3 tablespoons heavy cream, room temperature (or as needed to reach the desired consistency)

1. Place the chopped baker’s chocolate and coconut oil in a microwaveable bowl. Microwave on high in 15-20 second increments until chocolate has melted. Stir until smooth. Set aside to cool to lukewarm.

2. In a large bowl and using an electric mixer, whip together the butter, cream cheese and mascarpone cheese until combined and fluffy. Add the sweetener and cocoa powder and continue beating until well combined. You may need to scrap down the sides of the bowl occasionally. 

3. Add the vanilla extract and melted chocolate and beat again to combine. Add one tablespoon of the heavy cream at a time and beat until your frosting reaches the desired, spreadable consistency. (If you’re using piping tips, make sure your frosting isn’t too stiff or thick because it may be difficult to pipe it through the tip.)

4. This recipe makes enough frosting for 16-18 cupcakes, a single layer 9” round or 13”x9” sheet cake or a double layer 6” cake. The frosting can be refrigerated but, for best results, allow to come to room temperature before frosting your cake.

Low Carb Chocolate Fudge Frosting
Nutritional Information per 1/4 cup: 186 calories, 3.7 g carbohydrates (1 g dietary fiber, 0.4 g sugars, 1 g sugar alcohols), 17.8 g total fat (11.5 g saturated fat, 0 g trans fat), 39 mg cholesterol, 47 mg sodium, 7.3 mg calcium, 1 mg potassium, 58 ug Vit A, 3.2 g protein. Net carbs per serving: 2.7 grams

Recipe and photos by Kathy Sheehan, copyright 2020
All rights reserved. Please do not duplicate without the author’s permission. 
Saturday, March 21, 2020

Chocolate Peanut Butter Chaffle Cake

Chocolate Peanut Butter Chaffle Cake
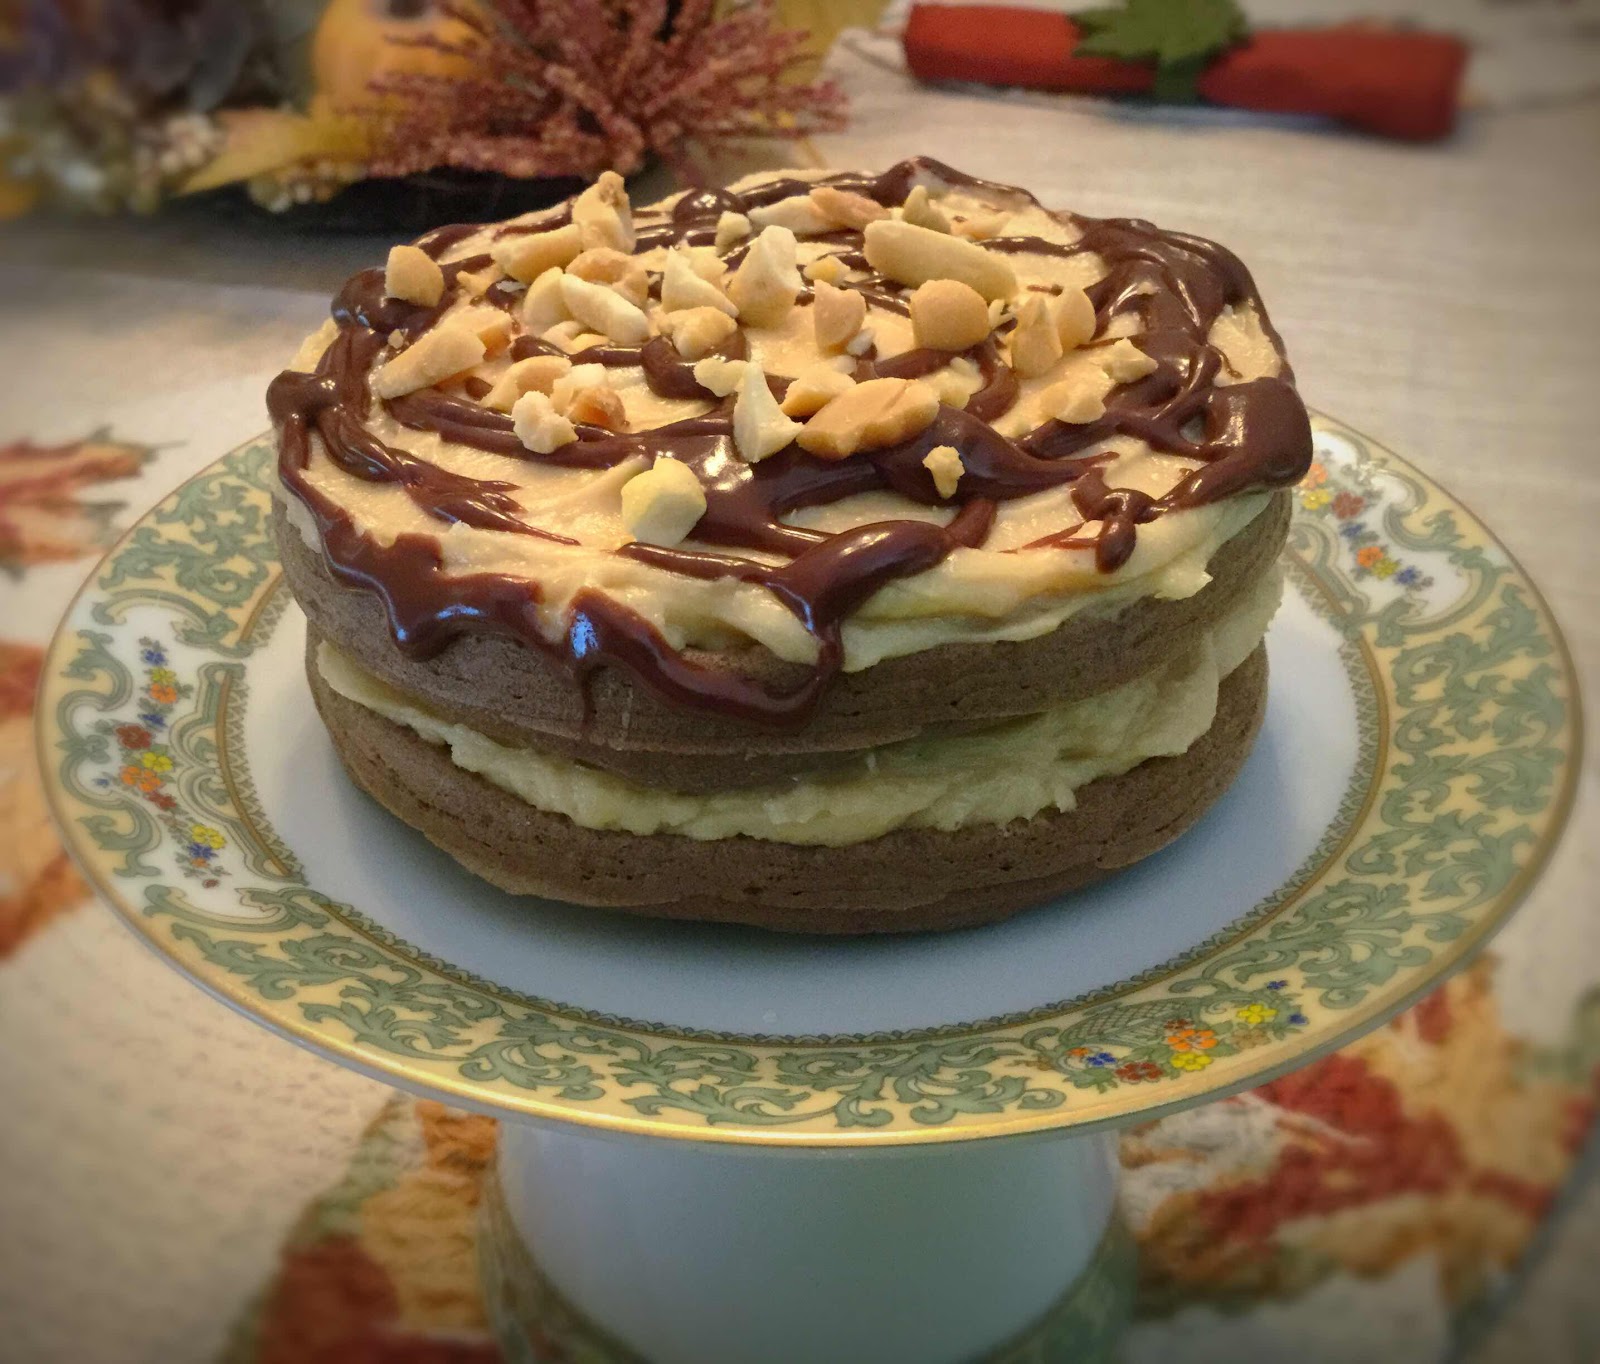
I love mini desserts and chaffles make it so easy to make a luscious, decadent little cake, without having a lot of leftovers to worry about. This particular cake includes my favorite flavors, and probably yours too: chocolate and peanut butter! You can’t go wrong with this little gem of a dessert for a special occasion or just because....

Chocolate Peanut Butter Chaffle Cake
Makes 1 mini cake (2 servings)

Chaffles:
1 teaspoon coconut flour
1 teaspoon unsweetened dark cocoa powder
1/8 teaspoon baking powder
1 tablespoon granulated erythritol sweetener
1 large egg, beaten (or 2 egg whites)
2 teaspoons creamy peanut butter, no sugar added
1 teaspoon water
1/8 teaspoon chocolate or vanilla extract
1 drop of peanut butter flavoring (optional)

Peanut Butter Frosting:
1 ounce cream cheese, softened
1 1/2 tablespoons creamy peanut butter, no sugar added and at room temperature 
1 tablespoon butter, softened 
1 1/2 tablespoons powdered erythritol sweetener 
1/8 teaspoon vanilla extract
2 to 2 1/2 tablespoons heavy cream

Chocolate Ganache Drizzle:
2-3 tablespoons heavy cream
3 tablespoons semi-sweet, sugar free chocolate chips, chopped (such as Lily’s or Bake Believe)
Additional hot heavy cream, if needed

1-2 teaspoons chopped peanuts to garnish, if desired

1. Preheat a 4-inch mini waffle maker. Whisk together all of the chaffle ingredients until a smooth batter is formed. Divide the batter in half and spoon about 4 tablespoons of batter in the waffle maker, spreading it around with the back of a spoon to cover all the waffle bumps. Close and cook for 3 to 3 1/2 minutes. Remove to a wire rack to cool. Repeat with the remaining batter to make a second chaffle. This recipe makes two chaffles. Cool completely before frosting.

2. Peanut Butter Frosting: In a medium bowl, beat the cream cheese, peanut butter and butter with an electric mixer until light and fluffy. Beat in the powdered sweetener and vanilla extract. Beat in the cream, one tablespoon at a time, until a fluffy and spreadable consistency is achieved.

3. Place one chaffle on a plate and spread with about 1/2 of the frosting. Add the second layer and top with the remaining frosting. Refrigerate for about 20 minutes.

4. Meanwhile, make the Chocolate Ganache: In a small bowl or saucepan, heat the heavy cream in the microwave or on the stovetop until hot and beginning to bubble at the edges. Add the chocolate chips and allow to sit for a few minutes to melt before stirring. Whisk until smooth. If your ganache is too thick, add additional hot cream, 1 teaspoon at a time, and whisk until you achieve at smooth and pourable consistency. (Note: This recipe will make more ganache than you need. Store the leftover in an airtight container at room temperature for up to 3 days. Simply reheat gently in the microwave, 10 seconds at a time, until melted.)

5. Drizzle about 1 tablespoon of ganache over the top of the cake and sprinkle with chopped peanuts. 

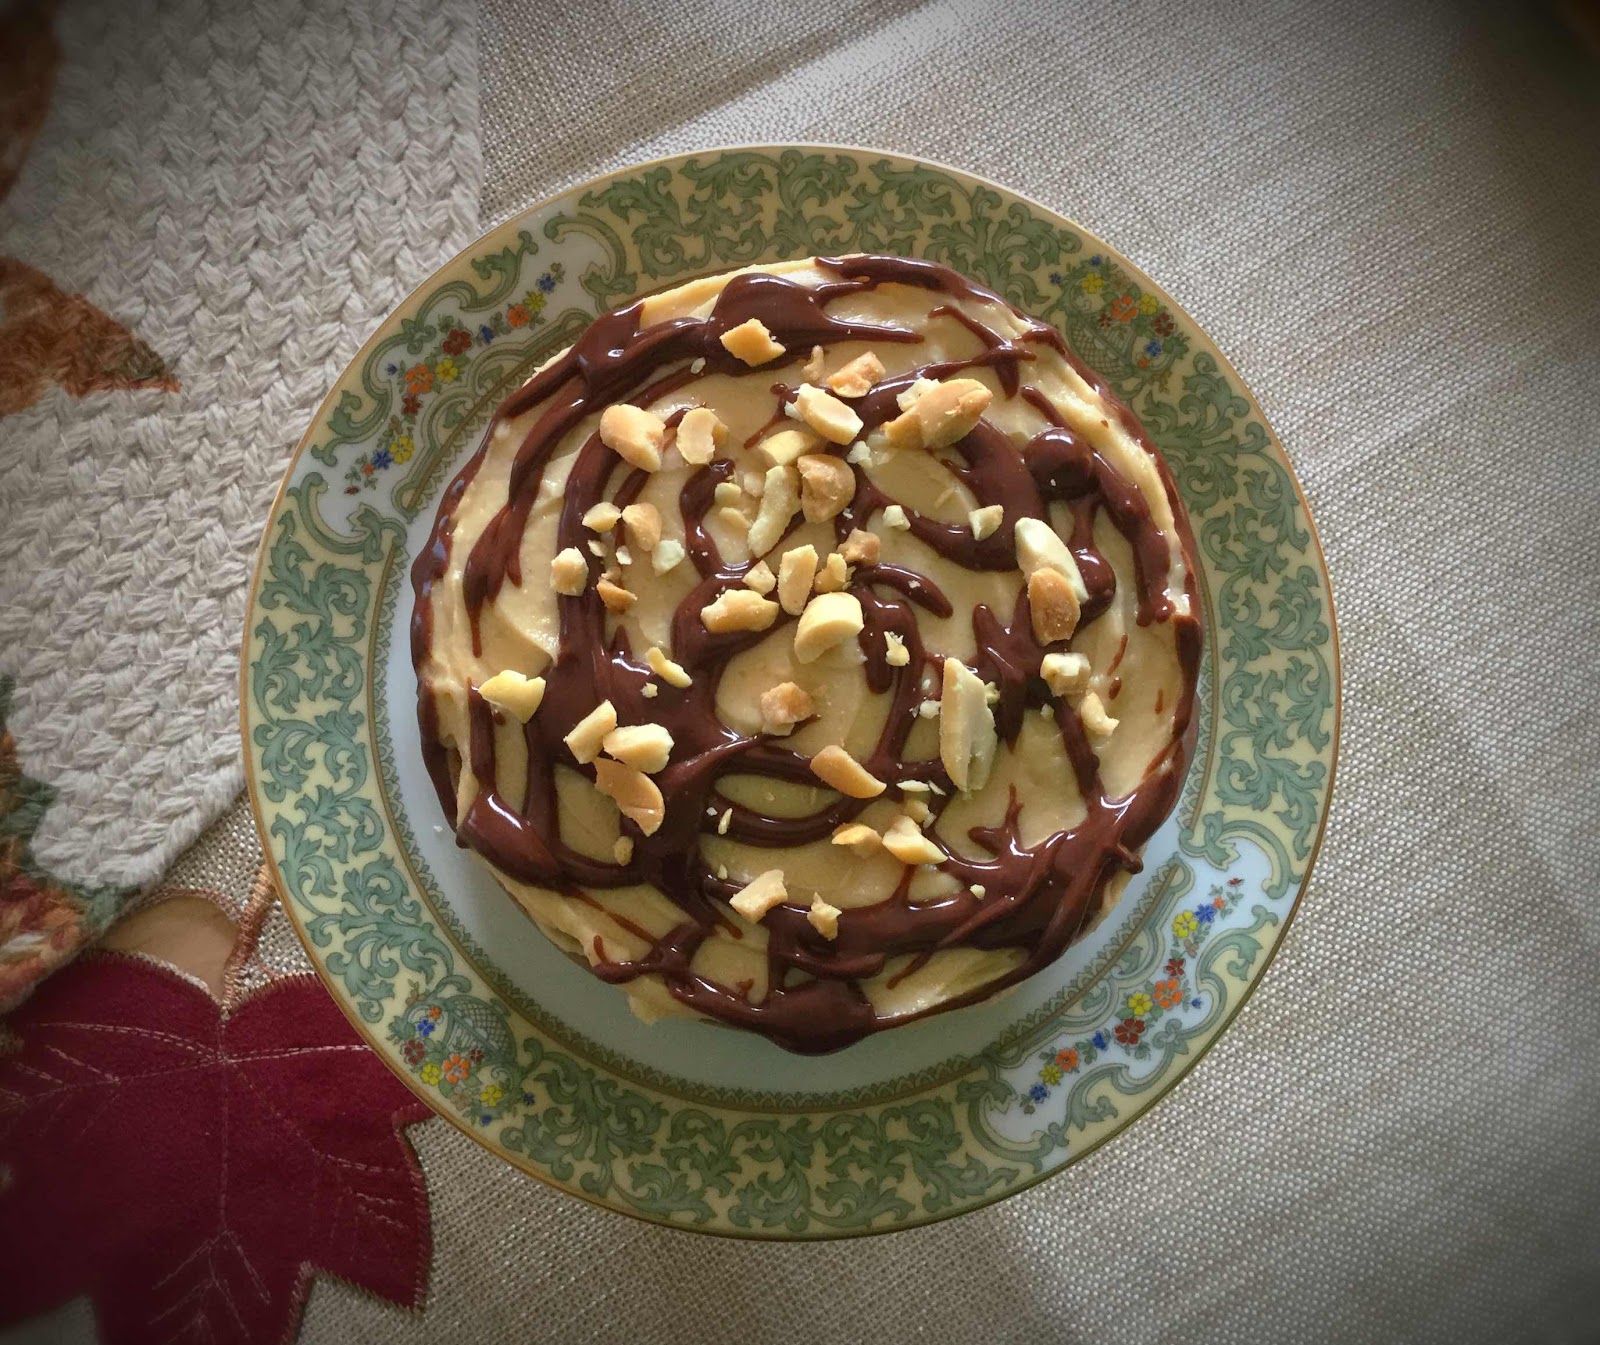
Chocolate Peanut Butter Chaffle Cake (top view)
Nutritional Information per 1/2 cake: 367 calories, 7.2 g carbohydrates (2.5 g dietary fiber, 1.2 g sugars), 33.8 g total fat (14.3 g saturated fat, 0 g trans fat), 153 mg cholesterol, 212 mg sodium, 55.8 mg calcium, 48 mg potassium, 222 mg Vit A, 1 mg iron, 9.7 g protein. Net carbs per serving: 4.7 grams

Photos and recipe by Kathy Sheehan, copyright 2020
All rights reserved. Please do not duplicate without the author’s permission. 

Saturday, December 14, 2019

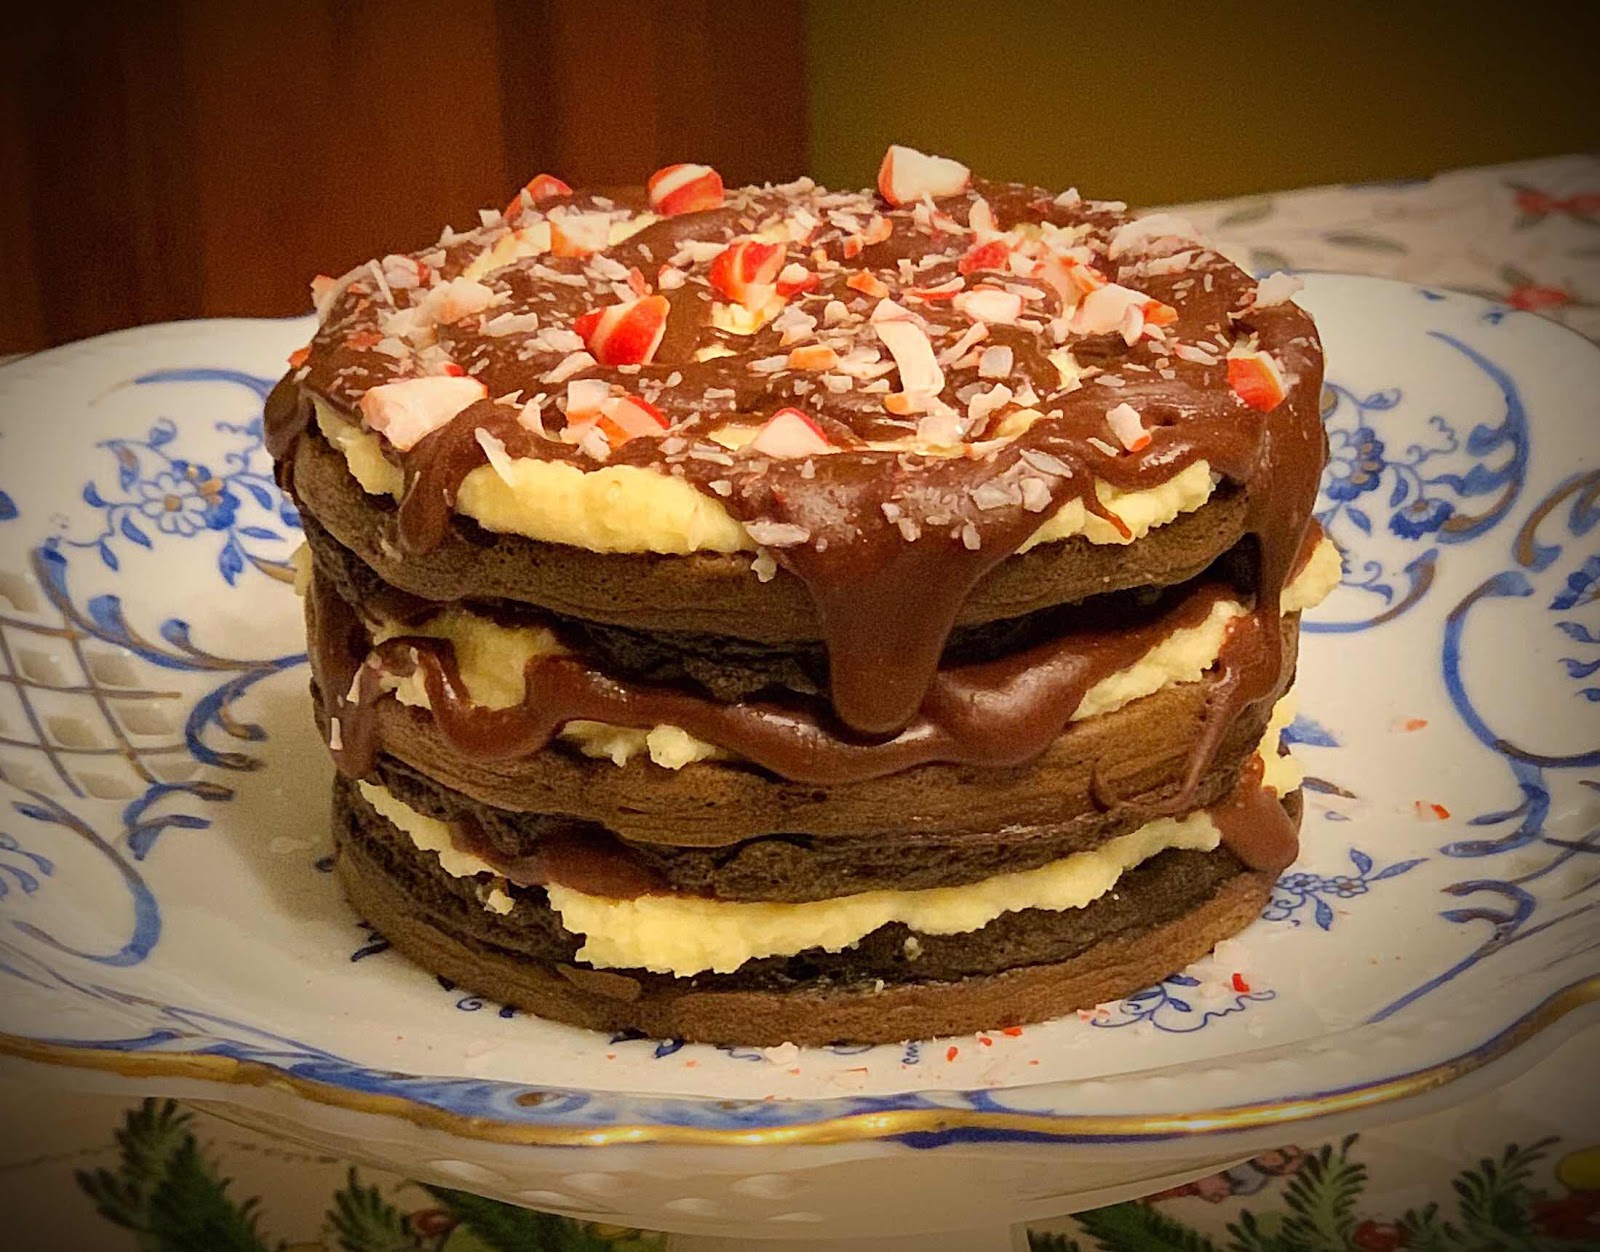
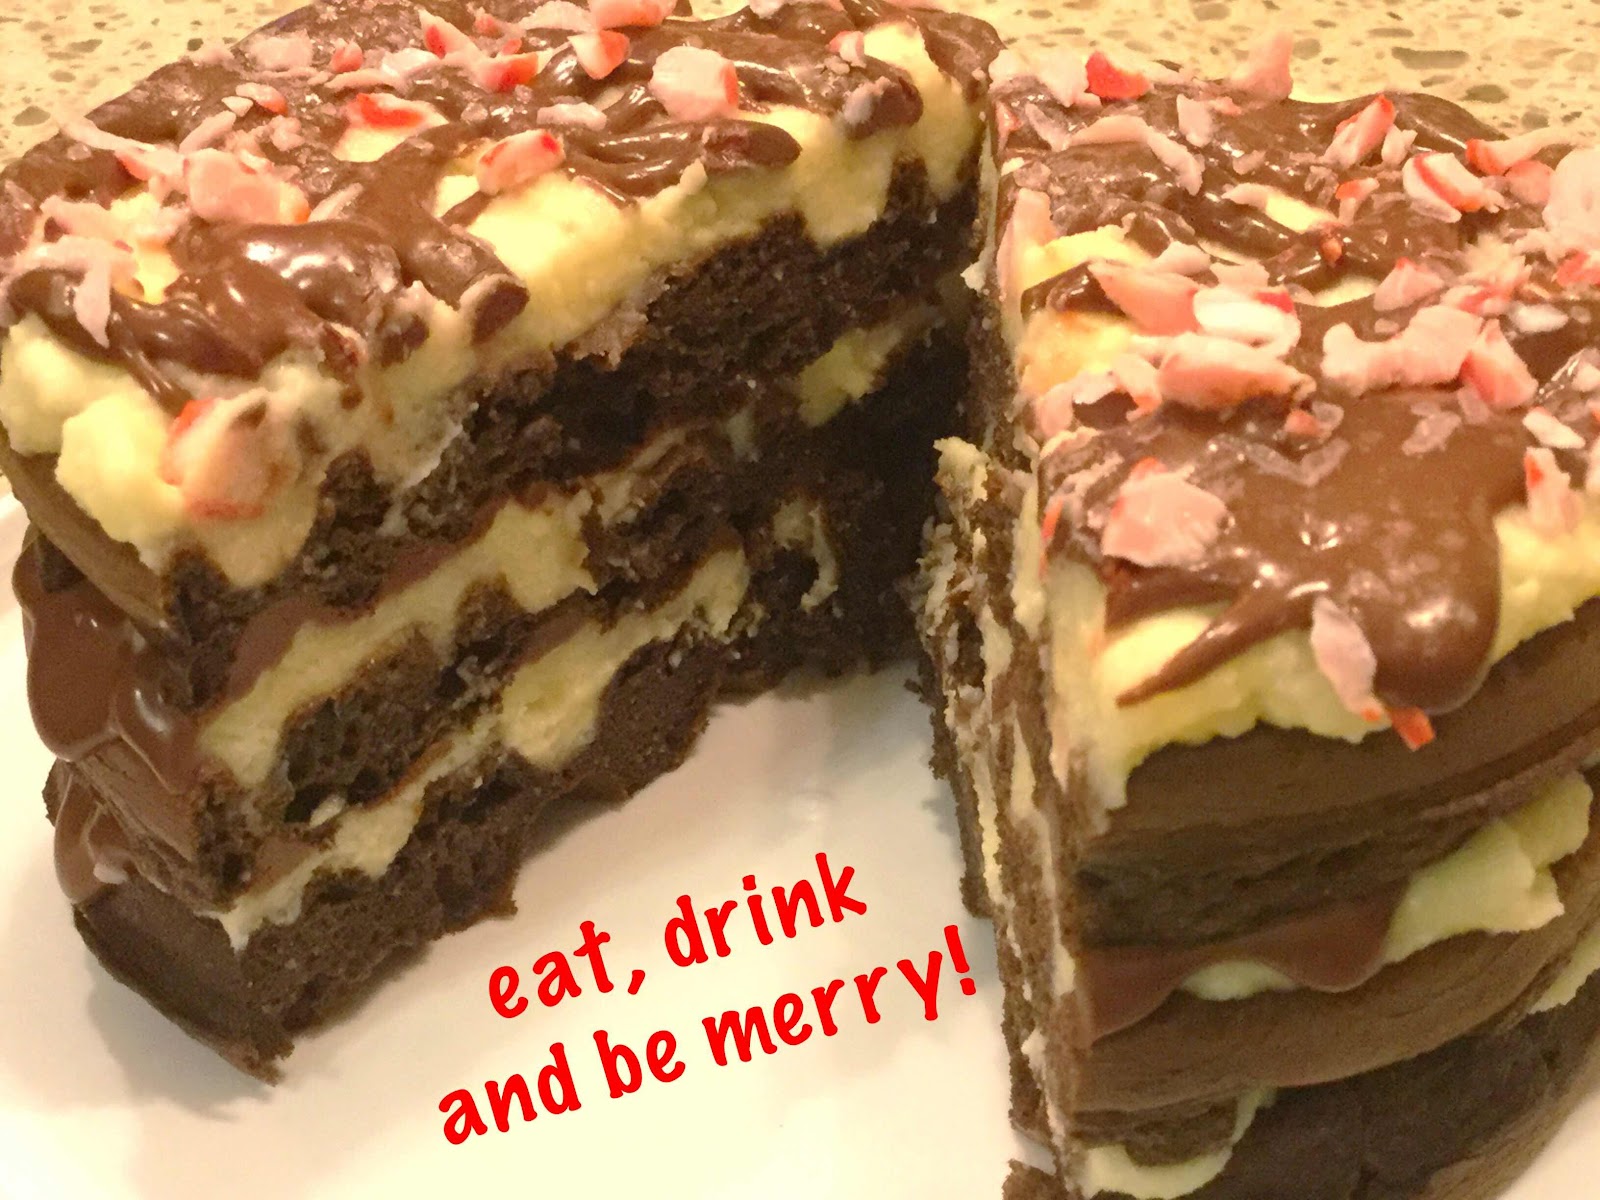
Chocolate Peppermint Bark Chaffle Cake

Chocolate Peppermint Bark Chaffle Cake
Wherever you go at this time of year, you’ll see boxes of Peppermint Bark candy. The combination of chocolate, vanilla or white chocolate with peppermint is a classic holiday treat. This low carb chaffle cake will definitely please anyone who loves this flavor combo. The sugar free peppermint candy sprinkled on top of the finished cake gives it a festive look. This triple-layer, mini cake is perfect for sharing a bit of Christmas cheer with your best friend!

Chocolate Peppermint Bark Chaffle Cake
Makes 2 servings

Chaffle Ingredients:
1 large egg, room temperature
2 tablespoons cream cheese, softened (or substitute sour cream)
1 tablespoon dark cocoa powder, unsweetened
2 tablespoons almond flour
1/4 teaspoon baking powder
2 teaspoons monkfruit-erythritol sweetener, granulated
1/8 teaspoon instant coffee powder (optional)
8 drops monkfruit extract (or add another teaspoon of granulated sweetener)
1/4 teaspoon pure peppermint extract
1 teaspoon water

Vanilla Buttercream Frosting:
1 ounce cream cheese, softened
3 tablespoons unsalted butter, room temperature
3 tablespoons powdered erythritol sweetener
1/2 teaspoon vanilla extract
2 1/2 tablespoons heavy whipping cream (plus more, if needed)

Chocolate Peppermint Ganache: (see *Note)
4 tablespoons heavy whipping cream
3 tablespoons sugar free dark or semi-sweet chocolate chips
1/4 teaspoon pure peppermint extract
Additional heavy cream, if needed

Topping:
1 teaspoon sugar free peppermint candy, crushed into small pieces

1. Preheat a mini waffle maker. (If using a larger waffle maker, you will need to double or triple this recipe.)

2. Mix together all of the chaffle ingredients and whisk until a smooth batter forms. Divide the mixture into thirds and spoon about 3-4 tablespoons of the batter onto the heated waffle maker. Close the lid and cook for 3 to 3 1/2 minutes. Remove chaffle to a wire rack to cool completely while you make two more chaffles. (This recipe makes 3 mini waffles.)

3. To make the Vanilla Buttercream Frosting, whip together the softened cream cheese and butter using a handheld or standing mixer until well combined. Beat in the sweetener and vanilla extract, then add the heavy cream 1 tablespoon at a time until a spreadable consistency is achieved. 

4. To make the Chocolate Peppermint Ganache, heat the heavy whipping cream in a small bowl and microwave in 15 second intervals until the cream is very hot and beginning to bubble around the edges. (You can also heat the cream in a small saucepan on the stove.) Add the chocolate chips and allow to sit for 5-8 minutes until the chocolate has melted, then whisk until smooth. Add the peppermint extract and stir to combine. If your ganache is too thick, add 1-2 teaspoons of hot cream and whisk until it is pourable. If needed, you can reheat for 6-8 seconds in the microwave, but do not allow the mixture to boil.

5. To assemble cake: Place one chaffle onto a plate, spread with about 1/3 of the buttercream frosting and drizzle with 1 tablespoon of ganache. Top with a second layer and spread with frosting and drizzle with ganache. Finally, add the last layer, spread with the remaining frosting and drizzle with 1-2 tablespoons of ganache and sprinkle the top with 1 teaspoon of crushed sugar free peppermint candy. 

6. The cake can be served immediately or cover in an airtight container and refrigerate. Bring to room temperature before serving.

*Note: This recipe for ganache makes more than you will need, so set the remaining aside for another use. Store in an airtight container at room temperature for up to 3 days. Gently reheat in the microwave for about 10 seconds.

Eat, Drink and Be Merry!

Nutritional Information per 1/2 cake: 446 calories, 6.9 g carbohydrates (2.4 g dietary fiber, 1.1 g sugars), 44.4 g total fat (25 g saturated fat, 0 g trans fat), 214 mg cholesterol, 209 mg sodium, 75 mg calcium, 43 mg potassium, 411 mg Vit A, 2 g iron, 7.7 g protein. Net carb per serving: 4.5 grams

Photo and recipe by Kathy Sheehan, copyright 2019
All rights reserved. Please do not duplicate without the author’s permission. 

Wednesday, January 31, 2018

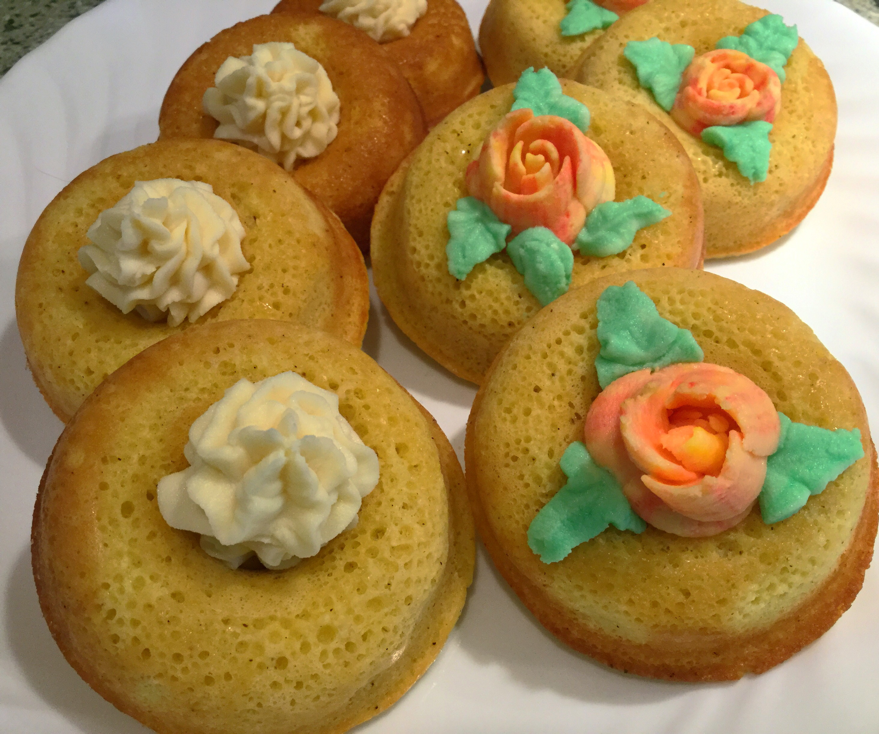
Frosted Vanilla Custard Donuts (Low Carb, Gluten Free)

Frosted Vanilla Custard Donuts
Vanilla custard is traditionally made with plenty of egg yolks, which are what make these donuts so rich and delicious. The batter rises up light and airy, so they have a tender crumb. If desired, this recipe would make wonderful cupcakes, but I like using my donut pan and filling each cavity high enough with batter that the hole of the donut disappears as it bakes, creating the perfect little platform for holding the dab of frosting. I just happen to have some decorating icing tips in my kitchen collection, so I had fun making them fancy and appropriate for Valentine’s Day, but that’s not necessary. Anyway you decorate them, these donuts will be both beautiful and delicious!

Frosted Vanilla Custard Donuts
Makes 8 donuts (more or less depending on your donut pan)

1 cup almond flour
1/4 cup erythritol sweetener, granulated
2 tablespoons unflavored whey protein powder
1 teaspoon baking powder
1/4 teaspoon vanilla powder (or seeds scraped from a vanilla bean)
1/8 teaspoon salt
1 large egg
2 egg yolks
1/4 cup heavy cream
1/4 cup almond or coconut milk
2 tablespoons butter, melted
1/2 teaspoon vanilla extract 

Frosting:
2 ounces cream cheese, room temperature
1 tablespoon butter, softened
4 ounces plain mascarpone cheese, room temperature
1/4 cup powdered erythritol (Confectioners), or to taste
1 teaspoon vanilla extract
2 tablespoons heavy cream

1. Preheat oven to 325 degrees F. Spray each cavity of your donut tin with non-stick cooking spray or grease with butter; set aside.

2. In a large bowl, whisk or sift together the almond flour, erythritol, whey protein powder, baking powder, vanilla powder and salt. Whisk to combine and until no lumps remain.

3. In a separate bowl, whisk together the egg, egg yolks, cream, almond milk, melted butter and vanilla extract. Add the wet ingredients to the dry ingredients and whisk well to combine. 

4. Fill each donut cavity to almost full. Be sure to fill each cavity until almost to the top because you want the donuts to puff up and fill in the hole as they bake, so there’s a place in the center of the donut to hold the frosting later. (see photo below) Bake for 14-16 minutes or until the edges are golden brown and the tops are just firm to the touch. Remove from the oven and let the donuts cool 10 minutes in the pan, then flip them onto a wire rack to cool completely.

Baked donut with center depression
5. To make the frosting: Whip together the room temperature cream cheese, butter and mascarpone cheese until fluffy using a handheld or standing electric mixer. Add the powdered erythritol and vanilla and beat until combined. Add the heavy cream 1 tablespoon at a time until the desired spreading consistency is reached. Taste and adjust sweetness to your taste. If desired, put the frosting into a piping bag with a decorator tip and pipe (or spoon) a tablespoon or so of the frosting into the center of each donut. (Note: This recipe for frosting will yield more than you need for eight donuts, which allows for dividing the frosting into batches and coloring each differently, if desired. Save any leftover frosting in an airtight container in the refrigerator to use for another recipe.)

Frosted Vanilla Custard Donuts
Nutritional Information per donut with 1 tablespoon of frosting (based on eight per recipe): 230 calories, 8.6 g carbohydrate (1.5 g dietary fiber, 0.8 g sugars, 13.5 g sugar alcohols), 21.7 g total fat (9.2 g saturated fat, 0 g trans fat), 114 mg cholesterol, 139 mg sodium, 102 mg calcium, 130 mg potassium, 1 mg iron, 431 mg Vit A, 6.1 g protein. Net carbs per serving: 7.1 grams.

Recipe and photos by Kathy Sheehan, copyright 2018
All rights reserved.  Please do not duplicate without the author’s permission. 

Saturday, March 20, 2010

Mini Peanut Butter Cupcakes with Chocolate Frosting

Recently I taught a cooking class entitled "How to Love Vegetables." We made main dish salads, vegetable snacks and nutritious side dishes but, just to prove how versatile vegetables can be, we also made these delicious miniature cupcakes that include grated zucchini in the batter. The amazing thing is, when peeled of its green skin, the zucchini is undetectable in the final result! The creamy, nutty peanut butter and sweet chocolate are the only flavors you'll taste. If you like Reese's Peanut Butter Cups, then you'll love these little 4-bite wonders at only 5 net carbs each. They are quick to make and fun to eat. What an ingenious way to sneak a little vegetable into a picky eater's diet!

Mini PB Cupcakes with Chocolate Frosting
(Makes 18 mini cupcakes)

½ cup of all-purpose flour
½ cup almond flour (or finely ground almonds)
1 teaspoon baking powder
1/2 teaspoon baking soda
1/8 teaspoon salt
1 large egg
3 tablespoons creamy peanut butter
½ cup Splenda granular (not the baking blend)
2 tablespoons canola oil
1 teaspoon vanilla extract
½ cup peeled zucchini, finely grated (make sure it is finely grated)
1/3 cup almond milk or skim milk

Chocolate frosting ingredients:
1 tablespoon cocoa powder (I used Hershey’s Special Dark)
1/3 cup almond milk
¼ cup mascarpone cheese (in the specialty cheese display at the grocery)
1½ tablespoons Splenda granular
1 tablespoon sugar-free, fat-free chocolate pudding mix

1. Preheat oven to 350-degrees. Arrange a rack in center of oven. Line muffin tin with paper liners. This recipe makes 18 mini cupcakes.

2. In a small bowl, whisk together the flour, almond flour, baking powder, baking soda and salt; set aside. In a large bowl, beat the egg until light and lemon colored using a handheld or standing mixer. Add the peanut butter, Splenda, canola oil and vanilla. Continue beating on medium-high speed for about 2-3 minutes. (Don't underbeat this step, you need to fluff up the egg mixture with air.) Beat in the grated zucchini on low speed until fully incorporated.

3. Alternate adding the dry ingredients with the milk and beat after each addition, scraping down the bowl occasionally with a rubber spatula. Use a small cookie scoop, spoon batter into the muffin cups until ¾ full (do not overfill).

4. Bake until a toothpick inserted into the center comes out clean. Test after 12 minutes and, if needed, bake another 1 to 2 minutes. The tops will only be slightly browned. Do not overbake because you don't want them to dry out.

5. Remove cupcakes to wire rack and cool completely before icing. To make frosting: Mix together the cocoa powder and almond milk and heat in the microwave for 20 seconds on high. Whisk until cocoa is incorporated and mixture is smooth. Set aside to cool, about 10-15 minutes. Add the mascarpone cheese and Splenda. With a handheld mixer, beat until light and fluffy (it should resemble a soft whipped cream). Add the dry powder from the pudding mix and beat until thickened. Refrigerate for at least 5 minutes until thickened and set. Stir before icing cupcakes.

Nutritional Information per cupcake with 2 generous teaspoons of frosting: 86.1 calories, 5.7 g carbohydrates, 6 g total fat, 1.3 g saturated fat, 0.8 g fiber, 2.4 g protein.

Original recipe by Kathy Sheehan, copyright 2009

Saturday, March 6, 2010

Mocha Cupcakes with Bailey's Irish Cream Frosting

Next weekend, our church is hosting a St. Patrick's Day dinner and I was asked to adapt a dessert recipe that would be appropriate for diabetics and others looking for a healthier alternative. The original recipe was loaded with saturated fat and carbohydrate, so some serious adjustments needed to be made. It was a fun challenge that required several delicious "taste testings" before a perfected recipe was finally obtained. If you can't find any instant espresso powder (which may not be a common ingredient found at the supermarket), you can substitute instant coffee granules and increase amount by ½ tablespoon. Also, if you want the Bailey's Irish Cream taste to really come through, eliminate the final dusting of espresso powder.

Now, the moment you've been waiting for (drum roll, please)...I am happy to present the following winning makeover recipe with only 11.3 net carbs per serving. Happy St. Patrick's Day!

Mocha Cupcakes with Bailey's Irish Cream Frosting
(Makes 15 cupcakes)

1/3 cup boiling water
2 tablespoons instant espresso powder (regular or decaf)
¼ cup almond milk
1¼ cups almond flour (or finely ground almonds)
¾ cup all-purpose flour
1 teaspoon baking powder
½ teaspoon baking soda
¼ teaspoon salt
5 tablespoons unsalted butter, softened
1½ tablespoons canola oil
One 2.5 oz. container of baby food prune puree (about 3 tablespoons)
2 tablespoons sugar
1 cup Splenda granular
½ teaspoon butter flavor extract
2 large eggs (room temperature)

Frosting Ingredients:
½ cup mascarpone cheese (4 oz.)
1/3 cup almond milk
1½ tablespoons Bailey's Irish Cream
1 tablespoon Splenda granular
2 tablespoons sugar-free, fat-free instant white chocolate pudding mix (dry powder)
dust with espresso powder

1. Preheat oven to 350-degrees. Pour boiling water over espresso powder and stir until dissolved. Combine espresso mixture with almond milk and let cool. Meanwhile, line muffin tin with paper liners; set aside. In a small mixing bowl, sift together the flours, baking powder, baking soda and salt; set aside.

2. In a large mixing bowl, cream together the butter, canola oil, sugar, Splenda, butter extract and prune puree until light and fluffy, about 3 minutes. Add eggs one at a time, beating well after each addition. Alternate adding the dry ingredients with the espresso and milk mixture, beginning and ending with flour mixture. Scrape down sides of bowl occasionally. Fill muffin cups ¾ full (do not overfill) and bake for 18-20 minutes until a toothpick inserted in center of cupcake comes out clean. Remove from oven and allow cupcakes to cool in pan for a few minutes, and then remove them to a wire rack to cool completely.

3. After cupcakes have cooled, make the frosting by combining mascarpone cheese, almond milk, Bailey's Irish Cream and Splenda in a mixing bowl. Beat well until mixture thickens to soft peaks. Add 2 tablespoons instant pudding mix and continue beating until well incorporated and thickened. Refrigerate frosting for at least 10 minutes. Spread 1½ tablespoons onto each cupcake and dust with espresso powder. Serve immediately or refrigerate until 15-20 minutes prior to serving.

Nutritional Information per cupcake with frosting: 190.7 calories, 12.6 g carbohydrate, 14 g total fat, 4.9 g saturated fat, 1.3 g fiber, 4.1 g protein.

Make over recipe by Kathy Sheehan, copyright 2010
The original recipe is one that appeared in Martha Living Magazine's March 2010 issue, p. 48.

How does this compare with the original recipe? This makeover recipe is much lower in saturated fat, calories and carbohydrates, plus it has more fiber and protein. For comparison, the nutritional information per cupcake made from the original recipe is 232.6 calories, 27 g carbohydrate, 12.2 g total fat, 7.5 g saturated fat, 0.4 g fiber, 2.6 g protein.

Saturday, February 13, 2010

Cream-Filled Triple Chocolate Cupcakes

Nothing says love like chocolate, at least that's my husband's motto. For Valentine's Day, I always make him a special dessert which must include chocolate in some form. This year, I went all the way! These dark chocolate devil's food cakes are filled with a delicious chocolate cream and topped with velvety, rich chocolate ganache. Ganache is typically a mixture of melted chocolate and heavy cream but, to lower the saturated fat, I used almond milk in place of the cream (or substitute skim milk, if you prefer.) Traditional devil's food cake recipes call for 4 ounces of sweet baker's chocolate, which is loaded with 6 to 9 grams of saturated fat per ounce! Instead, I used a combination of 1 ounce of baker's chocolate and ½ cup cocoa powder, which reduced the saturated fat by two-thirds. For extra dark chocolate cake, the way my husband likes it, try using Hershey's Special Dark cocoa powder which has zero saturated fat, but provides loads of dark chocolate flavor.

The really fun surprise of this recipe is the cream filling INSIDE the cakes! It's easy to do with a pastry bag and a round cake decorating tip. Don't worry if you don't have one because you can still make these chocolate marvels by cutting an inverted cone out of the top, spoon the filling in and replacing the cake on top. It will resemble a "top hat" and taste just as delicious! Have a happy, chocolate Valentine's Day!

Cream-Filled Triple Chocolate Cupcakes
(Makes 16 servings)

Cake Ingredients:
¾ cup almond milk
1 oz. unsweetened or bittersweet baking chocolate (1 square), chopped
1¼ cups almond flour (or finely ground almonds)
¾ cup all purpose flour
½ cup cocoa powder (I used Hershey’s Special Dark)
1 teaspoon baking soda
1½ teaspoon baking powder
¼ teaspoon salt
2 large eggs + 1 egg white
¾ teaspoon instant coffee granules (decaf or regular)
¼ cup sugar
5 tablespoons canola oil
One 2.5 oz. container of baby food prune puree (about 3 tablespoons)
1 cup Splenda granular
1½ teaspoons vanilla extract

Chocolate Filling Ingredients:
1½ tablespoons cocoa powder
½ cup almond milk (original or unsweetened)
½ cup mascarpone cheese
3½ tablespoons Splenda granular
1 teaspoon vanilla extract
2 tablespoons fat-free, sugar-free chocolate instant pudding mix (dry powder)

Chocolate Ganache Topping Ingredients:
1/3 cup almond milk
½ cup semi-sweet chocolate morsels

1. Preheat oven to 350-degrees. Prepare muffin tin by placing a paper liner in each cup or spray with non-stick cooking spray; set aside. In a small saucepan, heat ¾ cup almond milk over medium-low heat to scalding or microwave on high for 60-90 seconds. Remove from heat and add the roughly chopped unsweetened baking chocolate square and instant coffee granules; stir until melted and smooth.

2. In a small mixing bowl, sift together the flours, ½ cup cocoa powder, baking soda, baking powder and salt; set aside. In a large mixing bowl and using a handheld or standing mixer, beat the eggs and egg white until light in color and increased in volume. Add sugar and continue beating until well combined. Slowly add the canola oil and beat on high for 1 minute. Add the prune puree, Splenda and vanilla extract. Beat until well incorporated, stopping to scrape down sides of bowl at least once. Alternate adding the dry ingredients ½ cup at a time and the hot milk and chocolate mixture until well combined, scraping down sides of bowl occasionally.

3. Spoon into prepared muffin cups only until 2/3 full (do not overfill). Bake for 15-18 minutes or until toothpick inserted in center comes out clean. Remove from oven and cool in pan for 4 minutes. Remove a wire rack and cool cakes completely before filling.

4. Meanwhile make cream filling by first melting the 1½ tablespoons cocoa powder in almond milk over low heat or in the microwave for about 45-60 seconds on high. Stir to incorporate cocoa into milk. Set aside until cooled to room temperature. (If desired, place in refrigerator to hasten cooling.) Place mascarpone cheese in a large mixing bowl and add cooled almond milk mixture. Beat with a handheld or standing mixer on high until well combined and mixture is light and fluffy (it will resemble whipped cream). Add Splenda, extract and continue to beat until incorporated. Add the 2 tablespoons of chocolate instant pudding powder and beat well. Place in refrigerator for at least 10 minutes to set. Stir before filling cupcakes.

5. To make chocolate ganache icing, heat milk in microwave for 45-60 seconds on high (or heat in a small saucepan over medium-low heat until beginning to boil). Add chocolate morsels and allow to sit for 2-3 minutes. Stir until chocolate is melted and mixture is smooth; set aside to cool. Mixture will thicken as it cools. To hasten cooling, refrigerate for 10-15 minutes until the consistency of very thick cream, stirring occasionally.

6. When cupcakes are completely cooled, fill a pastry bag with chocolate cream and fix a round decorating tip onto the end of the bag. Insert tip into the top of each cupcake and squeeze about 1 tablespoon of filling into each cake. (If you do not have any cake decorating tips, remove a cone of cake from the top of the cupcake with a small, serrated knife. Fill hole with 1 tablespoon of filling and replace cake on top. The cake will stick up and resemble a top hat.) Dip cupcakes to coat top or drizzle 2 teaspoons of chocolate ganache icing over the top of each cupcake. Allow chocolate ganache to cool and set. If there is any leftover chocolate cream filling, you may decorate the top of each cupcake with additional chocolate cream before serving. Store in refrigerator, but allow to sit at room temperature for 15 minutes before serving.

Nutritional Information per cupcake with chocolate cream filling and ganache topping: 234.6 calories, 21.5 g carbohydrate, 15.9 g total fat, 4.1 g saturated fat, 2.7 g fiber, 5.3 g protein.

Nutritional Information per cupcake with only chocolate cream filling (no ganache topping): 198 calories, 16.4 g carbohydrate, 13.8 g total fat, 3 g saturated fat, 2.7 g fiber, 5 g protein.

Nutritional Information per 1 tablespoon chocolate cream (recipe makes about 20 tablespoons): 31.6 calories, 1.5 g carbohydrate, 2.5 g total fat, 1.4 g saturated fat, 0.2 g fiber, 0.6 g protein.

Original recipe by Kathy Sheehan, copyright 2010

Saturday, February 6, 2010

Pink Lemonade Cake with Strawberry Cream

Valentine's Day is only a week away, so I turned my lemon cake "pink" for the occasion. The lightly sweetened cake and tart lemon filling (tinted with a few drops of optional food coloring) pairs beautifully with the rich, velvety strawberry cream frosting. Also, do you find yourself wanting to disguise your vegetables so the kids don't know they're eating them? What better place than to hide them in a delicious pastry! They will never know they're eating zucchini in every bite of this sweet treat.

The other thing I love about this cake is it's beautiful, pastel color. It was especially cold outside today and the combination of delicate fruit flavors in this spectacular dessert, along with it's spring-like appearance, just made me smile!

Pink Lemonade Cake with Strawberry Cream
(Makes 12 servings)

Lemon Filling Ingredients:
2 tablespoons cornstarch
1 cup cold water
1 egg yolk, beaten
¾ cup Splenda granular
Pinch salt
Zest from one small lemon (1 tablespoon)
1 teaspoon butter
Juice from one small lemon (about 3 tablespoons or to taste)
3-4 drops of red food coloring (optional)

Cake Ingredients:
1¼ cups almond flour (or finely ground almonds)
¾ cup all purpose flour
1 teaspoon baking soda
1 teaspoon baking powder
¼ teaspoon salt
1 tablespoon lemon zest
2 eggs
¼ cup sugar
6 tablespoons canola oil
2 tablespoons light sour cream or buttermilk
¾ cup Splenda granular
2 teaspoons lemon extract
¾ cup finely grated zucchini, peeled of all green skin

Topping Ingredients:
2 tablespoons seedless, all-fruit strawberry jam
½ cup almond milk (original or unsweetened)
½ cup mascarpone cheese
2 tablespoons Splenda granular
1 tablespoon sugar-free strawberry syrup
2 tablespoons fat-free, sugar-free vanilla instant pudding mix (dry powder)

1. To make filling, blend cornstarch, cold water, egg yolk, Splenda and pinch of salt in medium saucepan. Cook on medium-low heat, stirring constantly, until thickened and beginning to boil. Remove from heat and add butter, lemon zest and lemon juice. Stir until butter is melted. Allow to cool for 4 minutes, add food coloring if you desire a pink color and stir again. Pour into a small bowl and cover with plastic wrap, allowing the plastic wrap to touch the surface of the pudding mixture so skin doesn’t form on top. Place in refrigerator until completely cooled.

2. Preheat oven to 350-degrees. In a small mixing bowl, sift together the flours, baking soda, baking powder and salt. Stir in lemon zest and set aside.

3. In a large mixing bowl and using a handheld or standing mixer, beat the eggs until light in color and increased in volume. Add sugar and continue beating until well combined. Slowly add the canola oil and beat on high for 1 minute. Add the sour cream, Splenda and lemon extract. Beat until well incorporated, stopping to scrape down sides of bowl at least once. Reduce speed and add the dry ingredients ¼ cup at a time until well combined, scraping down sides of bowl occasionally. Using a wooden spoon or rubber spatula, fold in the grated zucchini.

4. Pour into an 8-inch round cake pan that has been sprayed with non-stick cooking spray. Bake for 28-32 minutes or until toothpick inserted in center comes out clean. Remove from oven and cool in pan for about 10 minutes. Remove cake from pan and continue cooling on a wire rack for at least one hour.

5. Meanwhile make cream topping by first melting strawberry jam in almond milk over low heat or in the microwave for about 45-60 seconds on high. Stir to incorporate jam into milk. Set aside until cooled to room temperature. (If desired, place in refrigerator to hasten cooling.) Place mascarpone cheese in a large mixing bowl and add cooled almond milk mixture. Beat with a handheld or standing mixer on high until well combined and mixture is light and fluffy (it will resemble whipped cream). Add Splenda, strawberry syrup and continue to beat until incorporated. Add the 2 tablespoons of vanilla instant pudding powder and beat well. Place in refrigerator for at least 10 minutes to set. Stir before spreading onto cake.

6. When cake is completely cooled, take a serrated knife and cut in half lengthwise and place bottom half, cut side up, onto a serving plate. Stir the lemon filling until smooth, spread on cake and place the remaining top half of the cake, cut side down, on top of filling. Spread strawberry cream over top and sides of cake like frosting. Store in refrigerator, but allow to sit at room temperature for 15 minutes before serving.

Nutritional Information per serving of cake with lemon filling and cream topping: 266.5 calories, 20.9 g carbohydrate, 18.5 g total fat, 3.9 g saturated fat, 1.6 g fiber, 5.4 g protein.

Nutritional Information per serving of cake with only lemon filling (no cream topping): 212 calories, 17.8 g carbohydrate, 14.4 g total fat, 1.6 g saturated fat, 1.6 g fiber, 4.8 g protein.

Nutritional Information per 1 tablespoon strawberry cream topping (recipe makes about 20 tablespoons): 32.2 calories, 1.8 g carbohydrate, 2.4 g total fat, 1.4 g saturated fat, 0 g fiber, 0.4 g protein.

Original recipe by Kathy Sheehan, copyright 2010

Sunday, January 31, 2010

Carrot Cake Whoopie Pies with Cinnamon Cream Filling

It is freezing cold in Maine and, although the calendar still says January, I'm beginning to suffer from cabin fever. That's not good news, because I have many months of winter to endure before the thaw in April. To combat this restlessness, my husband and I took a drive down the coast yesterday to experience the brilliant sunshine, even though the temperature was 12-degrees outside! During our adventure, we stopped in York at the headquarters of Stonewall Kitchen, a gourmet food company that makes a wide range of unique products. This delicious recipe was inspired by one of their baking mixes that happened to catch my eye. Unfortunately, diabetes makes a traditionally prepared carrot cake or whoopie pie out of my reach, so I came up with my own recipe using an alternative flour to bring the carbs down to a reasonable 13 grams per serving and the taste is amazing!

Whoopie Pies are considered a New England phenomenon, although they are increasingly found across the country these days. Normally, they are chocolate cookies filled with a vanilla cream, but creative bakers are coming up with a variety of flavors to rival the traditional chocolate. I wouldn't deem this recipe a serving of vegetables, but it does include sweet, fresh grated carrots in a soft, cake-like cookie. Along with the creamy, cinnamon filling, this whoopie pie tastes like a delicious, light carrot cake. They were fun to make and eat...maybe being stuck inside isn't so bad!

Carrot Cake Whoopie Pies with Cinnamon Cream Filling
(Makes 32 cookies or 16 whoopie pies)

1½ cups almond flour (or finely ground almonds)
¾ cup all purpose flour
1 teaspoon baking soda
1 teaspoon baking powder
¼ teaspoon salt
½ teaspoon pumpkin pie spice
2 eggs
¼ cup sugar
½ cup canola oil
1/3 cup light sour cream
¾ cup Splenda granular
1½ teaspoons vanilla extract
1 teaspoon butter flavor extract
1 cup grated carrot

Filling Ingredients:
½ cup mascarpone cheese
½ cup almond milk (original or unsweetened)
2 tablespoons Splenda granular
1 teaspoon vanilla extract
½ teaspoon ground cinnamon
2 tablespoons fat-free, sugar-free vanilla instant pudding mix (dry powder)

1. Preheat oven to 375-degrees. Place parchment paper on cookie sheet or spray lightly with non-stick cooking spray and set aside.

2. In a small mixing bowl, sift together the flours, baking soda, baking powder, salt and pumpkin pie spice; set aside.

3. In a large mixing bowl and using a handheld or standing mixer, beat the eggs until light in color and increased in volume. Add sugar and continue beating until well combined. Slowly add the canola oil and beat on high for 1 minute. Add the sour cream, Splenda, and extracts and beat until well incorporated, stopping to scrape down sides of bowl at least once. Reduce speed and add the dry ingredients ¼ cup at a time until well combined, scraping down sides of bowl occasionally. Using a wooden spoon or rubber spatula, fold in the grated carrot.

4. Using a small cookie scoop or rounded tablespoon, drop batter onto prepared cookie sheet 2 inches apart (batter will spread during baking). Bake for 10-11 minutes until cookie springs back when lightly touched or when toothpick inserted in center comes out clean. Cookies will not brown much, so watch carefully and do not over bake. Remove from cookie sheet onto a wire rack to cool completely before filling.

5. To make cream filling, place mascarpone cheese in a large mixing bowl and add almond milk. Beat with a handheld or standing mixer on high until well combined and mixture is light and fluffy (it will resemble whipped cream). Add Splenda, vanilla, and cinnamon and continue to beat until incorporated. Add the 2 tablespoons of vanilla instant pudding powder and beat well. Place in refrigerator for 5 minutes to set cream.

6. To assemble whoopie pies, pair two cookies by size and place 1 slightly rounded tablespoon of cinnamon cream filling on the flat side of one cookie, top with second cookie and press gently. Repeat with remaining cookies. If not serving immediately, wrap each whoopie pie in plastic wrap and store in refrigerator.

Nutritional Information per whoopie pie: 209 calories, 13.1 g carbohydrate, 16 g total fat, 3 g saturated fat, 1.3 g fiber, 4.3 g protein.

Nutritional Information per cookie (no filling): 86.2 calories, 5.9 g carbohydrate, 6.4 g total fat, 0.6 g saturated fat, 0.6 g fiber, 2 g protein.

Nutritional Information per 1 tablespoon filling (recipe makes 20 tablespoons): 29.3 calories, 1 g carbohydrate, 2.4 g total fat, 1.4 g saturated fat, 0 g fiber, 0.4 g protein.

Original recipe by Kathy Sheehan, copyright 2010

How does this compare with a whoopie pie made with a traditional recipe? This recipe is considerably less in fat and carbohydrates and has only half the calories! For comparison, the nutritional information for a Pumpkin Whoopie Pie, which is similar in flavor to my carrot recipe, is an alarming 424 calories, 55.6 g carbohydrate, 21.7 g total fat, 8 g saturated fat, 1.5 g fiber, 3.4 g protein.

Tuesday, July 28, 2009

Vanilla Cupcakes with Chocolate Frosting

Okay, let's start with the basics. Here is a DELICIOUS, nutritious, moist vanilla cupcake that will make you realize that being diabetic doesn't mean giving up cake! My husband and daughter (my official taste testers) were amazed at how yummy these were and couldn't believe they were actually good for you.

Promise me that you won't run away when you see the list of ingredients. Yes, there is zucchini in this cupcake! But you won't taste it and, if you don't tell your kids, they won't ever know they're eating their vegetables when they're munching on this sweet, decadent treat. Because there's not a lot of oil, it adds needed moisture (not to mention something healthy) to this recipe to boost the nutrition. Tip: To disguise that it's in there, be sure to peel all the green skin off the zucchini before finely grating it. If you want to learn more about the alternative flours used in this recipe, check out my blog: Alternative Flours for Baking.

Makes 12 cupcakes
1 cup of all-purpose flour
6 tablespoons coconut flour
6 tablespoons almond flour (or finely ground almonds)
2 teaspoons baking powder
1/2 teaspoon baking soda
1/4 teaspoon salt
3 eggs
6 tablespoons granulated sugar
6 tablespoons Splenda granular (not the baking blend)
3 tablespoons canola oil
2 teaspoons good vanilla extract (or seeds scraped from 1 vanilla bean + 1/2 tsp. extract)
1-1/4 cups peeled zucchini, finely grated (make sure it is finely grated)

1. Preheat oven to 350 degrees.

2. Arrange a rack in center of oven. Line muffin tin with paper liners. This recipe makes 12 cupcakes.

3. In a small bowl, whisk together the flour, coconut flour, almonds, baking powder, baking soda and salt; set aside. In a large bowl, beat the eggs, sugar and Splenda with a handheld or standing mixer until thick and light-colored, about 4 minutes. (Don't underbeat this step, you need to fluff up the eggs with air.) Add canola oil and vanilla and beat another 30 seconds. Beat in the grated zucchini on low speed until fully incorporated.

4. Add the dry ingredients all at once and beat on low speed until fully incorporated, scraping down the bowl once with a rubber spatula. Use a 1/3 cup measure to spoon batter into the muffin cups.

5. Bake until a toothpick inserted into the center comes out clean. Test after 15 minutes and, if needed, bake another 5 to 8 minutes. The tops will only be slightly browned. Do not overbake because you don't want them to dry out.

6. Remove cupcakes to wire rack and cool completely before icing with the chilled frosting.


For the chocolate pudding frosting:
2 tablespoons dark chocolate chips (70% cocoa or higher)
2 oz. mascarpone cheese (in the speciality cheese display at the grocery)
1 small box of sugar-free, fat-free chocolate pudding mix (the one that makes 4 servings)
1 cup of 1% milk

To make frosting: Melt 2 TB chocolate chips in a double boiler until melted and smooth. Set aside to cool slightly. Add the mascarpone cheese and, with a handheld mixer, beat until light and fluffy. When chocolate mixture is well blended, add 1 cup milk and beat again. Finally, add the dry powder from the pudding mix and beat until thickened. Refrigerate for at least 15 minutes or longer until quite thick and set. Stir before icing cupcakes.

NOTE: This frosting is best if eaten soon after icing cupcakes, so only frost what will be eaten immediately. Refrigerate any leftovers until needed again. It will keep for 3 days if kept cool.

Nutritional Information per cupcake with 2 generous tablespoons of frosting: 193.15 calories, 23.4 g carbohydrates, 9.3 g total fat, 2 g saturated fat, 2.7 g fiber, 5.1 g protein.

Original recipe by Kathy Sheehan, copyright 2009

How does this recipe compare with a regular cupcake with frosting?
My recipe is higher in fiber and protein, plus significantly lower in calories, carbohydrates and somewhat lower in saturated fat. For comparison, here is the average nutritional information for a purchased vanilla cupcake with chocolate frosting: 310 calories, 55 g carbs, 10 g total fat, 4 g saturated fat, 1.5 g fiber, 3 g protein.