Showing posts with label dairy free recipes. Show all posts

Sunday, March 29, 2026

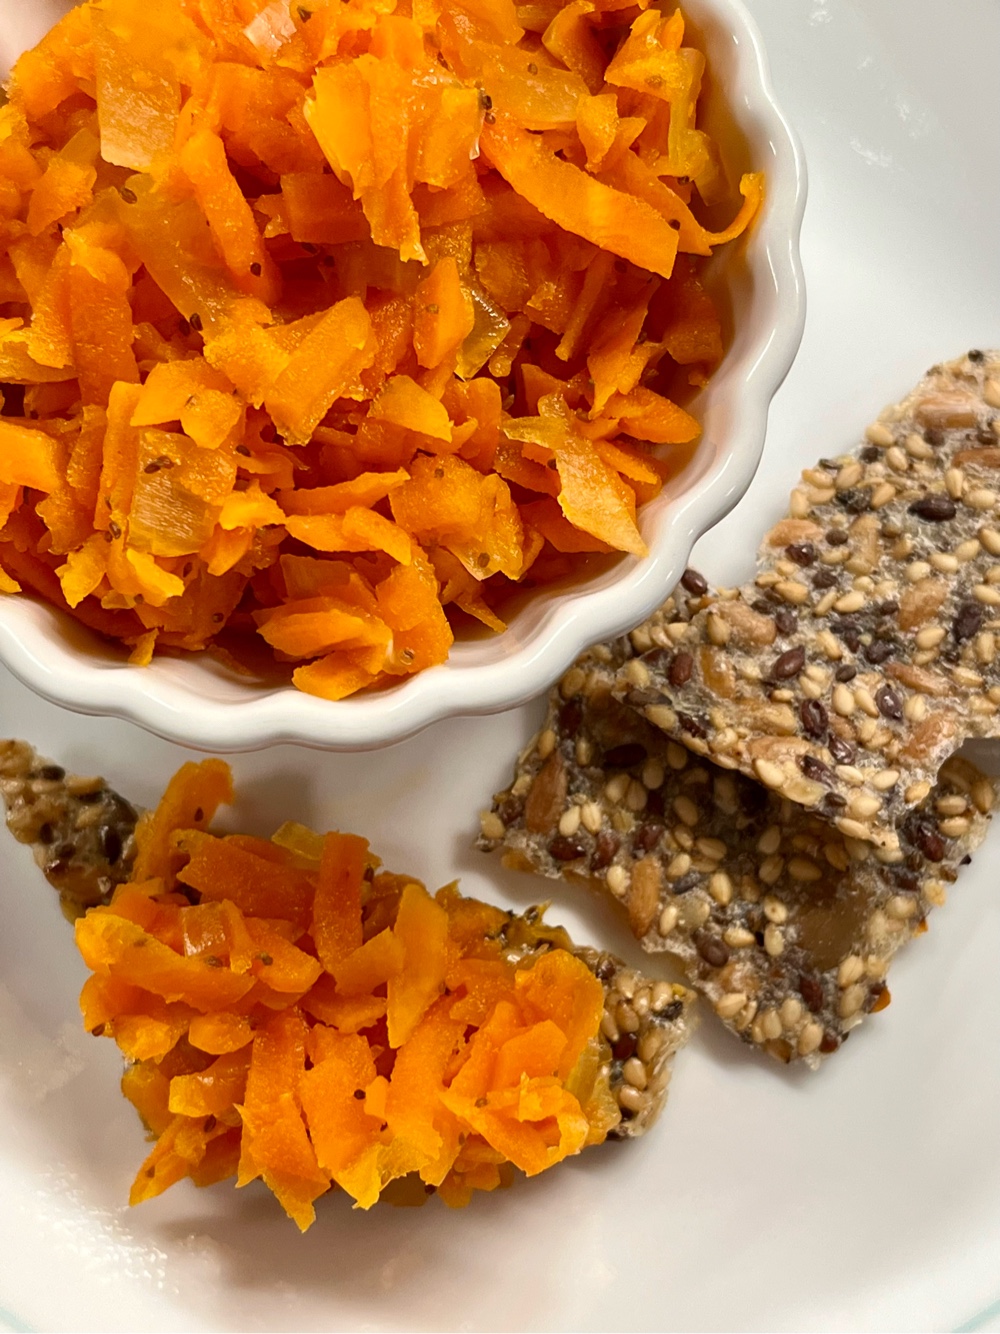
Sugar Free Carrot Relish (Hart’s Turkey Farm Copycat Recipe)


If you have ever been to Hart’s Turkey Farm Restaurant in Meredith, New Hampshire, then you will know of their delicious carrot relish that is served with saltine crackers as an appetizer. Traditionally, carrot relish is overloaded with sugar! This recipe uses allulose/monkfruit as its sweetener, which slashes the carb count significantly. I think you will find this sugar-free version just as delightful as the carrot relish that is so acclaimed at one of my favorite restaurants.

Sugar Free Carrot Relish
Makes 1 pint (32 servings)

3 cups shredded carrots, shredded on the big holes of a box grater
½ onion, chopped
A pinch of ground cayenne (or a dash or two of hot sauce)
1 teaspoon celery seed
½ teaspoon sea salt
1/3 cup allulose Monkfruit sweetener, or to taste
9 tablespoons apple cider vinegar 
1/4 cup water
Low carb crackers to serve

1. Add all the ingredients (except the crackers) to a heavy medium sauce pan. Bring to a boil and simmer for about 30 minutes on medium low heat, stirring occasionally. Simmer until the liquid is absorbed and the vegetables are tender. Spoon into a pint-size glass jar and cool completely before serving.

2. Serve with low carb crackers. Also, this relish is a very nice addition to a cheese platter. Spoon it directly onto a slice of cheddar cheese and enjoy!

Nutritional Information per tablespoon: 7 calories, 1.8 g carbohydrate (0.3 g dietary fiber, 0.6 g sugars), 0 g total fat, 0 mg cholesterol, 15 mg sodium, 5 mg calcium, 37 mg potassium, 520 IU Vit A, 1 mg Vit C, 0 g protein. Net carbs per serving: 1.5 grams

Photo and recipe by Kathy Sheehan, copyright 2026
All rights reserved. Please do not duplicate without the author’s permission.

Saturday, June 24, 2023

Summer Vegetable Stir Fry

Summer Vegetable Stir Fry

This is a dish we make often in the summer, utilizing the myriad of local summer vegetables available in the Farmer’s Markets. It’s a quick and easy stir fry that is fresh and delicious!

Summer Vegetable Stir Fry
Makes 2-3 servings

Cooked bratwurst, kielbasa or other cooked sausage 
1 small yellow zucchini or yellow summer squash
1 small green zucchini
½ onion
1 small Roma tomato
2 ounces cheese (cheddar, Parmesan or whatever is on hand)
Salt and pepper to taste

Optional Additions:
1-2 tablespoons tomato paste
1/4 cup heavy cream

1. Cut up the cooked sausage into cubes. Cube the yellow and green zucchini, onion, and tomato. Shred the cheese. Set aside.

2. Sauté the onions and sausage in a nonstick skillet over medium heat until the sausage begins to color and the onion is translucent and beginning to brown.

3. Add the zucchini and sauté, stirring occasionally, until it begins to soften and pick up some color. Add some salt and pepper to season the vegetables.

4. At the very end of cooking, add the chopped tomatoes and shredded cheese. When you stir in the tomatoes, they released their juices, which mixes with melted cheese to make a light sauce. If you want a saucier dish, add the optional tomato paste and heavy cream; stir to incorporate.

5. Taste and adjust seasoning if needed. Serve immediately.

Nutritional Information per serving (1/3 of recipe, not including optional additions): 351 calories, 8.9 g carbohydrate (1.8 g dietary fiber, 4.1 g sugars), 27.9 g total fat (12.2 g saturated fat, 0 g trans fat), 67 mg cholesterol, 1156 mg sodium, 151.2 mg calcium, 235 mg potassium, 107 IU Vit A, 15 mg Vit C, 15.3 g protein. Net carbs per serving: 7.1 grams.

Recipe and Photo by Kathy Sheehan, copyright 2023
All rights reserved. Please do not duplicate without the author’s permission. 

Monday, June 12, 2023

Keto Black and White Cookies

Keto Black and White Cookies

I’ve been trying for years to create an authentic, sugar free, Black and White cookie. Well, this is it! In this recipe, I start with raw macadamia nuts and process them in a food processor (or blender) to make smooth and creamy macadamia nut butter. This is the key to making these light, puffy, tender and cake-like cookies, which are the base of this iconic cookie. I chose macadamia nuts for the base of my cookie batter because they are the lowest carb and highest fat of all the nuts, mild in flavor, plus they’re much lower in oxalates, minimizing the need for almond flour. This cookie is a dream come true!

Keto Black and White Cookies
Makes 18 cookies

Cookies:
1½ cups raw macadamia nuts
2 large eggs
1 tablespoon unsalted butter, very soft or melted
1 teaspoon lemon juice
1½ teaspoons vanilla extract 
¾ cup powdered low carb sweetener (I used Confectioners LaKanto Monkfruit sweetener)
1/4 cup almond flour
1½ tablespoons oat fiber powder (not oat flour!)
2 tablespoons coconut flour
1 tablespoon unflavored whey protein powder
1 teaspoon baking powder
1/4 teaspoon baking soda
A pinch of salt
1-2 tablespoons water, only if needed!

Glaze:
1½ cups powdered low carb sweetener* (see note)
1 tablespoon vegetable glycerin or liquid allulose (it adds shine to the glaze, omit if you don’t have any)
¾ teaspoon lemon juice
½ teaspoon vanilla extract 
2-3 tablespoons water (or more, if needed)
1/4 cup unsweetened Dutch-process cocoa powder
More water for chocolate glaze, as needed

1. Preheat oven to 350°F. Line a rimmed baking sheet with a silicone baking mat or parchment paper.

2. In a food processor or powerful blender, process the macadamia nuts until a smooth nut butter forms, scraping down the sides occasionally. Add the eggs, softened butter, lemon juice and vanilla extract. Process until the mixture is completely smooth and no lumps remain.

3. Transfer the nut mixture to a large mixing bowl. Add the powdered sweetener and, using an electric mixer with the paddle attachment (if you have one), mix until the sweetener is completely incorporated.

4. In a small bowl, combine the almond flour, oat fiber powder, coconut flour, whey protein powder, baking powder, baking soda and salt. All at once, add the dry ingredients to the nut mixture and mix until the ingredients are well combined. Let the batter rest for a few minutes to allow the coconut flour to absorb the liquid, then mix again. What you’re looking for is a thick, but cohesive batter that is like a thick cake batter, slightly looser than a dough. (Only if needed, add water 1 teaspoon at a time until the proper consistency is reached.)

5. Using a 1½ tablespoon cookie scoop (size 40), drop the cookie batter onto the lined cookie sheet about 1½ inches apart. The cookies will spread a bit as they bake.

6. Bake for 12 to 14 minutes (begin checking them at 12 minutes). Bake until they’re lightly golden and the tops are just firm and spring back slightly when touched in the center. Remove the baking sheet from the oven and allow the cookies to remain on the baking sheet for a few minutes. Remove the cookies to a wire rack to cool completely before glazing.

7. To make the glaze, add the powdered sugar substitute, vegetable glycerin or liquid allulose, lemon juice, vanilla, and 2-3 tablespoons of water in a small bowl, and stir until smooth and easily spreadable. Then divide the glaze equally into two bowls. Add the cocoa powder to one and add just enough water until the consistency is the same as the vanilla glaze (adding 1 teaspoon of water at a time; it may take 3-6 teaspoons or more, judge by its consistency).

8. To ice the cookies, use the flat side (bottom) of the cookie and spread each half of the cookie with one of the icings, starting with the vanilla icing. Spread the vanilla on one half of all the cookies first, then coming back later after the vanilla has hardened, and adding chocolate icing to them on the remaining half, so you avoid the colors mixing.

9. Cookies can be stored at room temperature for 2-3 days, or refrigerate for longer periods, but allow the cookies to come to room temperature before enjoying. If stacking cookies in a cookie jar or storage container, place parchment paper between layers to prevent the icing from sticking.

Spread vanilla frosting first, then spread chocolate frosting last

*Notes: You can use an erythritol-based powdered sweetener (best option), such as Confectioners LaKanto Monkfruit sweetener. But because of the slight cooling effect, some people put off by that sensation might wish to use powdered allulose for the glaze. Allulose doesn’t have a cooling affect or aftertaste. If you can’t find powdered allulose, you can powder it yourself in a food processor. But NOTE: Allulose doesn’t absorb liquid in the same way as erythritol. Use less liquid, if using allulose. Also, icing made with allulose really doesn’t set up. It remains soft and sticky. Tastes delicious, but if you want to store them on top of each other in a cookie jar, don’t use allulose. 

Nutritional Information per cookie (with glaze): 106 calories, 6.1 g carbohydrate (1.8 g dietary fiber, 0.6 g sugars, 2.4 g sugar alcohols), 10.2 g total fat (2.1 g saturated fat, 0 g trans fat), 22 mg cholesterol, 87 mg sodium, 15.8 mg calcium, 71 mg potassium, 1 mg iron, 15 IU Vit A, 2 g protein. Net carbs per serving: 1.9 grams

Photos and recipe by Kathy Sheehan, copyright 2023
All rights reserved. Please do not duplicate without the author’s permission. 

Wednesday, May 3, 2023

Keto Dark Chocolate Pots de Crème (No cook Chocolate Mousse)

Keto Dark Chocolate Pots de Creme

This impressive dessert may sound fancy, but it’s quick and easy to make! I love to make them for a crowd or a party because they can be made ahead of time. They’re so rich and decadent that their small size is just enough. It uses a combination of zero carb sweeteners for the best flavor and smooth texture when chilled. Instead of being overly sweet, this thick mousse is somewhere between bittersweet and semi-sweet, but you can adjust the sweetness to your own taste. This recipe makes ten, small shooter-size dessert cups.

Keto Dark Chocolate Pots de Crème (Chocolate Mousse)
Makes 10 servings

9 ounces 100% unsweetened chocolate chips (or baking chocolate, roughly chopped)
3 large eggs
20 drops monkfruit extract or stevia drops
¾ teaspoon stevia powder
2 tablespoons powdered erythritol sweetener 
1½ teaspoons vanilla extract 
A good pinch of sea salt
¾ cup almond milk, coconut milk or other low carb milk of choice
¾ cup heavy cream
½ cup allulose

1. Put milk, heavy cream, and allulose into a small saucepan and bring to a boil.

2. Meanwhile, placed the chocolate chips into a food processor or blender. Pulse to chop chocolate into small pieces.

3. Add eggs, monkfruit extract, stevia powder, powdered erythritol, vanilla and salt. Process on low until ingredients are combined.

4. While the blender or food processor is running, pour boiling hot milk mixture through the opening at the top. Process until mixture is completely smooth and all of the chocolate has melted. The hot liquid will cook the eggs.

5. Divide the chocolate mixture into individual small dishes or cups (I use shooter size dessert cups) and place in the refrigerator to cool completely, about 3-4 hours. The mixture will solidify into a rich, thick, mousse-like consistency. Serve cold, and top with whipped cream, if desired.

Shooter Size Dessert

Nutritional information per serving (no whipped topping): 218 calories, 8.2 g carbohydrate (4.5 g dietary fiber, 0.2 g sugars, 0.8 g sugar alcohols), 22.9 g total fat (14.2 g saturated fat, 0 g trans fat), 83 mg cholesterol, 49 mg sodium, 18.7 mg calcium, 24 mg potassium, 95 IU Vit A, 5.9 g protein. Net carbs per serving: 3.7 grams.

Recipe and photos by Kathy Sheehan, copyright 2023
All rights reserved. Please do not duplicate without the author’s permission. 

Monday, January 30, 2023

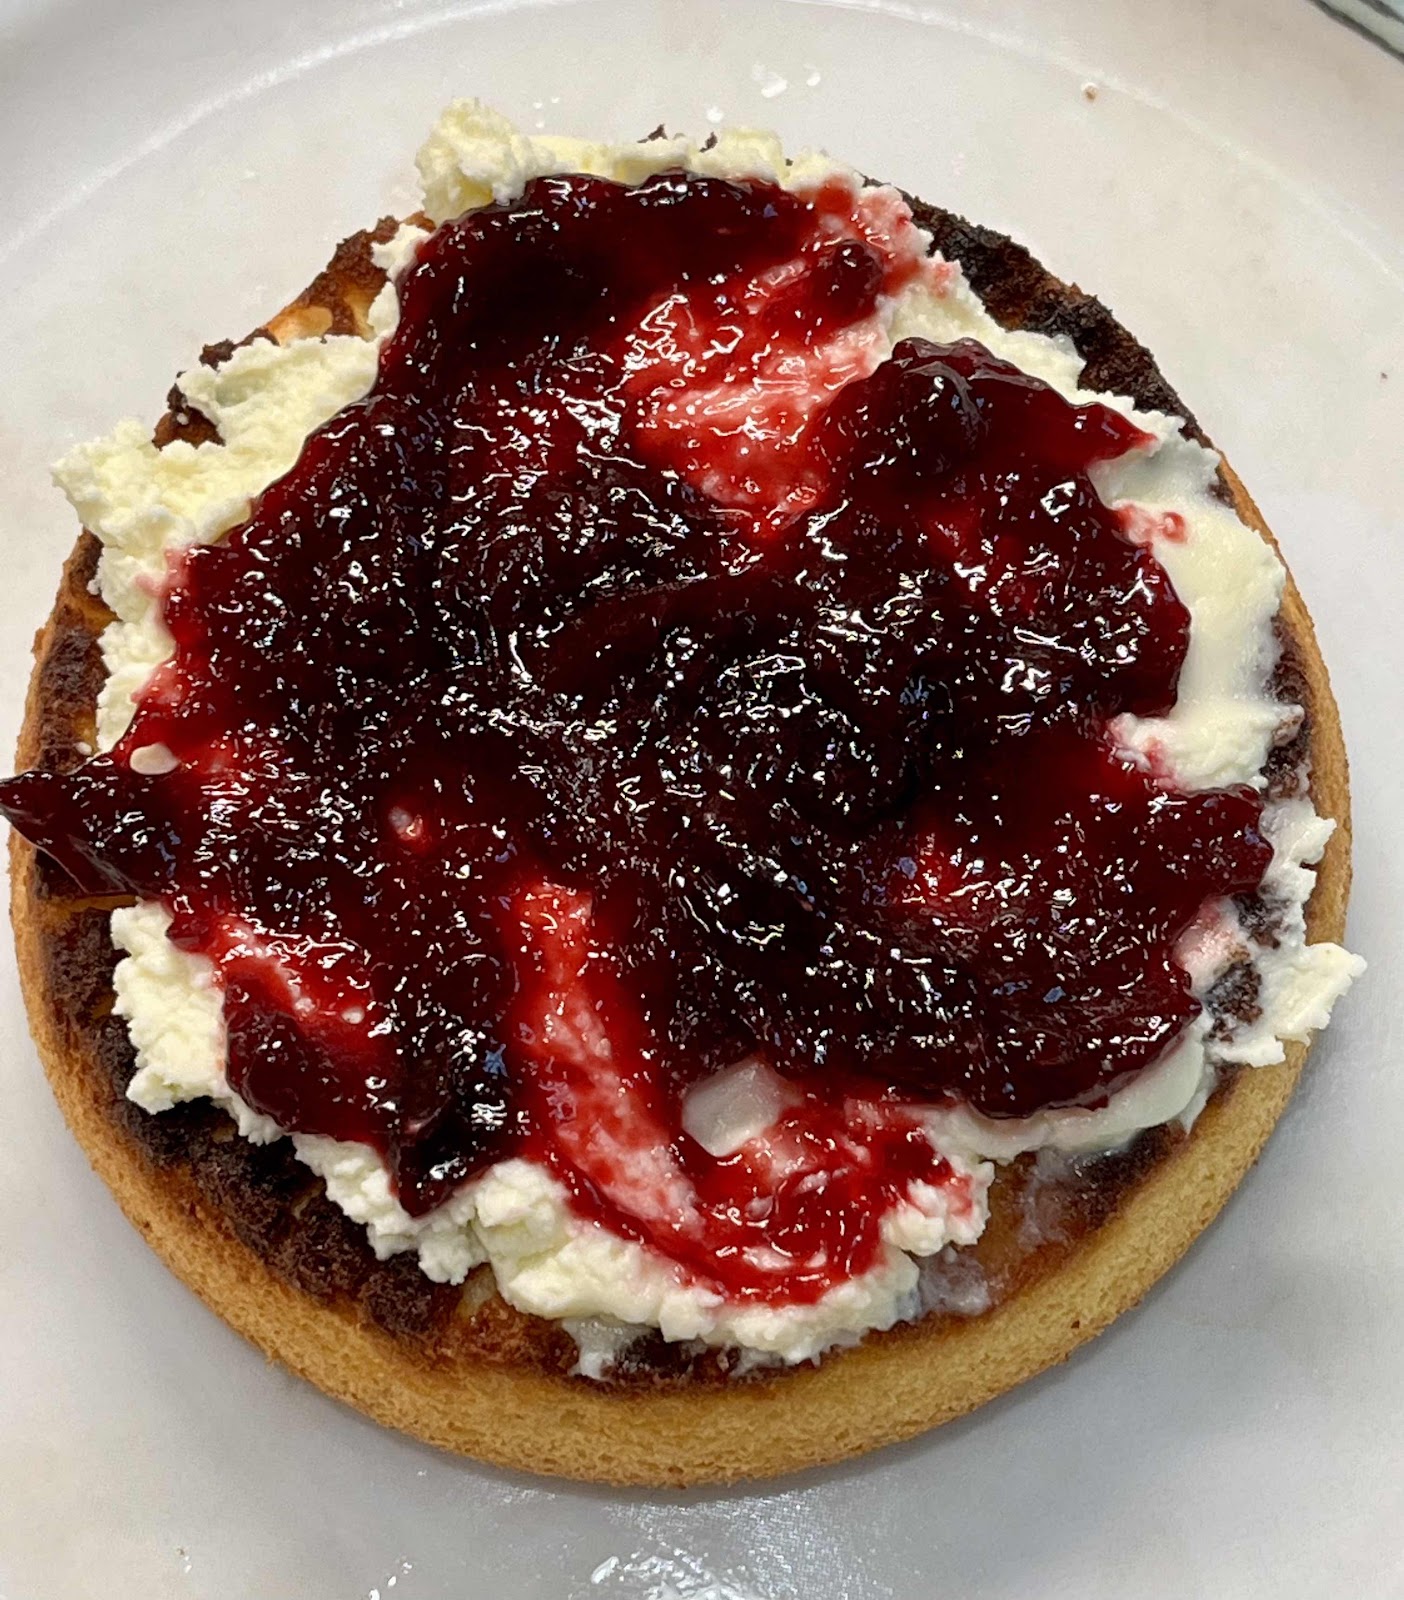
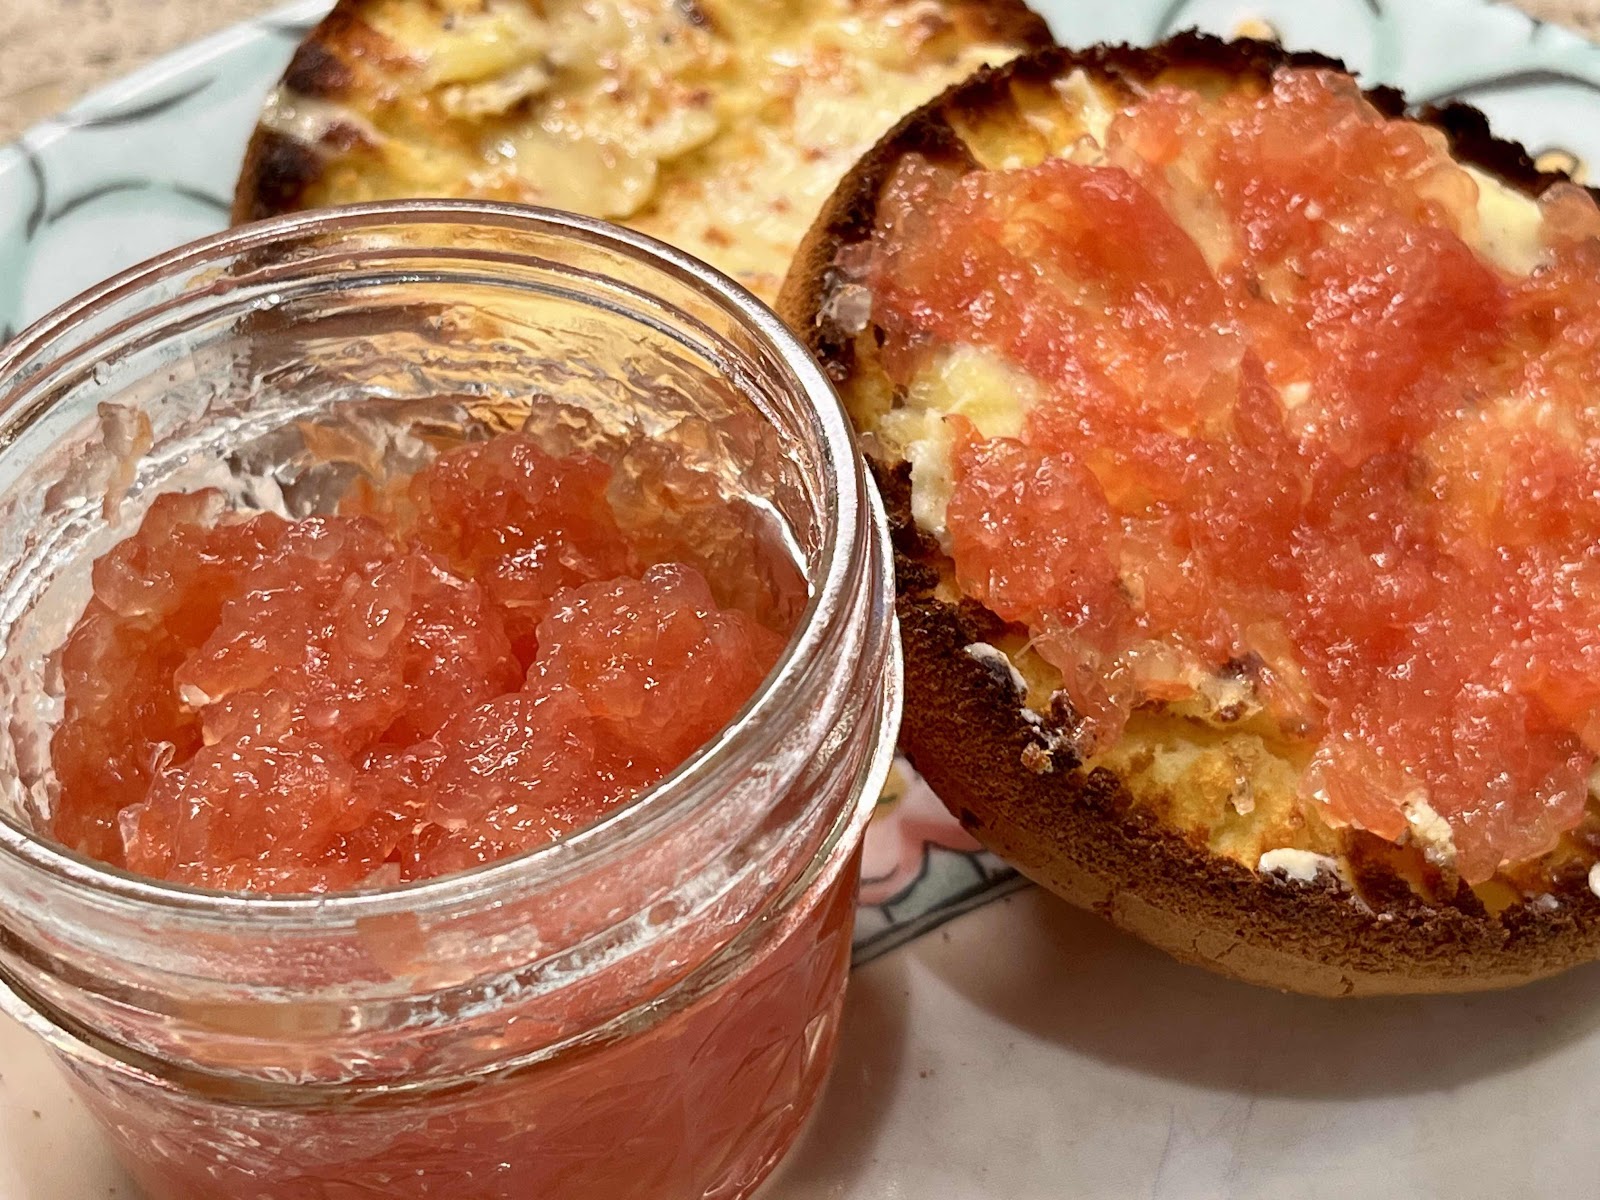
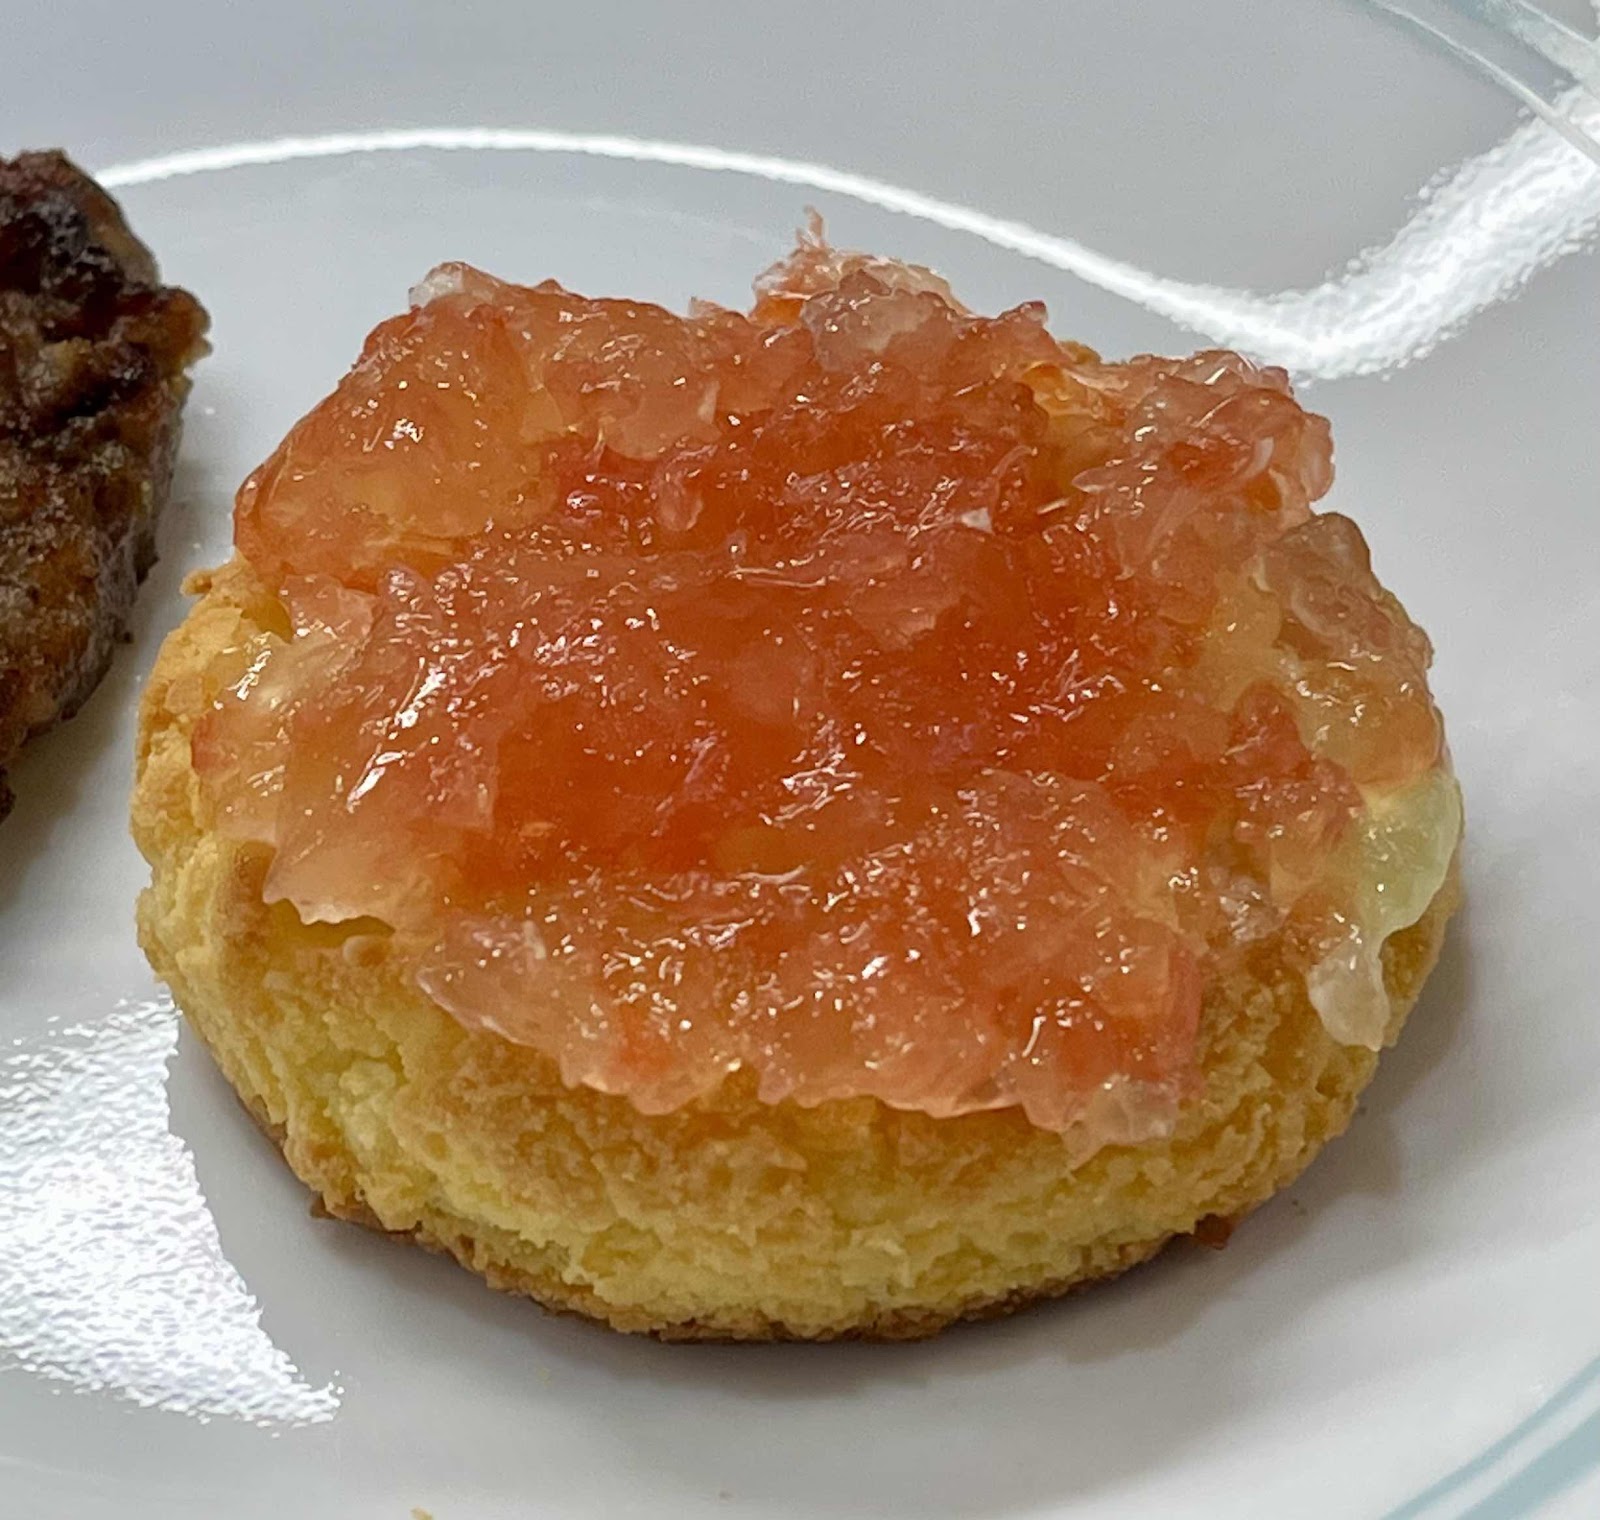
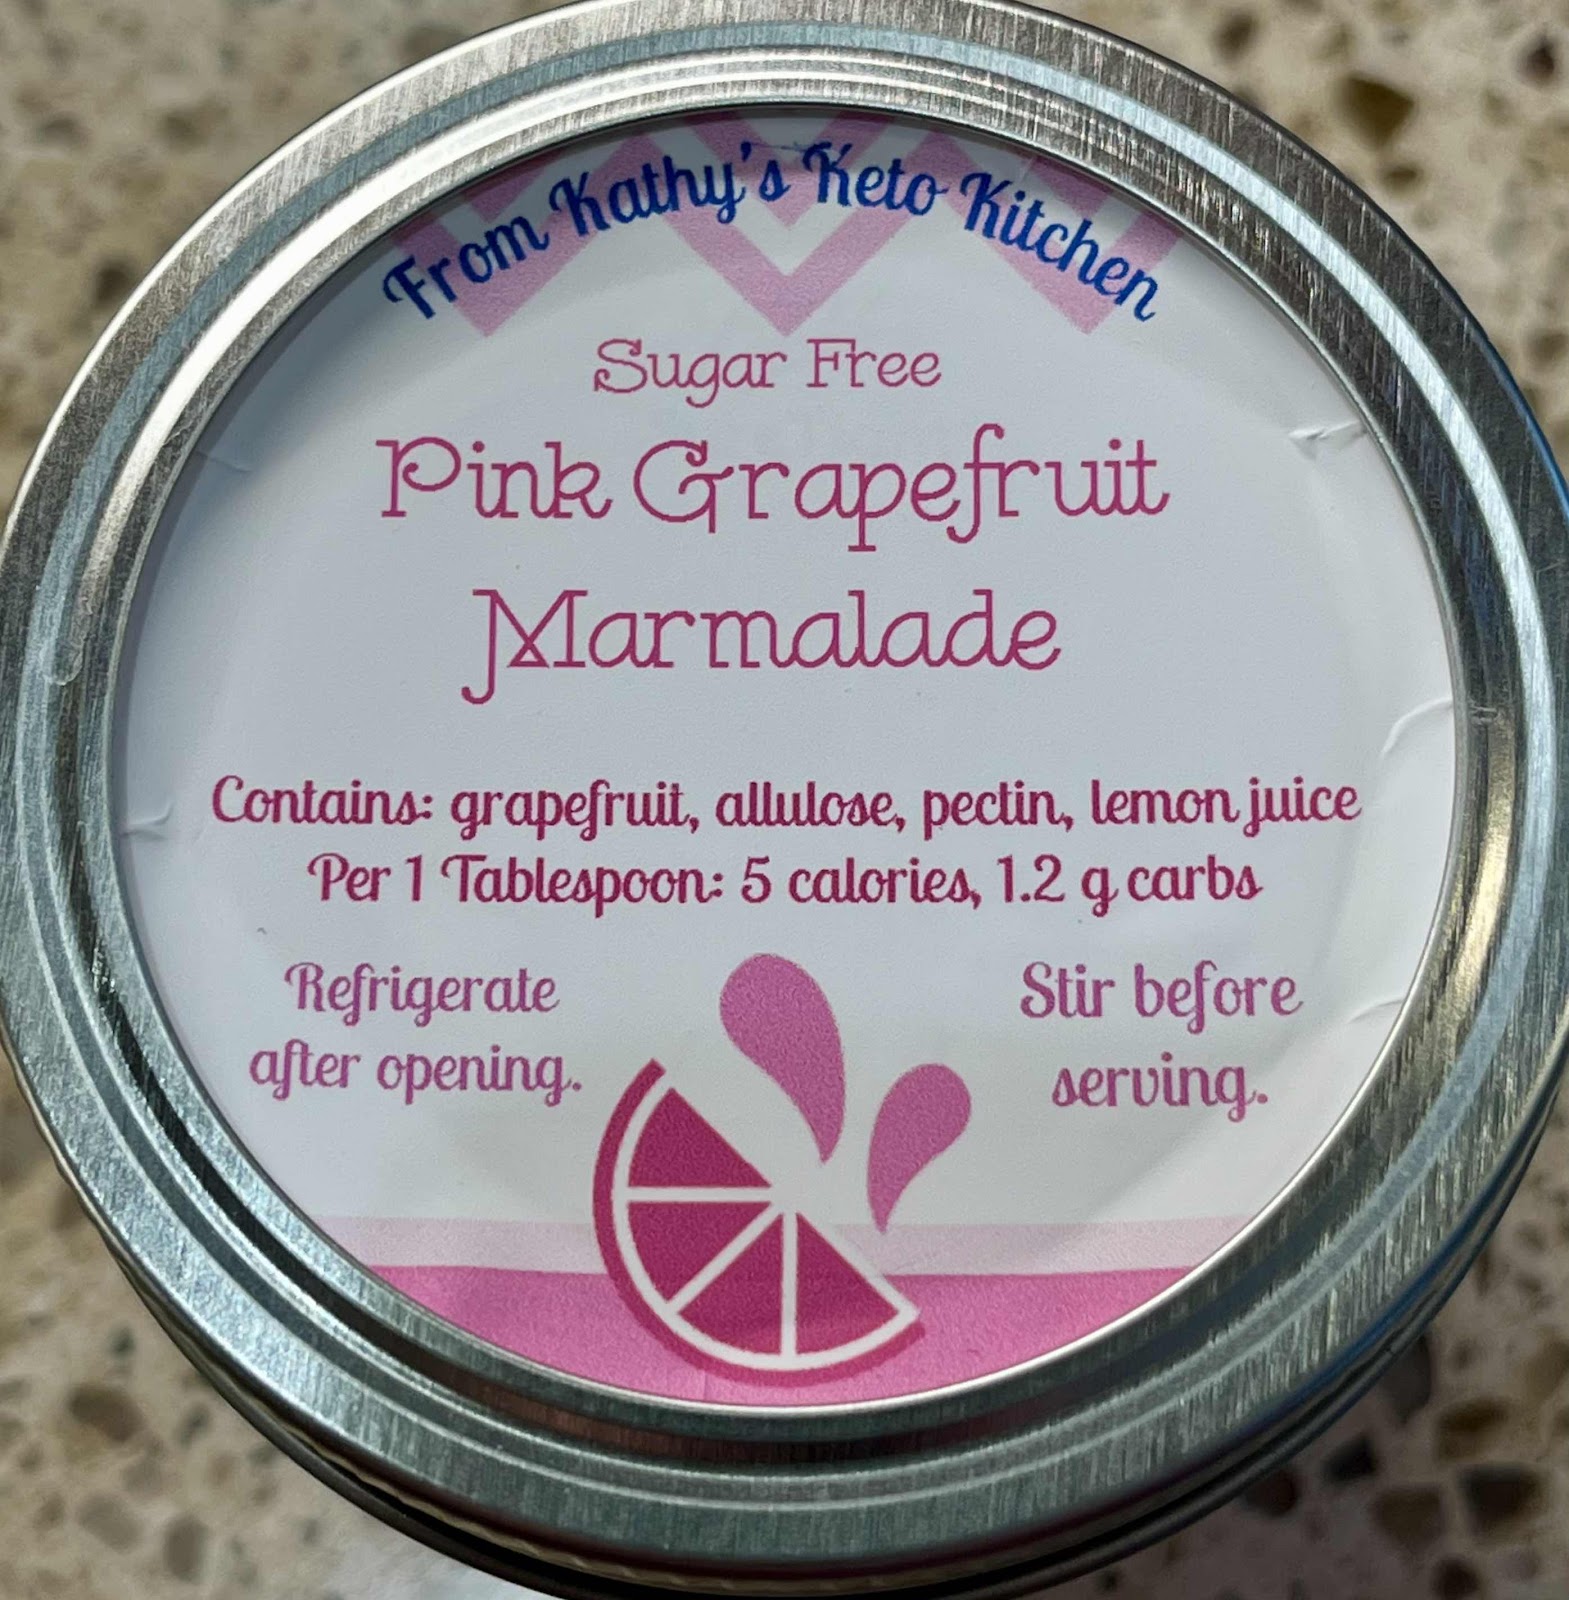
Sugar Free Pink Grapefruit Marmalade (Low Carb, Keto)

Sugar Free Pink Grapefruit Marmalade
I am loving my sugar free jams and jellies! They are easy and fun to make. When you use naturally sweet ruby red grapefruit, this marmalade is not too tart and utterly refreshing. Winter is the best time for buying citrus fruits. They are in season and at their peak of sweetness! This grapefruit marmalade is delicious served on low carb bread, crackers and pancakes, but it’s also excellent mixed with sugar free BBQ sauce and used as a glaze on ribs, chicken or pork tenderloin. 

Sugar Free Pink Grapefruit Marmalade 
Makes 4-5 half-pint jars

5-6 large red grapefruit, supremed (all rind and membrane removed and discarded)
2 tablespoons bottled lemon juice
3 teaspoons calcium water (see Step #1)
1 cup allulose (or substitute ½ cup allulose-based honey + ½ cup granulated allulose)
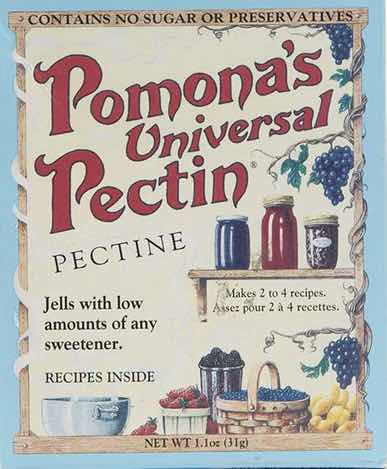
4 teaspoons Pomona’s Universal Pectin powder (made especially for low to no sugar jams)

Grapefruit Marmalade on a keto biscuit
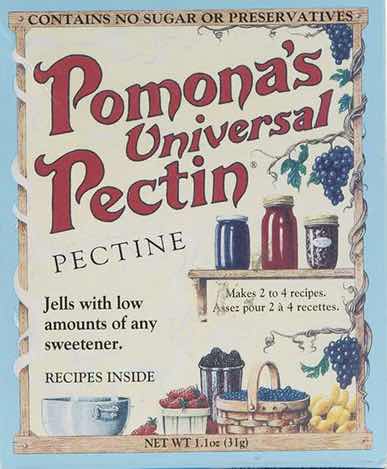
1. Before you begin, prepare the calcium water. To do this, combine ½ teaspoon calcium powder (in the small packet that comes in the box of Pomona’s Universal Pectin) with ½ cup water in a small jar with a lid. Shake well. (Extra calcium water can be stored in the refrigerator indefinitely for future use.)

Pomona’s Universal Pectin
2. Wash your canning jars, lids and bands. Place jars in a stock pot or canner, filled with water about 2/3 full, and bring to a boil. Boil for 10 minutes to sterilize your jars. Turn off the heat, cover, and keep jars in the hot water until ready to use. Place lids and bands in water in a small saucepan, cover and heat to simmer. Turn off heat and keep lids in the hot water until ready to use.

3. Cut away the rind and section the grapefruit, discarding all of the membrane and rind. Break the grapefruit sections into chunks and place them in a large measuring cup; you will need 4 cups of grapefruit and any accumulated juices. Place the 4 cups of grapefruit pieces and accumulated juice in a large saucepan with the lemon juice and calcium water. Mix well. Bring to a boil over high heat, stirring occasionally to prevent the grapefruit from scorching. 

4. Meanwhile, in a separate bowl, mix together the allulose and Pomona’s Universal Pectin powder, stirring to combine. (If you like the flavor of honey with your grapefruit, you can substitute ½ of the sweetener with sugar free allulose honey.)

5. Once the grapefruit mixture is boiling rapidly, slowly add the allulose and pectin mixture, stirring continuously until the sweetener and pectin have dissolved. Bring the mixture back up to a full boil, stirring constantly. Once the marmalade returns to a full boil, that cannot be stirred down, boil for one minute and remove move it from the heat. (If needed, skim any foam and discard.)

6. Fill hot, sterilized jars to 1/4” from the top. Wipe rims clean with a wet paper towel. Place a lid on each jar and then screw on a rim just until finger-tight. Put the filled jars into boiling water to cover. Boil for 10 minutes (add 1 more minute for every 1000 feet above sea level). Turn off heat and allow the jars to rest in the hot water for five minutes. (Note: if you don’t want to process the marmalade in a boiling water bath, you can put it in the refrigerator once it is cooled and it will keep for three weeks. You can also freeze the marmalade instead of canning it. For freezing, fill jars to 1/2 inch from top. To prevent the glass jars from cracking, freeze jars without a lid to allow for expansion, then screw on a lid once frozen. Defrost in the refrigerator before eating.)

7. Remove jars from hot water using a jar lifter tool and place them on a kitchen towel. Let the jars cool undisturbed on the kitchen counter for 12 to 24 hours. Check seals; lids should be sucked down and not move or click when pressed in the center. Properly sealed jars can be stored at room temperature for one year. Once opened, refrigerate and consume within three weeks. (Note: It is normal for this marmalade to separate as it cools. Simply stir before serving.)

Pink Grapefruit Marmalade Label
Nutritional Information per 1 tablespoon: 5 calories, 1.4 g carbohydrate (0.2 g dietary fiber, 0.9 g sugars), 0 g total fat, 0 mg cholesterol, 0 mg sodium, 1.6 mg calcium, 18 mg potassium, 35 IU Vit A, 5 mg Vit C, 0 g protein. Net carbs per serving: 1.2 grams

Recipe and photos by Kathy Sheehan, copyright 2023
All rights reserved. Please do not duplicate without the author’s permission.
Sunday, November 6, 2022

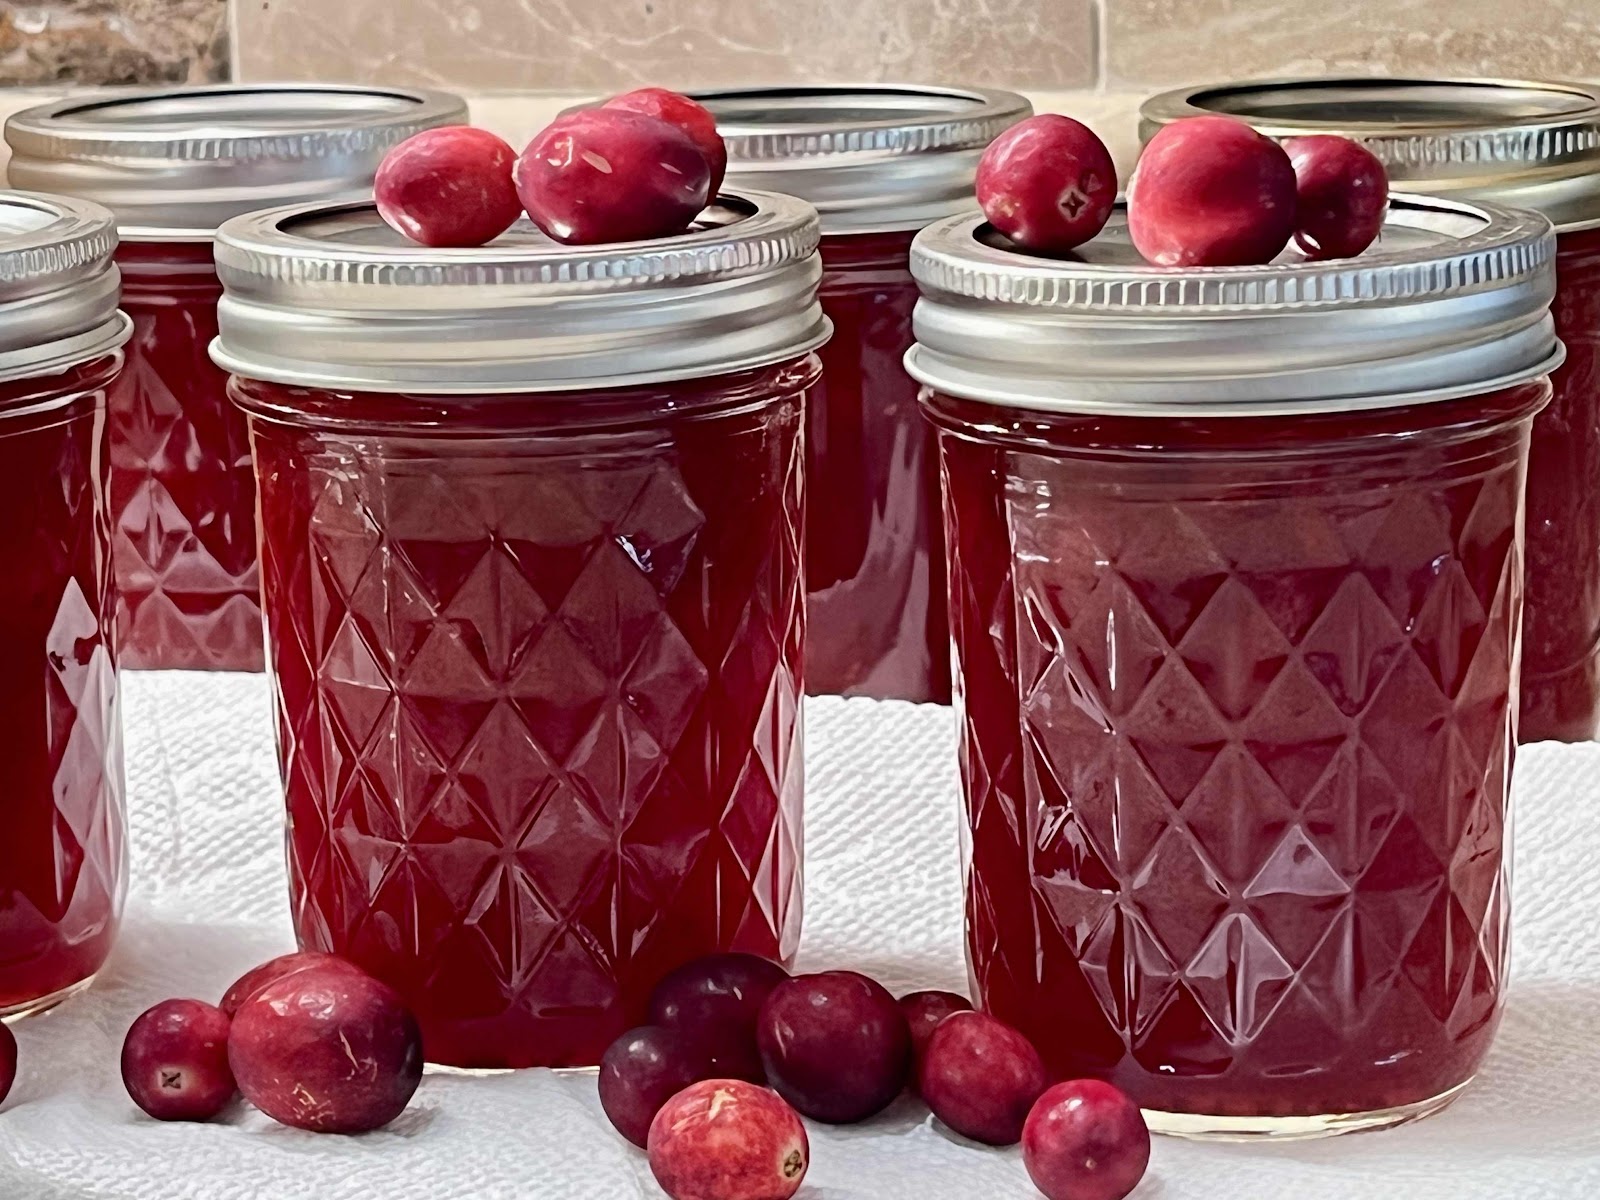
Sugar Free Cranberry Sauce (Jellied or Whole Berry)

Sugar Free Cranberry Sauce
Thanksgiving is approaching! I really like the taste combination of turkey with tart cranberry sauce. But, have you looked at the nutritional information on the back of a can of cranberry sauce? One-fourth cup contains an astonishing 28 grams of carbohydrate, mostly sugar!! Even a spoonful will derail your low carb plans and send your blood sugar skyrocketing. This recipe tastes just like traditional cranberry sauce, but only has 3.6g net carbs per serving. You can make it ahead, process it in a boiling water bath to seal your jars (which makes them shelf stable for a year), or simply refrigerate or freeze. Great idea for gift-giving to your low carb or diabetic friends and family, too!

Sugar Free Cranberry Sauce (Jellied or Whole Berry)
Makes three (8 oz) jars or 12 servings

Pulpy Cranberry Juice Ingredients:
12 ounce bag of fresh cranberries (or frozen), washed
1½ cups water

Cranberry Sauce Ingredients:
2 cups pulpy cranberry juice (see Step #3)
1 teaspoon calcium water (see Step #1)
2 tablespoons bottled lemon juice
1/4 cup liquid allulose or allulose honey (if not using, increase granulated allulose by an additional 1/4 cup)
1 teaspoon Pomona’s Universal Pectin
¾ cup granulated allulose sweetener 

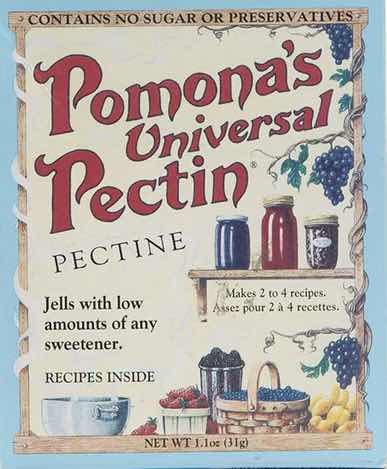
1. Before you begin, prepare the calcium water. To do this, combine ½ teaspoon calcium powder (in the small packet in the box of Pomona’s Universal Pectin) with ½ cup water in a small jar with a lid.  Shake well. (Extra calcium water can be stored in the refrigerator indefinitely for future use.)

Pomona’s Universal Pectin
2. Wash your canning jars, lids and bands. Placed jars in a stock pot or canner, fill with water about 2/3 full, and bring to a boil. Boil for 10 minutes to sterilize your jars. Turn off the heat, cover, and keep jars in hot canner water until ready to use. Place lids and bands in water in a small sauce pan, cover and heat to simmer. Turn off heat and keep lids in the hot water until ready to use.

3. To make the pulpy cranberry juice that you will use as a base for your sauce, bring a package of cranberries and water to a boil and simmer, covered, on low until the berries burst and soften. Put the mixture through a food mill or strainer to remove all or most of the skins to create pulpy cranberry juice. (Optional, depending how chunky you want your sauce, see notes.*)

4. Measure and place the pulpy cranberry juice from the previous step into a sauce pan. Add 1 teaspoon calcium water and 2 tablespoons bottled lemon juice; mix well.

5. Measure the granulated allulose into a bowl. Thoroughly stir in the pectin powder until no lumps remain. Set aside.

6. Bring cranberry mixture to a full boil. Add the liquid allulose (or allulose honey) and granulated pectin-allulose mixture, stirring vigorously for 1 to 2 minutes to thoroughly dissolve the pectin.

7. Stir while the sauce comes back up to a boil. Once the sauce returns to a full boil that cannot be stirred down, boil for one minute and remove it from the heat. (If needed, skim any foam and discard.)

8. Fill hot jars to 1/4” from top. Wipe rims clean. Place a lid on each jar and then screw on a rim just until finger-tight. Put the filled jars into boiling water to cover. Boil for 10 minutes (add 1 more minute for every 1000 feet above sea level). Turn off heat and allow the jars to rest in the hot water for 5 minutes. (Note: If you don’t want to process the cranberry sauce in a boiling water bath, you can put it in the refrigerator once it is cooled and it will keep for three weeks. You can also freeze the sauce instead of canning it. For freezing, fill jars to 1/2 inch from top. To prevent cracking, freeze glass jars without a lid to allow for expansion, then screw on a lid once frozen. Defrost in the refrigerator before eating.)

9. Remove jars from hot water using a jar lifter tool and place them on a kitchen towel. Let the jars cool undisturbed for 12 to 24 hours. Check seals; lids should be sucked down and not move or click when pressed. Properly sealed jars can be stored at room temperature for one year. Once opened, refrigerate and consume within three weeks.

*Notes: If you want whole berry or chunky cranberry sauce, do not run all of the cooked cranberries through the food mill or strainer.

Nutritional Information for 1/4 cup: 14 calories, 4.9 g carbohydrate (1.3 g dietary fiber, 1.2 g sugars), 0 g fat, 1 mg sodium, 2.5 mg calcium, 5 IU Vit A, 5 mg Vit C, 0.1 g protein. Net carbs per serving: 3.6 grams

Photo and recipe by Kathy Sheehan, copyright 2022
All rights reserved. Please do not duplicate without the author’s permission. 

Saturday, September 17, 2022

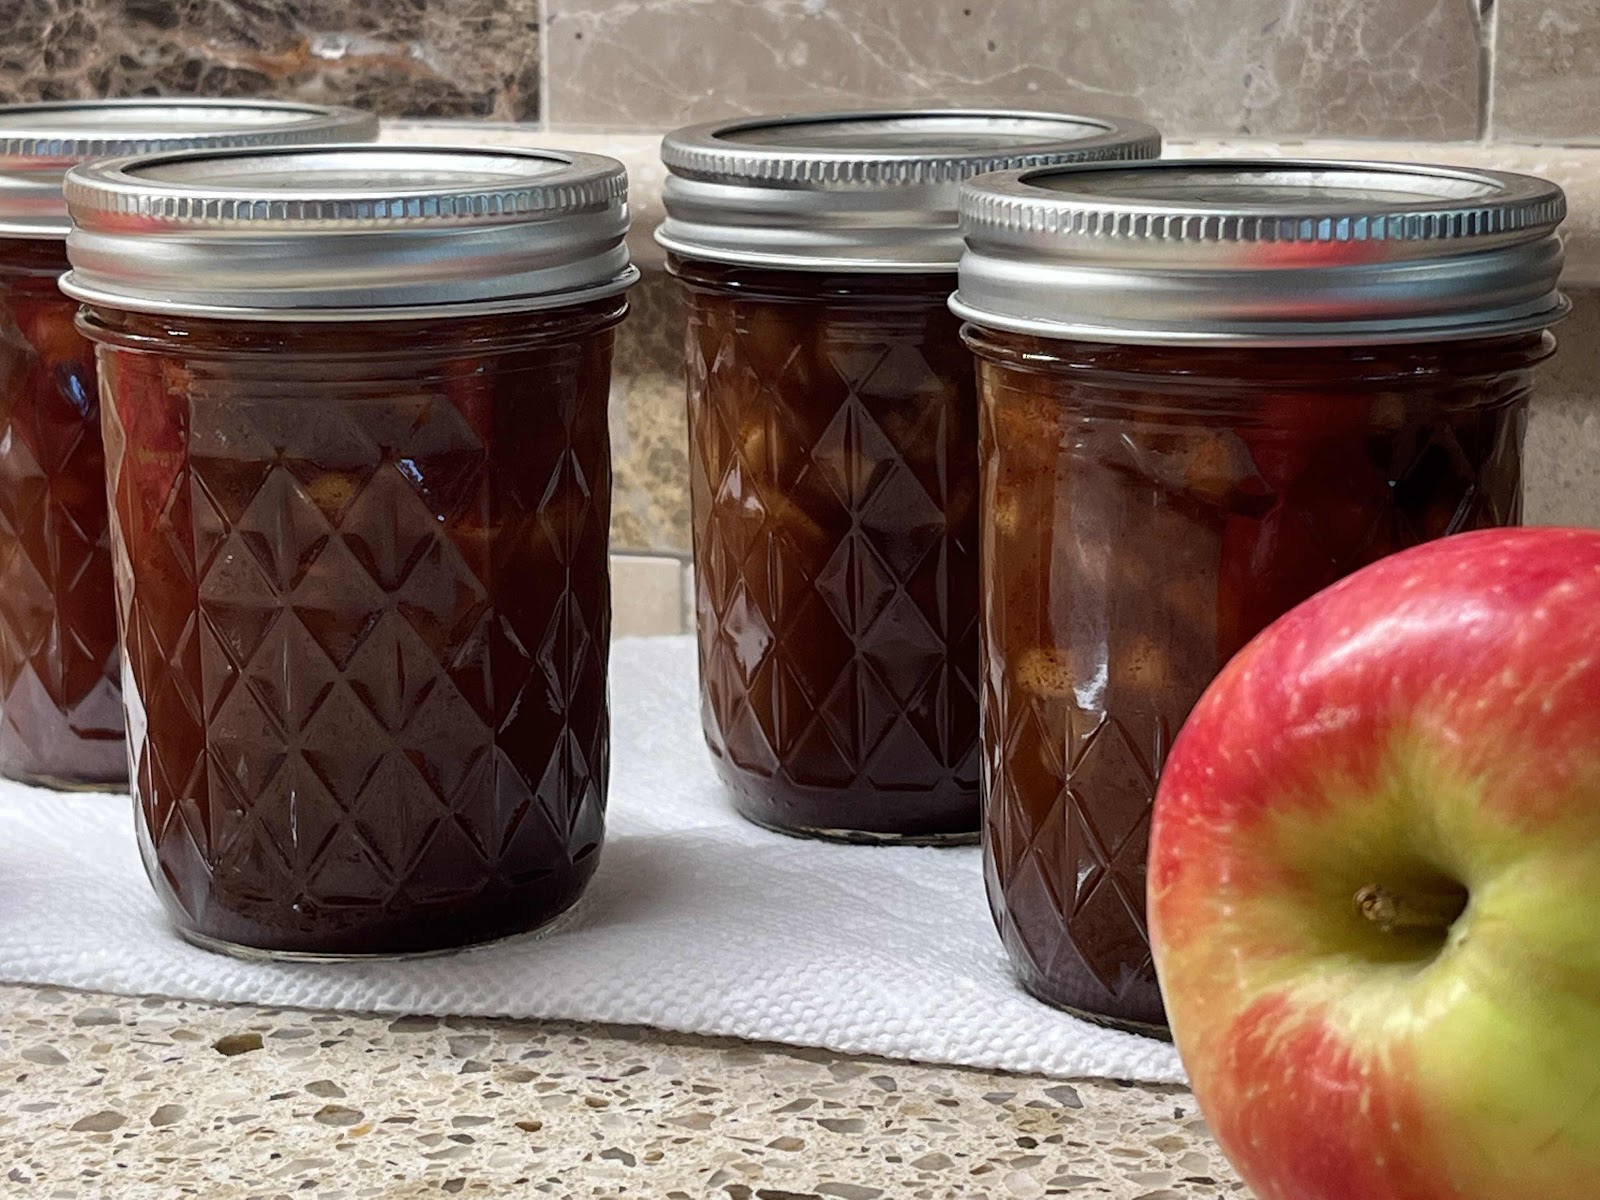
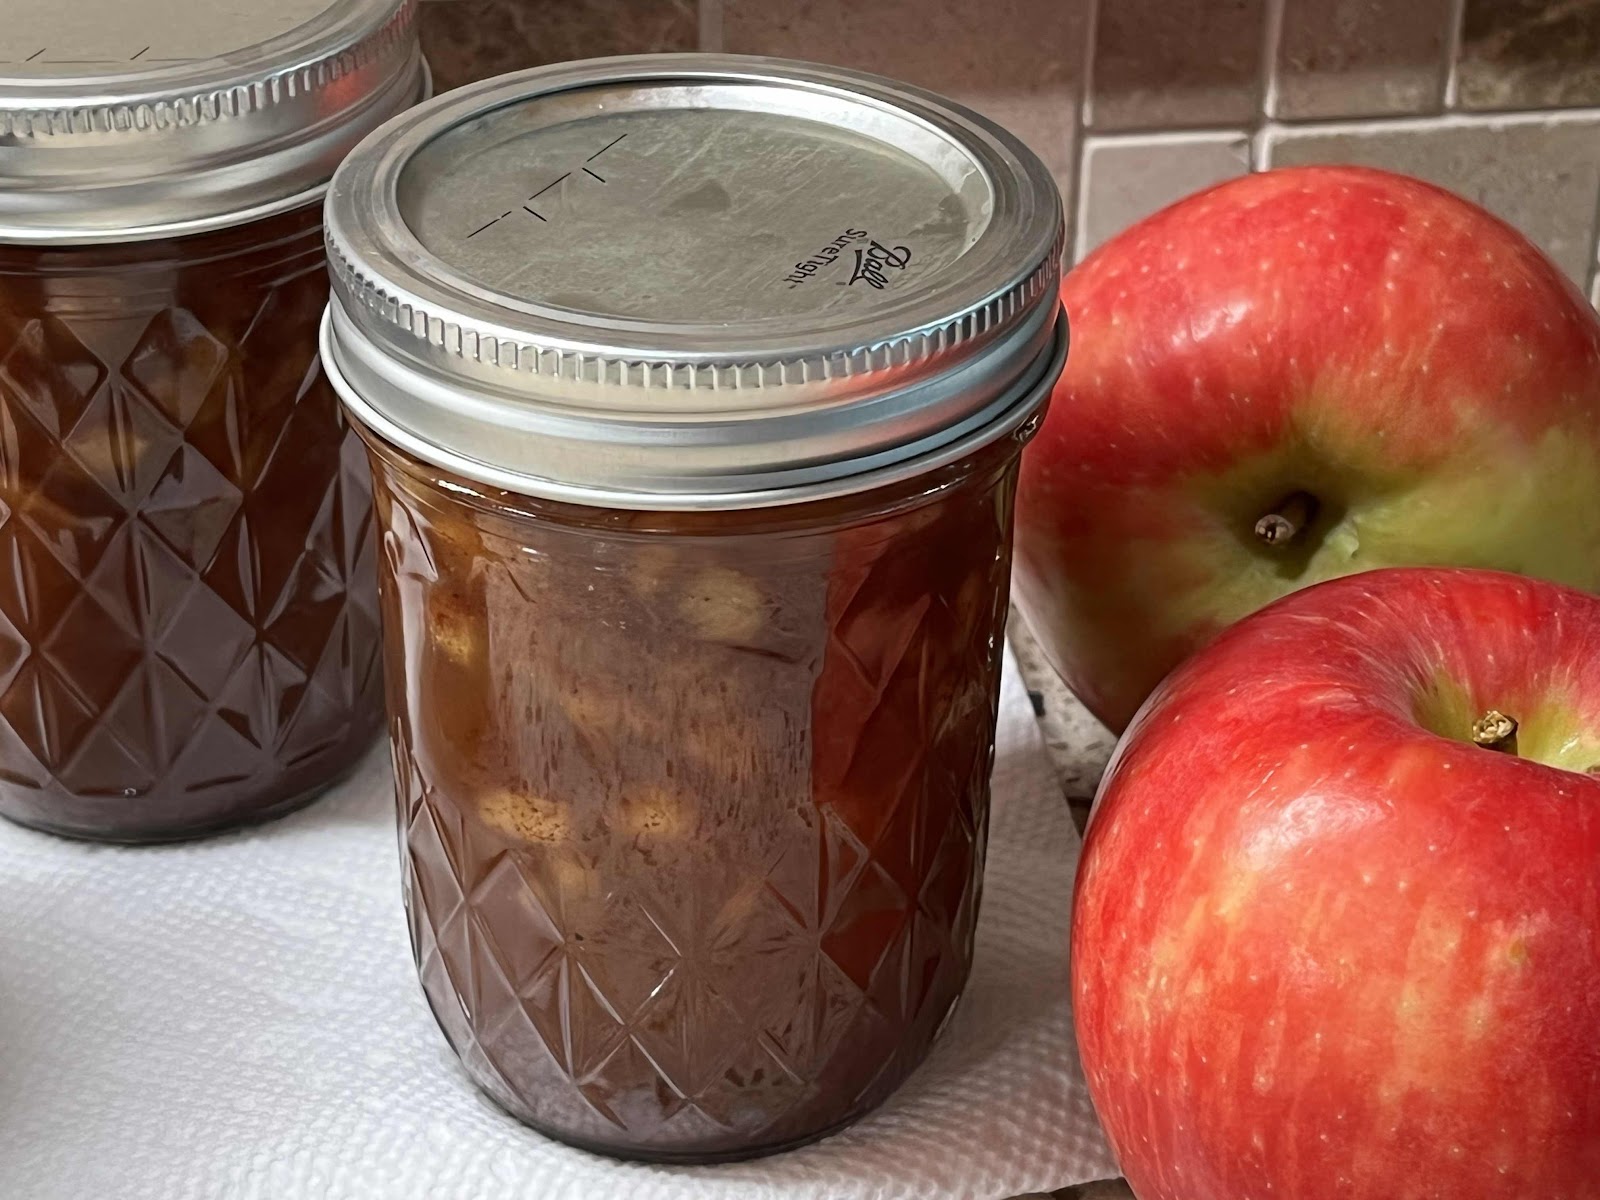
Keto Spiced Dutch Apple Jam

Keto Spiced Dutch Apple Jam
The weather is turning cooler and it’s apple picking season in Maine! Recently, I took a class at my Cooperative Extension Office where we learned to make Spiced Dutch Apple Jam. I had a wonderful time and learned a lot more about safe canning practices. But the recipe they used called for 7 cups of sugar! I came home and figured out that the amount of carbs per tablespoon was 16 grams! (That is equivalent to 4 teaspoons of sugar per tablespoon!!) With their recipe in hand, I went about making the necessary adjustments to make a batch that was sugar free. The final result is every bit as good as their recipe, but my recipe only has 2 grams of carb per tablespoon. This incredible jam tastes just like apple pie and is excellent on your low carb toast or spooned over low carb yogurt or ice cream. Also, share some with your keto friends! This makes an excellent gift for the holidays.

Keto Spiced Dutch Apple Jam
Makes four (8 oz) jars, 64 servings

4 cups apples, peeled, cored and diced small (about 5 medium apples)
1-1/4 cups allulose (or to taste)
2-1/2 teaspoons Pomona’s Universal Pectin (made especially for low sugar jams)
2 cups water
1/4 cup bottled lemon juice
3 teaspoons calcium water (see directions in Pomona’s Universal Pectin box)
1 teaspoon allspice
2 tablespoons + 2 teaspoons ground cinnamon
1 teaspoon ground nutmeg

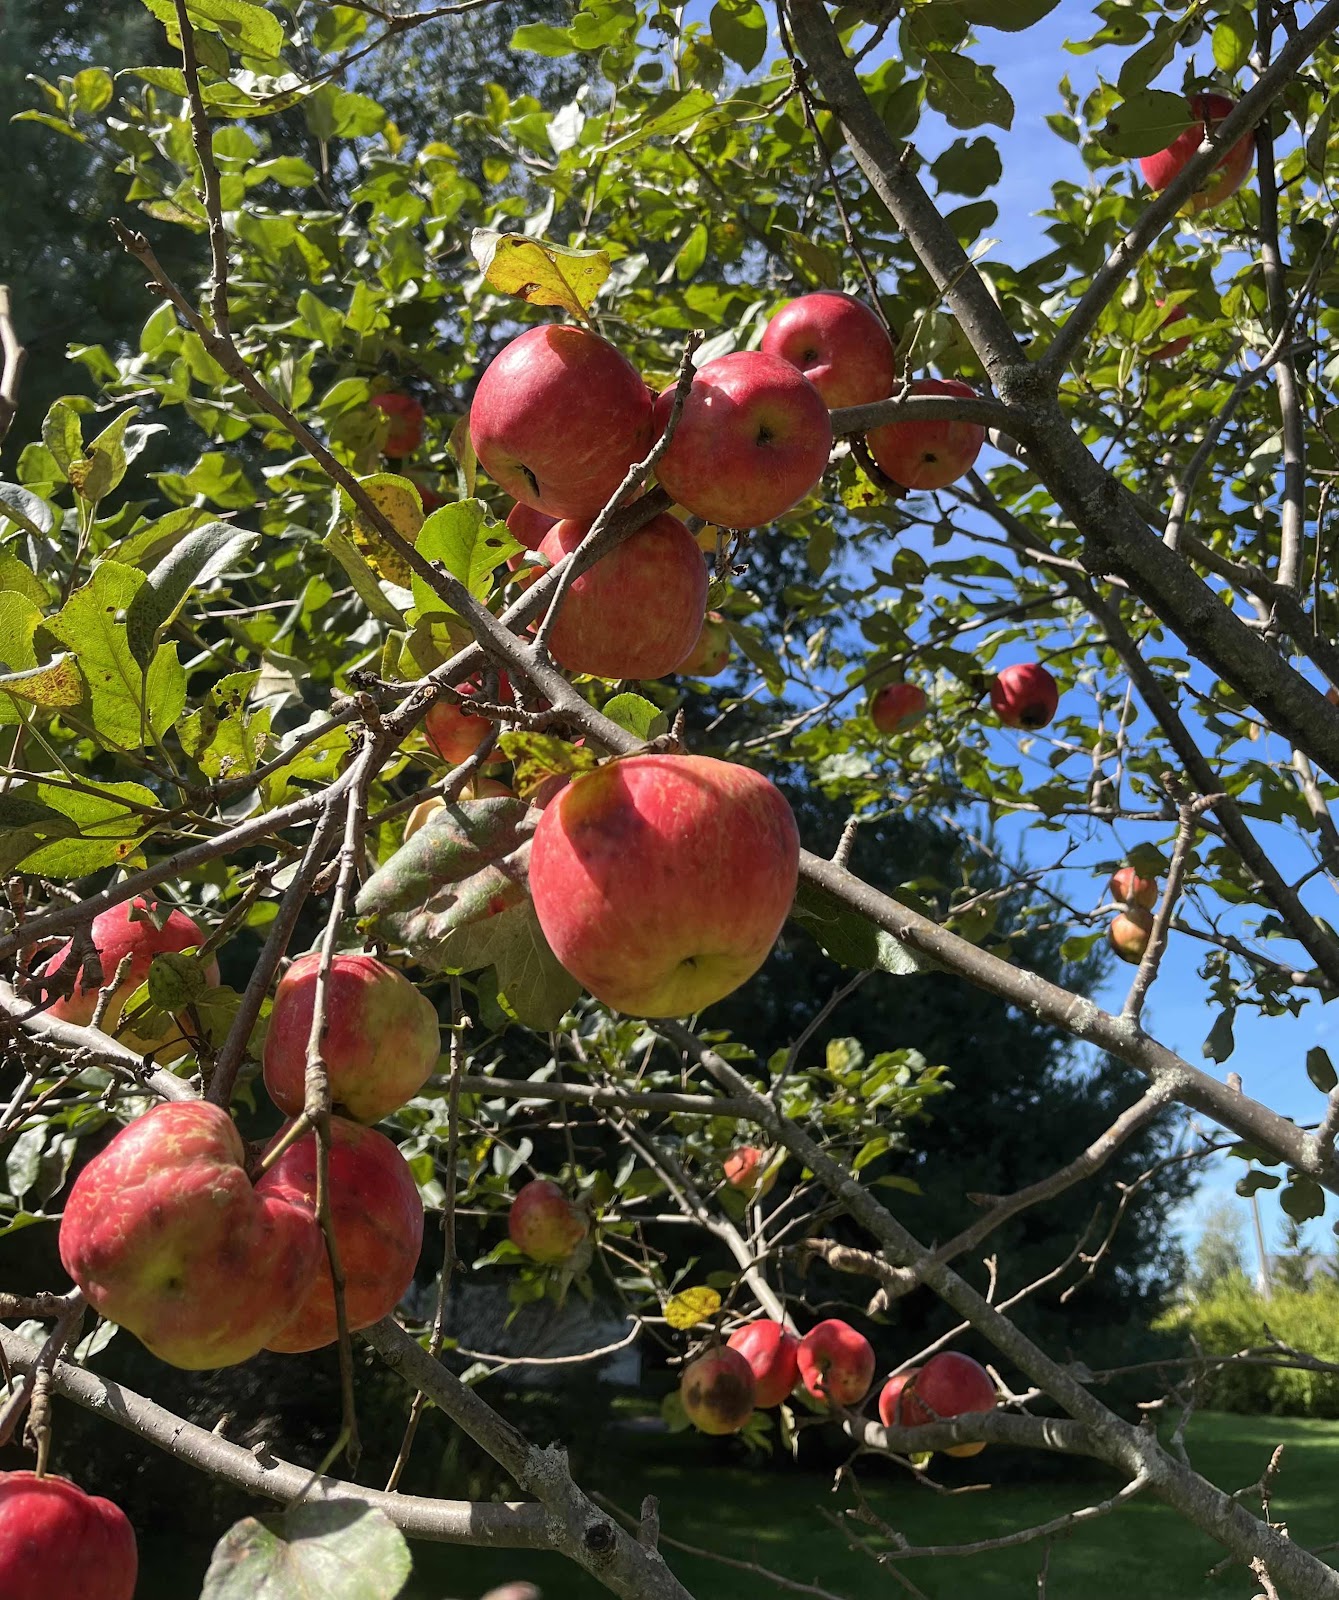
Apple Picking in Maine
1. Prepare the boiling water canner. Put the canning rack on the bottom of a large pot, then heat the jars in simmering water until ready to use, or for at least 10 minutes to sterilize the jars. Wash the lids in warm soapy water and set aside with the bands until you are ready to use them. (If you don’t want to process your jars in a water bath, your jam can be stored in the refrigerator for several months.)

2. In a bowl, combine the allulose and pectin; set aside. Place 1-2 small plates into your freezer to get cold. (These will be used for the “cold plate” test later.)

3. Place the diced apples into a large stainless steel saucepan or non-reactive cooking pot (not aluminum). Add the lemon juice, water and calcium water to the pot with the apples. Add the allspice, cinnamon and nutmeg. Stir to combine. Bring to a rolling boil over medium to high heat stirring often. (A rolling boil is a vigorous boil that cannot be stirred down, but continues to boil even as you stir.)

4. Once the apple mixture has reached a rolling boil, gradually stir in the allulose/pectin mixture and continue to stir until the sweetener and pectin dissolves.

5. Bring the mixture back to a full rolling boil that cannot be stirred down. Set a timer and boil hard for one minute, stirring constantly. Remove from the heat and check the jam using a cold plate from your freezer to be sure it will gel properly when set. Spoon a small amount onto a cold plate and allow to sit for a few minutes. Run your finger through the mixture and if a skin has formed and the jam is starting to set up, you have reached the proper temperature.

6. Using a jar lifter, lift one jar out of the simmering water and place it on a towel or wooden cutting board. Ladle the hot jam into a hot jar using a canning funnel. Leave 1/4 inch of headspace at the top. Remove any air bubbles and wipe the top of the jar rim clean. Center a lid on the jar and apply the band, adjusting to fingertip tight. Place the filled jar into the boiling water canner, then repeat the process until all of the jars are filled.

7. Process the jars in boiling water for 10 minutes, adjusting for altitude (search online for an altitude adjustment chart). Turn off the heat and let the jars sit in the canner, uncovered, for five minutes.

8. Very carefully remove the jars with a jar lifter, lifting them straight up (do not tilt jar!) and place them on a clean towel. Don’t worry about any water on the lid, that will evaporate quickly. Let the jam cool for 12 to 24 hours. Check the lids for a seal, they should not flex when the center is pressed.

9. A properly processed and sealed jar of jam is shelf stable for 12 to 18 months. Refrigerate after opening.

Recipe makes four jars
Nutritional Information per tablespoon: 6 calories, 2.3 g carbohydrate (0.2 g dietary fiber, 1.1 g sugars), 0.1 g total fat (0 g saturated fat, 0 g trans fat), 0 mg cholesterol, 0 mg sodium, 2 mg calcium, 11 mg potassium, 1 mg Vit C, 1 IU Vit A, 0 g protein. Net carbs per tablespoon: 2.1 grams

Photos and recipe by Kathy Sheehan, copyright 2022
All rights reserved. Please do not duplicate without the author’s permission. 

Monday, August 8, 2022

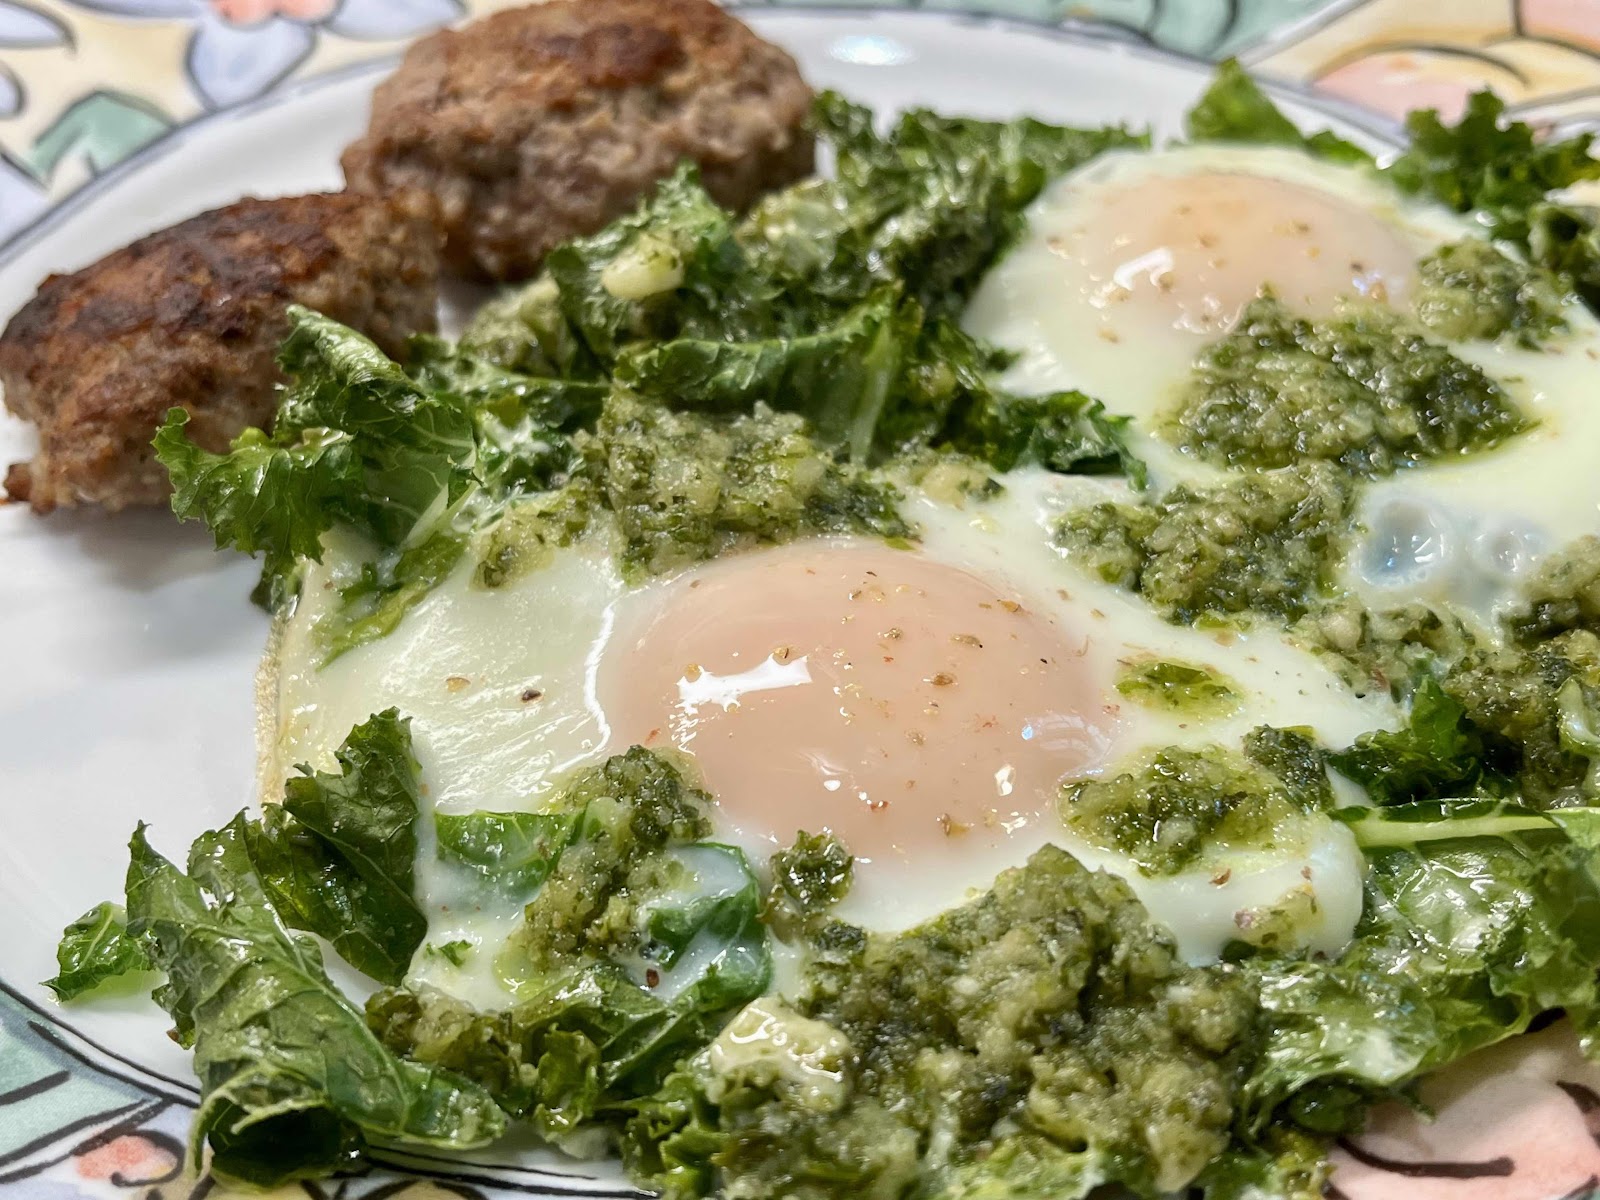
Creamed Kale and Eggs with Pesto

Creamed Kale and Eggs with Pesto
In the summertime, I have a small, backyard garden and kale is one of the most robust and easiest vegetables to grow! This baked egg dish is one of my very favorites and shows up on my breakfast table often while my kale is in season. As the kale bakes, it becomes crispy around the edges, similar to kale chips! The combination of flavors and textures makes this a deeply satisfying way to start the day.

Creamed Kale and Eggs with Pesto
Makes 1 serving

2 teaspoons olive or avocado oil
A large handful of fresh kale, washed and torn into pieces (you can substitute spinach or any leafy green)
2-3 tablespoons of heavy cream (or full fat coconut milk for dairy free)
Salt and pepper
2 eggs
2 tablespoons pesto (homemade or store bought)

1. Preheat the oven to 350°F.

2. In an 8 inch, oven proof skillet over medium heat, heat the oil and add the kale. As the kale wilts, toss it in the oil and season with salt and pepper.

3. Add heavy cream and stir to coat the kale. Create two wells and crack one egg into each well. Season the eggs with salt and pepper. Drizzle the pesto onto the top of the eggs and kale mixture.

4. Remove the skillet from the heat and bake in a 350° oven for seven minutes or until the eggs are done to your liking.

Nutritional Information per serving: 503 calories, 5.8 g carbohydrate (1.4 g dietary fiber, 0.6 g sugars), 48 g total fat (14.3 g saturated fat, 0 g trans fat), 414 mg cholesterol, 595 mg sodium, 156.5 mg calcium, 347 mg potassium, 3 mg iron, 42 mg Vit C, 1928 IU Vit A, 15.5 g protein. Net carbs per serving: 4.4 grams

Photo and recipe by Kathy Sheehan, copyright 2022
All rights reserved. Please do not duplicate without the author’s permission. 

Friday, August 5, 2022

No Sugar Added Keto Fruit Jam (Peach, Cherry or Strawberry)

Keto Cherry Jam
I don’t eat a lot of fruit because of the high carb count. But one thing I really enjoy is a teaspoon or two of sticky, gooey jam on my low carb, keto bread. And there are times when I just want a peanut butter and jelly sandwich! In a previous post, I mentioned the excellent keto bread recipe that I found that has made my life normal again. (Click here for the keto bread recipe.) With the bread problem solved, it was now time for me to turn to finding the best keto jam. There are a couple of store brands that are acceptable, but they are watery, taste a little off and, frankly, are nothing like the real thing. Jam making is not really difficult, but it can have special challenges when not using real sugar. I have discovered that allulose is the very best sugar alternative when making fruit jam, with absolutely no aftertaste! My amazing keto jam recipe is easily adaptable to most fruits, with minor adjustments. I provide recipes for cherry, strawberry or peach, but you can change it up to create your favorite flavor!

Tips and Tricks for Sugar Free Jam:

* You must use a pectin made especially for low or no sugar jam. Look for Pomona’s Universal Pectin, which is easy to find in most grocery stores or online. Follow the directions in the package to make the calcium water, which is the secret ingredient to properly thicken sugar free jams and jellies.

Pomona’s Universal Pectin
* Regular jam made with sugar typically reaches a temperature of 220°F when it is ready to be ladled into the jars. With sugar-free jams, the mixture will not rise to this temperature (usually no more than between 212 to 215°F), so you will have to use the “cold plate test” to determine when it is cooked enough to gel properly. Before you begin cooking the fruit mixture, place one or more small plates into the freezer to get cold. When you think your mixture is ready, spoon a small amount onto the cold plate and let it sit for a few minutes. If it forms a skin and begins to thicken and gel, then the jam mixture is ready for canning.

* You can use fresh or frozen fruit to make jam. If using frozen, increase the amount to 6 cups of fruit and proceed with the recipe as directed.

* You do not have to process the finished jam in a boiling water bath, if you want to dig right in! Use sterilized jars, but place the finished jam in the refrigerator to set up and consume within 1-2 weeks. If you want to make your jam shelf-stable at room temperature for up to a year, you must follow the canning directions, always use new lids and submerge the filled jars in boiling water for 10 minutes and test to make sure it sealed properly (add 1 minute to boiling time for every 1000 feet above sea level). After it has cooled completely, check the lids for a seal. They should not flex when the center of the lid is pressed. A properly processed and sealed jar of jam is shelf-stable for 12-18 months. Refrigerate after opening and consume within 1-2 weeks.

The Recipes:
Each recipe yields about 3-1/2 cups

Cherry Jam:
5 cups of cherries, pitted (or 6 cups frozen)
1/2 cup bottled lemon juice
3 teaspoons calcium water (see Tips and Tricks section above)
1 cup allulose
2 teaspoons Pomona’s Universal Pectin powder
1 teaspoon cherry extract (optional), or to taste

Peach Jam:
5 cups peeled and chopped fresh peaches (or 6 cups frozen)
1/4 cup bottled lemon juice
4 teaspoons calcium water
1 cup allulose
2 teaspoons Pomona’s Universal Pectin powder

Strawberry Jam:
5 cups fresh, chopped strawberries (or 6 cups frozen)
1/4 cup bottled lemon juice
4 teaspoons calcium water
1-1/3 cups allulose
2 teaspoons Pomona’s Universal Pectin powder
1/2 to 1 teaspoon strawberry extract (optional), or to taste

Sugar Free Strawberry Jam

Directions:

1. Prepare the boiling water canner. Put the canning rack on the bottom of a large pot, then heat the jars in simmering water until ready to use, for about 10 minutes. Wash the lids in soapy, hot water and set aside with the bands until you are ready to use them. (Do not boil the lids, but you can leave them in very hot water until you’re ready to use them.)

2. In a bowl, combine the allulose and pectin powder; set aside.

3. Prepare the fruit by peeling, pitting and chopping into chunks, whatever is required, and measure out the required amount (either 5 cups fresh fruit or 6 cups frozen). Put the fruit in a large pot over medium heat. Add the lemon juice and calcium water and stir. Bring to a boil, then use a potato masher to crush up the fruit to the desired consistency. If you like your jam chunky, then leave larger pieces of fruit. Bring to a rolling boil and, if needed, skim the foam and discard.
 
4. Gradually stir in the allulose/pectin mixture and continue to stir until the sweetener and pectin dissolves.

5. Bring the fruit mixture to a full rolling boil that cannot be stirred down. Boil hard for at least one minute, stirring constantly. Remove from the heat and skim any additional foam off the top if necessary. To test for the proper consistency, use the “cold plate test” as described in the Tips and Tricks section above.

6. Using a jar lifter, lift one jar out of the hot water and place it on a towel or wooden cutting board. Ladle the hot jam into the hot jar using a canning funnel. Leave 1/4 inch of head space at the top. Remove any air bubbles and wipe the jar rim with a paper towel or a clean cloth. Center a lid on the jar and apply the band, screwing it down until it is just fingertip tight. Repeat the process with the other jars until all of the jars are filled.

7. Process the jars in boiling water for 10 minutes, adjusting for altitude (add 1 minute to boiling time for every 1000 feet above sea level). Turn off the heat and let the jars sit in the canner, uncovered, until the water stops boiling or for several minutes. Very carefully remove the jars with the jar lifter, lifting them straight up (do not tilt jars as you lift them) and place them on a clean towel. You can gently blot any excess water from the top of each jar with a kitchen towel, but do not press down on the lid.

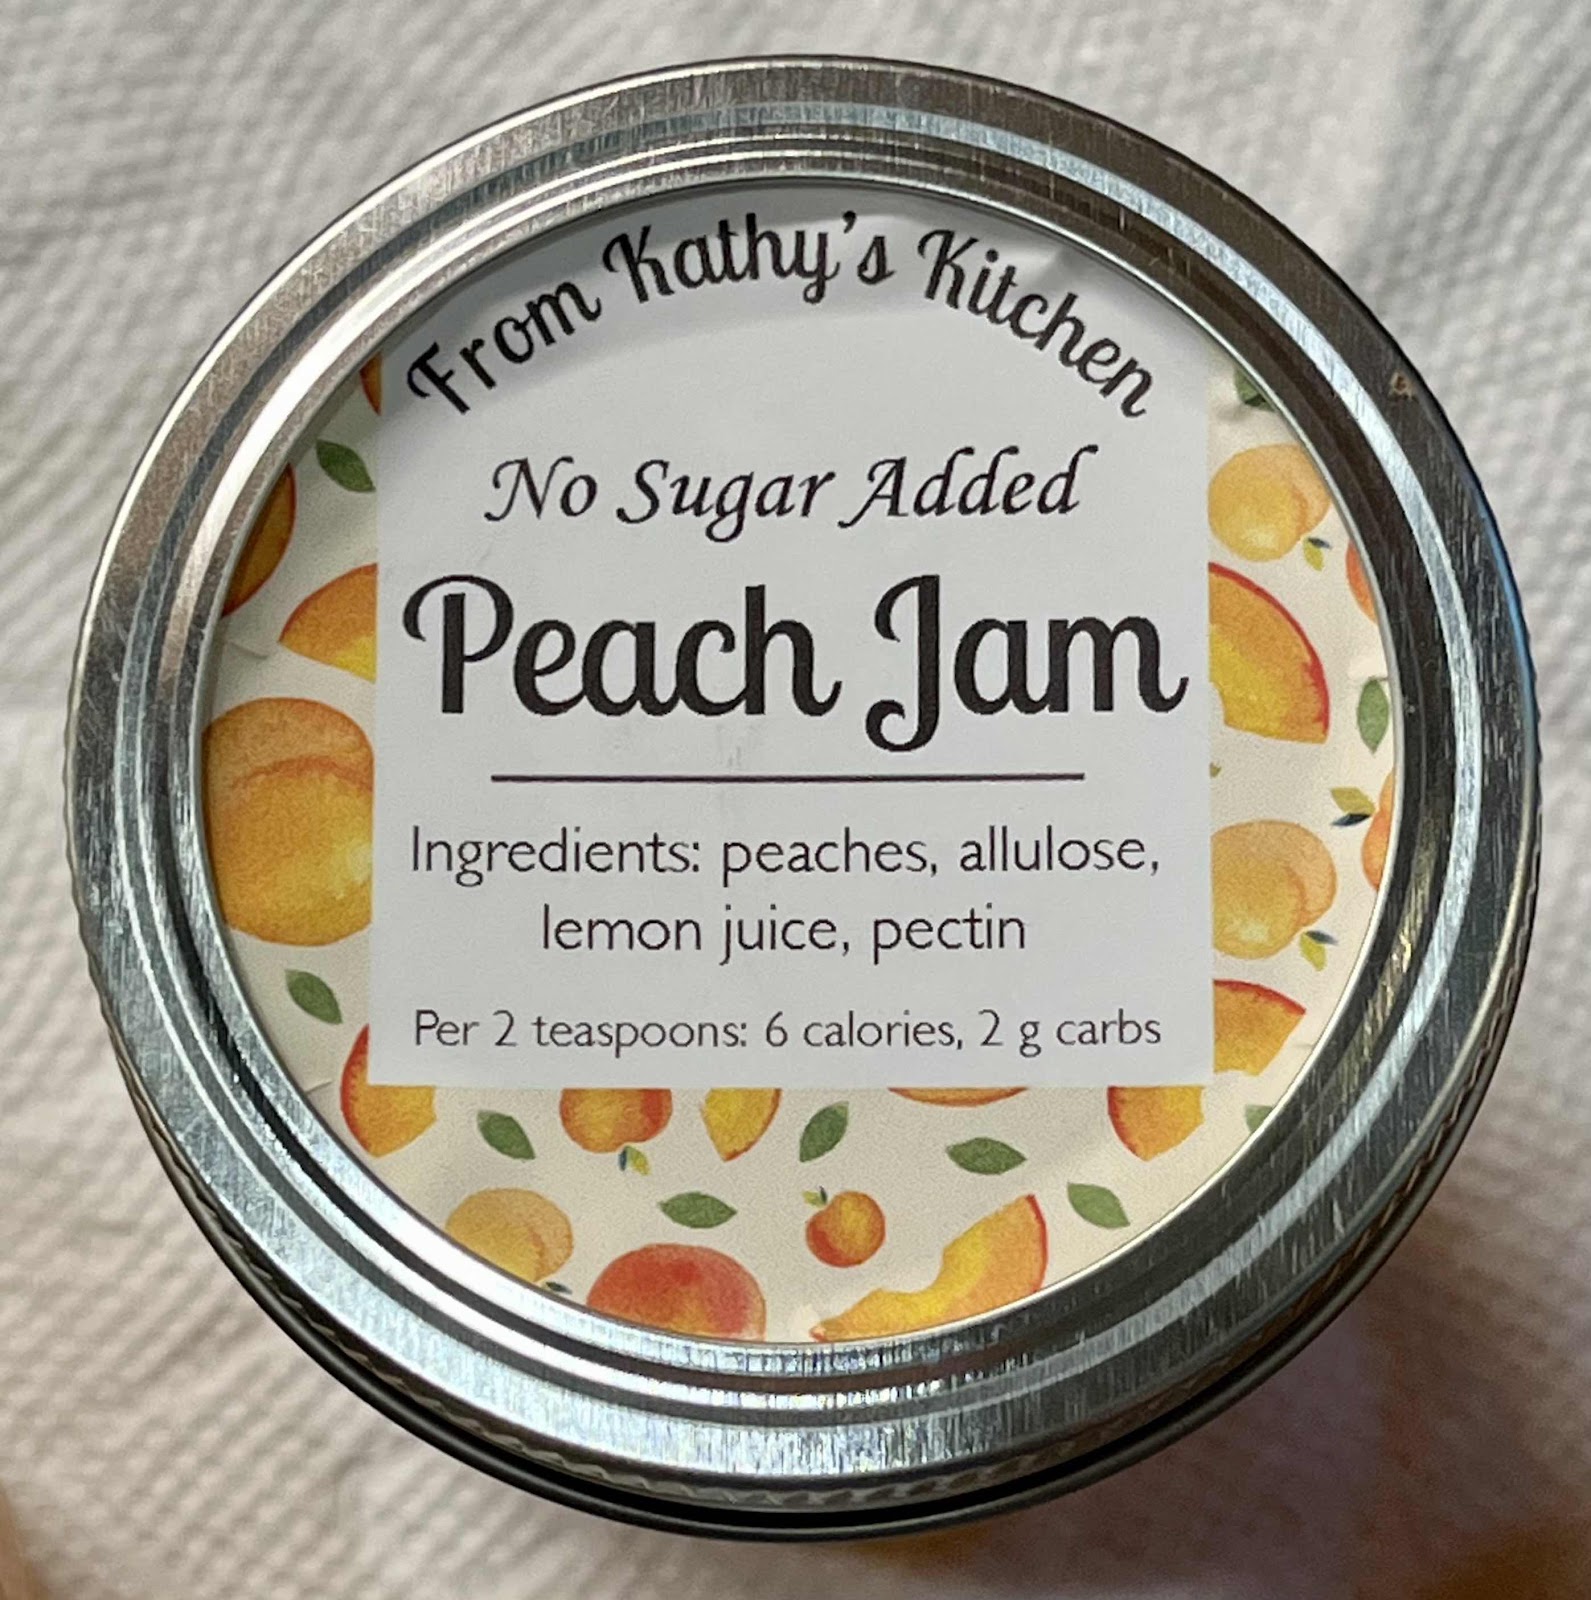
No Sugar Added Peach Jam
8. Let the jars cool undisturbed for 12 to 24 hours. You will hear a popping sound as the jars cool and create a vacuum seal. This is normal. After 12-24 hours, check the lids for a proper seal, they should not flex when the center is pressed. If any jars did not seal properly, you may put them in the refrigerator and use the jam immediately or you can reprocess them with a new lid.

Peach Jam Label
Nutritional Information for Cherry Jam (2 teaspoons): Calories: 8 / 2 g carbohydrate / 0 g dietary fiber / 0 g fat / 0 g protein

Nutritional Information for Peach Jam (2 teaspoons): Calories: 6 / 2 g carbohydrate / 0 g dietary fiber / 0 g fat / 0 g protein 

Nutritional Information for Strawberry Jam (2 teaspoons): Calories: 4 / 1 g carbohydrate / 0 g dietary fiber / 0 g fat / 0 g protein

Photos and recipes by Kathy Sheehan, copyright 2022
All rights reserved. Please do not duplicate without the author’s permission.

Friday, July 8, 2022

Keto Strawberry Milk

Keto Strawberry Milk
I have a confession to make: When I was young, I loved Nestle’s Strawberry Milk powder to make strawberry milk. I still enjoy the flavor, but don’t want all the sugar and carbs. I created this recipe to satisfy my craving for something sweet, nostalgic and bursting with fresh strawberry flavor!

Keto Strawberry Milk
Makes 1 serving

3 ripe medium strawberries
8 oz. Keto Dairy Milk, click here for recipe (or unsweetened almond or coconut milk)
8 drops monkfruit extract or liquid Stevia, to taste
1/4 teaspoon vanilla extract
1/2 teaspoon strawberry extract
2 tablespoons heavy whipping cream

1. Place the strawberries, low carb milk of choice, monkfruit sweetener and extracts into a blender and blend on high until the strawberries are completely incorporated into the milk mixture.*

2. Add heavy cream and blend on low until incorporated. Pour into a glass and enjoy!

*Alternative Suggestion: If you’d like to turn this into a breakfast or meal replacement smoothie, add a scoop of protein powder to the blender in step 1.

Nutritional Information per serving (entire recipe): 251 calories, 3.7 g carbohydrate (0.7 g dietary fiber, 2.8 g sugars), 24.1 g total fat (15 g saturated fat, 0 g trans fat), 90 mg cholesterol, 146 mg sodium, 141.9 mg calcium, 84 mg potassium, 121 IU Vit A, 6.2 g protein. Net carbs per serving: 3 grams

Photo and recipe by Kathy Sheehan, copyright 2022
All rights reserved. Please do not duplicate without the author’s permission. 

Monday, May 23, 2022

REAL Keto Fettuccine Pasta Made with Coconut Flour

REAL Keto Fettuccine Pasta
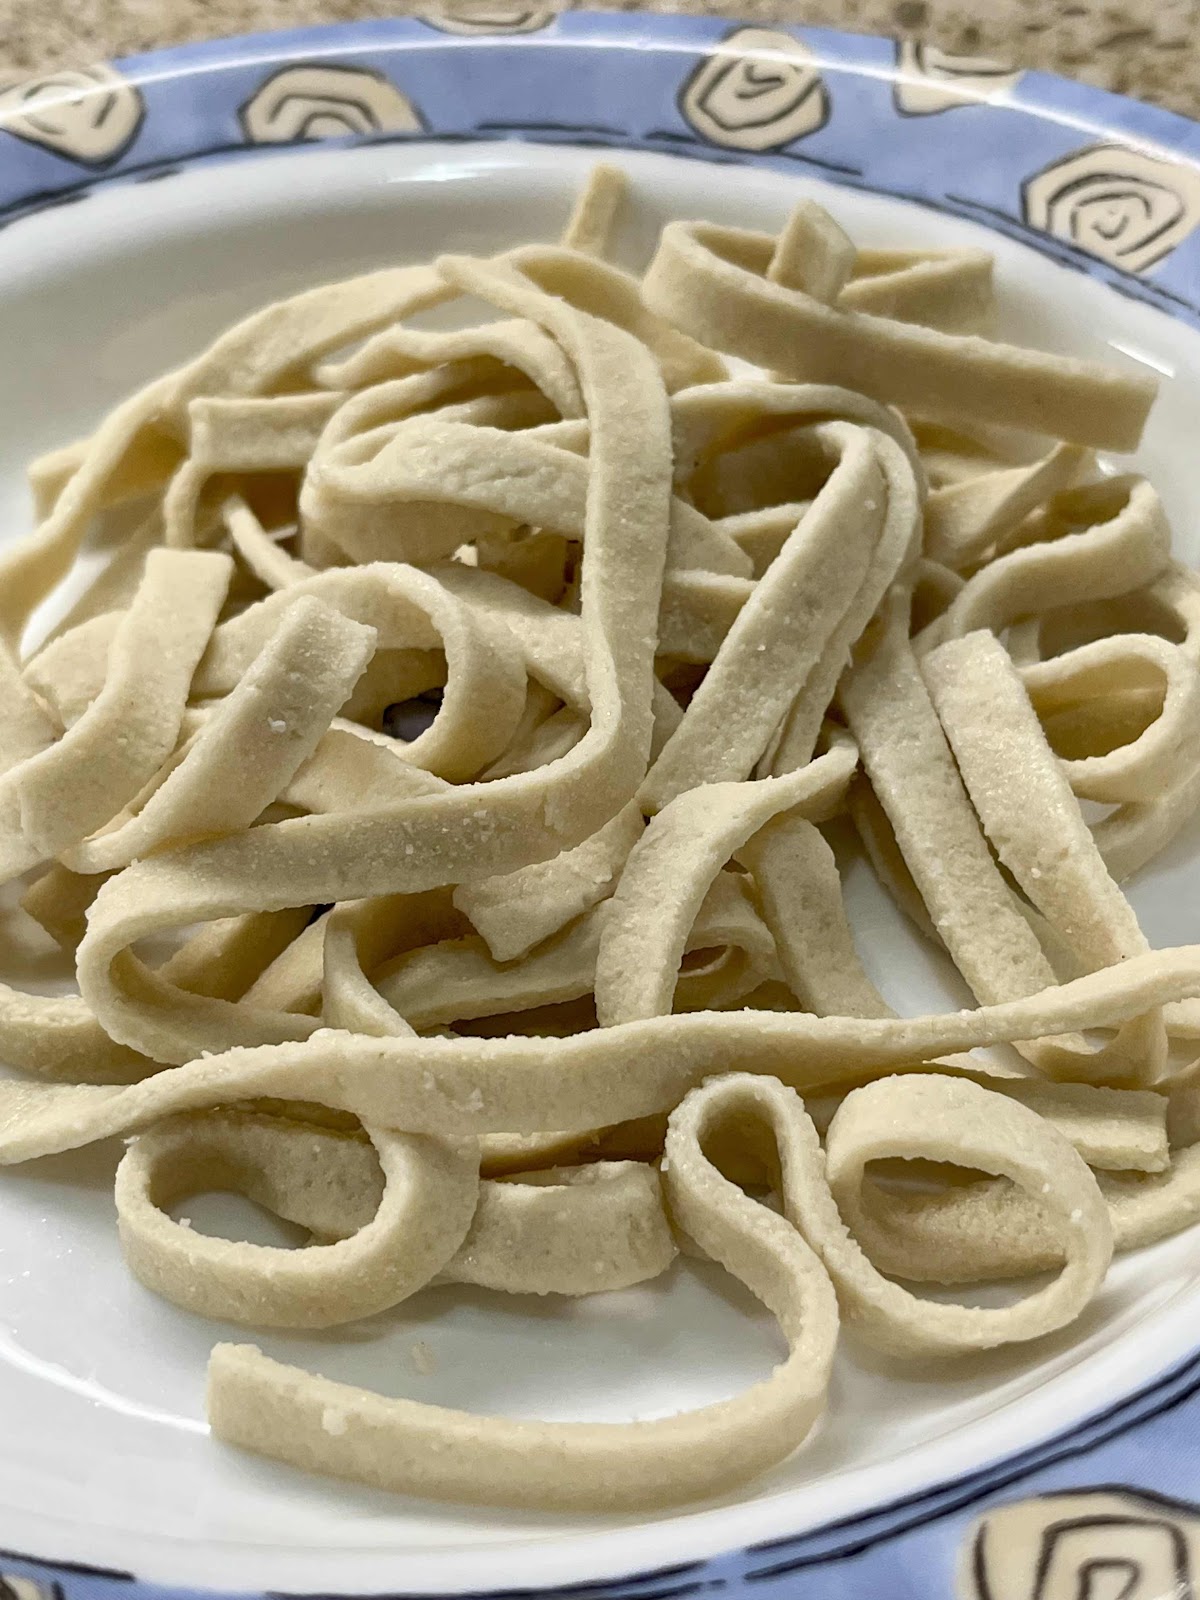
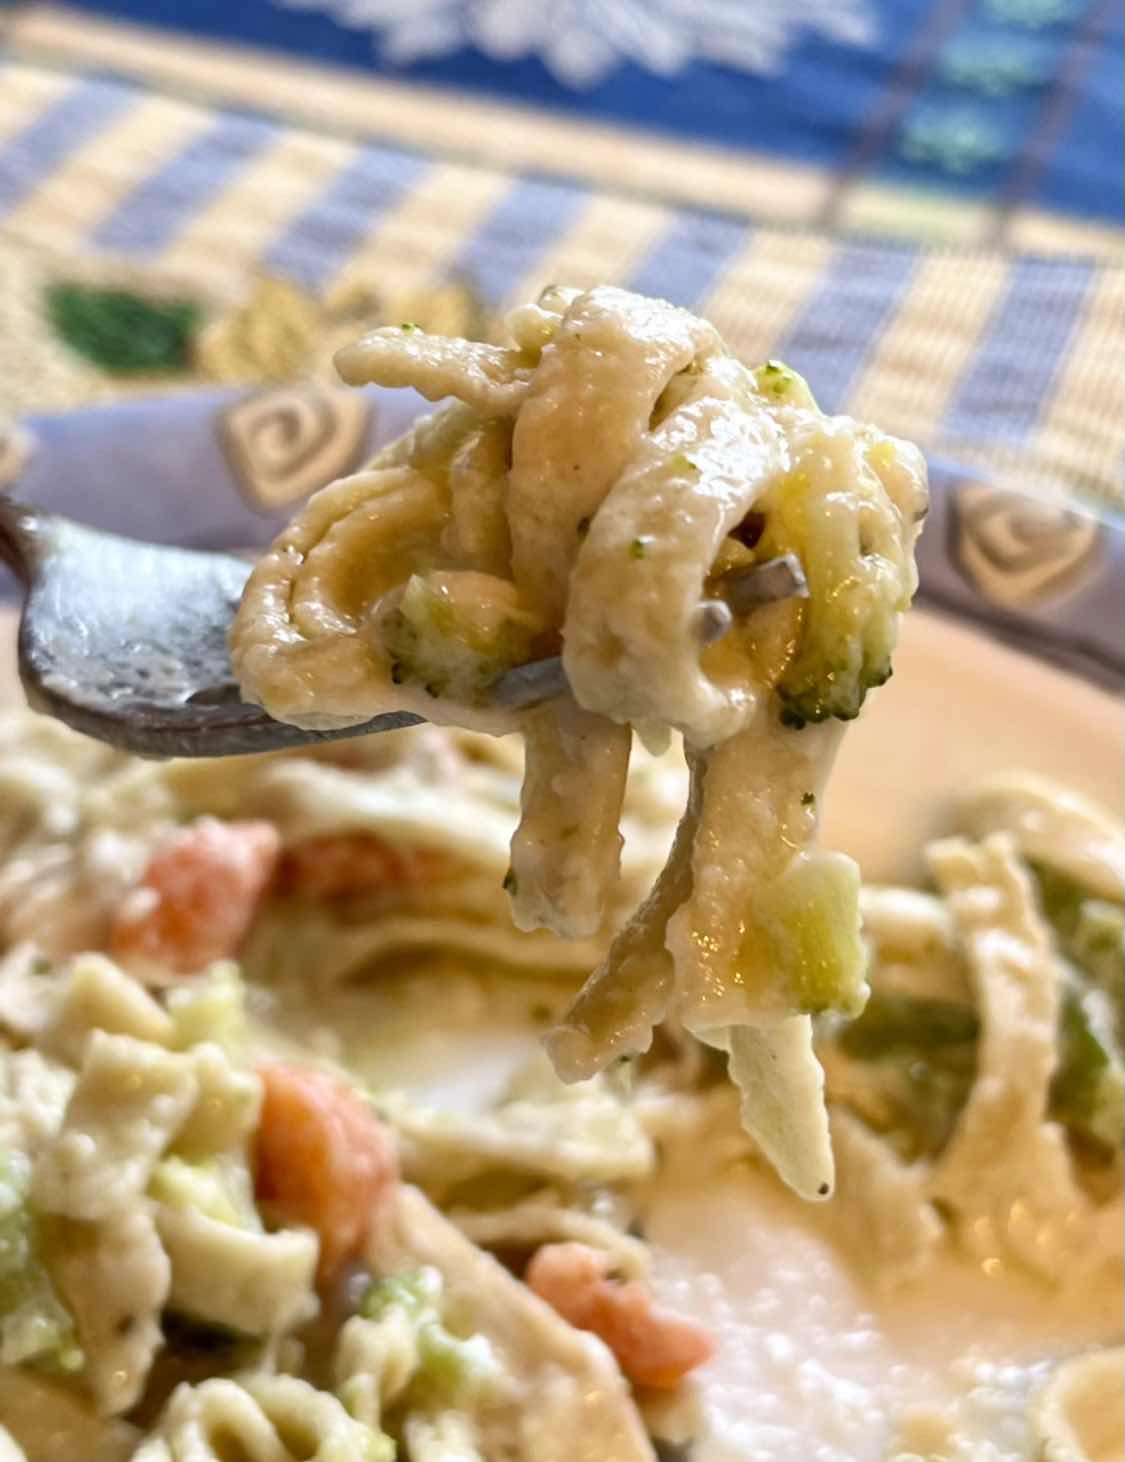
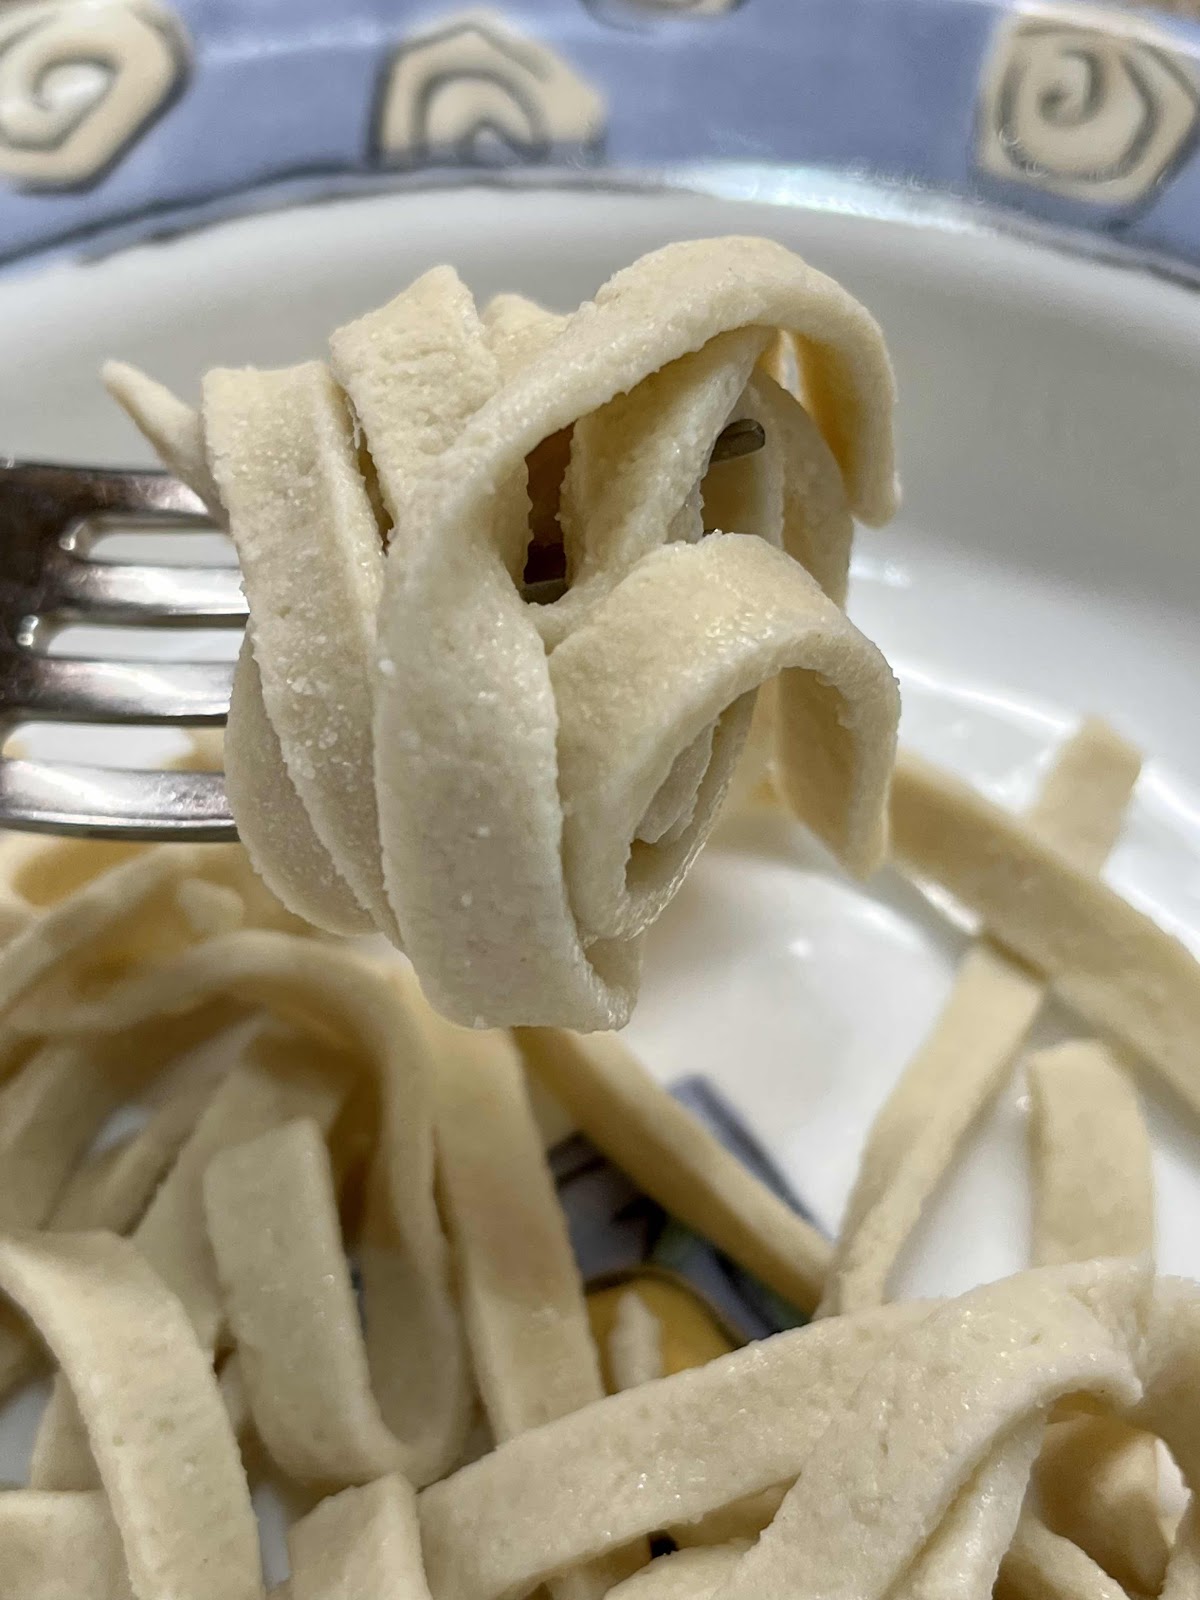
I was gifted with a pasta maker for Mother’s Day! After experimenting with several keto pasta noodle recipes I saw online, frankly I was very disappointed because they were nothing more than whisked eggs, maybe thickened with a bit of cream cheese or fiber powder, that had been spread thinly and baked into a big, flat plain omelette. It went through the pasta maker just fine and looked like egg noodles, but really tasted like scrambled eggs. The egg noodles were so fragile, they broke apart when I tried to twirl them on my fork. It was disappointing, to say the least. This only spurred me on to create a REAL pasta noodle dough that can go through the rollers of a pasta maker (or you can cut them with a knife or pizza cutter), be boiled instead of baked and tastes like real pasta, but without the carbs and won’t impact my blood sugar. I’ve been experimenting and perfecting this recipe for a couple of weeks and, I’m happy to say, these high-fiber, low carb pasta noodles far exceed my expectations with only 3.8g net carbs per serving! I can see a lot of delicious pasta dishes in my future. And look! These keto noodles can be twirled on your fork!!

You can twirl these keto noodles!
REAL Keto Fettuccine Pasta Made With Coconut Flour
Makes 2 servings

2 tablespoons oat fiber (NOT oat flour!)
2 teaspoons psyllium husk powder (I recommend Terrasoul brand)
1/4 teaspoon xanthan gum
1/8 teaspoon salt, or to taste
3 tablespoons coconut flour, plus 1-2 teaspoons as needed to make a cohesive ball of dough
1 large egg
2 egg whites
More coconut flour for dusting

1. Whisk together the oat fiber, psyllium husk powder, xanthan gum, salt and 3 tablespoons coconut flour in a small bowl until no lumps remain.

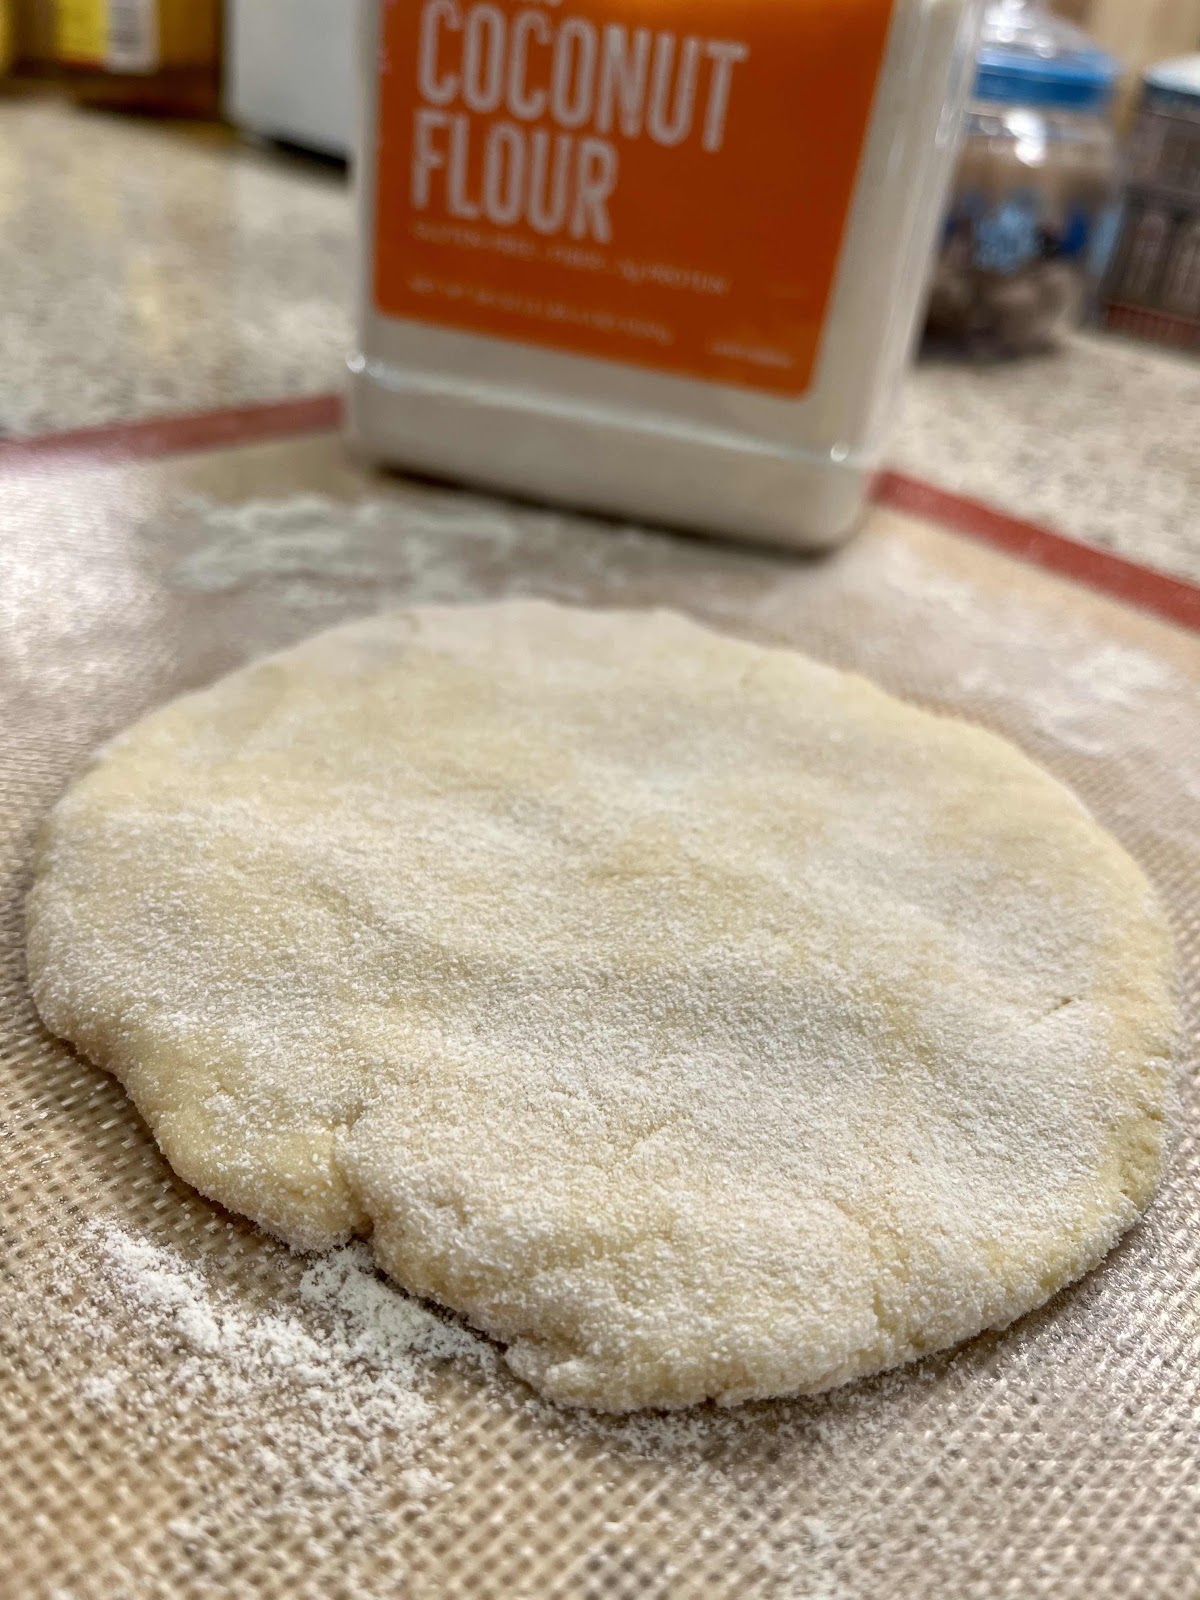
2. Place the egg, egg whites and dry ingredients into a mini food processor or regular food processor and process until all the ingredients are incorporated and the mixture is smooth. Allow the mixture to sit in the food processor and absorb liquid for 10 minutes. Process again, adding more coconut flour if needed, 1 teaspoon at a time, until the dough comes together into a ball. Remove the ball of dough from the food processor onto a board, silicone mat or your kitchen counter that has been dusted lightly with coconut flour.

REAL Keto Pasta Dough
Note: The uncooked pasta dough can be made ahead, wrapped in plastic wrap and set aside at room temperature if you plan to cut and eat your noodles in a few hours. (If you want to make your noodles ahead and store them for longer, I suggest cooking them first. See storage directions below.)

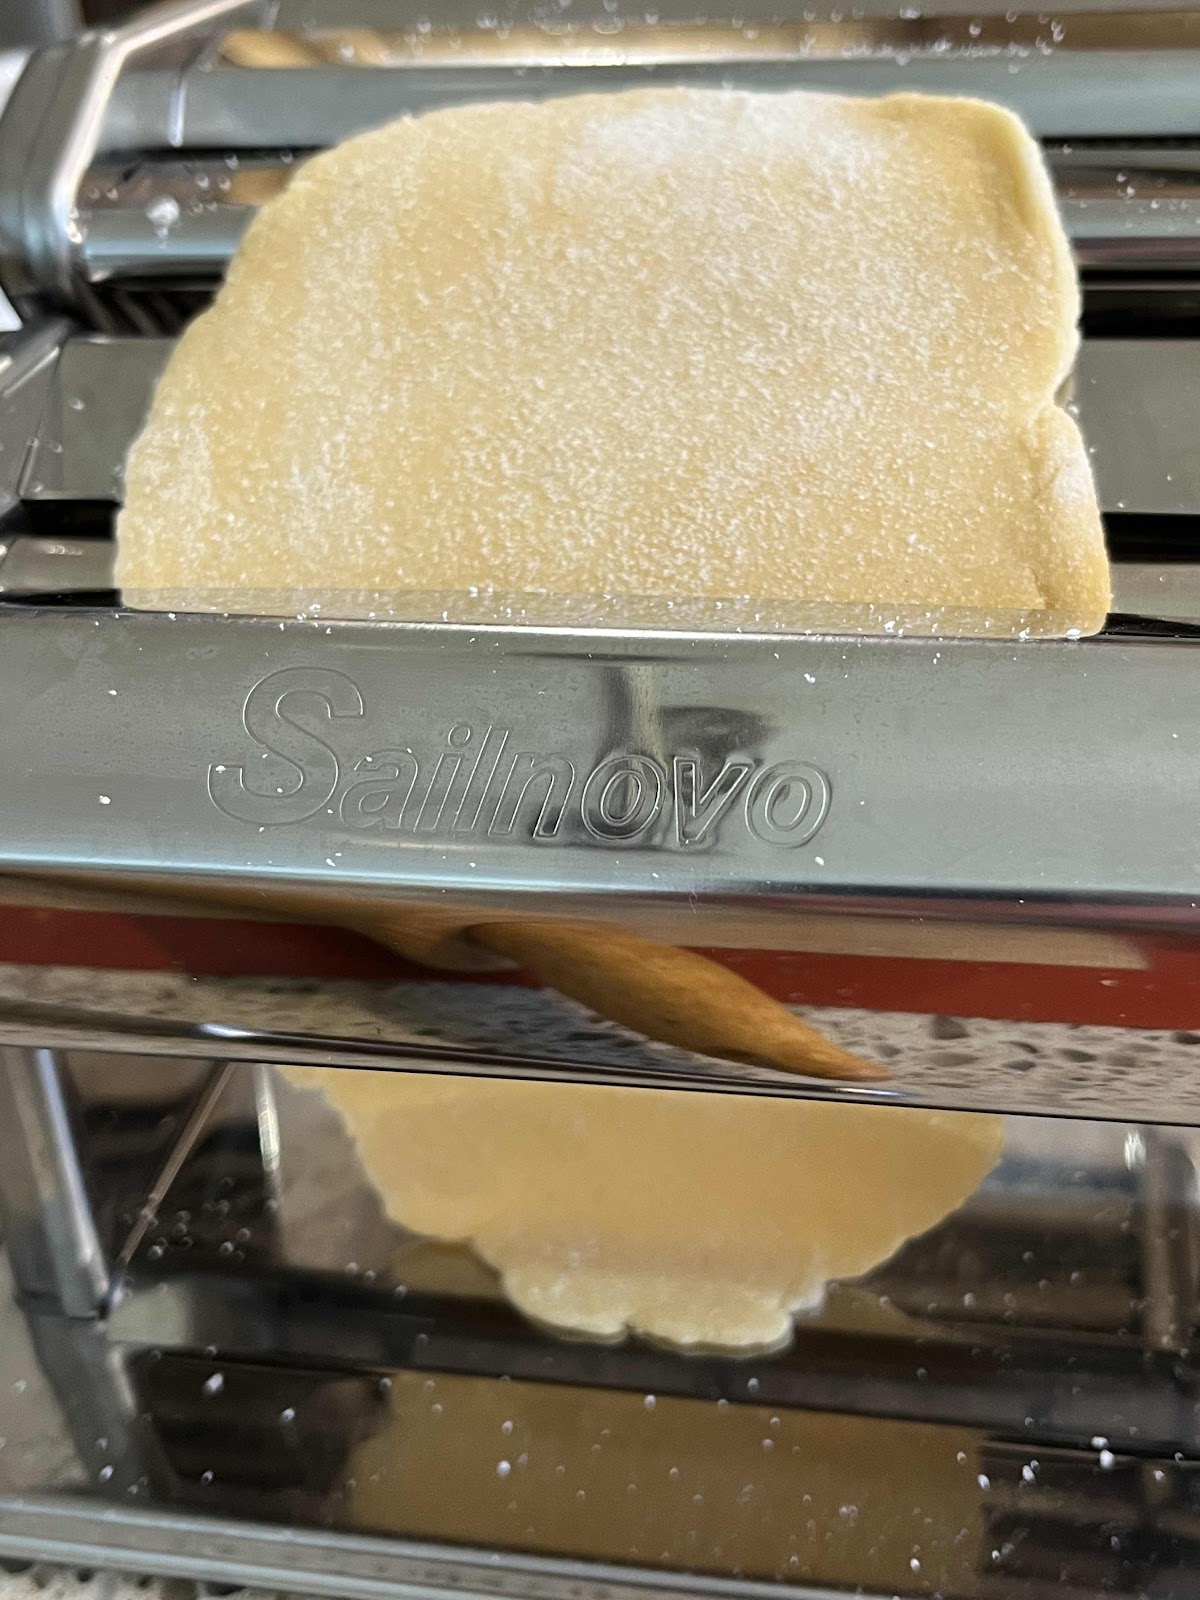
Run the dough through the rollers of the pasta maker
3. With a rolling pin, roll out the dough until it is thin enough to go through a pasta maker roller at the widest setting (*see note below for how to make noodles without a pasta maker). Then adjust the roller to the next thinner setting and run the dough through again. If needed, dust the dough very lightly with coconut flour between each pass to prevent sticking. (Be aware that this pasta dough is more delicate than regular pasta dough made with flour, so don’t roll it too thin.)

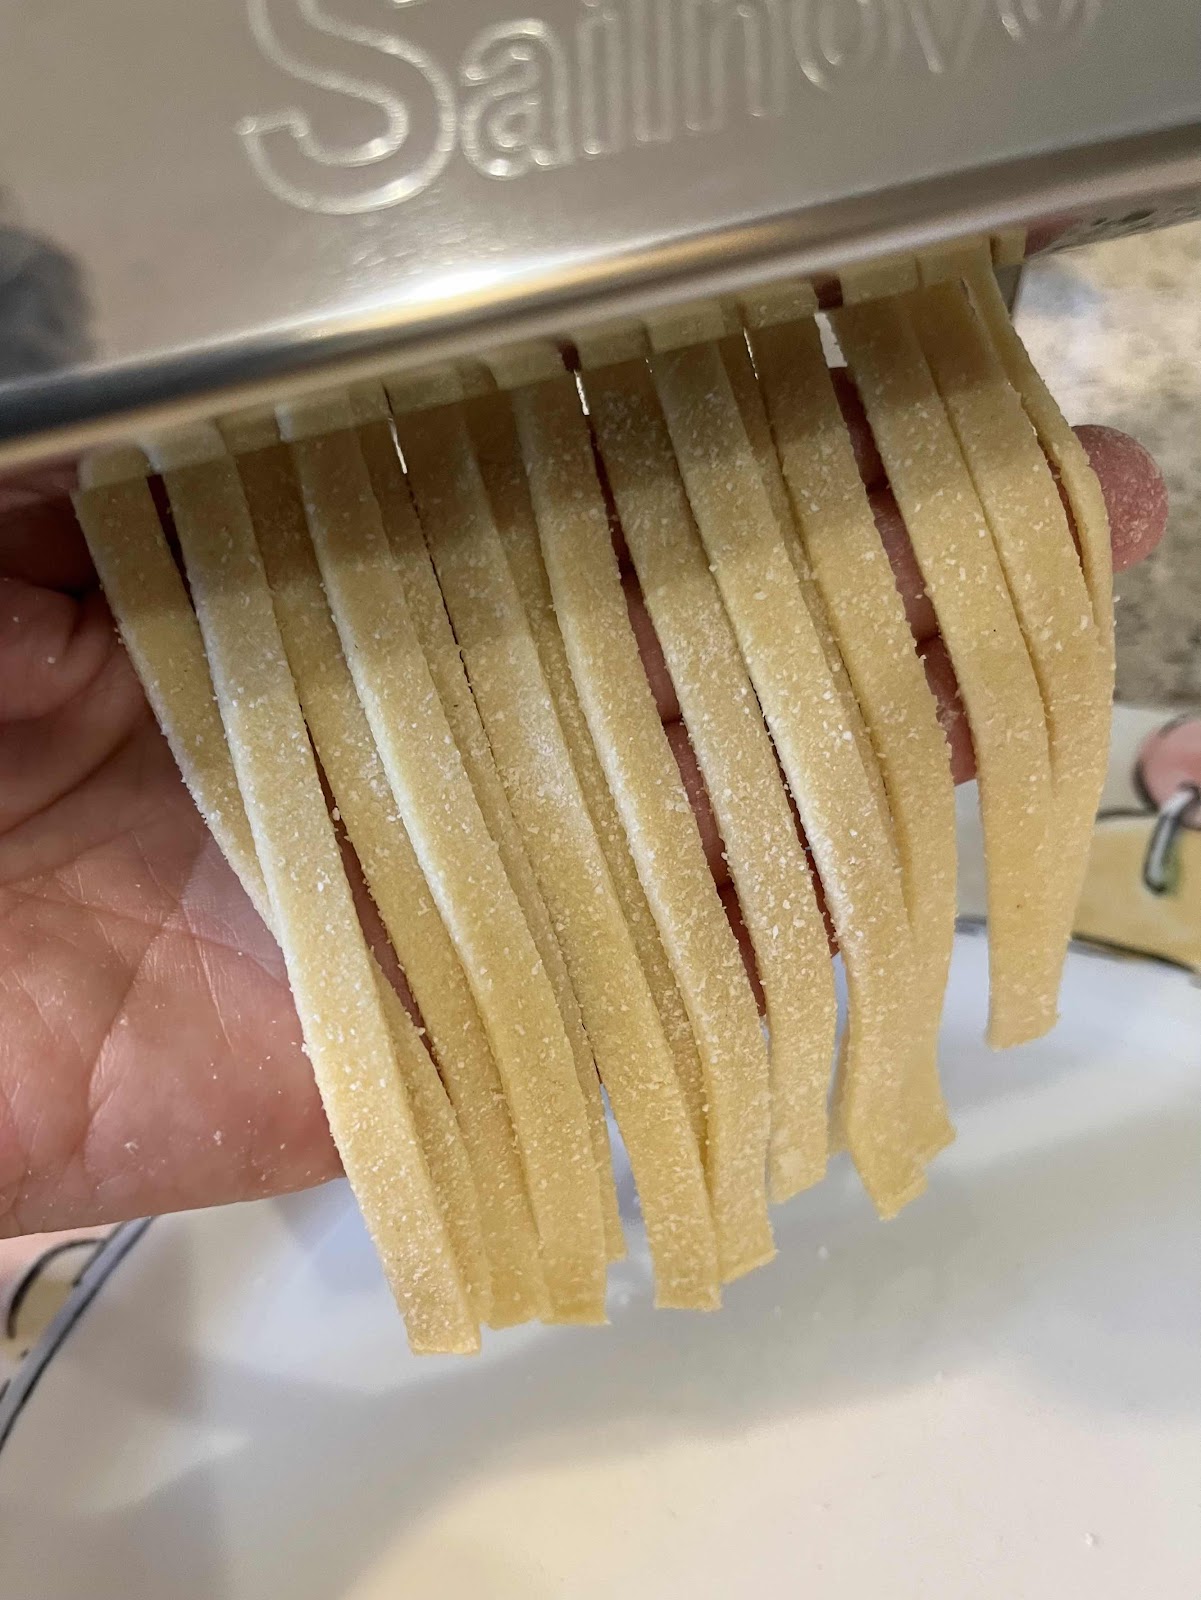
4. When the dough is the thickness you like, run it through a fettuccine or linguine-width roller/cutter to create noodles. (I have found that the wider, fettuccine-style noodles are much sturdier than narrow, spaghetti or angel hair. For best results, cut your noodles about 3/8” to 1/4” wide.)

Cut the dough into fettuccine noodles
5. Drop the noodles into rapidly boiling water that has been seasoned with salt and boil for 30 seconds or less. These noodles cook quickly! The color will change slightly, becoming whiter, to indicate it is done. Do not overcook!! (It is especially important that you do not overcook narrower noodles because, when overcooked, they might get too soft and begin to break apart.)

Boiled pasta keto noodles are sturdy enough to twirl on a fork!
6. Drain immediately and serve with your favorite sauce. Just like any fresh noodle pasta, this keto pasta is best eaten right away.

Storage: Cooked and drained noodles can be stored in an airtight container in the refrigerator for up to two days. To reheat, drop the noodles into your favorite sauce that has been heated until hot and gently toss, coating the noodles with the sauce, until the noodles are just heated through.

* If you do not have a pasta maker, roll the dough very thinly (1/8” or so), then roll the dough, jelly roll style, and cut with a sharp knife into noodles to the width you desire. Or use a pizza cutter to cut the dough into noodles.

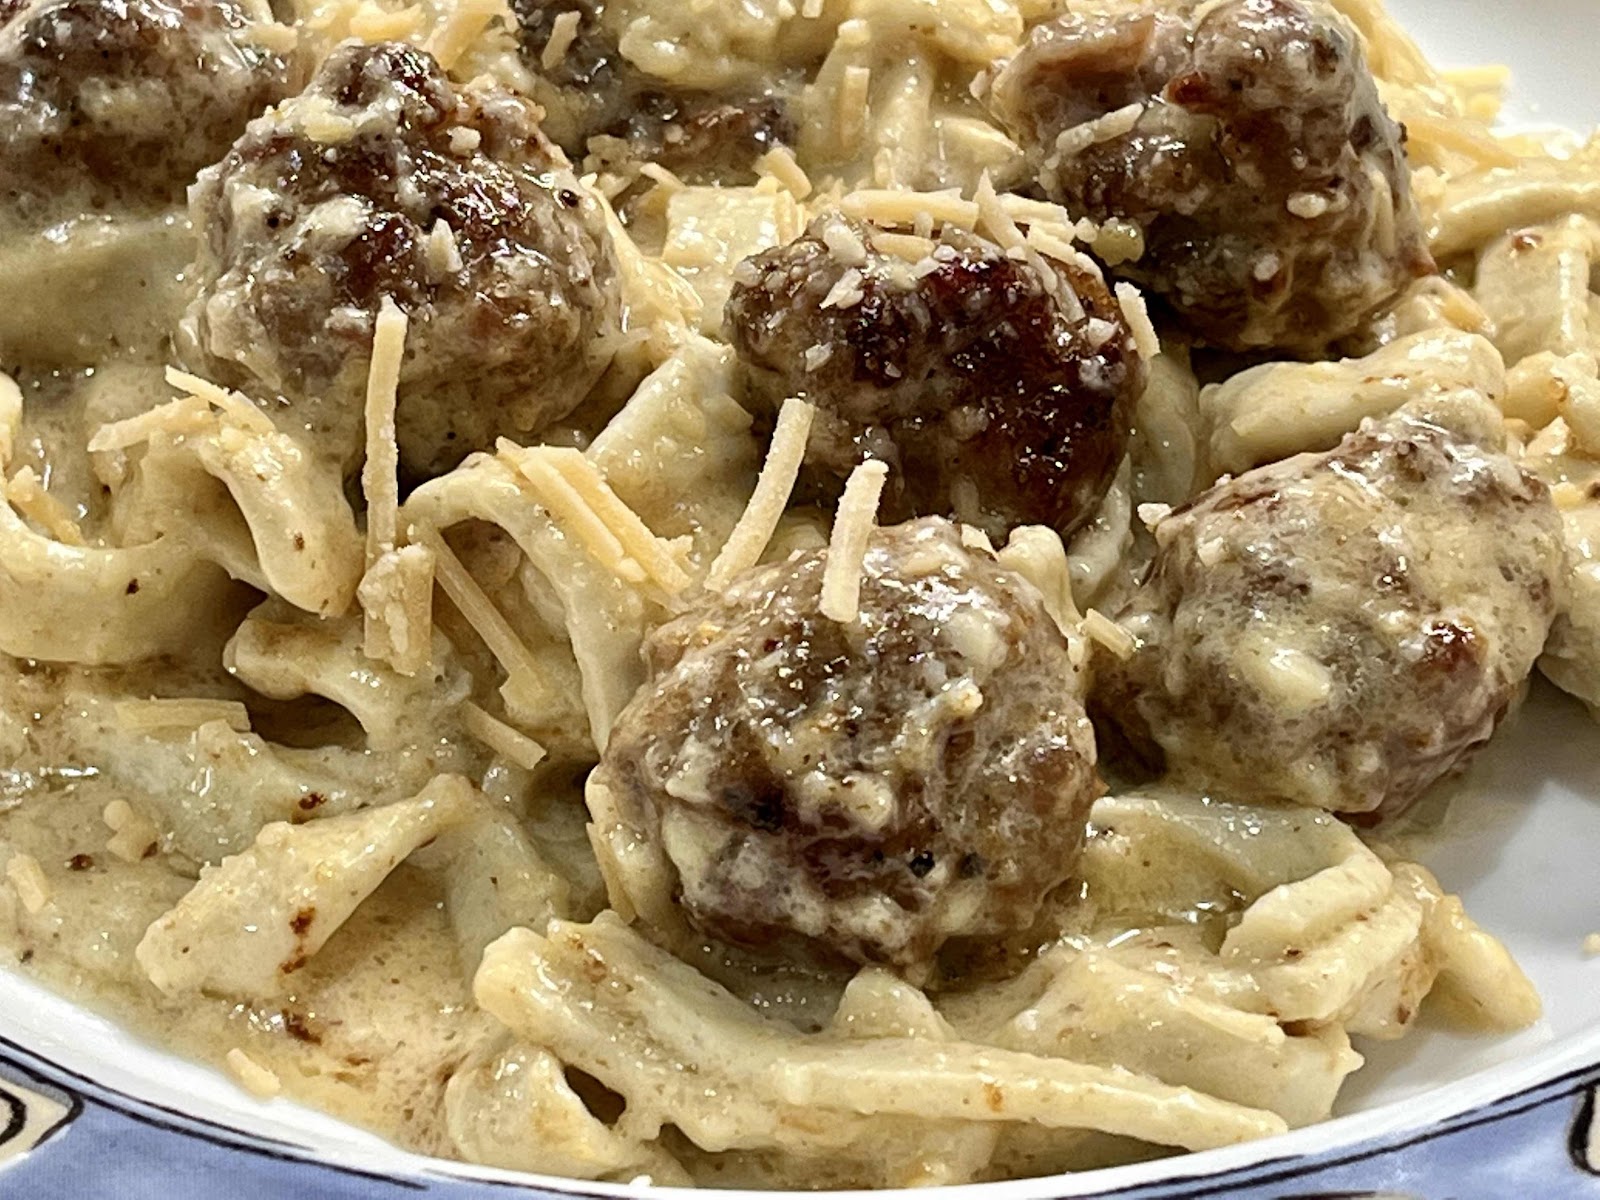
Serve with your favorite sauce
Nutritional Information per serving (1/2 recipe): 118 calories, 16.7 g carbohydrate (12.9 g dietary fiber, 2.7 g sugars), 5.1 g total fat (3.1 g saturated fat, 0 g trans fat), 93 mg cholesterol, 252 mg sodium, 16.4 mg calcium, 89 mg potassium, 1 mg iron, 40 IU Vit A, 9.1 g protein. Net carbs per serving: 3.8 grams

Photos and recipe by Kathy Sheehan, copyright 2022
All rights reserved. Please do not duplicate without the author’s permission. 


Sunday, February 6, 2022

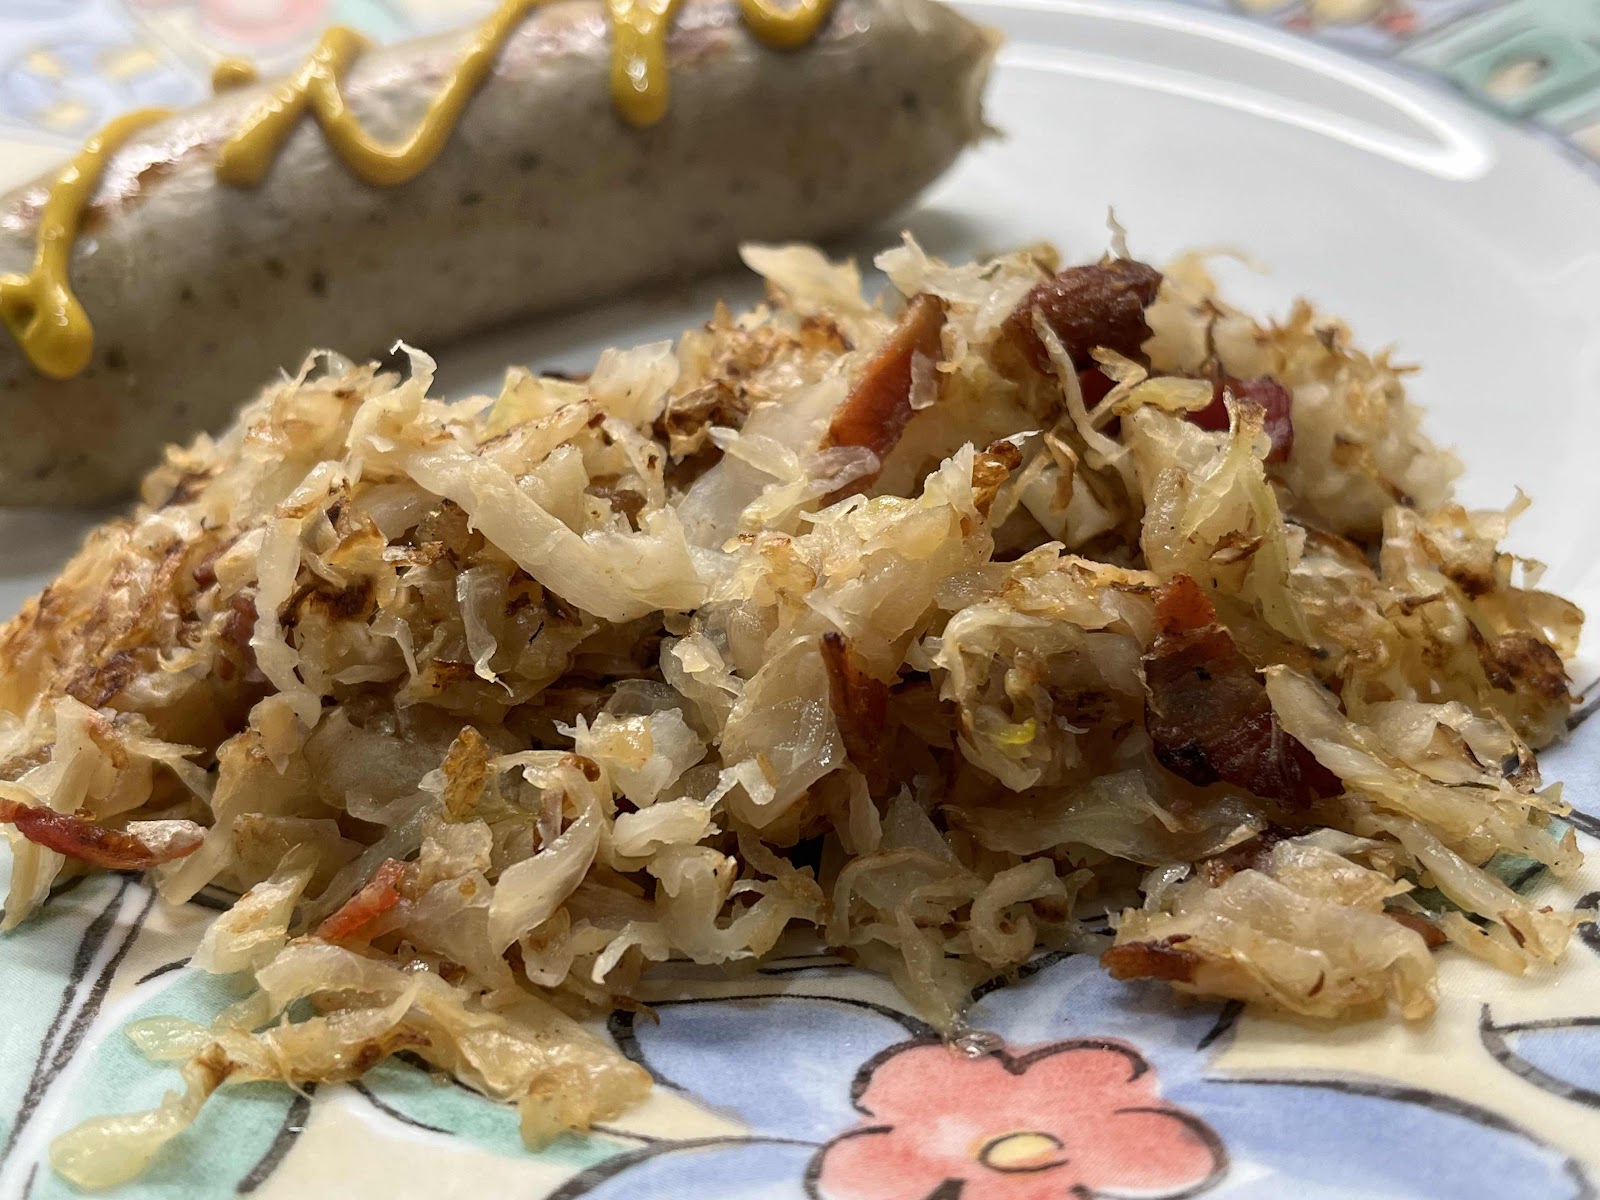
Grilled Sauerkraut

Grilled Sauerkraut
Many years ago, my husband and I had a wonderful meal at Morse’s Sauerkraut, a restaurant in Waldoboro, Maine. Along side the excellent bratwurst and schnitzel, we were served the most unbelievable grilled sauerkraut! This was new to us and it is a dish we have never forgotten, although the restaurant has been closed for several years. This recipe was inspired by this delicious side dish. It’s very quick and simple to make using fresh sauerkraut that you can purchase at the grocery store in the refrigerated section. The result is flavorful, with a touch of sweetness from the caramelized onion. It is one of my favorite side dishes to serve with brats, sausages and kielbasa. 

Grilled Sauerkraut
Makes 2 servings

1/2 onion, thinly sliced
2 slices precooked bacon, chopped
2 tablespoons avocado oil or refined coconut oil
1/2 pound fresh sauerkraut (found in the refrigerated section), drain well and pat dry with paper towels
1 tablespoon unsalted butter
Ground pepper to taste
A pinch of salt, only if needed

1. Heat your pan on medium-high heat. You may use a nonstick or cast iron pan. When it is hot, add the oil and onion, stirring often until softened and starting to brown.

Saute the ingredients until browned and crispy
2. Add the bacon and sauté until beginning to crisp. Stir in the drained sauerkraut, making sure to stir often to prevent burning. When the sauerkraut starts to brown and becomes slightly crisp, add the butter and stir until melted. Continue to cook until the sauerkraut reaches the desired level of browning. Season with pepper and salt to taste. Serve warm.

Nutritional Information per serving: 188 calories, 7 g carbohydrate (4.3 g dietary fiber, 1.2 g sugars), 16.1 g total fat (5.6 g saturated fat, 0 g trans fat), 25 mg cholesterol, 1030 mg sodium, 10.2 g calcium, 95 mg potassium, 54 IU Vit A, 16 mg Vit C, 3.5 g protein. Net carbs per serving: 2.7 grams

Photos and recipe by Kathy Sheehan, copyright 2022
All rights reserved. Please do not duplicate without the authors permission.

Monday, January 17, 2022

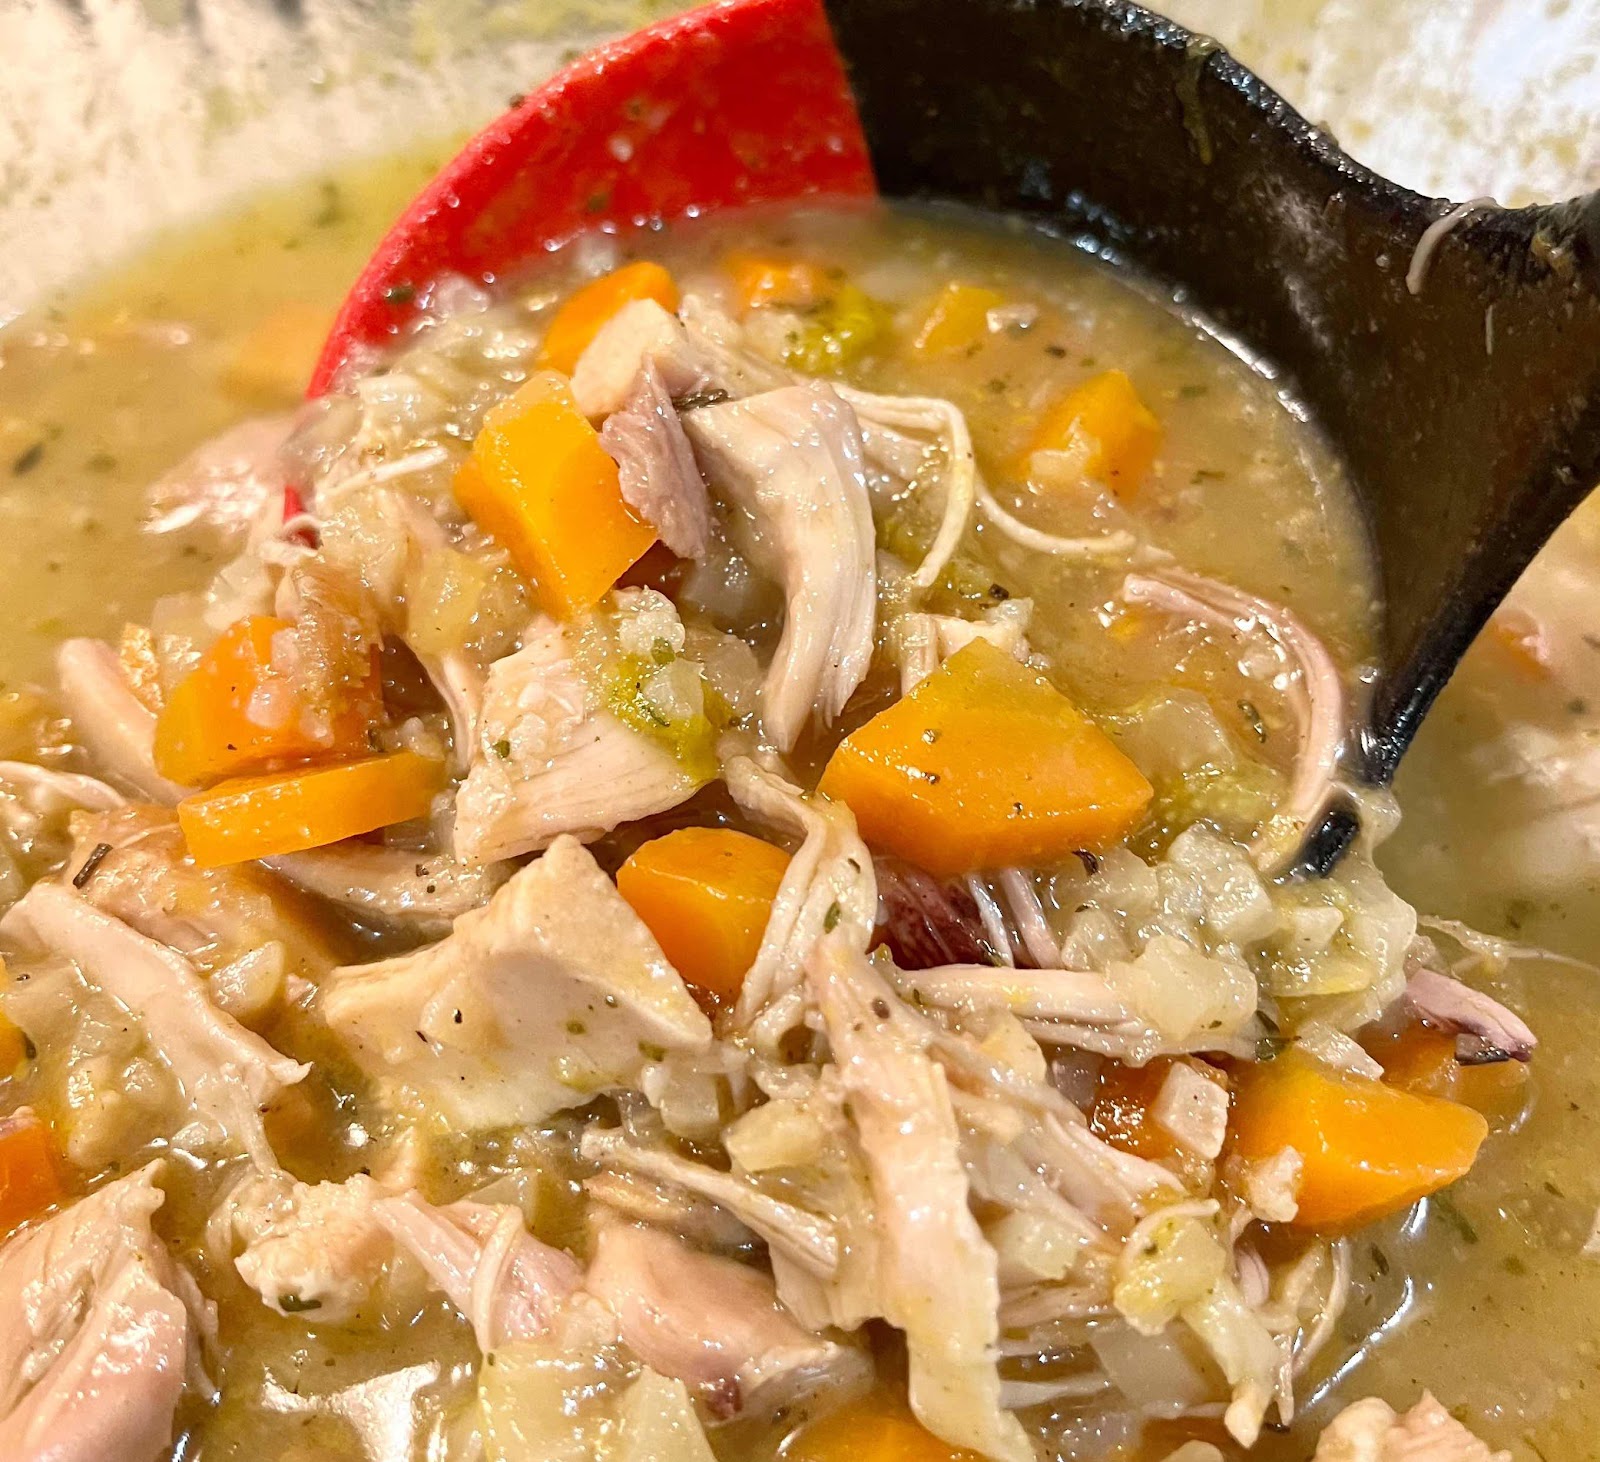
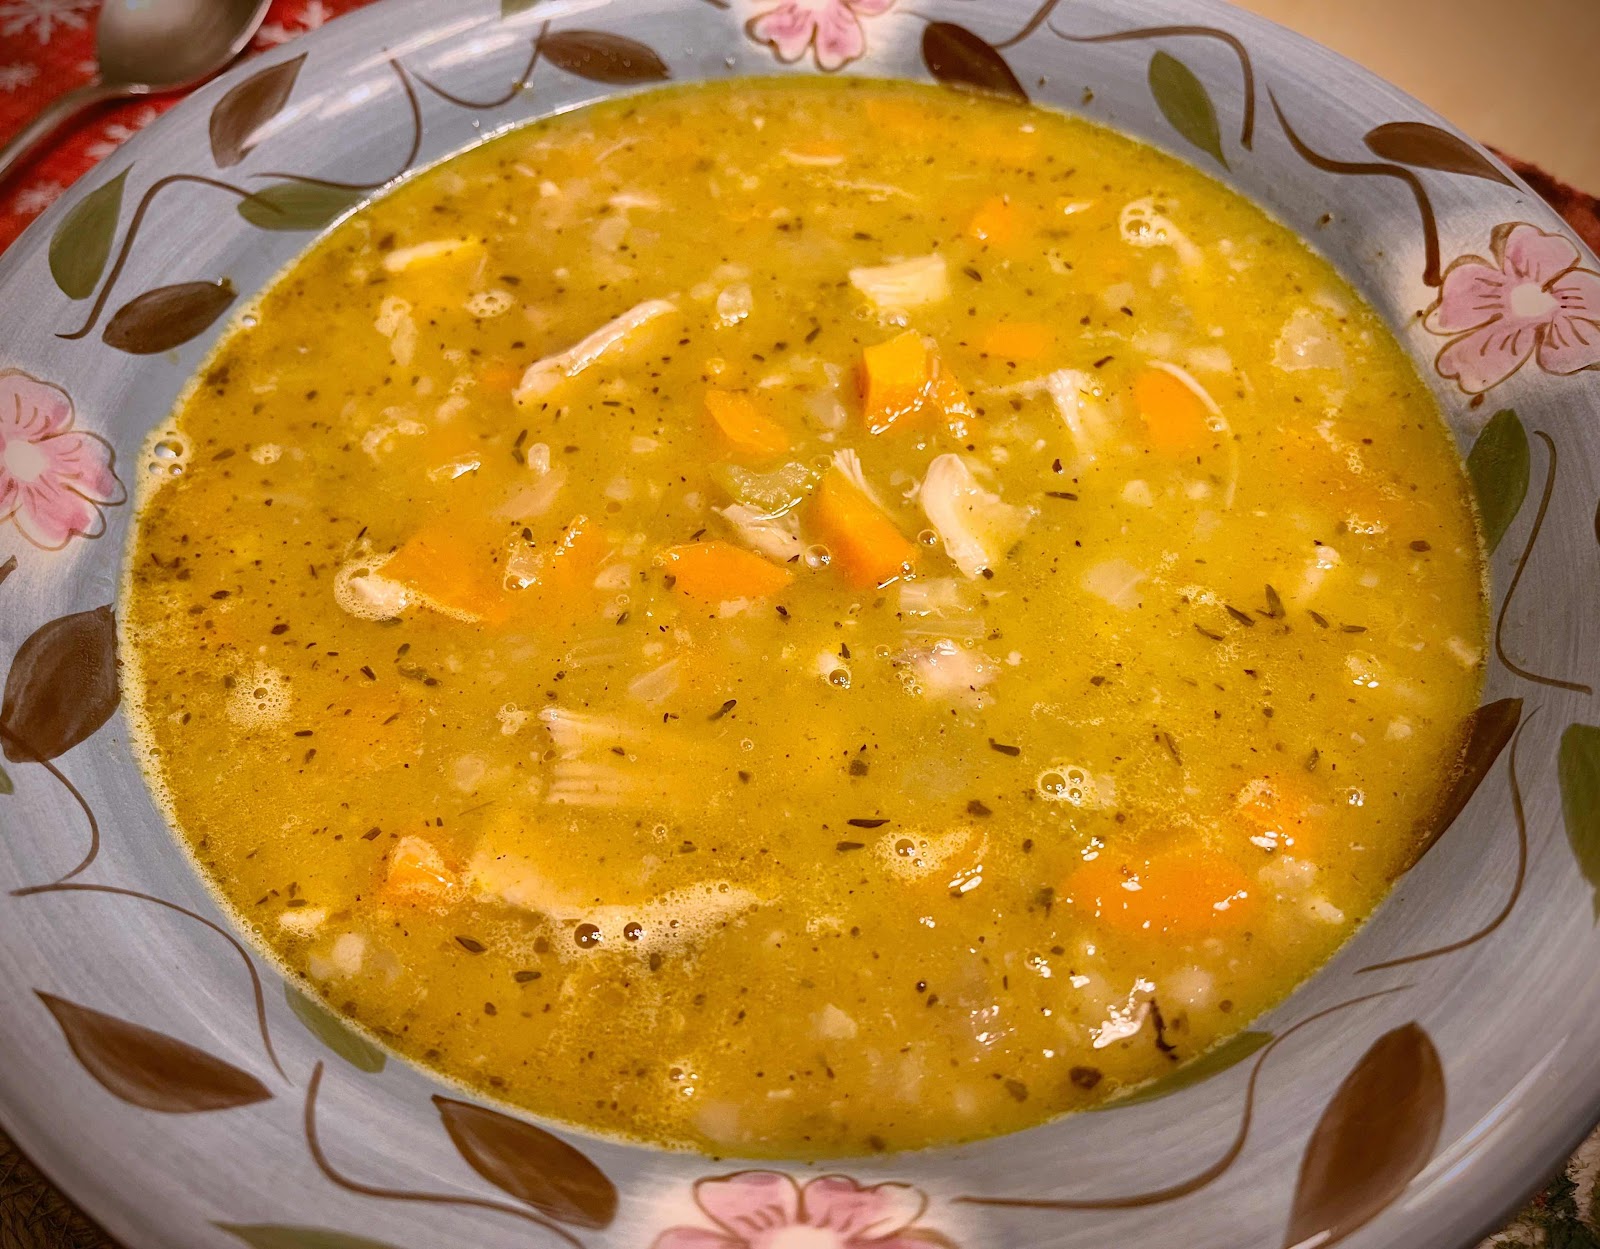
Keto Chicken and Cauliflower Rice Soup

Keto Chicken and Cauliflower Rice Soup
Sometimes when you’re sick, the only thing that sounds good is a warm bowl of soup. When I was recently ill, that’s the only thing I was craving! I looked through my cupboard to try and find the lowest carb soup in a can. I found a chicken rice soup with 12 g per cup and, because I was in no shape to make a homemade pot of soup that day, I ate it…and was very disappointed. There was very little chicken, lots of rice and even more potatoes! My blood sugar soared through the roof, much more than a serving of 12 carbs should have caused. The next day I was determined to make my own soup! And it turned out so delicious, very comforting and I ate it over the next several days as I recovered. Cauliflower rice in this recipe tastes and has the same texture as real rice! The broth was richer and more flavorful than anything you’ll find in a can. The real trick to this recipe is to brown the chicken, skin side down, in the Dutch oven or saucepan until crispy and a fond collects in the bottom of the sauce pan. Then, once you add the rest of the ingredients and broth, the fond is incorporated into the soup adding exceptional flavor. I hope you find this recipe as comforting as I did, especially on a sick day.

Keto Chicken and Cauliflower Rice Soup
Makes about 6 servings

12 ounces bone-in chicken thighs with skin (2 large thighs or 3-4 smaller)
2 carrots, diced
1/2 onion, diced
1 large rib celery, diced
1/4 teaspoon salt
1 clove garlic, minced
3/4 teaspoon dried thyme
1/2 teaspoon poultry seasoning
4 cups chicken stock or bone broth
2 cups frozen cauliflower rice, thawed
Salt and pepper, to taste

1. In a large Dutch oven or large, heavy saucepan, place the bone-in chicken thighs skin side down and heat over medium heat for eight minutes or until the skin has rendered its fat and is crispy. Turn the chicken over and continue cooking for another five minutes. Remove the chicken to a plate to rest while you continue making the soup.

2. Add the carrots, onion and celery to the saucepan, along with about 1/4 teaspoon of salt, and sauté until the vegetables are tender crisp and the onion is translucent. Add the garlic, thyme and poultry seasoning and stir for 30 seconds. Add the chicken stock and, with a wooden spoon, scrape the bottom of the pan until the accumulated fond is incorporated into the broth.

3. Add the chicken back into the pan and bring to a simmer. Cover and gently simmer the soup for 45 minutes. Test the temperature of the chicken with a probe thermometer. It should be at least 175°F. Remove the chicken from the pan and onto a plate to cool. Add the cauliflower rice to the soup and stir. Turn off the heat and allow the soup to sit, covered, while the chicken cools.

4. Once the chicken is cool enough to handle, remove the skin and bones from the chicken and discard. Cut the chicken into bite-size pieces and return the chicken to the pot. Reheat the soup, adding salt and pepper to taste. Simmer gently for 10 minutes before serving. Enjoy and get well! (This soup can be stored in an airtight container in the refrigerator for up to four days.)

Bowl of Chicken and Cauliflower Rice Soup
Nutritional Information per serving (1 cup): 150 calories, 4.7 g carbohydrate (1.5 g dietary fiber, 2.5 g sugars), 6.2 g total fat (1.7 g saturated fat, 0 g trans fat), 54 mg cholesterol, 414 mg sodium, 27.9 mg calcium, 214 mg potassium, 1 mg iron, 819 IU Vit A, 16 mg Vit C, 18.3 g protein. Net carbs per serving: 3.2 grams

Photos and recipe by Kathy Sheehan, copyright 2022
All rights reserved. Please do not duplicate without the author’s permission.
Saturday, December 18, 2021

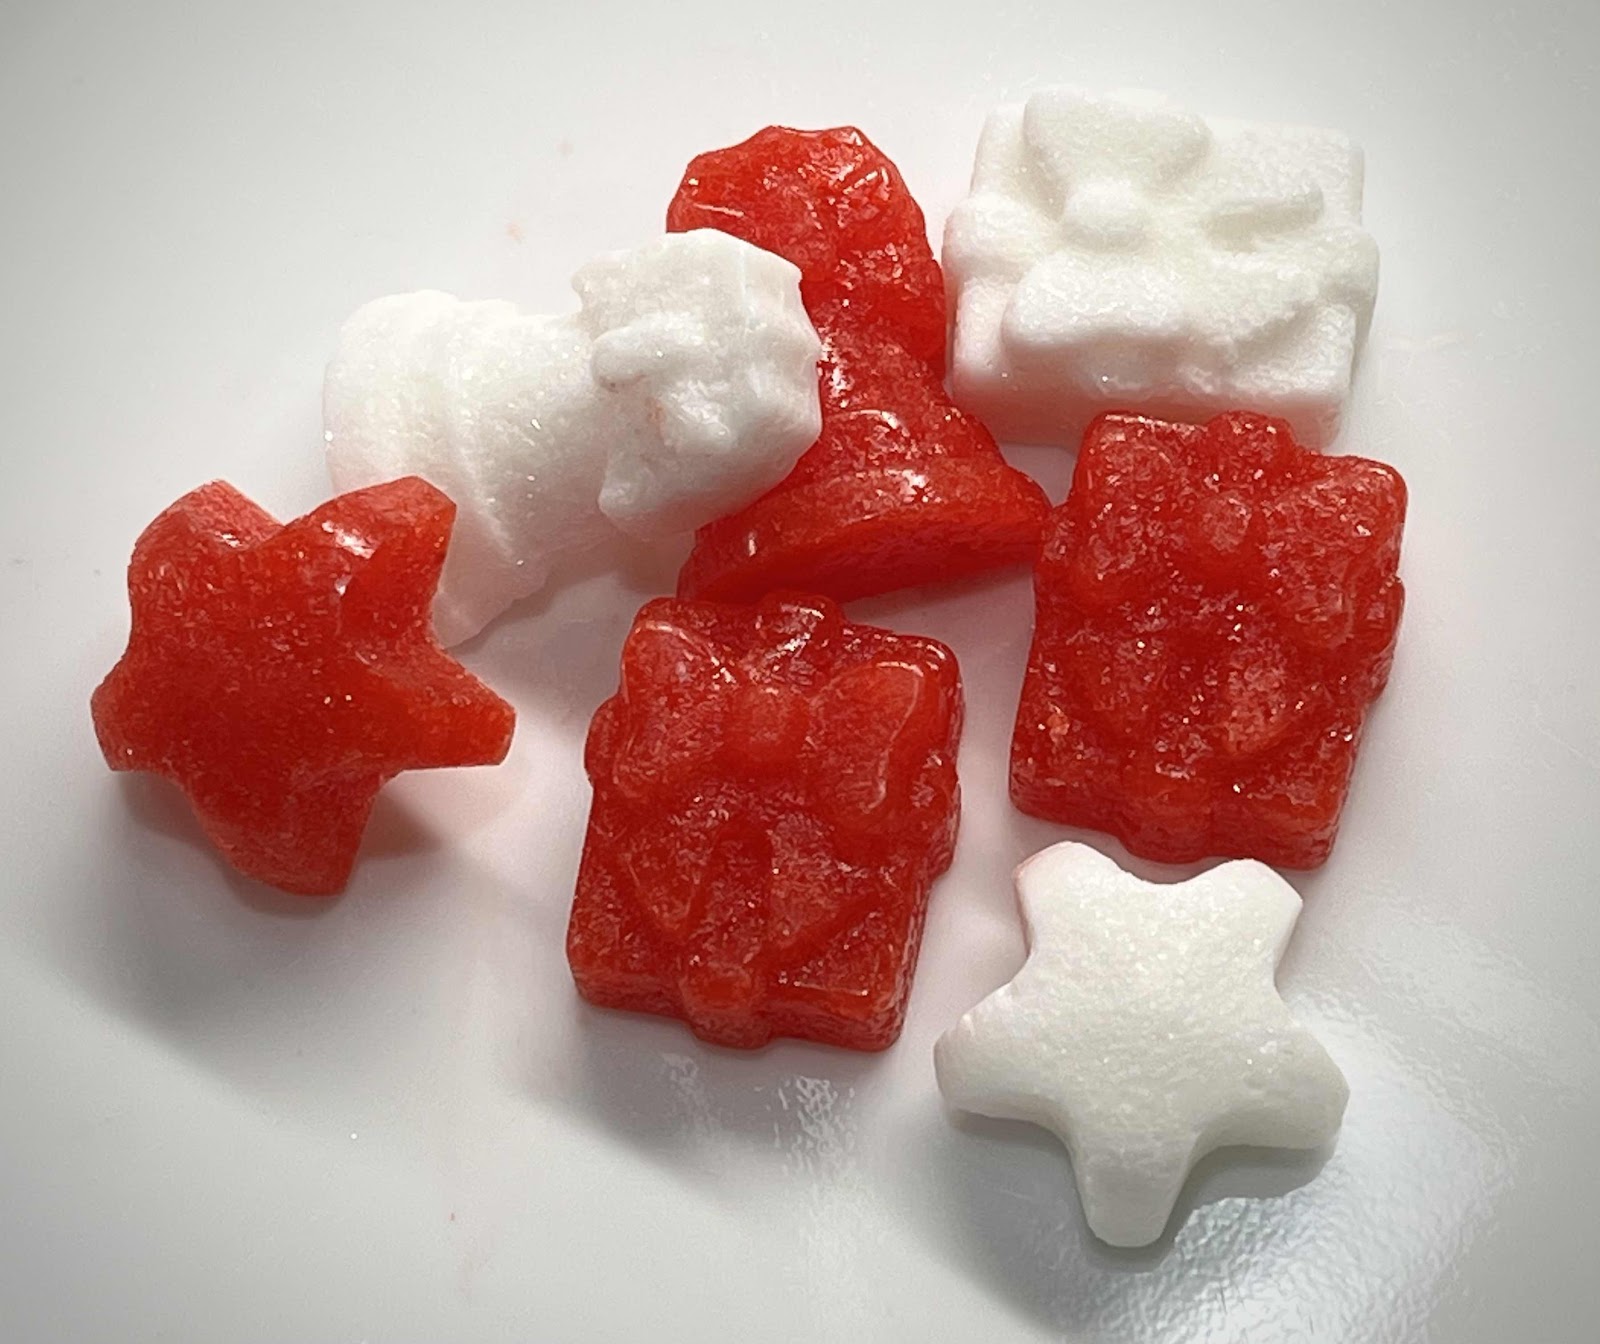
Sugar Free Peppermint Hard Candy

Sugar Free Peppermint Hard Candy
I love the taste of candy cane at this time of year. But, unfortunately, the sugar-free peppermint candies available in the stores are sweetened with the offending sugar alcohols isomalt, sorbitol or mannitol, all of which can cause embarrassing gas, bloating and loose stools… not the fun side effect you hope to experience from eating candy! I made these candies, not only for eating, but for sprinkling on my holiday baked goods or adding to my favorite ice cream flavor: Peppermint Stick Ice Cream! It is necessary to have a candy thermometer or probe thermometer to achieve correct hard-crack stage this candy requires. Also, erythritol-based sugar substitute is a must.  I’ve tried making this candy with allulose, but it turned out softer and chewy, like taffy, instead of a hard candy. Not bad, but not exactly what I was looking for. If you would like an alternative to the sugar-free candies available commercially, to crush and add to your ice cream or sprinkle on top of your keto baked goods, this is the recipe for you!

Sugar Free Peppermint Hard Candy
Number of servings varies (Yields 1/2 cup crushed candies)

1/2 cup erythritol-based powdered sweetener (I prefer Lakanto Monkfruit Powdered Sweetener)
1/16 teaspoon cream of tartar
1/3 cup water
1/2 teaspoon peppermint extract, or to taste
1 drop of gel food coloring (optional)

Equipment Needed:
Candy thermometer or Digital Probe thermometer*

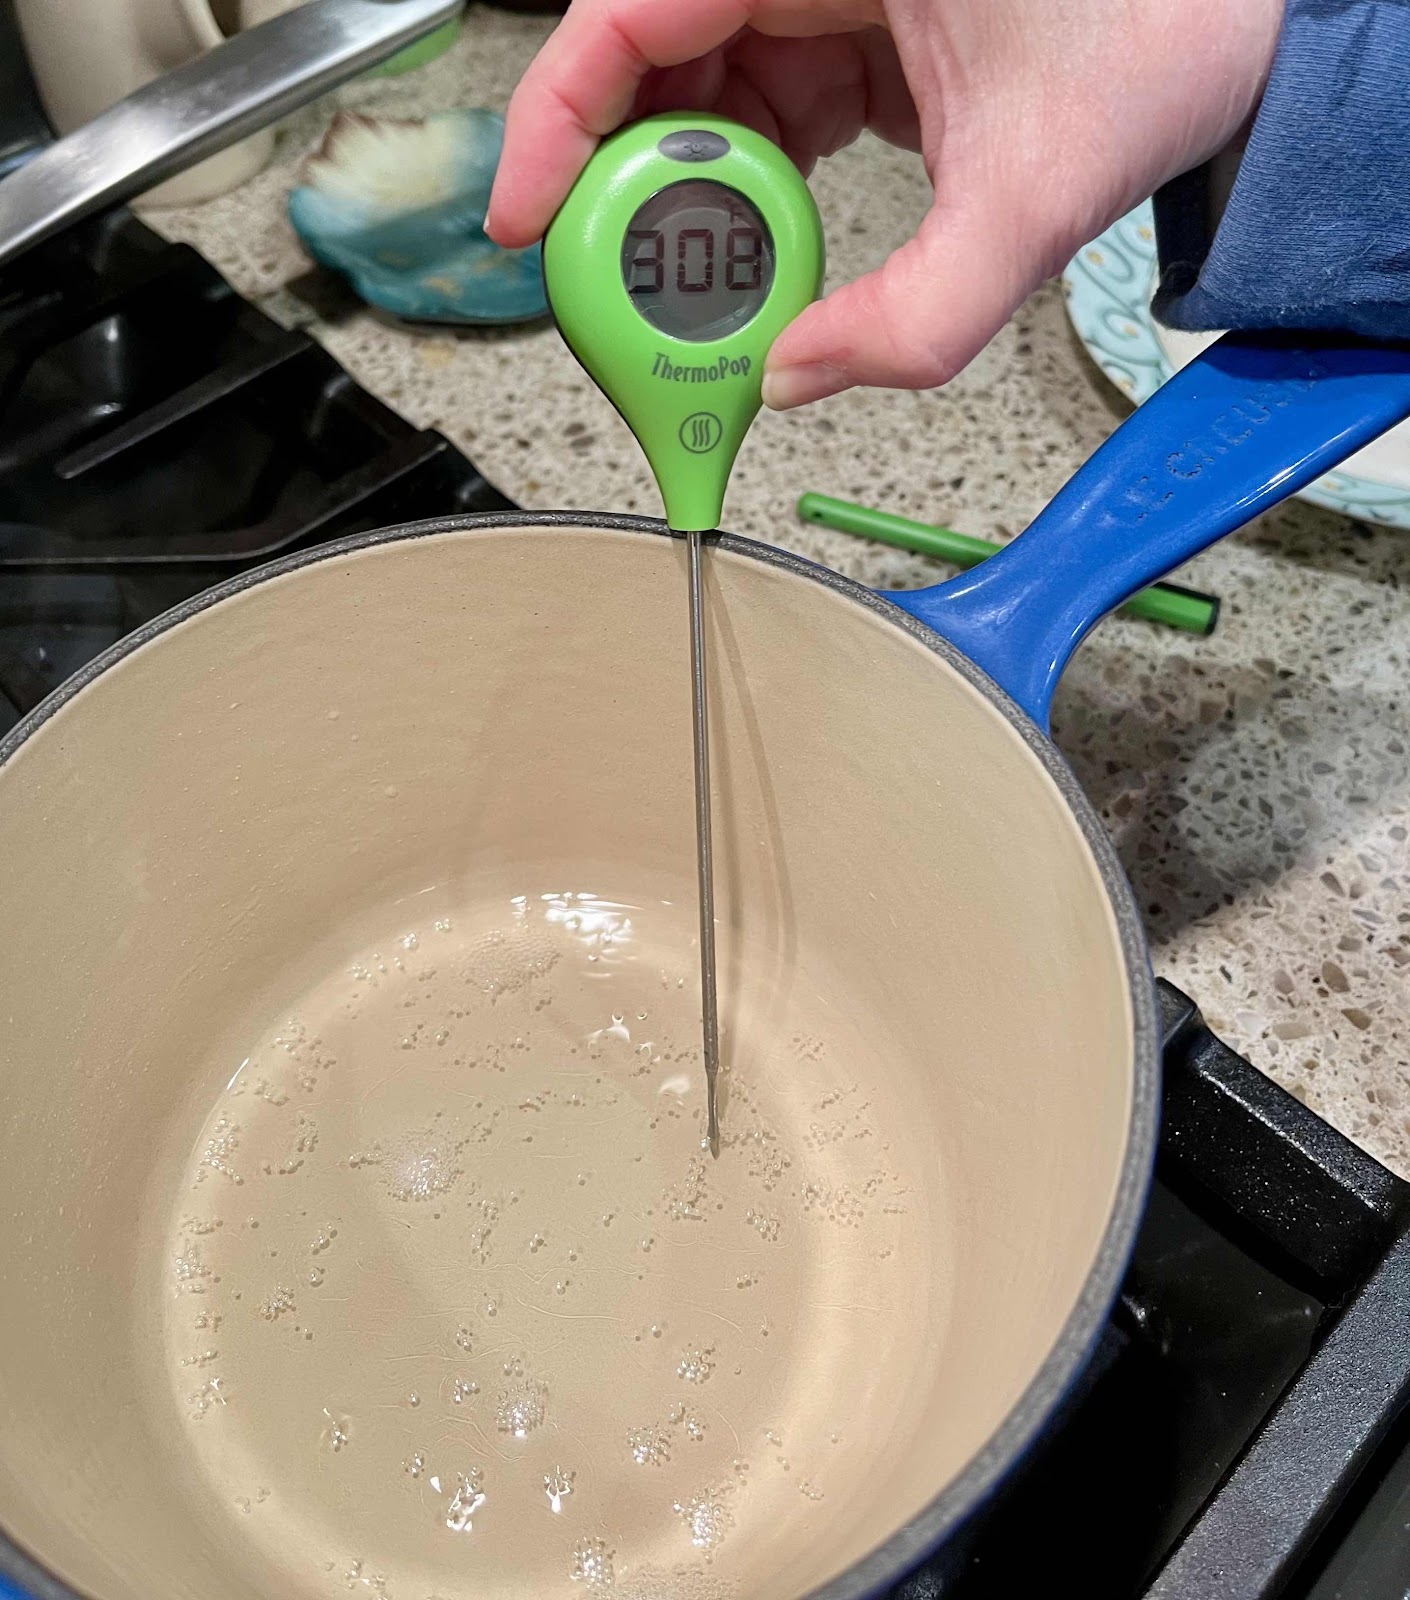
1. In a small, heavy saucepan, very gently stir together the sweetener, cream of tartar and water over medium high heat just until the dry ingredients are dissolved. Stop stirring and allow to come to a boil. Continue to boil, without stirring, until the mixture reaches between 300 - 310°F. The mixture will remain clear and not thicken into a syrup. Temperature is the only way to determine if it has reached the hard crack stage. (Do not overcook or the mixture will begin to take on a bitter, burnt flavor.) Remove from heat.

Boil until mixture reaches between 300 to 310 degrees
2. While the mixture is boiling, line a small heatproof bowl with foil and set aside. You may also use silicone candy molds to create individual, bite-sized candies.

3. When the mixture stops bubbling, add the extract and food coloring (if using) and stir to combine. Pour the mixture into the foil-lined bowl and allow to cool for about 15 minutes. (Or pour into a silicone candy mold to make individual candies.) Refrigerate the mixture several hours until completely set and hardened.

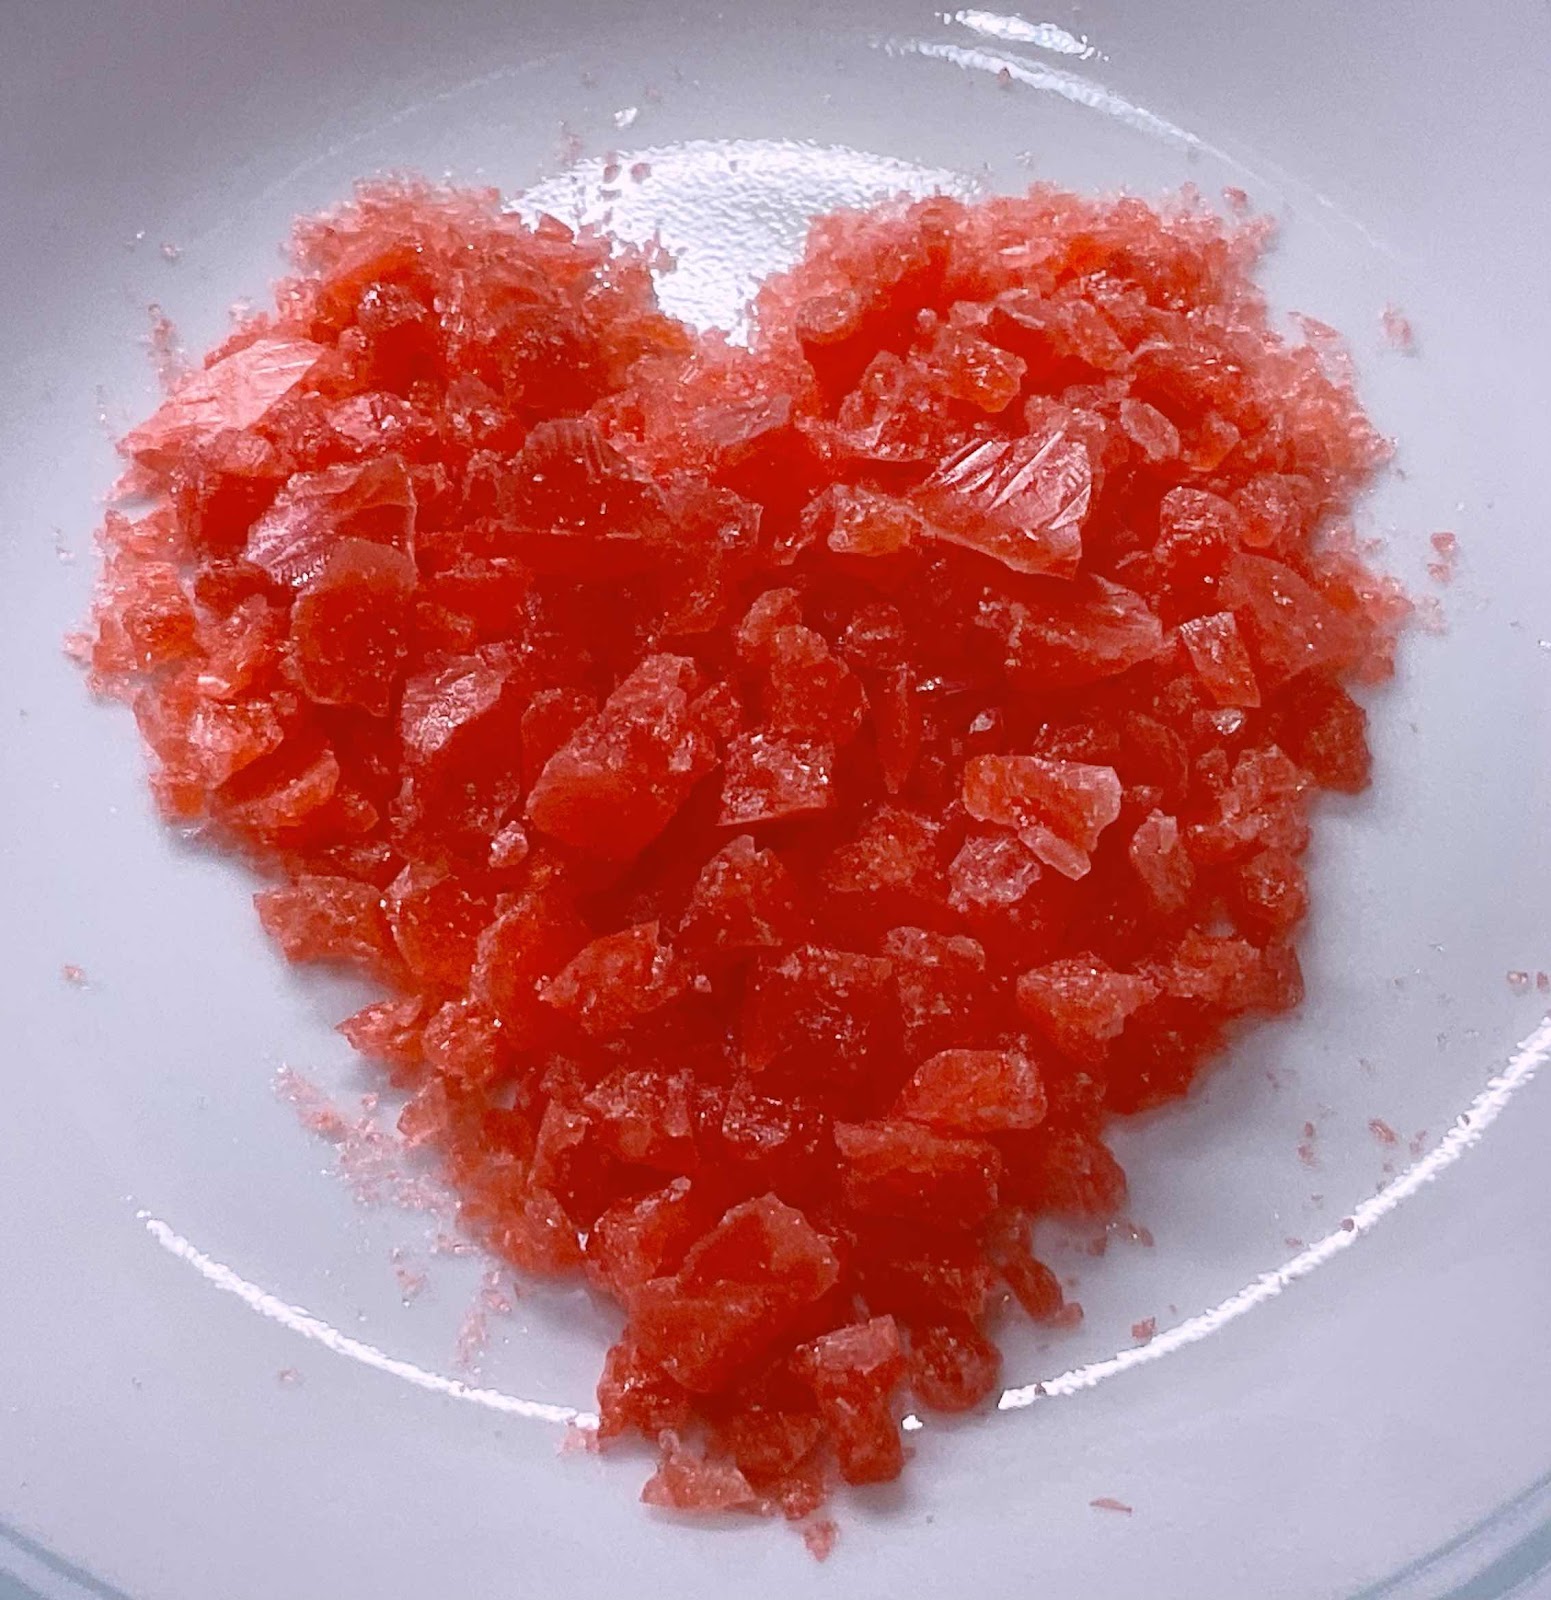
4. Remove the foil or pop out the individual candies from the silicone mold. To make peppermint candy sprinkles, place the harden candy disc in a plastic bag and gently break apart by lightly pounding with the handle of a butter knife. (This candy has a more delicate structure than hard candy made from real sugar, so don’t pound too aggressively.) The broken, gently crush candy makes an excellent mix-in for my Keto Peppermint Stick Ice Cream or as a topping on keto baked goods.

Crushed Sugar Free Peppermint Candies
*Note: To achieve a hard candy, you need to use an erythritol-based sweetener. Allulose or Bocha Sweet will not firm up properly. (These two sweeteners make great taffy or chewy caramel, but not hard candies.) Also, you really need a candy thermometer or digital thermometer to make sure the boiling mixture reaches the right temperature, between 300-310°F, so it will set up correctly. Erythritol-based sweetener will not act like real sugar. It doesn’t thicken up into a syrup and will not ball up when added to cold water, so temperature is the only way to determine when you’ve reached the hard crack stage.

Keto Peppermint Hard Candy

Nutritional Information per 1 tablespoon of crushed candy: 1 calorie, 6 g carbohydrate (0 g fiber, 0 g sugars, 12 g sugar alcohols), 0 g fat, 0 mg sodium, 10 mg potassium, 0 g protein. Net carbs per serving: 0 grams

Photos and recipe by Kathy Sheehan, copyright 2021
All rights reserved. Please do not duplicate without the author’s permission.
Sunday, August 29, 2021

Keto Home Fries

Keto Home Fries
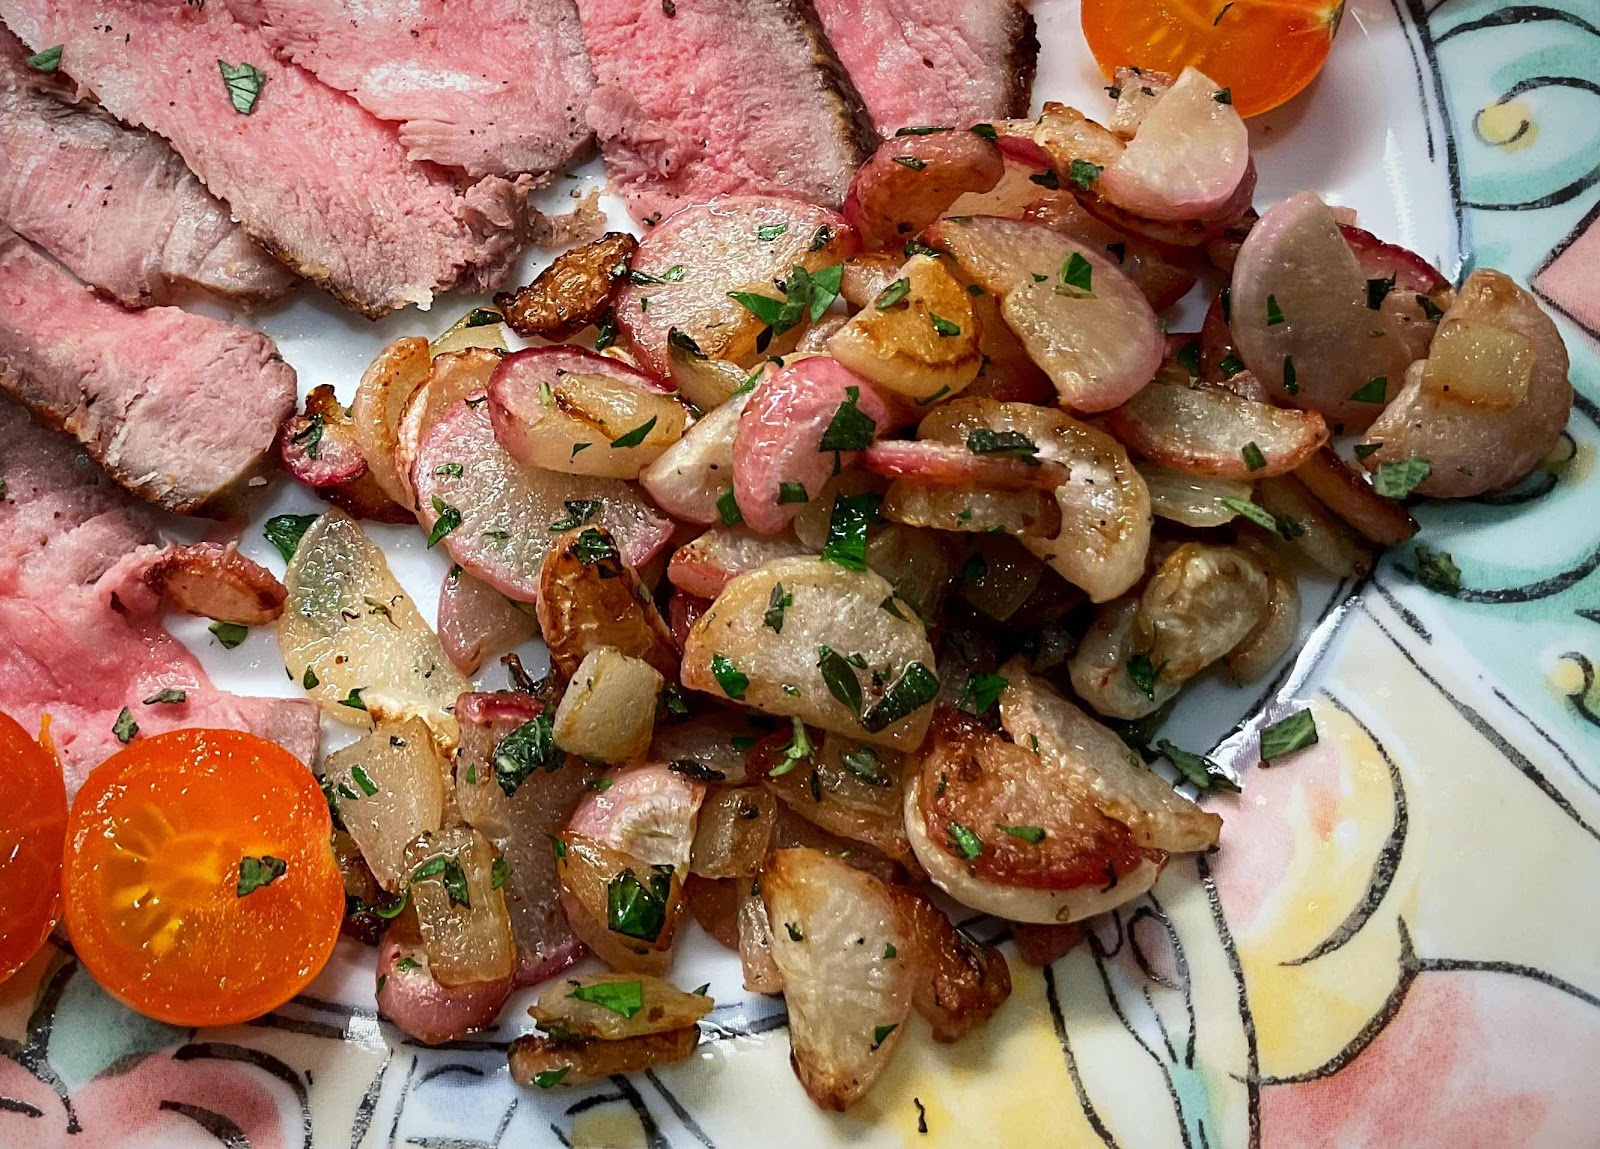
These pan-roasted radishes taste just like home fries! I think the real trick is adding some onion, so the radishes and onions caramelize together. Even my husband, who does not eat keto and is basically a meat & potatoes man, loved them! He commented that they tasted like fried potatoes—and they really do!

Keto Home Fries
Makes 2 servings

1-2 tablespoons avocado oil or bacon grease
2 cups cubed or sliced radishes
1/4 cup onion, cut into chunky pieces
Salt and pepper to taste
Chopped fresh chives and thyme, if desired

1. Place avocado oil or bacon grease into a skillet. Add cubed or sliced radishes and season with salt and pepper. Cover and cook for a few minutes until the radishes begin to release some of their moisture and start to soften.

2. Remove lid and add onion. Sauté uncovered over medium-low heat until the radishes and onions have browned and caramelized, stirring occasionally, making sure the radishes have browned nicely on all sides. Season with additional salt and pepper to taste. Sprinkle with herbs just before serving, if desired.

Nutritional Information per serving (1/2 recipe): 81 calories, 5.8 g carbohydrate (2.1 g dietary fiber, 3.1 g sugars), 6.4 g total fat (2.9 g saturated fat, 0 g trans fat), 6 mg cholesterol, 140 mg sodium, 32.2 mg calcium, 291 mg potassium, 2 IU Vit A, 1 g protein. Net carbs per serving: 3.7 grams

Photo and recipe by Kathy Sheehan, copyright 2021
All rights reserved. Please do not duplicate without the author’s permission. 
Friday, May 7, 2021

Schnitzel with Keto Brown Mushroom Gravy (Jagerschnitzel)

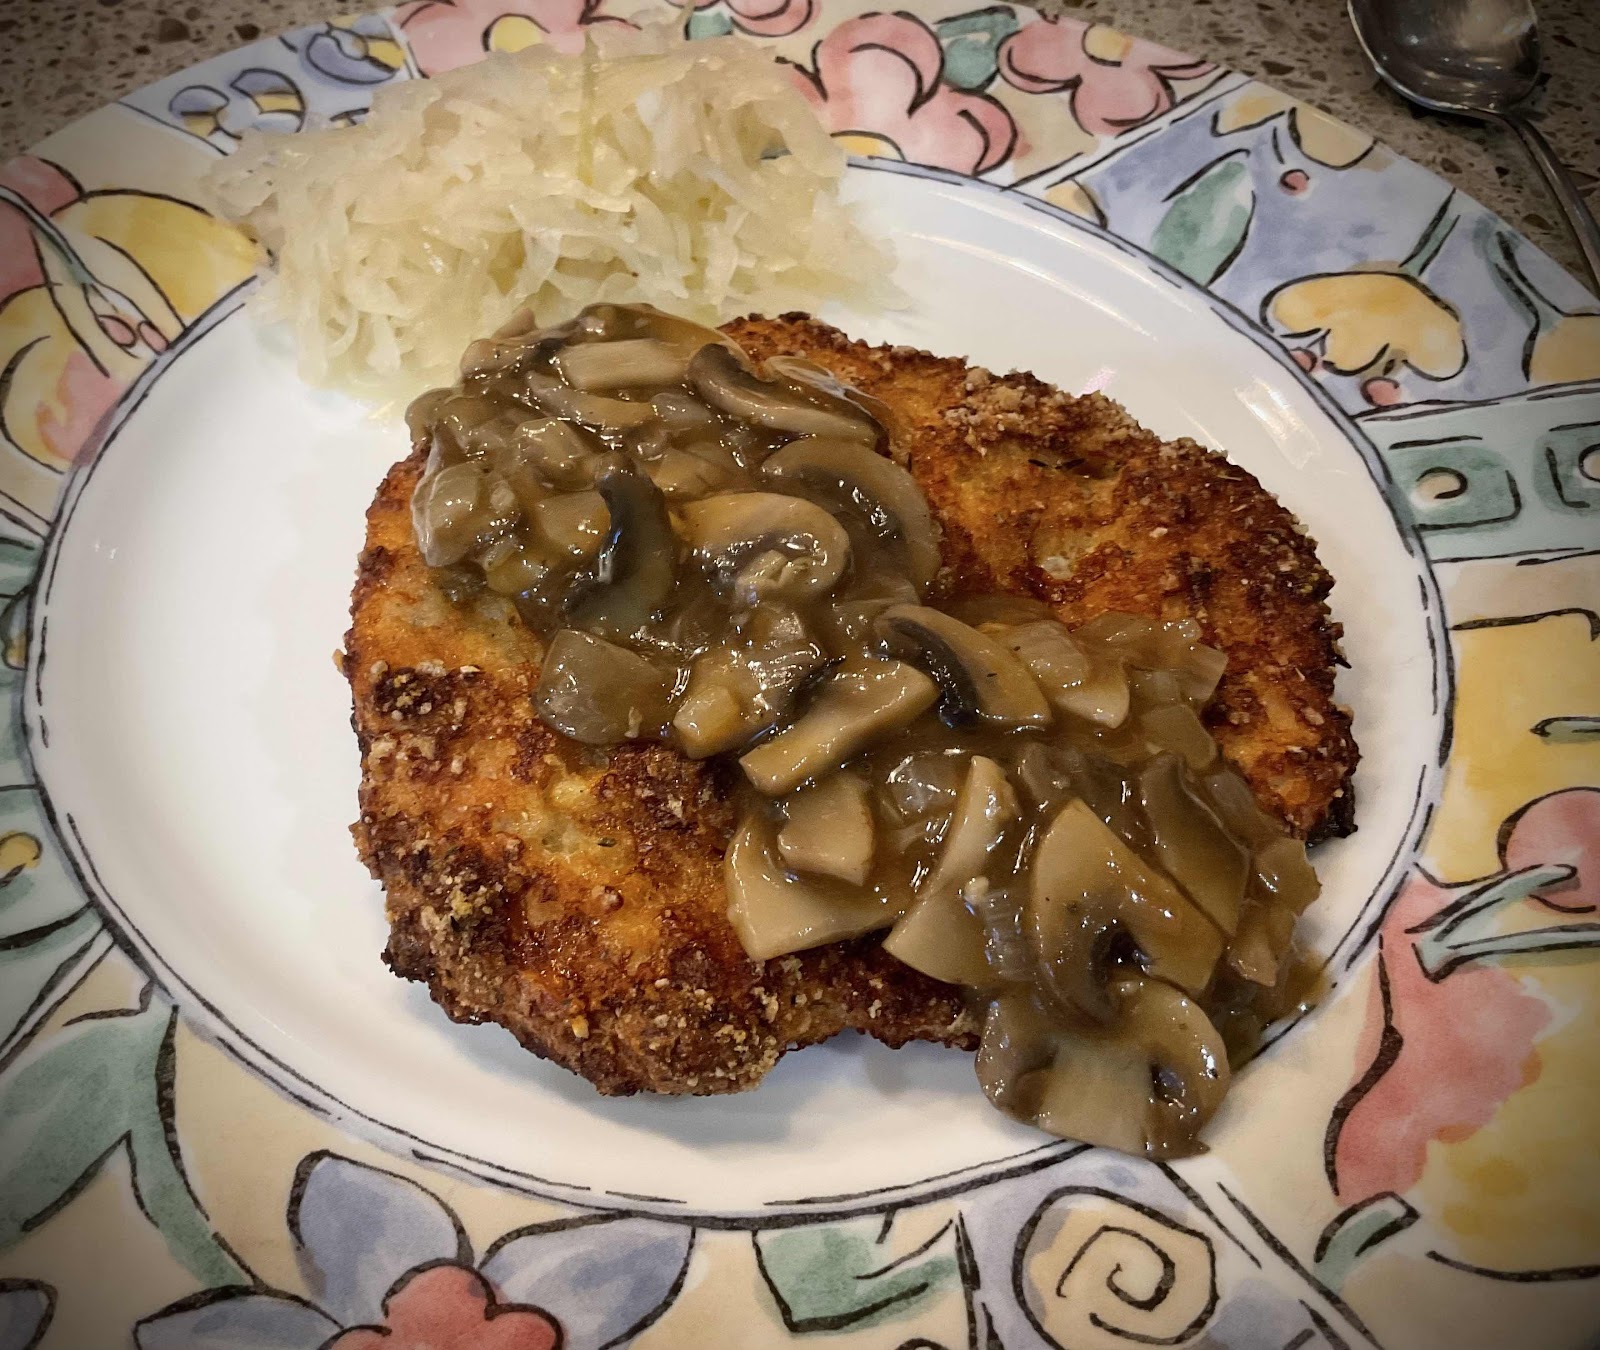
Schnitzel with Keto Brown Mushroom Gravy
My husband is a big fan of German cooking. I have tried other recipes for schnitzel that call for almond flour, but was always a bit disappointed in their soggy breading. I’ve been experimenting with using crushed pork rinds as breading and, so far, the results have been excellent! This pork rind breading is super crunchy and, even when reheated, remains crisp. I’m not a fan of pork rinds as a snack, but in this application, they are a winner! This schnitzel recipe has authentic flavor and texture. You can make it with your favorite cutlet, such as pork, chicken, turkey or veal. I’m sure you’ll be as pleased as my husband and this recipe will become a favorite of your family, too.

Schnitzel with Keto Brown Mushroom Gravy (Jagerschnitzel)
Makes 4 servings

Schnitzel:
1 pound boneless pork chops (or substitute chicken, turkey or veal)
1 1/2 cups crushed pork rinds (see notes)*
1/4 teaspoon salt
1/4 to 1/2 teaspoon black pepper
1/4 teaspoon dried thyme
1 large egg
1 tablespoon sour cream (omit for dairy free)
1/2 cup unflavored whey protein powder

Brown Mushroom Gravy:
1 tablespoon butter
1/2 onion, chopped
1 clove garlic, minced
8 ounces white button mushrooms, sliced
1 1/4 cups beef broth
1/4 teaspoon dried thyme (optional)**
1 teaspoon red wine vinegar (optional)**
1/4 to 1/2 teaspoon xanthan gum to thicken
Salt and pepper to taste

1. Prepare the 3-step dredging station by placing the whey protein powder onto a plate. In a small bowl, whisk together the egg and sour cream and pour onto a second plate. Finally, stir together the crushed pork rinds, salt, pepper and thyme and pour onto a third plate. Preheat the oven to 425 degrees Fahrenheit. 

2. Cut the pork chops in half horizontally and pound thin between two pieces of plastic wrap, to about 1/4 inch thickness. Set aside while you start the mushroom gravy. 

3. Melt the butter in a 10 or 12 inch skillet. Add the onion and heat over medium heat until softened and translucent. Add the garlic and stir for about 1 minute. Add the sliced mushrooms and sauté until all the liquid has evaporated and the mushrooms are nicely browned. Add the beef broth, thyme and vinegar. Bring to a simmer and allow to cook and reduce, stirring occasionally, while you prepare the schnitzel.

4. Line a baking sheet with foil and spray generously with non-stick cooking spray. 

5. Pat any excess moisture from the cutlets with a paper towel. Dredge each cutlet by first dipping into the whey protein powder on both sides and shaking off the excess. Next, dip the cutlet into the egg mixture and coat both sides. Lastly, place it in the third plate with the pork rind breading, turning to coat both sides. Place the dredged cutlet onto the prepared baking sheet. Repeat with the remaining cutlets. 

6. Place the baking sheet into the preheated oven on the middle rack and cook for 20 minutes. Meanwhile, finish the gravy.

7. Sprinkle the xanthan gum over the simmering gravy and stir briskly until dissolved and the gravy thickens. Season with salt and pepper to taste.

8. At the end of the 20 minutes of cooking, if the breading on the cutlets is not sufficiently browned and crispy, then broil for a few minutes until deeply golden brown. Serve immediately, topped with the mushroom gravy.

Crushed Pork Rind Crumbs
Notes: 
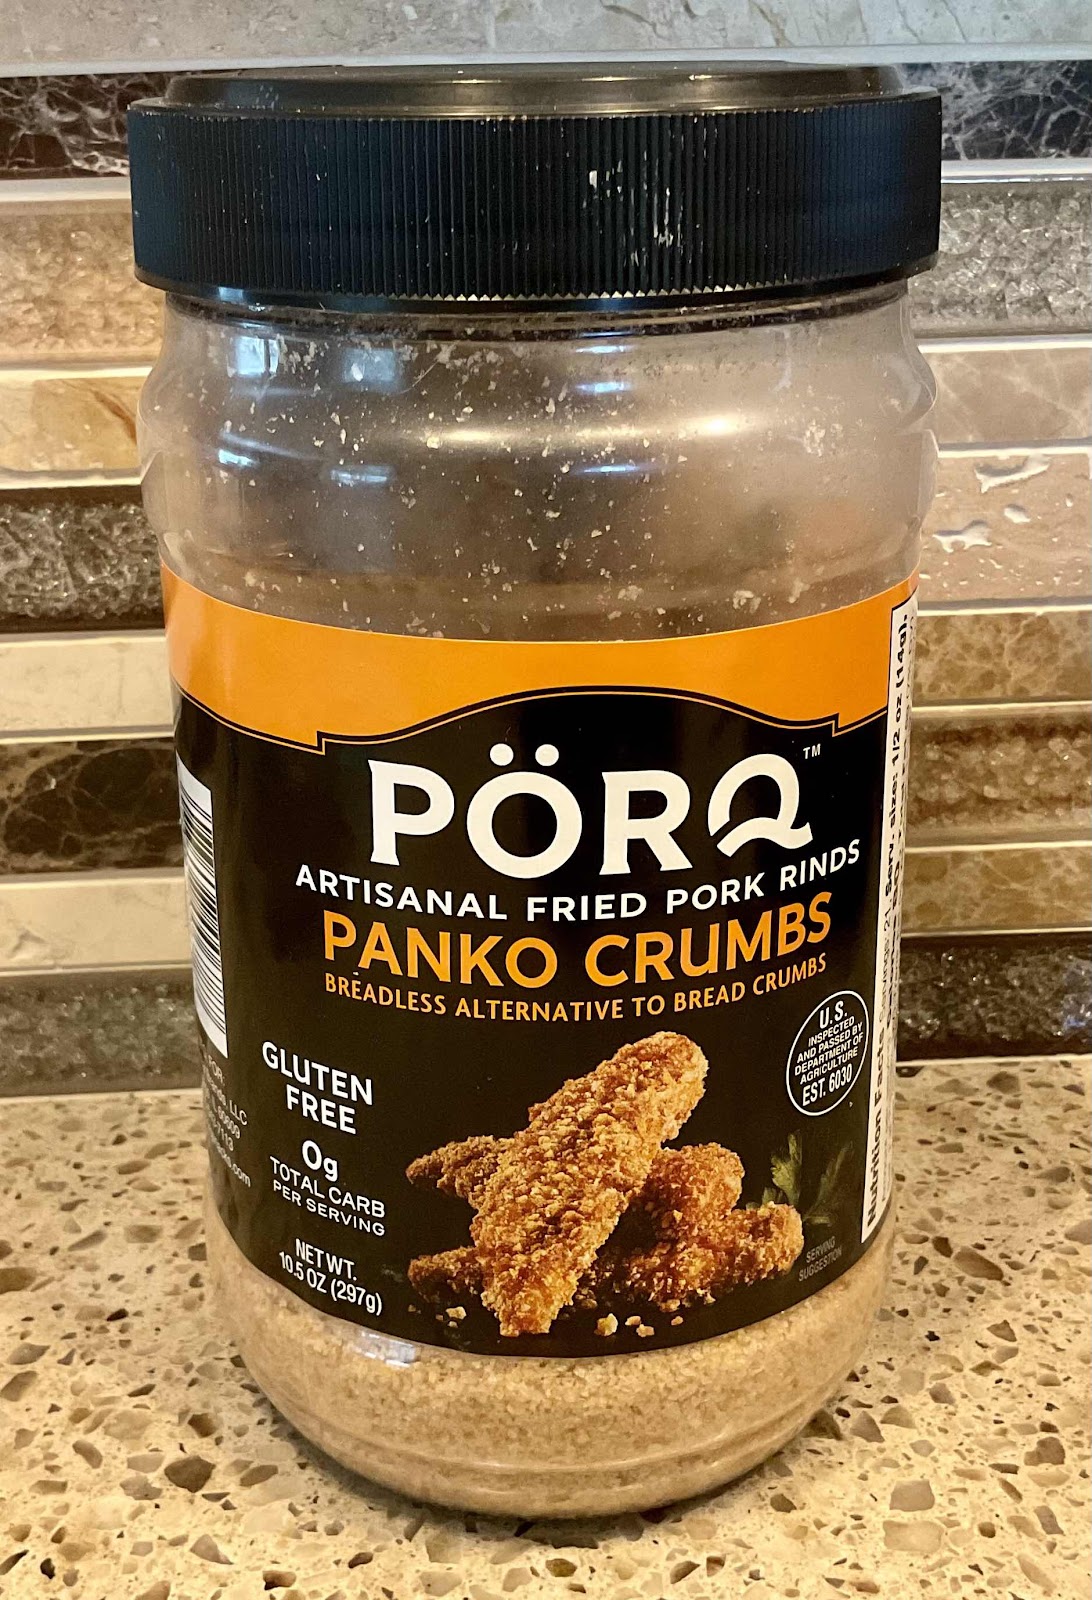
*Pork rinds conveniently come already crushed in panko-style crumbs! Look for them near the breadcrumbs or in the gluten-free section of your grocery store.

**If you want to make a plain, brown gravy, you may omit the thyme and vinegar. Personally, I like the very slight acidity the vinegar adds to the gravy, but if you don’t, then just leave it out.

Nutritional Information per serving of schnitzel (4 oz. cutlet, no gravy): 358 calories, 0.4 g carbohydrate (0 g fiber, 0 g sugars), 19.3 g total fat (7.4 g saturated fat, 0 g trans fat), 147 mg cholesterol, 378 mg sodium, 43.2 mg calcium, 545 mg potassium, 1 mg iron, 29 IU Vit A, 43.8 g protein. Net carbs per serving: 0.4 grams

Nutritional Information per 1/2 cup gravy: 51 calories, 4.1 g carbohydrate (0.9 g dietary fiber, 1.9 g sugars), 3 g total fat (1.8 g saturated fat, 0 g trans fat), 10 mg cholesterol, 354 mg sodium, 7.8 mg calcium, 206 mg potassium, 0 mg iron, 1 IU Vit A, 2 mg Vit C, 2.7 g protein. Net carbs per serving: 3.2 grams

Photos and recipe by Kathy Sheehan, copyright 2021
All rights reserved. Please do not duplicate without the author’s permission. 
Friday, March 5, 2021

Make Your Own Low Oxalate, Low Carb Macadamia Nut Flour

Low Oxalate, Low Carb Macadamia Nut Flour
I am a Type 1 diabetic and a kidney stone former. My doctor has recommended a low oxalate diet to prevent (or at least reduce or slow down) the formation of calcium oxalate stones in the future. This new development was a blow to me since I eat a very low carb, ketogenic diet to control my blood glucose, which typically includes a lot of nuts! Almond flour was my go-to alternative to wheat flour and I’ve been living on it for the past 8 years, consuming it almost every day. I was told that all nuts have oxalate, some more than others. I’ve since learned that almonds are the nut that is highest in oxalate content, about 400mg per 1/2 cup of almond flour! (Goodbye almonds.) Macadamia nuts, on the other hand, contain oxalate but at a much lower level, about 32mg per 1/2 cup of raw nuts. I’ve switched from making homemade almond milk to making a macadamia-coconut milk blend and like it even better. The best part is that the leftover solids, after straining the nut milk, give me a beautiful, finely ground macadamia nut flour that can’t be purchased anywhere. One-half cup of my macadamia nut flour weighs 20 grams and only contains 9.5mg of oxalate! Even lower is coconut flour which contains 4.5mg of oxalate per 1/2 cup. By substituting macadamia nut flour for almond flour in recipes really has lightened my oxalate load, while still allowing me to enjoy baking low carb, gluten free treats.

Low Oxalate, Low Carb Macadamia Nut Flour
Makes about 1 cup of flour

1 cup of raw macadamia nuts, soaked overnight
4 cups of water

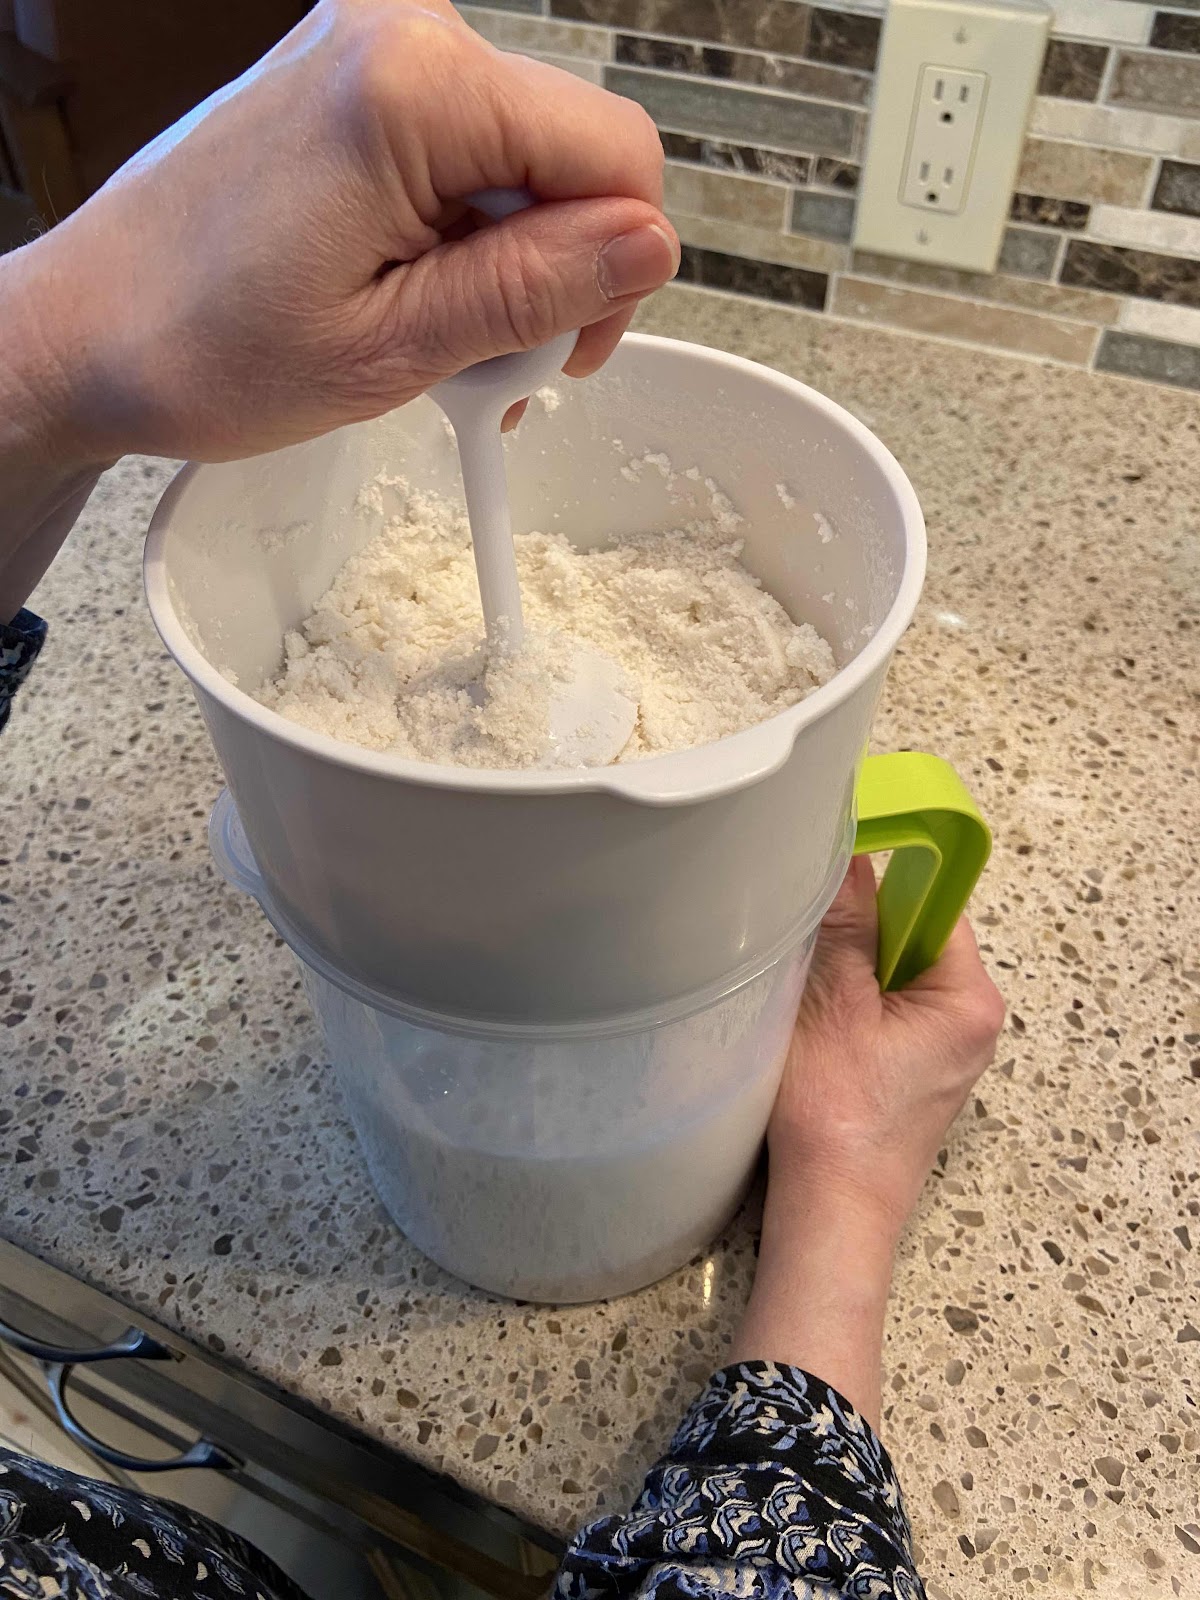
1. First, make a batch of macadamia nut milk by draining the soaked nuts, then blitzing them with 4 cups of water in a blender on high. This only takes a couple of minutes. Using a nut milk bag or other fine mesh strainer, strain the nut solids from the milk. Add a pinch of salt and a couple of drops of vanilla to your macadamia nut milk and stir. (If desired, add 1-2 drops of monkfruit extract or stevia). Pour the milk into a glass container or quart mason jar and refrigerate. Consume the milk within 5 days.

Straining the nut solids from the milk
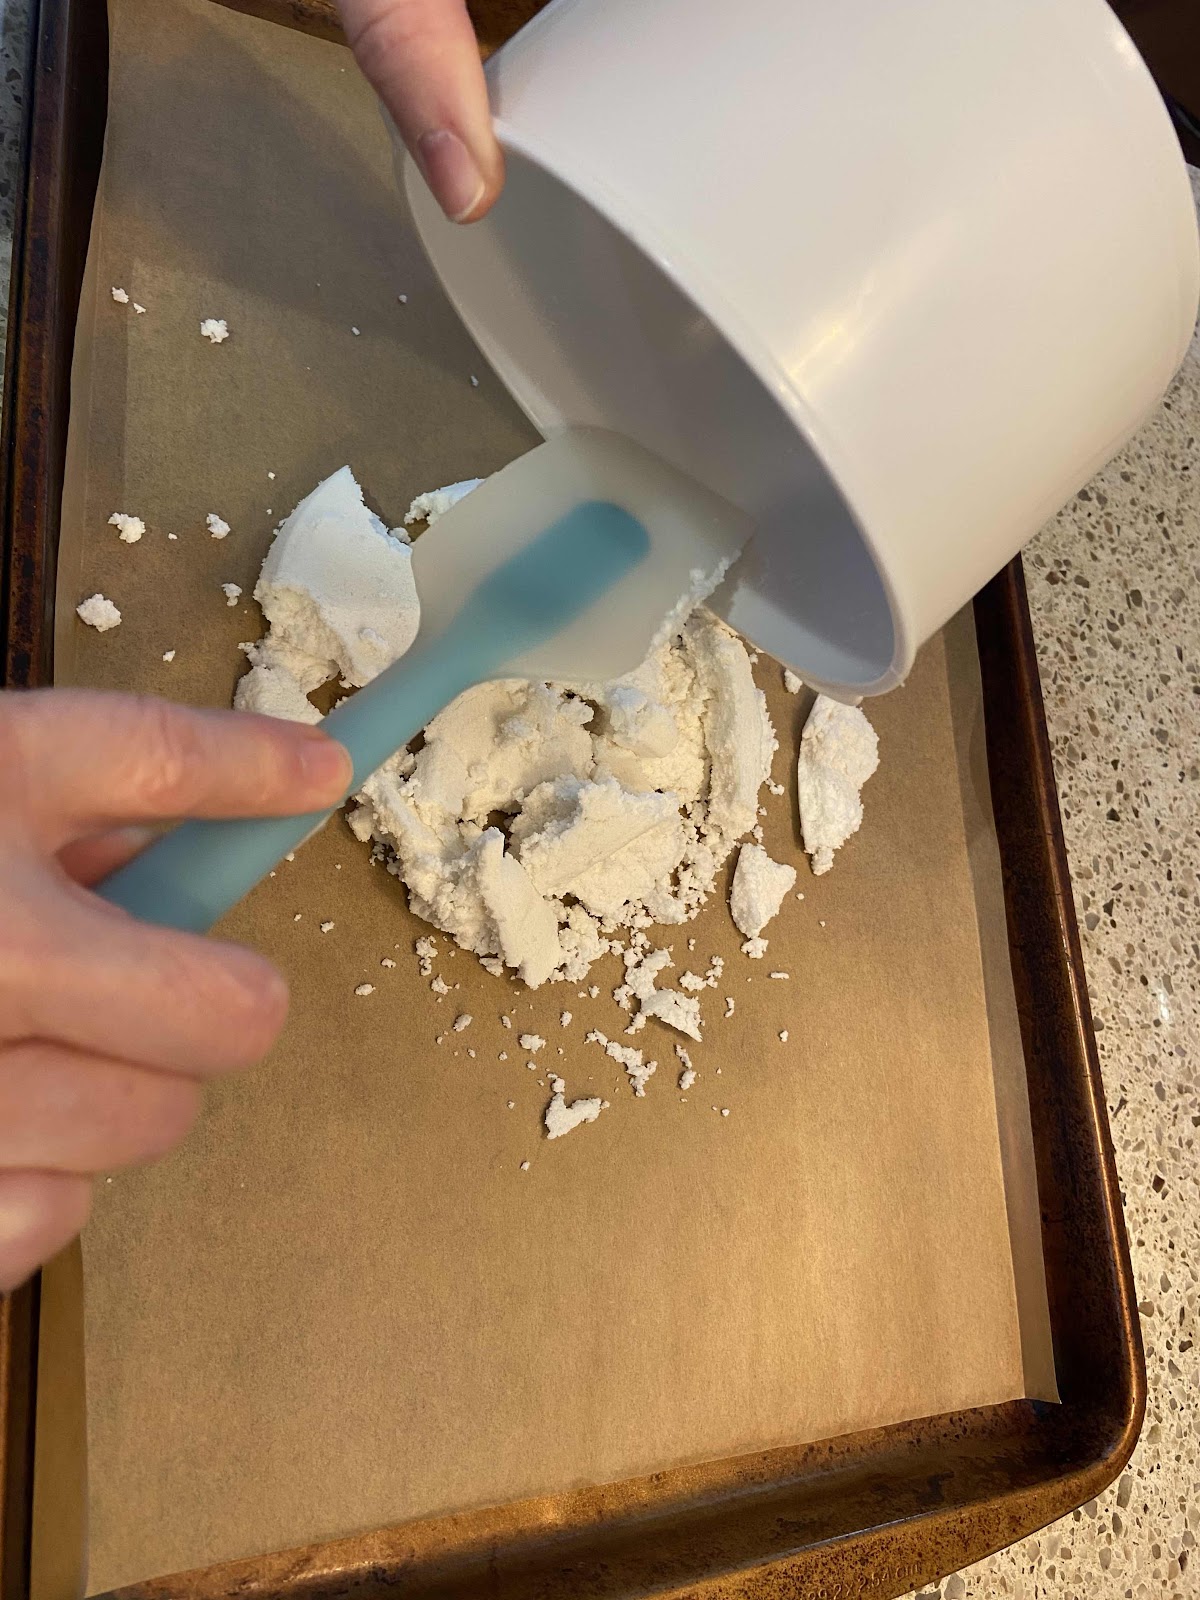
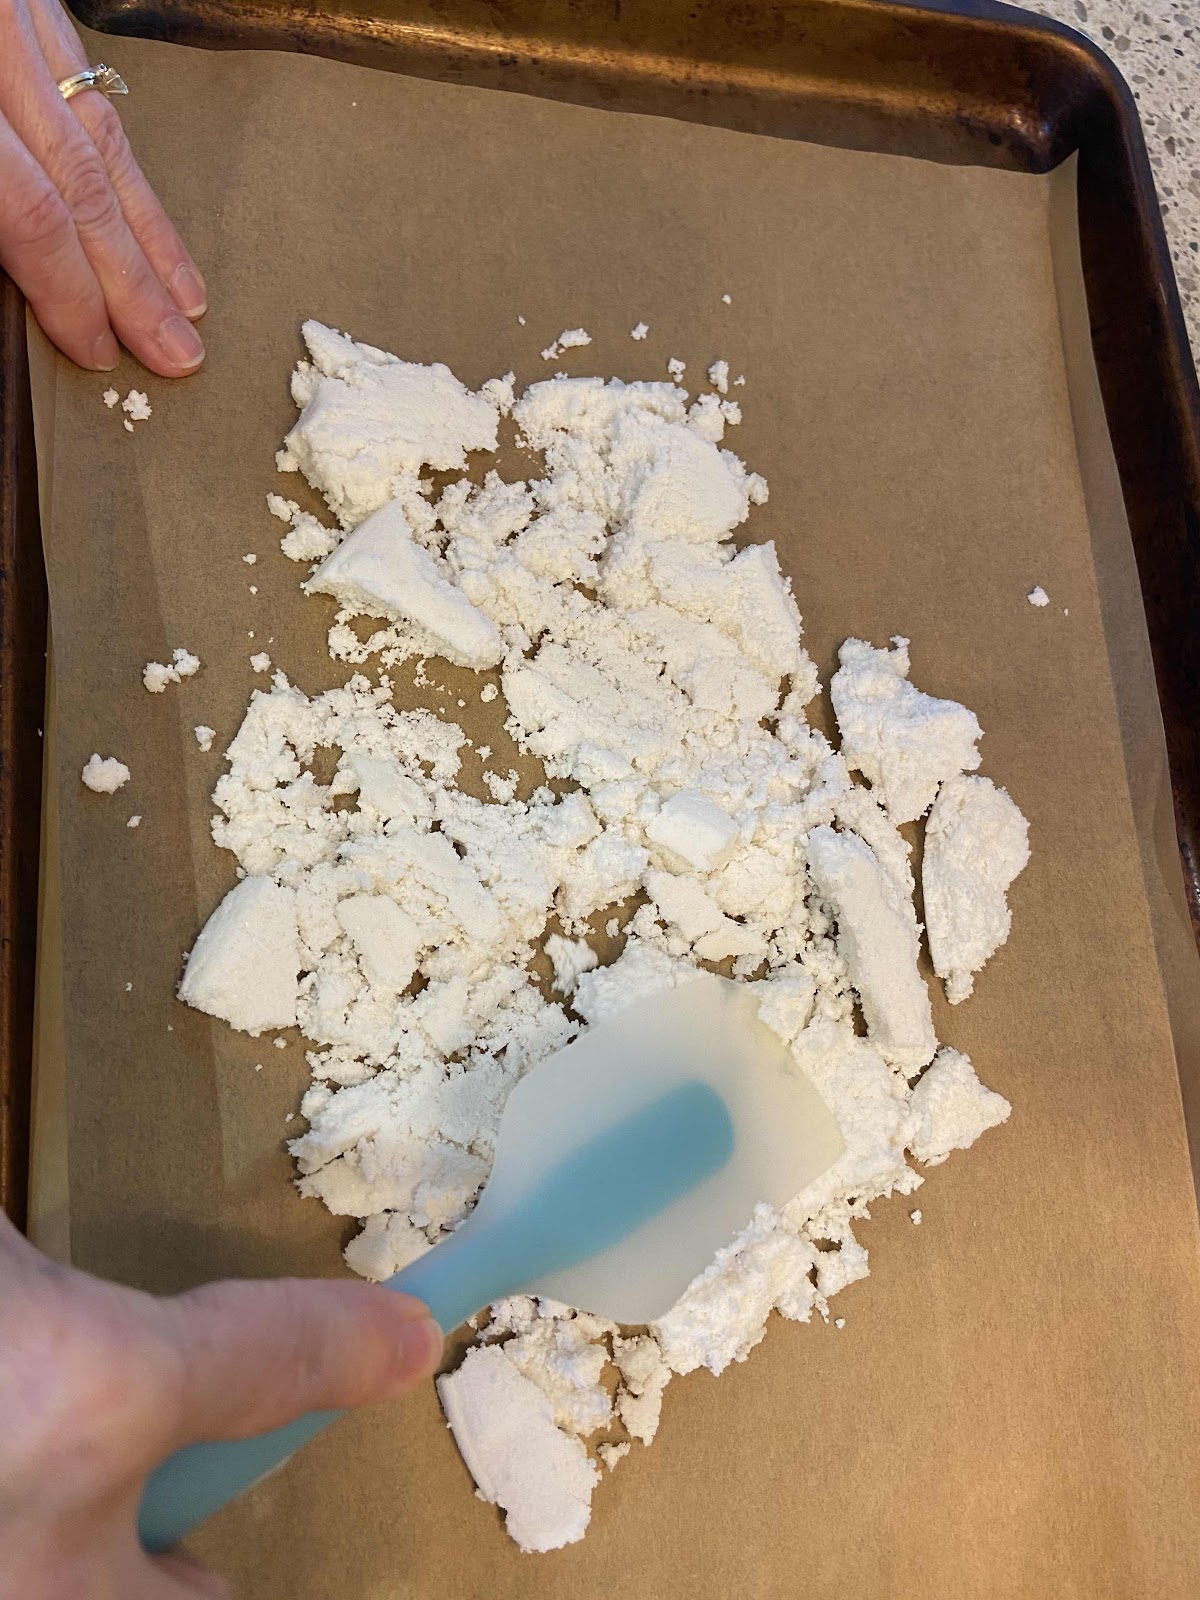
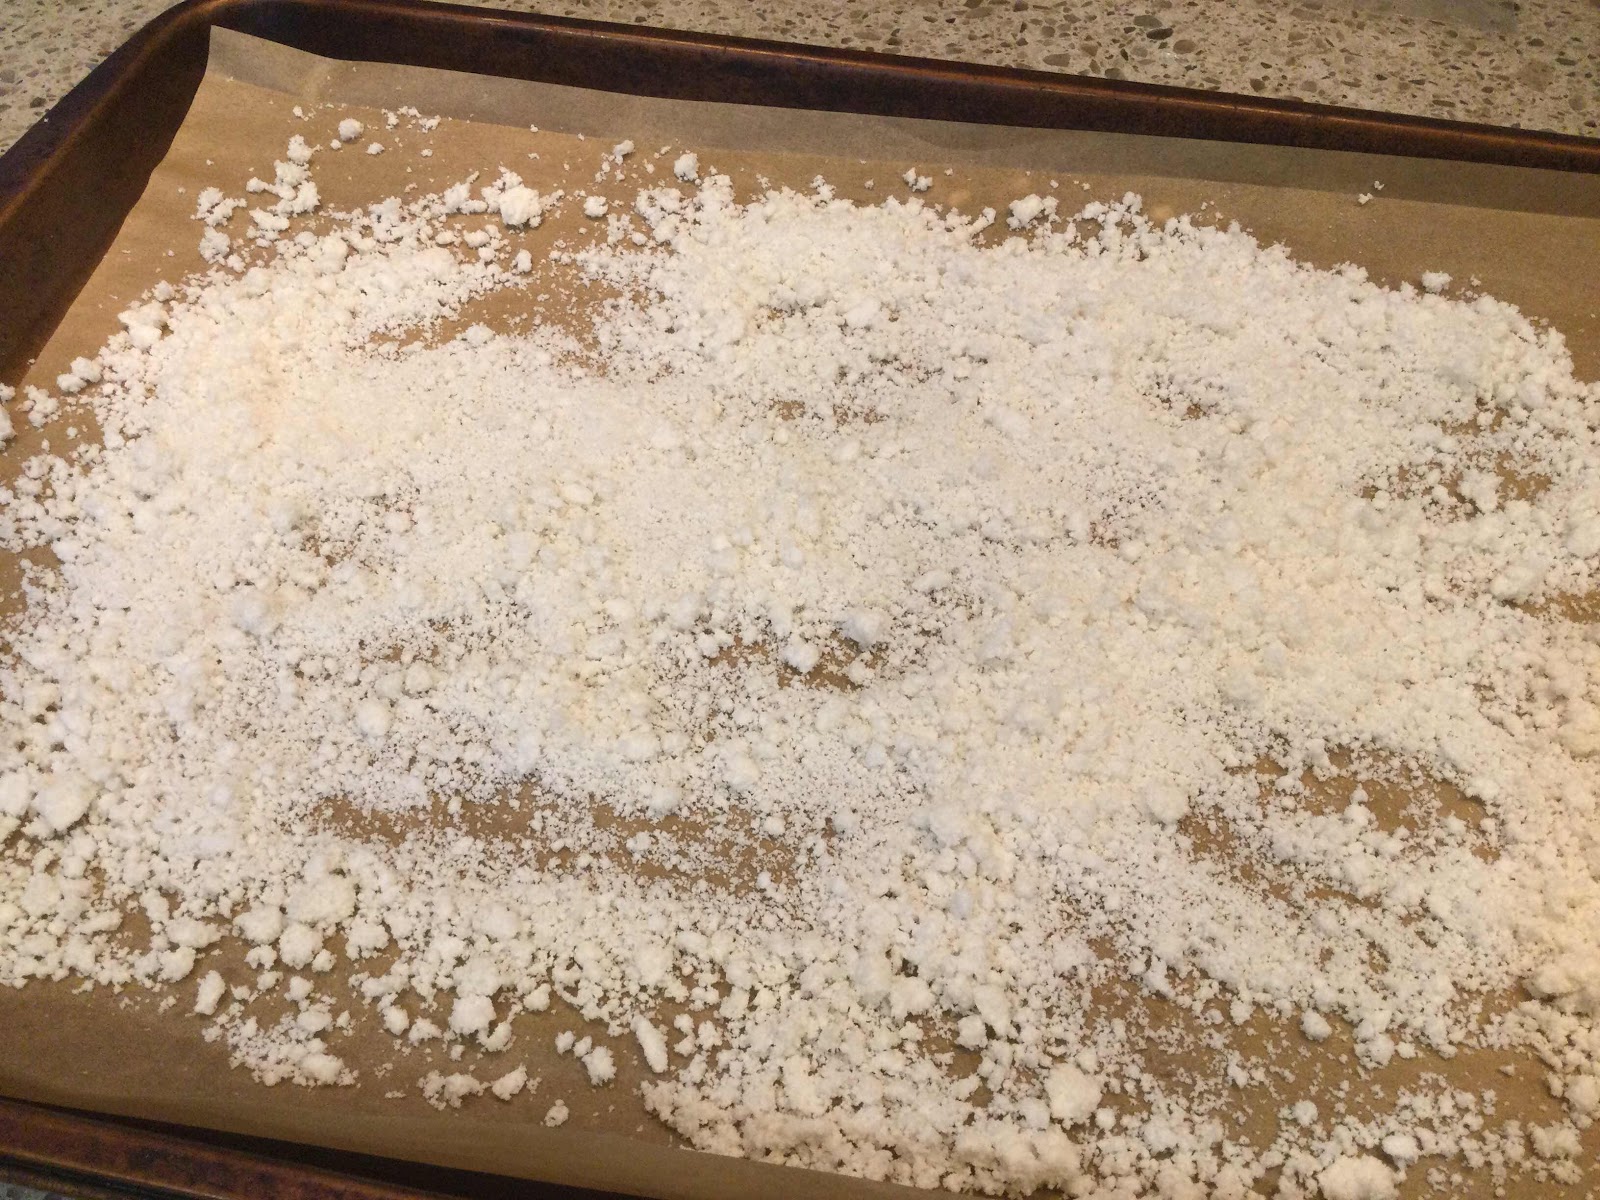
2. Take the reserved nut solids that have been finely ground and spread them on a cookie sheet in a thin layer. Preheat your oven to 200 degrees Fahrenheit and then turn it off. Place the cookie sheet into the oven to dry out the nut flour, stirring occasionally and breaking up any clumps. Every once in a while, turn the oven to 200 degrees and let it heat up, but then immediately turn it off, so the oven is warm. You want to dry out the nut flour, not cook it! I usually leave mine in the oven overnight. However long it takes, you want the mixture completely dry.

Spread the nut solids on a cookie sheet
Spread nut flour into a thin layer
3. After the nut flour is completely dry, sift it into a fine powder and store in an airtight container or plastic ziplock bag. Store your macadamia nut flour in the refrigerator to assure its freshness. Use within 3 months. You may use this flour in a 1:1 ratio to replace almond flour in any recipe.

The nut flour dried out, but not sifted yet
Nutritional Information per 1/2 cup (20 grams): 143.6 calories, 2.8 g carbohydrate (1.7 g dietary fiber, 0.9 g sugars), 15.1 g total fat (2.42 g saturated fat, 0 g trans fat), 0 mg cholesterol, 1 mg sodium, 17 mg calcium, 73.6 mg potassium, 1.6 g protein. Net carbs per 1/2 cup: 1.1 grams

Total Oxalate per 1/2 cup (20 grams): 9.5 mg;  Soluble Oxalate per 1/2 cup: 7.02 mg

Photos and recipe by Kathy Sheehan, copyright 2021
All rights reserved. Please do not duplicate without the author’s permission. 

Tuesday, February 23, 2021

Low Carb Beef Burgundy

Low Carb Beef Burgundy
This is one of my favorite recipes that goes way back! Beef Burgundy from the long-gone Cheechako Restaurant in Damariscotta, Maine. It takes time, but is a very easy recipe and your house will smell heavenly while it cooks! You can use chuck beef roast, chuck stew meat or go all-out and use sirloin, the extended cooking time will tenderize the meat beautifully. (Do not use beef round, it’s too lean and the result will be tough.) Simple to make any day, but elegant enough for company, this dish will become a family favorite at your house, too.

Low Carb Beef Burgundy
Makes 6 servings

2½ pounds trimmed beef, cut into cubes
1½ cups water
1 cup Burgundy or other dark red wine, such as Cabernet Sauvignon
1 teaspoon beef stock extract (Better Than Bouillon Beef Flavor will work fine too)
½ teaspoon xanthan gum to thicken
Salt and pepper to taste

1. Sear beef cubes over medium high to high heat in batches in a heavy 4-quart saucepan with a tight-fitting lid or Dutch oven, stirring and turning beef to brown on all sides. Reduce heat to low and add water and stir to deglaze the pan. Return seared beef to the pan, add red wine and beef extract and stir. The amount of liquid should just be visible among the beef cubes. Cover and simmer for 1 hour until tender.

2. Use a slotted spoon to remove beef cubes to a plate. While the liquid in the saucepan is simmering, whisk vigorously and slowly sprinkle the xanthan gum into the sauce. Whisk until incorporated, no lumps remain and the sauce thickens. Sample the sauce and add salt and pepper to taste.

3. Return beef to the saucepan and simmer for a few minutes to reheat the beef. 

4. Serve over riced cauliflower that has been seasoned with parsley.

Nutritional Information per serving of beef with sauce (not including riced cauliflower): 205 calories, 0.7 g carbohydrate (0 g dietary fiber, 0 g sugars), 4.7 g total fat (1.3 g saturated fat, 0 g trans fat), 87 mg cholesterol, 86 mg sodium, 1 mg potassium, 34.7 g protein. Net carbs per serving: 0.7 grams

Photo and recipe by Kathy Sheehan, copyright 2021
All rights reserved. Please do not duplicate without the author’s permission. 
Monday, December 28, 2020

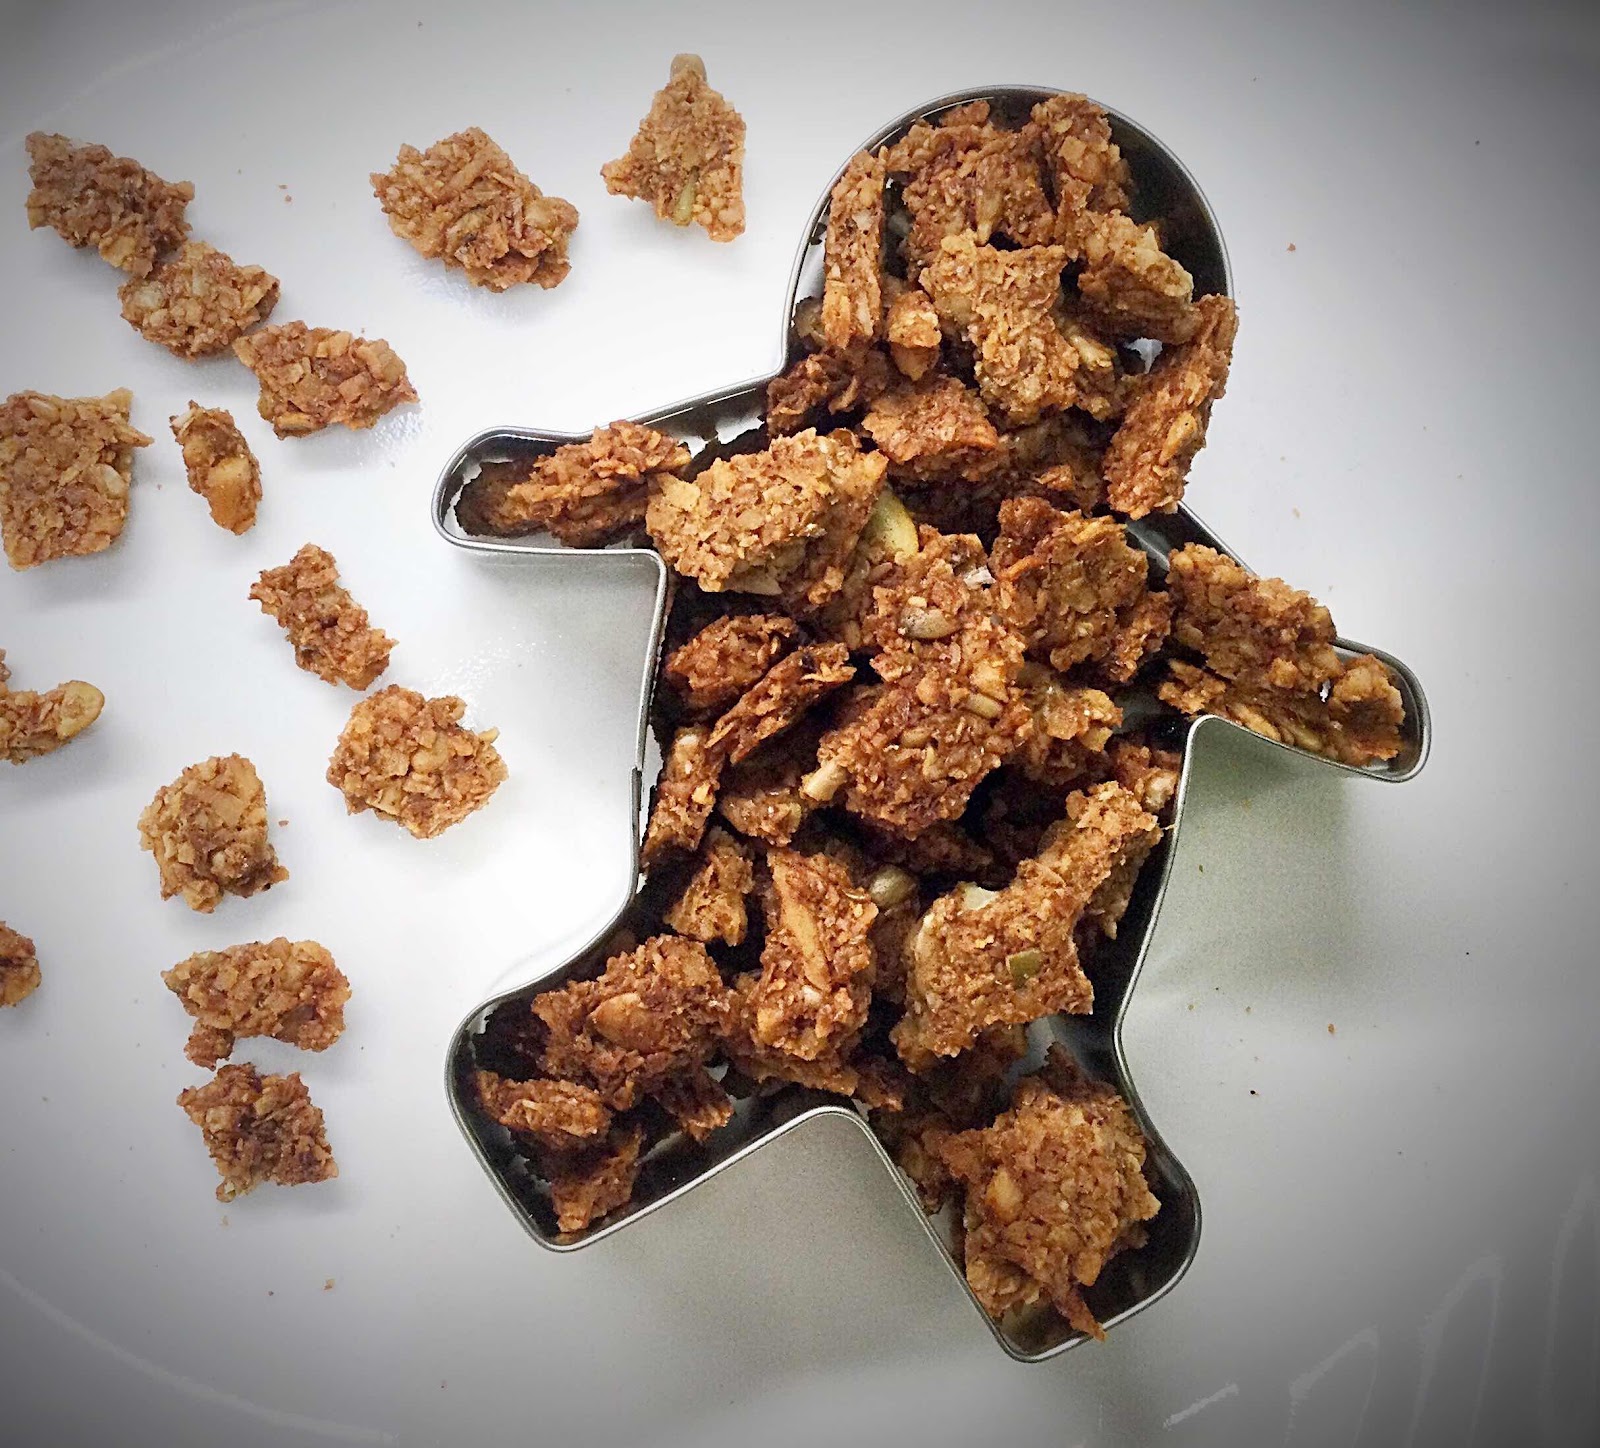
Low Carb Gingerbread Spice Granola

Low Carb Gingerbread Spice Granola
Spice up your low carb granola with the traditional flavor of gingerbread! Like all granola, this recipe is very easy to make and will fill your house with the irresistible aroma of holiday baking. 

Note: To make this granola truly low oxalate, substitute 1/2 teaspoon of both ginger and cinnamon extracts with a few drops of clove oil for the dried ground gingerbread spice mix (which is shockingly very high in oxalates!). If you need to be nut free, simply omit the macadamia nuts and substitute with more sunflower seeds and pepitas in their place (this will lower the oxalates further, too). That’s the best part about making homemade granola, you can customize it to your own personal taste and preferences!

Low Carb Gingerbread Spice Granola
Makes about 14 servings (1/4 cup each)

1-1/2 cup unsweetened shredded coconut 
1/3 cup sunflower seeds
1/3 cup pepitas (pumpkin seeds)
1/2 cup macadamia nuts or pecans
1/2 cup golden flaxseed meal
1/2 cup Golden LaKanto Monkfruit sweetener (or Swerve Brown)
1 teaspoon gingerbread spice (or substitute extracts for low oxalate and add to liquid ingredients, see note in description above)
1/2 teaspoon salt
2 egg whites (1/4 cup)
2 teaspoons finely minced ginger (fresh or from a jar)
2 tablespoons melted butter
2 tablespoons sugar free simple syrup (or SF maple syrup)
3/4 teaspoon molasses extract (or substitute 2 teaspoons molasses, but will add some carb)
24 drops OOO Gingerbread Cookie flavoring (or more gingerbread spice, if not concerned about oxalates)
1/2 teaspoon vanilla extract
1/2 teaspoon cinnamon extract (or ground cinnamon, if not concerned about oxalates)

1. Preheat the oven to 250 degrees Fahrenheit. Prepare a large cookie sheet by lining with parchment paper; set aside.

2. Place the coconut, sunflower seeds, pepitas and macadamia nuts in a food processor and pulse until the mixture resembles rough-cut oatmeal. Pour into a large mixing bowl and add the flaxseed meal, sweetener, gingerbread spice and salt. Stir to combine.

3. Whisk together the egg whites and minced ginger until frothy. In another small bowl, whisk together the melted butter, sugar free simple syrup, extracts and OOO Gingerbread Cookie flavoring. Pour the egg white mixture and the butter/syrup mixture into the dry ingredients and stir until well distributed and all of the dry ingredients are well coated.

4. Pour the granola onto your parchment-lined cookie sheet and spread out and press down into a thin layer. (I put my hand into a plastic sandwich bag to prevent my hands turning into a sticky mess. Another suggestion is to cover the granola with plastic wrap and use a rolling pin.) You want the granola in a thin layer, about 1/4” to 1/2” thick.

5. Place the baking sheet into the preheated oven and bake for 1 hour. Then use a spatula to break up and turn over the granola. Return to the oven and continue baking for 15-30 minutes or until deep golden brown in color. Remove from the oven and allow to cool completely on the baking sheet. The granola will crisp up as it cools.

6. Once it has cooled completely, break into bite-size pieces and store in an airtight container at room temperature for up to 3 weeks. This granola can be served as a breakfast cereal, sprinkled over yogurt for a bit of crunch or eaten plain as a snack or dessert.

Nutritional Information per 1/4 cup: 171 calories, 6.1 g carbohydrate (3 g dietary fiber, 0.9 g sugars, 0.9 g sugar alcohols), 15.1 g total fat (7.4 g saturated fat, 0 g trans fat), 4 mg cholesterol, 139 mg sodium, 8 mg calcium, 29 mg potassium, 1 mg iron, 18 IU Vit A, 3.8 g protein. Net carbs per serving: 3.1 grams

Total Oxalate per serving (made with dried spices): 6.1 mg; Soluble Oxalate: 3.1 mg. (Made with dried spices, this is a Medium Oxalate food.)

Total Oxalate (if made with extracts only, no dried spices): 3.9 mg; Soluble Oxalate: 2.4 mg

Recipe and Photo by Kathy Sheehan, copyright 2020
All rights reserved. Please do not duplicate without the author’s permission. 
Monday, November 30, 2020

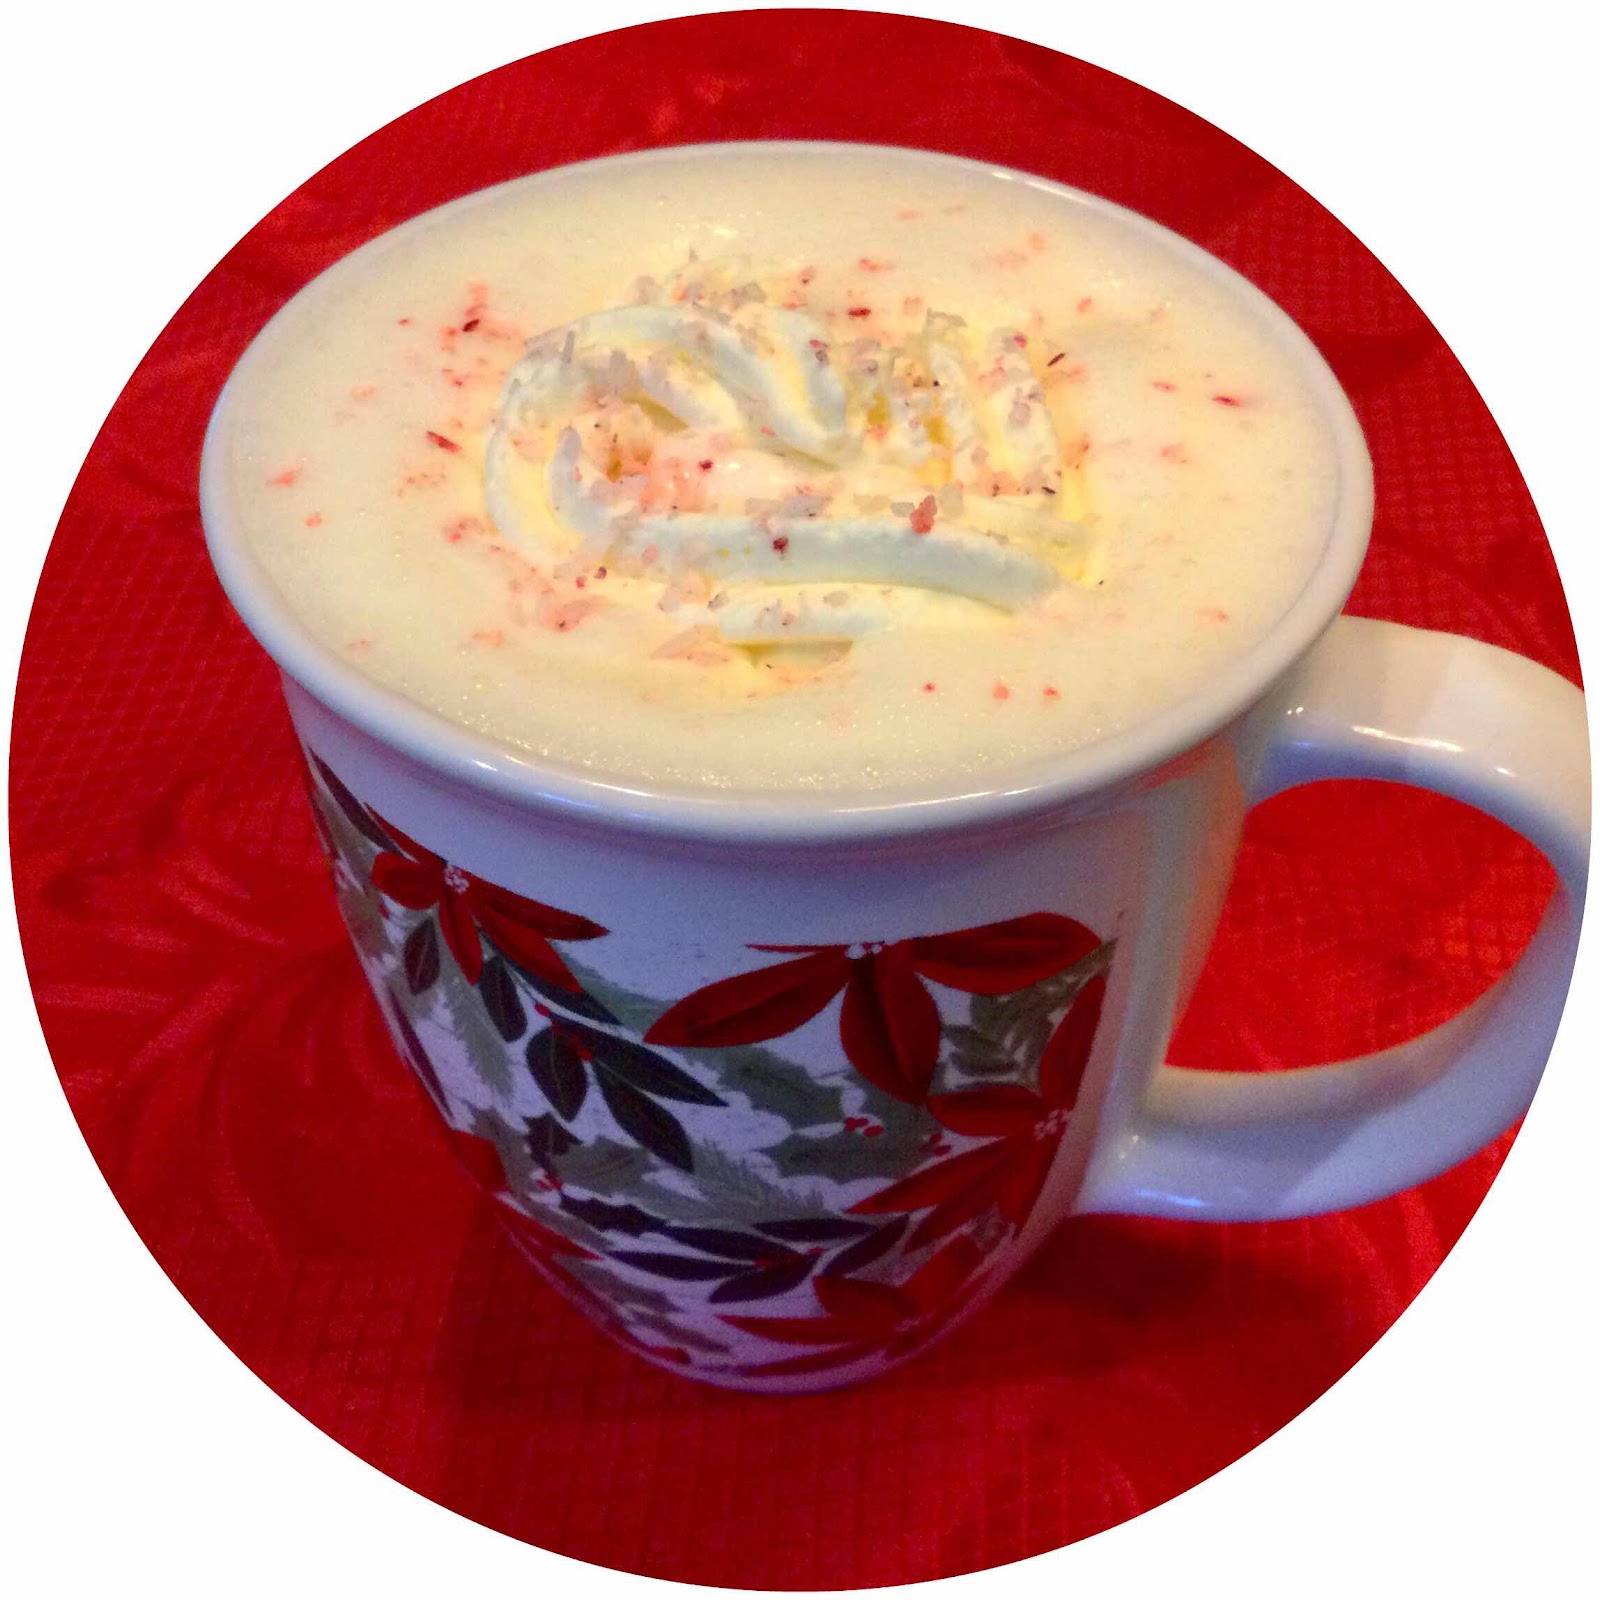
Keto Hot White Chocolate Peppermint Cocoa

Keto White Chocolate Peppermint Cocoa
The mornings and evenings are colder, which puts me in the mood for hot chocolate! This version uses white chocolate chips (either in peppermint flavor or plain) to create a delicious warming beverage that has a flavor reminiscent of Peppermint Bark. Perfect for any time of day, but especially at night, because there’s no caffeine...just pure, delicately sweet white chocolate and peppermint!

Keto Hot White Chocolate Peppermint Cocoa
Makes 1 serving

1-1/4 cups unsweetened coconut milk
2 tablespoons heavy cream
A tiny pinch of salt
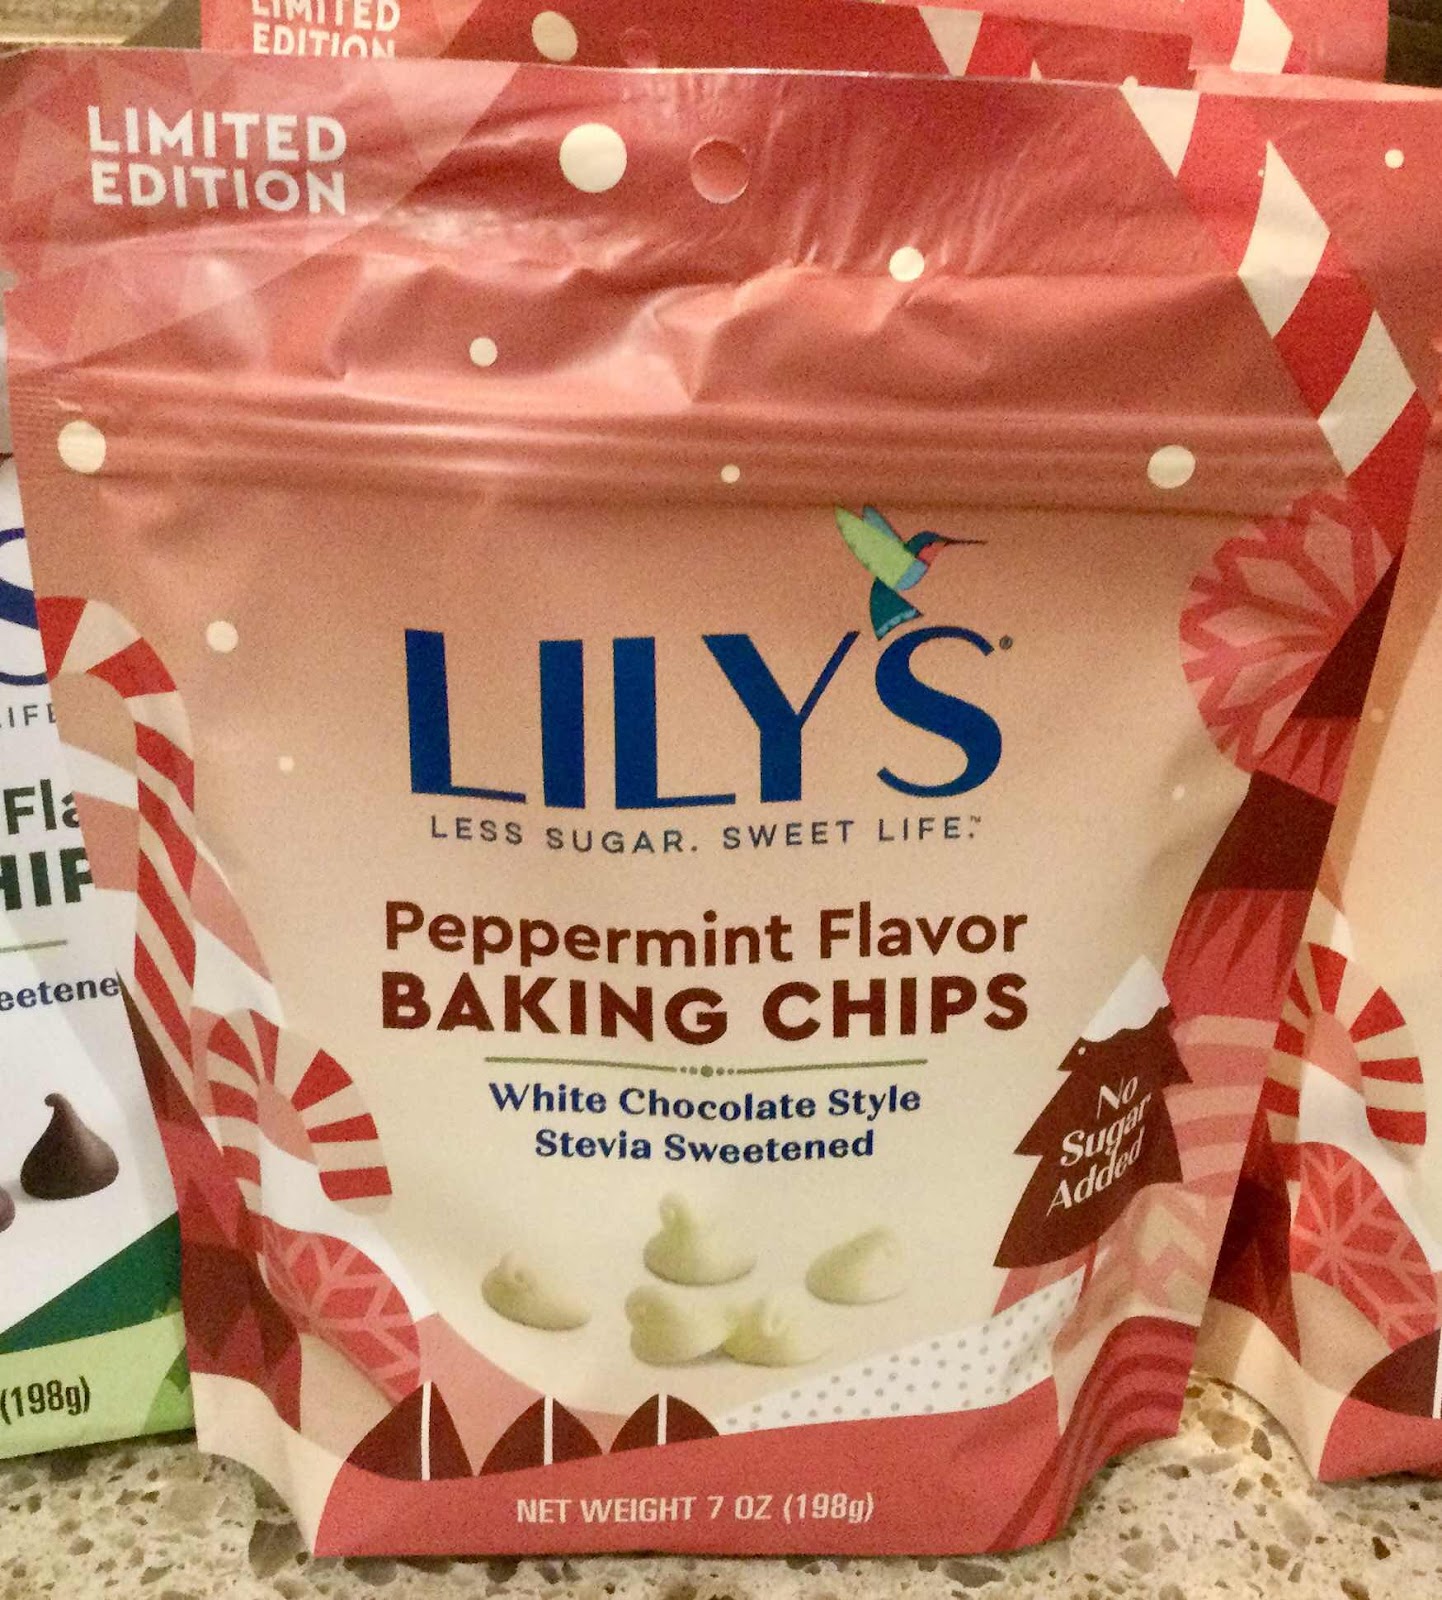
2 tablespoons sugar free white chocolate chips (I used Lily’s Peppermint baking chips, see below*)
2-3 drops peppermint extract, or to taste
1/4 teaspoon chocolate or vanilla extract
6-7 drops monkfruit extract or liquid stevia, or to taste

1. Heat the coconut milk, heavy cream, pinch of salt and white chocolate chips in a small saucepan over medium-low heat, stirring constantly until the chips are melted and the mixture is hot and bubbly around the edges.

2. Remove from heat and add the extracts and sweetener. Stir to combine.

3. If you have one, use a frothing tool to create foam and pour into a mug. If desired, top with whipped cream and a sprinkle of crushed sugar free peppermint candies. Serve immediately. 

*Note: I used Lily’s sugar free Peppermint Flavor baking chips, which are available for a limited time at WalMart. If you can’t find them, just use any sugar free white chocolate chips and add enough peppermint extract to achieve the peppermint flavor you desire.

Lily’s Peppermint Baking Chips
Nutritional Information: 168 calories, 4.4 g carbohydrate (1.5 g dietary fiber, 0.6 g sugars), 17 g total fat (8.3 g saturated fat, 0 g trans fat), 42 mg cholesterol, 215 mg sodium, 572.6 mg calcium, 19 mg potassium, 120 IU Vit A, 1.4 g protein. Net carbs per serving: 2.9 grams

Photos and recipe by Kathy Sheehan, copyright 2020
All rights reserved. Please do not duplicate without the author’s permission.