Showing posts with label apples. Show all posts

Tuesday, September 16, 2025

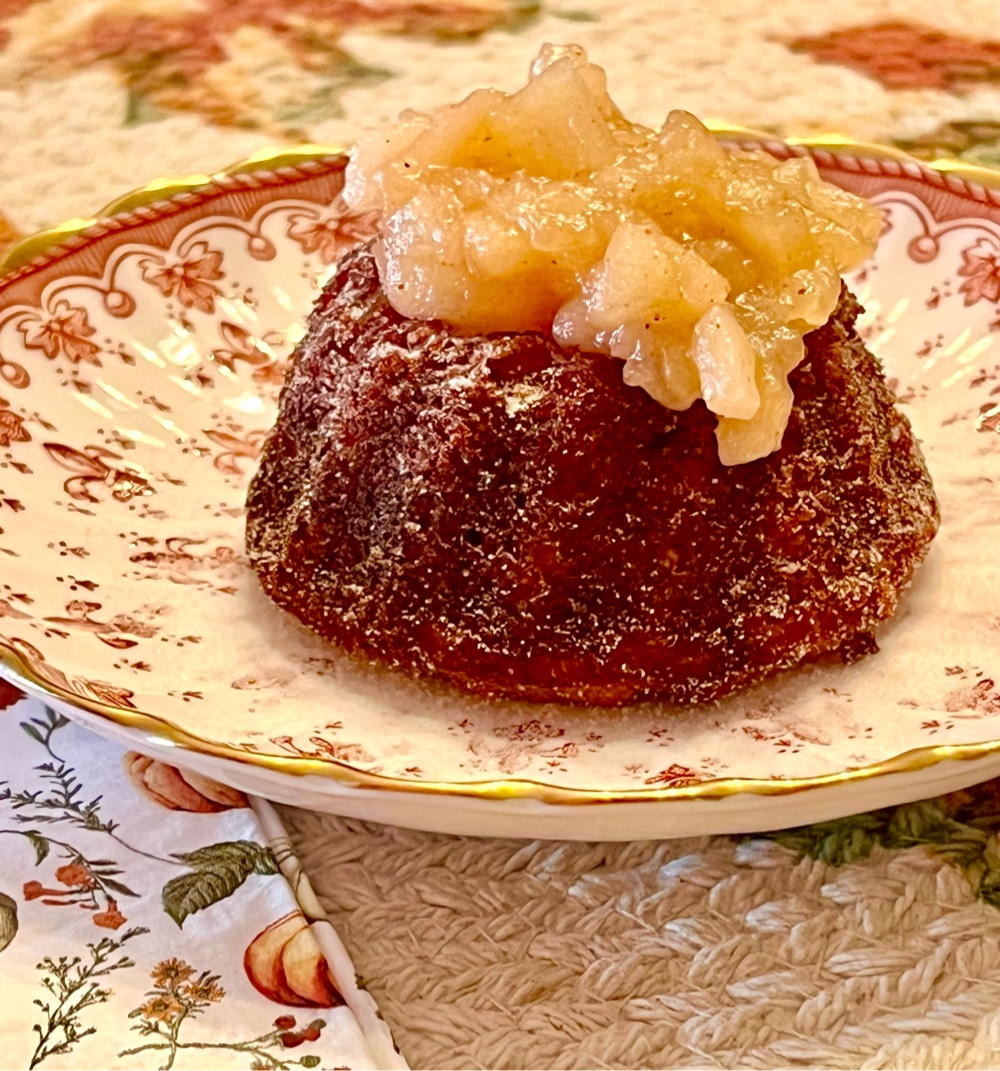
Keto Mini Ginger Cakes with Warm Apple Compote

Keto Mini Ginger Cakes with Warm Apple Compote
Autumn is in the air and warm spices, like ginger and cinnamon, are calling to me! These Mini Ginger Cakes make the perfect fall dessert. The warm, lightly spiced apple compote puts it over the top! The collagen peptide powder is a secret ingredient that keeps the cake tender and moist, even days later (no dry or stale cake!). That means they store very well. Also, the cakes can be made ahead, wrapped with plastic wrap and frozen too! Use a bundt mini cakes baking pan to make them extra special or, if you don’t have one, you can use a regular size muffin pan or even a donut pan.

Keto Mini Ginger Cakes with Warm Apple Compote
Makes 8 mini cakes and 8 servings of compote

Ginger Cakes:
1/4 cup strong Apple Spice Herbal Tea (any brand), brewed and cooled
2 tablespoons unsalted butter, softened
½ cup granulated low carb sweetener of choice 
2 large eggs, room temperature 
1 teaspoon apple cider vinegar
1 teaspoon vanilla extract
½ cup coconut flour
1 teaspoon baking powder
½ teaspoon baking soda
1½ teaspoons ground ginger
1/4 teaspoon salt
2 tablespoons unflavored collagen peptide powder (such as Vital Proteins brand)
2 tablespoons crystallized ginger, finely chopped

Apple Compote:
1 tablespoon unsalted butter
1½ cups Gala apples, diced small
2 tablespoons lemon juice
1/3 cup allulose sweetener 
1/4 teaspoon ground cinnamon (optional)
1/4 cup strong Apple Spice Herbal Tea (any brand), brewed

1. Preheat the oven to 350°F. Generously spray 8 wells of a mini Bundt pan with nonstick baking spray, especially the center post of each cake; set aside.

2. In the bowl of a food processor, add the softened butter and granulated sweetener and pulse to combine. Add the eggs, one at a time, pulsing after each addition. Add the brewed and cooled tea, vanilla extract, apple cider vinegar and pulse to combine. (If you do not have a food processor, you may do this in a mixing bowl using an electric mixer.)

3. In a small bowl, mix together the coconut flour, collagen peptides, baking powder, baking soda, ground ginger, and salt. Whisk to combine and to remove any lumps. Add to the wet ingredients in the processor and pulse to combine. Fold in the chopped crystallized ginger.

4. Divide the batter evenly among the prepared wells of the pan. Tap the pan forcefully on the counter several times to settle the batter and to remove air bubbles.

5. Bake until the edges are golden brown and a wooden pick inserted in the center of each cake comes out clean, 13 to 15 minutes. Let the cakes cool in the pan for 10 minutes. Transfer to a wire rack and let the cakes cool completely. Cooled cakes can be stored at room temperature for one to two days, or in the refrigerator for up to a week. (The cakes can also be frozen after being wrapped carefully in plastic wrap for up to two months.) Serve cakes at room temperature.

6. Just before serving, garnish cakes with a dusting of confectioners sweetener, if desired. Spoon the warmed apple compote into the well of each cake. Serve immediately.

To make the Apple Compote:

1. In a medium nonstick, sauté pan, melt the butter over medium high heat. Add the chopped apples, lemon juice, cinnamon (if using), and sweetener. Cook and stir for 2 to 3 minutes. Add the tea and cover the pan, reducing heat to medium low. Cook until the apples are just starting to be tender, approximately 5 to 10 minutes, stirring occasionally.

2. Using a slotted spoon, transfer the apple pieces to a bowl.

3. Increase heat to medium high and cook remaining liquid until reduced and slightly thickened and syrupy. Add the syrup to the apples, stirring to coat. Use immediately or transfer to a covered container and refrigerate for up to 3 days. Warm compote gently before serving.
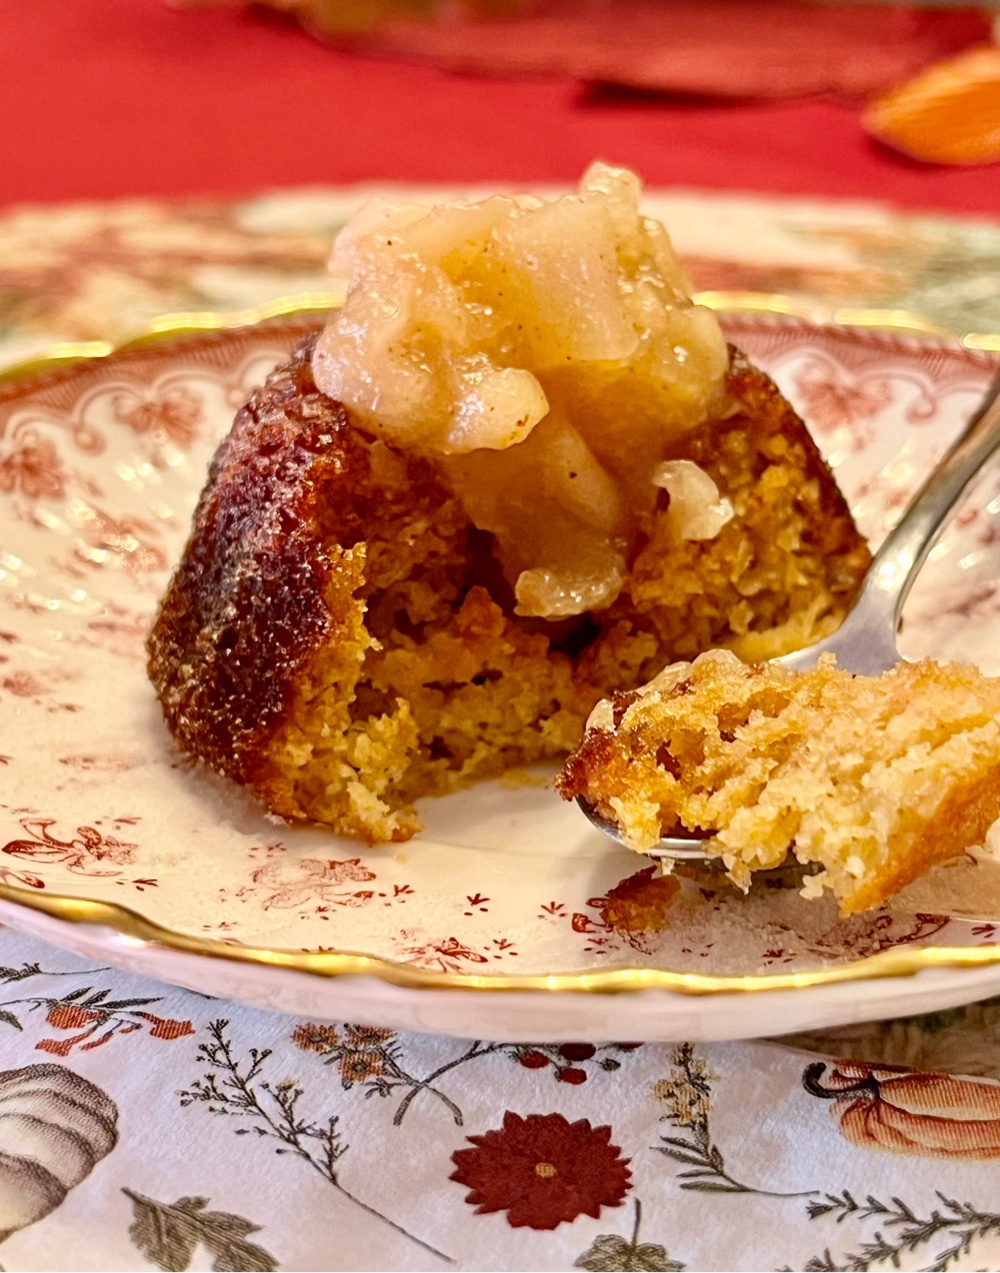
Mini Ginger Cake with Apple Compote
Nutritional Information per serving of 1 mini cake and 2 TB apple compote: 100 calories, 10.5 g carbohydrate (4.6 g dietary fiber, 4.1 g sugars), 6.6 g total fat (4.1 g saturated fat), 58 mg cholesterol, 231 mg sodium, 56.2 mg calcium, 77 mg potassium, 1 mg iron, 65 IU Vit A, 1 mg Vit C, 4.8 g protein. Net carbs per serving: 5.9 grams

Photos and recipe by Kathy Sheehan, copyright 2025
All rights reserved. Please do not duplicate without the author’s permission. 

Saturday, September 17, 2022

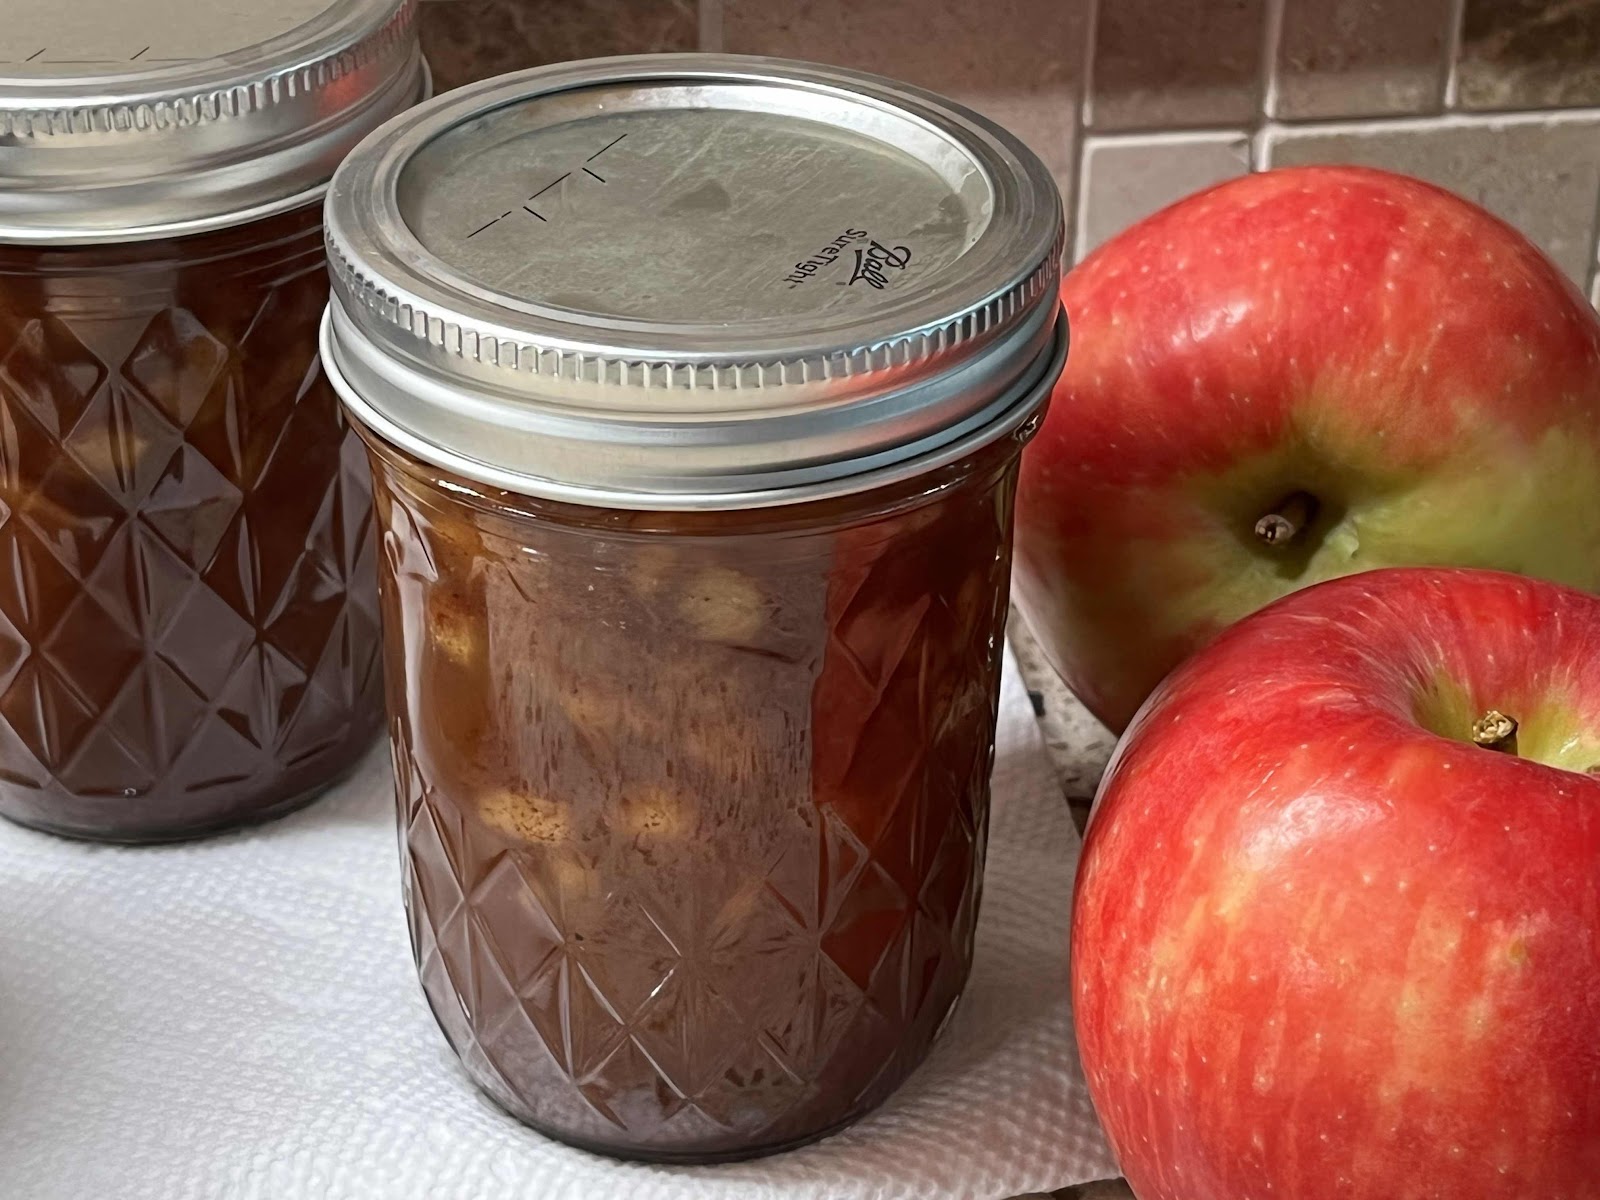
Keto Spiced Dutch Apple Jam

Keto Spiced Dutch Apple Jam
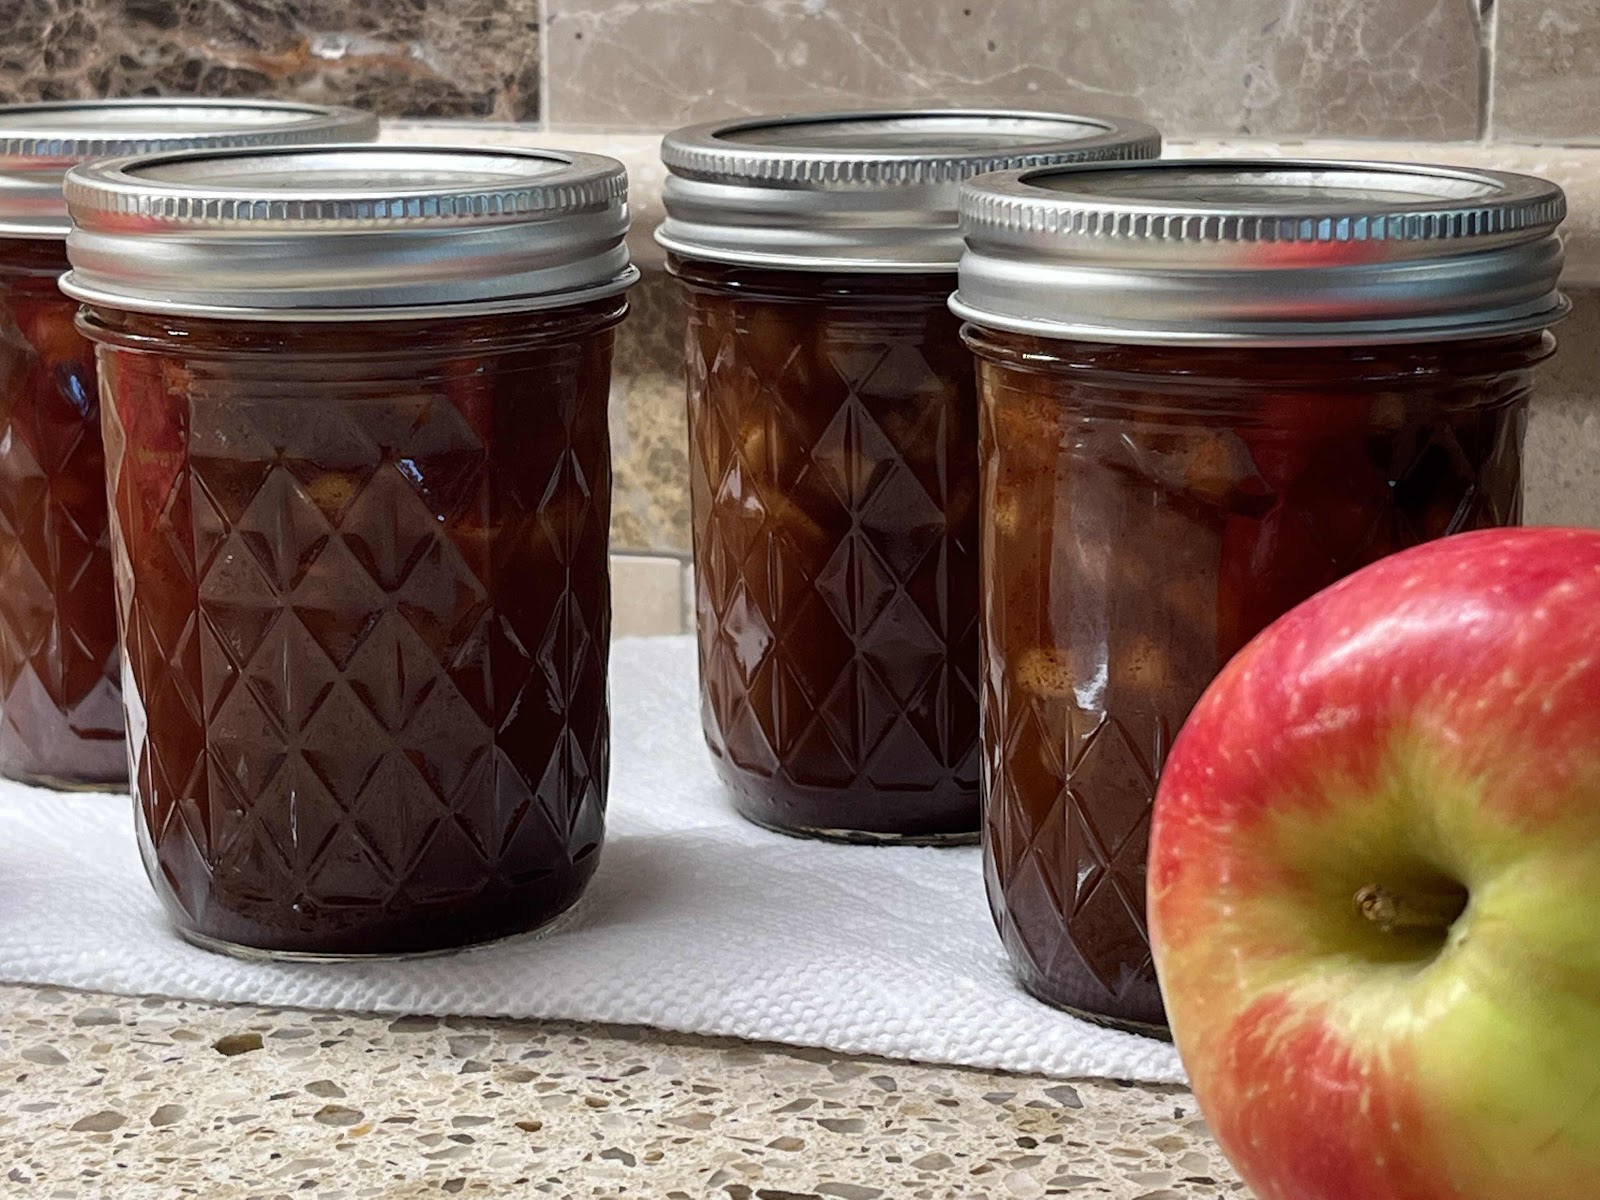
The weather is turning cooler and it’s apple picking season in Maine! Recently, I took a class at my Cooperative Extension Office where we learned to make Spiced Dutch Apple Jam. I had a wonderful time and learned a lot more about safe canning practices. But the recipe they used called for 7 cups of sugar! I came home and figured out that the amount of carbs per tablespoon was 16 grams! (That is equivalent to 4 teaspoons of sugar per tablespoon!!) With their recipe in hand, I went about making the necessary adjustments to make a batch that was sugar free. The final result is every bit as good as their recipe, but my recipe only has 2 grams of carb per tablespoon. This incredible jam tastes just like apple pie and is excellent on your low carb toast or spooned over low carb yogurt or ice cream. Also, share some with your keto friends! This makes an excellent gift for the holidays.

Keto Spiced Dutch Apple Jam
Makes four (8 oz) jars, 64 servings

4 cups apples, peeled, cored and diced small (about 5 medium apples)
1-1/4 cups allulose (or to taste)
2-1/2 teaspoons Pomona’s Universal Pectin (made especially for low sugar jams)
2 cups water
1/4 cup bottled lemon juice
3 teaspoons calcium water (see directions in Pomona’s Universal Pectin box)
1 teaspoon allspice
2 tablespoons + 2 teaspoons ground cinnamon
1 teaspoon ground nutmeg

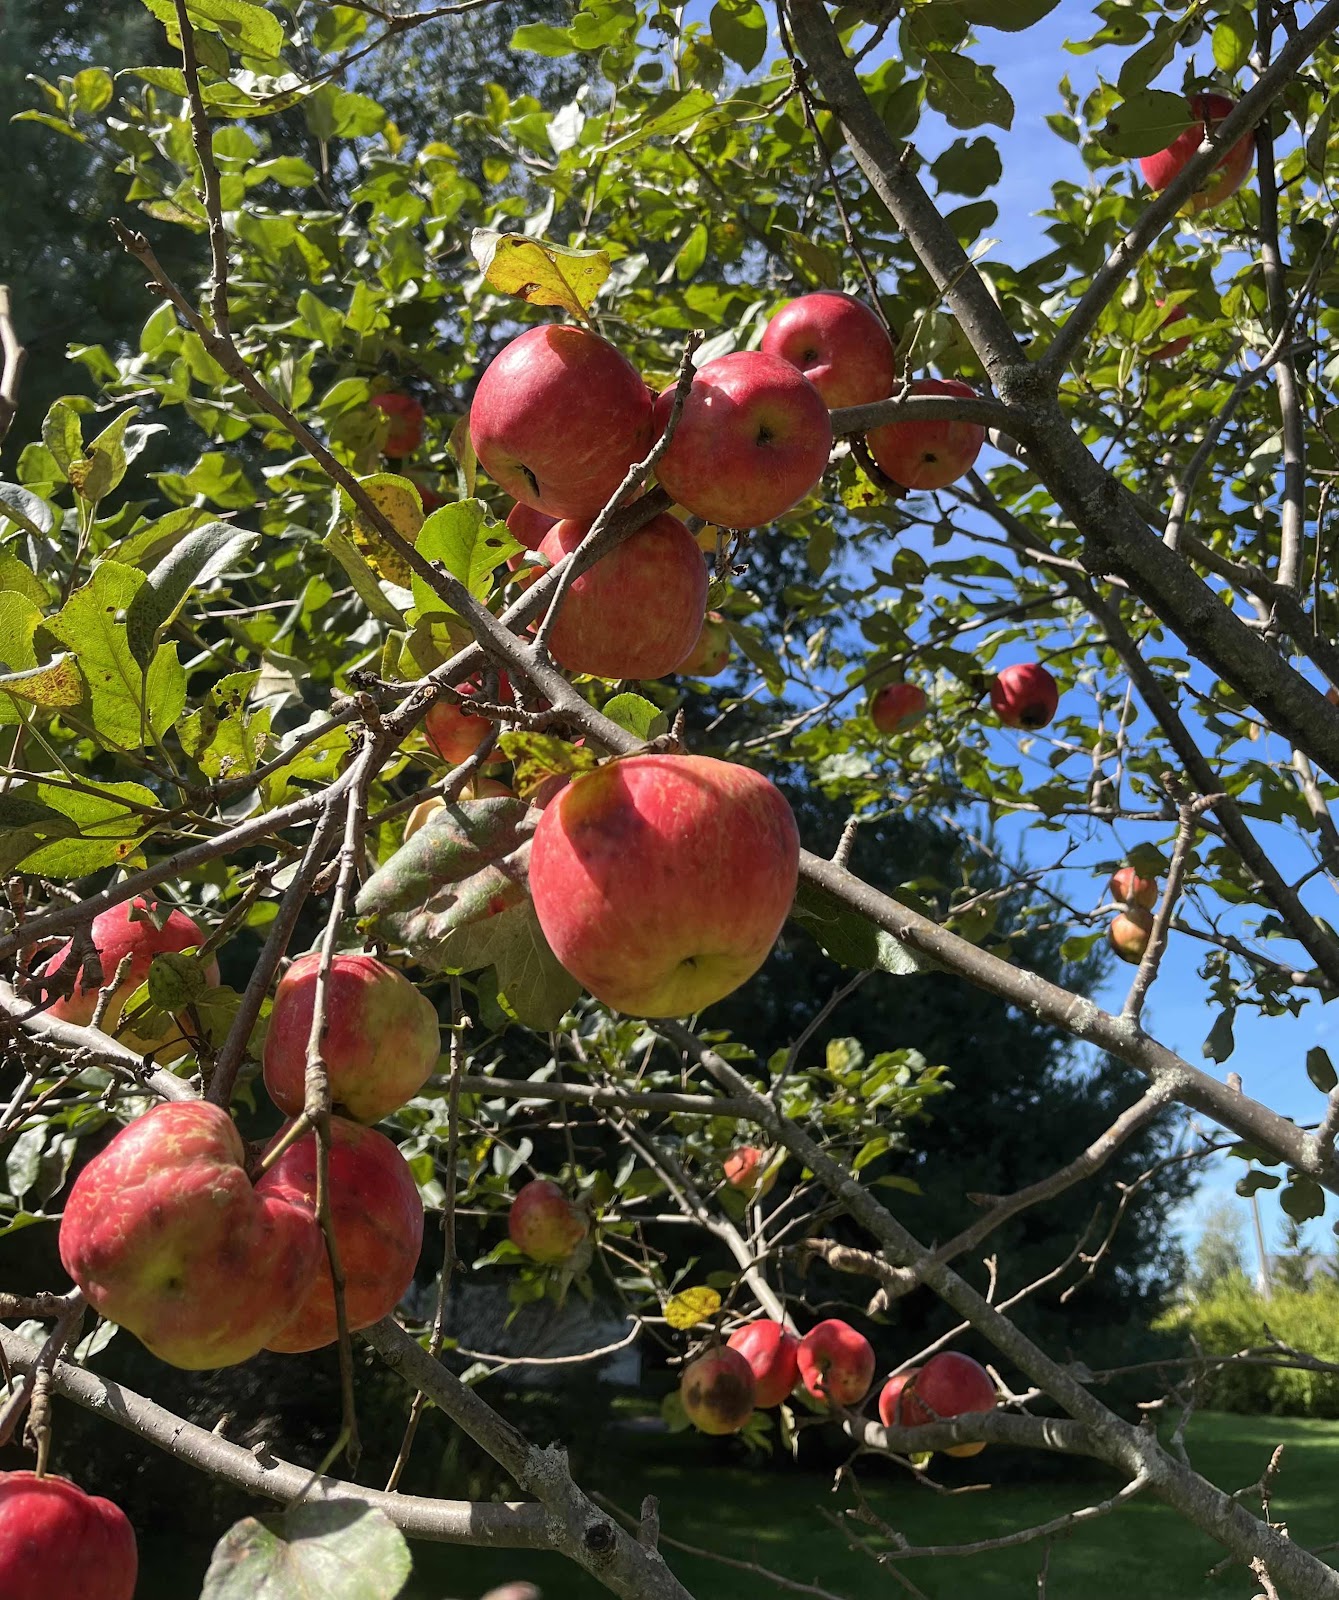
Apple Picking in Maine
1. Prepare the boiling water canner. Put the canning rack on the bottom of a large pot, then heat the jars in simmering water until ready to use, or for at least 10 minutes to sterilize the jars. Wash the lids in warm soapy water and set aside with the bands until you are ready to use them. (If you don’t want to process your jars in a water bath, your jam can be stored in the refrigerator for several months.)

2. In a bowl, combine the allulose and pectin; set aside. Place 1-2 small plates into your freezer to get cold. (These will be used for the “cold plate” test later.)

3. Place the diced apples into a large stainless steel saucepan or non-reactive cooking pot (not aluminum). Add the lemon juice, water and calcium water to the pot with the apples. Add the allspice, cinnamon and nutmeg. Stir to combine. Bring to a rolling boil over medium to high heat stirring often. (A rolling boil is a vigorous boil that cannot be stirred down, but continues to boil even as you stir.)

4. Once the apple mixture has reached a rolling boil, gradually stir in the allulose/pectin mixture and continue to stir until the sweetener and pectin dissolves.

5. Bring the mixture back to a full rolling boil that cannot be stirred down. Set a timer and boil hard for one minute, stirring constantly. Remove from the heat and check the jam using a cold plate from your freezer to be sure it will gel properly when set. Spoon a small amount onto a cold plate and allow to sit for a few minutes. Run your finger through the mixture and if a skin has formed and the jam is starting to set up, you have reached the proper temperature.

6. Using a jar lifter, lift one jar out of the simmering water and place it on a towel or wooden cutting board. Ladle the hot jam into a hot jar using a canning funnel. Leave 1/4 inch of headspace at the top. Remove any air bubbles and wipe the top of the jar rim clean. Center a lid on the jar and apply the band, adjusting to fingertip tight. Place the filled jar into the boiling water canner, then repeat the process until all of the jars are filled.

7. Process the jars in boiling water for 10 minutes, adjusting for altitude (search online for an altitude adjustment chart). Turn off the heat and let the jars sit in the canner, uncovered, for five minutes.

8. Very carefully remove the jars with a jar lifter, lifting them straight up (do not tilt jar!) and place them on a clean towel. Don’t worry about any water on the lid, that will evaporate quickly. Let the jam cool for 12 to 24 hours. Check the lids for a seal, they should not flex when the center is pressed.

9. A properly processed and sealed jar of jam is shelf stable for 12 to 18 months. Refrigerate after opening.

Recipe makes four jars
Nutritional Information per tablespoon: 6 calories, 2.3 g carbohydrate (0.2 g dietary fiber, 1.1 g sugars), 0.1 g total fat (0 g saturated fat, 0 g trans fat), 0 mg cholesterol, 0 mg sodium, 2 mg calcium, 11 mg potassium, 1 mg Vit C, 1 IU Vit A, 0 g protein. Net carbs per tablespoon: 2.1 grams

Photos and recipe by Kathy Sheehan, copyright 2022
All rights reserved. Please do not duplicate without the author’s permission. 
Tuesday, March 10, 2020

Low Carb Apple Pie Filling (made with Chayote Squash)

Low Carb Apple Pie Filling (made with Chayote Squash)
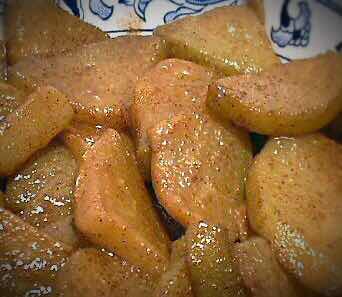
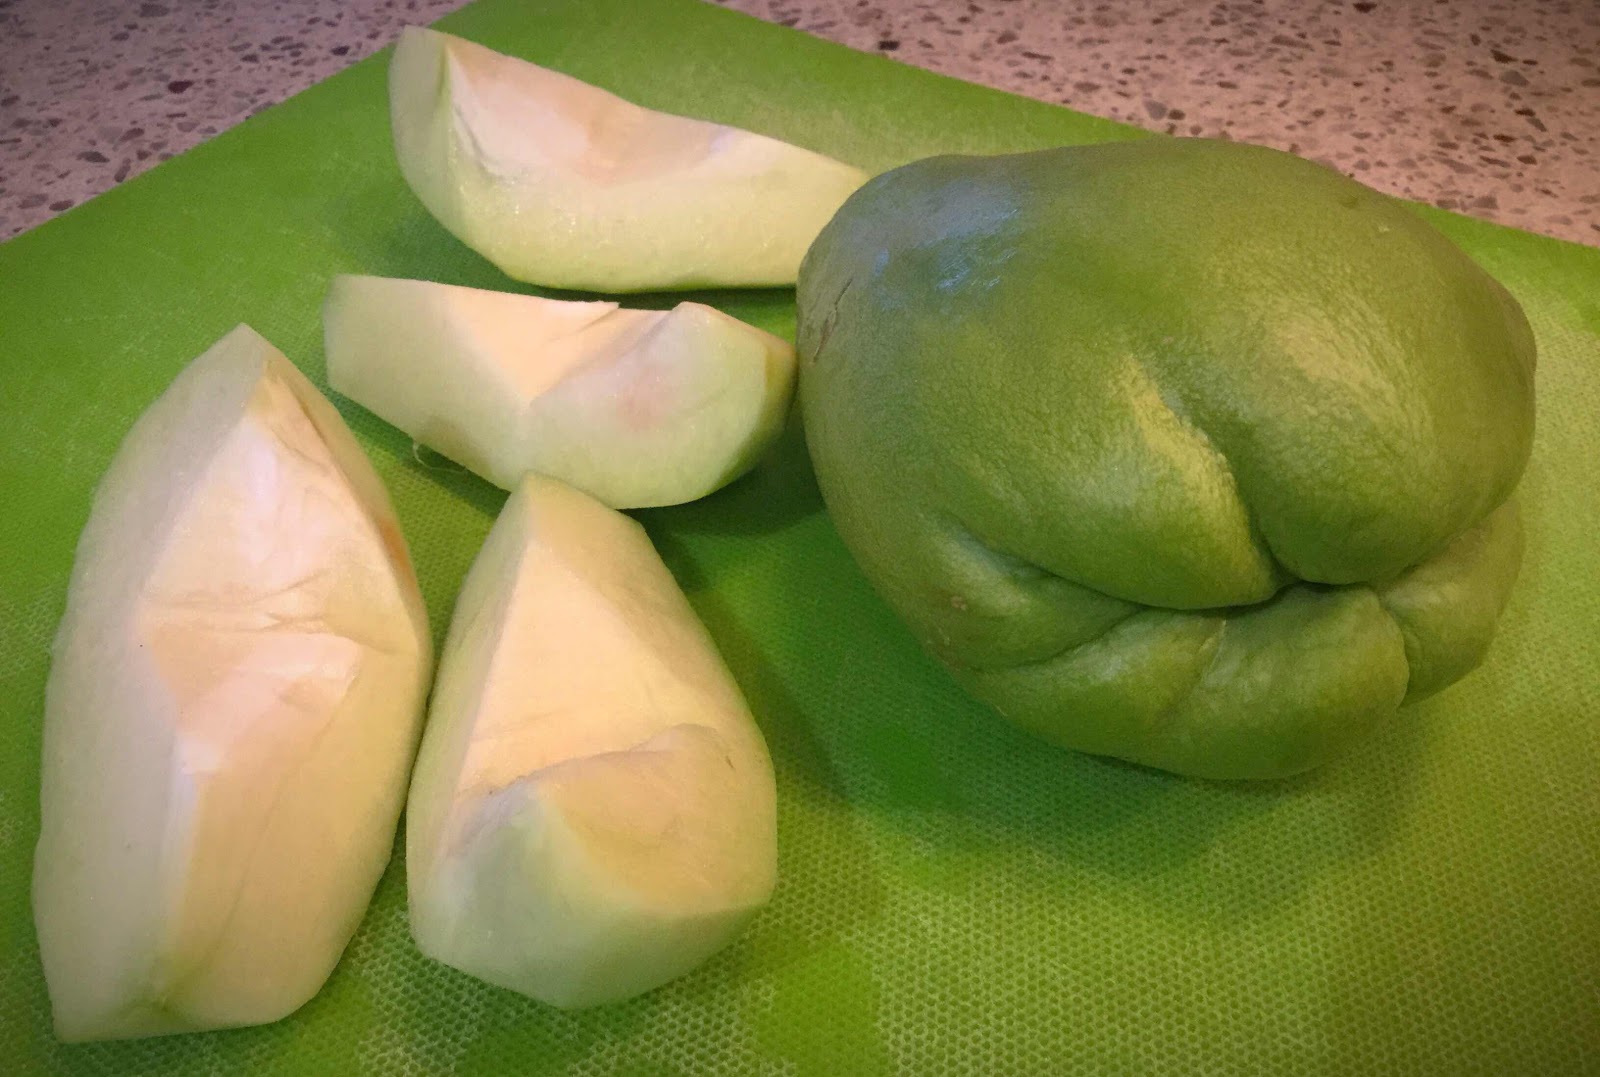
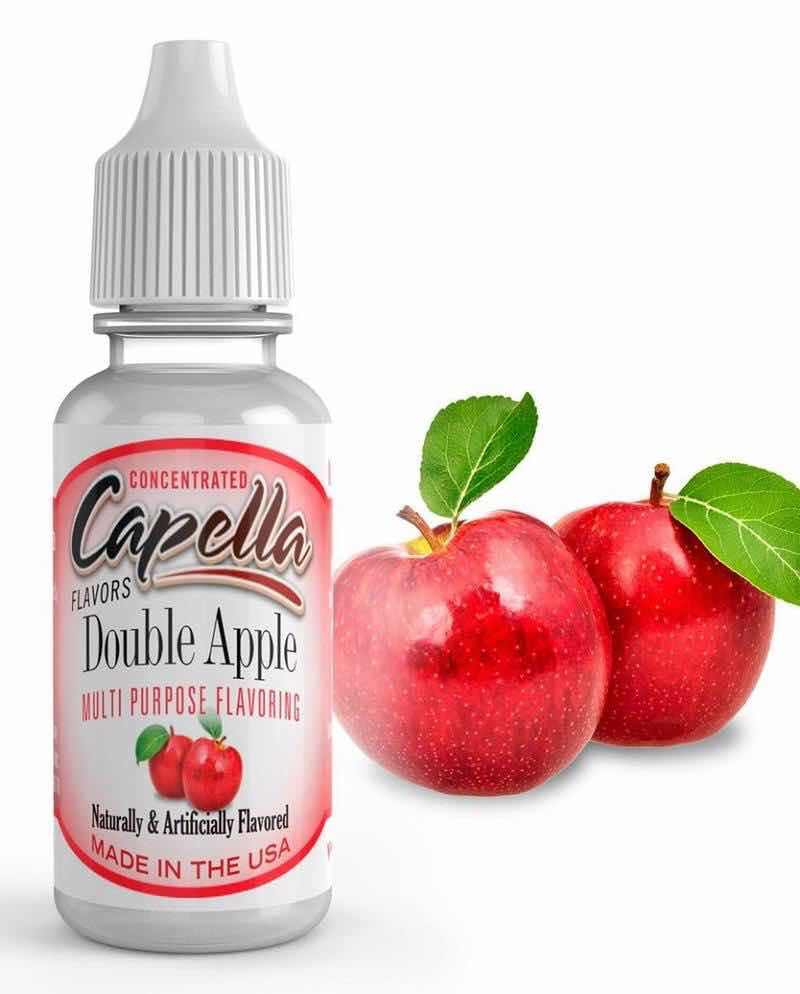
This all-purpose “apple” filling is great to use in any recipe that calls for apples, such as a pie or tart, cake, bread, pancakes, fritters or even applesauce. They are delicious on their own or served with keto ice cream. Their taste and texture is amazingly and truly like apples! Chayote squash is an almost tasteless, mild and firm squash, so it’s a perfect low carb substitute for apples. Simmered with apple pie spices, a zero-carb sweetener and lemon juice for tartness, it readily absorbs those flavors. Although it is optional, I think the addition of apple extract or flavoring is important to achieve the best apple-like flavor. I use Capella Double Apple flavoring (see photo below) and only a few drops is enough to impart a realistic “appleness” to this recipe. (You can leave it out and the recipe will still work fine, but the result may not give you the full apple punch, in my opinion.) I’m offering this basic recipe as a prelude to more “apple” recipes to come. Once you try these apples, I think you’ll be as delighted as I am to have this low carb alternative in your recipe box.

Low Carb “Apple” Pie Filling
Makes 2 cups

2 cups chayote squash, peeled, seeded and cut into thin slices (2-3 squash, depending on size)
2 tablespoons butter
2 tablespoons golden erythritol sweetener, or to taste (I use LaKanto Golden)
2 teaspoons apple pie spice blend
2 tablespoons lemon juice
1/2 teaspoon apple extract or 10 drops apple flavoring (I used Capella Double Apple), optional
6-8 drops monkfruit extract or stevia, if additional sweetness is needed
Water, if needed

Chayote Squash
In a medium to large skillet, melt the butter over medium-low heat and add the squash, sweetener, apple pie spice and lemon juice. Stir to combine. Cover and simmer for at least 20 minutes, stirring occasionally, adding water if needed to keep the apples hydrated (you don’t want them to dry out). Once the squash begins to soften, add the apple extract and monkfruit extract or stevia to taste. Continue cooking, covered, until the squash is tender, about 5-10 more minutes. You want the “apples” to be fork-tender. (If you plan to eat them without additional cooking, such as in a recipe that is baked, make sure they are very soft and no longer have any crunch.)

Allow to cool for at least 15 minutes to allow the flavors to mingle or store in an airtight container for up to a week. You can use this filling in any recipe that calls for apples, such as a pie or tart, apple cake or bread. Or serve warm with whipped cream or keto vanilla ice cream.

Capella Double Apple Flavoring
Nutritional Information per 1/2 cup: 67 calories, 4.2 g carbohydrates (1.8 g dietary fiber, 1.4 g sugars), 5.9 g total fat (3.7 g saturated fat, 0 g trans fat), 15 mg cholesterol, 43 mg sodium, 27.6 mg calcium, 100 mg potassium, 1 mg iron, 66 mg Vit A, 9 mg Vit C, 0.7 g protein. Net carbs per serving: 2.4 grams

Note: Compared to no sugar added, canned apple pie filling, this recipe is about 10 carbs LESS per 1/2 cup! 

Recipe by Kathy Sheehan, copyright 2020
All rights reserved. Please do not duplicate without the author’s permission. 
Saturday, September 2, 2017

Low Carb, Gluten Free Autumn Recipes


When the mornings and evenings start getting cooler and the first kick-off of football season as occurred, I begin to experience cravings for the warm and comforting foods of autumn. I've been browsing through my recipe file and here are a few links to some of my favorite main dishes and treats to usher in the season. 

Main Dishes

One Pan Autumn Chicken Dinner from Cooking Classy with a Sprinkle of Fancy

Low Carb Bacon Cheeseburger Casserole from bunsinmyoven.com

Original Cauliflower Mac and Cheese Casserole. Recipe by George Stella

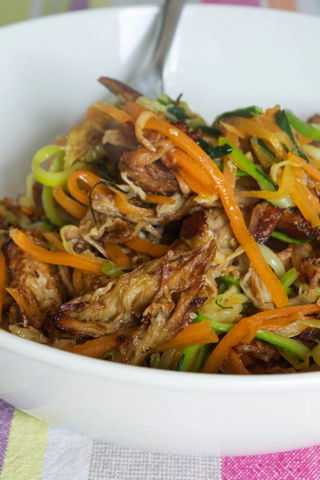
Pulled Pork and Zoodles
Pulled Pork and Zoodles from the Comfort Bites Blog

Salmon in Cream from Salmon Recipes Old and New

Turkey Saltimbocca Meatballs
Turkey Saltimbocca Meatballs. Recipe by Melissa Sevigny from ibreatheimhungry.com

Rainbow Chili by Kathy from Diabetics Rejoice blog

Sautéed Brussel Sprouts with Pancetta. Recipe by Gina Homolka from skinnytaste.com

Autumn Treats

Baked Cinnamon Spice Granola
Baked Cinnamon Spice Grain-Free, Low Carb Granola. Recipe by Kathy from Diabetics Rejoice blog

Keto Pumpkin Spice Donuts from ketosizeme.com

Low Carb Pumpkin Cheesecake Mousse. Recipe by Brenda from sugarfreemom.com

Pumpkin Scones with Cinnamon Glaze
Pumpkin Scones with Cinnamon Glaze. Recipe by Carolyn from alldayidreamaboutfood.com

Toasted Pumpkin Seeds. Recipe by Diabetic Living from diabeticlivingonline.com

Bulletproof Pumpkin Misto. Recipe by Kathy from Diabetics Rejoice blog

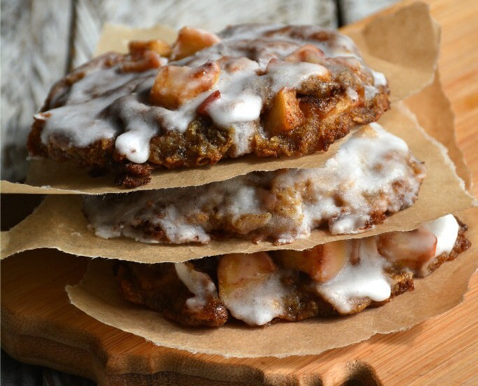
Low Carb Apple Fritters
Low Carb Apple Fritters from forestandfauna.com


Monday, September 26, 2016

Apple Pie Kefir Smoothie


It's apple season in Maine! This is the time of year I get a serious craving for apples, maybe because they're everywhere--in the Farmer's Markets and grocery stores. When my daughter was young, apple picking was a yearly activity that was followed up with a lot of cooking with apples in every conceivable way. This delicious smoothie has that apple-cinnamon flavor that is reminiscent of the all-American favorite, apple pie.  To keep the carbs down, I only use 1/4 of a tart apple but, combined with the warm spices, it's enough to give it the apple flavor I desire.  This smoothie is a great way to get a crisp, cool autumn morning off to a good and healthy start!

Apple Pie Kefir Smoothie
Makes 1 serving

1/2 cup plain, unsweetened kefir (or yogurt)
1/4 organic Granny Smith apple with skin, cut into chunks
1 tablespoon coconut or flaxseed oil
1/2 cup coconut or almond milk (I used full-fat coconut milk)
1 teaspoon apple pie spice
1 tablespoon chia seed
1/4 teaspoon stevia powder, or to taste (I use Sweet Leaf brand)
A pinch of salt
2 kale leaves or a handful of spinach (if you want it green)
1 teaspoon collagen hydrolysate (or your favorite protein powder)
1/4 teaspoon vanilla extract
4-5 ice cubes
Enough water to reach desired consistency

Place all of the ingredients in a blender and blend until smooth. Enjoy immediately.

Nutritional Information per serving: 421 calories, 13.4 g carbohydrate (3.5 g dietary fiber, 9.6 g sugars), 35.3 g total fat (24.8 g saturated fat, 0 g trans fat), 12 mg cholesterol, 77 mg sodium, 161.4 mg calcium, 286 mg potassium, 8.3 g protein.  Net carbs per serving: 9.9 grams

Recipe by Kathy Sheehan, copyright 2016
All rights reserved. Please do not duplicate without author's permission.

Wednesday, August 10, 2016

Slow Cooker Pork Chops with Carrots and Apples


I love my Crock Pot and use it often. Even if I'm at home for the day, I love the aroma wafting though the house and knowing that all I have to do is lift the lid from the slow cooker and dinner is ready. This recipe in particular smells wonderful while it's cooking and it's so easy to throw together. The combination of pork and apples is a classic and by cooking them in a crock pot, the pork chops turn out moist and tender. To reduce some carbs, I recommend using a green Granny Smith apple, instead of a higher sugar variety. With a side of probiotic-rich homemade sauerkraut, this is a comforting and healing meal.

Slow Cooker Pork Chops with Carrots and Apples
Makes 2-4 servings, depending on the size of your pork chops

1 tablespoon coconut oil
2 large, thick, center cut, boneless pork chops (organic or antibiotic free)
1 large onion, sliced
2 cups carrots, thickly sliced (I use multi-colored carrots)
1 Granny Smith apple, cut into slices and sprinkled with lemon juice
2 teaspoons fresh thyme (or 1 teas dried)
1-1/2 tablespoons fresh rosemary, chopped (or 2 teas dried)
Salt and pepper

1. In a heavy skillet, heat the oil on medium-high. Season the chops with salt and pepper and brown on both sides.

2. In the crock pot, add the sliced onion and carrots and season with a little salt and pepper. Place the pork chops on top of the vegetables and sprinkle with the chopped herbs.

Top vegetables with browned pork chops.

3.  Spread the sliced apples on top of the pork and put the lid on the Crock Pot. Set the slow cooker to high (or 350-degrees Fahrenheit) and cook for 3 hours. Test meat and, if it's tender and the internal temperature is at least 165-degrees, turn off slow cooker.  If additional cooking is needed, continue cooking covered for another 30 minutes.  Serve pork with vegetables and spoon any sauce over the chops for added flavor.

Scatter apple slices over all before cooking.

Nutritional Information per serving (with 1/2 cup vegetables): 341 calories, 24 g carbohydrate (4 g dietary fiber, 16.2 g sugars), 16.2 g total fat (6.1 g saturated fat, 0 g trans fat), 70 mg cholesterol, 174 mg sodium, 31.7 mg calcium, 228 mg potassium, 24.2 g protein. Net carbs per serving: 20 grams

Recipe by Kathy Sheehan, copyright 2016
All rights reserved. Do not replicate without written permission.

Saturday, January 25, 2014

Drink Your Vegetables!


This is a continuation of the "Love Your Vegetables" post from last week and the theme this week is juicing.  What's all the hype about?  Many doctors recommend it as an additional way to get the micro-nutrients in fruits and vegetables.  Those micro-nutrients are easier to absorb without the bulk of fiber that accompanies the fresh produce.  But is it a healthy idea, especially for someone who has problems metabolizing carbohydrates?  Making fresh juice appealed to me, so I talked to my doctor about it and this is what he said:  Yes, juicing vegetables is an excellent idea but, because of the high sugar content of fruit, it should be limited, preferably to lower glycemic fruit that includes green apples, berries, cherries, grapefruit, lemons and limes.  Fresh vegetable juices can be tolerated and beneficial, if a person's blood sugar is fairly well managed.  For someone whose blood glucose isn't stable, drinking green smoothies might be a better choice.

I've been vegetable juicing now for several months and I've seen a reduction in my high blood pressure and I have more energy throughout the day.  My blood glucose readings have remained in the normal range and I enjoy making fresh juice!  I love that I can drink the nutrients from an entire, heaping plate of vegetables (see photo above). From my experience, the more vegetables I can consume, the better my health and well-being!

Before you run out to buy a juicer, here are some tips I would suggest:

1.  Do your homework before buying!  There are several types of juicers available that work in different ways and at various prices.  I'm not going to go into a whole lesson here, but I highly recommend that you consider carefully before investing in a juicer.  My #1 Rule: Try vegetable juicing without a juicer first, to see if you like the taste, before buying!  Try this method for several weeks to see if you're really serious or if the idea was a passing fancy. (See directions below for how to make juice without a juicing machine.)

2.  Go into it with the knowledge that you'll be juicing mostly vegetables, with maybe a small amount of fruit for sweetness.  If additional sweetness is desired, add drops of liquid Stevia to taste.

3.  To minimize a blood sugar spike, don't drink juice alone or an entire batch at once.  Combine an 8 ounce glass of fresh juice (or less) with a meal or snack that contains some protein and/or fat.  If you've made more than 8 ounces, pour the remainder into a glass water bottle, place it in the refrigerator and have a little with every meal throughout the day with the idea of consuming the entire batch within 24 hours for the most nutritional impact.  For a diabetic, it can be better tolerated to add back some of the fiber removed by juicing.  For example, sometimes I stir a spoonful of fiber powder into my fresh juice before drinking, especially if it contains a higher glycemic fruit.

4.  Test your blood sugar level 1 and 2 hours after consuming juice.  This will tell you how your body reacts to juice and whether it can be tolerated.  After two hours, your blood sugar reading should be below 150 or back to normal.

5.  Finally, vegetable juicing doesn't replace eating vegetables!  Fresh vegetables and fruit contain much needed fiber, that's often lacking from the standard diet.  Juicing is just another way to add more vegetables and their healthy micro-nutrients to your diet in a rather pleasant way.

RECIPE IDEA:  Green Lemonade!


Typically, I juice whatever vegetables I have on hand at the moment and throw in a clementine and lemon or green apple.  I have found that I can juice parts of a vegetable I normally wouldn't eat, such as broccoli stalks or the woody ends of asparagus.  In this recipe, the tart lemon becomes the predominate flavor that hides the more earthy or pungent flavors of the vegetables.  With a few drops of liquid Stevia, lemonade is the result!

Green Lemonade
Makes 2 servings

1 clementine
3 stalks of celery
1/4 savoy cabbage (or 2 cups other leafy greens)
2 carrots
1/2 or 1 small lemon, with peel
1/2 cucumber or zucchini
2 broccoli stalks (about 1-1/2 cups)
4-6 drops of liquid Stevia or to taste (add after juicing)

Wash and cut vegetables to the size that will feed into your juicer.  According to the manufacturer's instructions, juice the vegetables.  Add Stevia and stir.  Pour over ice and serve immediately.

To make juice without a juicing machine:  Cut up all of the vegetables and fruit and place into a blender.  Add enough water to allow the mixture to swirl freely.  Blend on high until mixture is smooth.  Strain through a couple of layers of cheese cloth or a nut milk bag until all the liquid has been extracted.  You may need to gently massage and squeeze the bag to drain thoroughly.  Add Stevia to taste and serve over ice.

Nutritional Information per serving: 71 calories, 21.3 g carbohydrate (1 g dietary fiber, 9 g sugars), 0.7 g total fat (0 g saturated fat), 0 mg cholesterol, 113 mg sodium, 115 mg calcium, 132.3 mg vitamin C, 830 mg potassium, 5 g protein.

Recipe by Kathy Sheehan, copyright 2014.

Sunday, October 6, 2013

The BEST Gluten Free Apple Pie with Crumble Topping


It's apple time!  There's nothing quite as wonderful to usher in the autumn season than a homemade apple pie made from freshly picked apples.  This recipe is simply the best!  The fact that it's gluten free and drastically reduced in sugar are just healthy bonuses.  Honestly, you'd never know it was low sugar or GF; there's nothing lacking in taste here.  My gluten-eating, non-diabetic family members loved it!  Because of the crunchy, crumble topping, this pie is best eaten on the day it's made (although it will taste wonderful the day after, even though the topping will have softened).  Be sure to read the note about choosing apples for pie--it's important, you don't want to end up with a mushy, applesauce pie!  For ease, I used a ready-to-fill, frozen gluten free pie crust (Whole Foods has them), but you certainly could make your own using your favorite recipe.

The BEST Gluten Free Apple Pie with Crumble Topping
Makes 12 servings

one 9" gluten free, frozen pie crust, thawed (or make your own)

Filling:
5-6 medium cooking apples* (see note below)
1 tablespoon lemon juice
1 teaspoon ground cinnamon
1/4 teaspoon nutmeg
1/8 teaspoon allspice
1/4 cup Stevia or Splenda granular
1 tablespoon tapioca flour
1 teaspoon melted butter, butter substitute (Earth Balance) or ghee (clarified butter)

Topping:
1/4 cup light brown sugar
1/4 cup Stevia or Splenda granular
1/2 cup all purpose gluten free baking flour
1/8 teaspoon salt
1/2 teaspoon cinnamon
1/4 teaspoon nutmeg or mace
1/8 teaspoon ginger
1-1/2 tablespoons gluten free old-fashioned oats
3 tablespoons very cold butter or butter substitute, cubed

1.  Preheat oven to 400-degrees F.  Thaw pie crust.  Poke crust with fork on bottom and sides.  Place crust on a foil-lined cookie sheet; set aside.

2.  To prepare the filling, peel, core and thinly slice apples and place in a large bowl.  Add remaining filling ingredients and stir to coat apples evenly.  Spoon apples into the pie crust until quite full and heaped in the center (apples will reduce in volume as they cook).

3.  In another bowl, stir together the sugars, GF flour, oats, salt, and spices.  Add the cold, cubed butter and, with a pastry cutter or two knives, cut butter into the dry ingredients until butter is well distributed and mixture resembles coarse crumbs.  Spoon crumb topping evenly over apples.

4.  Bake in preheated oven for 40 minutes.  Topping should be nicely browned and the apples bubbly.  Cool for at least one hour before slicing.

*Note about choosing apples: The type of apples is important.  Create a mixture of several types, such as Cortland, Macoun, Granny Smith, Honey Crisp, Yellow Delicious or Macintosh.  Be aware that Macintosh apples are tart and impart a wonderful flavor, but when baked can turn soft or mushy (but in a good way, when combined with firmer apples).  I recommend using Macintosh sparingly in the mix and never use Macintosh by themselves.

Nutritional Information per serving: 185 calories, 30.5 g carbohydrate (2.3 g dietary fiber, 14.1 g sugar), 8.4 g total fat (4.9 g saturated fat, 0 g trans fat), 47 mg cholesterol, 236 mg sodium, 25.4 mg calcium, 106 mg potassium, 2 g protein.

Recipe by Kathy Sheehan, copyright 2013


Thursday, October 3, 2013

Roasted Squash with Rice, Spinach and Cranberry Stuffing


This is a fabulous autumn recipe!  This time of year, winter squash is abundant and a wide variety is available in farmer's markets or at the grocery.  To prepare as a side dish, I choose a small squash, such as Delicata.  If I want this to be the main course, I choose the slightly larger Acorn Squash.  The squash is easy to prepare: Simply cut in half lengthwise, scoop out the seeds, season with salt and pepper and roast with cut side down in a 375-degree oven for 30-45 minutes, depending on the size of the squash (until fork tender).  The stuffing can be made ahead of time and keeps well in the refrigerator for several days.  Also, any leftover vegetable-rich, rice stuffing is excellent on its own as a side dish or a quick lunch.  Your taste buds will be tantalized by the tangy flavors in the stuffing combined with the slightly sweet flesh of the squash.  This is a culinary experience of autumn's bounty at its very best!

Roasted Squash with Rice, Spinach and Cranberry Stuffing
Makes 2 servings

1 Delicata or Acorn Squash
2 teaspoons coconut oil or olive oil
3-4 cups fresh spinach, chopped (or 1/2 package of frozen chopped spinach, thawed and drained)
1/2 cup onion, chopped
1 carrot, julienne cut or finely chopped
2 cloves garlic, minced
2 tablespoons sweetened, dried cranberries (or chopped apple can be substituted)
1/2 cup leftover brown rice
1 tablespoon Apple Cider Vinegar
2 teaspoons Stevia in the Raw or Splenda
Salt and Pepper to taste
2 tablespoons gluten-free panko breadcrumbs (I used Ian's)
1 teaspoon melted butter or ghee (clarified butter)

1.  Preheat oven to 375-degrees F.  Cut squash in half lengthwise, scoop out and discard the seeds, season with salt and pepper and place cut-side down on a baking sheet.  Roast for 30-45 minutes until fork tender.  Remove from oven and turn cut-side up.

2.  Meanwhile, in a large heavy skillet with lid, heat the oil over medium-low heat.  Add the onion and carrot to skillet and saute until onion is translucent and carrot is beginning to soften, about 2-3 minutes.  Add the chopped spinach.  If using fresh, place lid on skillet and allow to steam for a few minutes or until wilted.  Add the garlic and saute until fragrant.  Add the cranberries and rice and stir to blend.  Add the apple cider vinegar and Stevia.  Stir to combine.  Add salt and pepper to taste.  Remove skillet from heat and rest until squash is ready to stuff (or cool to room temperature and refrigerate to use later).

3.  To make the crumble topping, combine the gluten-free panko breadcrumbs and melted butter or olive oil in a small bowl.  Stir with a fork until crumbs are moistened; set aside.

4.  Generously fill the scooped-out cavity of each roasted squash with about 1/2 cup rice mixture.  Sprinkle the crumb topping over the top and broil until topping is browned.  Serve warm.

Nutritional Information per serving: 208 calories, 44.3 g carbohydrate (7.5 g dietary fiber, 10.1 g sugars), 3.4 g total fat (1.7 g saturated fat, 0 g trans fat), 4 mg cholesterol, 667 mg sodium, 107.3 mg calcium, 726 mg potassium, 4.4 g protein.

Recipe by Kathy Sheehan, copyright 2013

Sunday, January 9, 2011

Apple Cheddar Muffins

My friend gave me The Colonial Williamsburg Tavern Cookbook and I've enjoyed looking through the recipes and recalling many fond memories of our trips to Williamsburg, Virginia. This particular recipe was inspired by one in the book and is a large savory muffin, with just a touch of sweetness from the apples. It makes a wonderful snack by itself, one would be great with a steaming bowl of soup or they would be the perfect side dish for a ham or BBQ dinner. As a variation, I made one batch with smoked cheddar and the smokiness of the cheese was reminiscent of bacon, although these are meat-free. Whether you use regular sharp or smoked cheese, these muffins will not last long when a crowd is around!

Apple Cheddar Muffins
(Makes 12 servings)

1 cup all-purpose flour
1 cup almond flour (or finely ground almonds)
1 tablespoon baking powder
¼ teaspoon baking soda
¼ teaspoon salt
½ teaspoon ground cinnamon
4 tablespoons unsalted butter, softened
1 tablespoon sugar
3 tablespoons Splenda granular
2 large eggs
1 cup light sour cream
2 medium apples, peeled, cored and finely chopped
½ cup reduced fat sharp cheddar, shredded

1. Preheat oven to 425-degrees. Spray muffin tin with non-stick cooking spray; set aside.

2. In a large bowl, combine the flours, baking powder, baking soda, cinnamon and salt. Stir with a fork to break up any lumps in the mixture; set aside.

3. With a handheld or standing mixer, cream the butter and sugar until creamy. Add the Splenda and continue beating until well combined. Add the eggs, one at a time. Add sour cream and beat until combined. Pour the wet ingredients into the dry ingredients and stir with a wooden spoon until just moistened. Fold in the chopped apples and cheese.

4. Divide batter evenly into the twelve muffin cups and bake for 18-20 minutes or until toothpick inserted comes out clean. Allow to cool in pan for 5 minutes, and then remove to wire rack. Allow to cool for about 15 minutes and serve. Store any leftovers in an air tight container at room temperature. These muffins are best eaten warm, so it is suggested to reheat in 300-degree oven for 5-8 minutes before serving leftovers.

Nutritional Information per muffin: 188.3 calories, 16.5 g carbohydrate, 11.2 g total fat, 4.2 g saturated fat, 120 mg. sodium, 1.6 g fiber, 6.1 g protein.

Adapted by Kathy Sheehan from the recipe "King's Arms Tavern Apple Cheddar Muffins" (page 157) in the book The Colonial Williamsburg Tavern Cookbook, published by The Colonial Williamsburg Foundation, copyright 2001.

How does this recipe compare to the original? This recipe is lower in calories, has significantly fewer carbs, less saturated fat, less sodium, plus more fiber and more protein. For comparison, the nutritional information for one muffin made with the original recipe is 204 calories, 25 g carbohydrate, 9.5 g total fat, 5.4 g saturated fat, 166 mg sodium, 0.8 g fiber and 5 g protein.

Monday, December 20, 2010

Easy Pear & Cranberry Cobbler

At this time of year when sweets are abundant, arriving in gift boxes every day and threatening my food plan, I try to have something on hand that I can enjoy without guilt. This fruit cobbler is an easy dessert that is delicious and good for me! It utilizes the wonderful Comice pears available in the stores right now (they are the sweetest and juiciest of the pear varieties), plus the warm spices give it a holiday twist. Apples can be substituted and are just as delicious. I used Quaker Oatmeal Pancake mix, but you can use any whole grain mix you may already have in your pantry. This cobbler is quick, very simple to prepare and just as tempting as anything my friends and relatives have given us this holiday season. Like me, you may find it a lot easier to leave the high-carb, sugary treats to others if you have an alternative to satisfy your sweet tooth. Best wishes for a happy, healthy holiday!

Easy Pear & Cranberry Cobbler
Makes 8 servings

½ cup whole grain or oatmeal pancake mix
½ cup almond flour
1½ teaspoons cinnamon, divided
¾ teaspoon ground ginger, divided
¼ teaspoon nutmeg
1/8 teaspoon ground cloves
3 tablespoons Splenda granular
1 egg
½ cup skim or almond milk
1 tablespoon canola oil
4 pears, cored, peeled and cut into 1" chunks (apples can be substituted)
½ tablespoon lemon juice
3 tablespoons dried cranberries
1 tablespoon flour

1. Preheat oven to 375-degrees. Spray an 8" square baking dish with non-stick cooking spray; set aside. In a small mixing bowl, mix together the pancake mix, almond flour, 1 teaspoon cinnamon, ½ teaspoon ginger, nutmeg, cloves and Splenda. Mix together with a fork to break up any lumps. Set aside dry ingredients and prepare pears.

2. Core and peel each pear, then cut into large chunks. Place the pears into a medium mixing bowl, add lemon juice and toss to coat. Add the dried cranberries, ½ teaspoon cinnamon, ¼ teaspoon ginger and 1 tablespoon flour; stir to combine. Spoon pears into the prepared baking dish; set aside.

3. To the dry ingredients, add the egg, milk and canola oil. Stir vigorously with a fork until batter is well combined. Pour over pears and spread to cover fruit. Bake in preheated oven for 30 minutes. Remove from oven and cool for 15 minutes before serving. Also, it can be served at room temperature.

Nutritional Information per serving: 162.5 calories, 25.4 g carbohydrate, 6.4 g total fat, 0.6 g saturated fat, 91.8 mg sodium, 4.6 g fiber, 3.7 g protein.

Original recipe by Kathy Sheehan, copyright 2010

How does this recipe compare to traditional cobbler? This recipe is much lower is calories, carbs and fat, plus it has 4x the fiber and double the protein! For comparison, a ½ cup serving of traditional fruit cobbler is 360 calories, 67 g carbohydrate, 10 g total fat, 3 g saturated fat, 1 g fiber, 2 g protein.

Monday, October 25, 2010

Apple Honey Balls

The air is cool, the trees are bright with autumn colors, apples are still abundant and pumpkins are on the doorstep, all of which makes me crave the earthy, rich flavors of the season and are the inspiration behind this soft, flavorful, nutritious cookie. The flaxseed meal provides a good dose of omega 3 fatty acids, as much as 170 mg per cookie! It also gives it a nutty flavor which pairs so well with the grated apple. The light coating of pumpkin pie spiced sugar really makes this the perfect cookie for an autumn day, but the real treat is that it's only about 7 carbs each!

Apple Honey Balls
(Makes 28 cookies)

¾ cup all-purpose flour
1 cup almond flour (or finely ground almonds)
¼ cup flaxseed meal
1 teaspoon baking powder
½ teaspoon baking soda
¼ teaspoon salt
1 teaspoon ground cinnamon
1/8 teaspoon ground mace
1/3 cup zero trans-fat buttery spread (I use Smart Balance)
¾ cup Splenda granular
2 tablespoons honey
1 egg
1 teaspoon vanilla
¾ cup grated Granny Smith apple (peeled and cored)
1½ teaspoons lemon juice

Topping Ingredients:
2 tablespoons sugar
1 teaspoon pumpkin pie spice

1. Preheat oven to 375-degrees. If desired, line cookie sheet with parchment paper; set aside.

2. In a small mixing bowl, combine the flours, flaxseed meal, baking powder, baking soda, salt, cinnamon and mace. Stir with a fork to break up any clumps in the almond flour; set aside. Grate the apple into a small bowl and toss with the lemon juice; set aside.

3. Prepare the topping by placing the sugar in a small bowl with the 1 teaspoon pumpkin pie spice, stir to combine; set aside.

4. In a large mixing bowl, cream together the buttery spread, Splenda and honey with a handheld or standing mixer. Add egg and vanilla and beat for 2 minutes. With a wooden spoon, add the dry ingredients all at once and stir until well combined. Fold in the grated apple. Drop the dough by rounded teaspoonful into the sugar-spice topping mixture (or a level small cookie scoop). Roll just one side in the sugar-spice mixture and place on cookie sheet with the topping mixture side up. (Tip: If dough is too soft, place in refrigerator for 15-20 minutes and it will be easier to handle.)

5. Bake for 12-13 minutes until bottom begins to brown. Remove to wire rack to cool. Store at room temperature in an airtight container.

Nutritional Information per cookie: 70 calories, 6.9 g carbohydrate, 4.2 g total fat, 0.7 g saturated fat, 42.5 mg sodium, 0.8 g fiber, 1.6 g protein.

Original recipe by Kathy Sheehan, copyright 2010

Saturday, September 11, 2010

Peanut Butter Caramel Dip with Apples

It's football season again...and a danger for mindless snacking while my attention is focused on the game is a very real threat to my commitment to healthy eating. I'm surrounded by an array of pretzels, chips, pizza and beer. I must be vigilant, or my hand will stray to a bad place and make its way to my mouth! The key to success is to plan ahead and have nutritious snacks within my reach, preferably some with protein, which will be more filling and keep my BG from spiking and crashing later. If you need some good ideas, check out the appetizers in my blog archive, along with the recipe below.

I want to tell you about a product I use often for flavoring my morning smoothies that has many other uses, as well. I'm talking about the wonderful selection of sugar-free flavored syrups available. I use DaVinci Sugar Free Syrups, which are available online and in some stores. They are great for flavoring plain yogurt, to spice up a mug of coffee or to use in the many recipes posted on the company's website. I recently purchased the Dulce de Leche flavor and used it to add the taste of creamy caramel to peanut butter, which is excellent as a dip for sliced apples. It satisfies my craving for caramel apples that I strangely only get this time of year. So, enjoy the game AND take care of your health at the same time!

Peanut Butter Caramel Dip with Apples
(Makes 2 servings)

2 tablespoons creamy peanut butter
1 tablespoon sugar-free caramel flavored syrup
1 large apple, cored and sliced

1. Measure the peanut butter and caramel syrup in a small microwavable bowl or custard cup. Microwave for about 12 seconds on high and stir until combined. Use as a dip for the sliced apples.

Nutritional Information per serving: 148 calories, 18.4 g carbohydrate, 8.2 g total fat, 1.8 g saturated fat, 81 mg sodium, 3.7 g fiber, 3.8 g protein.

Original recipe by Kathy Sheehan, copyright 2010

Sunday, June 13, 2010

Harvest Tuna or Chicken Salad

I like tuna and try to eat it often to include more fish and Omega 3 in my diet, but something seems to happen to my creativity when I open that can so I end up making the same boring tuna fish salad with mayo, mustard and pickle relish. Today I challenged myself to come up with a different twist on my ordinary tuna salad and the end result was bursting with flavor! The idea of adding dried fruit came from a harvest salad I was recently served at a local restaurant (Rudy's in Cape Elizabeth). It adds texture and a hint of sweetness that blends perfectly with the homemade cherry-balsamic dressing. If you want variety, keep in mind that this recipe would be excellent with cooked chicken, as well. With warmer weather coming, I'll be glad to have another cool, main dish salad in my recipe box and this one is definitely worth repeating!

Harvest Tuna or Chicken Salad
(Makes 2 servings)

3 tablespoons balsamic vinegar
1 tablespoon cherry preserves or jam
Freshly ground black pepper to taste
2 tablespoons olive oil
5 cups romaine lettuce
2 tablespoons dried cherries, chopped
¼ cup dried apples, chopped
2 tablespoons almonds, chopped (or use slivered)
2/3 cup broccoli florets
½ cup cucumber or celery, quartered and sliced
5 ounces solid white tuna, drained & broken into small pieces (or ¾ cup chicken)

1. In a large bowl, whisk together the balsamic vinegar, cherry preserves, pepper and olive oil until well blended and emulsified.

2. To the bowl, add the remaining ingredients and toss until combined and well coated with the dressing. Equally divide among two serving plates and serve immediately.

Nutritional Information per serving: 382.5 calories, 33.4 g carbohydrate, 19 g total fat, 2.4 g saturated fat, 272.5 mg sodium, 5.4 g fiber, 19.2 g protein.

Original recipe by Kathy Sheehan, copyright 2010

Wednesday, November 25, 2009

Sugar-free Cranberry Sauce

I love cranberry sauce with my turkey, but traditional cranberry sauce is off the charts! Even a small portion of only 1/4 cup is loaded with 22 grams of added sugar and a total of 27 grams of carbs. Add that to the other carbohydrates in a Thanksgiving meal and cranberry sauce, even a spoonful, is off limits for me. Instead of dwelling on the things I can't have because of my diabetes, on this Thanksgiving Day I smile and am thankful I live in an age when there are so many wonderful alternatives that make it easy to manage this complicated disease.

It's simple to make homemade cranberry sauce and it tastes so much better than canned. I tweaked the traditional recipe just a bit to create this delicious variation that calls for a combination of erythritol sweetener, stevia and applesauce to replace the sugar called for in the recipe found on the back of a bag of fresh cranberries, plus it cooks up quick on the stovetop. The hint of cinnamon, cloves and vanilla balances out the tartness. The pectin in the applesauce helps to thicken the sauce perfectly. This cranberry sauce is so delicious, I top it with whipped cream and have it for dessert, use it as a fruit spread on my gluten free waffles or stir it into yogurt. Happy Thanksgiving to all!

Sugar-free Cranberry Sauce
(Makes eight ¼-cup servings)

One 12 ounce bag of cranberries (fresh or frozen)
1/3 cup LaKanto Monkfruit sweetener (or other erythritol sweetener)
a pinch of sea salt
2 tablespoons water
1/2 cup unsweetened applesauce (no sugar added)
1 teaspoon ground cinnamon
1/8 teaspoon ground cloves
1/2 teaspoon vanilla extract
1/2 + 1/8 teaspoon stevia powder, or to taste (I used Sweet Leaf brand)

1. Rinse and pick over the cranberries and place them in a large saucepan. Add the LaKanto Monkfruit sweetener, salt, water, applesauce, cinnamon and cloves. Stir to combine.

2. Boil gently for 5-8 minutes (skins will split), stirring occasionally. Remove from heat and add the vanilla and stevia powder to taste. Stir to combine. Allow the sauce to cool until it reaches room temperature. Store in the refrigerator until time to serve.  The sauce will thicken as it cools.

Nutritional Information per ¼ cup serving: 28 calories, 7 g carbohydrate, (2.3 g dietary fiber, 3.2 g sugars, 8 g sugar alcohols), 0 g total fat, 0 mg cholesterol, 16 mg sodium, 7.8 mg calcium, 50 mg potassium, 0.2 g protein.  Net carbs per serving: 4.7 grams

Original recipe by Kathy Sheehan, copyright 2009, revised 2016

Friday, October 9, 2009

Easy and Quick Peach Crisp

There is nothing more delicious and welcome on a cold day than a fresh fruit crisp right out of the oven. Right now, when peaches and apples are so abundant, this is a quick and easy way to partake in this year's fruit harvest. I love this recipe because it is so versatile! Start with a base of your favorite fruit, such as apples, peaches, pears, nectarines, cherries or berries. The ease of using a packet of instant oatmeal, possibly something you already have in your cabinet, then adding appropriate spices to jazz it up takes only a few minutes of prep time before the wonderful aroma of bubbling fruit combined with the oatmeal cookie-like topping fills your kitchen. If you don't need a full recipe, the topping can be kept in the refrigerator for up to a week and you can bake individual fruit crisps whenever they're needed. So, remember this simple recipe when you want a special treat just for yourself or invite a couple of friends over for an afternoon tea party.

Easy and Quick Peach Crisp
(Makes 3 servings)

2 large ripe peaches, skin removed and sliced (or substitute 2½ cups fruit of your choice)
1 packet low sugar Cinnamon Instant Oatmeal (I use Quaker Weight Control brand)
¼ teaspoon ground nutmeg
¼ teaspoon ground ginger
Pinch salt
1 tablespoon Splenda granular (or 2 packets)
2 tablespoons cold butter

1. Preheat oven to 350-degrees. Place sliced peaches into a buttered 8-inch x 8-inch glass baking dish or divide peaches into three individual baking dishes; set aside.

2. Into a medium mixing bowl, combine instant oatmeal, spices, salt and Splenda and stir. Using a pastry cutter or two knives, cut butter into oatmeal mixture until it resembles crumbles and the butter is well distributed. Spoon evenly over peaches.

3. Bake in preheated oven for 30-35 minutes. Remove from oven and allow to cool for about 10-15 minutes. Serve warm.

Nutritional Information per serving: 162.6 calories, 20.5 g carbohydrate, 8.5 g total fat, 4.9 g saturated fat, 3.4 g fiber, 3.2 g protein.

Recipe by Kathy Sheehan, copyright 2009

Thursday, September 17, 2009

Caramel Apple Tea Bread

It's still the height of apple season here in Maine and I continue to be drawn to cooking and baking with these heavenly globes of goodness. Take my word for it, your whole house will become infused with the glorious splendor of autumn when the aroma of this moist, delicious bread floats out of the oven.

The addition of apple butter in the recipe gives it a boost of intense apple flavor that could not be gotten from ordinary applesauce. Also, the caramelized apples in the fruit butter combine with the tiny bit of molasses to produce a slight undertone of rich, creamy caramel. To get this same caramel flavor, traditional apple bread recipes require a cup or more of brown sugar! I think you'll agree that this low-sugar bread has a satisfying level of sweetness without all the added refined sugar that creates havoc on any person's blood glucose level, not just a PWD (person with diabetes). Of course, this bread is perfect for breakfast or with tea, but also it's an excellent snack paired with sharp cheddar cheese or slice it thin to make a wonderful peanut butter sandwich (no jelly needed).

Caramel Apple Tea Bread
(Makes 12 servings)

¾ cup all-purpose flour
1 cup almond flour (or finely ground blanched almonds)
2 teaspoons baking powder
½ teaspoon baking soda
1 teaspoon ground cinnamon
½ teaspoon ground nutmeg
¼ teaspoon ground allspice or cloves
¼ teaspoon salt
2 large eggs + 1 egg white
1 tablespoon granulated sugar
¼ cup Splenda granular (not baking blend)
2 teaspoons molasses
¼ cup apple butter
1 teaspoon vanilla extract
¼ cup canola oil
1½ medium apples, peeled, cored and grated
½ medium apple, peeled, cored and chopped
½ tablespoon lemon juice, divided

1. Preheat oven to 350-degrees. Prepare an 8½" x 4½" loaf pan with non-stick cooking spray and set aside.

2. Place the grated apple in a small bowl and sprinkle with half of the lemon juice and toss to coat. Place the chopped apple in another small bowl and sprinkle with the remaining lemon juice and toss to coat. Set both aside.

3. In a medium bowl, mix together the flours, baking powder, baking soda, spices and salt; set aside.

4. In a large mixing bowl and using a handheld or standing mixer, beat the eggs, egg white, sugar and Splenda on medium-high speed for 3 minutes, until light and fluffy (do not underbeat in this step because you need to incorporate air into the mixture). Add the molasses, apple butter, vanilla, canola oil and grated apple and beat for another 30 seconds. Add the dry ingredients all at once and beat on low speed, scraping down the sides of the bowl once until fully incorporated. Gently and quickly fold in the chopped apple. Pour batter into prepared pan.

5. Bake in preheated oven for 45-55 minutes until golden brown and a toothpick inserted into the center comes out clean. Test at 45 minutes and bake longer if additional time is needed. Do not overbake to avoid drying out.

6. Remove from oven to a wire rack. Allow bread to cool in pan for 10 minutes, then remove from pan and continue to cool on wire rack for another hour. This bread can be left at room temperature for 1 day or overnight, or wrap well and store in refrigerator.

NOTE: This batter can be made into 12 muffins. Bake in 350-degree oven for only 15-20 minutes until golden and toothpick inserted into the center comes out clean. Do not overbake. Cool on wire rack before serving.

Nutritional Information per serving: 163 calories, 15.5 g carbohydrate, 10 g total fat, 1 g saturated fat, 1.6 g fiber, 4.1 g protein

Original recipe by Kathy Sheehan, copyright 2009

How does this compare with other quick apple bread recipes? This recipe is lower in calories and only half the amount of carbohydrate. It is higher in fiber and protein and is a good source of Vitamin E and monounsaturated fat (one of the good fats) from the almond flour. For comparison, the nutritional information for apple bread or a muffin made from a traditional recipe is 225 calories, 30.5 g carbohydrate, 10.5 g total fat, 0.5 g fiber, 3.5 g protein.

Sunday, September 13, 2009

"Apple Pie" Fruit Butter

A few days ago, I made "Apple Pie" Sauce, which was incredibly delicious. My husband enjoyed it with light ice cream and for a week it was my go-to snack! Inspired by the same luscious flavors, today I turned my kitchen into an apple factory to cook up another spectacular creation. It was a bit more involved, but not difficult. First, I made a huge batch of fresh applesauce, then put it into my crock pot to simmer all afternoon and reduce into apple butter, which is a spiced apple spread for toast, waffles, pancakes, or anything in which you'd spread with butter or jam. (In spite of the name, it doesn't contain any dairy butter.) Also, it is a very flavorful ingredient in baked recipes to replace some of the oil or sugar, as you most likely will see used here in later posts. While it was cooking, my house smelled heavenly! It was better than any potpourri you could buy.

There are a lot of apple butter recipes out there, but very few that offer a sugar-free version and not any I could find that suggest adding vanilla with the spices. The vanilla seeds really gives this fruit butter it's distinctive "apple pie" flavor. A typical apple butter recipe calls for 1 or 2 cups of added sugar -- Yikes! In my opinion, if you use a combination of apples that include some sweeter varieties (or you start with "no sugar added" applesauce from the grocery store), you don't need to add any sugar. If your apples are tart, such as the local varieties I have used in my recipe, stevia works just fine. Homemade apple butter is a wonderful gift and this recipe makes enough to share with at least a few special people on your list!

"Apple Pie" Fruit Butter
(Makes about 6 cups)

10 pounds apples (about 34 to 36 medium to large apples), peeled, cored and sliced
1½ tablespoons lemon juice
½ cup apple cider
1/2 teaspoon stevia powder, or to taste (I used Sweet Leaf brand)
1½ teaspoons cinnamon
¼ to ½ teaspoon nutmeg
¼ teaspoon allspice or cloves, ground
¼ teaspoon salt
seeds scraped from one vanilla bean*

1. Make applesauce by placing sliced apples and lemon juice into a large heavy pot and, without adding water, cook covered on medium-low heat until soft, stirring occasionally. Mash with a potato masher until a smooth consistency has been reached. If desired, you can use a handheld or standing blender, food processor or food mill for an extra fine, smooth sauce. (Note: If you don't want to make applesauce from scratch, purchase 12 cups of no sugar added applesauce from grocery store.)

2. Pour applesauce into a large crock pot or roasting pan. Add cider, stevia, spices, salt and seeds scraped from vanilla bean* and stir to combine. Simmer on medium-low heat for 5 to 8 hours, stirring occasionally, until thick and dark brown in color. (If cooking in oven, set for 350-degrees.) Time will depend on the amount of moisture in the applesauce. You want the mixture to simmer to release the liquid and reduce in volume by about half. You will know when it is ready because, instead of simmering, the bubbles will begin to have a "plopping" sound and the mixture will be very, very thick. You can partially cover pot to avoid splatters, but make sure the steam can escape. (I have seen it suggested to place two butter knives across rim of crock pot and place lid on top to allow a space for steam to escape.) Apple butter will thicken slightly when cooled.

3. If you plan to preserve the apple butter in jars, prepare jars by sterilizing. (Note: Always use new lids, but jars and bands can be reused.) Jars can be sterilized in your dishwasher, or wash with soap and warm water then place in a 200-degree oven for 15 minutes. Lids can be sterilized by soaking in hot (not boiling) water for 5 minutes. Pour hot apple butter into hot jars leaving ¼-inch space at top to allow for a proper seal, wipe rim of jar with dry paper towel, top with lid and tighten band just until finger tight. Do not tighten rim too much or it will interfere with seal. Boil in water for 10 minutes making sure water is at least 1-inch over top of jar (higher altitudes need longer boiling time, check with jar manufacturer for proper amount of time). Remove to a towel on your counter and do not touch for 12 hours or overnight. Test to make sure the top has sealed by pressing on middle of lid. If it is sealed properly, it will not pop up and down.

4. Properly sealed jars can be left at room temperature for storage up to a year. Otherwise, store apple butter in airtight container in refrigerator and use within 2 weeks. (If any jars have not sealed properly, store in refrigerator and use within 2 weeks.)

*Note about the vanilla: Using the seeds from a vanilla bean is preferred. If you don't have that available to add to the sauce before cooking, then add 2 teaspoons of pure vanilla extract during the final 10-15 minutes of cooking because if it boils too long, extract's flavor will be altered. If you are planning to can your apple butter and you're using extract, the vanilla must boil with the mixture for at least 10 minutes before pouring into sterilized jars.

Nutritional Information per tablespoon: 23.8 calories, 6.4 g carbohydrate, 0 g fat, 0.6 g fiber, 0.1 g protein.

How does this recipe compare with other apple butters made with cider? This recipe is lower in calories and carbohydrates. The average nutritional information for 1 tablespoon of traditional apple butter that includes cider as an ingredient is 45 calories, 11 g carbohydrate, 0 g fat, 0 g fiber, 0 g protein.

Original recipe by Kathy Sheehan, copyright 2009

Wednesday, September 9, 2009

Savory Apple & Cheddar Crustless Quiche

After picking two pecks of apples the other day, I have a lot of apples! Most often they are used in dessert and pastry recipes but, being diabetic and wanting to limit my intake of sweets, I try to be more creative and use them in different ways. This savory custard has only a hint of sweetness from the apple and onion combination. Thyme has an earthy, lemon quality and really adds a special flavor to this dish. This unique crustless quiche will be the star attraction at an autumn brunch or pair it with a salad and toasted cheese triangles for a light meal.

Savory Apple & Cheddar Crustless Quiche
(Makes 2 individual servings)

1 teaspoon butter or margarine
1 teaspoon olive or canola oil
½ small onion
¼ teaspoon salt
2 small apples, cored and cut into chunks
¼ teaspoon pumpkin pie spice
Ground pepper to taste
Leaves from 4 sprigs fresh thyme (or ½ teaspoon dried), divided
2 large eggs
Salt and pepper to taste
1 ounce very sharp 2% milk reduced fat cheddar cheese, shredded

Preheat oven to 350°F. In small skillet heat butter and oil; add onion, ¼ teaspoon salt and sauté until onion is soft. Add apples, pumpkin pie spice, and pepper to taste and leaves from two sprigs of fresh thyme (or ¼ teaspoon dried). Cook, stirring occasionally, until apples just begin to soften, about 2 minutes. Divide mixture into two 10-14 ounce ramekins or custard cups that have been sprayed with non-stick cooking spray. In small bowl combine remaining ingredients and beat until well mixed; pour half of mixture into each custard cup and bake until custard is set, 30 to 35 minutes. Allow to cool for about 5 minutes before serving.

Nutritional Information per serving: 256 calories, 23 g carbohydrate, 13 g total fat, 4.8 g saturated fat, 2.5 g fiber, 14.4 g protein

Original recipe by Kathy Sheehan, copyright 2009

Monday, September 7, 2009

Homemade "Apple Pie" Sauce

Yesterday, my husband and I were walking the dog and commenting how early autumn seems to be arriving this year in Maine. Leaves have already started to change (a month too soon), the sun is setting noticeably earlier, the night temperatures are dropping into the 50's and we're pulling out our long sleeves and jackets from storage again. (Didn't we just put them away last week?) It feels like Halloween could be tomorrow! Even though we haven't done it since our daughter was young, all these sudden seasonal changes gave us the urge to go apple picking, so we did this afternoon and had a wonderful time!

This is first result of that adventure (with many more to come) and it is no ordinary applesauce recipe! It tastes exactly like delicious, homemade apple pie—but without the crust (and the carbs that come with it). It can be served as a dessert, side dish or snack. Since I love the combination of sharp cheddar melted on apple pie, I sprinkle grated cheese over this warm applesauce for a special dessert.

Homemade "Apple Pie" Sauce
(Serves 8)

12 medium baking apples (try to use two different types)
½ tablespoon lemon juice (juice from ½ lemon)
Seeds scraped from one vanilla bean
2½ teaspoons vanilla extract (if not using vanilla bean, increase to 4 teaspoons)
1 teaspoon ground cinnamon
1 teaspoon ground nutmeg
1/8 teaspoon salt
½ to ¾ cup Splenda granular (not baking blend)
1 tablespoon butter

Core and peel apples. Cut into slices and place in a large pan. Add lemon juice and mix until coated. Do not add water. Cover and cook on medium-low heat, stirring frequently. While the mixture is cooking, add vanilla, spices, salt, ½ cup Splenda, butter and stir. Cook until apples are soft, about 15-20 minutes. Remove from heat and mash with a potato masher to reach desired consistency, but leave sauce somewhat chunky. Taste and, if too tart, add more Splenda 1 tablespoon at a time until desired sweetness is reached. Serve warm or cold. Store in an airtight container in refrigerator.

Nutritional Information per ½ cup: 103 calories, 23.3 g carbohydrate, 1.6 g total fat, 0.9 g saturated fat, 2.3 g fiber, 0.3 g protein.

Original recipe by Kathy Sheehan, copyright 2009