Saturday, August 8, 2020

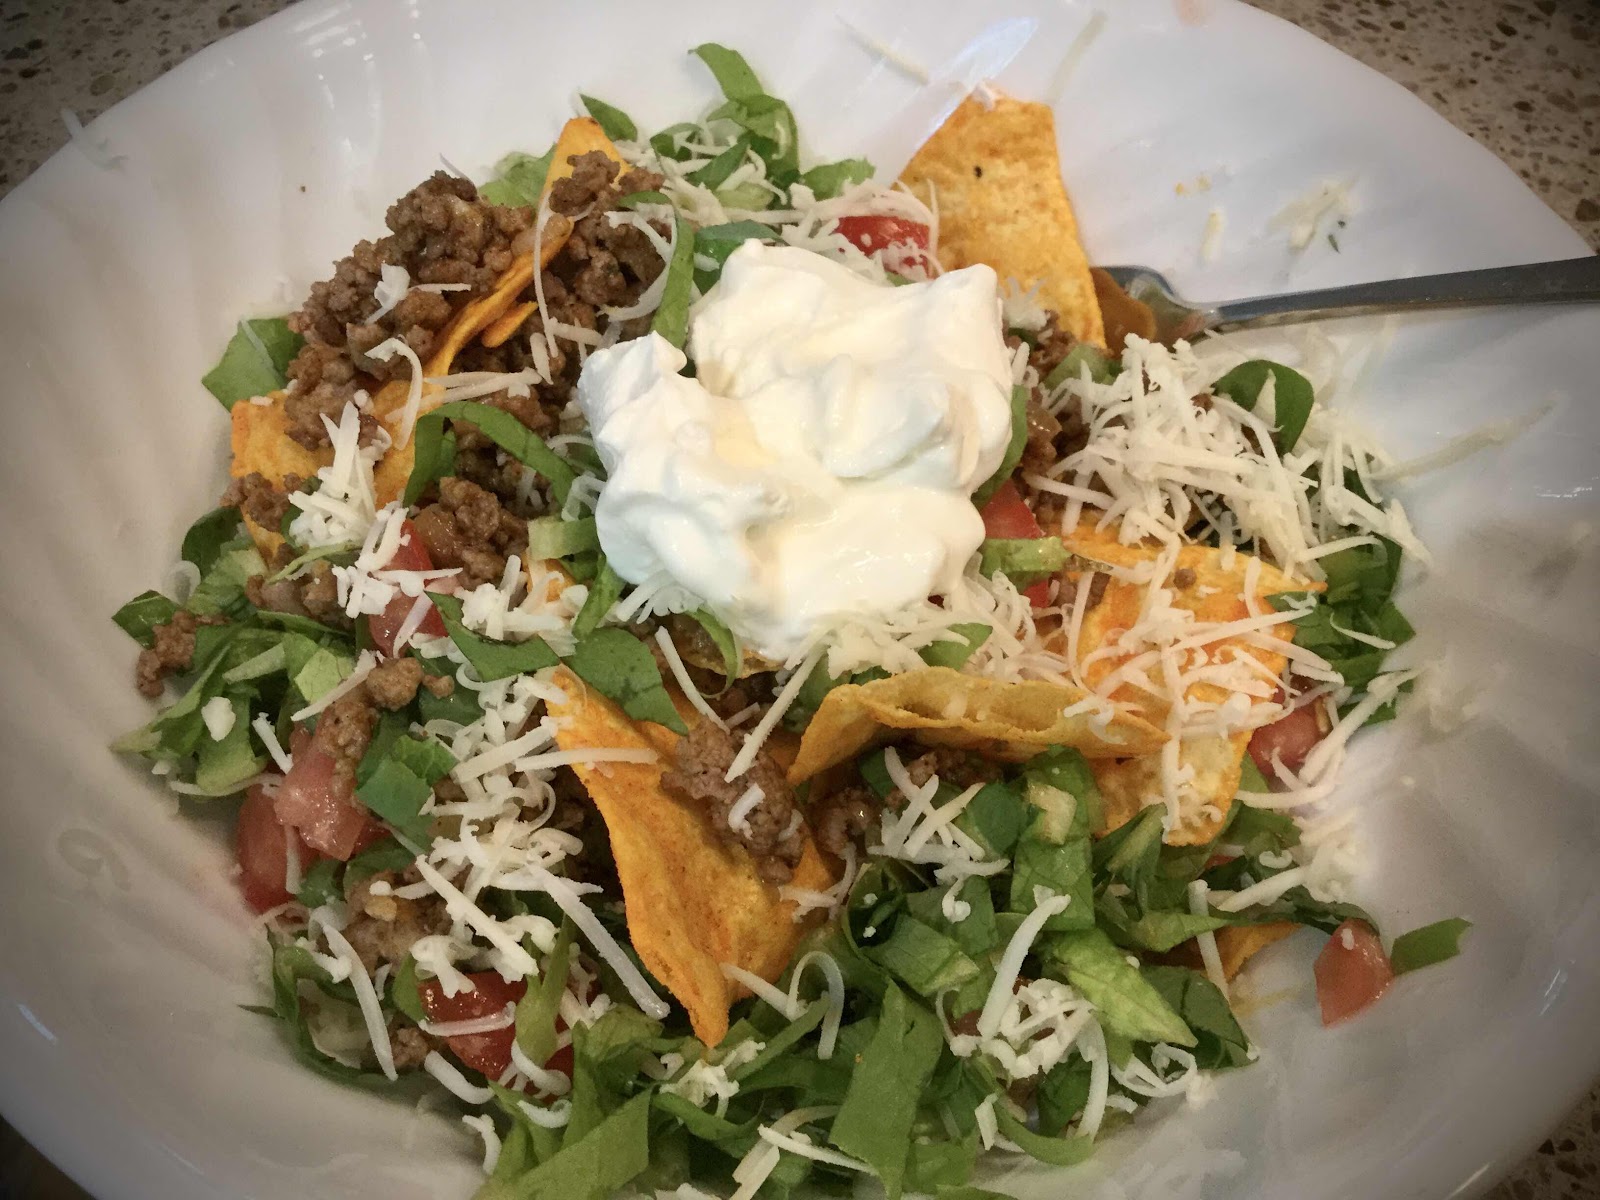
Taco Salad with Quest Protein Chips

Taco Salad with Quest Protein Chips
Here’s an easy dinner that is entirely satisfying and tastes just like a higher carb version. The secret is to use Quest Protein Tortilla-Style Chips in place of corn tortilla chips (I chose Nacho Cheese flavor, but you can substitute your favorite). This delicious salad has become a hands-down favorite on my keto diet, especially when I don’t feel like cooking!

Taco Salad with Quest Protein Chips
Makes 1 serving

3 oz. ground beef
1-2 teaspoons taco seasoning, to taste
1 tablespoon water
1 tablespoon chopped onion
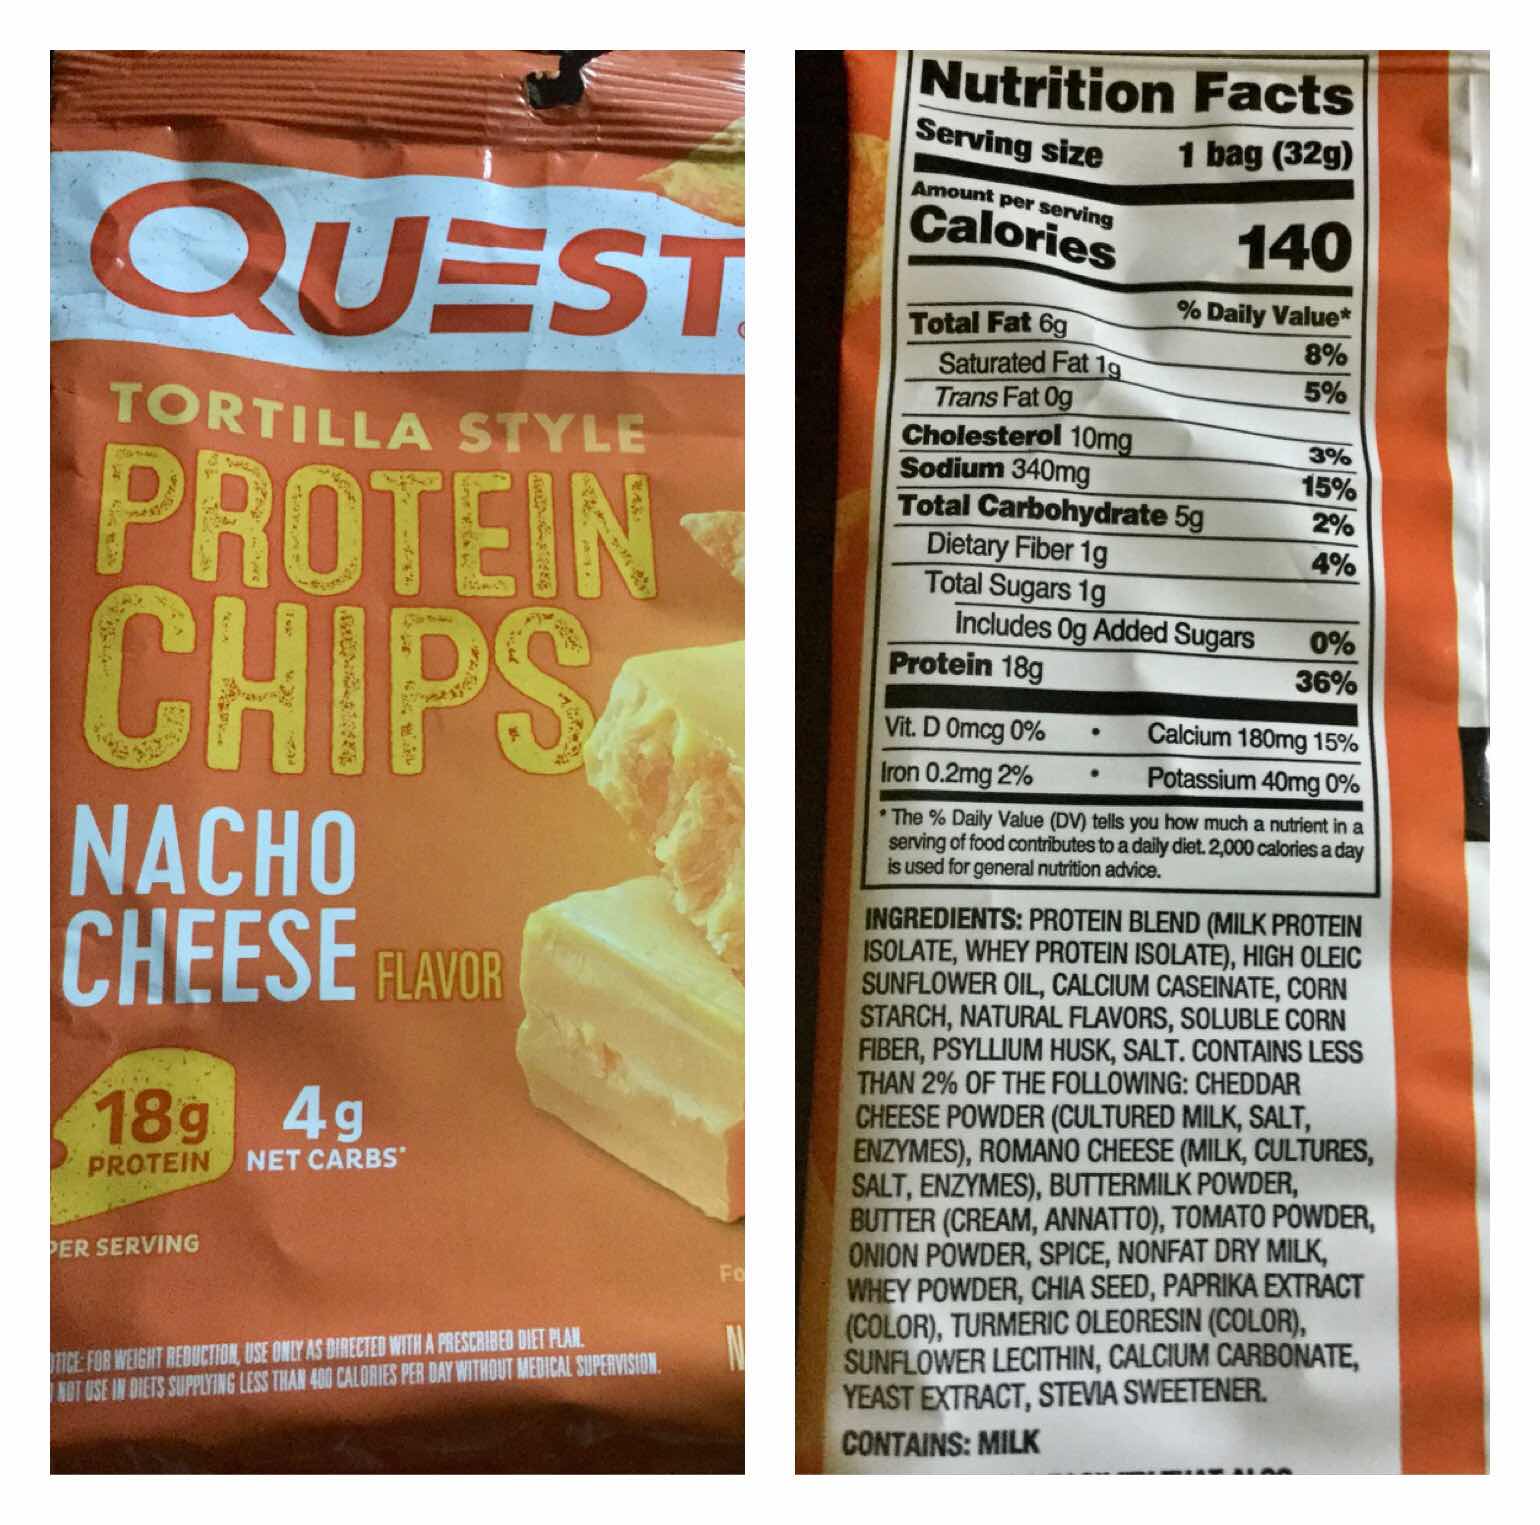
1 bag Quest Protein Tortilla-style Chips, Nacho Cheese (see image below)
1 cup lettuce, torn into bite-size pieces
1/4 cup chopped tomato
1/2 oz. shredded cheddar cheese
2 tablespoons sour cream

1. In a skillet over medium heat, brown the ground beef. Add the taco seasoning to taste. Add the water and chopped onion; stir to combine.

2. Pour the entire bag of Quest Protein chips into a large serving bowl. Top with the seasoned beef, lettuce, chopped tomato and shredded cheese. Dollop with sour cream and serve.

Quest Protein Chips
Nutritional Information: 445 calories, 9.6 g carbohydrates (2.2 g dietary fiber, 2.9 g sugars), 28.5 g total fat (12.2 g saturated fat, 0 g trans fat), 93 mg cholesterol, 498 mg sodium, 335 mg calcium, 505 mg potassium, 2 mg iron, 614 ug Vit A, 12 mg Vit C, 38.8 g protein. Net carbs per serving: 7.4 grams

Photos and recipe by Kathy Sheehan, copyright 2020
All rights reserved. Please do not duplicate without the author’s permission. 

Tuesday, July 21, 2020

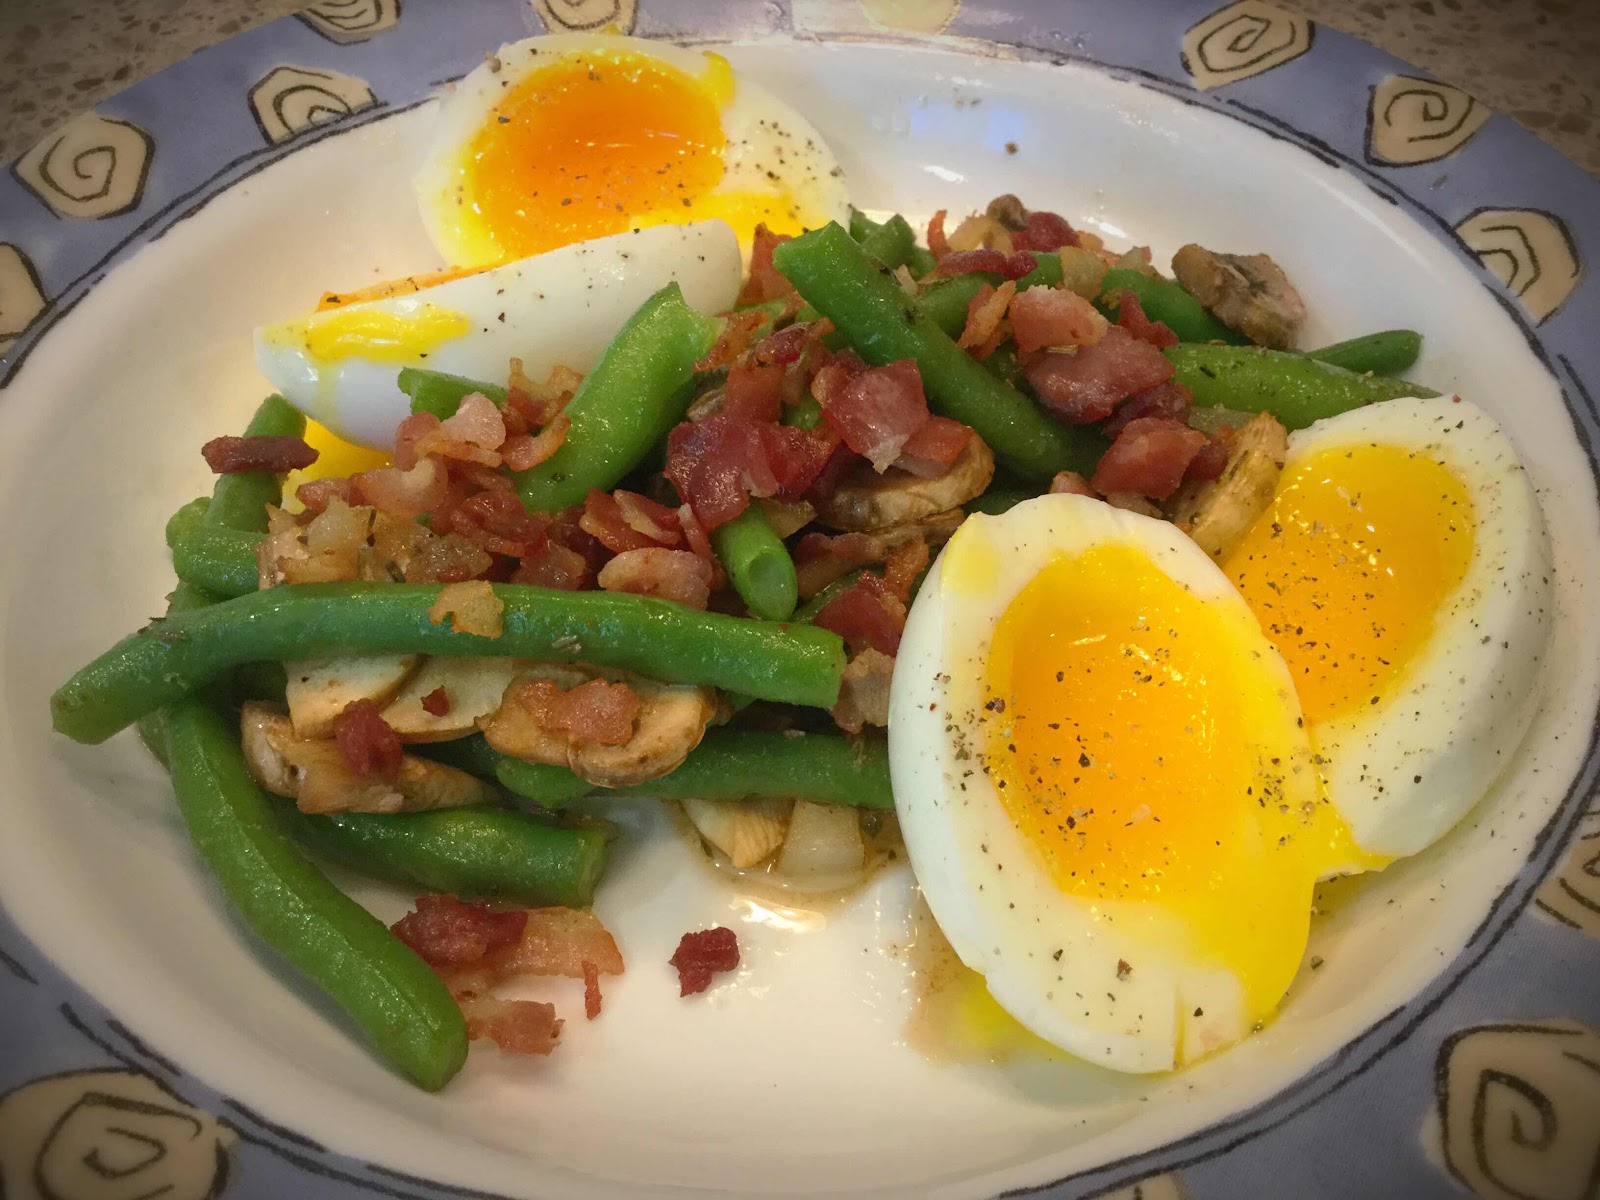
Brunch Green Bean Salad with Perfect Soft-Boiled Eggs

Brunch Green Bean Salad with Perfect Soft-Boiled Eggs
Right now, I’m harvesting a lot of green beans from my garden and am always trying to come up with delicious and varied ways to enjoy them. This breakfast or brunch salad is a great way to start the day! The addition of soft-boiled eggs puts this dish over the top, in my opinion. The tender-crisp green beans and creamy eggs topped with a sweet and sour dressing and crispy bacon go so well together. The method of boiling the green beans and eggs together in the same pot is a clever one, making this a very quick and easy meal. It makes two servings, but can be either halved to serve one or doubled and tripled to serve many.

Brunch Green Bean Salad with Perfect Soft-Boiled Eggs
Makes 2 servings

4 white button mushrooms, sliced
4 slices bacon, cut into small pieces
2 tablespoons onion, minced
1-1/2 tablespoons white wine vinegar
1/2 teaspoon dried thyme
1/2 teaspoon granulated erythritol, or to taste
Salt and black pepper to taste
1-1/2 cups fresh green beans, trimmed
4 eggs, room temperature 

1. Fill a large saucepan or pot 1/2 to 3/4 full of water (enough water to cover the eggs completely as they boil). Add salt and bring to a boil over medium to high heat.

2. Meanwhile, sauté the mushrooms in a small dry skillet over medium heat until they release their moisture, about 3 minutes. Remove the mushrooms to a plate and set aside. In the same skillet, sauté the bacon until crispy. Remove with a slotted spoon to a plate lined with paper towels; set aside.

3. Reserve 2 tablespoons of bacon drippings in the skillet. Add the onion and sauté until translucent. Add the vinegar, thyme, sweetener, salt and pepper. Whisk to combine. Return the mushrooms to the skillet and stir to combine. Keep the dressing warm while the green beans and eggs are cooking.

4. Drop the green beans into the salted, boiling water and set a timer for exactly 8 minutes. At the 5-1/2 minute mark, add the eggs and continue boiling. Drain and rinse under cold running water to stop the cooking. Set the eggs aside in cold water while you pat dry the green beans with a paper towel and divide them evenly between two serving dishes. Toss each serving with 1/2 of the warm dressing and top each portion with crumbled bacon. Carefully peel the eggs, placing two in each serving dish. Cut the eggs in half and season with salt and pepper to taste. Serve immediately.

Nutritional Information per serving (1/2 recipe): 277 calories, 10.8 g carbohydrates (3.5 g dietary fiber, 2.6 g sugars, 1 g sugar alcohols), 17 g total fat (5.5 g saturated fat, 0 g trans fat), 391 mg cholesterol, 506 mg sodium, 107.2 mg calcium, 453 mg potassium, 3 mg iron, 364 ug Vit A, 10 mg Vit C, 21.4 g protein. Net carbs per serving: 6.5 grams

Photo and recipe by Kathy Sheehan, copyright 2020
All rights reserved. Please do not duplicate without the author’s permission.

Friday, July 17, 2020

40 Second Keto Lemon Cupcakes

40 Second Keto Lemon Cupcakes
You don’t have to wait for a special occasion or dirty the entire kitchen to enjoy a few cupcakes! These light and delicious cupcakes bake in the microwave in about 40 seconds. Normally, I don’t think about the microwave when I want to bake a cake, but I have found that keto mug cakes made in a microwave rise beautifully and have a light, tender crumb. Just be sure you don’t overcook them or they can become tough. Silicone cupcake liners are microwave-safe, come in a variety of fun colors, are non-stick and hold their shape during cooking, so that’s what I use. (You can use paper liners, but you’ll need to support them in a microwave-safe cup so the cupcakes retain their shape during the cooking process. If you decide to use paper liners, make sure there is no metal in the liner or its printed design.) This quick recipe makes only three cupcakes, which is just enough to share with one or two friends. There’s no reason not to have a little party tonight!

40 Second Keto Lemon Cupcakes
Makes 3 cupcakes

Cupcake Ingredients:
1/4 cup almond flour
2 teaspoons coconut flour
1 tablespoon granulated erythritol sweetener
1/2 teaspoon baking powder
A pinch of salt
1 large egg
1 teaspoon lemon juice (or almond milk)
1/2 teaspoon lemon zest (or 1-2 drops of food grade lemon essential oil)
1/2 teaspoon vanilla extract
5 drops monkfruit extract (or liquid stevia)
1 teaspoon melted butter or ghee

Lemon Cream Frosting:
2 ounces cream cheese, room temperature 
2 tablespoons unsalted butter, softened
4 ounces plain mascarpone cheese, room temperature
1/4 cup powdered erythritol sweetener 
1 teaspoon vanilla extract
1/4 to 1/2 teaspoon lemon extract, to taste
1-2 tablespoons heavy cream

Sugar free sprinkles (optional)

1. In a small bowl, combine the first five dry ingredients (almond flour through salt) with a fork until thoroughly mixed; set aside.

2. In a separate bowl, whisk together the egg, lemon juice or almond milk, lemon zest, vanilla extract, monkfruit extract or stevia and melted butter.

3. Add the dry ingredients to the wet ingredients and whisk until just combined. Divide the batter equally among three silicone cupcake liners (or small greased ramekins). Microwave on high for 35-40 seconds or until the cakes have risen, look dry and the tops spring back when lightly touched in the center. Do not overcook! (Note: Cooking time may vary depending on the wattage of your microwave. Instructions for baking in the oven are provided below.*) Remove the cupcakes from the microwave and cool on a wire rack completely while you make the frosting.

4. To make the frosting: Whip together the room temperature cream cheese, butter and mascarpone cheese with an electric mixer until light and fluffy. Add the powdered sweetener, extracts and beat until combined. Add the heavy cream, one tablespoon at a time, until your frosting reaches the desired consistency. Taste and adjust sweetness to your liking. If desired, spoon the frosting into a piping bag with a decorating tip and frost your cupcakes or spread about 3 tablespoons of frosting onto each cupcake.

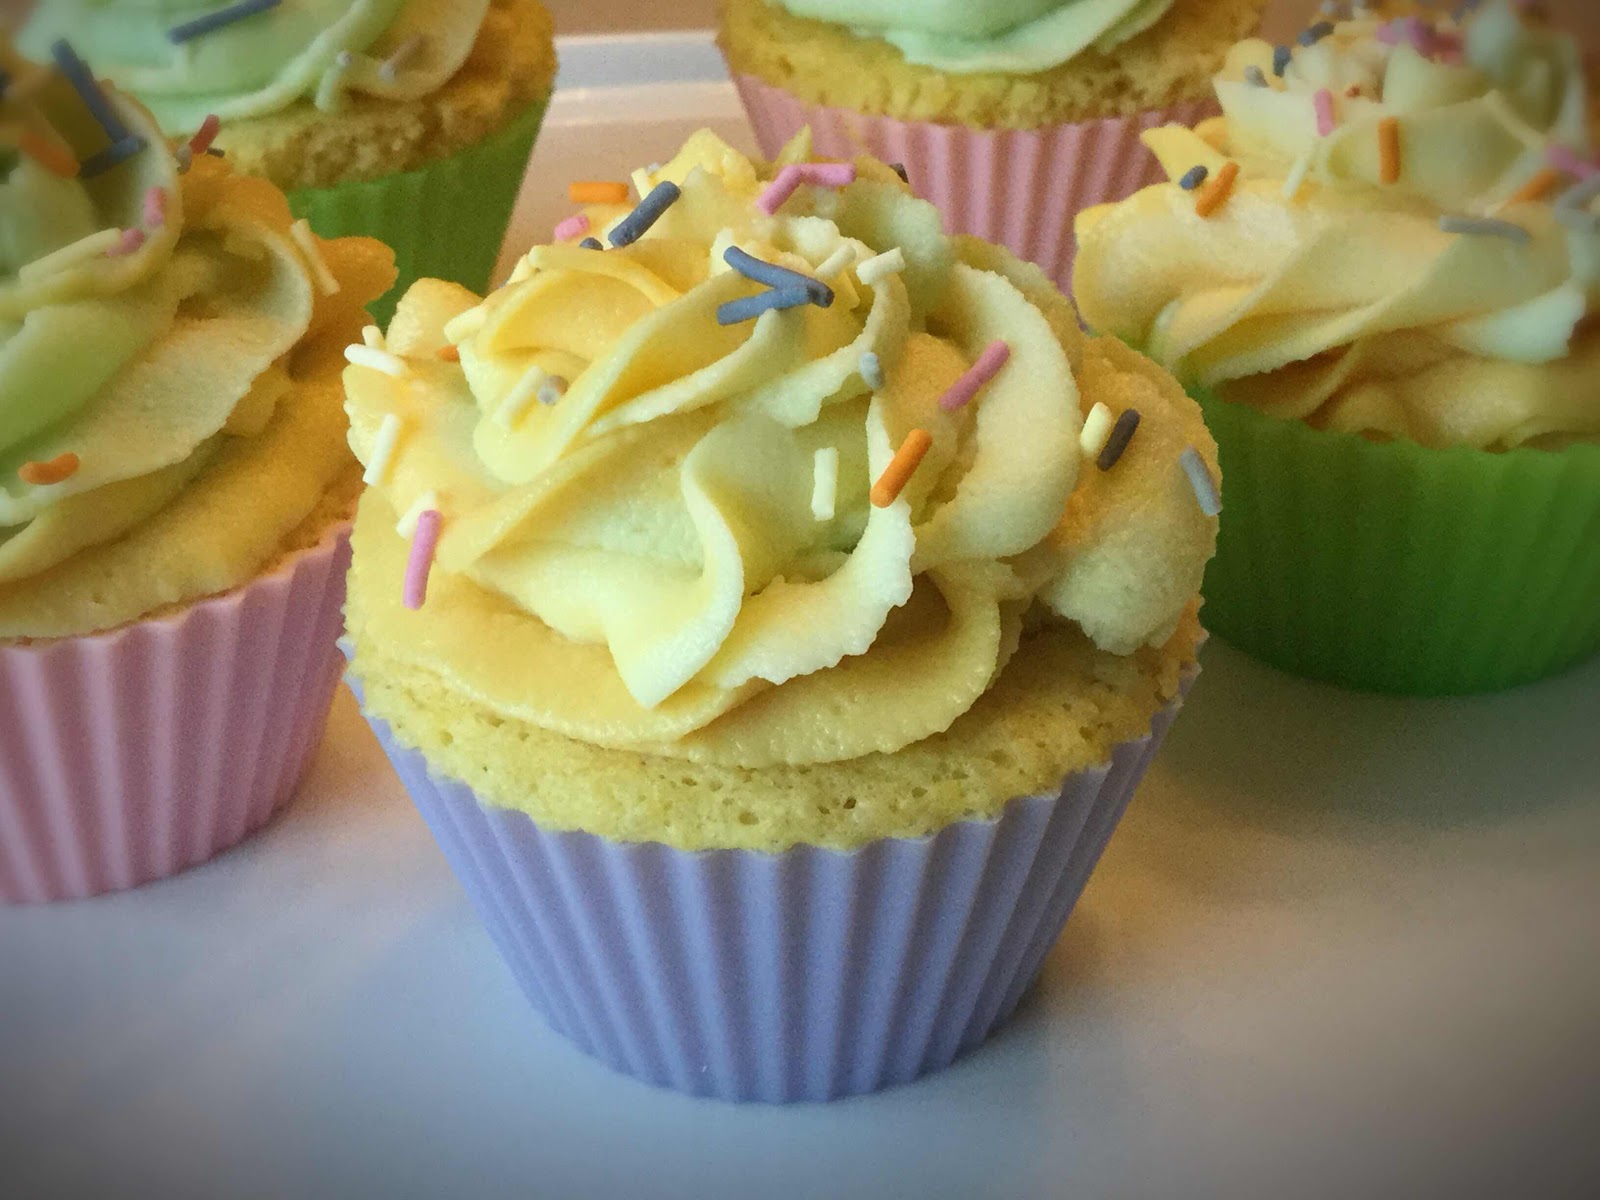
5. This frosting recipe yields more than you will need for 3 cupcakes, which allows for dividing into batches and coloring each differently using gel food colors (as shown). Store any leftover frosting in an airtight container in the refrigerator and save for another use. It will keep well for 4-5 days. Bring to room temperature and rewhip if needed to restore spreading consistency. 

*To bake the cupcakes in the oven, bake in a preheated 325 degree F oven for 16-18 minutes or until a toothpick comes out clean when tested and the tops spring back when lightly touched near the center.
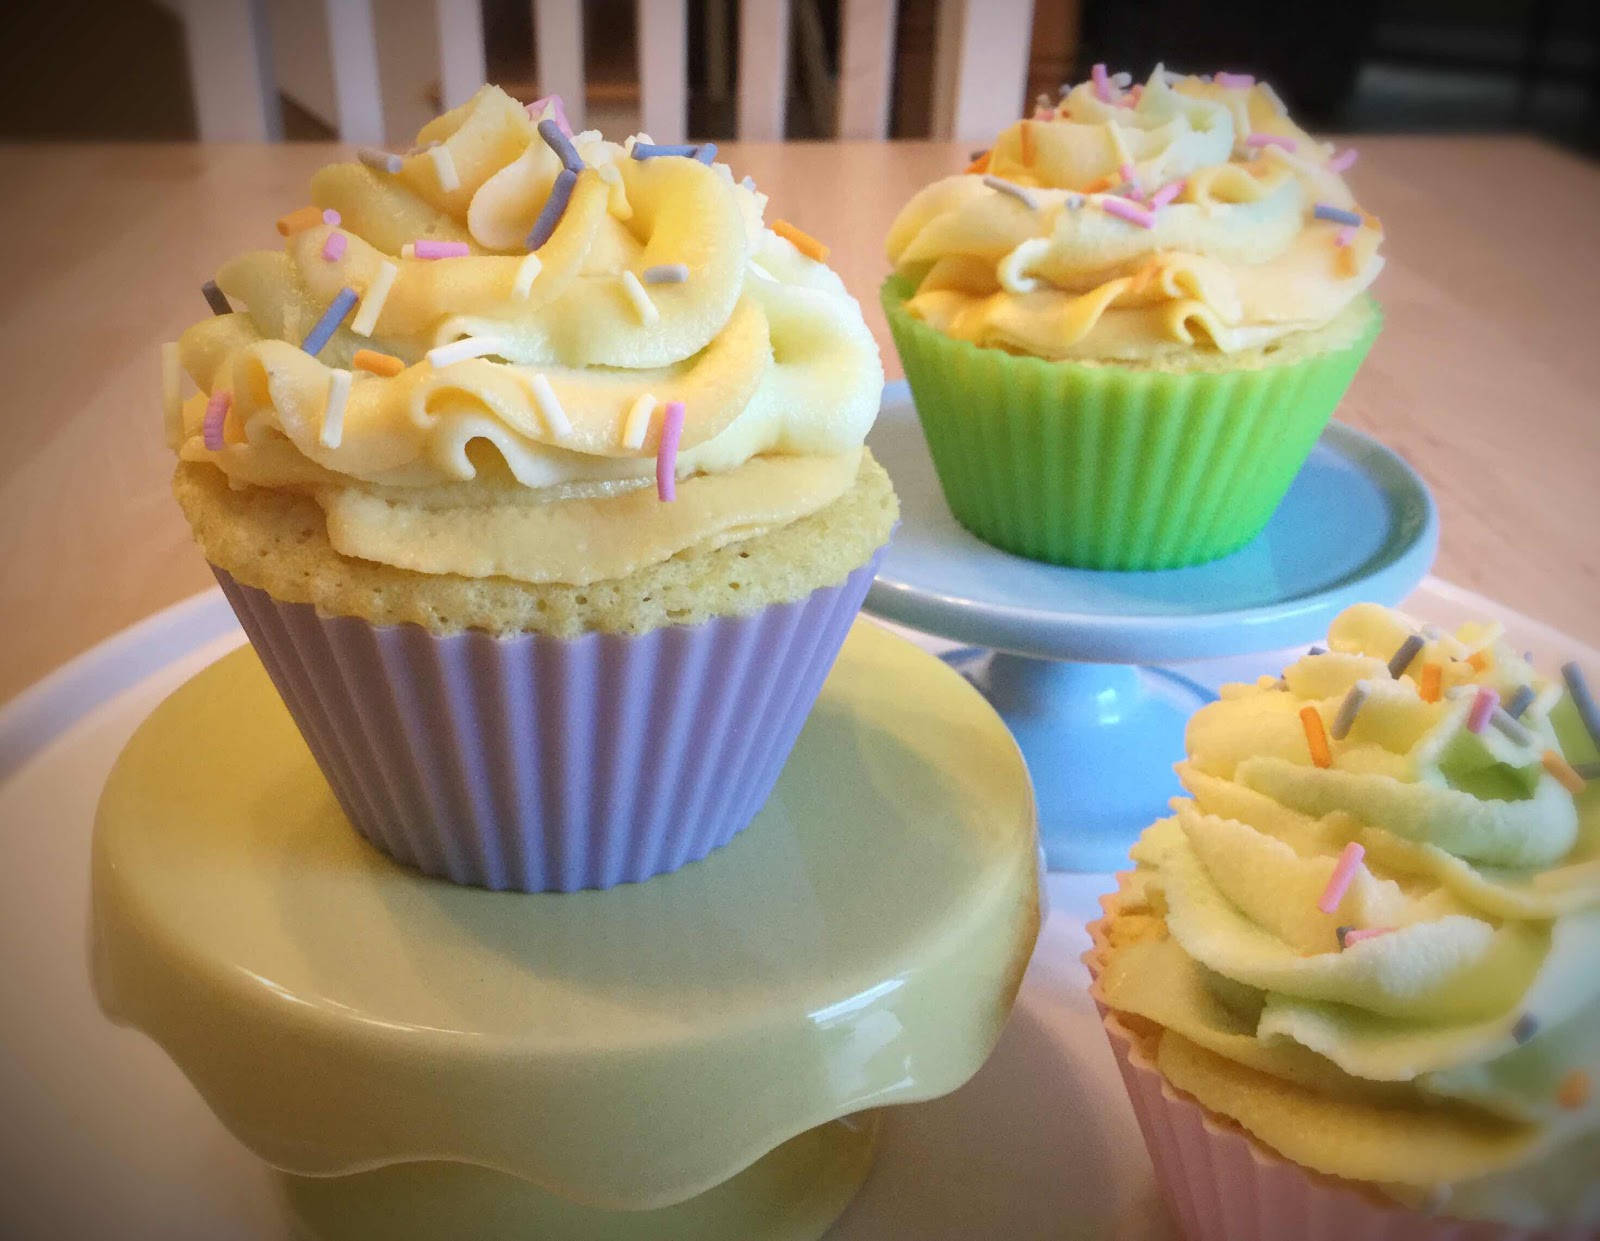
40 Second Keto Cupcakes
Nutritional Information per 1 cupcake with 3 TB frosting: 210 calories, 5 g total carbohydrates (1 g dietary fiber, 0.4 g sugars, 2.7 g sugar alcohols), 20.3 g total fat (.8 g saturated fat, 0 g trans fat), 77 mg cholesterol, 278 mg sodium, 217.8 mg calcium, 19 mg potassium, 97 ug Vit A, 2 mg Vit C, 3.6 g protein. Net carbs per serving: 2 grams

Recipe and photos by Kathy Sheehan, copyright 2020
All rights reserved. Please do not duplicate without the author’s permission.
Saturday, June 20, 2020

The Best Low Carb Chocolate Fudge Frosting

Best Low Carb Chocolate Fudge Frosting
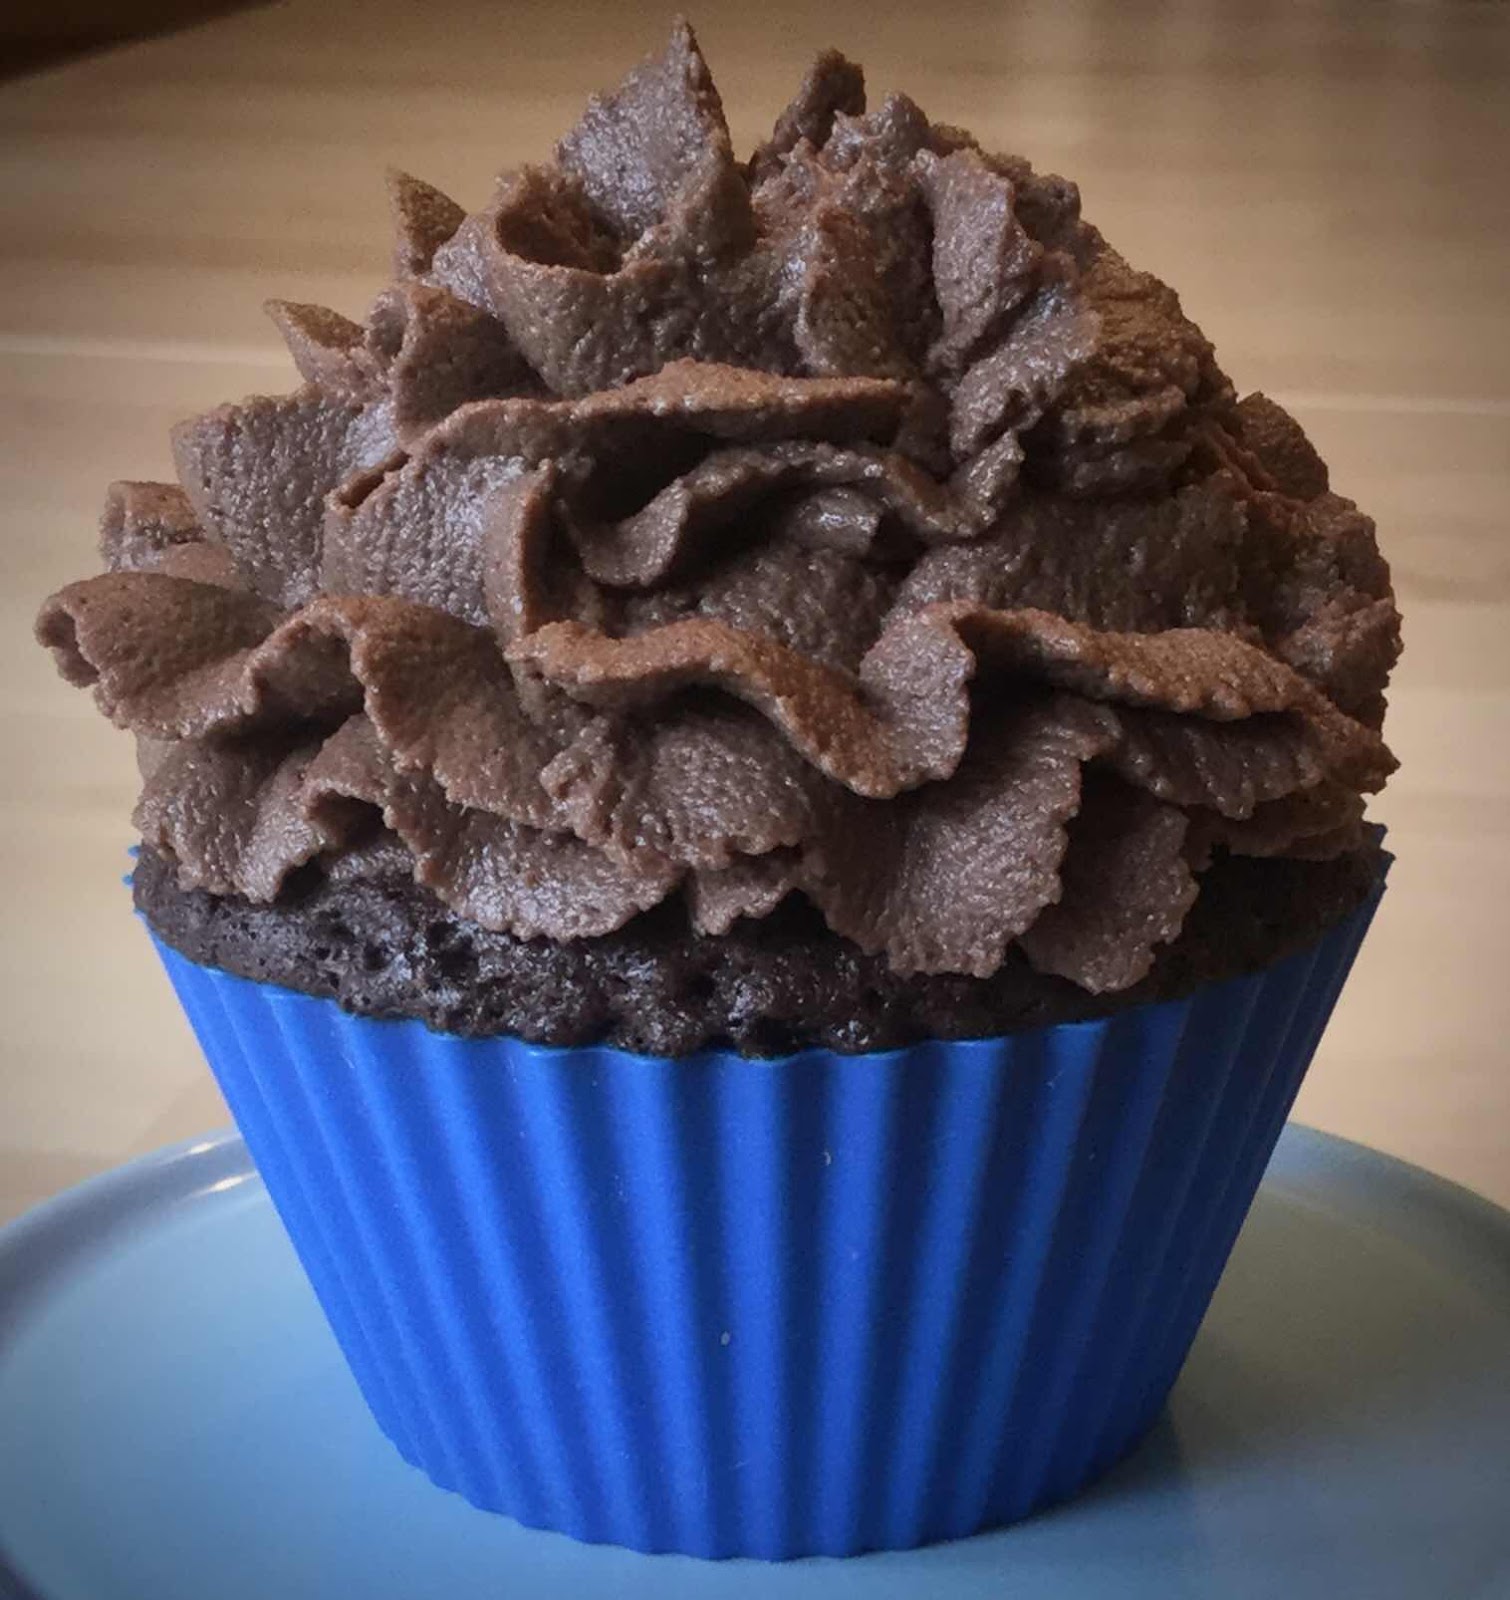
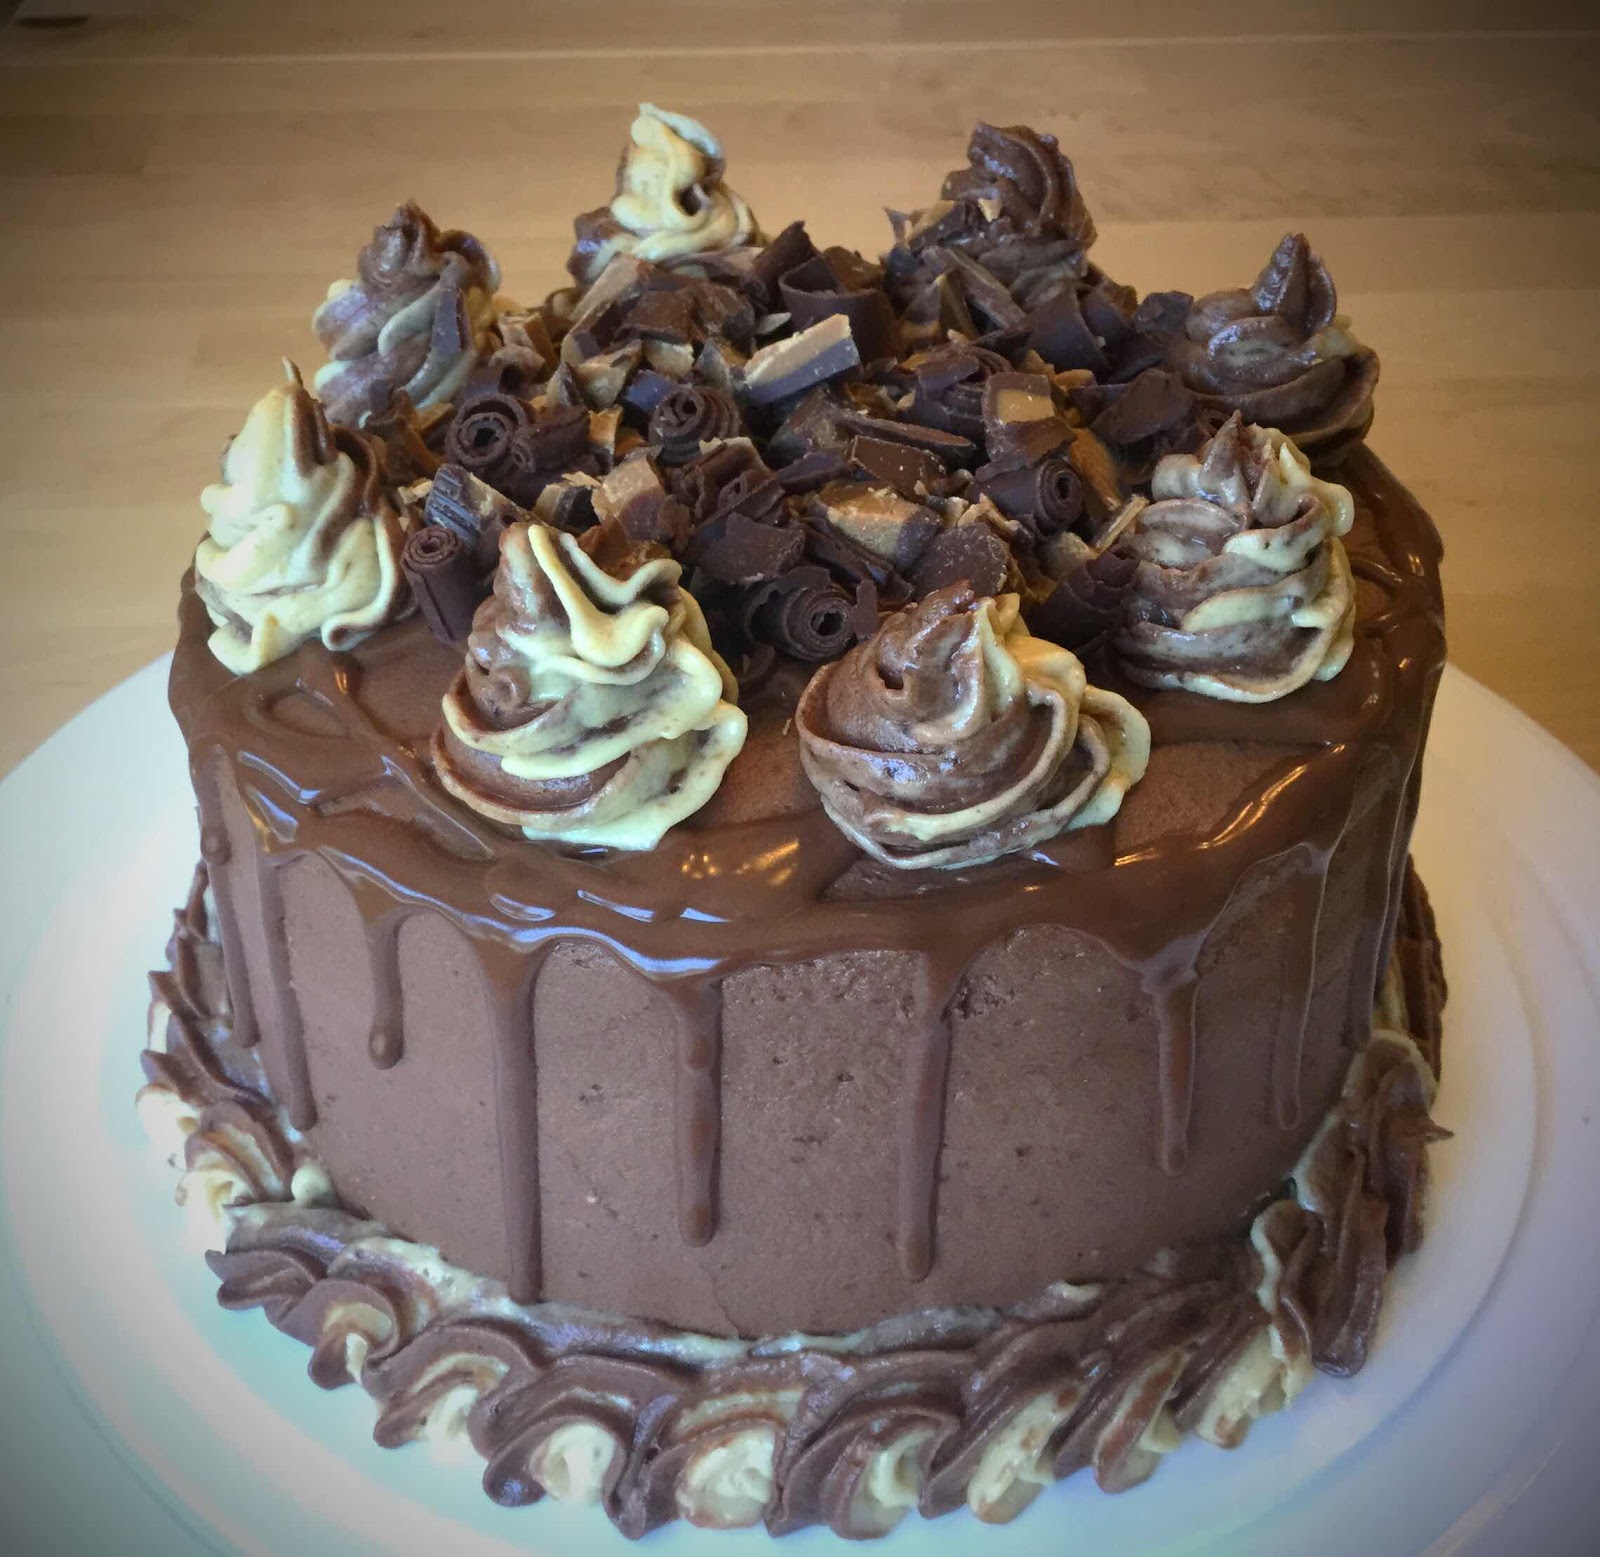
Lately I’ve enjoyed learning about cake decorating. I bought an inexpensive kit that includes a lot of fun decorating piping tips and a cake turntable, so now my keto cakes can look more professional. My first few attempts have turned out remarkably well! The biggest problem about making low carb cakes or cupcakes is that it can be difficult to get the frosting just right. I’ve tried many recipes, but have finally come up with the very best! It has the taste and consistency of a true buttercream, but only 4 carbs (3 net carbs) for a generous 1/4 cup serving. This chocolate frosting is fudgy and so rich and delicious that my non-keto family really cannot tell this is sugar free. My husband is a serious chocoholic and gave this frosting his enthusiastic nod of approval when I made him this Chocolate Peanut Butter Cake for Father’s Day.

The Best Low Carb Chocolate Fudge Frosting
Makes about 12 servings

2 ounces unsweetened baker’s chocolate, chopped
1/2 tablespoon refined coconut oil
2 tablespoons unsalted butter, room temperature
4 ounces cream cheese, softened 
8 ounces mascarpone cheese, room temperature 
2/3 cup powdered erythritol sweetener (LaKanto or Swerve)
2 tablespoons unsweetened cocoa powder
1/2 teaspoon vanilla extract
2-3 tablespoons heavy cream, room temperature (or as needed to reach the desired consistency)

1. Place the chopped baker’s chocolate and coconut oil in a microwaveable bowl. Microwave on high in 15-20 second increments until chocolate has melted. Stir until smooth. Set aside to cool to lukewarm.

2. In a large bowl and using an electric mixer, whip together the butter, cream cheese and mascarpone cheese until combined and fluffy. Add the sweetener and cocoa powder and continue beating until well combined. You may need to scrap down the sides of the bowl occasionally. 

3. Add the vanilla extract and melted chocolate and beat again to combine. Add one tablespoon of the heavy cream at a time and beat until your frosting reaches the desired, spreadable consistency. (If you’re using piping tips, make sure your frosting isn’t too stiff or thick because it may be difficult to pipe it through the tip.)

4. This recipe makes enough frosting for 16-18 cupcakes, a single layer 9” round or 13”x9” sheet cake or a double layer 6” cake. The frosting can be refrigerated but, for best results, allow to come to room temperature before frosting your cake.

Low Carb Chocolate Fudge Frosting
Nutritional Information per 1/4 cup: 186 calories, 3.7 g carbohydrates (1 g dietary fiber, 0.4 g sugars, 1 g sugar alcohols), 17.8 g total fat (11.5 g saturated fat, 0 g trans fat), 39 mg cholesterol, 47 mg sodium, 7.3 mg calcium, 1 mg potassium, 58 ug Vit A, 3.2 g protein. Net carbs per serving: 2.7 grams

Recipe and photos by Kathy Sheehan, copyright 2020
All rights reserved. Please do not duplicate without the author’s permission. 

Friday, May 29, 2020

Halibut in a Sour Cream Sauce with Buttery Onions (or Salmon)

Halibut in a Sour Cream Sauce with Buttery Onions
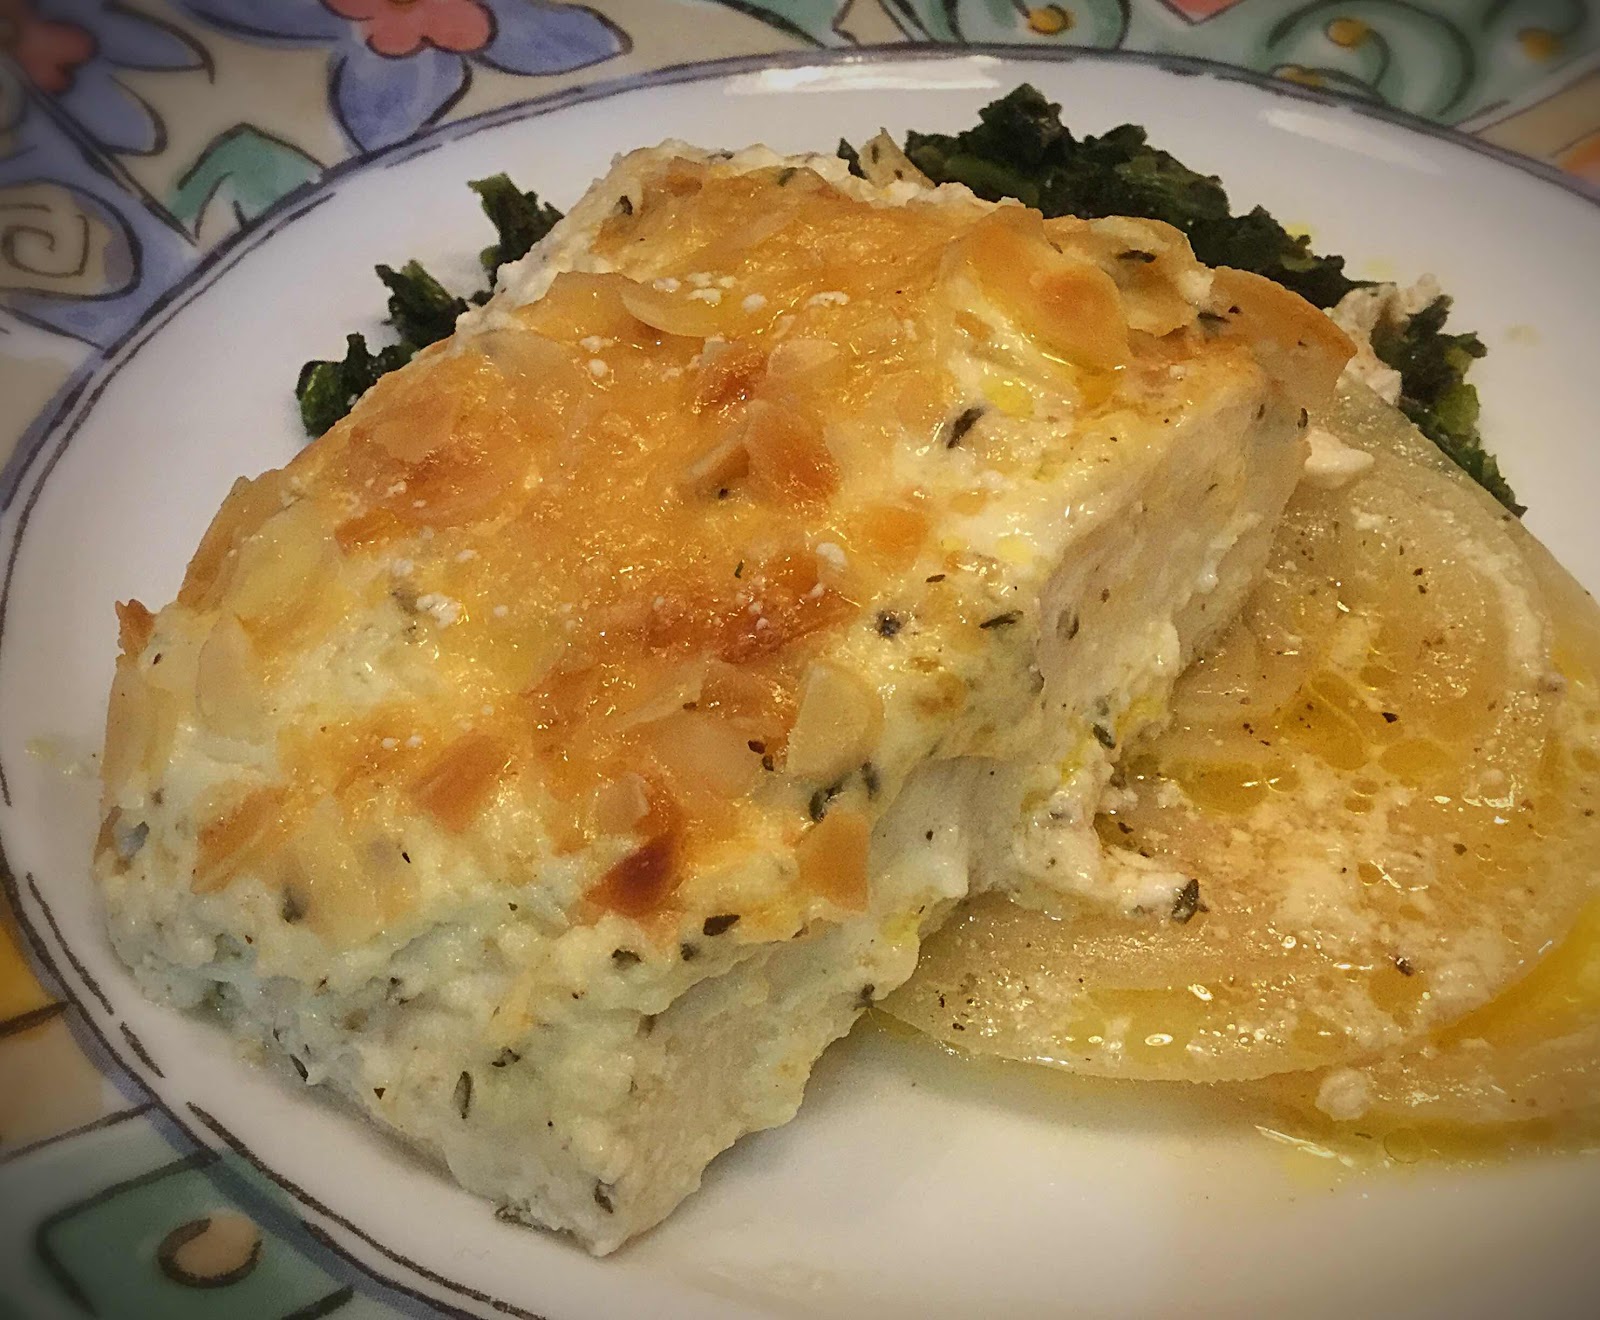
When fish is steamed in a pouch, it comes out perfectly cooked, tender and delicious! This recipe utilizes the fragrant moisture and natural sweetness of the onions to permeate the fish, giving it wonderful flavor. You can use any type of fish that you like, but I suggest a “meaty” fish, such as halibut, salmon, swordfish or tuna steaks, as they work particularly well with this cooking technique.

Halibut in a Sour Cream Sauce with Buttery Onions
Makes 2 servings

1 tablespoon cold butter, cut into 4 thin slices
2 (1/4”) onion slices from a large onion (or 4 slices from a small onion)
2 (5 oz.) halibut steaks, or fish of your choice
1/4 cup mayonnaise 
1/4 cup sour cream
1/4 teaspoon garlic powder
1/4 teaspoon dried basil
1/4 teaspoon seasoned salt
1/4 teaspoon dried thyme
1/8 teaspoon black pepper
2 tablespoons sliced almonds, coarsely chopped
2 tablespoons shredded or grated Parmesan cheese 

1. Place each onion slice on a 12” or 14” square of heavy duty foil (or a double thickness of regular foil). Place two slices of cold butter on top of each onion. Season the fish with salt and pepper on both sides and place one piece of fish on top of each onion.

2. In a small bowl, mix together the mayonnaise, sour cream and seasonings. Set aside a couple of tablespoons for serving. Divide the remaining sauce between the two pieces of fish and spread to cover. Sprinkle each with one tablespoon of the almonds and one tablespoon of Parmesan cheese. Fold the foil around each piece of fish, sealing tightly, to create two puffed pouches, allowing for a little space over the fish so the steam can circulate and the sauce won’t be disturbed during cooking. (This step can be done ahead and the pouches refrigerated, if desired. Before cooking, remove the pouches from the refrigerator and allow to sit at room temperature for at least 20 minutes.)

3. Grill Method: Grill, covered, over indirect medium heat for 15-20 minutes or until the fish flakes easily with a fork and the internal temperature of the fish reaches 135 degrees Fahrenheit.

4. Oven Method: Preheat the oven to 350 degrees Fahrenheit. Place foil pouches on a baking sheet and bake for 22-24 minutes or until the fish flakes easily with a fork and the internal temperature reaches 135 degrees.

5. If desired, at the end of cooking, you can open the top of each pouch and broil for a few minutes until the almonds turn golden brown and the Parmesan cheese bubbles. With a spatula, carefully remove the onion and the fish onto serving plates. Drizzle the accumulated liquid from the pouch over the top of the fish and serve immediately. (I like to serve this over sautéed spinach.) Serve the reserved sour cream sauce on the side.

Nutritional Information per serving (made with halibut): 565 calories, 7.2 g carbohydrate (1.8 g dietary fiber, 2 g sugars), 40 g total fat (11.9 g saturated fat, 0 g trans fat), 98 mg cholesterol, 536 mg sodium, 213.6 mg calcium, 924 mg potassium, 2 mg iron, 192 ug Vit A, 3 mg Vit C, 42.5 g protein. Net carbs per serving: 5.4 grams

Photo and recipe by Kathy Sheehan, copyright 2020
All rights reserved. Please do not duplicate without the author’s permission. 
Wednesday, May 27, 2020

Keto Cinnamon Applesauce

Low Carb Applesauce
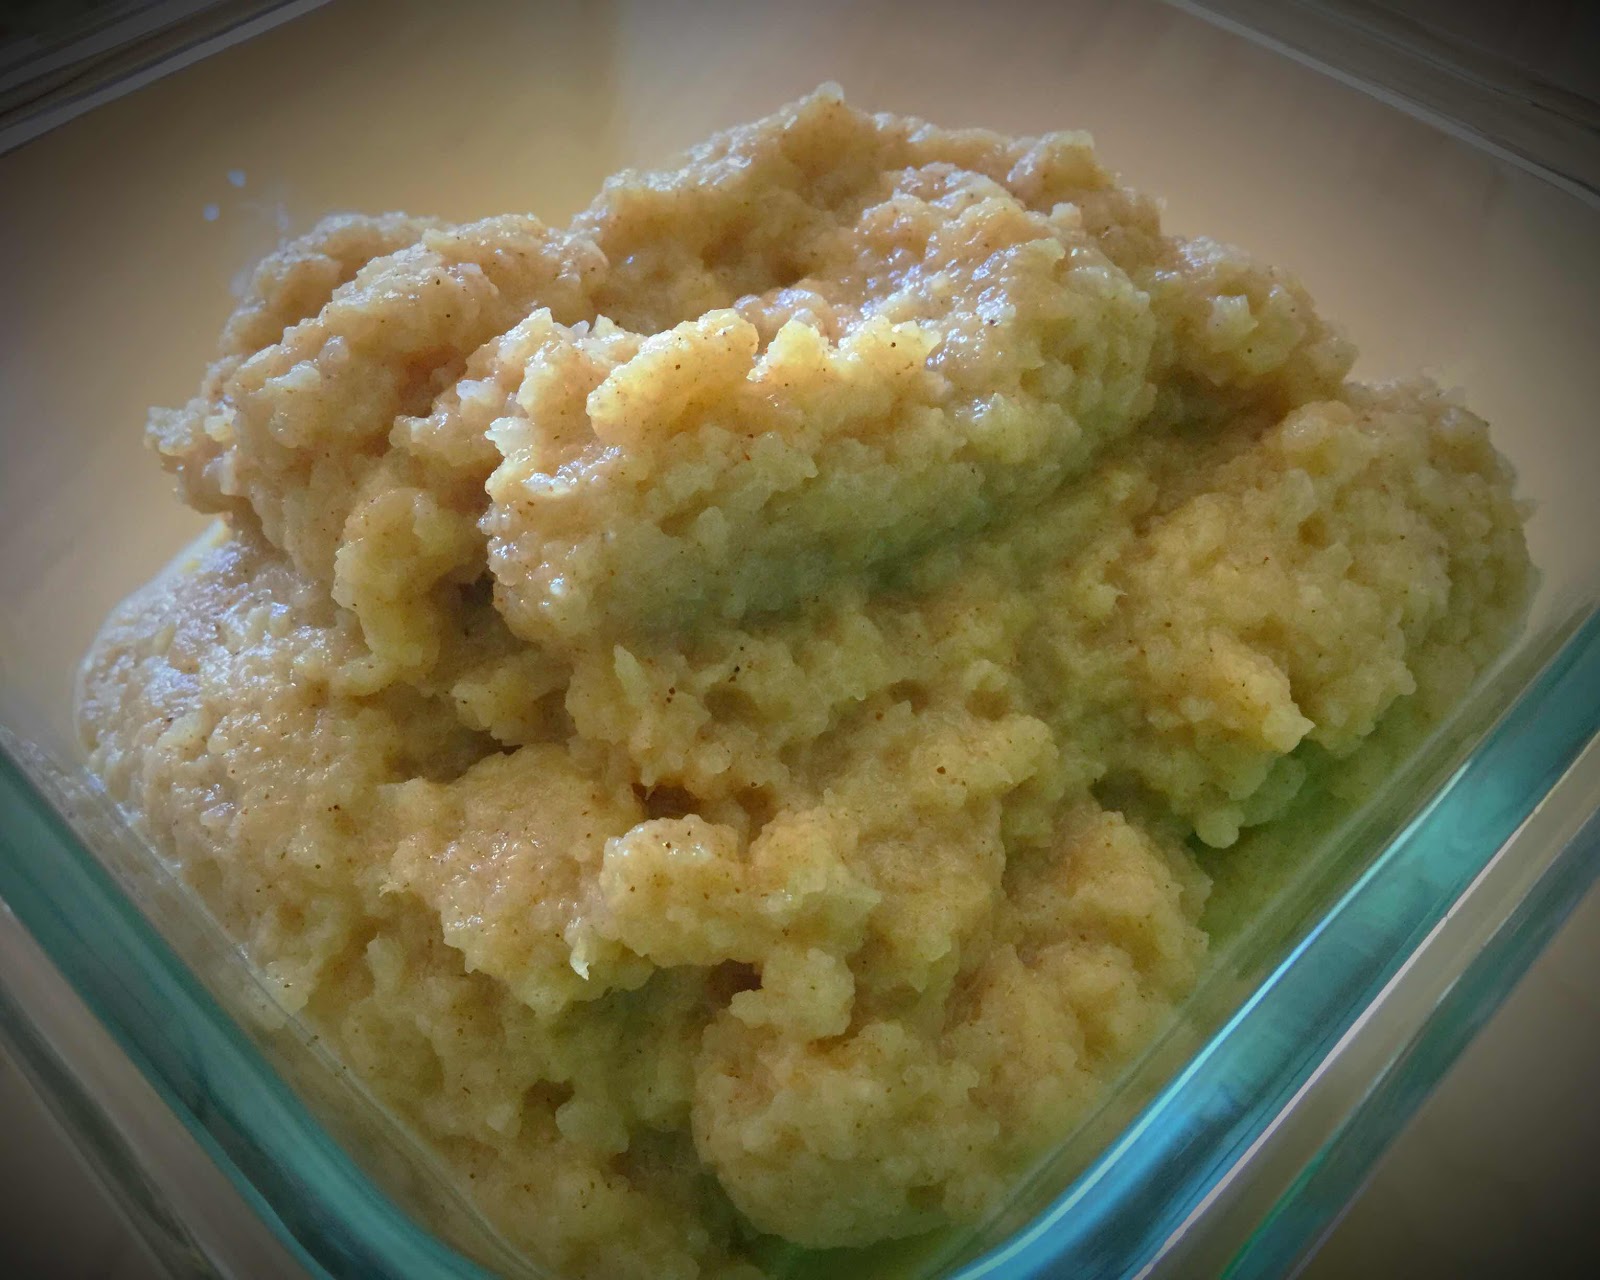
I have always loved applesauce! But, sadly, it’s so high in carbs and sugar that it is completely off limits on my low carb, ketogenic diet. Ordinary applesauce that you buy in the store is 16 carbs for a 1/3 cup serving, all of which is sugar! (That equals 4 teaspoons of sugar!) This “applesauce,” made with chayote squash, tastes just like the real thing and has only 5 carbs per serving (3 net carbs) and is a good source of calcium and potassium! Honestly, you and your kids will not be able to tell the difference. You can make it chunky or smooth and add as much cinnamon as you like. It can be used in recipes, enjoyed over low carb ice cream, in yogurt or eaten by itself. It’s a treat you can feel good about!

Keto Cinnamon “Applesauce” (made with Chayote Squash)
Makes 3 servings

1 tablespoon butter (can be omitted for dairy free)
2 cups chayote squash, peeled, cored and diced fine (2-3 squash, depending on size)
1 tablespoon LaKanto Golden or other brown erythritol sweetener 
1 tablespoon granulated erythritol sweetener (or use all brown)
1 teaspoon ground cinnamon or apple pie spice
2 tablespoons lemon juice
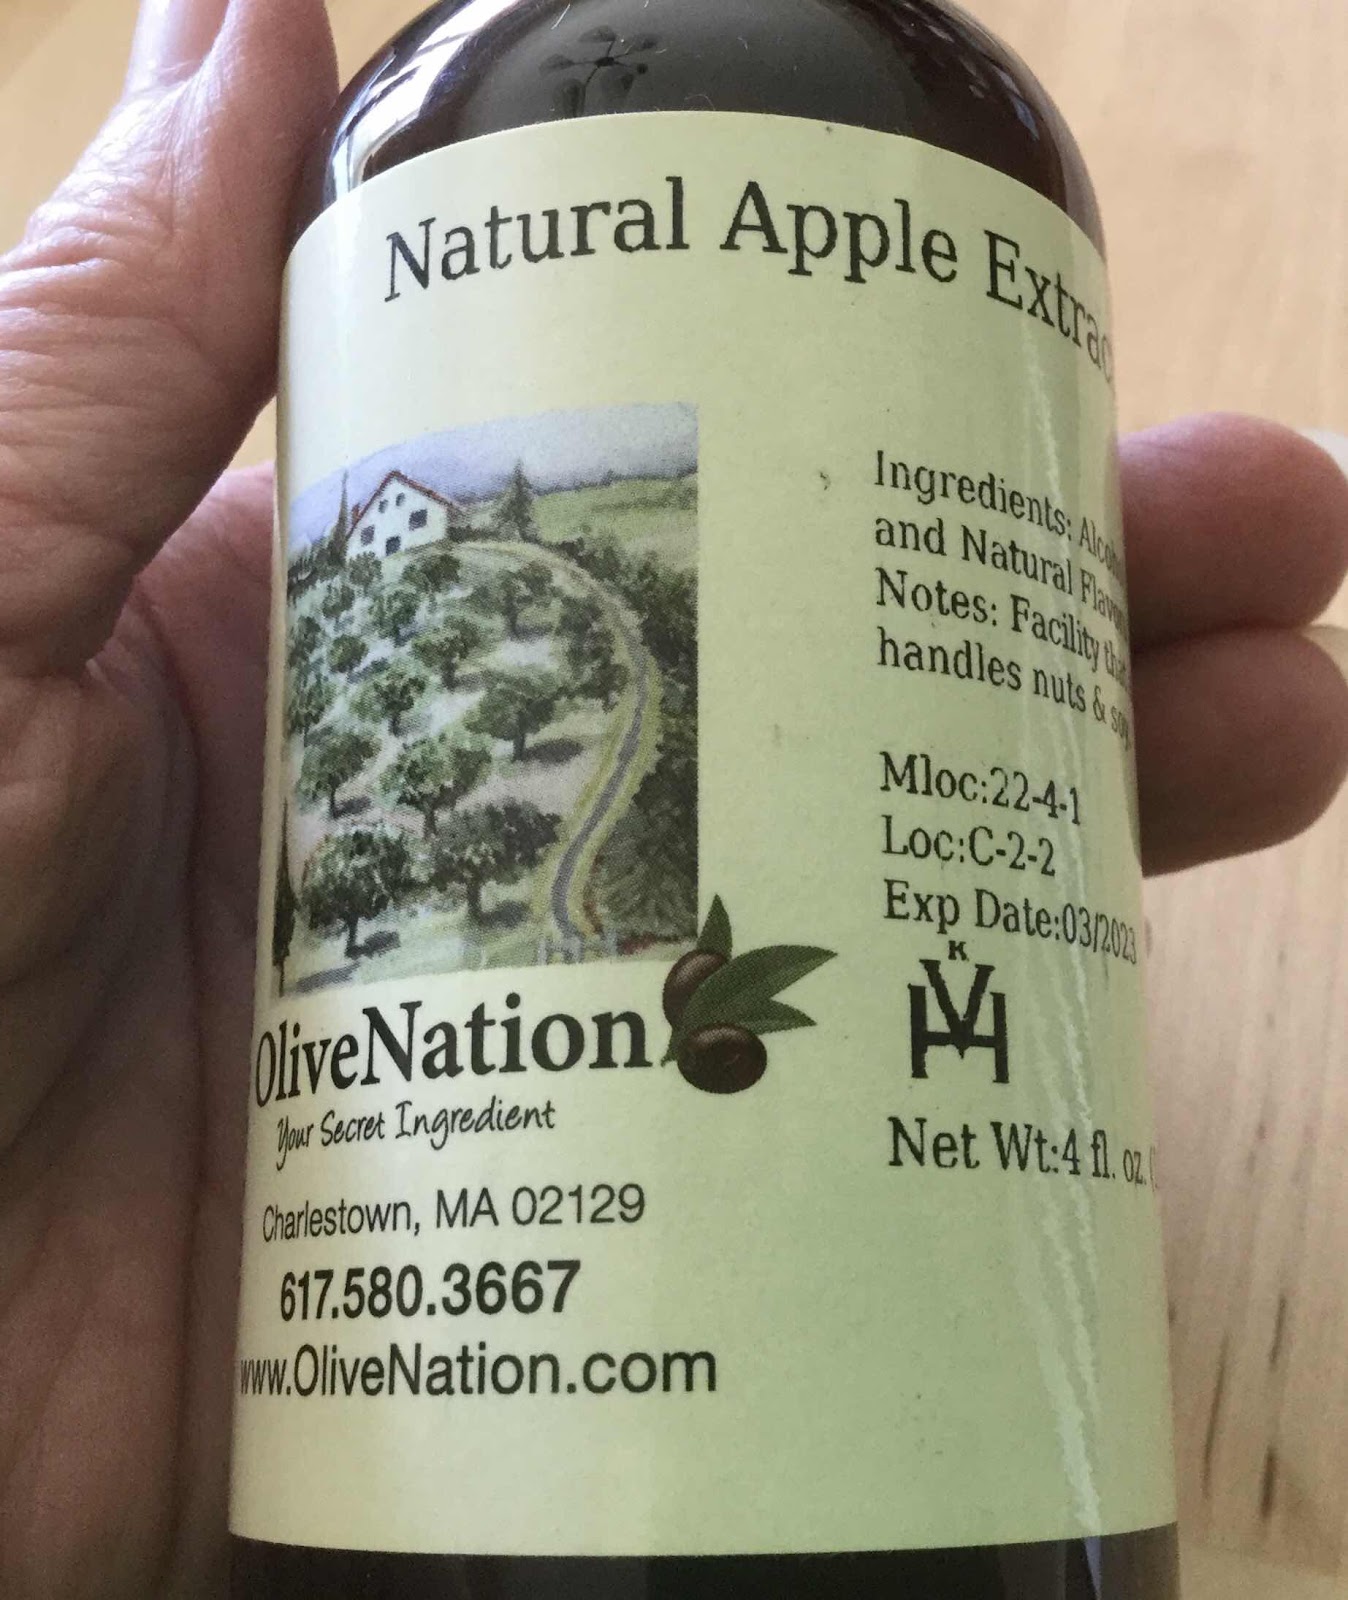
3/4 teaspoon apple extract, or to taste (see photo below)
6-8 drops monkfruit extract or stevia, to taste
3/4 cup water + 2-4 tablespoons water, divided

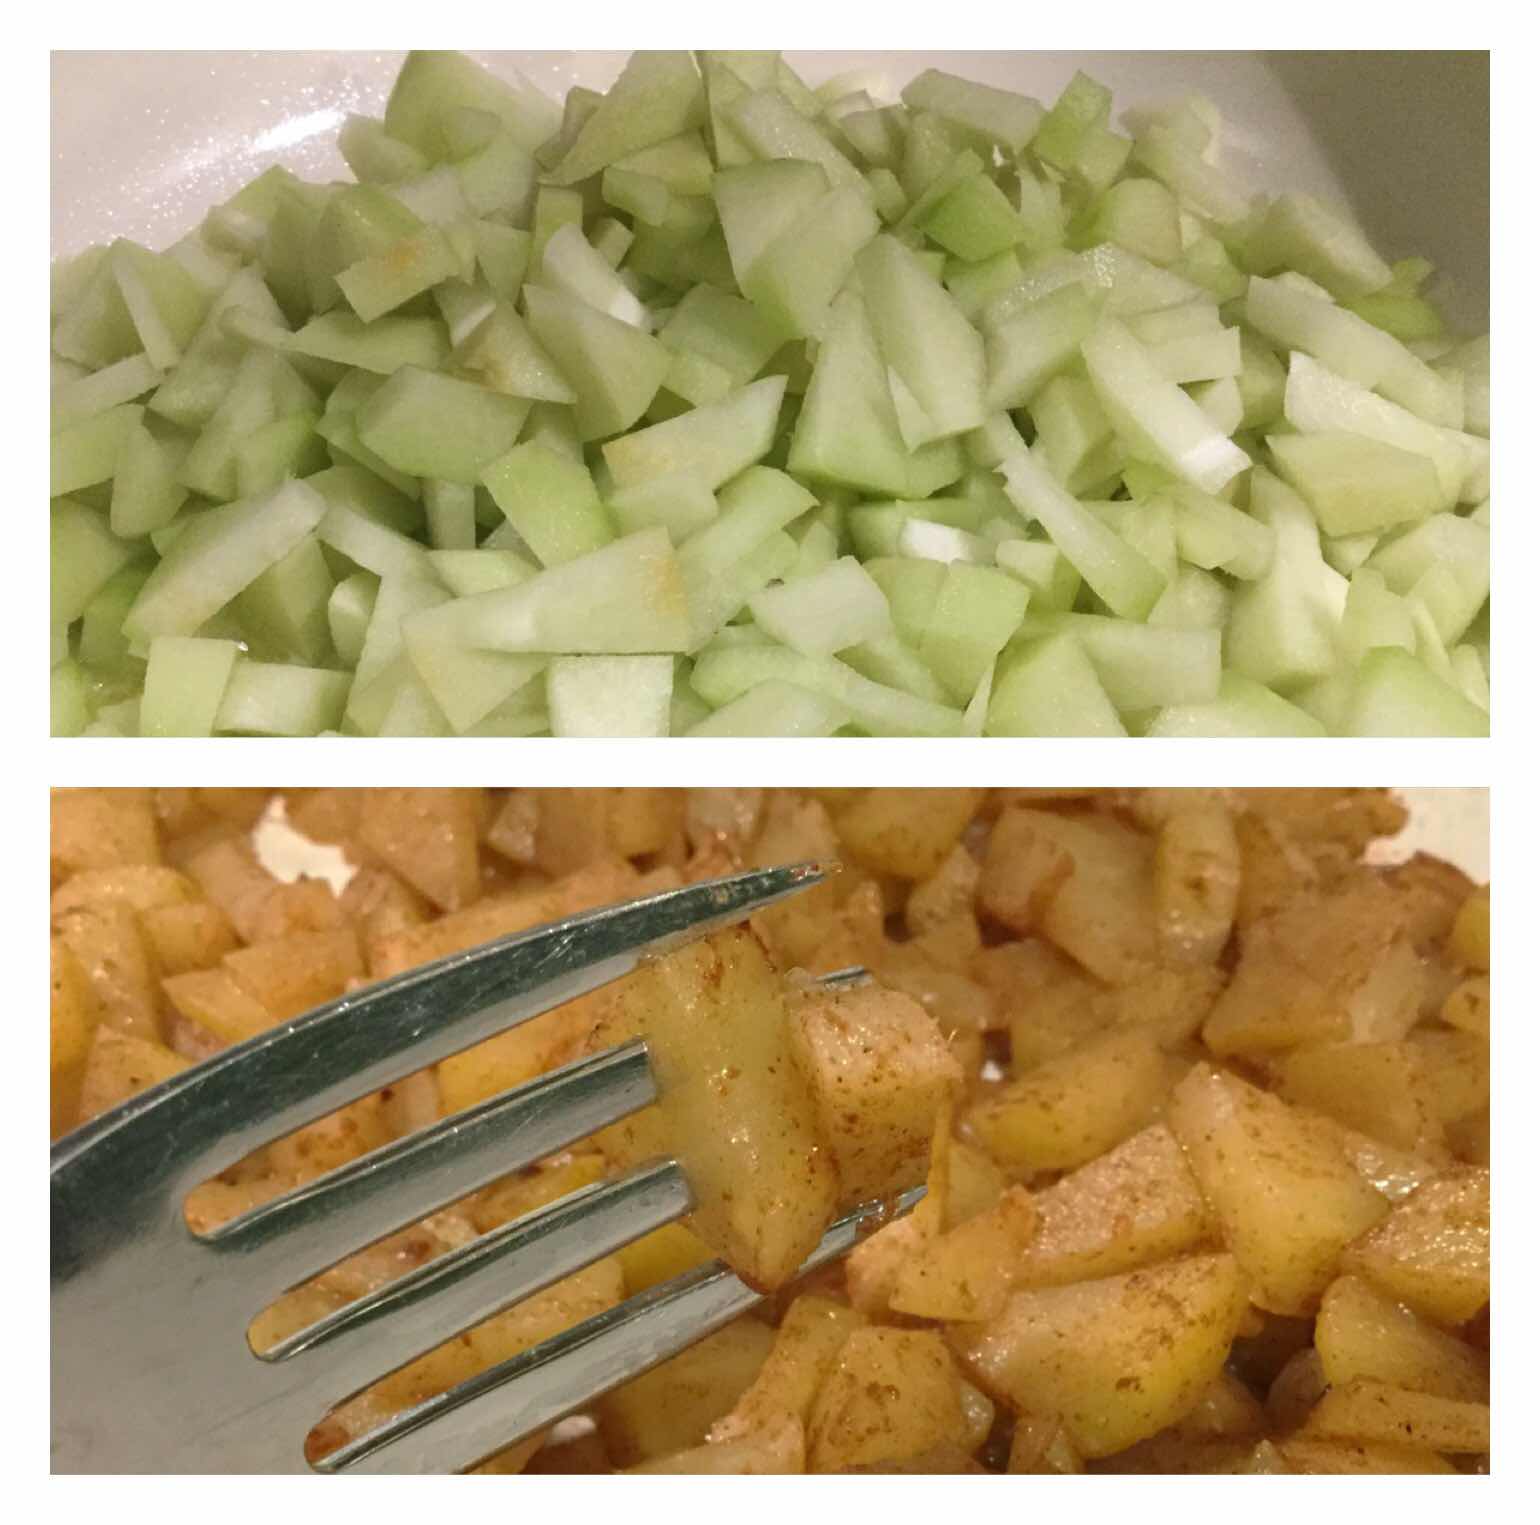
1. In a non-stick, 10 inch skillet, combine the butter, chayote squash, sweeteners, cinnamon or apple pie spice, lemon juice, apple extract and 3/4 cup of water. Simmer over a low heat, covered tightly, for about 35 minutes or until softened. Stir occasionally and, if the mixture is drying out, add a bit more water and continue simmering until most of the liquid has evaporated and the squash is fork tender, very soft and no longer has any crunch. Add the monkfruit extract or stevia, taste and adjust sweetness, if desired.

Cooking Chayote Squash 2. Remove from heat and allow the squash to sit covered in the warm skillet for at least 10 minutes to allow the flavors to blend. 

3. Spoon the warm “apples” into a food processor. Pulse and then process on low until finely chopped, scraping down the sides of the bowl with a spatula occasionally. Add 2-4 tablespoons of water, one tablespoon at a time, and continue to process until the sauce is smooth and has reached the consistency you desire.

4. The applesauce can be eaten immediately, warm or cold, or can be stored in an airtight container for up to a week. This recipe makes about 1 cup.

OliveNation Apple Extract
Nutritional Information per 1/3 cup: 56 calories, 5 g carbohydrates (2 g dietary fiber, 2 g sugars), 4 g total fat (2.5 g saturated fat, 0 g trans fat), 10 mg cholesterol, 29 mg sodium, 26.3 mg calcium, 129 mg potassium, 1 mg iron, 51 ug Vit A, 12 mg Vit C, 0.8 g protein. Net carbs per serving: 3 grams

Photos and recipe by Kathy Sheehan, copyright 2020
All rights reserved. Please do not duplicate without the author’s permission.
Tuesday, May 12, 2020

Low Carb Deep Dish, Chicago-Style Sausage Pizza

Low Carb Deep Dish, Chicago-style Pizza
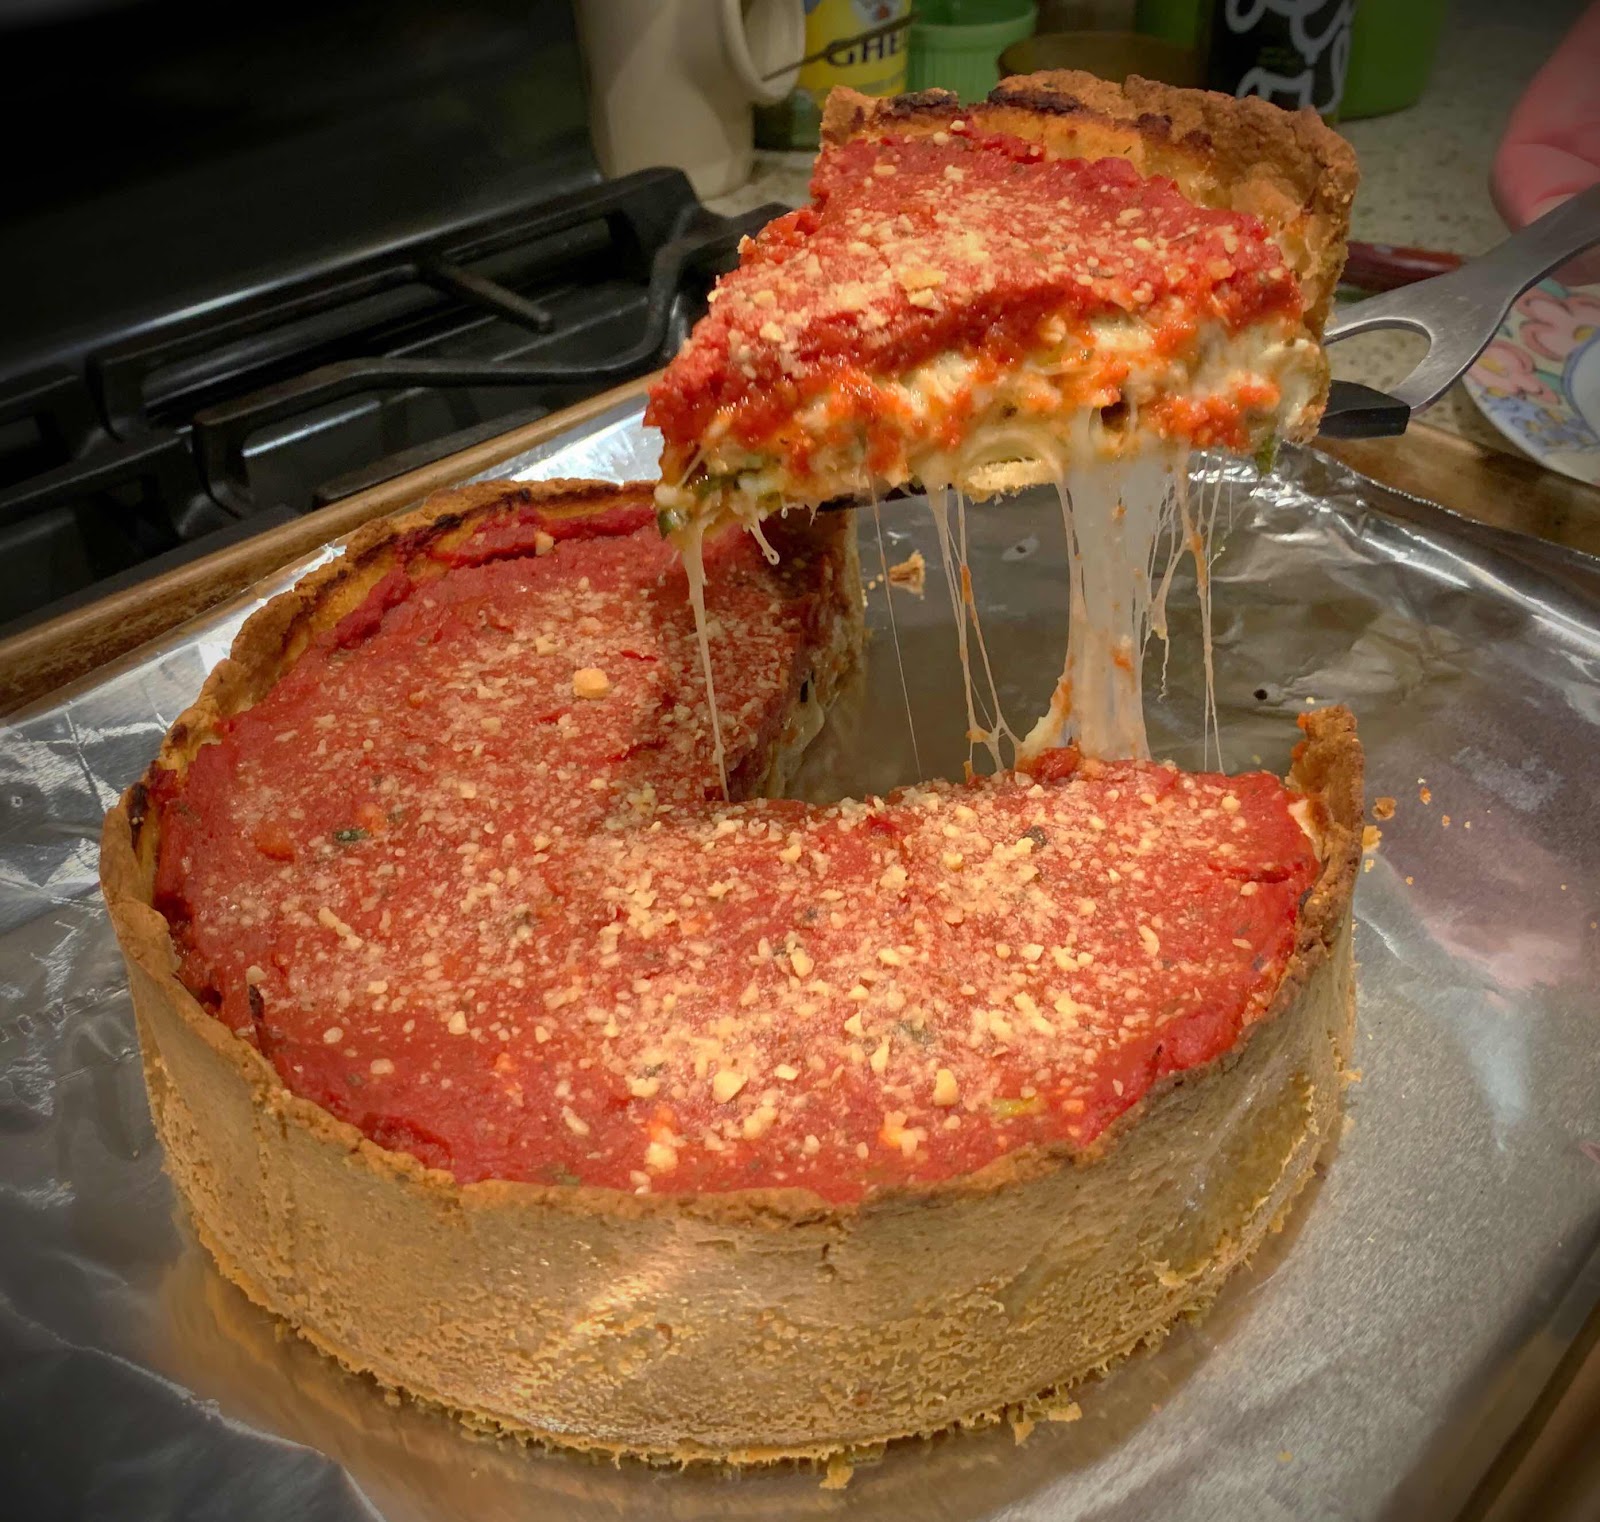
This is one of the most outstanding recipes I’ve ever made and tastes so much like the real thing, no one will be able to tell it’s low carb and gluten free. The dough comes together quickly in a food processor and really holds up during the baking process. The result is a crisp crust overflowing with gooey, melted cheese, savory Italian sausage and tangy tomato sauce in every bite. Believe me, if you like Uno’s Pizza, you and your family will be delighted with this copy-cat recipe. Fill the pizza with any fillings you desire to make it your own.

Low Carb Deep Dish, Chicago-Style Sausage Pizza
Makes 6 servings

Sauce:
26 oz. box of Pomi chopped tomatoes, drained of excess liquid (yields about 1 1/4 cup)
3 cloves garlic, minced
3/4 teaspoon dried oregano
1/4 teaspoon salt (or to taste)

Pizza Crust:
3/4 cup almond flour
3 tablespoons Keto Birch Benders Pancake Mix (or more almond flour)
1/4 cup coconut flour
1 tablespoon psyllium husk powder (I use this Terrasoul brand)
1 teaspoon baking powder
1/4 teaspoon salt
3/4 teaspoon dried Italian herb seasoning
3 tablespoons olive oil (or avocado oil)
1 large egg
3 tablespoons cold water
2 tablespoons grated Parmesan cheese (for dusting inside of pan)

Filling:
6 ounces provolone cheese, sliced
1 pound Italian pork sausage
Sliced black olives (optional)
Sliced mushrooms, heated in skillet until they release their moisture (optional)
6 ounces mozzarella, shredded (whole milk cheese melts better!)

Topping:
3/4 cup grated Parmesan cheese

1. Preheat the oven to 350 degrees Fahrenheit. Grease a 9-inch springform pan very well and sprinkle with 2 tablespoons of finely grated Parmesan cheese, moving the pan around until the bottom and sides are coated; set aside.

2. If using mushrooms, heat over medium heat in a dry skillet until the mushrooms have released their moisture; remove to a bowl and set aside. Remove the sausage from their casings and sauté in the same skillet, breaking up into crumbles, until just cooked through. Drain on a plate that has been lined with several layers of paper towels to remove excess fat; set aside. 

3. Pour the chopped tomatoes into a fine-mesh strainer that has been placed over a bowl to catch excess liquid. Drain, stirring occasionally with a spoon, until most of the liquid has been removed. You want a thick, chunky sauce. Place the tomato sauce into a bowl and add the garlic, oregano and salt; stir to combine and set aside. (Discard or store the drained liquid in the refrigerator for another use.) 

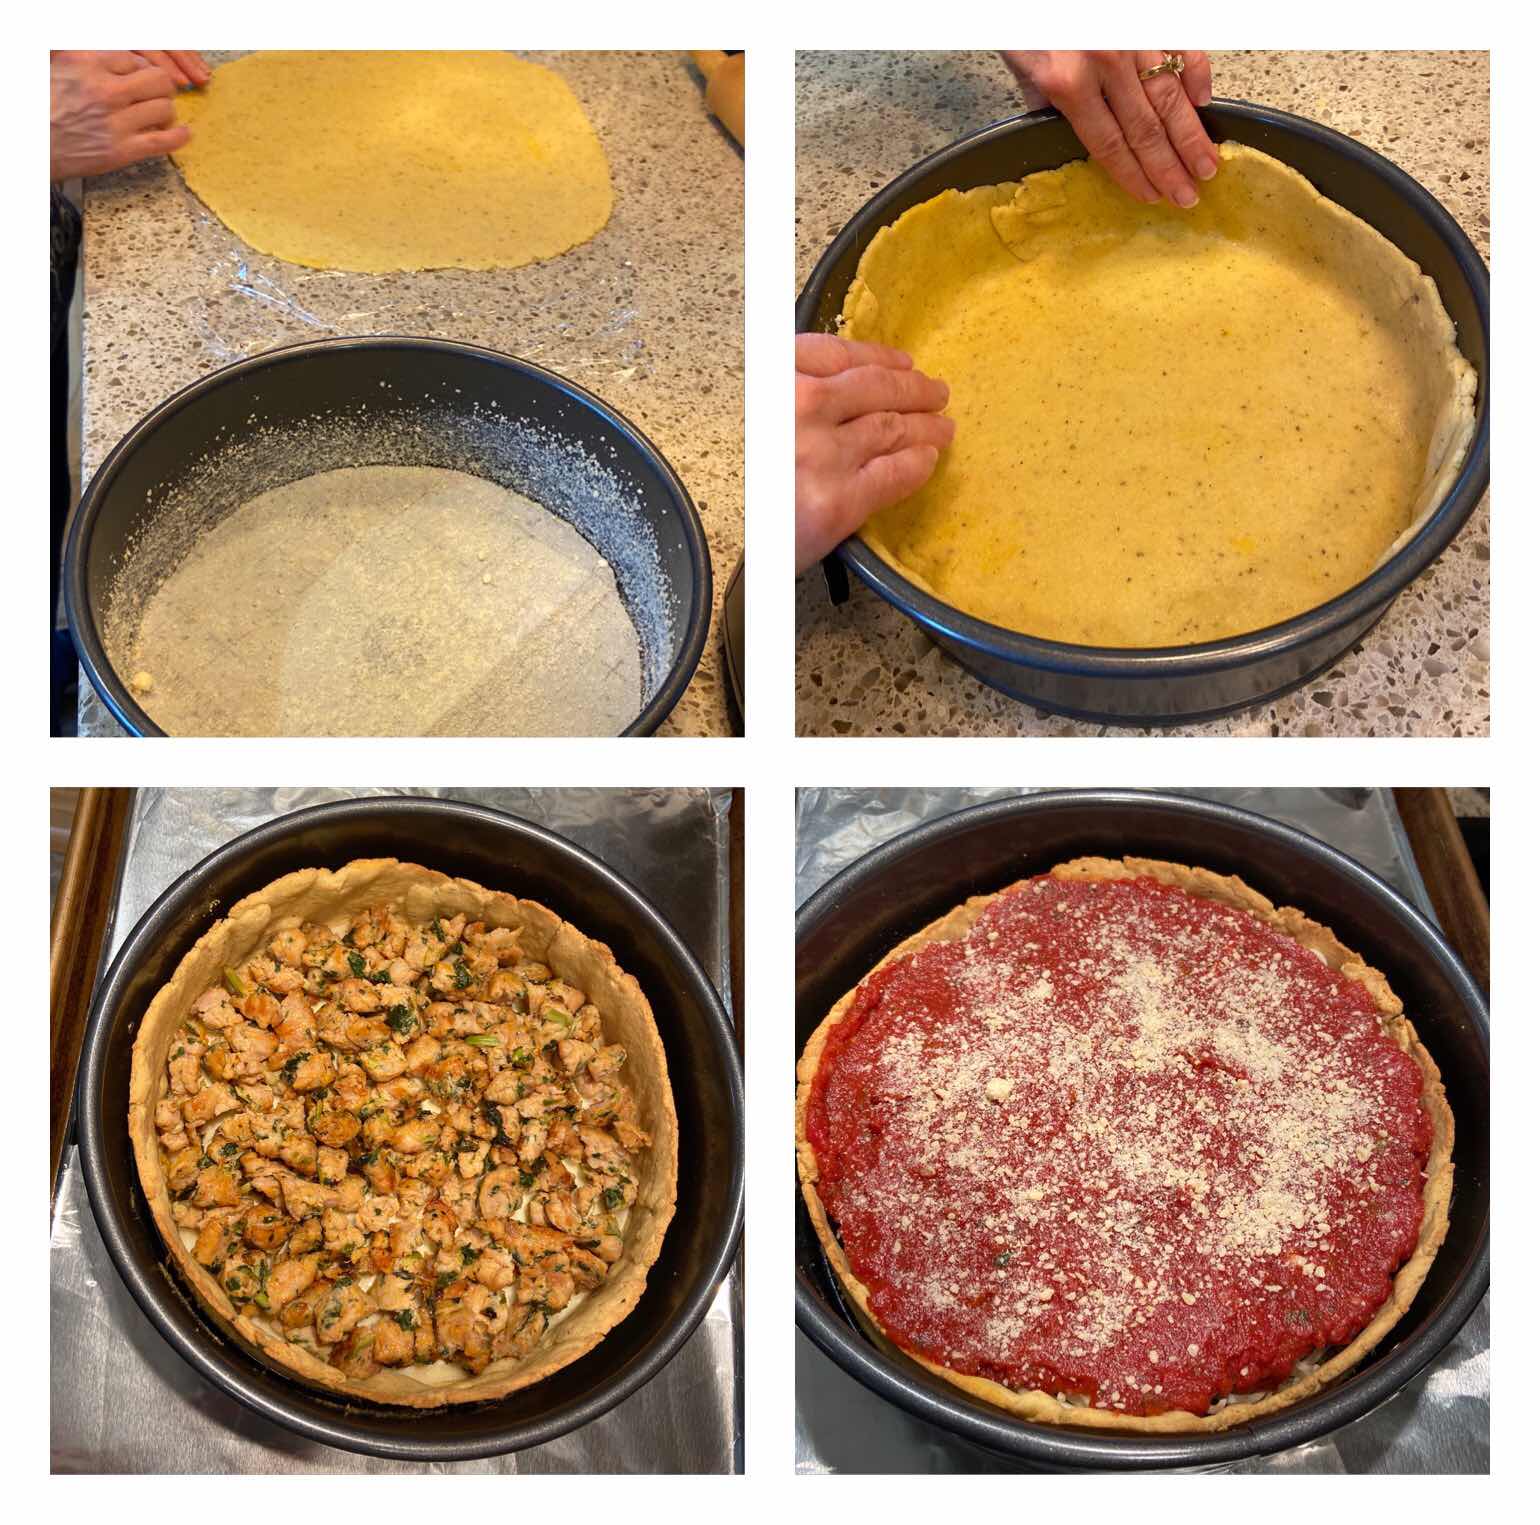
4. Place the dry ingredients for the crust into the food processor and pulse to combine. Add the olive oil, egg and water and process on low until the dough comes together and forms into a ball. Roll the dough out between two pieces of plastic wrap (or parchment paper) into a 12-inch circle. Remove the top piece of plastic wrap and turn the dough into your prepared springform pan, dough side down. Remove the remaining layer of plastic wrap and then, with your fingers, gently press the dough into the pan. “Cut and paste” the dough evenly in the pan and part way up the sides (just tear and press where needed). Once the dough is pressed into the pan, prick the bottom with a fork.

5. Pre-bake the crust in the preheated 350 degree oven for 15 minutes. Remove the crust from the oven and allow to cool for a few minutes before filling. Meanwhile, increase the oven temperature to 410 degrees.

6. Into the pre-baked crust, put down a layer of sliced provolone cheese to cover the entire bottom of the crust. Spread the cooked sausage and any other optional fillings you desire on top of the provolone cheese in an even layer. Next, add a layer of shredded mozzarella over the fillings. Top the layer of shredded cheese with the drained and seasoned chunky tomato sauce, spreading with the back of a spoon to cover the cheese layer entirely. Finally, sprinkle the sauce with 3/4 cup grated Parmesan cheese.

Pizza crust and layering fillings7. Place the pan on a baking sheet (in case the filling leaks). Bake for 30-35 minutes or until the Parmesan cheese has turned a golden color and the melted mozzarella cheese you can see below the sauce is bubbly.
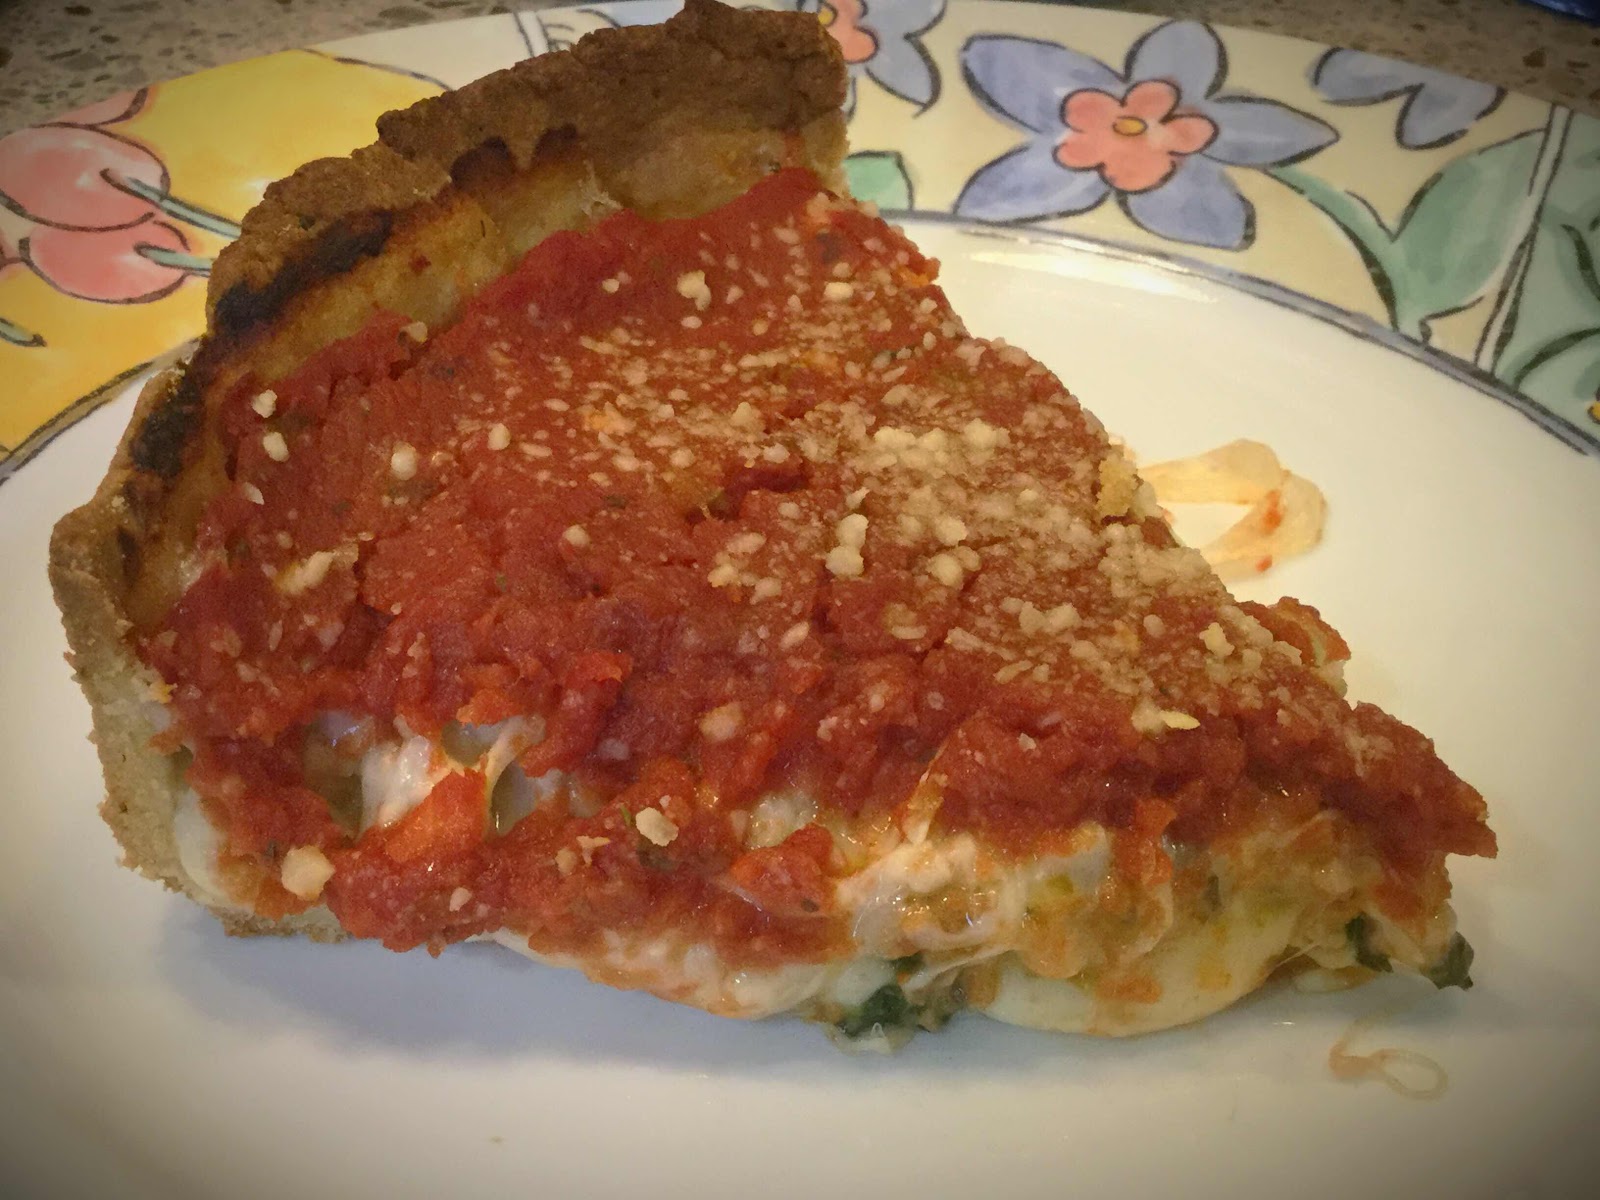
8. Remove the pizza from the oven and allow to cool for at least 10 minutes before slicing. Enjoy!

Slice of Deep Dish Pizza
Nutritional Information per 1/6th of pizza: 588 calories, 13.5 g carbohydrates (5.1 g dietary fiber, 3.2 g sugars), 41.8 g total fat (15.6 g saturated fat, 0 g trans fat), 123 mg cholesterol, 1292 mg sodium,  651.4 mg calcium, 169 mg potassium, 2 mg iron, 169 ug Vit A, 38.9 g protein. Net carbs per serving: 8.4 grams

Photos and recipe by Kathy Sheehan, copyright 2020
All rights reserved. Please do not duplicate without the author’s permission.