Showing posts with label alternative flours. Show all posts

Friday, March 5, 2021

Make Your Own Low Oxalate, Low Carb Macadamia Nut Flour

Low Oxalate, Low Carb Macadamia Nut Flour
I am a Type 1 diabetic and a kidney stone former. My doctor has recommended a low oxalate diet to prevent (or at least reduce or slow down) the formation of calcium oxalate stones in the future. This new development was a blow to me since I eat a very low carb, ketogenic diet to control my blood glucose, which typically includes a lot of nuts! Almond flour was my go-to alternative to wheat flour and I’ve been living on it for the past 8 years, consuming it almost every day. I was told that all nuts have oxalate, some more than others. I’ve since learned that almonds are the nut that is highest in oxalate content, about 400mg per 1/2 cup of almond flour! (Goodbye almonds.) Macadamia nuts, on the other hand, contain oxalate but at a much lower level, about 32mg per 1/2 cup of raw nuts. I’ve switched from making homemade almond milk to making a macadamia-coconut milk blend and like it even better. The best part is that the leftover solids, after straining the nut milk, give me a beautiful, finely ground macadamia nut flour that can’t be purchased anywhere. One-half cup of my macadamia nut flour weighs 20 grams and only contains 9.5mg of oxalate! Even lower is coconut flour which contains 4.5mg of oxalate per 1/2 cup. By substituting macadamia nut flour for almond flour in recipes really has lightened my oxalate load, while still allowing me to enjoy baking low carb, gluten free treats.

Low Oxalate, Low Carb Macadamia Nut Flour
Makes about 1 cup of flour

1 cup of raw macadamia nuts, soaked overnight
4 cups of water

1. First, make a batch of macadamia nut milk by draining the soaked nuts, then blitzing them with 4 cups of water in a blender on high. This only takes a couple of minutes. Using a nut milk bag or other fine mesh strainer, strain the nut solids from the milk. Add a pinch of salt and a couple of drops of vanilla to your macadamia nut milk and stir. (If desired, add 1-2 drops of monkfruit extract or stevia). Pour the milk into a glass container or quart mason jar and refrigerate. Consume the milk within 5 days.
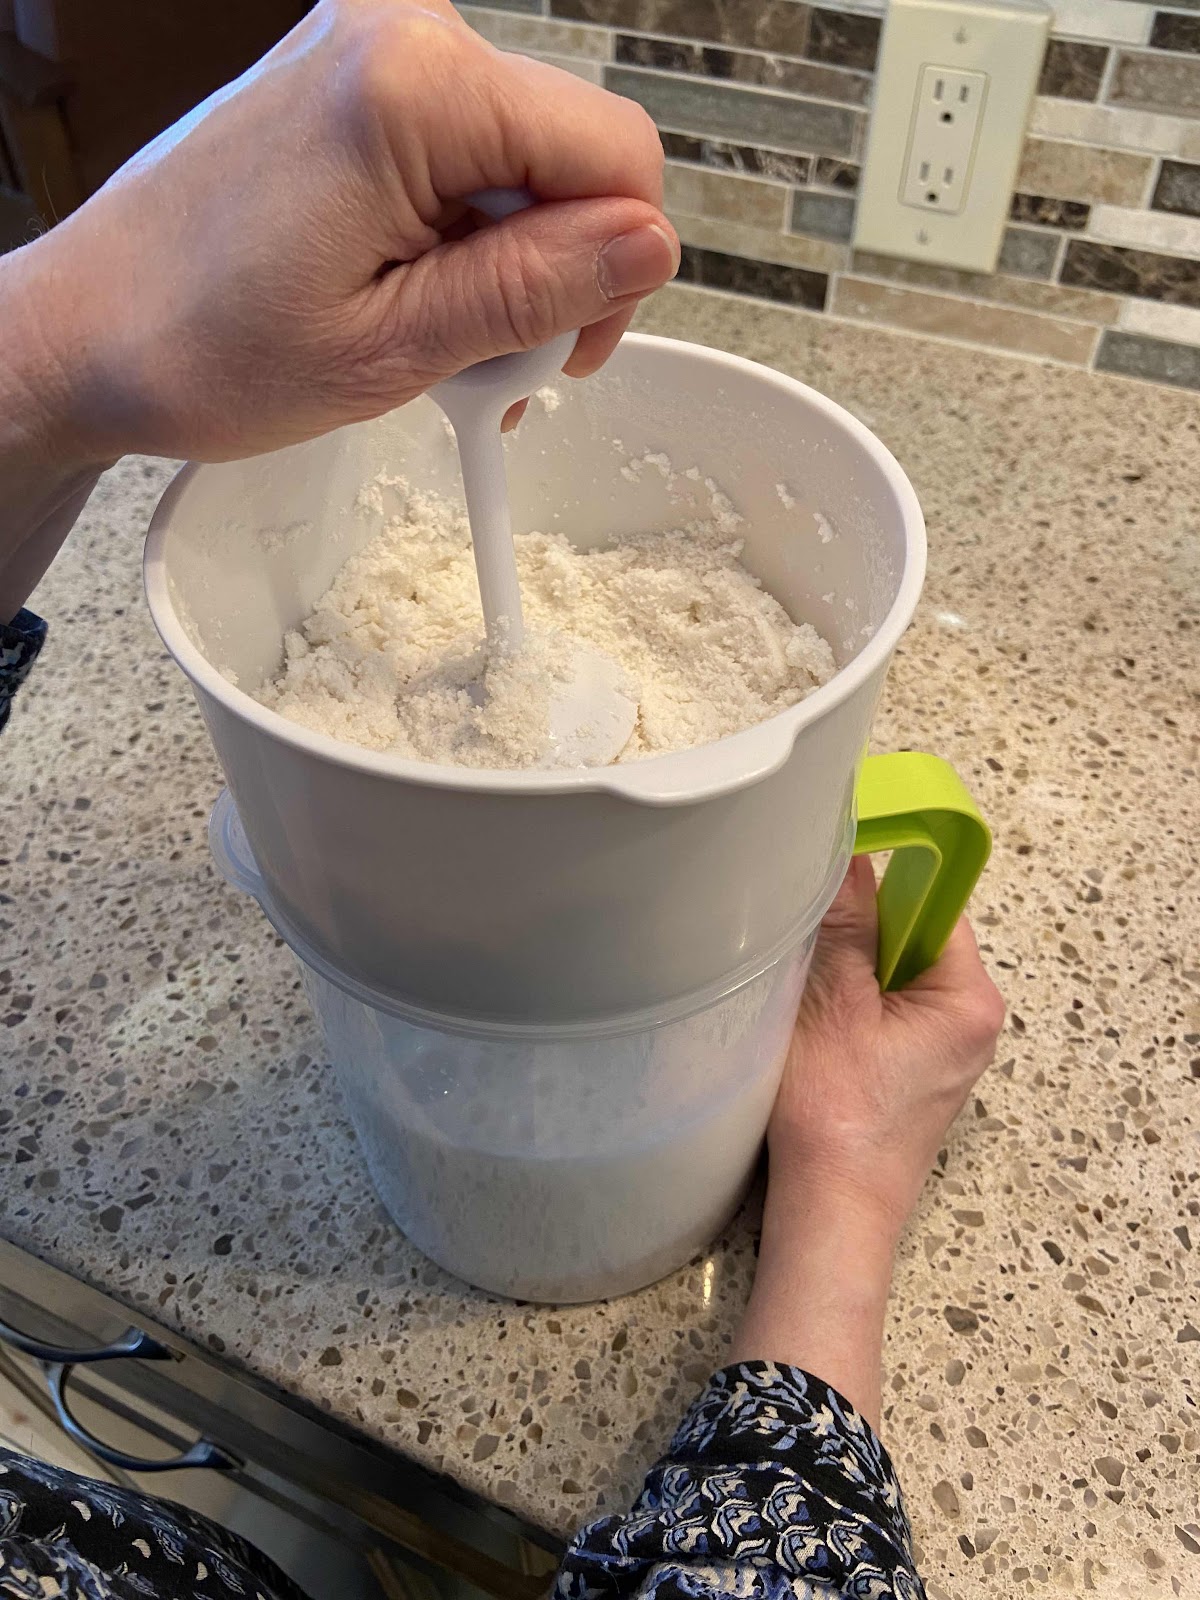
Straining the nut solids from the milk
2. Take the reserved nut solids that have been finely ground and spread them on a cookie sheet in a thin layer. Preheat your oven to 200 degrees Fahrenheit and then turn it off. Place the cookie sheet into the oven to dry out the nut flour, stirring occasionally and breaking up any clumps. Every once in a while, turn the oven to 200 degrees and let it heat up, but then immediately turn it off, so the oven is warm. You want to dry out the nut flour, not cook it! I usually leave mine in the oven overnight. However long it takes, you want the mixture completely dry.
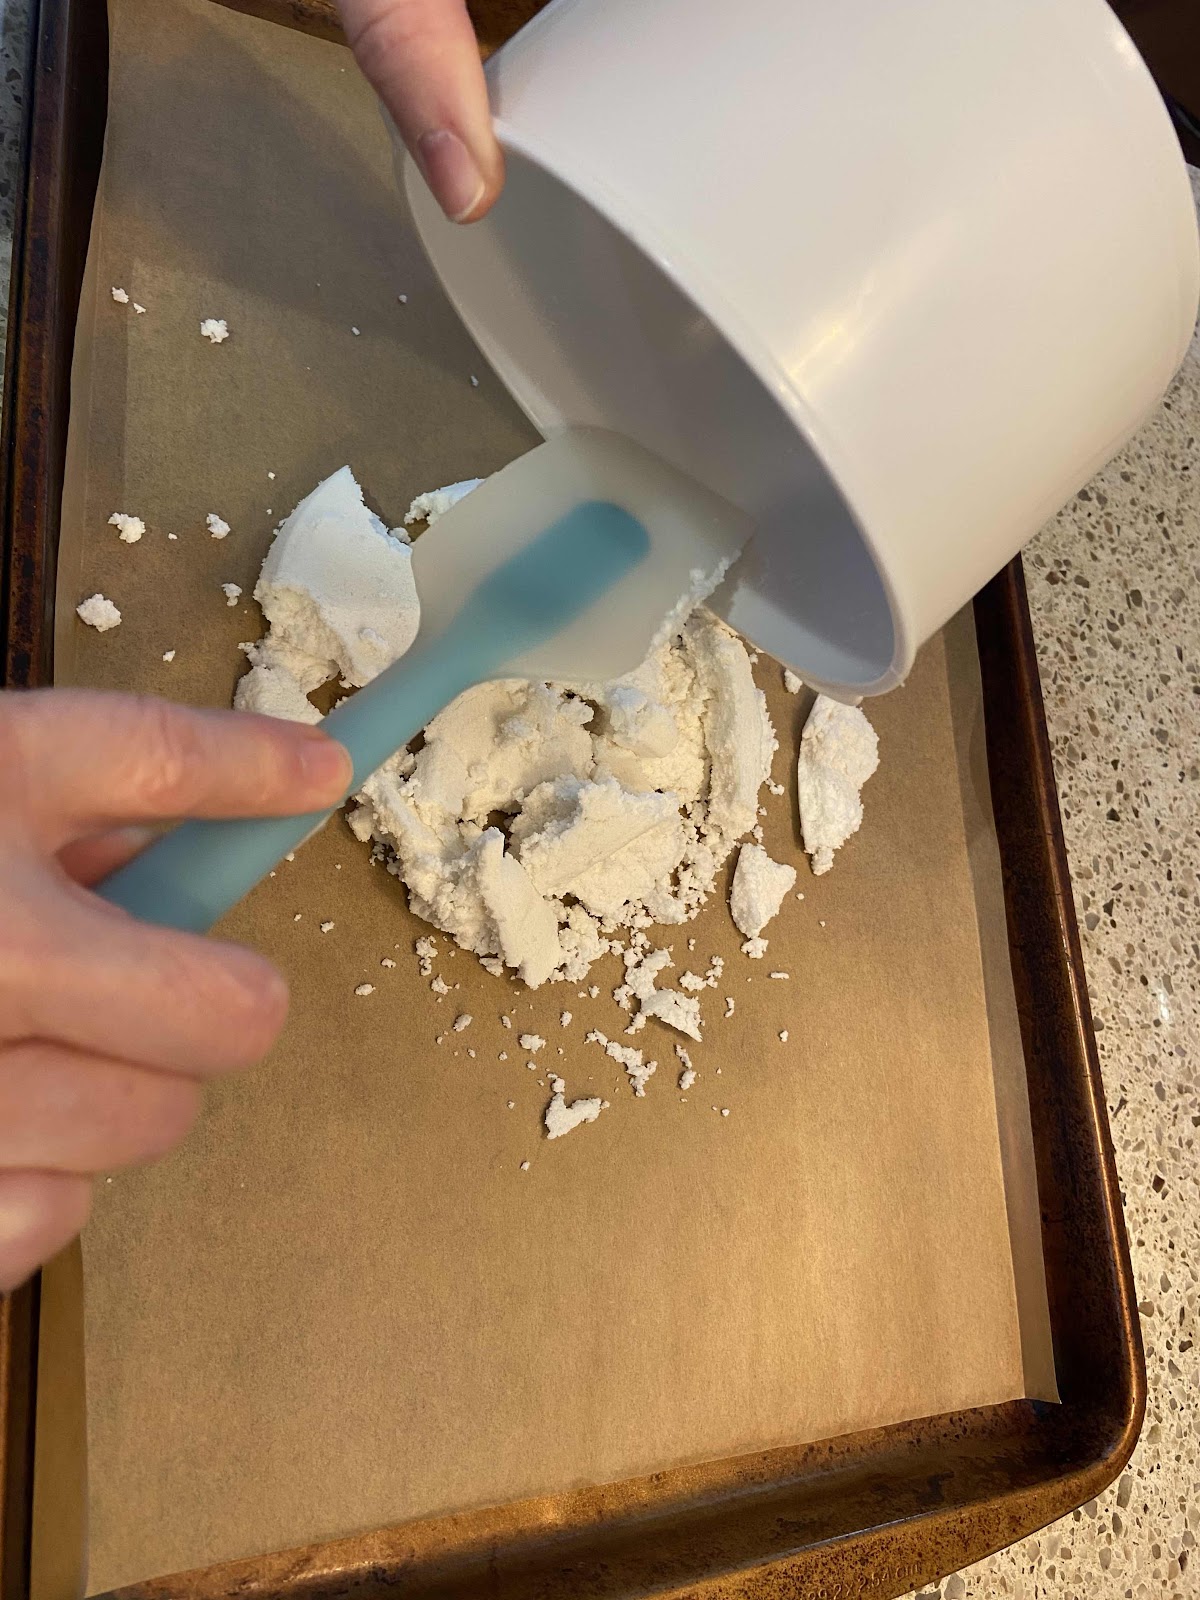
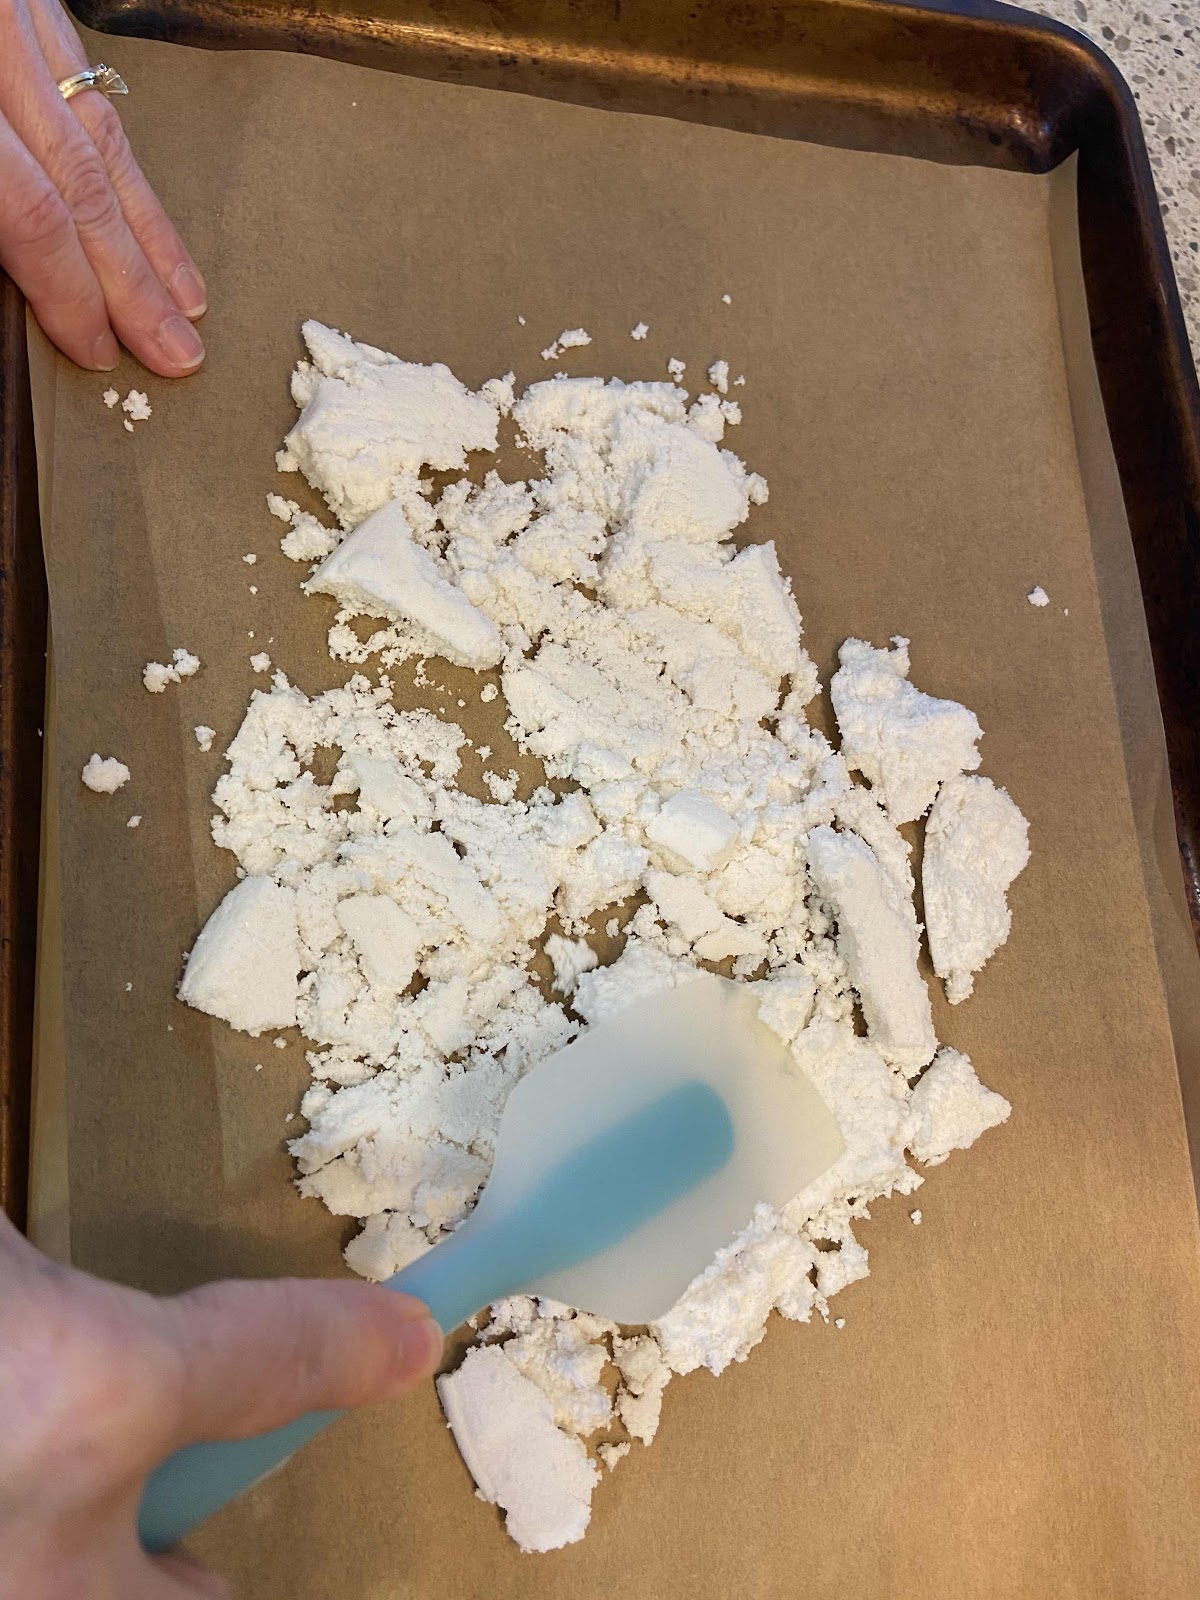
Spread the nut solids on a cookie sheet
Spread nut flour into a thin layer
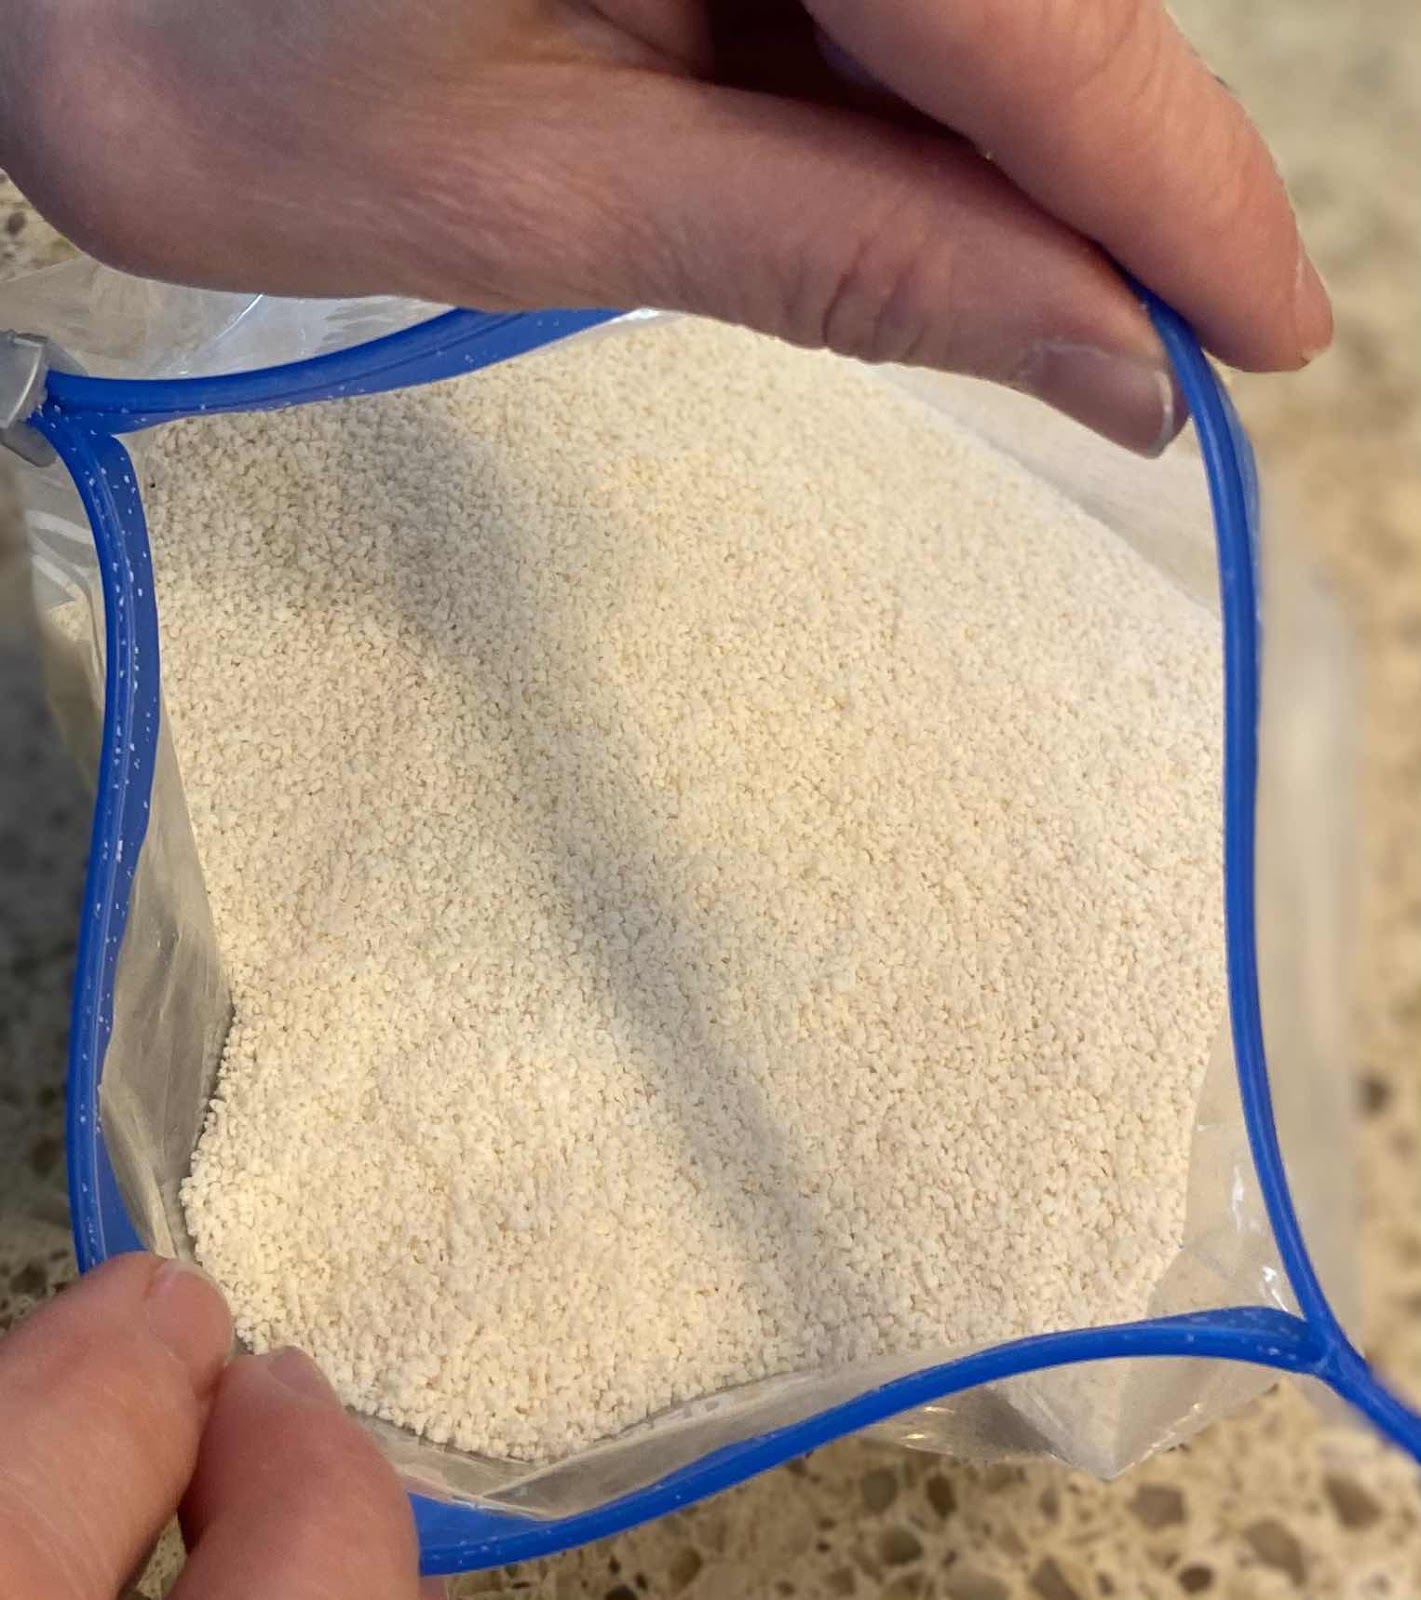
3. After the nut flour is completely dry, sift it into a fine powder and store in an airtight container or plastic ziplock bag. Store your macadamia nut flour in the refrigerator to assure its freshness. Use within 3 months. You may use this flour in a 1:1 ratio to replace almond flour in any recipe.
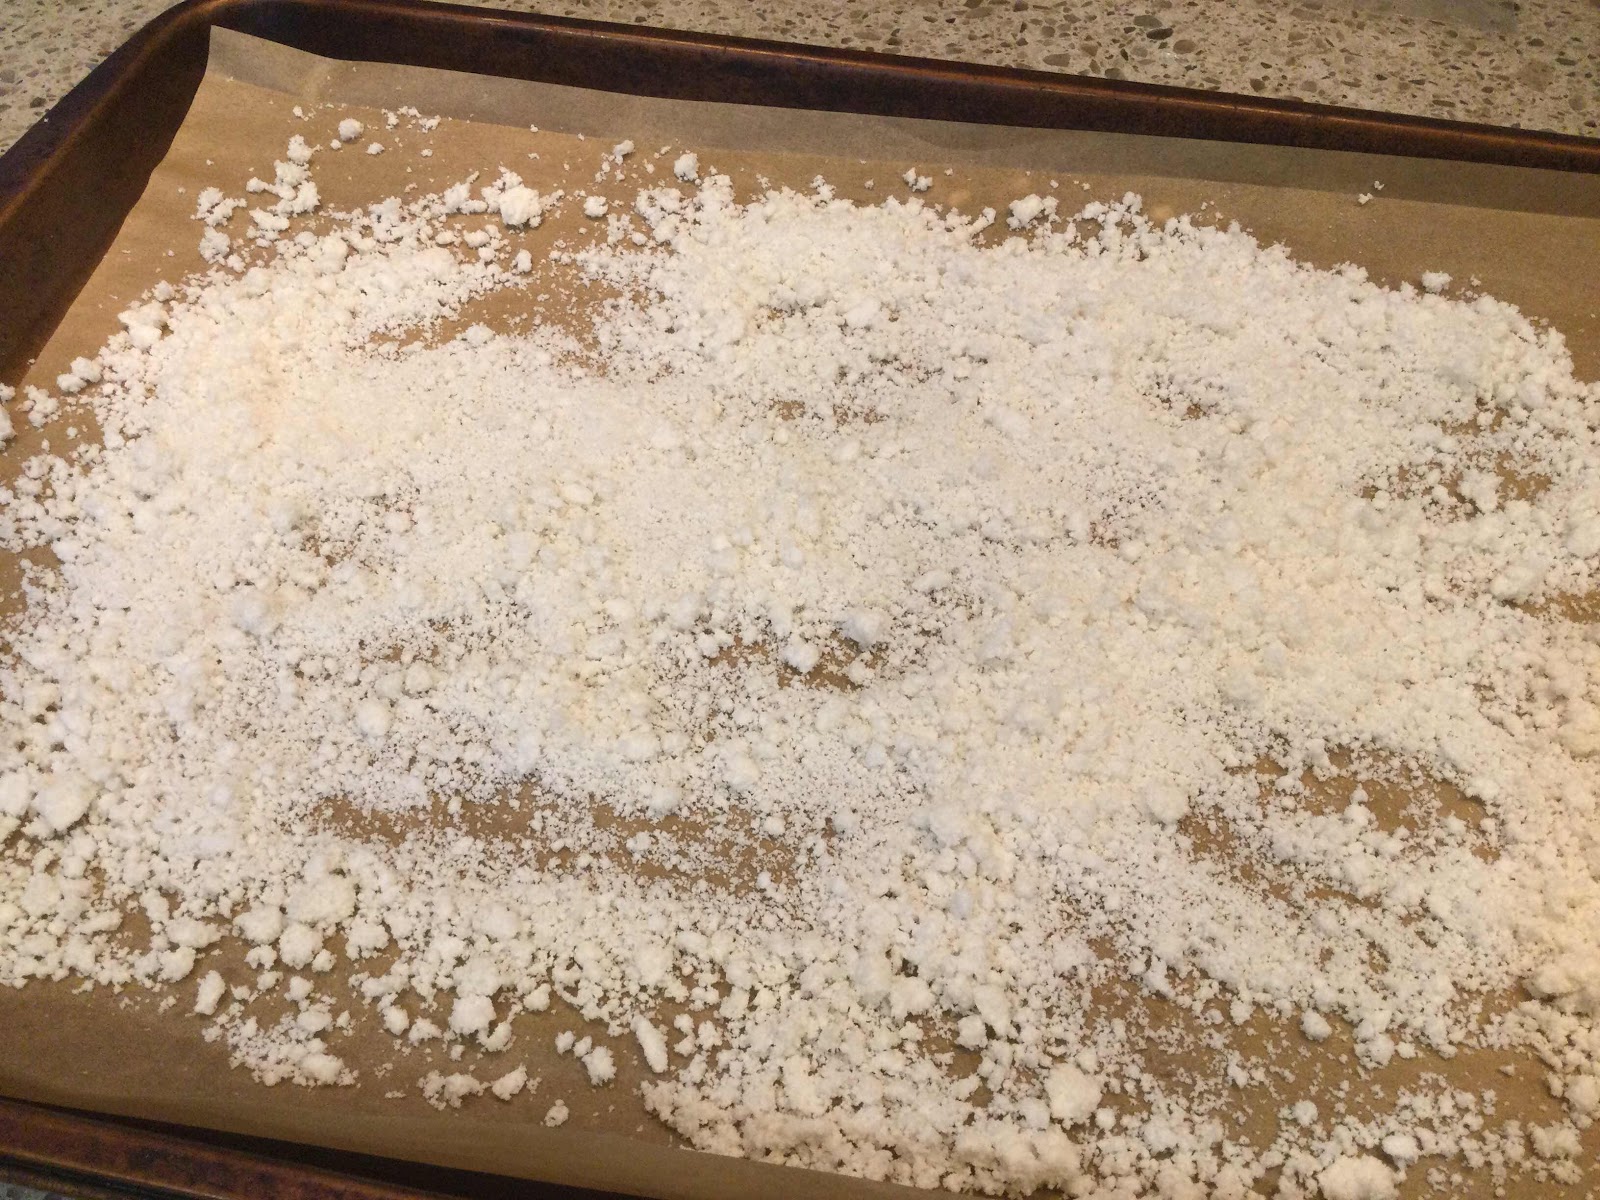
The nut flour dried out, but not sifted yet
Nutritional Information per 1/2 cup (20 grams): 143.6 calories, 2.8 g carbohydrate (1.7 g dietary fiber, 0.9 g sugars), 15.1 g total fat (2.42 g saturated fat, 0 g trans fat), 0 mg cholesterol, 1 mg sodium, 17 mg calcium, 73.6 mg potassium, 1.6 g protein. Net carbs per 1/2 cup: 1.1 grams

Total Oxalate per 1/2 cup (20 grams): 9.5 mg;  Soluble Oxalate per 1/2 cup: 7.02 mg

Photos and recipe by Kathy Sheehan, copyright 2021
All rights reserved. Please do not duplicate without the author’s permission. 


Wednesday, February 10, 2016

Simple 1-Minute Chocolate Mug Cake


You can have this low carb, grain-free cake and eat it too! Mug cakes may be the quickest and easiest dessert you'll ever make. They are "baked" in the microwave* in less than a minute (depending on the wattage of your microwave) and are a special treat for low carbers. Most recipes I've tried call for alternative "nut flours," such as almond flour.  The problem with those recipes is that the cake usually ends up being grainy and dry. My recipe is different because it uses nut butter as a base which creates a moist cake with a tender crumb. To achieve consistent success making Mug Cakes, it may take a bit of experimentation with different mugs and the cooking time. Once you find the perfect combination, write it down so you'll remember. I've discovered that a thicker-walled mug, small bowl or ramekin works best.  The microwave times given are approximate.  Start with the shortest time and, if needed, continue microwaving at 10-15 second intervals until the cake is puffed up and the batter is just beginning to be dried out on the top.  It will continue to cook for a minute after being removed from the oven.  The extra time it might take to learn which mug and cooking time is best for your microwave will be worth it!  I believe that this and other Mug Cake recipes will become favorites for those occasions when you crave a special treat. Happy Valentine's Day!

Simple 1-Minute Chocolate Mug Cake
Makes 1 small cake (2 servings)

2 tablespoons nut butter of choice
1 egg
1 tablespoon unsweetened cocoa powder
1/2 teaspoon stevia powder (I used Sweet Leaf brand), or to taste
A pinch of salt
3/4 teaspoon vanilla extract
2-3 teaspoons coconut milk (or any milk) to achieve a cake-like batter consistency
1/4 teaspoon apple cider vinegar
1/16 teaspoon baking soda

In a small bowl, whisk together all of the ingredients until well blended. Pour batter into a mug or two ramekins that have been sprayed with non-stick cooking spray or greased with butter or ghee.  Microwave for 40 seconds to 1-1/2 minutes, depending on the wattage of your microwave.* (Check cake after 40 seconds and only continue cooking if needed in 10-15 second intervals.) The cake is done when it is puffed up and the top of the cake is just dry.  Do not overcook. Remove cake from the microwave and allow to cool in the mug for about 1 minute before serving.  It can be eaten directly from the mug or placed on a serving plate.  Optional: Sprinkle with 1 teaspoon chopped or shaved dark chocolate and top with whipped cream or coconut cream flavored with vanilla and sweetened with stevia.

*To bake in the oven: Bake for 15-18 minutes at 350-degrees Fahrenheit until toothpick comes out clean and cake springs back when touched slightly off center.  Cool for at least 10 minutes before serving.

Nutritional Information per serving (1/2 cake, no toppings): 150 calories, 5.4 g carbohydrate (1.9 g dietary fiber, 0.8 g sugar), 13.5 g total fat (2.4 g saturated fat, 0 g trans fat), 93 mg cholesterol, 169 mg sodium, 44.1 mg calcium, 136 mg potassium, 5.4 g protein.  Net carbs per serving: 3.5 grams

Original recipe by Kathy Sheehan, copyright 2016

Thursday, August 19, 2010

Blueberry Upside Down Cake

Sometimes when I cook, things don't always turn out as I hoped, as with this recipe. When I turned it out of the pan, it didn't release properly from my old baking tin so that it ended up a broken jumble on the plate (the reason why there's no pretty picture). But the taste was terrific and this dessert was a real hit with my family, so I wanted to share it anyway. Next time when I make this, I'll be sure to coat the pan liberally with the cooking spray or just plan to eat it like a cobbler.

The benefit of substituting almond and coconut alternative flours for most of the white flour not only adds more nutrients to the finished product, but also fiber (something we all need more of in our diet). It is most notably the coconut flour that brings fiber to this recipe. If you've never tried using coconut flour to make pastries, cookies or pancakes, I highly recommend it. I love the creamy, rich texture it brings to my baked goods. It's best for sweet recipes, as it adds a hint of natural coconutty sweetness to the mix.

Blueberry Upside Down Cake
(Makes 8 servings)

1½ cups fresh blueberries, washed and drained (or frozen can be substituted)
2 tablespoons blueberry, grape jelly or seedless blackberry jam
1 teaspoon Splenda granular or 1 packet
1 tablespoon water
1 tablespoon lemon juice

2/3 cup almond flour (or finely ground almonds)
¼ cup coconut flour
½ cup all-purpose flour
2 teaspoons baking powder
¼ teaspoon salt
6 tablespoons zero trans-fat buttery spread (I use Smart Balance)
2/3 cup Splenda granular
1 egg
Zest of 1 lemon (about 1½ teaspoons)
2/3 cups skim or almond milk (original flavor)

1. Preheat oven to 350-degrees. Spray a 9-inch round cake pan with non-stick cooking spray.

2. In a small microwaveable bowl, mix together the water and jelly. Microwave for a few seconds until jelly melts. Add the blueberries, 1 teaspoon Splenda and lemon juice. Stir to coat berries with jelly mixture. Pour into the prepared cake pan and spread into an even layer; set aside.

3. In a medium bowl, sift together the flours, baking powder and salt. In a large bowl and using a handheld or standing mixer, cream together the buttery spread and 2/3 cup Splenda. Beat until smooth and creamy. Add egg and lemon zest and beat well. Alternate adding the dry ingredients and milk, beginning and ending with the dry ingredients. Beat on medium speed for 1 minute. The batter should be thick, but pourable. Spoon batter over berries in pan and spread gently to cover berry mixture while being careful not to stir the berry juice into the batter.

4. Bake for 30-35 minutes or until toothpick comes out clean and the surface is golden. Cool pan on a wire rack for about 5 minutes. Place large plate over the pan and invert cake so blueberries are on top. Let cool another 10-15 minutes until no longer steaming hot. Serve warm or at room temperature. Top with whipped cream, if desired (optional).

Nutritional Information per serving: 219.5 calories, 23.5 g carbohydrate, 12.7 g total fat, 2.7 g saturated fat, 254 mg sodium, 4.8 g fiber, 4.7 g protein
Original recipe by Kathy Sheehan, copyright 2010

Sunday, January 31, 2010

Carrot Cake Whoopie Pies with Cinnamon Cream Filling

It is freezing cold in Maine and, although the calendar still says January, I'm beginning to suffer from cabin fever. That's not good news, because I have many months of winter to endure before the thaw in April. To combat this restlessness, my husband and I took a drive down the coast yesterday to experience the brilliant sunshine, even though the temperature was 12-degrees outside! During our adventure, we stopped in York at the headquarters of Stonewall Kitchen, a gourmet food company that makes a wide range of unique products. This delicious recipe was inspired by one of their baking mixes that happened to catch my eye. Unfortunately, diabetes makes a traditionally prepared carrot cake or whoopie pie out of my reach, so I came up with my own recipe using an alternative flour to bring the carbs down to a reasonable 13 grams per serving and the taste is amazing!

Whoopie Pies are considered a New England phenomenon, although they are increasingly found across the country these days. Normally, they are chocolate cookies filled with a vanilla cream, but creative bakers are coming up with a variety of flavors to rival the traditional chocolate. I wouldn't deem this recipe a serving of vegetables, but it does include sweet, fresh grated carrots in a soft, cake-like cookie. Along with the creamy, cinnamon filling, this whoopie pie tastes like a delicious, light carrot cake. They were fun to make and eat...maybe being stuck inside isn't so bad!

Carrot Cake Whoopie Pies with Cinnamon Cream Filling
(Makes 32 cookies or 16 whoopie pies)

1½ cups almond flour (or finely ground almonds)
¾ cup all purpose flour
1 teaspoon baking soda
1 teaspoon baking powder
¼ teaspoon salt
½ teaspoon pumpkin pie spice
2 eggs
¼ cup sugar
½ cup canola oil
1/3 cup light sour cream
¾ cup Splenda granular
1½ teaspoons vanilla extract
1 teaspoon butter flavor extract
1 cup grated carrot

Filling Ingredients:
½ cup mascarpone cheese
½ cup almond milk (original or unsweetened)
2 tablespoons Splenda granular
1 teaspoon vanilla extract
½ teaspoon ground cinnamon
2 tablespoons fat-free, sugar-free vanilla instant pudding mix (dry powder)

1. Preheat oven to 375-degrees. Place parchment paper on cookie sheet or spray lightly with non-stick cooking spray and set aside.

2. In a small mixing bowl, sift together the flours, baking soda, baking powder, salt and pumpkin pie spice; set aside.

3. In a large mixing bowl and using a handheld or standing mixer, beat the eggs until light in color and increased in volume. Add sugar and continue beating until well combined. Slowly add the canola oil and beat on high for 1 minute. Add the sour cream, Splenda, and extracts and beat until well incorporated, stopping to scrape down sides of bowl at least once. Reduce speed and add the dry ingredients ¼ cup at a time until well combined, scraping down sides of bowl occasionally. Using a wooden spoon or rubber spatula, fold in the grated carrot.

4. Using a small cookie scoop or rounded tablespoon, drop batter onto prepared cookie sheet 2 inches apart (batter will spread during baking). Bake for 10-11 minutes until cookie springs back when lightly touched or when toothpick inserted in center comes out clean. Cookies will not brown much, so watch carefully and do not over bake. Remove from cookie sheet onto a wire rack to cool completely before filling.

5. To make cream filling, place mascarpone cheese in a large mixing bowl and add almond milk. Beat with a handheld or standing mixer on high until well combined and mixture is light and fluffy (it will resemble whipped cream). Add Splenda, vanilla, and cinnamon and continue to beat until incorporated. Add the 2 tablespoons of vanilla instant pudding powder and beat well. Place in refrigerator for 5 minutes to set cream.

6. To assemble whoopie pies, pair two cookies by size and place 1 slightly rounded tablespoon of cinnamon cream filling on the flat side of one cookie, top with second cookie and press gently. Repeat with remaining cookies. If not serving immediately, wrap each whoopie pie in plastic wrap and store in refrigerator.

Nutritional Information per whoopie pie: 209 calories, 13.1 g carbohydrate, 16 g total fat, 3 g saturated fat, 1.3 g fiber, 4.3 g protein.

Nutritional Information per cookie (no filling): 86.2 calories, 5.9 g carbohydrate, 6.4 g total fat, 0.6 g saturated fat, 0.6 g fiber, 2 g protein.

Nutritional Information per 1 tablespoon filling (recipe makes 20 tablespoons): 29.3 calories, 1 g carbohydrate, 2.4 g total fat, 1.4 g saturated fat, 0 g fiber, 0.4 g protein.

Original recipe by Kathy Sheehan, copyright 2010

How does this compare with a whoopie pie made with a traditional recipe? This recipe is considerably less in fat and carbohydrates and has only half the calories! For comparison, the nutritional information for a Pumpkin Whoopie Pie, which is similar in flavor to my carrot recipe, is an alarming 424 calories, 55.6 g carbohydrate, 21.7 g total fat, 8 g saturated fat, 1.5 g fiber, 3.4 g protein.

Wednesday, July 29, 2009

My Banana Almond Tea Bread with Blueberries (or not)

My daughter arrived home from college for the last few weeks of summer not long ago and presented me with the gift of two black bananas that had been stored in her refrigerator. There was nothing else to do but make banana bread! Normally, I don't eat many bananas (although I love them) because they are a dense fruit with more carbs than I usually allow for myself. But they are an excellent source of vitamins B6, C and potassium. In this recipe, I added blueberries because Maine is famous for these small, rare, blue gems that are harvested late in the season. I buy them by the bushel for only a few short weeks before they disappear, along with summer.

You'll notice in the nutritional information that each serving seems rather high in fat grams. Don't be alarmed because most of the fat comes from the almond flour, which is rich in Vitamin E and monounsaturated "good fat." Actually, the saturated fat (the bad fat) is delightfully low for such a moist, yummy bread. If you want to learn more about the alternative flours used in this recipe, check out my blog: Alternative Flours for Baking

My Banana Almond Tea Bread with Blueberries (or not)
Makes 12 servings
¾ cup all-purpose flour
¾ cup almond flour (or finely ground blanched almonds)
¼ cup coconut flour
2 teaspoons baking powder
½ teaspoon baking soda
¼ teaspoon salt
2 large eggs + 1 egg white
6 teaspoons granulated sugar
6 teaspoons Splenda granular (not baking blend)
3 tablespoons canola oil
1 cup mashed ripe banana (about 2 medium)
Optional: ¾ cup fresh or frozen blueberries (if using frozen, do not thaw)

1. Preheat oven to 350-degrees. Prepare an 8½” x 4½” loaf pan with non-stick cooking spray and set aside.

2. In a medium bowl, mix together the flours, baking powder, baking soda and salt; set aside. In a large mixing bowl and using a handheld or standing mixer, beat the eggs, egg white, sugar and Splenda on medium-high speed for 2 minutes, until light and fluffy (do not underbeat in this step because you need to incorporate air into the mixture). Add the canola oil and beat for another 30 seconds. Add the mashed banana and blend on low speed until incorporated. Add the dry ingredients all at once and beat on low speed, scraping down the sides of the bowl once until fully incorporated. Gently and quickly fold in the blueberries. Pour batter into prepared pan.

3. Bake in preheated oven for 45-55 minutes until golden brown and a toothpick inserted into the center comes out clean. Test at 45 minutes and bake longer if additional time is needed. Do not overbake to avoid drying out.

4. Remove from oven to a wire rack. Allow bread to cool in pan for 10 minutes, then remove from pan and continue to cool on wire rack for another hour. This bread can be left at room temperature for 1 day or overnight, or wrap well and store in refrigerator.

NOTE: This batter can be made into 12 muffins. Bake in 350-degree oven for only 15-20 minutes until golden and toothpick inserted into the center comes out clean. Do not overbake. Cool on wire rack before serving.

Nutritional Information per serving (with blueberries): 154.8 calories, 18 g carbohydrate, 8.15 g total fat, 1 g saturated fat, 2.7 g fiber, 4.3 g protein
Original recipe by Kathy Sheehan, copyright 2009

How does this recipe compare with regular Banana Bread?
My version is higher in fiber, higher in protein, lower in total fat & saturated fat and significantly lower in carbohydrates and calories. For comparison, here are some average nutritional numbers for purchased Banana Bread: 215 calories, 34 g carbohydrates, 12 g total fat, 4 g saturated fat, 1.5 g fiber, 2 g protein.

Monday, July 27, 2009

Alternative Flours for Baking

If you go to the health food store, you'll see an array of flours to choose from. In my recipes, I have included a few alternative flours to cut the carbs and boost the nutrition. It just so happens that these alternative flours are gluten free, but going completely gluten free isn't my goal here. My main concern is lowering the carbohydrates without sacrificing flavor or changing the texture so much as to make the final result "weird."

Here are a couple of alternative flours I use to replace some of the all-purpose flour in my baked goods:

ALMOND FLOUR is nothing other than ground, blanched almonds (they do have almond flour made from almonds with skin, but that doesn't work in my recipes). You can grind your own in a blender until it resembles a fine meal, but be careful not to over process or you'll end up with almond butter. If I don't have any almond flour on hand, I usually grind my own. Almond flour has fewer carbs than regular flour, plus it adds Vitamin E and cholesterol-lowering monounsaturated "good fats" to the final product. You can find almond flour in most health food stores, at Whole Foods or online.

The very best is Honeyville Almond Flour and can be purchased online. It has the finest grind, making it virtually undetectable in baked goods. It is the brand I use and recommend. Bob's Red Mill Almond Flour is the brand usually available in health food stores. It has a coarser grind and, although it is an acceptable alternative, it will add a slight crunch to the final product, similar to the texture of cornbread.


COCONUT FLOUR is the by-product of coconut after the coconut milk has been extracted. It has been ground into a fine, light flour and can replace up to 20% of flour in a recipe without much change. It does have a lovely coconut aroma, but in baking that coconut smell and taste disappears, especially when only a small amount has been used. Coconut flour is low in digestible carbs, high in fiber and boosts the nutrition of your baked goods by the addition of the vitamins and minerals naturally present in the flour. You can purchase coconut flour in health food stores, at Whole Foods or online. The brand I use is Bob's Red Mill Coconut Flour, which is available at Whole Foods.

Don't be afraid to experiment with these delicious, healthier alternatives in your own recipes today!

