Showing posts with label chicken. Show all posts

Thursday, November 30, 2023

Keto Chicken Pot Pie (or Turkey Pot Pie)

Keto Chicken Pot Pie

This classic recipe is a great way to use leftover cooked chicken or turkey, something we often have on hand around the holidays. This low carb version has all the flavor of a traditional pot pie: the vegetables and chicken or turkey in a creamy gravy and topped with a flaky crust. Leftovers just don’t get any better than this!

Keto Chicken Pot Pie (or Turkey Pot Pie)
Makes 6-8 servings

Filling:
1 tablespoon butter
2 cups leftover cooked chicken or turkey, cut into bite-size pieces
½ cup onion, finely chopped
1 small carrot, finely chopped
1 clove garlic, minced
½ teaspoon dried thyme
1 tablespoon white wine vinegar
1 cup chicken broth
1/4 cup peas, fresh or frozen (no need to defrost)
½ cup heavy cream
1/4 teaspoon sea salt
1/4 teaspoon ground black pepper

Crust:
½ cup coconut flour
½ cup almond flour (or pecan flour for lower oxalate)
1/3 cup flaxseed meal
½ teaspoon xanthan gum
5 tablespoons unsalted butter, melted
2-3 eggs, beaten

1. Preheat oven to 375°F. Grease a 9 inch pie pan.

2. Heat a large skillet over medium high heat. Melt 1 tablespoon of butter in the skillet. When butter has melted, add onions and carrots to the skillet. Sprinkle with a little salt and pepper. Turn the heat to medium low. Cook, stirring occasionally, until the onions begin to brown at the edges. Stir in garlic and dried thyme. Cook one minute, stirring constantly.

3. Stir in vinegar, scraping up any brown bits. When vinegar has almost completely evaporated, stir in the chicken broth.

4. Turn the heat to medium high. Simmer broth, stirring occasionally, until it thickens, about 10 minutes. The broth is thick enough when you can draw a line on the bottom of the pan with a spoon and the line does not immediately fill in. While the filling simmers, prepare the crust. 

5. Once the broth has thickened slightly, add the heavy cream, cooked chicken or turkey and peas. Bring to a simmer. Turn the heat to low. Simmer until mixture is thick and gravy-like in consistency. Taste before adding additional salt and pepper. Season to taste with salt and pepper, if necessary.

6. To make the crust, in a medium mixing bowl, whisk together the coconut flour, almond flour, ground flaxseed meal, xanthan gum, and salt.

7. Using a fork, stir in the melted butter, coating all the mixture until it resembles crumbs. Add the beaten egg. Start with two eggs, only adding a third egg if needed.

8. Gather mixture into a ball and place on a piece of plastic wrap. Top with a second piece of plastic wrap and, using a rolling pin, roll into a disk to cover the top of the pie, about 1/4 inch thick.

9. To assemble, pour the filling into the prepared pie pan. Gently place dough over the filling and crimp the edges. Cut a hole in the center to allow steam to escape. Bake in the preheated oven for 20 to 25 minutes, or until crust has browned.

Keto Chicken or Turkey Pot Pie

Nutritional Information per serving (1/8th of recipe): 294 calories, 10 g carbohydrate (6 g dietary fiber, 2.6 g sugars), 23 g total fat (11 g saturated fat, 0 g trans fat), 123 mg cholesterol, 282 mg sodium, 30.7 mg calcium, 160 mg potassium, 1 mg iron, 2 mg Vit C, 525 IU Vit A, 16.8 g protein. Net carbs per serving: 4 grams

Photos and recipe by Kathy Sheehan, copyright 2023
All rights reserved. Please do not duplicate without the author’s permission.

Thursday, April 14, 2022

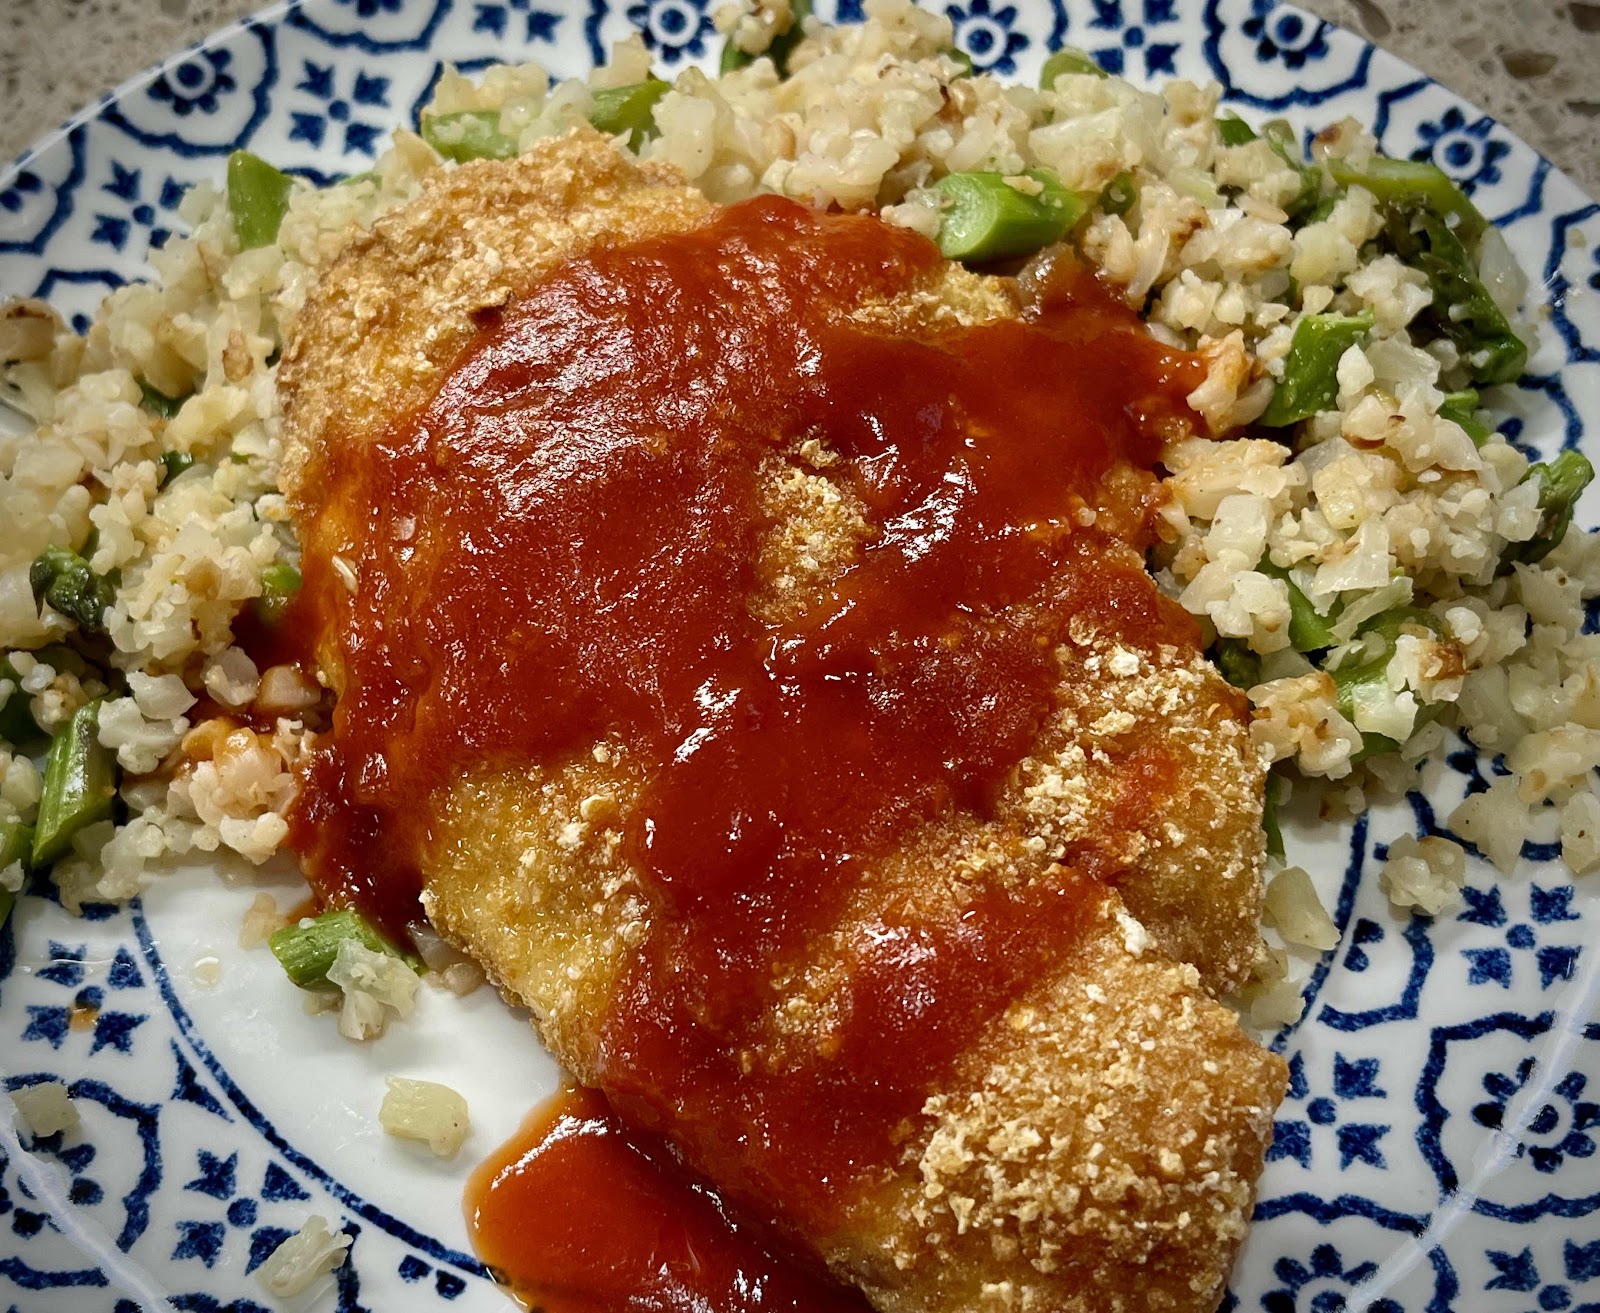
Keto Sweet and Sour Panfried Tilapia (or Sole)

Keto Sweet and Sour Panfried Tilapia
This Asian-inspired, sweet and sour fish is a quick and very tasty meal! I first saw something similar to this dish in an Asian cookbook, but of course it contained flour, breadcrumbs and sugar. This recipe has been revamped to include keto ingredients, making it a perfect choice for a low carb diet. If fish is not your thing, you can replace the fish fillet with a thin chicken cutlet. Serve the fried fish and sauce over cooked riced cauliflower or radishes that have been cut into matchsticks and sautéed in a pan with onions.

Keto Sweet and Sour Panfried Tilapia (or Sole)
Makes 4 servings

2 tablespoons water
2 teaspoons rice vinegar
2 teaspoons soy sauce (or gluten free tamari sauce)
2 tablespoons no-sugar-added ketchup (I use Primal Kitchen brand)
3/4 teaspoon toasted sesame oil
2 teaspoons allulose or monkfruit sweetener
1/4 teaspoon cornstarch (or a pinch of xanthan gum)
1 large egg
1/3 cup unflavored whey protein powder
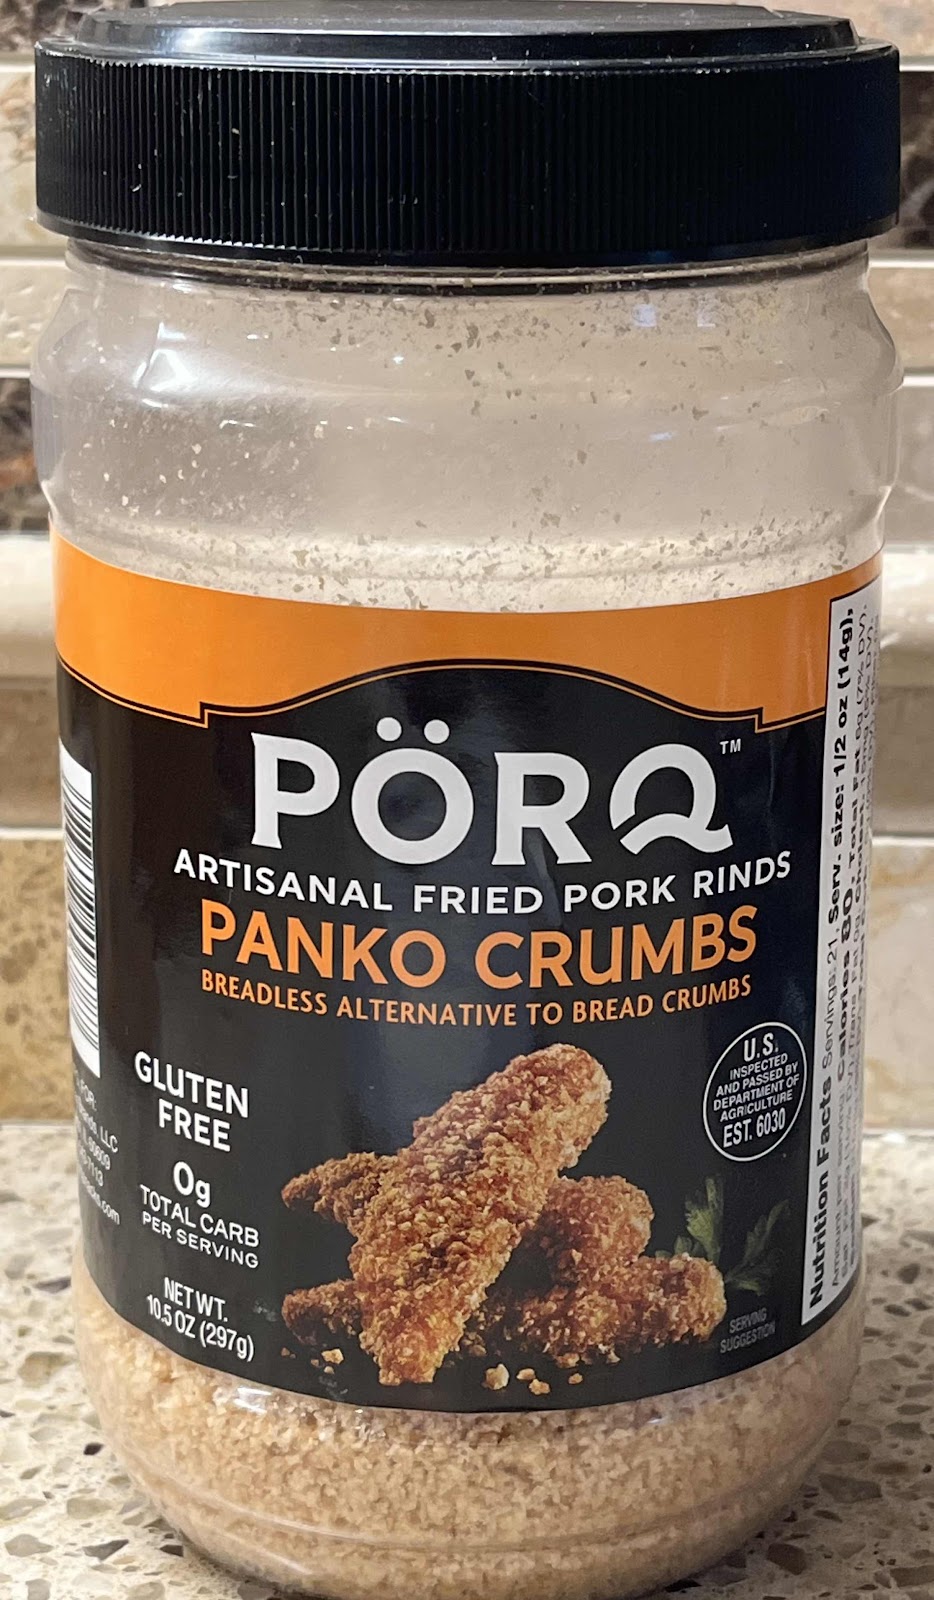
1 cup pork rind Panko
Salt and pepper
4 tilapia fillets (or sole), between 1 and 1-1/2 pounds
3 tablespoons refined coconut oil or avocado oil for frying

Pork Rind Panko
1. Make the sauce: In a small saucepan over low heat, stir together the 2 tablespoons water, rice vinegar, soy sauce, ketchup, sesame oil, allulose and cornstarch or xanthan gum. (If the sauce is too thick, add a little water to thin it out a bit.) Set aside.

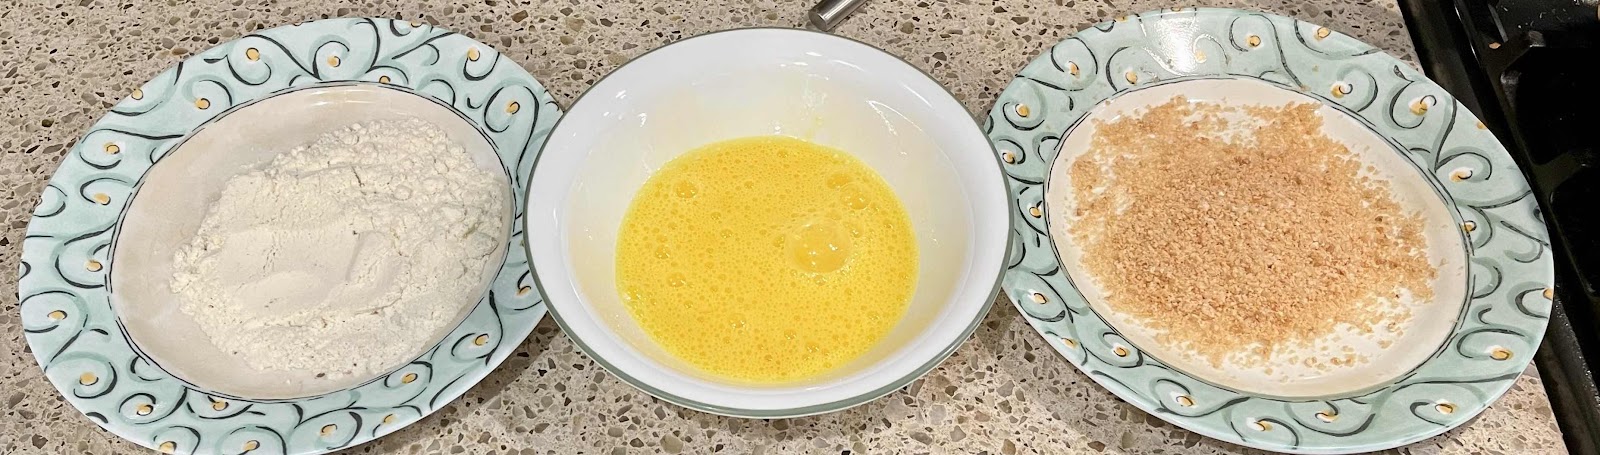
2. In a shallow bowl, whisk the egg. Spread the whey protein powder and pork rind Panko on two separate plates. Season the whey protein powder with salt and pepper. Set up your dipping station in the following order: whey protein powder, beaten egg, then followed by the pork rind Panko.

Dipping Station
3. Just before frying, pat the fish fillets with a paper towel to remove any excess moisture. Dip them first into the seasoned whey protein powder and shake off any excess, then the egg, and finally in the pork rind panko, coating evenly each side.

4. Heat a large, nonstick frying pan over medium-high heat until hot and add the refined coconut oil or avocado oil. Swirl your pan around to distribute the oil evenly in the pan. Add the fish and fry the first side about 4 minutes until golden. Very carefully, turn the fish fillets over and fry on the second side 3 to 4 minutes until golden. Serve immediately with the warm sauce.

5. Serving Suggestion: Serve the fried fish and sauce over cooked rice cauliflower or radishes that have been cut into matchsticks and sautéed in a pan with onion.

Keto Sweet and Sour Tilapia with radishes
Nutritional Information per 1 fish fillet with sauce (no vegetables): 334 calories, 2.6 g carbohydrate (0 g fiber, 0.7 g sugars), 10.5 g total fat (3 g saturated fat, 0 g trans fat), 123 mg cholesterol, 447 mg sodium, 35.7 mg calcium, 377 mg potassium, 1 mg iron, 50 IU Vit A, 35 g protein. Net carbs: 2.6 grams.

Photos and recipe by Kathy Sheehan, copyright 2022
All rights reserved. Please do not copy without the author’s permission.

Monday, January 17, 2022

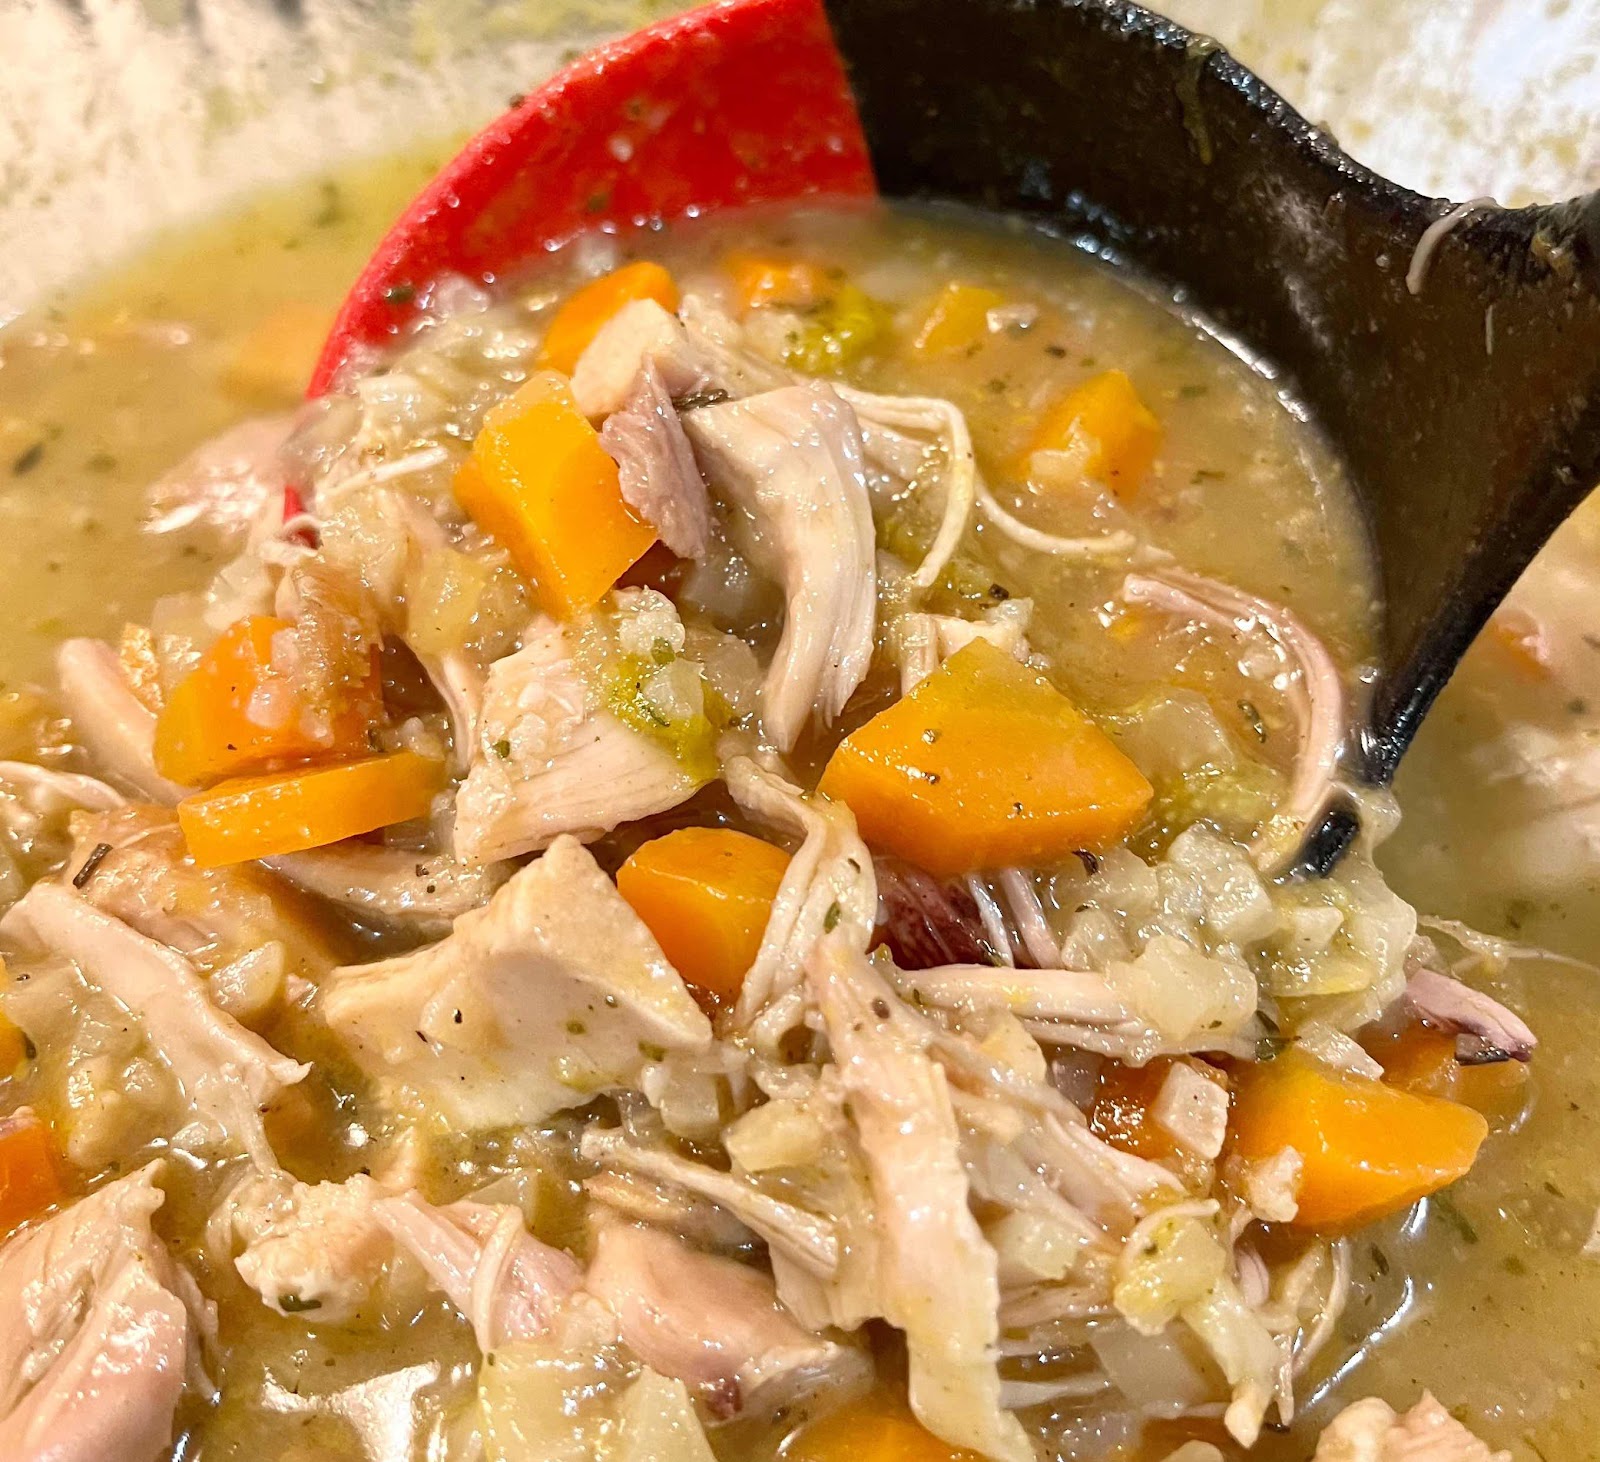
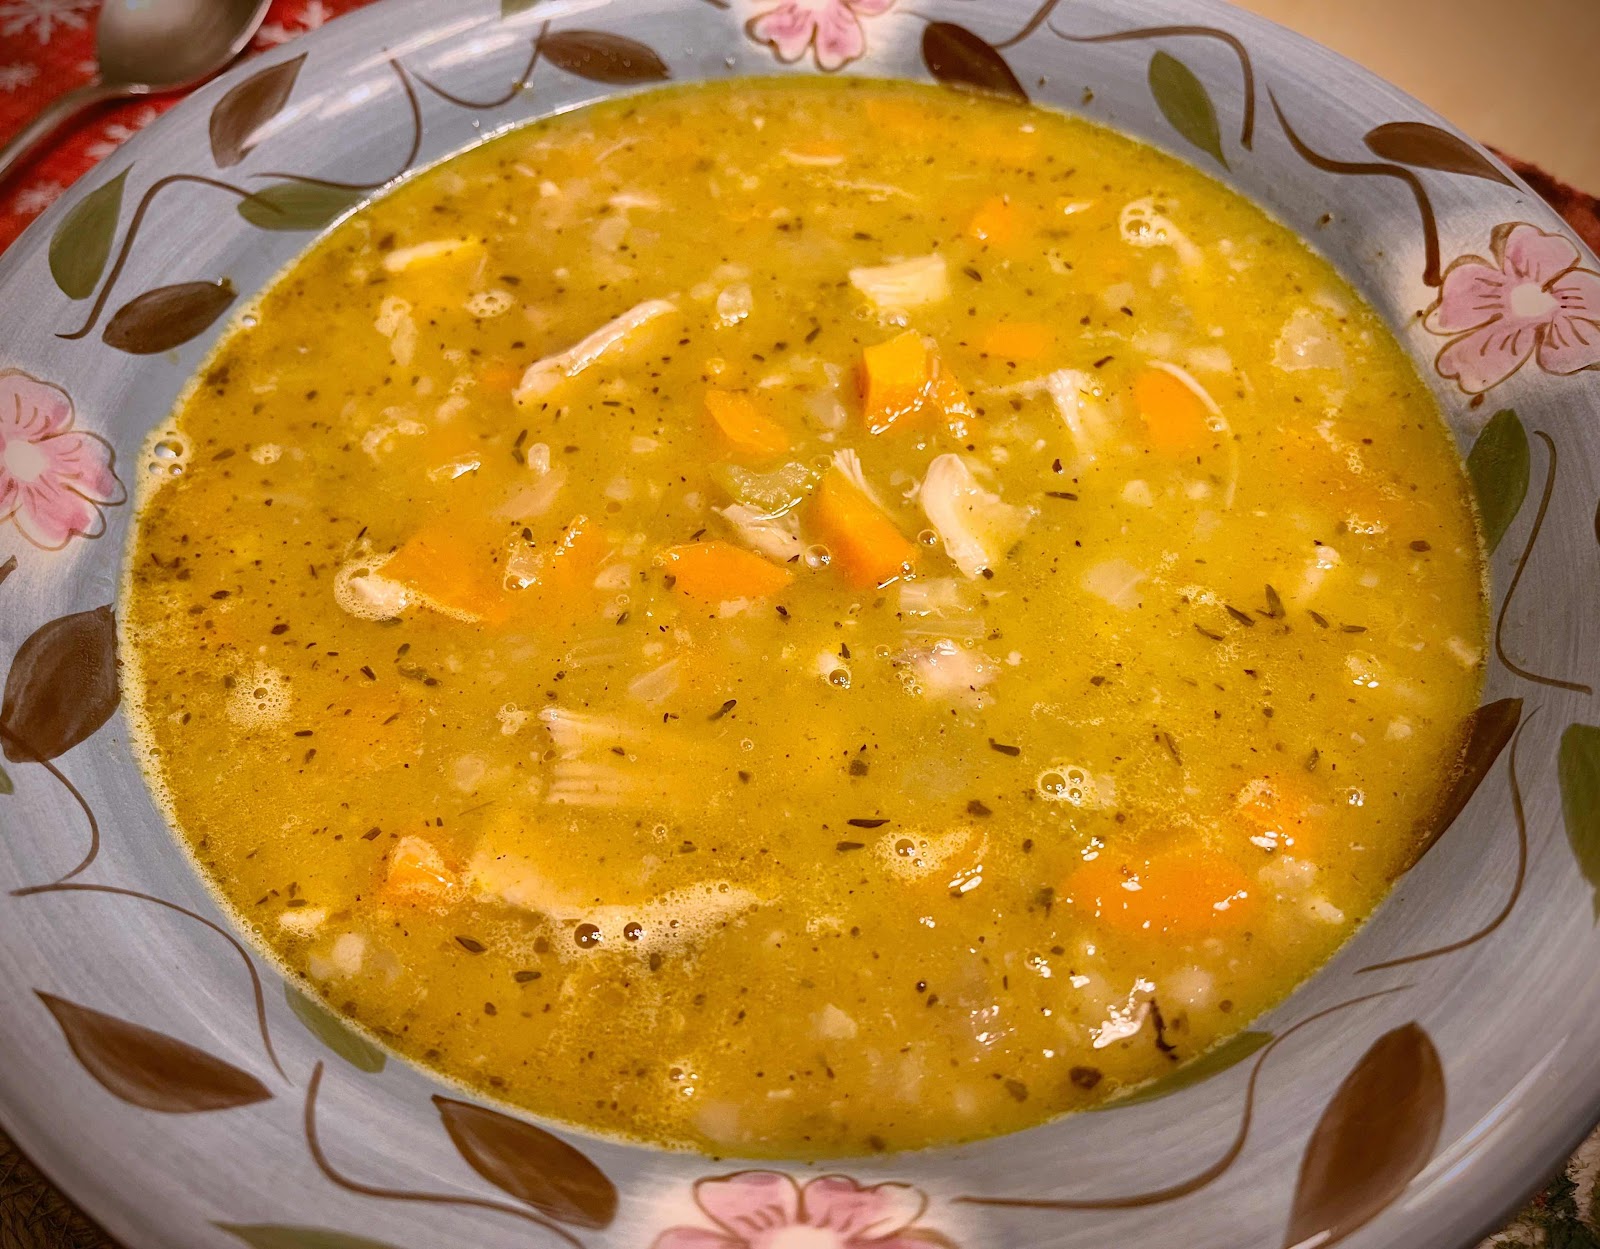
Keto Chicken and Cauliflower Rice Soup

Keto Chicken and Cauliflower Rice Soup
Sometimes when you’re sick, the only thing that sounds good is a warm bowl of soup. When I was recently ill, that’s the only thing I was craving! I looked through my cupboard to try and find the lowest carb soup in a can. I found a chicken rice soup with 12 g per cup and, because I was in no shape to make a homemade pot of soup that day, I ate it…and was very disappointed. There was very little chicken, lots of rice and even more potatoes! My blood sugar soared through the roof, much more than a serving of 12 carbs should have caused. The next day I was determined to make my own soup! And it turned out so delicious, very comforting and I ate it over the next several days as I recovered. Cauliflower rice in this recipe tastes and has the same texture as real rice! The broth was richer and more flavorful than anything you’ll find in a can. The real trick to this recipe is to brown the chicken, skin side down, in the Dutch oven or saucepan until crispy and a fond collects in the bottom of the sauce pan. Then, once you add the rest of the ingredients and broth, the fond is incorporated into the soup adding exceptional flavor. I hope you find this recipe as comforting as I did, especially on a sick day.

Keto Chicken and Cauliflower Rice Soup
Makes about 6 servings

12 ounces bone-in chicken thighs with skin (2 large thighs or 3-4 smaller)
2 carrots, diced
1/2 onion, diced
1 large rib celery, diced
1/4 teaspoon salt
1 clove garlic, minced
3/4 teaspoon dried thyme
1/2 teaspoon poultry seasoning
4 cups chicken stock or bone broth
2 cups frozen cauliflower rice, thawed
Salt and pepper, to taste

1. In a large Dutch oven or large, heavy saucepan, place the bone-in chicken thighs skin side down and heat over medium heat for eight minutes or until the skin has rendered its fat and is crispy. Turn the chicken over and continue cooking for another five minutes. Remove the chicken to a plate to rest while you continue making the soup.

2. Add the carrots, onion and celery to the saucepan, along with about 1/4 teaspoon of salt, and sauté until the vegetables are tender crisp and the onion is translucent. Add the garlic, thyme and poultry seasoning and stir for 30 seconds. Add the chicken stock and, with a wooden spoon, scrape the bottom of the pan until the accumulated fond is incorporated into the broth.

3. Add the chicken back into the pan and bring to a simmer. Cover and gently simmer the soup for 45 minutes. Test the temperature of the chicken with a probe thermometer. It should be at least 175°F. Remove the chicken from the pan and onto a plate to cool. Add the cauliflower rice to the soup and stir. Turn off the heat and allow the soup to sit, covered, while the chicken cools.

4. Once the chicken is cool enough to handle, remove the skin and bones from the chicken and discard. Cut the chicken into bite-size pieces and return the chicken to the pot. Reheat the soup, adding salt and pepper to taste. Simmer gently for 10 minutes before serving. Enjoy and get well! (This soup can be stored in an airtight container in the refrigerator for up to four days.)

Bowl of Chicken and Cauliflower Rice Soup
Nutritional Information per serving (1 cup): 150 calories, 4.7 g carbohydrate (1.5 g dietary fiber, 2.5 g sugars), 6.2 g total fat (1.7 g saturated fat, 0 g trans fat), 54 mg cholesterol, 414 mg sodium, 27.9 mg calcium, 214 mg potassium, 1 mg iron, 819 IU Vit A, 16 mg Vit C, 18.3 g protein. Net carbs per serving: 3.2 grams

Photos and recipe by Kathy Sheehan, copyright 2022
All rights reserved. Please do not duplicate without the author’s permission.
Friday, May 7, 2021

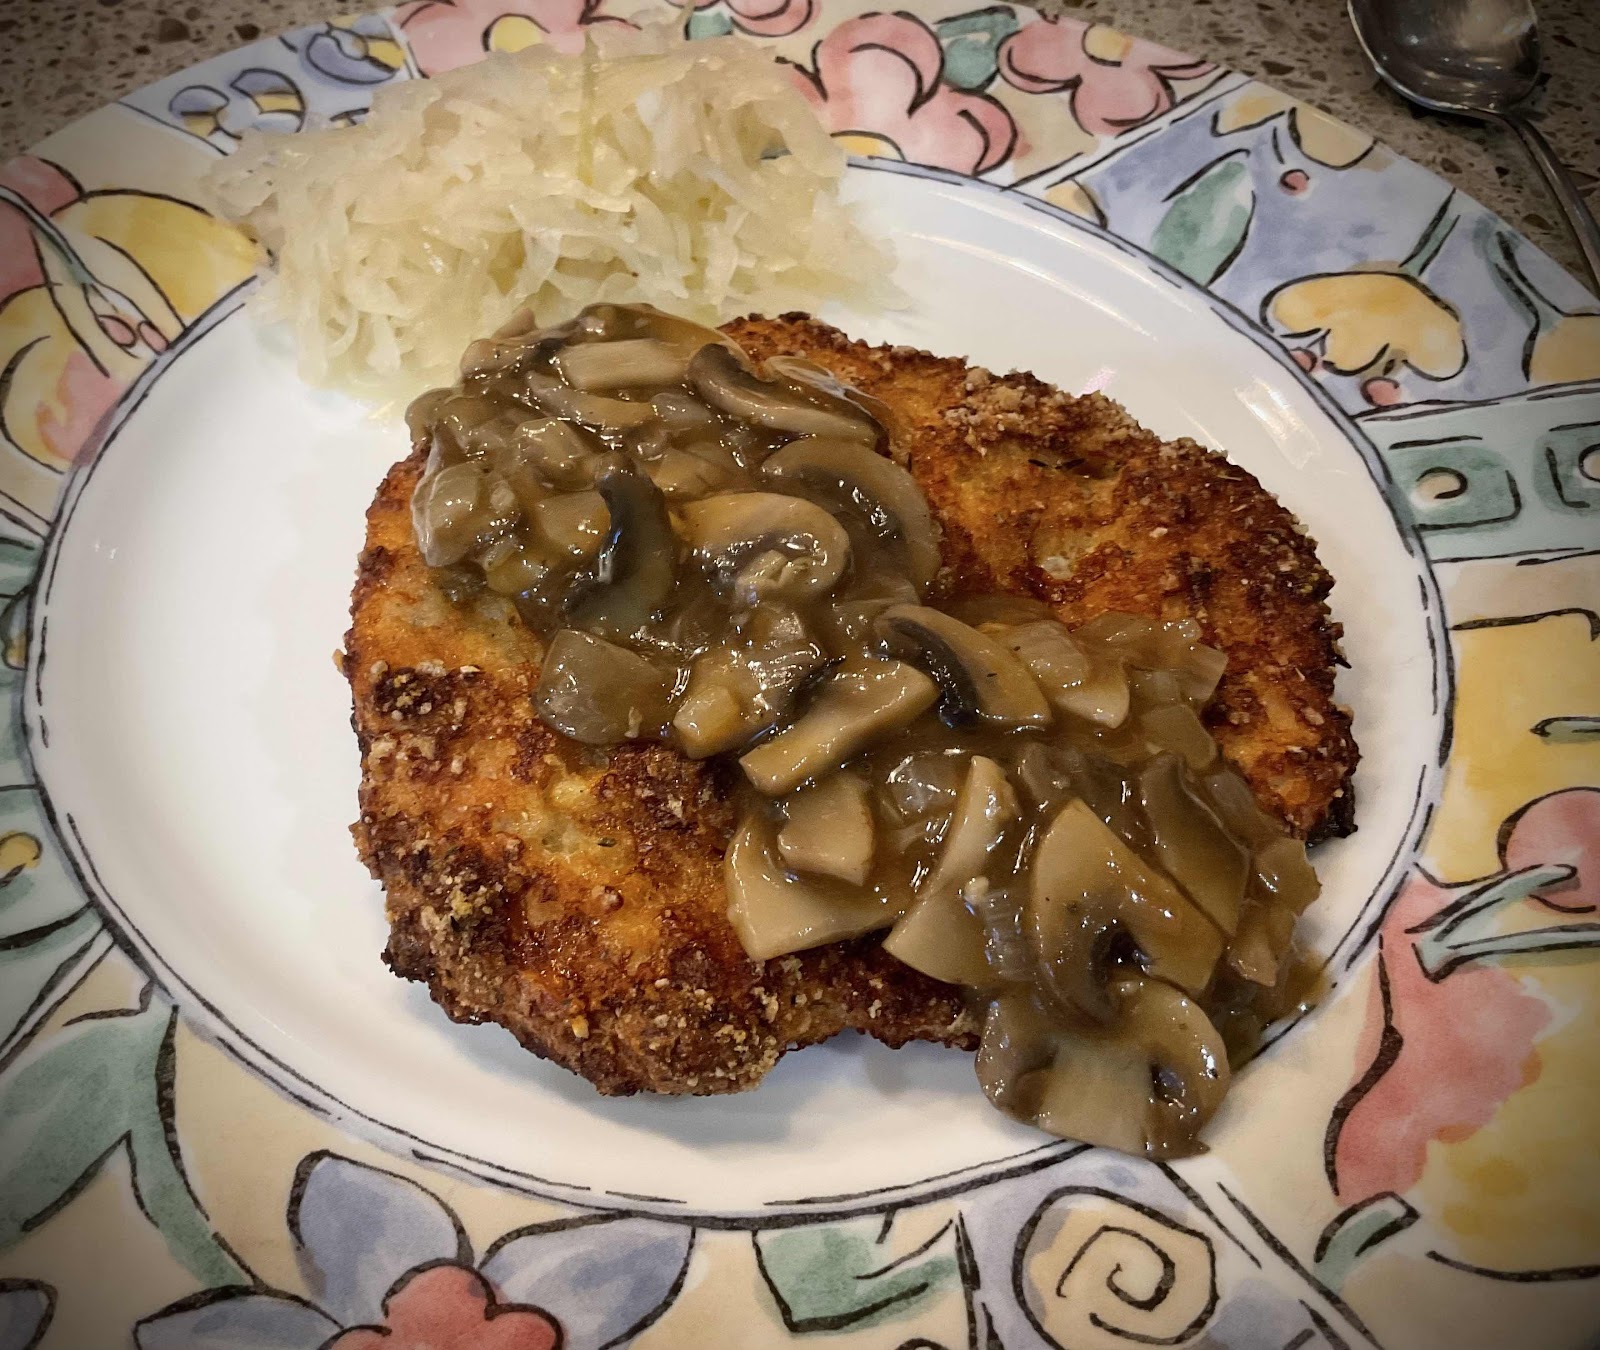
Schnitzel with Keto Brown Mushroom Gravy (Jagerschnitzel)

Schnitzel with Keto Brown Mushroom Gravy
My husband is a big fan of German cooking. I have tried other recipes for schnitzel that call for almond flour, but was always a bit disappointed in their soggy breading. I’ve been experimenting with using crushed pork rinds as breading and, so far, the results have been excellent! This pork rind breading is super crunchy and, even when reheated, remains crisp. I’m not a fan of pork rinds as a snack, but in this application, they are a winner! This schnitzel recipe has authentic flavor and texture. You can make it with your favorite cutlet, such as pork, chicken, turkey or veal. I’m sure you’ll be as pleased as my husband and this recipe will become a favorite of your family, too.

Schnitzel with Keto Brown Mushroom Gravy (Jagerschnitzel)
Makes 4 servings

Schnitzel:
1 pound boneless pork chops (or substitute chicken, turkey or veal)
1 1/2 cups crushed pork rinds (see notes)*
1/4 teaspoon salt
1/4 to 1/2 teaspoon black pepper
1/4 teaspoon dried thyme
1 large egg
1 tablespoon sour cream (omit for dairy free)
1/2 cup unflavored whey protein powder

Brown Mushroom Gravy:
1 tablespoon butter
1/2 onion, chopped
1 clove garlic, minced
8 ounces white button mushrooms, sliced
1 1/4 cups beef broth
1/4 teaspoon dried thyme (optional)**
1 teaspoon red wine vinegar (optional)**
1/4 to 1/2 teaspoon xanthan gum to thicken
Salt and pepper to taste

1. Prepare the 3-step dredging station by placing the whey protein powder onto a plate. In a small bowl, whisk together the egg and sour cream and pour onto a second plate. Finally, stir together the crushed pork rinds, salt, pepper and thyme and pour onto a third plate. Preheat the oven to 425 degrees Fahrenheit. 

2. Cut the pork chops in half horizontally and pound thin between two pieces of plastic wrap, to about 1/4 inch thickness. Set aside while you start the mushroom gravy. 

3. Melt the butter in a 10 or 12 inch skillet. Add the onion and heat over medium heat until softened and translucent. Add the garlic and stir for about 1 minute. Add the sliced mushrooms and sauté until all the liquid has evaporated and the mushrooms are nicely browned. Add the beef broth, thyme and vinegar. Bring to a simmer and allow to cook and reduce, stirring occasionally, while you prepare the schnitzel.

4. Line a baking sheet with foil and spray generously with non-stick cooking spray. 

5. Pat any excess moisture from the cutlets with a paper towel. Dredge each cutlet by first dipping into the whey protein powder on both sides and shaking off the excess. Next, dip the cutlet into the egg mixture and coat both sides. Lastly, place it in the third plate with the pork rind breading, turning to coat both sides. Place the dredged cutlet onto the prepared baking sheet. Repeat with the remaining cutlets. 

6. Place the baking sheet into the preheated oven on the middle rack and cook for 20 minutes. Meanwhile, finish the gravy.

7. Sprinkle the xanthan gum over the simmering gravy and stir briskly until dissolved and the gravy thickens. Season with salt and pepper to taste.

8. At the end of the 20 minutes of cooking, if the breading on the cutlets is not sufficiently browned and crispy, then broil for a few minutes until deeply golden brown. Serve immediately, topped with the mushroom gravy.

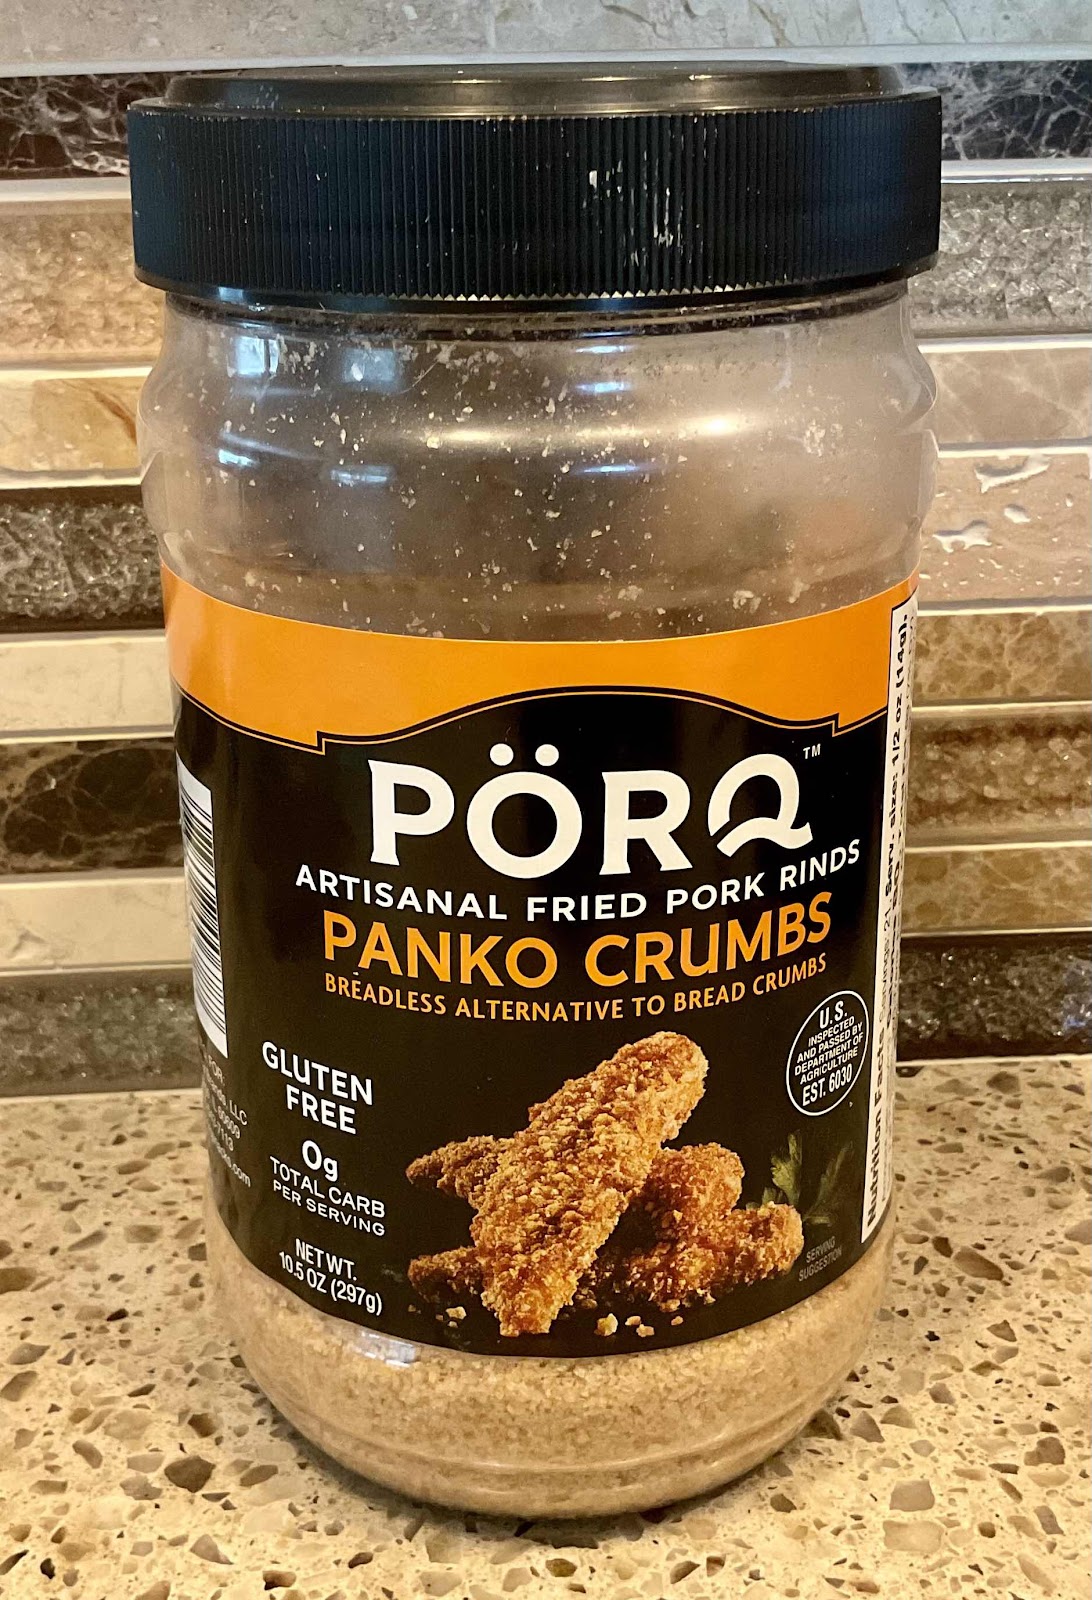
Crushed Pork Rind Crumbs
Notes: 
*Pork rinds conveniently come already crushed in panko-style crumbs! Look for them near the breadcrumbs or in the gluten-free section of your grocery store.

**If you want to make a plain, brown gravy, you may omit the thyme and vinegar. Personally, I like the very slight acidity the vinegar adds to the gravy, but if you don’t, then just leave it out.

Nutritional Information per serving of schnitzel (4 oz. cutlet, no gravy): 358 calories, 0.4 g carbohydrate (0 g fiber, 0 g sugars), 19.3 g total fat (7.4 g saturated fat, 0 g trans fat), 147 mg cholesterol, 378 mg sodium, 43.2 mg calcium, 545 mg potassium, 1 mg iron, 29 IU Vit A, 43.8 g protein. Net carbs per serving: 0.4 grams

Nutritional Information per 1/2 cup gravy: 51 calories, 4.1 g carbohydrate (0.9 g dietary fiber, 1.9 g sugars), 3 g total fat (1.8 g saturated fat, 0 g trans fat), 10 mg cholesterol, 354 mg sodium, 7.8 mg calcium, 206 mg potassium, 0 mg iron, 1 IU Vit A, 2 mg Vit C, 2.7 g protein. Net carbs per serving: 3.2 grams

Photos and recipe by Kathy Sheehan, copyright 2021
All rights reserved. Please do not duplicate without the author’s permission. 
Wednesday, April 21, 2021

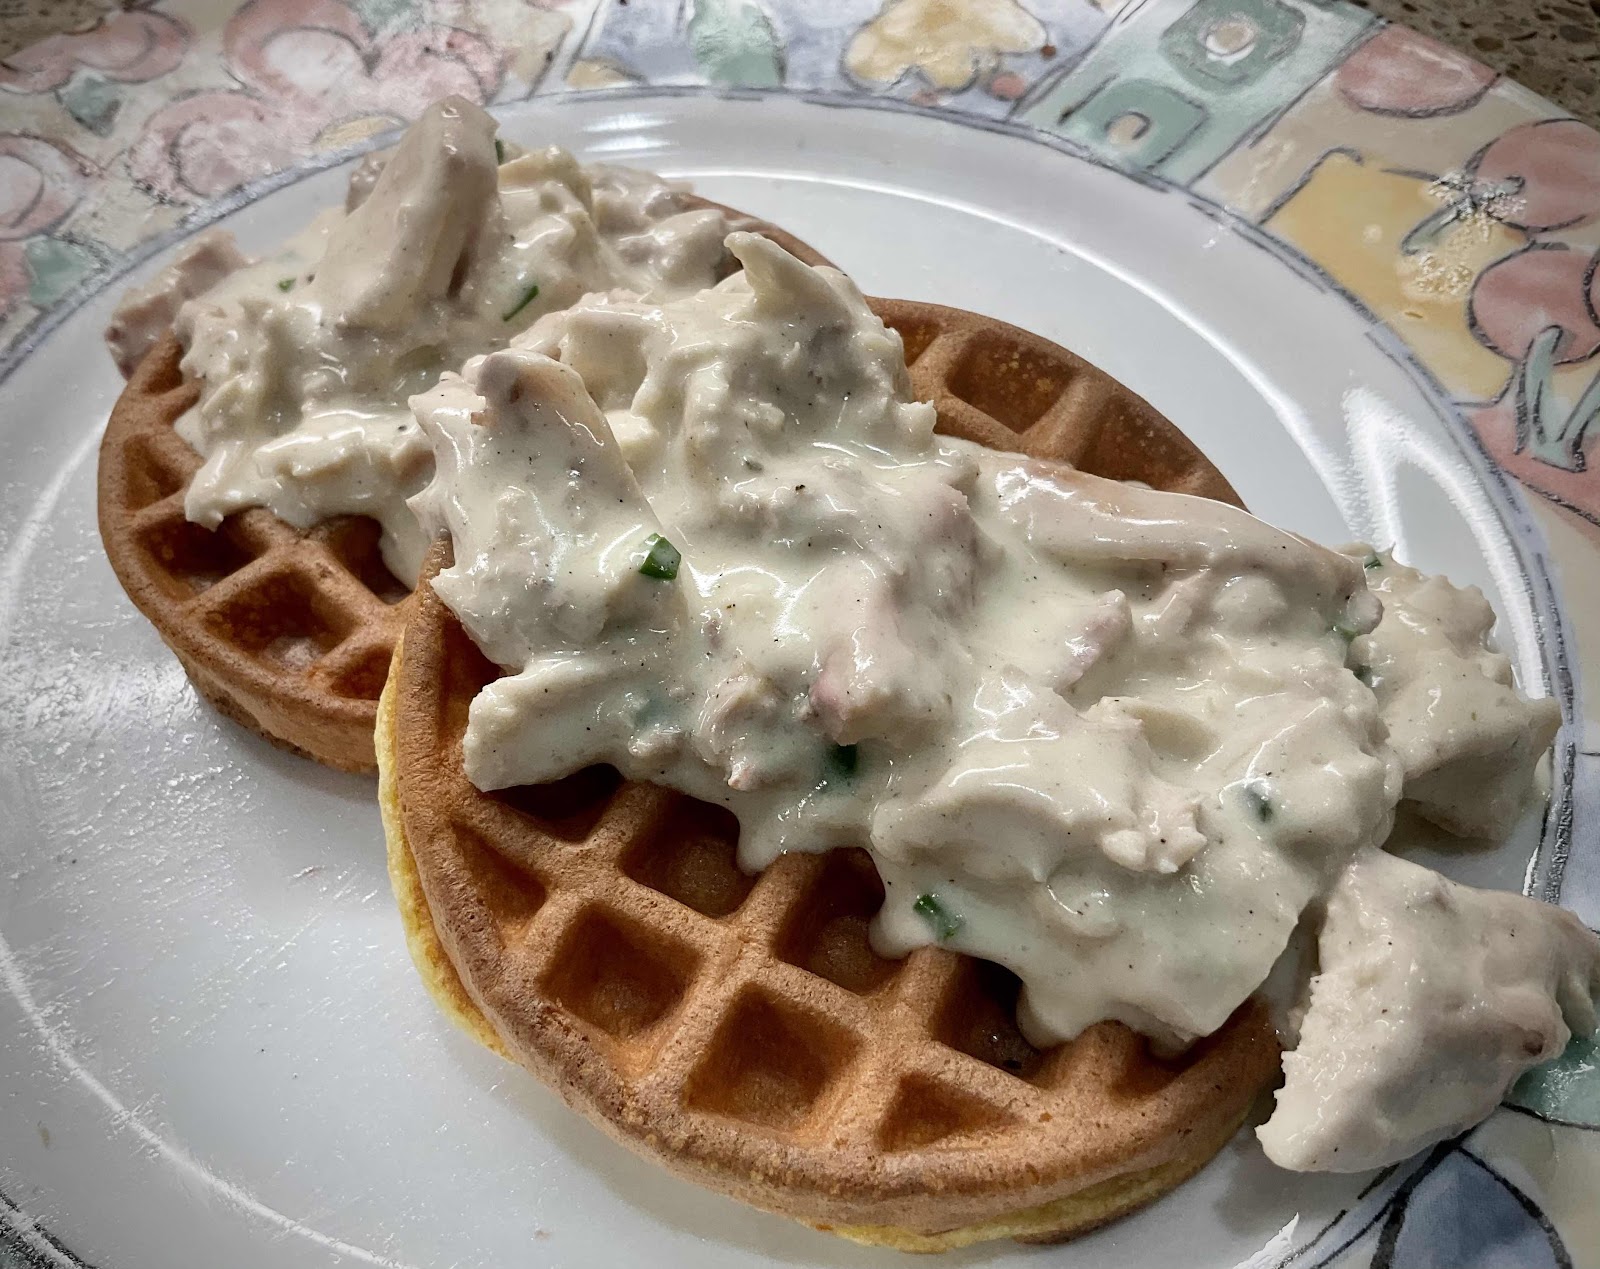
Keto Creamed Chicken over Chaffles (or Riced Cauliflower)

Keto Creamed Chicken over Chaffles
I had some leftover chicken in the refrigerator and, wondering what to do with it, I remembered an old-fashioned Creamed Chicken recipe I used to love when I was first married. In the 1970’s and 80’s, Creamed Chicken was a popular dish served over puffed pastry shells. With a few substitutions, you can create the same, comforting meal in a keto version! Using xanthan gum instead of flour to thicken the sauce and served over toasted chaffles or riced cauliflower, this entire meal is only about 2 carbs per serving! Tonight’s dinner was a wonderful trip down Memory Lane...one I won’t forget anytime soon!

Keto Creamed Chicken
Makes 4 servings

1 cup chicken broth
1/2 cup heavy cream
1/2 teaspoon poultry seasoning
1 teaspoon chopped fresh chives or parsley
1/2 to 3/4 teaspoon xanthan gum
2 cups cooked chicken, cubed or shredded
1 tablespoon white wine or sherry
Salt and pepper to taste

Optional for serving:
Toasted Chaffles
Riced cauliflower

1. In a saucepan over medium heat, whisk together the chicken broth, heavy cream and herbs and heat to a simmer. While whisking, add the xanthan gum and continue whisking until thickened and smooth.

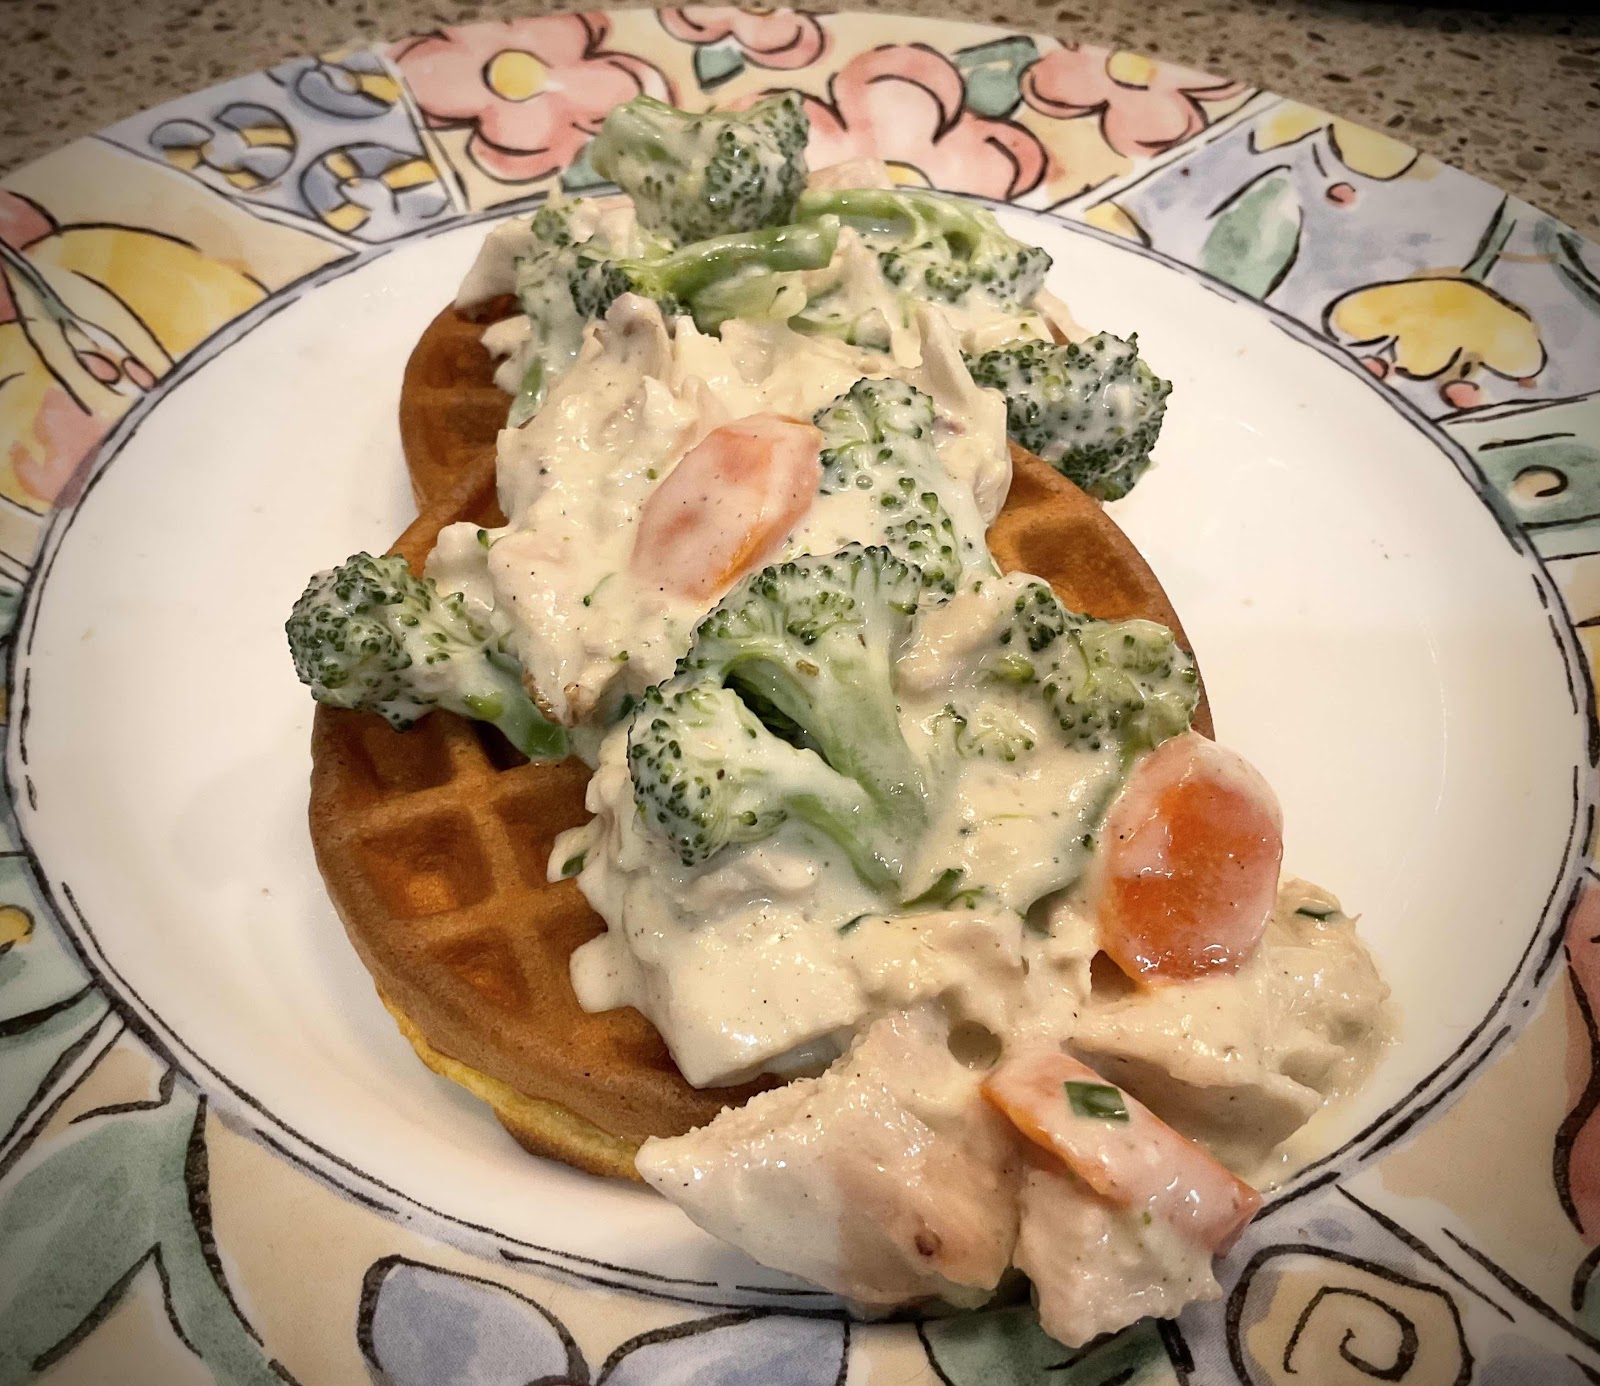
2. Add the cooked chicken, white wine or sherry and season with salt and pepper to taste. Simmer until the sauce is thicken to desired consistency, stirring occasionally. (If desired and if your diet allows a few more carbs, add any optional vegetables you might like, such as broccoli, one (4 oz) can of mushrooms and their liquid, a tablespoon of peas or carrots.)

3. Serve warm over toasted chaffles or cooked riced cauliflower. Enjoy!

Creamed Chicken and Vegetables over Chaffles
Nutritional Information per serving (1/4 recipe, no vegetables or optional ingredients): 221 calories, 0.5 g carbohydrates (0.1 g dietary fiber, 0.3 g sugars), 14.3 g total fat (7.6 g saturated fat, 0 g trans fat), 99 mg cholesterol, 223 mg sodium, 12 mg calcium, 182 mg potassium, 1 mg iron, 129 IU Vit A, 22.7 g protein. Net carbs per serving: 0.4 grams

Recipe and photos by Kathy Sheehan, copyright 2021
All rights reserved. Please do not duplicate without the author’s permission. 

Saturday, September 2, 2017

Low Carb, Gluten Free Autumn Recipes


When the mornings and evenings start getting cooler and the first kick-off of football season as occurred, I begin to experience cravings for the warm and comforting foods of autumn. I've been browsing through my recipe file and here are a few links to some of my favorite main dishes and treats to usher in the season. 

Main Dishes

One Pan Autumn Chicken Dinner from Cooking Classy with a Sprinkle of Fancy

Low Carb Bacon Cheeseburger Casserole from bunsinmyoven.com

Original Cauliflower Mac and Cheese Casserole. Recipe by George Stella

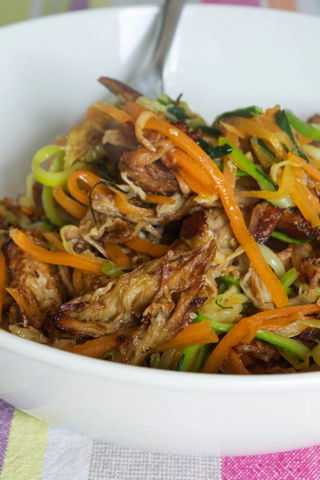
Pulled Pork and Zoodles
Pulled Pork and Zoodles from the Comfort Bites Blog

Salmon in Cream from Salmon Recipes Old and New

Turkey Saltimbocca Meatballs
Turkey Saltimbocca Meatballs. Recipe by Melissa Sevigny from ibreatheimhungry.com

Rainbow Chili by Kathy from Diabetics Rejoice blog

Sautéed Brussel Sprouts with Pancetta. Recipe by Gina Homolka from skinnytaste.com

Autumn Treats

Baked Cinnamon Spice Granola
Baked Cinnamon Spice Grain-Free, Low Carb Granola. Recipe by Kathy from Diabetics Rejoice blog

Keto Pumpkin Spice Donuts from ketosizeme.com

Low Carb Pumpkin Cheesecake Mousse. Recipe by Brenda from sugarfreemom.com

Pumpkin Scones with Cinnamon Glaze
Pumpkin Scones with Cinnamon Glaze. Recipe by Carolyn from alldayidreamaboutfood.com

Toasted Pumpkin Seeds. Recipe by Diabetic Living from diabeticlivingonline.com

Bulletproof Pumpkin Misto. Recipe by Kathy from Diabetics Rejoice blog

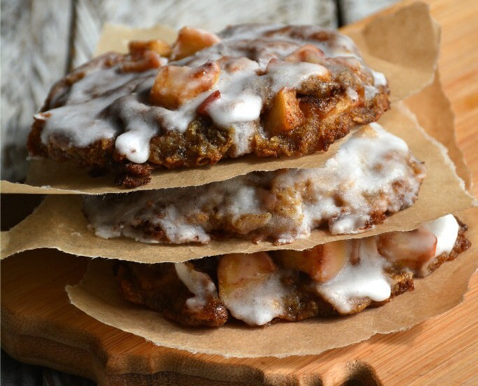
Low Carb Apple Fritters
Low Carb Apple Fritters from forestandfauna.com


Saturday, November 1, 2014

Spicy Fish (or Chicken)


Just playing around in my kitchen with a few on-hand ingredients, I created this delightful meal.  I loved it so much, I've had it in various forms four times this week!  I've tried it with haddock, tilapia, salmon and chicken...and I'm certain it would be just as good made with shrimp or pork.  The secret is in the combination of ingredients: The crispy coating of nut flour, the flavorful blackening spice and the hint-of-heat in the spicy sauce.  It's one of those dishes that lingers delightfully on the tongue!  Blackening spice can be purchased or make your own, like I do.  (George Stella has a great blackening spice recipe here:  http://stellastyle.com/site/2012/12/07/blackened-salmon-or-chicken-breast/)  Adjust the seasoning to your own taste.  If you like heat, then use more blackening spice in the coating mix and a medium or hot salsa.  If you want it flavorful but tame, use a little less spice and mild salsa. It's a versatile recipe, so have fun experimenting with your favorite fish, chicken or meat to make your own unique dish.

Spicy Fish (or Chicken)
Makes 2 servings

2 fish fillets: white fish, salmon or shrimp (or 2 boneless, skinless chicken breasts)
3 tablespoons grass-fed butter or ghee*
1/2 cup salsa (no sugar added, look for 2 carbs or less per 2 TB serving)
1/2 fresh lime, cut into 4 wedges

Coating Ingredients:

1/2 cup almond or other nut flour (I used walnut flour)
1 to 1-1/2 teaspoons blackening spice (or to taste)
1/4 teaspoon black pepper
1/4 teaspoon salt, optional (the blackening spice has some salt in it)
1 teaspoon dried parsley or cilantro
1 beaten egg OR a drizzle of coconut oil (to help the coating adhere to the fish or chicken)*

1.  On a shallow plate, mix together the coating ingredients.  Pat your fish or chicken with a paper towel to dry completely.  (If your chicken breast is thick, pound to flatten slightly for more even cooking.). Either dip your fish or chicken in beaten egg or drizzle with coconut oil and press into the coating mixture until both sides are well covered.  Set aside.

2.  In a skillet, melt the butter or ghee over medium-high heat.  Add fish or chicken and allow to cook, without disturbing or turning, for at least 3-4 minutes for fish (depending on type and thickness) or 5-6 minutes for chicken until coating begins to crisp and brown.  (Shrimp will take less time, only about 1-2 minutes.)  Carefully turn fish or the chicken and continue cooking on the second side for the same amount of time or until done.  Note: Fish is done when no longer translucent and flaky.  Chicken should be at least 160-degrees Fahrenheit in the thickest part of the breast and juices run clear.  Do not consume undercooked fish or meat.  When cooked sufficiently, remove to a serving plate.

3.  Remove skillet from the heat.  To the drippings in the skillet, add the salsa and stir to deglaze the pan and loosen any brown bits.  (Note: Be careful and stand back when adding salsa to the hot pan because it will boil and possibly splatter.  If concerned, wait for a minute or two to allow the skillet to cool slightly.)  Serve sauce over fish or chicken with a generous squeeze of fresh lime juice.

Nutritional Information per serving (made with tilapia): 320 calories, 3.8 g carbohydrate (1.6 g dietary fiber, 1.5 g sugar), 23.9 g total fat (9.3 g saturated fat, 0 g trans fat), 68 mg cholesterol, 359 mg sodium, 31.7 mg calcium, 443 mg potassium, 25.2 g protein (this may vary, depending on type of fish or meat used).  Net carbs per serving: 2.2 grams

*For those with food allergies: To create a dairy free version, use ghee instead of butter.  If you are allergic or sensitive to eggs, omit and use a drizzle of melted coconut oil instead.

Recipe by Kathy Sheehan, copyright 2014

Friday, September 26, 2014

Supreme Pizza Chicken


I haven't had a slice of pizza for over 1-1/2 years, since learning that I have celiacs (an intolerance to gluten).  Not long after that discovery, I chose to go totally grain-free, which has made all the difference in reversing my diabetes.  I don't miss pizza itself, but the flavor of pizza is another matter.  This recipe tastes so much like the real thing that I feel like I just ate a slice!  I think the secret is the turkey pepperoni.  It adds zip to the sauce.  I think this easy recipe will become a family favorite!  If you are lucky enough to have any leftovers, cut up the chicken into bite-size pieces, stir them back into the sauce and serve over zero calorie, zero carb shirataki noodles.  It will be the best chicken cacciatore you'll ever eat!

Supreme Pizza Chicken
Makes 6 servings

2 lbs chicken pieces, skin removed (I used thighs and breasts)
2 TB coconut oil
1 cup strained tomatoes (I used Pomi brand) or plain tomato sauce mixed with 1 TB tomato paste
1/2 cup red wine 
1 small onion, chopped
4 oz. mushrooms, sliced
1-1/2 tsp dried oregano
2 cloves garlic, minced
34 slices of turkey pepperoni, cut into quarters
Salt and pepper to taste 
3 TB Parmesan cheese, shredded (shredded mozzarella can be substituted)*

1. In a heavy Dutch oven, heat coconut oil over medium heat.  Brown the chicken on all sides, remove to a platter and set aside.

2. To the pot add the wine, strained tomatoes (or tomato sauce thickened with tomato paste), onion, mushrooms, garlic, oregano and turkey pepperoni.  Return chicken to pot and turn heat to low.  Cover and simmer for 45 minutes.

3.  When chicken is done, remove it to a serving platter.  Turn heat to medium and boil sauce for about 10 minutes or until thickened to desired consistency.  Season with salt and pepper to taste.  Return chicken to pot to reheat briefly.  To serve, spoon sauce over chicken and sprinkle each portion with 1/2 TB cheese.

Nutritional information per serving: 324 calories, 6.2 g carbohydrate (1.2 g dietary fiber, 2.4 g sugar), 14.6 g total fat (7.1 g saturated fat, 0 g trans fat), 117 mg cholesterol, 585 mg sodium, 45.8 mg calcium, 473 mg potassium, 37 g protein.  Net carbs per serving: 5 grams

* For those with food allergies: To create a dairy-free version, omit cheese or substitute a dairy-free cheese product.

Recipe by Kathy Sheehan, copyright 2014

Wednesday, September 17, 2014

Lamb Chops with Orange, Rosemary and Butter Sauce


I'm celebrating tonight after a good doctor's visit that brought excellent news!  My lab results show that the changes I've made in my diet to reduce carbs combined with moderate protein and increased fat over the past five months are working.  My A1c dropped to 5.8 and I'm being taken off all diabetic medication!  This is a special recipe for a special occasion.  Lamb can be a bit pricey, but if you choose a shoulder blade instead of a the smaller chop, you'll save money and get a tasty cut of meat.  Ever since experiencing lamb during a trip to Iceland a few months ago, I've fallen in love!  Honestly, the best free range lamb on the planet comes from Iceland.  I was thrilled to see Icelandic lamb available for a limited time at my local Whole Foods Market.  I had to create the best recipe, since it's a rare treat, and this definitely meets with my approval.  If you can't get good lamb, this sauce is equally delicious over pork chops or chicken.

Lamb Chops with Orange, Rosemary and Butter Sauce
Makes 2 servings

2 shoulder blade lamb chops (about 6 oz each)
Salt and pepper
onion powder
1 tablespoon ghee or butter*
1 teaspoon orange zest
2 tablespoons freshly squeezed orange juice
1/4 cup chicken stock*
2 tablespoons high fat coconut milk or heavy cream*
1 teaspoon chopped fresh rosemary (or 1/2 teas dried)
1/4 teaspoon xanthan gum or low carb Thick It Up thickener (or 1/2 teas cornstarch or arrowroot)

1. Generously season the chops with salt and pepper, and lightly sprinkle with onion powder; set aside.

2.  In a heavy saucepan, melt the ghee or butter over medium heat.  Add the chops and cook, without turning, for at least 5 minutes.  When browned, turn and continue cooking for another 3 minutes.  Cover and cook for 2-3 minutes or until done to your taste.

3.  Meanwhile, zest the orange and chop the rosemary; set aside.  Cut the orange and squeeze 2 tablespoons of the fresh juice into a small bowl.  Add the stock and coconut milk to the juice; stir until blended.

4.  When the lamb chops are done, remove them to a serving plate.  Add the juice and stock mixture to the pan and whisk.  Add the zest and rosemary.  While whisking (important), sprinkle the xanthan gum into the sauce and stir until thickened.  (In order to prevent the xanthan gum from lumping, I use a small shaker top bottle and lightly sprinkle it while whisking vigorously.  Do not add it all at once because it might turn lumpy.  If using cornstarch or arrowroot, stir into a tablespoon or two of chicken stock until smooth, then add to the sauce in the pan.)

5.  Divide the butter sauce equally over the two chops and serve immediately.

Nutritional information per serving: 500 calories, 3 g carbohydrate (0.3 g dietary fiber, 1.9 g sugar), 37.6 g total fat (17.2 g saturated fat, 0 g trans fat), 144 mg cholesterol, 344 mg sodium, 59.2 mg calcium, 490 mg potassium, 35.4 g protein.  Net carbs per serving: 2.7 grams

* For those with food allergies: To create a dairy free version, use ghee (clarified butter) and coconut milk.  If gluten is a problem for you, choose a certified gluten free chicken stock.

Recipe by Kathy Sheehan, copyright 2014

Tuesday, August 19, 2014

Bacon Wrapped Chicken with Cucumber in a Creamy Herb Sauce


Finally, after years of trial, some success, backsliding, and continual adjustments to my diet, I am hopeful that I've discovered my personal tolerance level for carbohydrate and protein, both of which act upon insulin and blood sugar.  For the past several months, my blood glucose has been steady, with a fasting BG in the mid-80's, which has prompted a further reduction of diabetic meds!  We all understand the effect of carbs, right?  But protein, you might ask?  You may think protein doesn't affect blood sugar, but an excess of protein does!  Through a process called gluconeogenesis, your body will convert excess dietary protein into glucose.  Have you ever wondered why your BG will rise, even after not eating carb?  Gluconeogenesis could be the culprit!  So, how much protein should a diabetic eat?  Actually, for each person, it is different based on body size, metabolism, diet, etc.  With guidance from my doctor, I determined my level to be around 45 grams a day, but I'm a small person.  For a taller woman or man, it would be different.  The formula for calculating the optimum amount of protein is 1 gram for every kilogram of lean body mass.  If you're an athlete, then about 2 grams. (Click here for an online calculator to determine the approximate amount of protein for your size & activity level.)  So, the ratio of carbs, protein and fat that have brought about normal blood sugar levels for me is about 10-15% carb (under 25 g net carbs), 15% protein and 65-75% healthy fats (about 100 grams), such as olive oil, ghee, coconut oil, avocados, nuts and seeds.  (By the way, even with all that fat, my lipid levels, triglycerides, inflammation markers and blood pressure have dramatically improved, along with my BG!  Based on test results, my risk for heart disease has gone down!)  But, as I said, every person is different and, as nice as it would be to be given the proper ratio for your body to reverse diabetes, it will take some experimentation on your part to discover your personal tolerance levels.  

A good place to start is to reduce carbs to under 100 grams per day (spread throughout the day) and eventually reduce them to under 50.  Eat no more than 20 grams of protein per meal (an excess of that is usually more than a body can use in 4-5 hours) and ramp up your fat intake.  I want to be very clear about one point: a low fat, low carb diet doesn't work!  (And neither does a high carb, high fat diet.) Without enough fat, you'll be hungry and crave carbs, which can sabotage your efforts.  If you cut carbs and moderate your protein intake, then you'll need to increase your fat.  The best gauge is to eat enough fat until you're satisfied and don't experience any hunger, cravings or discomfort between meals.  Also, because your blood sugar and insulin requirements will drop, you'll need to be under a doctor's care because a reduction in medication will likely be necessary.  Another caution is to Type 1 or insulin-dependent T2 diabetics: this type of diet adjustment needs close monitoring by a doctor.  To learn more, I highly recommend The Diabetes Solution by Dr. Richard Bernstein, who is himself a Type 1 diabetic.  His book explains this type of low carb diet in great detail and includes approved food lists and recipes.  Another good book to get you started is The New Atkins for a New You by Drs. Eric Westman, Stephen Phinney and Jeff Volek.

Now, on to my incredible new recipe!  Why is it that when you add bacon to a dish, it instantly becomes the best thing you put into your mouth? Well, that statement says it all.

Bacon Wrapped Chicken with Cucumber in a Creamy Herb Sauce
Makes 4 servings

12 ounces boneless, skinless chicken breasts, cut into 3 oz. medallions
4-6 slices of bacon
1 large cucumber, seeds removed and sliced into 1/8" quarter rounds
1/2 cup chicken stock*
2 tablespoons ghee (or butter)*
1/3 cup high fat coconut milk (or heavy cream)*
2 tablespoons chopped, fresh parsley (or 1 TB dried)
1 teaspoon fresh thyme (or 1/2 tsp dried)
Salt and pepper
6 cups spring mix lettuce, divided among 4 serving plates

1. Pat chicken with a paper towel and cut into 3 oz pieces.  Generously season chicken medallions with salt and pepper.  Wrap one piece of bacon around each medallion.  Heat a heavy skillet to medium and place chicken into the pan.  Meanwhile, heat oven to 350-degrees.  Cook chicken for 5 minutes, flip each medallion and cook for another 5 minutes.  Remove chicken from pan and place in a baking dish.  Continuing heating chicken in the oven while you make the sauce.

2.  Drain all but 2 tablespoons of bacon fat from the skillet.  Add the chicken stock and stir to deglaze the brown bits from the bottom of the skillet.  Add the ghee (or butter) and the cucumber.  Sauté until the cucumber is beginning to soften and the stock has been reduced by half.  Add the coconut milk (or cream) and stir to combine and until slightly thickened. Season with herbs, salt and pepper to taste.  Remove skillet from heat.  Remove chicken from oven and place a chicken medallion on each mound of lettuce.  Pour any drippings from the baking pan into the sauce and stir.  Divide sauce and cucumbers evenly over the four portions and serve immediately.

* For those with food allergies: To create a dairy, lactose and casein free version, use ghee and coconut milk.  To make it gluten free, be sure to purchase a certified GF chicken stock or broth.

Nutritional Information per serving: 292 calories, 5 g carbohydrates (1 g dietary fiber, 2.4 g sugars), 18 g total fat (10.1 g saturated fat, less than 0.1 g trans fat), 75 mg cholesterol, 739 mg sodium, 70.8 mg calcium, 456 mg potassium, 26.8 g protein.  Net carbs per serving: 4 g

Recipe by Kathy Sheehan, copyright 2014

Thursday, August 9, 2012

Chicken Sausage & Grilled Onions Over Spicy Mustard Beans

The chicken sausages that come cooked in a package are convenient and easy to prepare.  When I don't feel like cooking, they often are my "go to" quick meal.  This recipe can use any flavor of chicken sausage, although I chose Chicken-Apple because its my favorite.  It's served over canned cannellini beans which provides lots of heart-healthy fiber!  Because they're not too exciting on their own, I drained and rinsed the beans before adding them to a spicy mustard sauce and heating them briefly.  This allowed them to pick up the flavor of the sauce and gave them a more interesting flavor.  The other reason I love this quick recipe is that it's a one-pot meal.  It's not fancy, but it's hearty and delicious! 

Chicken Sausage & Grilled Onions Over Spicy Mustard Beans
Makes 3 servings

2 large yellow onions, thinly sliced
1 tablespoon olive oil
½ teaspoon salt
4 tablespoons sherry, divided
4 cooked chicken sausage links (any flavor), sliced into rounds
2 plum tomatoes, seeded and chopped
1 can (14.5 ounce) cannellini beans, rinsed & drained
½ cup chicken broth
1 tablespoon spicy brown mustard (or your favorite)
½ teaspoon ground black pepper
½ cup shredded gruyere cheese (or parmesan)

1.  Heat the oil in a large, heavy skillet on medium and add sliced onions and salt.  Cook, stirring frequently, until softened and translucent.  Add 3 tablespoons sherry.  Reduce heat to low and continue cooking, stirring occasionally, until beginning to turn golden in color.  Add sliced sausage and continue cooking until sausage has browned a bit and onions are caramelized.

2.  Meanwhile, while onions are cooking, in a medium saucepan combine the drained beans, chicken broth, 1 tablespoon Sherry, mustard and pepper.  Bring to a boil over medium-high heat.  Reduce heat to low and continue simmering for 5-8 minutes.  Remove from heat and allow to sit until onion mixture is ready.

3.  When onions are caramelized and sausage is browned, add chopped tomatoes and stir gently until heated through.  Salt & pepper to taste.

4.  To serve, use a slotted spoon to divide beans equally among the serving plates.  (Discard any remaining liquid.)  Top each with 1/3 of the onion-sausage mixture and sprinkle with shredded cheese.  Serve immediately.
Nutritional Information per serving:  565 calories, 44 g carbohydrate, 28 total fat, 8.3 g saturated fat, 2210 mg sodium, 100 mg cholesterol, 14 g sugar, 11 g fiber,  33 g protein.

Original recipe by Kathy Sheehan, copyright 2012


Monday, February 14, 2011

Enchiladas Your Way!

One cold afternoon late last week, I made a slow-cooking pot roast. I love doing this because it provides me with lots of leftover roast to make other meals during the week. A favorite "leftover" were these delicious beef enchiladas made better with the substitution of healthier ingredients. First, the roast was top round, which is extremely lean to begin with but made melt-in-your-mouth tender by the slow-cooking process. Also, I used reduced-fat cheese in place of full-fat. Another addition was the V-8 juice to extend the store-bought enchilada sauce and increase the amount of vegetables. The final result was every bit as wonderful as my favorite Mexican restaurant, but with many fewer calories, carbs and fat.

If beef is not your thing, then chicken or a firm, white fish (such as cod or halibut) is easily substituted. You can use leftover chicken or braise boneless, skinless breasts in place of the beef. If you like fish tacos, then I guarantee you'll enjoy fish enchiladas just as much. Be certain to select a firm, white fish that will be "meaty" enough not get overlooked when mixed with the other ingredients. Finally, if you want a totally meatless version, omit the meat and add more beans and possibly some chopped spinach. Anyway you prepare these spicy enchiladas, I'm sure they'll become an often-requested, go-to recipe to feed your hungry family.

Enchiladas Your Way!
(Makes 8 enchiladas)

¼ cup chopped onion
2 teaspoons olive oil
2/3 cup V-8 vegetable juice
¾ cup salsa (in strength of your choice)
½ pound left-over roast or blade steaks (chicken or fish can be substituted)
8 ounces enchilada sauce (1 cup)
8 corn tortillas
1½ cups shredded reduced-fat cheddar, divided
½ cup canned pinto or kidney beans (drained and rinsed)
Chopped cilantro (optional)

1. In a heavy saucepan, heat the oil over medium heat and add the onion. Saute until soft and translucent. Add the vegetable juice and salsa; stir to combine.

2. If using blade steaks, cut the steaks into two strips and discard the center membrane that runs down the middle. Place into the saucepan and simmer over low heat for 1½ hours. If using leftover roast, simmer for 25-30 minutes until the meat shreds easily. (If using chicken, place ½ pound of skinless, boneless chicken breasts into the mixture and simmer for 20-25 minutes. If using fish, place fillets into mixture and simmer for about 12-15 minutes or until flaky.)

3. Remove meat to a plate and shred with two forks. (If using fish, break into bite-size chunks.) Strain the sauce through a sieve and catch the liquid in a bowl and reserve. Mix the reserved liquid with the enchilada sauce; stir to combine and set aside. Add the solids to the shredded meat and cool for 10-15 minutes. Meanwhile, preheat oven to 350-degrees. Once the meat mixture is cooled, add ½ cup of the shredded cheese and the drained beans; stir to combine. Taste to adjust seasonings and add more salt, pepper, hot sauce, chopped cilantro or chili powder to your liking.

4. Place several large spoonfuls of the smooth enchilada sauce into the bottom of a 9" x 13" baking dish. Spread sauce to edges. Follow the directions on the package to heat the tortillas and make them pliable. (Keep the warm tortillas covered with a damp cloth until you fill them so they don't dry out.) Place a large spoonful of filling down the center of one tortilla, fold ends over filling and place into the baking dish with seam side down. Repeat with remaining tortillas.*

5. Pour and spread the enchilada sauce over the top of the filled tortillas being certain to spread until any exposed tortilla is covered with sauce (this will prevent the tortilla from drying and cracking during the baking process). Sprinkle the remaining 1 cup of cheese and chopped cilantro over the top and cover tightly with foil. Bake in preheated oven for 20 minutes. Remove foil and bake for another 4-5 minutes until cheese has browned slightly. Serve immediately.

*The beauty of this dish is that you can make only the number of servings you need, and then refrigerate the leftover filling, enchilada sauce, cheese and corn tortillas to make another meal later in the week.

Nutritional Information per 1 beef enchilada: 229 calories, 16.3 g carbohydrate, 9.2 g total fat, 4 g saturated fat, 559 mg sodium, 3 g fiber, 16.9 g protein.

Nutritional Information per 1 chicken enchilada: 184 calories, 16 g carbohydrate, 5 g total fat, 2 g saturated fat, 596 mg sodium, 3 g fiber, 15 g protein.

Nutritional Information per 1 fish enchilada (made with cod): 206 calories, 16 g carbohydrate, 6 g total fat, 2 g saturated fat, 553 mg sodium, 3 g fiber, 22 protein

Original recipe by Kathy Sheehan, copyright 2011

Monday, October 18, 2010

Glazed Chicken with Pear

I know that grilled chicken is an excellent, lean protein choice but it can be boring, especially when it's on the menu a couple of times a week. When I was thinking about how I could prepare it tonight, I looked around my kitchen and saw a beautiful, ripe pear sitting in my fruit bowl and remembered how the sweet and savory combination of fruit with meat can be so satisfying. Pears and apples are abundant in stores right now and they are at their peak. I especially like a Bartlett pear for this recipe because it cooks and softens quickly, but if you prefer a crisper fruit, try Bosc or Red Pear. The mixture of nutmeg, apple juice with the broth reduces into a nice, light glaze. This quick recipe takes only about 15 minutes to prepare and makes a beautiful and delicious autumn meal.

Glazed Chicken with Pear
(Makes 2 servings)

2 boneless, skinless chicken breasts (about 6 oz. each)
Poultry seasoning
Lemon pepper
Salt
2 teaspoons olive oil
1 large, ripe Bartlett pear (cored, peeled and sliced)
¼ cup low-sodium chicken broth
½ cup apple juice or cider
Dash of nutmeg
½ teaspoon cornstarch (omit for gluten free recipe)

1. Butterfly or pound chicken breasts until about ½" thick. Season both sides with a dusting of poultry seasoning, lemon pepper and salt. In a measuring cup, combine the chicken broth, apple juice and nutmeg. Measure the cornstarch in a small bowl and add 2 tablespoons of the liquid. Stir cornstarch until dissolved; set aside.

2. Heat a non-stick skillet over medium heat, add olive oil and add chicken breasts. Cook for 3-4 minutes, turn and continue cooking for another 3 minutes or until juices run clear. Remove chicken to a plate and cover with foil to keep warm.

3. Add pear slices to the pan and cook for 1 minute, turn each slice and continue cooking for another minute. Add the broth-juice mixture and simmer until liquid has been reduced by half and pear slices are soft. Return chicken breasts to pan to reheat. Add cornstarch mixture and stir liquid until thickened slightly. Turn chicken to coat with glaze.

4. Divide chicken and pear slices equally between two serving plates and serve immediately.

Nutritional Information per serving: 320.5 calories, 24.7 g carbohydrate, 6.3 g total fat, 1.2 g saturated fat, 312.5 mg sodium, 3.3 g fiber, 40.1 g protein.

Original recipe by Kathy Sheehan, copyright 2010

Wednesday, June 30, 2010

Don't forget Kabobs!

Already, on several occasions this summer, my husband and I have cooked shish kabobs on the grill. They are so much fun to make and eat...and talk about EASY! Simply marinate chicken, shrimp or scallops for an hour. Another method for adding flavor is to apply a dry rub on beef, chicken or scallops. Then pick and choose your favorite vegetables, toss them in a tablespoon of olive oil and season with salt and pepper and start lining them up on soaked bamboo skewers. Grill them directly over hot coals for about 3-4 minutes per side and you'll be ready to eat in no time!

Some of our favorite combinations are teriyaki chicken with fresh pineapple, peppers and onions. Sirloin chunks that have been tossed in a seasoned dry rub are excellent paired with zucchini, mushrooms and cherry tomatoes. Also, jumbo shrimp and scallop kabobs would be a fun and delicious way to introduce more fish into your diet. For a meatless meal, skewer and grill a variety of your favorite vegetables. The possibilities are endless and limited only by your imagination!

Nutritional Information: The nutritional information per kabob will vary, depending on the type of meat, vegetables and marinades used. But whatever the combination, shish kabobs are typically low in calories, carbohydrate and fat because they are mostly grilled vegetables with a small amount of meat or fish. You can feel good about eating this meal, so enjoy and don't worry about the numbers.

Friday, June 18, 2010

Crispy Chicken Asparagus Bundles

I have made this dish a couple of times and really enjoy it. Not only do the flavors go together well, but it also looks so fancy on the plate! When you cut into it, the spiraling layers gives it an elegant appearance, even though it is extremely easy to prepare. The trick to a really crispy coating is the panko (Japanese-style breadcrumbs). It comes in regular or whole wheat so, if you want the addition of a little fiber, go with the whole wheat variety. I used minced fresh herbs from my little herb garden but, if you don't have fresh, dried will work just fine.

The recipe calls for the chicken breasts to be "butterflied." It's a simple cutting technique in which you slice into the thickest side and stop just before cutting completely through. When it is opened and flattened, it turns a small piece of meat into what looks like a large portion. Click on this link if you would like to see a short slideshow about How to Butterfly a Chicken Breast.

Crispy Chicken Asparagus Bundles
(Makes 2 servings)

2 boneless, skinless chicken breasts (5 oz. each)
¼ teaspoon onion powder
¼ teaspoon garlic salt
¼ teaspoon black pepper
2 thin slices deli ham
2 teaspoons grated Parmesan cheese
8 spears asparagus, woody ends removed
¼ cup whole wheat panko Japanese-style breadcrumbs (or regular)
1 tablespoon chopped rosemary (or 1 teaspoon dried)
1 tablespoon chopped parsley (or 1 teaspoon dried)
¼ teaspoon garlic powder
¼ teaspoon black pepper
Pinch of salt
4 teaspoons pub-style Dijon mustard
Drizzle of olive oil (about 1 teaspoon)

1. Preheat the oven to 400-degrees. Spray a shallow baking pan with non-stick spray or spread 1 teaspoon of olive oil to prevent chicken from sticking; set aside.

2. Butterfly the chicken breasts and cover with plastic wrap. Pound with a mallet until about ¼ to ½-inch thick. Sprinkle one side with onion powder, garlic salt, and pepper. Place a ham slice on each and sprinkle with the Parmesan cheese. Lay 4 asparagus spears in the center of each and roll chicken around the vegetables; set aside.

3. In a shallow plate, combine the panko breadcrumbs, herbs, garlic powder, pepper and salt. Spread each chicken bundle with mustard and roll in the breadcrumb mixture. Place in the prepared baking dish (seam side down). Drizzle a small amount of olive oil over the top of each bundle and bake for 25 minutes. Serve hot.

Nutritional Information per serving: 239 calories, 10 g carbohydrate, 5.3 g total fat, 1.8 g saturated fat, 540 mg sodium, 1 g fiber, 38.1 g protein.

Original recipe by Kathy Sheehan, copyright 2010

Sunday, June 13, 2010

Harvest Tuna or Chicken Salad

I like tuna and try to eat it often to include more fish and Omega 3 in my diet, but something seems to happen to my creativity when I open that can so I end up making the same boring tuna fish salad with mayo, mustard and pickle relish. Today I challenged myself to come up with a different twist on my ordinary tuna salad and the end result was bursting with flavor! The idea of adding dried fruit came from a harvest salad I was recently served at a local restaurant (Rudy's in Cape Elizabeth). It adds texture and a hint of sweetness that blends perfectly with the homemade cherry-balsamic dressing. If you want variety, keep in mind that this recipe would be excellent with cooked chicken, as well. With warmer weather coming, I'll be glad to have another cool, main dish salad in my recipe box and this one is definitely worth repeating!

Harvest Tuna or Chicken Salad
(Makes 2 servings)

3 tablespoons balsamic vinegar
1 tablespoon cherry preserves or jam
Freshly ground black pepper to taste
2 tablespoons olive oil
5 cups romaine lettuce
2 tablespoons dried cherries, chopped
¼ cup dried apples, chopped
2 tablespoons almonds, chopped (or use slivered)
2/3 cup broccoli florets
½ cup cucumber or celery, quartered and sliced
5 ounces solid white tuna, drained & broken into small pieces (or ¾ cup chicken)

1. In a large bowl, whisk together the balsamic vinegar, cherry preserves, pepper and olive oil until well blended and emulsified.

2. To the bowl, add the remaining ingredients and toss until combined and well coated with the dressing. Equally divide among two serving plates and serve immediately.

Nutritional Information per serving: 382.5 calories, 33.4 g carbohydrate, 19 g total fat, 2.4 g saturated fat, 272.5 mg sodium, 5.4 g fiber, 19.2 g protein.

Original recipe by Kathy Sheehan, copyright 2010

Sunday, May 16, 2010

Chicken Caprese Pasta

Here is an outstanding pasta dish that is extremely flavorful and healthy. The trick to reducing the carbs from pasta is to take a small amount and stretch it. In this recipe, only 3 ounces feeds four people, but you'll not feel deprived at all! The plum tomatoes make this dish especially fresh tasting, light and delicious but, if time is an issue, you can substitute petite diced from a can and eliminate the salt.

Insalata Caprese is the inspiration for this pasta dish. Traditionally, it is a combination of sliced tomatoes, buffalo mozzarella and basil. Also, a balsamic dressing is common. I've added more vegetables to the fresh tomatoes to boost the nutrition and created a balsamic-tomato sauce that brings it all together beautifully. Looking for a meatless meal? Simply leave out the chicken and enjoy.

Chicken Caprese Pasta
(Makes 4 servings)

3 ounces dry spaghetti or angel hair pasta (I recommend Dreamfield’s)
1½ teaspoons olive oil, divided
6 ounces chicken tenders (about 4 tenders)
4 cups seeded and chopped plum tomatoes (about 6 tomatoes)
1 cup chopped onion
2 cloves garlic, minced
½ cup zucchini, quartered and sliced (½ medium zucchini)
3 cups baby spinach leaves
3 tablespoons fresh basil, rolled and sliced into ribbons (or 1 tablespoon dried)
¼ teaspoon salt, divided
Ground black pepper to taste
2 ounces fresh mozzarella, cut into cubes (or purchase small balls in the cheese section of your grocery)

Sauce Ingredients:
2 tablespoons tomato paste
2 tablespoons balsamic vinegar
1 tablespoon olive oil
3 tablespoons chicken broth

1. Cook pasta according to package directions. While water is boiling and pasta is cooking, heat 1 teaspoon olive oil in a large, non-stick skillet over medium-high heat. Add chicken and cook about 3 minutes per side until juices run clear; remove to plate and cool until it can be handled. Shred or cut into bite-size pieces; set aside.

2. Reduce heat to medium. Add the remaining ½ teaspoon olive oil to pan and add onion. Sprinkle with 1/8 teaspoon salt and cook until beginning to soften. Add zucchini and garlic; saute for 2 minutes, stirring occasionally. Add tomatoes and remaining 1/8 teaspoon salt and cook for 3-4 minutes, stirring occasionally.

3. While vegetable mixture is simmering, in a small bowl, mix together the sauce ingredients; set aside.

4. Add baby spinach to vegetables and cook until wilted. Add pepper, basil, drained cooked pasta, chicken and sauce mixture to skillet and toss until pasta is coated and vegetable sauce is well distributed. Remove from heat and add fresh mozzarella; stir to combine and serve immediately.

Nutritional Information per serving: 253 calories, 30 g carbohydrate, 8.3 g total fat, 2.2 g saturated fat, 4.6 g fiber, 285.5 mg sodium, 17.8 g protein

Original recipe by Kathy Sheehan, copyright 2010

Wednesday, April 28, 2010

Salmon or Chicken Salad with Strawberry Balsamic Reduction

Strawberries and balsamic vinegar are such a perfect combination of sweet and sour that I borrowed the idea from my earlier post (see Balsamic Strawberries with Mascarpone Cream) and took it in another direction to come up with this delicious main dish salad. The strawberries in particular give this salad a delightful Spring flavor, while the crunch from the crisp romaine and toasted almonds only adds to its freshness.

The following recipe describes how to make this salad using salmon, but it is equally delicious with boneless, skinless chicken breasts or tenders that have been quickly browned in a skillet in place of the salmon (see variation suggestion below recipe). I hope while strawberries are at their peak, you'll give this one a try.

Salmon Salad with a Strawberry Balsamic Reduction
(Makes 2 servings)

2 tablespoons slivered almonds
2/3 cup balsamic vinegar
2 teaspoons Splenda granular
1 teaspoon lemon juice
6 cups romaine lettuce
2 center cut salmon fillets (about 5 oz. each)
1 tablespoon canola oil or grapeseed oil (for high temp cooking, not olive oil)
Lemon pepper
10-12 strawberries, quartered

1. Heat a heavy skillet over medium heat (I use a small cast-iron skillet). Add almonds to dry pan and toast, stirring often, until golden brown. Pour almonds into a bowl; set aside.

2. In another small bowl, mix together the balsamic vinegar, Splenda, and lemon juice; set aside. Divide and arrange romaine lettuce on two serving plates; set aside.

3. Wipe out pan of any almond bits and increase heat to medium-high. Meanwhile, coat both sides of the salmon fillets with oil and sprinkle with lemon pepper. When skillet is very hot, place the oiled salmon in the pan and do not disturb for at least 2 minutes until a brown crust has formed. Turn salmon and sear other side for at least two minutes. Turn again and complete cooking to desired doneness. (If you like your salmon on the rare side, the 2 minutes per side should be fine. I like mine cooked through to flaky and no longer pink in center, which takes another 2-3 minutes. Do not overcook, or fish will be dry.) Place salmon on top of lettuce on serving plates and set aside.

4. Add balsamic vinegar mixture and strawberries to hot pan. Boil and cook, stirring occasionally, until reduced to ½ cup and thickened to consistency of syrup. Evenly divide balsamic reduction and strawberries over salmon and lettuce. Top each with 1 tablespoon of the toasted almonds and serve immediately.

Nutritional Information per serving: 367 calories, 20 g carbohydrate, 14 g total fat, 3.2 g saturated fat, 3.9 g fiber, 38.7 g protein.

Original recipe by Kathy Sheehan, copyright 2010

Variation: Try this salad with grilled chicken, instead of salmon. Pan-grill the chicken for about 3-4 minutes per side and cook until juices run clear. Allow chicken to rest before slicing and distributing over salad greens. If desired, add a chopped plum tomato with the romaine.

Saturday, April 24, 2010

Parmesan Zucchini Crepes with Creamy Garlic Sauce

As I've said, crepes are an excellent vehicle for vegetables, turning them into a quick, but impressive meal. Here is another delicious light meal or side dish that will encourage any picky eater in your family to eat more vegetables. In this recipe, the zucchini sticks are browned in a skillet, then topped with cheese and finished off under the broiler before being folded into a crepe. The creamy garlic sauce compliments the dish perfectly. If you've created a batch of crepes ahead of time, this recipe takes less than 15 minutes to prepare. As a matter-of-fact, it's so simple, I've made this beautiful quick meal for lunch several times, even though I'm alone and there's nobody to impress, because I'm worth it!

NOTE: Are you not wanting to make crepes, but this recipe sounds good? Try the variation described below and serve with grilled chicken.*

Parmesan Zucchini Crepes with Creamy Garlic Sauce
(Makes 2 servings)

two 6" to 7" crepes made from my "Basic Crepes" recipe (see 4/6/10 post)
1 medium zucchini, sliced lengthwise into 6 or 8 wedges
2 teaspoons olive oil, divided
3 tablespoons grated parmesan cheese
½ teaspoon dried Italian herbs
1 teaspoon minced garlic
1½ tablespoons all-purpose flour
½ cup reduced sodium chicken or vegetable stock
¼ teaspoon freshly ground pepper
1 tablespoon fat-free half and half

1. Preheat oven to broil. In an oven-proof, non-stick skillet, heat 1 teaspoon olive oil on medium-high heat. (I use an 8" cast iron skillet.) Place zucchini wedges, cut side down, into the heated pan and cook, turning occasionally, until the zucchini is browned on all sides. Sprinkle with the grated parmesan that has been combined with the Italian herbs and place under the broiler for a couple of minutes until parmesan is bubbly and browned slightly. (Watch carefully so cheese doesn't burn.)

2. To make sauce, heat 1 teaspoon olive oil in a small saucepan over medium heat. Add garlic and saute for 1 minute, stirring often to prevent scorching. Add flour and stir until flour has begun to brown lightly. Remove from heat and add stock while whisking constantly. Add pepper and continue to whisk until flour has been incorporated and mixture is smooth. Return to heat and cook, stirring often, until sauce boils. Remove from heat and add fat-free half and half. Stir until combined.

3. Divide broiled zucchini strips between two crepes that have been prepared ahead of time. Fold each filled crepe into a tube, place seam side down on a serving plate and top with garlic sauce. Serve immediately.

Nutritional Information per serving: 187.5 calories, 15.7 g carbohydrate, 9.8 g total fat, 3.4 g saturated fat, 1.3 g fiber, 303.7 mg sodium, 10 g protein.

Original recipe by Kathy Sheehan, copyright 2010

* Variation: The zucchini sticks in this recipe are delicious on their own and served as a side dish. For dinner one evening (after my last batch of crepes had been eaten), I served the crunchy parmesan zucchini with grilled chicken breasts and drizzled the creamy garlic sauce over the chicken (no crepes). Prepared in this way, it is another quick and easy meal that is simply divine.

Sunday, April 4, 2010

Blueberry-Lemon Chicken

Easter Sunday dawned glorious and sunny in Maine. My first daffodils have opened their golden cups and Spring is undoubtedly in the air! Because I wanted to spend as much time outdoors as possible, dinner needed to be an easy and undemanding affair. I had recently made this dish while visiting family in Oklahoma and it was well received. Today, I changed the original recipe a bit by adding lemon undertones and the result was even better! The star of this colorful dish is the blueberries, deemed a "super fruit" full of antioxidants. If you're looking for a light, easy dinner to herald in the warmth of spring, I highly recommend you give this one a try. It is a celebration of fresh fruit flavor!

Blueberry-Lemon Chicken(Makes 4 servings)
4 boneless & skinless chicken breasts (about 4½ ounces each)
Lemon pepper and salt
2 teaspoons olive oil
2 small shallots, finely chopped
Zest and juice from one small lemon (about 3 tablespoons juice)
3 tablespoons chicken broth
1¼ cups frozen or fresh blueberries (wild Maine berries are best)
2 tablespoons balsamic vinegar
1 tablespoon erythritol sweetener, granular

1. Season the chicken breasts on both sides with the lemon pepper and salt. Heat olive oil in a large, nonstick skillet on medium-high heat. Add chicken breasts and cook until browned and just cooked through (juices will run clear), about 5-6 minutes on each side depending on thickness of chicken. Remove to a platter and cover with foil to keep warm or place in a warm oven that has been heated to 200-degrees.

2. Add chopped shallots and saute until brown and translucent. Add lemon juice, zest and chicken broth and stir to deglaze skillet. Add blueberries, balsamic vinegar and Splenda. Cook, stirring occasionally, until the liquid is reduced and slightly thickened into a sauce. Spoon over chicken and serve immediately.

Nutritional Information per serving: 164.5 calories, 9 g carbohydrate, 3.9 g total fat, 0.5 g saturated fat, 1.9 g fiber, 26 g protein.
Original recipe by Kathy Sheehan, copyright 2010