Showing posts with label onions. Show all posts

Sunday, March 29, 2026

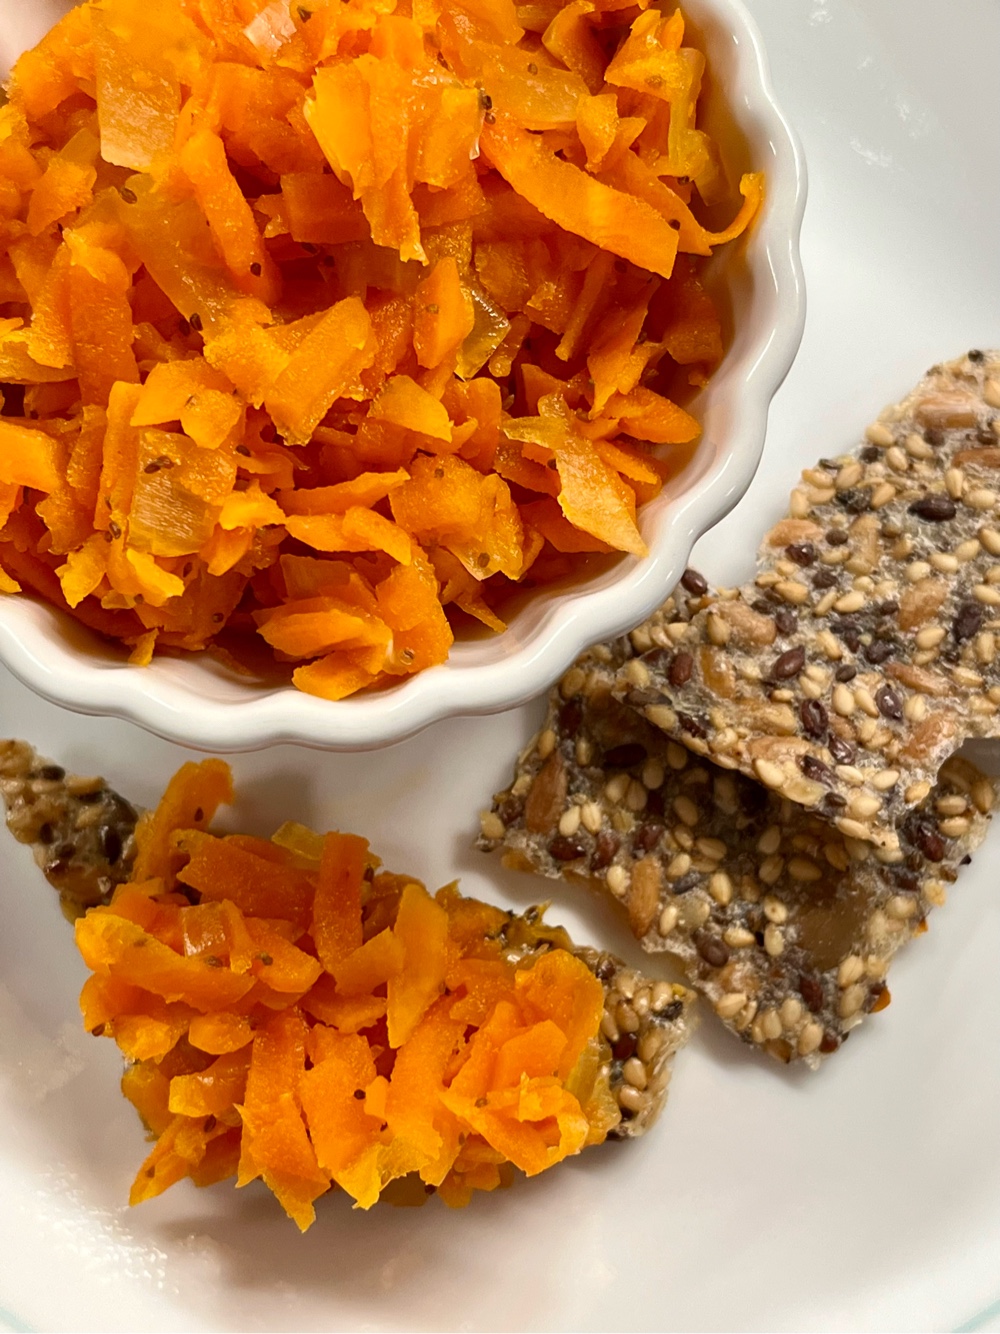
Sugar Free Carrot Relish (Hart’s Turkey Farm Copycat Recipe)


If you have ever been to Hart’s Turkey Farm Restaurant in Meredith, New Hampshire, then you will know of their delicious carrot relish that is served with saltine crackers as an appetizer. Traditionally, carrot relish is overloaded with sugar! This recipe uses allulose/monkfruit as its sweetener, which slashes the carb count significantly. I think you will find this sugar-free version just as delightful as the carrot relish that is so acclaimed at one of my favorite restaurants.

Sugar Free Carrot Relish
Makes 1 pint (32 servings)

3 cups shredded carrots, shredded on the big holes of a box grater
½ onion, chopped
A pinch of ground cayenne (or a dash or two of hot sauce)
1 teaspoon celery seed
½ teaspoon sea salt
1/3 cup allulose Monkfruit sweetener, or to taste
9 tablespoons apple cider vinegar 
1/4 cup water
Low carb crackers to serve

1. Add all the ingredients (except the crackers) to a heavy medium sauce pan. Bring to a boil and simmer for about 30 minutes on medium low heat, stirring occasionally. Simmer until the liquid is absorbed and the vegetables are tender. Spoon into a pint-size glass jar and cool completely before serving.

2. Serve with low carb crackers. Also, this relish is a very nice addition to a cheese platter. Spoon it directly onto a slice of cheddar cheese and enjoy!

Nutritional Information per tablespoon: 7 calories, 1.8 g carbohydrate (0.3 g dietary fiber, 0.6 g sugars), 0 g total fat, 0 mg cholesterol, 15 mg sodium, 5 mg calcium, 37 mg potassium, 520 IU Vit A, 1 mg Vit C, 0 g protein. Net carbs per serving: 1.5 grams

Photo and recipe by Kathy Sheehan, copyright 2026
All rights reserved. Please do not duplicate without the author’s permission.

Wednesday, May 22, 2024

Keto Dutch Stamppot

Keto Dutch Stamppot

Stamppot is a Dutch comfort dish that is traditionally made with mashed potatoes, mixed with vegetables and topped with smoked sausage, meatballs and sometimes gravy. Recently my daughter and I took a trip to The Netherlands where she enjoyed this meal of pure warmth and comfort on a chilly night in Amsterdam. I returned home determined to make a low carb version. It was so easy to remake it with low carb substitutions without sacrificing texture or flavor! I couldn’t be more delighted with the result! I made mine with meatballs, but feel free to substitute smoked sausage, fish or whatever sounds right to you.

Keto Dutch Stamppot
Makes 4 servings

1 recipe of Quick and Easy Mashed Cauliflower (click here for the recipe)
1 cup endive, chopped
½ cup kale leaves, cabbage or sauerkraut, chopped into small pieces

Meatballs:
1 pound 85% ground beef
½ cup onion, finely chopped
1/4 cup fresh parsley, chopped
½ teaspoon salt
1/4 teaspoon black pepper

Gravy:
1½ cups beef broth (to reduce sodium, you can substitute low sodium broth)
3 tablespoons heavy cream
¾ teaspoon xanthan gum
Salt and pepper to taste

1. Prepare the mashed cauliflower as directed. While hot, stir in the endive and kale. Set aside. (This can be made ahead.)

2. To make the meatballs, mix together the ground beef, onion, parsley, salt and pepper. Form into 8 balls. Place on a baking sheet and bake in an oven that has been preheated to 350 degrees F. Bake for about 20-25 minutes, turning half way through cooking, until the internal temperature reaches 145 degrees F. 

3. Meanwhile, make the gravy in a saucepan. Whisk together the beef broth and heavy cream and bring to a simmer over medium heat. Sprinkle the xanthan gum over the top and whisk vigorously until well incorporated. Bring to a boil and cook, stirring often, until the gravy has thickened to the desired consistency. Season with salt and pepper to taste.

4. To serve, spoon 1/2 cup of mashed cauliflower into a serving bowl, top with 2 meatballs and couple of spoonfuls of hot gravy. Enjoy!

5. Leftovers can be stored in airtight containers and refrigerated for up to 4 days. I recommend storing the mashed cauliflower separate from the meatballs and gravy. Reheat to enjoy again!

Keto Stamppot

Nutritional Information per serving: 443 calories, 8.5 g carbohydrate (3.3 g dietary fiber, 3.4 g sugars), 33.7 g total fat (17 g saturated fat, 0 g trans fat), 126 mg cholesterol, 1120 mg sodium, 135.4 mg calcium, 498 mg potassium, 3 mg iron, 345 IU Vit A, 61 mg Vit C, 27.4 g protein. Net carbs per serving: 5.2 grams

Recipe and photos by Kathy Sheehan, copyright 2024
All rights reserved. Please do not duplicate without the author’s permission.

Thursday, February 8, 2024

Low Carb Savory Amish Onion Cake

Low Carb Savory Amish Onion Cake

This delicious savory bread makes a great accompaniment with soup or stew on a cold winter day. It’s also excellent grilled and topped with poached eggs for breakfast or brunch. It’s based on a traditional Amish recipe in which the cake is meant to be slightly sweet, while the topping of caramelized onions are seasoned so that they’re savory with a slight peppery kick. The combination is wonderful! This low carb remake of the traditional recipe is made very easy because it uses a boxed keto muffin mix as its base! The bread is soft and cake-like, hence the name. You can bake it in any 8” baking dish or cast iron skillet, but I like using a springform pan. When it’s removed from the mold, it makes an impressive presentation at the table.

Slice of Low Carb Amish Onion Cake

Low Carb Savory Amish Onion Cake
Makes 12 servings

Onion Topping:
3 medium onions, chopped
3 tablespoons unsalted butter
1 ½ teaspoons poppy seeds (optional)
½ teaspoon salt
1 teaspoon paprika
½ teaspoon coarsely ground black pepper

Bread Batter:
5 large eggs
1/4 cup avocado oil
½ cup sour cream
¾ cup low carb milk of choice
¾ teaspoon onion powder
¾ teaspoon paprika
1/4 teaspoon black pepper
1 pkg. (10 oz.) King Arthur All-Purpose Keto Muffin Mix

King Arthur All-Purpose Keto Muffin Mix

1. In a large skillet, cook onions and 3 tablespoons unsalted butter over low heat for 10 minutes until softened. Stir in the 1/2 teaspoon salt, 1 teaspoon paprika, 1/2 teaspoon coarsely ground black pepper and poppy seeds, if using. Cook on low to medium-low until the onions are golden brown, stirring occasionally. Remove from heat; set aside.

2. Whisk together the eggs, avocado oil and sour cream using an electric mixer. Add the milk and whisk to blend well. Add the onion powder, paprika, black pepper, and keto muffin mix. Beat until well combined.

3. Spread the batter into a greased 8 inch cast iron skillet, baking pan or spring form pan. Spoon onion mixture over the batter. Bake at 350°F for 45 to 55 minutes or until a toothpick inserted in the center comes out clean and the internal temperature reaches between 200°- 205°F. Cool for about 20 minutes. Serve warm. 

4. Store any leftovers in an airtight container or cake keeper. It can be stored at room temperature for 2 days. Refrigerate for longer storage. Always warm to room temperature before serving.

Grilled Onion Cake Topped with Poached Eggs

Nutritional Information per serving: 161 calories, 12.9 g carbohydrate (1.6 g dietary fiber, 2.4 g sugars, 10 g sugar alcohols), 12.6 g total fat (5.3 g saturated fat, 0 g trans fat), 89 mg cholesterol, 304 mg sodium, 101.6 mg calcium, 186 mg potassium, 2 mg iron, 128 IU Vit A, 2 mg Vit C, 4.3 g protein. Net carbs per serving: 1.3 grams

Photos and recipe by Kathy Sheehan, copyright 2024
All rights reserved. Please do not duplicate without the author’s permission. 

Saturday, June 24, 2023

Summer Vegetable Stir Fry

Summer Vegetable Stir Fry

This is a dish we make often in the summer, utilizing the myriad of local summer vegetables available in the Farmer’s Markets. It’s a quick and easy stir fry that is fresh and delicious!

Summer Vegetable Stir Fry
Makes 2-3 servings

Cooked bratwurst, kielbasa or other cooked sausage 
1 small yellow zucchini or yellow summer squash
1 small green zucchini
½ onion
1 small Roma tomato
2 ounces cheese (cheddar, Parmesan or whatever is on hand)
Salt and pepper to taste

Optional Additions:
1-2 tablespoons tomato paste
1/4 cup heavy cream

1. Cut up the cooked sausage into cubes. Cube the yellow and green zucchini, onion, and tomato. Shred the cheese. Set aside.

2. Sauté the onions and sausage in a nonstick skillet over medium heat until the sausage begins to color and the onion is translucent and beginning to brown.

3. Add the zucchini and sauté, stirring occasionally, until it begins to soften and pick up some color. Add some salt and pepper to season the vegetables.

4. At the very end of cooking, add the chopped tomatoes and shredded cheese. When you stir in the tomatoes, they released their juices, which mixes with melted cheese to make a light sauce. If you want a saucier dish, add the optional tomato paste and heavy cream; stir to incorporate.

5. Taste and adjust seasoning if needed. Serve immediately.

Nutritional Information per serving (1/3 of recipe, not including optional additions): 351 calories, 8.9 g carbohydrate (1.8 g dietary fiber, 4.1 g sugars), 27.9 g total fat (12.2 g saturated fat, 0 g trans fat), 67 mg cholesterol, 1156 mg sodium, 151.2 mg calcium, 235 mg potassium, 107 IU Vit A, 15 mg Vit C, 15.3 g protein. Net carbs per serving: 7.1 grams.

Recipe and Photo by Kathy Sheehan, copyright 2023
All rights reserved. Please do not duplicate without the author’s permission. 

Sunday, February 6, 2022

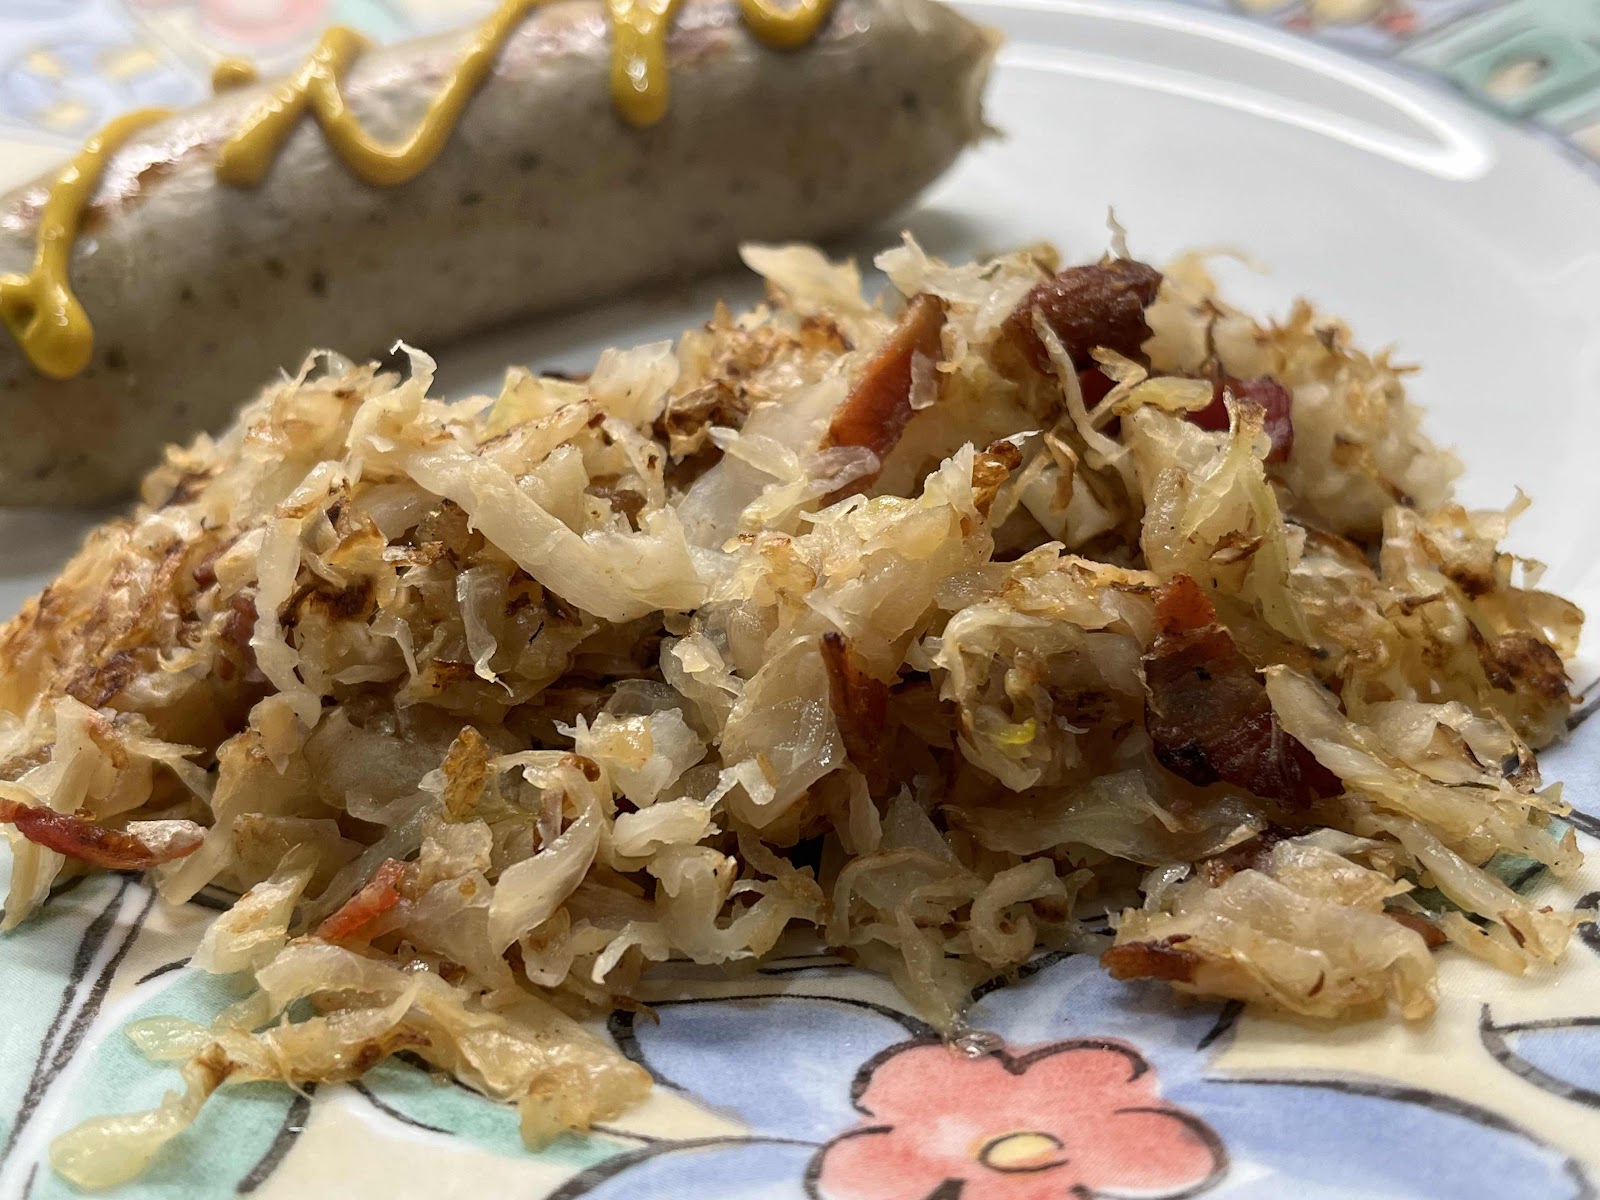
Grilled Sauerkraut

Grilled Sauerkraut
Many years ago, my husband and I had a wonderful meal at Morse’s Sauerkraut, a restaurant in Waldoboro, Maine. Along side the excellent bratwurst and schnitzel, we were served the most unbelievable grilled sauerkraut! This was new to us and it is a dish we have never forgotten, although the restaurant has been closed for several years. This recipe was inspired by this delicious side dish. It’s very quick and simple to make using fresh sauerkraut that you can purchase at the grocery store in the refrigerated section. The result is flavorful, with a touch of sweetness from the caramelized onion. It is one of my favorite side dishes to serve with brats, sausages and kielbasa. 

Grilled Sauerkraut
Makes 2 servings

1/2 onion, thinly sliced
2 slices precooked bacon, chopped
2 tablespoons avocado oil or refined coconut oil
1/2 pound fresh sauerkraut (found in the refrigerated section), drain well and pat dry with paper towels
1 tablespoon unsalted butter
Ground pepper to taste
A pinch of salt, only if needed

1. Heat your pan on medium-high heat. You may use a nonstick or cast iron pan. When it is hot, add the oil and onion, stirring often until softened and starting to brown.

Saute the ingredients until browned and crispy
2. Add the bacon and sauté until beginning to crisp. Stir in the drained sauerkraut, making sure to stir often to prevent burning. When the sauerkraut starts to brown and becomes slightly crisp, add the butter and stir until melted. Continue to cook until the sauerkraut reaches the desired level of browning. Season with pepper and salt to taste. Serve warm.

Nutritional Information per serving: 188 calories, 7 g carbohydrate (4.3 g dietary fiber, 1.2 g sugars), 16.1 g total fat (5.6 g saturated fat, 0 g trans fat), 25 mg cholesterol, 1030 mg sodium, 10.2 g calcium, 95 mg potassium, 54 IU Vit A, 16 mg Vit C, 3.5 g protein. Net carbs per serving: 2.7 grams

Photos and recipe by Kathy Sheehan, copyright 2022
All rights reserved. Please do not duplicate without the authors permission.

Monday, January 17, 2022

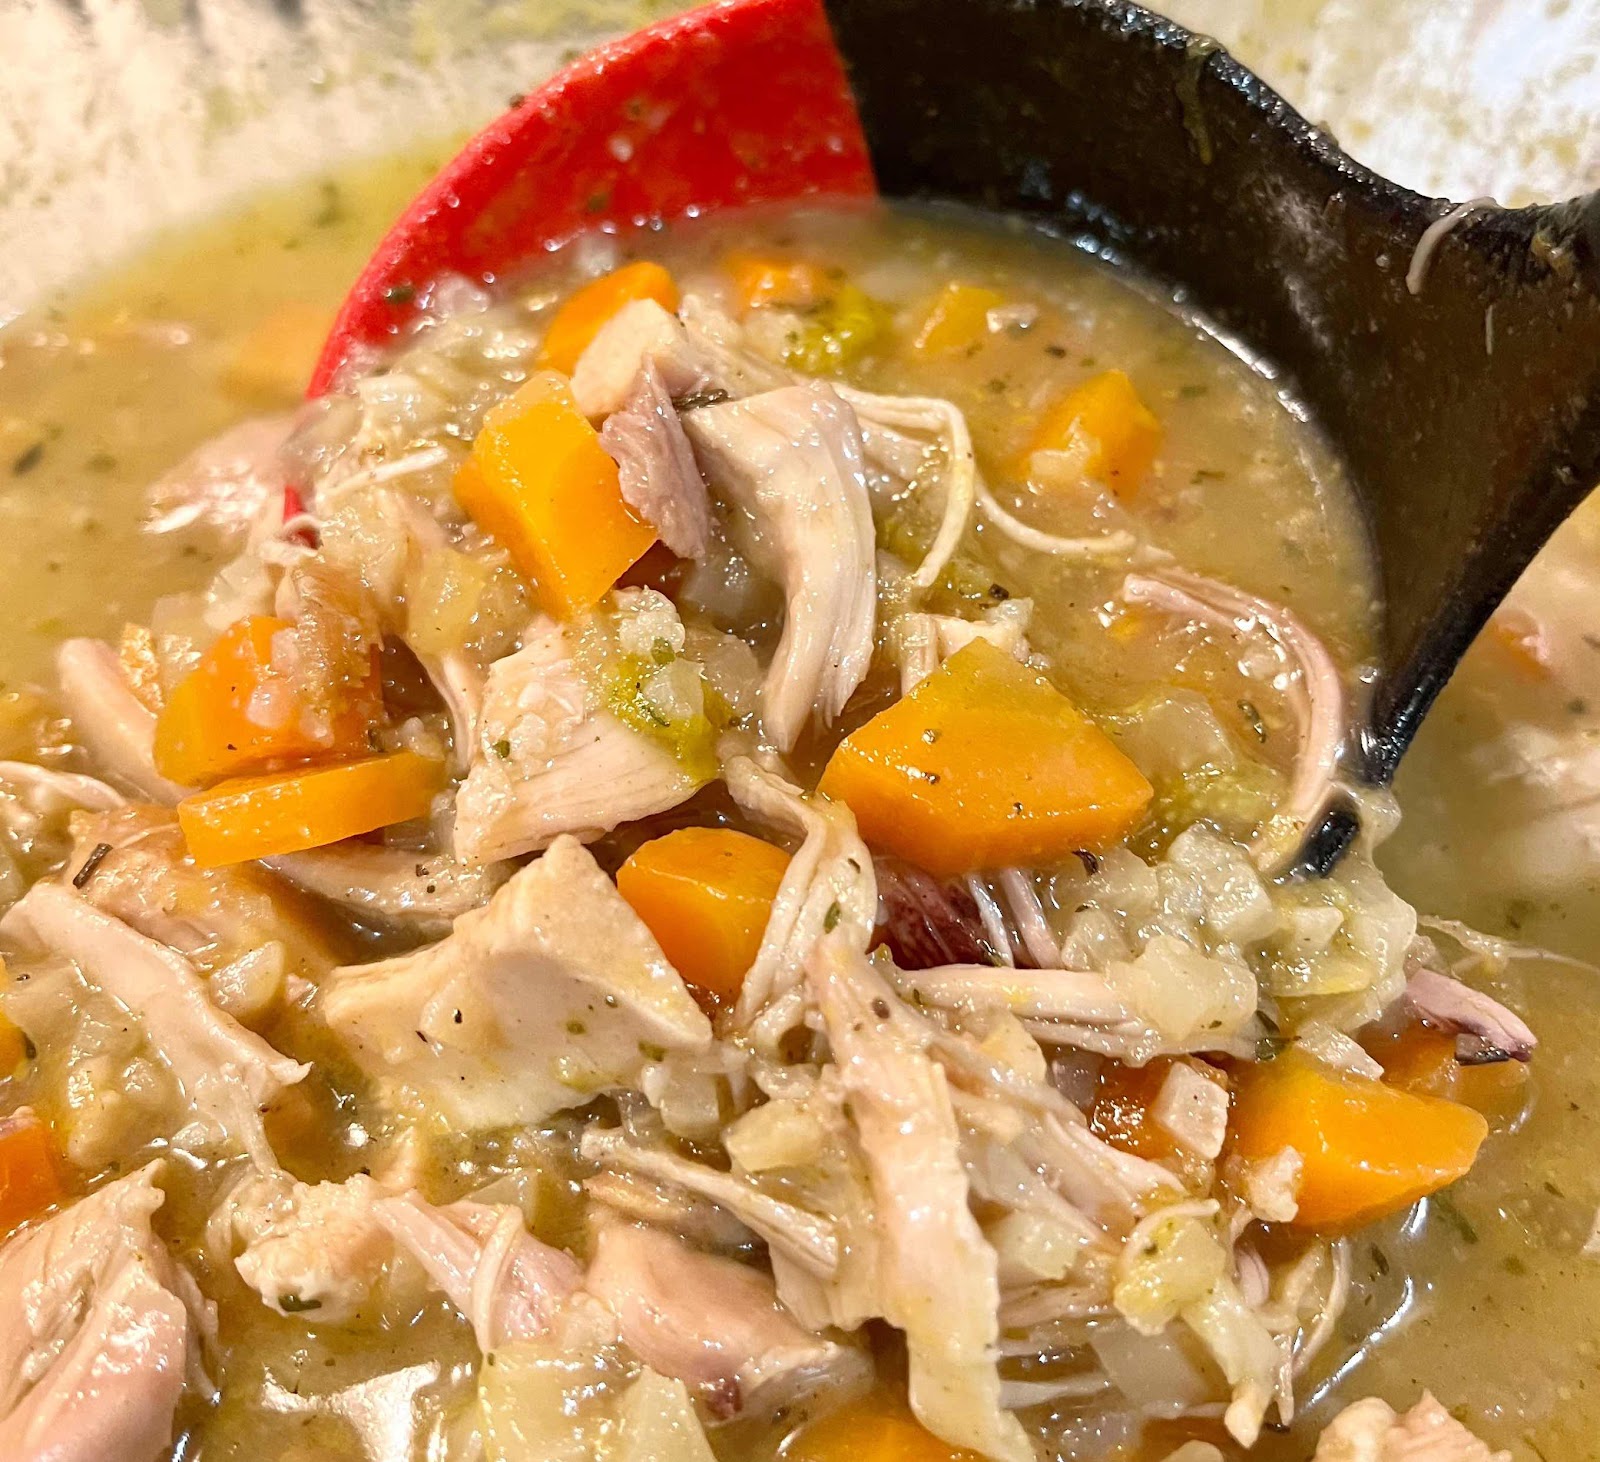
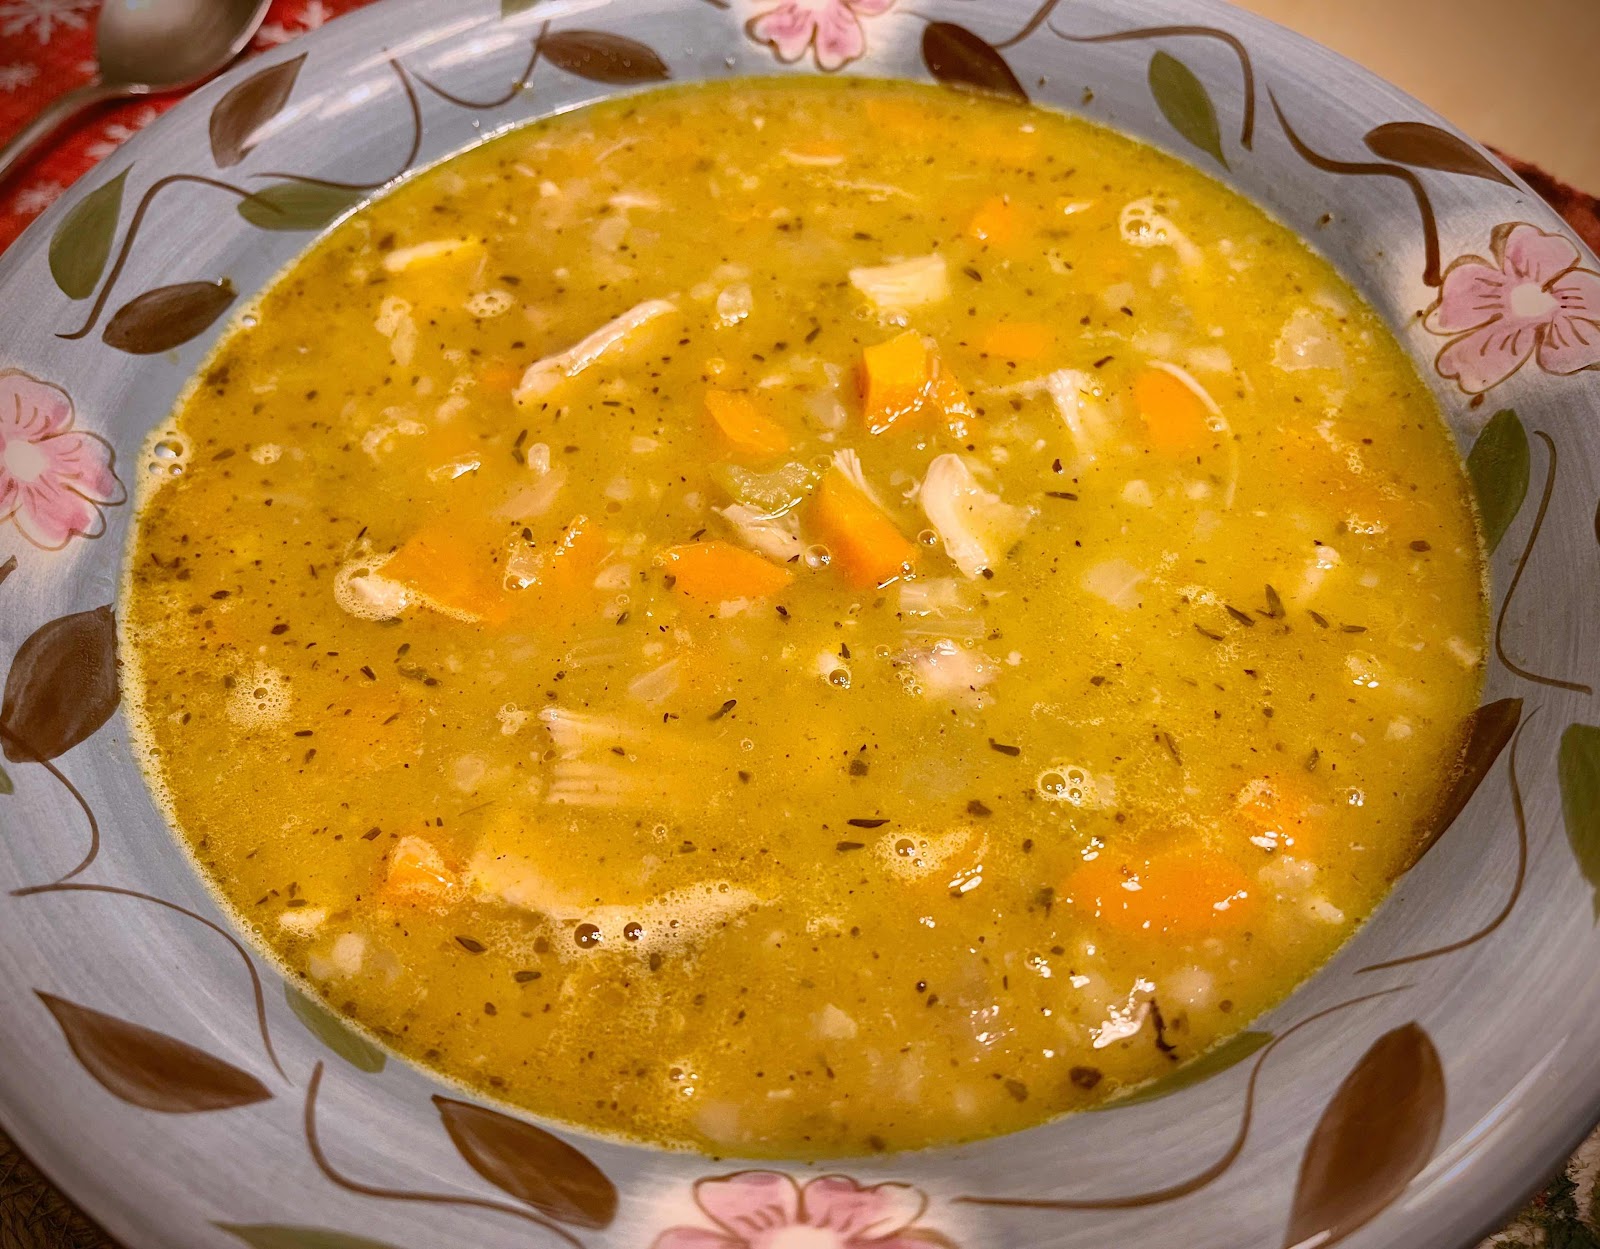
Keto Chicken and Cauliflower Rice Soup

Keto Chicken and Cauliflower Rice Soup
Sometimes when you’re sick, the only thing that sounds good is a warm bowl of soup. When I was recently ill, that’s the only thing I was craving! I looked through my cupboard to try and find the lowest carb soup in a can. I found a chicken rice soup with 12 g per cup and, because I was in no shape to make a homemade pot of soup that day, I ate it…and was very disappointed. There was very little chicken, lots of rice and even more potatoes! My blood sugar soared through the roof, much more than a serving of 12 carbs should have caused. The next day I was determined to make my own soup! And it turned out so delicious, very comforting and I ate it over the next several days as I recovered. Cauliflower rice in this recipe tastes and has the same texture as real rice! The broth was richer and more flavorful than anything you’ll find in a can. The real trick to this recipe is to brown the chicken, skin side down, in the Dutch oven or saucepan until crispy and a fond collects in the bottom of the sauce pan. Then, once you add the rest of the ingredients and broth, the fond is incorporated into the soup adding exceptional flavor. I hope you find this recipe as comforting as I did, especially on a sick day.

Keto Chicken and Cauliflower Rice Soup
Makes about 6 servings

12 ounces bone-in chicken thighs with skin (2 large thighs or 3-4 smaller)
2 carrots, diced
1/2 onion, diced
1 large rib celery, diced
1/4 teaspoon salt
1 clove garlic, minced
3/4 teaspoon dried thyme
1/2 teaspoon poultry seasoning
4 cups chicken stock or bone broth
2 cups frozen cauliflower rice, thawed
Salt and pepper, to taste

1. In a large Dutch oven or large, heavy saucepan, place the bone-in chicken thighs skin side down and heat over medium heat for eight minutes or until the skin has rendered its fat and is crispy. Turn the chicken over and continue cooking for another five minutes. Remove the chicken to a plate to rest while you continue making the soup.

2. Add the carrots, onion and celery to the saucepan, along with about 1/4 teaspoon of salt, and sauté until the vegetables are tender crisp and the onion is translucent. Add the garlic, thyme and poultry seasoning and stir for 30 seconds. Add the chicken stock and, with a wooden spoon, scrape the bottom of the pan until the accumulated fond is incorporated into the broth.

3. Add the chicken back into the pan and bring to a simmer. Cover and gently simmer the soup for 45 minutes. Test the temperature of the chicken with a probe thermometer. It should be at least 175°F. Remove the chicken from the pan and onto a plate to cool. Add the cauliflower rice to the soup and stir. Turn off the heat and allow the soup to sit, covered, while the chicken cools.

4. Once the chicken is cool enough to handle, remove the skin and bones from the chicken and discard. Cut the chicken into bite-size pieces and return the chicken to the pot. Reheat the soup, adding salt and pepper to taste. Simmer gently for 10 minutes before serving. Enjoy and get well! (This soup can be stored in an airtight container in the refrigerator for up to four days.)

Bowl of Chicken and Cauliflower Rice Soup
Nutritional Information per serving (1 cup): 150 calories, 4.7 g carbohydrate (1.5 g dietary fiber, 2.5 g sugars), 6.2 g total fat (1.7 g saturated fat, 0 g trans fat), 54 mg cholesterol, 414 mg sodium, 27.9 mg calcium, 214 mg potassium, 1 mg iron, 819 IU Vit A, 16 mg Vit C, 18.3 g protein. Net carbs per serving: 3.2 grams

Photos and recipe by Kathy Sheehan, copyright 2022
All rights reserved. Please do not duplicate without the author’s permission.

Thursday, November 4, 2021

Keto Radish and Egg Frico

Radish and Egg Frico
Frico is a traditional dish from north eastern Italy usually made with potatoes. I modified the recipe to make it keto by replacing the potatoes with radishes. This quick meal for any time of day is basically a crispy, double-crusted cheese pie filled with vegetables and made in a skillet. It is rustic comfort food that is filling and SO DELICIOUS!

Radish and Egg Frico, cut into quarters
Keto Radish and Egg Frico
Makes 2 servings

1/2 tablespoon avocado oil or bacon grease
3/4 cup sliced radishes
1/2 small onion, sliced
4 ounces shredded cheese, about 1-1/2 cup (Cheddar, Asiago and Gruyere are good choices)
2 eggs
2 slices cooked bacon, chopped
Salt and pepper to taste

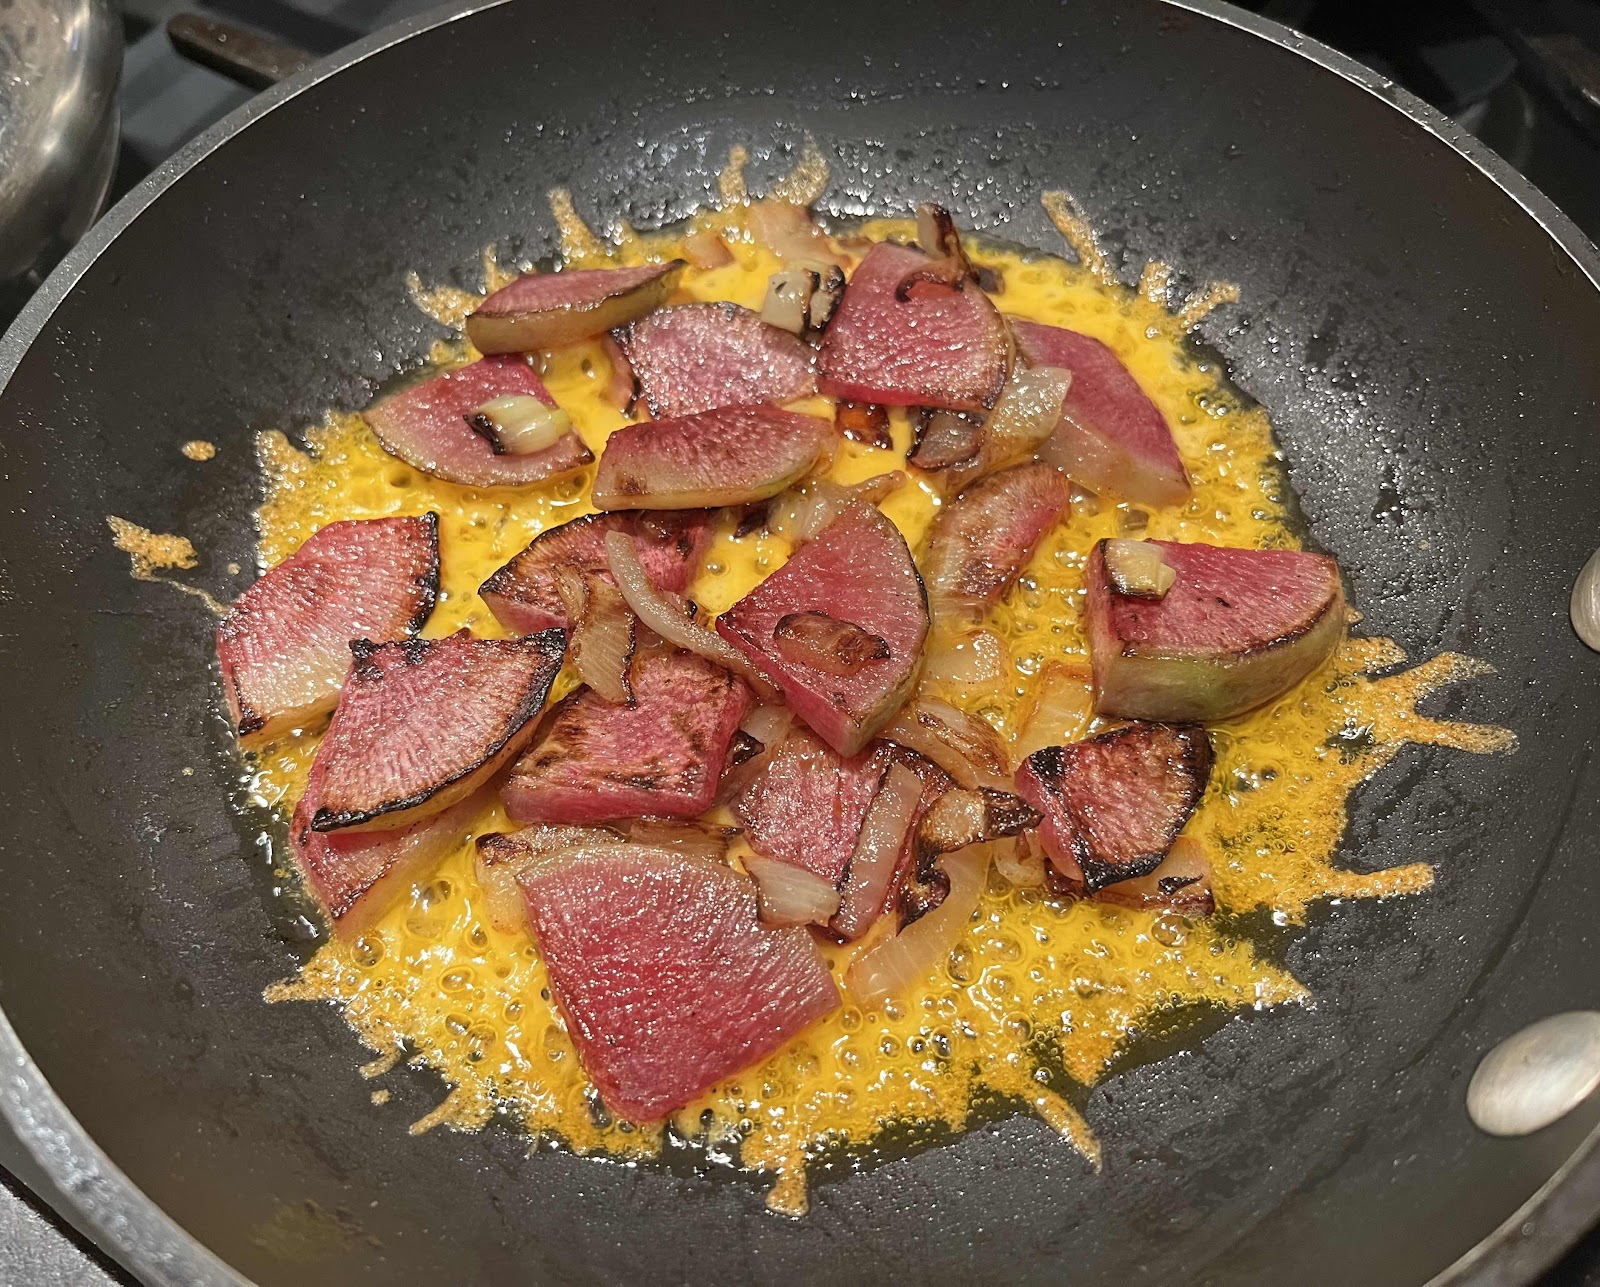
1. Melt the oil in an 8-inch, non-stick skillet over medium heat. Add the sliced onions and radishes and cover, stirring occasionally, until the vegetables are browned and tender. 

Sauteed radishes and onions
2. Remove lid and reduce heat to low. Remove the cooked vegetables to a plate and, into the hot skillet, sprinkle 1/2 of the shredded cheese.

Sprinkle skillet with cheese
3. Return the sautéed vegetable to the skillet, carefully arranging the vegetables on top of the shredded cheese.

Return vegetables to skillet
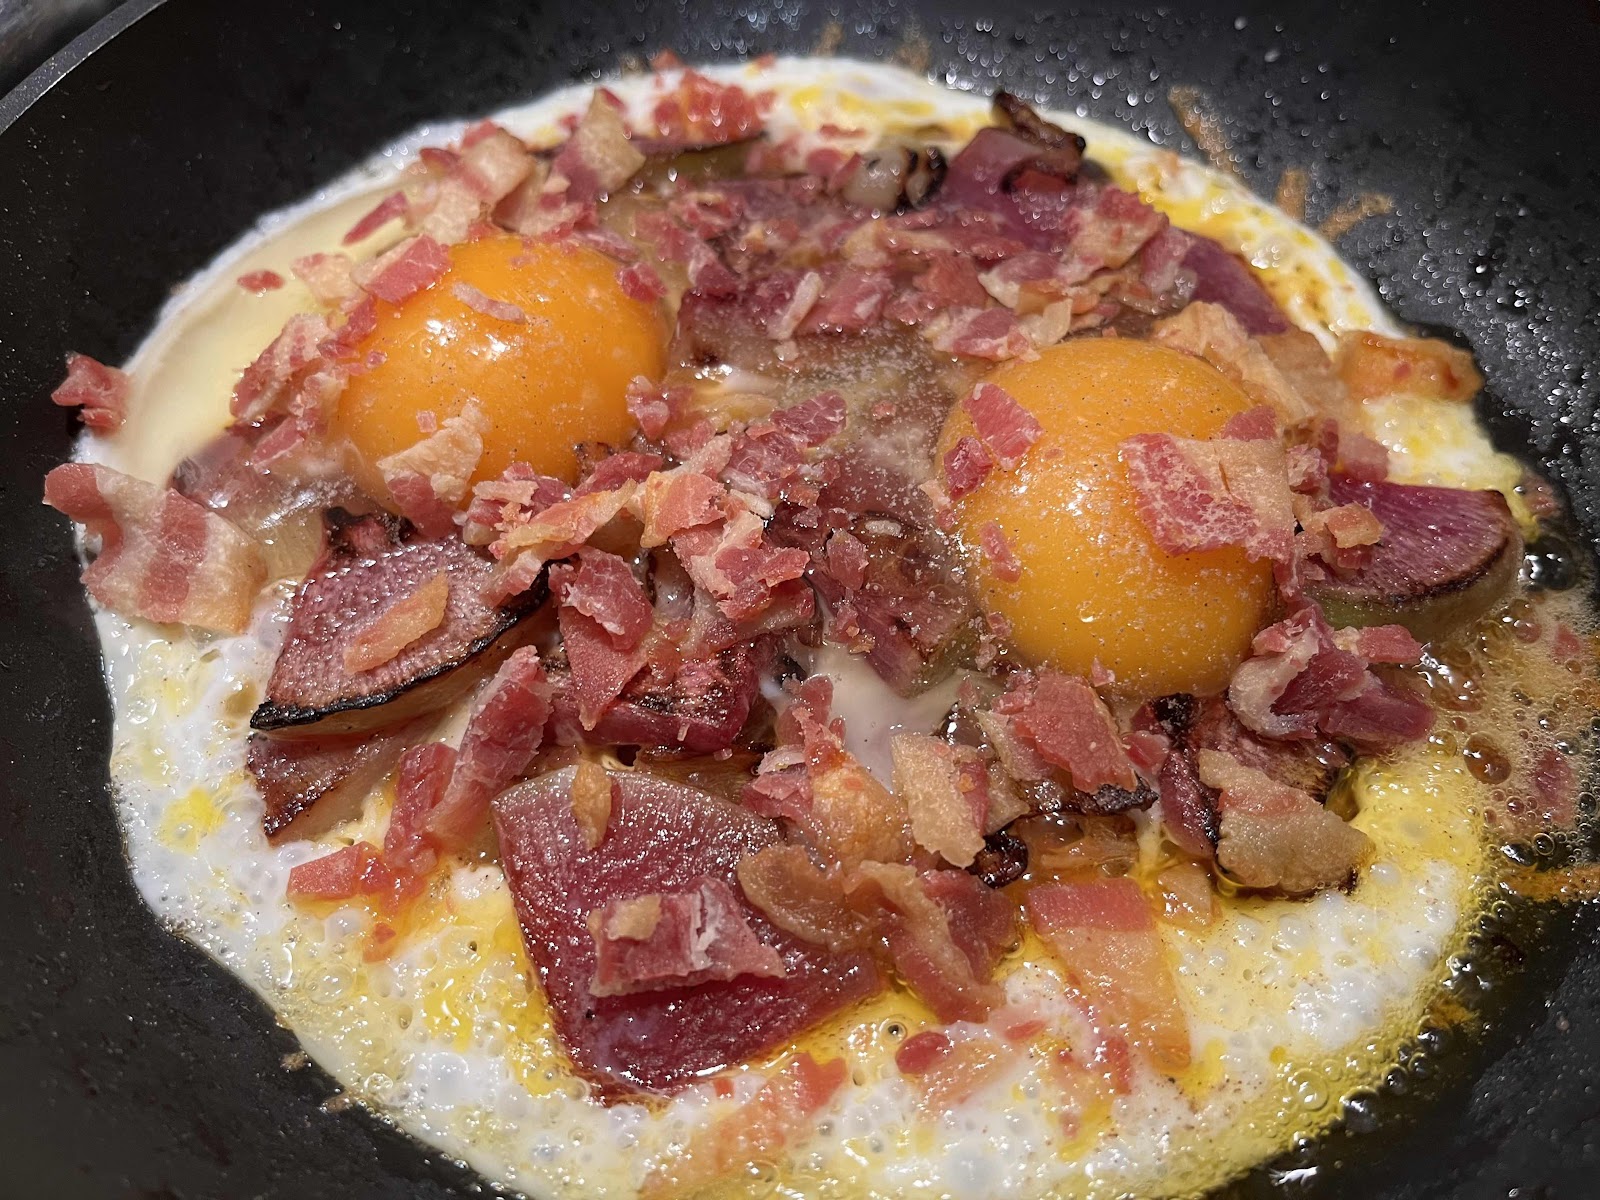
4. Crack two eggs on top of the vegetables. Season the eggs with salt and pepper. Add the chopped bacon on top of the eggs.

Add eggs and bacon
5. Finally, sprinkle the remaining shredded cheese over the top. Continue cooking until the bottom layer of cheese is firm and crispy.

Top with remaining cheese
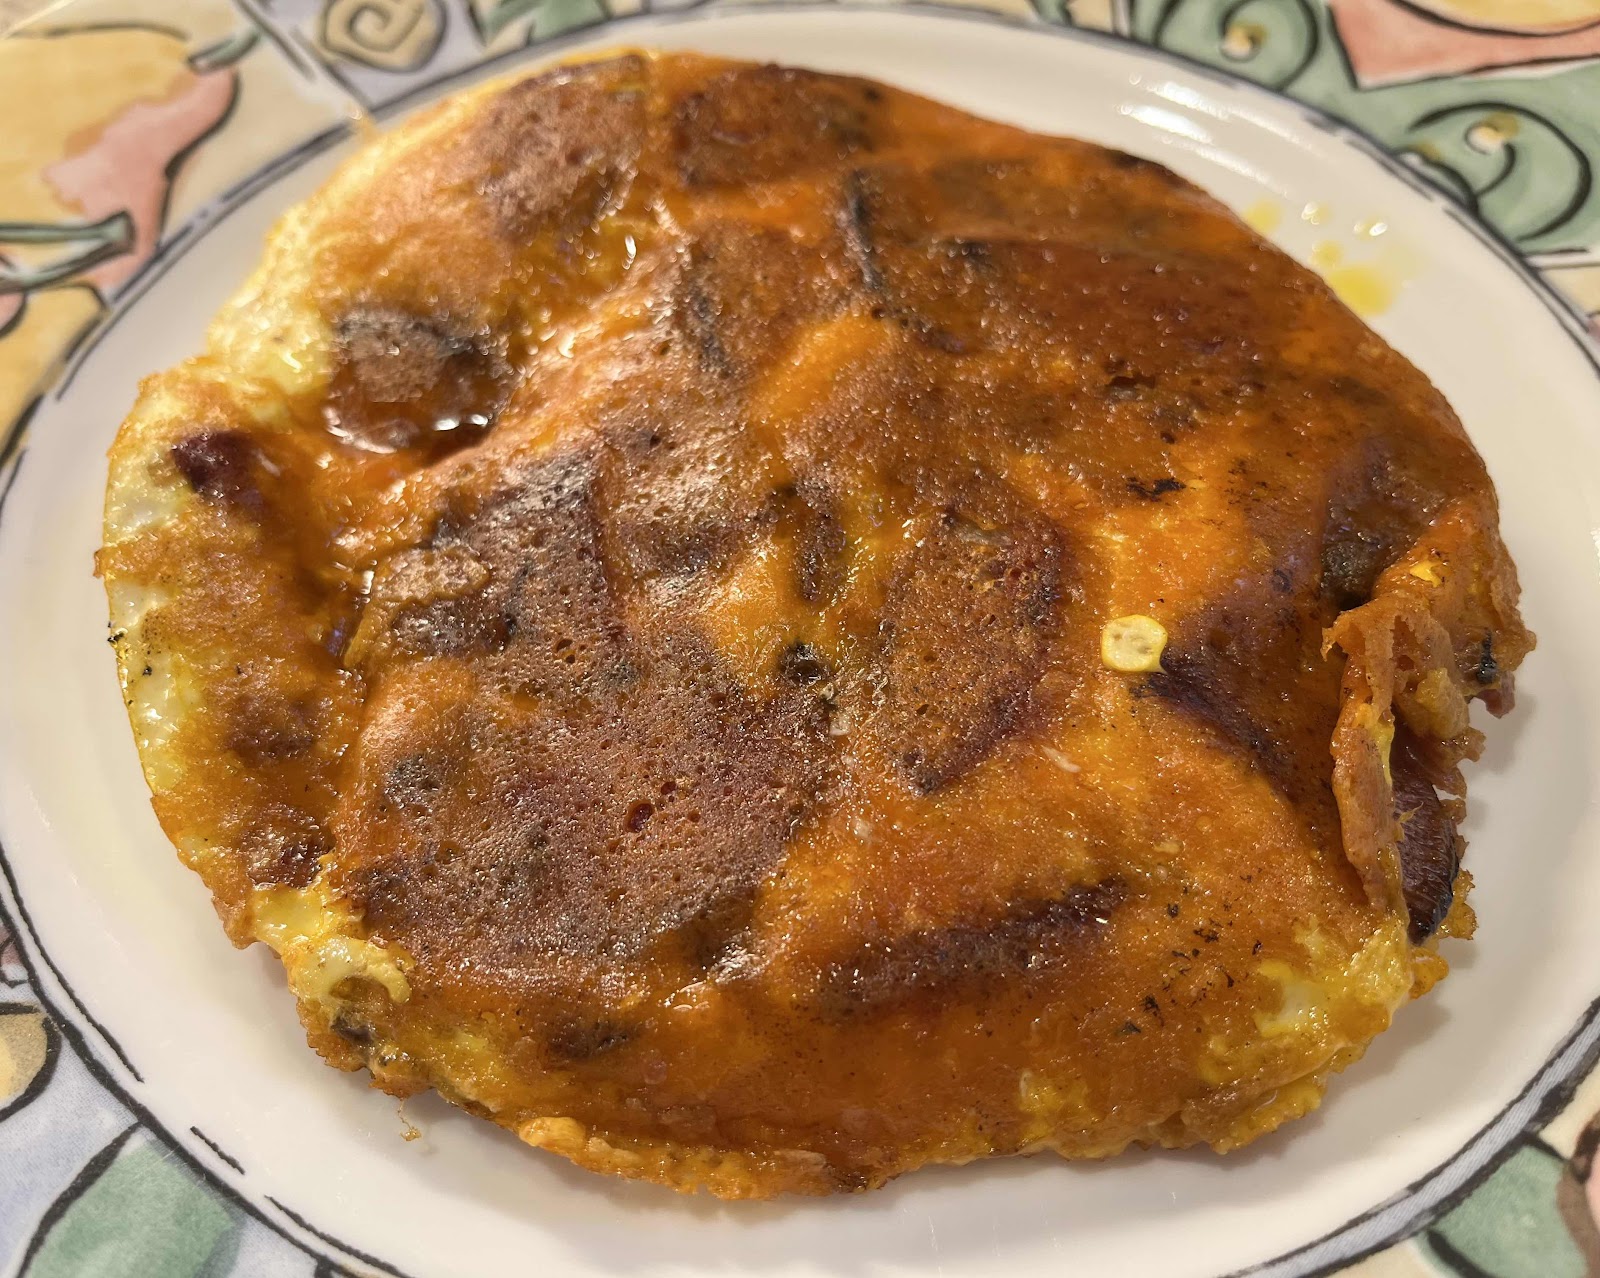
6. Very carefully, flip the frico with a spatula. Cook on the second side until the cheese is firm and crispy. Remove to a serving plate, cut in half or quarters and enjoy!

Whole Radish and Egg Frico
Nutritional Information per serving (1/2 recipe): 357 calories, 5.1 g carbohydrate (1.1 g dietary fiber, 2.3 g sugars), 26.4 g total fat (14.8 g saturated fat, 0 g trans fat), 255 mg cholesterol, 655 mg sodium, 446.7 mg calcium, 262 mg potassium, 1 mg iron, 263 IU Vit A, 8 mg Vit C, 24 g protein. Net carbs per serving: 4 grams

Photos and recipe by Kathy Sheehan, copyright 2021
All rights reserved. Please do not duplicate without the author’s permission. 
Sunday, August 29, 2021

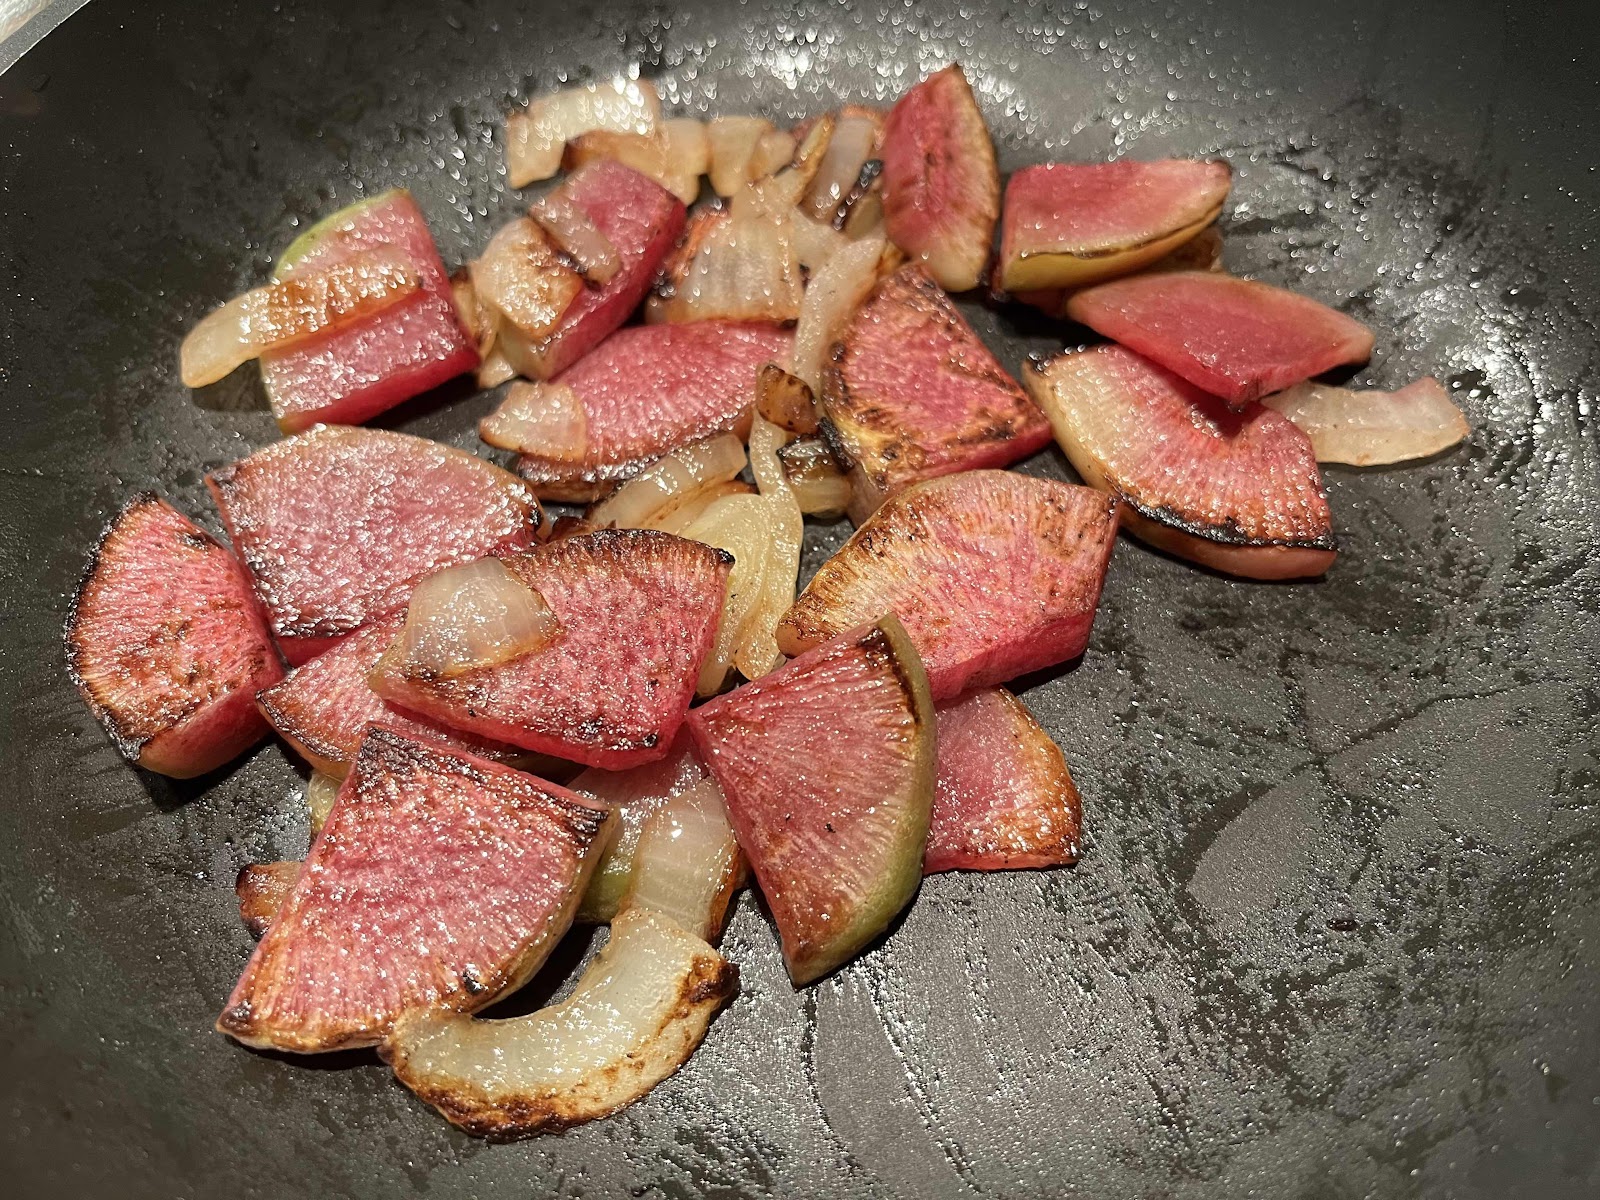
Keto Home Fries

Keto Home Fries
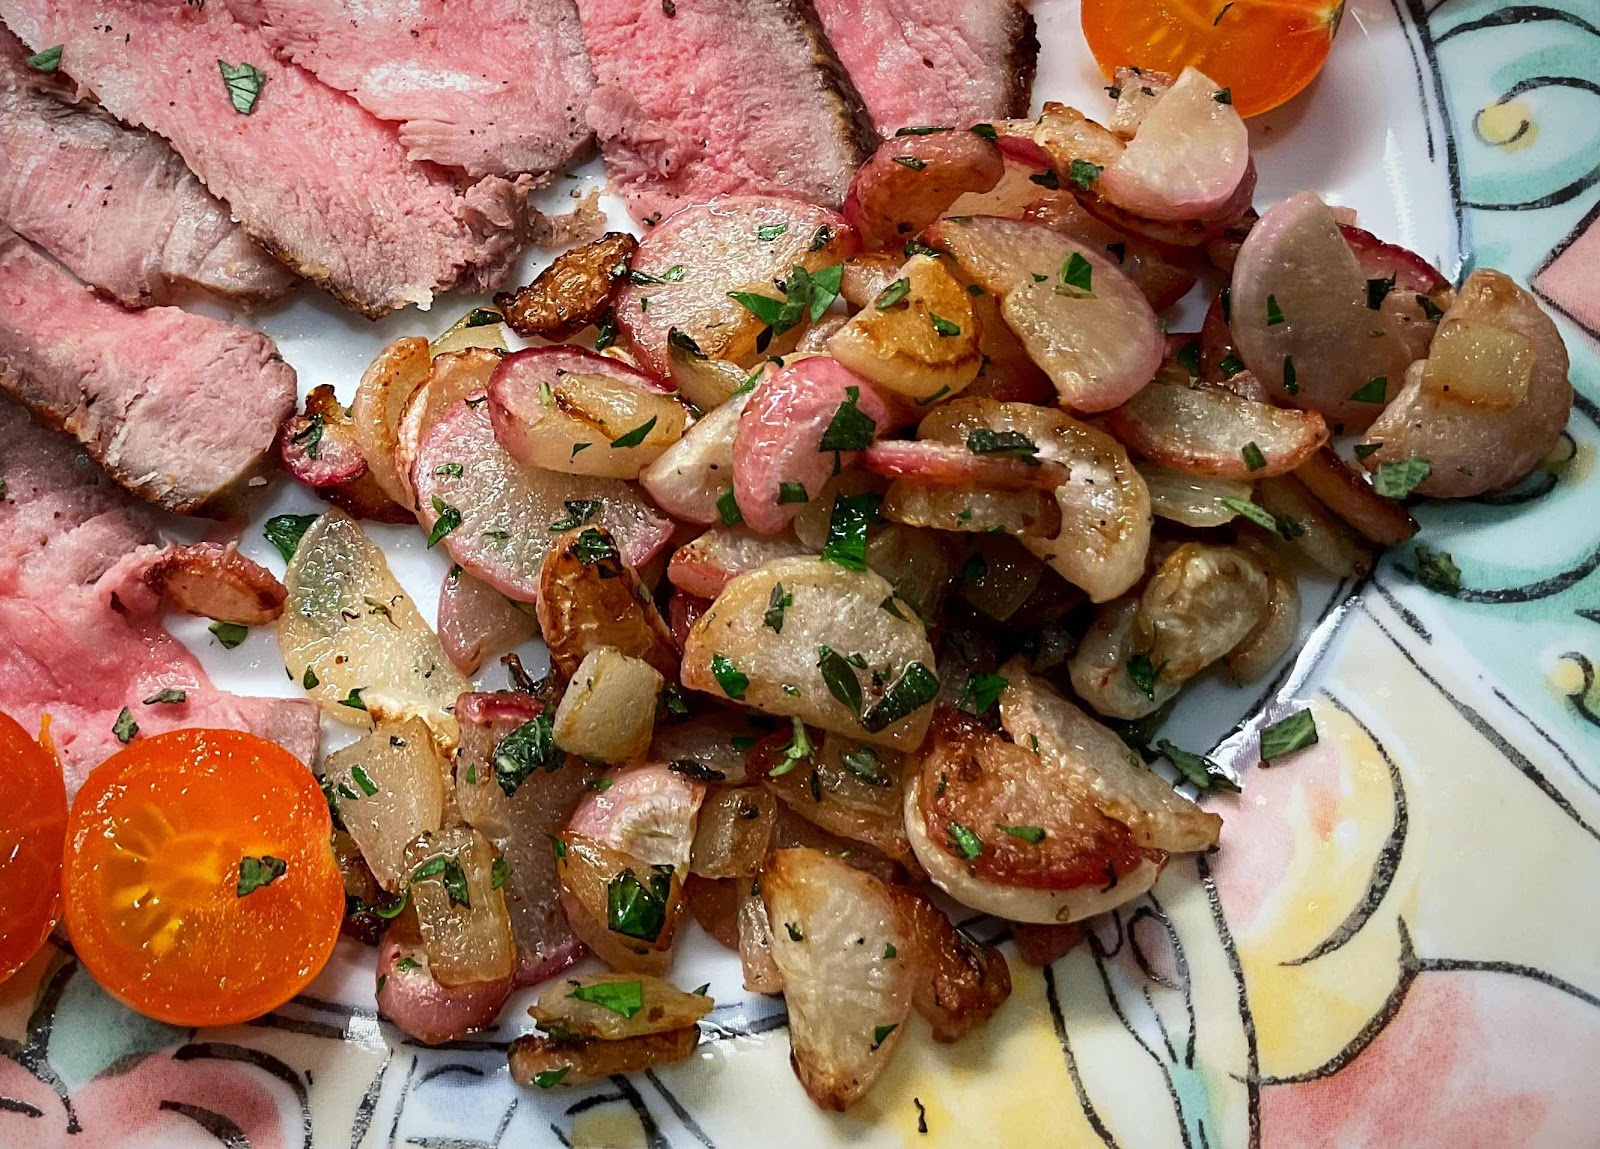
These pan-roasted radishes taste just like home fries! I think the real trick is adding some onion, so the radishes and onions caramelize together. Even my husband, who does not eat keto and is basically a meat & potatoes man, loved them! He commented that they tasted like fried potatoes—and they really do!

Keto Home Fries
Makes 2 servings

1-2 tablespoons avocado oil or bacon grease
2 cups cubed or sliced radishes
1/4 cup onion, cut into chunky pieces
Salt and pepper to taste
Chopped fresh chives and thyme, if desired

1. Place avocado oil or bacon grease into a skillet. Add cubed or sliced radishes and season with salt and pepper. Cover and cook for a few minutes until the radishes begin to release some of their moisture and start to soften.

2. Remove lid and add onion. Sauté uncovered over medium-low heat until the radishes and onions have browned and caramelized, stirring occasionally, making sure the radishes have browned nicely on all sides. Season with additional salt and pepper to taste. Sprinkle with herbs just before serving, if desired.

Nutritional Information per serving (1/2 recipe): 81 calories, 5.8 g carbohydrate (2.1 g dietary fiber, 3.1 g sugars), 6.4 g total fat (2.9 g saturated fat, 0 g trans fat), 6 mg cholesterol, 140 mg sodium, 32.2 mg calcium, 291 mg potassium, 2 IU Vit A, 1 g protein. Net carbs per serving: 3.7 grams

Photo and recipe by Kathy Sheehan, copyright 2021
All rights reserved. Please do not duplicate without the author’s permission. 

Friday, May 7, 2021

Schnitzel with Keto Brown Mushroom Gravy (Jagerschnitzel)

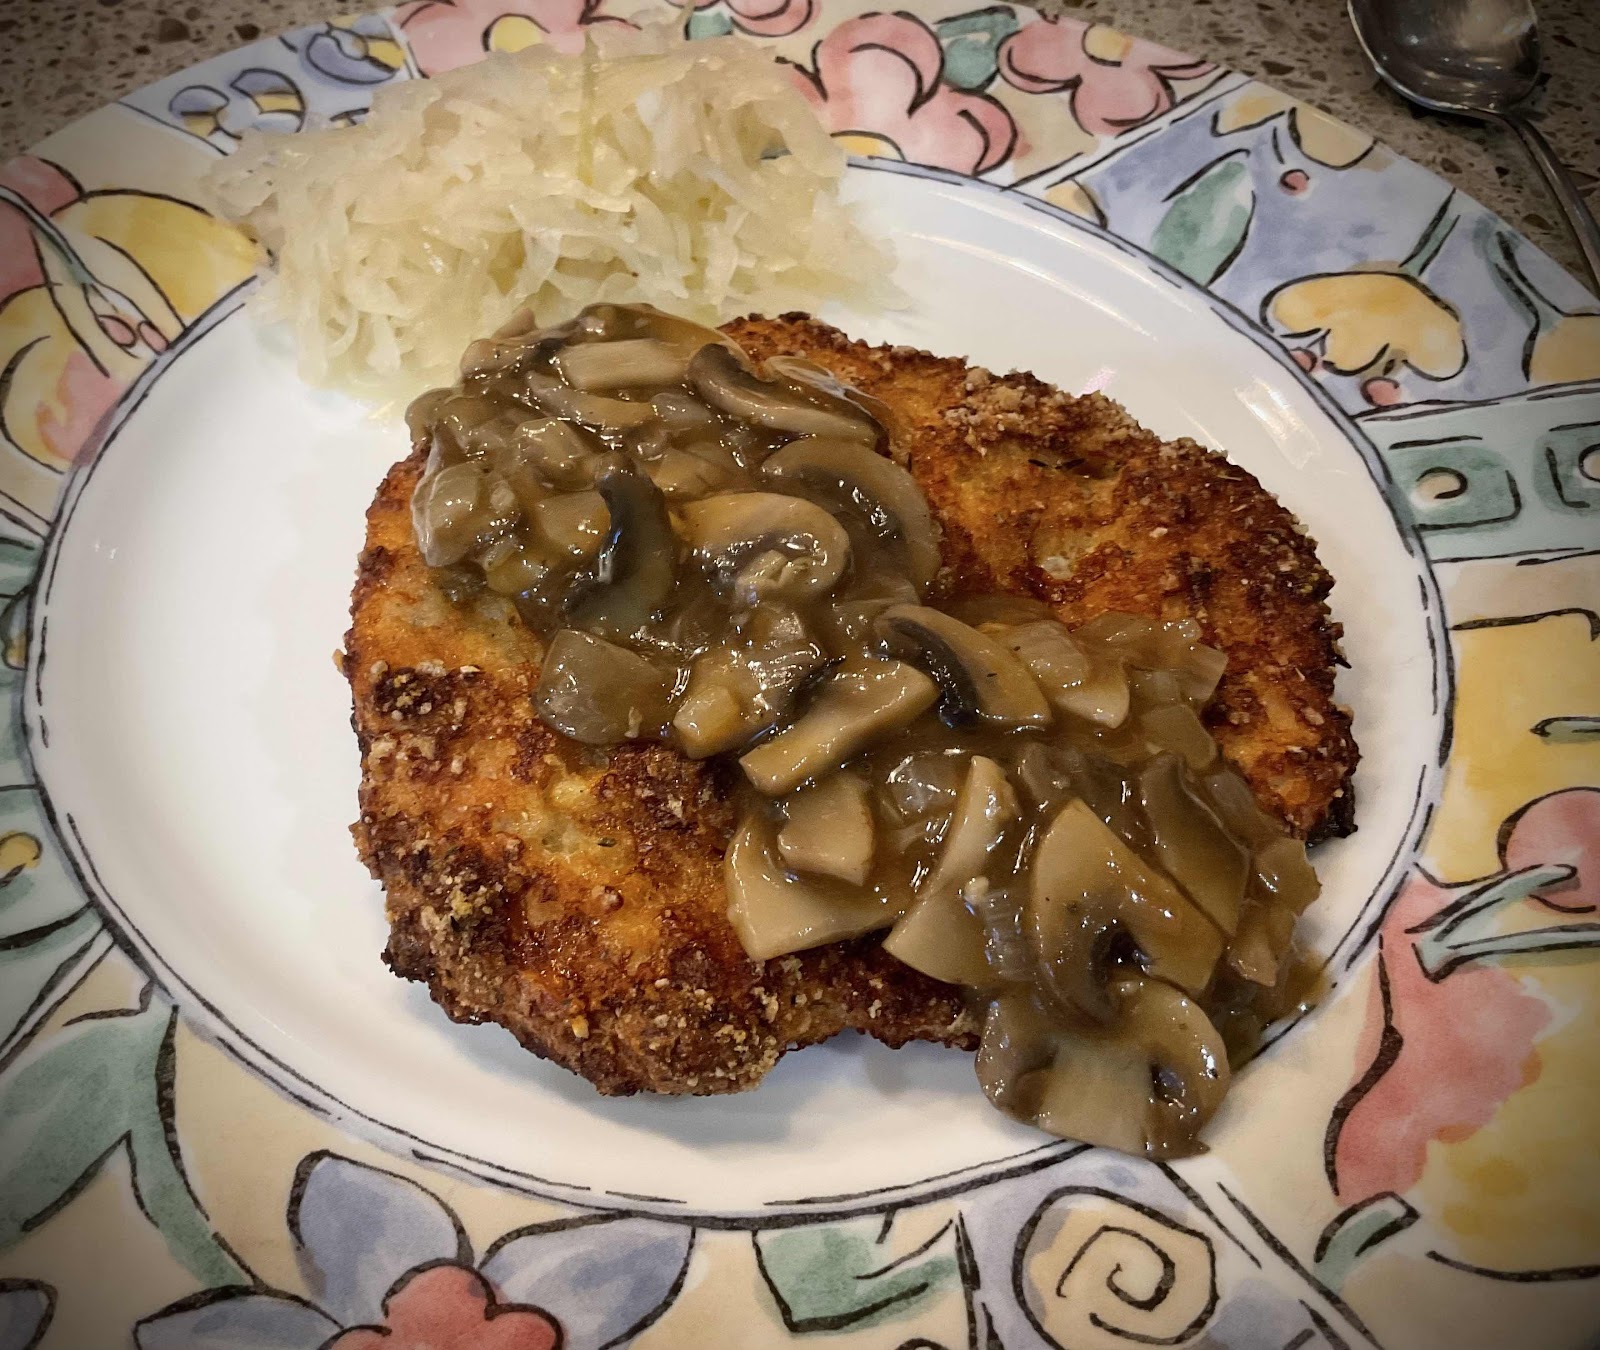
Schnitzel with Keto Brown Mushroom Gravy
My husband is a big fan of German cooking. I have tried other recipes for schnitzel that call for almond flour, but was always a bit disappointed in their soggy breading. I’ve been experimenting with using crushed pork rinds as breading and, so far, the results have been excellent! This pork rind breading is super crunchy and, even when reheated, remains crisp. I’m not a fan of pork rinds as a snack, but in this application, they are a winner! This schnitzel recipe has authentic flavor and texture. You can make it with your favorite cutlet, such as pork, chicken, turkey or veal. I’m sure you’ll be as pleased as my husband and this recipe will become a favorite of your family, too.

Schnitzel with Keto Brown Mushroom Gravy (Jagerschnitzel)
Makes 4 servings

Schnitzel:
1 pound boneless pork chops (or substitute chicken, turkey or veal)
1 1/2 cups crushed pork rinds (see notes)*
1/4 teaspoon salt
1/4 to 1/2 teaspoon black pepper
1/4 teaspoon dried thyme
1 large egg
1 tablespoon sour cream (omit for dairy free)
1/2 cup unflavored whey protein powder

Brown Mushroom Gravy:
1 tablespoon butter
1/2 onion, chopped
1 clove garlic, minced
8 ounces white button mushrooms, sliced
1 1/4 cups beef broth
1/4 teaspoon dried thyme (optional)**
1 teaspoon red wine vinegar (optional)**
1/4 to 1/2 teaspoon xanthan gum to thicken
Salt and pepper to taste

1. Prepare the 3-step dredging station by placing the whey protein powder onto a plate. In a small bowl, whisk together the egg and sour cream and pour onto a second plate. Finally, stir together the crushed pork rinds, salt, pepper and thyme and pour onto a third plate. Preheat the oven to 425 degrees Fahrenheit. 

2. Cut the pork chops in half horizontally and pound thin between two pieces of plastic wrap, to about 1/4 inch thickness. Set aside while you start the mushroom gravy. 

3. Melt the butter in a 10 or 12 inch skillet. Add the onion and heat over medium heat until softened and translucent. Add the garlic and stir for about 1 minute. Add the sliced mushrooms and sauté until all the liquid has evaporated and the mushrooms are nicely browned. Add the beef broth, thyme and vinegar. Bring to a simmer and allow to cook and reduce, stirring occasionally, while you prepare the schnitzel.

4. Line a baking sheet with foil and spray generously with non-stick cooking spray. 

5. Pat any excess moisture from the cutlets with a paper towel. Dredge each cutlet by first dipping into the whey protein powder on both sides and shaking off the excess. Next, dip the cutlet into the egg mixture and coat both sides. Lastly, place it in the third plate with the pork rind breading, turning to coat both sides. Place the dredged cutlet onto the prepared baking sheet. Repeat with the remaining cutlets. 

6. Place the baking sheet into the preheated oven on the middle rack and cook for 20 minutes. Meanwhile, finish the gravy.

7. Sprinkle the xanthan gum over the simmering gravy and stir briskly until dissolved and the gravy thickens. Season with salt and pepper to taste.

8. At the end of the 20 minutes of cooking, if the breading on the cutlets is not sufficiently browned and crispy, then broil for a few minutes until deeply golden brown. Serve immediately, topped with the mushroom gravy.

Crushed Pork Rind Crumbs
Notes: 
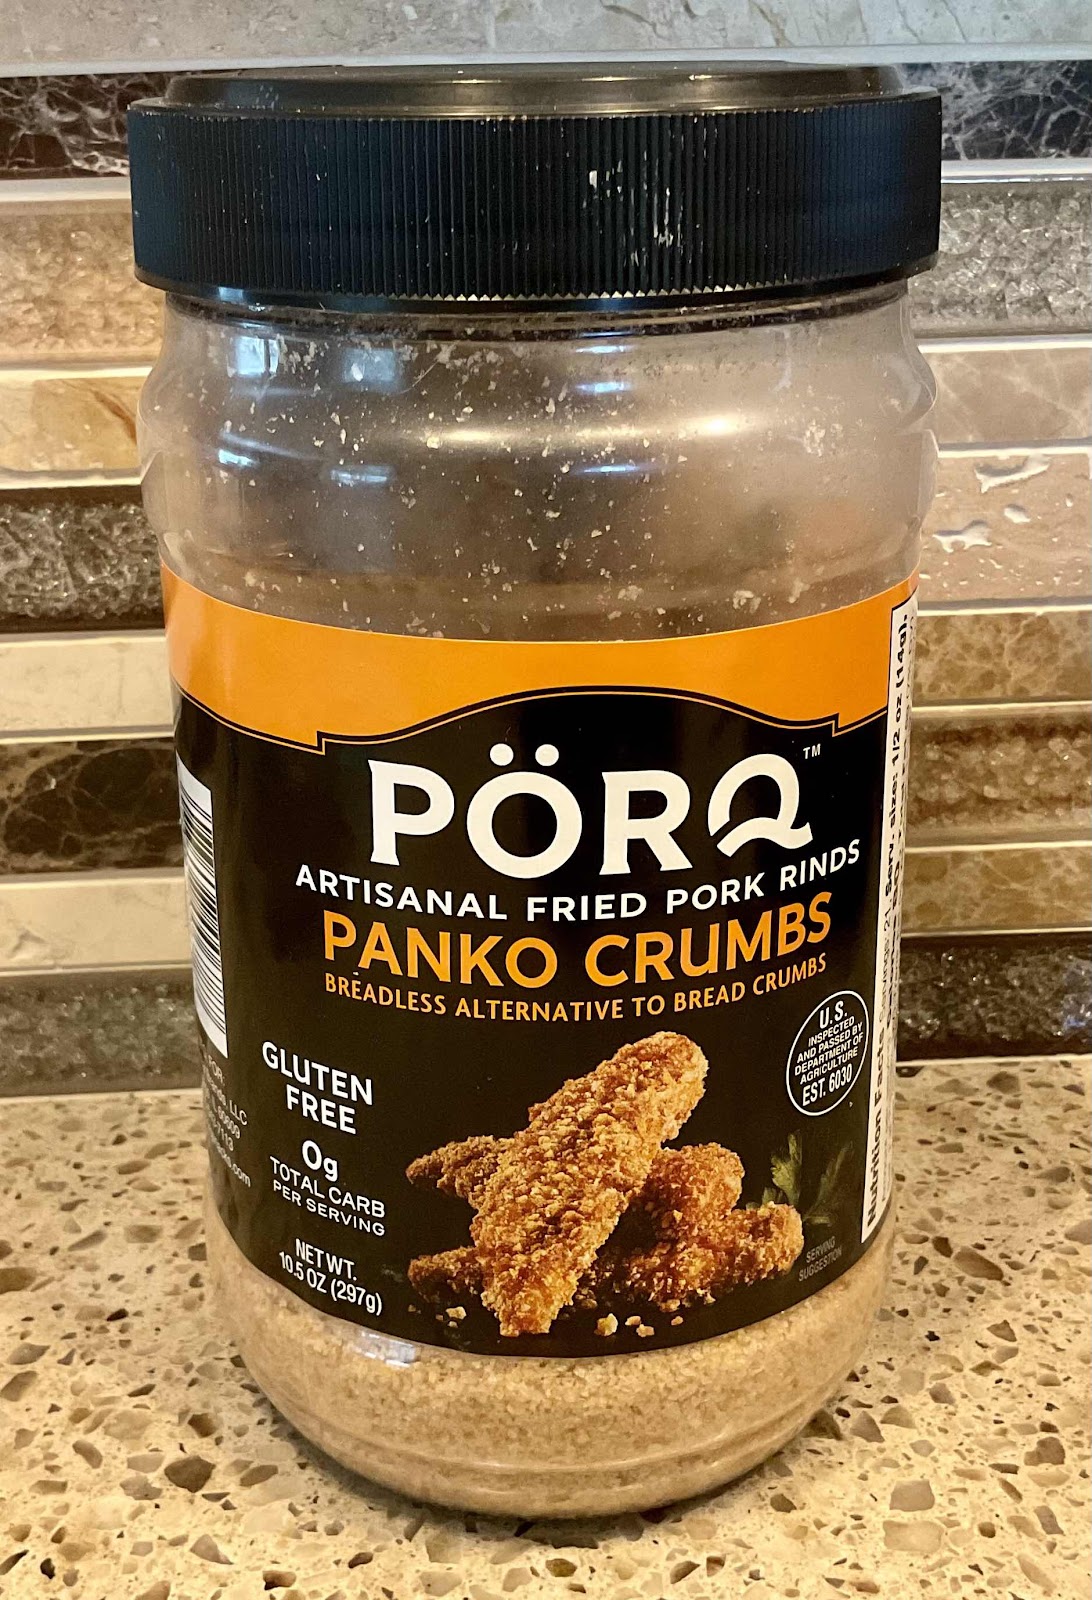
*Pork rinds conveniently come already crushed in panko-style crumbs! Look for them near the breadcrumbs or in the gluten-free section of your grocery store.

**If you want to make a plain, brown gravy, you may omit the thyme and vinegar. Personally, I like the very slight acidity the vinegar adds to the gravy, but if you don’t, then just leave it out.

Nutritional Information per serving of schnitzel (4 oz. cutlet, no gravy): 358 calories, 0.4 g carbohydrate (0 g fiber, 0 g sugars), 19.3 g total fat (7.4 g saturated fat, 0 g trans fat), 147 mg cholesterol, 378 mg sodium, 43.2 mg calcium, 545 mg potassium, 1 mg iron, 29 IU Vit A, 43.8 g protein. Net carbs per serving: 0.4 grams

Nutritional Information per 1/2 cup gravy: 51 calories, 4.1 g carbohydrate (0.9 g dietary fiber, 1.9 g sugars), 3 g total fat (1.8 g saturated fat, 0 g trans fat), 10 mg cholesterol, 354 mg sodium, 7.8 mg calcium, 206 mg potassium, 0 mg iron, 1 IU Vit A, 2 mg Vit C, 2.7 g protein. Net carbs per serving: 3.2 grams

Photos and recipe by Kathy Sheehan, copyright 2021
All rights reserved. Please do not duplicate without the author’s permission. 

Tuesday, July 21, 2020

Brunch Green Bean Salad with Perfect Soft-Boiled Eggs

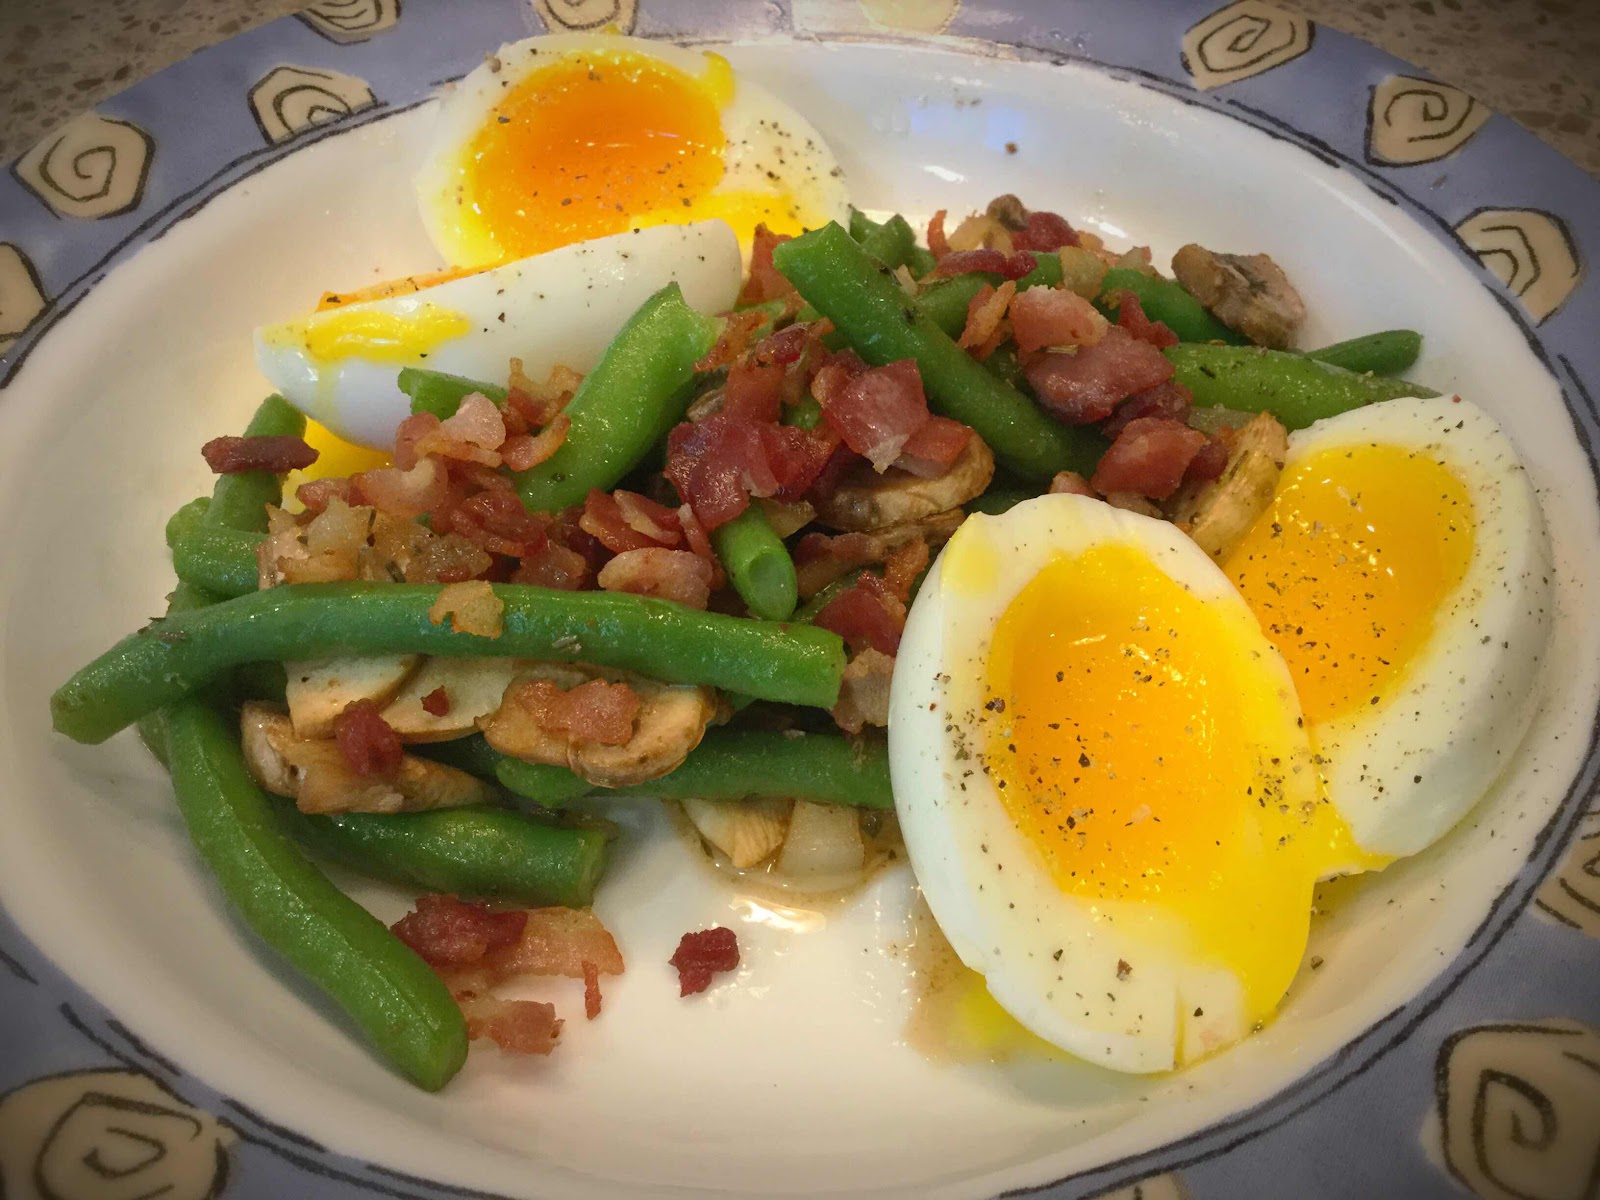
Brunch Green Bean Salad with Perfect Soft-Boiled Eggs
Right now, I’m harvesting a lot of green beans from my garden and am always trying to come up with delicious and varied ways to enjoy them. This breakfast or brunch salad is a great way to start the day! The addition of soft-boiled eggs puts this dish over the top, in my opinion. The tender-crisp green beans and creamy eggs topped with a sweet and sour dressing and crispy bacon go so well together. The method of boiling the green beans and eggs together in the same pot is a clever one, making this a very quick and easy meal. It makes two servings, but can be either halved to serve one or doubled and tripled to serve many.

Brunch Green Bean Salad with Perfect Soft-Boiled Eggs
Makes 2 servings

4 white button mushrooms, sliced
4 slices bacon, cut into small pieces
2 tablespoons onion, minced
1-1/2 tablespoons white wine vinegar
1/2 teaspoon dried thyme
1/2 teaspoon granulated erythritol, or to taste
Salt and black pepper to taste
1-1/2 cups fresh green beans, trimmed
4 eggs, room temperature 

1. Fill a large saucepan or pot 1/2 to 3/4 full of water (enough water to cover the eggs completely as they boil). Add salt and bring to a boil over medium to high heat.

2. Meanwhile, sauté the mushrooms in a small dry skillet over medium heat until they release their moisture, about 3 minutes. Remove the mushrooms to a plate and set aside. In the same skillet, sauté the bacon until crispy. Remove with a slotted spoon to a plate lined with paper towels; set aside.

3. Reserve 2 tablespoons of bacon drippings in the skillet. Add the onion and sauté until translucent. Add the vinegar, thyme, sweetener, salt and pepper. Whisk to combine. Return the mushrooms to the skillet and stir to combine. Keep the dressing warm while the green beans and eggs are cooking.

4. Drop the green beans into the salted, boiling water and set a timer for exactly 8 minutes. At the 5-1/2 minute mark, add the eggs and continue boiling. Drain and rinse under cold running water to stop the cooking. Set the eggs aside in cold water while you pat dry the green beans with a paper towel and divide them evenly between two serving dishes. Toss each serving with 1/2 of the warm dressing and top each portion with crumbled bacon. Carefully peel the eggs, placing two in each serving dish. Cut the eggs in half and season with salt and pepper to taste. Serve immediately.

Nutritional Information per serving (1/2 recipe): 277 calories, 10.8 g carbohydrates (3.5 g dietary fiber, 2.6 g sugars, 1 g sugar alcohols), 17 g total fat (5.5 g saturated fat, 0 g trans fat), 391 mg cholesterol, 506 mg sodium, 107.2 mg calcium, 453 mg potassium, 3 mg iron, 364 ug Vit A, 10 mg Vit C, 21.4 g protein. Net carbs per serving: 6.5 grams

Photo and recipe by Kathy Sheehan, copyright 2020
All rights reserved. Please do not duplicate without the author’s permission.

Friday, May 29, 2020

Halibut in a Sour Cream Sauce with Buttery Onions (or Salmon)

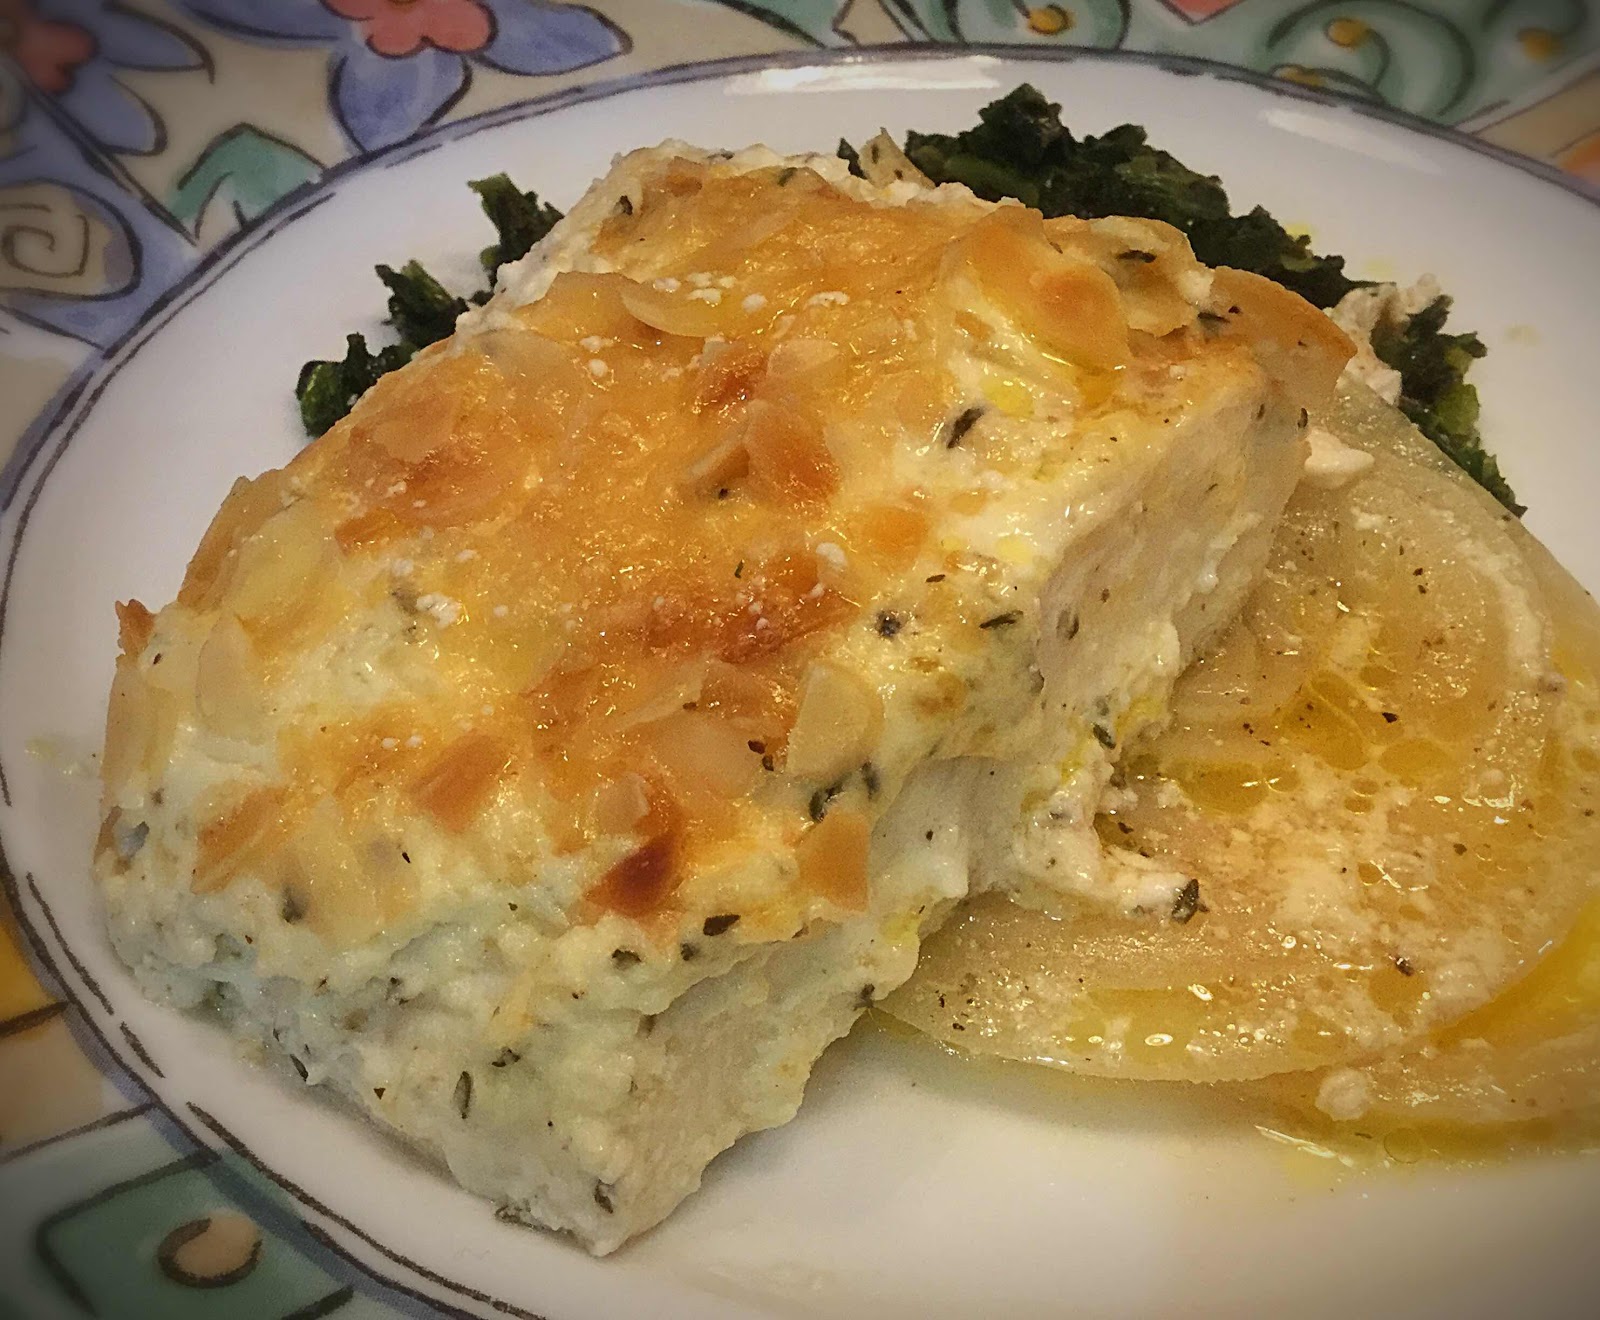
Halibut in a Sour Cream Sauce with Buttery Onions
When fish is steamed in a pouch, it comes out perfectly cooked, tender and delicious! This recipe utilizes the fragrant moisture and natural sweetness of the onions to permeate the fish, giving it wonderful flavor. You can use any type of fish that you like, but I suggest a “meaty” fish, such as halibut, salmon, swordfish or tuna steaks, as they work particularly well with this cooking technique.

Halibut in a Sour Cream Sauce with Buttery Onions
Makes 2 servings

1 tablespoon cold butter, cut into 4 thin slices
2 (1/4”) onion slices from a large onion (or 4 slices from a small onion)
2 (5 oz.) halibut steaks, or fish of your choice
1/4 cup mayonnaise 
1/4 cup sour cream
1/4 teaspoon garlic powder
1/4 teaspoon dried basil
1/4 teaspoon seasoned salt
1/4 teaspoon dried thyme
1/8 teaspoon black pepper
2 tablespoons sliced almonds, coarsely chopped
2 tablespoons shredded or grated Parmesan cheese 

1. Place each onion slice on a 12” or 14” square of heavy duty foil (or a double thickness of regular foil). Place two slices of cold butter on top of each onion. Season the fish with salt and pepper on both sides and place one piece of fish on top of each onion.

2. In a small bowl, mix together the mayonnaise, sour cream and seasonings. Set aside a couple of tablespoons for serving. Divide the remaining sauce between the two pieces of fish and spread to cover. Sprinkle each with one tablespoon of the almonds and one tablespoon of Parmesan cheese. Fold the foil around each piece of fish, sealing tightly, to create two puffed pouches, allowing for a little space over the fish so the steam can circulate and the sauce won’t be disturbed during cooking. (This step can be done ahead and the pouches refrigerated, if desired. Before cooking, remove the pouches from the refrigerator and allow to sit at room temperature for at least 20 minutes.)

3. Grill Method: Grill, covered, over indirect medium heat for 15-20 minutes or until the fish flakes easily with a fork and the internal temperature of the fish reaches 135 degrees Fahrenheit.

4. Oven Method: Preheat the oven to 350 degrees Fahrenheit. Place foil pouches on a baking sheet and bake for 22-24 minutes or until the fish flakes easily with a fork and the internal temperature reaches 135 degrees.

5. If desired, at the end of cooking, you can open the top of each pouch and broil for a few minutes until the almonds turn golden brown and the Parmesan cheese bubbles. With a spatula, carefully remove the onion and the fish onto serving plates. Drizzle the accumulated liquid from the pouch over the top of the fish and serve immediately. (I like to serve this over sautéed spinach.) Serve the reserved sour cream sauce on the side.

Nutritional Information per serving (made with halibut): 565 calories, 7.2 g carbohydrate (1.8 g dietary fiber, 2 g sugars), 40 g total fat (11.9 g saturated fat, 0 g trans fat), 98 mg cholesterol, 536 mg sodium, 213.6 mg calcium, 924 mg potassium, 2 mg iron, 192 ug Vit A, 3 mg Vit C, 42.5 g protein. Net carbs per serving: 5.4 grams

Photo and recipe by Kathy Sheehan, copyright 2020
All rights reserved. Please do not duplicate without the author’s permission. 

Wednesday, May 22, 2019

Low Carb Spring Vegetable Frittata with Bacon for One

Spring Vegetable Frittata with Bacon for One
Frittatas are basically just baked omelets. They’re so easy to prepare, they make an excellent quick breakfast or main dish anytime. Often frittatas are made in a large skillet to feed many people, but in this version I prepared it in an 8-inch oven proof omelet pan (or you can use any 8 inch skillet) to create one generous serving. I’ve chosen to highlight the early spring vegetables in this bright and colorful frittata, but feel free to substitute your favorites at any time of year.

Low Carb Spring Vegetable Frittata with Bacon for One
Make 1 serving

2 eggs
1 tablespoon almond milk (or heavy cream)
Salt and pepper to taste
1 tablespoon avocado or coconut oil
4 spears asparagus, cut into 1/2-inch pieces
1 green onion, chopped (green and white parts)
2 medium radishes, cut into matchsticks
2 slices of precooked bacon, chopped (leave out for vegetarian)
1 ounce fontina or cheddar cheese, cubed
1 teaspoon chives, chopped (optional)

1. Preheat oven to 400 degrees Fahrenheit. Beat the eggs, almond milk, salt and pepper together in a small bowl; set aside.

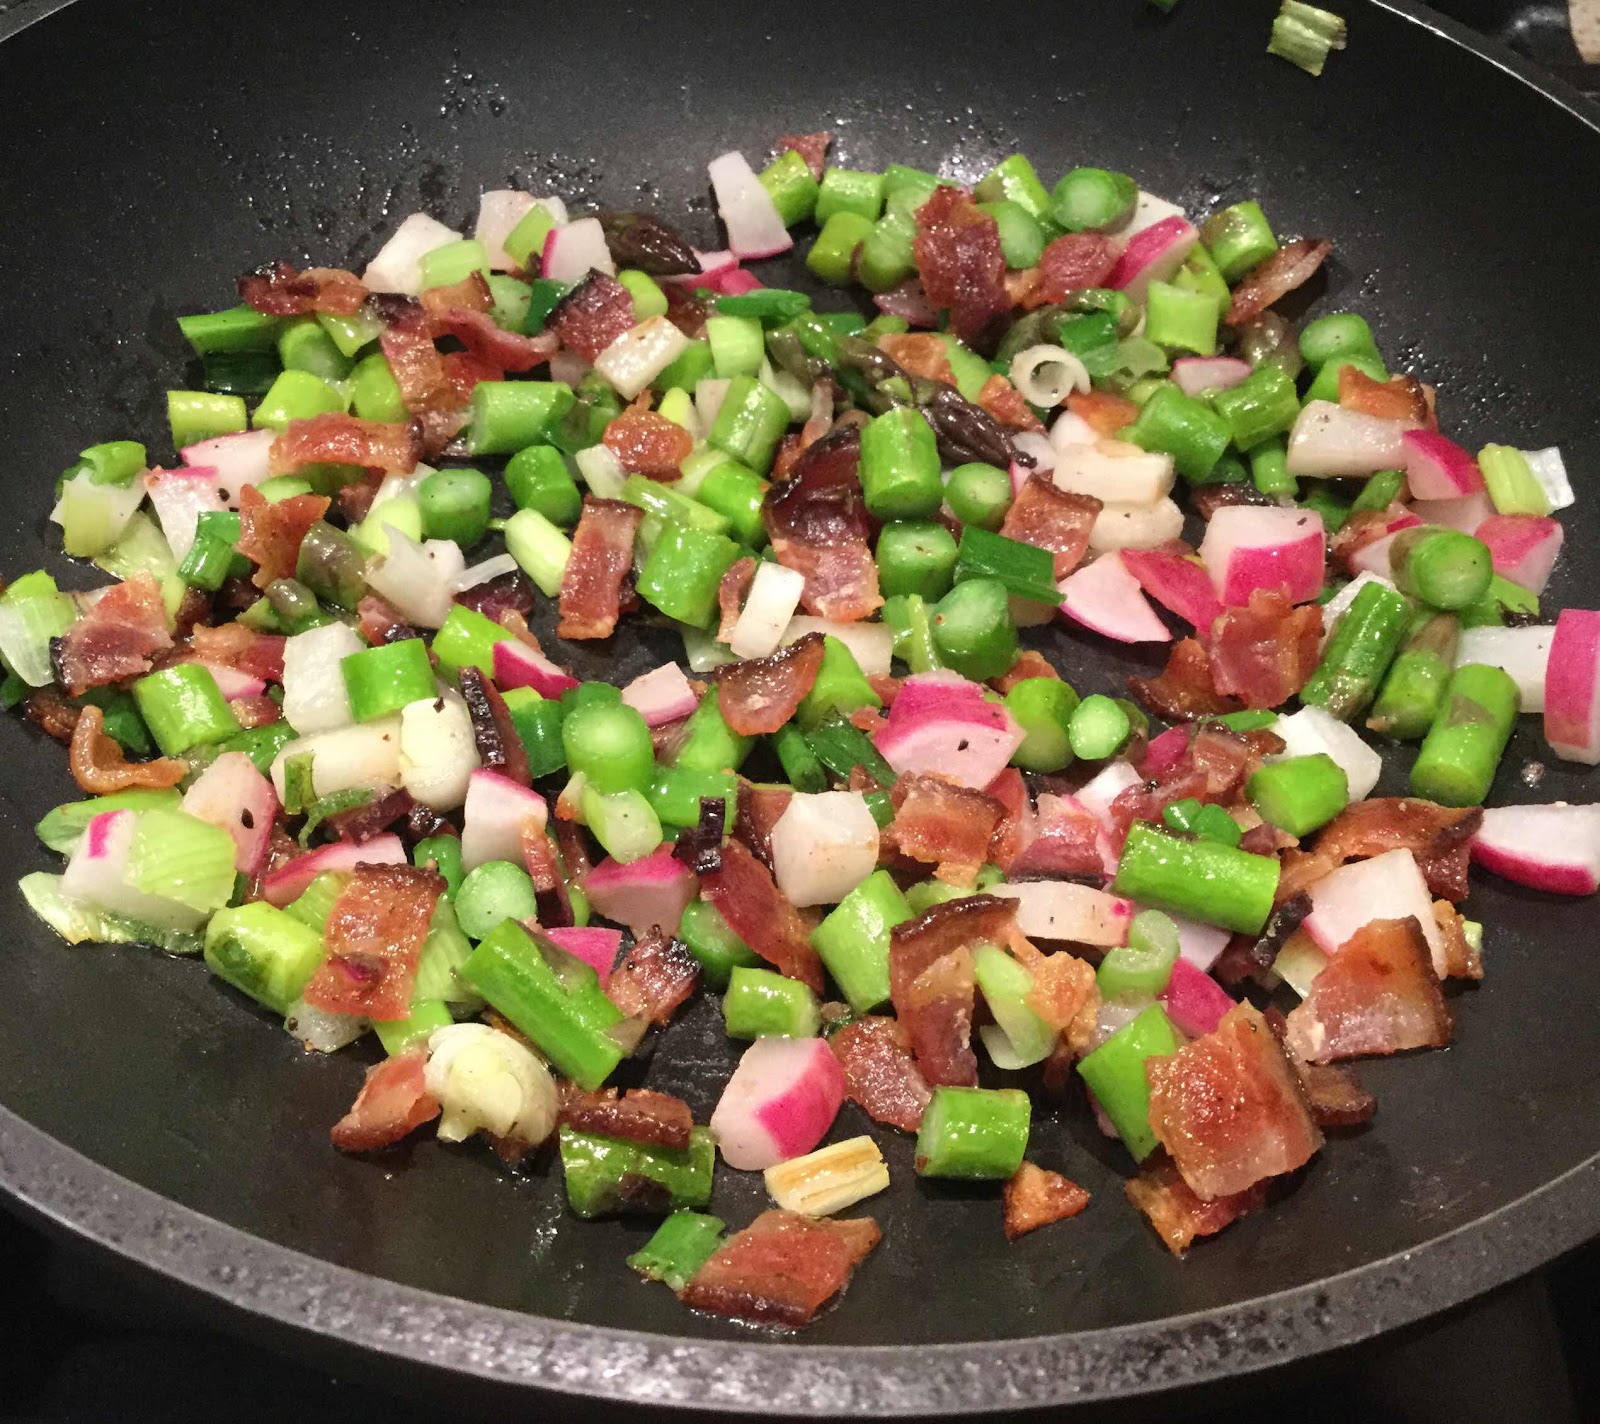
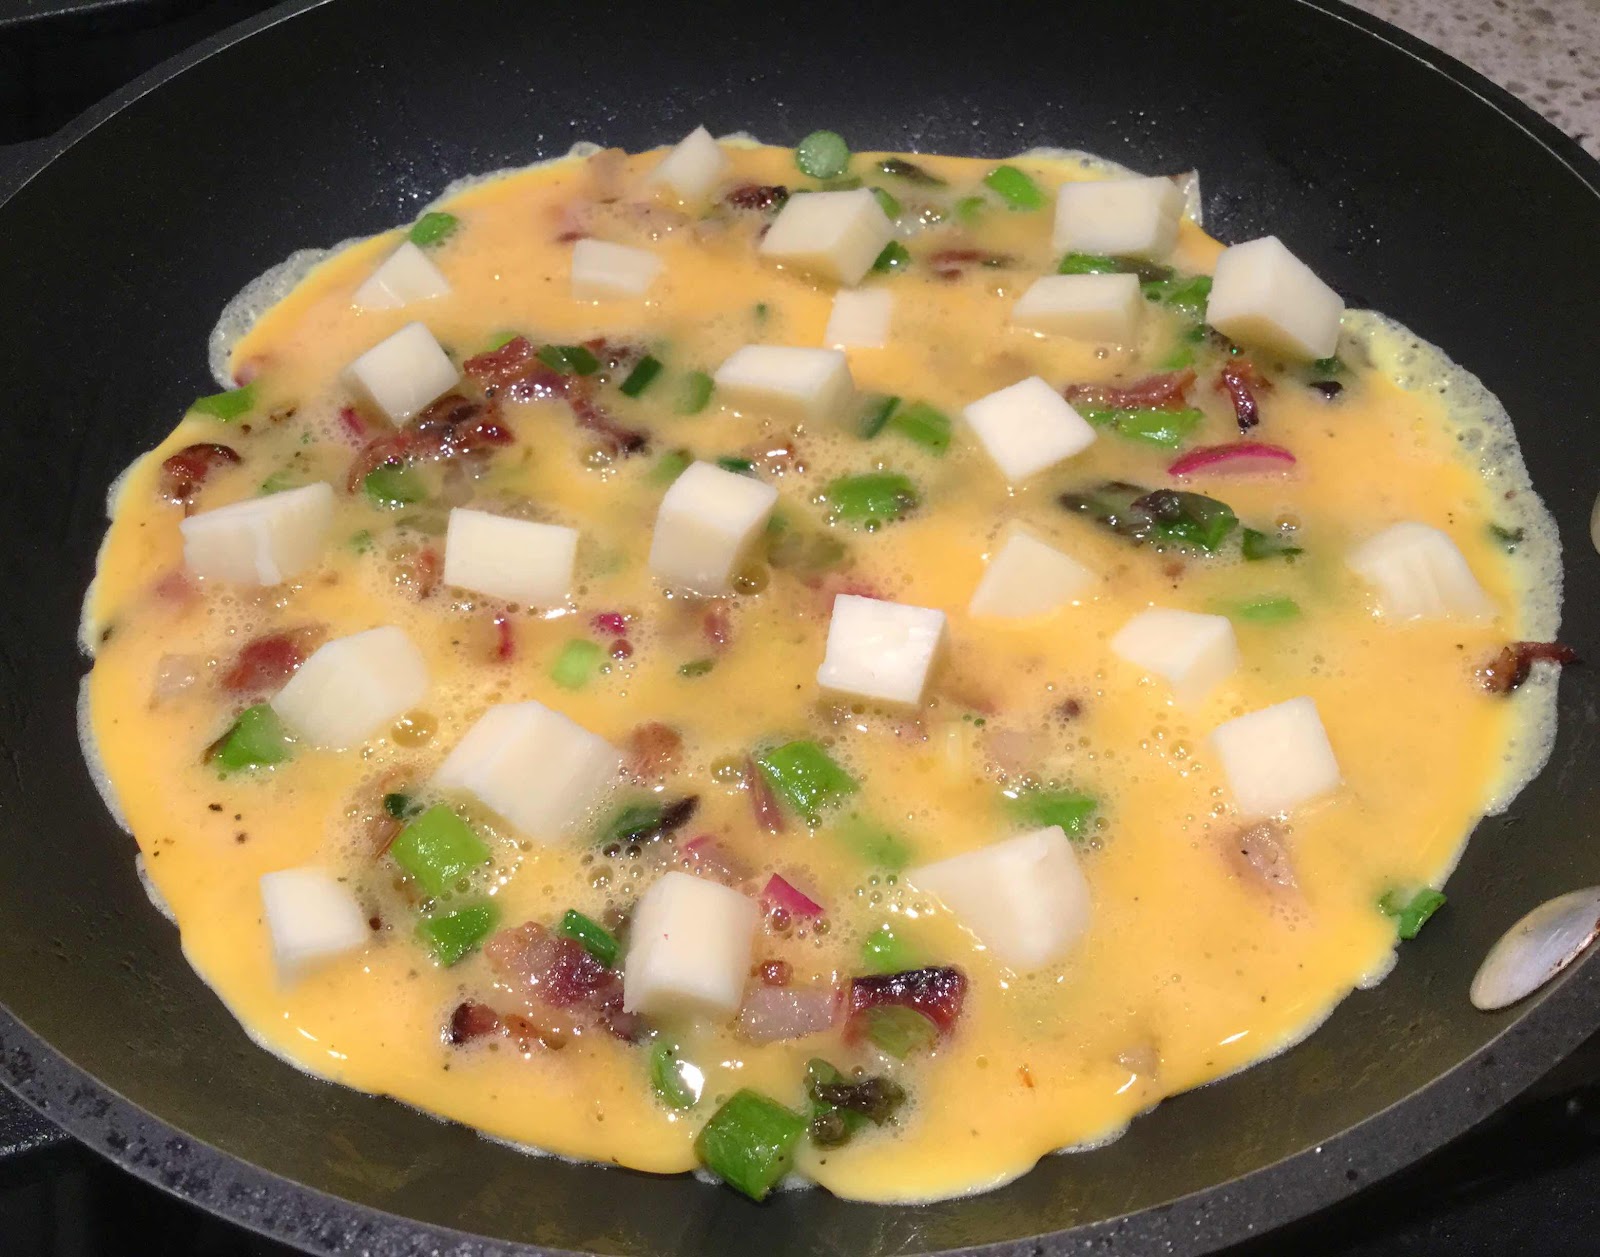
2. In an 8-inch, oven proof skillet, heat oil over medium heat. Add the chopped vegetables and bacon and sauté for about 4-5 minutes until the vegetables begin to soften and brown slightly. Remove from heat and pour the egg mixture over the vegetables and shake the pan to evenly distribute the vegetables. Drop the cubes of cheese on the top of the egg and bake in a preheated oven for 12 minutes, or until set.


3. Remove from oven and transfer frittata to a serving plate. Top with the chopped chives and enjoy.

Nutritional Information per serving (entire recipe): 370 calories, 5.5 g carbohydrate (1.9 g dietary fiber, 2.5 sugars), 26.2 g total fat (11.3 g saturated fat, 0 g trans fat), 425 mg cholesterol, 439 mg sodium, 241.5 mg calcium, 442 mg potassium, 27.8 g protein. Net carbs per serving: 3.6 grams

Photos and Recipe by Kathy Sheehan, copyright 2019
All rights reserved. Please do not duplicate without the author’s permission. 

Monday, February 26, 2018

Slow Cooker Beef (or Lamb) with Onions and Gravy

Slow Cooker Beef (or Lamb) with Onions and Gravy
There are some days I just need some comfort food. This easy slow cooker recipe definitely fits that description. It fills my kitchen with a savory aroma that just enhances my anticipation of enjoying this hearty and healthy meal at the end of a long day. The meat is so tender, it just falls apart! I recently learned the trick of sprinkling meat with a little baking soda to ensure perfect browning. It is optional, but it really works. I serve this meat and gravy dish over cooked riced cauliflower or, for even more nutrition, I choose a riced cauliflower-broccoli blend (as pictured). When covered with silky gravy, I never miss the starchy rice and, even more important, my post-meal blood sugar doesn’t spike. I’ve listed two options, using beef or lamb, and you will use either red wine and beef broth (for beef) or white wine and chicken broth (for lamb). There is a distinct difference in flavor, but both are equally delicious, so choose your favorite combination and enjoy!

Slow Cooker Beef (or Lamb) with Onions and Gravy
Makes 6 servings

2 pounds beef or lamb chunks (stew meat)
1 teaspoon salt
3/4 teaspoon baking soda
2 tablespoons coconut oil
1 onion, sliced into 1/2 rounds or chunks
1 teaspoon dried thyme
1/2 teaspoon black pepper, or to taste
1 cup red or white wine
2-3 cups beef or chicken broth
1/4 - 1/2 teaspoon Thick-It-Up (or xanthan gum)
6 cups cooked cauliflower rice (or cauliflower-broccoli rice blend)
Fresh parsley, chopped (optional garnish)

1. Toss together the meat, salt and baking soda. Allow to sit for a few minutes while you slice the onions and put them into the crock pot to cover the bottom. Heat up a heavy skillet over medium-high heat and add the coconut oil. Add beef or lamb to the heated skillet and brown all sides. Add the browned meat to the slow cooker. Sprinkle with thyme and black pepper.

2. Add 1 cup of wine to the hot skillet and deglaze the pan (red wine for beef or white wine for lamb). Add 2 cups of broth (beef broth for beef or chicken broth for lamb) and stir. Pour the liquid over the meat and onions in the crock pot. Add just enough additional broth to the crock pot until it almost covers the meat. Cook on low heat for 8 hours or on high heat for 4 hours.

3. About 10-15 minutes before serving, transfer the liquid from the crock pot to a large saucepan and bring to a simmer. While whisking, sprinkle the Thick-It-Up or xanthan gum over the liquid and whisk constantly until thickened into a nice sauce (use a tiny bit more or less Thick-It-Up or xanthan gum as needed to reach a gravy consistency). Add the sauce to the cooked meat and remaining ingredients in the crock pot and stir to coat the meat. Serve over the cooked cauliflower rice. Sprinkle with chopped parsley, if desired.

Nutritional Information per serving (including 1 cup of cooked cauliflower rice): 323 calories, 8.4 g carbohydrates (2.5 g dietary fiber, 3.5 g sugars), 11 g total fat (5.1 g saturated fat, 0 g trans fat), 82 mg cholesterol, 825 mg sodium, 54.8 mg calcium, 365 mg potassium, 4 mg iron, 7 mg Vit A, 43 mg Vit C, 40 g protein. Net carbs per serving: 5.9 grams

Photo and recipe by Kathy Sheehan, copyright 2018
All rights reserved. Please do not duplicate without the author’s permission.

Tuesday, October 3, 2017

Low Carb Broccoli Cheddar Soup

Broccoli Cheddar Soup
I was browsing through some broccoli soup recipes and landed on a good one asserting to be a Panera copycat recipe but it was too high in carbs and called for flour, which are both no-nos for me. So I adapted this recipe to be low carb and ketogenic with a few minor adjustments. This is the creamiest and, by far, the BEST Broccoli Cheddar soup I’ve ever made and will definitely be my go-to recipe from now on! Perfect for a cool fall evening or anytime.

Low Carb Broccoli Cheddar Soup
Makes about 6 cups

2 tablespoons unsalted butter
1/2 small onion, finely chopped
1 clove garlic, minced
2 cups chicken broth
1 cup organic heavy cream
1/2 teaspoon salt, or to taste
1/2 teaspoon ground black pepper, or to taste
1/2 teaspoon paprika
1/2 teaspoon dry mustard powder
A small pinch of cayenne
3 cups broccoli florets and stems, diced into small pieces
1 small carrot, sliced into thin rounds
8 ounces high-quality cheddar cheese, grated
1/2 teaspoon Thick-It-Up low carb thickener (or xanthan gum), if needed

1. In a large heavy saucepan or Dutch oven, melt butter over medium-low heat. Add chopped onion and sauté for about 4 minutes, stirring occasionally, until translucent and just starting to turn golden in color. Add garlic and sauté for another minute or so until fragrant. Add the chicken stock and heavy cream and whisk to combine. Add the salt, pepper, paprika, dry mustard powder and cayenne and stir to combine. Bring to a simmer and add the broccoli and carrots and allow the mixture to gently simmer on low heat uncovered, stirring occasionally, for about 20 minutes, or until the vegetables have softened and the broth has thickened slightly.

2. Meanwhile, grate the cheese and set aside a portion to use as a garnish later. After the soup has simmered and the vegetables have softened, add the cheese and stir continuously until it has melted and is fully incorporated into the soup. Taste and adjust seasonings. If needed, sprinkle the Thick-It-Up (or xanthan gum) into the soup while whisking continuously until the desired thickness is reached.

3. Ladle the soup into serving bowls, garnish with the reserved grated cheese and serve immediately. Any leftovers can be stored in an airtight container in the refrigerator for up to 5 days. It is best reheated in the microwave or heated very gently in a heavy saucepan over low heat while stirring often. Do not freeze.

Nutritional Information per cup: 305 calories, 7.3 g carbohydrate (1.8 g dietary fiber, 1.9 g sugars), 30.9 g total fat (19.7 g saturated fat, 0 g trans fat), 105 mg cholesterol, 651 mg sodium, 323.9 mg calcium, 217 mg potassium, 1 mg iron, 2888 mg Vit A, 41 mg Vit C, 13.1 g protein. Net carbs per cup: 5.5 grams

Photo and recipe by Kathy Sheehan, copyright 2017
Adapted from a recipe on averiecooks.com
All Rights Reserved. Please do not duplicate without the author’s permission.

Saturday, August 12, 2017

Low Carb Creamy Coleslaw


Sometimes I forget about coleslaw, but it's really the perfect side dish for a cookout, family gathering, picnic or potluck. It's so quick and easy to throw together, it's a shame that I don't make it often. With the help of a food processor, I can shred my own cabbage and carrot in minutes, but you can use a bag of prepackaged coleslaw mix, if you prefer. This recipe is super creamy with just the right amount of tang from the apple cider vinegar. Replace the sugar in a traditional recipe with erythritol or stevia and you have a delicious, low carb coleslaw the whole family will love.

Low Carb Creamy Coleslaw
Makes about 8 servings

1 small head green cabbage, shredded
1 small carrot, finely shredded

Dressing Ingredients:

2/3 cup mayonnaise 
2 tablespoons sour cream
2 tablespoons minced onion
1-2 tablespoons powdered erythritol, to taste (I used Swerve Confectioners)
1.5 tablespoons apple cider vinegar
1/2 teaspoon celery salt
Salt and freshly ground pepper to taste

Combine the shredded cabbage and carrot in a large bowl. In a separate bowl, whisk together the dressing ingredients. Add to the cabbage mixture and stir to coat the cabbage. (Use only the amount of dressing needed to coat the slaw mix. You may have some leftover dressing, which can be stored in the refrigerator for up to 2 weeks.) Mix well to combine. Taste and adjust seasoning, adding more salt, pepper or sweetener if desired. Refrigerate for 45 minutes or more to allow the flavors to blend.

Nutritional Information per serving (about 1/2 cup): 155 calories, 6.4 g carbohydrate (2 g dietary fiber, 3.5 g sugars, 1.9 g sugar alcohols), 14.5 g total fat (2.5 g saturated fat, 0 g trans fat), 8 mg cholesterol, 236 mg sodium, 48 mg calcium, 246 mg potassium, 1230 mg Vit A, 1 mg iron, 1.5 g protein. Net carbs per serving: 4.4 grams

Recipe by Kathy Sheehan, copyright 2017
All rights reserved. Do not duplicate without the author's permission.
Friday, April 21, 2017

Low Carb, Grain Free Cheese and Onion Enchiladas

  
This is a super simple, low-carb meal that can be assembled ahead and then baked just prior to serving. I recently made several trays of enchiladas for a large gathering and everyone raved and asked for the recipe. The tortillas (or Mexican-style crepes) were made a day or two ahead and the red sauce was whipped up in the blender in a matter of minutes, so it took no time at all to prepare a delicious and satisfying meal for a party of over a dozen people. The nice part was that I assembled the enchiladas in their baking pans on the morning of the event, then just popped them in the oven to bake later, which allowed me to socialize with my guests instead of being stuck in the kitchen. Served with a big salad, some non-GMO corn chips for the carb-eaters and a simple dessert, the evening was a huge success and I never broke a sweat! Cinco de Mayo is coming up on May 5th. If you're looking for a stress-free, festive meal to feed your family or a crowd, then this is the recipe for you.

Grain Free, Mexican-Style Tortillas (or Crepes)
Makes 6 tortillas

1/4 cup mild-flavored nut butter (room temperature), such as cashew, macadamia or almond
2 large eggs
3 tablespoons milk (or non-dairy milk)
1 tablespoon melted butter, ghee or coconut oil
1/8 teaspoon sea salt
1/2 teaspoon chili powder
1/2 teaspoon ground cumin
1/8 teaspoon onion powder
1/4 teaspoon dried oregano
1/8 teaspoon black pepper
Melted butter or coconut oil for cooking

Whisk together all of the ingredients until the nut butter is fully incorporated and the batter is smooth (it will be somewhat thin). Using a small sauté pan, heat over medium-low heat and brush a thin layer of the melted butter or coconut oil around the inside of the heated pan to prevent sticking. (I used an inexpensive, 8" non-stick omelet pan which only required a thin coating of oil. Adjust this amount if needed for your pan.) While holding the heated pan off the heat in your dominant hand, quickly pour a scant 1/4 cup of batter into the center of the pan and immediately begin to swirl the batter around to create a round, very thin tortilla. Keep swirling until the batter firms up in the shape you desire. (To see my YouTube video demonstrating this crepe-making technique, click here: https://www.youtube.com/watch?v=jhzXjJ2HVeM). Replace pan onto the heat and cook the tortilla for about 1 minute until slightly brown around the edges. Very carefully flip the tortilla and cook the second side for about 45 seconds. Remove tortilla to a plate to cool. Repeat until all the batter is gone. Set aside tortillas until you're ready to assemble the enchiladas. For storage, place a piece of parchment paper between each tortilla to prevent them from sticking together. These can be made 1-2 days ahead and refrigerated, although bring to room temperature before rolling the enchiladas for the greatest flexibility. 

Nutritional Information per tortilla (no filling): 117 calories, 2.3 g carbohydrate (0.6 g dietary fiber, 0.2 g sugar) 10.8 g total fat (3.2 g saturated fat, 0 g trans fat), 66 mg cholesterol, 50 mg sodium, 24 mg calcium, 52 mg potassium, 3.4 g protein. Net carbs per serving: 1.7 grams


Easy Blender Enchilada Red Sauce
Makes 2-1/2 cups (10 servings)

2 (8 ounce) cans tomato sauce (no sugar added)
1/2 cup water
1/4-1/2 teaspoon stevia powder (or 2-4 teaspoons erythritol sweetener), to taste
1/2 teaspoon onion powder
1/2 teaspoon garlic powder
1-3 tablespoons chili powder, to taste
1-2 teaspoons ground coriander, or to taste
1-2 teaspoons ground cumin, or to taste
1/8 teaspoon sea salt, optional or to taste

Place all of the ingredients in a blender and blend until smooth. (When a measurement range is given for a spice, start with the smallest amount and add more if you like yours spicier. I admit, I'm a wimp and like my sauce mild.) Taste and adjust seasonings, if necessary.

Nutritional Information per 1/4 cup serving (no salt added): 20 calories, 4 g carbohydrate (1.2 g dietary fiber, 1.7 g sugars), 0.2 g total fat (0 g saturated fat, 0 g trans fat), 0 mg cholesterol, 336 mg sodium, 5.3 mg calcium, 150 mg potassium, 0.6 G protein.  Net carbs per serving: 2.8 grams
 
Low Carb, Grain Free Cheese and Onion Enchiladas
Makes 6 enchiladas

6 Grain Free, Mexican-Style Tortillas, room temperature (see recipe above)
1-1/4 cups Easy Blender Enchilada Red Sauce (see recipe above)
1/2 pound sharp cheddar, cut into six 3/4" logs
1 cup shredded Cheddar-Monterey Jack Cheese Blend
6 green onions, chopped (separate white part from green part)

Place 1/2 cup of the Enchilada Red Sauce into a baking pan and spread around to cover the bottom of the pan. Take one cheddar cheese log, roll it inside one tortilla and place it into the sauce-covered baking pan. Repeat with remaining cheese logs and tortillas. Top each enchilada with about 3 tablespoons of the red sauce and spread with a spoon to cover. Evenly divide the white part of the chopped onion over the enchiladas, then sprinkle 1 cup of the Cheddar-Monterey Jack cheese over all.  Cover the pan tightly with foil and bake in a preheated 350-degree Fahrenheit oven for 30 minutes. Remove from oven and top with the chopped green onion and serve.

Nutritional Information per enchilada: 324 calories, 8 g carbohydrate (2 g dietary fiber, 2 g sugars), 25.8 g total fat (12.9 g saturated fat, 0 g trans fat), 86 mg cholesterol, 659 mg sodium, 437 mg calcium, 205 potassium, 1119 mg Vit A, 6 mg Vit C, 17 g protein. Net carbs per enchilada: 6 grams

Recipes by Kathy Sheehan, copyright 2017
All rights reserved. Please do not duplicate without author's permission.
Wednesday, February 1, 2017

Sautéed Red Cabbage with Bacon and Onions


Part of my strategy for keeping my blood sugar and weight in check is intermittent fasting. Because the body and metabolism resets itself whenever you're on a calorie restricted diet for a period of time (which explains the weight loss plateaus most dieters hit), it's a good idea to keep the body guessing! Intermittent fasting at irregular intervals makes it easier to lose weight and keep it off. Over the holidays, I regained some weight and, as a result, my blood sugar started creeping up to prediabetic levels again. On January 2nd and continuing for 2 weeks, I began an intermittent fasting schedule of skipping breakfast (to allow for 16-18 hour fast between dinner the night before and my next meal) and eating only within a 6 hour window each day. That worked to bring my blood glucose (BG) down a bit and steadied my weight, but it didn't go far enough or act quickly enough for me. Then for the next two weeks, I only ate one meal a day. That brought greater success! I lost 4 pounds and my fasting BG came down 10 points, but still not low enough and, although progress was slow and steady, I wanted faster results. After reading the book The Complete Guide to Fasting by Dr. Jason Fung MD with Jimmy Moore, I was motivated to try an extended fast. Today I just completed a 3-day total fast that only allowed coffee, tea, broth and water and was completely surprised how easy it was to do! In 3 days, I lost 2 pounds, lost inches around my waist and hips and experienced perfectly normal blood glucose. This morning I woke up to a fasting BG of 78! Even tonight, as I was making dinner, I thought I could have gone on for another day or more! I didn't experience any hunger or discomfort and, as a matter-of-fact, I felt GREAT the whole time! If you're struggling with weight or getting your blood sugar under control, I highly recommend that you get Dr. Fung's book and learn about his successful therapy that includes intermittent fasting for reversing diabetes, sometimes as quickly as a couple of weeks.


I wanted to share my break-fast meal, which was really, really delicious after having not eaten for 3 days! In this sweet and sour red cabbage sauté, I replaced the sugar of a traditional recipe with my favorite erythritol sweetener, LaKanto Monkfruit sweetener, and the result was perfection. My non-diabetic husband loved it too. It paired beautifully with an award-winning white wine and herb sausage I bought at my local Whole Foods. This low carb side dish is quick and easy to make and will become favorite of your family, too!

Sautéed Red Cabbage with Bacon and Onions
Makes 4 servings

3 slices of organic bacon, sliced into narrow strips (reserve grease)
1/2 cup onion, thinly sliced
4 cups red cabbage, thinly sliced (about 1/2 head)
3 tablespoons apple cider vinegar
1/2 teaspoon kosher or sea salt
2 teaspoons dried rosemary
3-4 teaspoons LaKanto Monkfruit sweetener, or to taste (or another erythritol sweetener)

1. In a large enameled pot or pan (not cast iron because the vinegar may react with the pan), sauté the bacon until crispy. Remove to drain on a paper towel and reserve bacon grease in the pan. Sauté the onion in the fat. When it is transluscent, add the cabbage and cook, covered and stirring frequently, until the cabbage has begun to soften.

2. Add the vinegar, rosemary and salt. Allow the cabbage mixture to continue cooking until soft and can be pierced with a fork.

3.  Add the sweetener. Start with 3 teaspoons and add more if needed to reach your desired sweetness. Add a tablespoon or two of water if the mixture becomes too dry. Add the bacon back into the pan. Stir and serve.

Nutritional Information per serving (1/4 recipe): 72 calories, 9 g carbohydrate (2.4 g dietary fiber, 4.3 g sugars, 4 g sugar alcohols), 2.9 g total fat (0.9 g saturated fat, 0 g trans fat), 52.8 mg calcium, 461 mg sodium, 287 mg potassium, 1013 mg Vit A, 52 mg Vit C, 1 mg iron, 3.8 g protein. Net carbs per serving: 6.6 grams

Recipe by Kathy Sheehan, copyright 2017
All rights reserved. Please do not duplicate without author's permission.

Wednesday, October 5, 2016

Rainbow Chili


 A cool, autumn day calls for a comforting meal that is warming, all the way to my toes! This spicy meat chili has the added health benefit of assorted vegetables to nourish the body, but don't overlook the fact that their bright colors are appealing to the eye, as well. The purple of red cabbage, the bright orange of carrots, the bold red of tomatoes, the white of onion, the spring green of celery and the summer yellow of squash all come together in a rainbow of flavor! Mix them up and use whatever vegetables you have on hand or choose your family's favorites. I enjoy this hearty chili with a sprinkling of shredded cheese or topped with guacamole and sour cream.

I'm often asked how I fulfill the various tastes and dietary requirements of different family members at mealtime, since not everyone chooses to eat low carb. This meal is a great example! My carb-loving husband (who is not diabetic) loves his chili over boiled potatoes. We usually keep some starchy side dish in the fridge to add to his meals, such as boiled potatoes, pasta or rice.  This arrangement works well for us. It's easy for me to stay on my low-carb diet, while still satisfying his desire for a starch...that way we're both happy!

Rainbow Chili
Makes about 10 cups

2 teaspoons coconut oil
1 pound grass-fed, organic ground beef
1 medium onion, chopped
2 celery stalks, chopped
2 carrots, chopped
1 cup chopped red cabbage
1 cup chopped yellow summer squash
2 cloves garlic, minced
1 can diced tomatoes (14.5 oz.)
1 can organic black soy beans (15 oz.), drained and rinsed
1/2 teaspoon beef concentrate (optional)
1 teaspoon dried oregano
1 teaspoon sea salt, or to taste
1/2 teaspoons ground black pepper, or to taste
1-1/2 teaspoons chili powder, or to taste
1 to 1-1/2 teaspoons ground cumin, or to taste
1/16 teaspoon cayenne pepper, to more if you like it hot
1-1/2 cups to 2 cups beef broth (until desired consistency is reached)

Heat the coconut oil in a heavy Dutch oven. Brown the ground beef. Add the onions, celery and carrots and sauté, stirring occasionally, until the onion becomes translucent. Add the remaining chopped vegetables, garlic, tomatoes, beans, beef concentrate (if using), salt, pepper, herbs and spices. Stir to combine and sauté briefly. Add enough beef broth to reach the desired consistency. Taste and adjust seasonings to taste.  (I'm a wimp and like my chili mild, but if you like yours hot, you may need to add more chili powder, cumin and cayenne.) Cover and simmer for at least 30 minutes, stirring occasionally, before serving.

Nutritional Information per cup: 166 calories, 7.3 g carbohydrate (3.5 g dietary fiber, 2.6 g sugars), 9.6 g total fat (3.7 g saturated fat, 0 g trans fat), 28 mg cholesterol, 478 mg sodium, 48.6 mg calcium, 273 mg potassium, 13.3 g protein.  Net carbs per serving: 3.8 grams

Recipe by Kathy Sheehan, copyright 2016
All rights reserved. Please do not duplicate without author's permission.

Wednesday, August 10, 2016

Slow Cooker Pork Chops with Carrots and Apples


I love my Crock Pot and use it often. Even if I'm at home for the day, I love the aroma wafting though the house and knowing that all I have to do is lift the lid from the slow cooker and dinner is ready. This recipe in particular smells wonderful while it's cooking and it's so easy to throw together. The combination of pork and apples is a classic and by cooking them in a crock pot, the pork chops turn out moist and tender. To reduce some carbs, I recommend using a green Granny Smith apple, instead of a higher sugar variety. With a side of probiotic-rich homemade sauerkraut, this is a comforting and healing meal.

Slow Cooker Pork Chops with Carrots and Apples
Makes 2-4 servings, depending on the size of your pork chops

1 tablespoon coconut oil
2 large, thick, center cut, boneless pork chops (organic or antibiotic free)
1 large onion, sliced
2 cups carrots, thickly sliced (I use multi-colored carrots)
1 Granny Smith apple, cut into slices and sprinkled with lemon juice
2 teaspoons fresh thyme (or 1 teas dried)
1-1/2 tablespoons fresh rosemary, chopped (or 2 teas dried)
Salt and pepper

1. In a heavy skillet, heat the oil on medium-high. Season the chops with salt and pepper and brown on both sides.

2. In the crock pot, add the sliced onion and carrots and season with a little salt and pepper. Place the pork chops on top of the vegetables and sprinkle with the chopped herbs.

Top vegetables with browned pork chops.

3.  Spread the sliced apples on top of the pork and put the lid on the Crock Pot. Set the slow cooker to high (or 350-degrees Fahrenheit) and cook for 3 hours. Test meat and, if it's tender and the internal temperature is at least 165-degrees, turn off slow cooker.  If additional cooking is needed, continue cooking covered for another 30 minutes.  Serve pork with vegetables and spoon any sauce over the chops for added flavor.

Scatter apple slices over all before cooking.

Nutritional Information per serving (with 1/2 cup vegetables): 341 calories, 24 g carbohydrate (4 g dietary fiber, 16.2 g sugars), 16.2 g total fat (6.1 g saturated fat, 0 g trans fat), 70 mg cholesterol, 174 mg sodium, 31.7 mg calcium, 228 mg potassium, 24.2 g protein. Net carbs per serving: 20 grams

Recipe by Kathy Sheehan, copyright 2016
All rights reserved. Do not replicate without written permission.

Saturday, November 8, 2014

Roasted Garlic Burgers Topped with Caramelized Onion


Rummaging through my vegetable bin today, I found an overlooked bulb of elephant garlic.  It had begun to sprout, so I knew I had to cook it or plant it immediately.  I chopped the top off, drizzled it with olive oil, wrapped it loosely in a tent of foil and baked it in a 400-degree F oven for about 45 minutes until the cloves were soft and golden brown.  It is common to serve roasted garlic spread on bread but, because I don't eat bread, I needed to find another use for it and this recipe came to mind.  The caramelized onion pairs beautifully with the garlic-infused beef.  I served it with an optional drizzle of reduced sugar ketchup, which added another layer of flavor.  This recipe will undoubtedly become one of my favorite weekday meals!

Roasted Garlic Burgers Topped with Caramelized Onion
Makes 4 servings

1 large bulb of garlic, roasted (see directions above)
1 pound of grass fed ground beef
1 tablespoon tomato paste
1/2 tablespoon Worcestershire sauce (gluten free)
1 tablespoon fresh parsley, chopped (or 1/2 TB dried)
1/2 teaspoon black pepper
3/4 teaspoon Himalayan salt
2 teaspoons butter or ghee* (or substitute coconut oil)
1 large onion, sliced
1/4 teaspoon salt
3 drops molasses
1/2 teaspoon apple cider vinegar
Sprinkle of cayenne to taste
1 tablespoon coconut oil
Reduced sugar or sugar free ketchup, optional

1.  Remove the cloves from the roasted garlic bulb when cooled and chop into small pieces.  Place the garlic into a large bowl, add the ground beef, tomato paste, pepper, Himalayan salt, Worcestershire sauce and parsley.  Mix until ingredients are well distributed throughout the ground beef and form into four hamburger patties.  Set aside.  (You can place the patties in the refrigerator for later.  Allow them to come to room temperature before cooking.)

2.  In a skillet, melt the butter or ghee.  Add the sliced onion, add 1/4 teaspoon salt and heat over low heat, stirring occasionally.  The best method for caramelizing onions is to cook them low and slow to allow the natural sugars to be drawn out.  (When the onions are translucent and begin to color, you can begin cooking the patties in another skillet.)  Add the molasses, vinegar and cayenne to the onions at the end of their cooking time, a few minutes before the beef is done.

3.  In a separate skillet, heat a tablespoon of coconut oil over medium to high heat.  Add the patties and allow to cook, without disturbing, until seared and well colored.  Turn and repeat on second side and until done to your satisfaction.  (I like mine medium, with a hot pink center.)

4.  Remove patties to serving plates and top with 2 tablespoons of caramelized onion per serving.  Provide reduced or sugar free ketchup (2 carbs or less per serving), optional.  Serve immediately.

Nutritional Information per serving (no ketchup and no bun): 296 calories, 7.5 g carbohydrate (1.1 g dietary fiber, 2.9 g sugar), 19.6 g total fat (8.5 g saturated fat, 0 g trans fat), 74 mg cholesterol, 114 mg sodium, 27.2 mg calcium, 150 mg potassium, 22.1 g protein.  Net carbs per serving: 6.4 grams

* For those with food allergies: To create a dairy, lactose and casein free meal, use ghee (clarified butter) or coconut oil instead of dairy butter.

Recipe by Kathy Sheehan, copyright 2014.