Showing posts with label quick meals. Show all posts

Thursday, February 5, 2026

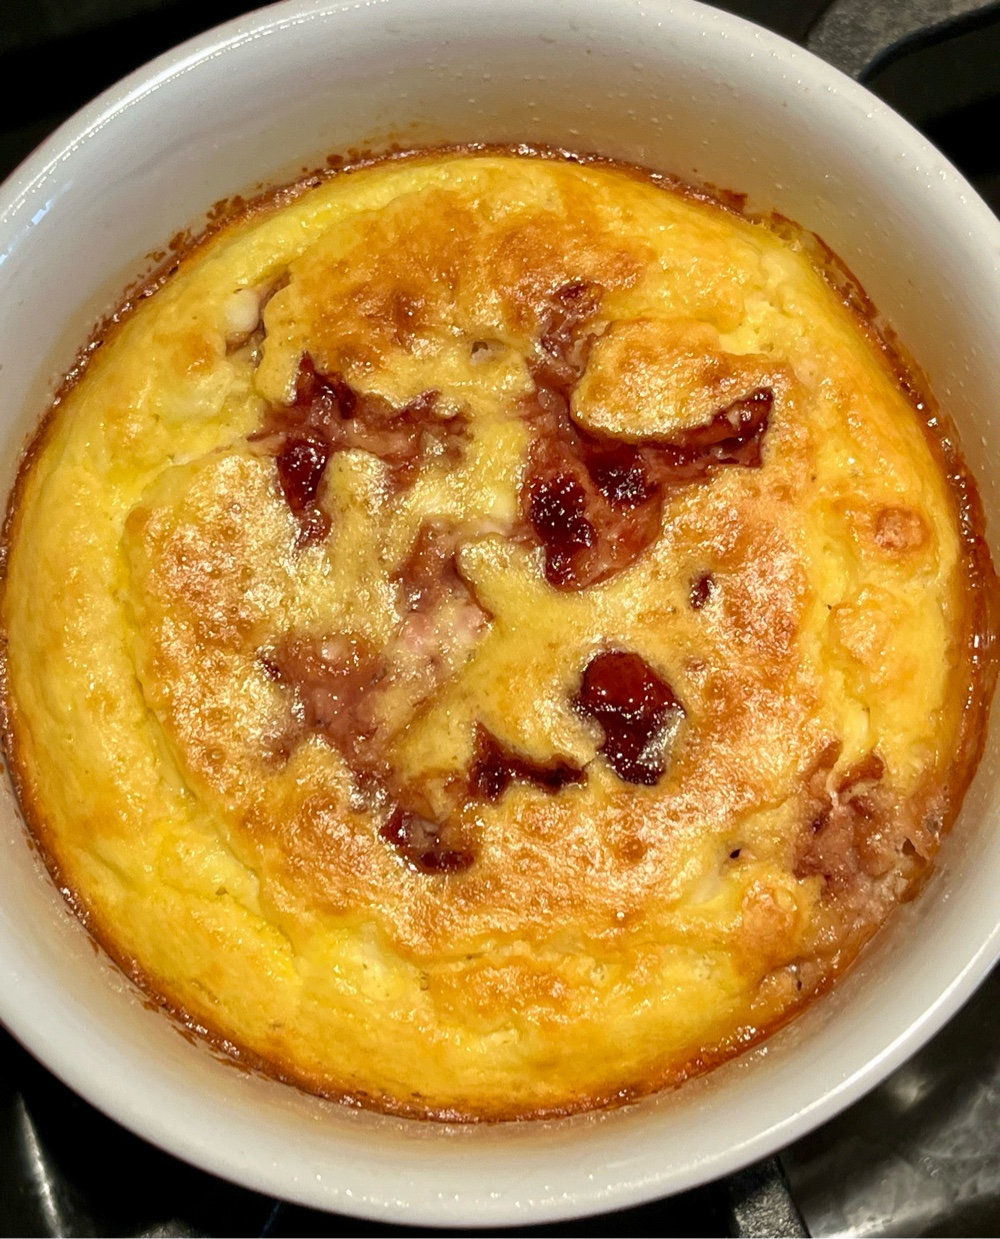
Baked Cottage Cheese Breakfast Bowl

Baked Cottage Cheese Breakfast Bowl
This high protein breakfast pudding can be made either sweet or savory! It makes one generous serving that leaves your body nourished and satisfied for hours.

Baked Cottage Cheese Breakfast Bowl
Makes 1 serving

Base Mixture:
½ cup cottage cheese (4% fat)
1 large egg
1/4 cup almond flour
1/4 teaspoon baking powder
A pinch of salt

Sweet Additions:
½ teaspoon vanilla extract
1-2 tablespoons allulose honey or sugar free maple syrup (or 6 drops monkfruit extract)
1/4 cup strawberries (chopped), or blueberries, fresh or frozen

Savory Additions:
1/4 cup ham, or cooked sausage, bacon or broccoli (chopped)
2 tablespoons shredded cheese
Freshly ground black pepper to taste
½ teaspoon chopped herbs

Preheat the oven to 350°F. Lightly grease one large oven-safe ramekin or small baking dish; set aside.

In a bowl, whisk together the base mixture of cottage cheese, egg, almond flour, baking powder, and salt until smooth.

If making sweet, whisk in your sweetener of choice and vanilla. Then gently fold in the fruit.

If making savory, add the meat or chopped broccoli, cheese, pepper and herbs to the base mixture and stir to combine.

Pour the mixture into the greased ramekin and bake for 25-30 minutes until set and lightly golden on top. Cool for about 10 minutes before serving.

Nutritional Information per serving: Varies, depending on additions to base mixture. Base mixture is 330 calories, 9.7 g carbohydrate (2 g dietary fiber, 5.2 g sugars), 22.8 g total fat (5.6 g saturated fat, 0 g trans fat), 201 mg cholesterol, 607 mg sodium, 255.6 mg calcium, 229 mg potassium, 2 mg iron, 141 IU Vit A, 24.3 g protein. Net carbs per serving: 7.7 grams.

Photo and recipe by Kathy Sheehan, copyright 2026
All rights reserved. Please do not duplicate without the author’s permission.

Tuesday, November 7, 2023

Keto Crispy Cheese Egg In a Nest


Keto Crispy Cheese Egg in a Nest

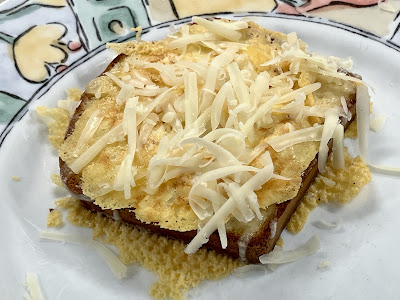
Cheese is a familiar addition to a traditional Egg in a Nest, but what about super crispy, crunchy cheese? This method of cooking allows the cheese in the pan to sizzle and crisp up, adding an unforgettable texture and flavor to this favorite breakfast food. For best results, use a nonstick skillet. You can use any aged cheese. My favorite is sharp cheddar.

Keto Crispy Cheese Egg In a Nest
Makes 1 serving

1 slice of low carb bread, with a hole cut out of the center
1 large egg
1½ ounces cheddar, shredded
Salt and pepper

Step by step Process

1. Preheat a nonstick skillet to medium to medium-high. Sprinkle a bit more than 1/3 of the shredded cheese onto the preheated skillet.

2. When it starts to sizzle, place a piece of low carb bread on top.

3. Crack an egg into the hole and sprinkle with salt and pepper.

4. Sprinkle more cheese on top of the bread and egg, reserving some for serving. Cover the skillet to allow the cheese over the top to melt a bit.

Flip when cheese is crispy

5. Once the cheese on the bottom is golden brown and crispy, flip and continue cooking until the cheese on the flip side is crispy and the egg is done to your liking. To serve, sprinkle reserved cheese over the top to melt. Enjoy!

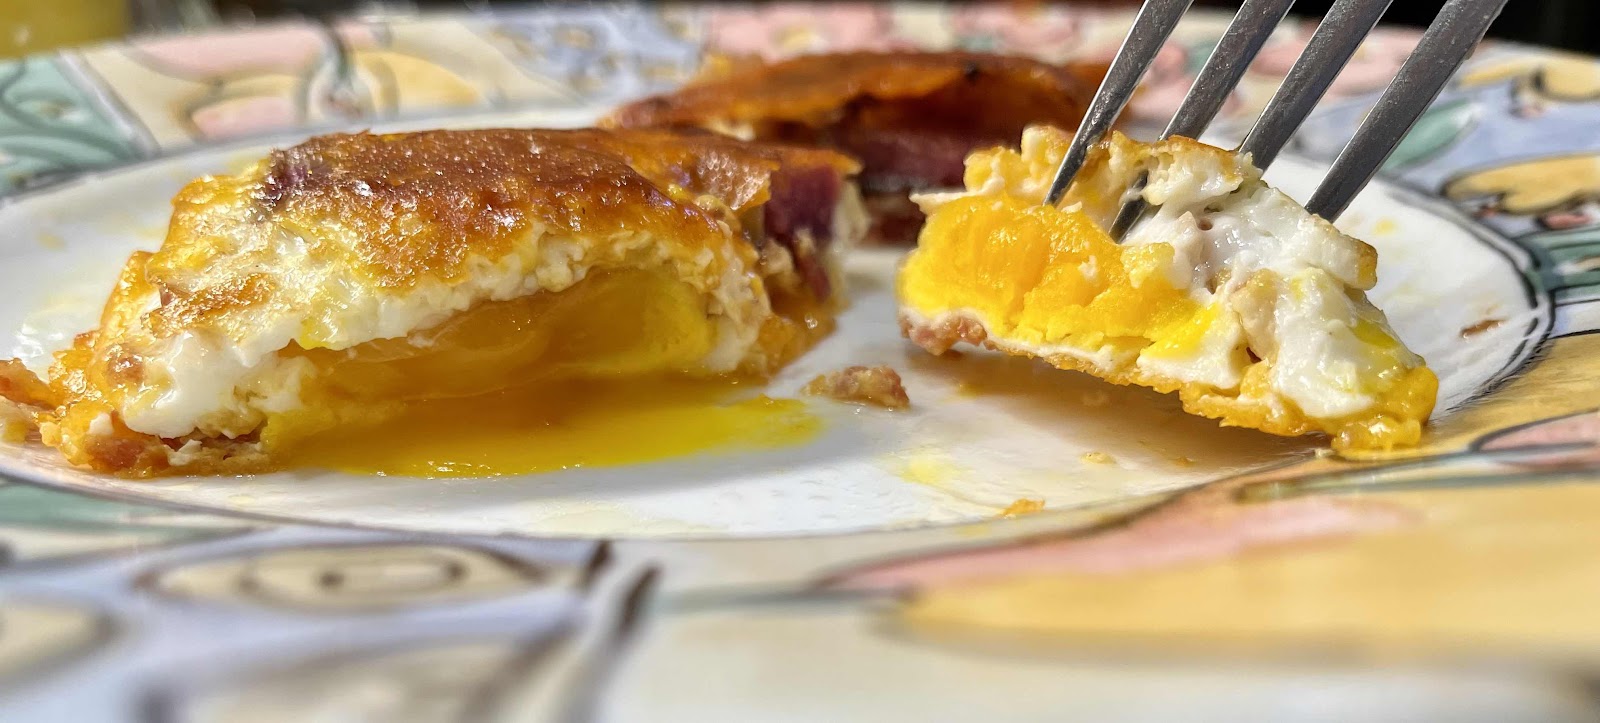
Crispy Cheese Egg in a Nest (cooked)

Nutritional Information (may vary, depending on the low carb bread used): 349 Calories, 1.4 g carbohydrate (1 g dietary fiber, 1.2 g sugars), 27.3 g total fat (11.6 g saturated fat, 0 g trans fat), 310 mg cholesterol, 448 mg sodium, 345.6 mg calcium, 129 mg potassium, 2 mg iron, 318 IU Vit A, 24.8 g protein. Net carbs per serving: 0.4 grams

Photos and recipe by Kathy Sheehan, copyright 2023
All rights reserved. Please do not duplicate without the author’s permission. 

Saturday, July 1, 2023

Keto Bacon and Cheese Dutch Baby Pancake

Keto Bacon and Cheese Dutch Baby Pancakes

This fluffy, puffy egg pancake is baked in the oven in a preheated, hot skillet. When it comes out of the oven, it is impressive! I use a 6-inch cast iron skillet, which imparts a higher rise and nice crust. Similar to a puffy omelet, but so much easier to make.

Keto Bacon and Cheese Dutch Baby Pancake
Makes 1 serving

1 tablespoon unsalted butter
6 inch heatproof skillet
2 large eggs
2 tablespoons heavy cream
2 tablespoons water
2 tablespoons almond flour (or 1 tablespoon coconut flour for nut free)
Salt and pepper to taste
2 slices cooked bacon, chopped
1 ounce cheddar cheese, shredded
Sugar free maple syrup (optional)

1. Placed the 1 tablespoon of unsalted butter into your skillet. Place the skillet into the oven and preheat to 400°F.

2. Meanwhile, whisk together the eggs, cream, water, almond flour, salt, and pepper. You can do this in a blender or food processor for an extra fluffy pancake.

3. When the oven and pan are preheated, swirl the melted butter all around the bottom and sides of the skillet. Pour the egg mixture into the hot skillet. Sprinkle the chopped bacon and cheese on top. Return the skillet to the oven and bake for 14 minutes until puffy and golden.

4. Remove the skillet from the oven and use a sharp knife to loosen the pancake from the sides of the pan. Transfer the pancake to a serving plate and drizzle sugar-free maple syrup on top, if desired. Eat it immediately. The pancake will deflate as it cools.

Cooked Keto Dutch Baby Pancake

Nutritional Information per serving (entire recipe): 618 calories, 2.5 g carbohydrate (0.9 g dietary fiber, 0.4 g sugars), 56.7 g total fat (27 g saturated fat, 0 g trans fat), 491 mg cholesterol, 723 mg sodium, 270.4 mg calcium, 276 mg potassium, 2 mg iron, 480 IU Vit A, 26.8 g protein. Net carbs per serving: 1.6 grams

Recipe and photos by Kathy Sheehan, copyright 2023
All rights reserved. Please do not duplicate without the author’s permission. 

Saturday, June 24, 2023

Summer Vegetable Stir Fry

Summer Vegetable Stir Fry

This is a dish we make often in the summer, utilizing the myriad of local summer vegetables available in the Farmer’s Markets. It’s a quick and easy stir fry that is fresh and delicious!

Summer Vegetable Stir Fry
Makes 2-3 servings

Cooked bratwurst, kielbasa or other cooked sausage 
1 small yellow zucchini or yellow summer squash
1 small green zucchini
½ onion
1 small Roma tomato
2 ounces cheese (cheddar, Parmesan or whatever is on hand)
Salt and pepper to taste

Optional Additions:
1-2 tablespoons tomato paste
1/4 cup heavy cream

1. Cut up the cooked sausage into cubes. Cube the yellow and green zucchini, onion, and tomato. Shred the cheese. Set aside.

2. Sauté the onions and sausage in a nonstick skillet over medium heat until the sausage begins to color and the onion is translucent and beginning to brown.

3. Add the zucchini and sauté, stirring occasionally, until it begins to soften and pick up some color. Add some salt and pepper to season the vegetables.

4. At the very end of cooking, add the chopped tomatoes and shredded cheese. When you stir in the tomatoes, they released their juices, which mixes with melted cheese to make a light sauce. If you want a saucier dish, add the optional tomato paste and heavy cream; stir to incorporate.

5. Taste and adjust seasoning if needed. Serve immediately.

Nutritional Information per serving (1/3 of recipe, not including optional additions): 351 calories, 8.9 g carbohydrate (1.8 g dietary fiber, 4.1 g sugars), 27.9 g total fat (12.2 g saturated fat, 0 g trans fat), 67 mg cholesterol, 1156 mg sodium, 151.2 mg calcium, 235 mg potassium, 107 IU Vit A, 15 mg Vit C, 15.3 g protein. Net carbs per serving: 7.1 grams.

Recipe and Photo by Kathy Sheehan, copyright 2023
All rights reserved. Please do not duplicate without the author’s permission. 

Monday, August 8, 2022

Creamed Kale and Eggs with Pesto

Creamed Kale and Eggs with Pesto
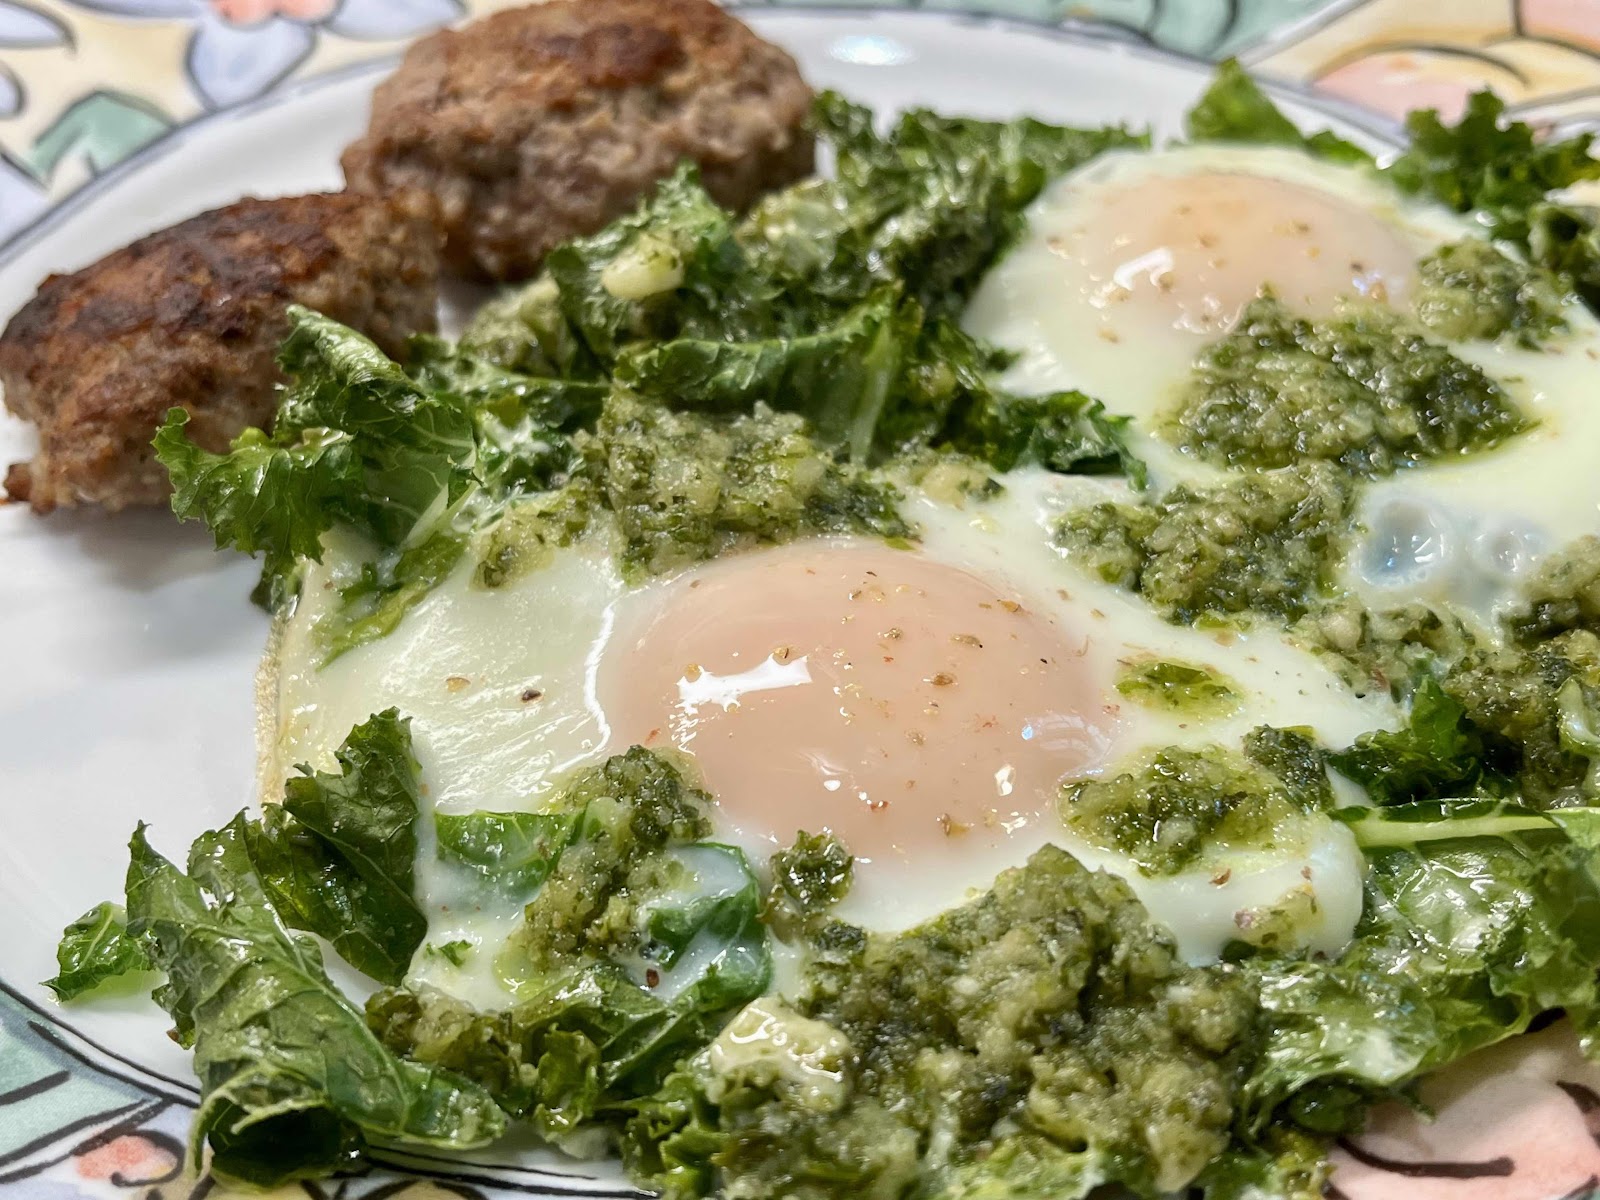
In the summertime, I have a small, backyard garden and kale is one of the most robust and easiest vegetables to grow! This baked egg dish is one of my very favorites and shows up on my breakfast table often while my kale is in season. As the kale bakes, it becomes crispy around the edges, similar to kale chips! The combination of flavors and textures makes this a deeply satisfying way to start the day.

Creamed Kale and Eggs with Pesto
Makes 1 serving

2 teaspoons olive or avocado oil
A large handful of fresh kale, washed and torn into pieces (you can substitute spinach or any leafy green)
2-3 tablespoons of heavy cream (or full fat coconut milk for dairy free)
Salt and pepper
2 eggs
2 tablespoons pesto (homemade or store bought)

1. Preheat the oven to 350°F.

2. In an 8 inch, oven proof skillet over medium heat, heat the oil and add the kale. As the kale wilts, toss it in the oil and season with salt and pepper.

3. Add heavy cream and stir to coat the kale. Create two wells and crack one egg into each well. Season the eggs with salt and pepper. Drizzle the pesto onto the top of the eggs and kale mixture.

4. Remove the skillet from the heat and bake in a 350° oven for seven minutes or until the eggs are done to your liking.

Nutritional Information per serving: 503 calories, 5.8 g carbohydrate (1.4 g dietary fiber, 0.6 g sugars), 48 g total fat (14.3 g saturated fat, 0 g trans fat), 414 mg cholesterol, 595 mg sodium, 156.5 mg calcium, 347 mg potassium, 3 mg iron, 42 mg Vit C, 1928 IU Vit A, 15.5 g protein. Net carbs per serving: 4.4 grams

Photo and recipe by Kathy Sheehan, copyright 2022
All rights reserved. Please do not duplicate without the author’s permission. 

Monday, June 20, 2022

Keto Scottish Salmon in Cream

Keto Scottish Salmon in Cream
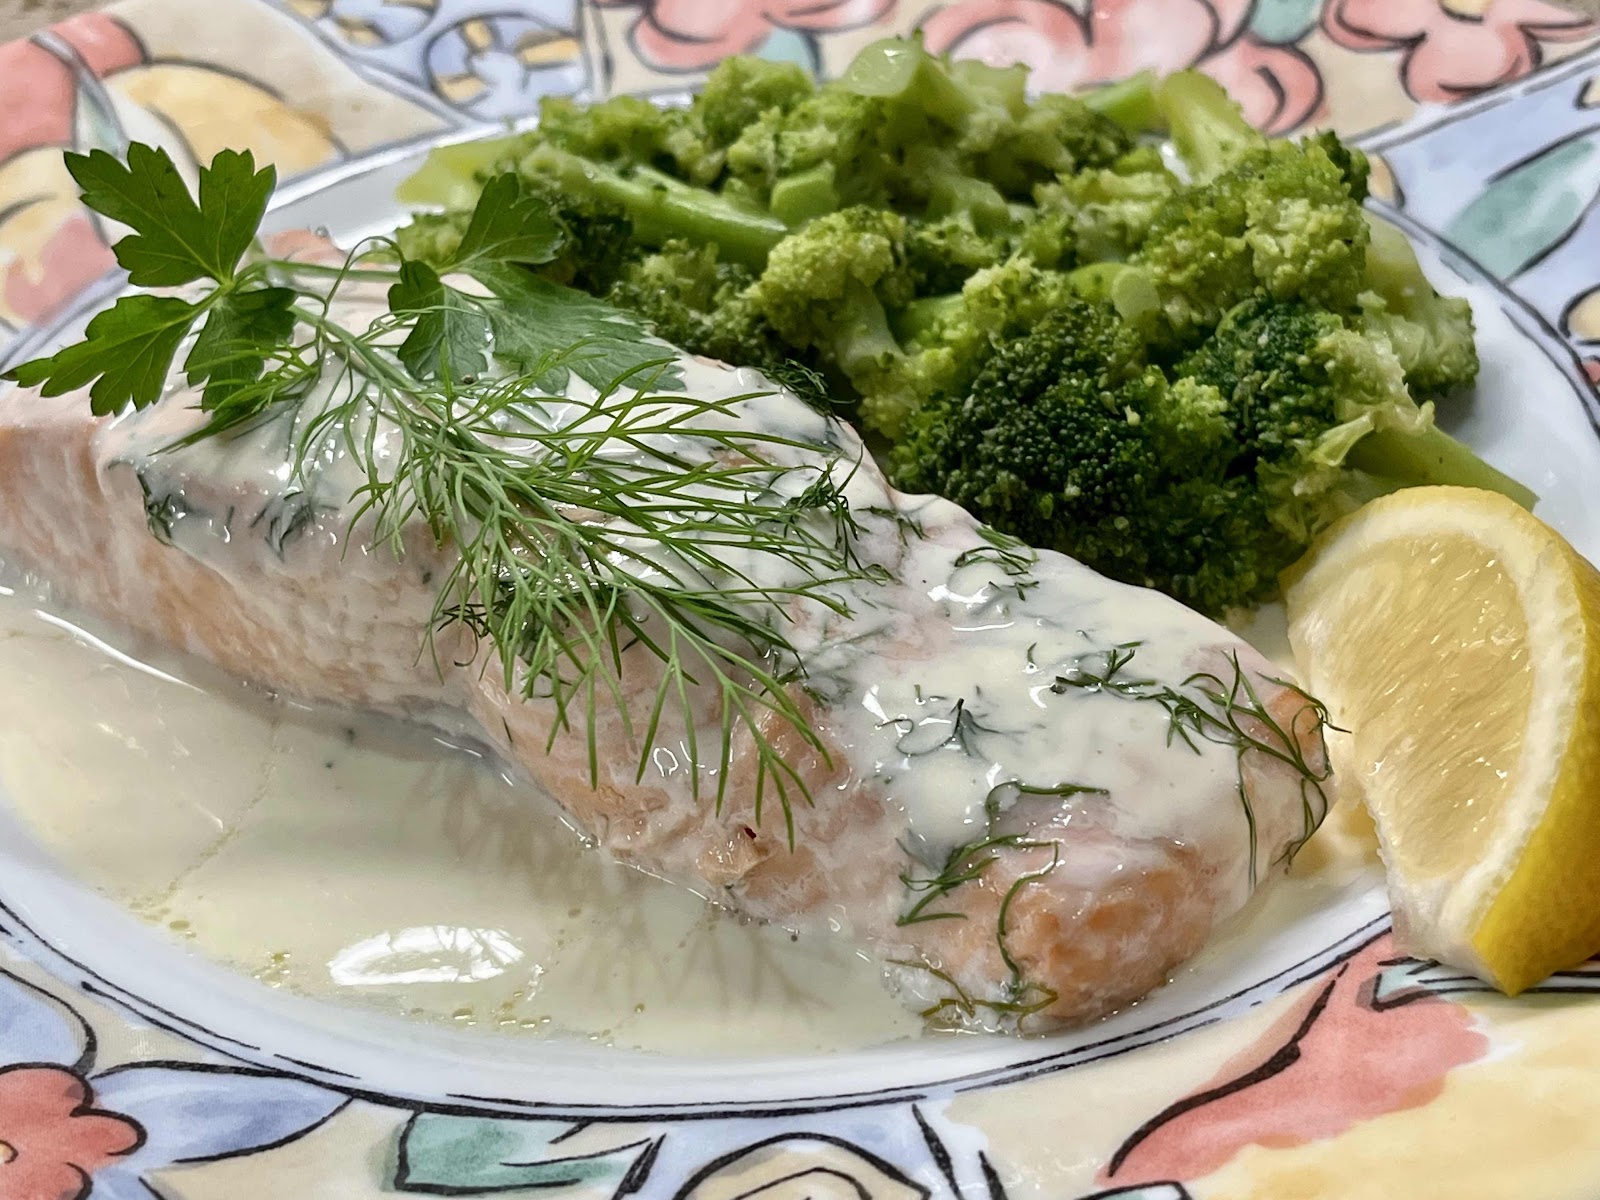
Many years ago I visited Scotland and, while there, I had the most wonderful salmon dish I had ever eaten! It was simple, but so elegant. I couldn’t get it out of my mind! When I got home I was determined to duplicate the recipe. This is what I came up with that almost exactly matches that fantastic dish! It is sophisticated and impressive enough for company or a special occasion, but quick and simple to make with only a few ingredients. Using fresh herbs is best, but in a pinch I’ve made this using dried and it turned out fine. This recipe makes two servings, but it’s easy to increase for a dinner party. It’s one of my favorite ways to prepare salmon that always brings back the wonderful memories of our Scotland vacation.

Keto Scottish Salmon in Cream
Makes 2 servings

2 salmon filets (5 oz. each)
1/2 cup heavy cream (or full-fat coconut milk for dairy free)
Juice of 1/2 lemon
1 tablespoon chopped fresh dill (or chives)
Salt and pepper to taste
1/2 to 1 teaspoon brown or dijon mustard, to taste
1 tablespoon chopped parsley

1. Preheat oven to 350°F.

2. Place salmon in a shallow dish that has been well buttered. Sprinkle with salt, pepper, lemon juice, chopped dill and/or chives.

3. Cover with foil. Cook in the preheated oven for 10 to 15 minutes until tender and the internal temperature reaches 125°F in the thickest part.

4. Meanwhile, in a small sauce pan, heat the cream gently, add the mustard and whisk. Heat until the sauce comes to a gentle simmer and thickens slightly. Spoon over the cooked fish. (If using coconut milk, you may need to simmer longer until the sauce is reduced and thickens.)

5. Garnish with chopped parsley and/or fresh dill sprigs. Serve with lemon wedges.

Nutritional Information per serving (1/2 recipe): 403 calories, 1.2 g carbohydrate (0.1 g dietary fiber, 0 g sugars), 32 g total fat (15.7 g saturated fat, 0 g trans fat), 80 mg cholesterol, 195 mg sodium, 19 mg calcium, 516 mg potassium, 1297 IU Vit A, 9 mg Vit C, 1 mg iron, 30.4 g protein. Net carbs per serving: 1.1 grams

Photo and recipe by Kathy Sheehan, copyright 2022
All rights reserved. Please do not duplicate without the author’s permission. 

Monday, May 23, 2022

REAL Keto Fettuccine Pasta Made with Coconut Flour

REAL Keto Fettuccine Pasta
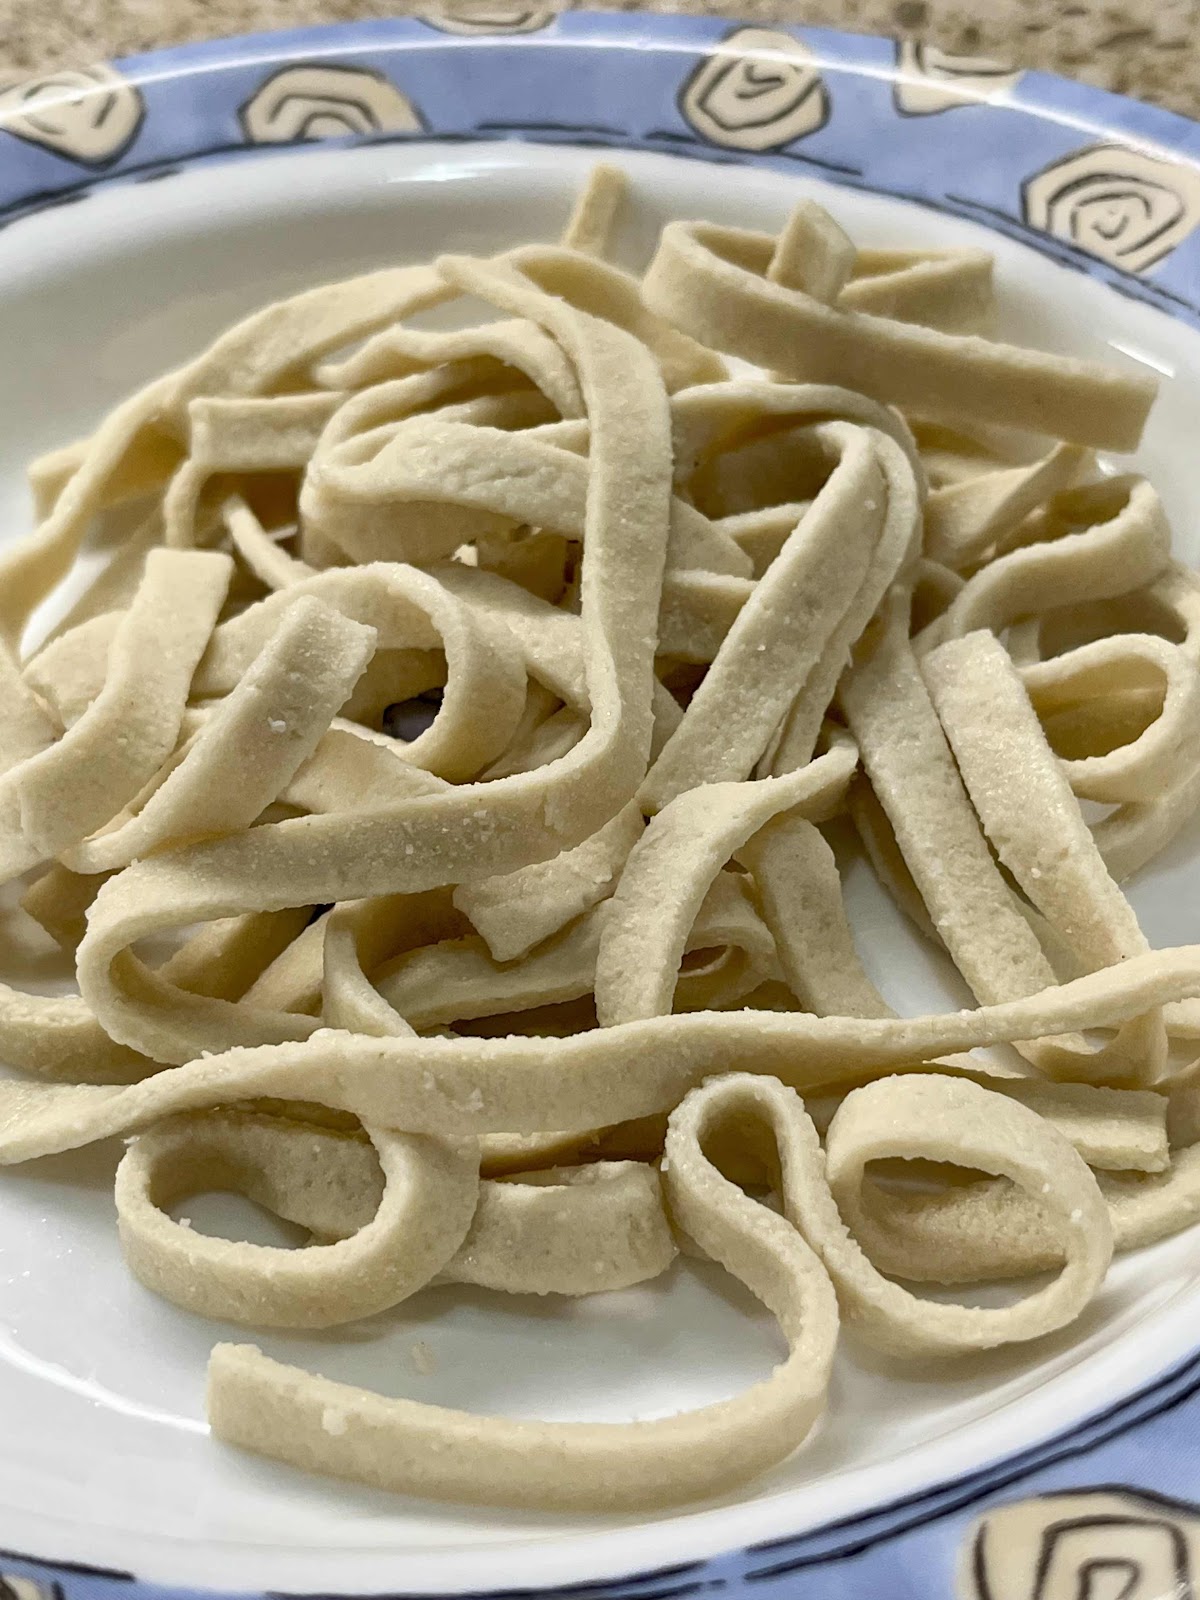
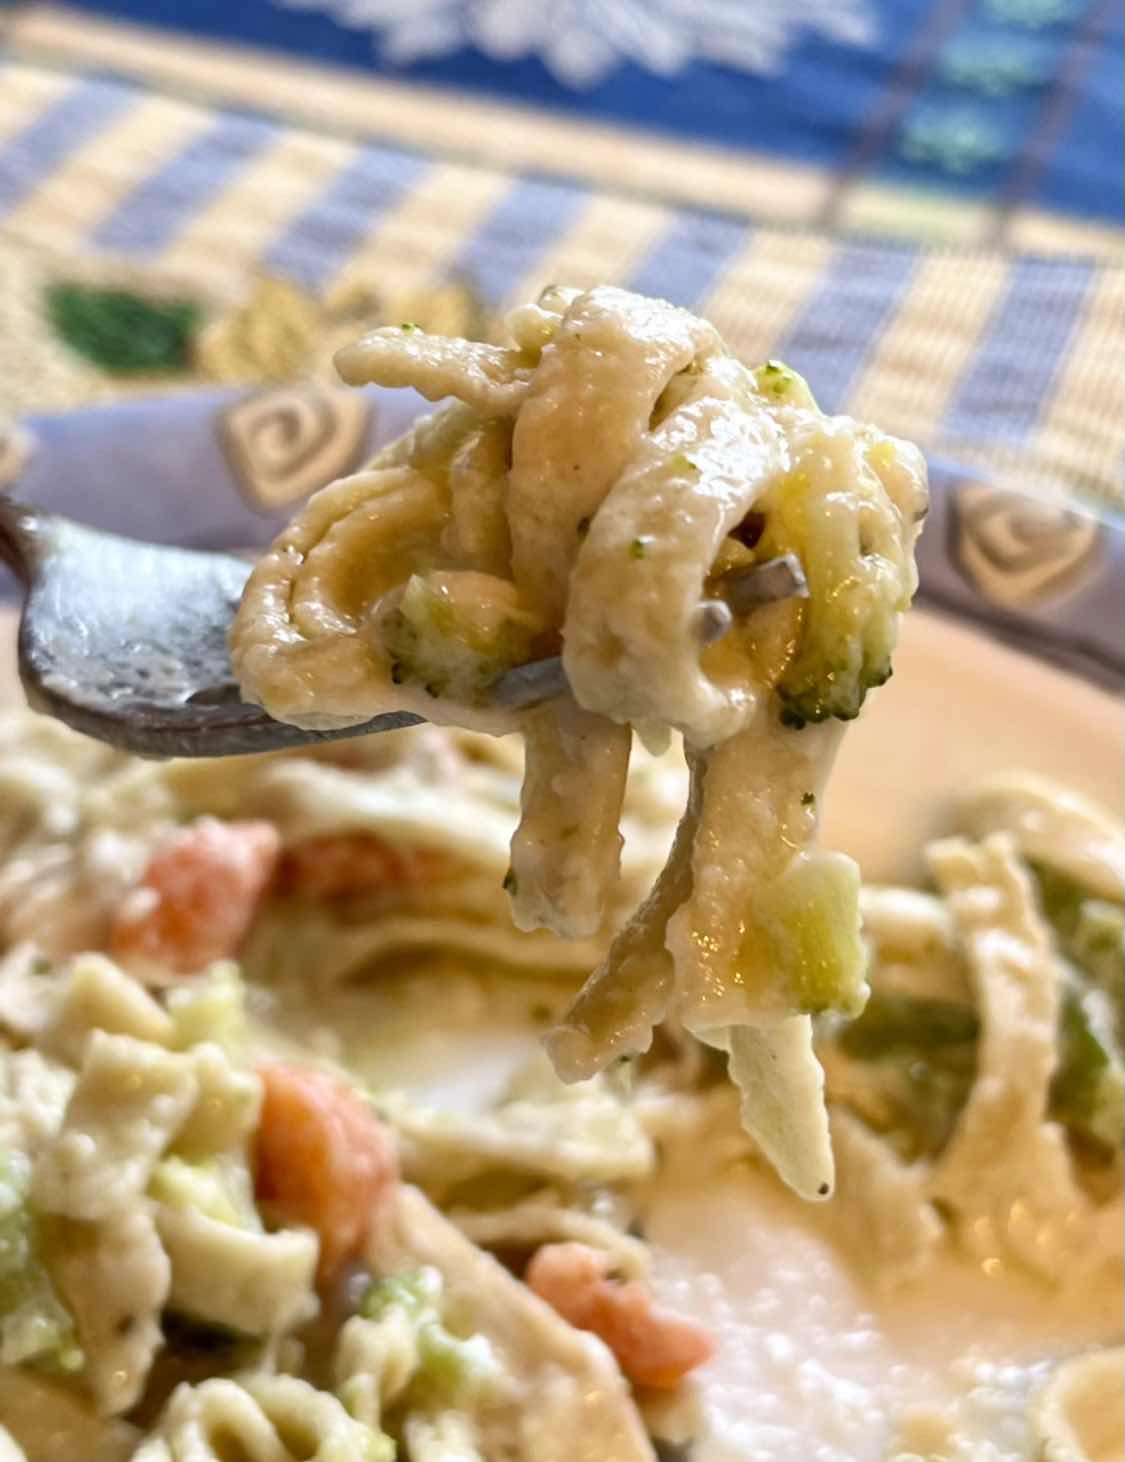
I was gifted with a pasta maker for Mother’s Day! After experimenting with several keto pasta noodle recipes I saw online, frankly I was very disappointed because they were nothing more than whisked eggs, maybe thickened with a bit of cream cheese or fiber powder, that had been spread thinly and baked into a big, flat plain omelette. It went through the pasta maker just fine and looked like egg noodles, but really tasted like scrambled eggs. The egg noodles were so fragile, they broke apart when I tried to twirl them on my fork. It was disappointing, to say the least. This only spurred me on to create a REAL pasta noodle dough that can go through the rollers of a pasta maker (or you can cut them with a knife or pizza cutter), be boiled instead of baked and tastes like real pasta, but without the carbs and won’t impact my blood sugar. I’ve been experimenting and perfecting this recipe for a couple of weeks and, I’m happy to say, these high-fiber, low carb pasta noodles far exceed my expectations with only 3.8g net carbs per serving! I can see a lot of delicious pasta dishes in my future. And look! These keto noodles can be twirled on your fork!!

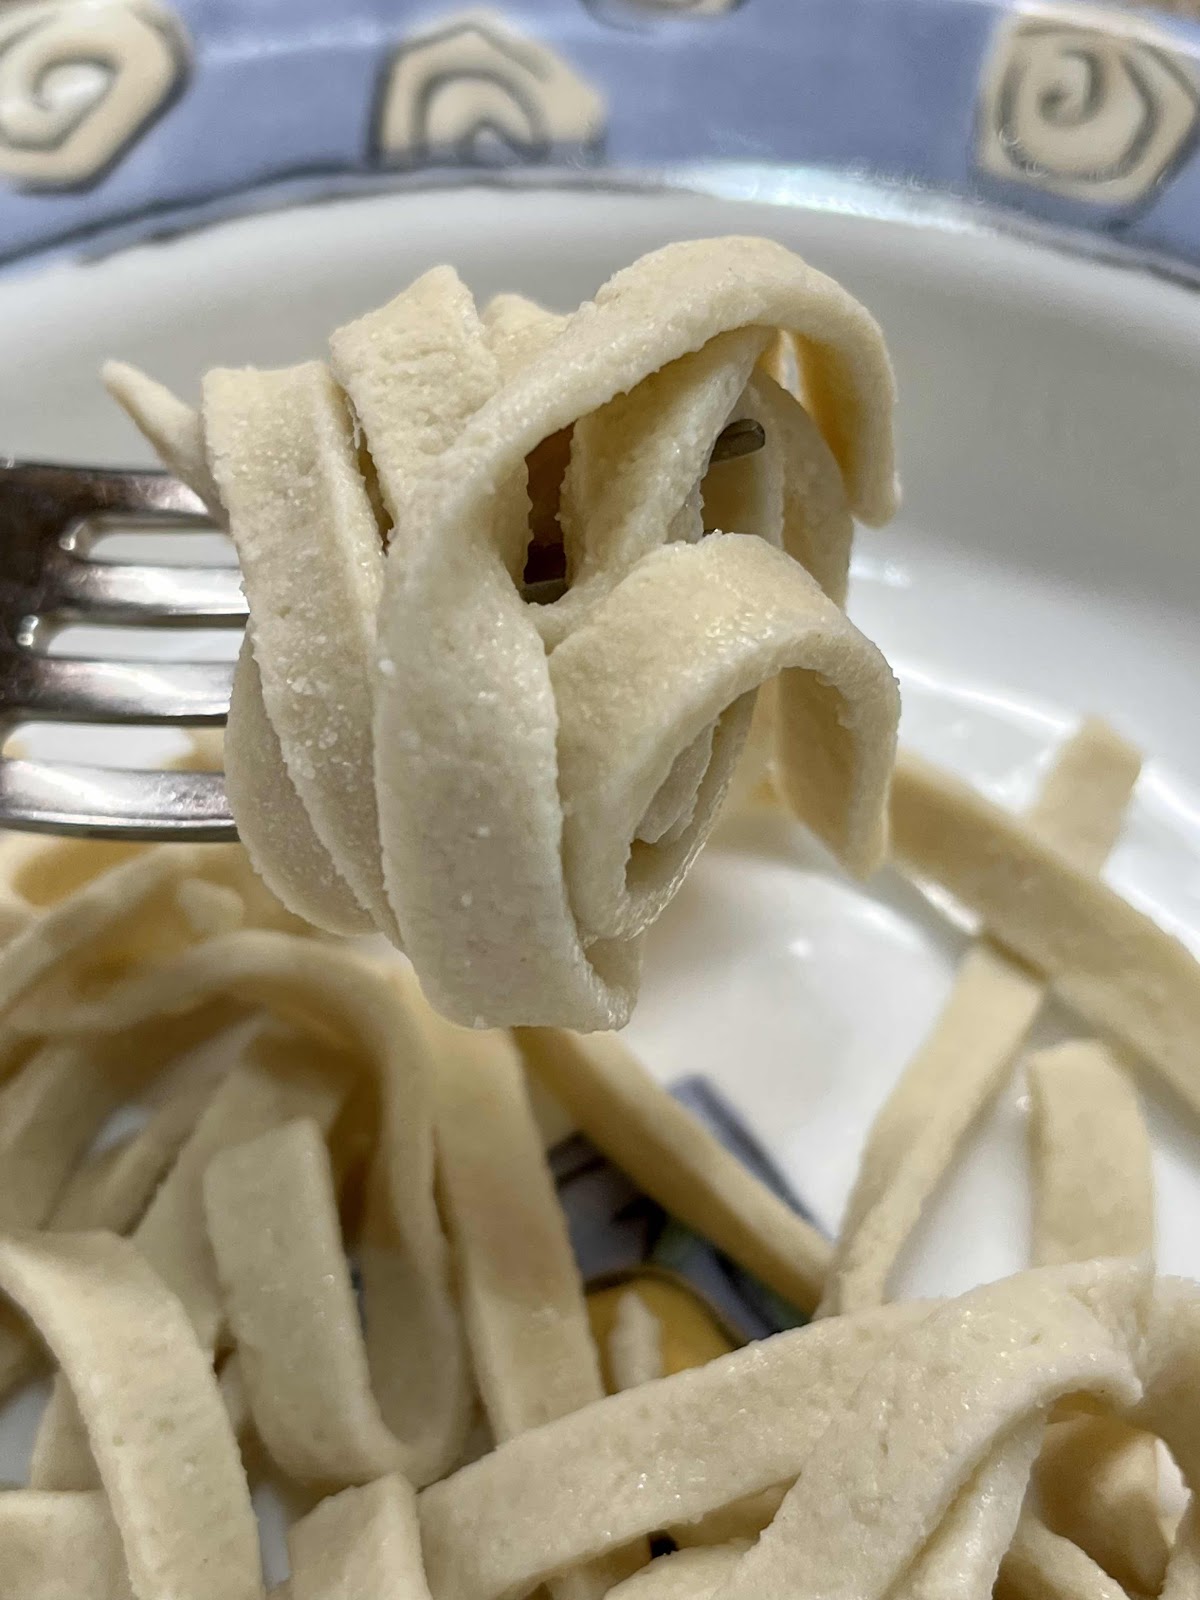
You can twirl these keto noodles!
REAL Keto Fettuccine Pasta Made With Coconut Flour
Makes 2 servings

2 tablespoons oat fiber (NOT oat flour!)
2 teaspoons psyllium husk powder (I recommend Terrasoul brand)
1/4 teaspoon xanthan gum
1/8 teaspoon salt, or to taste
3 tablespoons coconut flour, plus 1-2 teaspoons as needed to make a cohesive ball of dough
1 large egg
2 egg whites
More coconut flour for dusting

1. Whisk together the oat fiber, psyllium husk powder, xanthan gum, salt and 3 tablespoons coconut flour in a small bowl until no lumps remain.

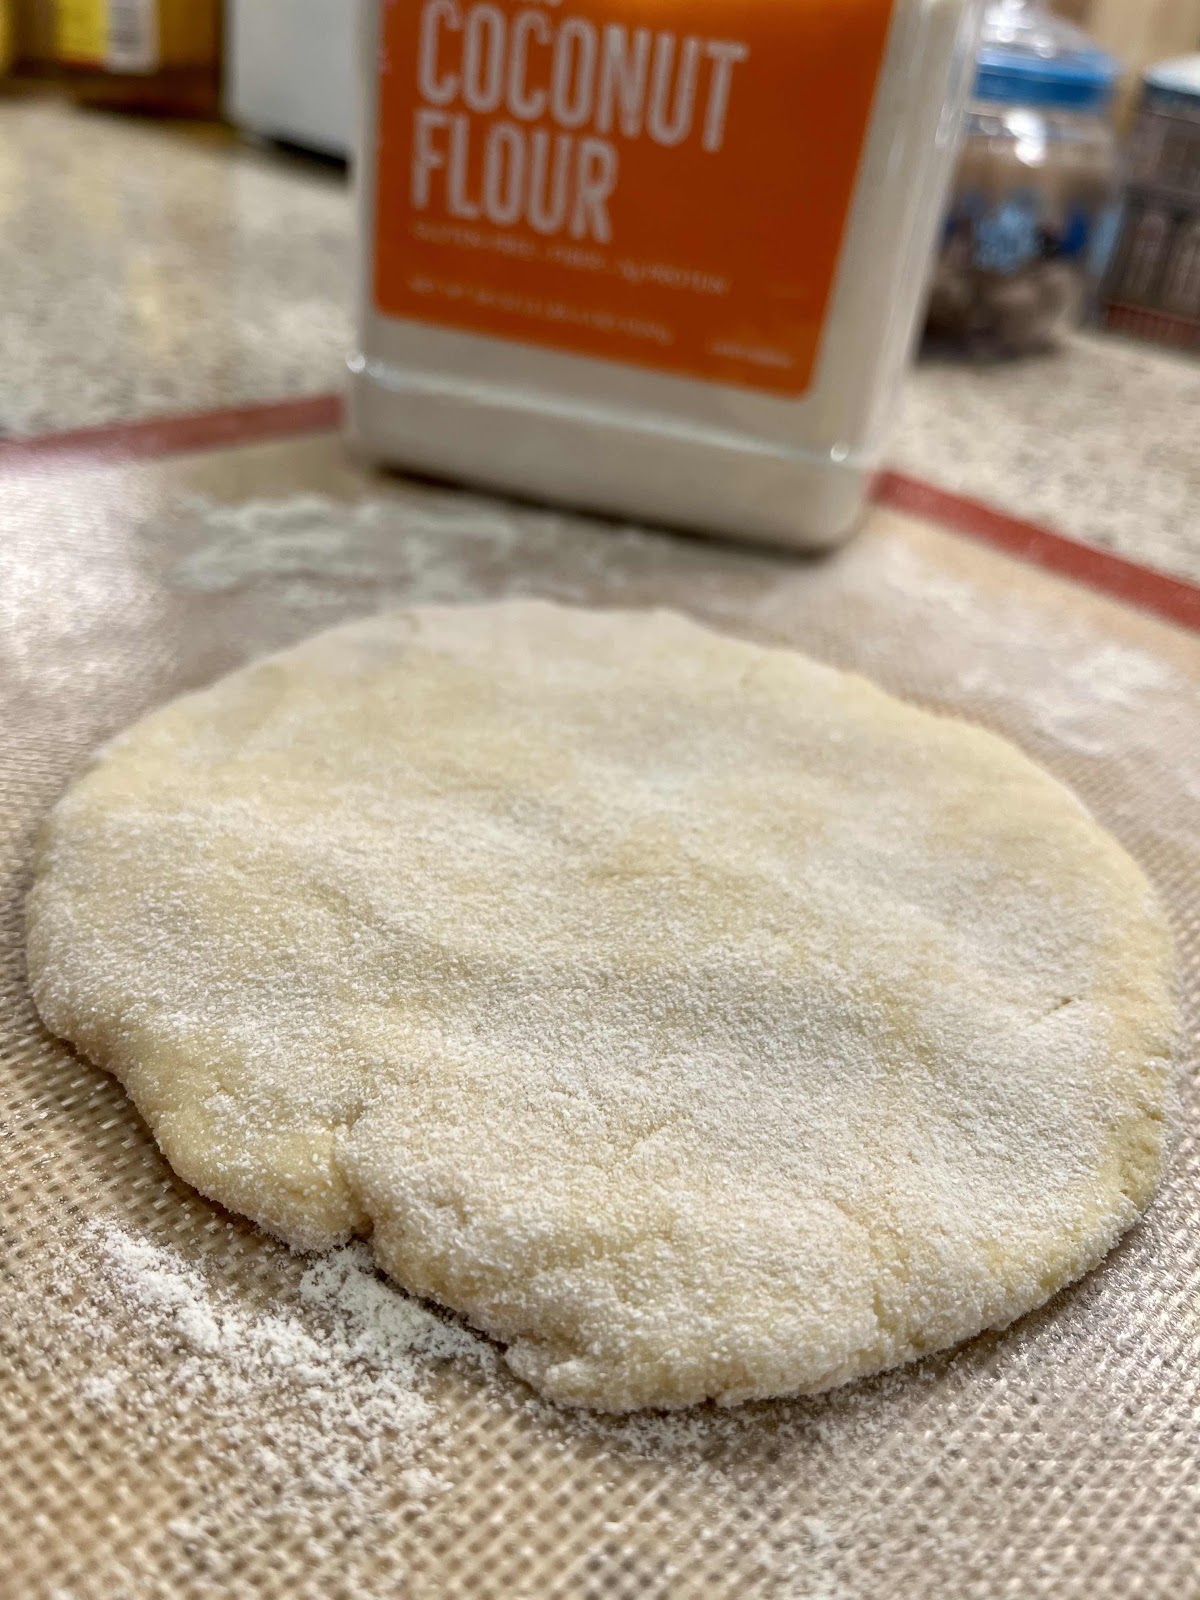
2. Place the egg, egg whites and dry ingredients into a mini food processor or regular food processor and process until all the ingredients are incorporated and the mixture is smooth. Allow the mixture to sit in the food processor and absorb liquid for 10 minutes. Process again, adding more coconut flour if needed, 1 teaspoon at a time, until the dough comes together into a ball. Remove the ball of dough from the food processor onto a board, silicone mat or your kitchen counter that has been dusted lightly with coconut flour.

REAL Keto Pasta Dough
Note: The uncooked pasta dough can be made ahead, wrapped in plastic wrap and set aside at room temperature if you plan to cut and eat your noodles in a few hours. (If you want to make your noodles ahead and store them for longer, I suggest cooking them first. See storage directions below.)

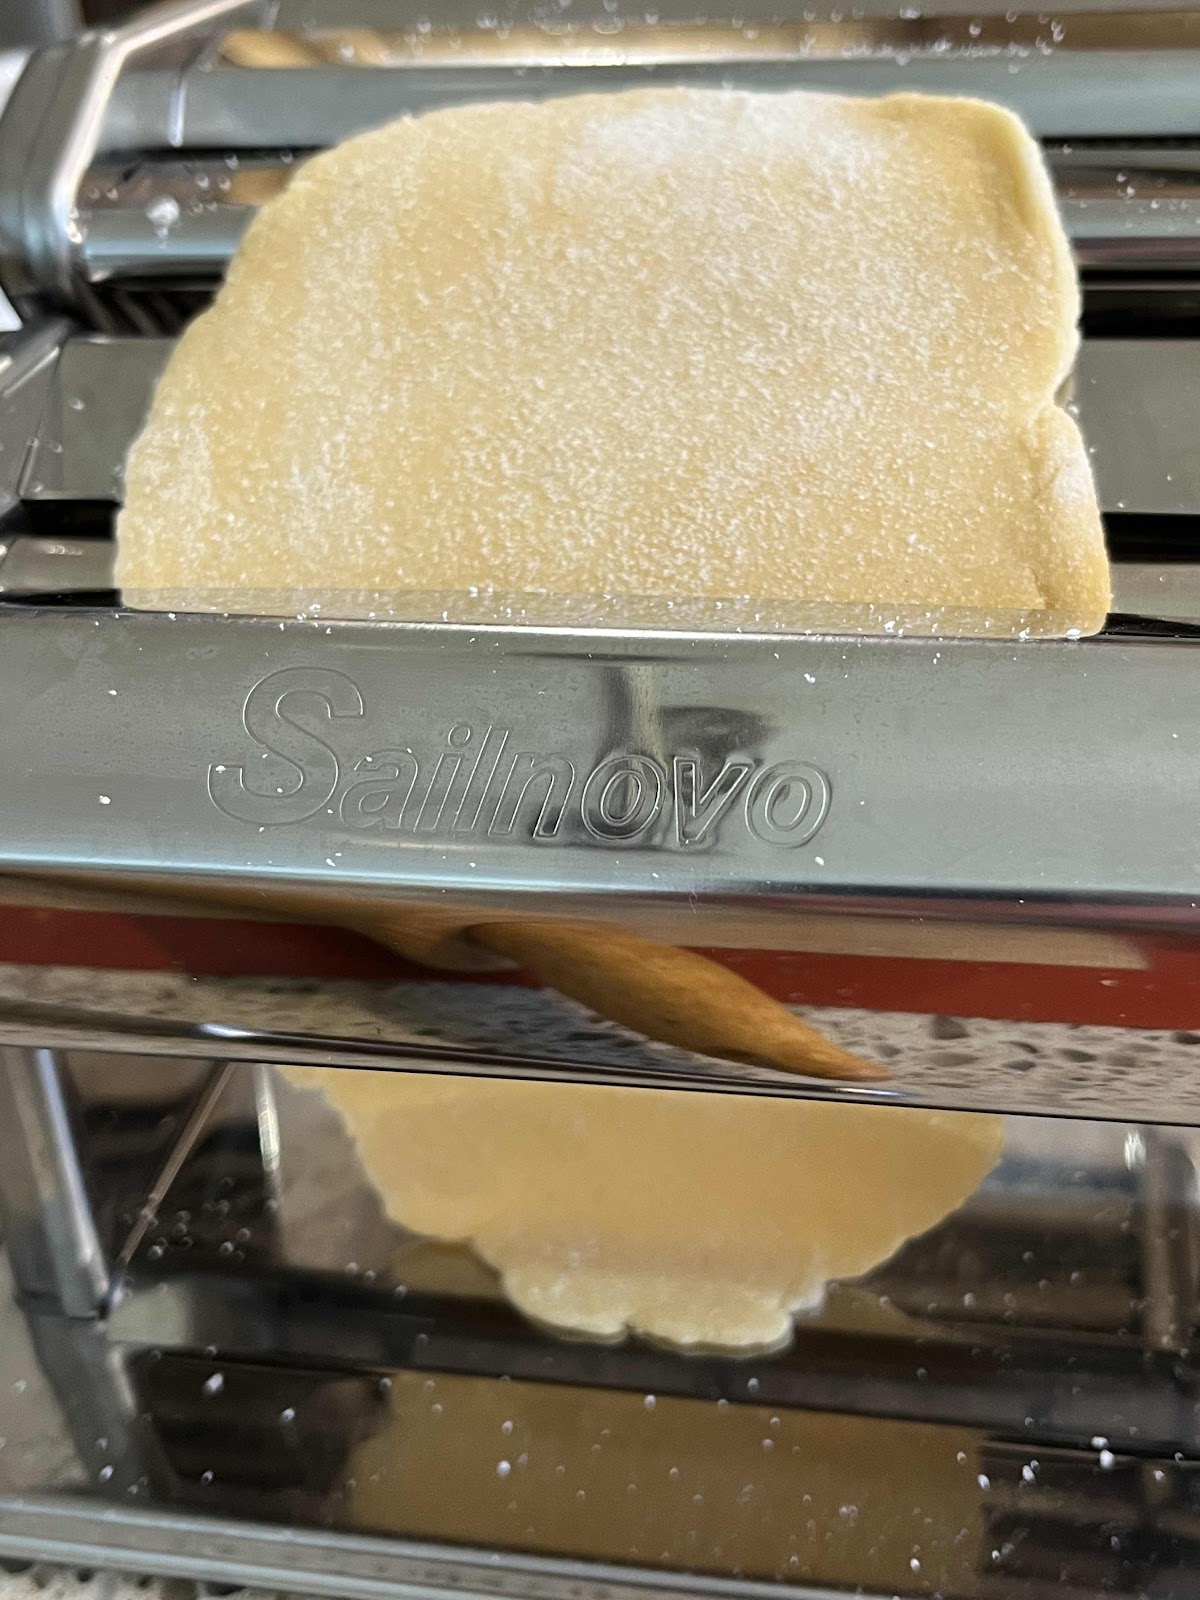
Run the dough through the rollers of the pasta maker
3. With a rolling pin, roll out the dough until it is thin enough to go through a pasta maker roller at the widest setting (*see note below for how to make noodles without a pasta maker). Then adjust the roller to the next thinner setting and run the dough through again. If needed, dust the dough very lightly with coconut flour between each pass to prevent sticking. (Be aware that this pasta dough is more delicate than regular pasta dough made with flour, so don’t roll it too thin.)

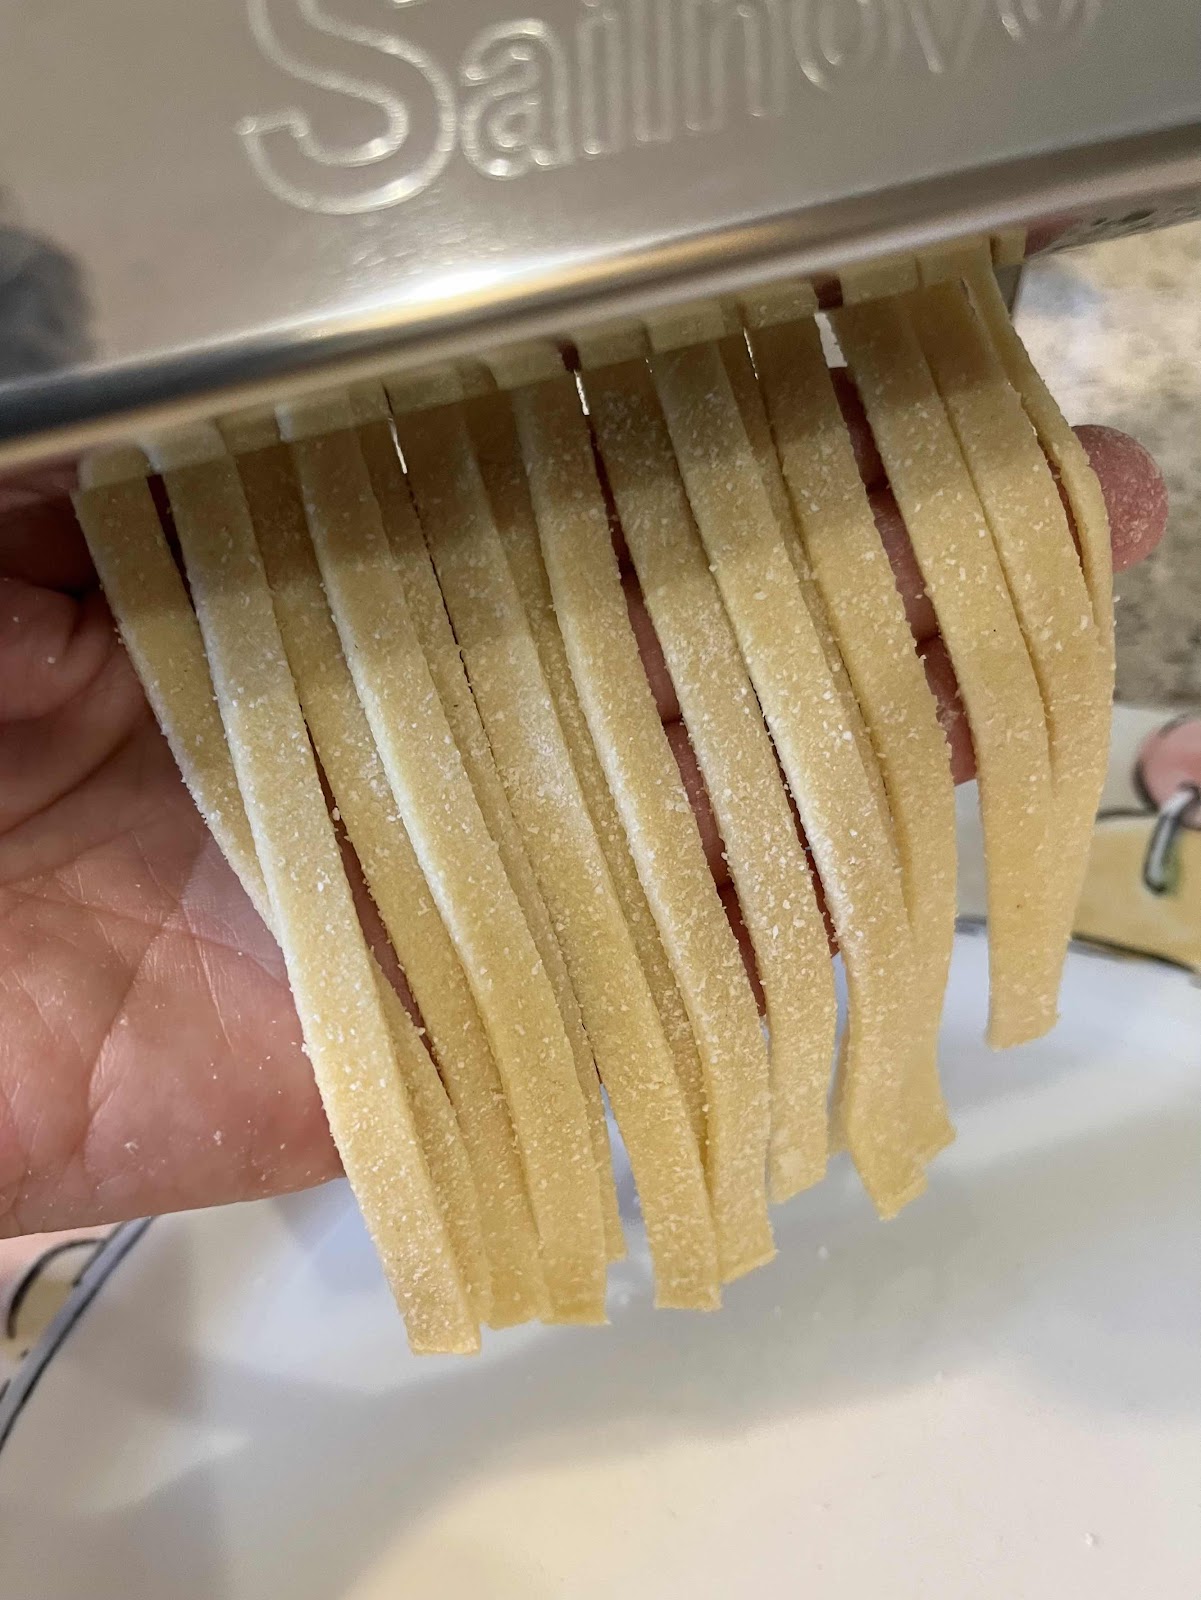
4. When the dough is the thickness you like, run it through a fettuccine or linguine-width roller/cutter to create noodles. (I have found that the wider, fettuccine-style noodles are much sturdier than narrow, spaghetti or angel hair. For best results, cut your noodles about 3/8” to 1/4” wide.)

Cut the dough into fettuccine noodles
5. Drop the noodles into rapidly boiling water that has been seasoned with salt and boil for 30 seconds or less. These noodles cook quickly! The color will change slightly, becoming whiter, to indicate it is done. Do not overcook!! (It is especially important that you do not overcook narrower noodles because, when overcooked, they might get too soft and begin to break apart.)

Boiled pasta keto noodles are sturdy enough to twirl on a fork!
6. Drain immediately and serve with your favorite sauce. Just like any fresh noodle pasta, this keto pasta is best eaten right away.

Storage: Cooked and drained noodles can be stored in an airtight container in the refrigerator for up to two days. To reheat, drop the noodles into your favorite sauce that has been heated until hot and gently toss, coating the noodles with the sauce, until the noodles are just heated through.

* If you do not have a pasta maker, roll the dough very thinly (1/8” or so), then roll the dough, jelly roll style, and cut with a sharp knife into noodles to the width you desire. Or use a pizza cutter to cut the dough into noodles.

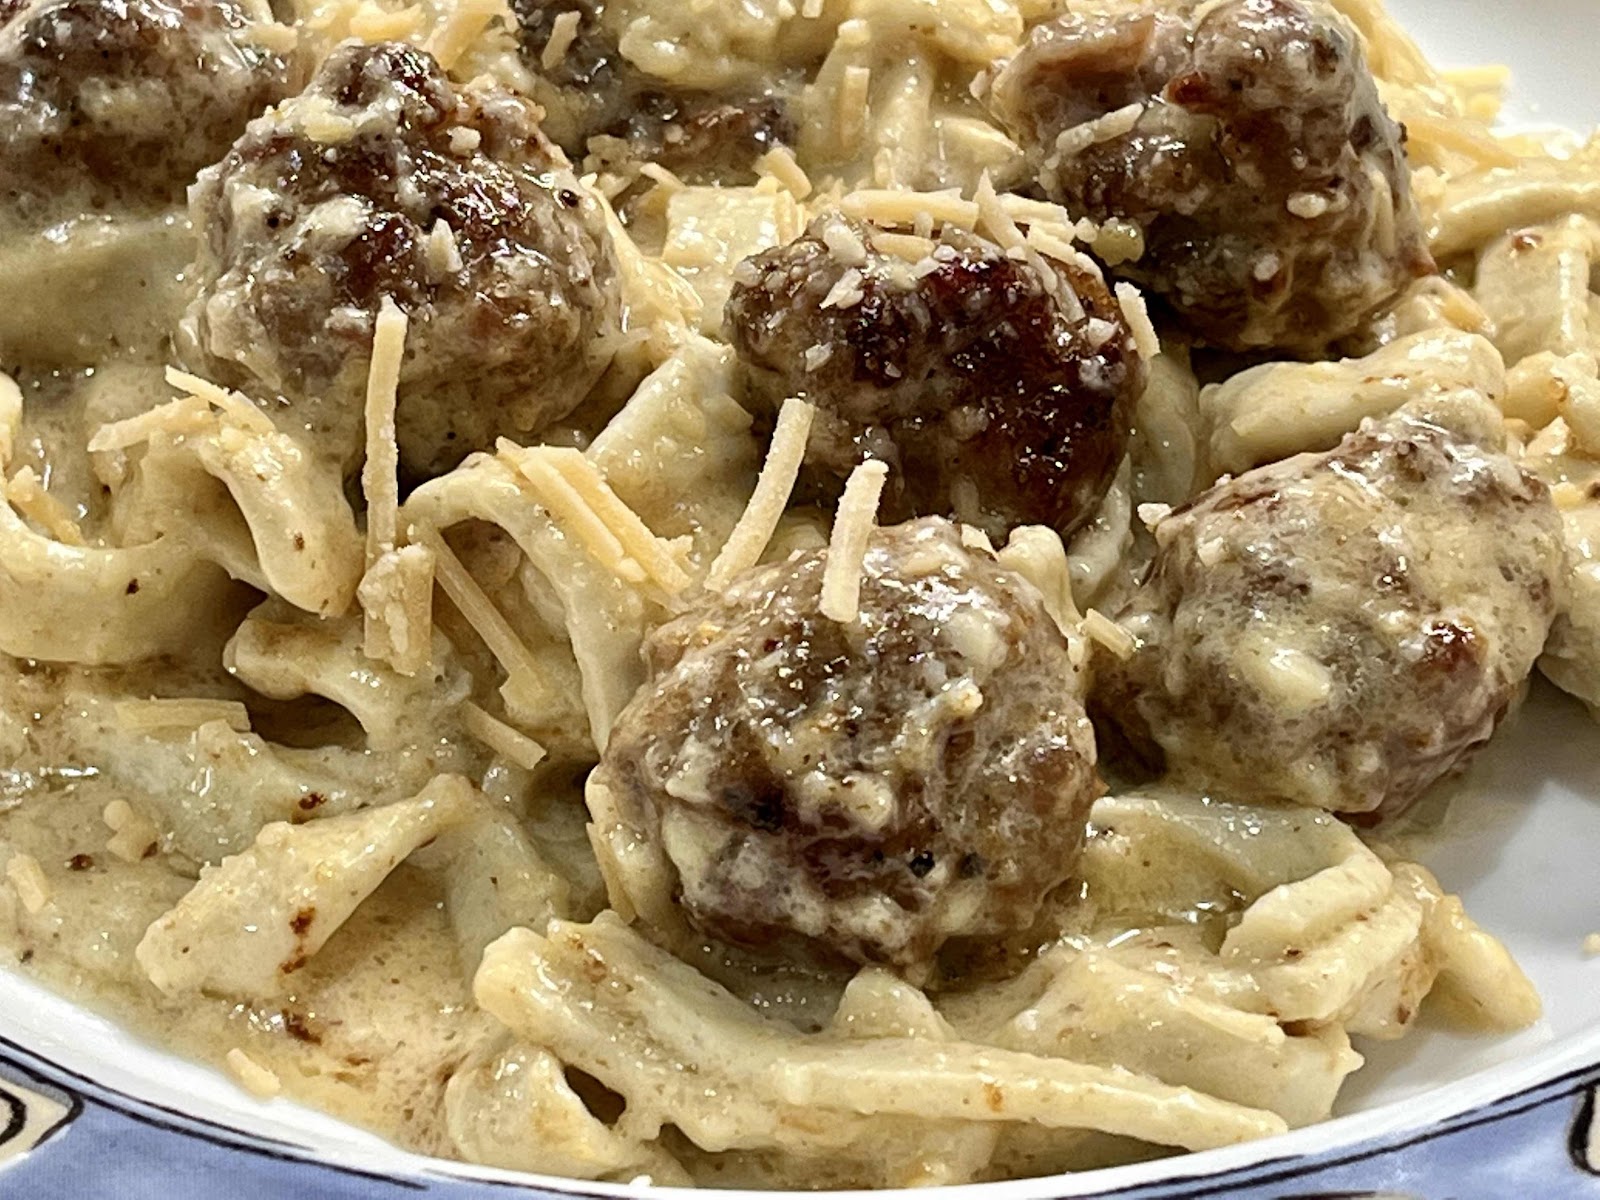
Serve with your favorite sauce
Nutritional Information per serving (1/2 recipe): 118 calories, 16.7 g carbohydrate (12.9 g dietary fiber, 2.7 g sugars), 5.1 g total fat (3.1 g saturated fat, 0 g trans fat), 93 mg cholesterol, 252 mg sodium, 16.4 mg calcium, 89 mg potassium, 1 mg iron, 40 IU Vit A, 9.1 g protein. Net carbs per serving: 3.8 grams

Photos and recipe by Kathy Sheehan, copyright 2022
All rights reserved. Please do not duplicate without the author’s permission. 


Thursday, April 14, 2022

Keto Sweet and Sour Panfried Tilapia (or Sole)

Keto Sweet and Sour Panfried Tilapia
This Asian-inspired, sweet and sour fish is a quick and very tasty meal! I first saw something similar to this dish in an Asian cookbook, but of course it contained flour, breadcrumbs and sugar. This recipe has been revamped to include keto ingredients, making it a perfect choice for a low carb diet. If fish is not your thing, you can replace the fish fillet with a thin chicken cutlet. Serve the fried fish and sauce over cooked riced cauliflower or radishes that have been cut into matchsticks and sautéed in a pan with onions.

Keto Sweet and Sour Panfried Tilapia (or Sole)
Makes 4 servings

2 tablespoons water
2 teaspoons rice vinegar
2 teaspoons soy sauce (or gluten free tamari sauce)
2 tablespoons no-sugar-added ketchup (I use Primal Kitchen brand)
3/4 teaspoon toasted sesame oil
2 teaspoons allulose or monkfruit sweetener
1/4 teaspoon cornstarch (or a pinch of xanthan gum)
1 large egg
1/3 cup unflavored whey protein powder
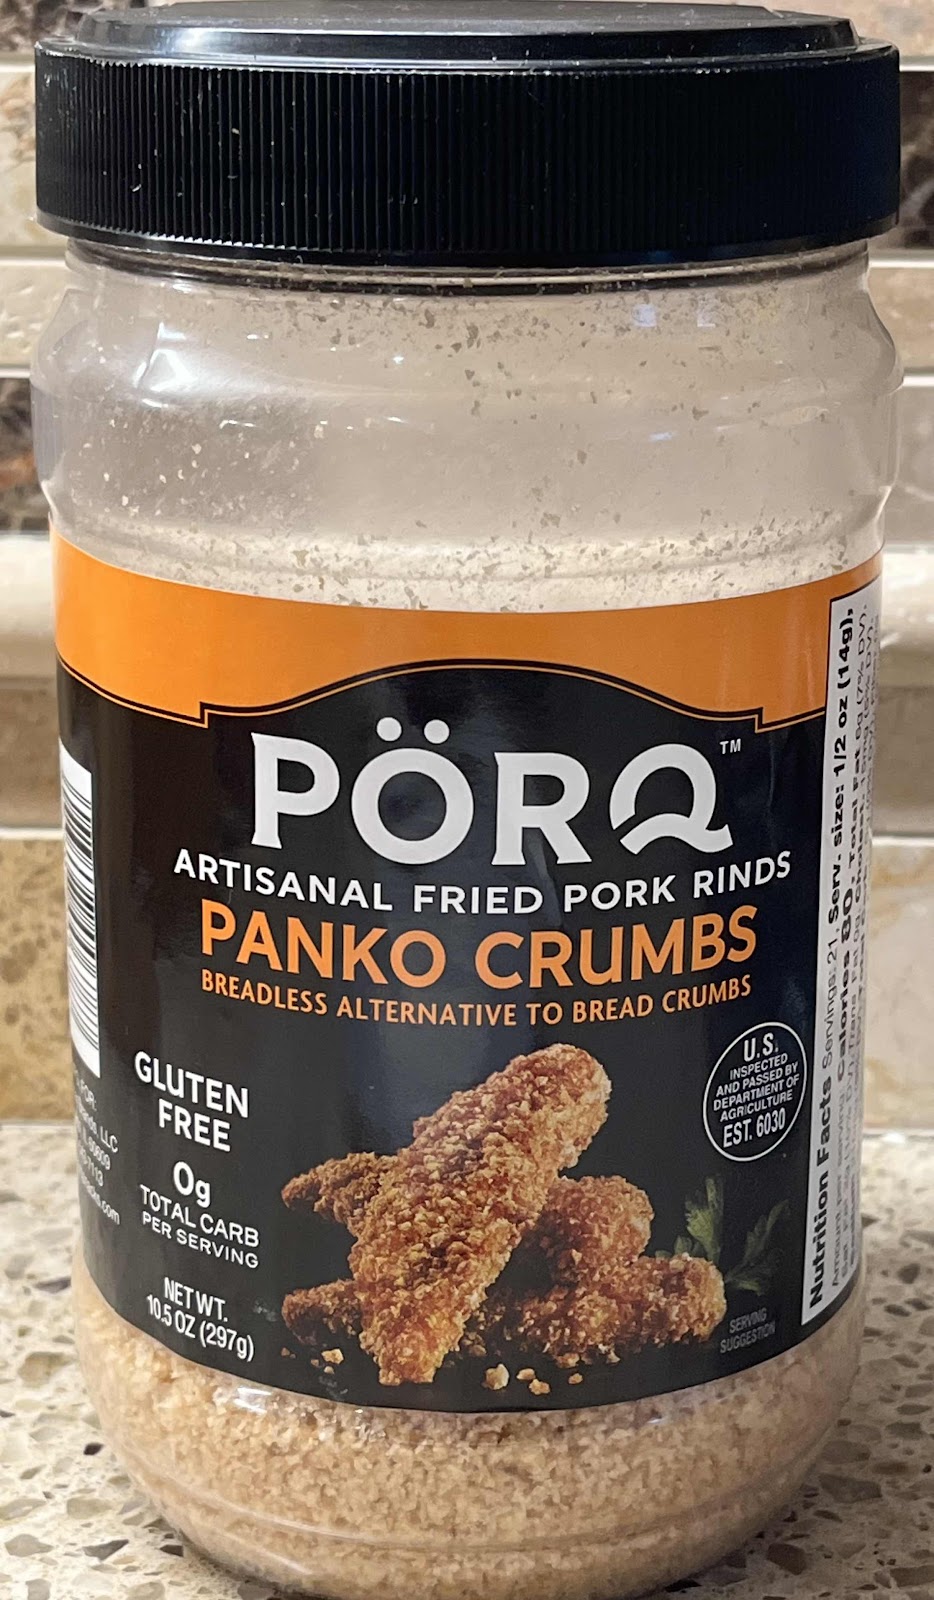
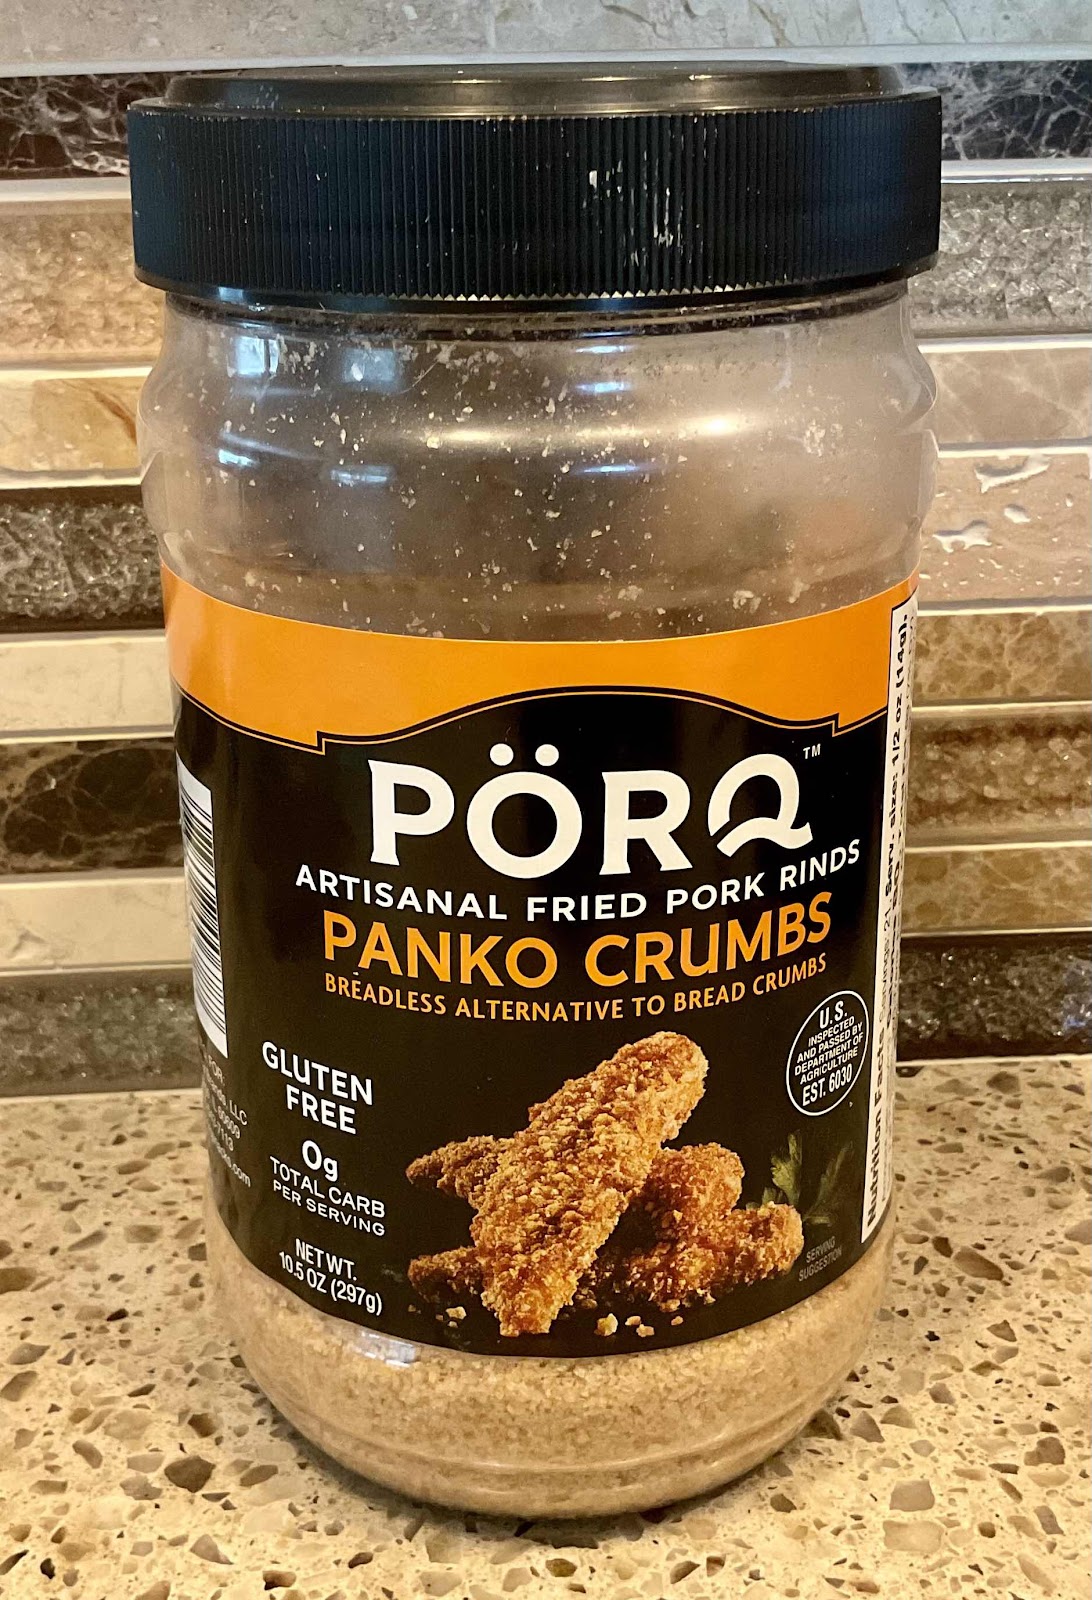
1 cup pork rind Panko
Salt and pepper
4 tilapia fillets (or sole), between 1 and 1-1/2 pounds
3 tablespoons refined coconut oil or avocado oil for frying

Pork Rind Panko
1. Make the sauce: In a small saucepan over low heat, stir together the 2 tablespoons water, rice vinegar, soy sauce, ketchup, sesame oil, allulose and cornstarch or xanthan gum. (If the sauce is too thick, add a little water to thin it out a bit.) Set aside.

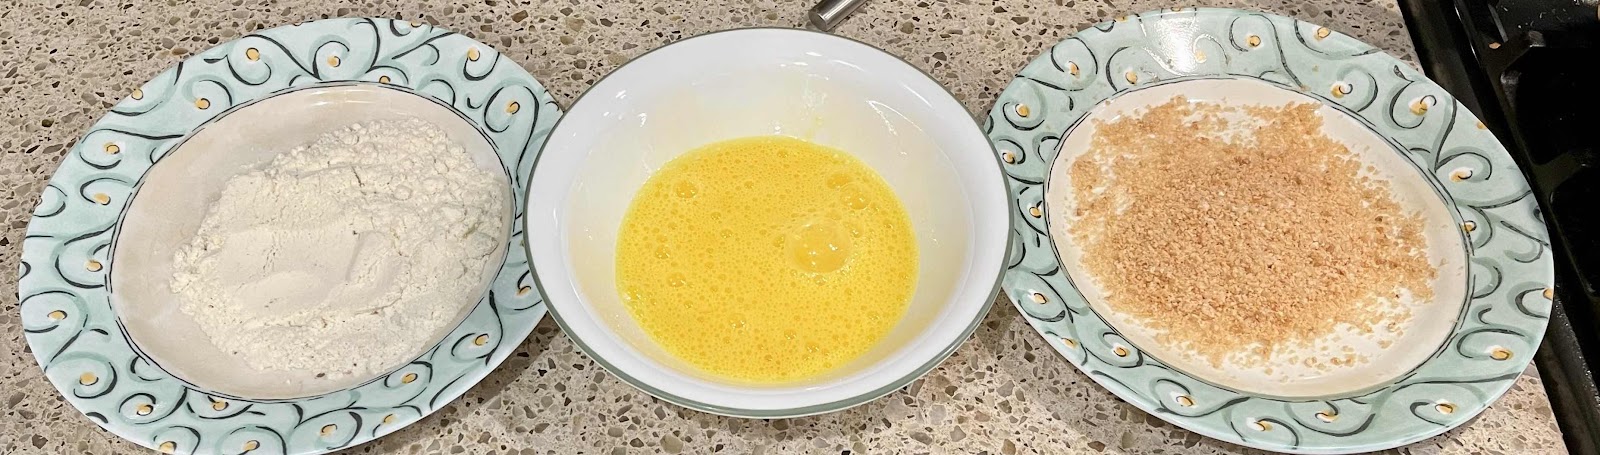
2. In a shallow bowl, whisk the egg. Spread the whey protein powder and pork rind Panko on two separate plates. Season the whey protein powder with salt and pepper. Set up your dipping station in the following order: whey protein powder, beaten egg, then followed by the pork rind Panko.

Dipping Station
3. Just before frying, pat the fish fillets with a paper towel to remove any excess moisture. Dip them first into the seasoned whey protein powder and shake off any excess, then the egg, and finally in the pork rind panko, coating evenly each side.

4. Heat a large, nonstick frying pan over medium-high heat until hot and add the refined coconut oil or avocado oil. Swirl your pan around to distribute the oil evenly in the pan. Add the fish and fry the first side about 4 minutes until golden. Very carefully, turn the fish fillets over and fry on the second side 3 to 4 minutes until golden. Serve immediately with the warm sauce.

5. Serving Suggestion: Serve the fried fish and sauce over cooked rice cauliflower or radishes that have been cut into matchsticks and sautéed in a pan with onion.

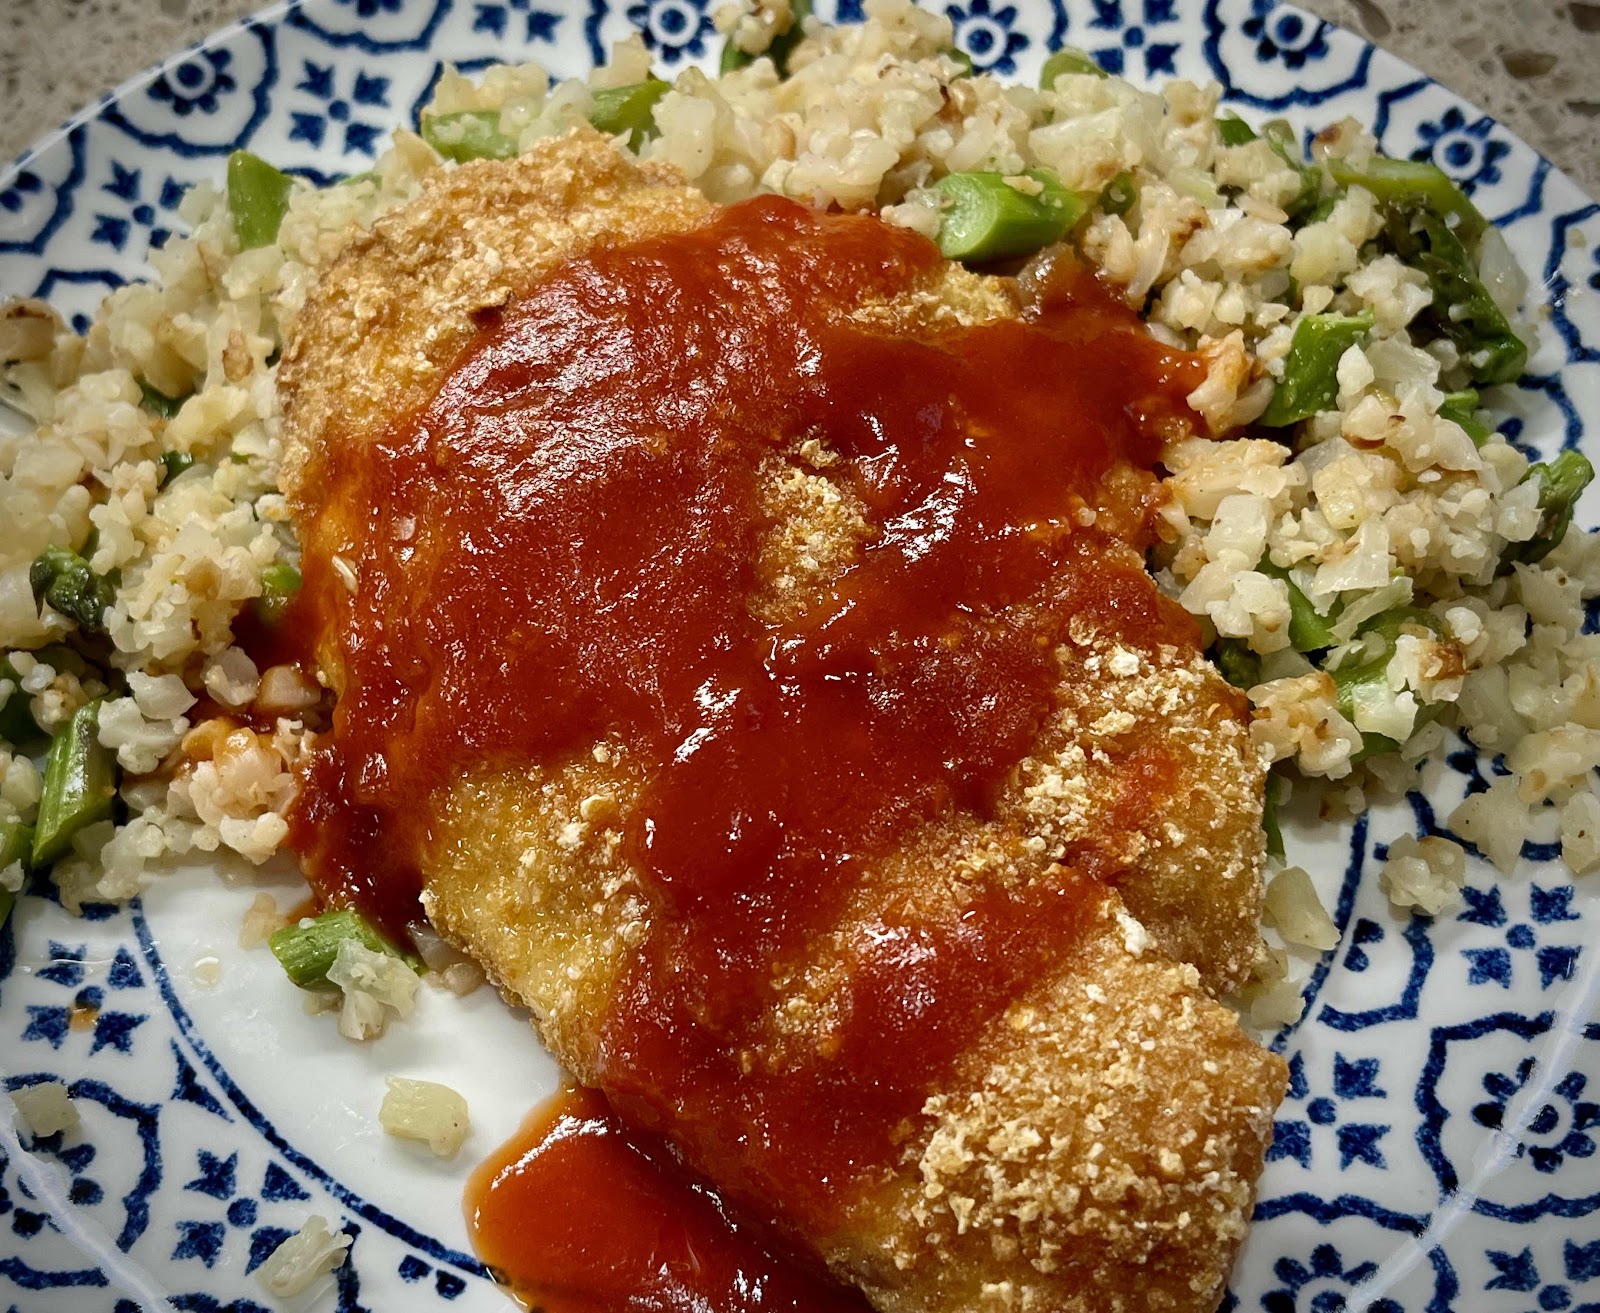
Keto Sweet and Sour Tilapia with radishes
Nutritional Information per 1 fish fillet with sauce (no vegetables): 334 calories, 2.6 g carbohydrate (0 g fiber, 0.7 g sugars), 10.5 g total fat (3 g saturated fat, 0 g trans fat), 123 mg cholesterol, 447 mg sodium, 35.7 mg calcium, 377 mg potassium, 1 mg iron, 50 IU Vit A, 35 g protein. Net carbs: 2.6 grams.

Photos and recipe by Kathy Sheehan, copyright 2022
All rights reserved. Please do not copy without the author’s permission.

Sunday, April 10, 2022

Keto Lemon Soufflé Pancakes

Keto Lemon Soufflé Pancakes
Earlier this week, I saw a recipe online for lemon soufflé pancakes. Of course, they contained flour and sugar. I adapted that recipe to make these keto pancakes, which I am sure are just as delicious as the original recipe. They are so delicate and light, almost like feasting on a cloud! They can be made ahead, then stored between wax paper or parchment paper in the refrigerator. Reheating them is a quick and easy process. Some people, as soon as they see that egg whites need to be whipped, turn away from a recipe. I can assure you that whipping egg whites is very easy, especially when you add a little cream of tartar which stabilizes them and prevents them from being overwhipped. I find it easier to separate eggs when they are at room temperature, but it’s not necessary. Be sure to separate each egg over a small bowl to catch the whites, then add the whites to your larger mixing bowl before cracking the next egg. The only trick is to make sure there are no bits of egg yolk (or oil) in the whites! Besides that, use a clean bowl, clean beaters and it’s easy-peasy!

Keto Lemon Soufflé Pancakes
Makes 6 servings (2 pancakes each)

3 large eggs, separated
1/8 teaspoon cream of tartar
2 tablespoons avocado oil
1/8 teaspoon salt
2 teaspoons baking powder
1 cup 4% cottage cheese (not low fat)
1 tablespoon sugar free maple syrup
2 tablespoons lemon juice
1 tablespoon lemon zest (or 2-3 drops lemon essential oil for low oxalate)
2 tablespoons coconut flour
Warm sugar free maple syrup, for serving

1. Beat the egg whites and cream of tartar until stiff, then set aside.

2. Combine in a food processor or blender the egg yolks, oil, salt, baking powder, cottage cheese, sugar-free maple syrup, lemon juice, lemon zest and coconut flour, blending until smooth. Pour the batter into a bowl and fold in the egg whites with a rubber spatula until no more white streaks remain.

3. Melt a teaspoon of butter and a teaspoon of avocado oil in a non-stick skillet over medium heat. Swirl around to coat the skillet. Drop batter by spoonfuls onto the greased skillet. (Make the pancakes about 4 inches across. A smaller pancake is easier to flip than a larger one.) Cook the first side for about three minutes until nicely browned. Very carefully, flip the pancakes and brown the other side. Please note that these pancakes are very delicate, so take your time and be gentle as you flip them.

4. Serve with the warmed sugar-free maple syrup. These pancakes can be stored in the refrigerator, layered between sheets of wax paper or parchment paper, for up to two days. To reheat, place them on a wire rack that is set inside a rimmed cookie sheet. Place in a preheated 250° oven for about 15 minutes.

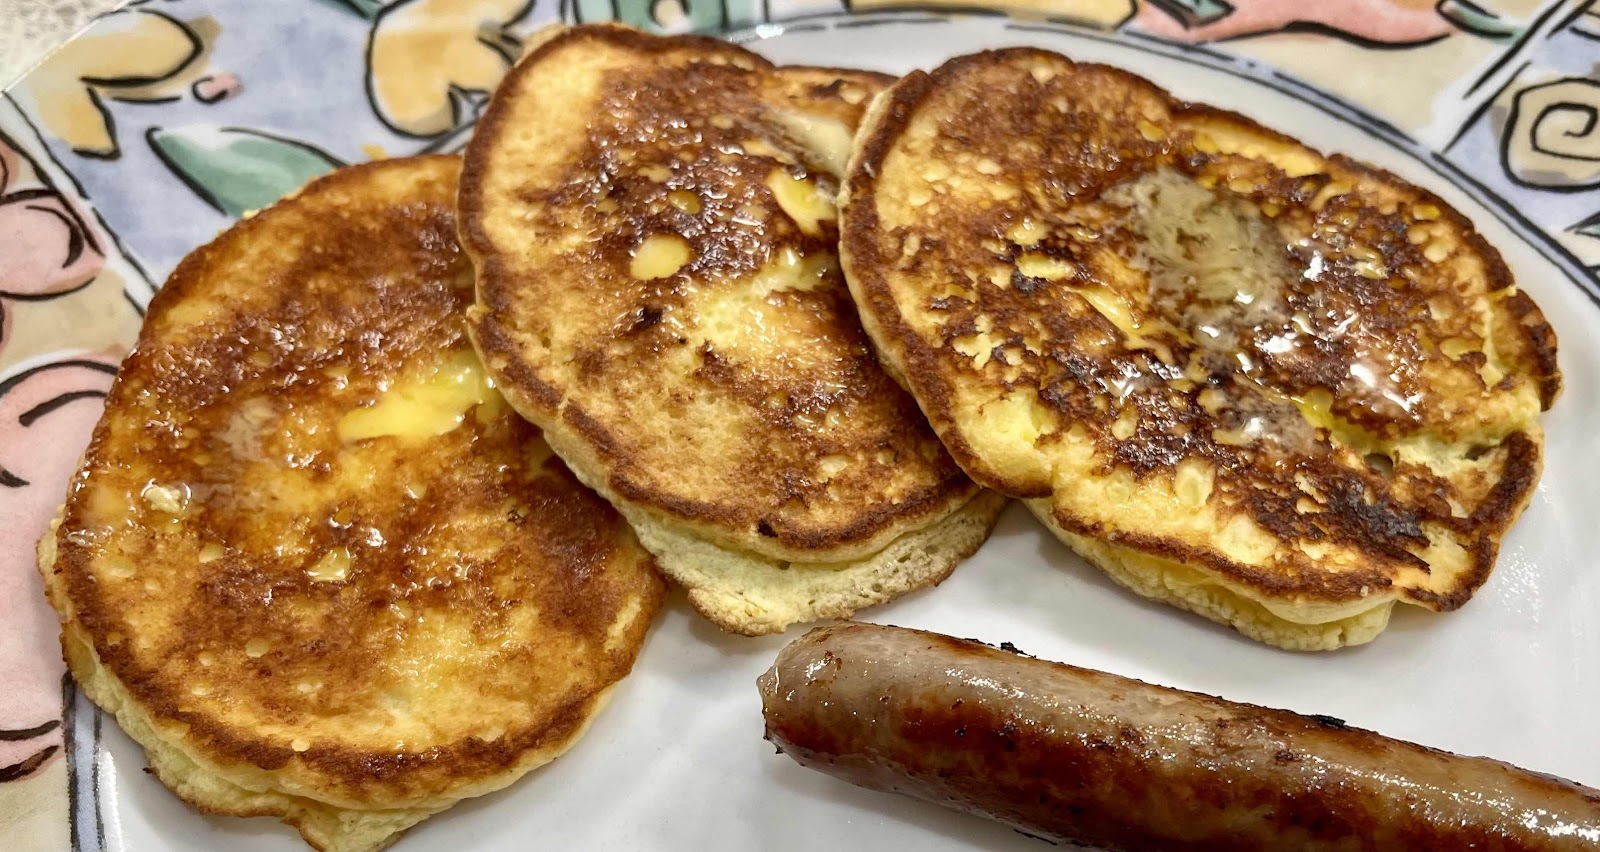
Lemon Pancakes
Nutritional Information per 2 pancakes (based on recipe making 12 pancakes): 129 calories, 4.1 g carbohydrate (1.3 g dietary fiber, 0.8 g sugars), 9.2 g total fat (2.8 g saturated fat, 0 g trans fat), 98 mg cholesterol, 354 mg sodium, 149.2 mg calcium, 88 mg potassium, 1 mg iron, 58 IU Vit A, 3 mg Vit C, 8 g protein. Net carbs per serving: 2.8 grams

Photos and recipe by Kathy Sheehan, copyright 2022
All rights reserved. Please do not duplicate author’s permission.

Saturday, March 26, 2022

The Ultimate Keto Grilled Cheese Egg in a Nest

Ultimate Keto Grilled Cheese Egg In a Nest
I have recently discovered the best keto bread recipe I’ve ever tried! (Click here for the recipe.) Now, I have real bread that I can use in a variety of ways in my meals. I have always loved Egg In a Nest, but this recipe takes it a step further. It has all the best flavors of a grilled cheese and tomato sandwich with Egg In a Nest! By itself, it makes a great quick and easy meal. Of course, you can use any keto bread that you like in place of homemade, but be aware the nutritional information may change depending on the bread you use.

The Ultimate Keto Grilled Cheese Egg In a Nest
Makes 1 serving

2 slices of keto bread (I used this recipe for Cloud Bread Loaf)
1 teaspoon yellow mustard
2 teaspoons butter, softened (I prefer salted butter)
1 slice tomato
1 ounce sliced cheese (I prefer sharp cheddar)
1/2 teaspoon olive or avocado oil
1 egg
Salt and pepper to taste
1 ounce shredded cheddar cheese

Equipment Needed: small biscuit cutter

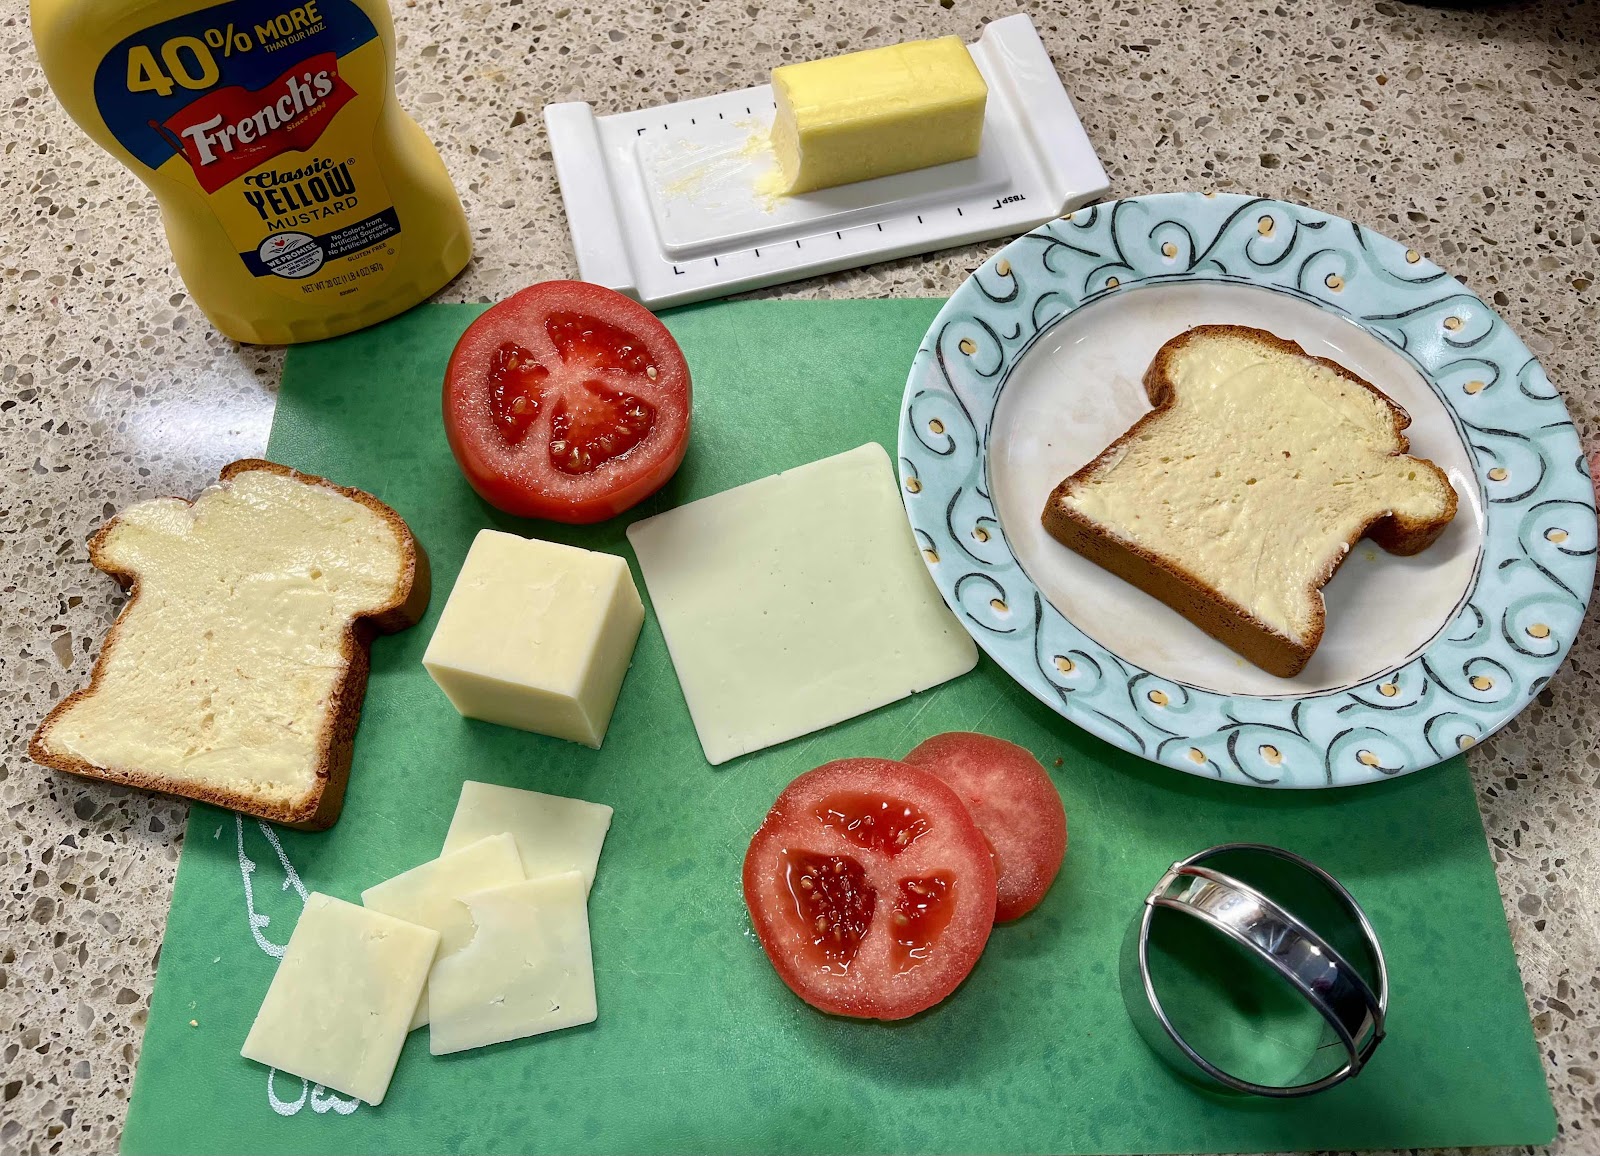
Ingredients needed
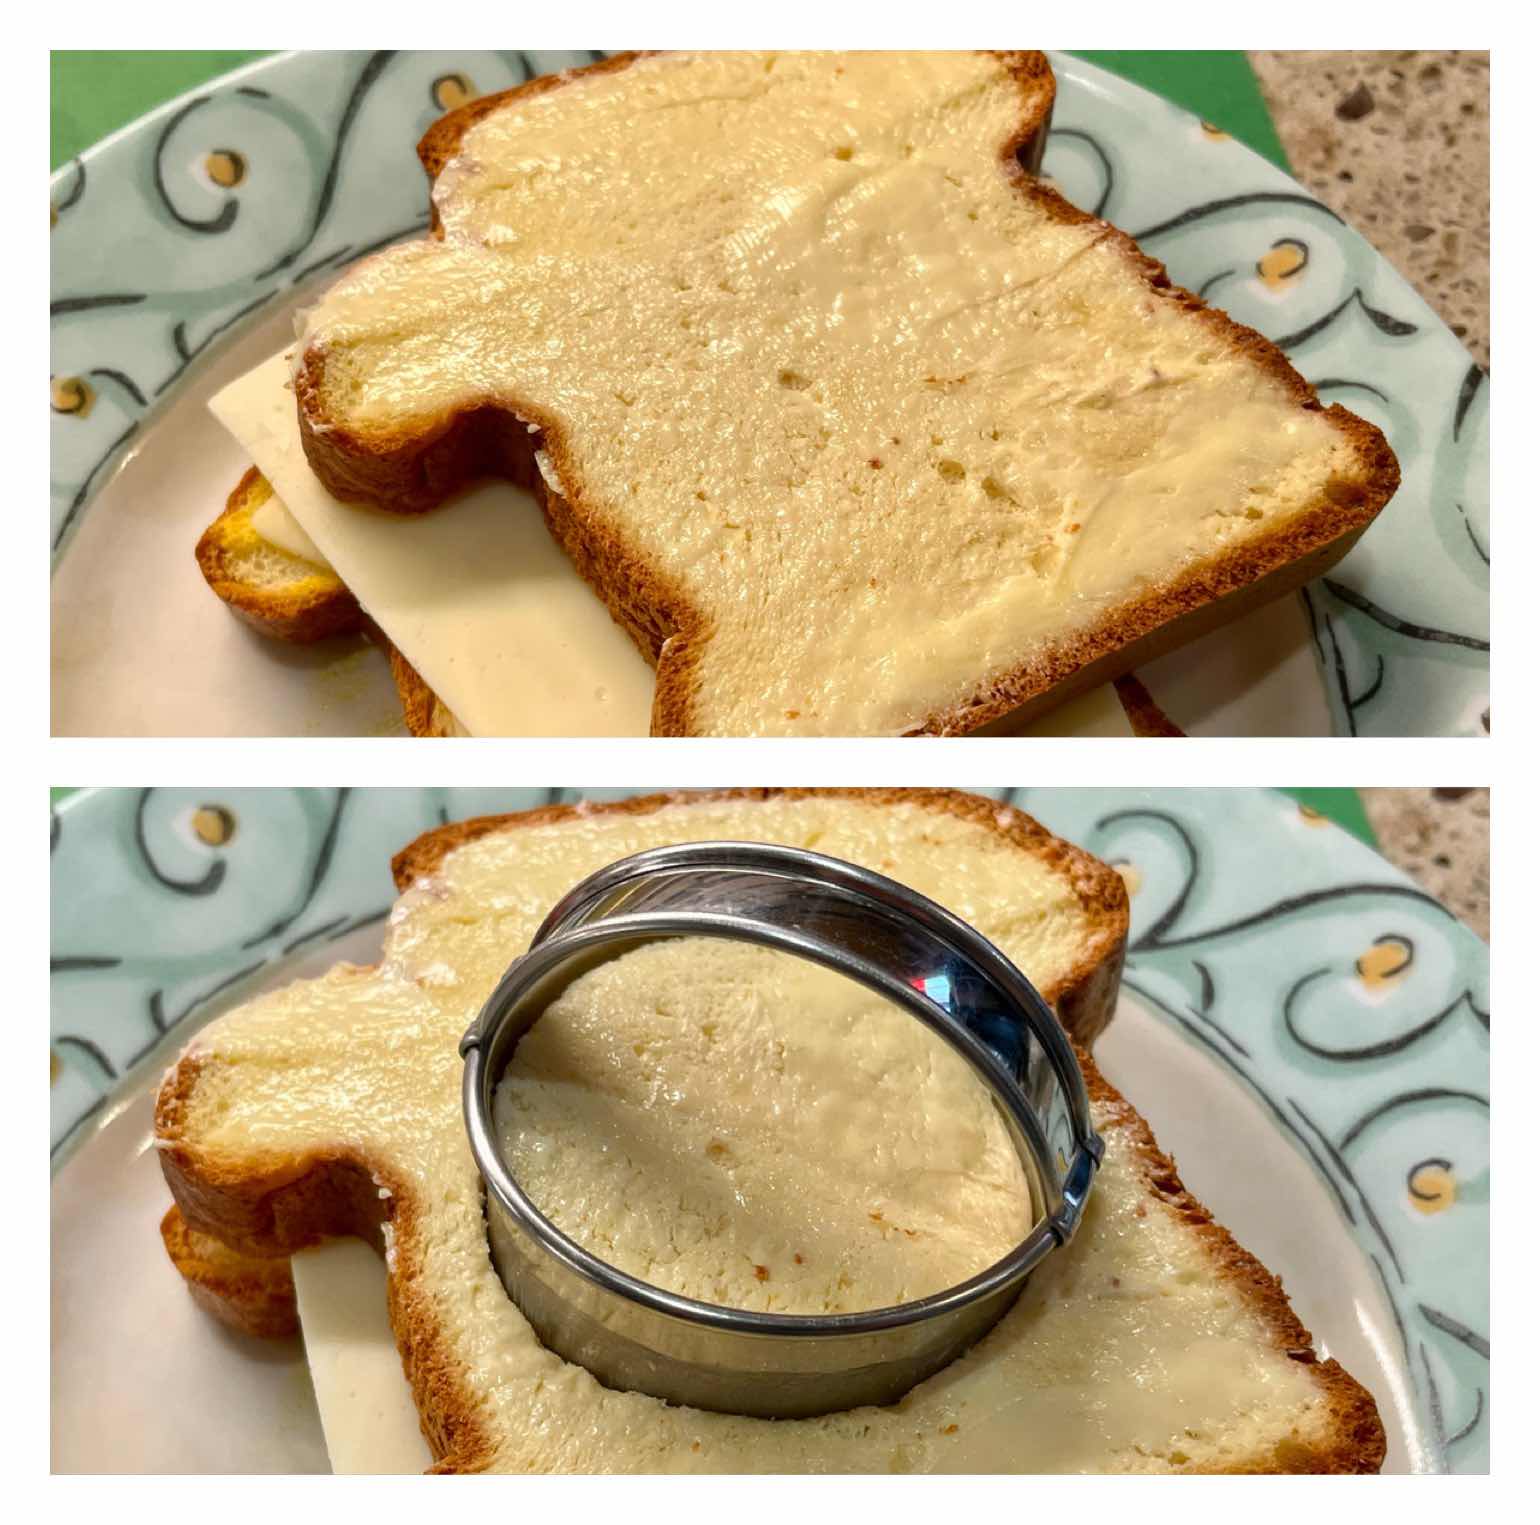
1. Spread the mustard on both slices of the bread, on the side that will become the inside of the grilled cheese sandwich. Spread the softened butter on both sides of the bread, on the sides that will become the outside of the grilled cheese sandwich.

Make cheese sandwich
2. Place one slice of bread, butter side down, on a small plate or cutting board. Top with cheese and place the remaining slice of bread, butter side up, onto the cheese. Use the small biscuit cutter to cut a hole in the center of the cheese sandwich. Save the center circle to be grilled along side the Egg in a Nest.

Cut tomato to fit hole
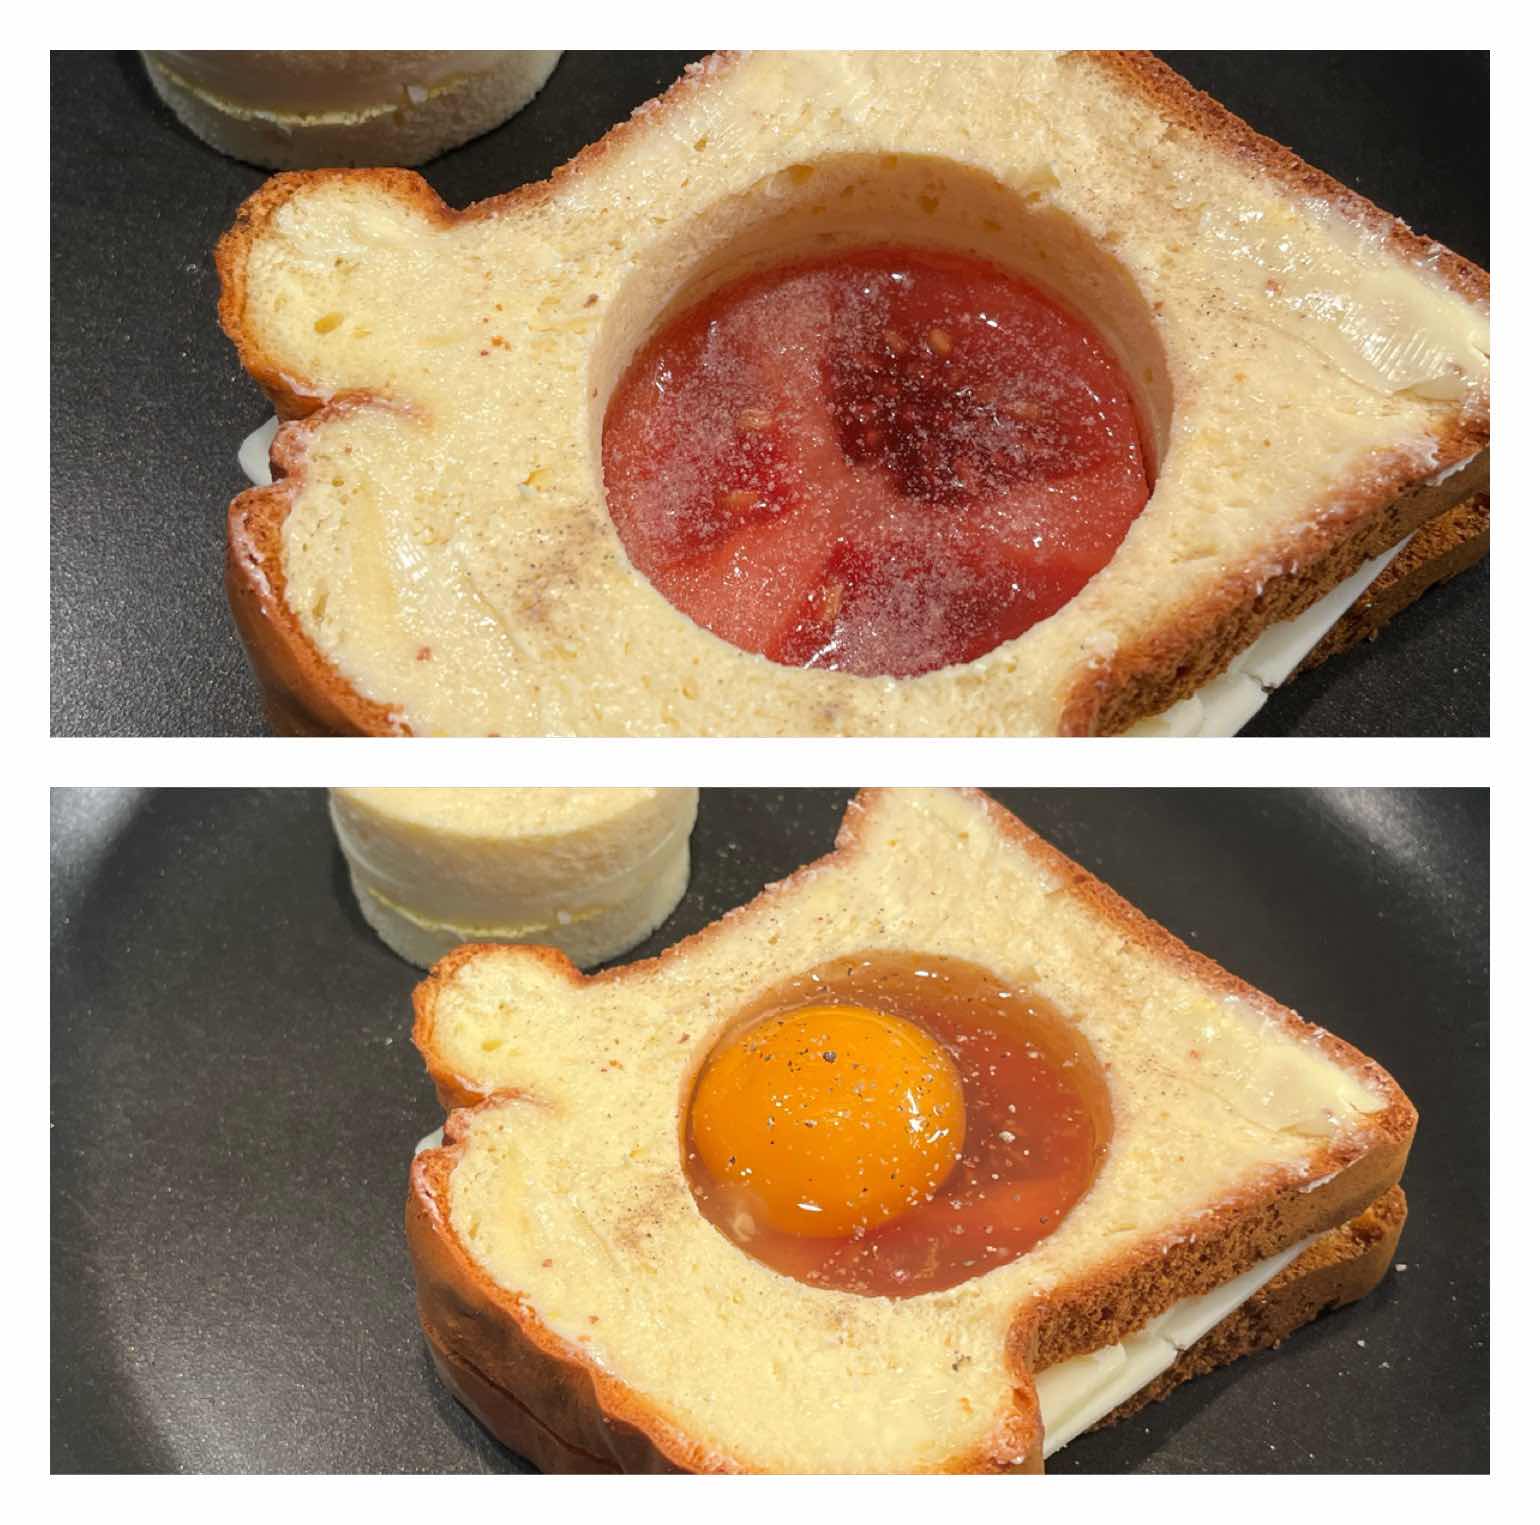
3. If your tomato slice is larger than the hole you created, use the biscuit cutter to make it the correct size. You want it to fit inside the circle.

Place tomato in hole and top with egg
4. Place the cheese sandwich, with the hole in it, into a non-stick skillet (I start with a cold skillet). Drizzle 1/2 teaspoon of oil into the hole, then insert the tomato slice into the hole. Season with salt and pepper to taste. Crack an egg over the tomato slice and again season the egg with salt and pepper. Turn the heat to low (or medium-low). Cover the skillet with a lid to trap the heat and help melt the cheese. Grill until the bread has browned nicely. At the same time, grill the round cheese sandwich that you cut from the center.

Flip Egg In a Nest
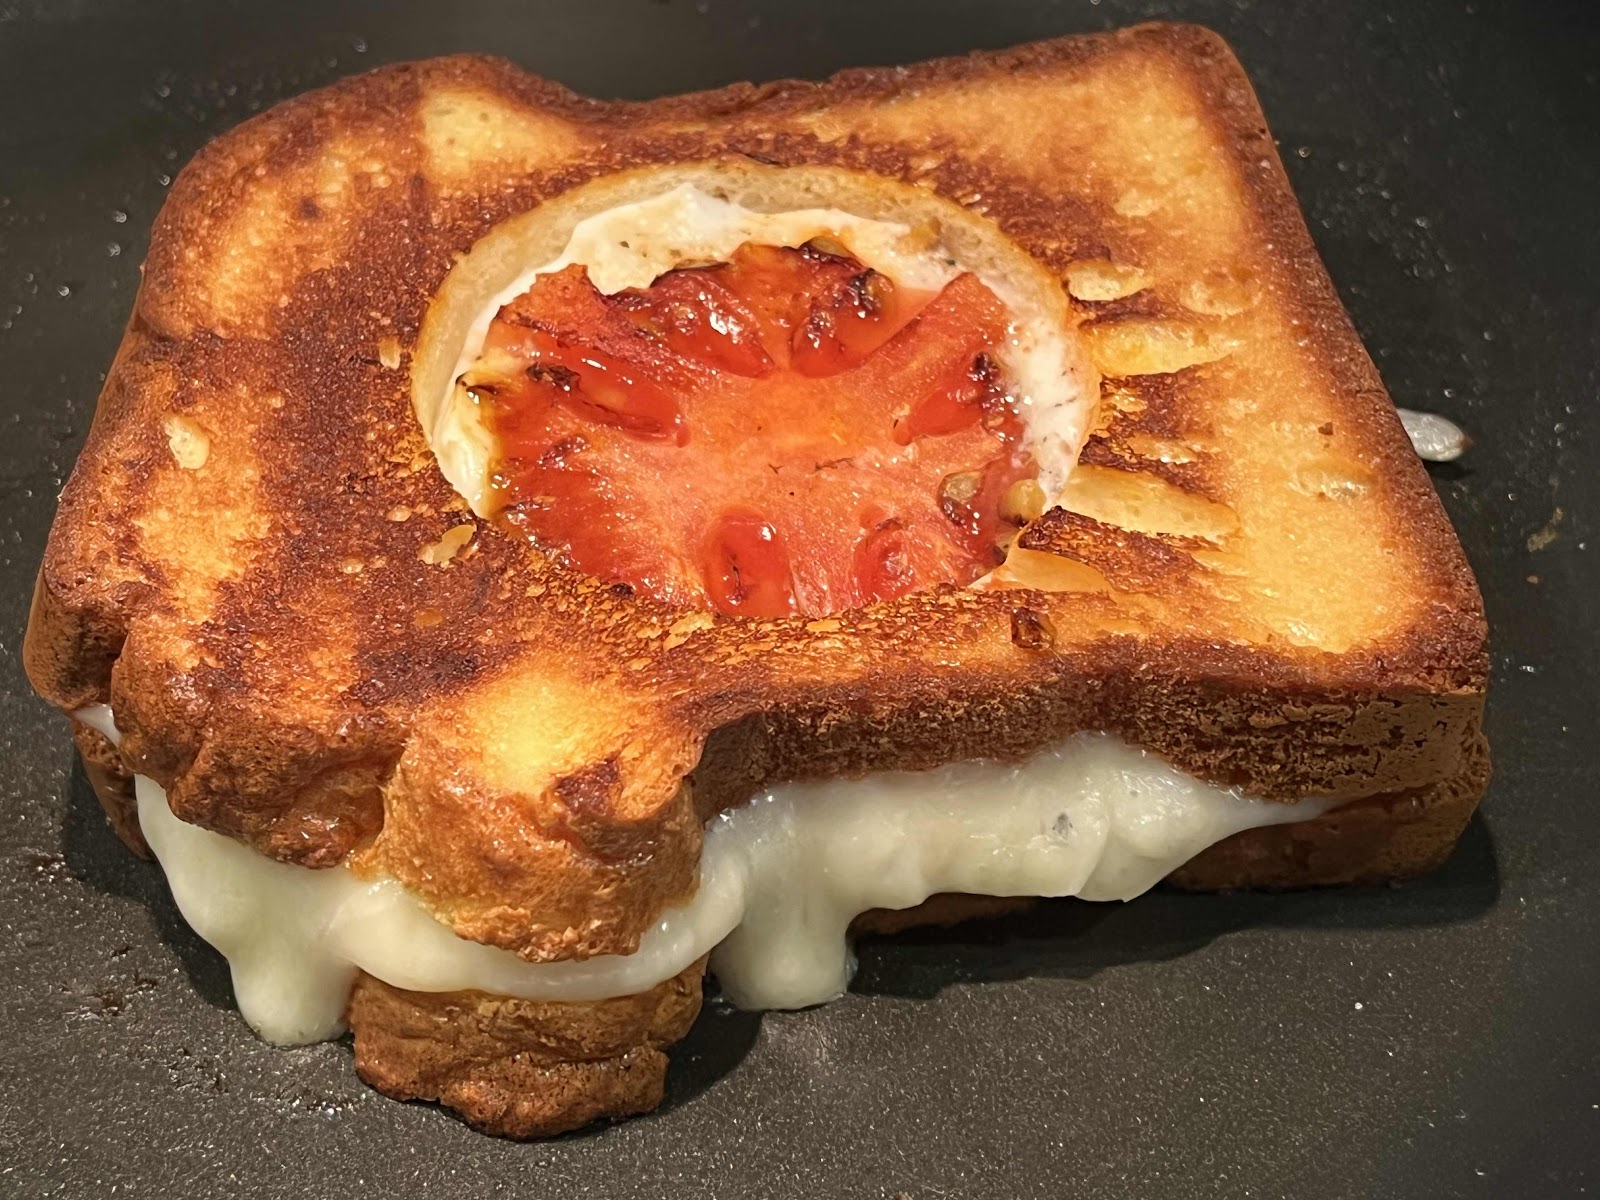
5. With a spatula, carefully flip the sandwich and continue grilling on the second side until the bread has browned and the egg is done to your liking. (Again, I like to cover the skillet to trap the heat.) Flip the small round cheese sandwich and brown the second side, as well.

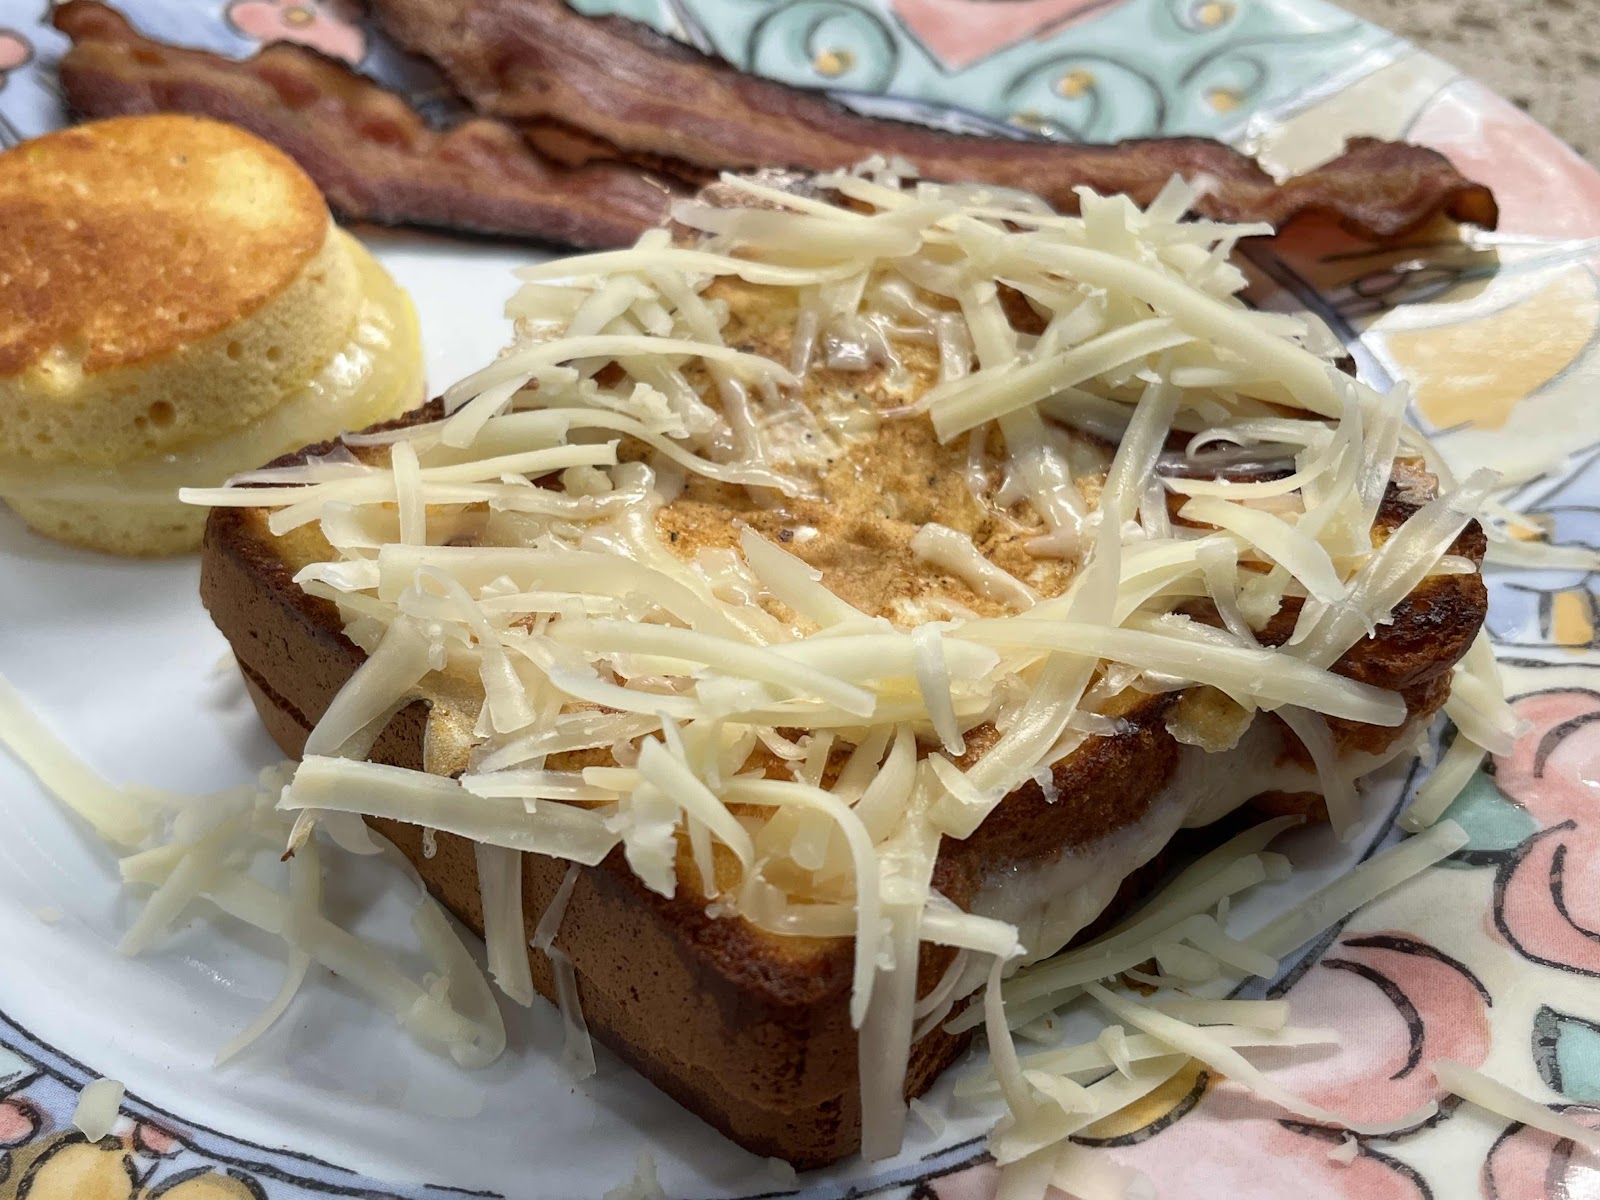
Grilled Cheese Egg In a Nest
6. Remove the Egg In a Nest and the round grilled cheese sandwich to a serving plate. Sprinkle the shredded cheese over the Egg In a Nest and serve! YUM!

Nutritional Information per serving (made with 2 slices Cloud Bread Loaf): 603 calories, 3.6 g carbohydrate (2.4 g dietary fiber, 2.9 g sugars), 49.8 g total fat (20 g saturated fat, 0 g trans fat), 428 mg cholesterol, 690 mg sodium, 466.9 mg calcium, 254 mg potassium, 533 IU Vit A, 3 mg Vit C, 3 mg iron, 36.7 g protein. Net carbs per serving: 1.2 grams

Photos and recipe by Kathy Sheehan, copyright 2022
All rights reserved. Please do not duplicate without the author’s permission.

Thursday, March 10, 2022

Keto Carbonara (Made with Egglife Wrap Noodles)

Keto Carbonara (Made with Egglife Wrap Noodles)
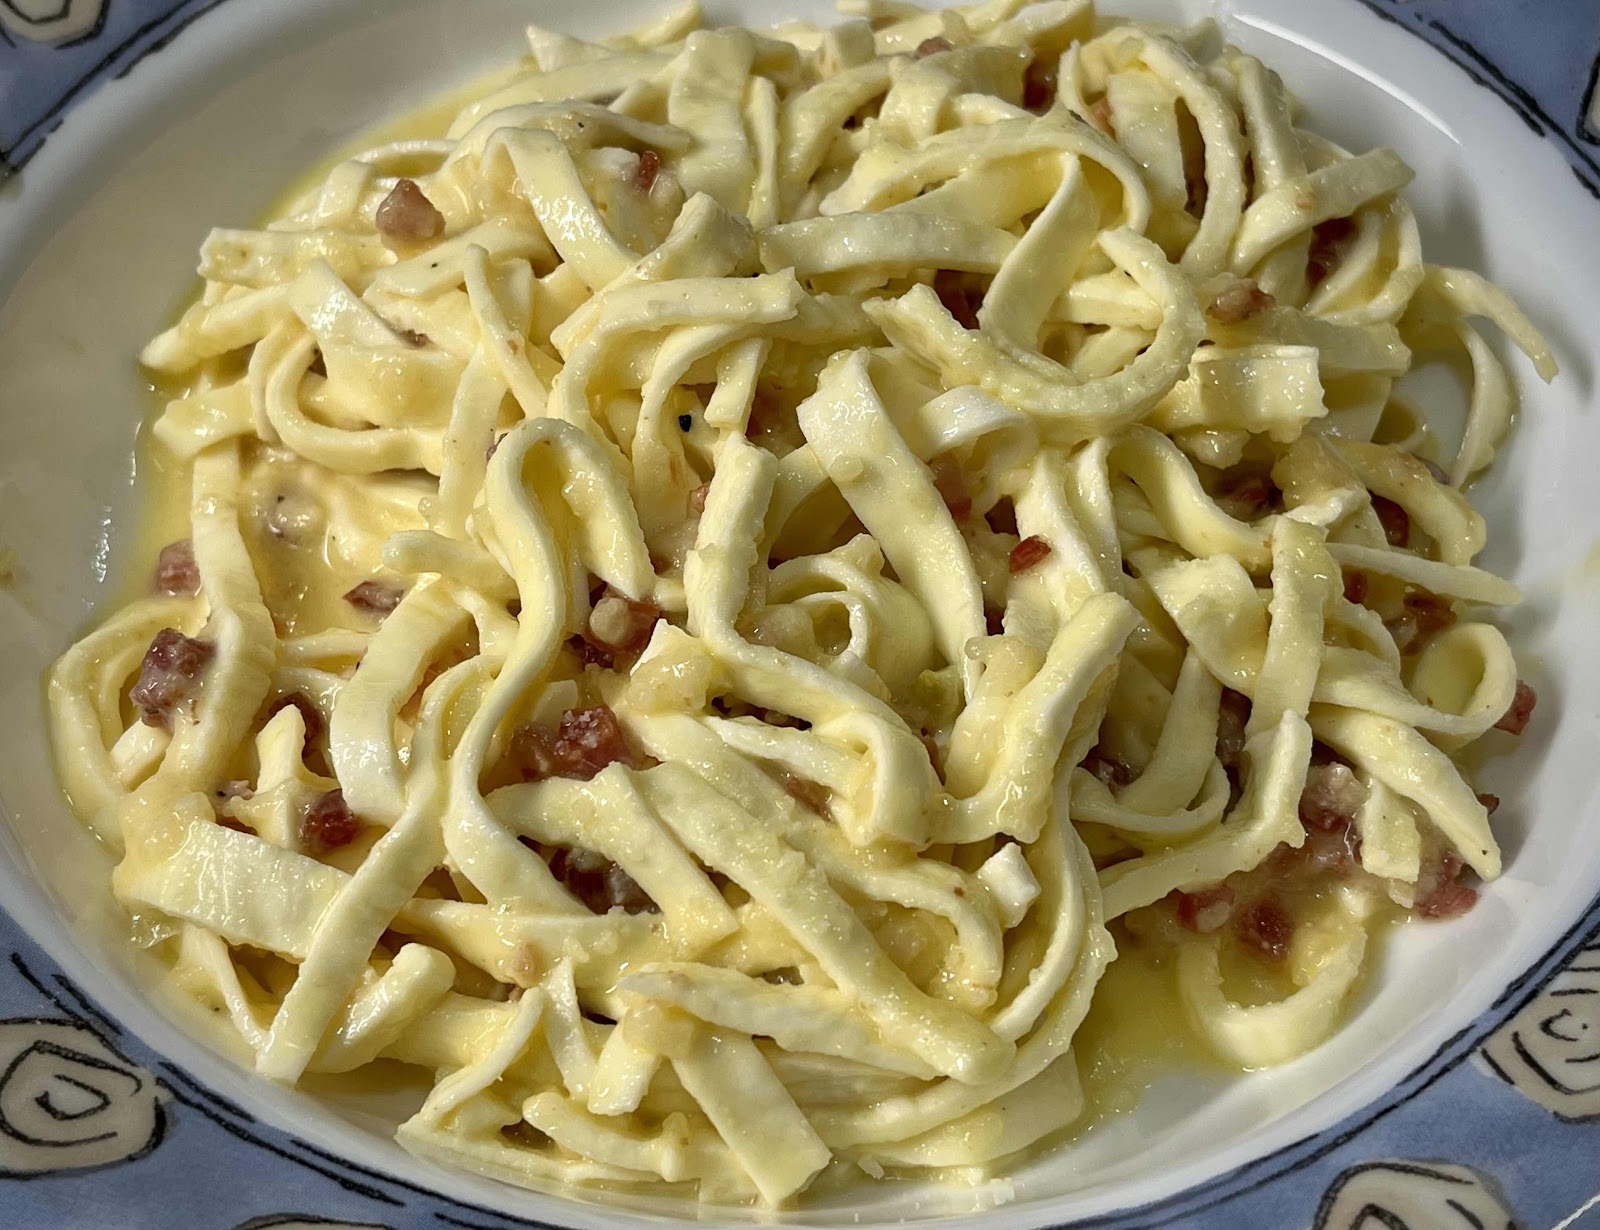
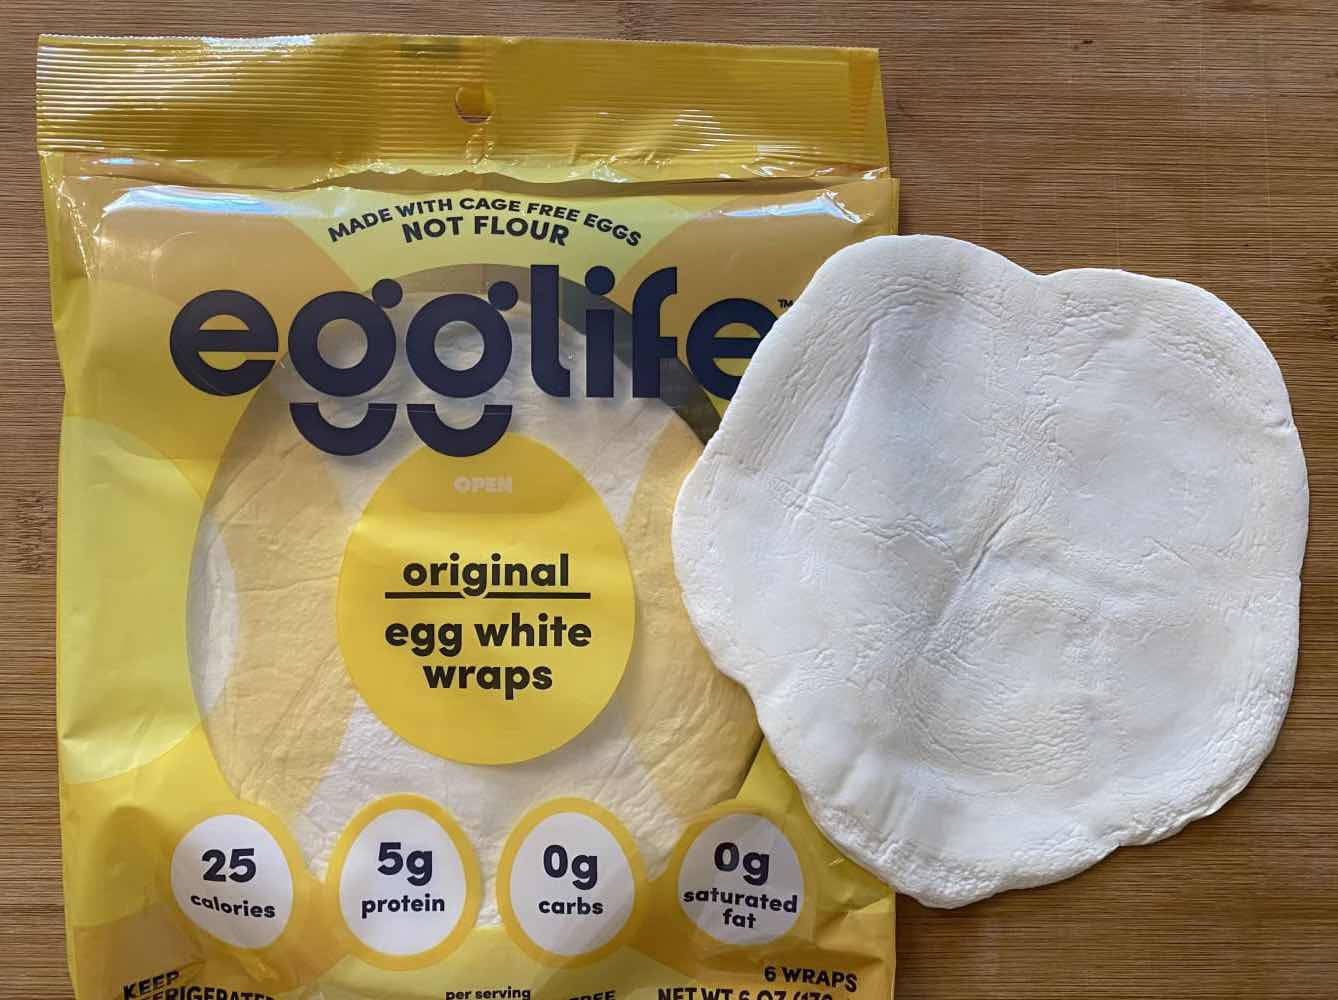
I recently made Carbonara using three Egglife wraps that I cut into thin strips using a pizza cutter. The result was very good! I have to admit that this idea of using Egglife wraps as noodles is not my own. I saw a post on Facebook that inspired me. I thought it was ingenious! So, I tried it with my homemade carbonara recipe and I like the way it turned out. The Egglife wraps, by themselves, are pretty plain. They do not impart much flavor, so using them as a wrap in anything other than a breakfast burrito is not appealing to me. But when cut into thin strips, I think they make a pretty good egg noodle substitute. I will definitely be trying this again in other recipes that call for egg noodles, such as stroganoff. This recipe is convenient and quick to throw together anytime you need a “fast food” dinner. (To find out where you can buy Egglife Wraps in your area, check out the Store Locator on their website here.)

Keto Carbonara (Made with Egglife Wrap “Noodles”)
Makes 1 generous serving (or two side dish servings)

3 plain Egglife Wraps, cut into thin strips
2 ounces pancetta, cut into small cubes (or bacon)
2 cloves garlic, minced
1 egg
6 tablespoons grated Parmesan cheese
Ground black pepper to taste

1. In a small, heavy saucepan, boil some water. Cut three plain Egglife wraps into thin strips using a pizza cutter or sharp knife, about the width of fettuccine noodles; set aside. In a small bowl, whisk together one egg and 6 tablespoons of grated Parmesan cheese. Add pepper to taste; set aside.

Egglife Wraps
2. In a skillet, sauté 2 ounces of cubed pancetta until it has rendered its fat and is beginning to brown. Add two finely chopped or minced cloves of garlic and stir until fragrant. Remove from heat.

3. Once the water has boiled, drop the Egglife ”noodles” into the water for 15 seconds. Reserve about 1/4 cup of the boiling water. Drain the noodles and set aside.

4. To the now empty, but still hot saucepan, add the sautéed pancetta, including any rendered fat. Add the egg/Parmesan mixture and a little bit of the reserved hot water and whisk into a sauce. (Only add enough water to create a smooth, but still slightly thick sauce.) Add the drained Egglife noodles and toss until the noodles are well coated. Serve immediately.

Nutritional Information per entire recipe (1 generous serving): 521 calories, 3.5 g carbohydrate (0.2 g dietary fiber, 0.2 g sugars), 35 g total fat (14.8 g saturated fat, 0 g trans fat), 258 mg cholesterol, 1761 mg sodium, 446 mg calcium, 336 mg potassium, 1 mg iron, 139. IU Vit A, 43 g protein. Net carbs per serving: 3.3 grams

Photo and recipe by Kathy Sheehan, copyright 2022
All rights reserved. Please do not duplicate without the author’s permission. 

Wednesday, February 16, 2022

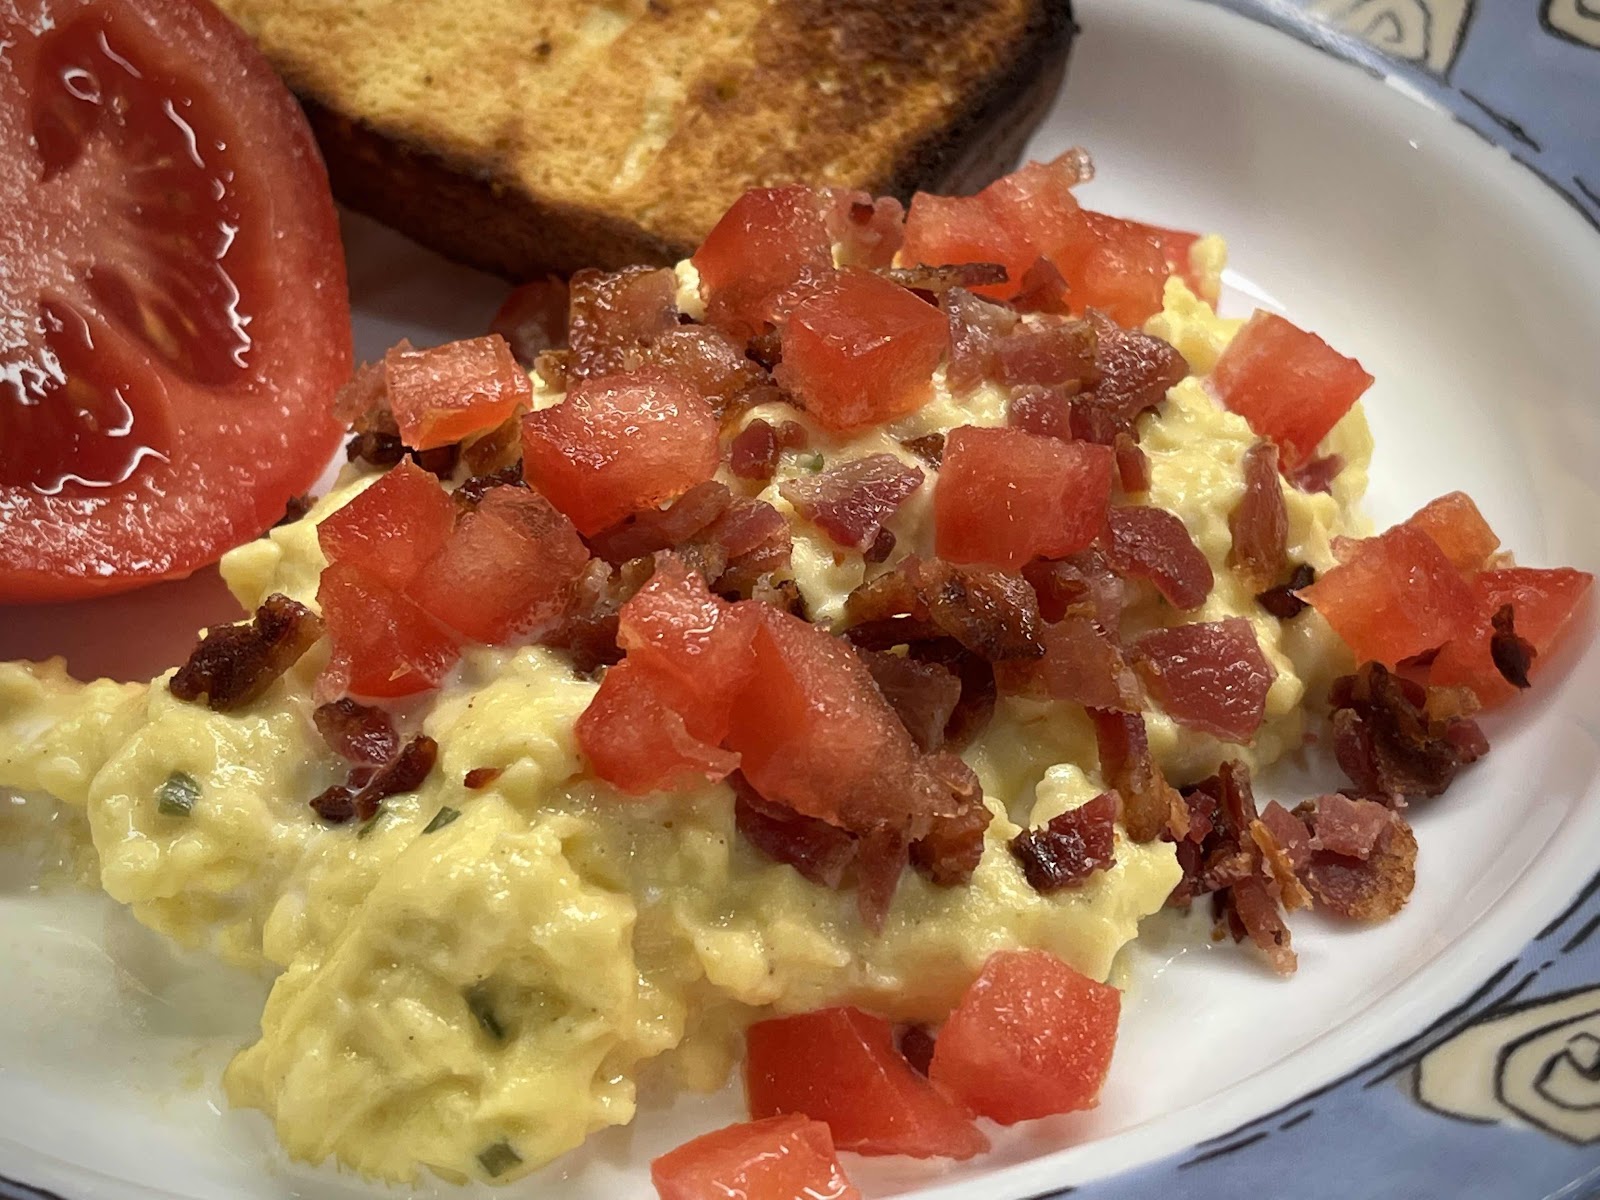
French Style Stirred Scrambled Eggs with Smoked Salmon or Bacon

French-Style Stirred Scrambled Eggs
I eat eggs nearly every morning for breakfast, so it can get boring after a while! I always love trying new ways to prepare eggs and make my breakfast more exciting. I came across this technique for making soft, silky, decadent scrambled eggs and I am in love! The trick is to cook them over low heat and stir them constantly with a whisk. As soon as they are beginning to set and are still soft, remove them from the heat. I think this is going to be one of my very favorite ways of preparing eggs from now on!

French-Style Stirred Scrambled Eggs with Smoked Salmon or Bacon
Makes 2 servings

4 large eggs
1/8 to 1/4 teaspoon salt, to taste
1/8 teaspoon white pepper (or black pepper), or to taste
3 tablespoons heavy cream, divided
1 ounce smoked salmon, diced (or 2 slices cooked bacon, diced)
1 tablespoon unsalted butter

Optional Garnishes: chopped fresh chives or other herbs, diced tomato, flaked sea salt

1. In a bowl, whisk together the eggs, salt, pepper and 1 tablespoon of heavy cream.

2. Place a nonstick skillet over low heat and add the unsalted butter. When the butter is melted, swirl it around in the pan. Add the eggs and stir with a whisk continuously until just set, but still soft. Stir in the remaining 2 tablespoons of heavy cream. Remove from the heat and divide evenly into two serving bowls or ramekins.

3. Top with the diced smoked salmon or bacon and any other garnishes you desire. Drizzle with a tiny bit of additional heavy cream and serve immediately.

Stirred Scrambled Eggs with Bacon and Tomato
Nutritional Information per serving (1/2 recipe): 286 calories, 1 g carbohydrate (0 g dietary fiber, 0.4 g sugars), 24.9 g total fat (12.2 g saturated fat, 0 g trans fat), 421 mg cholesterol, 556 mg sodium, 60.1 mg calcium, 165 mg potassium, 2 mg iron, 309 IU Vit A, 15.2 g protein.

Photos and recipe by Kathy Sheehan, copyright 2022
All rights reserved. Please do not copy without the author’s permission.

Thursday, November 4, 2021

Keto Radish and Egg Frico

Radish and Egg Frico
Frico is a traditional dish from north eastern Italy usually made with potatoes. I modified the recipe to make it keto by replacing the potatoes with radishes. This quick meal for any time of day is basically a crispy, double-crusted cheese pie filled with vegetables and made in a skillet. It is rustic comfort food that is filling and SO DELICIOUS!

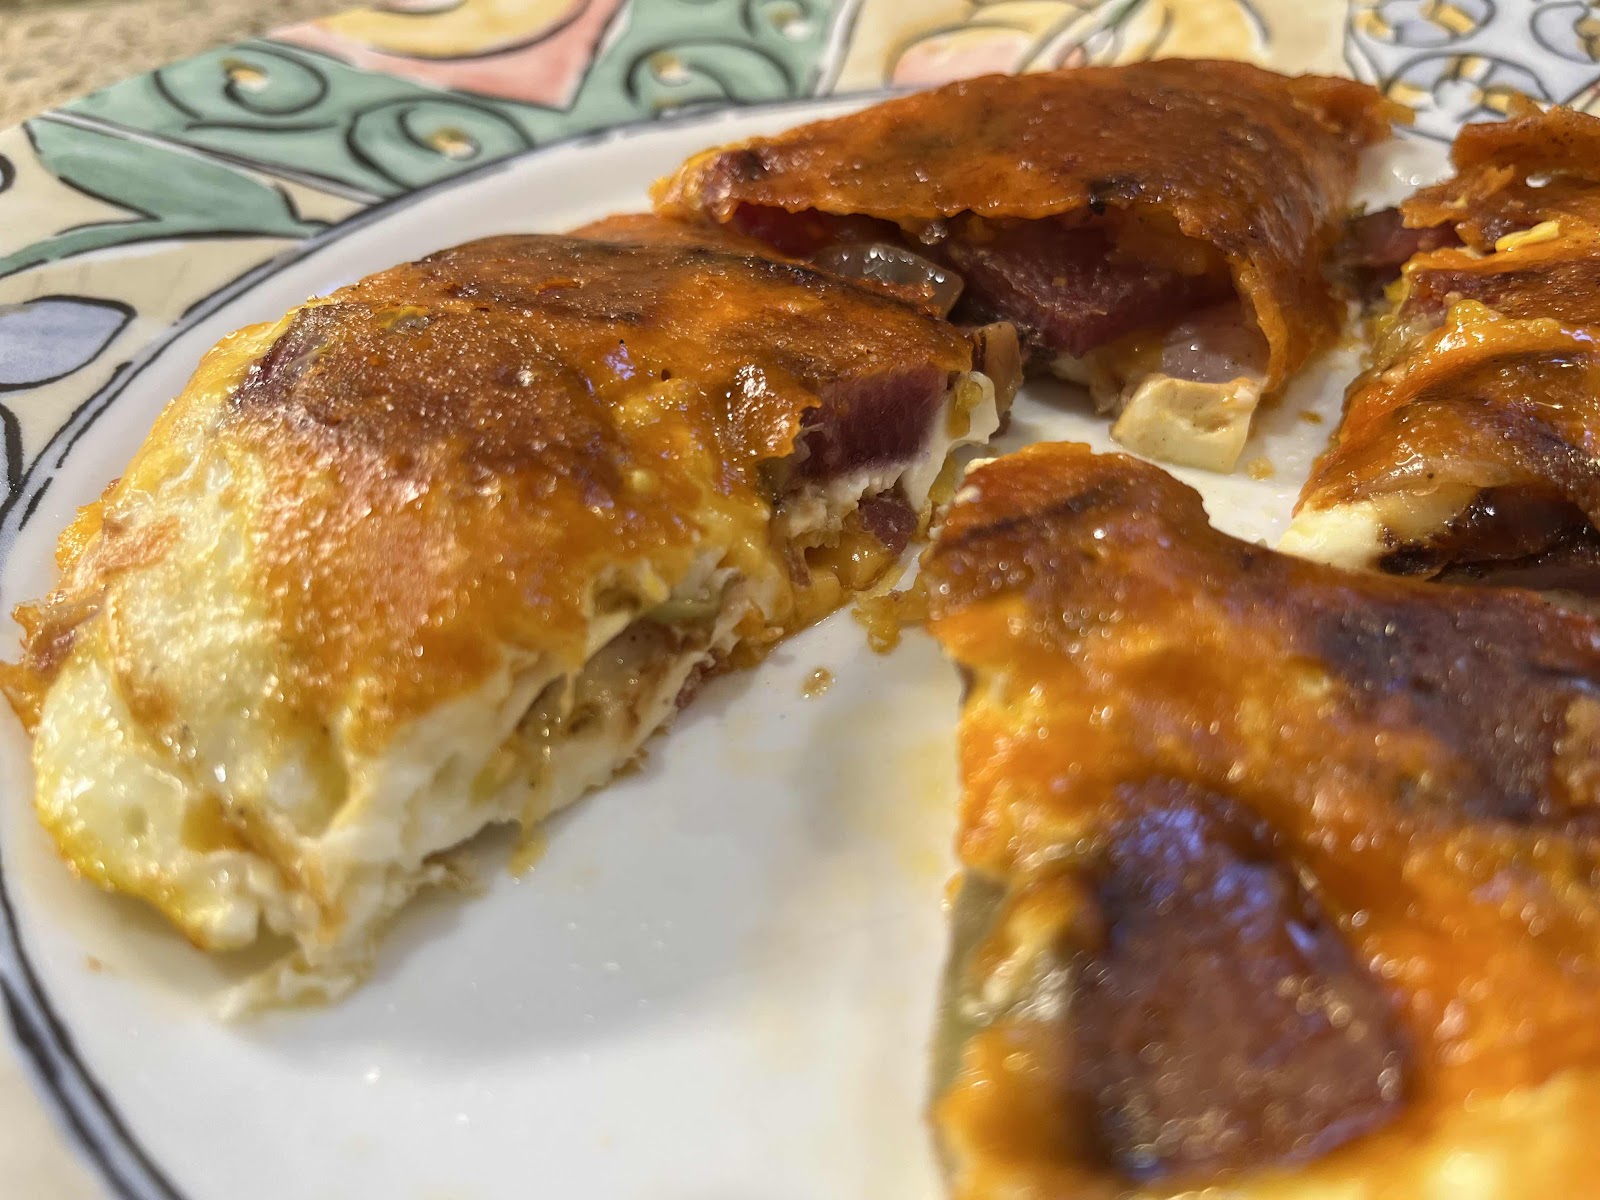
Radish and Egg Frico, cut into quarters
Keto Radish and Egg Frico
Makes 2 servings

1/2 tablespoon avocado oil or bacon grease
3/4 cup sliced radishes
1/2 small onion, sliced
4 ounces shredded cheese, about 1-1/2 cup (Cheddar, Asiago and Gruyere are good choices)
2 eggs
2 slices cooked bacon, chopped
Salt and pepper to taste

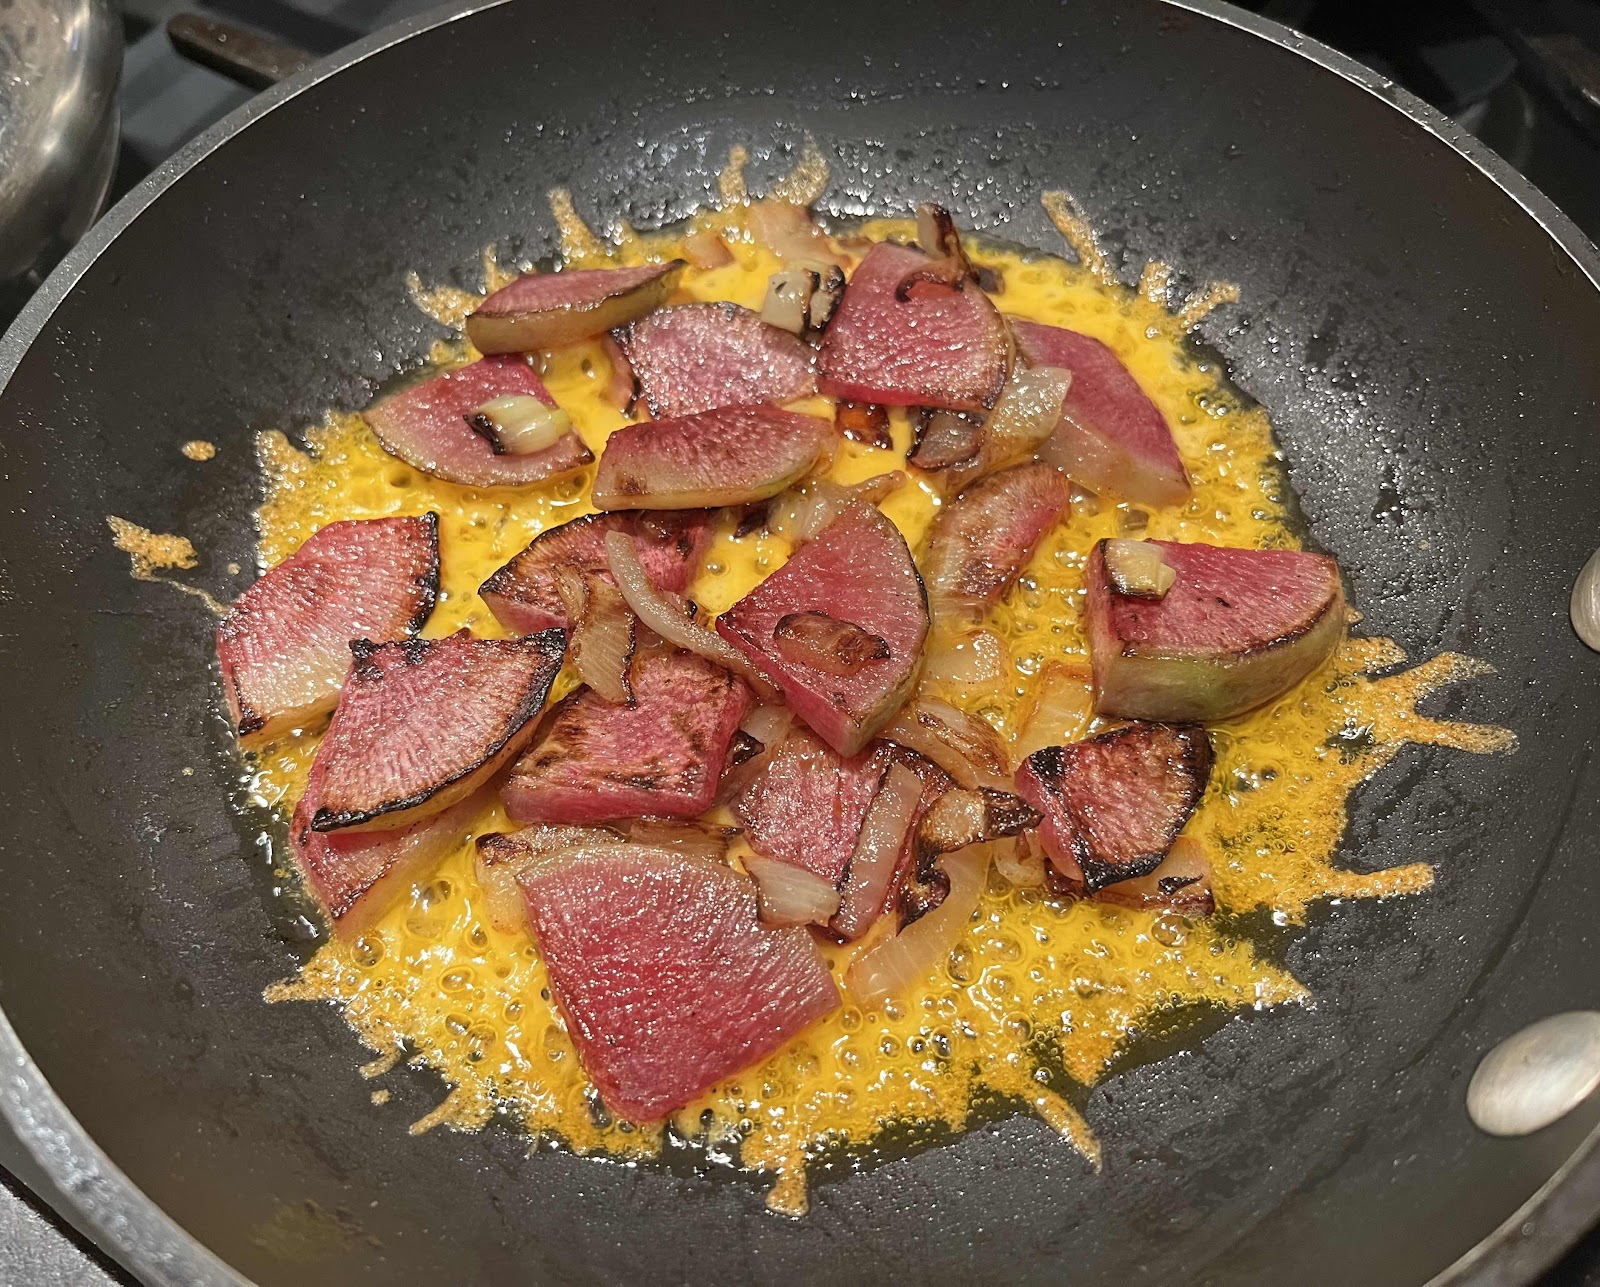
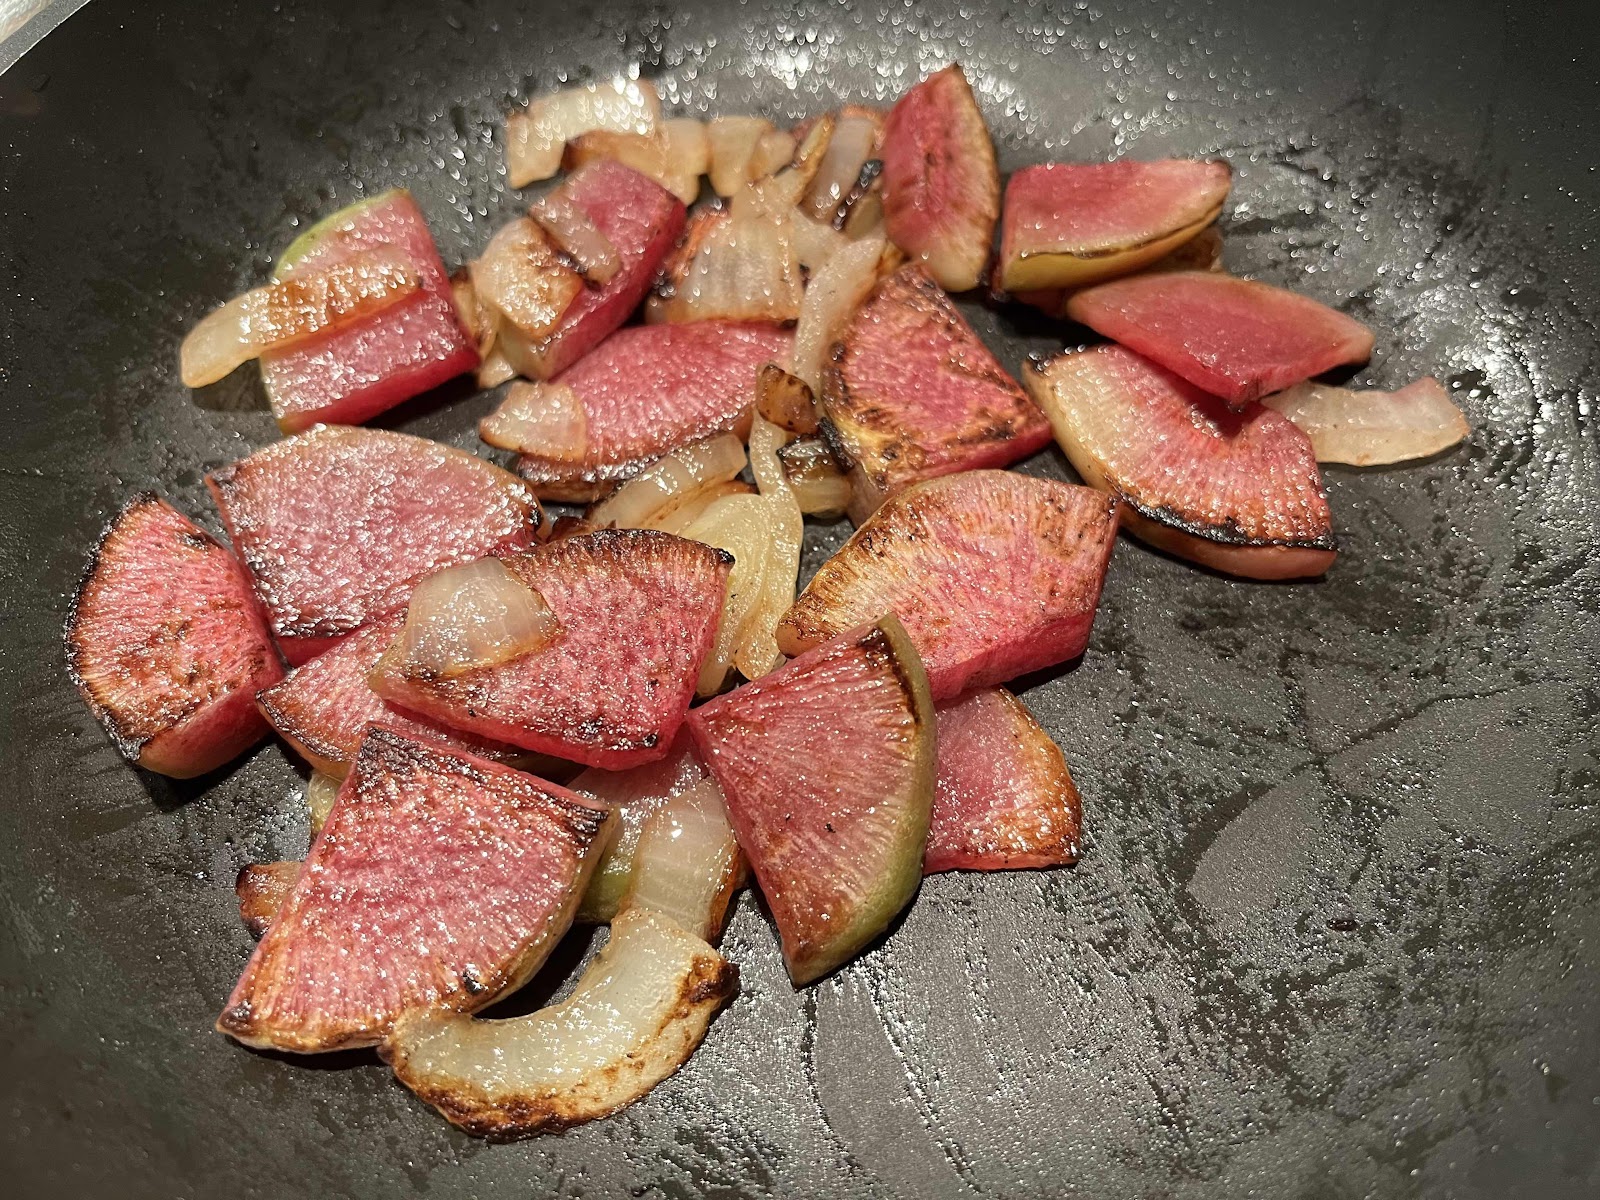
1. Melt the oil in an 8-inch, non-stick skillet over medium heat. Add the sliced onions and radishes and cover, stirring occasionally, until the vegetables are browned and tender. 

Sauteed radishes and onions
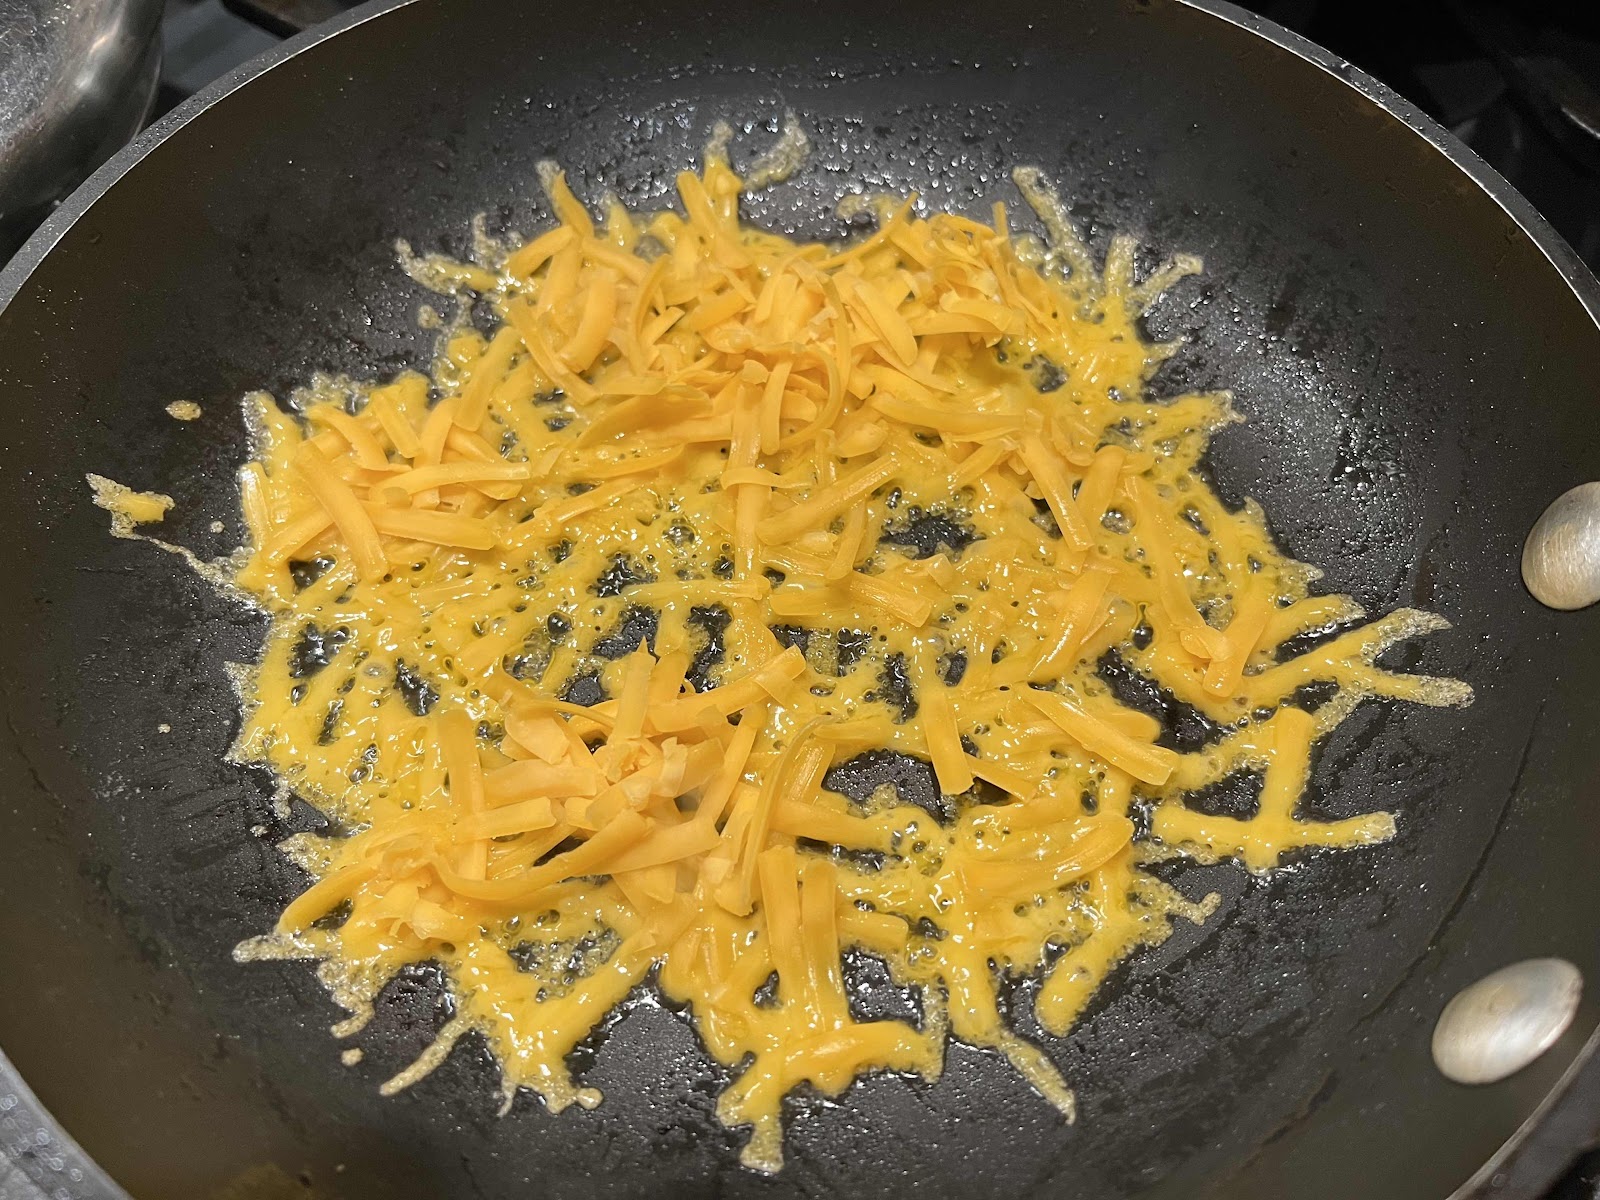
2. Remove lid and reduce heat to low. Remove the cooked vegetables to a plate and, into the hot skillet, sprinkle 1/2 of the shredded cheese.

Sprinkle skillet with cheese
3. Return the sautéed vegetable to the skillet, carefully arranging the vegetables on top of the shredded cheese.

Return vegetables to skillet
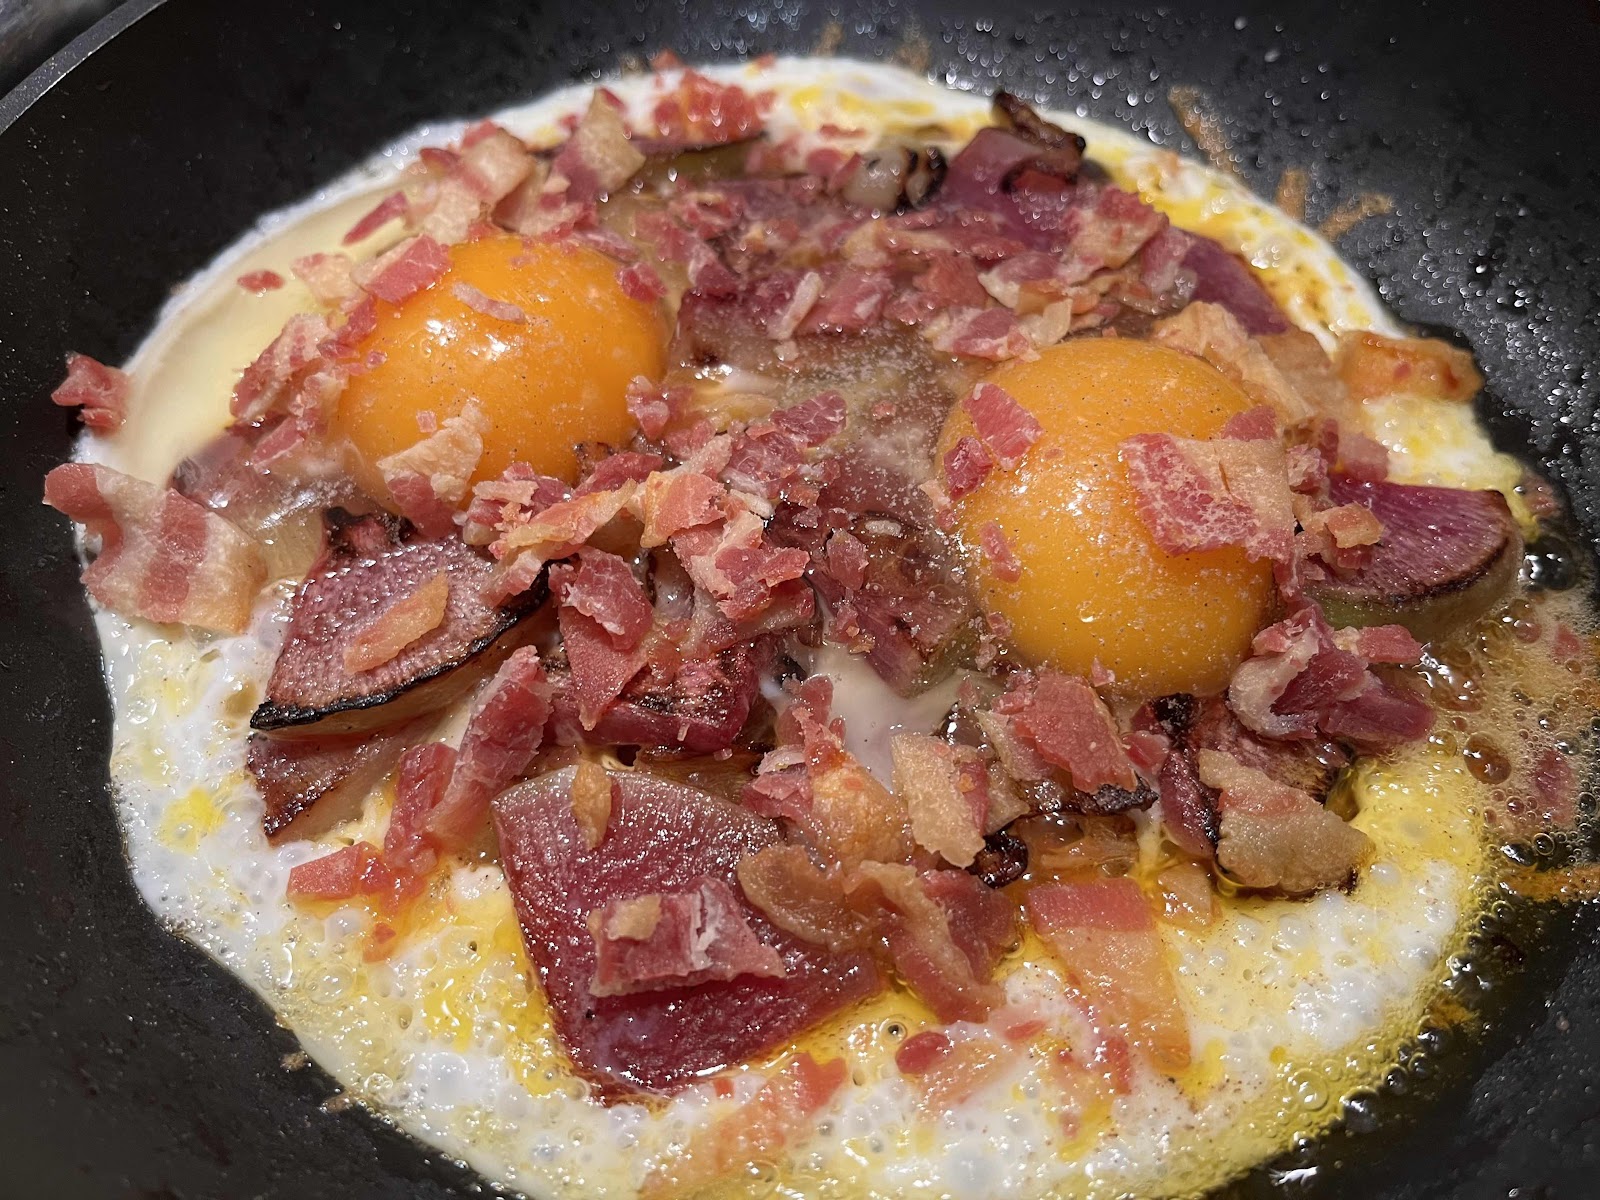
4. Crack two eggs on top of the vegetables. Season the eggs with salt and pepper. Add the chopped bacon on top of the eggs.

Add eggs and bacon
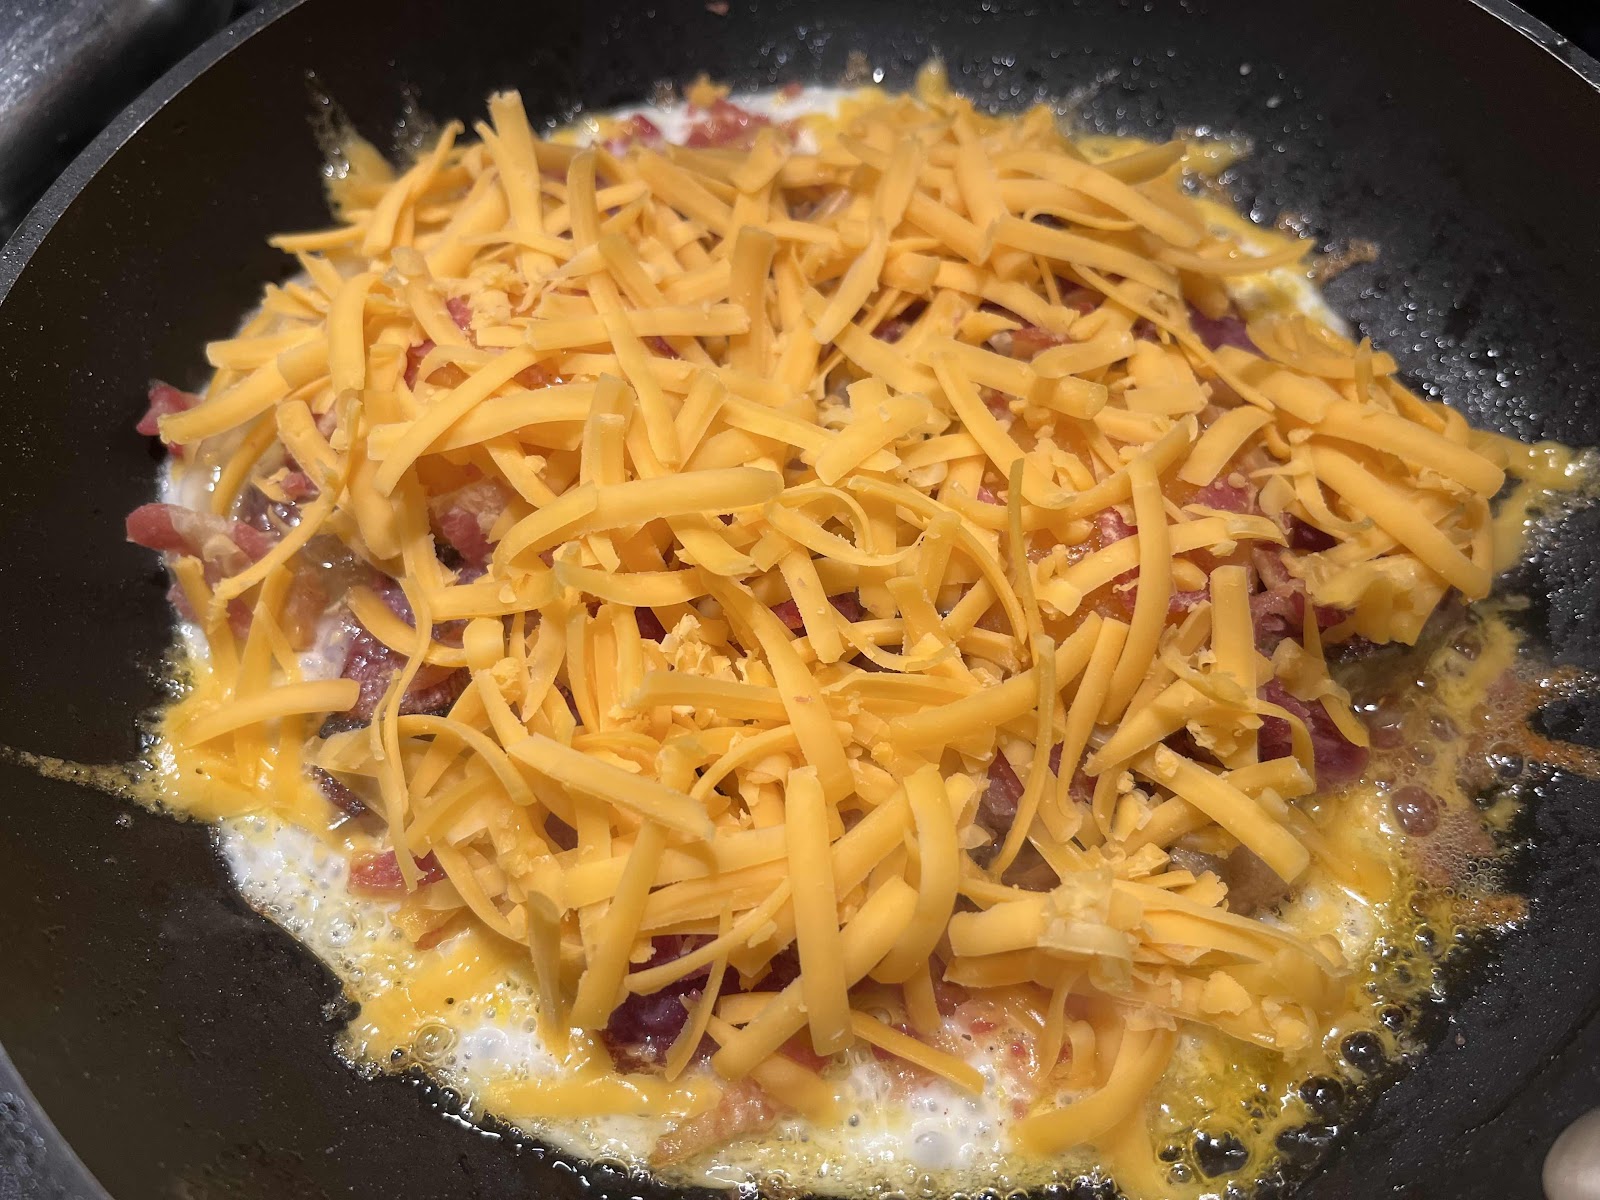
5. Finally, sprinkle the remaining shredded cheese over the top. Continue cooking until the bottom layer of cheese is firm and crispy.

Top with remaining cheese
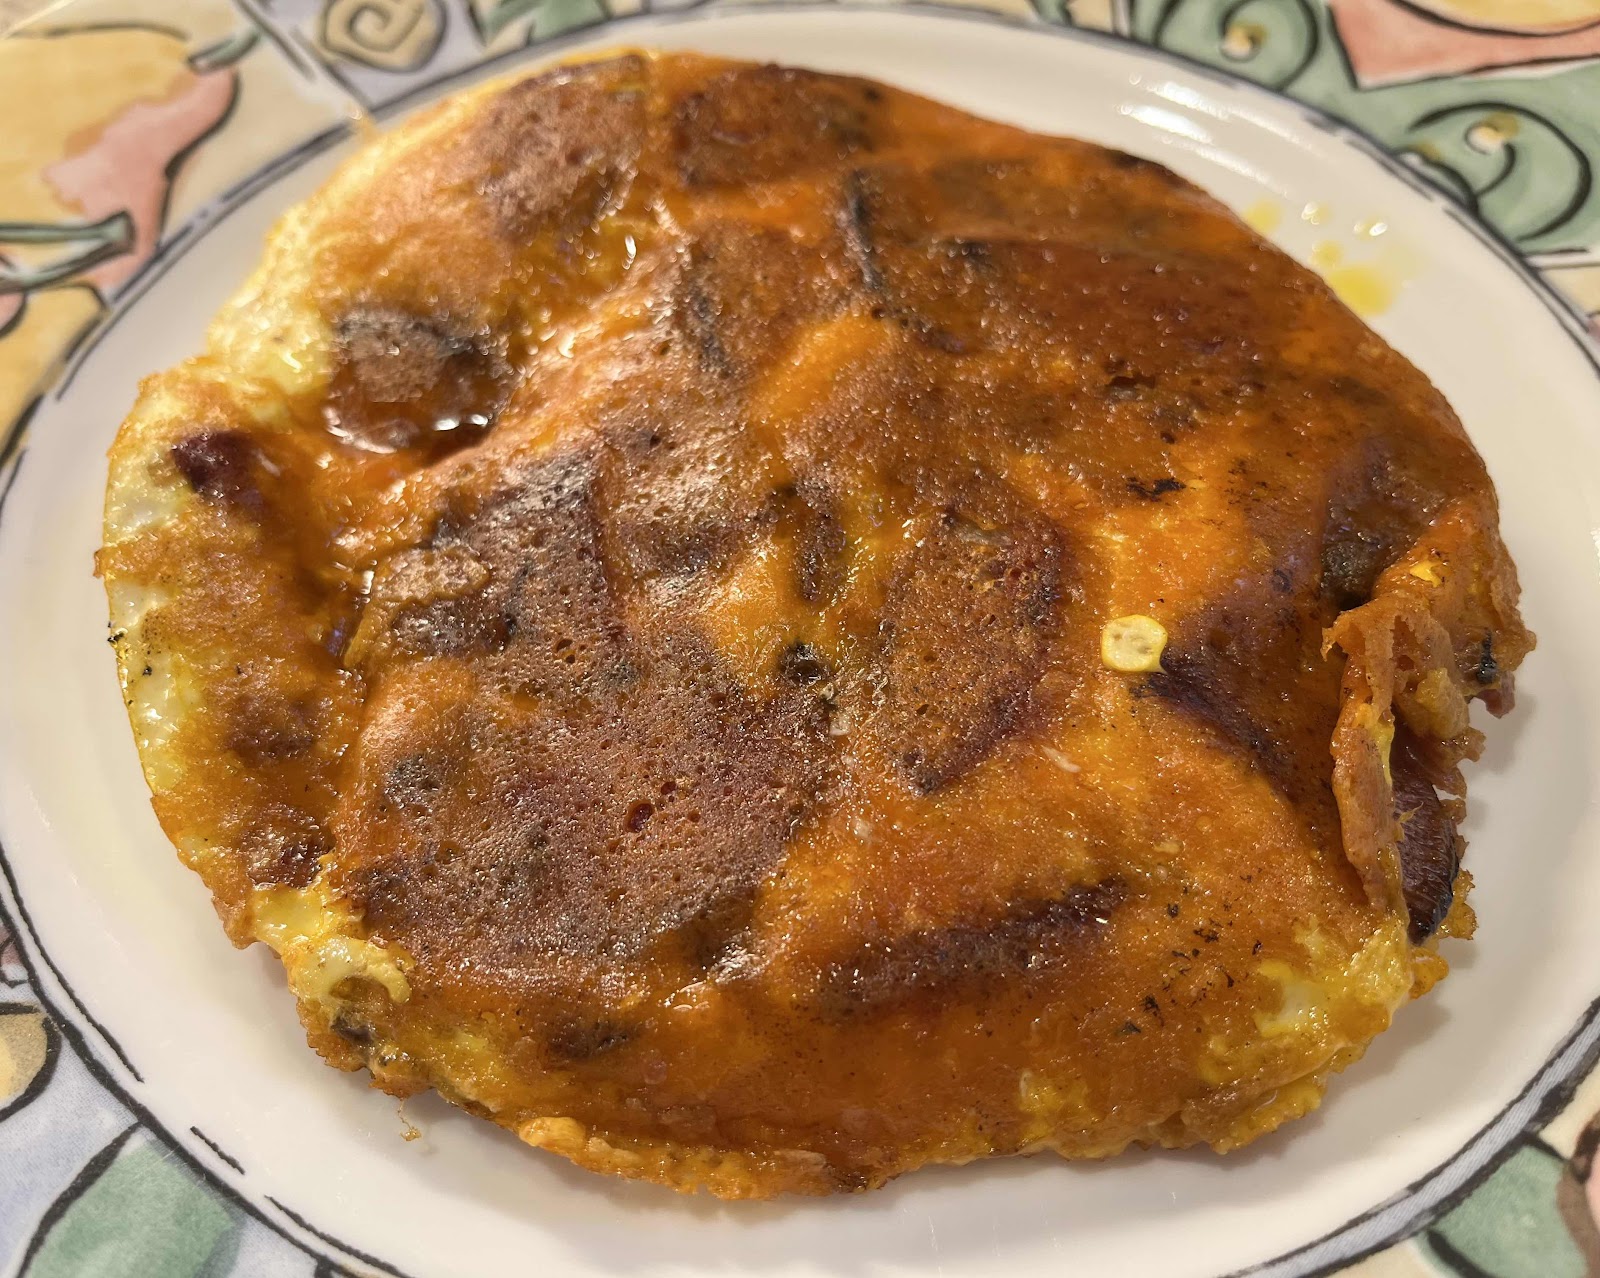
6. Very carefully, flip the frico with a spatula. Cook on the second side until the cheese is firm and crispy. Remove to a serving plate, cut in half or quarters and enjoy!

Whole Radish and Egg Frico
Nutritional Information per serving (1/2 recipe): 357 calories, 5.1 g carbohydrate (1.1 g dietary fiber, 2.3 g sugars), 26.4 g total fat (14.8 g saturated fat, 0 g trans fat), 255 mg cholesterol, 655 mg sodium, 446.7 mg calcium, 262 mg potassium, 1 mg iron, 263 IU Vit A, 8 mg Vit C, 24 g protein. Net carbs per serving: 4 grams

Photos and recipe by Kathy Sheehan, copyright 2021
All rights reserved. Please do not duplicate without the author’s permission. 

Friday, May 7, 2021

Schnitzel with Keto Brown Mushroom Gravy (Jagerschnitzel)

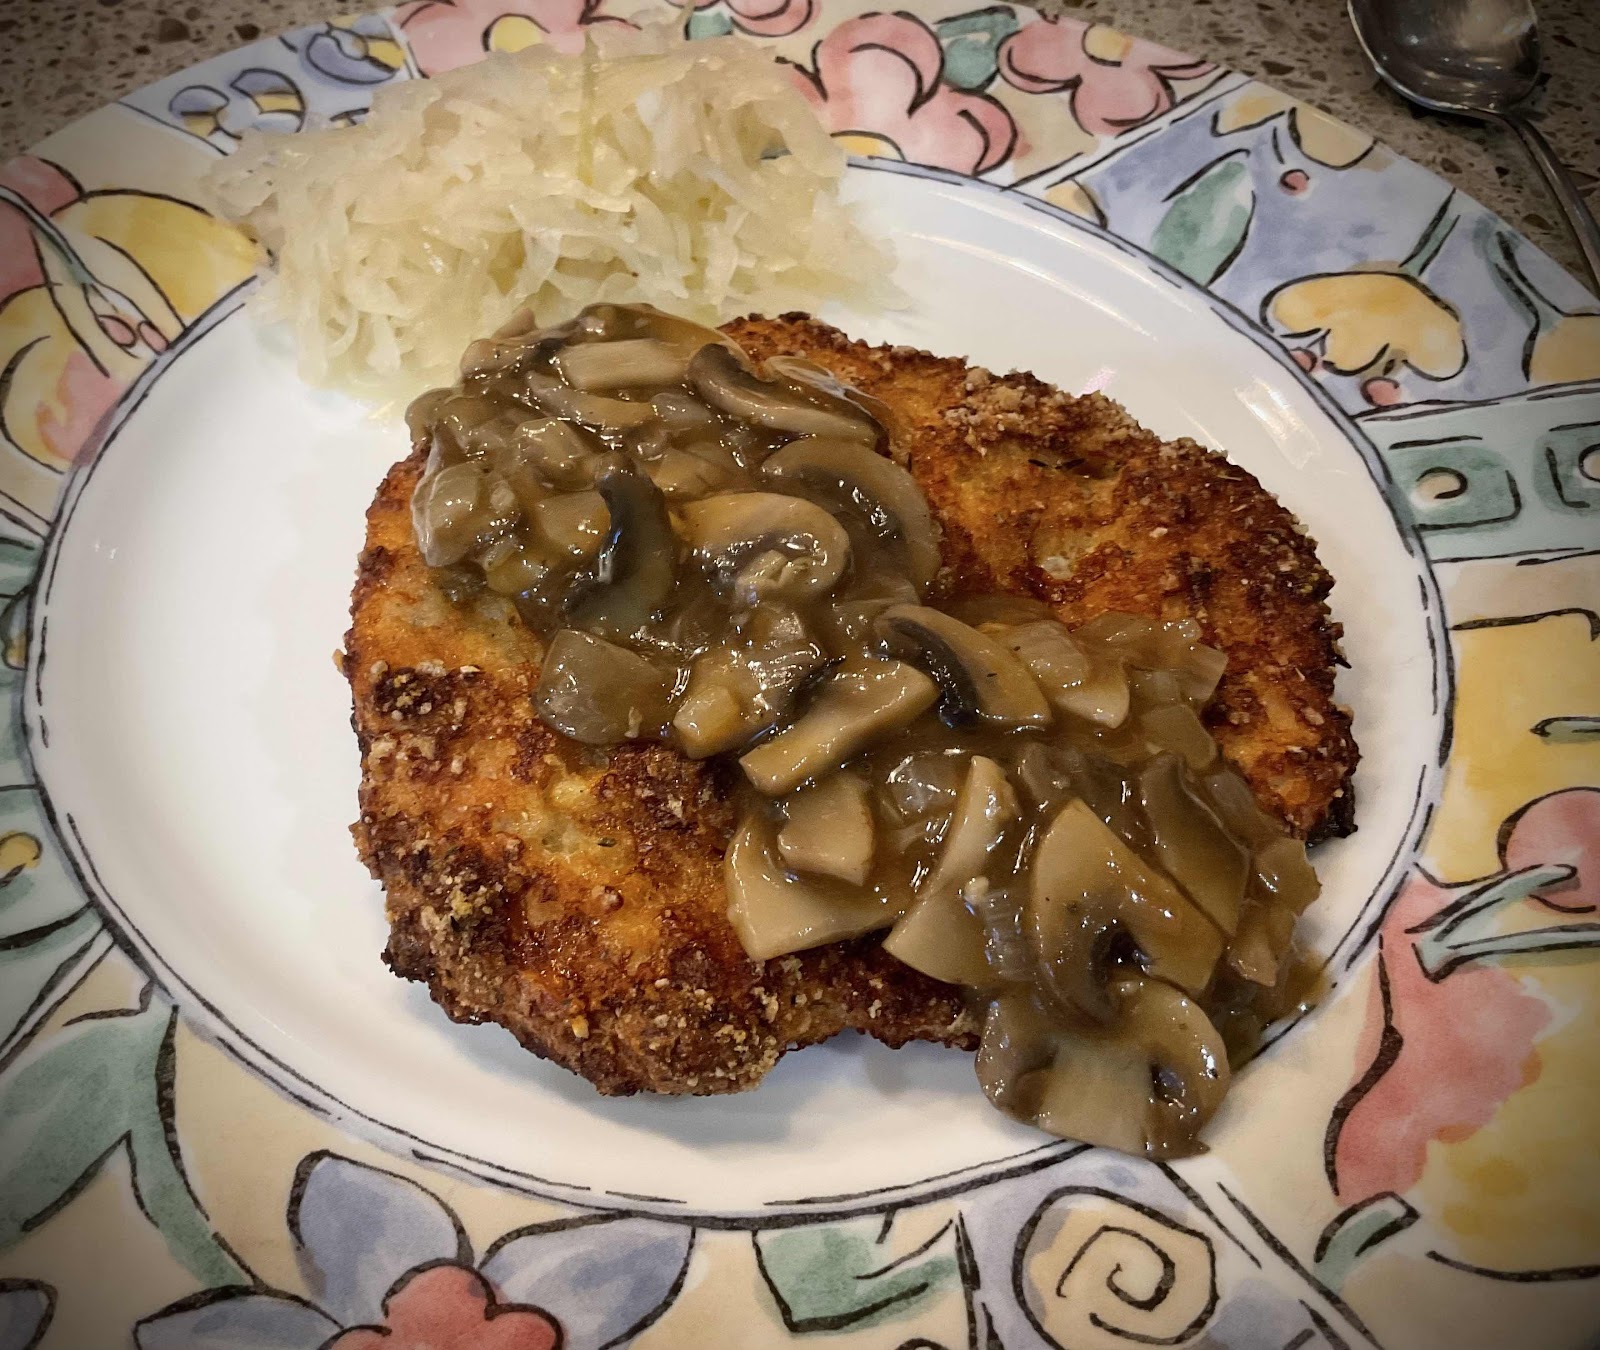
Schnitzel with Keto Brown Mushroom Gravy
My husband is a big fan of German cooking. I have tried other recipes for schnitzel that call for almond flour, but was always a bit disappointed in their soggy breading. I’ve been experimenting with using crushed pork rinds as breading and, so far, the results have been excellent! This pork rind breading is super crunchy and, even when reheated, remains crisp. I’m not a fan of pork rinds as a snack, but in this application, they are a winner! This schnitzel recipe has authentic flavor and texture. You can make it with your favorite cutlet, such as pork, chicken, turkey or veal. I’m sure you’ll be as pleased as my husband and this recipe will become a favorite of your family, too.

Schnitzel with Keto Brown Mushroom Gravy (Jagerschnitzel)
Makes 4 servings

Schnitzel:
1 pound boneless pork chops (or substitute chicken, turkey or veal)
1 1/2 cups crushed pork rinds (see notes)*
1/4 teaspoon salt
1/4 to 1/2 teaspoon black pepper
1/4 teaspoon dried thyme
1 large egg
1 tablespoon sour cream (omit for dairy free)
1/2 cup unflavored whey protein powder

Brown Mushroom Gravy:
1 tablespoon butter
1/2 onion, chopped
1 clove garlic, minced
8 ounces white button mushrooms, sliced
1 1/4 cups beef broth
1/4 teaspoon dried thyme (optional)**
1 teaspoon red wine vinegar (optional)**
1/4 to 1/2 teaspoon xanthan gum to thicken
Salt and pepper to taste

1. Prepare the 3-step dredging station by placing the whey protein powder onto a plate. In a small bowl, whisk together the egg and sour cream and pour onto a second plate. Finally, stir together the crushed pork rinds, salt, pepper and thyme and pour onto a third plate. Preheat the oven to 425 degrees Fahrenheit. 

2. Cut the pork chops in half horizontally and pound thin between two pieces of plastic wrap, to about 1/4 inch thickness. Set aside while you start the mushroom gravy. 

3. Melt the butter in a 10 or 12 inch skillet. Add the onion and heat over medium heat until softened and translucent. Add the garlic and stir for about 1 minute. Add the sliced mushrooms and sauté until all the liquid has evaporated and the mushrooms are nicely browned. Add the beef broth, thyme and vinegar. Bring to a simmer and allow to cook and reduce, stirring occasionally, while you prepare the schnitzel.

4. Line a baking sheet with foil and spray generously with non-stick cooking spray. 

5. Pat any excess moisture from the cutlets with a paper towel. Dredge each cutlet by first dipping into the whey protein powder on both sides and shaking off the excess. Next, dip the cutlet into the egg mixture and coat both sides. Lastly, place it in the third plate with the pork rind breading, turning to coat both sides. Place the dredged cutlet onto the prepared baking sheet. Repeat with the remaining cutlets. 

6. Place the baking sheet into the preheated oven on the middle rack and cook for 20 minutes. Meanwhile, finish the gravy.

7. Sprinkle the xanthan gum over the simmering gravy and stir briskly until dissolved and the gravy thickens. Season with salt and pepper to taste.

8. At the end of the 20 minutes of cooking, if the breading on the cutlets is not sufficiently browned and crispy, then broil for a few minutes until deeply golden brown. Serve immediately, topped with the mushroom gravy.

Crushed Pork Rind Crumbs
Notes: 
*Pork rinds conveniently come already crushed in panko-style crumbs! Look for them near the breadcrumbs or in the gluten-free section of your grocery store.

**If you want to make a plain, brown gravy, you may omit the thyme and vinegar. Personally, I like the very slight acidity the vinegar adds to the gravy, but if you don’t, then just leave it out.

Nutritional Information per serving of schnitzel (4 oz. cutlet, no gravy): 358 calories, 0.4 g carbohydrate (0 g fiber, 0 g sugars), 19.3 g total fat (7.4 g saturated fat, 0 g trans fat), 147 mg cholesterol, 378 mg sodium, 43.2 mg calcium, 545 mg potassium, 1 mg iron, 29 IU Vit A, 43.8 g protein. Net carbs per serving: 0.4 grams

Nutritional Information per 1/2 cup gravy: 51 calories, 4.1 g carbohydrate (0.9 g dietary fiber, 1.9 g sugars), 3 g total fat (1.8 g saturated fat, 0 g trans fat), 10 mg cholesterol, 354 mg sodium, 7.8 mg calcium, 206 mg potassium, 0 mg iron, 1 IU Vit A, 2 mg Vit C, 2.7 g protein. Net carbs per serving: 3.2 grams

Photos and recipe by Kathy Sheehan, copyright 2021
All rights reserved. Please do not duplicate without the author’s permission. 

Wednesday, April 21, 2021

Keto Creamed Chicken over Chaffles (or Riced Cauliflower)

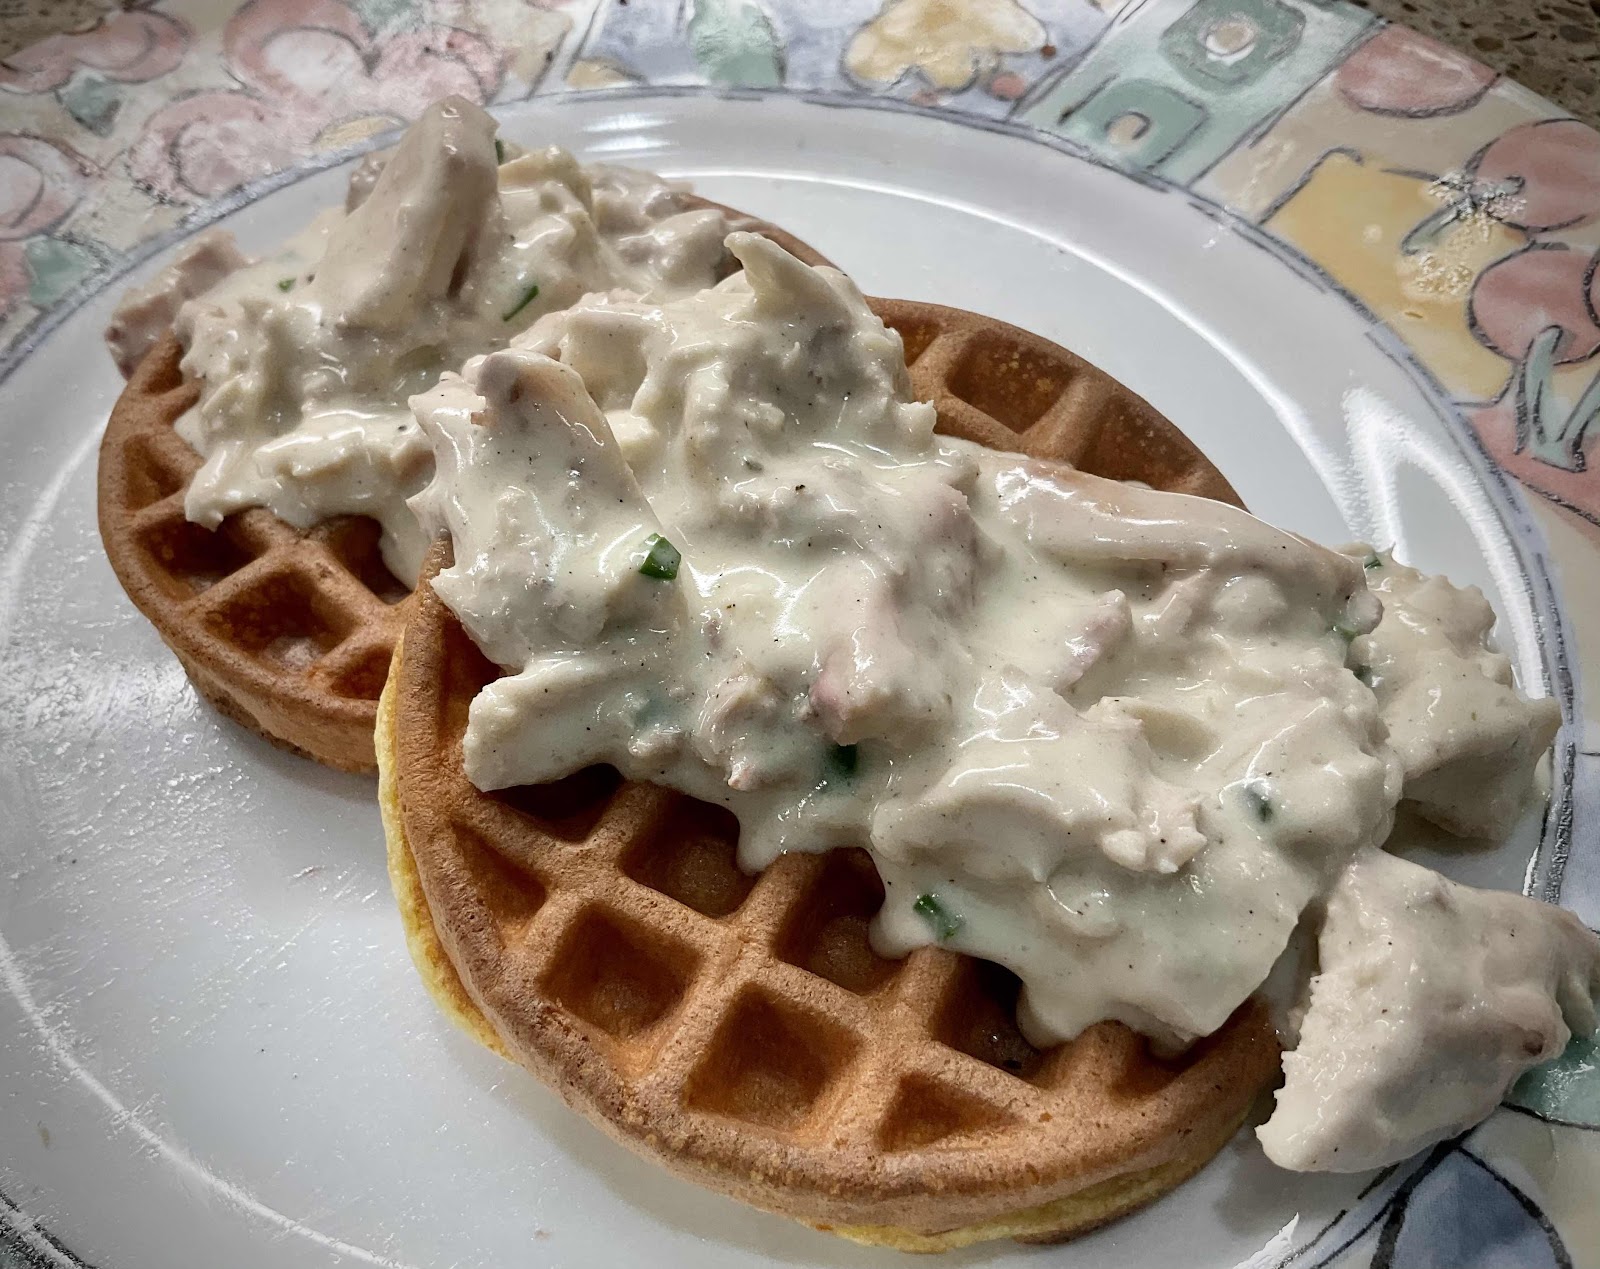
Keto Creamed Chicken over Chaffles
I had some leftover chicken in the refrigerator and, wondering what to do with it, I remembered an old-fashioned Creamed Chicken recipe I used to love when I was first married. In the 1970’s and 80’s, Creamed Chicken was a popular dish served over puffed pastry shells. With a few substitutions, you can create the same, comforting meal in a keto version! Using xanthan gum instead of flour to thicken the sauce and served over toasted chaffles or riced cauliflower, this entire meal is only about 2 carbs per serving! Tonight’s dinner was a wonderful trip down Memory Lane...one I won’t forget anytime soon!

Keto Creamed Chicken
Makes 4 servings

1 cup chicken broth
1/2 cup heavy cream
1/2 teaspoon poultry seasoning
1 teaspoon chopped fresh chives or parsley
1/2 to 3/4 teaspoon xanthan gum
2 cups cooked chicken, cubed or shredded
1 tablespoon white wine or sherry
Salt and pepper to taste

Optional for serving:
Toasted Chaffles
Riced cauliflower

1. In a saucepan over medium heat, whisk together the chicken broth, heavy cream and herbs and heat to a simmer. While whisking, add the xanthan gum and continue whisking until thickened and smooth.

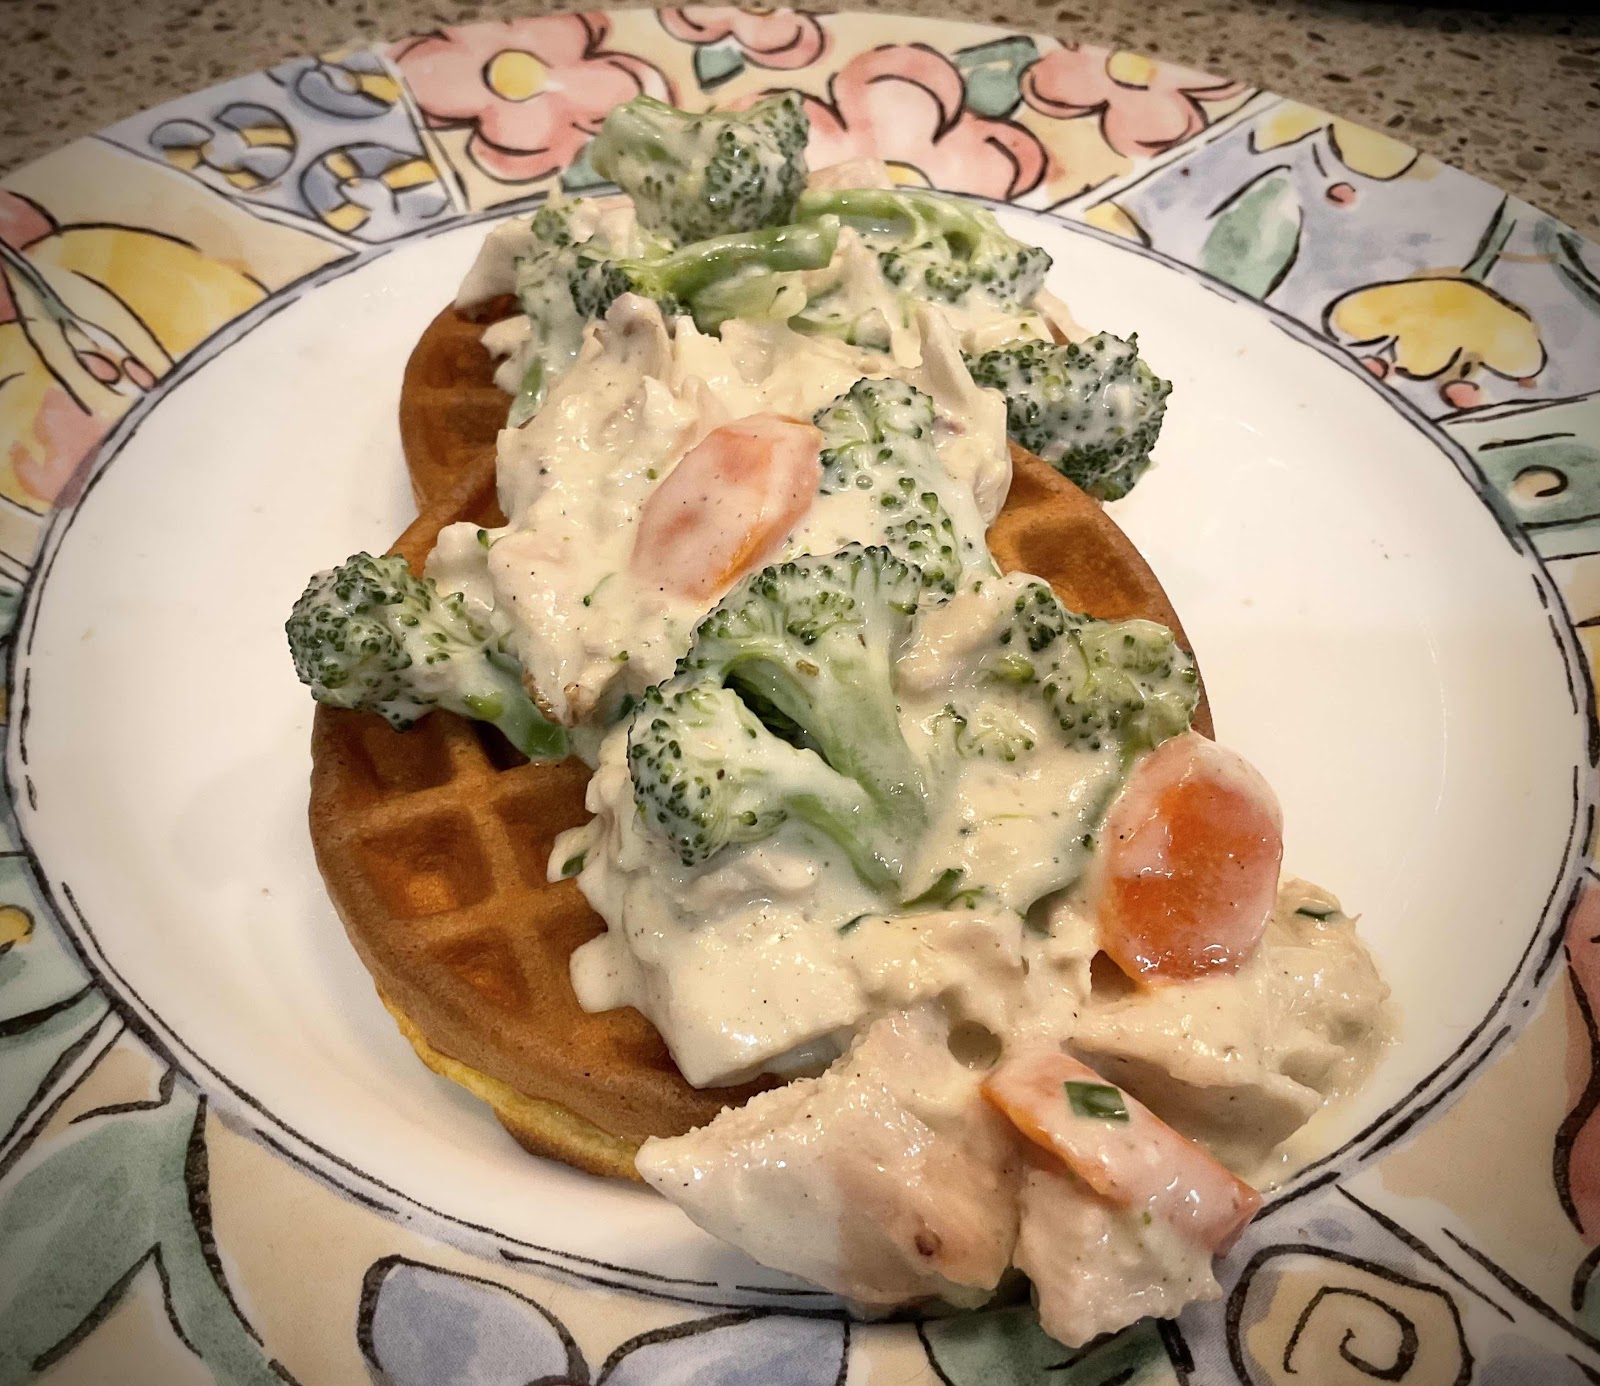
2. Add the cooked chicken, white wine or sherry and season with salt and pepper to taste. Simmer until the sauce is thicken to desired consistency, stirring occasionally. (If desired and if your diet allows a few more carbs, add any optional vegetables you might like, such as broccoli, one (4 oz) can of mushrooms and their liquid, a tablespoon of peas or carrots.)

3. Serve warm over toasted chaffles or cooked riced cauliflower. Enjoy!

Creamed Chicken and Vegetables over Chaffles
Nutritional Information per serving (1/4 recipe, no vegetables or optional ingredients): 221 calories, 0.5 g carbohydrates (0.1 g dietary fiber, 0.3 g sugars), 14.3 g total fat (7.6 g saturated fat, 0 g trans fat), 99 mg cholesterol, 223 mg sodium, 12 mg calcium, 182 mg potassium, 1 mg iron, 129 IU Vit A, 22.7 g protein. Net carbs per serving: 0.4 grams

Recipe and photos by Kathy Sheehan, copyright 2021
All rights reserved. Please do not duplicate without the author’s permission. 

Tuesday, March 16, 2021

Low Carb Corned Beef Hash

Low Carb Corned Beef Hash
Hash is an easy dish that is typically made with leftover meat and potatoes. In this spectacular recipe, I’ve used riced cauliflower in place of the potatoes and added some shredded cheese to help bind it together. The cheese will brown and get crispy during the cooking and give it an authentic texture. The result is very much like the real thing! I am so please with this recipe, I can’t wait to try it with leftover roast beef next time.

Low Carb Corned Beef Hash
Makes 2 servings

1 tablespoon avocado oil
4 ounces of leftover corned beef, cut into small cubes
2 tablespoons onion, chopped fine
2 ounces mild cheese (such as Monterey Jack), shredded
1-1/2 cup frozen riced cauliflower, thawed
3/4 tsp dried thyme
Salt and pepper to taste

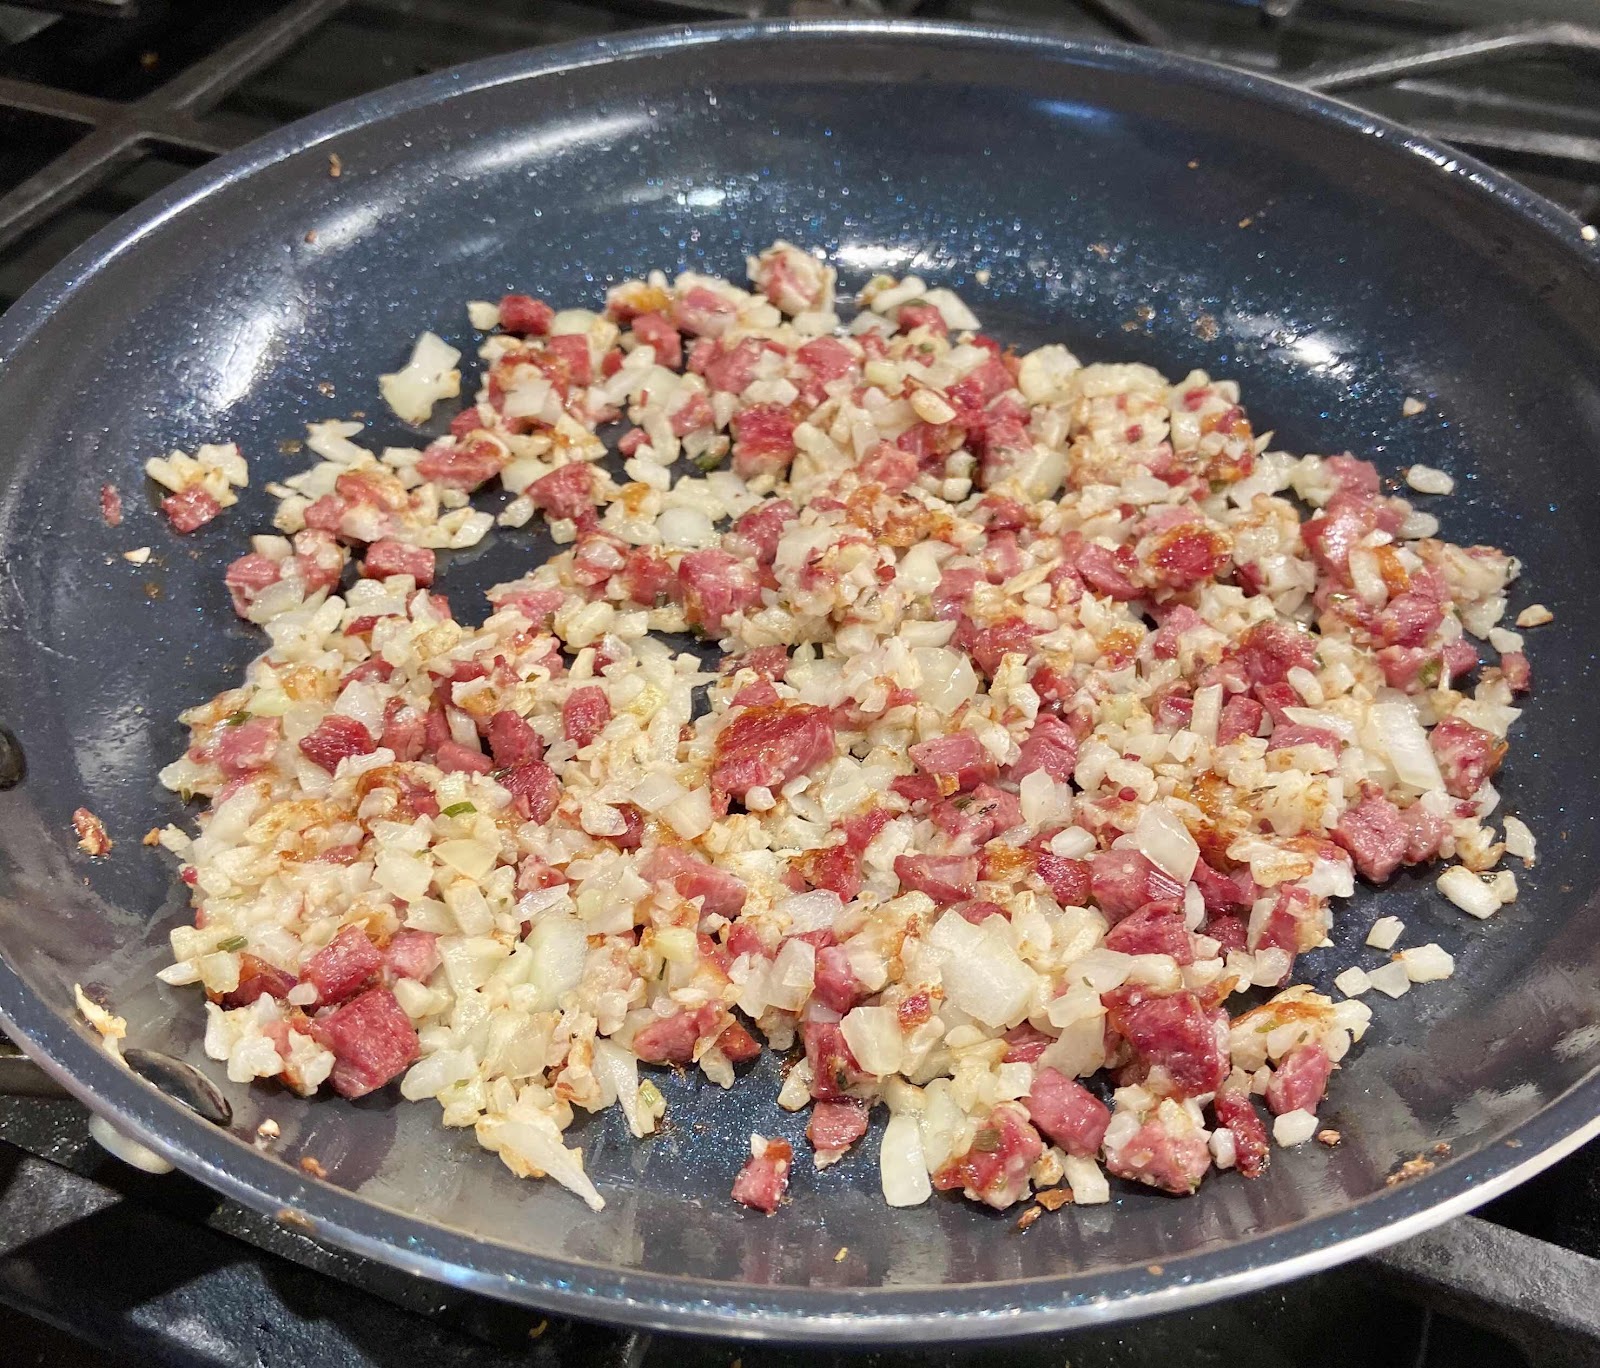
1. Add oil to a non-stick or well seasoned cast iron skillet and heat over medium heat. Add the chopped corned beef and onion and sauté until the onion is translucent, about 2-3 minutes.

2. Sprinkle the shredded cheese over the mixture and allow it to melted and start sizzling. Add the cauliflower and thyme to the pan, but do not stir until the cheese has begun to brown.

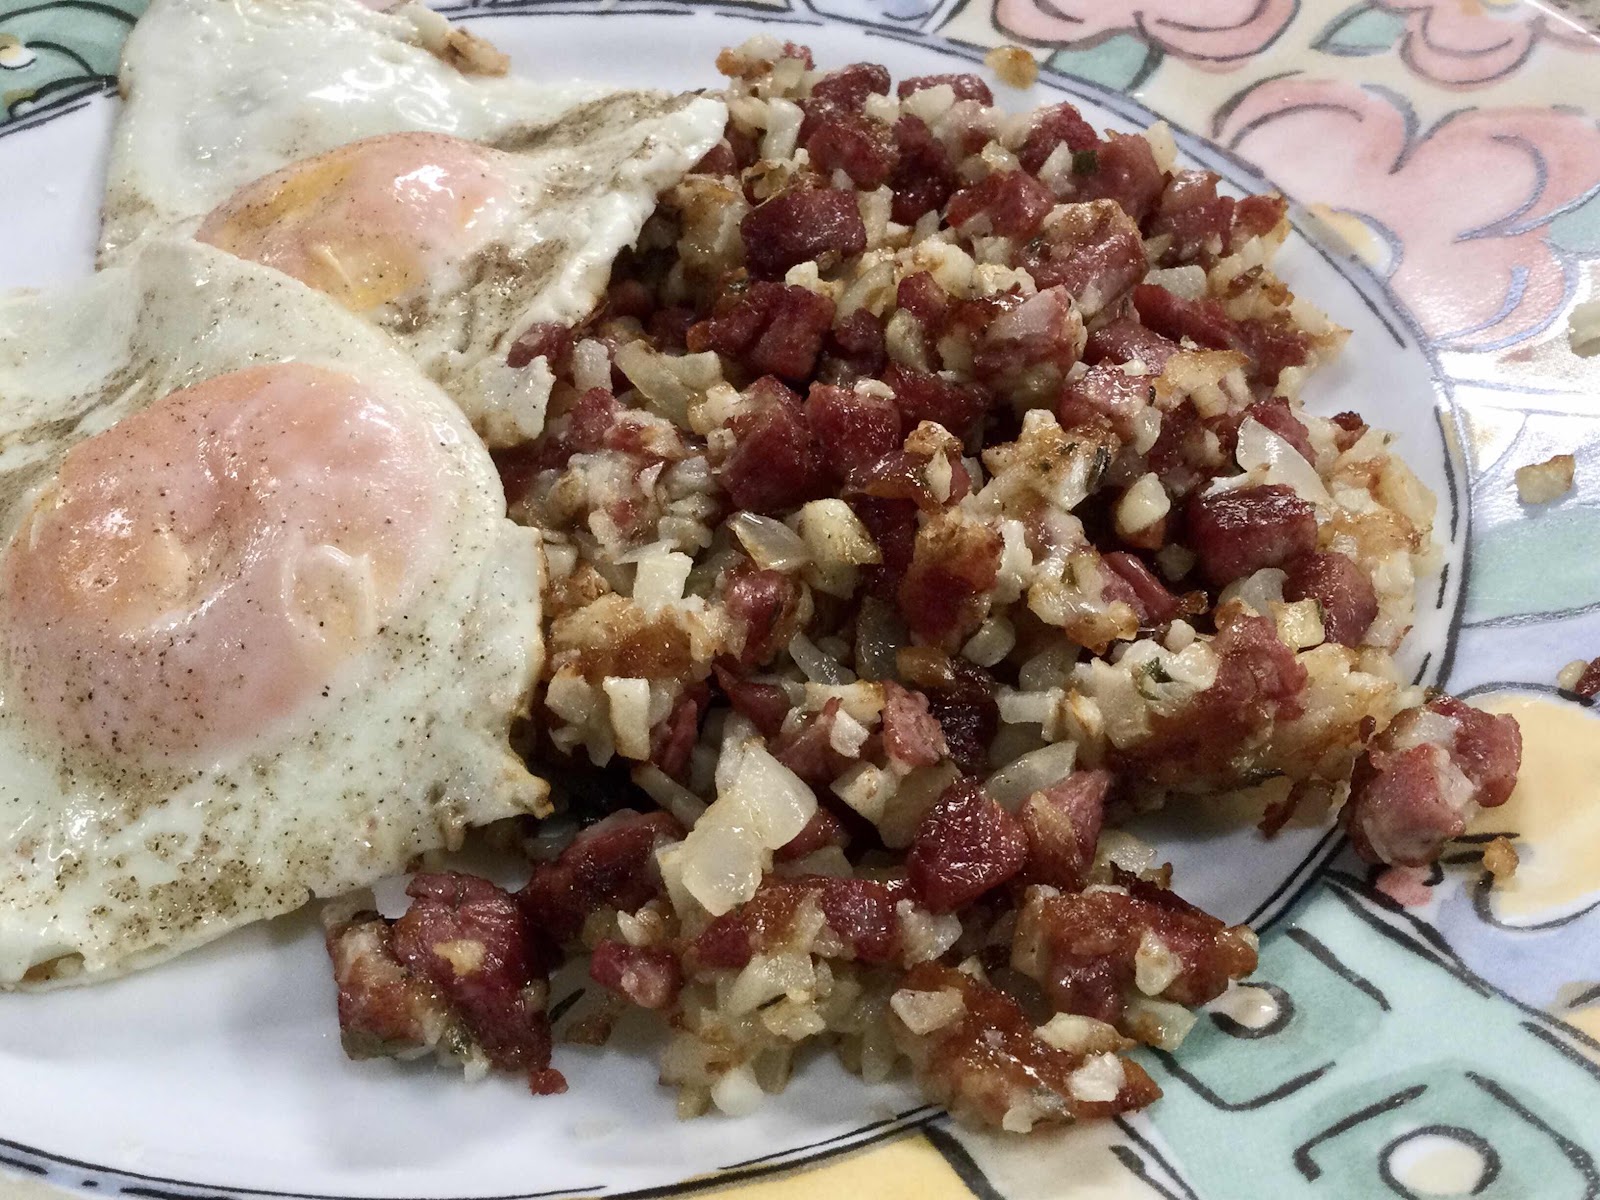
Corned Beef Hash made with riced cauliflower
3. With a spatula, turn the mixture over and stir, breaking up the cheese and incorporating it throughout the cauliflower and meat mixture. Press the mixture down with the back of the spatula into one layer and continue cooking for a few minutes, stirring and flipping occasionally, until the hash is nicely browned.

4. Season with salt and pepper to taste. Serve hot. Corned beef hash is excellent served with fried eggs!

Nutritional Information per serving (1/2 recipe): 241 calories, 4.8 g carbohydrate (1.8 g dietary fiber, 1.9 g sugars), 17.5 g total fat (7.5 g saturated fat, 0 g trans fat), 49 mg cholesterol, 789 mg sodium, 225 mg calcium, 18 mg potassium, 2 mg iron, 94 IU Vit A, 32 mg Vit C, 17.5 g protein. Net carbs per serving: 3 grams

Recipe and photos by Kathy Sheehan, copyright 2021
All rights reserved. Please do not duplicate without the author’s permission.
Saturday, August 8, 2020

Taco Salad with Quest Protein Chips

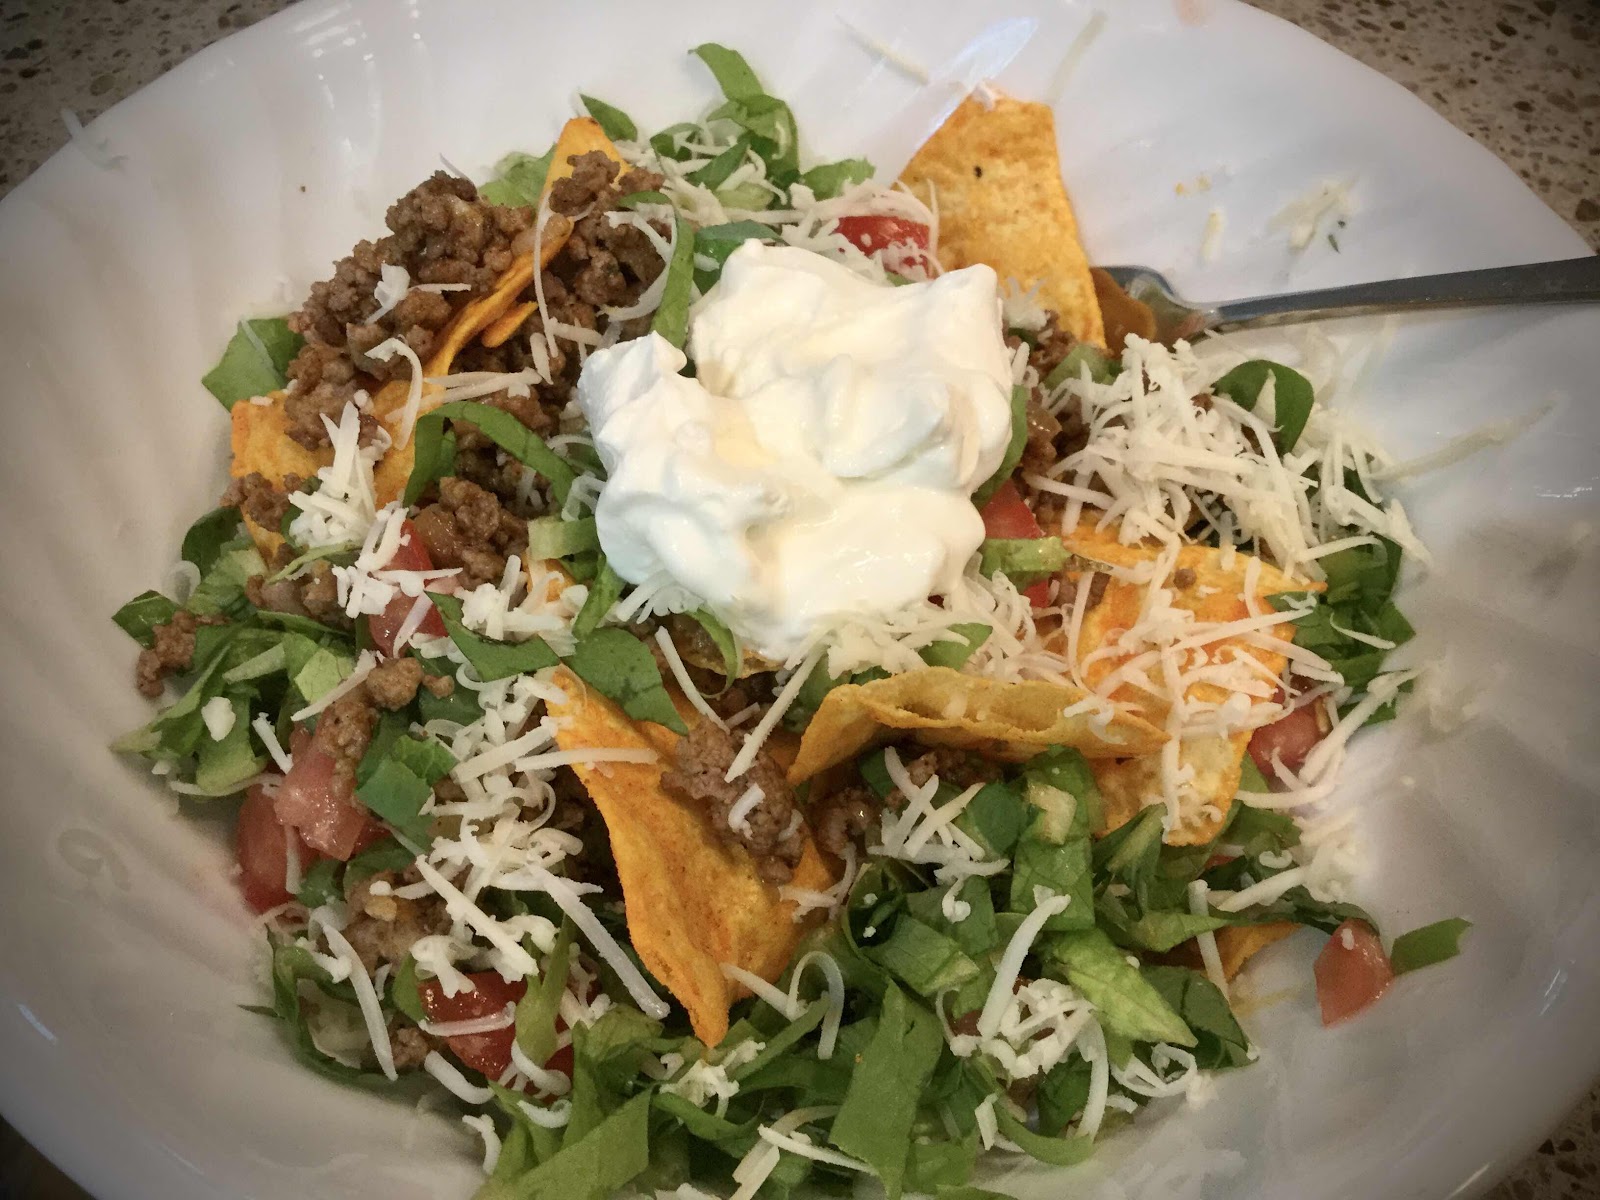
Taco Salad with Quest Protein Chips
Here’s an easy dinner that is entirely satisfying and tastes just like a higher carb version. The secret is to use Quest Protein Tortilla-Style Chips in place of corn tortilla chips (I chose Nacho Cheese flavor, but you can substitute your favorite). This delicious salad has become a hands-down favorite on my keto diet, especially when I don’t feel like cooking!
Taco Salad with Quest Protein Chips
Makes 1 serving

3 oz. ground beef
1-2 teaspoons taco seasoning, to taste
1 tablespoon water
1 tablespoon chopped onion
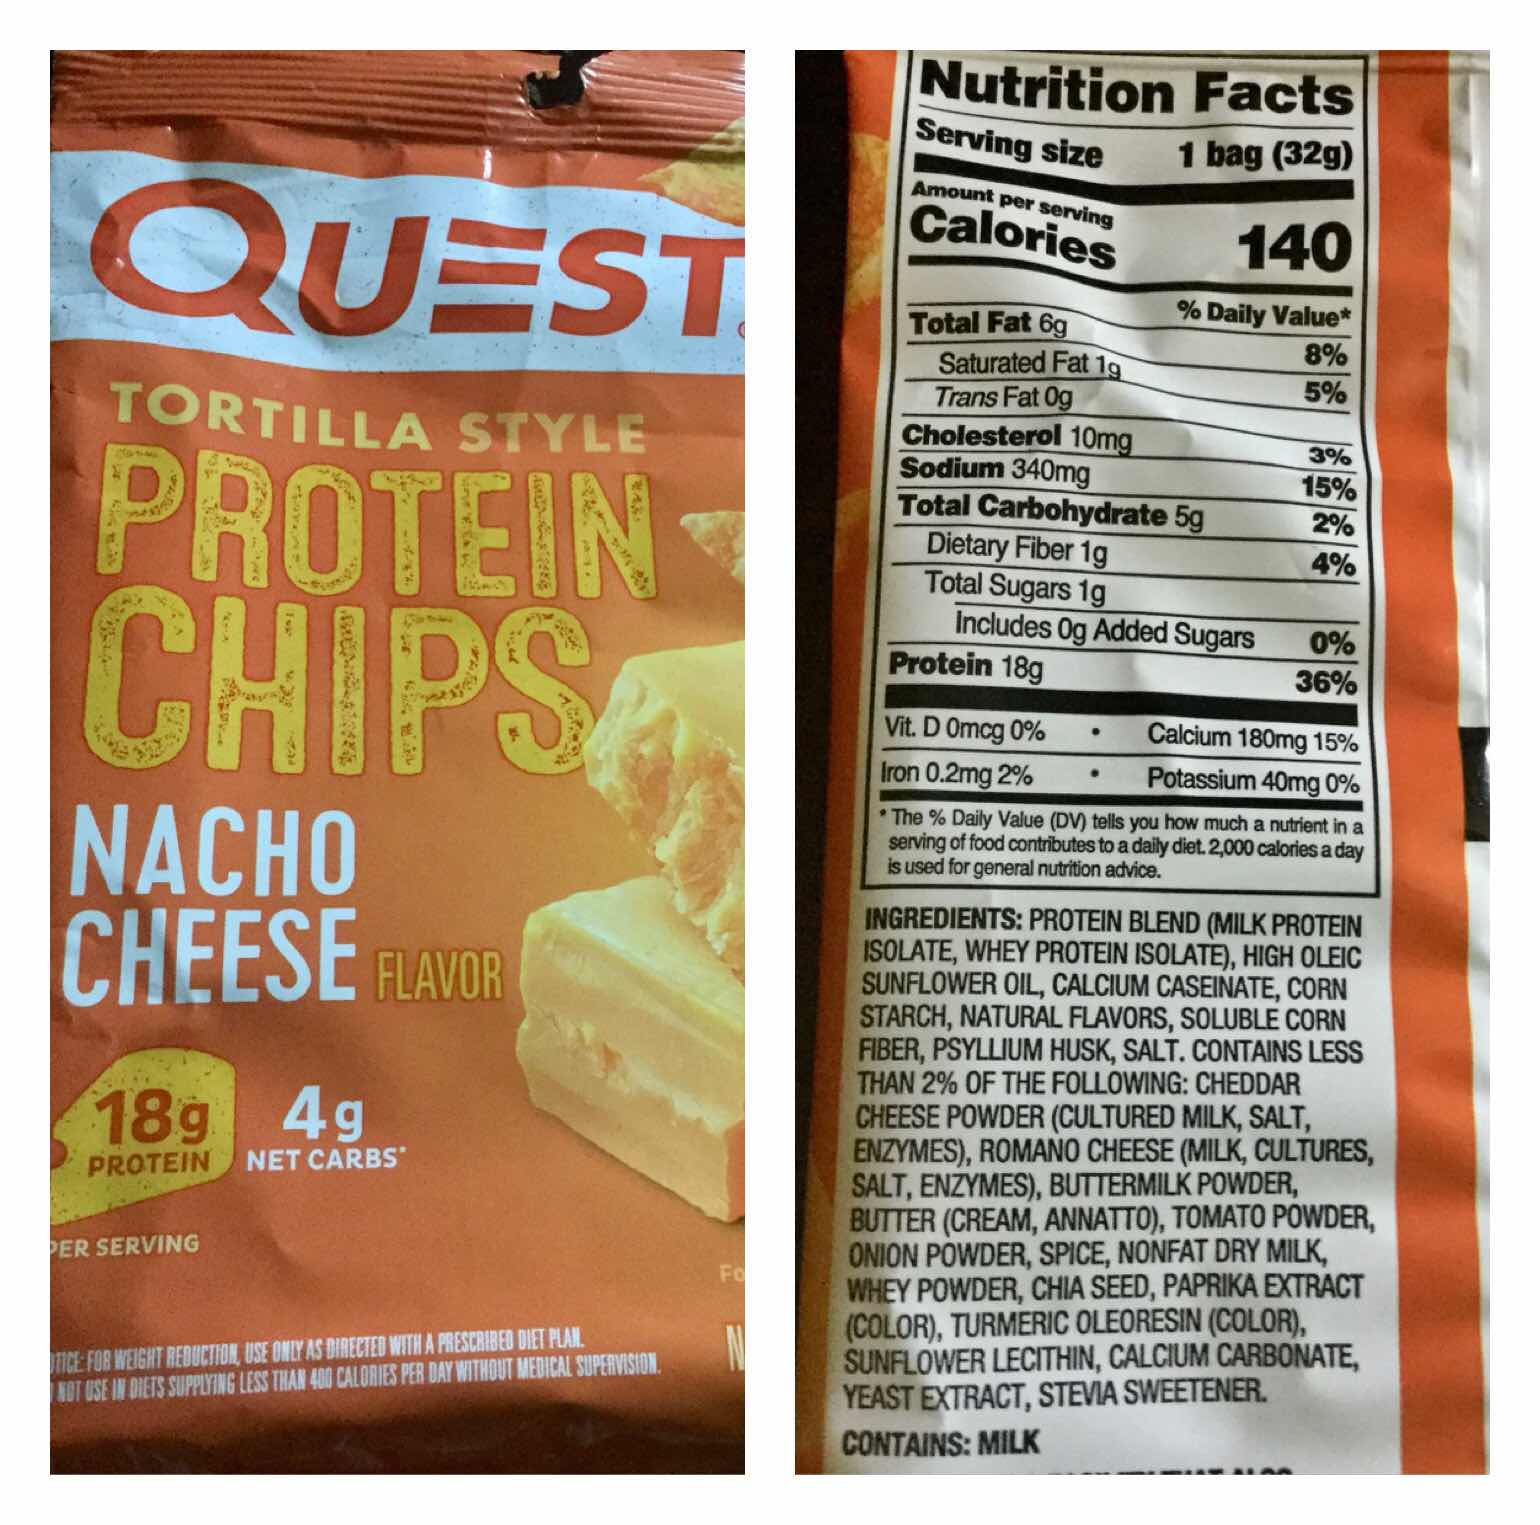
1 bag Quest Protein Tortilla-style Chips, Nacho Cheese (see image below)
1 cup lettuce, torn into bite-size pieces
1/4 cup chopped tomato
1/2 oz. shredded cheddar cheese
2 tablespoons sour cream

1. In a skillet over medium heat, brown the ground beef. Add the taco seasoning to taste. Add the water and chopped onion; stir to combine.

2. Pour the entire bag of Quest Protein chips into a large serving bowl. Top with the seasoned beef, lettuce, chopped tomato and shredded cheese. Dollop with sour cream and serve.

Quest Protein Chips
Nutritional Information: 445 calories, 9.6 g carbohydrates (2.2 g dietary fiber, 2.9 g sugars), 28.5 g total fat (12.2 g saturated fat, 0 g trans fat), 93 mg cholesterol, 498 mg sodium, 335 mg calcium, 505 mg potassium, 2 mg iron, 614 ug Vit A, 12 mg Vit C, 38.8 g protein. Net carbs per serving: 7.4 grams
Photos and recipe by Kathy Sheehan, copyright 2020
All rights reserved. Please do not duplicate without the author’s permission.