Showing posts with label pies. Show all posts

Tuesday, March 14, 2023

Low Carb Peanut Butter and Chocolate Mousse Pie in a Jar

Low Carb Peanut Butter and Chocolate Mousse Pie in a Jar
These grab-and-go dessert cups are the perfect size! They may look small, but they deliver BIG FLAVOR and are rich and decadent! And who doesn’t love the combination of peanut butter and chocolate?

Low Carb Peanut Butter and Chocolate Mousse Pie in a Jar
Makes 6 servings

Peanut Butter Crumb Crust (Bottom Layer):
¾ cup almond flour (or sunflower seed flour for lower oxalate)
2 tablespoons unsweetened peanut butter powder
1 tablespoon powdered erythritol sweetener (Confectioners sweetener)
A pinch of salt
1 teaspoon vanilla extract
2 tablespoons refined coconut oil, melted (or unsalted butter)

Chocolate Cream Cheese Mousse (Middle Layer):
4 ounces cream cheese, room temperature 
2 tablespoons butter, room temperature (use unsalted or salted, your preference)
1/4 cup creamy peanut butter, no sugar added
2 tablespoons unsweetened cocoa powder
2 tablespoons powdered erythritol sweetener 
15 drops Monkfruit Extract (or ½ teaspoon liquid stevia), or to taste
1½ teaspoons vanilla extract 
½ cup heavy cream
3 tablespoons sugar free chocolate chips, chopped (Such as Lily’s brand)

White Chocolate Peanut Butter Ganache (Top Layer):
1/3 cup heavy cream
1/3 cup sugar free white chocolate chips 
1/4 cup creamy peanut butter, no sugar added
4 drops Monkfruit Extract or stevia
½ teaspoon vanilla extract 

1. To make the Peanut Butter Crumb Crust: With a fork, mix together the almond flour, peanut butter powder, erythritol sweetener and salt in a medium bowl until no lumps remain (you may sift the mixture to easily remove lumps). Add the vanilla extract and melted coconut oil and stir with a fork until the mixture is coated and resembles coarse crumbs. Divide equally between six small jelly jars (4 oz) or serving dishes (about 2 generous tablespoons in each jar). Gently press down to create an even layer; set aside.

2. To make the Chocolate Cream Cheese Mousse: Add the room temperature cream cheese, butter, and peanut butter to a mixing bowl. With a hand-held or standing mixer, whip on high until the mixture is well combined and smooth. Add the cocoa powder, powdered sweetener, Monkfruit extract drops or stevia, vanilla extract, and heavy cream. Beat until the mousse is quite fluffy and smooth. Taste and adjust sweetening, if needed. Fold in the chopped, sugar-free chocolate chips. Divide the mousse equally between the six jars or serving dishes. 

Layers of dessert cup
3. To make the White Chocolate Peanut Butter Ganache: Microwave the heavy cream in a heat-proof measuring cup or bowl until hot and bubbly around the edges (about 20-30 seconds on high) or heat in a small saucepan over medium heat, if not using a microwave. Pour the hot cream over the white chocolate chips in a bowl and allow to stand for several minutes. Whisk until smooth. Add the 1/4 cup peanut butter, Monkfruit extract or stevia drops, and vanilla. Whisk until the peanut butter is melted and the ganache is smooth.

4. While warm, pour the ganache over the chocolate mousse layer, dividing the ganache evenly among the six containers. Place the dessert cups into the refrigerator to set for two hours before serving.

5. To serve, you may garnish with optional whip cream, chopped chocolate, or chopped peanuts. Enjoy!
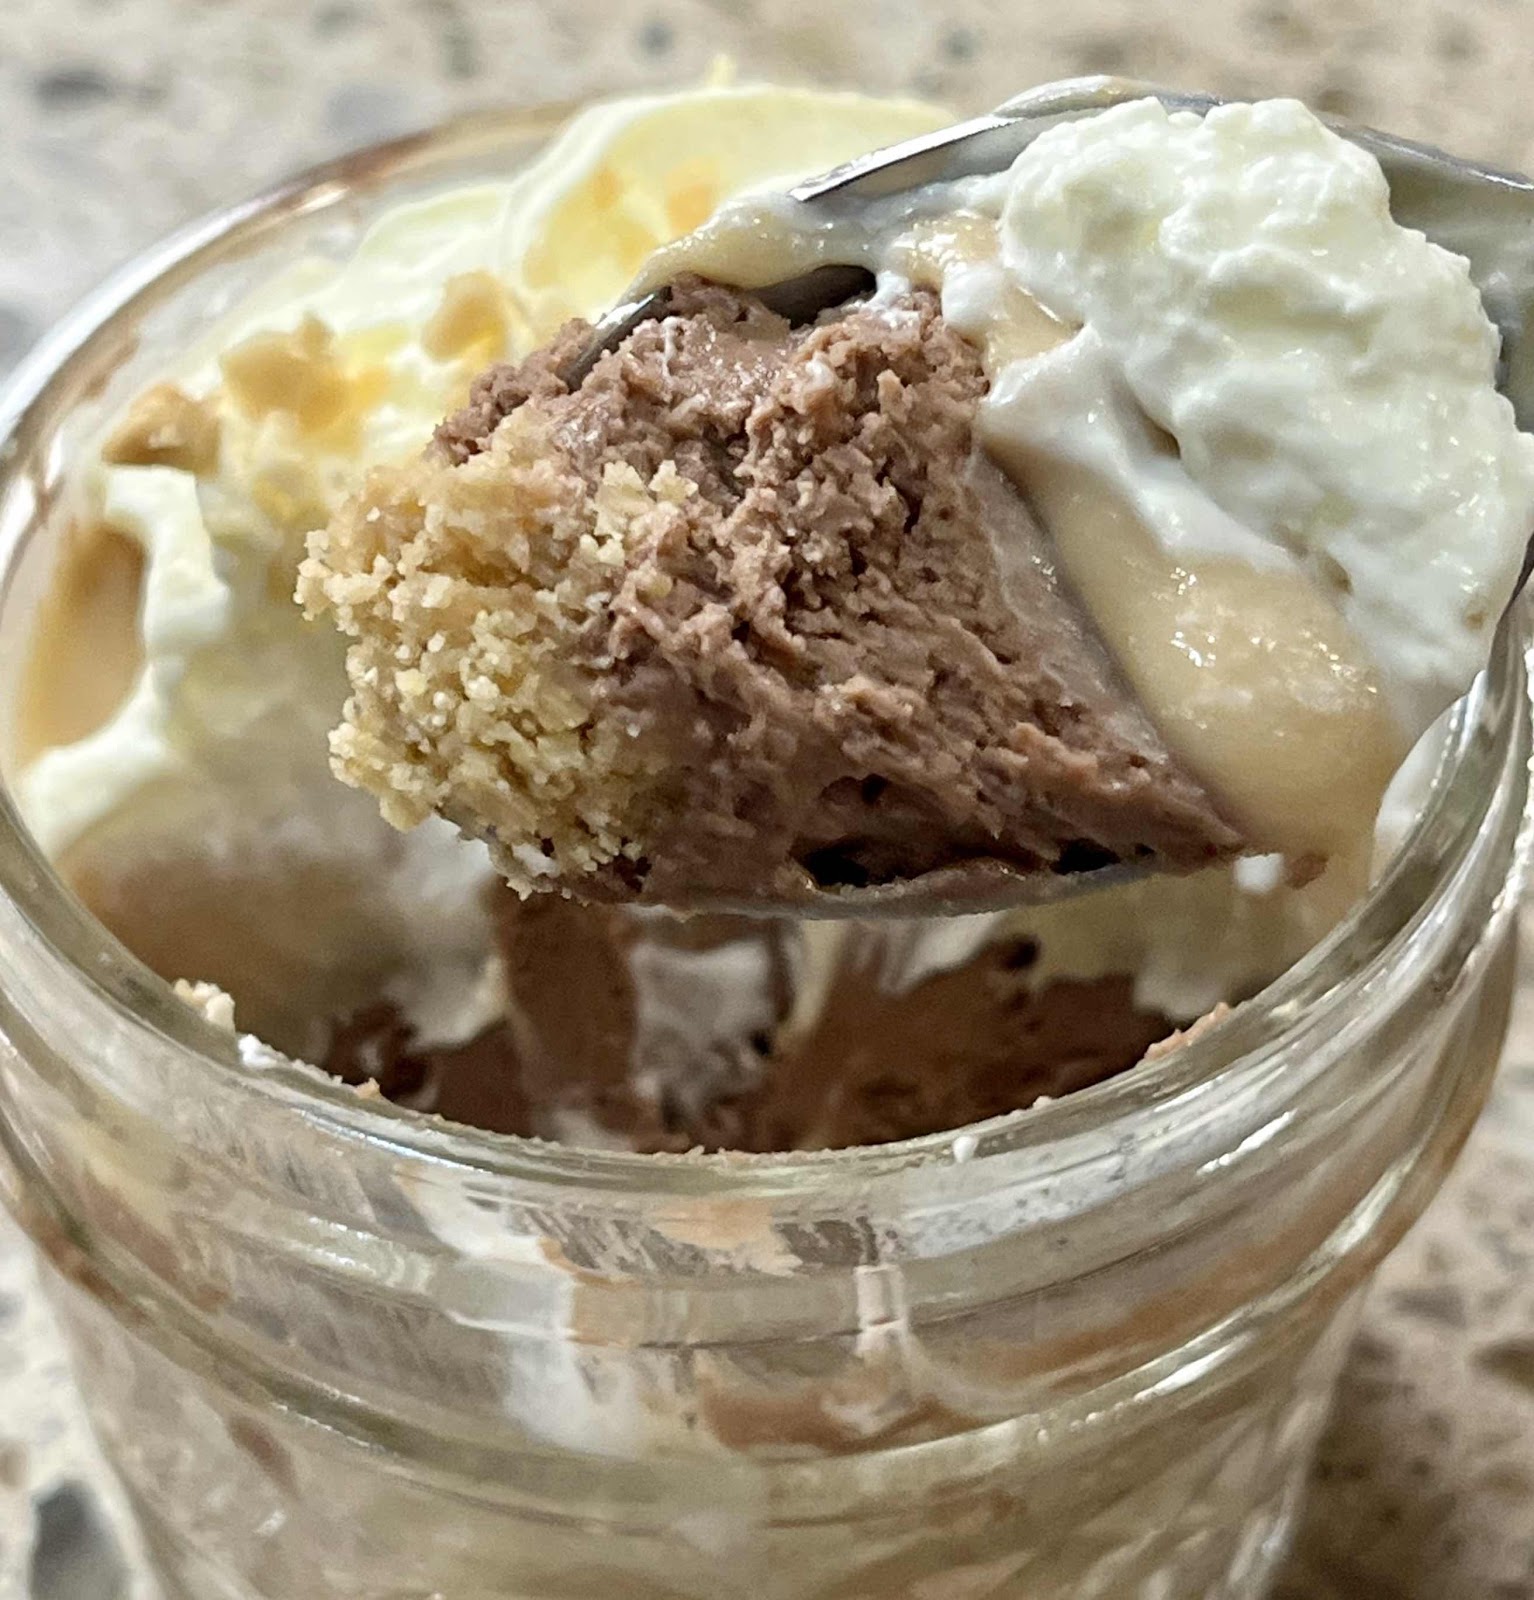
See pie layers in a spoonful
Nutritional Information per serving: 457 calories, 9.7 g carbohydrate (4 g dietary fiber, 1.7 g sugars, 2 g sugar alcohols), 44.2 g total fat (21.1 g saturated fat, 0 g trans fat), 79 mg cholesterol, 119 mg sodium, 24.8 mg calcium, 56 mg potassium, 228 IU Vit A, 1 mg iron, 8 g protein. Net carbs per serving: 5.7 grams

Recipe and photos by Kathy Sheehan, copyright 2023
All rights reserved. Please do not duplicate without the author’s permission.

Monday, January 2, 2023

Low Carb Coconut Custard Pie (or Pudding)

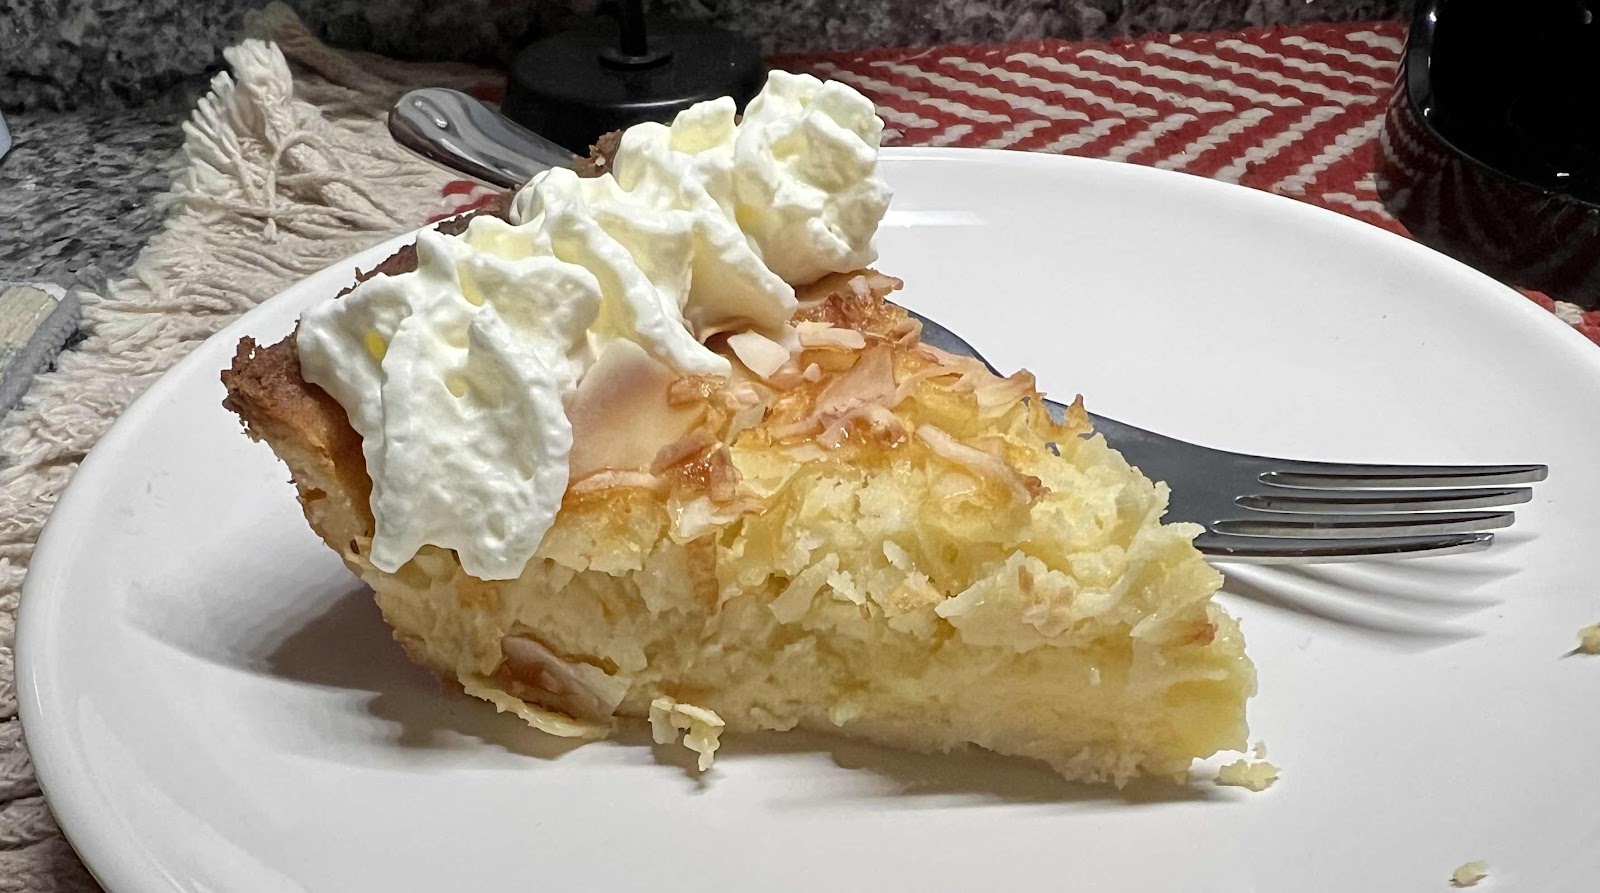
Low Carb Coconut Custard Pie
My husband recently requested Coconut Custard Pie for a special dessert. It wasn’t difficult to remake a traditional Coconut Custard Pie recipe substituting low-carb ingredients. The result was spectacular! This pie can be made using your favorite low-carb piecrust, or it can be eaten as a pudding without a crust to save even more carbs. Topped with whipped cream, this is indeed a special dessert!

Low Carb Coconut Custard Pie (or Pudding)
Makes 10 servings

3 eggs, room temperature 
½ cup unsalted butter, cubed then allowed to softened slightly
1/8 teaspoon salt
½ cup allulose
1/4 cup powdered erythritol-based sweetener 
1 tablespoon coconut flour
½ teaspoon xanthan gum
1 cup low carb, unsweetened milk of choice (coconut milk works nicely in this recipe)
1 cup + 3 tablespoons flaked, unsweetened coconut
¾ teaspoon vanilla extract
One 9” low carb pie crust (your favorite recipe), par-baked for 15 minutes (optional)
Whipped Cream for serving (optional)

1. Preheat the oven to 350°F. In a large bowl, beat the eggs lightly. Cut the butter into small cubes and add to the bowl along with the salt and sweeteners. Set an electric mixer to medium speed and mix until blended. The mixture will be lumpy because of the butter, which is normal.

2. Add in the coconut flour and xanthan gum, and blend again. Add the milk, and blend again.

3. Stir in the 1 cup of unsweetened flaked coconut and vanilla. Pour the coconut custard into a buttered pie dish or a par-baked pie crust. Top with the remaining 3 tablespoons of coconut.

4. Bake on a baking sheet for 45 to 50 minutes, until firm. Let the pie cool for one hour before slicing and serving. Top with whipped cream, if desired.

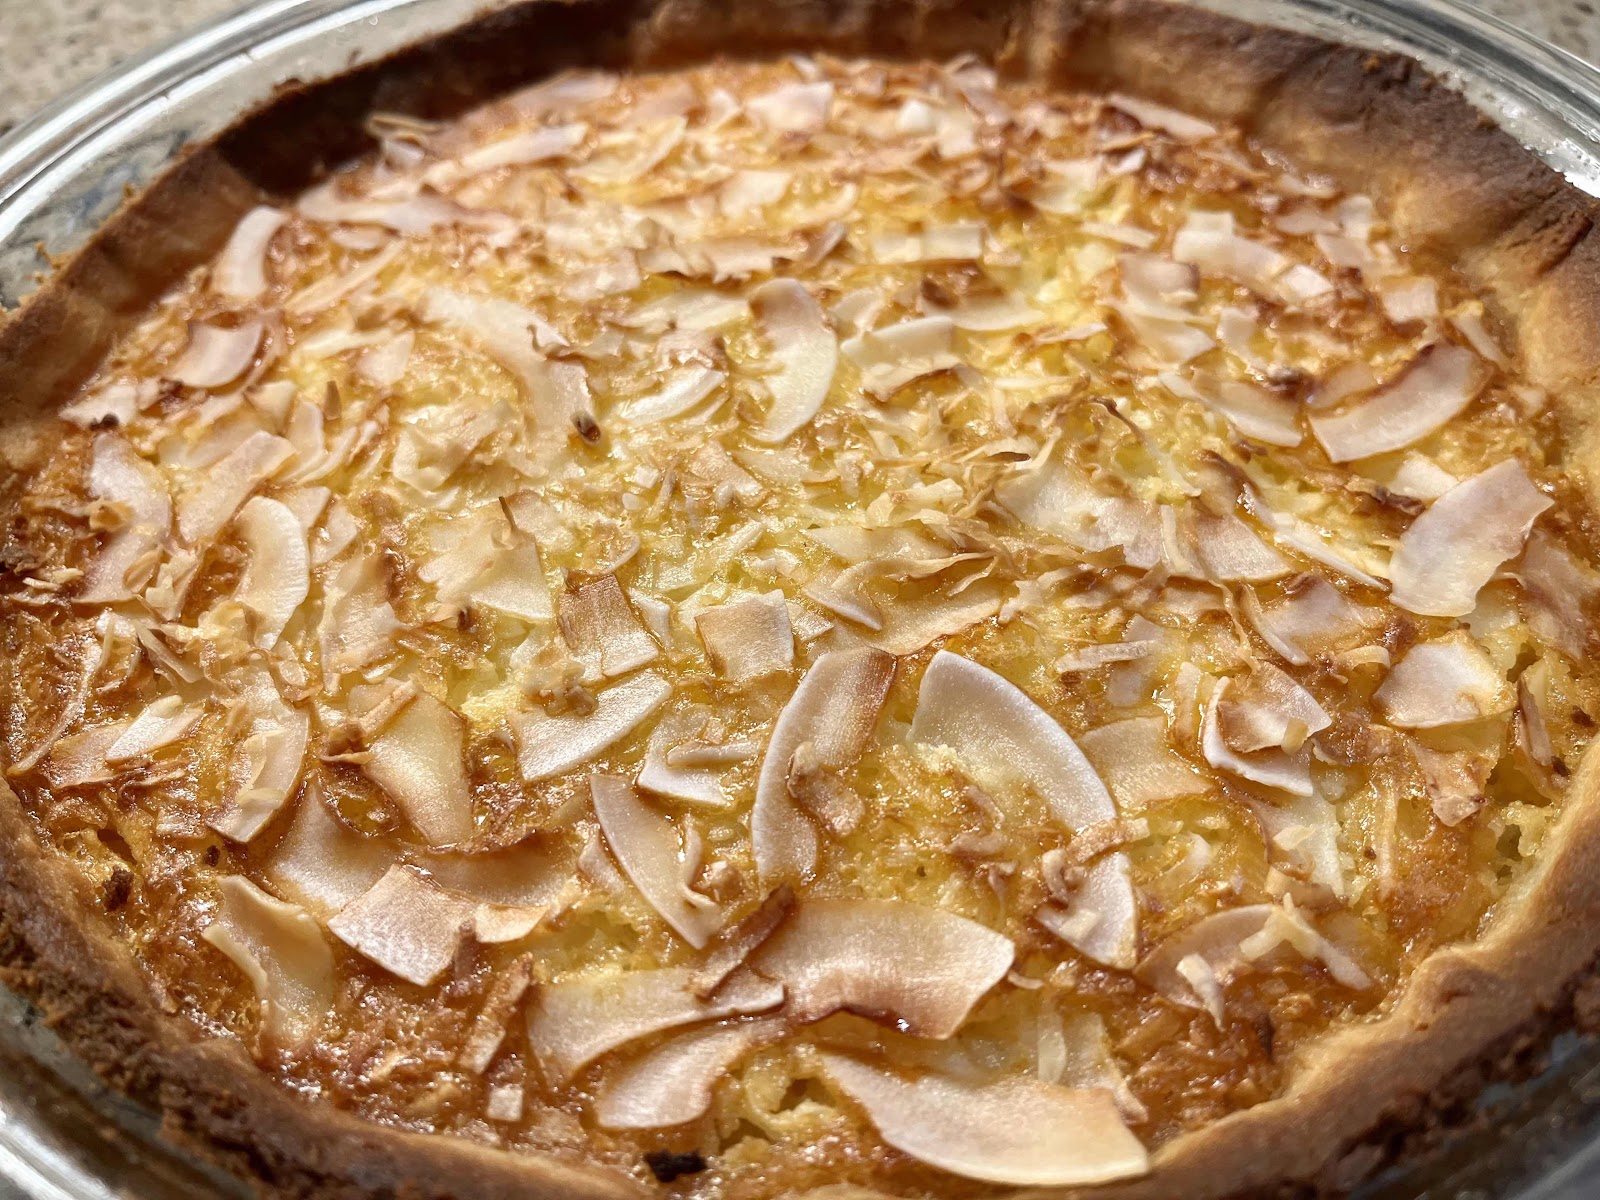
Baked Low Carb Coconut Custard Pie
Nutritional Information for Filling (no crust), 1/10th of recipe: 177 calories, 4.3 g carbohydrate (1.5 g dietary fiber, 0.4 g sugars, 1.5 g sugar alcohols), 17.2 g total fat (12.2 g saturated fat, 0 g trans fat), 80 mg cholesterol, 30 mg sodium, 21.2 mg calcium, 24 mg potassium, 124 IU Vit A, 2.8 g protein. Net carbs per serving (not counting optional crust): 2.8 grams

Photos and recipe by Kathy Sheehan, copyright 2023
All rights reserved. Please do not duplicate without the author’s permission. 
Thursday, December 9, 2021

Keto Graham Cracker Pie Crust

Keto Graham Cracker Pie Crust
There are a lot of great keto pie crust recipes out there. But I haven’t found one that has a true graham cracker crust taste and texture, until now! By substituting keto cinnamon toast cereal for the graham crackers, you will be amazed how this recipe has the same flavor as one made with real graham crackers. Don’t forget this game-changing tip next time you need a graham cracker crust for a pie or cheesecake!

Keto “Graham Cracker” Pie Crust
Makes one 9” pie crust

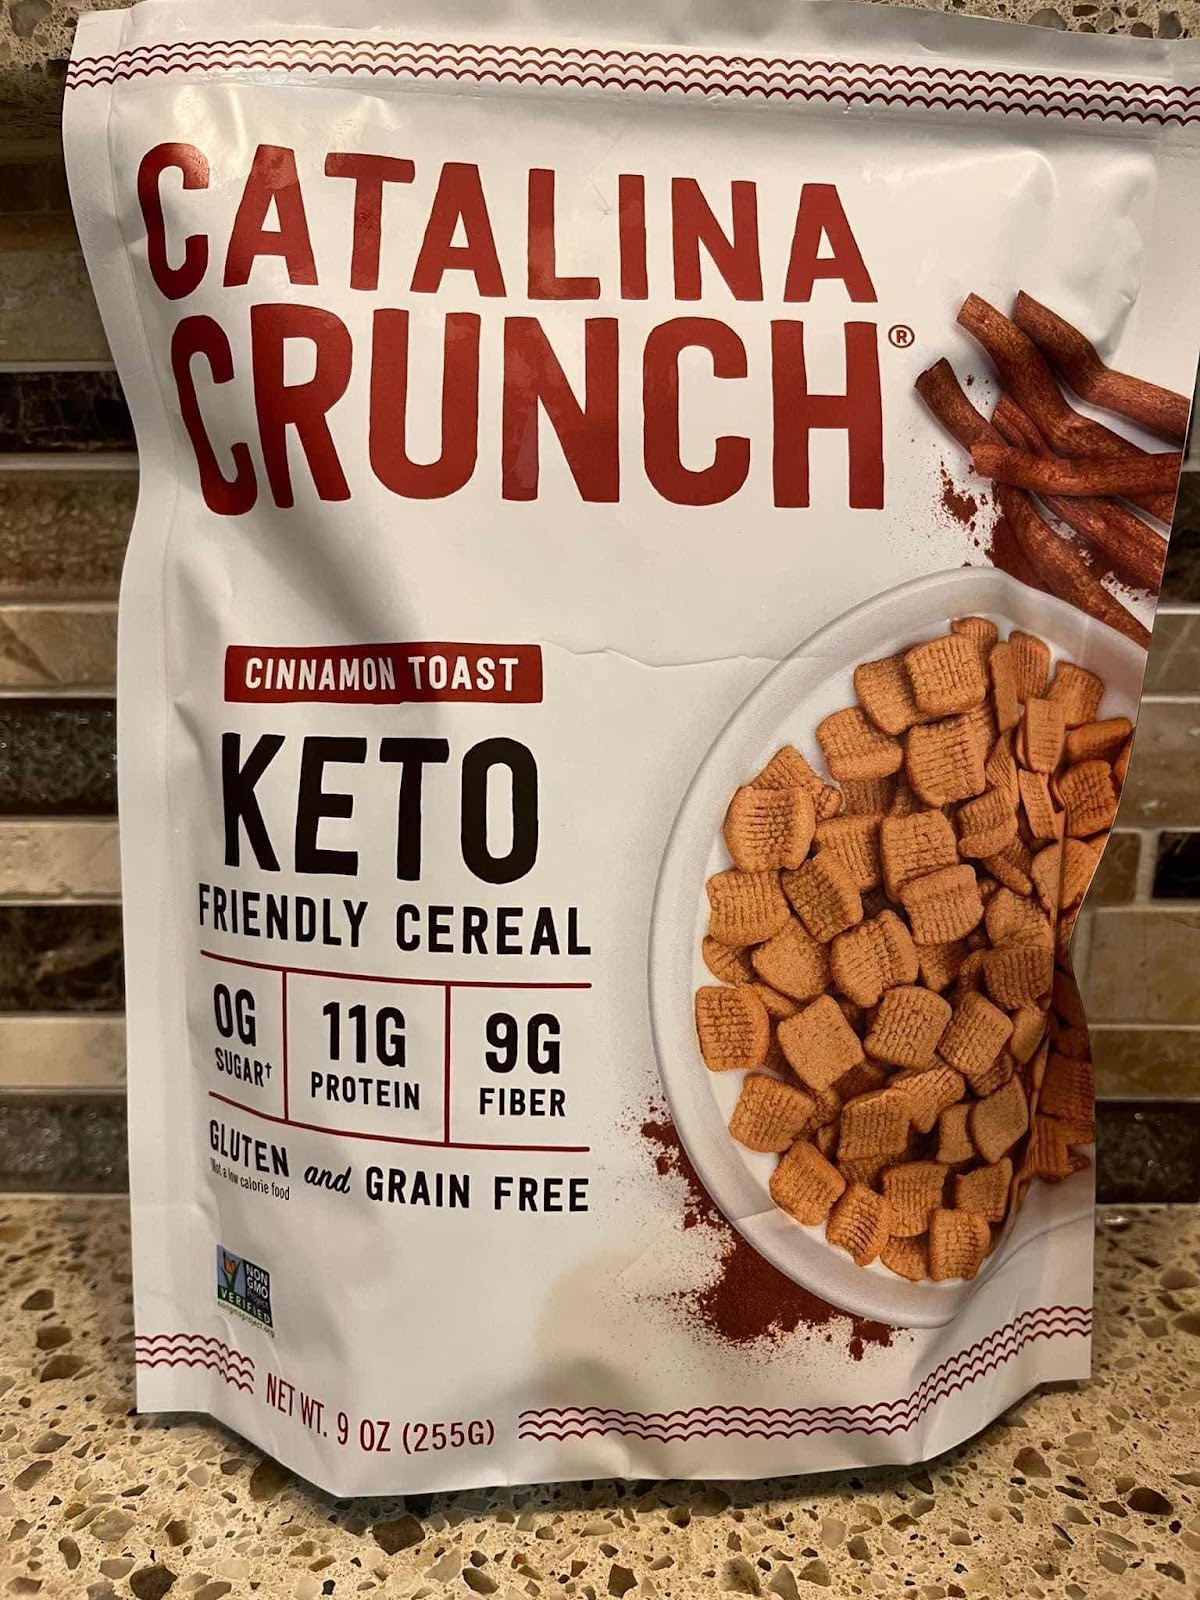
2 cups crushed Catalina Crunch Cinnamon Toast Keto Cereal (or substitute their chocolate cereal for a chocolate crust)*
6 tablespoons unsalted butter, melted

Catalina Crunch Keto Cereal
1. Preheat the oven to 350°F.

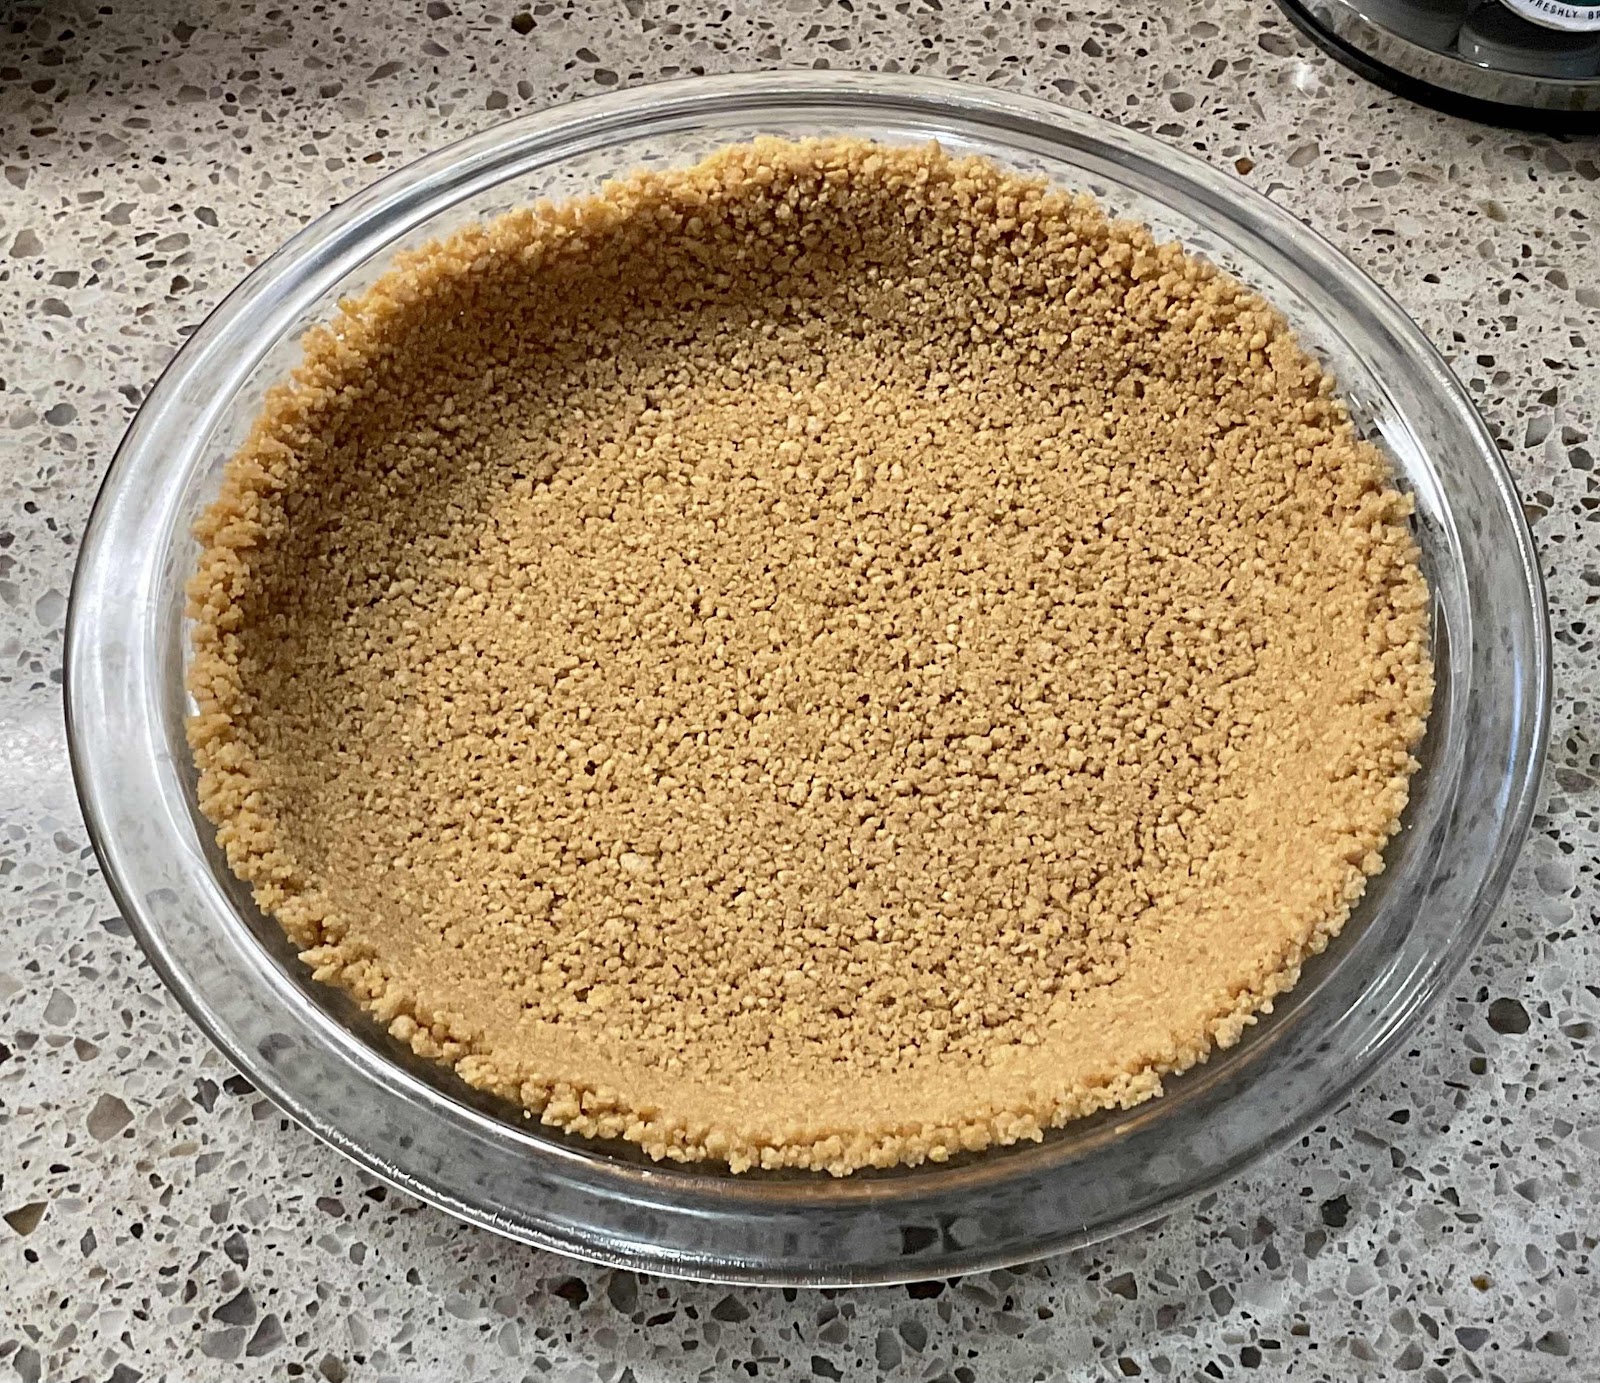
2. Pulse the cereal in a food processor until very fine crumbs, almost a powder. Measure crumbs. You want to have 2 cups of crumbs; transfer to a medium bowl. Mix cereal crumbs and melted butter in the bowl until the mixture looks like wet sand.

3. Pour crumb mixture into a 9-inch pie pan and use the back of a measuring cup or large spoon to press it firmly in the bottom of the pan and a little bit up the sides.

4. Bake for 10 minutes. Remove from oven and allow to cool. The crust will be delicate while still hot from the oven. It will set up as it cools.

*Notes: You can use any flavor or brand of keto cereal to make a pie crust. 

Make ahead instructions: This crust is a great make ahead recipe. You can prep the crust 1 to 2 days ahead of time and store it in the refrigerator until ready to use. 

Freezing instructions: Prepare the crust and do not bake it. Cover it well and freeze for 2 to 3 months. Allow to thaw completely before baking and filling.

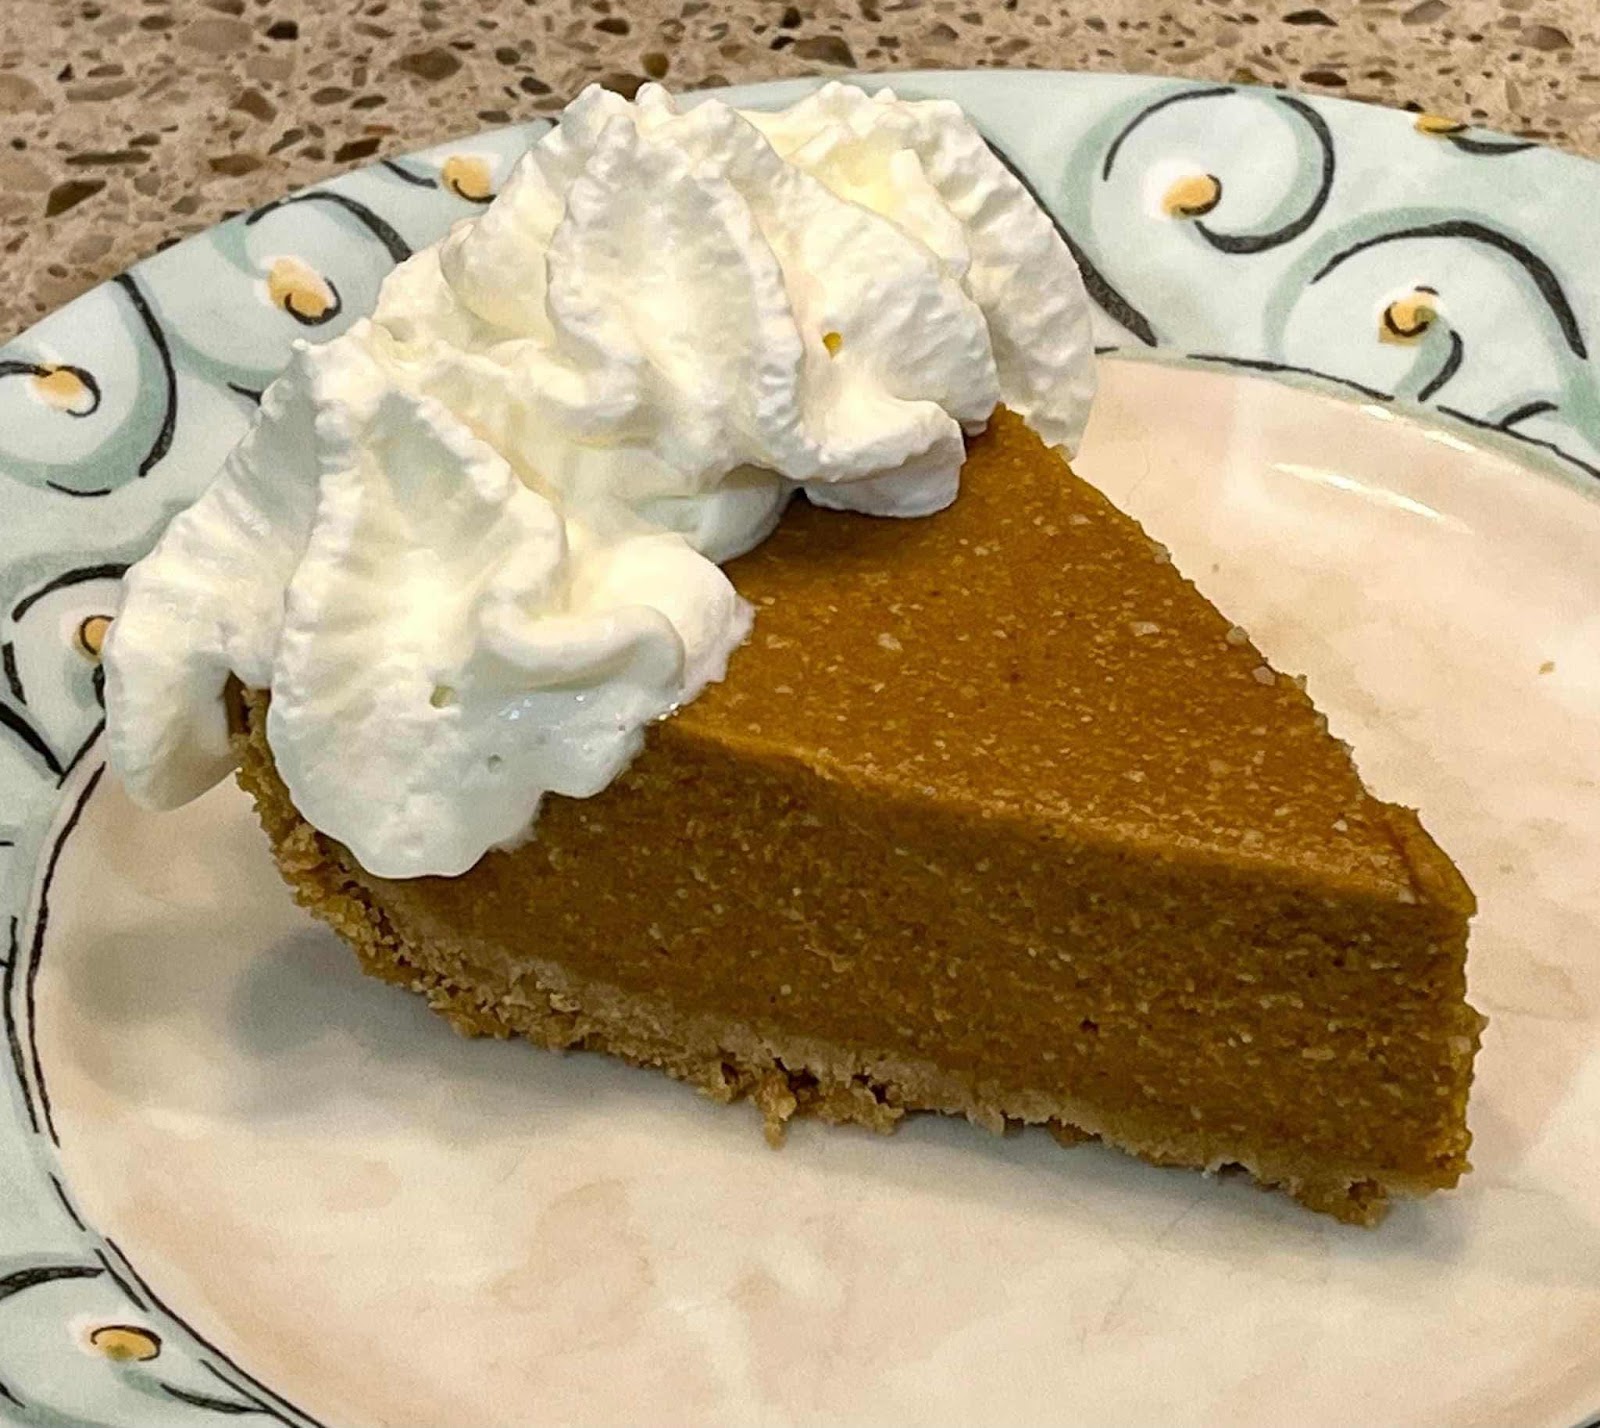
Sugar Free Pumpkin Pie with Keto Graham Cracker Crust
Nutritional Information per serving made with Catalina Crunch Keto Cereal (1/12th of recipe): 88 calories, 4.7 g carbohydrate (3 g fiber, 0.1 g sugars), 7.4 g total fat (3.8 g saturated fat, 0 g trans fat), 15 mg cholesterol, 37 mg sodium, 18.4 mg calcium, 12 mg potassium, 1 mg iron, 53 IU Vit A, 3.7 g protein. Net carbs per serving: 1.7 grams

Photos and recipe by Kathy Sheehan, copyright 2021
All rights reserved. Please do not duplicate without the author’s permission. 
Tuesday, May 12, 2020

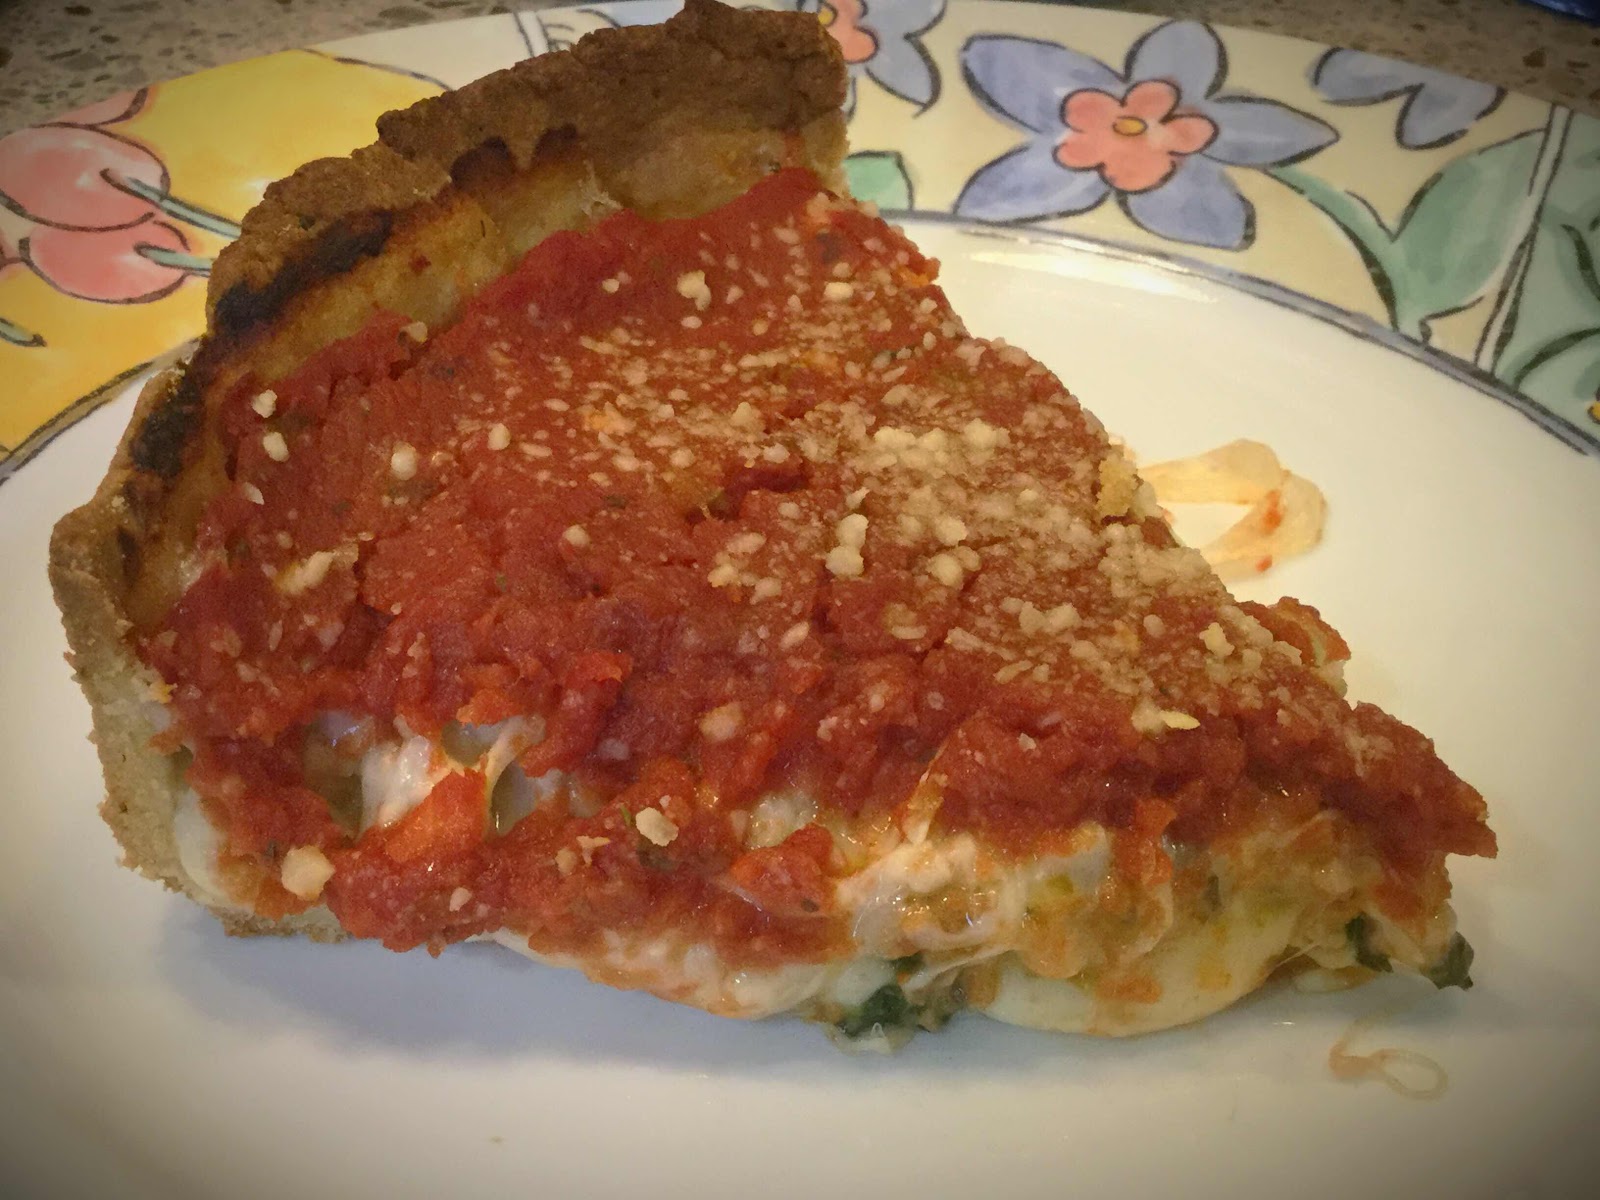
Low Carb Deep Dish, Chicago-Style Sausage Pizza

Low Carb Deep Dish, Chicago-style Pizza
This is one of the most outstanding recipes I’ve ever made and tastes so much like the real thing, no one will be able to tell it’s low carb and gluten free. The dough comes together quickly in a food processor and really holds up during the baking process. The result is a crisp crust overflowing with gooey, melted cheese, savory Italian sausage and tangy tomato sauce in every bite. Believe me, if you like Uno’s Pizza, you and your family will be delighted with this copy-cat recipe. Fill the pizza with any fillings you desire to make it your own.

Low Carb Deep Dish, Chicago-Style Sausage Pizza
Makes 6 servings

Sauce:
26 oz. box of Pomi chopped tomatoes, drained of excess liquid (yields about 1 1/4 cup)
3 cloves garlic, minced
3/4 teaspoon dried oregano
1/4 teaspoon salt (or to taste)

Pizza Crust:
3/4 cup almond flour
3 tablespoons Keto Birch Benders Pancake Mix (or more almond flour)
1/4 cup coconut flour
1 tablespoon psyllium husk powder (I use this Terrasoul brand)
1 teaspoon baking powder
1/4 teaspoon salt
3/4 teaspoon dried Italian herb seasoning
3 tablespoons olive oil (or avocado oil)
1 large egg
3 tablespoons cold water
2 tablespoons grated Parmesan cheese (for dusting inside of pan)

Filling:
6 ounces provolone cheese, sliced
1 pound Italian pork sausage
Sliced black olives (optional)
Sliced mushrooms, heated in skillet until they release their moisture (optional)
6 ounces mozzarella, shredded (whole milk cheese melts better!)

Topping:
3/4 cup grated Parmesan cheese

1. Preheat the oven to 350 degrees Fahrenheit. Grease a 9-inch springform pan very well and sprinkle with 2 tablespoons of finely grated Parmesan cheese, moving the pan around until the bottom and sides are coated; set aside.

2. If using mushrooms, heat over medium heat in a dry skillet until the mushrooms have released their moisture; remove to a bowl and set aside. Remove the sausage from their casings and sauté in the same skillet, breaking up into crumbles, until just cooked through. Drain on a plate that has been lined with several layers of paper towels to remove excess fat; set aside. 

3. Pour the chopped tomatoes into a fine-mesh strainer that has been placed over a bowl to catch excess liquid. Drain, stirring occasionally with a spoon, until most of the liquid has been removed. You want a thick, chunky sauce. Place the tomato sauce into a bowl and add the garlic, oregano and salt; stir to combine and set aside. (Discard or store the drained liquid in the refrigerator for another use.) 

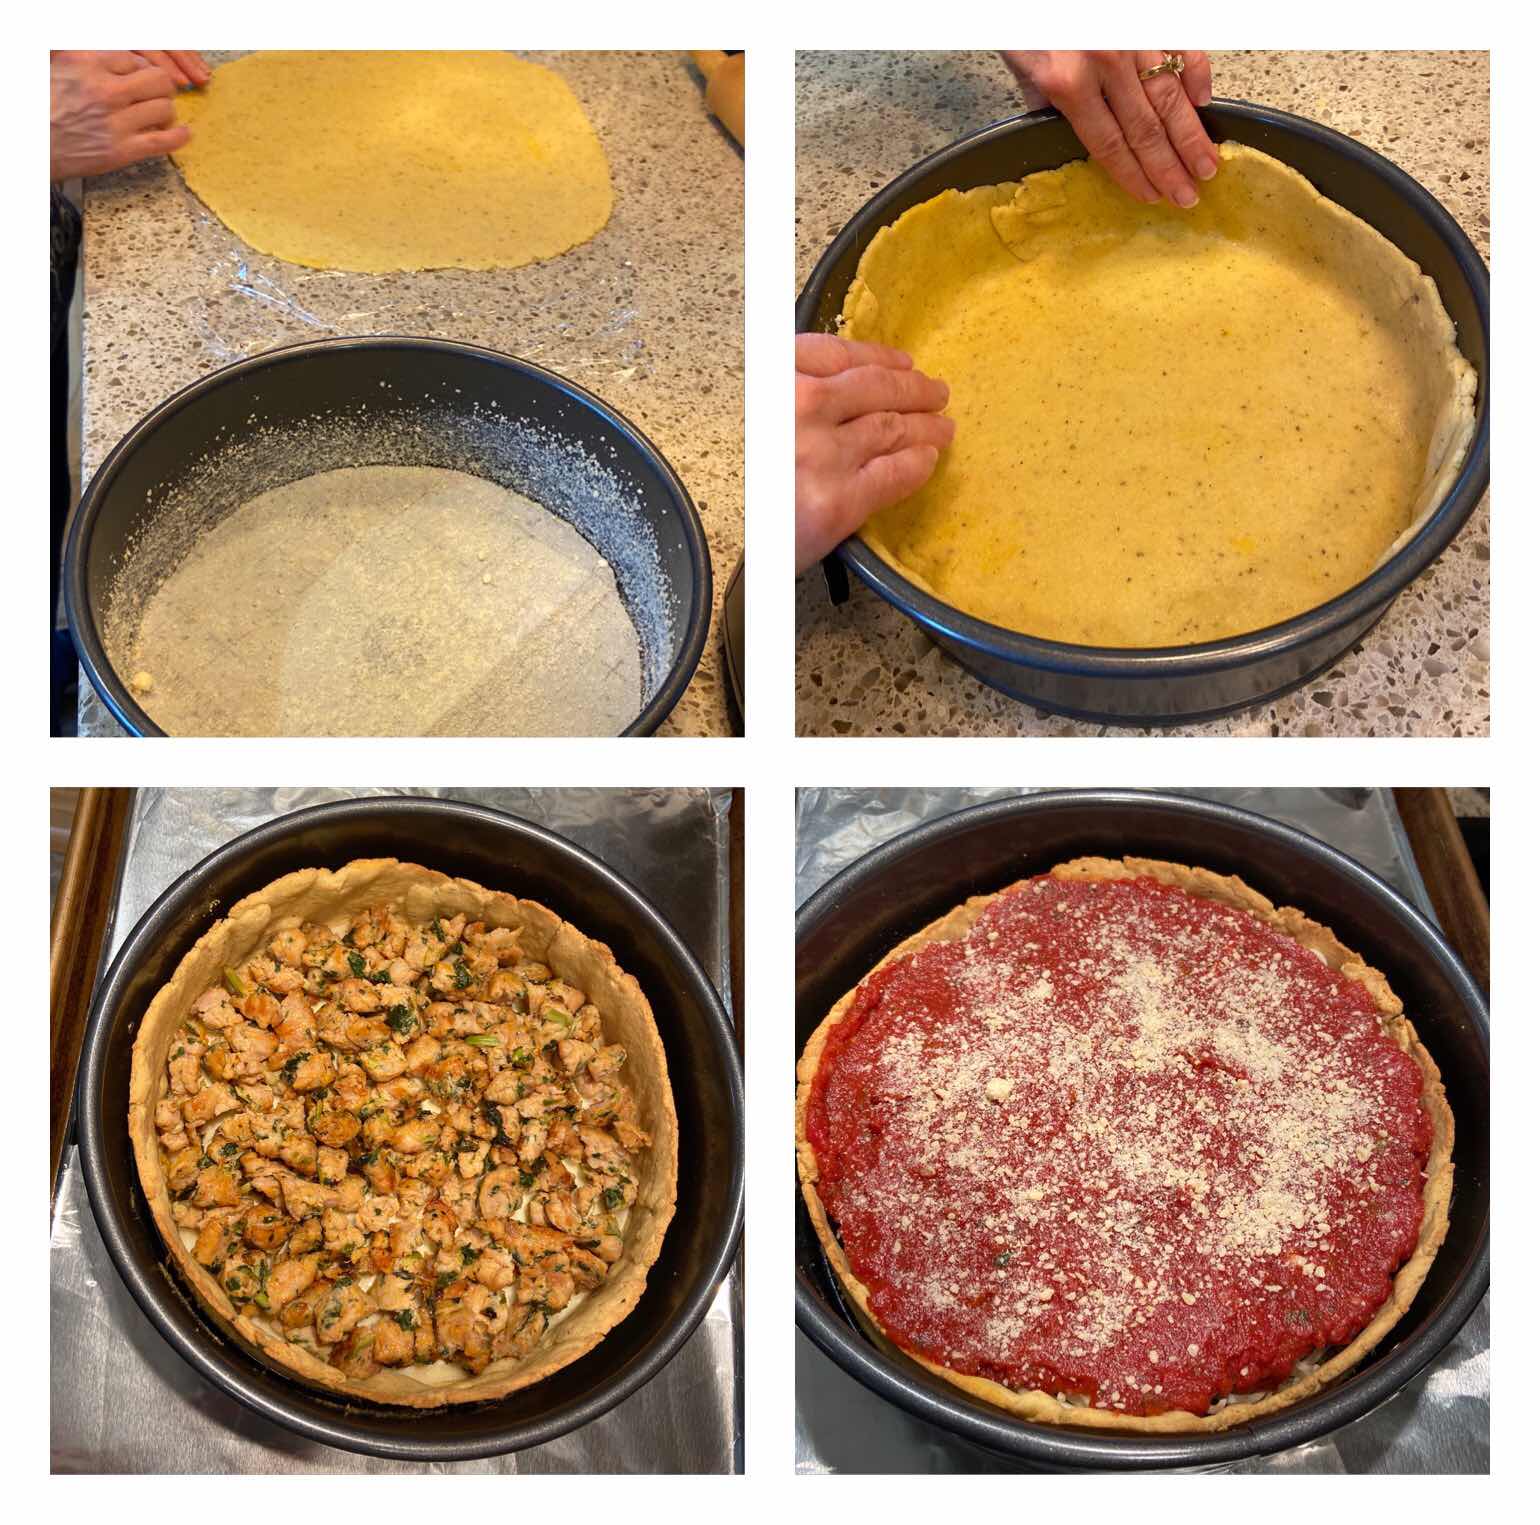
4. Place the dry ingredients for the crust into the food processor and pulse to combine. Add the olive oil, egg and water and process on low until the dough comes together and forms into a ball. Roll the dough out between two pieces of plastic wrap (or parchment paper) into a 12-inch circle. Remove the top piece of plastic wrap and turn the dough into your prepared springform pan, dough side down. Remove the remaining layer of plastic wrap and then, with your fingers, gently press the dough into the pan. “Cut and paste” the dough evenly in the pan and part way up the sides (just tear and press where needed). Once the dough is pressed into the pan, prick the bottom with a fork.

5. Pre-bake the crust in the preheated 350 degree oven for 15 minutes. Remove the crust from the oven and allow to cool for a few minutes before filling. Meanwhile, increase the oven temperature to 410 degrees.

6. Into the pre-baked crust, put down a layer of sliced provolone cheese to cover the entire bottom of the crust. Spread the cooked sausage and any other optional fillings you desire on top of the provolone cheese in an even layer. Next, add a layer of shredded mozzarella over the fillings. Top the layer of shredded cheese with the drained and seasoned chunky tomato sauce, spreading with the back of a spoon to cover the cheese layer entirely. Finally, sprinkle the sauce with 3/4 cup grated Parmesan cheese.

Pizza crust and layering fillings7. Place the pan on a baking sheet (in case the filling leaks). Bake for 30-35 minutes or until the Parmesan cheese has turned a golden color and the melted mozzarella cheese you can see below the sauce is bubbly.

8. Remove the pizza from the oven and allow to cool for at least 10 minutes before slicing. Enjoy!

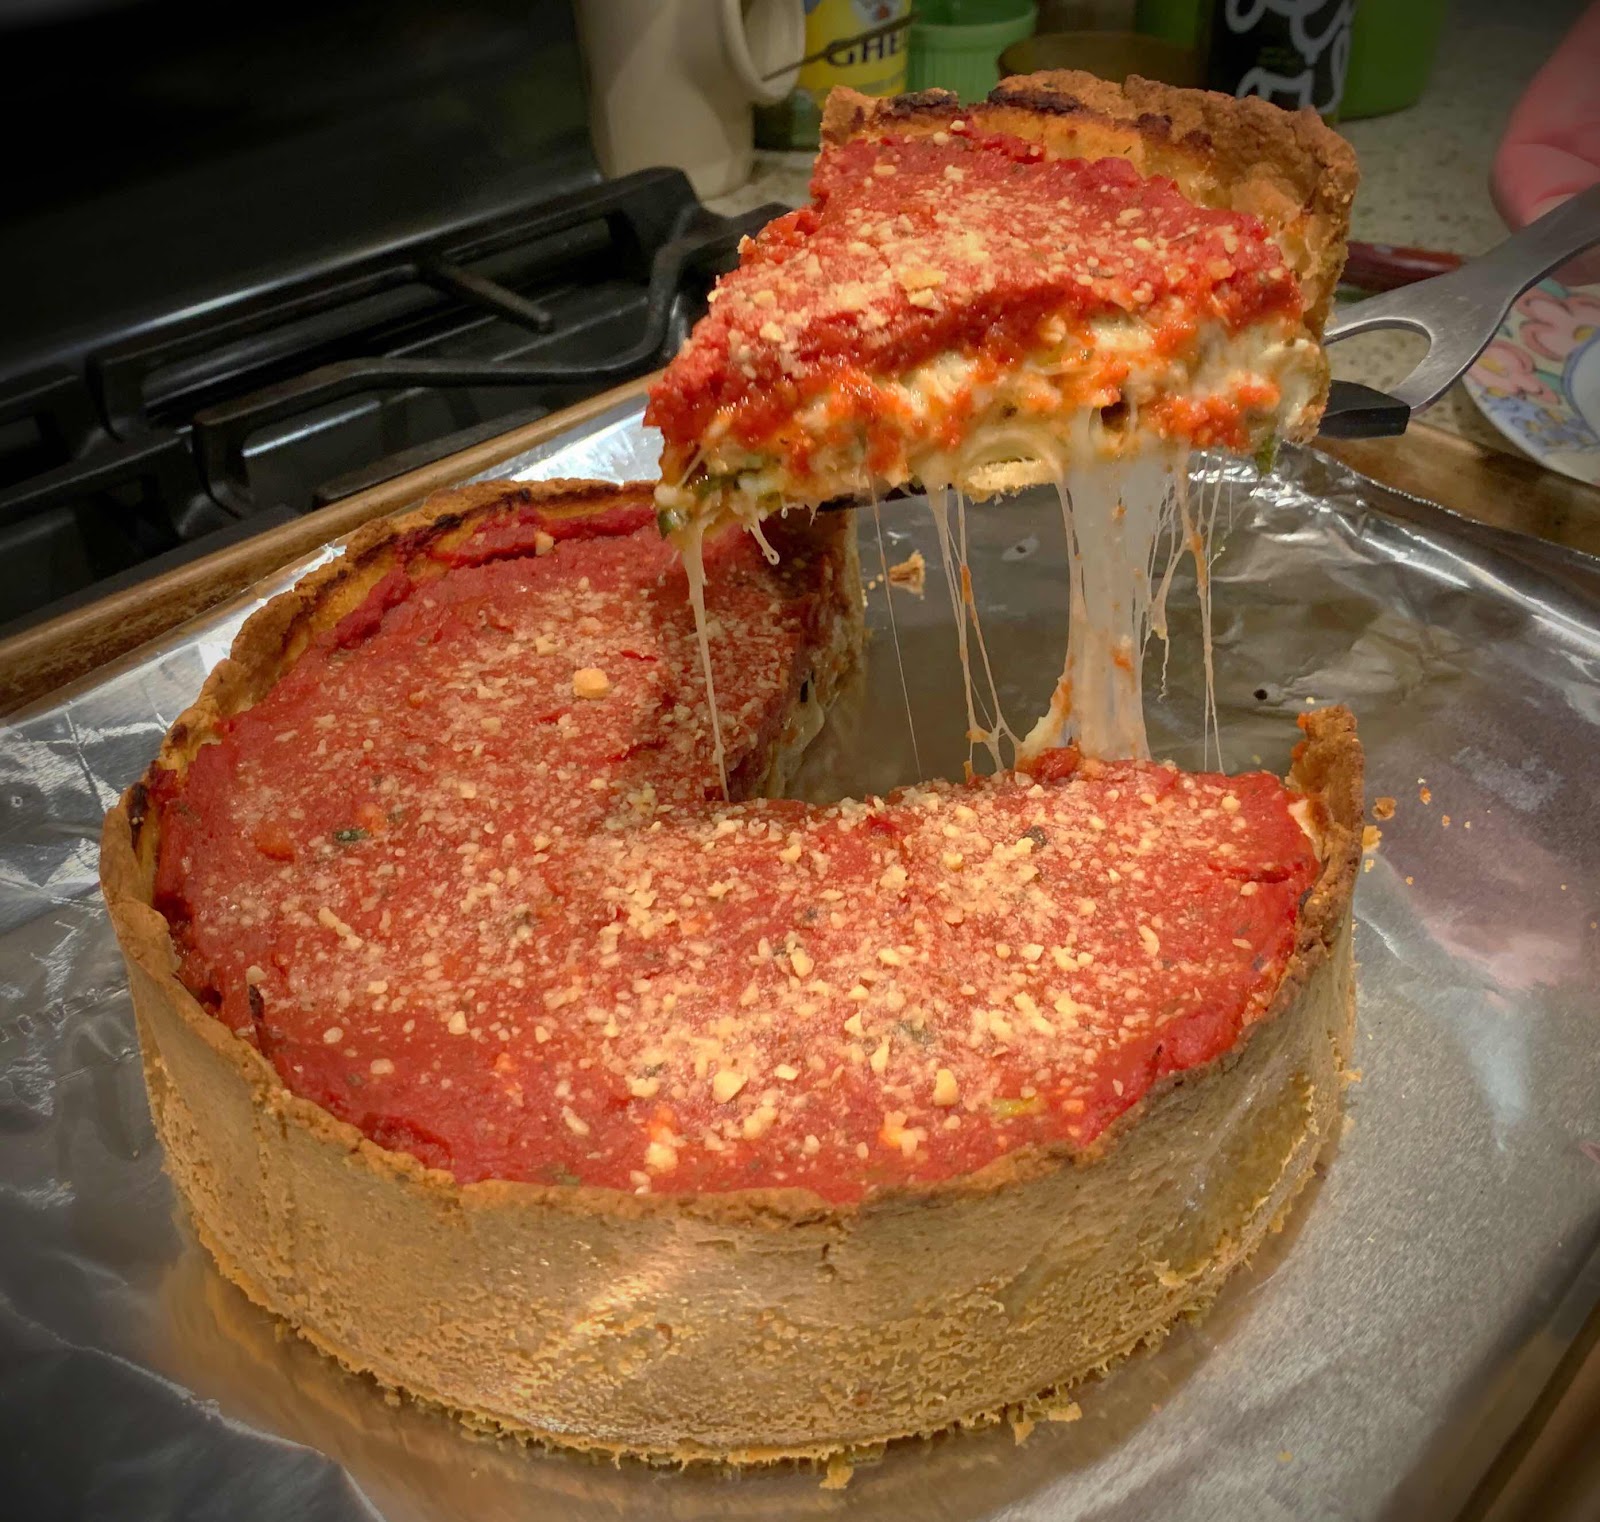
Slice of Deep Dish Pizza
Nutritional Information per 1/6th of pizza: 588 calories, 13.5 g carbohydrates (5.1 g dietary fiber, 3.2 g sugars), 41.8 g total fat (15.6 g saturated fat, 0 g trans fat), 123 mg cholesterol, 1292 mg sodium,  651.4 mg calcium, 169 mg potassium, 2 mg iron, 169 ug Vit A, 38.9 g protein. Net carbs per serving: 8.4 grams

Photos and recipe by Kathy Sheehan, copyright 2020
All rights reserved. Please do not duplicate without the author’s permission. 
Tuesday, March 10, 2020

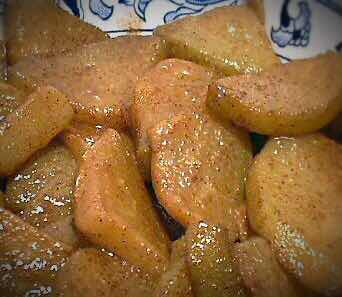
Low Carb Apple Pie Filling (made with Chayote Squash)

Low Carb Apple Pie Filling (made with Chayote Squash)
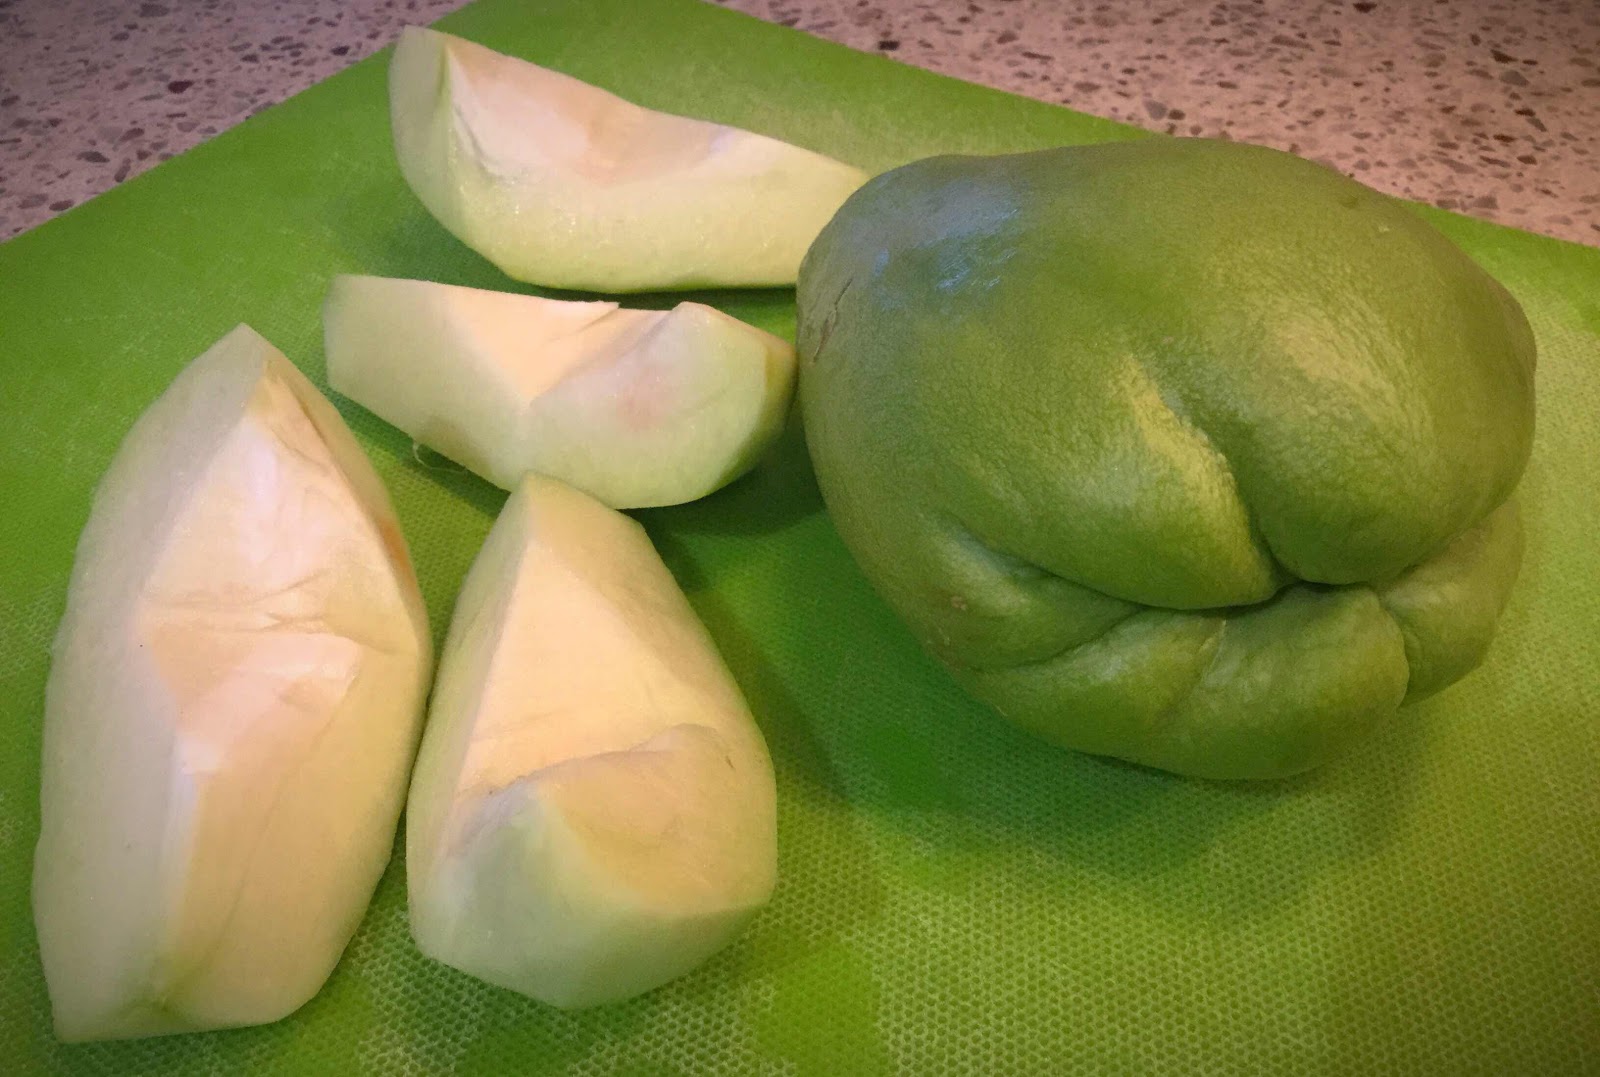
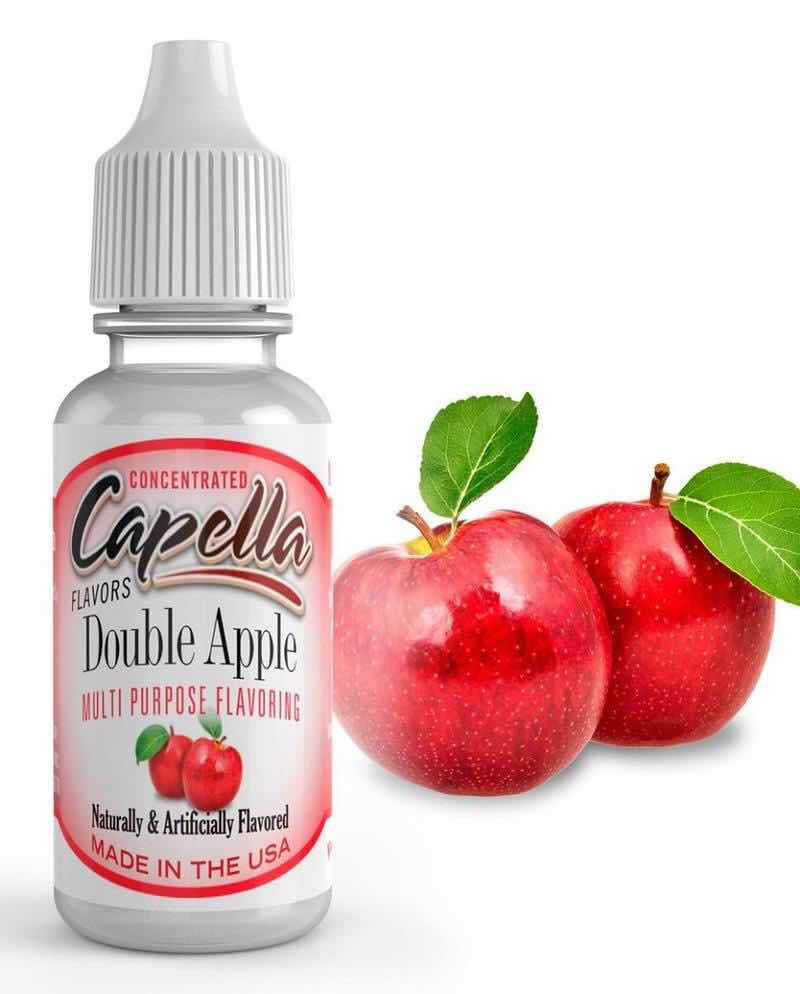
This all-purpose “apple” filling is great to use in any recipe that calls for apples, such as a pie or tart, cake, bread, pancakes, fritters or even applesauce. They are delicious on their own or served with keto ice cream. Their taste and texture is amazingly and truly like apples! Chayote squash is an almost tasteless, mild and firm squash, so it’s a perfect low carb substitute for apples. Simmered with apple pie spices, a zero-carb sweetener and lemon juice for tartness, it readily absorbs those flavors. Although it is optional, I think the addition of apple extract or flavoring is important to achieve the best apple-like flavor. I use Capella Double Apple flavoring (see photo below) and only a few drops is enough to impart a realistic “appleness” to this recipe. (You can leave it out and the recipe will still work fine, but the result may not give you the full apple punch, in my opinion.) I’m offering this basic recipe as a prelude to more “apple” recipes to come. Once you try these apples, I think you’ll be as delighted as I am to have this low carb alternative in your recipe box.

Low Carb “Apple” Pie Filling
Makes 2 cups

2 cups chayote squash, peeled, seeded and cut into thin slices (2-3 squash, depending on size)
2 tablespoons butter
2 tablespoons golden erythritol sweetener, or to taste (I use LaKanto Golden)
2 teaspoons apple pie spice blend
2 tablespoons lemon juice
1/2 teaspoon apple extract or 10 drops apple flavoring (I used Capella Double Apple), optional
6-8 drops monkfruit extract or stevia, if additional sweetness is needed
Water, if needed

Chayote Squash
In a medium to large skillet, melt the butter over medium-low heat and add the squash, sweetener, apple pie spice and lemon juice. Stir to combine. Cover and simmer for at least 20 minutes, stirring occasionally, adding water if needed to keep the apples hydrated (you don’t want them to dry out). Once the squash begins to soften, add the apple extract and monkfruit extract or stevia to taste. Continue cooking, covered, until the squash is tender, about 5-10 more minutes. You want the “apples” to be fork-tender. (If you plan to eat them without additional cooking, such as in a recipe that is baked, make sure they are very soft and no longer have any crunch.)

Allow to cool for at least 15 minutes to allow the flavors to mingle or store in an airtight container for up to a week. You can use this filling in any recipe that calls for apples, such as a pie or tart, apple cake or bread. Or serve warm with whipped cream or keto vanilla ice cream.

Capella Double Apple Flavoring
Nutritional Information per 1/2 cup: 67 calories, 4.2 g carbohydrates (1.8 g dietary fiber, 1.4 g sugars), 5.9 g total fat (3.7 g saturated fat, 0 g trans fat), 15 mg cholesterol, 43 mg sodium, 27.6 mg calcium, 100 mg potassium, 1 mg iron, 66 mg Vit A, 9 mg Vit C, 0.7 g protein. Net carbs per serving: 2.4 grams

Note: Compared to no sugar added, canned apple pie filling, this recipe is about 10 carbs LESS per 1/2 cup! 

Recipe by Kathy Sheehan, copyright 2020
All rights reserved. Please do not duplicate without the author’s permission. 
Sunday, June 23, 2019

Chocolate Chip Mousse Pie in a Jar

Chocolate Chip Mousse Pie in a Jar
I love desserts that are already portioned out. They’re easy to grab out of the fridge and enjoy without worrying about overindulging. These little desserts are so satisfying and delicious. The creamy mousse and the dark chocolate cookie crust...you get it all, and without the hassle of baking!

Chocolate Chip Mousse Pie in a Jar
Makes 6 servings

Chocolate Cookie Crust:
3/4 cup almond flour
2 tablespoons unsweetened special dark cocoa powder
1 tablespoon powdered erythritol 
A pinch of salt
1 teaspoon vanilla extract
1 tablespoon + 1 teaspoon refined coconut oil, melted

Chocolate Chip Mousse:
4 ounces cream cheese, room temperature
2 tablespoons salted butter, room temperature
1/4 cup creamy peanut butter (no sugar added), or other nut butter of choice
1 tablespoon powdered erythritol 
12 drops monkfruit extract or stevia to taste (or add another tablespoon of erythritol)
1-1/2 teaspoons vanilla extract
1/2 cup heavy cream (or canned full-fat coconut milk)
3 tablespoons sugar free chocolate chips, chopped (such as Lily’s)

Optional Garnishes:
3 teaspoons sugar free chocolate chips
3 teaspoons chopped peanuts or other nut of choice

1. To make the Chocolate Cookie Crust: With a fork, mix together the almond flour, cocoa powder, erythritol and salt in a medium bowl until no lumps remain (you may pulse this mixture in a food processor, if desired). Add the vanilla extract and melted coconut oil and stir until the mixture is coated and resembles coarse crumbs. Divide equally between six small jelly jars or serving dishes (about 2 TB in each jar). Gently press down to create an even layer; set aside.

2. To make the Chocolate Chip Mousse: Add the room temperature cream cheese, butter and peanut butter to a mixing bowl. With a hand-held or standing mixer, whip on high until the mixture is well combined. Add the erythritol, monkfruit drops, vanilla extract and heavy cream. Beat until the mousse is quite fluffy and smooth. Taste and adjust sweetening, if needed. Fold in the sugar free chocolate chips. 

3. Divide the mousse equally between the six jars or serving dishes. If desired, top each dessert with a few sugar free chocolate chips and 1/2 teaspoon of chopped nuts. Place lids on jars and refrigerate until ready to serve.

Mousse Pie in a Jar
Nutritional Information per serving: 351 calories, 8.5 g carbohydrate (3.8 g dietary fiber, 1.4 g sugars), 33.2 g total fat (14.8 g saturated fat, 0 g trans fat), 60 mg cholesterol, 168 mg sodium, 51.5 mg calcium, 106 mg potassium, 584 mg Vit A, 1 mg iron, 7.5 g protein. Net carbs per serving: 4.7 grams

Photos and recipe by Kathy Sheehan, copyright 2019
All rights reserved. Please do not duplicate without the author’s permission.
Saturday, November 12, 2016

Low Carb Pumpkin Cheesecake


Thanksgiving is just around the corner and many of us are already dreaming about the feast we'll soon enjoy with our family and friends. What is Thanksgiving without pumpkin pie? Years ago, I posted my favorite Pumpkin Pie In a Cup recipe (baked pumpkin pie filling, served without a crust). It certainly is an excellent way to enjoy the best part of the pumpkin pie with fewer carbs. In this recipe, the cheesecake is baked in a springform pan and served by the slice. It has a wonderful pumpkin and spice flavor with substantially fewer carbs than traditional pumpkin pie, only 8 net grams per serving. (One slice of traditional pie with crust has 41 carbs that will send anyone's blood sugar soaring, especially after a full meal!!!) You CAN join in and have your Thanksgiving pie without guilt by making a few adjustments. Try my recipe and enjoy the celebration!

Low Carb Pumpkin Cheesecake
Makes 12 servings

1 cup chopped pecans, toasted if desired
2 (8 ounce) packages of organic cream cheese, softened just to room temperature
1/4 cup + 2 teaspoons Golden LaKanto Monkfruit Sweetener (or other erythritol sweetener)
1 teaspoon stevia powder (I used Sweet Leaf brand)
2 teaspoons vanilla extract
1-1/2 cups plain pumpkin purée (canned is fine)
1/2 cup organic sour cream
4 large eggs
4 teaspoons pumpkin pie spice
1/4 teaspoon fine sea salt

1. Preheat oven to 300 degrees Fahrenheit with the oven rack set in the center of the oven.

2. Butter the bottom and sides of a 9-inch springform pan.* Place a piece of parchment paper cut to size into the pan, then butter the paper. Sprinkle the chopped pecans over the bottom of the prepared springform pan, spreading them evenly to completely cover the bottom. Set aside.

3. In a large mixing bowl, beat the softened cream cheese, LaKanto Monkfruit sweetener, stevia and vanilla extract with an electric mixer until smooth. Add the pumpkin purée and sour cream and beat on medium until combined. Add the eggs, one at a time, beating well after each addition. Add the pumpkin pie spice and salt. Beat until combined.

4. Immediately ladle the batter over the nuts, trying not to disturb the nuts. Tap the pan gently on your kitchen counter to release any bubbles and settle the batter in an even layer.

5.  Bake for 70 minutes (or more), until a knife placed in the center of the cheesecake comes out clean. (If using small pans, reduce the baking time to 50-55 minutes, see note below.)  Remove pan from oven and place on a wire rack. Allow the cheesecake to cool for at least 20-25 minutes. If needed, run a sharp knife around the edge before attempting to release it from the springform pan. Chill the cake in the refrigerator for at least 2 hours before slicing.

6. To serve, cut into 12 equal wedges and top with a dollop of vanilla and stevia-sweetened whipped cream, if desired.  Store any leftovers in the refrigerator for up to 3 days.

Nutritional Information per serving (no whipped topping): 249 calories, 9.9 g carbohydrate (1.9 g dietary fiber, 2.6 g sugars, 4 g sugar alcohols), 22.6 g total fat (9.9 g saturated fat, 0 g trans fat), 108 mg cholesterol, 168 mg sodium, 70 mg calcium, 132 mg potassium, 6.2 g protein.  Net carbs per serving: 8 grams.

*Note: You can bake this recipe in six small (4-inch) springform pans. Reduce baking time to 50-55 minutes.  Serving size would be 1/2 of a small cheesecake, if prepared this way.

Recipe by Kathy Sheehan, 2016
All rights reserved. Please do not duplicate without the author's permission.

Sunday, October 6, 2013

The BEST Gluten Free Apple Pie with Crumble Topping


It's apple time!  There's nothing quite as wonderful to usher in the autumn season than a homemade apple pie made from freshly picked apples.  This recipe is simply the best!  The fact that it's gluten free and drastically reduced in sugar are just healthy bonuses.  Honestly, you'd never know it was low sugar or GF; there's nothing lacking in taste here.  My gluten-eating, non-diabetic family members loved it!  Because of the crunchy, crumble topping, this pie is best eaten on the day it's made (although it will taste wonderful the day after, even though the topping will have softened).  Be sure to read the note about choosing apples for pie--it's important, you don't want to end up with a mushy, applesauce pie!  For ease, I used a ready-to-fill, frozen gluten free pie crust (Whole Foods has them), but you certainly could make your own using your favorite recipe.

The BEST Gluten Free Apple Pie with Crumble Topping
Makes 12 servings

one 9" gluten free, frozen pie crust, thawed (or make your own)

Filling:
5-6 medium cooking apples* (see note below)
1 tablespoon lemon juice
1 teaspoon ground cinnamon
1/4 teaspoon nutmeg
1/8 teaspoon allspice
1/4 cup Stevia or Splenda granular
1 tablespoon tapioca flour
1 teaspoon melted butter, butter substitute (Earth Balance) or ghee (clarified butter)

Topping:
1/4 cup light brown sugar
1/4 cup Stevia or Splenda granular
1/2 cup all purpose gluten free baking flour
1/8 teaspoon salt
1/2 teaspoon cinnamon
1/4 teaspoon nutmeg or mace
1/8 teaspoon ginger
1-1/2 tablespoons gluten free old-fashioned oats
3 tablespoons very cold butter or butter substitute, cubed

1.  Preheat oven to 400-degrees F.  Thaw pie crust.  Poke crust with fork on bottom and sides.  Place crust on a foil-lined cookie sheet; set aside.

2.  To prepare the filling, peel, core and thinly slice apples and place in a large bowl.  Add remaining filling ingredients and stir to coat apples evenly.  Spoon apples into the pie crust until quite full and heaped in the center (apples will reduce in volume as they cook).

3.  In another bowl, stir together the sugars, GF flour, oats, salt, and spices.  Add the cold, cubed butter and, with a pastry cutter or two knives, cut butter into the dry ingredients until butter is well distributed and mixture resembles coarse crumbs.  Spoon crumb topping evenly over apples.

4.  Bake in preheated oven for 40 minutes.  Topping should be nicely browned and the apples bubbly.  Cool for at least one hour before slicing.

*Note about choosing apples: The type of apples is important.  Create a mixture of several types, such as Cortland, Macoun, Granny Smith, Honey Crisp, Yellow Delicious or Macintosh.  Be aware that Macintosh apples are tart and impart a wonderful flavor, but when baked can turn soft or mushy (but in a good way, when combined with firmer apples).  I recommend using Macintosh sparingly in the mix and never use Macintosh by themselves.

Nutritional Information per serving: 185 calories, 30.5 g carbohydrate (2.3 g dietary fiber, 14.1 g sugar), 8.4 g total fat (4.9 g saturated fat, 0 g trans fat), 47 mg cholesterol, 236 mg sodium, 25.4 mg calcium, 106 mg potassium, 2 g protein.

Recipe by Kathy Sheehan, copyright 2013


Monday, July 30, 2012

Best Ever Coconut Cream Pie

Moody's Diner in Maine is quite well known and appeals to the locals as much as the summer tourists. This past spring, while there was still snow on the ground, my husband and I took a drive and had lunch at Moody's. Although I couldn't eat a piece of their homemade pie, I did convince my husband to get a slice and share some with me. It was heavenly and a few bites just wasn't enough. I went home and immediately created my own low sugar, reduced carb version that was spectacular! Not long ago, I made this for a church potluck supper and, even though the dessert table was loaded with brownies, cookies and other delicious treats, everyone seemed to have their eye on my pie. As soon as the first few people approached the dessert table and took a slice of pie, onlookers became anxious and, without even finishing their meal, they began to storm the table to secure a piece for themselves. Within a couple of minutes, long before most people had eaten their meal, my pie was gone! The lucky few raved and couldn't believe it was a low sugar pie. It's easy to prepare and can be made ahead. If you don't want pie, try making pudding instead. Either way, I think you'll agree that this is the best ever!

Best Ever Coconut Cream Pie

3/4 cup Splenda granular
1 1/2 cups unsweetened coconut milk (or lite)
1 1/2 cups 2% milk (or 1% for less fat)
1/4 cup cornstarch
4 egg yolks
1/4 teaspoon salt
3/4 cup flaked, unsweetened coconut
2 teaspoons vanilla extract
1 tablespoon butter
1 (9-inch) pie shell, prebaked
1/4 cup toasted coconut
Whipped cream, for garnish (optional)

1. In a 1-quart saucepan, combine 3/4 cup Splenda, coconut milk, and 1 cup milk. Scald mixture.

2. In a small mixing bowl, whisk the remaining 1/2 cup milk and cornstarch together to make a slurry. Whisk egg yolks with salt in medium bowl. Temper yolks by adding 1/2 cup scaled milk mixture to yolks and whisk well. Add yolk mixture and slurry back into milk mixture and whisk vigorously over medium heat until thickened, about 2 minutes. Remove from heat and add coconut, vanilla, and butter. Whisk until uniformly incorporated.

3. Pour the filling into the prepared pie shell. Cover the pie with plastic wrap and place in the refrigerator. Chill the pie completely, about 2 hours.

4. To serve, top with toasted coconut (see directions below) and a dollop of whipped cream.

5. How to toast coconut:  Preheat oven to 350ºF. Spread unsweetened coconut shavings, or sweetened shredded or flaked coconut on a rimmed baking sheet and bake, stirring once or twice, until golden, about 5 to 10 minutes. If toasting sweetened coconut, check and stir more frequently because the added sugar causes irregular browning.

Nutritional Information: Per 1/8 pie made with 1% milk and lite coconut milk:  282 calories, 23.9 g carbohydrates, 18.6 g total fat, 11.8 g sat. Fat, 0.5 g fiber, 168.6 mg sodium, 4.4 g protein.

Just pudding, made with 1% milk and lite coconut milk (1/8 recipe):
175 calories, 15 g carbohydrate, 11.5 g total fat, 8.2 g saturated fat, 0.5 g fiber, 79.6 mg sodium, 4.4 g protein.

Original recipe by Kathy Sheehan, copyright 2012

How does this recipe compare to a traditional Coconut Cream Pie?  My version is significantly lower in calories, fat, carbs, sugars, and sodium.  For comparison, the nutritional information for a restaurant size slice of coconut cream pie is 630 calories, 65 g carbohydrate, 39 g total fat, 24 g saturated fat, 1 g fiber, 370 mg sodium, 43 g sugars, 6 g protein.

Monday, February 22, 2010

Sugar-free Banana Cookie Cream Pie

I went over to visit my daughter at her college this past weekend and we had a wonderful time together. She's a creative cook and we enjoyed talking recipes while she whipped up an incredible spinach and goat cheese pizza for our lunch. She's graciously posted the recipe on her food blog, if you want to give it a try: http://whaticooked-ixipixi.blogspot.com/2010/02/pesto-pizza-with-goats-cheese.html Sometime later, our conversation turned to banana pudding when I complained about how her Dad will buy lots of bananas and not eat them, so I end up scrambling around having to use them in recipes or fruit smoothies before they get too ripe. I returned home to a speckled, ripe banana on the counter and knew exactly what to make!

This recipe is even faster and easier to make than cookies because you don't have to fiddle with measuring out teaspoons of dough and having to watch several batches, you just spread it in a pie tin and bake! The "pie crust" is nothing more than a big, delicious cookie filled with a thick, banana cream pudding. The taste will remind you of the famous banana pudding made with Nilla wafers, but this sugar-free recipe only has 9.1 grams of net carbohydrate per serving! So, if you're in need of some southern comfort food without the guilt, enjoy a slice today.

Banana Cookie Cream Pie(Makes 10 servings)

½ cup almond flour (or finely ground blanched almonds)
2 tablespoons coconut flour
¼ cup all-purpose flour
¼ teaspoon baking soda
¼ teaspoon baking powder
¼ teaspoon salt
2 tablespoons butter, softened (¼ stick)
1 tablespoon canola oil
¼ cup Splenda granular (not baking blend)
1 large egg
1/3 cup mashed ripe banana (about 1 small)
1 teaspoon vanilla extract

Filling Ingredients:
2 oz. mascarpone cheese (¼ cup)
¾ cup skim or 1% milk
1 tablespoon Splenda granular
1 teaspoon vanilla extract
one 1.4 oz. pkg. sugar-free, fat-free instant banana cream pudding mix

1. Preheat oven to 375-degrees. Spray a pie tin with non-stick cooking spray; set aside.

2. In a small mixing bowl, mix together flours, baking soda, baking powder and salt; set aside.

3. In a large mixing bowl, cream together butter, canola oil and Splenda with handheld or standing mixer until light and fluffy. Add egg and beat until well incorporated and thickened slightly. Add mashed banana and vanilla extract and beat until well blended.

4. Add dry ingredients ¼ cup at a time, scraping down sides of bowl occasionally. Using a rubber spatula, spread dough evenly in the prepared pie tin along bottom and sides. Bake until set and golden brown, about 15-18 minutes. Immediately remove from oven and onto wire rack to cool.

5. When crust is cool, combine the mascarpone cheese, milk, Splenda and vanilla extract in a medium mixing bowl with a wire whisk or mixer. Add the pudding mix and whip until well combined and thickened. Spread evenly over the cookie crust and refrigerate until set, at least 20 minutes. Optional: Serve with a dollop of whipped cream or light whipped topping (not included in nutritional information below).

Nutritional Information per serving: 143.4 calories, 10.5 g carbohydrates, 9.6 g total fat, 3.4 g saturated fat, 1.4 g fiber, 3.5 g protein.
Original recipe by Kathy Sheehan, copyright 2010

Tuesday, February 16, 2010

Quick Lemon Ricotta Tart

I love the seriously tart flavor of lemon or lime curd, but each tablespoon is 11 grams of carbohydrate, all of which are sugar. Here is an excellent way to satisfy my craving for this sweet, delectable spread and receive some good nutrition at the same time!

Fat-free ricotta is a smooth, rather bland, cream cheese that delivers 200 mg of calcium with only 45 calories and 5 grams of carbohydrate per serving. Combined with lemon zest and lemon curd, it becomes a lightly sweetened, creamy spread. Try it with other citrus flavors, such as lime or orange for variety. This simple and quick "tart" makes a wonderful snack or serve it alongside a salad for lunch. You'll enjoy it's tangy flavor so much that I guarantee it will brighten up your gray, cold, February day, too.

Quick Lemon Ricotta Tart
(Makes 4 servings)

2 Pepperidge Farm Deli Flats or Arnold’s Sandwich Thins (7 Grain or Oatmeal)
2 teaspoons 0% trans fat light buttery spread (such as Smart Balance Light)
4 tablespoons Splenda granular, divided
1/8 teaspoon ground mace (or nutmeg)
1 cup fat-free ricotta cheese
2 tablespoons lemon curd*
Zest from one lemon (about 2 teaspoons)*
¼ teaspoon lemon extract*

1. In a small bowl, mix together 1 tablespoon Splenda with the 1/8 teaspoon ground mace; set aside.

2. Split apart the bread thins and spread each flat side with ½ teaspoon light buttery spread to edges. Sprinkle with the Splenda-mace mixture and toast in a toaster oven or oven preheated to 350-degrees until crisp and golden. Remove from oven and cool completely.

3. In a small mixing bowl, mix together the ricotta cheese, lemon curd, lemon zest, lemon extract and 3 tablespoons Splenda. Spread ¼ cup of ricotta mixture on each toasted bread round and serve immediately.

*This recipe is equally delicious if you substitute lime curd or orange marmalade and flavor with the zest of those fruits.

Nutritional Information per serving: 139.5 calories, 21.5 g carbohydrate, 1.4 g total fat, 0 g saturated fat, 2.6 g fiber, 8 g protein.

Original recipe by Kathy Sheehan, copyright 2010

Wednesday, November 11, 2009

Keto Pumpkin Pie in a Cup


Thanksgiving! My favorite meal of the year. I read somewhere that when you're a PWD (person with diabetes), you never get a holiday and that's true. Just because it's Thanksgiving doesn't mean your blood sugar gets to take a holiday and go off the charts. You need to plan ahead, make choices or substitutions and measure portions just like every other day of the year. I know for me, giving up my favorite holiday foods, especially dessert, would leave me feeling unsatisfied and left out of the festivities. The experts will tell you "don't make it about the food" but, let's be honest here, Thanksgiving is very much about the food! Are those experts giving up their slice of pumpkin pie? (I doubt it.) Well, neither am I!

This excellent recipe has been perfected after many trials. I tried making a low carb crust with almond flour in various combinations, but they all turned out to be duds. Either they were too crumbly, too high in carbs, or were too far from the REAL pumpkin pie taste that they failed the test. I almost gave up on the idea of crust altogether and thought I'd have to settle on pumpkin custard (which is good but doesn't have that same pie taste without the crust), then a light bulb went on over my head! The crust doesn't have to be on the bottom, I can have a little bit of real crust on the top while keeping the carbs down with other minor adjustments to the filling recipe -- I can have it all and so can you! Have a happy and sweet Thanksgiving.

Pumpkin Pie in a Cup
(Makes 8 servings)

Pudding Ingredients:
3 eggs
One 15 oz. canned pumpkin (2 cups)
2 tablespoons Swerve Brown
1/3 cup LaKanto Monkfruit Sweetener (or other erythritol sweetener)
1 teaspoon stevia powder, or to taste (I use Sweet Leaf brand)
½ teaspoon ground ginger
1 teaspoon ground cinnamon
¾ teaspoon nutmeg
¼ teaspoon ground cloves
¼ teaspoon salt
1¼ cups almond milk or coconut milk (no sugar added, not vanilla flavor)

Optional Crust Cut Out Ingredients:
2 tablespoons unsalted butter, melted
1/4 cup coconut flour
1/4 cup almond flour
1/8 teaspoon xanthan gum
1/4 teaspoon salt
1 egg, beaten

Whipped topping (optional)

1. Preheat oven to 350-degrees. In a large mixing bowl or 5 cup measure, beat eggs and add canned pumpkin. Whisk in brown sugar, sweeteners, spices (2½ teaspoons of pumpkin pie spice can be substituted), salt and almond milk; set aside.

2. Place eight (4-ounce size) custard cups into a 9" x 13" baking dish. Divide pumpkin mixture equally between the custard cups. Pour very hot water into pan until it reaches about half way up the side of the custard cups and carefully transfer to oven. (Tip: To avoid spilling water, place pan on oven rack before pouring in hot water.)

3. Bake for 45-55 minutes until set and a knife comes out clean when inserted in center of custard. Remove from oven and transfer custard cups to a wire rack to cool completely.

4. While custard is cooling, preheat oven to 375-degrees. Mix together the crust cut out ingredients with a fork and gather the mixture together into a dough ball. Roll dough out between two pieces of plastic wrap. Cut out small leaf shapes with tiny cookie or pie crust cutters. Place on a cookie sheet that has been covered with a piece of parchment paper (or lightly grease with butter). Bake for 12-15 minutes or until browned. Remove to wire rack to cool. Store in a sealed plastic bag until serving time. To serve, place 2-3 cutouts on each pumpkin custard as garnish.


Nutritional Information per serving of pumpkin pudding (Optional crust cut outs not included in this calculation, see below): 59 calories, 7 g carbohydrate (2.2g dietary fiber, 2.1 g sugars, 3.2 g sugar alcohols), 2.3 g total fat (0.6 g saturated fat, 0 g trans fat), 70 mg cholesterol, 128 mg sodium, 105 mg calcium, 30 mg potassium, 1 mg iron, 3mg Vit C, 2881 IU Vit A, 3 g protein. Net carbs per serving: 4.8 grams

Nutritional Information for Crust Cut Outs (1/8 recipe, 2-3 cut outs): 59 calories, 2.3 g carbohydrate (1.4 g dietary fiber, 0.3 g sugars), 4.9 g total fat (2.7 g saturated fat, 0 g trans fat), 31 mg cholesterol, 93 mg sodium, 5.4 mg calcium, 14 mg potassium, 37 IU Vit A, 1.4 g protein. Net carbs per 2-3 cut outs: 0.9 grams. 

Original recipe by Kathy Sheehan, copyright 2009, revised 2023
All rights reserved. Please do not duplicate without the author’s permission.
How does this recipe compare with traditional Pumpkin Pie? It is much lower in calories, fat and carbohydrates, plus, with this recipe, you actually get more pumpkin filling than you would if you had a slice of pie! For comparision, the nutritional information for 1/8th of a 9" traditional pumpkin pie is 375 calories, 52.5 g carbohydrate, 16.2 g total fat, 7.5 g saturated fat, 2.5 g fiber, 5 g protein.

Saturday, September 26, 2009

Fresh Peach Custard Tart

This phenomenal dessert is a fabulous way to showcase the fresh peaches that can be found in your grocery store or farm stand this time of year. It is elegant enough for company, but really simple to prepare because the tart shell is a quick "press in" crust, so there's no need to find your rolling pin or make a mess on your counter. Pies are difficult for carb-conscience eaters because a purchased pie shell or traditional pie crust recipe will turn any sugar-free, low carb filling into high carb, guilt-burdened fare. This easy crust is extremely low carb because it uses almond flour in place of wheat flour, which is a difference of 89 grams of carbohydrate for 1¼ cup, plus the addition of 15 grams of fiber! The creamy "custard" filling is completely milk-free. Instead I used the natural sweetness of pureed fruit as the base of the cooked pudding, so very little added sweetener is required. The result is a light, beautiful dessert in which the fresh peach is the star attraction!


Fresh Peach Custard Tart
(Makes 8 servings)

1¼ cup almond flour (or finely ground blanched almonds)
¼ cup Splenda granular
½ teaspoon salt, divided
3 tablespoons + 1 teaspoon melted butter
2 fresh, ripe medium to large peaches
1½ tablespoons lemon juice, divided
About ½ cup water + 2 tablespoons cold water, divided
2 tablespoons cornstarch (gluten-free, if desired)
½ cup Splenda granular
½ teaspoon ground nutmeg
1 egg, beaten
½ teaspoon vanilla extract
Sprinkle of ground cinnamon for garnish

1. Preheat oven to 350-degrees. In food processor or medium mixing bowl, measure almond flour, ¼ cup Splenda, ¼ teaspoon salt and pulse to break up any clumps in the flour (or stir with fork). While machine is on, stream in melted butter until mixture resembles wet sand (do not over process because you do not want almond butter) or combine with fork. Once the mixture is thoroughly moistened, spread evenly into a 9-inch tart pan with removable bottom. With your fingers, press into bottom and only slightly up the sides of the tart pan making certain that it is evenly distributed and there are no thin places. Bake in oven for 15-18 minutes until very lightly browned. Remove to wire rack to cool completely before proceeding, about 45 minutes.

2. Preheat oven to 375-degrees. To make filling, peel one fresh peach and cut into chunks. Add 1 tablespoon lemon juice and process in food processor or blender until pureed. Add enough water to equal 1 cup (about ½ cup) and process again to make sure mixture is smooth.

3. Place 2 tablespoons cornstarch and 2 tablespoons cold water into small saucepan; stir until cornstarch is dissolved. Add peach puree, ½ cup Splenda, ¼ teaspoon salt, nutmeg, and beaten egg. With a wire whisk, stir mixture until well combined. Heat over medium-low heat, stirring constantly, until thick and spreadable (boiling is not necessary). Remove from heat and add vanilla. Spoon onto prepared tart shell and spread evenly almost to edges.

4. Peel and thinly slice remaining peach. Toss with remaining ½ tablespoon lemon juice. Arrange peach slices decoratively on top of filling in a spiral pattern. Sprinkle top of peaches with a dusting of cinnamon. Place tart on a cookie sheet and cover loosely with foil. Bake for 30 minutes, only removing foil for the last five minutes.

5. Remove to wire rack. If your peaches are especially juicy, there may be small puddles of peach juice around peaches or on filling, dip the corner of a dry paper towel to soak up any standing peach juice. Cool completely. To serve, remove tart from pan by pushing up on the removable bottom. Tip: Because crust is delicate and flaky, allow tart to remain on bottom tin while cutting. Slide a spatula between bottom tin and crust to loosen each piece before carefully lifting and placing on individual serving plates.

Nutritional Information per serving: 179 calories, 11 g carbohydrate, 13.8 g total fat, 3.7 g saturated fat, 2.3 g fiber, 4.8 g protein

Original recipe by Kathy Sheehan, copyright 2009

How does this recipe compare with a traditional peach tart? You might think a peach tart would be a lower carb choice because it doesn't have a top crust, but you would be mistaken. The bottom crust alone contains 1¼ cups wheat flour, not to mention the loads of sugar in the filling! The carbohydrates in my recipe are mainly derived from heart-healthy ground almonds and naturally sweet fresh peaches. For comparison, the nutritional information for a same size piece of peach tart made from a traditional recipe contains an astonishing 380 calories, 53.9 g carbohydrate, 17.8 g total fat, 8.5 g saturated fat, 1.6 g fiber, 3.5 g protein.