Showing posts with label summer squash. Show all posts

Saturday, June 24, 2023

Summer Vegetable Stir Fry

Summer Vegetable Stir Fry

This is a dish we make often in the summer, utilizing the myriad of local summer vegetables available in the Farmer’s Markets. It’s a quick and easy stir fry that is fresh and delicious!

Summer Vegetable Stir Fry
Makes 2-3 servings

Cooked bratwurst, kielbasa or other cooked sausage 
1 small yellow zucchini or yellow summer squash
1 small green zucchini
½ onion
1 small Roma tomato
2 ounces cheese (cheddar, Parmesan or whatever is on hand)
Salt and pepper to taste

Optional Additions:
1-2 tablespoons tomato paste
1/4 cup heavy cream

1. Cut up the cooked sausage into cubes. Cube the yellow and green zucchini, onion, and tomato. Shred the cheese. Set aside.

2. Sauté the onions and sausage in a nonstick skillet over medium heat until the sausage begins to color and the onion is translucent and beginning to brown.

3. Add the zucchini and sauté, stirring occasionally, until it begins to soften and pick up some color. Add some salt and pepper to season the vegetables.

4. At the very end of cooking, add the chopped tomatoes and shredded cheese. When you stir in the tomatoes, they released their juices, which mixes with melted cheese to make a light sauce. If you want a saucier dish, add the optional tomato paste and heavy cream; stir to incorporate.

5. Taste and adjust seasoning if needed. Serve immediately.

Nutritional Information per serving (1/3 of recipe, not including optional additions): 351 calories, 8.9 g carbohydrate (1.8 g dietary fiber, 4.1 g sugars), 27.9 g total fat (12.2 g saturated fat, 0 g trans fat), 67 mg cholesterol, 1156 mg sodium, 151.2 mg calcium, 235 mg potassium, 107 IU Vit A, 15 mg Vit C, 15.3 g protein. Net carbs per serving: 7.1 grams.

Recipe and Photo by Kathy Sheehan, copyright 2023
All rights reserved. Please do not duplicate without the author’s permission. 

Wednesday, April 26, 2017

Low Carb Zucchini Lasagna (or Hearts of Palm)


It's been eight years since I posted a lasagna recipe and, now that I'm living gluten and grain free, it's time for an updated version. My husband brought home two gorgeous, organic zucchini the other day and my plan was to spiralize them and make spaghetti. But because today was a cold and rainy spring day in Maine, I decided to make a warm and comforting baked lasagna instead. Instead of pasta noodles, I cut my zucchini lengthwise into narrow slices and used them between the layers of cheese and sauce. (You can substitute hearts of palm noodles in place of the zucchini.) It's important to place the zucchini slices between paper towels and leave at room temperature for at least an hour (or longer) to allow the moisture to be drawn out of this watery vegetable before assembling the casserole. The ricotta cheese mixture and meat sauce can be made a day or two ahead so, when it's time to assemble and bake, the prep time is minimal. Whether made with zucchini or hearts of palm noodles, this recipe is definitely a keeper! The lasagna was so delicious and, because it is a complete and balanced meal by itself, you don't even need to worry about a side dish. Keep life simple!

Low Carb Zucchini Lasagna (or Hearts of Palm)
Makes 6 servings

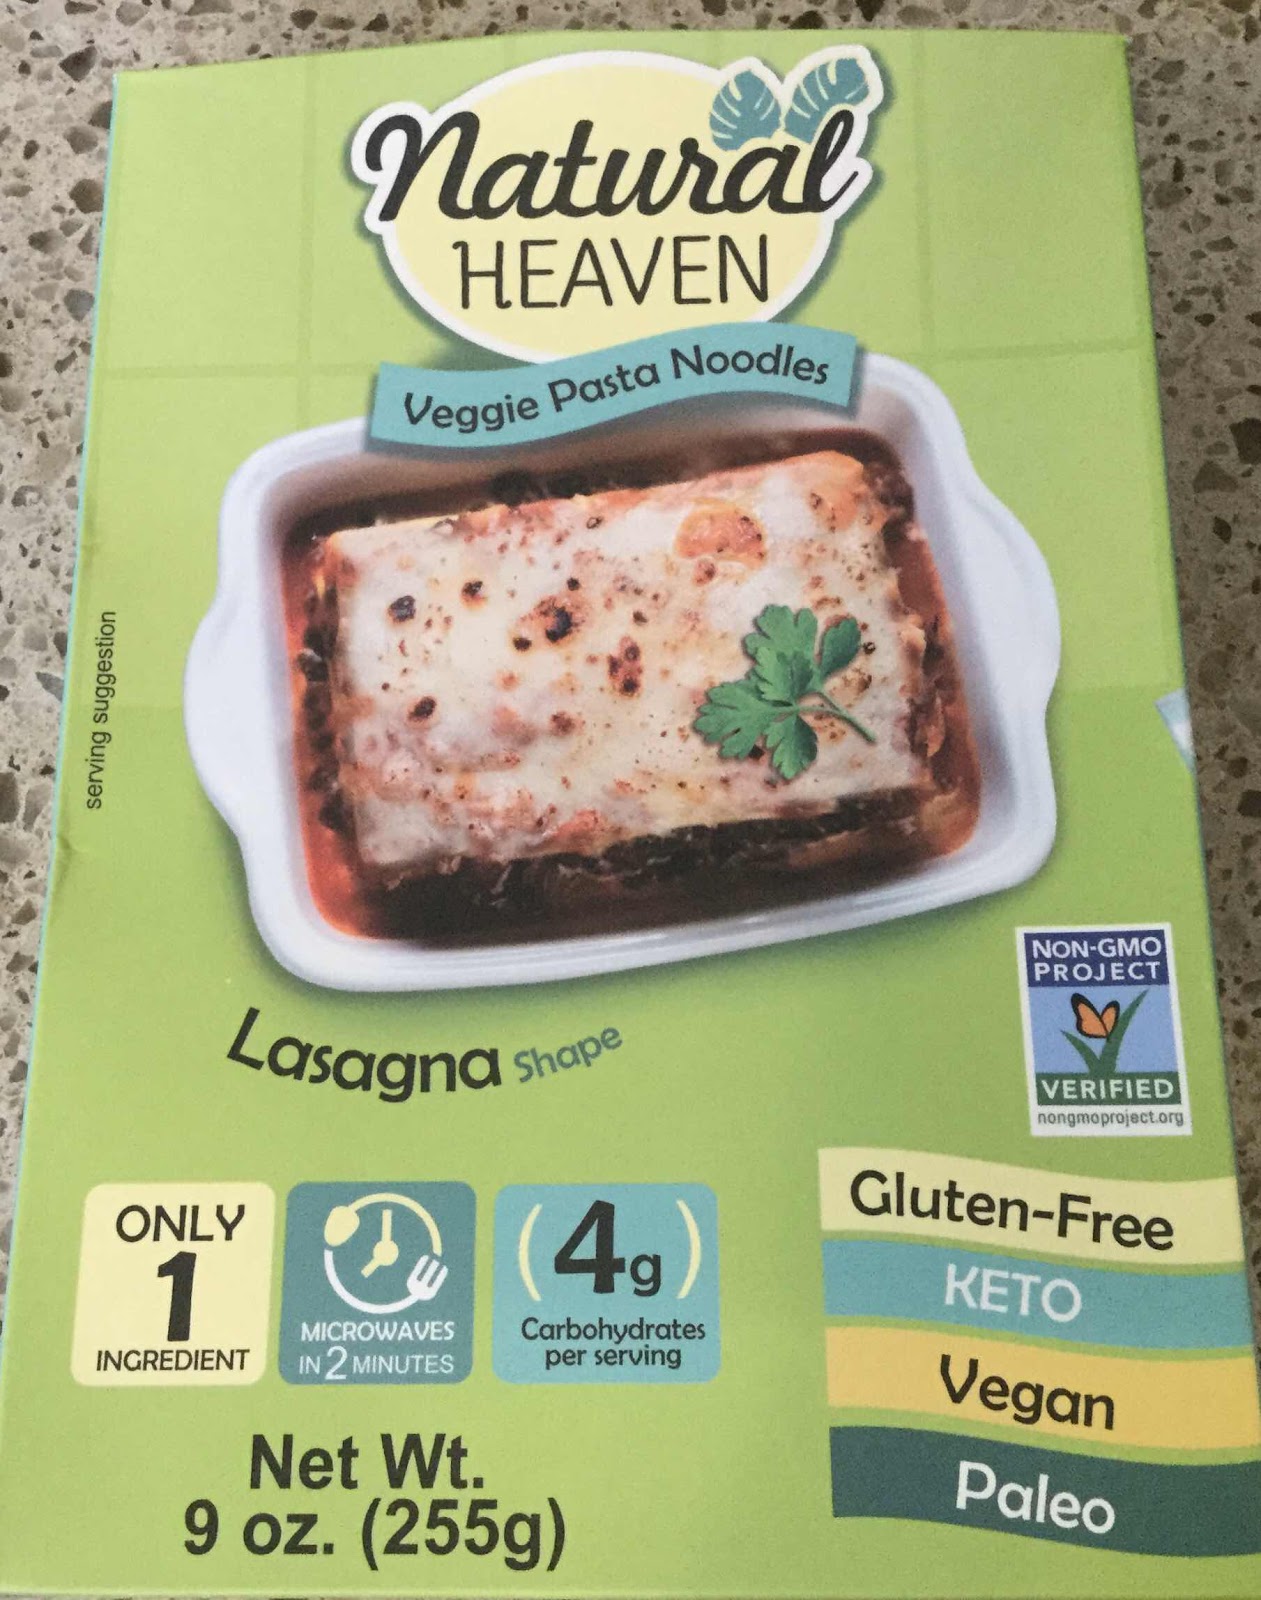
2 large zucchini, about 9 inches long or 9 oz package of hearts of palm lasagna noodles (drained, rinsed and dried), such as Palmini or Natural Heaven brand)
1 cup shredded mozzarella cheese

Ricotta Cheese Filling:
15 oz. of whole milk or part-skim ricotta cheese
1 cup of chopped fresh spinach (or 1/2 cup frozen, squeezed and drained of moisture)
1/4 cup grated Parmesan cheese
1/2 teaspoon dried basil
1 teaspoon of Italian herb seasoning
1/8 teaspoon nutmeg
1/4 teaspoon black pepper
2 cloves garlic, minced (or 1/2 teaspoon garlic powder)
1 egg, slightly beaten

Meat Sauce:
3/4 pound of sweet Italian sausage, casings removed (or substitute ground beef)
2 cups marinara or your favorite pasta sauce, no sugar added

1. Prepare the zucchini ahead of time by slicing lengthwise into thin slices (about 3/16-inch wide). If you have one, a mandoline works well to make even, thin slices, otherwise cut with a large knife. Lay the slices in a single layer on several layers of paper towel, sprinkle very sparingly with salt and cover with several more layers of paper towel. If desired, you can place a baking sheet over them and weight it with canned goods or other objects. Allow the zucchini slices to remain at room temperature between the paper towels for at least one hour (or longer) to draw out the excess moisture. Wipe off any excess salt before assembling the lasagna. (If using hearts of palm noodles, you can skip this step.)
Step by Step Pictorial

2. In a medium bowl, mix together the Ricotta Cheese Filling ingredients and stir until well combined. Set aside. (If making ahead, refrigerate until you're ready to assemble the lasagna.)

3. In a large skillet, brown the sausage and add the pasta sauce. Stir to combine and set aside. (This can be made ahead and refrigerated, if desired.)

4. Preheat oven to 375 degrees Fahrenheit. To assemble the lasagna, spray a baking pan with non-stick spray or grease with coconut oil or butter. Spoon in about 1/2 cup of the pasta sauce (no sausage) and spread to cover the bottom of the pan. Lay down a layer of the zucchini slices or hearts of palm noodles, overlapping just slightly, until the bottom of the pan is covered. Spread 1/3 of the ricotta filling over the zucchini or noodles and spread into an even layer, covering the slices. Top with 1/3 of the meat sauce and spread to edges. Sprinkle sauce with 1/4 cup shredded mozzarella cheese.

5. Repeat with a layer of zucchini slices or noodles, 1/3 of the ricotta filling, 1/3 of the meat sauce and 1/4 cup mozzarella.

6. Repeat a final time with a layer of zucchini slices or noodles, the remaining ricotta filling, the remaining meat sauce and sprinkle with the remaining 1/2 cup mozzarella.

7. Cover with the pan lid or tightly with foil (spray the foil with non-stick spray to prevent the cheese from sticking). Bake for 50-60 minutes. Remove foil and continue baking for 10 minutes until cheese is bubbly and beginning to brown. Remove from oven and allow to rest for at least 10-15 minutes before slicing and serving.

Natural Heaven Hearts of Palm Lasagna Noodles
Nutritional Information per serving made with zucchini (1/6th of recipe): 482 calories, 14 g carbohydrate (3 g dietary fiber, 6.8 g sugars), 36.6 g total fat (15.5 g saturated fat, 0 g trans fat), 120 mg cholesterol, 968 mg sodium, 376 mg calcium, 560 mg potassium, 277 mg Vit A, 1 mg iron, 26.8 g protein. Net carbs per serving: 11 grams

Nutritional Information made with hearts of palm noodles (1/6th of recipe): 478 calories, 10.1 g carbohydrate (1.7 g dietary fiber, 3.4 g sugars), 36.2 g total fat (15.4 g saturated fat, 0 g trans fat), 120 mg cholesterol, 981 mg sodium, 369 mg calcium, 386 mg potassium, 1 mg iron, 708 mg Vit A, 26.4 g protein. Net carbs per serving: 8.4 grams.

Photos and recipe by Kathy Sheehan, copyright 2017, updated 2020
All rights reserved. Please do not duplicate without author's permission.

Saturday, February 11, 2017

Zucchini Noodle Carbonara


The other day, my husband was reminiscing about our trip to Italy many years ago and dreaming about the excellent and authentic pasta carbonara he had there. Every time we talk about that trip, he brings up the carbonara! Tonight, I recreated this special dish for him. He had his over traditional pasta and I had mine over zucchini noodles. We were both delighted with the result! Carbonara is not particularly difficult to make, but can be tricky because, if you cook the egg-parmesan sauce at too high of a temperature, you get carbonara scramble instead of a creamy sauce, so be watchful. The thing I love most about this dish is that when served over zoodles and/or shiritaki noodles, it's an elegant and very low carb meal. I have provided the option to replace one of the zucchini with a package of shiritaki noodles. The shiritaki noodles absorb the sauce nicely and can provide a more noodle-like texture for those who may balk at the thought of an entire plate of vegetables! This low-carb carbonara is a great, quick meal when you want something spectacular that will impress, but don't want to spend too much time in the kitchen. It would make a wonderful Valentine's Day dinner!


Zucchini Noodle Carbonara
Makes 4 servings

4 spirialized zucchini (use spaghetti blade)
1 package Angel Hair shiritaki noodles (optional, but if using, reduce number of zucchini to 3)
4 ounces pancetta, cubed (or substitute bacon)
4 garlic cloves, minced
1 large egg
1/2 cup grated Parmigiano Reggiano cheese, plus more for serving
Freshly ground black pepper to taste
1 handful of fresh, flat-leaf parsley, chopped (or 1 TB dried)

1. In a heavy skillet over medium heat, brown the pancetta or bacon until crispy. Add the garlic and sauté for 1 minute. With a slotted spoon, remove pancetta and garlic to a paper towel-lined plate; set aside. Reduce heat to low. Remove all but about 2 TB of the grease in the skillet and add zucchini noodles. Sauté uncovered, stirring occasionally, to soften the zoodles and allow the zucchini to release some moisure.

2.  Place the drained and rinsed shiritaki noodles (if using) into another dry pan or skillet and stir frequently over high heat until the moisture has evaporated. Remove from heat; set aside and keep warm.

3. When the zoodles are suffiencently soften to your liking, remove skillet from heat and allow to sit while you prepare the sauce ingredients (this is important!). Add the shiritaki noodles and toss to mix. In a small bowl, mix together the 1/2 cup grated cheese and egg; add to the noodle mixture, stirring constantly, until noodles are well coated.  The residual heat from the skillet and noodles will cook the egg. Do not overcook! (If you see the egg beginning to seize up and scramble, immediately remove mixture from heated pan to prevent further cooking.) The sauce should be creamy and smooth. Season the carbonara with black pepper. Mound the carbonara into individual dishes, garnish with chopped parsley and serve immediately.  Pass extra shredded or grated cheese around the table.

Nutritional information per serving (1/4 recipe): 209 calories, 9 g carbohydrate (2.2 g dietary fiber, 5.2 g sugars), 13.7 g total fat (5.5 g saturated fat, 0 g trans fat), 186 mg cholesterol, 470 mg sodium, 191.8 mg calcium, 597 mg potassium, 14.2 G protein. Net carbs per serving: 6.8 grams

Recipe by Kathy Sheehan, copyright 2017
All rights reserved. Please do not duplicate without author's permission.

Wednesday, October 5, 2016

Rainbow Chili


 A cool, autumn day calls for a comforting meal that is warming, all the way to my toes! This spicy meat chili has the added health benefit of assorted vegetables to nourish the body, but don't overlook the fact that their bright colors are appealing to the eye, as well. The purple of red cabbage, the bright orange of carrots, the bold red of tomatoes, the white of onion, the spring green of celery and the summer yellow of squash all come together in a rainbow of flavor! Mix them up and use whatever vegetables you have on hand or choose your family's favorites. I enjoy this hearty chili with a sprinkling of shredded cheese or topped with guacamole and sour cream.

I'm often asked how I fulfill the various tastes and dietary requirements of different family members at mealtime, since not everyone chooses to eat low carb. This meal is a great example! My carb-loving husband (who is not diabetic) loves his chili over boiled potatoes. We usually keep some starchy side dish in the fridge to add to his meals, such as boiled potatoes, pasta or rice.  This arrangement works well for us. It's easy for me to stay on my low-carb diet, while still satisfying his desire for a starch...that way we're both happy!

Rainbow Chili
Makes about 10 cups

2 teaspoons coconut oil
1 pound grass-fed, organic ground beef
1 medium onion, chopped
2 celery stalks, chopped
2 carrots, chopped
1 cup chopped red cabbage
1 cup chopped yellow summer squash
2 cloves garlic, minced
1 can diced tomatoes (14.5 oz.)
1 can organic black soy beans (15 oz.), drained and rinsed
1/2 teaspoon beef concentrate (optional)
1 teaspoon dried oregano
1 teaspoon sea salt, or to taste
1/2 teaspoons ground black pepper, or to taste
1-1/2 teaspoons chili powder, or to taste
1 to 1-1/2 teaspoons ground cumin, or to taste
1/16 teaspoon cayenne pepper, to more if you like it hot
1-1/2 cups to 2 cups beef broth (until desired consistency is reached)

Heat the coconut oil in a heavy Dutch oven. Brown the ground beef. Add the onions, celery and carrots and sauté, stirring occasionally, until the onion becomes translucent. Add the remaining chopped vegetables, garlic, tomatoes, beans, beef concentrate (if using), salt, pepper, herbs and spices. Stir to combine and sauté briefly. Add enough beef broth to reach the desired consistency. Taste and adjust seasonings to taste.  (I'm a wimp and like my chili mild, but if you like yours hot, you may need to add more chili powder, cumin and cayenne.) Cover and simmer for at least 30 minutes, stirring occasionally, before serving.

Nutritional Information per cup: 166 calories, 7.3 g carbohydrate (3.5 g dietary fiber, 2.6 g sugars), 9.6 g total fat (3.7 g saturated fat, 0 g trans fat), 28 mg cholesterol, 478 mg sodium, 48.6 mg calcium, 273 mg potassium, 13.3 g protein.  Net carbs per serving: 3.8 grams

Recipe by Kathy Sheehan, copyright 2016
All rights reserved. Please do not duplicate without author's permission.

Friday, October 17, 2014

Easy Vegetarian Chili


I made a new discovery (I love it when that happens)!  I finally found a bean that fits into my very low carb lifestyle: Black Soy Beans!  For the past year, I've been avoiding beans because most beans are too high in carbs, usually around 23 g carbs per 1/2 cup serving.  Even if you subtract the fiber, they weigh in at about 17 net carbs...still too high.  Recently, while browsing a low carb cookbook from the library, I saw the ingredient "black soy beans" multiple times, so I just had to investigate.  To my surprise, I learned that black soy beans are an extremely low 7 g total carbs per 1/2 cup serving, with 6 g fiber.  That's an amazing 1 net carb per serving!  I tried them, tested my blood sugar to see how my BG reacted and I knew immediately that this is a bean I can work with. My blood sugar didn't rise at all.  So, into my kitchen I went and started cooking. This extremely easy vegetarian chili is a complete meal-in-a-bowl and was a huge hit at a recent church supper.  The black soy beans provide all the essential amino acids (so they are a complete protein source) and they taste exactly like regular black beans without the carbs.  This recipe is dedicated to my little sister -- enjoy!

Easy Vegetarian Chili
Makes about 10 servings

2 tablespoons coconut oil
1 medium zucchini, cubed
3 small carrots, cut into small chunks
1 small onion, chopped
1 cup frozen chopped spinach or kale
1 jalapeno pepper, chopped
1 green or yellow pepper, chopped
2 cloves garlic, minced
2 teaspoons chili powder, or to taste
1 teaspoon ground cumin, or to taste
2 teaspoons dried oregano
28 oz. Marinara Sauce, no sugar added
28 oz. crushed tomatoes, no sugar added (no sodium, if desired)
2 cans (15 oz each) organic black soy beans, drained and rinsed (I buy Eden's brand)
1 cup plain tomato sauce, no sugar added  (no sodium, if desired)
1 cup water (or more to achieve desired consistency)
Salt and pepper to taste
Dash or two of hot sauce, optional
Shredded cheese for topping, optional (omit for dairy free)

1. Heat coconut oil in a dutch oven or heavy pot, add chopped vegetables and saute until beginning to soften.  Add herbs and spices and saute for another minute.  Add beans, marinara sauce, crushed tomatoes, plain tomato sauce, and water.  Allow to simmer, covered for about 40-45 minutes or until carrots are cooked through.  Season with salt, pepper and hot sauce (optional) before serving.  Top with shredded cheese, if desired (omit for dairy free).

NOTE:  This makes an excellent crock pot recipe!  Just saute the vegetables in a skillet, add them to the crock pot with the remaining ingredients and cook on low for 4-6 hours (or high for 2-3 hours), until carrots are cooked through.

Nutritional Information per serving (optional ingredients not included): 212 calories, 22 g total carbohydrate (9 g dietary fiber, 9.6 g sugar), 9.3 g total fat (3.1 g saturated fat, 0 g trans fat), 0 mg cholesterol, 793 mg sodium, 109.3 mg calcium, 603 mg potassium, 11.3 g protein.  Net carbs per serving: 13 grams

Recipe by Kathy Sheehan, copyright 2014


Saturday, August 7, 2010

Summer Garden Pasta Alfredo

Prior to my diagnosis of T2 diabetes, my meal of choice at my favorite Italian restaurant would most often be Fettuccine Alfredo. I love that creamy, cheesy sauce over the soft noodles. But, if you look at the nutritional information per serving of the traditional recipe (see below), it's no wonder I ended up with a digestive medical illness! That doesn't change the fact that I love Pasta Alfredo and have cravings for it occasionally.

This recipe makeover really satisfies my longing for noodles and creamy cheese sauce. It includes lots of high-fiber, nutritious vegetables that are abundant in backyard gardens and farmer's markets right now. If you've run out of ways to serve zucchini and tomatoes, try this recipe! Here's my daughter's comment at the dinner table last night that says it all: "If I was served this at Olive Garden, I would think it was great! It tastes like the real thing to me."

Summer Garden Pasta Alfredo
(Makes 5 servings)

1 zucchini, quartered and sliced
1 yellow summer squash, quarter and sliced
¼ cup finely chopped onion
1 package frozen broccoli florets or 3 cups fresh
1 tablespoon flour
6.5 oz. soft cheese spread, garlic and herb flavor (I used Alouette)
1-2/3 cups skim milk or Hood Calorie Countdown Dairy Beverage
½ cup grated Parmesan cheese
2 tablespoon torn fresh basil (or 2 teaspoons dried)
1 tablespoon chopped fresh parsley (or 2 teaspoons dried)
2 plum tomatoes, seeded and chopped
Salt and pepper to taste
6 oz. dried carb-friendly spaghetti pasta (I used Dreamfields)

1. Cook pasta according to package directions.

2. In a large non-stick skillet sprayed with non-stick cooking spray, saute the first four ingredients until tender-crisp. Add flour and cook for 30 seconds. Add cheese spread and stir until melted. Add milk and stir to combine. Cook, stirring frequently, until bubbly and thickened. Add Parmesan cheese, herbs, tomatoes, salt and pepper. Stir and cook until heated through.

3. Place drained spaghetti into a large serving bowl. Pour sauce and vegetables over the top and toss until noodles are coated. Serve immediately.

Nutritional Information per serving: 303.2 calories, 37.8 g carbohydrate, 10.9 g total fat, 7.2 g saturated fat, 386 mg sodium, 5.8 g fiber, 16.4 g protein.

Original recipe by Kathy Sheehan, copyright 2010

How does this recipe compare with traditional Pasta Alfredo? Traditional Alfredo is made with loads of butter and heavy cream and doesn't have the benefit of added vegetables. This healthier recipe is seriously lower in calories, carbohydrate and saturated fat. For comparison, the nutritional information for a lunch-size portion of Fettuccine Alfredo at a favorite Italian restaurant chain is an astonishing 800 calories, 69 g carbohydrate, 48 g total fat, 30 g saturated fat, 810 g sodium, 4 g fiber, 23 g protein.

Tuesday, August 18, 2009

Summer Vegetable Lasagna

It was really too hot to cook today, but my friend had given me some beautiful, organically-grown summer squash from her garden and I desperately wanted to make this recipe. Luckily, it cooks in a dish just the right size to fit inside my toaster oven, so we didn't cook while it did! This is the time of year when zucchini are plentiful in the garden or readily available at the farm stand, so I assembled two lasagnas and froze one for some busy day in the future. (If you do the same, wrap well to prevent freezer burn. Also, to cook from frozen add another 30 minutes to the cooking time.)

Lasagna may sound difficult, but the "no-boil" noodles available make it super easy. You can find them next to the regular lasagna noodles in your grocery. They're thinner than the boiled variety, which is perfect for someone looking to reduce their carbs. Also, use whatever vegetables you have on hand to create your own version and enjoy this wonderful, comforting meal at any time of year!

Summer Vegetable Lasagna
(Serves 6)

1 (10 oz.) package of frozen chopped spinach (thaw or microwave for 5 minutes)
15 oz. part-skim ricotta cheese
¼ cup grated Parmesan cheese
1/8 teaspoon grated nutmeg
¼ teaspoon pepper
½ teaspoon basil, dried (or 1 teaspoon fresh, chopped)
1 egg, slightly beaten
2 cups No sugar added spaghetti sauce (I use Hunt’s brand)
1 teaspoon Italian herbs, dried
2 cloves garlic, minced
6 no boil lasagna noodles (I use Barilla)
1½ cups zucchini, quartered and sliced thin
1½ cups summer squash, quartered and sliced thin
1 cup part-skim mozzarella cheese, shredded

1. Preheat oven to 375-degrees. Spray an 8" x 8" glass baking dish with non-stick cooking spray; set aside.

2. If spinach is frozen, place in microwave-safe dish and microwave on high for 5 minutes. Place spinach in strainer and press out as much liquid as possible using the back of a spoon. If still warm from microwave, allow to cool for 15 minutes before proceeding.

3. Place cooled and drained spinach in a medium mixing bowl. Add ricotta cheese, Parmesan, nutmeg, pepper, basil and egg. Mix together with a fork until well combined; set aside.

4. To the spaghetti sauce, add the Italian herbs and garlic and stir to combine. Measure ¾ cup of the sauce into the baking dish and spread to coat the bottom. Lay two no-boil lasagna noodles side-by-side on top of the sauce. Spread ½ of the ricotta-spinach mixture over the noodles, being sure to spread mixture to edges of dish. Top with 1½ cups sliced squashes and distribute equally. Measure 6 tablespoons sauce over vegetables and spread to edges of dish. Sprinkle evenly with ¼ cup mozzarella.

5. On top of the cheese, lay two more lasagna noodles side-by-side, but going in the opposite direction than the first layer. Top with remaining ricotta-spinach mixture and the remaining sliced vegetables. Measure another 6 tablespoons of sauce over vegetables and spread to edges of dish. Sprinkle evenly with another ¼ cup mozzarella.

6. For the final layer, lay the last two lasagna noodles side-by-side, but again going in the opposite direction from the layer before. Top noodles with remaining sauce and sprinkle evenly with remaining ½ cup mozzarella cheese. (Note: Noodles will puff up during cooking, so you’ll want at least ½-inch free at top of dish to allow for this expansion.)

7. Spray foil with non-stick cooking spray and cover tightly. Bake for 50-60 minutes. Remove foil and bake for another 5-10 minutes until cheese is bubbly. Remove from oven and allow to cool for 10-15 minutes before serving to allow the filling to set.

Nutritional Information per serving (1/6th of recipe): 329 calories, 28.2 g carbohydrate, 13.9 g total fat, 7.2 g saturated fat, 4.4 g fiber, 22.4 g protein.

Original recipe by Kathy Sheehan, copyright 2009

How does this recipe compare to traditional lasagna? This lasagna is considerably lower in calories, carbohydrates and fats. For comparison, the lunch-size portion of traditional meat lasagna at a well-known Italian restaurant (only 4" x 4½" slice) is an astonishing 858 calories, 54 g carbohydrate, 47.4 g fat, 5 g fiber, 54 g protein.

Monday, August 10, 2009

Farmer's Market Vegetable & Bean Pot Pie

This time of year I sometimes go overboard buying fresh vegetables at the nearby farm stand. I guess when you live in the northeast, where winters are so long and the growing season so short, you get a little excited when you finally see lots of fresh, green things sprouting up all around you! This was the case this week. I had a refrigerator overflowing with more vegetables than I could possibly eat and had to use them before they spoiled.

Most store-bought pot pies, even the vegetable variety, are beyond the limits of a diabetic's diet because of the double crust and the over-abundance of potatoes. Not so with this recipe! I've included a few potatoes to disguise the fact that most of the white, starchy-looking chunks are turnip. (They look and so closely resemble the taste and texture of potatoes, my family never even suspected!) The base of this pot pie is a creamy, delicious mixture of vegetables and beans as thick as a stew, then topped with golden, flaky layers of phyllo to give it that distinctive pot pie crust. The beans provide protein and fiber, while adding creaminess and more substance to truly make this a satisfying meal.

Farmer’s Market Vegetable & Bean Pot Pie
(Makes 6 servings)

2 tablespoons olive oil, divided
1 small onion, chopped
3 carrots, chopped
3 stalks celery, chopped
6 cups of low-carb vegetables, cut into bite-size pieces (use a combination of 1 or 2 zucchini, 3 small turnips, 1 or 2 yellow squash, 1 cup broccoli florets, 1 leek or whatever you have on hand)
2 or 3 small red potatoes, cut into bite-size pieces with skin (about ½ cup)
salt & pepper to taste
1 bay leaf
3 sprigs of fresh thyme (or ½ teaspoon dried)
¼ cup all-purpose flour
2 ¼ cups chicken or vegetable stock
1 can cannellini beans (15 oz.), drained and rinsed
½ cup peas, fresh or frozen
2 tablespoons fat-free ½ & ½
6 sheets of phyllo dough (can be purchased in the frozen section of grocery)
1 tablespoon olive oil for brushing between layers of dough
3 teaspoons of freshly grated Parmesan, if desired

1. In a dutch oven or large pot, heat 1 tablespoon olive oil over medium-high heat and add onion, carrots and celery. Add a little salt and pepper and cook until vegetables begin to soften. Add the 6 cups of vegetables, 1 more tablespoon olive oil, bay leaf and thyme and continue to cook, stirring occasionally, until vegetables begin to soften and have taken on some color.

2. Reduce heat to medium. Add flour and stir to coat vegetables; stir and cook for 2 minutes. Slowly add stock, stirring constantly until flour and stock has blended and has started to thicken into a sauce. Reduce heat further to medium-low and simmer for 5 minutes, uncovered, stirring occasionally until vegetables are almost, but not quite, cooked through. Meanwhile, preheat oven to 350-degrees.

3. Remove from heat and add beans and peas. Add the fat-free ½ & ½ and stir to combine. Remove bay leaf and thyme stems (leaves should have fallen off). Check seasonings and add salt and pepper to taste. Divide mixture into individual oven-proof dishes or pour into one large casserole dish.

4. If using individual serving dishes, take one sheet of phyllo dough, cut into four rectangles and lay one rectangle on top of one of the dishes, tucking in corners of dough to fit. Coat lightly with olive oil (or use a pump oil sprayer, such as Misto). Top with another small rectangle and repeat with oil. If desired, sprinkle ½ teaspoon of grated Parmesan cheese and/or pepper, then repeat layering of dough and oil with remaining two small rectangles, ending with a light brushing of oil on the top. Follow the same procedure for the remaining dishes. (If using one large casserole dish, do not cut phyllo, but lay one sheet on top of the casserole dish filled with vegetables and coat lightly with oil. Repeat with remaining five sheets of dough ending with a light coating of oil on the top.)

5. Place individual dishes on a baking sheet (not necessary if using large casserole). Bake in preheated oven for 25-30 minutes, or until top is golden brown and crispy. Cool for 5-10 minutes before serving.

Nutritional Information per serving: 219.8 calories, 33 g carbohydrates, 7.5 g total fat, 0.5 g saturated fat, 5.2 g fiber, 8 g protein.

Variation: Use a can of black beans and add chili powder, cumin and a few dashes of hot sauce to create a spiced up Mexican version.

Original recipe by Kathy Sheehan, copyright 2009

How does this compare with a store-bought Pot Pie? If you thought eating one of those store-bought pot pies was healthy because it was vegetable, think again! For comparison, one serving made by a well-known vegetarian food company is a whopping 420 calories, 54 g carbohydrates, 19 g fat, 4 g fiber, 9 g protein.

Friday, July 31, 2009

Seared Salmon with Summer Squash in a Creamy White Wine Sauce

The summer in Maine is fleeting and the growing season so short, I like to eat locally as much and as long as possible. Not much is available at the nearby farm stand until the end of July, after which the harvest begins to come in. We will have more variety in the coming weeks, but for now I have to be creative with greens and root vegetables, such as chard, carrots and beets (you should taste my chocolate cake made with grated beets!). Today I returned home with what was available in abundance this week: summer squash and broccoli. This beautiful dinner is the delicious result of today's find and was whipped up in less than 15 minutes:

Seared Salmon with Summer Squash in a Creamy White Wine Sauce

Makes 2 servings

2 center-cut salmon fillets (6 oz. each, no skin)
Salt & freshly ground pepper
1 tablespoon Canola oil or Grapeseed Oil (for high temp cooking, not olive oil)
1 small to medium zucchini, chopped
1 small to medium yellow summer squash, chopped
¼ cup dry white wine
¼ cup chicken stock
1½ tablespoons chopped fresh herbs of your choice (dill, thyme, chives and/or parsley)
2 tablespoons low-fat sour cream (or plain, Greek-style yogurt)
1 teaspoon butter

1. Heat a heavy skillet over medium to high heat (I use a cast-iron skillet). Chop vegetables and herbs to have ready before cooking salmon; set aside

2. Season salmon fillets with salt & pepper and rub the oil on each side. When skillet is very hot, place the oiled salmon in the pan and do not disturb for at least 2 minutes until a brown crust has formed. Turn salmon and sear other side for at least two minutes. Turn again and complete cooking to desired doneness. (If you like your salmon on the rare side, the 2 minutes per side should be fine. I like mine cooked through to flaky and no longer pink in center, which takes another 2-3 minutes. Do not overcook, or fish will be dry.) Remove to serving plate and set aside.

3. Reduce heat to medium and add chopped vegetables to pan. Season with a little salt and pepper. Stir fry until they turn a golden color. Add wine & broth to deglaze the pan. Add 1 tablespoon of herbs and stir into sauce. Cook until reduced by half then remove pan from heat and allow to cool slightly. Add the sour cream (or yogurt) to sauce and stir to combine. Melt butter in warm sauce. To serve, divide equally and spoon vegetables and sauce over salmon. Garnish with remaining fresh herbs.

Nutritional Information per serving: 460 calories, 8 g carbohydrates, 14 g total fat, 4.3 g saturated fat, 2 g fiber, 43.75 g protein.

Original recipe by Kathy Sheehan, copyright 2009