Showing posts with label cherries. Show all posts

Friday, August 5, 2022

No Sugar Added Keto Fruit Jam (Peach, Cherry or Strawberry)

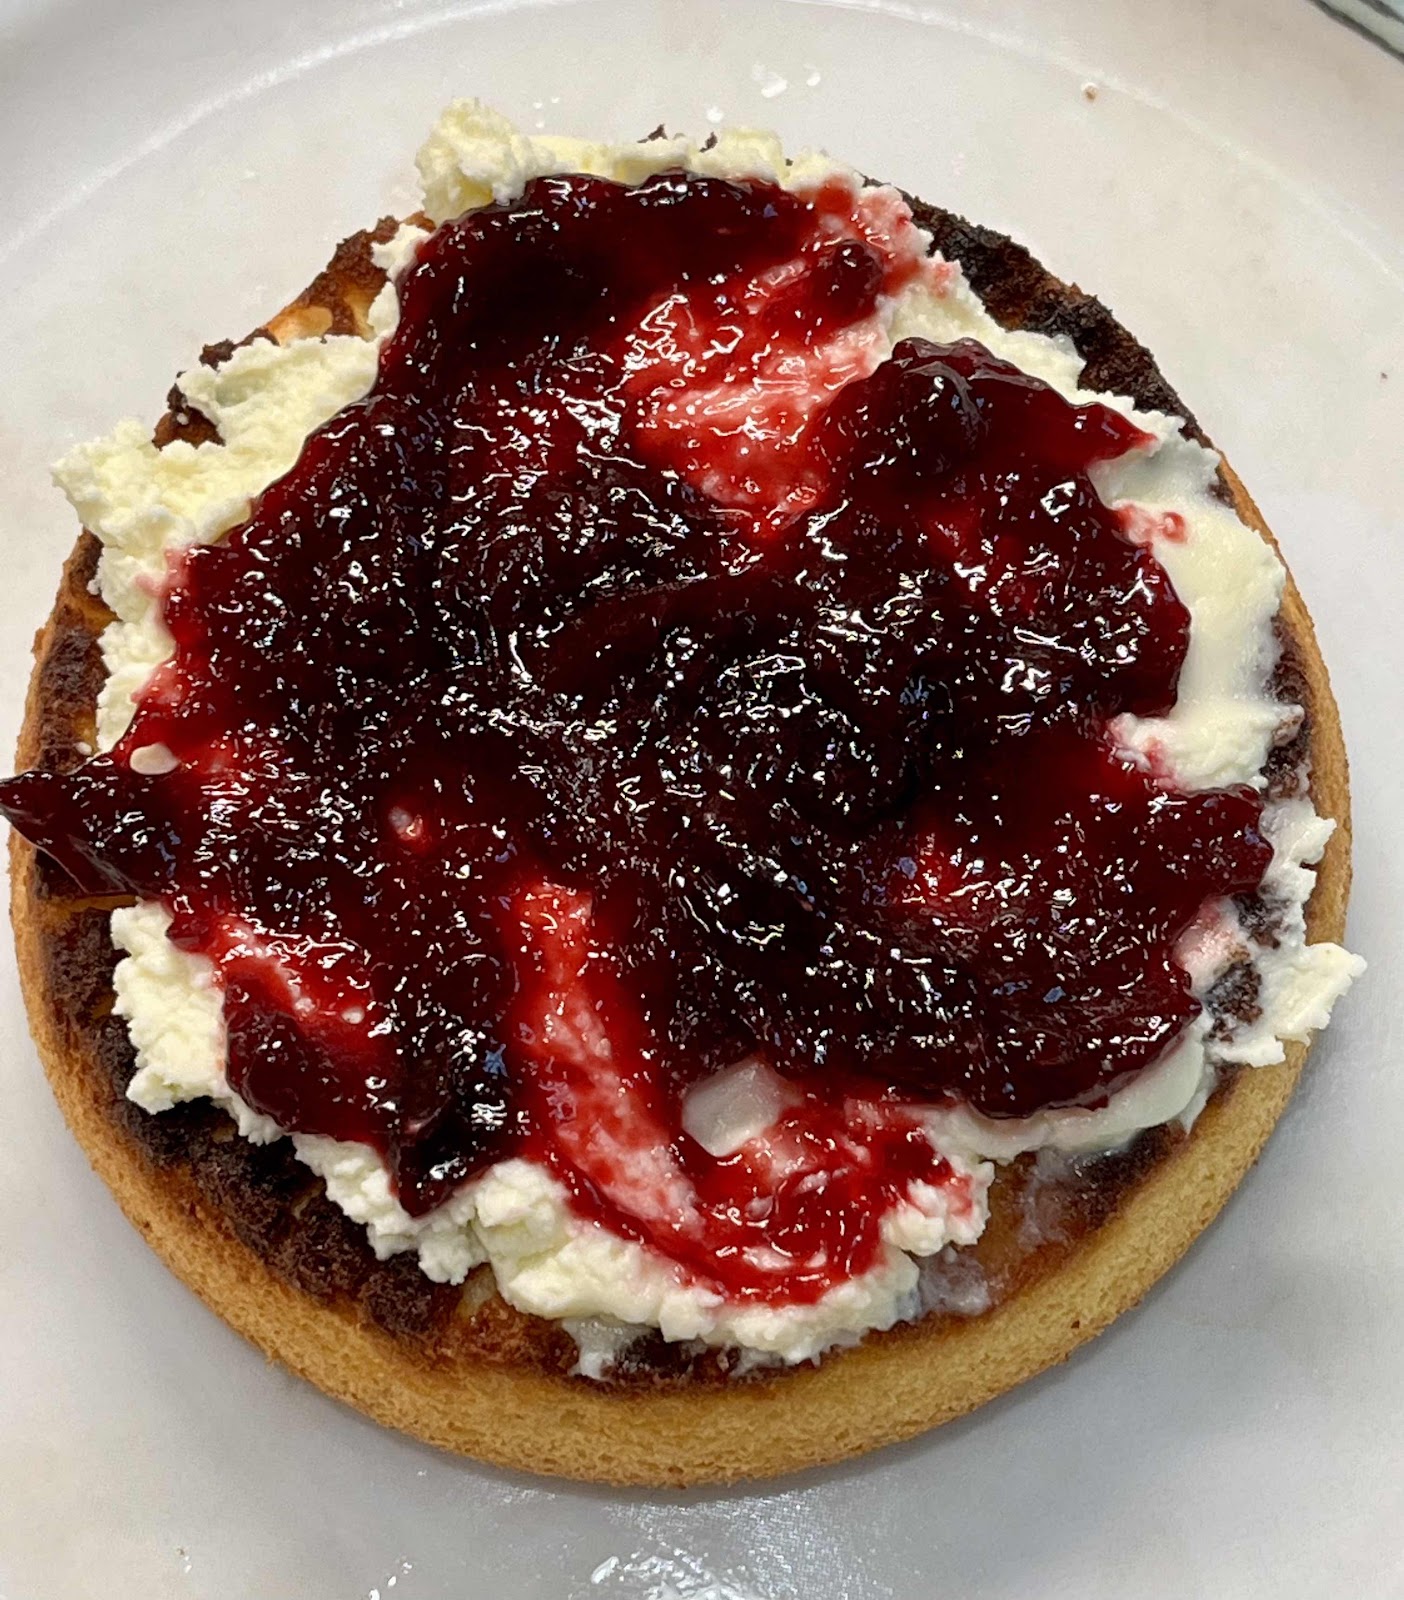
Keto Cherry Jam
I don’t eat a lot of fruit because of the high carb count. But one thing I really enjoy is a teaspoon or two of sticky, gooey jam on my low carb, keto bread. And there are times when I just want a peanut butter and jelly sandwich! In a previous post, I mentioned the excellent keto bread recipe that I found that has made my life normal again. (Click here for the keto bread recipe.) With the bread problem solved, it was now time for me to turn to finding the best keto jam. There are a couple of store brands that are acceptable, but they are watery, taste a little off and, frankly, are nothing like the real thing. Jam making is not really difficult, but it can have special challenges when not using real sugar. I have discovered that allulose is the very best sugar alternative when making fruit jam, with absolutely no aftertaste! My amazing keto jam recipe is easily adaptable to most fruits, with minor adjustments. I provide recipes for cherry, strawberry or peach, but you can change it up to create your favorite flavor!

Tips and Tricks for Sugar Free Jam:

* You must use a pectin made especially for low or no sugar jam. Look for Pomona’s Universal Pectin, which is easy to find in most grocery stores or online. Follow the directions in the package to make the calcium water, which is the secret ingredient to properly thicken sugar free jams and jellies.
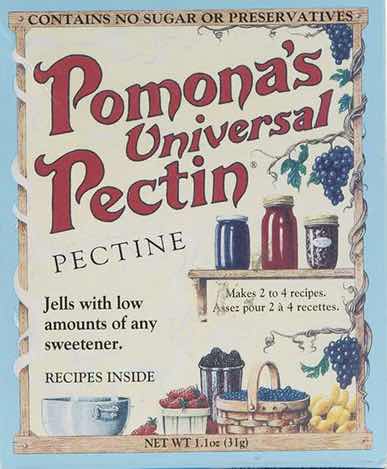
Pomona’s Universal Pectin
* Regular jam made with sugar typically reaches a temperature of 220°F when it is ready to be ladled into the jars. With sugar-free jams, the mixture will not rise to this temperature (usually no more than between 212 to 215°F), so you will have to use the “cold plate test” to determine when it is cooked enough to gel properly. Before you begin cooking the fruit mixture, place one or more small plates into the freezer to get cold. When you think your mixture is ready, spoon a small amount onto the cold plate and let it sit for a few minutes. If it forms a skin and begins to thicken and gel, then the jam mixture is ready for canning.

* You can use fresh or frozen fruit to make jam. If using frozen, increase the amount to 6 cups of fruit and proceed with the recipe as directed.

* You do not have to process the finished jam in a boiling water bath, if you want to dig right in! Use sterilized jars, but place the finished jam in the refrigerator to set up and consume within 1-2 weeks. If you want to make your jam shelf-stable at room temperature for up to a year, you must follow the canning directions, always use new lids and submerge the filled jars in boiling water for 10 minutes and test to make sure it sealed properly (add 1 minute to boiling time for every 1000 feet above sea level). After it has cooled completely, check the lids for a seal. They should not flex when the center of the lid is pressed. A properly processed and sealed jar of jam is shelf-stable for 12-18 months. Refrigerate after opening and consume within 1-2 weeks.

The Recipes:
Each recipe yields about 3-1/2 cups

Cherry Jam:
5 cups of cherries, pitted (or 6 cups frozen)
1/2 cup bottled lemon juice
3 teaspoons calcium water (see Tips and Tricks section above)
1 cup allulose
2 teaspoons Pomona’s Universal Pectin powder
1 teaspoon cherry extract (optional), or to taste

Peach Jam:
5 cups peeled and chopped fresh peaches (or 6 cups frozen)
1/4 cup bottled lemon juice
4 teaspoons calcium water
1 cup allulose
2 teaspoons Pomona’s Universal Pectin powder

Strawberry Jam:
5 cups fresh, chopped strawberries (or 6 cups frozen)
1/4 cup bottled lemon juice
4 teaspoons calcium water
1-1/3 cups allulose
2 teaspoons Pomona’s Universal Pectin powder
1/2 to 1 teaspoon strawberry extract (optional), or to taste

Sugar Free Strawberry Jam

Directions:

1. Prepare the boiling water canner. Put the canning rack on the bottom of a large pot, then heat the jars in simmering water until ready to use, for about 10 minutes. Wash the lids in soapy, hot water and set aside with the bands until you are ready to use them. (Do not boil the lids, but you can leave them in very hot water until you’re ready to use them.)

2. In a bowl, combine the allulose and pectin powder; set aside.

3. Prepare the fruit by peeling, pitting and chopping into chunks, whatever is required, and measure out the required amount (either 5 cups fresh fruit or 6 cups frozen). Put the fruit in a large pot over medium heat. Add the lemon juice and calcium water and stir. Bring to a boil, then use a potato masher to crush up the fruit to the desired consistency. If you like your jam chunky, then leave larger pieces of fruit. Bring to a rolling boil and, if needed, skim the foam and discard.
 
4. Gradually stir in the allulose/pectin mixture and continue to stir until the sweetener and pectin dissolves.

5. Bring the fruit mixture to a full rolling boil that cannot be stirred down. Boil hard for at least one minute, stirring constantly. Remove from the heat and skim any additional foam off the top if necessary. To test for the proper consistency, use the “cold plate test” as described in the Tips and Tricks section above.

6. Using a jar lifter, lift one jar out of the hot water and place it on a towel or wooden cutting board. Ladle the hot jam into the hot jar using a canning funnel. Leave 1/4 inch of head space at the top. Remove any air bubbles and wipe the jar rim with a paper towel or a clean cloth. Center a lid on the jar and apply the band, screwing it down until it is just fingertip tight. Repeat the process with the other jars until all of the jars are filled.

7. Process the jars in boiling water for 10 minutes, adjusting for altitude (add 1 minute to boiling time for every 1000 feet above sea level). Turn off the heat and let the jars sit in the canner, uncovered, until the water stops boiling or for several minutes. Very carefully remove the jars with the jar lifter, lifting them straight up (do not tilt jars as you lift them) and place them on a clean towel. You can gently blot any excess water from the top of each jar with a kitchen towel, but do not press down on the lid.

No Sugar Added Peach Jam
8. Let the jars cool undisturbed for 12 to 24 hours. You will hear a popping sound as the jars cool and create a vacuum seal. This is normal. After 12-24 hours, check the lids for a proper seal, they should not flex when the center is pressed. If any jars did not seal properly, you may put them in the refrigerator and use the jam immediately or you can reprocess them with a new lid.
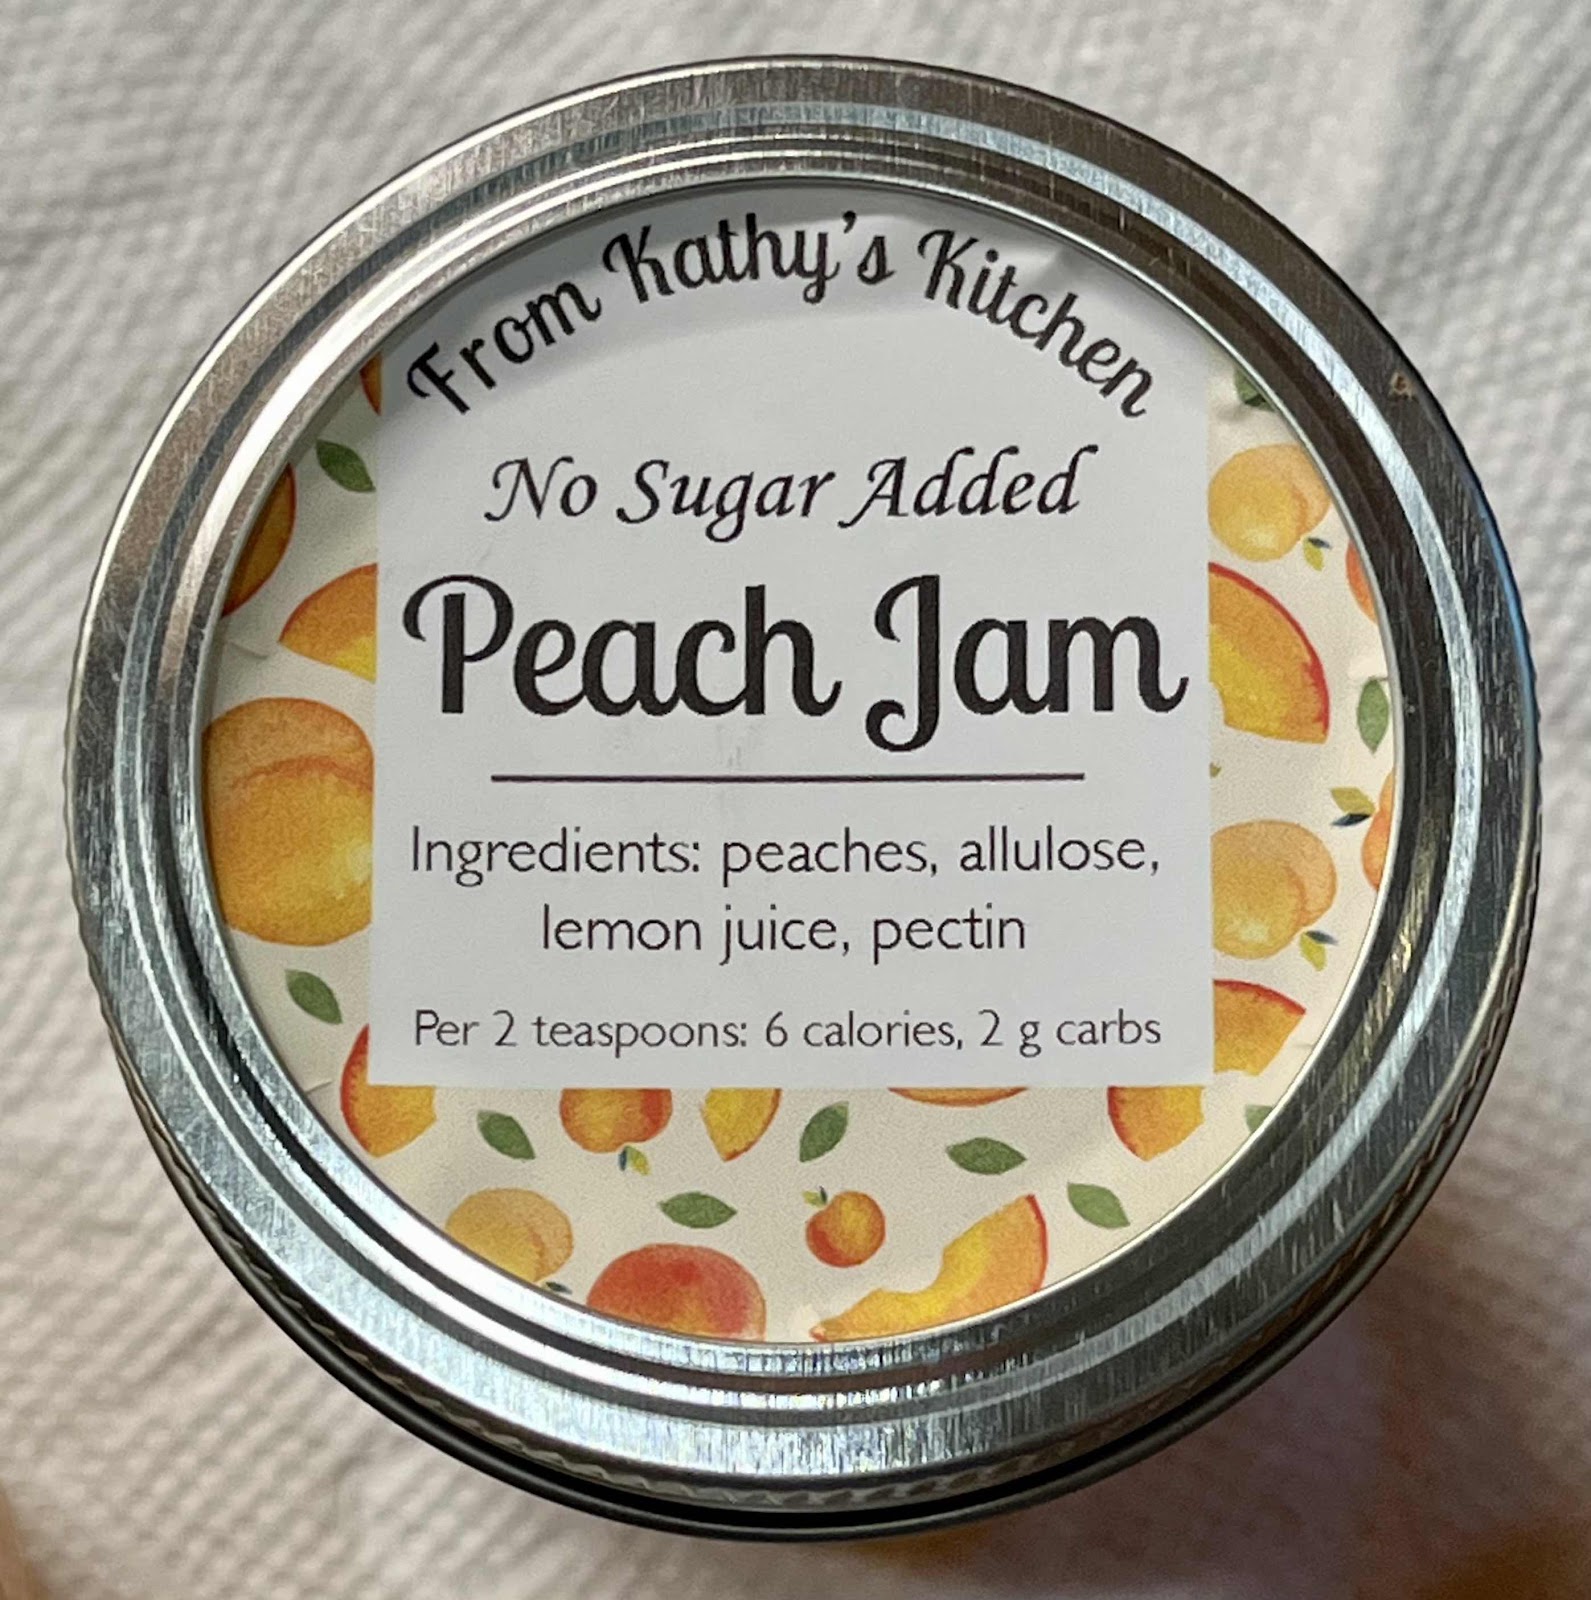
Peach Jam Label
Nutritional Information for Cherry Jam (2 teaspoons): Calories: 8 / 2 g carbohydrate / 0 g dietary fiber / 0 g fat / 0 g protein

Nutritional Information for Peach Jam (2 teaspoons): Calories: 6 / 2 g carbohydrate / 0 g dietary fiber / 0 g fat / 0 g protein 

Nutritional Information for Strawberry Jam (2 teaspoons): Calories: 4 / 1 g carbohydrate / 0 g dietary fiber / 0 g fat / 0 g protein

Photos and recipes by Kathy Sheehan, copyright 2022
All rights reserved. Please do not duplicate without the author’s permission.

Tuesday, August 3, 2021

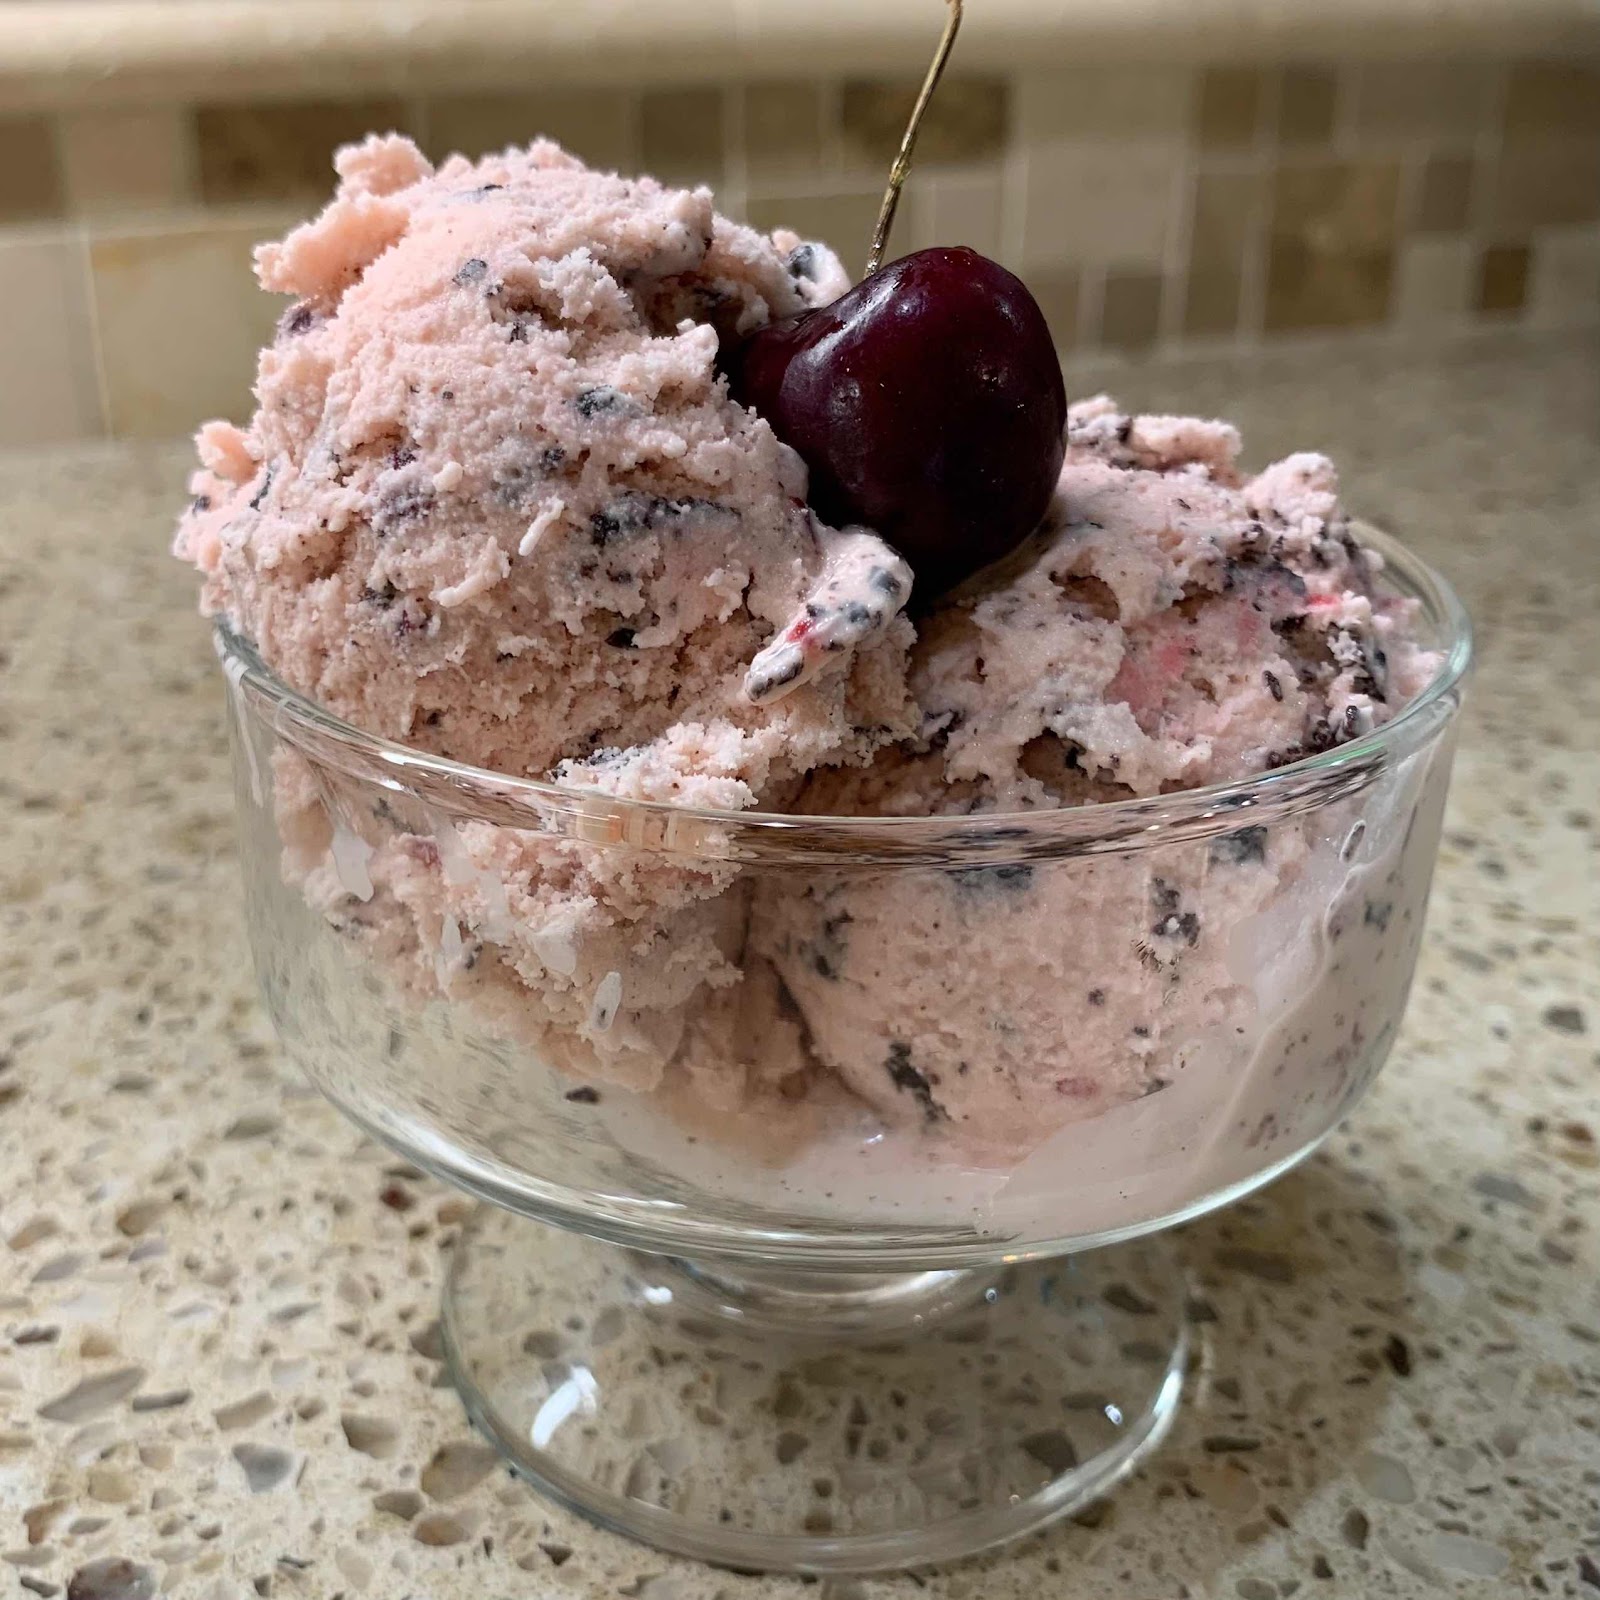
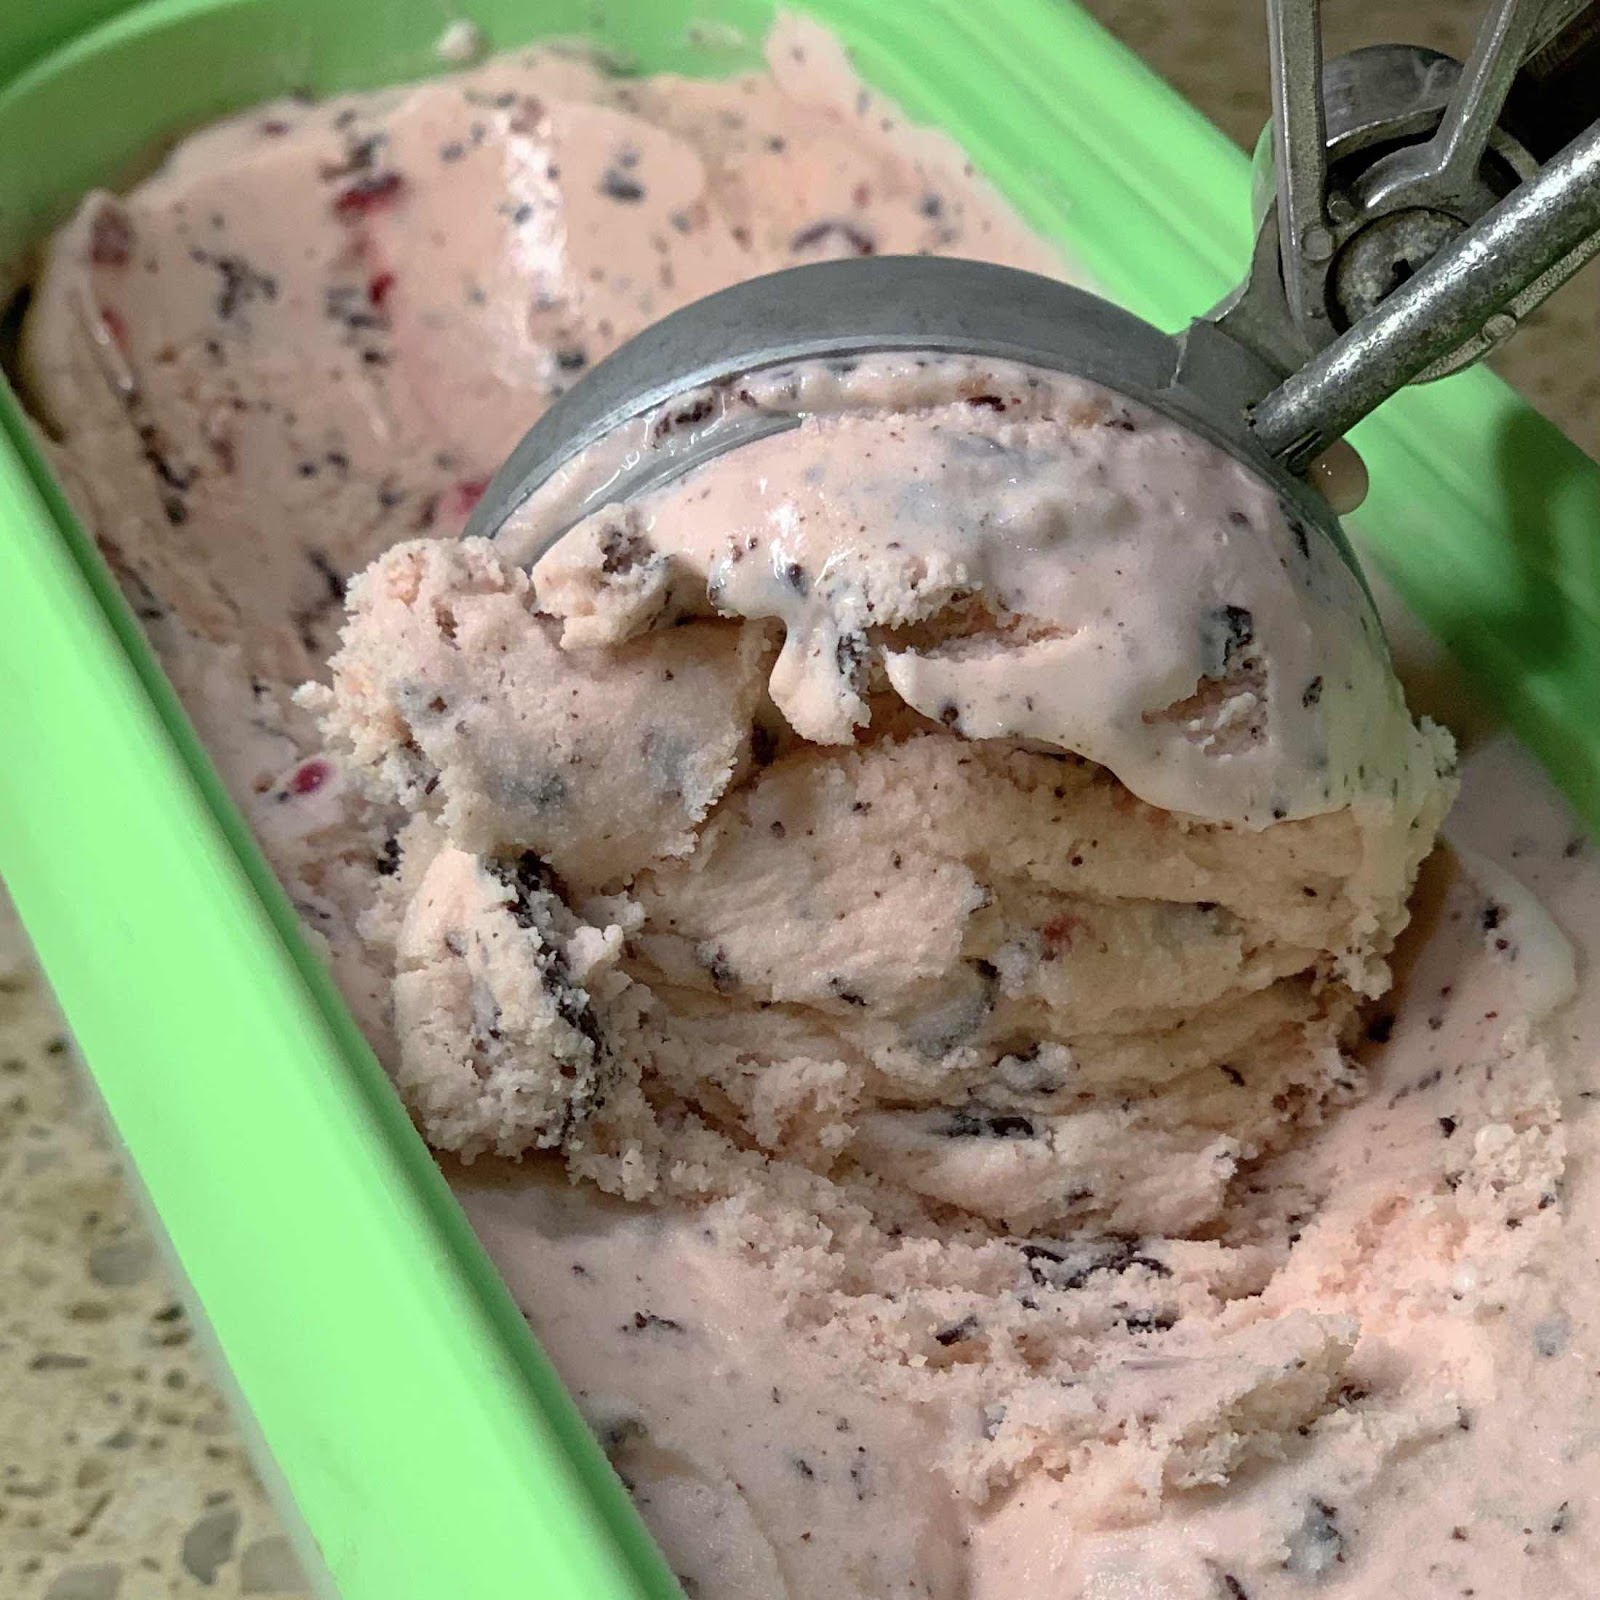
Low Carb Cherry Stracciatella Ice Cream (Cherry Chip)

Low Carb Cherry Stracciatella Ice Cream
In Italian, the word stracciatella literally means, “rags or shards.” Stracciatella is made by drizzling a fine stream of chocolate into cold, churning ice cream. The chocolate thread instantly solidifies and, as it continues to be churned, breaks into flakes of melt-in-your-mouth, rich chocolate. This isn’t like any ordinary chocolate chip ice cream; it is luxurious! Normally, Stracciatella Gelato is vanilla-based. I wanted to take advantage of the gorgeous, ripe cherries available right now, so I made mine cherry-based instead. Because cherries are higher carb than berries, I take advantage of a high quality cherry extract to enhance the cherry flavor, so only a few chopped cherries are needed as a final mix-in. (I recommend Olive Nation brand, which can be purchased online.) This beautiful, delicately pink ice cream, laced with bits of cherry and sumptuous chocolate is quickly becoming a summer favorite at my house!

Remains scoopable, even when frozen
Low Carb Cherry Stracciatella Ice Cream (Cherry Chip)
Makes 8 servings

Cherry Ice Cream Base:
1 cup whole milk* (see note)
3 tablespoons erythritol-based sweetener (I used LaKanto Monkfruit sweetener)
6 tablespoons allulose
A pinch of salt
2 cups heavy cream
1 teaspoon vanilla extract
1 teaspoon cherry extract (I recommend Olive Nation brand)
1 drop of red food coloring (optional)
10 sweet, dark cherries (fresh or thawed from frozen), pitted and chopped

Chocolate Stracciatella:
2 tablespoons refined coconut oil, melted
3 squares of Lily’s sugar free dark chocolate bar, chopped (about 1 tablespoon)
2 tablespoons unsweetened cocoa powder
1/8 teaspoon vanilla extract
6-8 drops stevia or monkfruit extract, or to taste

1. In a medium bowl, whisk together the whole milk, sweeteners and salt. Whisk until the sweeteners are dissolved. Add the heavy cream, extracts and food coloring, if using. Cover and refrigerate a minimum of 2 hours, or overnight. Whisk mixture together again just before churning. 

2. Pit and chop the cherries, or pulse in a food processor, to desired consistency. Place the chopped cherries and any accumulated juices into an airtight container and refrigerate until called for in the churning process.

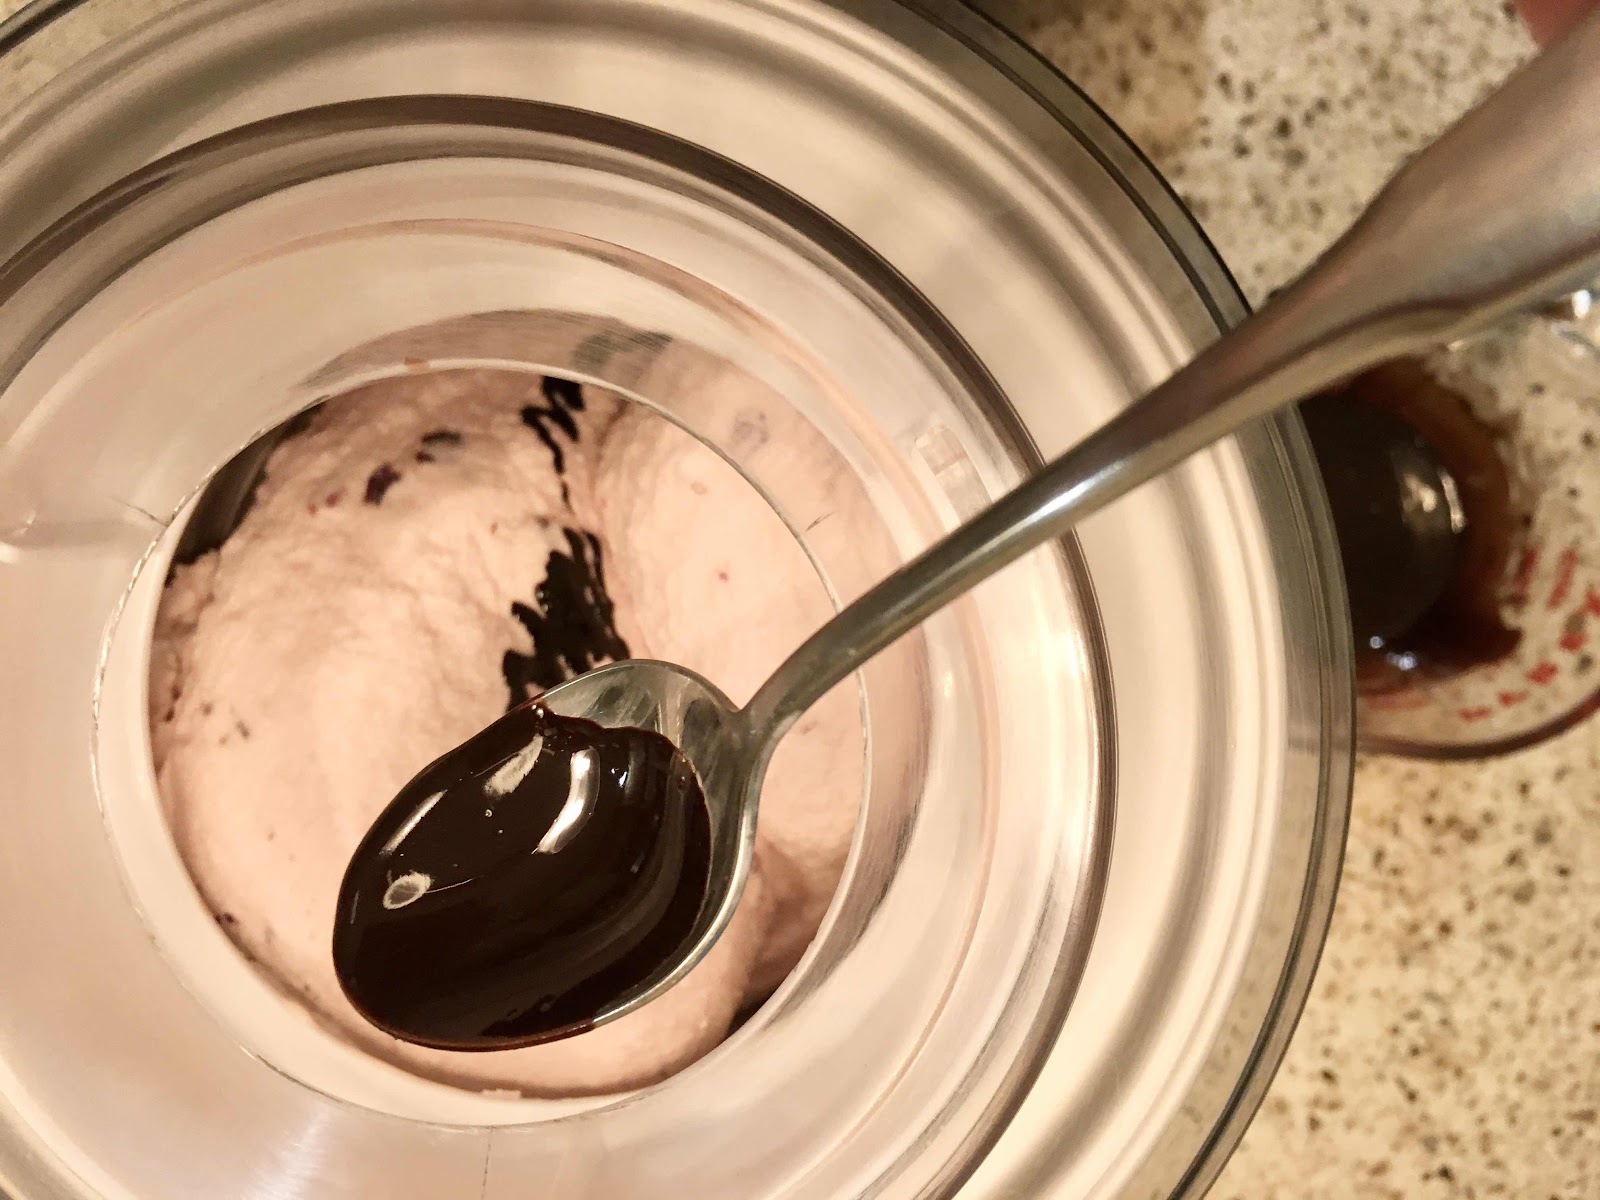
3. When the ice cream base is almost ready to churn, make the Chocolate Stracciatella by melting the coconut oil in a glass or microwave-safe measuring cup. Add the chopped chocolate and stir until melted and smooth. Add the cocoa powder, vanilla extract and stevia or monkfruit extract. Stir until completely smooth. Taste and adjust sweetening as desired; set aside to cool a bit before proceeding. Just prior to churning the ice cream, whisk and, only if necessary, microwave for a few seconds. You want the chocolate in a liquid state, but not too warm, so it will solidify quickly and create a flaked effect when added to the cold ice cream at the end of the churning process.

4. Follow the directions for your ice cream maker. Pour the chilled ice cream base into your ice cream maker and churn until thickened and beginning to set. Add the chopped cherries and any accumulated juices and continue churning until quite cold, very thick and nearly set. Slowly drizzle the Chocolate Stracciatella, as the ice cream is churning, 1 teaspoon at a time, waiting for the previous teaspoon of chocolate to solidify and move on before adding the next teaspoon.

Drizzle in the Chocolate Stracciatella
5. Spoon the ice cream into an airtight container and place in the freezer for a minimum of 3-4 hours or more before serving.

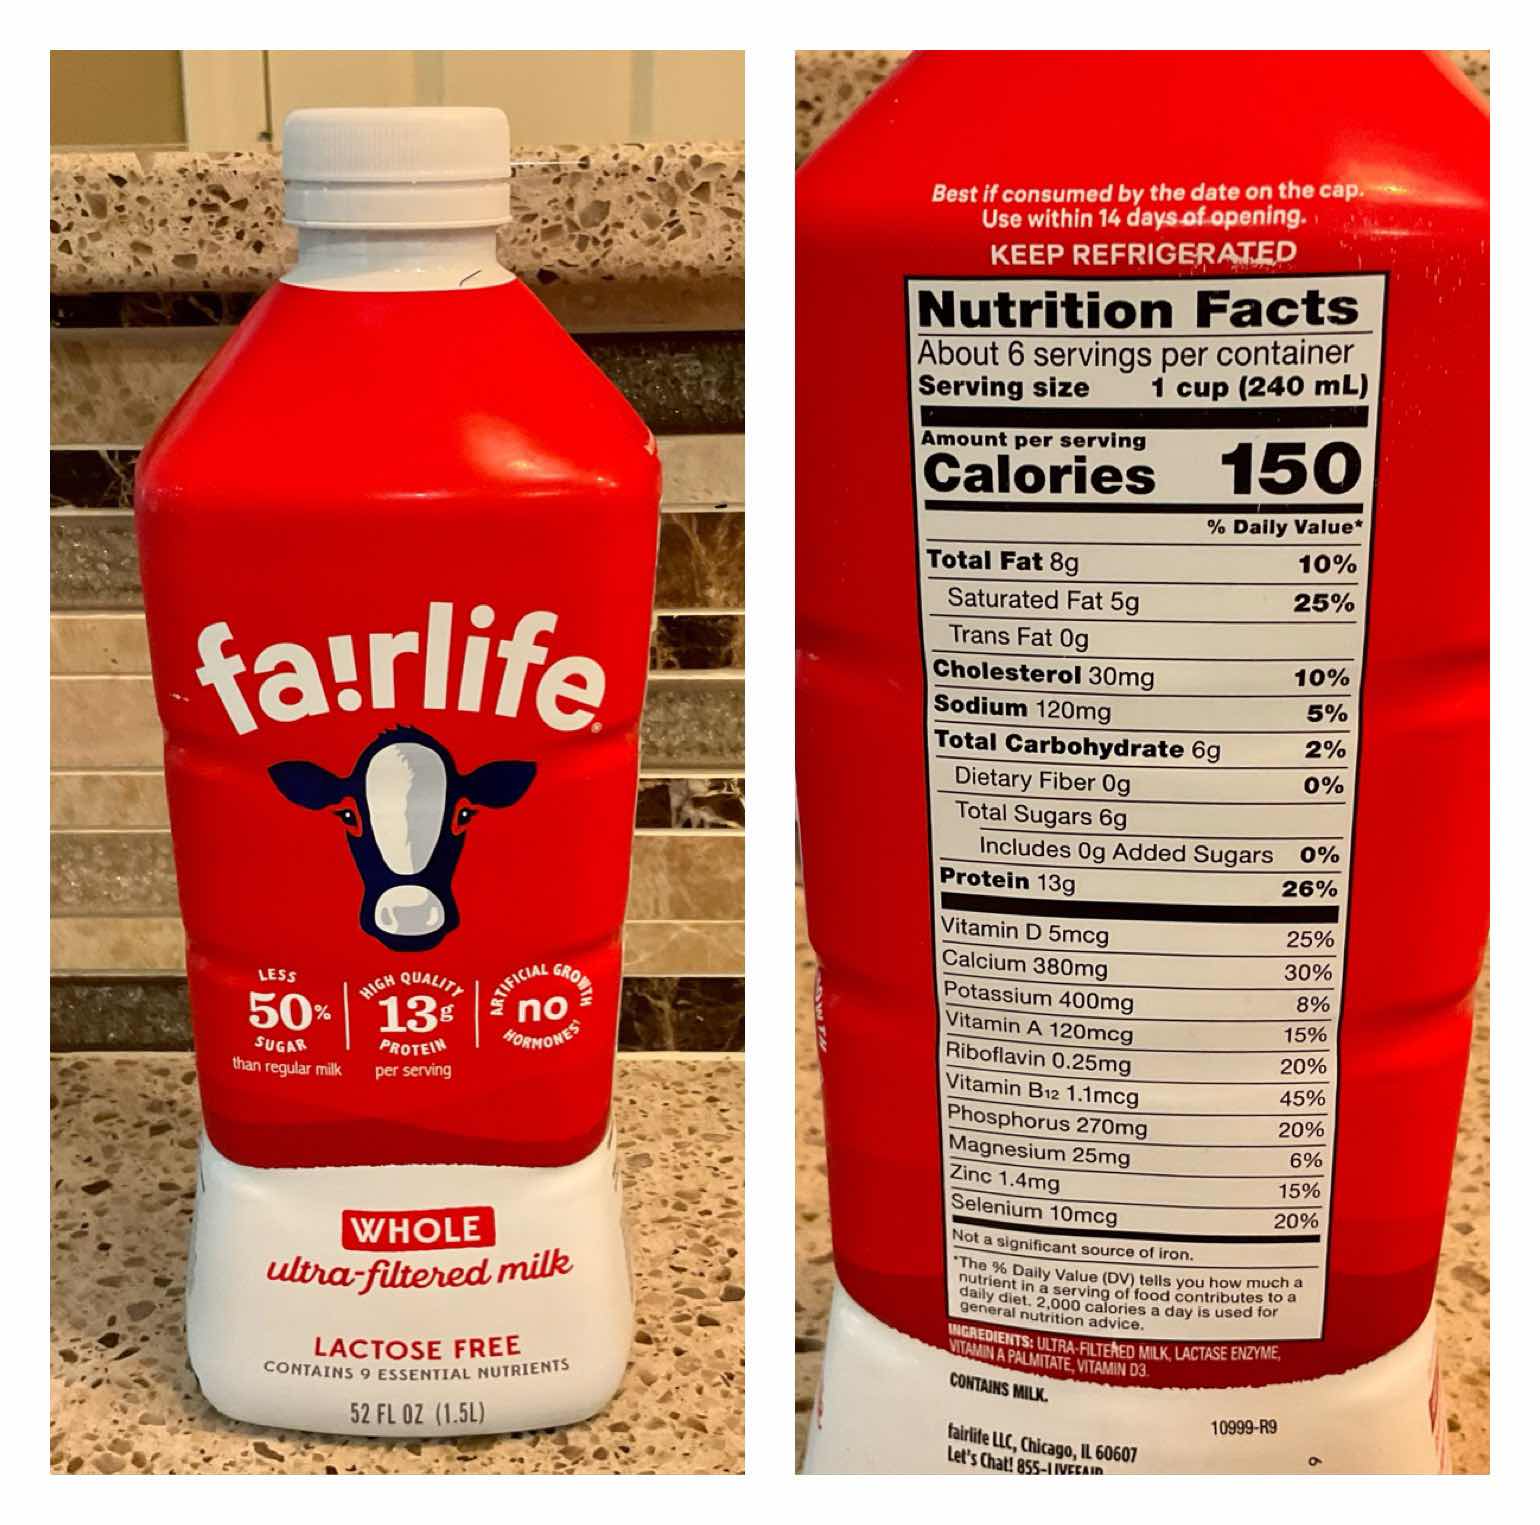
*Note about milk: I recommend the brand Fairlife Whole Milk because it has less sugar, is lactose free and has half the carbs of regular milk. If using regular whole milk, add 1.5 g carb per serving.

Fairlife Milk
Nutritional Information per serving (1/2 cup): 257 calories, 4.6 g carbohydrate (0.8 g dietary fiber, 2 g sugar, 0.6 g sugar alcohols), 27.1 g total fat (16.4 g saturated fat, 0 g trans fat), 83 mg cholesterol, 49 mg sodium, 53.6 mg calcium, 21 mg potassium, 257 IU Vit A, 1 mg Vit C, 2.1 g protein. Net carbs per serving: 3.2 grams

Recipe and Photos by Kathy Sheehan, copyright 2021
All rights reserved. Please do not duplicate without the author’s permission. 
Friday, June 25, 2021

Keto Chocolate-Covered Strawberry Cheesecake Popsicles

Keto Strawberry Cheesecake Popsicle
When the weather is hot, there’s nothing as refreshing as a cold and creamy popsicle! It just brings out the kid in me. This fruit-laced popsicle is excellent with fresh, ripe strawberries, but cherries would be just as delicious!

Keto Chocolate-Covered Strawberry Cheesecake Popsicles
Makes 4-6 popsicles, depending on the size of your molds (mine made 5)

1 teaspoon unflavored gelatin powder
1 tablespoon + 1 teaspoon cold water
4 ounces cream cheese, softened
1/2 teaspoon vanilla extract
3/4 teaspoon strawberry extract
1 1/2 tablespoons powdered allulose, or to taste
1 1/2 tablespoons powdered erythritol sweetener 
1/4 teaspoon stevia powder
3/4 cup heavy cream

Add In:
1/2 cup finely chopped or puréed ripe, fresh strawberries (pulse in food processor to desired consistency), or 10 cherries*

“Magic Shell” Chocolate Coating:
1 cup sugar free chocolate chips (dark, milk or white)
2 tablespoons refined coconut oil

1. In a small bowl or ramekin, sprinkle the gelatin over the cold water and allow to sit for a few minutes to bloom. Microwave on high for 5-8 seconds until the gelatin is dissolved. Stir and set aside.

2. With an electric handheld or standing mixer, beat the cream cheese until fluffy and no lumps remain. Add the extracts and sweeteners and beat again to incorporate. Add the heavy cream and whip until medium peaks form. Add the gelatin mixture and beat briefly on low or medium speed until well distributed and combined.

3. With a rubber spatula or large spoon, fold in the puréed strawberries. Spoon into popsicle molds and freeze until very firm, overnight is best.

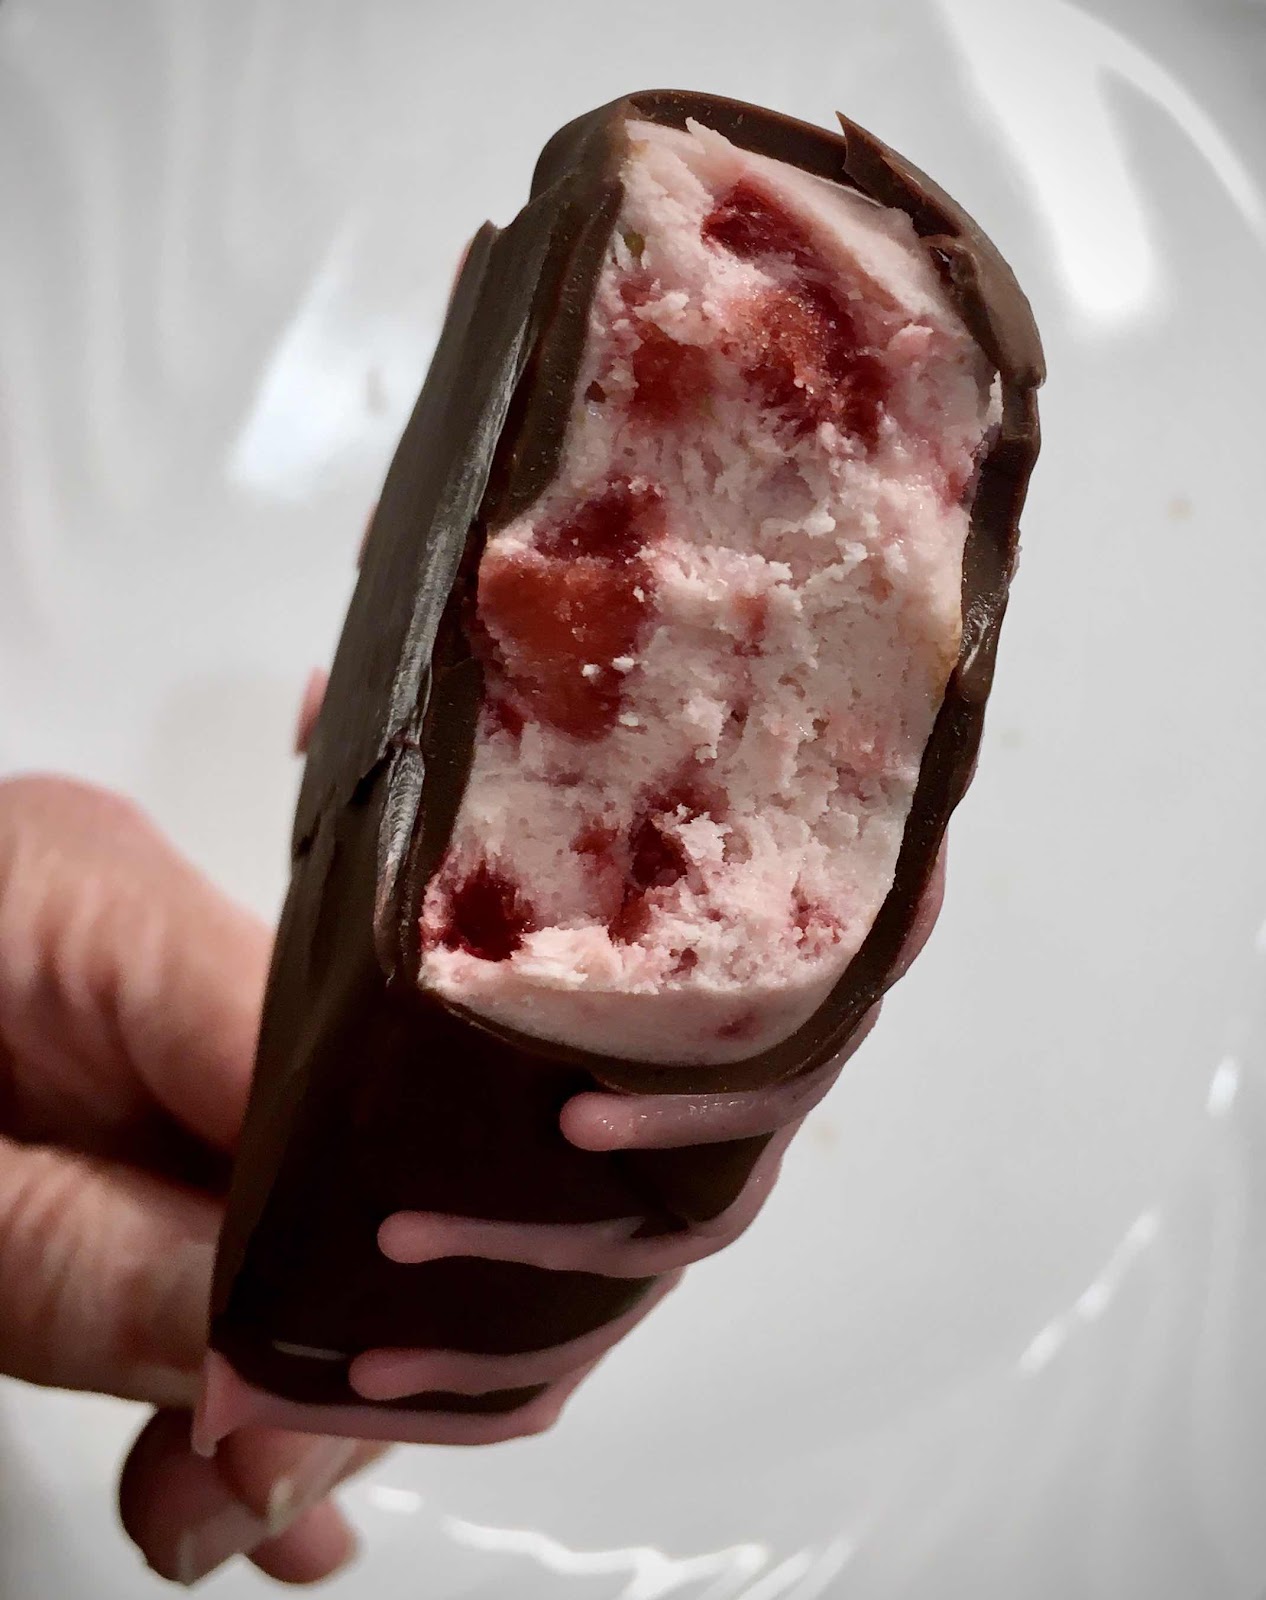
Close Up of Popsicle
4. To make the chocolate coating, place the sugar free chocolate chips and coconut oil into a tall, narrow microwaveable cup or mug (one that is wide enough that the popsicles will fit inside). Microwave at 50% power for 30 seconds, allow to sit for 1 minute and stir until chocolate is melted and completely smooth. If additional heating is needed, microwave at 50% power for 12 second intervals, stirring after each heating. Do not overheat or boil. Allow to cool a bit before dipping popsicles.

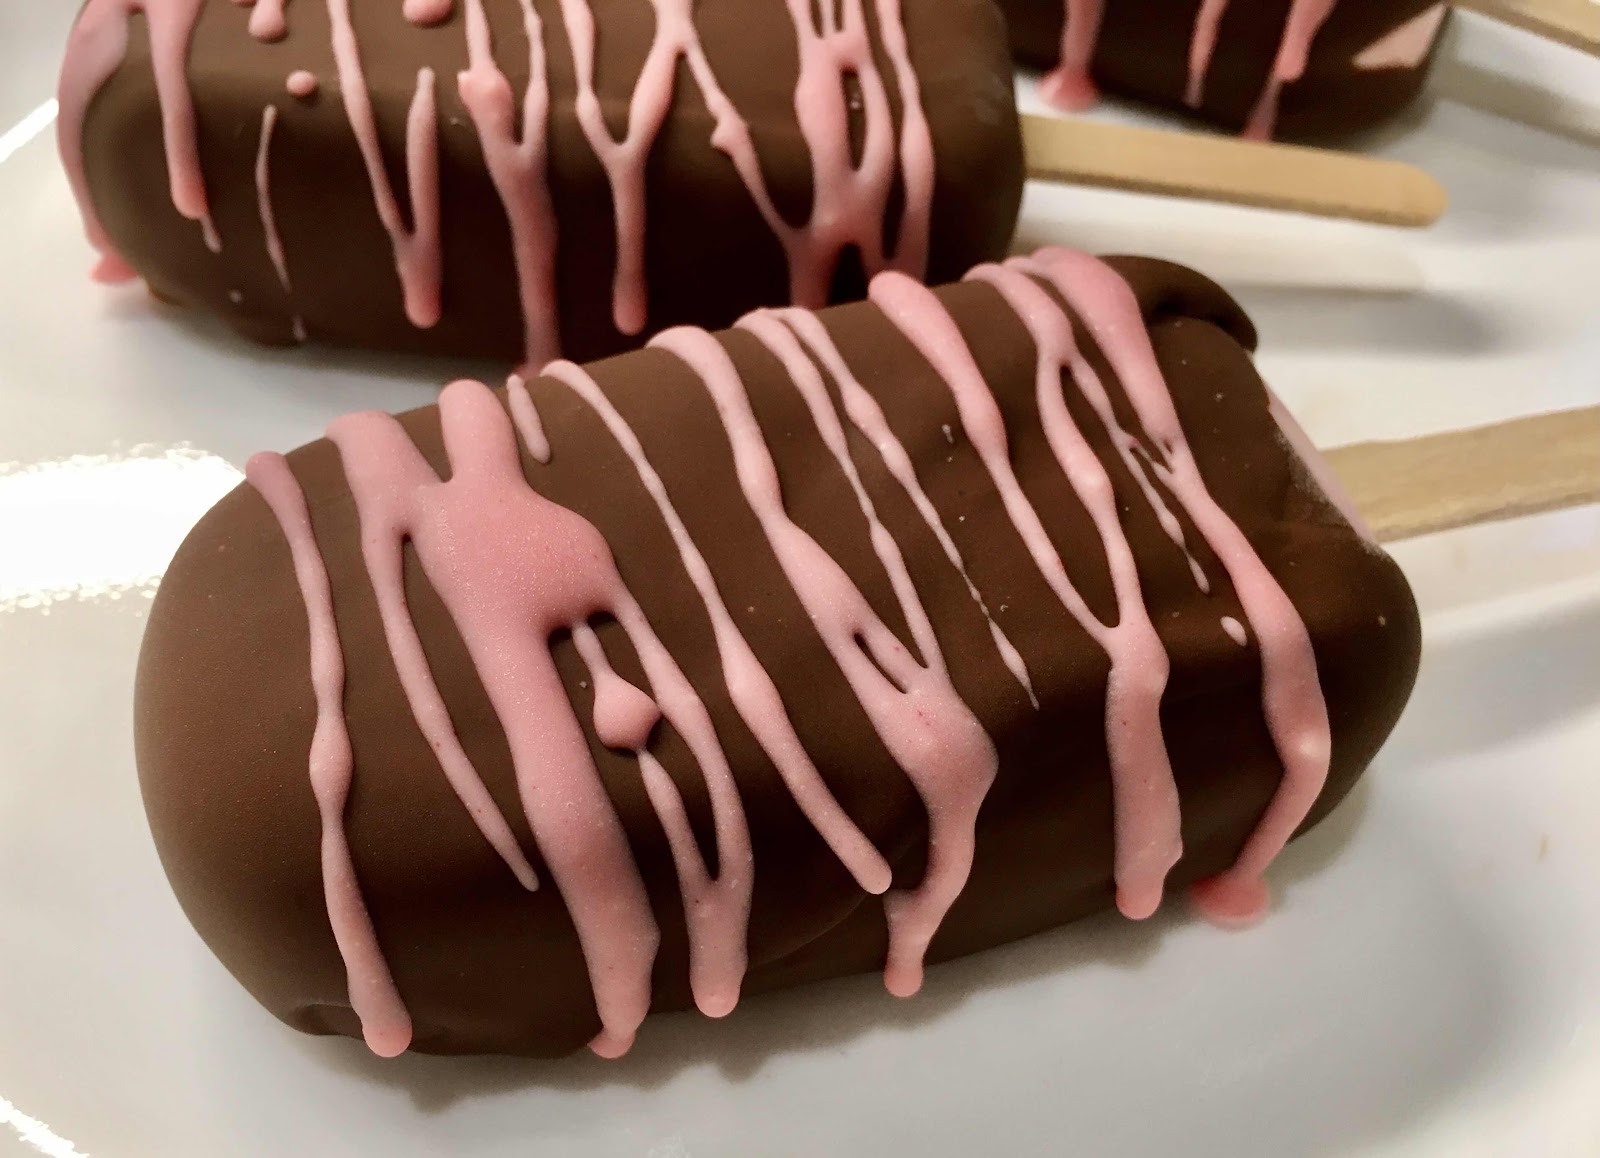
5. Remove the popsicles from their molds and dip into the chocolate mixture, allowing the excess to drip off. Place on a parchment-lined plate or small baking sheet. Return the popsicles to the freezer for at least 10 minutes or until chocolate has hardened. (I decorated mine with stripes of melted white chocolate tinted with red food coloring after the chocolate coating had hardened, but that is optional.)

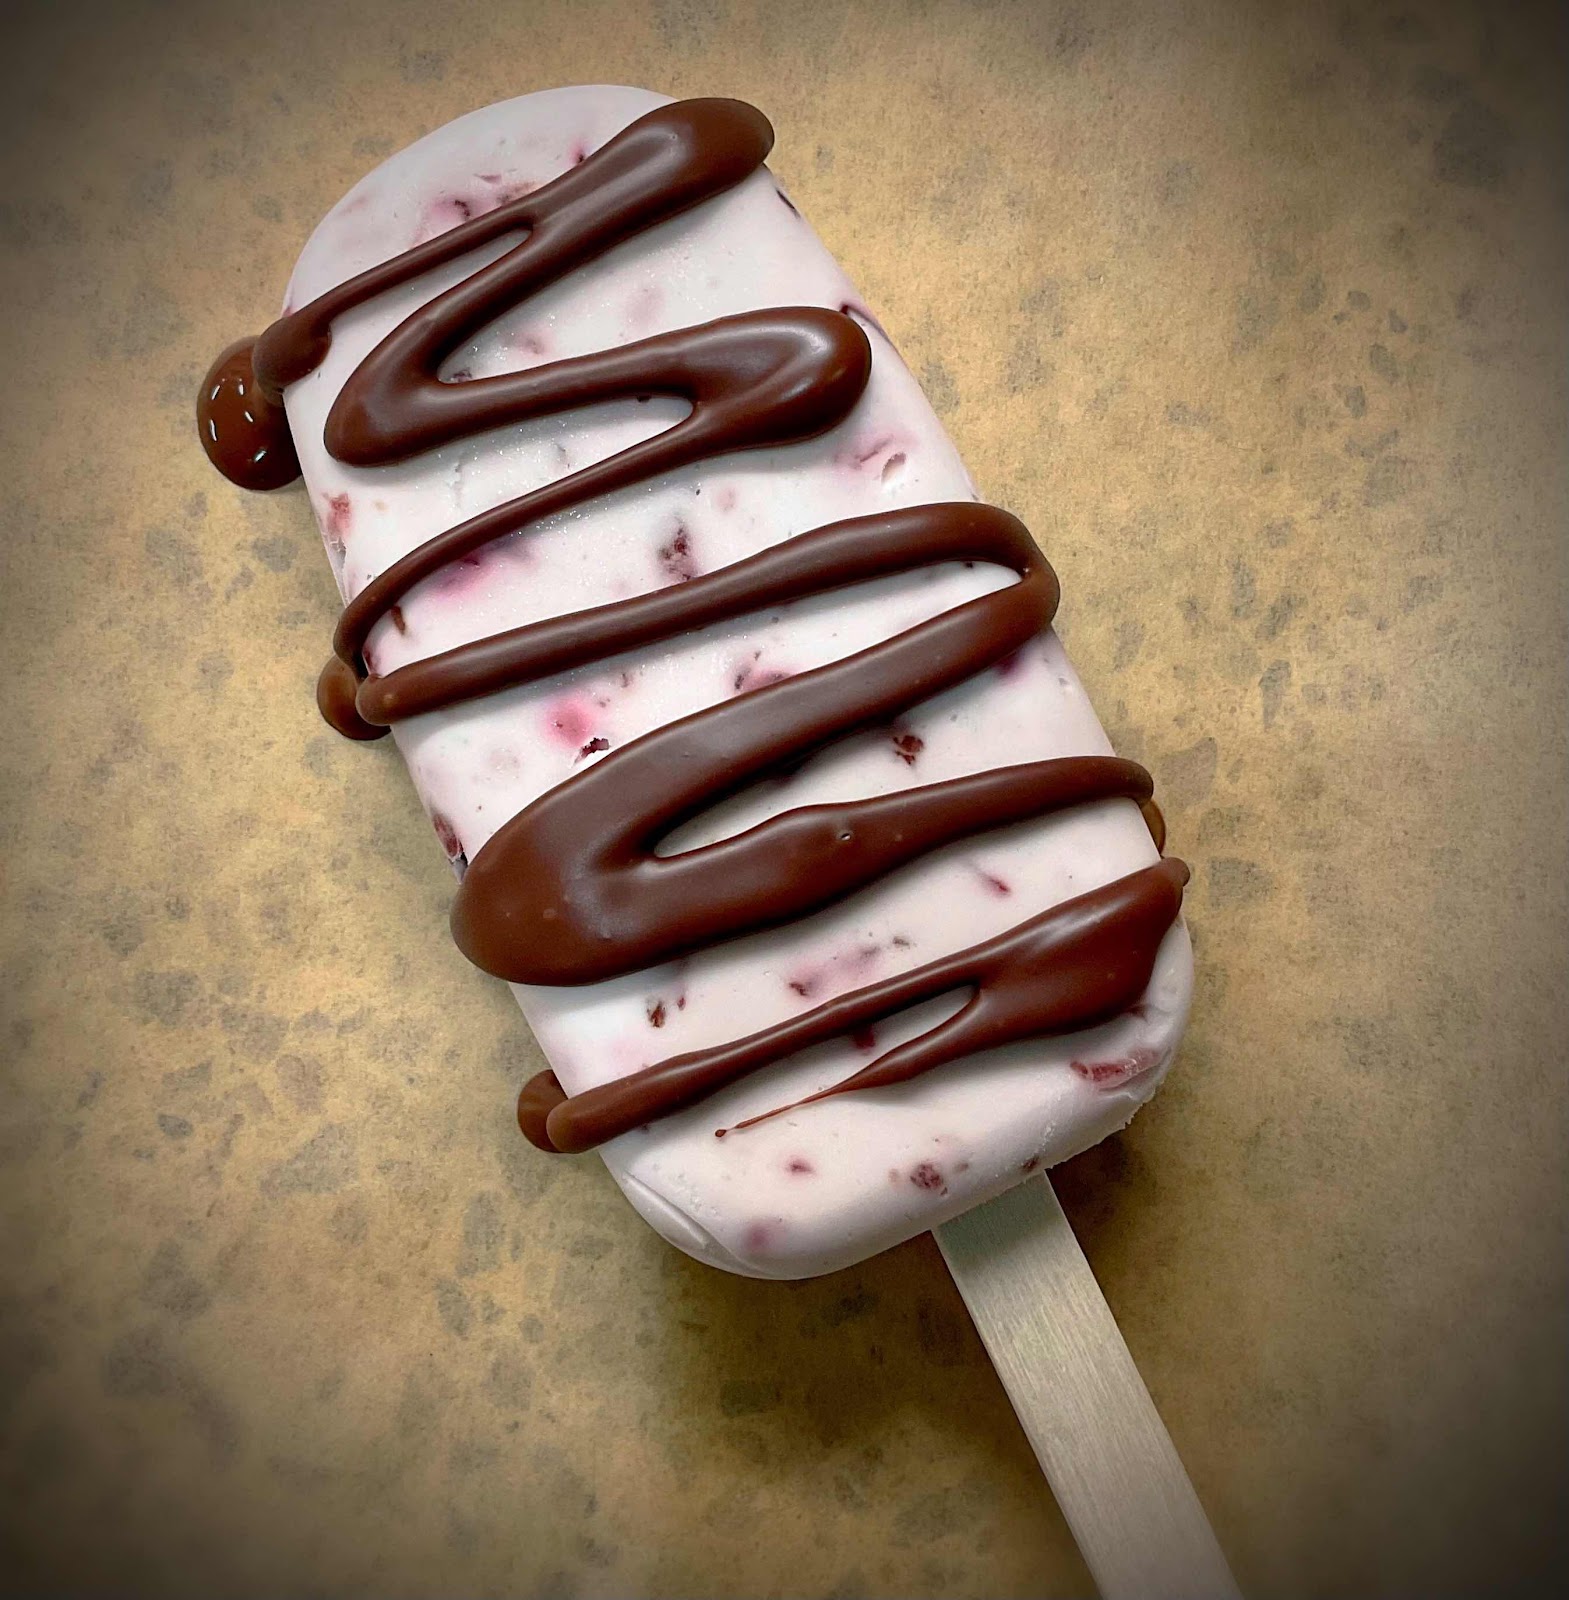
Chocolate Covered Cherry Cheesecake Popsicles
*Note: You can make these popsicles with sweet dark cherries (fresh or thawed from frozen) instead of strawberries. Adjust the extracts to 1/4 teaspoon vanilla extract and 1 teaspoon cherry extract and omit the strawberry extract.

Nutritional Information per popsicle with chocolate coating: 158 calories, 5.9 g carbohydrate (2 g dietary fiber, 1.4 g sugars), 16.5 g total fat (9.7 g saturated fat, 0 g trans fat), 52 mg cholesterol, 25 mg sodium, 5.4 mg calcium, 37 mg potassium, 14 mg Vit C, 150 IU Vit A, 1.1 g protein. Net carbs per serving: 3.9 grams

Photos and recipe by Kathy Sheehan, copyright 2021
All rights reserved. Please do not duplicate without the author’s permission. 
Friday, July 21, 2017

Cherry Cream Donuts with Dark Chocolate Glaze (Low Carb, Gluten Free)


I've been having way too much fun with my new donut baking pan! Yesterday I picked up some beautiful, organic fresh cherries and this recipe magically appeared in my mind. These donuts are reminiscent of the chocolate-covered cherries my grandmother used to love, so this recipe is dedicated to Gaga. The choice of chocolate for the glaze is important to keep the carb count down, so look for a very dark chocolate bar. My favorite brand is Green and Black's Organic 85% Cacao. Also, because cherries are higher in carb and must be limited, chop the few cherries called for in this recipe into small pieces so you will enjoy their sweet flavor in every bite. 

Cherry Cream Donuts with Dark Chocolate Glaze
Makes 6 donuts (more or less, depending on your pan)

1/2 cup almond flour
1 tablespoon coconut flour
1 tablespoon + 1 teaspoon granulated erythritol (I used LaKanto Monkfruit Sweetener)
1/2 teaspoon stevia powder (I used Sweet Leaf brand)
1 tablespoon unflavored whey protein powder
3/4 teaspoon baking powder
1/8 teaspoon kosher or sea salt
2 tablespoons butter, melted
1 large egg, lightly beaten
2 tablespoons heavy cream (or full-fat coconut milk)
1/4 teaspoon vanilla extract
7 fresh cherries, pitted and finely chopped

Chocolate Glaze:
2 ounces 85% or higher dark chocolate (I used 16 squares from a Green and Black bar)
1/4 cup heavy cream
A pinch of salt

1. For the donuts, lightly grease a donut pan and preheat oven to 325 degrees Fahrenheit. 

2. In a large bowl, whisk together the almond flour, coconut flour, erythritol, stevia powder, whey protein powder, baking powder and salt until no lumps remain. Stir in the melted butter, egg, heavy cream and vanilla extract. Whisk until the batter is well combined and smooth. Fold in chopped cherries until well distributed.

3. Fill donut pan holes approximately 2/3 to 3/4 full (do not overfill) and bake for 16-18 minutes or until donuts are lightly browned and set. Let cool in pan for 5 minutes, then flip out onto a wire rack to cool completely before glazing.

4. For the glaze, place the heavy cream and salt in a small saucepan and heat until just simmering (or microwave in 10-15 second intervals until it is hot and just begins to boil). Meanwhile, chop the chocolate and place into a small, heat-proof bowl. Add the hot cream to the chocolate and allow to sit for 5-10 minutes before whisking until the mixture is smooth and no lumps remain. 

5. Dip the tops of the cooled donuts into the chocolate mixture.* Place the glazed donuts on a wire rack to cool until the chocolate glaze is set.

*Note: You will have plenty of extra glaze leftover (this recipe will glaze about a dozen or more regular-sized donuts). Place leftover glaze in an airtight container and store in the refrigerator to glaze other donuts or to drizzle over fresh berries. Heat gently to restore glaze to a liquid consistency.

Nutritional Information per donut (based on six per recipe): 173 calories, 7.3 g carbohydrate (2.1 g dietary fiber, 2 g sugars, 2.7 g sugar alcohols), 15.4 g total fat (6.9 g saturated fat, 0 g trans fat), 58 mg cholesterol, 126 mg sodium, 90.9 mg calcium, 107 mg potassium, 1 mg iron, 197 mg Vit A, 4.4 g protein. Net carbs per serving: 5.2 grams

Recipe by Kathy Sheehan, copyright 2017
All rights reserved. Please do not duplicate without author's permission.

Thursday, December 29, 2016

Black Forest Cherry Cobbler


You're going to thank me for this recipe. It was the featured dessert at my Christmas Eve family gathering this year and it was spectacular! Plump, dark sweet cherries, fudgy cake and topped with vanilla-laced whipped cream...what's not to love? Even the members of my family that are not gluten free or low carb enjoyed it immensely. (I gave them the option of real vanilla ice cream as a topping, which was a good compromise and worked out perfectly for everyone.) If you're partial to Black Forest Cake, like I am, this cobbler has all those delicious flavors without the carbs or guilt. Happy New Year!

Black Forest Cherry Cobbler
Makes 9 servings

3 cups fresh, organic dark cherries, pitted (or frozen, thawed for 30 minutes)
3/4 cup almond flour
2 tablespoons coconut flour
5 tablespoons unsweetened cacao powder
1/2 teaspoon baking powder
1/4 teaspoon salt
1/4 cup LaKanto Monkfruit sweetener (or other erythritol sweetener)
1 teaspoon stevia powder (I used Organic Sweet Leaf brand)
4 tablespoons cold butter, cubed
1/2 teaspoon vanilla extract
2 eggs, beaten
2 tablespoons heavy cream or full-fat coconut milk

1. Preheat oven to 350 degrees Fahrenheit. Grease an 8x8 inch glass baking dish with coconut oil, butter or ghee. Pour the cherries into the dish and distribute evenly, reserving a few cherries for the top, if desired. Set aside.

2. Whisk together the almond flour, coconut flour, cacao powder, salt, LaKanto Monkfruit sweetener, stevia powder and baking powder in a medium mixing bowl until no lumps remain. Add the cold butter cubes and, using a pastry cutter or two knives, cut in butter until the mixture resembles coarse cornmeal (the butter should be smaller than pea size).

3. Separately, in a small bowl, beat the eggs, vanilla and cream. Whisk wet and dry ingredients together until just combined. Drop by spoonfuls over the cherries and spread to the edges. Top with reserved cherries, if desired.

4. Bake in preheated oven for 45-50 minutes, or until batter is set on top. Serve warm or at room temperature. Top with vanilla whipped cream sweetened with stevia (optional).

Nutritional Information per serving (1/9 or recipe, no whipped cream): 169 calories, 13.7 g carbohydrate (3.4 g dietary fiber, 7.2 g sugars, 5.2 g sugar alcohols), 12 g total fat (4.7 g saturated fat, 0 g trans fat), 18 mg cholesterol, 96 mg sodium, 42.5 mg calcium, 121 mg potassium, 3.3 g protein. Net carbs per serving: 10.3 grams

Recipe by Kathy Sheehan, copyright 2016
All rights reserved. Please do not duplicate without author's permission.

Sunday, July 3, 2016

Cherry Chocolate Chip Kefir Ice Cream with Macadamia


Summer just isn't summer without ice cream! For a long time, I only would allow myself a single dip of ice cream once a year as a treat. (How sad and un-American is that?) I felt deprived and certainly left out of the whole social experience of eating ice cream with family and friends. I wanted more freedom to enjoy the short, warm season in Maine like everyone else...and that means having plenty of ice cream. The only difference now is that I make it myself. For my birthday last year, I received an ice cream maker and have been having a grand time creating healthy, sugar free ice cream in every season. My imagination has been the only limit to the variety of flavors I've enjoyed! The one ingredient I add to all my recipes is plain milk kefir because it's a delicious way to consume more probiotics. My ice cream is similar to frozen yogurt, but it contains many more beneficial microorganisms to boost digestive health, which is very important for a person with diabetes. This recipe highlights fresh cherries that are in season and at the lowest price right now. Combined with chocolate chips, cacao nibs and chopped macadamia nuts, it is bursting with real summertime flavor! If you don't have an ice cream maker, you can make this mixture into ice pops instead, but I highly recommend you consider getting one for all the ice cream you'll want to make in the future after you taste this!  To browse my other low carb, delicious and healthy ice cream recipes, click here.

Cherry Chocolate Chip Kefir Ice Cream with Macadamia
Makes eight (1/2 cup) servings

Ice cream base:

1 cup plain milk kefir (to learn how to make your own, click here) or use plain yogurt
2 cups full-fat coconut milk (I used A-Roy D brand)
1 tablespoon Lakanto Monkfruit sweetener (or other erythirtol sweetener)
3/4 teaspoon stevia powder, or to taste (I use Sweet Leaf brand)
1 heaping tablespoon raw cacao powder (or unsweetened cocoa powder)
5-8 drops of Cherry flavored liquid stevia (or regular)
1 tablespoon macadamia nut butter (or cashew butter)
12 fresh red sweet cherries, pitted (divided)

Stir-Ins:

2 tablespoons 70% or higher dark chocolate, chopped (I used 5 squares of Green and Black's 85% Organic Chocolate bar)
1 tablespoon raw cacao nibs
1/4 cup chopped macadamia nuts

1. In a blender, blend together the kefir, coconut milk, sweeteners, cacao powder, macadamia nut butter and 8 of the pitted cherries. Blend until well combined and smooth. Taste and adjust sweetening, if desired. Lastly, add the remaining 4 cherries and pulse blender only until cherries are roughly chopped (you want some chopped cherry pieces visible in the mixture). Pour into a glass jar and refrigerate for at least 1 hour.

2. Meanwhile, prepare stir-in ingredients and put them in a small bowl; set aside. (I like using cacao nibs with the chopped dark chocolate because it adds a nice crunchy texture to the finished ice cream but, if you don't have them, you can leave them out and add another 1 tablespoon of chopped chocolate instead.)

3. According to the manufacturer's instructions for your ice cream maker, churn the ice cream base until beginning to solidify.  Add the stir-ins and continue churning until a soft serve consistency is reached. At this point, you can serve immediately or, if you wish to scoop the ice cream, pour into a container and place in the freezer for about 15 minutes, but do not allow it to freeze completely (see note below). 

NOTE: This ice cream is best served right away because, if it is completely frozen, it will be too hard to scoop. Fill ice pop molds with any leftover ice cream and freeze to be eaten as popsicles later.

Nutritional Information per 1/2 cup: 202 calories, 6.8 g carbohydrate (1.3 g dietary fiber, 3.7 g sugars, 1.5 g sugar alcohol), 19 g total fat (10.9 g saturated fat, 0 g trans fat) 0 mg cholesterol, 13 mg sodium, 21.7 mg calcium, 51 mg potassium, 1.8 g protein. Net carbs per serving: 5.5 grams

Recipe by Kathy Sheehan, copyright 2016

Thursday, July 9, 2015

Milk and Non-Dairy Kefir


Kefir is a fermented milk beverage often described as a drinkable yogurt.  It is similar to yogurt, although kefir has more of the beneficial live organisms that many people hope to receive from yogurt to improve their health.  By consuming fermented and cultured foods, it helps to reduce inflammation which is a hallmark of T2 diabetes, and balance your gut microbiome.  It's extremely easy to make, requiring only milk or non-dairy milk (I use 100% coconut milk) and a culture starter known as kefir grains (not really a grain like wheat, but that's what they're called).  Kefir grains are a colony of the beneficial bacteria that will turn ordinary milk into kefir.  Lately. I've been having a wonderful time making batch after batch of delicious coconut milk kefir and flavoring it with chocolate, strawberries and, as pictured here, fresh cherries!  I am feeding my microbiome and seeing the positive results on my blood glucose monitor!  I highly encourage you to start making your own kefir and experimenting with different flavorings.  Below is the basic plain recipe, which can be made with any dairy milk from cow to goat, or full-fat coconut milk for non-dairy kefir.  Enjoy!

Milk or Non-Dairy Plain Milk Kefir
Makes 6-8 servings (1/2 cup)

3-4 cups milk of choice (If using coconut milk, choose full-fat and not coconut milk beverage)
2 tablespoons kefir grains (or use one packet of powdered starter)*

Place the milk and kefir grains (or powdered starter) into a clean, glass quart-size Mason jar.  Cover with cheese cloth and secure with a rubber band or cover loosely with the jar lid.  As the milk ferments the organisms will release gas, so it needs a way to escape.  Place at room temperature on your kitchen counter for 8-24 hours until it is slightly sour and tangy to your liking.  It's difficult to tell you an exact amount of time because fermentation happens at different rates depending on the vitality of the kefir grains, the temperature in your kitchen and your personal taste.  Check after 8 hours by tasting and continue checking at regular intervals until it reaches the level of tang that you like.  The longer it ferments, the more sour and tangy it will become.  It should taste similar to yogurt.

Pour through a fine mesh strainer to remove the lumpy kefir grains and store the strained kefir in the refrigerator.  (Do not refrigerate with grains still in the kefir; you must strain them out and save them to start your next batch.  If using powdered starter, strain and keep any small lumpy grains for your next batch.  If using powdered starter, you'll also need to hold back about 1/4-1/2 cup of the plain cultured kefir to add to your next batch.)  Kefir will keep in the refrigerator for about a week, although it may continue to thicken and ferment, becoming more tangy with time.  If it becomes too thick, either eat it with a spoon or add more milk and blend to reach desired consistency.

You can immediately start a new batch with your kefir grains or add them to 1-2 cups of milk and store them in the refrigerator for a few days before making more kefir.  When making non-dairy kefir, it's advisable to store your kefir grains between batches in dairy milk to keep them alive and in good condition.  The preferred food for kefir grains is lactose (milk sugar), so you'll need to revitalize them every few batches by storing them in milk.  Before making another batch of non-dairy kefir, strain and rinse the kefir grains in cool water, which will remove nearly all of the dairy residue.  If you are extremely sensitive to dairy, your best choice would be to use the powdered starter (instead of grains).  Body Ecology brand powdered kefir starter will make about 7 batches before you need to begin again with a new packet of powdered starter.

*Resources: The website Cultures for Health (www.culturesforhealth.com) sells both kefir grains and Body Ecology brand powdered kefir starter.  Also, the website offers many step-by-step, how-to videos for making a wide variety of cultured foods.  I highly recommend you check them out!

How to flavor your kefir:

Strawberry or Cherry Kefir:  Take 3/4 to 1 cup of fresh, sliced strawberries or cherries and gently heat them in a saucepan to release their juices.  Allow the heated fruit to come to room temperature.  Add the cooled fruit and 3 cups strained, plain kefir to a blender and blend until smooth.  Add 5-10 drops of liquid stevia to taste.  You might also wish to add vanilla extract.  If kefir becomes too thick after refrigeration, simply add additional milk and blend until desired consistency.  Try this variation with other berries!

Chocolate Kefir:  Heat 1/2 cup milk, 3 tablespoons unsweetened cocoa powder and 1/2 teaspoon stevia powder in a saucepan.  Stir constantly until cocoa powder dissolves and no lumps remain.  Remove from heat and allow to cool.  Stir again and add this mixture and 3 cups plain kefir to a blender.  Add 1/2 teaspoon vanilla extract and blend until smooth.  Taste and add additional sweetening as desired.  Store in the refrigerator.

Other uses for kefir:  Create your own flavored kefir by trying different fruits!  Use kefir in your smoothies or to make kefir ice cream (see my Pumpkin Pecan Kefir Ice Cream recipe here).  You can make kefir cheese (similar to cream cheese) from thick, dairy kefir by allowing the whey to drain from the kefir overnight through a fine-mesh strainer lined with several layers of cheese cloth.  Note: Non-dairy kefir usually isn't as thick as dairy kefir and may not work for making kefir cheese.

Cherry Chocolate Chip Kefir Ice Cream
 Nutritional Information per 1/2 cup serving will vary depending on type of milk used and other flavor additions.  Plain kefir will have approximately the same nutritional information as the milk used to make it.  Check the packaging label on the milk carton.

Recipe by Kathy Sheehan, copyright 2015.

Friday, May 10, 2013

Light & Easy Mini Cherry Cheesecake


I love cheesecake, but even if you substitute reduced fat cream cheese for the full fat in a recipe, the calorie and fat count can be staggering!  In this makeover recipe, I used one block of lower fat Neufchatel cream cheese and combined it with 1 cup of fat-free cottage cheese, which reduced the fat and calories from a traditional cheesecake recipe considerably.  Also, by using Splenda instead of white sugar, the carb count dropped by over 50%.  I am so pleased with the result.  Topped with "no sugar added" cherry pie filling, I can have my cheesecake and eat it, too!

Light & Easy Mini Cherry Cheesecake
Makes 10 servings

8 ounces Neufchatel cheese (or reduced fat cream cheese in a block, not whipped)
1 cup fat-free cottage cheese
2/3 cup Splenda granular (or other sugar subtitute of your choice)
2 teaspoons vanilla extract
1/2 teaspoon almond extract (optional)
2 eggs
10 chocolate wafer or Nilla wafer cookies (I used Nabisco Famous Chocolate wafers)
1-1/4 cups no sugar added cherry pie filling (I used Lucky Leaf brand)

1. Preheat the oven to 325-degrees F. Place a paper cupcake liner into 10 muffin cups of a baking tin.  Place one wafer cookie into each lined cup; set aside.

2. In a blender, blend together the first six ingredients (cream cheese through eggs) and blend until smooth.  Pour into prepared muffin tins, filling each cup 2/3 to 3/4 full.  Bake for 22-24 minutes or until set. 

3. Remove from oven and allow to cool on a wire rack until room temperature.  Refrigerate for at least 2-3 hours or overnight.  Top each with 2 tablespoons of the no sugar added pie filling & serve.  (You may substitute fresh fruit as topping, if desired.)

Nutritional Information per serving: 137 calories, 10.3 g carbohydrate (0.2 g dietary fiber, 4.8 g sugars), 7.2 g total fat (4 g saturated fat, 0 g trans fat), 55 mg cholesterol, 236 mg sodium, 42.7 mg calcium, 41 mg potassium, 6.5 g protein.

Recipe by Kathy Sheehan, copyright 2013

Friday, March 15, 2013

Smoothies (They're Green, but don't tell!)


I'm making progress.  This morning, my BG was 113! Although it hasn't been consistently in the normal range, I'm encouraged because I'm seeing a downward trend.  For the past six weeks, my diet has been mainly vegetable-based soups, fresh vegetables or salad, fruit, yogurt, cottage cheese and, a few days a week, a lean protein such as fish or chicken for dinner.  It's not very exciting, but it seems to be working. Also, the most amazing part is that my sugar and carb cravings are gone! I don't plan to remain on this highly restrictive diet always but, for now and until I reach my goal, I am severely limiting all bread products, grains, potatoes, rice and pasta.

The most exciting and varied part of my day is the green smoothie I make for breakfast.  I love mixing the different fruit flavors and hiding two or more servings of vegetables and fruit in each glass!  I know that some people turn away from green smoothies because they can't get past the green color.  Even though the fruit flavors overpower the greens (if the combination is right), the smoothie may not have an appetizing appearance which can make it hard for some to swallow.  I wanted to share these two delicious recipes because they're not green!  If you're one who might benefit from green smoothies, but have been reluctant to give them a try, these might just change your mind.

Tips for introducing yourself to green smoothies:  At first, add a small amount of greens to an otherwise fruit-based smoothie.  Add a little more every week until you reach the suggested amount in a recipe or to taste.  Use frozen fruit for a refreshing, cool smoothie (or add ices cubes).  When I make one of these smoothies in the morning, I drink about 2/3 of the entire recipe for breakfast, then refrigerate and finish the remaining portion as a snack in the late afternoon.


Chocolate Cherry “Green” Smoothie
Makes 2 servings 

(If you add a few ice cubes, this smoothie becomes an unforgettable frozen dessert.)

1 cup frozen cherries, no sugar added
½ small banana (frozen)
1 ½ cups unsweetened or original almond or soy milk
2 Tablespoons unsweetened cocoa powder
1-2 Tablespoons Splenda or Stevia, granular (or to taste)
2 cups mild greens, such as spinach or kale
1 Tablespoon fiber powder (optional)
½ scoop protein powder (optional)

Place all of the ingredients in a blender and blend until smooth or desired consistency is reached.

Nutritional Information per serving (with fiber and protein powders):  175 calories, 34.6 g carbohydrate (10.6 g fiber, 18.7 g sugars), 2.8 g total fat, 0.5 g saturated fat, 0 mg cholesterol, 155 mg sodium, 280.1 mg calcium, 6.2 g protein.


Chocolate Cashew Peanut Butter Banana Smoothie
Makes 2 servings 

(The cashews add a rich creaminess to this awesome smoothie!) 

2 Tablespoons raw cashews (about 12-14 whole cashews)
1 ½ cups unsweetened or original almond or soy milk
½ small banana (frozen)
2 Tablespoons unsweetened cocoa powder
2 Tablespoons creamy peanut butter
1-2 Tablespoons Splenda or Stevia, granular (or to taste)
2 cups mild greens, such as spinach or kale
1 Tablespoon fiber powder (optional)
½ scoop protein powder (optional)
6 ice cubes

If necessary, soak the cashews in the almond milk for 30 minutes or overnight. (This is advisable for those using a normal household blender.  If you have a heavy-duty blender, such as a Vita-mix, it is not necessary.) Place the cashews and almond milk in the blender and blend until smooth.  Add the remaining ingredients and blend until smooth.  One by one, drop the ice cubes into the blender while on low speed through the lid opening and blend until desired consistency is reached.

Nutritional Information per serving (with fiber and protein powders):  300 calories, 34.7 g carbohydrate (11 g fiber, 11 g sugars), 14.7 g total fat, 3.1 g saturated fat, 0 mg cholesterol, 280 mg sodium, 345.9 mg calcium, 12.3 g protein.

Recipes by Kathy Sheehan, copyright 2013

Thursday, June 16, 2011

Cherry Cheesecake Tapioca Pudding

It's that time of year again when fresh cherries are widely available and at the lowest prices of the season. My family loves them and I can't have too many recipes that highlight their juicy goodness. This is an old-fashioned one that reminds me of my childhood. Our housekeeper, Melvina, didn't make many desserts when cooking for my seven brothers and sisters, although on a rare occasion she'd make creamy tapioca to our great delight. Normally, tapioca pudding is made with milk, but this recipe is water-based which reduces the calories and fat. The fresh, light flavor is drawn directly from the cherries as they simmer and infuse the pudding. The addition of low-fat cream cheese and sprinkling of graham cracker gives it that distinct "cheesecake" taste. This is an easy dessert or snack that just screams "Summer!"

Cherry Cheesecake Tapioca Pudding
Makes 4 servings

3 cups fresh cherries, pitted and halved
1¼ cups water
1 teaspoon lemon juice
1/3 cup Splenda granular
3 tablespoons quick tapioca
Dash salt
2 tablespoons low-fat cream cheese, room temperature
½ teaspoon vanilla extract
2 tablespoons crushed graham crackers, divided for garnish

1. Mix the cherries, water, lemon juice, Splenda, tapioca and salt in a medium saucepan and allow to sit for 5 minutes. Heat mixture on medium heat, stirring constantly, until it comes to a boil. Reduce heat to a simmer and continue cooking, stirring often, for 10-15 minutes until cherries soften and tapioca becomes translucent.

2. Add cream cheese and stir until melted and well blended. Remove from heat and add vanilla. Divide into 4 serving dishes and refrigerate until chilled.

3. Just before serving, sprinkle each with ½ tablespoon crushed graham crackers.

Nutritional Information per serving: 159.5 calories, 29 g carbohydrate, 3 g total fat, 2 g saturated fat, 96 mg sodium, 1.5 g fiber, 1.7 g protein.

Original recipe by Kathy Sheehan, copyright 2011

Tuesday, November 23, 2010

Slice-of-Pie Oatmeal

The mornings are getting colder and I'm in the mood for a hot breakfast. These quick, flavorful additions to a bowl of steaming oatmeal make a wonderful start to the day! Using simple ingredients you might already have on hand, you can create a different flavor every morning. Oatmeal makes an ideal brunch, especially on weekends when most people sleep a bit later. Also, I'll admit to eating it as an afternoon snack, especially when it tastes like pie or cheesecake! My favorite style is the old-fashioned oats (or steel cut), which only take 5-7 minutes to prepare over the quick cooking variety, because the thicker grain is heartier and more substantial. I like my oatmeal to have a bite to it! Quick cooking is fine, but instant is too mushy in my opinion. Whatever time of day you get a craving for it, just boil some water and, in a few minutes, you'll have a satisfying bowl of warm goodness.

Slice-of-Pie Oatmeal
(Serves 1)

½ dry oatmeal, old-fashioned or quick cooking (not instant)
1 cup water
Pinch salt

Prepare oatmeal on the stovetop according to package directions. (Quick cooking may not require as much water, so please check the package.) Add topping of your choice from suggestions below and add nutritional information accordingly.

Nutritional Information for cooked oatmeal alone: 150 calories, 27 g carbohydrate, 2.5 g total fat, 0.5 g saturated fat, 250 mg sodium, 4 g fiber, 5 g protein.

Pumpkin Pie Spiced Oatmeal (pictured): Top cooked oatmeal with 1 tablespoon pumpkin butter, 2 tablespoons light vanilla yogurt and 1/8 teaspoon pumpkin pie spice. If you like it a bit sweeter, add ½ teaspoon Splenda granular and stir.
Add the following nutritional information to cooked oatmeal: 47 calories, 12 g carbohydrate, 0 g fat, 7 mg sodium, 0 g fiber, 0.5 g protein.

Apple Pie Oatmeal: Top cooked oatmeal with 1 tablespoon apple butter or ½ grated apple, 2 tablespoons light vanilla yogurt, 1/8 teaspoon vanilla extract and 1/8 teaspoon cinnamon. If you like it sweeter, add ½ teaspoon Splenda granular and stir.
Add the following nutritional information to cooked oatmeal: 47 calories, 12 g carbohydrate, 0 g fat, 7 mg sodium, 0 g fiber, 0.5 g protein.

Banana Cream Pie Oatmeal: Top cooked oatmeal with 1 tablespoon mashed ripe banana, 2 tablespoons light vanilla yogurt, 1 packet Splenda or Stevia and 1/8 teaspoon banana extract. Stir to combine.
Add the following nutritional information to cooked oatmeal: 46 calories, 11.2 g carbohydrate, 0.1 g total fat, 0 g saturated fat, 7 mg sodium, 1.1 g fiber, 0.9 g protein.

Cherry Cheesecake Oatmeal: Mix together 1 tablespoon low-fat cream cheese, ½ teaspoon vanilla extract, 1 packet of Splenda or Stevia and spoon onto cooked oatmeal. Top with 1 tablespoon chopped dried cherries and a pinch of nutmeg.
Add the following nutritional information to cooked oatmeal: 55 calories, 7 g carbohydrate, 1.8 g total fat, 1.1 g saturated fat, 30 mg sodium, 0.3 g fiber, 1.5 g protein.

Recipes by Kathy Sheehan, copyright 2010

Friday, June 25, 2010

Fresh Cherry Crumble

This is THE season for sweet cherries and my husband and I look forward to it every summer! Right now they're readily available in the stores, usually at the lowest price of the year. It always has been a tradition that every year at this time I make a sugar-free fresh cherry pie for my family. (If you've never had a cherry pie made from scratch with fresh cherries, then you've missed out. ) I love the taste but, even though it's sugar-free, it still must remain a once-a-summer treat because the carb and calorie count is too high. The culprit is in the crust. In this recipe, I've eliminated the high carb crust while keeping the best part - the yummy, sweet, gooey cherry filling! With only 18.5 net carbs per serving, it is a dessert I can have more often. It's very easy to prepare and, I guarantee, will be a huge hit at your family's 4th of July gathering.

Sugar-free Fresh Cherry Crumble
(Serves 8)

4 cups fresh cherries, pitted
2 tablespoons Splenda granular
2 tablespoons quick-cooking tapioca (dry)
1/8 teaspoon nutmeg
2 teaspoons grated lemon zest or ¼ teaspoon almond extract

Crumble Topping:
¼ cup almond flour
¼ cup all-purpose flour
½ cup Splenda granular
1/8 teaspoon ground mace
¼ teaspoon ground ginger
½ teaspoon ground cinnamon
Pinch salt
3 tablespoons cold unsalted butter, cubed

1. Preheat oven to 375-degrees. Place the pitted cherries into a large bowl. Add 2 tablespoons Splenda, tapioca, nutmeg, lemon zest or extract. (Do not add the zest, if using almond extract.) Stir to combine. Allow to sit for 10-15 minutes, stirring occasionally.

2. Meanwhile, place all of the dry topping ingredients into a large bowl. Add cubed butter and cut in using a pastry blender or two knives until butter has been incorporated and the mixture resembles small pebbles (do not overwork the mixture or it will turn to dough).

3. Pour cherry mixture into an 8-inch square baking dish that has been lightly sprayed with non-stick cooking spray. Distribute cherries into an even layer and sprinkle the crumble topping over the top. Bake in a preheated oven for 45-50 minutes. Remove from oven and allow to cool for at least 40 minutes before serving.

Nutritional Information per serving: 134.8 calories, 20 g carbohydrate, 6 g total fat, 2.7 g saturated fat, 20 mg sodium, 1.5 g fiber, 1.1 g protein

Original recipe by Kathy Sheehan, copyright 2010

How does this recipe compare to a traditional two-crust cherry pie? The difference will blow you away! If you thought that a fresh fruit pie is a good dessert choice, think again. For comparison, the nutritional information for 1/8th of a 9" cherry pie is 486 calories, 69.3 g carbohydrate, 22 g total fat, 5.4 g saturated fat, 344 mg sodium, 1.4 g fiber, 5 g protein.