Showing posts with label vanilla. Show all posts

Saturday, February 14, 2026

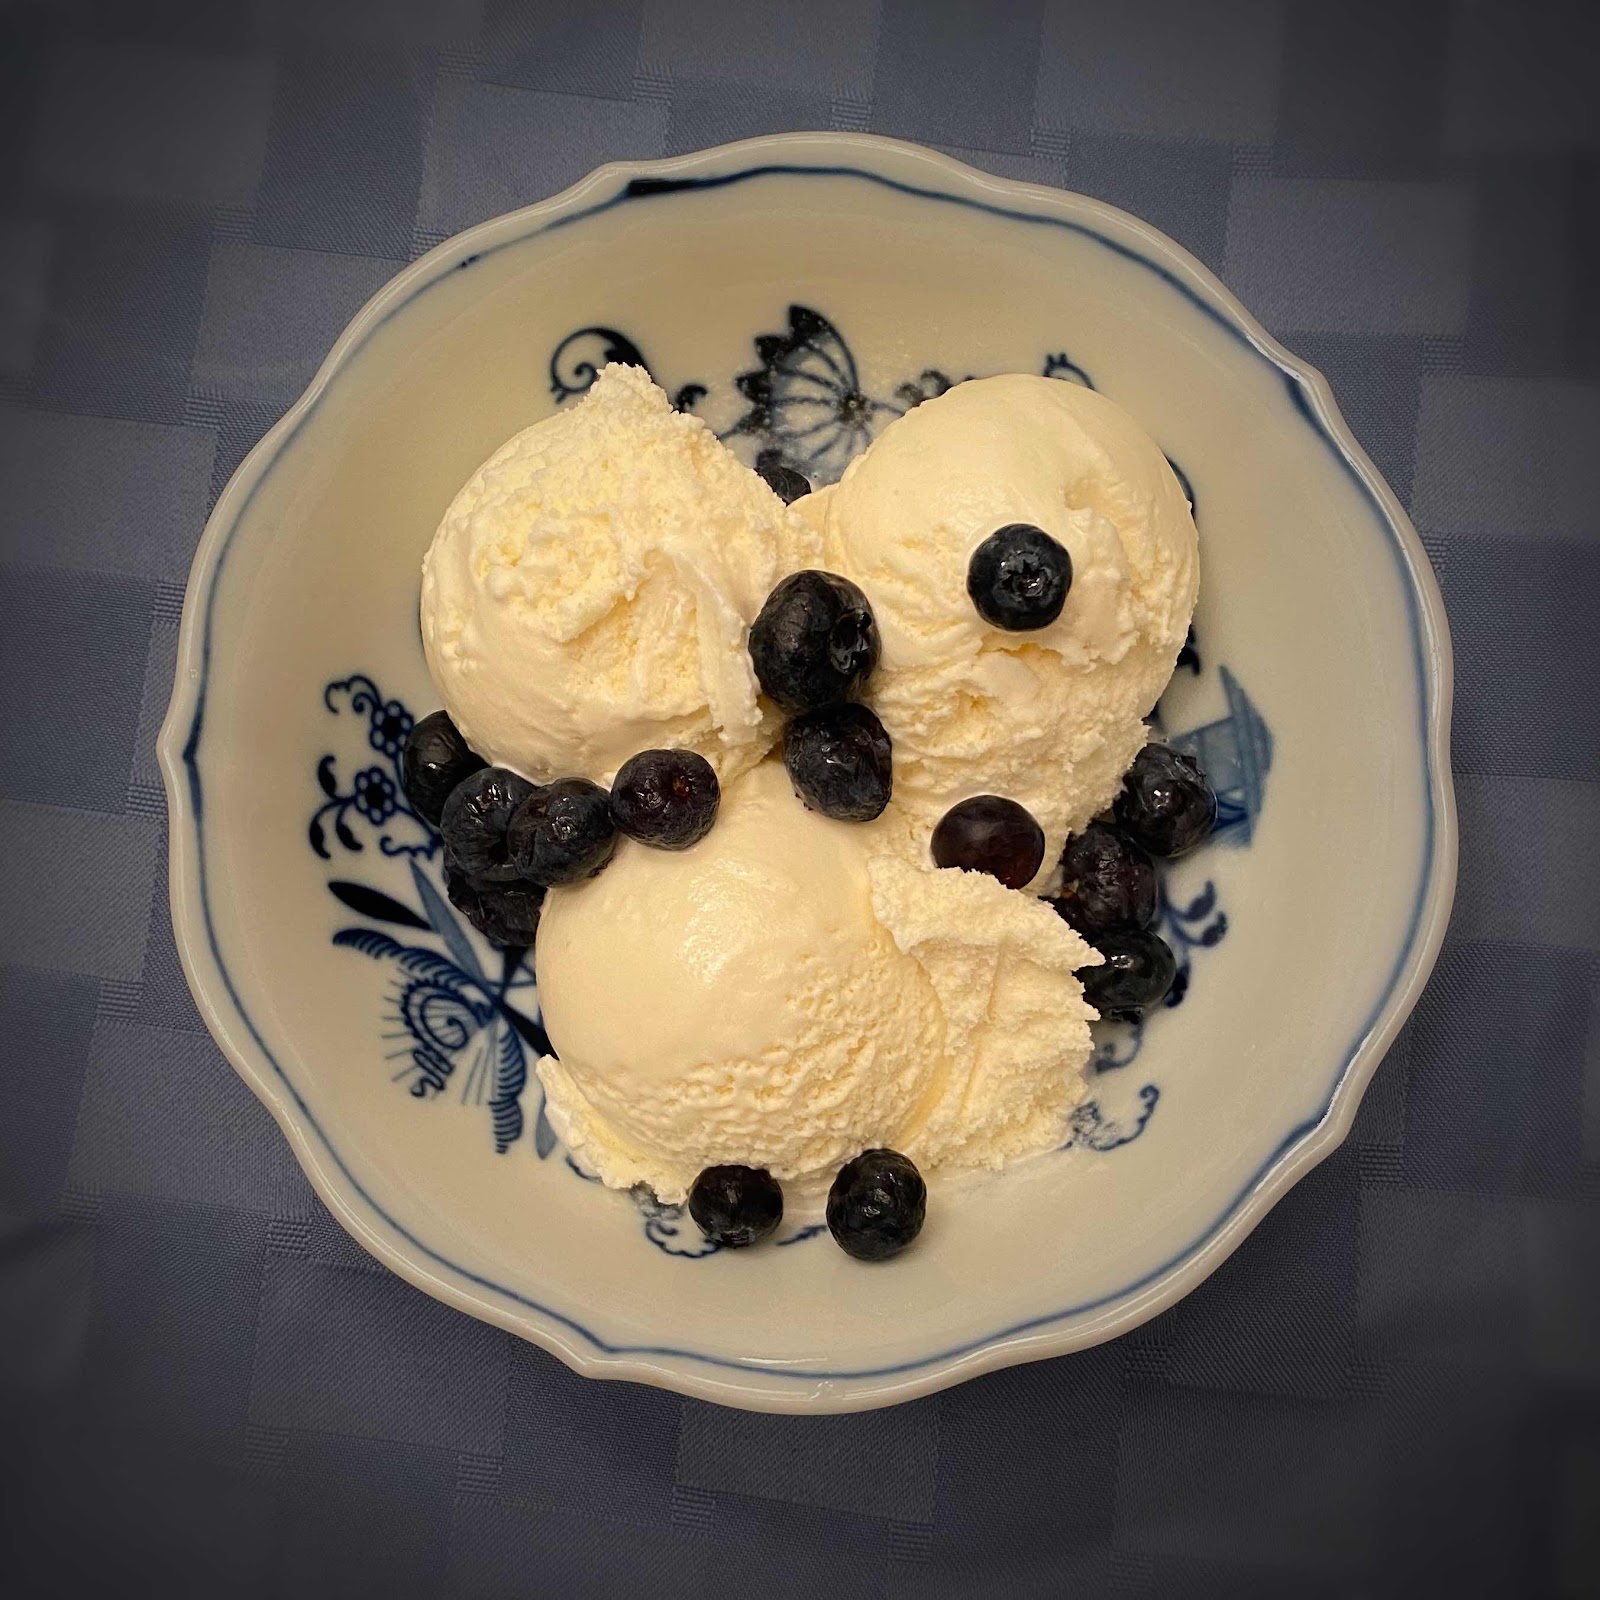
Low Carb Clotted Cream Ice Cream


Low Carb Clotted Cream Ice Cream with sugar free chocolate sauce

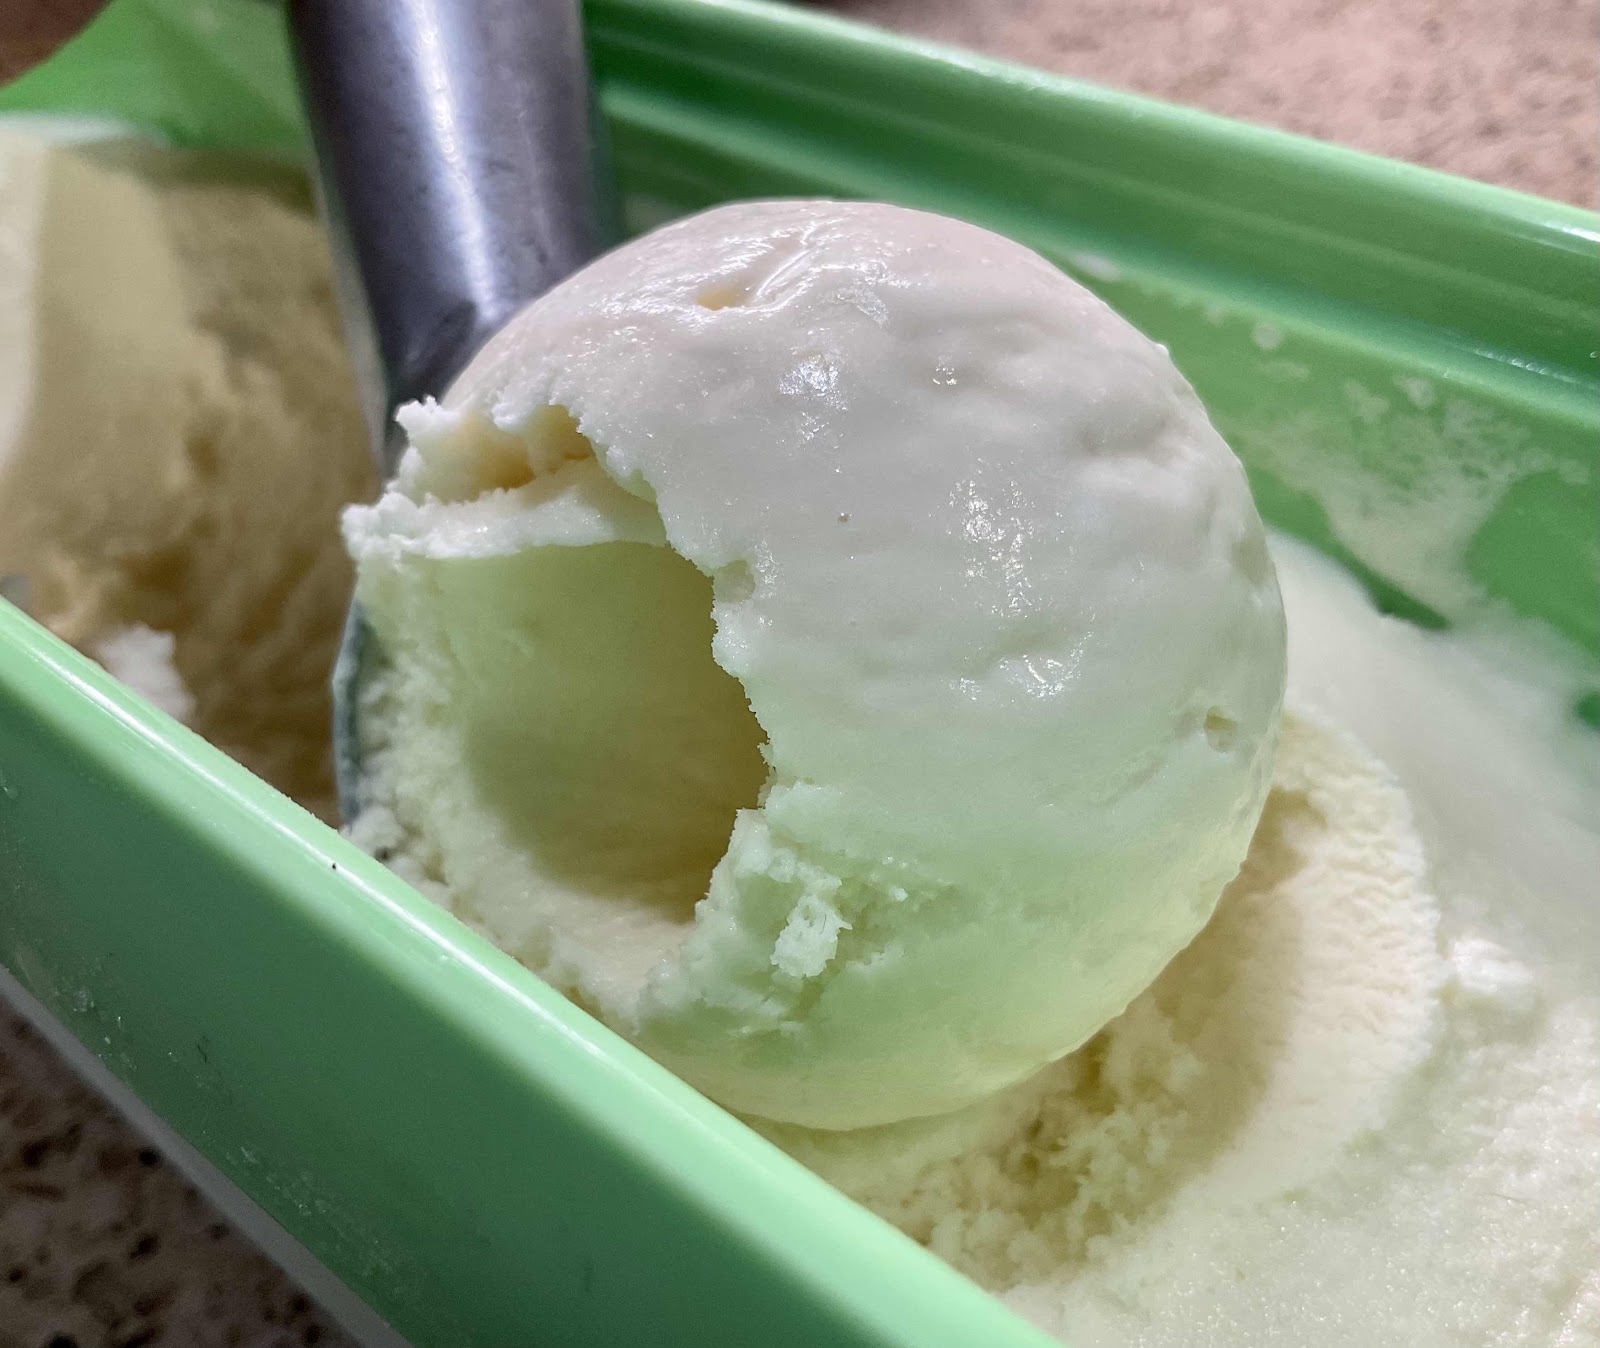
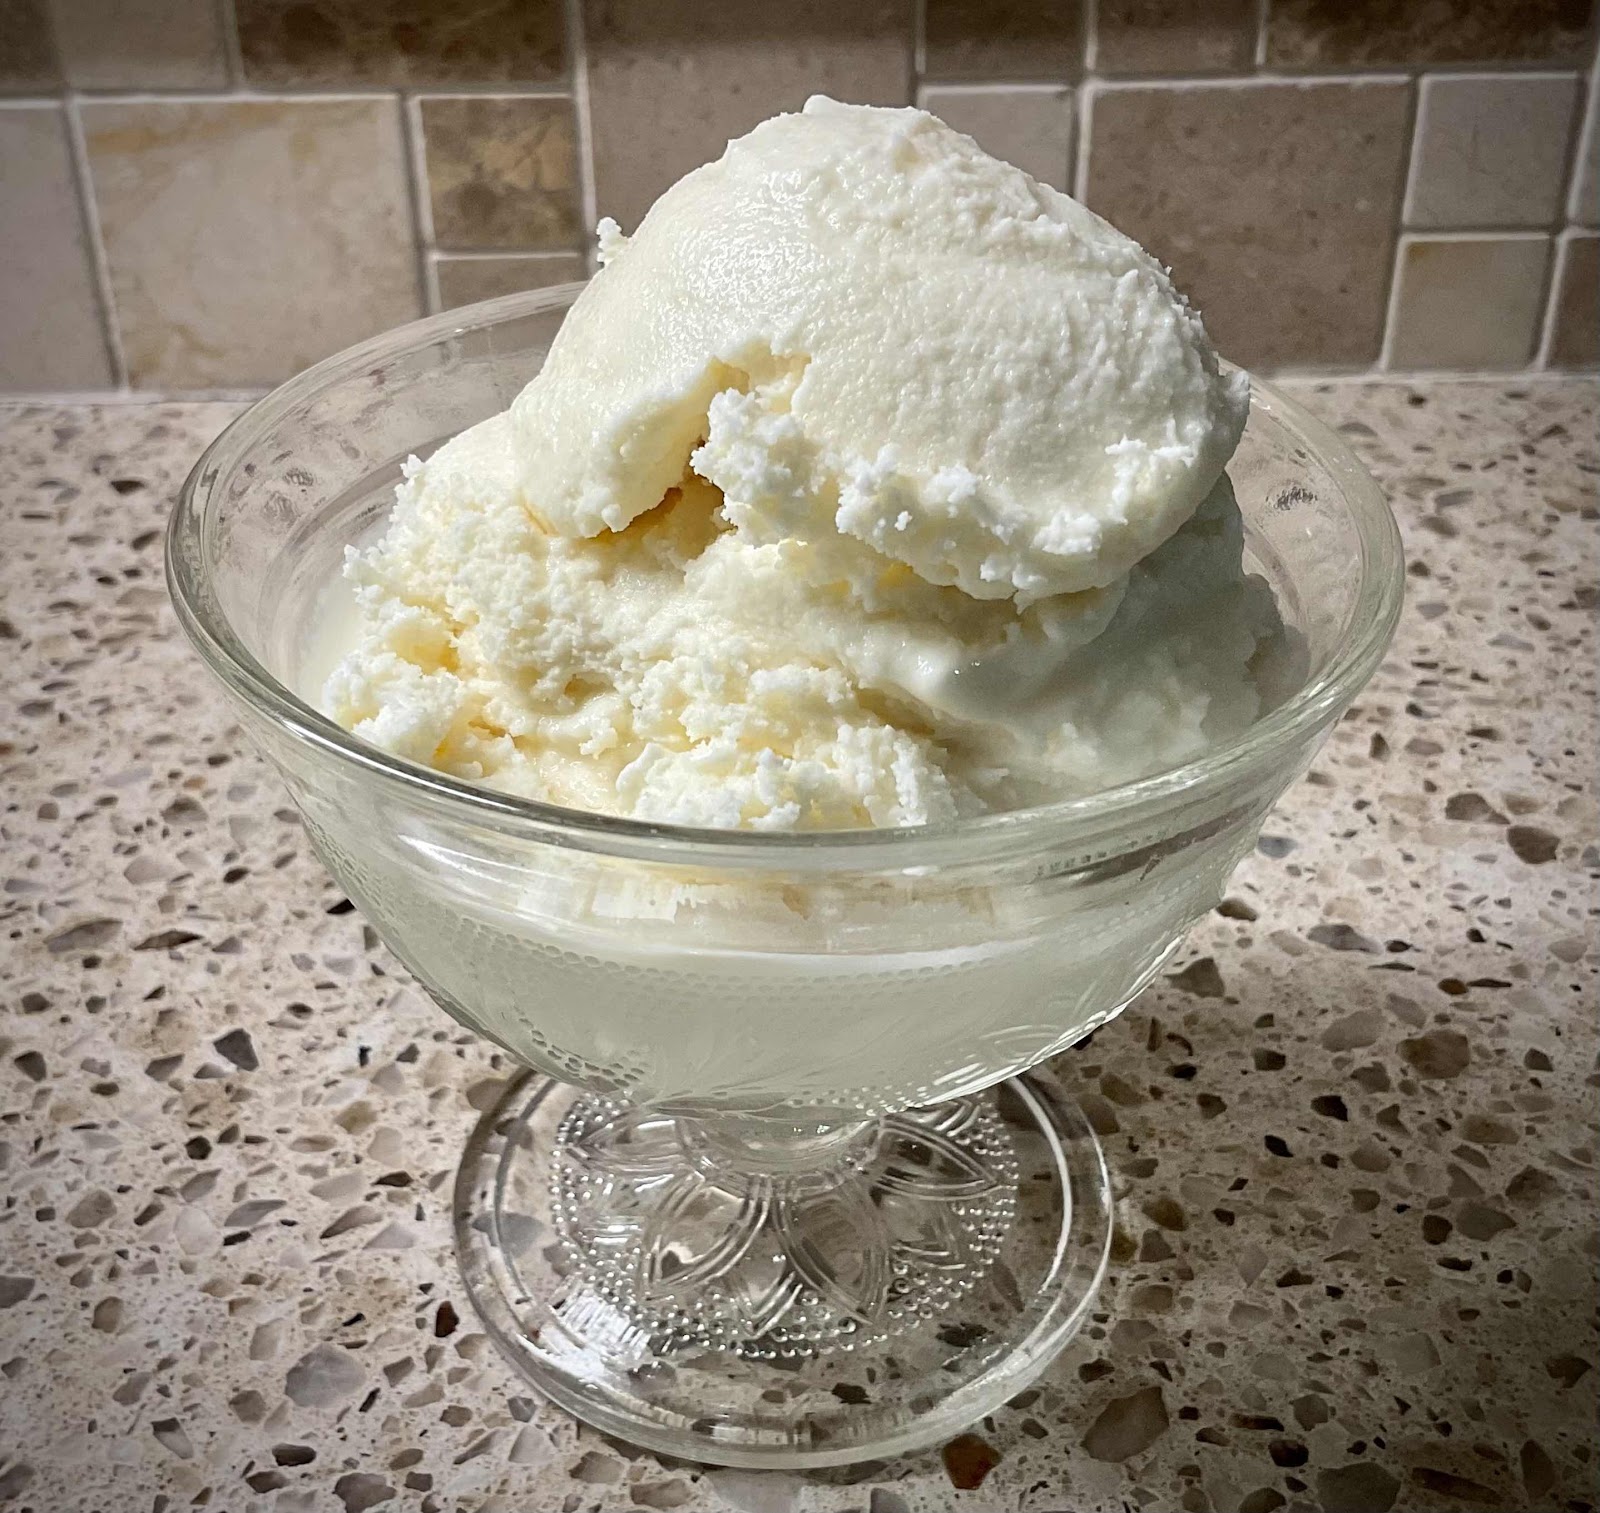
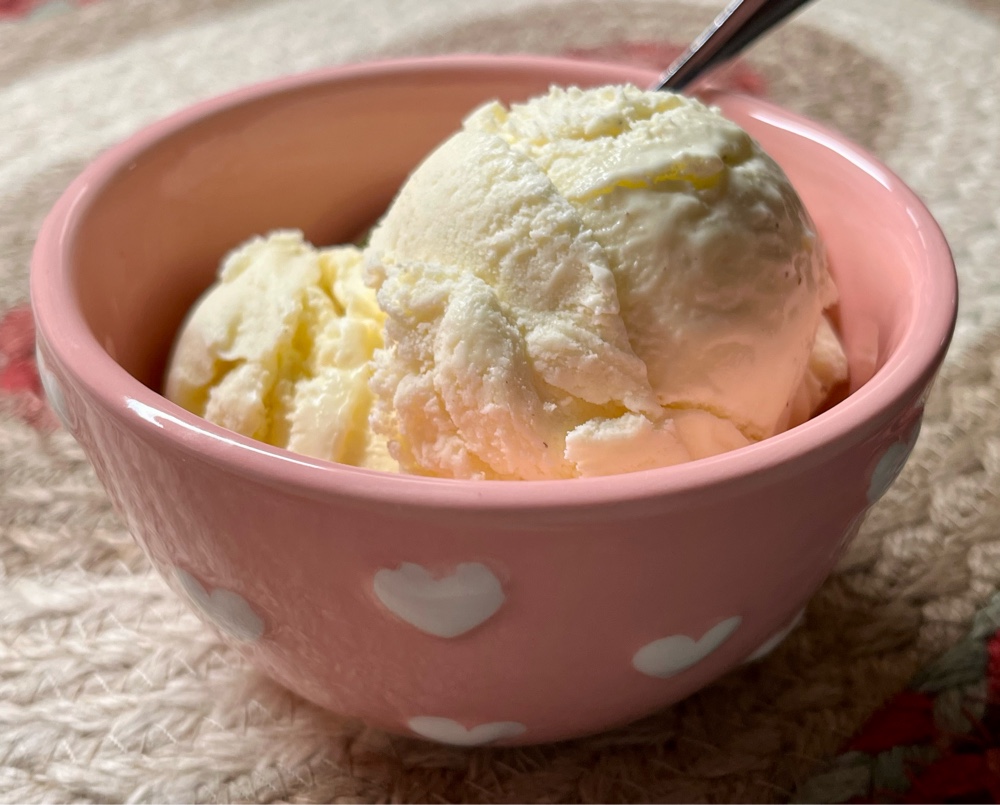
I was browsing the internet and learned there was such a thing as Clotted Cream Ice Cream! Of course, I had to give this a try, but sugar free and low carb. The final result is the BEST frozen custard ice cream I’ve ever had! If you want a low carb vanilla ice cream that is decadent beyond belief, this is the recipe for you.

Low Carb Clotted Cream Ice Cream
Makes 10 servings

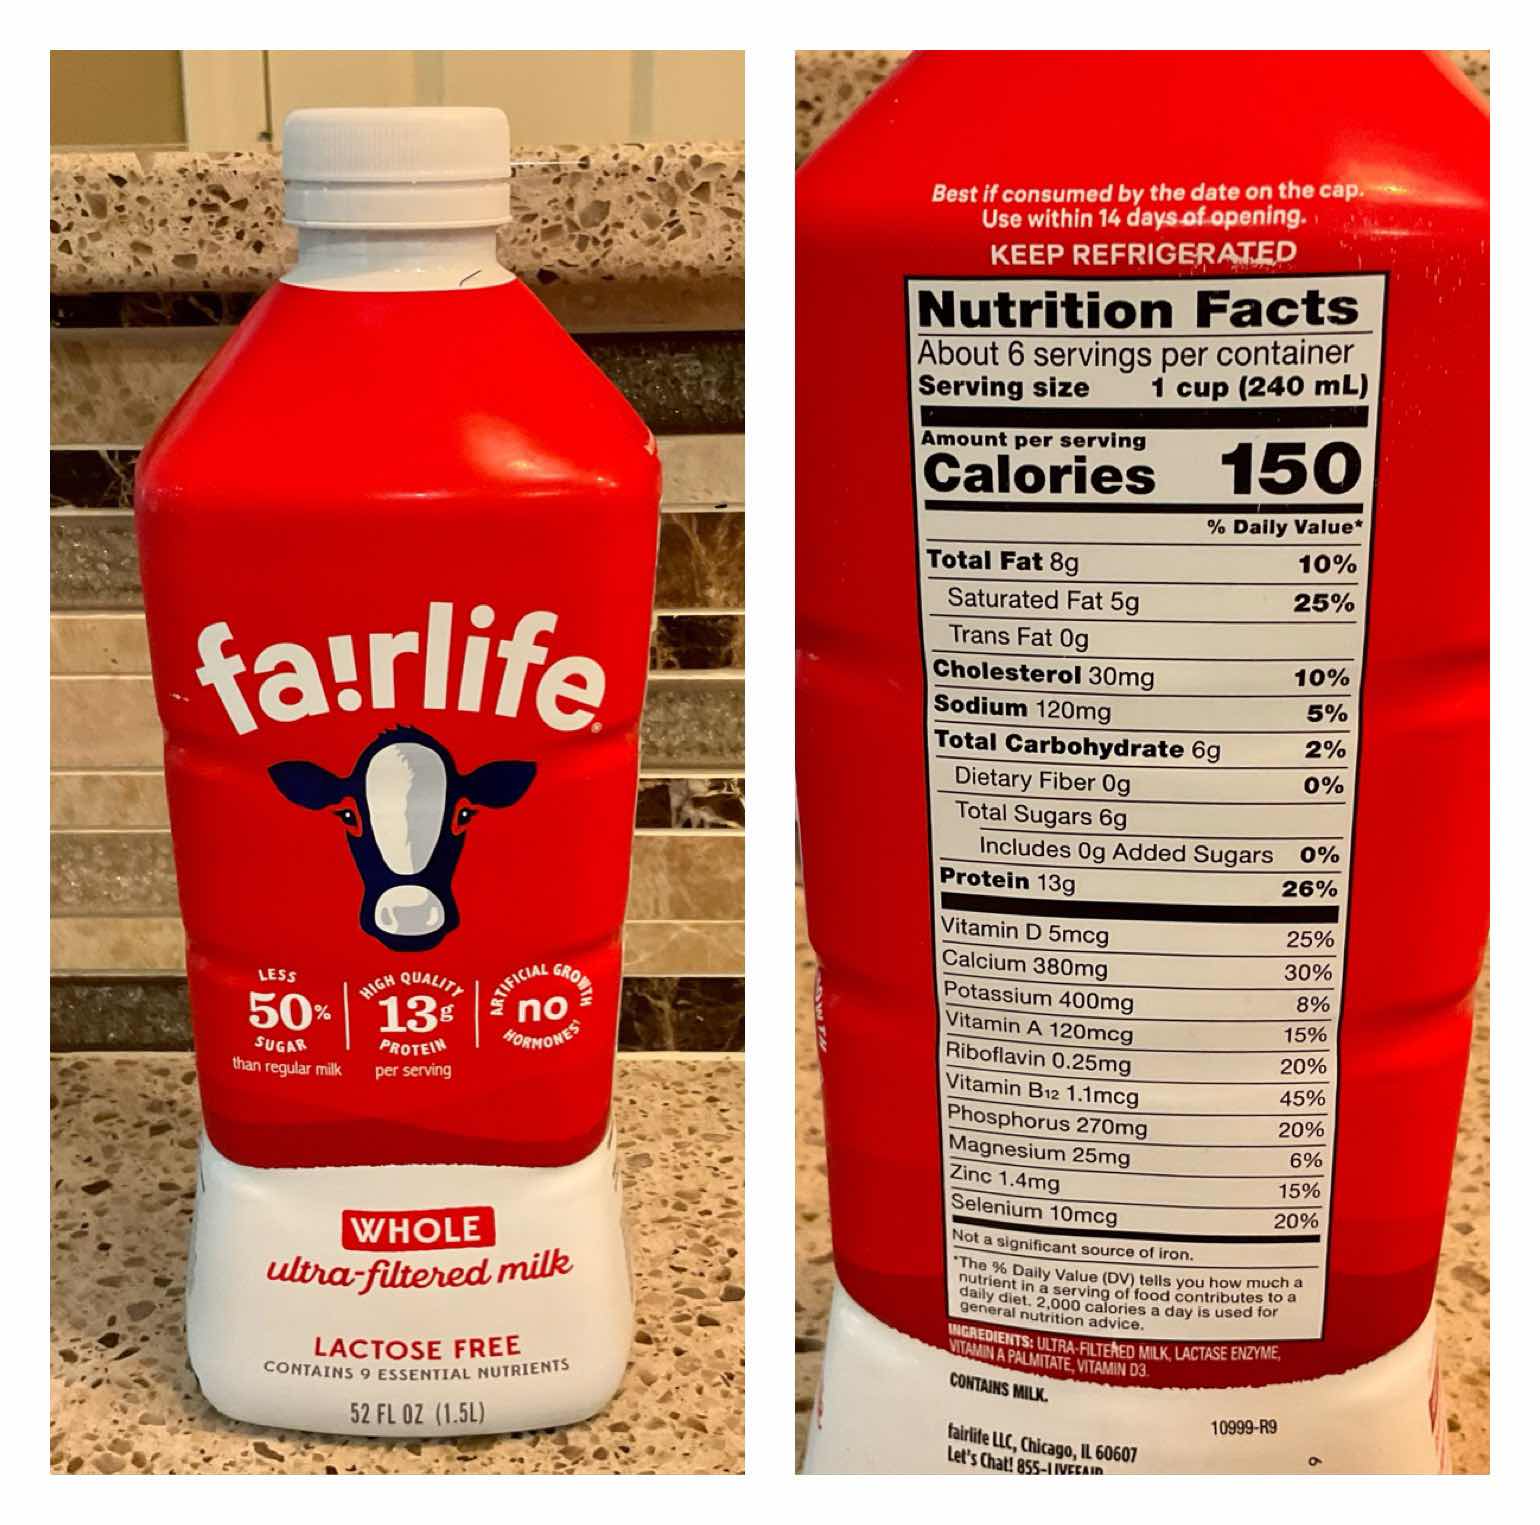
1 cup whole milk (I used Fairlife brand, which is half the carbs of regular whole milk)
1 ½ cups heavy cream
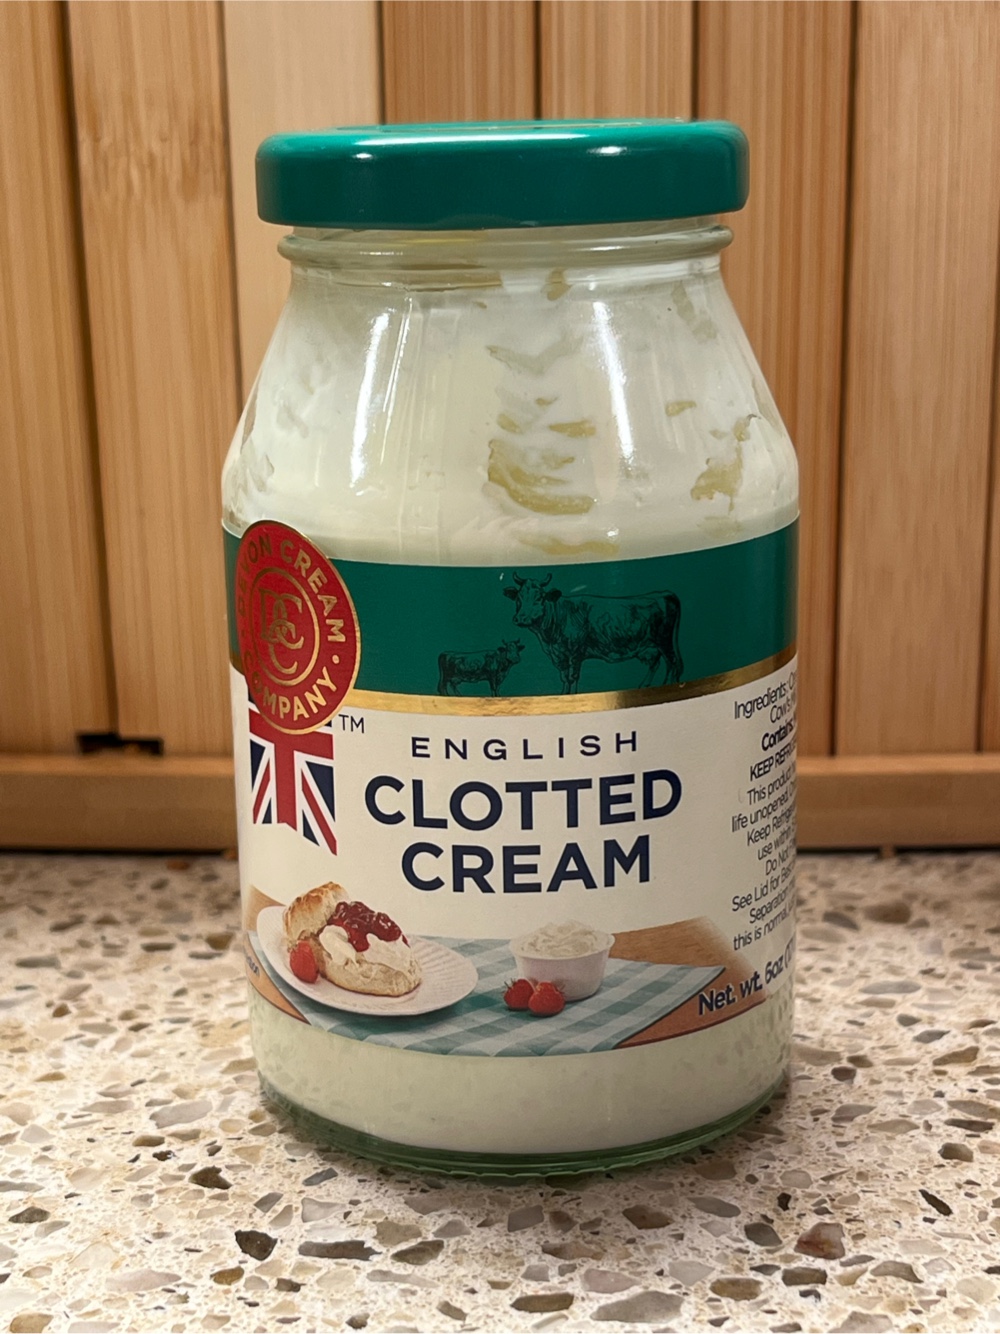
6 oz. English Clotted Cream*
3 tablespoons powdered monkfruit/erythritol sweetener (I used LaKanto Monkfruit sweetener)
A pinch of salt
4 egg yolks
6 tablespoons allulose sweetener
1 tablespoon vanilla extract

English Clotted Cream
In a heavy saucepan, whisk the milk, heavy cream, clotted, cream, powdered monkfruit sweetener and salt over medium heat until the sweetener and clotted cream are dissolved.

In a small bowl or glass measuring cup, whisk together the egg yolks and allulose sweetener.

When the milk and cream mixture begins to bubble at the edges of the pan, ladle about 1/2 cup of the warm liquid slowly into the egg yolks while whisking to temper the yolks. Then slowly add the tempered egg yolk mixture into the hot milk and cream mixture while whisking continuously. Continue whisking gently until the custard reaches 170°F and coats the back of a wooden spoon. (Do not boil or the mixture may curdle.)

Remove the saucepan from the heat, add the vanilla and stir to combine. Pour the custard through a fine mesh strainer and into a medium/large bowl. Top with plastic wrap and refrigerate until cool, about two hours.

Churn according to the manufacturers instructions for your ice cream maker. Churn until thickened, about 20 to 25 minutes. The ice cream will have a soft, creamy texture. If a firmer consistency is desired, transfer the ice cream to an airtight container and place in the freezer for at least six hours or overnight.

*Clotted Cream is sometimes referred to as Cornish Clotted Cream or Devonshire Cream. Also, if using regular whole milk instead of Fairlife brand, add 1 ½ carbs per serving.

Clotted Cream Ice Cream in pink bowl

Nutritional Information per ½ cup serving: 252 calories, 2.7 g carbohydrates (0 g fiber, 0.8 g sugars, 0.5 g sugar alcohols), 24.8 g total fat (15.4 g saturated fat, 0 g trans fat), 166 mg cholesterol, 54 mg sodium, 72 mg calcium, 35 mg potassium, 202 IU Vit A, 3.1 g protein. Net carbs per serving: 2.7 grams

Recipe and photos by Kathy Sheehan, copyright 2026
All rights reserved . Please do not duplicate without the author’s permission.

Wednesday, March 2, 2022

Keto Creme Brûlée

Keto Creme Brûlée
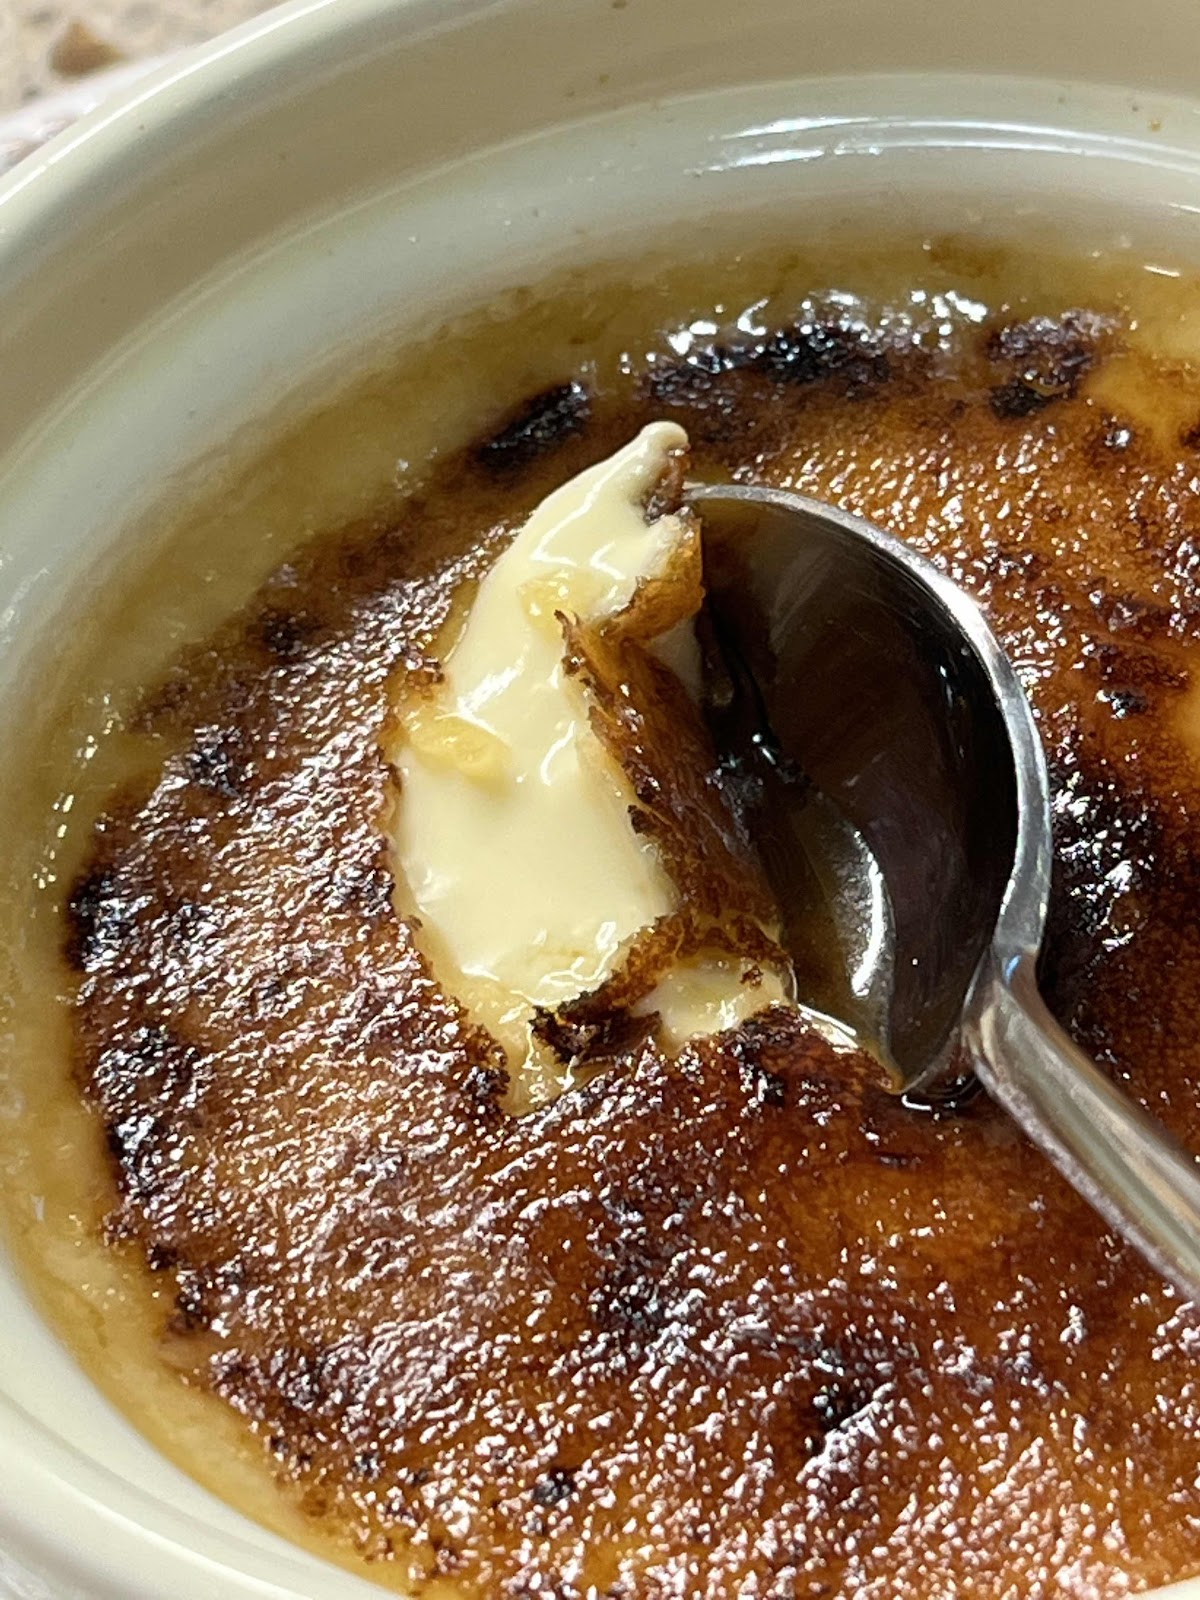
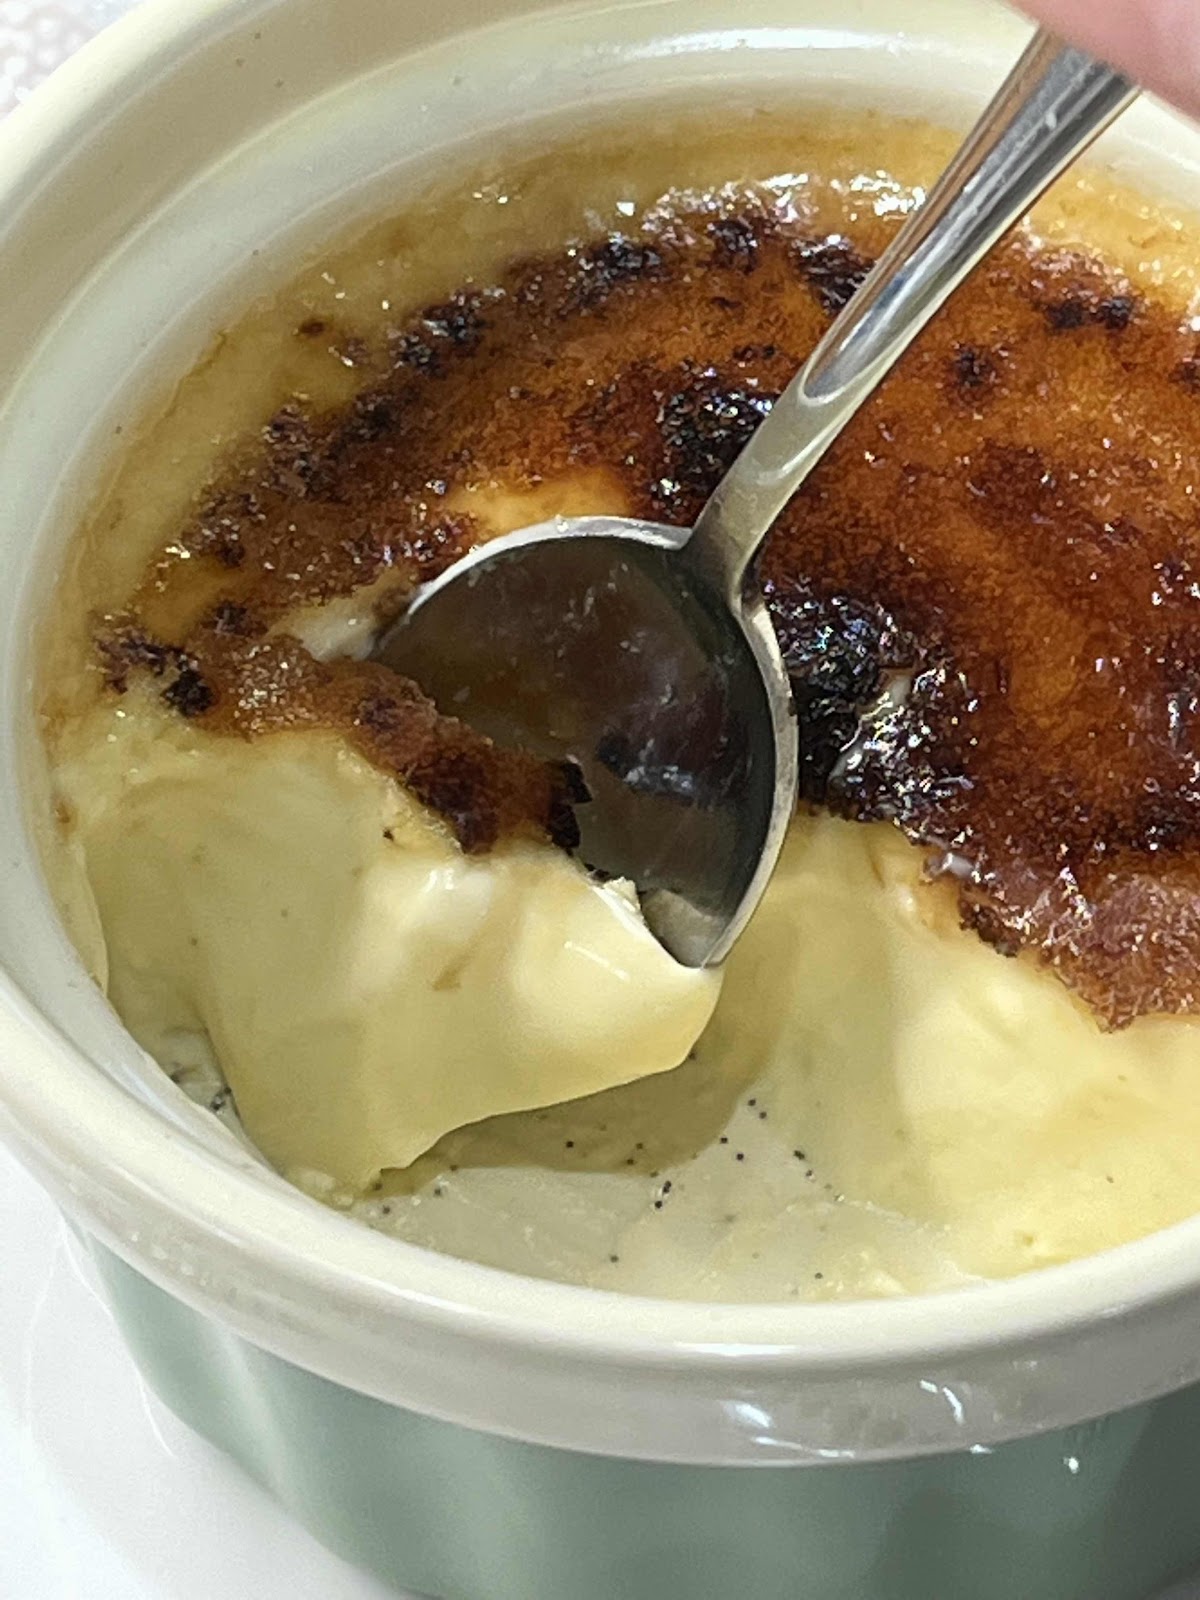
Creme Brûlée is one of my all-time favorite desserts! Before going keto, every time I’d see it on a menu, I just had to order it. I thought it was too complicated to make at home, so I never even tried. I am delighted to tell you that it is very simple, really! This elegant dessert will impress your family and friends. I suggest that if you’re making it for a mixed crowd (some low carbers and some guests that are not), go ahead and make the custards sugar free for everyone. No one will be able to tell the difference, I promise! Then, when it’s time to torch or broil the sugar topping, use LaKanto or another erythritol-based sweetener for your low carb, keto guests and regular sugar for those that do not follow a sugar free diet. Admittedly, the burnt sugar topping made with an erythritol-based sweetener doesn’t have the “hard crack” that is classic. It has a softer crack, but trust me, the burnt sugar flavor combined with the velvety custard is just as delightful and satisfying as a brûlée made in the traditional way. I worked for weeks perfecting this recipe, experimenting and testing. I had to eat a lot of brûlées until I got it just right…but someone had to do it! Enjoy the brûlée of my labors; I think you’ll be pleased.

Keto Creme Brûlée
Makes 6-8 servings (depending on the size of your ramekins)

Custard:
3 cups heavy cream, divided
1/2 cup allulose (*see notes, if you can’t find allulose)
A pinch of salt
4 egg yolks
1 whole large egg
8 drops monkfruit extract or stevia drops
2 teaspoons vanilla bean paste (or 3 teaspoons pure vanilla extract, not imitation)

Sugar topping:
6-8 teaspoons erythritol-based granulated sweetener (do not use allulose for topping, it doesn’t harden)

1. Boil about 1 to 2 quarts of water, depending on the size of your baking pan, and have it ready to use for the water bath.

2. Preheat oven to 300°F. Adjust the rack to the lower middle position.

3. Add half of the heavy cream (1 and 1/2 cups), allulose and a pinch of salt to a heavy saucepan and turn to medium high. Heat, stirring to dissolve the allulose until you see tiny bubbles forming around the edges and just beginning to simmer. While you are heating the cream mixture, place the remaining 1 and 1/2 cups of cream in the refrigerator to stay chilled.

4. As the cream is heating up, place the egg yolks, egg and monkfruit extract or stevia drops to a bowl or large glass measuring cup and whisk vigorously until well combined. (If you do not have vanilla bean paste, add 3 teaspoons of vanilla extract to the eggs and whisk.)

5. Once the cream is heated, remove from the heat and slowly pour into the egg mixture, whisking the eggs the entire time as you add the hot cream. This will temper the eggs so the custards do not “break” or scramble when baked. Add the chilled 1 and 1/2 cups of cream you set aside in the refrigerator and whisk well. Add the vanilla bean paste, if using and, once combined, pour into 6 to 8 ramekins and set inside an oven-safe baking dish. I like to use a 13” x 9” glass Pyrex baking pan but, if you don’t have one, use whatever high-sided baking pan that you have, even a roasting pan will do. Arrange the ramekins so that they are not touching and have a little space between each other.

6. Carefully pour the boiling water in the pan, about halfway up the sides of the ramekins. Place the baking pan in the preheated oven and bake for 25 to 30 minutes, or until the internal temperature reaches between 170 to 175°F. (If you are using shallow ramekins or small ramekins, the baking time should be reduced to 20 to 25 minutes.) The custard will slightly jiggle in the center when shaken. Remove the ramekins from the water bath and place on a wire rack. Leave at room temperature for 15 minutes. Place in the refrigerator for at least four hours or overnight. Once the custards are cooled sufficiently, you may cover them loosely with plastic wrap and return them to the refrigerator, until they are quite chilled and the custard is set.
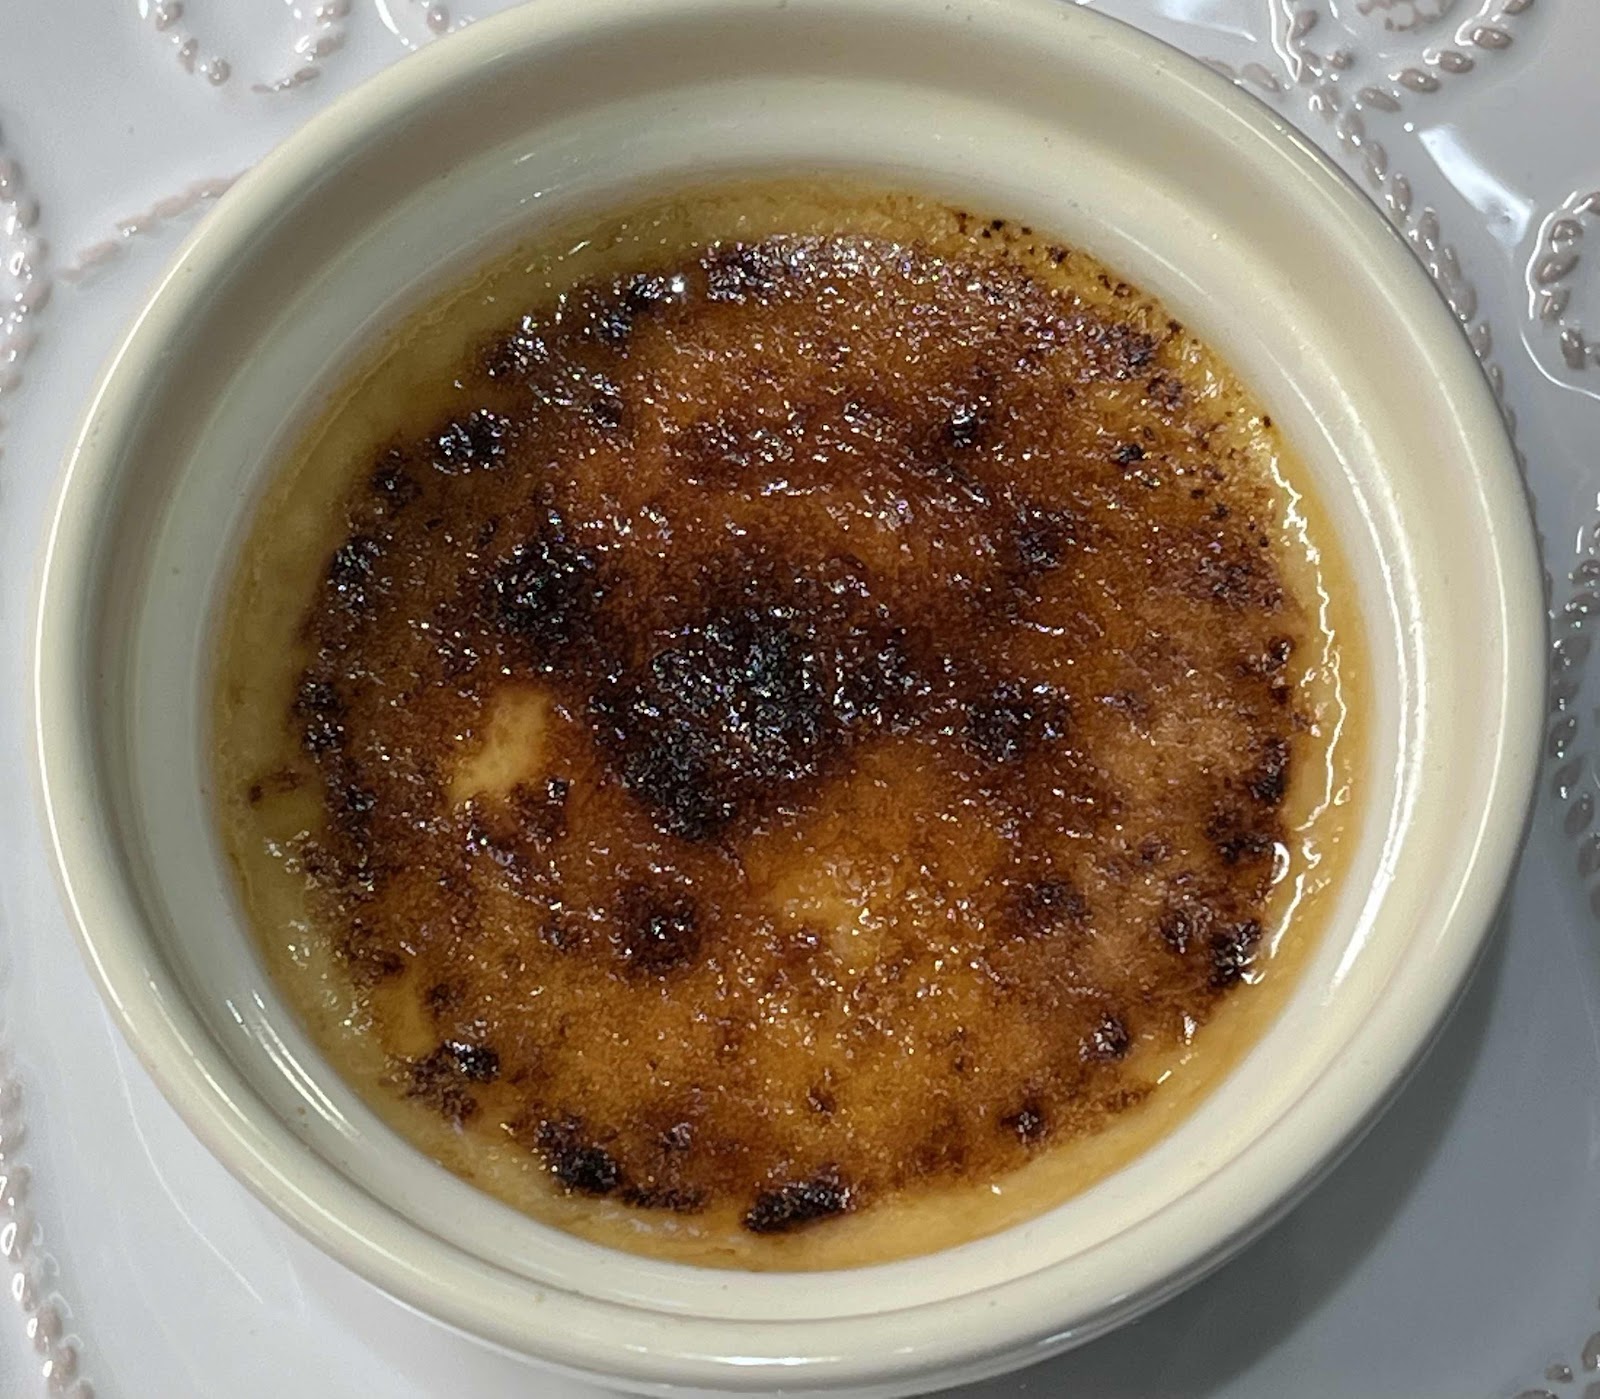
Torched Creme Brûlée
7. Once ready to serve, sprinkle 1 teaspoon of the erythritol-based sweetener evenly over the top of each ramekin, tilting it from side to side, until a thin layer covers the entire surface. Using a kitchen torch, caramelize the erythritol until browned and bubbly. Return the dessert to the refrigerator, uncovered, for 30 minutes until the sweetener has hardened. (If you do not have a kitchen torch, you may broil the brûlées in the oven for a few minutes until the sweetener is browned and caramelized. Because the broiling method heats the entire custard, you may need to cool the ramekins in the refrigerator for longer until the topping hardens and the custard is cool again.)

*Notes: Allulose or Bocha Sweet are the best sweeteners to use in the custard because they do not have the “cooling effect” of erythritol and they will not recrystalize when cooled. If you cannot find either of these products, you may use a powdered erythritol-based sweetener instead, such as Swerve Confectioners or Powdered LaKanto Monkfruit Sweetener. The cooled custard may not be as creamy, but the taste will be similar.
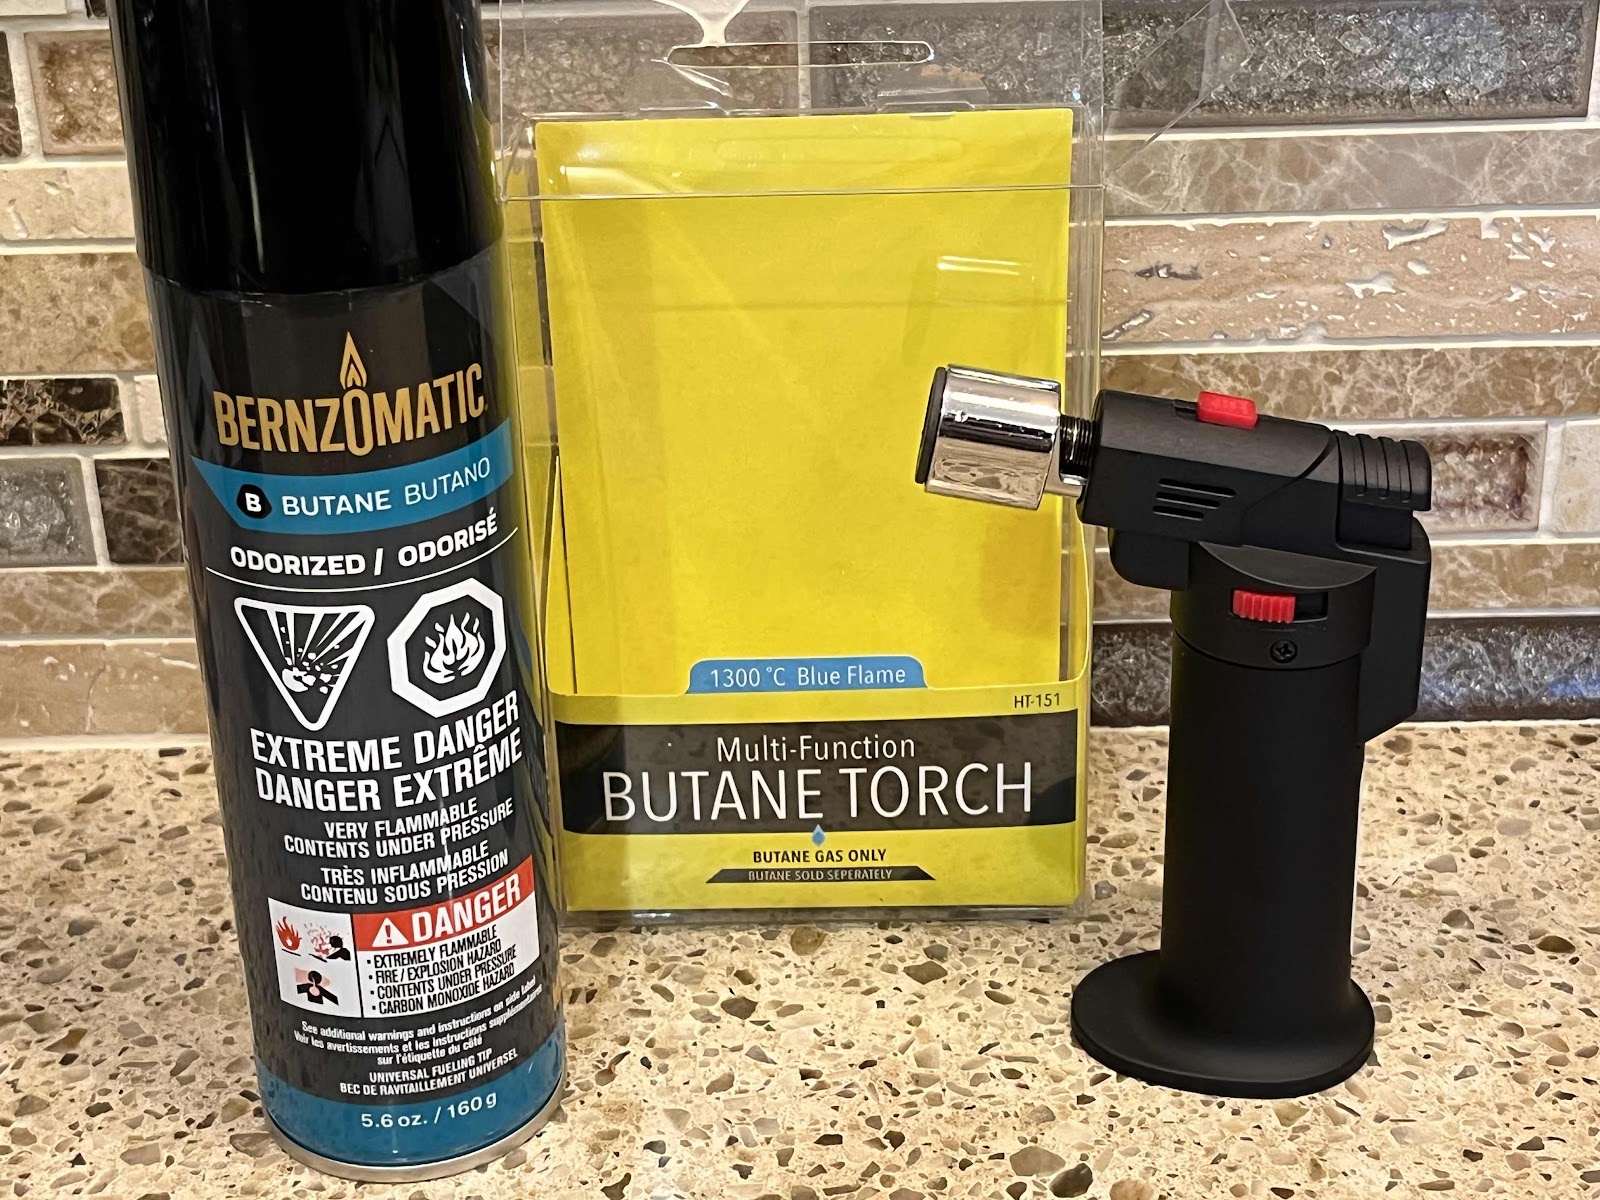
Butane Torch from Hardware store
You can purchase a Butane Torch online or at a hardware store (look in the electrical or plumbing section). Follow the directions that come with your torch to fill with butane, which usually must be purchased separately. I bought a small torch at the hardware store (see photo above). It works just as well as a larger Kitchen Torch, although I have to refill it more often if I plan to caramelize more than 3-4 desserts at a time. If you have a large family or guest list, you might be happier with a larger torch. But, since it’s just me and my husband most of the time, the small torch works fine.

Creamy Custard of the Creme Brûlée
Nutritional Information per serving (based on recipe making 6 servings): 446 calories, 4.6g carbohydrate (0 g fiber, 0.3 g sugars, 4 g sugar alcohols), 51 g total fat (29 g saturated fat, 0 g trans fat), 329 mg cholesterol, 76 mg sodium, 19.4 mg calcium, 26 mg potassium, 536 IU Vit A, 2.8 g protein. Net carbs per serving: 0.6 grams

Photos and recipe by Kathy Sheehan, copyright 2022
All rights reserved. Please do not duplicate without the author’s permission. 
Thursday, August 19, 2021

Low Carb Blueberry Pie a la mode Ice Cream

Low Carb Blueberry Pie a la mode Ice Cream
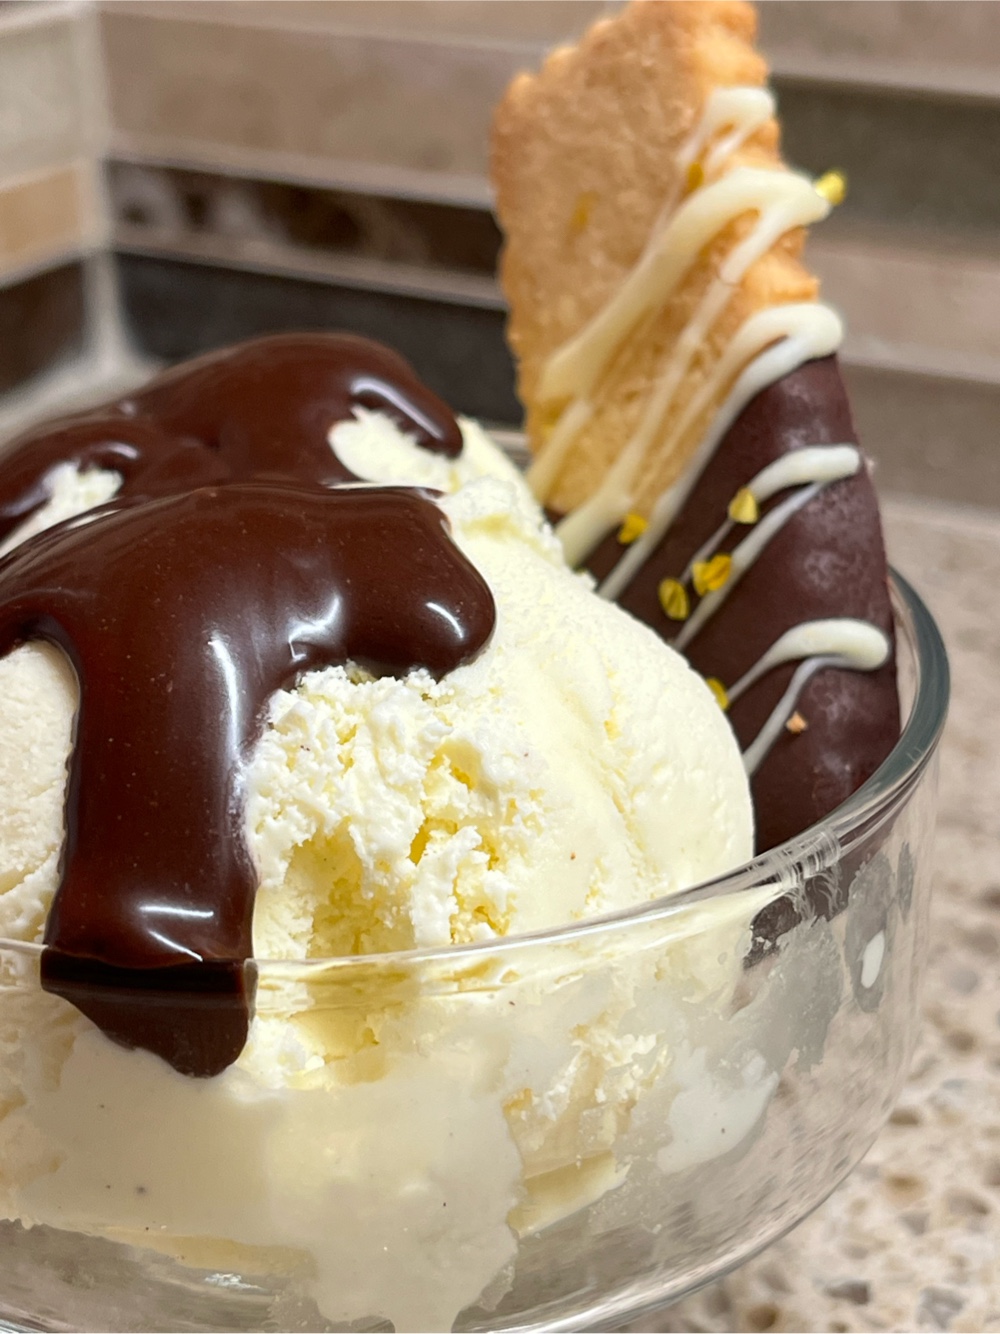
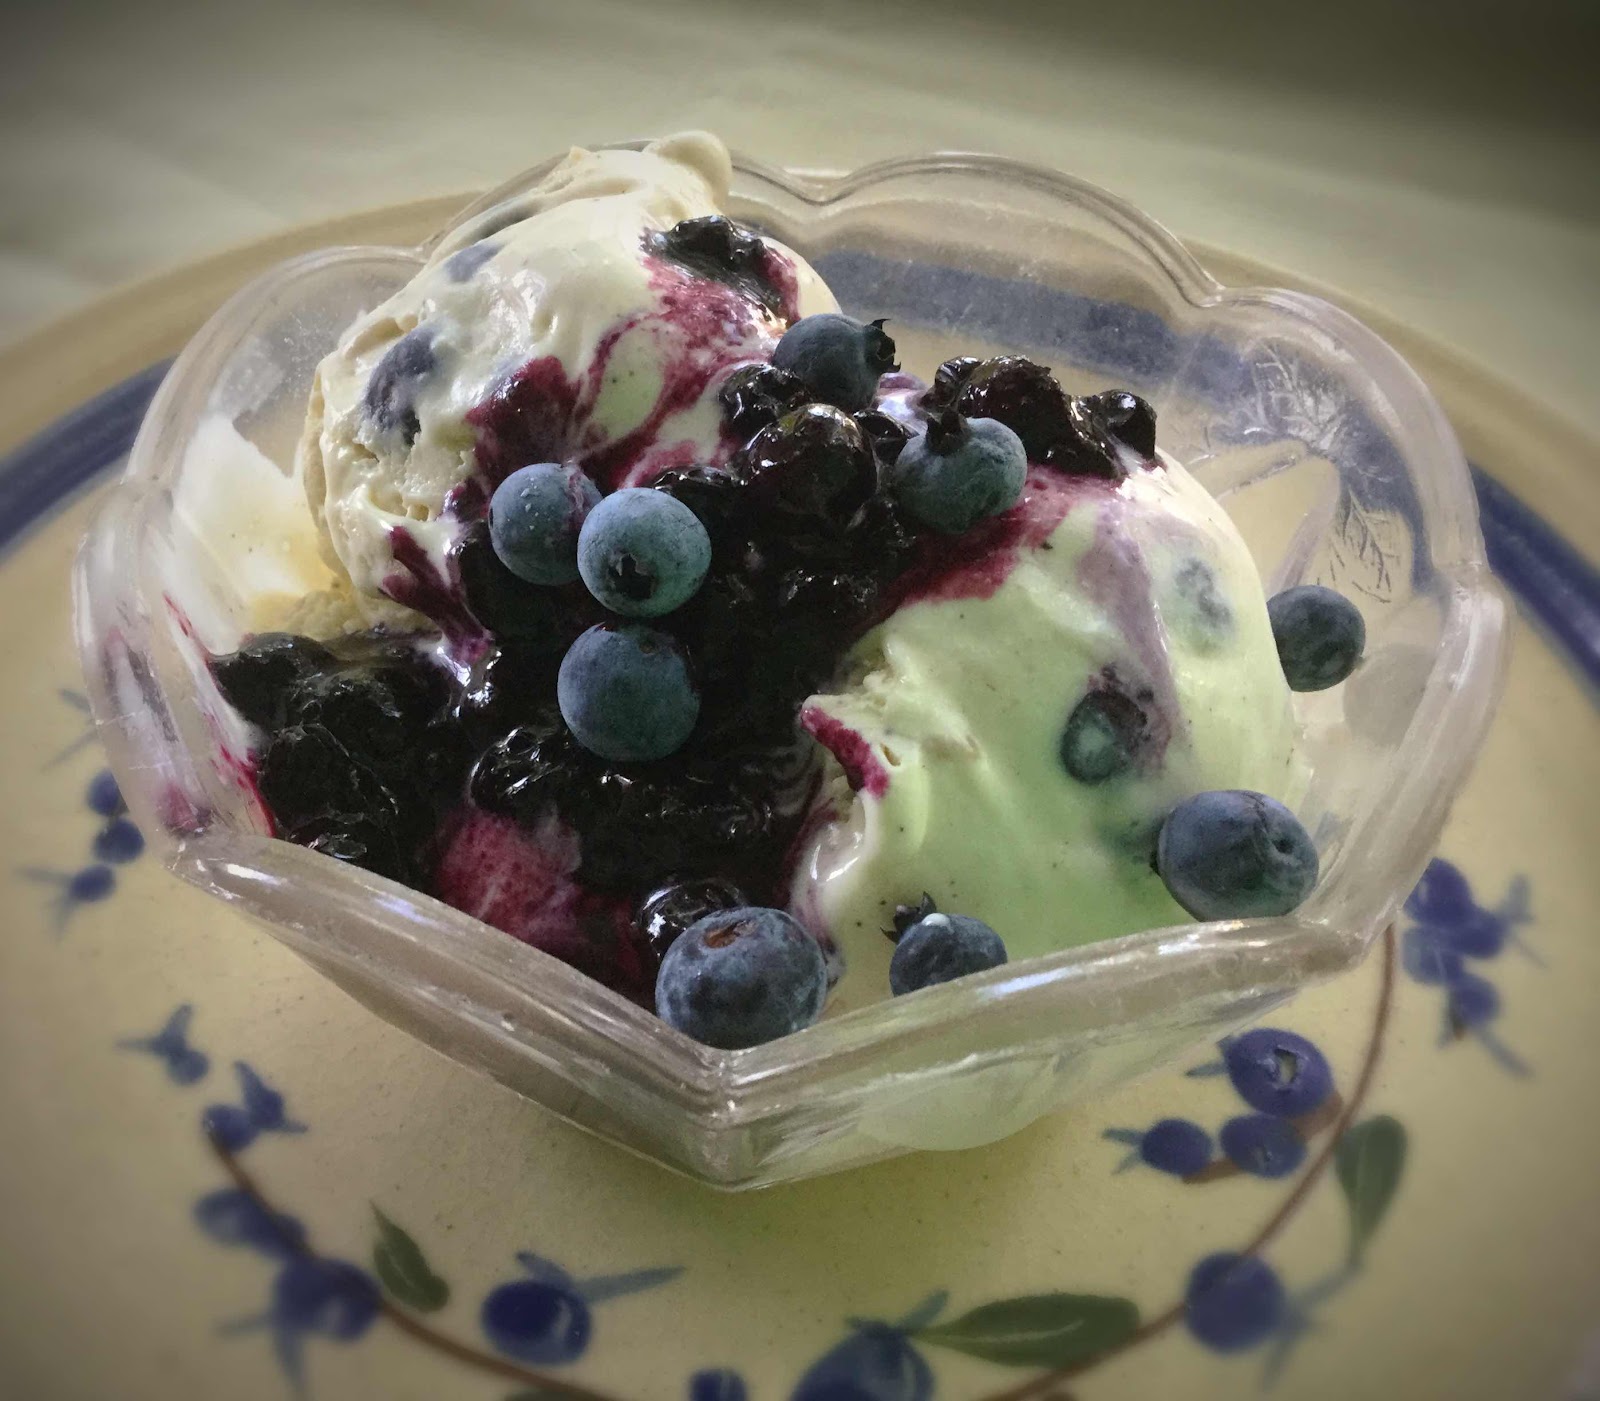
“I scream! You scream! We all scream for ice cream!” Every since I learned the right combination of sweeteners to create the best scoopable, sugar free ice cream right from the freezer, I’ve been having a wonderful time experimenting in my kitchen. Wild Maine blueberries are just hitting the Farmer’s Markets so, of course, I had to make my own version of Blueberry Ice Cream! It includes those juicy, little berries and chunks of keto ‘pie crust’ all swirled into creamy vanilla ice cream. The sauce is optional, but it really makes a wonderful ice cream sundae topping. This ice cream flavor just screams SUMMER where I live!

Low Carb Blueberry Pie a la mode Ice Cream
Makes 8 servings

Ice Cream Base:
1 cup whole milk* (I suggest Fairlife, see note)
3 tablespoons powdered erythritol-based sweetener
6 tablespoons allulose
A pinch of salt
2 cups heavy cream
1 tablespoon vanilla extract
The beans scraped from a vanilla bean (or 1/8 teaspoon vanilla seed powder), optional

Pie Crust Stir In:
1/3 cup almond flour (or sunflower seed flour for low oxalate)
2 teaspoons powdered erythritol sweetener
A pinch of salt
1 tablespoon unsalted butter, melted

Other Stir In:
3/4 cup Wild Maine blueberries (small berries), fresh or frozen

Blueberry Sauce (optional):
2 cups blueberries, fresh or frozen
2 tablespoons water
6-8 drops monkfruit extract or stevia, to taste

1. Make the ice cream base: In a medium bowl, use a whisk to combine the milk, sweeteners and salt. Whisk until the sweeteners are dissolved. Add the heavy cream and vanilla extract and whisk to combine. Cover and refrigerate for at least 2 hours or overnight, until well chilled. Whisk together again and add the vanilla beans, if using, just before churning.

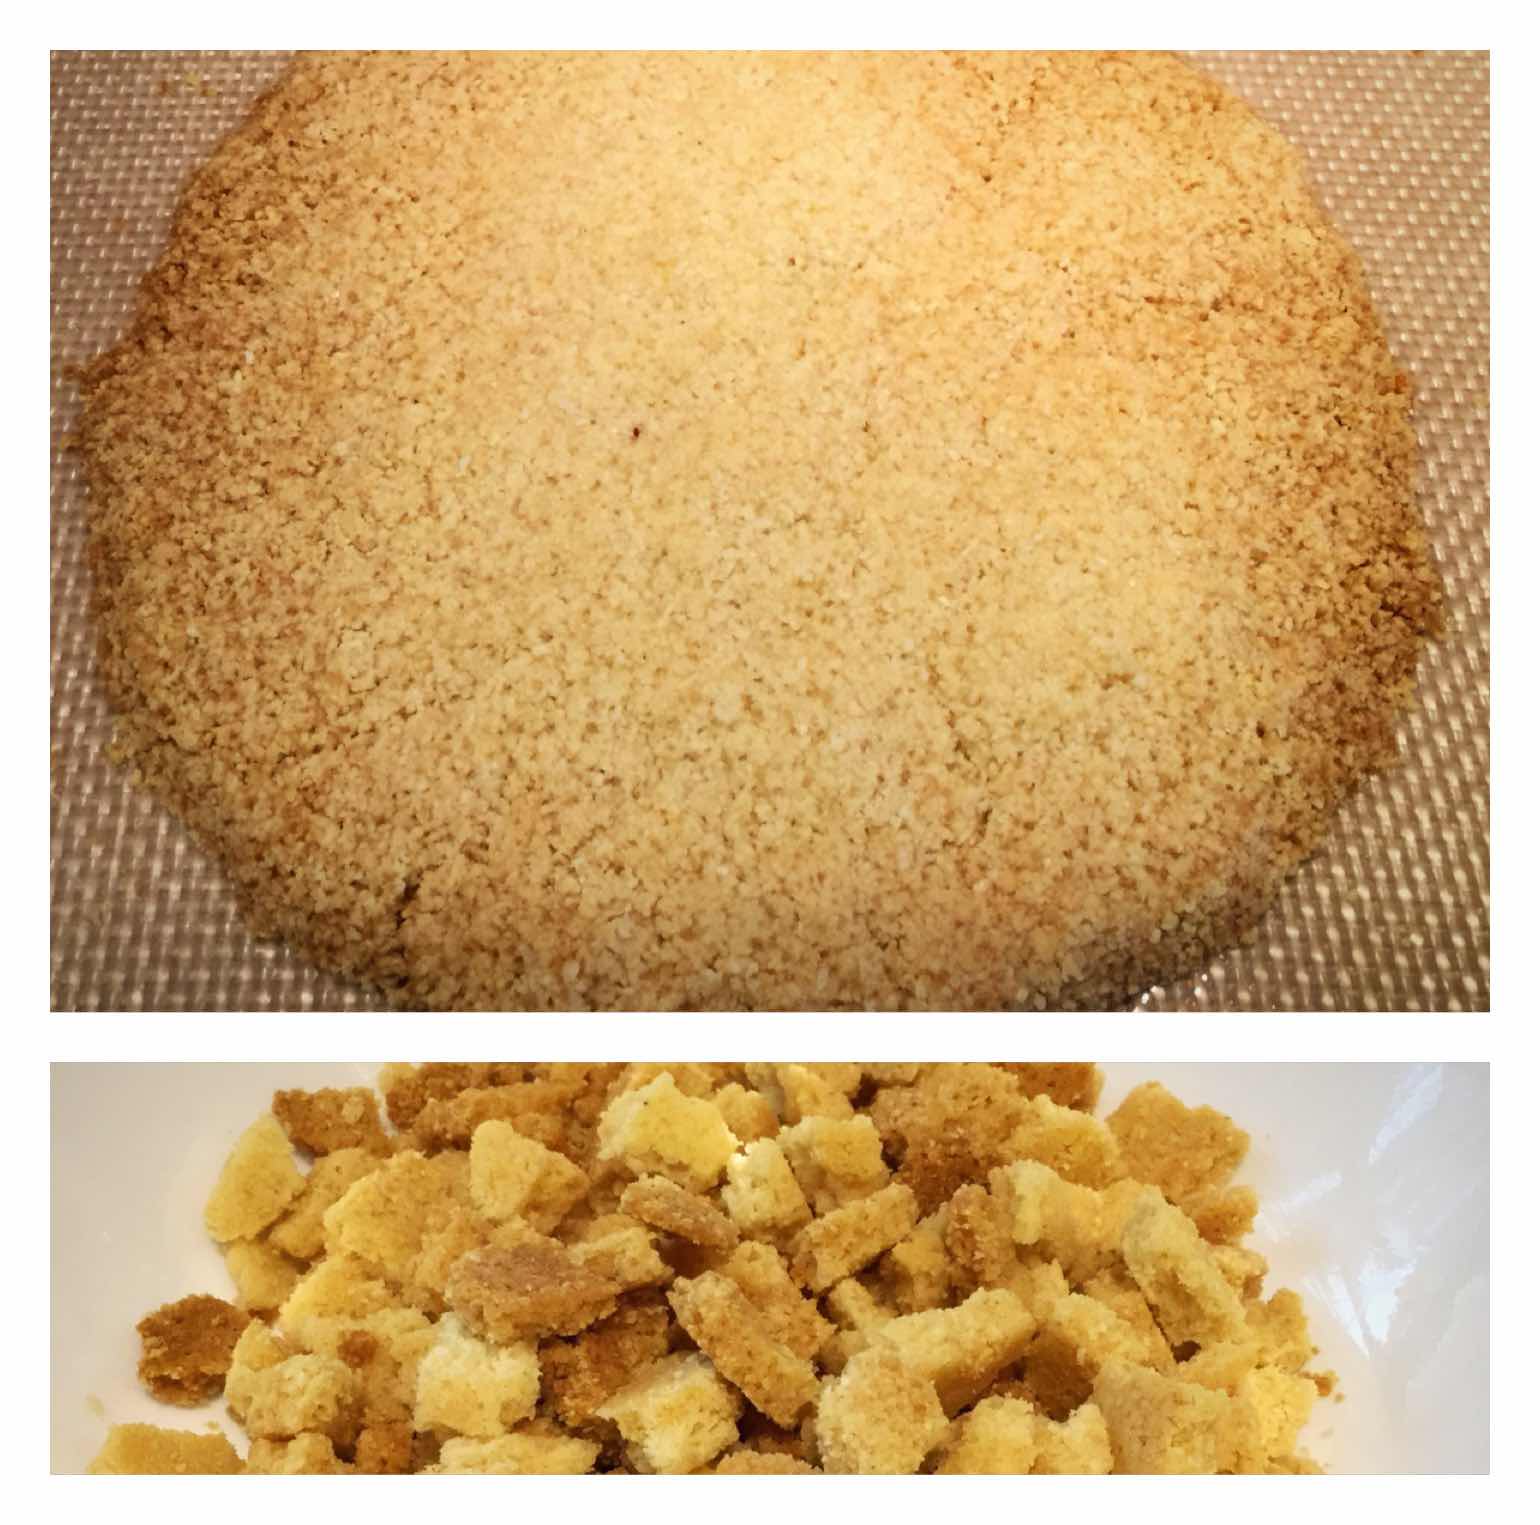
2. While the ice cream base is chilling, make the Pie Crust Stir In: Preheat oven to 300 degrees Fahrenheit. In a medium bowl, whisk together the almond flour, sweetener and salt. Add the melted butter and stir until it resembles coarse crumbs. 

3. Pour the mixture in a mound onto a cookie sheet lined with parchment paper or a silicone baking mat. Press down with your fingers to flatten into a circle or oval (the shape really doesn’t matter) until it is between 1/8” to 1/4” in thickness. Bake in the preheated oven for 7-10 minutes or until the edges are golden brown. Watch carefully because once it starts to turn golden, it can brown quickly and you don’t want the edges to burn.

Pie Crust Stir In4. Allow the crust to cool on the baking sheet for 5 minutes, then remove the parchment paper or silicone mat to a wire rack to finish cooling completely (keep crust on paper to prevent crumbling). The crust will firm up and crisp as it cools. Once cool, carefully break the crust into small pieces and set aside until it’s time to add them to the ice cream at the end of the churning process.

5. Churn the Ice Cream: Following the manufacturer’s instructions for your machine, churn the ice cream base. When it has thickened sufficiently, slowly add the pie crust pieces and blueberries. Continue churning until quite thick. Serve immediately as a soft-serve ice cream or spoon into an air-tight container and place in the freezer for 4 hours or more until set.

6. To make the Blueberry Sauce (optional): Place 2 cups of blueberries and water into a saucepan and heat over medium-low heat until the berries burst. Mash with a potato masher or the tines of a fork to break up the berries. Simmer for a few minutes to thicken slightly. Remove from heat and allow to cool. Taste and add monkfruit extract or stevia if desired. Store in a glass jar in the refrigerator. Spoon over ice cream to serve. Makes about 1 cup.

*Note: I recommend Fairlife brand Whole Milk, which is lactose free and has half the carbs of regular milk. If using regular whole milk, add 1-1/2 carbs per serving.

Nutritional Information per 1/2 cup ice cream (no sauce): 210 calories, 3.7 g carbohydrate (0.5 g dietary fiber, 1.9 g sugars, 0.8 g sugar alcohols), 22.7 g total fat (12.5 g saturated fat, 0 g trans fat), 70 mg cholesterol, 54 mg sodium, 42.8 mg calcium, 19 mg potassium, 206 IU Vit A, 1.6 g protein.  Net carbs per serving: 2.4 grams

Blueberry Sauce per 1 tablespoon: 11 calories, 2.7 g carbohydrate (0.4 g dietary fiber, 1.8 g sugars), 0.1 g total fat, 0 mg cholesterol, 0 mg sodium, 1.1 mg calcium, 14 mg potassium, 3 IU Vit A, 2 mg Vit C, 0.1 g protein. Net carbs per serving: 2.3 grams

Photos and recipe by Kathy Sheehan, copyright 2021
All rights reserved. Please do not duplicate without the author’s permission. 
Friday, July 30, 2021

Simple Keto Vanilla Ice Cream (Chipper Ice Milk)

Simple Keto Vanilla Ice Cream
Growing up in Oklahoma in the 1960’s and 70’s, I have a fond memory of a local dairy’s Chipper Ice Milk. Every time I stayed at my Grandmother’s house, she’d be sure to have a quart on hand because she knew it was a favorite treat that we didn’t get at home. I recently visited relatives in Oklahoma and a dear family friend introduced me to her keto vanilla ice cream, that tastes amazingly like the Chipper Ice Milk we all remembered and loved! Her homemade ice cream was so delicious, I asked for the recipe and her permission to post it. It’s just too delicious not to share! The best part is that it remains creamy and easy to scoop right out of the freezer, even after many days. The trick is the right ratio of sweeteners, both powdered erythritol (or LaKanto monkfruit-erythritol blend) and allulose are required. It is key that you use the right amount of allulose, no other sweetener will do, because it prevents the ice cream from turning into a block of ice! (Bocha Sweet might work, although I’ve never tried it.) No tempering of eggs, just whisk the ingredients together and churn! Keto never tasted so good!

Scoopable right from the freezer!
Simple Keto Vanilla Ice Cream (Chipper Ice Milk)
Makes 8 servings

1 cup whole milk* (I used Fairlife brand, see note below)
3 tablespoons powdered erythritol sweetener (I used Powdered LaKanto Monkfruit-Erythritol sweetener)
6 tablespoons allulose
A pinch of salt
2 cups heavy cream
1 tablespoon pure vanilla extract

1. In a medium bowl, whisk together the milk, sweeteners and salt until the sweeteners are dissolved. Stir in the heavy cream and vanilla extract. Cover and refrigerate a minimum of 2 hours, or overnight is even better. Whisk mixture again before churning.

2. Follow the manufacturer’s directions for your ice cream maker and churn the mixture until quite thickened, about 15-20 minutes. At this stage, your ice cream will have a soft, creamy texture and can be eaten right away as a soft-serve, although it is preferred that you remove the churned ice cream to an airtight container and freeze for a minimum of 3-4 hours.

Keto Chipper Ice Milk
*Note about milk: You might be saying, “Hey, wait a minute! Milk is not keto!” That’s true. Regular Whole Milk is about 12-13 grams of carbohydrate per cup, all of which is lactose (sugar). I suggest Fairlife Whole Milk, which has less sugar and is half the carbs of regular whole milk. Because Fairlife is 6 g carbs per cup, when divided into the number of servings, it imparts less than 1 gram of carb per serving. If using regular whole milk, add 1.5 carbs per serving.

For the whole milk you can substitute unsweetened nut milk of choice, although the ice cream will be firmer when frozen due to the higher water content. To obtain the creamiest result, I suggest full-fat canned coconut milk. If using coconut milk, it will impart a slight coconut flavor. Also, if using coconut milk, the nutritional information per serving changes to: 257 calories, 2 g carbs (0 g fiber, 0.2 g sugars, 0.5 g sugar alcohols), 29.7 g total fat (19.1 g saturated fat), 79 mg cholesterol, 38 mg sodium, 5.3 mg calcium, 64 mg potassium, 1 mg iron, 236 IU Vit A, 0.6 g protein. 

Fairlife Milk has less sugarNutritional Information per 1/2 cup (made with Fairlife milk): 220 calories, 1.9 g carbohydrate (0 g dietary fiber, 0.9 g sugars, 0.5 g sugar alcohols), 24.7 g total fat (14.7 g saturated fat, 0 g trans fat), 83 mg cholesterol, 48 mg sodium, 50.2 mg calcium, 2 mg potassium, 255 IU Vit A, 1.6 g protein. Net carbs per serving: 1.4 grams

Recipe by Debbie Davidson, copyright 2021
Photos by Debbie Davidson and Kathy Sheehan
All rights reserved. Please do not duplicate without the author’s permission. 
Friday, June 11, 2021

Low Carb Frozen Custard on a Stick

Low Carb Frozen Custard on a Stick
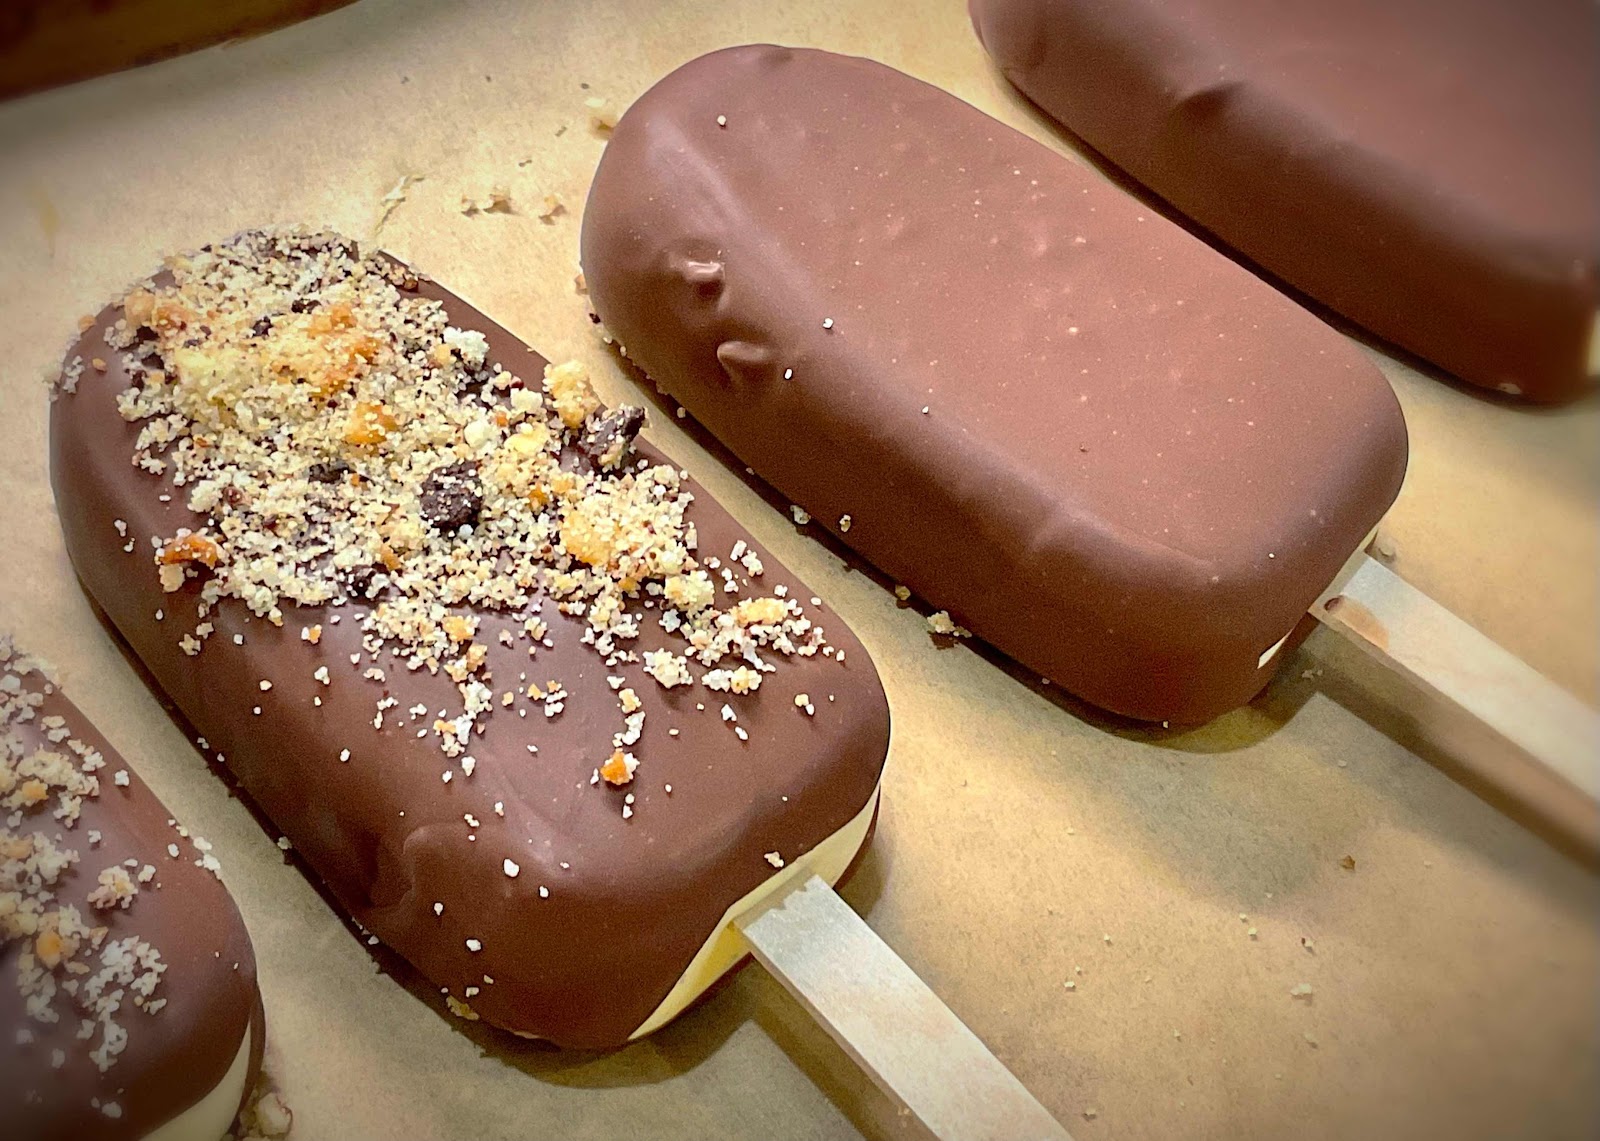
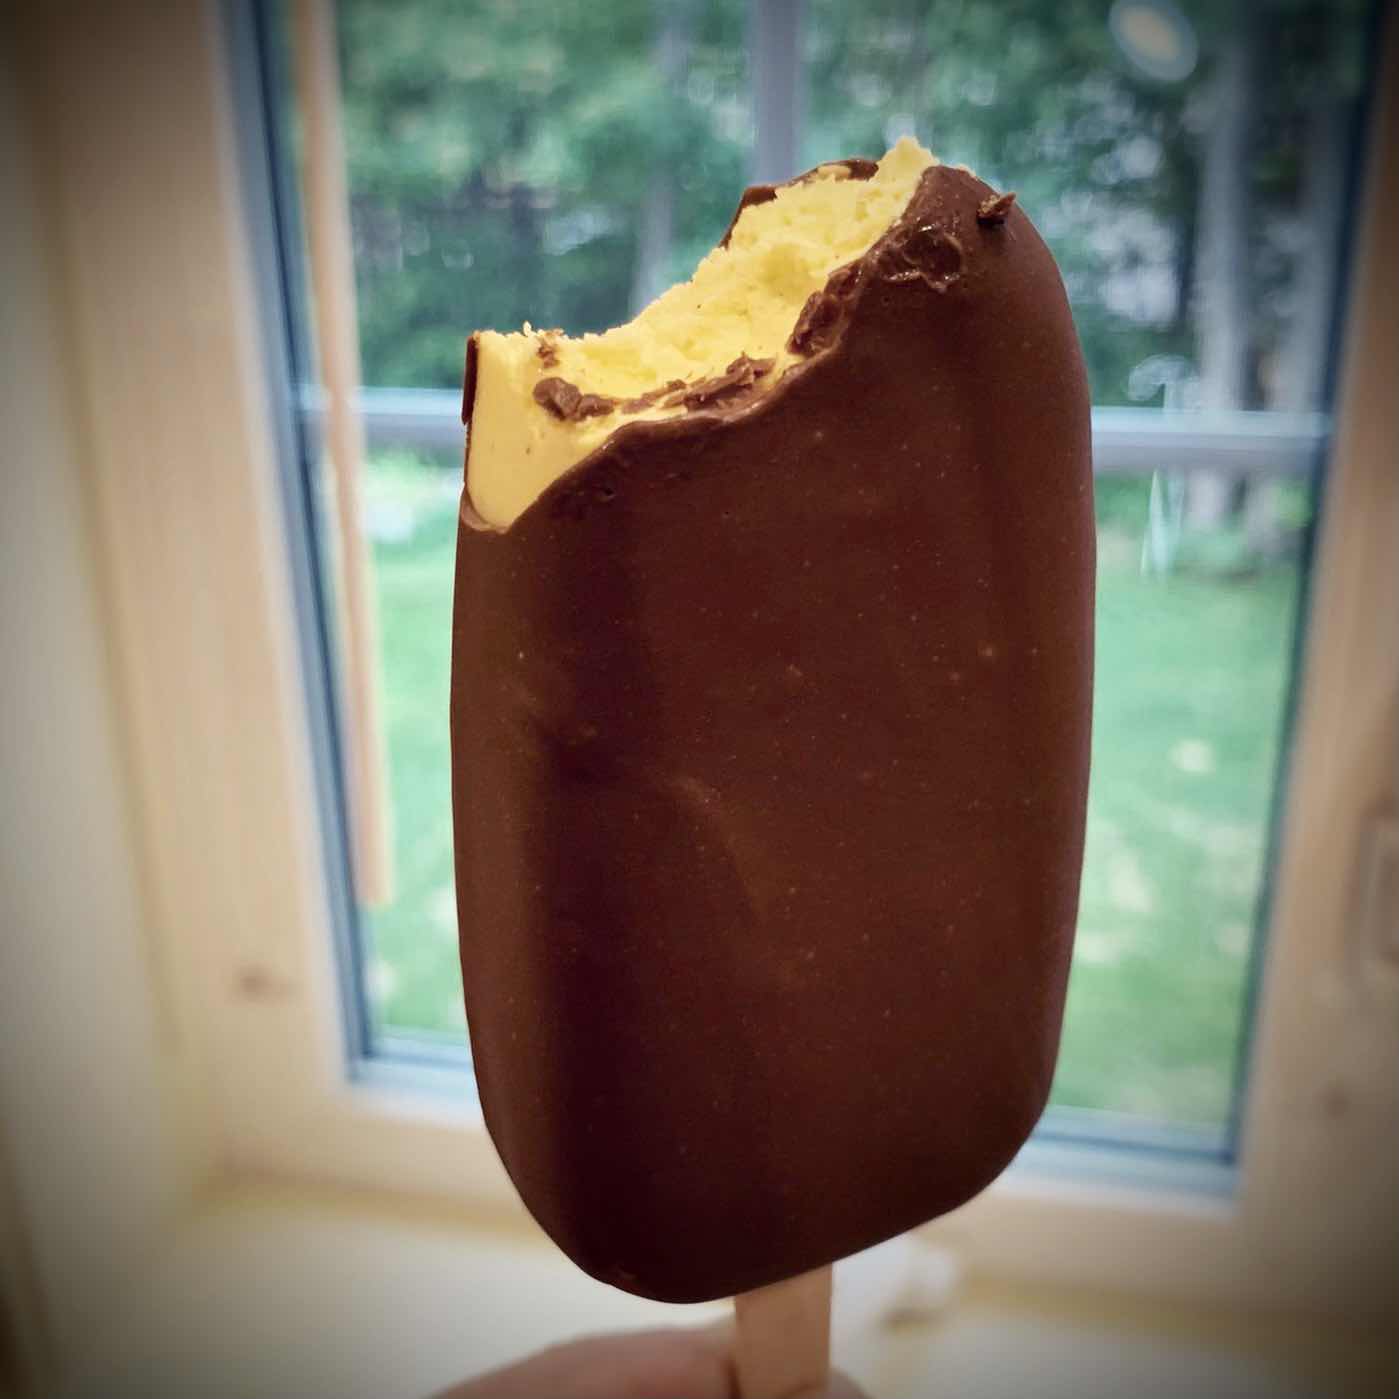
There’s a frozen custard ice cream stand up the coast in Freeport, Maine that has the creamiest, most amazing vanilla frozen custard! It’s been many years since I allowed myself this indulgence because the sugar and carbs are just too high, but I remember this delectable dessert in my dreams. After making Scrambled Egg Pudding the other day, which tastes quite similar, I thought I’d try turning it into a frozen treat. It’s a fact that traditional frozen custard has eggs in the mixture, which gives the ice cream a distinct, egg custard flavor. With some minor modifications to the original Scrambled Egg Pudding recipe (view here), I came up with the perfect formula! This pudding pop has the same rich, deep vanilla flavor and is creamy in texture, without being icy. The trick is the combination of sweeteners: I recommend half powdered erythritol and half allulose (Bocha Sweet would also work). The allulose prevents the ice cream from freezing solid like an ice cube, so the pudding pop remains silky and creamy, and the xanthan gum and gelatin keep it firm enough without being too soft. The result is just right!!

Low Carb Frozen Custard on a Stick
Makes about 4 pudding pops, depending on size of mold

Frozen Custard Pop:
3 eggs, scrambled in 1 tablespoon of unsalted butter
1/2 cup heavy cream
1/4 cup unsweetened coconut or almond milk
2 tablespoons powdered erythritol sweetener 
2 tablespoons allulose sweetener (or Bocha Sweet)
1/4 teaspoon stevia powder (or add more erythritol or allulose to taste)
1/4 to 1/2 teaspoon liquid monkfruit extract or liquid stevia (to taste)
1 teaspoon vanilla extract 
1/8 teaspoon caramel extract (optional, but adds an additional depth of flavor)
A pinch of salt
3/4 teaspoon xanthan gum
3/4 teaspoon unflavored gelatin powder
1/8 teaspoon vanilla powder or seeds scraped from a vanilla bean (optional)

Optional Magic Shell Coating:
1 cup sugar free chocolate chips
2 tablespoons refined coconut oil

1. In a medium to large skillet, scrambled the eggs in 1 tablespoon of butter until firmed up and no longer wet.

2. Place the scrambled eggs into a blender with the remaining ingredients, except the vanilla powder, and blitz on high until smooth, scraping down the sides once or twice. Taste and adjust sweetening, if needed. Add the vanilla powder or vanilla seeds, if using, and blend on low until evenly distributed.

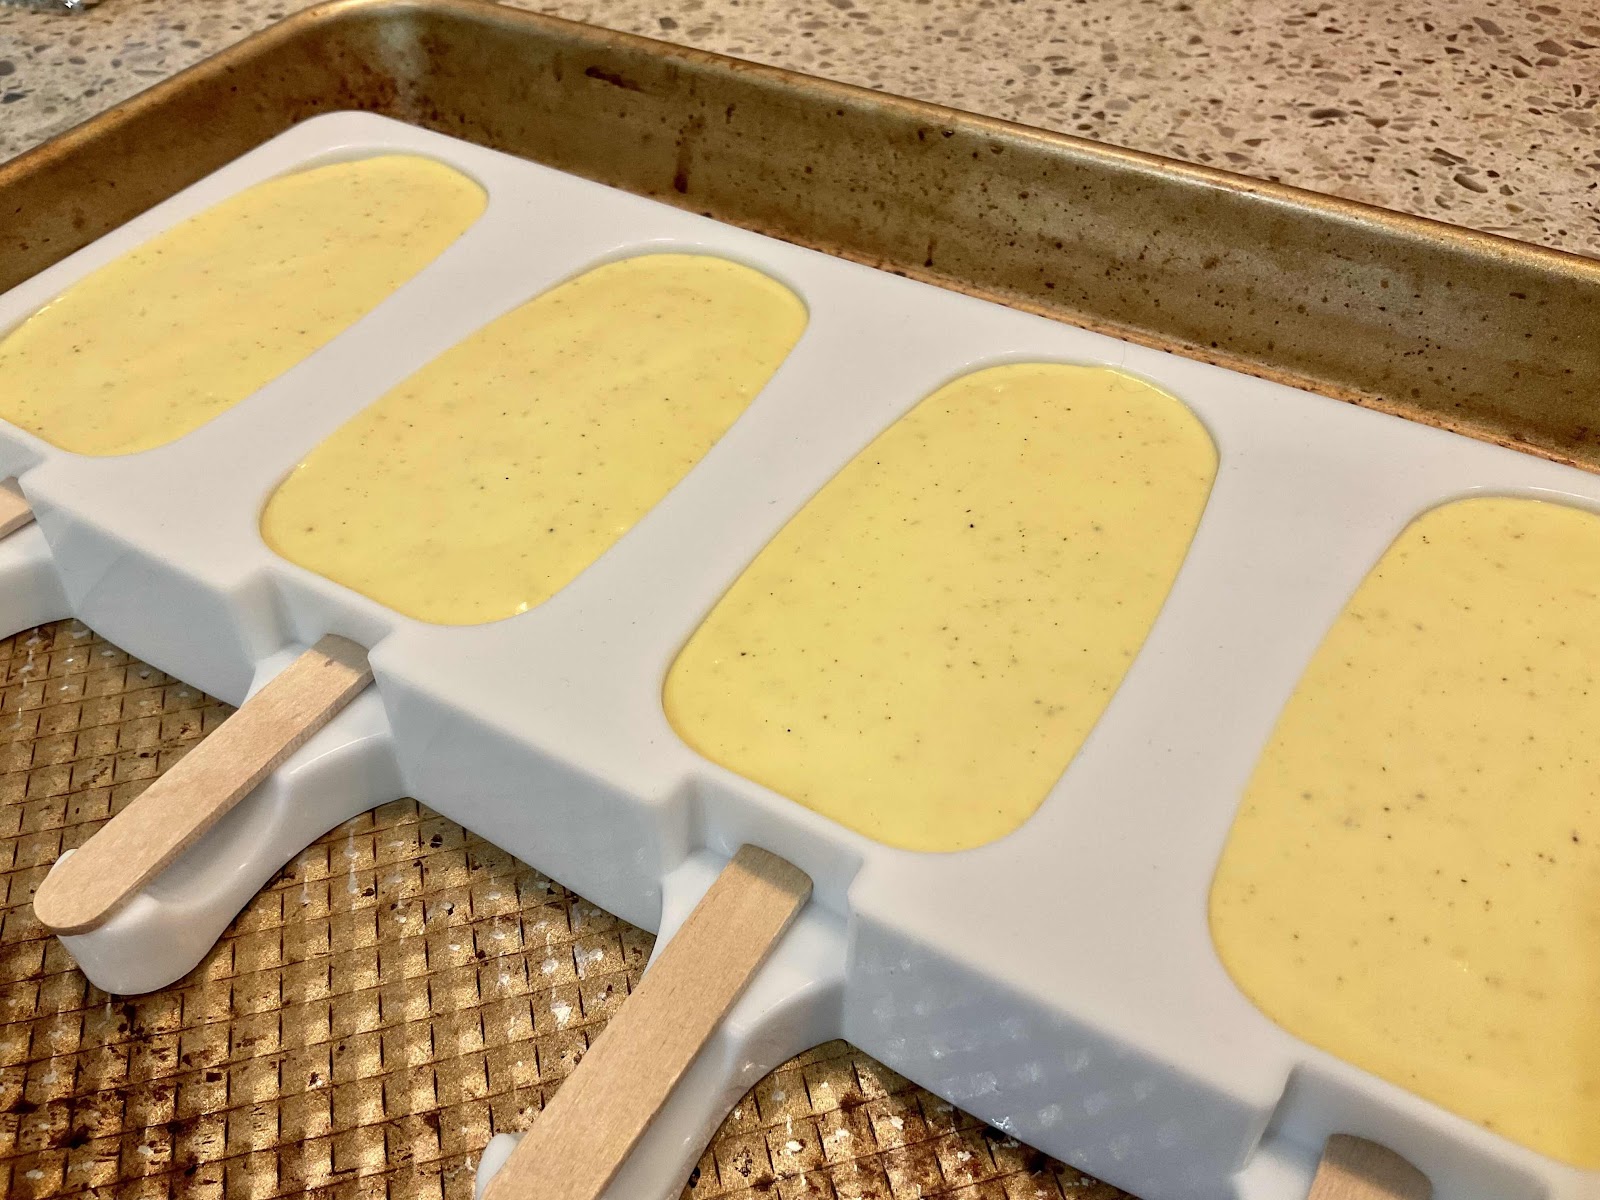
Frozen Custard mixture in mold
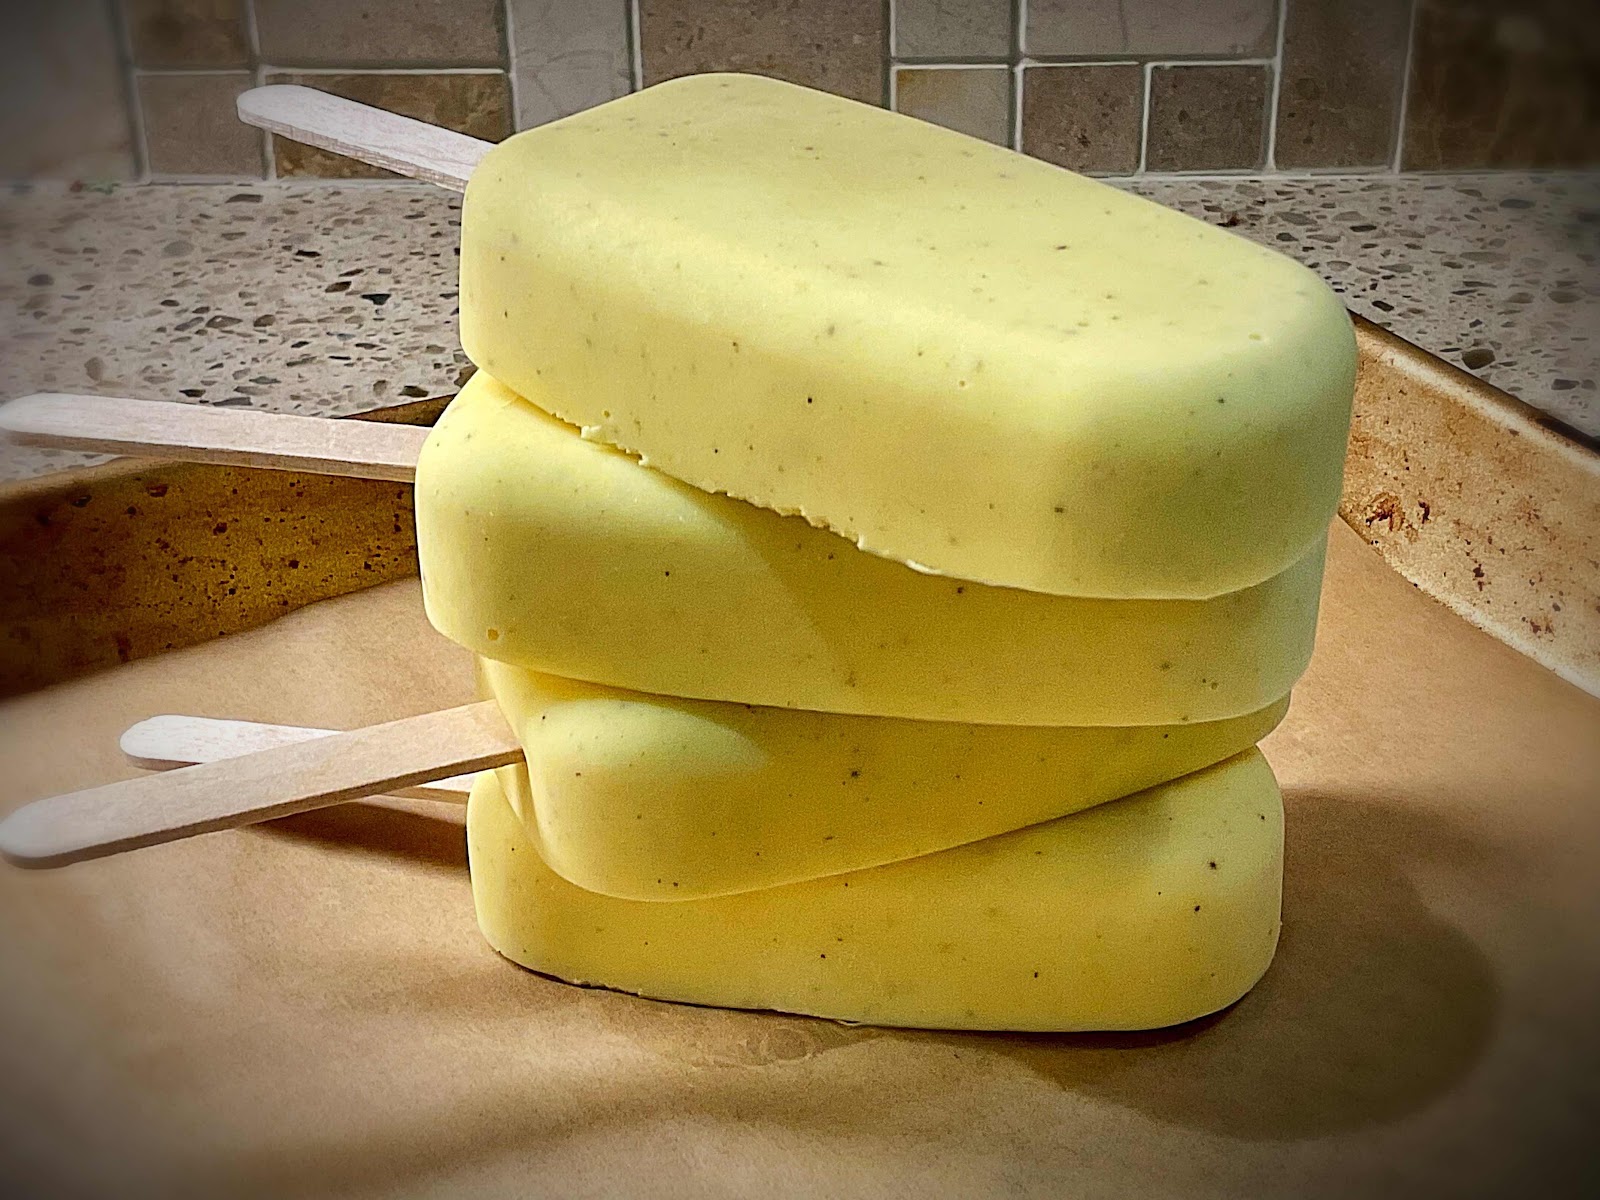
3. Fill each cavity in your ice pop mold nearly to the top (the mixture doesn’t expand much when frozen, so go ahead and pour it almost to the top). Insert the sticks and freeze for at least 5 hours or overnight. 

Dipped Frozen Custard Pops
4. Optional Magic Shell Coating: Place the sugar free chocolate chips and coconut oil in a microwaveable container. Heat at 50% power for 30 seconds and stir. If additional heating is needed, microwave at 50% power at 15 second intervals, stirring between each heating, until mixture is completely smooth. Allow to cool for a bit before dipping your frozen pudding pops. Place each dipped pop on a small tray lined with parchment or waxed paper and freeze for about 10 minutes to harden the shell. If desired, while the chocolate is still wet, sprinkle on crushed keto cookies or finely chopped nuts.

Low Carb Frozen Custard Pudding Pop
Nutritional Information per frozen custard pop (no chocolate coating): 161 calories, 1.8 g carbohydrate (0.4 g dietary fiber, 0.3 g sugars), 16.7 g total fat (8.4 g saturated fat, 0 g trans fat), 179 mg cholesterol, 78 mg sodium, 27.4 mg calcium, 55 mg potassium, 1 mg iron, 188 IU Vit A, 5.1 g protein. Net carbs per serving: 1.4 grams

Photos and recipe by Kathy Sheehan, copyright 2021
All rights reserved. Please do not duplicate without the author’s permission. 

Wednesday, June 2, 2021

Keto Scrambled Egg Pudding (using fewer eggs)

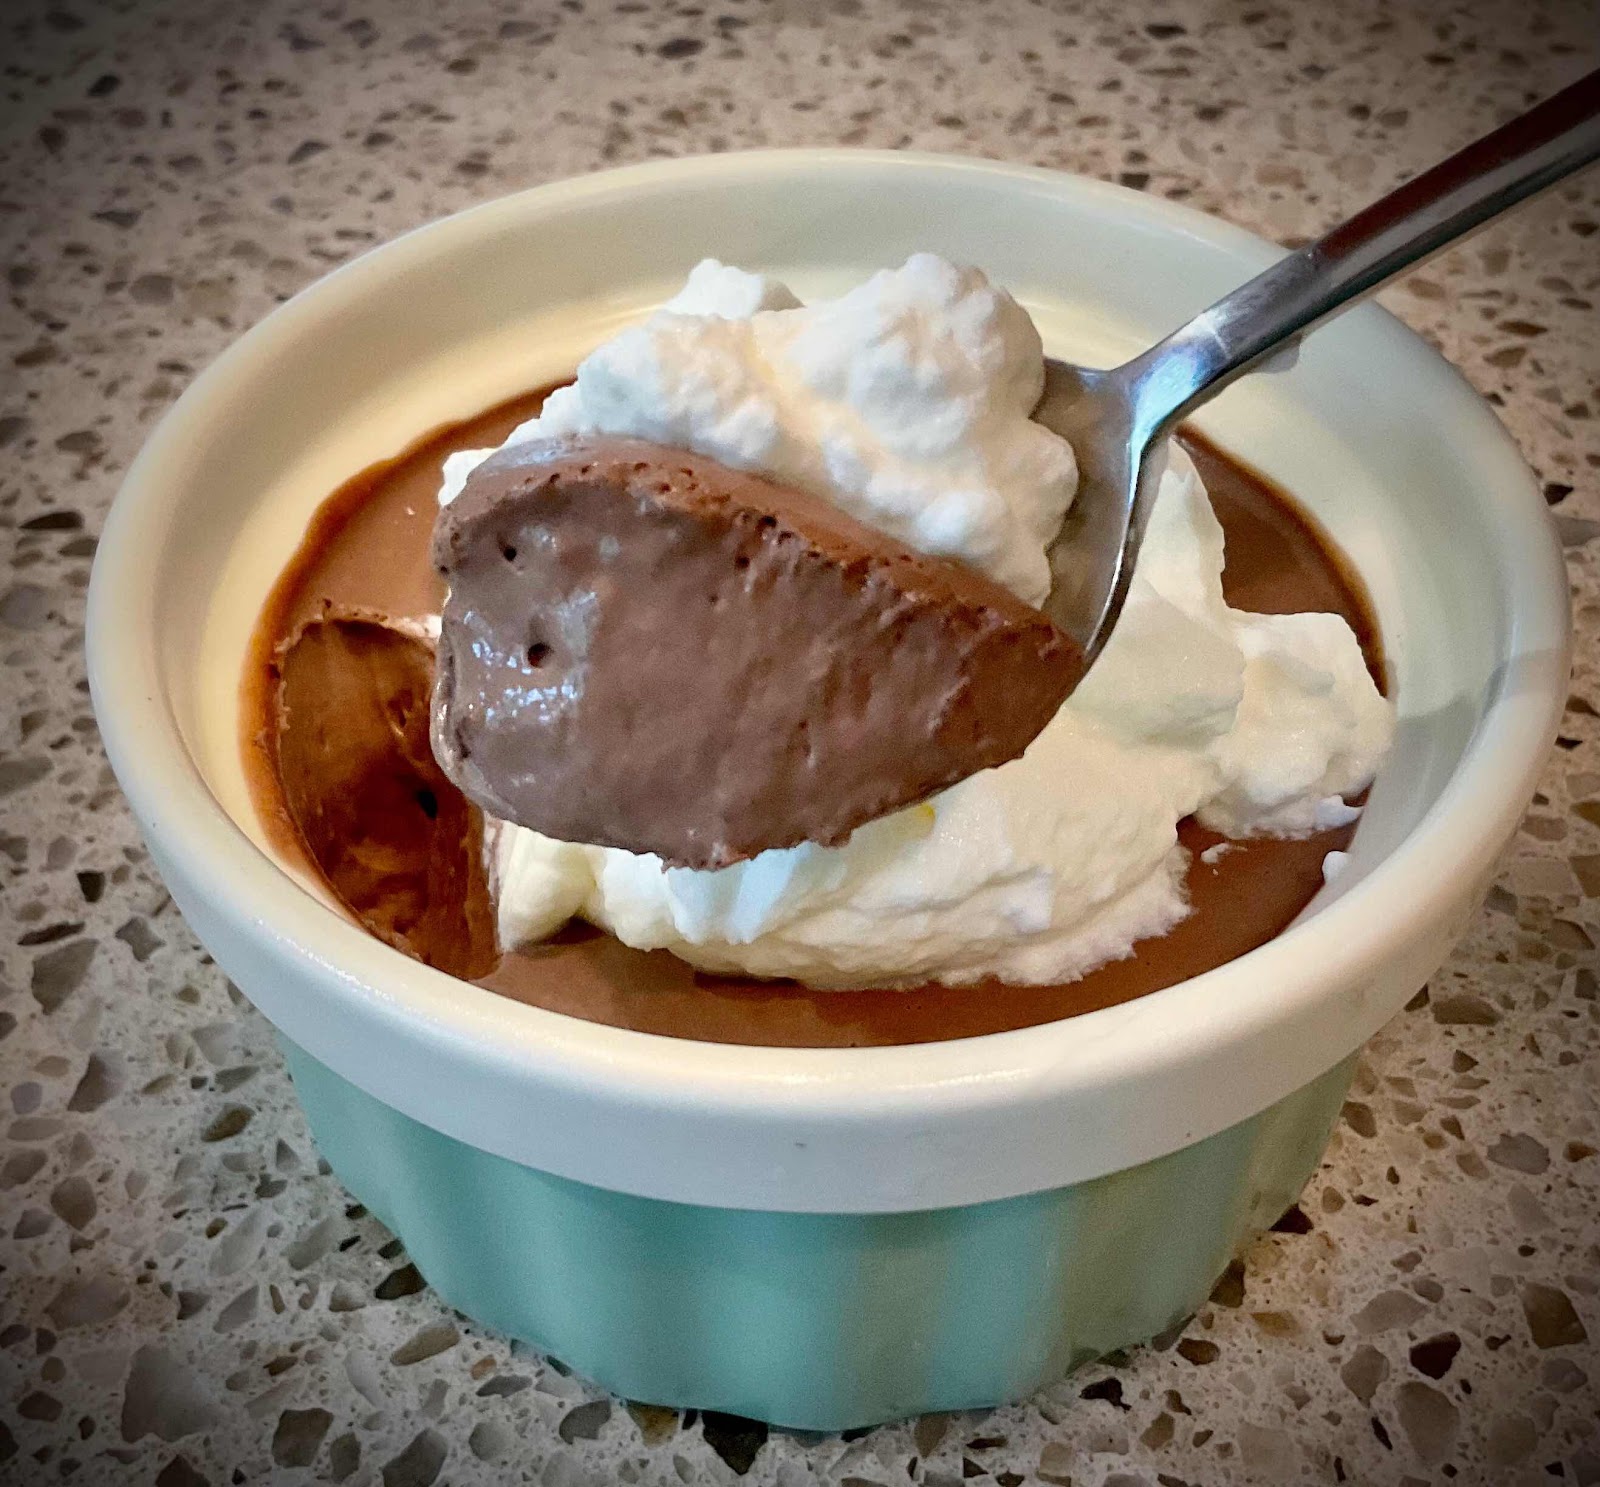
Scrambled Egg Milk Chocolate Pudding
Pudding for breakfast? YES! This is Scrambled Egg Pudding and makes a delicious, low carb breakfast or dessert. I make mine using fewer eggs, but it thickens up just as well as recipes using many more. By scrambling the eggs beforehand and using a blender, this method is so much easier than the traditional way of making pudding. No more standing at the stove carefully stirring (and stirring)… just put all of the ingredients in the blender and blitz until smooth!

Keto Scrambled Egg Milk Chocolate Pudding
Makes 6 generous servings

8 eggs, scrambled in 2 tablespoons unsalted butter
1 cup heavy cream
1 cup coconut milk (or other low carb nut milk of choice)
1/4 cup unsweetened cocoa powder
1/2 cup powdered erythritol sweetener
1/4 teaspoon stevia powder (or more erythritol to taste)
1/2 teaspoon liquid chocolate monkfruit or stevia extract (or 1/2 tsp monkfruit or stevia + an additional 1/4 tsp chocolate extract)
1/2 teaspoon chocolate extract
1/2 teaspoon vanilla extract
A pinch of salt
1-1/2 teaspoons unflavored gelatin powder
1-1/2 teaspoons xanthan gum

1. Place your scrambled eggs into a blender. Add the remaining ingredients and blend on high until smooth in texture. If needed, scrape down sides of blender until all of the ingredients are blended and completely smooth. Taste and adjust the sweetness as desired.

2. Divide the pudding evenly between six ramekins or dessert dishes. Refrigerate until set, at least 3 hours, but overnight is even better. The longer the pudding sets, the thicker it will be. Store uncovered in the refrigerator for up to 4 days.

Nutritional Information per serving (about 3/4 cup): 280 calories, 4.7 g carbohydrate (1.7 g dietary fiber, 0.6 g sugars, 1.3 g sugar alcohols), 26.9 g total fat (14 g saturated fat, 0 g trans fat), 311 mg cholesterol, 193 mg sodium, 118 mg calcium, 152 mg potassium, 2 mg iron, 311 IU Vit A, 9.7 g protein. Net carbs per serving: 3 grams

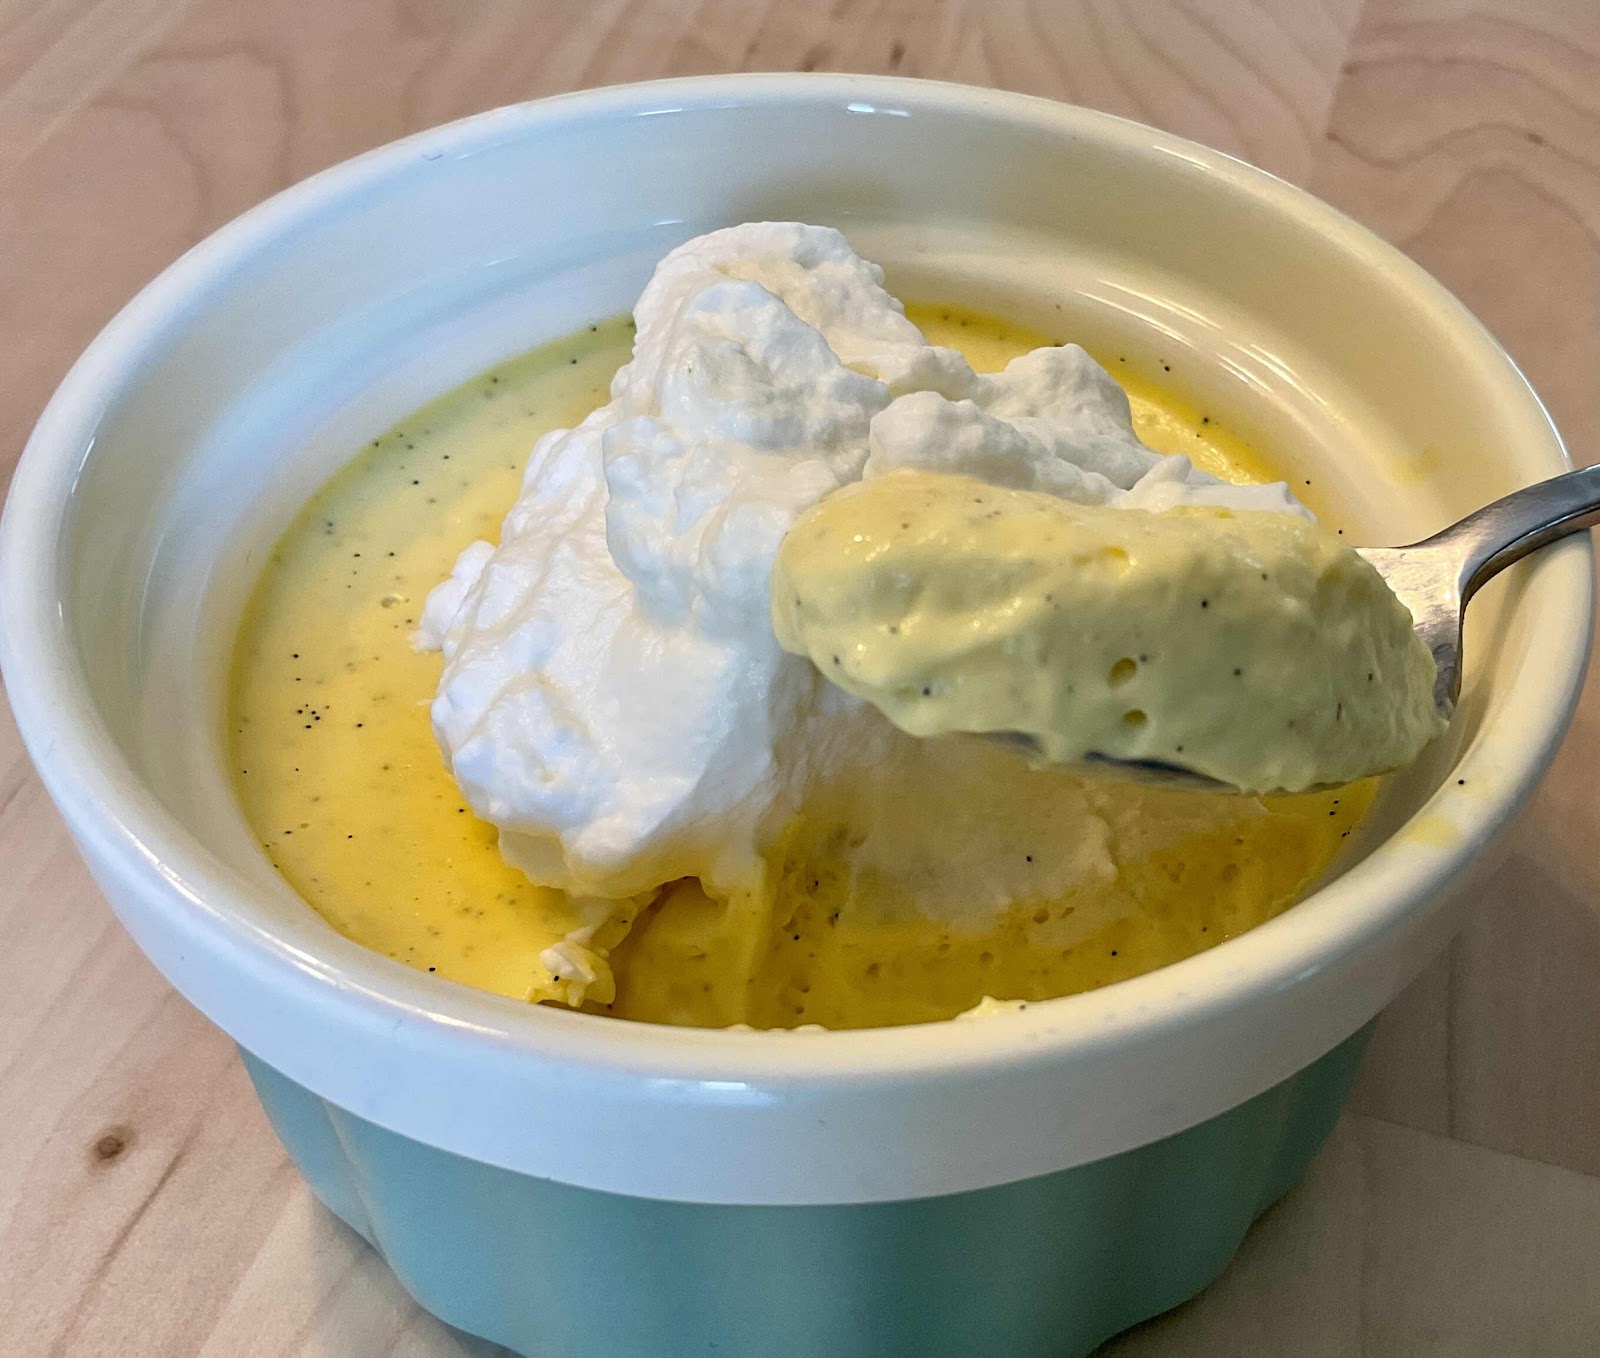
Scrambled Egg French Vanilla Pudding
Keto Scrambled Egg French Vanilla Pudding
Makes 6 servings

8 eggs, scrambled in 2 tablespoons unsalted butter
1 cup heavy cream
3/4 cup coconut milk (or other low carb nut milk of choice)
1/2 cup powdered erythritol sweetener
1/4 teaspoon stevia powder (or more erythritol to taste)
1/2 teaspoon liquid monkfruit or stevia extract
2 teaspoons vanilla extract
1/4 teaspoon caramel extract (optional)
A pinch of salt
1-1/2 teaspoons unflavored gelatin powder
1-1/2 teaspoons xanthan gum
1/4 teaspoon vanilla powder or the seeds scraped from one vanilla bean (optional)

1. Follow the directions as described in the Milk Chocolate Pudding recipe above, but stirring in the vanilla powder or seeds from a vanilla bean at the end, after blending until smooth. Pour into ramekins or dishes and refrigerate until set.

Nutritional Information per serving: 270 calories, 2.2 g carbohydrate (0.2 g dietary fiber, 0.4 g sugars, 1.3 g sugar alcohols), 26.4 g total fat (14 g saturated fat, 0 g trans fat), 311 mg cholesterol, 156 mg sodium, 47 mg calcium, 96 mg potassium, 1 mg iron, 311 IU Vit A, 8.8 g protein. Net carbs per serving: 2 grams

Photos and recipes by Kathy Sheehan, copyright 2021
All rights reserved. Please do not duplicate without the author’s permission.
Friday, December 18, 2020

Keto White Chocolate Powder

Keto White Chocolate Powder
I’ve been on the lookout for white chocolate powder online. The one gourmet brand I found was full of sugar and included maltodextrin, soy and other questionable ingredients. I knew I could do better and started experimenting in my kitchen. I am so pleased with how this mix turned out! It makes the best, creamiest Hot White Chocolate drink, but it also can be used to flavor coffee, smoothies or protein shakes and in any recipe where you want a rich, complex white chocolate flavor that is unforgettable!

Keto White Chocolate Powder
Yields 3/4 cup (12 servings)

1-1/2 ounces of cocoa butter (wafers or chopped)
1/4 cup heavy cream powder (I used Anthony’s brand)
2-3 tablespoons powdered erythritol sweetener, or to taste
A tiny pinch of salt
1 teaspoon vanilla powder

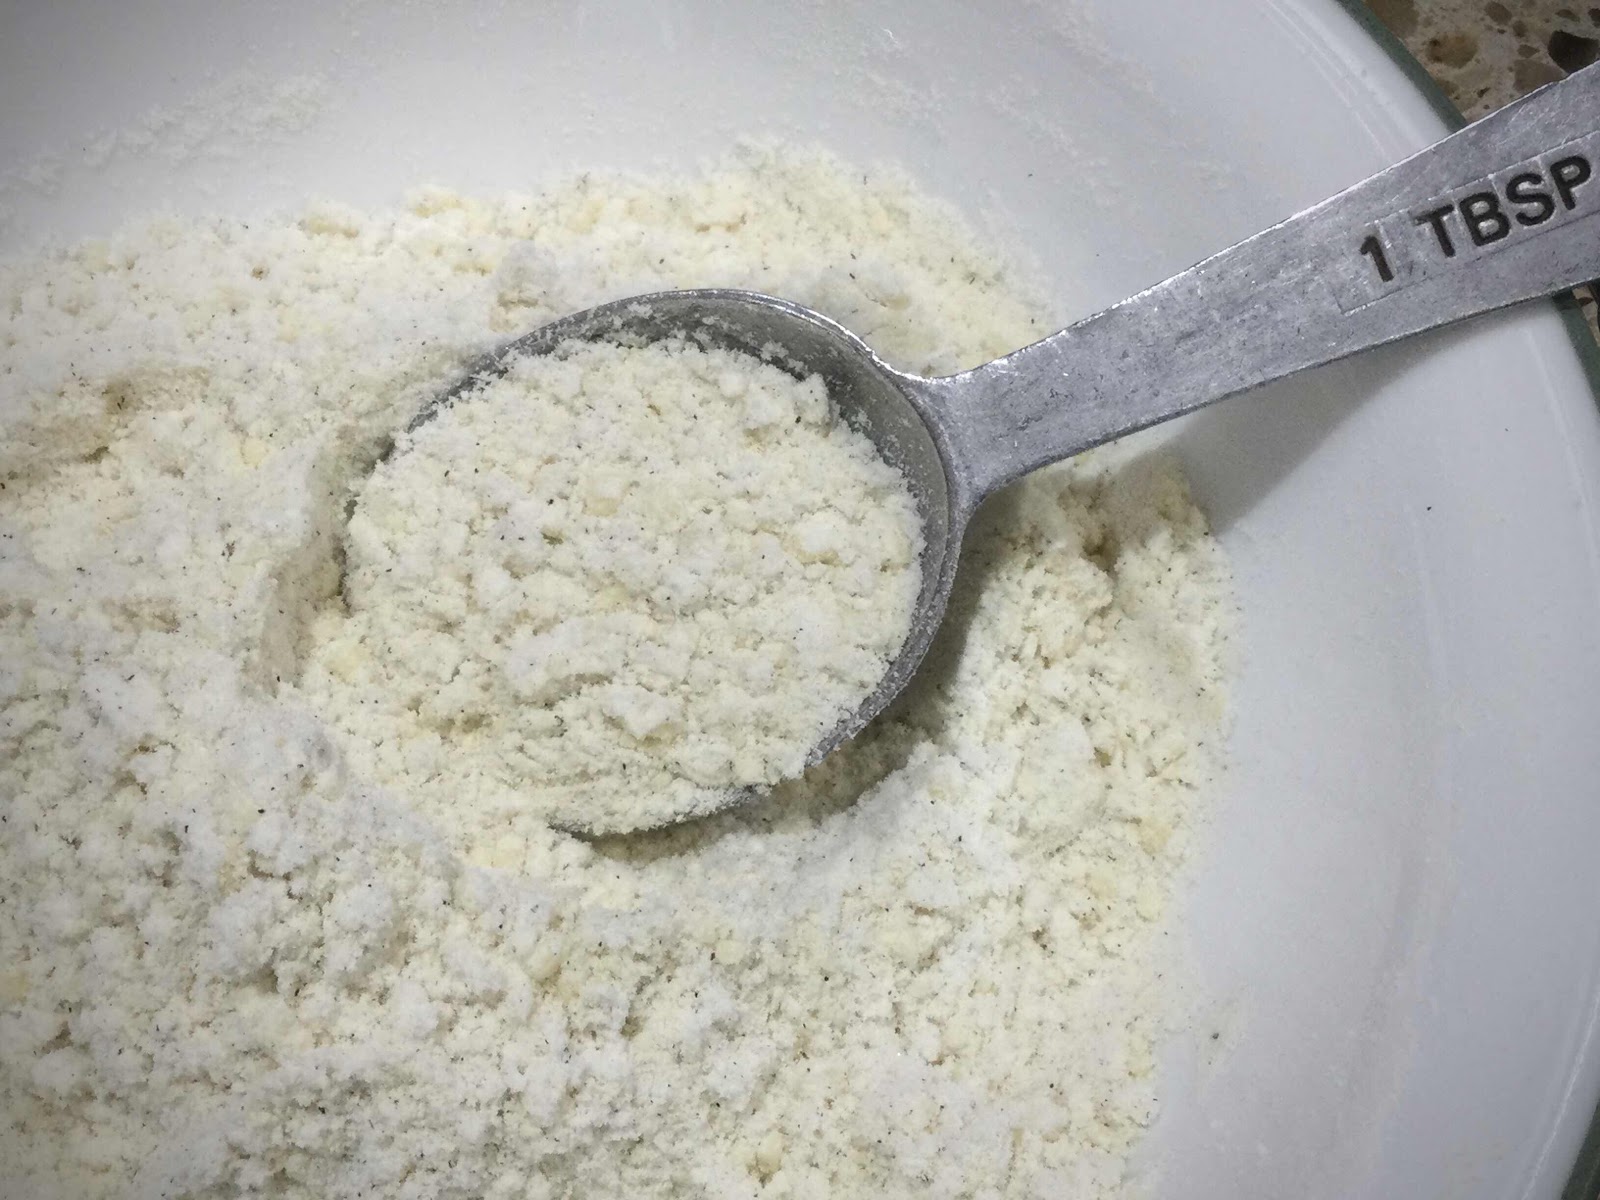
1. Place all of the ingredients into a food processor at the same time and process in pulses until the cocoa butter is finely chopped into minuscule bits and all of the ingredients are well combined. Store in an airtight container or glass jar at room temperature. (Note: Take your time while processing and pulse the mixture. The heat of the food processor blades could begin to melt the cocoa butter, if you process too vigorously. If you see this happening, stop the food processor and stir. Allow the mixture to cool off for a while before you continue pulsing.)

2. To make hot white chocolate, place a tablespoon of the mix into a mug and add 3/4 cup hot, low carb milk of your choice. (For low oxalate, choose coconut milk.) Stir until the mixture has incorporated and the hot cocoa is smooth.

3. You can jazz up the flavor your hot white chocolate by adding a drop or two of peppermint extract, strawberry extract, chocolate extract or orange extract.

4. Other uses: Stir into coffee, a smoothie or protein shake. Use as the powdered cocoa mix when making sugar free Hot Chocolate Bombs. Add to low carb cake or cupcake batter for a richer flavor. It’s also delicious when added to pancake batter!

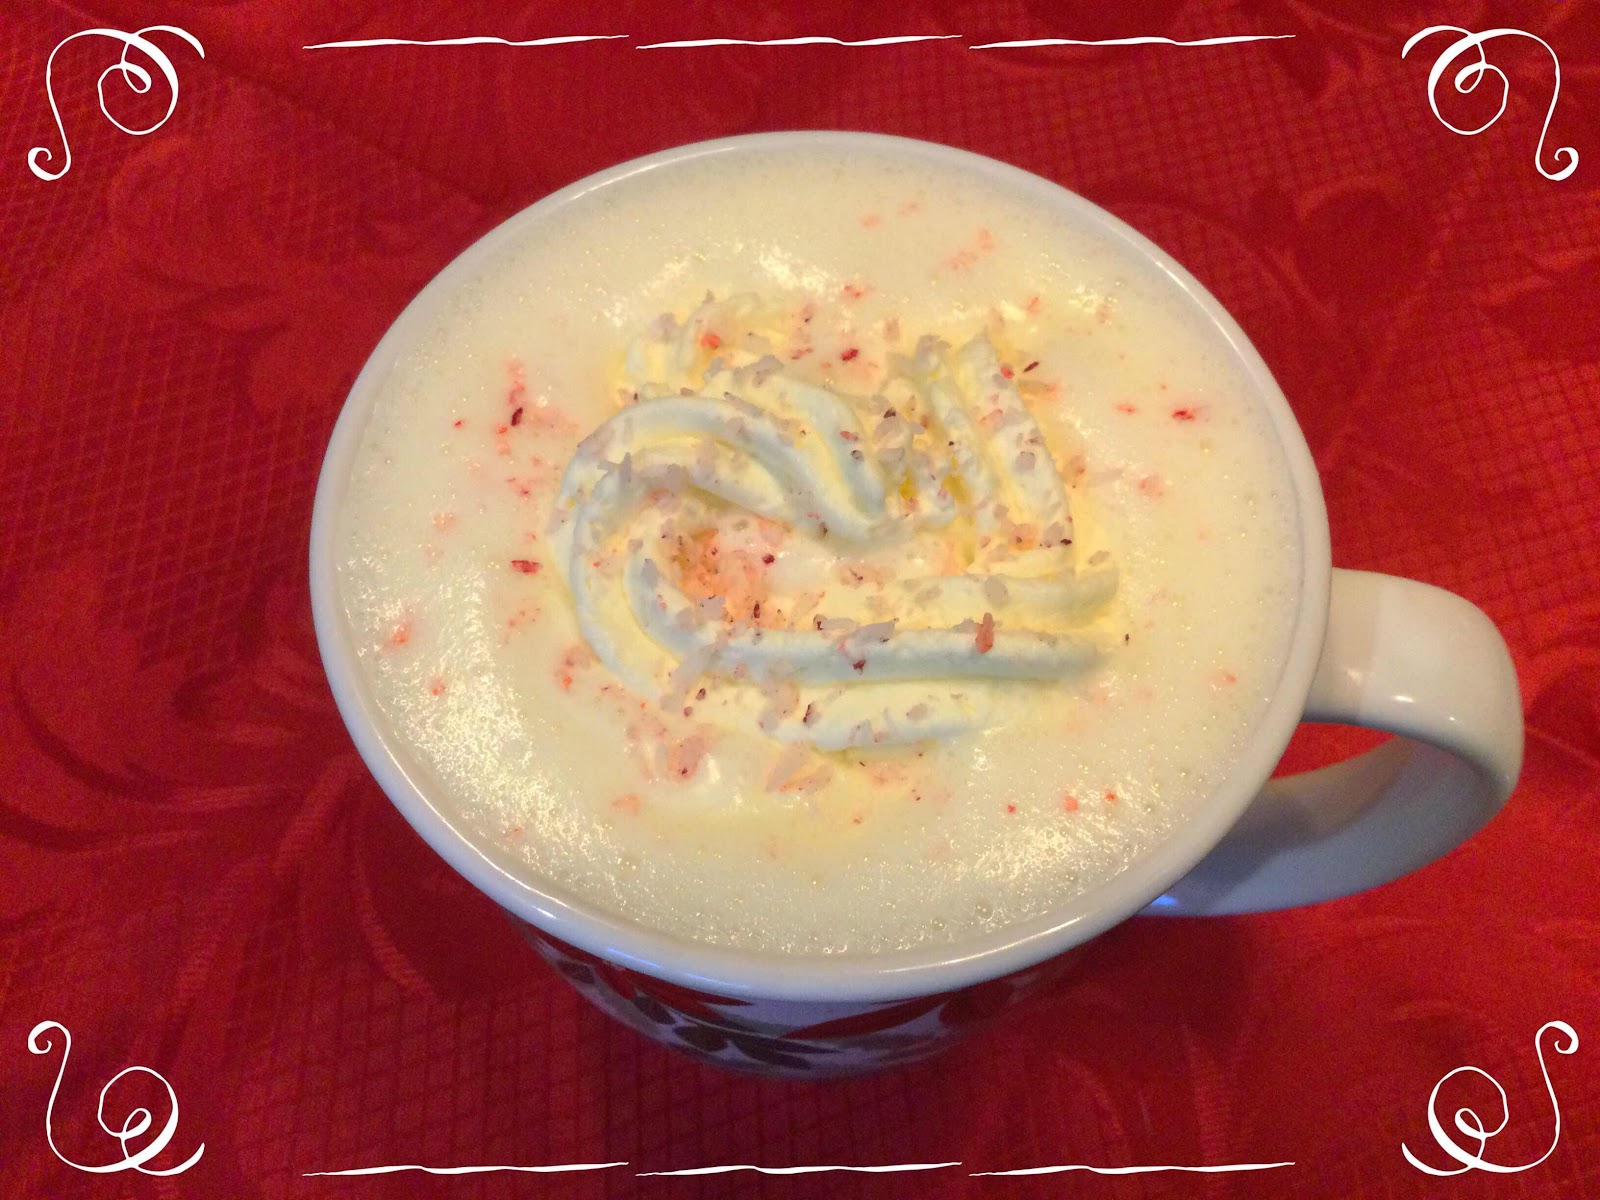
Hot White Chocolate made with powder
Nutritional Information per 1 tablespoon: 46 calories, 1 g carbohydrate (0 g dietary fiber, 0.3 g sugars, 0.7 g sugar alcohol), 5 g total fat (2.5 g saturated fat, 0 g trans fat), 4 mg cholesterol, 3 mg sodium, 6 mg calcium, 8 mg potassium, 0 g protein. Net carbs per serving: 0.3 grams

Photos and recipe by Kathy Sheehan, copyright 2020
All rights reserved. Please do not duplicate without the author’s permission.
Tuesday, August 25, 2020

Hot White Chocolate

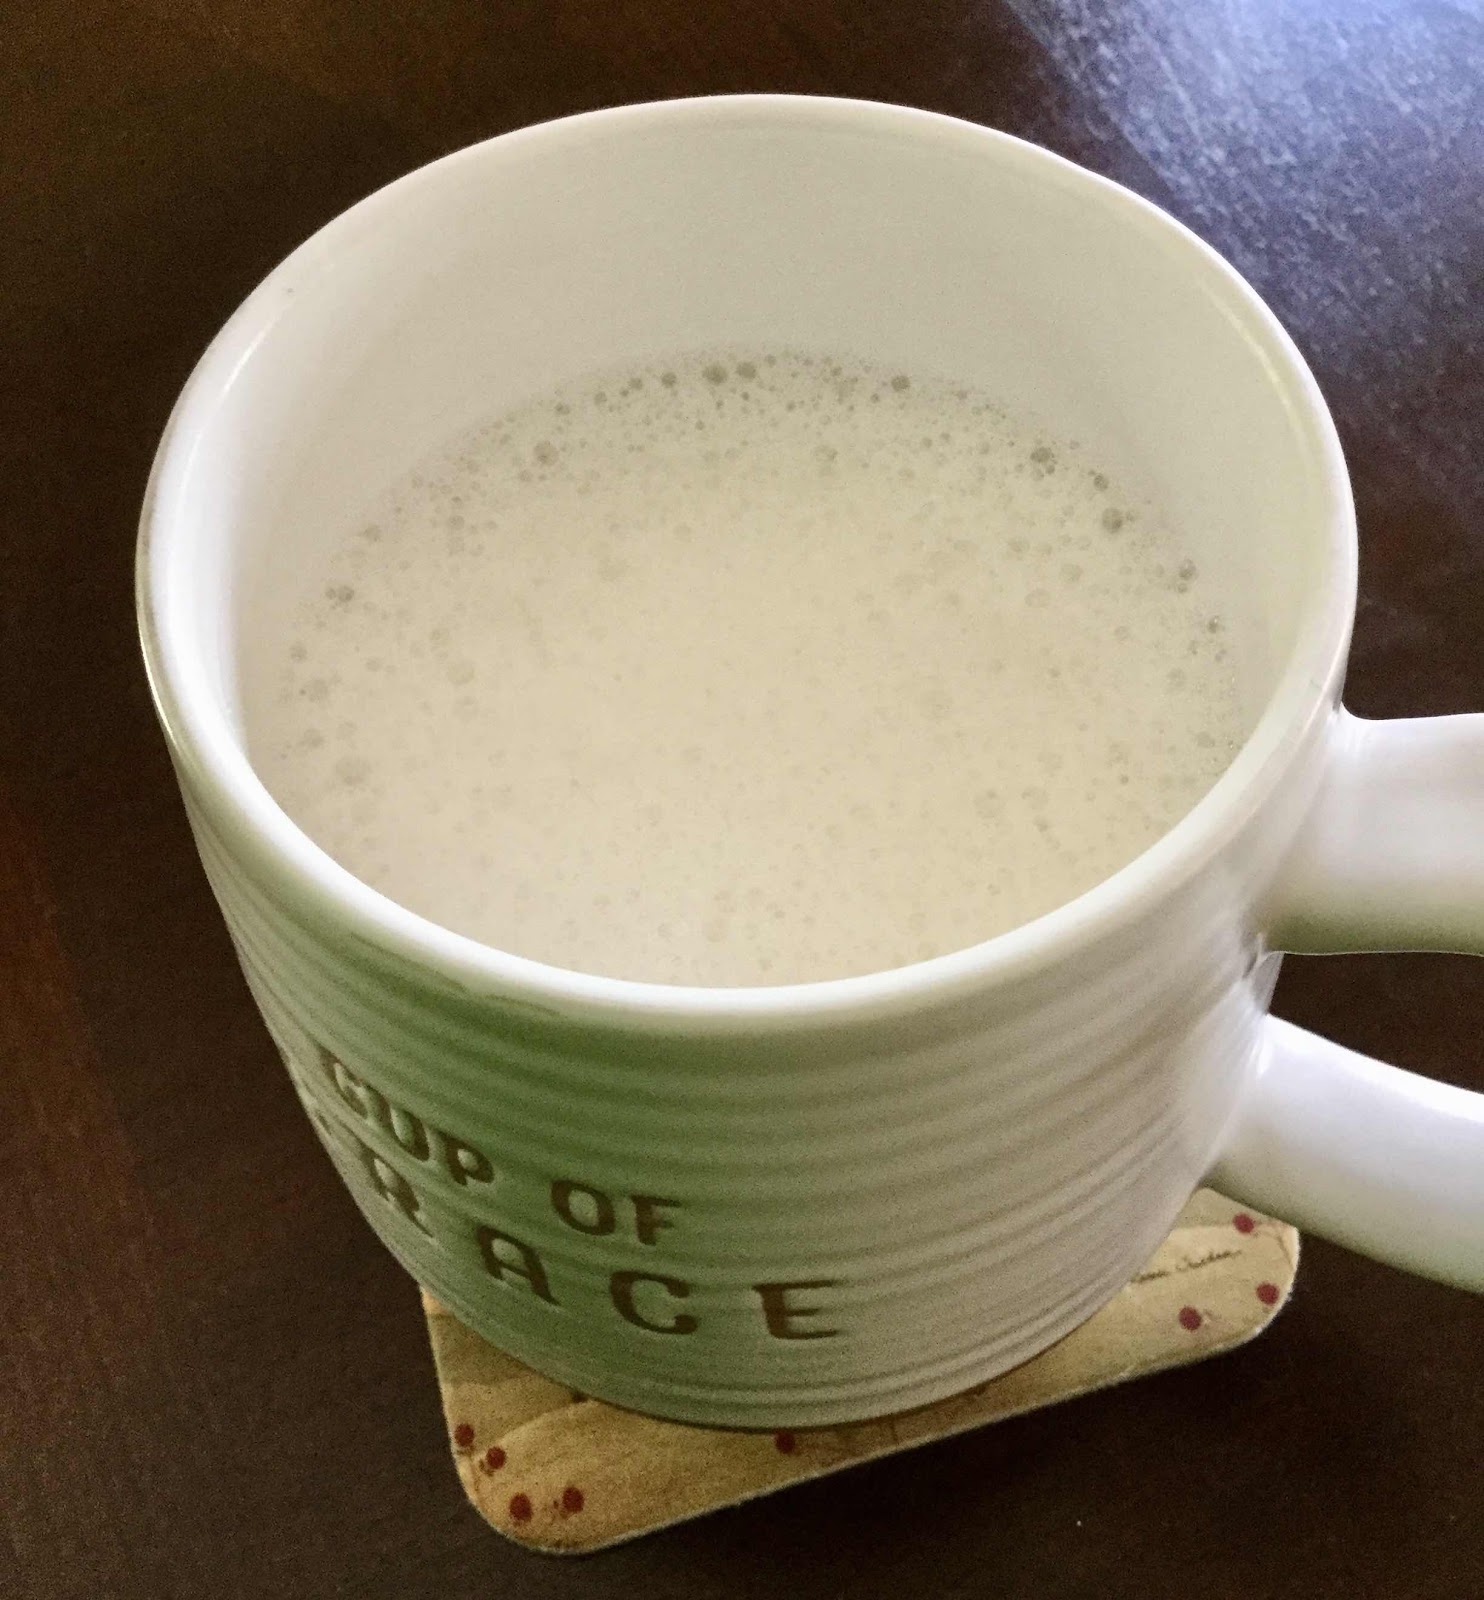
Hot White Chocolate
It may be a bit early to be thinking about hot chocolate but, because of recurring kidney stones, my doctor tells me that I need to cut back on oxalates in my diet. Sadly, dark chocolate and cocoa powder are very high in oxalates and can encourage the development of kidney stones. The good news is that white chocolate is very low in oxalates! I live in Maine and need some type of hot chocolate beverage to get through the long, cold winters. I developed this recipe that is creamy, rich and just as satisfying. Low carb AND low oxalate, this recipe will be one of my favorite treats as the weather gets cooler!

Hot White Chocolate
Makes 1 serving

1-1/4 cups non-dairy nut milk of choice (coconut milk is lowest in oxalate)
2 tablespoons heavy cream
6 drops monkfruit extract (or stevia)
1/8 teaspoon vanilla extract
1/4 teaspoon chocolate extract
A tiny pinch of salt
1 tablespoon sugar free white chocolate chips (see note below)

1. Heat the milk, cream, monkfruit extract or stevia, extracts and salt in a small saucepan until it comes to a simmer. Remove from heat and add the white chocolate chips, stirring until they are completely melted and incorporated into the hot milk. 

2. If you have a frothing wand, give it a whisk to create foam and to make sure the chips are well incorporated. If you don’t have a powered frothing tool, you can use a hand whisk. Serve immediately. 

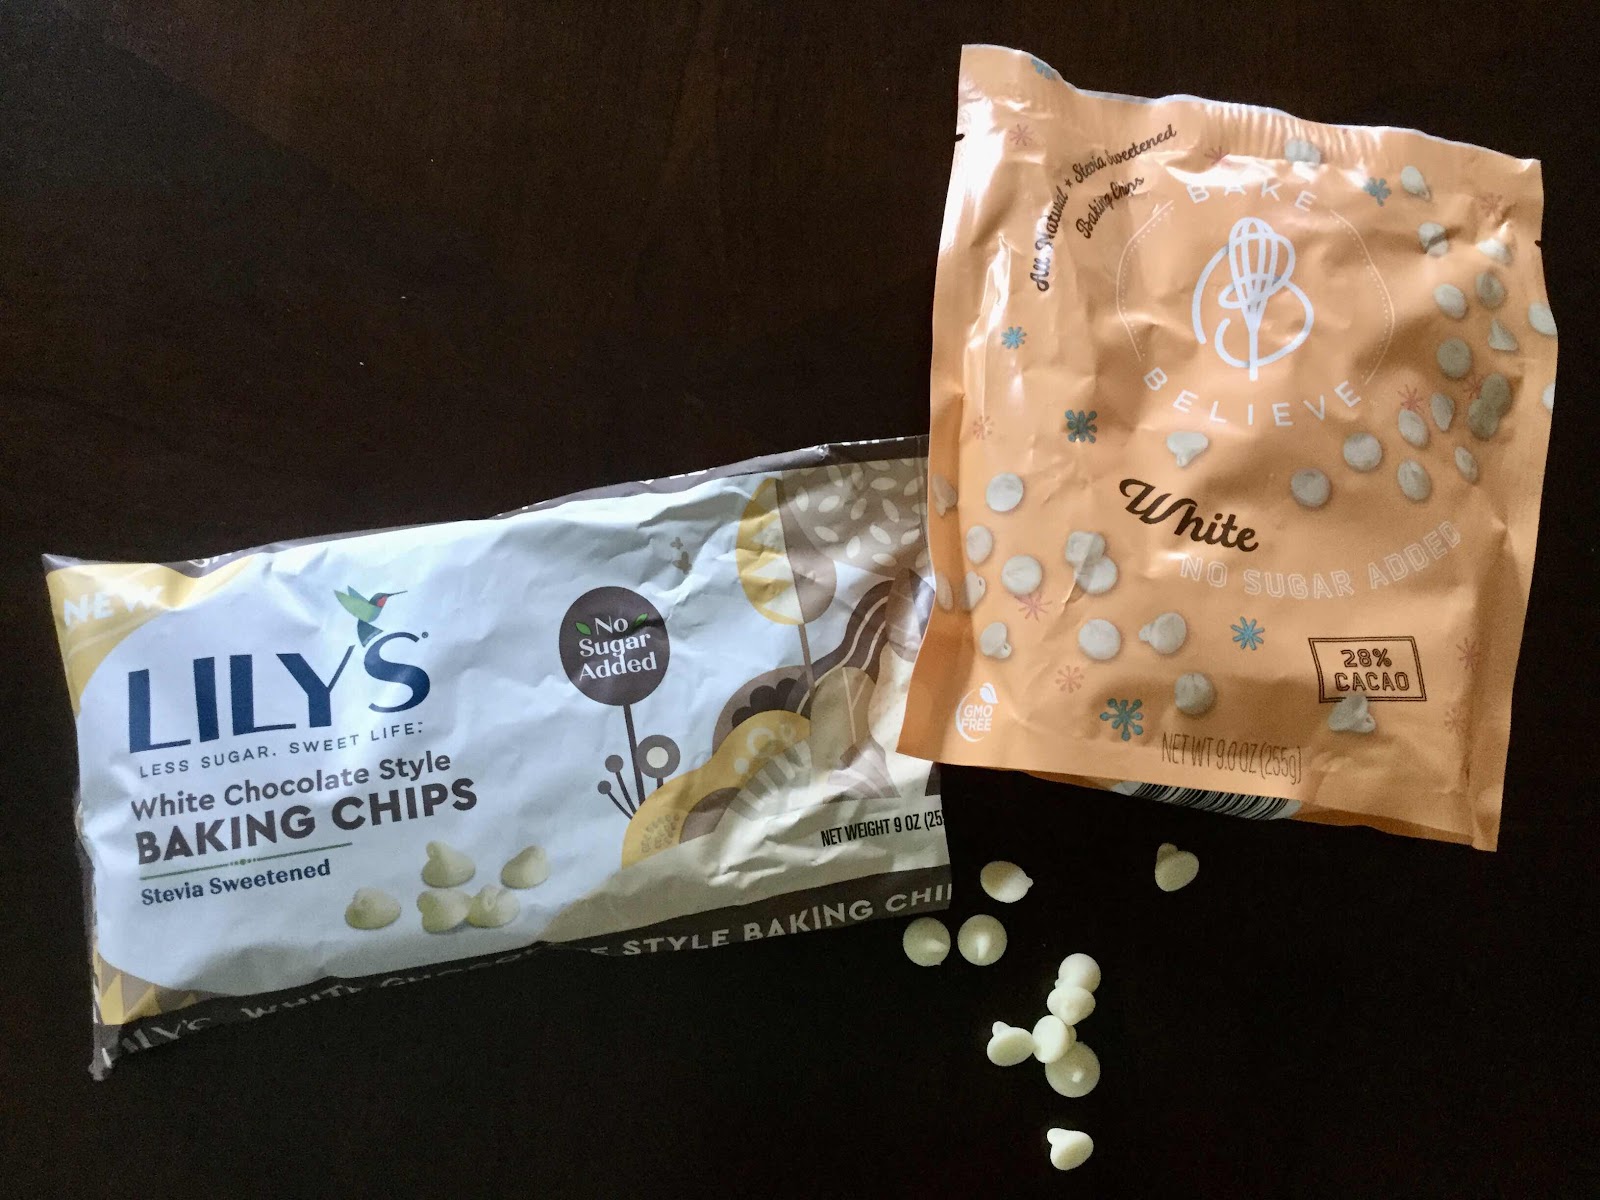
Sugar Free Chocolate Chips
Note: There are several brands of sugar free white chocolate chips available. I used Lily’s, which I bought at Whole Foods, but WalMart carries Bake Believe brand which can be found in the baking aisle. Another company that sells sugar free white chocolate chips is Choc Zero, which you can buy online. 

Nutritional Information per serving: 223 calories, 3.9 g carbohydrates (1.9 g dietary fiber, 0.8 g sugars), 24.4 g total fat (13.8 g saturated fat, 0 g trans fat), 66 mg cholesterol, 60 mg sodium, 12.3 mg calcium, 29 mg potassium, 195 IU Vit A, 0.3 g protein. Net carbs per serving: 2 grams

Photos and recipe by Kathy Sheehan, copyright 2020
All rights reserved. Please do not duplicate without the author’s permission. 
Friday, August 24, 2018

Extra Creamy Homemade Almond Coconut Milk (or Cashew)

Extra Creamy Homemade Almond Coconut Milk
Sometimes having the right tools in your kitchen make all the difference between whether you buy premade, processed food or make it yourself at home. A fine example is today’s recipe of homemade almond coconut milk (or cashew). I find that store bought nut milks are fine to use in cooking, but are otherwise undrinkable. Using a high-speed blender or a nut milk maker machine (such as the SoyaPower G4 pictured above) allows me to create my own organic, additive and preservative-free nut milks in a few minutes! Last Christmas I received this nut milk maker machine, which I love and have been using consistently every week. The resulting almond coconut milk (or cashew) is naturally creamy, extremely low carb and more delicious than any store bought I’ve ever tried. Although my recipe contains heavy cream, it is virtually lactose and casein free. (Of course, you could leave out the cream if you wish, but it adds a richness to the milk that I highly recommend without adding any carbs.) The only thing that takes prior planning and time is soaking the nuts beforehand, but that’s easily done overnight while I sleep. Take it from me, homemade almond milk is worth the effort!  

Extra Creamy Homemade Almond Coconut Milk (or Cashew)
Makes about 5 cups

1/2 cup raw almonds, soaked in water for 12 hours
1/2 cup unsweetened shredded coconut
4-1/2 cups water
1/2 cup organic heavy whipping cream (can omit, if desired)
1/4 teaspoon pink Himalayan or sea salt
5 drops stevia or LaKanto Monkfruit extract
1/2 teaspoon vanilla

1. Presoak your almonds for 12 hours prior to making your nut milk (if using cashews, soak for 4-8 hours). Drain and rinse the soaked almonds. Place them into your high-speed blender or nut milk maker machine. Add the unsweetened shredded coconut and water. If using a blender, blend on high for 4 minutes. If using a nut milk maker machine, add enough water to reach the specified line in your pitcher. Turn the machine on and select raw/juice and press start (see your instruction manual for the correct procedure for making nut milk). The machine will turn off automatically when the milk is done.

2. Using a very fine mesh strainer or a nut milk bag, strain the solids out of the blended milk and discard. Add the whipping cream, salt, sweetener and vanilla to the strained milk and stir. Pour into a glass container and place in the refrigerator to cool completely before drinking or it can be used right away for cooking. The milk can be stored in the refrigerator for 5-7 days.

Nutritional Information per 1 cup almond coconut milk: 117 calories, 1.3 g carbohydrate (0.7 g dietary fiber, 0.3 g sugars), 12.8 g total fat (7.1 g saturated fat, 0 g trans fat), 32 mg cholesterol, 37 mg sodium, 8.5 mg calcium, 25 mg potassium, 316 mg Vit A, 0.9 g protein. Net carbs per serving: 0.6 grams.

Nutritional Information per 1 cup cashew coconut milk: 169 calories, 4.4 g carbohydrate (1.8 g dietary fiber, 1.1 g sugars), 16 g total fat (10.8 g saturated fat, 0 g trans fat), 32 mg cholesterol, 137 mg sodium, 6.2 mg calcium, 46 mg potassium, 1 mg iron, 316 mg Vit A, 1.6 g protein. Net carbs per serving: 2.6 grams

Recipe and photo by Kathy Sheehan, copyright 2018
All rights reserved. Please do not duplicate without the author’s permission. 

Friday, July 13, 2018

Low Carb Banana Milk (and other Flavored Milks)

Low Carb Banana Milk
When I was a little girl, it was always a treat when my Mom made me Vanilla Milk, which was basically milk with vanilla extract added. Where I live in Maine, flavored milks are all the rage. The dairy shelf is lined with them: Banana, Coffee, Strawberry and, of course, Chocolate. There are so many flavors available, it makes my head spin! This low carb version actually starts with unsweetened almond, coconut or cashew milk, which is then flavored with extracts. To make it richer, I add a splash of heavy cream and give it a spin in my blender until it’s frothy. It’s a fat bomb you can sip through a straw and tastes like melted ice cream! It’s delicious for breakfast (especially the Coffee Milk), as a snack or dessert. The carb count is so low, you can enjoy this treat anytime.

Low Carb Banana Milk
Makes 1 serving

1/2 cup unsweetened almond, coconut or cashew milk
1 cup cold water
2 tablespoons heavy cream
1/4 teaspoon vanilla extract
1/4 teaspoon banana extract, or to taste
5 drops of LaKanto Monkfruit or stevia sweetener, to taste
1/2 cup ice cubes

Place all of the ingredients into a blender and blend until smooth and frothy. Enjoy cold.

Nutritional Information per serving: 128 calories, 0.8 g carbohydrate (0.5 g dietary fiber, 0 g sugars), 13.8 g total fat (7.5 g saturated fat, 0 g trans fat), 40 mg cholesterol, 73 mg sodium, 3 mg potassium, 225 mg Vit A, 0.5 g protein. 

Other Milk Flavor Variations:

Coffee Milk: In place of the cold water, substitute 1 cup of brewed strong coffee and omit the banana extract.

Chocolate Peppermint Milk: Substitute chocolate and peppermint extracts (I like to add a few leaves from my Chocolate Mint plant!). This would be great made with coffee as a base, too.

Orange Cream Milk: Substitute orange oil or extract for the banana extract.

Salted Caramel Milk: Substitute caramel extract (or flavoring) for the banana and add a pinch of salt to taste.

Maple Milk: Substitute maple extract to taste.

Bullet Proof Milk: To any flavor, add 1 tablespoon MCT or coconut oil. This adds about 100 calories and 12 g of fat to the nutritional information; the carbs and protein stays the same. A Bullet Proof Milk makes a quick and easy meal replacement.

Probiotic Milk: To any flavor, add 2 tablespoons unsweetened, plain yogurt or kefir. This adds about 18 calories, 0.5 g carbohydrate, 1 g of fat and 1 g of protein.

??? Make up your own! Use whatever extracts you have on hand. Kids especially enjoy coming up with their favorite milk flavors.

Recipe and photo by Kathy Sheehan, copyright 2018
All rights reserved. Please do not duplicate without the author’s permission.

Wednesday, January 31, 2018

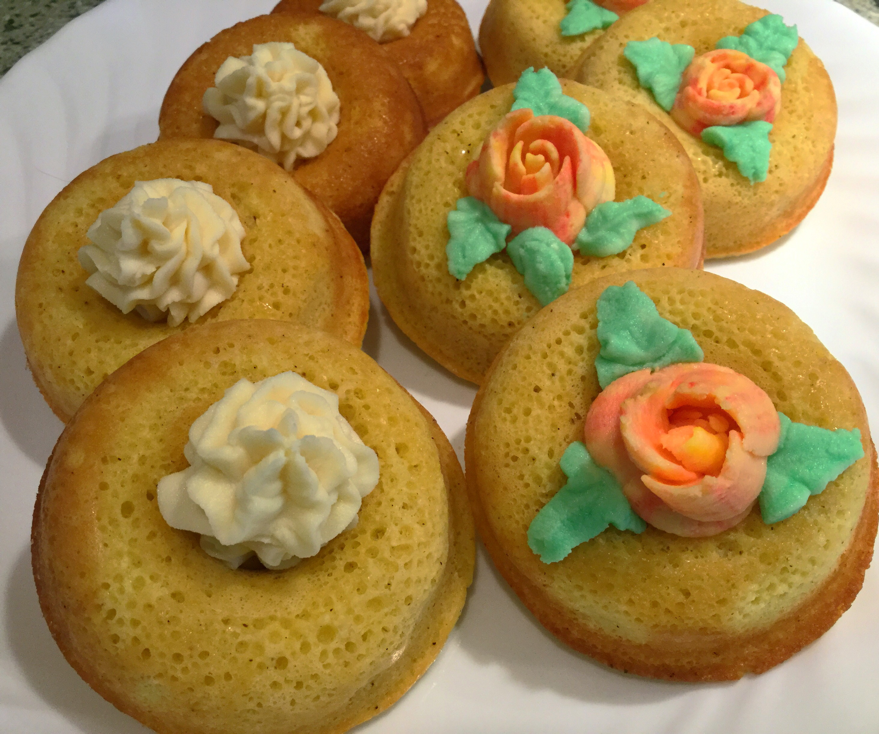
Frosted Vanilla Custard Donuts (Low Carb, Gluten Free)

Frosted Vanilla Custard Donuts
Vanilla custard is traditionally made with plenty of egg yolks, which are what make these donuts so rich and delicious. The batter rises up light and airy, so they have a tender crumb. If desired, this recipe would make wonderful cupcakes, but I like using my donut pan and filling each cavity high enough with batter that the hole of the donut disappears as it bakes, creating the perfect little platform for holding the dab of frosting. I just happen to have some decorating icing tips in my kitchen collection, so I had fun making them fancy and appropriate for Valentine’s Day, but that’s not necessary. Anyway you decorate them, these donuts will be both beautiful and delicious!

Frosted Vanilla Custard Donuts
Makes 8 donuts (more or less depending on your donut pan)

1 cup almond flour
1/4 cup erythritol sweetener, granulated
2 tablespoons unflavored whey protein powder
1 teaspoon baking powder
1/4 teaspoon vanilla powder (or seeds scraped from a vanilla bean)
1/8 teaspoon salt
1 large egg
2 egg yolks
1/4 cup heavy cream
1/4 cup almond or coconut milk
2 tablespoons butter, melted
1/2 teaspoon vanilla extract 

Frosting:
2 ounces cream cheese, room temperature
1 tablespoon butter, softened
4 ounces plain mascarpone cheese, room temperature
1/4 cup powdered erythritol (Confectioners), or to taste
1 teaspoon vanilla extract
2 tablespoons heavy cream

1. Preheat oven to 325 degrees F. Spray each cavity of your donut tin with non-stick cooking spray or grease with butter; set aside.

2. In a large bowl, whisk or sift together the almond flour, erythritol, whey protein powder, baking powder, vanilla powder and salt. Whisk to combine and until no lumps remain.

3. In a separate bowl, whisk together the egg, egg yolks, cream, almond milk, melted butter and vanilla extract. Add the wet ingredients to the dry ingredients and whisk well to combine. 

4. Fill each donut cavity to almost full. Be sure to fill each cavity until almost to the top because you want the donuts to puff up and fill in the hole as they bake, so there’s a place in the center of the donut to hold the frosting later. (see photo below) Bake for 14-16 minutes or until the edges are golden brown and the tops are just firm to the touch. Remove from the oven and let the donuts cool 10 minutes in the pan, then flip them onto a wire rack to cool completely.

Baked donut with center depression
5. To make the frosting: Whip together the room temperature cream cheese, butter and mascarpone cheese until fluffy using a handheld or standing electric mixer. Add the powdered erythritol and vanilla and beat until combined. Add the heavy cream 1 tablespoon at a time until the desired spreading consistency is reached. Taste and adjust sweetness to your taste. If desired, put the frosting into a piping bag with a decorator tip and pipe (or spoon) a tablespoon or so of the frosting into the center of each donut. (Note: This recipe for frosting will yield more than you need for eight donuts, which allows for dividing the frosting into batches and coloring each differently, if desired. Save any leftover frosting in an airtight container in the refrigerator to use for another recipe.)

Frosted Vanilla Custard Donuts
Nutritional Information per donut with 1 tablespoon of frosting (based on eight per recipe): 230 calories, 8.6 g carbohydrate (1.5 g dietary fiber, 0.8 g sugars, 13.5 g sugar alcohols), 21.7 g total fat (9.2 g saturated fat, 0 g trans fat), 114 mg cholesterol, 139 mg sodium, 102 mg calcium, 130 mg potassium, 1 mg iron, 431 mg Vit A, 6.1 g protein. Net carbs per serving: 7.1 grams.

Recipe and photos by Kathy Sheehan, copyright 2018
All rights reserved.  Please do not duplicate without the author’s permission. 

Tuesday, November 14, 2017

My Low Carb Eggnog

My Low Carb Eggnog

It’s that time of year when I start seeing eggnog in the stores...and wishing I could have some. Store-bought eggnog is loaded with sugar, but not my recipe! You will be amazed and delighted by the real, eggnog flavor of this low carb holiday specialty. It’s thick and creamy, just like I remember from my pre-Keto days, and satisfies my desire for good, old-fashioned eggnog. The addition of alcohol is completely optional (I didn’t add any, since I don’t care for boozy nog). Raise your glass this holiday and enjoy! Cheers!

My Low Carb Eggnog
Makes 12 servings (the entire recipes makes about 1½ quarts)

6 large eggs
2 egg yolks
½ cup + 2 tablespoons allulose
1/4 teaspoon table salt
1 cup Fairlife Whole Milk
½ cup heavy cream
½ cup water
2 cups unsweetened almond or coconut milk beverage
1/4 to ½ cup brandy, bourbon or dark rum to taste (optional)
1 tablespoon vanilla extract
½ teaspoon nutmeg, plus extra for garnish
6-8 drops monkfruit extract or stevia, to taste
½ cup heavy cream, whipped to soft peaks

1. Off heat, whisk eggs, yolks, allulose, and salt in a heavy saucepan. Stir in whole milk, heavy cream, water and almond or coconut milk. (Do this in small additions because it’s easier to incorporate, instead of all at once.) Heat slowly over lowest heat setting, stirring constantly, until the mixture reaches 160 degrees Fahrenheit, thickens slightly and coats the back of a spoon, about 20-25 minutes. Pour the eggnog through a sieve into a large bowl. Stir in liquor, if using.  Add vanilla, nutmeg and monkfruit extract or stevia. Cover with plastic wrap (with the plastic wrap touching the surface of the eggnog) and refrigerate until well chilled, at least 3 hours or up to 3 days.

2. Just before serving, whip the ½ cup heavy cream in a medium bowl to soft peaks. Fold whipped cream into the eggnog mixture until completely incorporated. Serve in a chilled punch bowl or cups, garnishing with a sprinkle of nutmeg, if desired.

Nutritional Information per 1/2 cup (no alcohol): 141 calories, 1.4 g carbohydrate (0 g dietary fiber, 0.4 g sugars, 6 g sugar alcohols), 13 g total fat (6.2 g saturated fat, 0 g trans fat), 162 mg cholesterol, 92 mg sodium, 87.9 mg calcium, 82 mg potassium, 132 mg Vit A, 5.6 g protein. Net carbs per serving: 1.4 grams
Recipe and photo by Kathy Sheehan, copyright 2017, revised 2023
All Rights Reserved. Please do not duplicate without the author’s permission.

Sunday, June 25, 2017

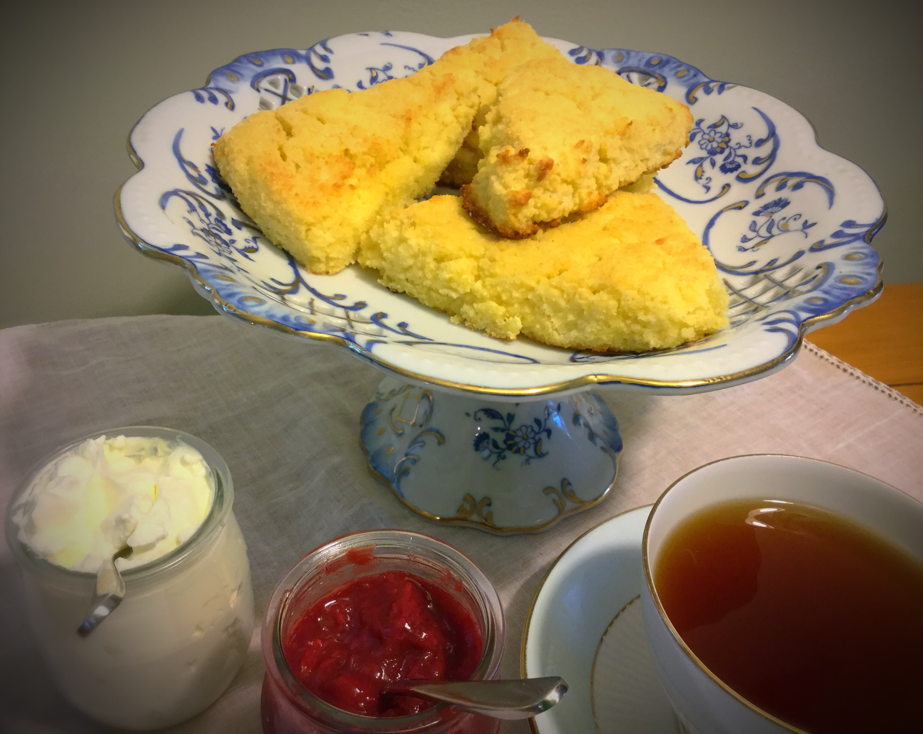
Best Low Carb Vanilla Cream Scones

Best Low Carb Vanilla Cream Scones
Low carb, gluten free scone recipes made from almond flour abound on the internet. I've found them to be too dense and heavy, almost too rich for my tastes. So, I set out to make a scone that's lighter in texture, with a subtle flavor that doesn't overpower...in other words, the perfect scone for a traditional English tea. A cream tea is a speciality of Devon and Cornwall counties and is a form of afternoon tea consisting of scones, clotted cream and jam. The true stars of this delightful past time are the clotted cream and jam, so the scone is actually just a vehicle to get these yummies from the plate to your mouth! The coconut flour imparts a softer, more delicate texture than you can get using almond flour alone and, for that reason, I think these are the best scones I've ever made. They are slightly sweet with a subtle vanilla flavor that is perfect for hosting your very own cream tea.

Best Low Carb Vanilla Cream Scones
Makes 8 scones

1/2 cup coconut flour
1/2 cup almond flour
2 tablespoons granular erythritol sweetener (I used LaKanto Monkfruit sweetener)
3/4 teaspoon stevia powder (I used Sweet Leaf brand)
2 teaspoons baking powder
1/4 teaspoon salt (reduce to a pinch if using salted butter)
5 tablespoons very cold butter (unsalted preferred), cut into cubes
1/2 cup heavy cream (or full-fat coconut milk)
2 large eggs
2 teaspoons vanilla extract
Plus coconut flour for dusting board

1. Preheat oven to 350 degrees F. Cover a baking sheet with parchment paper; set aside.

2. In a large bowl, whisk together all the dry ingredients until well mixed. Add cubed butter and, with a pastry cutter or two knives, cut butter into the dry ingredients until it is coarse, pea-size crumbs.

3. In a separate bowl, vigorously whisk together the eggs, cream and vanilla extract until thick and well combined. Add to the dry ingredients and stir quickly with a fork to combine thoroughly. Allow the batter sit for a few minutes until the coconut flour absorbs the liquid and a soft dough forms.

4. Dust a board or your countertop lightly with coconut flour. With a rubber spatula or your hands, gather the dough into a ball and put it onto the board.  Lightly dust the top of the dough with more coconut flour. Using your hand, pat and shape the dough into a 6-inch circle that is about 3/4-inch thick. Try not to overwork the dough. Cut evenly into 8 wedges (like you're cutting a pie) and place the wedges on the prepared baking sheet, being sure to allow space between each wedge because the dough with puff a bit while baking. Bake in the preheated oven for about 20 minutes, or until the bottoms and outer edges are golden brown and the tops are just beginning to brown.

5. Let cool on the baking sheet for a few minutes, then carefully transfer to a wire rack to cool completely. Serve at room temperature with clotted cream or butter and sugar free jam (here is a good recipe: https://www.lowcarbmaven.com/low-carb-sugar-free-strawberry-jelly/). Store leftovers in an airtight container.

Best Low Carb Vanilla Cream Scones 
Nutritional Information per serving (1 scone, no toppings): 206 calories, 8 g carbohydrate (3.3 g dietary fiber, 1 g sugars, 3 g sugar alcohols), 18.4 g total fat (9.6 g saturated fat, 0 g trans fat), 86 mg cholesterol, 238 mg sodium, 101.5 mg calcium, 83 mg potassium, 508 mg Vit A, 4.5 g protein. Net Carbs per serving: 4.7 grams.

Recipe by Kathy Sheehan, copyright 2017
All rights reserved. Please do not duplicate without the author's permission. 

Thursday, June 1, 2017

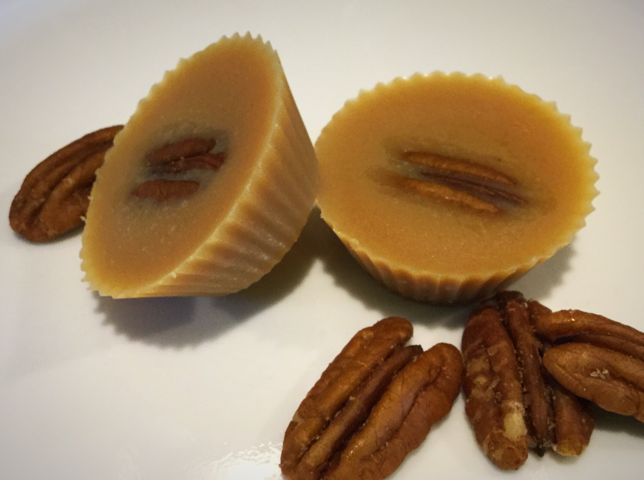
Triple Butter Caramel Pecan Fat Bombs

Triple Butter Caramel Pecan Fat Bomb
On my low carb/high healthy fat (LCHF) Keto diet, Fat Bombs offer me a quick energy boost or even can replace a meal without raising my insulin levels if I'm in a hurry to get out the door. Also, they're great on a day when I'm intermittent fasting, but I need a little something to keep going. If I experience that afternoon slump about 3:00 PM, just one fat bomb wakes me up and provides instant energy without caffeine! I always have a batch of Fat Bombs in my refrigerator. They are delicious, have so many uses and are my secret weapon to reduce cravings and keep me on track!

Triple Butter Caramel Pecan Fat Bombs
Makes 10 servings

2 tablespoons coconut oil
2 tablespoons butter
2 ounces unsweetened cocoa butter
3 tablespoons nut butter of choice (I used peanut butter)
1/4 teaspoon vanilla extract
1/8 teaspoon Caramel Sweet Drops, or 8-10 drops English Toffee liquid stevia to taste
10 pecan halves

1. Melt coconut oil, butter, cocoa butter and nut butter together in a small saucepan until melted or in a glass measuring cup in the microwave.

2. Add in the vanilla extract and liquid stevia and whisk until combined. Divide equally between ten mini-size silicone muffin liners and place in the freezer for a few minutes or the refrigerator for about 15 minutes until just beginning to set.

3. Remove and place one pecan half on the top of each fat bomb. Return to the freezer or refrigerator and chill until completely set. These fat bombs must be stored in the refrigerator until just prior to serving because they can melt quickly.

Nutritional Information per fat bomb: 109 calories, 1.1 g carbohydrate (0.4 g dietary fiber, 0.2 g sugars), 11.4 g total fat (5.9 g saturated fat, 0 g trans fat), 6 mg cholesterol, 8 mg sodium, 1.7 mg calcium, 7 mg potassium, 72 mg Vit A, 1.2 g protein. Net carbs per serving: 0.7 g

Recipe by Kathy Sheehan, copyright 2017
All rights reserved. Please do not duplicate without the author's permission.

Friday, December 23, 2016

Kefir Orange Julius Smoothie


I've always enjoyed the flavor combination of orange and vanilla. When I was a kid, I would always choose a creamcicle push-up when the ice cream truck came through our neighborhood. And when I was a teenager spending my own money at the mall, an Orange Julius was worth the expense, even on my limited budget! Right now, there's a very juicy and sweet seedless tangerine available at my local Whole Foods called Satsuma Mandarins (see photo below). They're only around for a short time and, although I normally don't eat a lot of fruit, this is one fruit I look forward to every year and enjoy in moderation only during this season. This kefir smoothie has the taste of an authentic Orange Julius! It's frothy and sweet with the perfect blend of orange and vanilla, just as I remember. The orange oil or extract is important to give this recipe the orange punch of the original drink. I used a few drops of culinary orange oil, which is available through specialty cooking stores or on the internet, but regular orange extract that you can find at any grocery store will work too, just make sure it's pure orange extract, not imitation flavoring. This recipe makes about 3 servings, so you can share it or save some for later. It makes a delicious breakfast smoothie, afternoon snack or healthy dessert.


Kefir Orange Julius Smoothie
Makes 3 servings (about 1 cup each)

1-3/4 cup plain milk kefir, unsweetened
1 peeled seedless mandarin orange (or small navel orange)
1/4 cup water
2 tablespoons heavy cream (or full-fat coconut milk)
6 drops of Valencia Orange stevia
1-1/2 teaspoon vanilla extract
2-4 drops of orange oil (or 1/8 teaspoon orange extract), to taste
1/4 teaspoon stevia powder, or to taste (I used Sweet Leaf brand)
4-5 ice cubes
1 tablespoon coconut or flax oil (optional)
1 scoop prebiotic powder (optional)

Place all of the ingredients in a blender and blend until smooth. Taste and adjust flavorings and sweetness, if desired. Serve immediately or store in a glass jar in the refrigerator for up to 2 days.

Nutritional Information per 1 cup serving (no optional ingredients): 146 calories, 6.8 g carbohydrate (0.5 g dietary fiber, 6.8 g sugars), 8.5 g total fat (3.5 g saturated fat, 0 g trans fat), 28 mg cholesterol, 56 mg sodium, 140.1 mg calcium, 213 mg potassium, 346 mg Vit A, 8 mg Vit C, 5.7 g protein. Net carbs per serving: 6.3 grams

Recipe by Kathy Sheehan, copyright 2016
All rights reserved. Please do not duplicate without author's permission.

Tuesday, August 23, 2016

Snickerdoodle Smoothie


If I could choose only one food item that has had the biggest impact on my improved health, it would be my morning smoothie. For the past eight years, most of my days start with a smoothie. Some are green with a little low-glycemic fruit and others are made from a base of nut butter, but the thing they all have in common is that they're nutritious, delicious and keep me feeling satisfied for many hours, sometimes all the way to dinner! The trick about making smoothies for a diabetic is that they need to be very low carb, plus contain enough healthy fat and protein to keep the blood glucose steady. It's the blood sugar spike of a high carb breakfast and then rapid crash a couple of hours later that causes hunger and cravings by mid-morning, requiring an "elevenzees" snack just to make it to lunch! When you start your morning on a blood sugar roller coaster ride, it will effect your eating pattern for the rest of the day and may lead to the over-consumption of carbs. This delicious and creamy smoothie has the sweet vanilla and cinnamon flavor of the popular Snickerdoodle cookie. Cinnamon is well-known and documented as a blood sugar stabilizing spice and this is a great way to get more of it into my diet.

Snickerdoodle Smoothie
Makes 1 serving

1/2 cup plain, unsweetened kefir (or yogurt)
1/2 cup coconut milk (or almond milk)
1 tablespoon macadamia nut butter (or 2 tablespoons macadamia nuts)
1 teaspoon ground cinnamon
1/8 teaspoon ground nutmeg
A pinch of sea salt
1/4 teaspoon stevia powder, or to taste (I used Sweet Leaf brand)
1/2 tablespoon collagen hydrolysate powder (or your favorite protein powder)
1 tablespoon chia seeds
1/2 tablespoon coconut oil, ghee or flax oil
4 drops of Vanilla Creme stevia
1/2 cup water (or enough to create desired consistency)
4-5 ice cubes
1 scoop of prebiotic powder, optional (I used Prebio Plus)

Put all of the ingredients in a blender and blend until completely smooth. Taste and adjust sweetening, if desired. Pour into a tall glass and enjoy!

Nutritional Information: 304 calories, 8 g carbohydrate (7.4 g dietary fiber, 4.4 g sugars), 24.7 g total fat (9 g saturated fat, o g trans fat), 12 mg cholesterol, 132 mg sodium, 379.9 mg calcium, 150 mg potassium, 9.4 g protein.  Net carbs per serving: 0.6 grams

Recipe by Kathy Sheehan, copyright 2016
All rights reserved. Please do not duplicate without author's permission.

Tuesday, August 16, 2016

Brownie Chocolate Chip Kefir Ice Cream


Wowza!! That's the only word to describe this rich and creamy frozen treat. Prior to my diagnosis of Celiacs disease, one of my favorite flavors of ice cream was Cookies and Cream. I was sad thinking I might never have it again. But instead of feeling sorry for myself or living without, I took it as a personal challenge and went to work in my kitchen. The result of my creative effort has me smiling again! The base for this ice cream is a rich vanilla egg custard, which is delicious by itself. But when I added chunks of my Chocolate Fudge Brownies and chopped dark chocolate bits to the custard, the vanilla deliciousness reached to near perfection! Of course, as I always do, I added probiotic-rich kefir to the mix to make it even more healthy. You will never believe this ice cream is low carb, sugar free and grain free. It tastes like the real thing to me!

Brownie Chocolate Chip Kefir Ice Cream
Makes eight (1/2 cup) servings

Vanilla Custard Ice Cream Base:

1 cup full-fat coconut milk
1/2 cup heavy cream (or use all coconut milk**)
4 egg yolks
1/4 cup LaKanto Monkfruit sweetener (or other erythritol sweetener), divided
1-1/2 teaspoons vanilla extract
The seeds scraped from one vanilla bean (or 1/4 teaspoon vanilla powder)
A pinch of salt
1 cup plain, unsweetened kefir or plain yogurt** (to make your own kefir, click here)
1/2 to 3/4 teaspoon stevia powder, to taste (I used Sweet Leaf brand)
8-10 drops Vanilla Creme stevia (I used Sweet Leaf brand)

Stir Ins:
1 serving of Chocolate Fudge Brownie Cups (recipe here), cut into small squares and frozen
4 squares of dark chocolate 70% or higher bar (I used 85% Green and Black bar), chopped

1. In a medium heavy saucepan, stir together the coconut milk, heavy cream, 2 tablespoons LaKanto Monkfruit sweetener, vanilla extract, vanilla seeds (or powder) and salt. Heat on medium-low heat until steam begins to rise from the mixture and small bubbles form on the edges of the pan, stirring occasionally to dissolve sweetener.

2. Meanwhile, in a 2-cup glass measuring cup or bowl, whisk the egg yolks and 2 tablespoons of remaining LaKanto Monkfruit sweetener vigorously until light and pale yellow in color, about 2 minutes.

3.  When the milk mixture is heated, use a ladle to slowly add about 1/4 cup of the hot liquid to the egg yolks while whisking continuously, until incorporated. Slowly add another 1/4 cup of the hot milk mixture into the egg yolks while whisking. Then pour the tempered egg yolks into the saucepan with the rest of the milk mixture, stirring continuously until the mixture has thickened slightly and coats the back of a spoon. Remove from heat and pour the custard through a strainer to remove any lumps. Cool completely, eventually moving to the refrigerator to chill.

4. While the custard is chilling, bake the Chocolate Fudge Brownie Cups until firmly set, about 20 minutes baking time (click here for the recipe). Once cooled to room temperature, cut one serving (1/3 of recipe) into small squares and freeze. Chop dark chocolate and set aside.

5. Once the custard is cold, pour it into a blender with the kefir, stevia powder and stevia drops. Blend briefly until combined. Taste and adjust sweetening, if desired. Cool mixture in the refrigerator for at least 1 hour before proceeding.

6. Follow the manufacturer's instructions for your ice cream maker to churn the ice cream base. When it has thickened sufficiently, add the stir in ingredients (add the frozen brownie squares toward the end of the churning process to prevent them from pulverizing). Serve immediately as a soft-serve ice cream or pour into a container and freeze for about 40 minutes before scooping. (See Notes* regarding leftovers.)

*Notes: Sugar free ice cream is best served at the soft-serve stage or soon after freezing briefly. Once it has frozen completely, it will be too hard to scoop. Spoon any leftovers into ice pop molds and freeze to be enjoyed later.

**This ice cream can be made dairy free by using all coconut milk and substituting either coconut milk kefir or a dairy-free yogurt.

Nutritional Information per 1/2 cup serving: 175 calories, 6.4 g carbohydrate (0.6 g dietary fiber, 1.7 g sugars, 6.5 g sugar alcohols), 15.9 g total fat (8.8 g saturated fat, 0 g trans fat), 140 mg cholesterol, 64 mg sodium, 74.6 mg calcium, 78 mg potassium, 3.9 g protein.  Net carbs per serving: 5.8 grams

Recipes by Kathy Sheehan, copyright 2016
All rights reserved. Do not duplicate without author's permission.

Friday, July 29, 2016

Blueberry Mug Muffin with Easy Cultured Butter


I was lying in bed this morning, thinking about what I might want for breakfast, when an idea flashed into my mind: Blueberry Muffin. This is a twist on my favorite Mug Cake recipes but, instead, it's a Mug Muffin! And to make it even extra healthy, I mixed together kefir cheese and butter to create a simple and quick cultured butter as a spread. YUM...so delicious! I highly recommend using the smaller wild Maine blueberries for this recipe so they won't sink to the bottom (like mine did in this picture) but, even if the bigger variety of berry is all you have, it will still taste amazing, especially topped with creamy butter. (It would also be great made with raspberries.) This delightful breakfast was a great way to start a beautiful summer day in Maine!

Blueberry Mug Muffin
Makes 2 servings

2 tablespoons almond flour/meal
2 teaspoons coconut flour
2 teaspoons LaKanto Monkfruit sweetener (or other erythritol sweetener)
1/4 + 1/8 teaspoon stevia powder (I used Sweet Leaf brand)
A pinch of salt
1/2 teaspoon baking powder
1/8 teaspoon lemon extract or 1 teaspoon lemon zest (or 2 drops dietary-grade lemon essential oil)
1/2 teaspoon vanilla extract
5 drops Lemon Drop stevia (I used Sweet Leaf brand)
1 large egg
1 tablespoon butter, melted (use ghee for dairy-free)
1 tablespoon small wild blueberries (fresh or frozen)

1. Melt the 1 tablespoon of butter in a mug by microwaving on high for about 15 seconds; set aside.

2. In a small mixing bowl, combine the almond flour, coconut flour, sweeteners, salt and baking powder. Stir with a fork until well combined and no lumps are visible.

3.  Add the melted butter, extracts, lemon stevia drops, and egg. Whisk with a fork until a smooth batter forms. Take a paper towel and coat the bottom and sides of the mug with any butter remaining in the mug. Add 1/2 of the blueberries to the batter and gently fold to incorporate and pour into the prepared mug. Top batter with remaining berries.

4. Microwave on high for about 45 seconds.* Remove and test by touching the muffin near the center. It is done when the batter on top of the muffin looks set and springs back when touched lightly. If additional cooking time is needed, microwave at 10 second intervals and retest. Do not overcook. Allow the muffin to cool in the mug for 1 minute.

5. Invert the muffin onto a serving plate and allow to cool for 1-2 minutes. Serve immediately with butter or store leftovers in an airtight container at room temperature for 1 day. This recipe makes 2 servings.

*To bake in the oven, divide batter into two greased muffin tins or ramekins and bake at 325-degree Fahrenheit for 16-18 minutes or until toothpick comes out clean when tested or muffins spring back when touched near the center. 

These muffins can be microwaved or baked in the oven. Both methods are equally delicious!
Nutritional Information per 1/2 recipe: 143 calories, 6 g carbohydrate (1.7 g dietary fiber, 0.9 g sugars, 4 g sugar alcohols), 11.7 g total fat (4.9 g saturated fat, 0 g trans fat), 113 mg cholesterol, 173 mg sodium, 114.5 mg calcium, 88 mg potassium, 5 g protein.  Net carbs per serving: 4.3 grams

Easy and Quick Cultured Butter: Mix together 2 tablespoons softened butter, 1 tablespoon kefir cheese (to make kefir cheese, click here) and 1/4 teaspoon honey.  This probiotic-rich buttery spread is excellent on muffins, pancakes and waffles.

Recipes by Kathy Sheehan, copyright 2016
All rights reserved. Do not duplicate without author's permission.

Wednesday, June 22, 2016

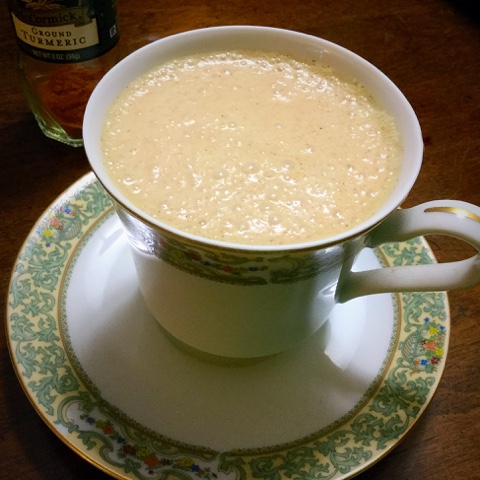
Healing Golden Milk Kefir with Cacao


If you read my blog regularly, you know I recommend consuming probiotic-rich foods or beverages on a daily basis for health. Another resource of healing is my spice cabinet! In particular, turmeric, cinnamon and ginger are potent anti-inflammatory spices that are especially beneficial for improving chronic diseases, including T2 diabetes. This recipe is my twist on the classic Golden Turmeric Milk or Tea, which has been proven to reduce pain and systemic inflammation. The addition of raw cacao powder provides antioxidants and, more importantly, a delicious flavor that completely masks the warm, peppery and sometimes bitter turmeric compounds (which are what makes turmeric so healthful). Because I include kefir, this beverage should not be heated to retain the quality of the probiotic microorganisms. If you're worried that this won't taste good, you are wrong...because it is AMAZING! It is slightly spicy, but so sweet and delicious too. It's a great flavor combination and I love it! Enjoy this for breakfast or as a meal replacement, in the afternoon as a pick-me-up or, leave out the cacao powder, and have a cup before bed to help you relax and fall asleep.

Healing Golden Milk Kefir with Cacao
Makes 1 serving

1/2 cup plain milk or coconut milk kefir (click here to make your own)
1/2 cup unsweetened coconut milk (I use full-fat A-roy D brand)
1/2 teaspoon ground turmeric
1/4 teaspoon ground cinnamon
1/8 teaspoon ground ginger
1 teaspoon raw cacao powder (or unsweetened cocoa powder)
1/4 teaspoon stevia powder (I use Sweet Leaf brand)
A pinch of black pepper (increases absorption)

Place all of the ingredients into a blender and blend until well combined. (You may also use a whisk, but I find a blender mixes the ingredients more thoroughly.) Do not heat. Pour into a mug and serve immediately.

Nutritional Information per serving (made with full-fat coconut milk): 230 calories, 7.9 g carbohydrate (0.9 g dietary fiber, 5.7 g sugars), 19.7 g total fat (13.5 g saturated fat, 0 g trans fat), 9 mg cholesterol, 53 mg sodium, 100 mg calcium, 61 mg potassium, 4.4 g protein. Net carbs per serving: 7 grams

Recipe by Kathy Sheehan, copyright 2016

Monday, June 20, 2016

Shortcake in a Mug


It's strawberry season again and there's nothing that says summer like Strawberry Shortcake! I normally don't eat a lot of fruit but, when it's fresh, in season and local, I usually indulge in a pint or two. This is my favorite way to eat strawberries. The best part about this recipe is how quick and easy it is to make the shortcakes. Taking only 45 seconds in the microwave, this mug cake will be ready in minutes to split and share with a friend, topped with sweet berries and a dollop of whipped coconut cream laced with vanilla. (If you can't find a friend to share it with, save half of the shortcake for later.) The cake itself isn't overly sweet, so the flavor of the berries will shine forth. The slight hint of lemon gives it a nice touch and will go well with any fruit. Enjoy the summer!

Shortcake in a Mug
Makes 2 servings

1/4 cup almond flour
2 teaspoons golden flaxseed meal or coconut flour
1 tablespoon Lakanto Monkfruit sweetener (or other erythritol sweetener)
1/2 teaspoon baking powder
A pinch of salt
1 egg, slightly beaten
1 teaspoon lemon juice (or almond milk)
1/2 teaspoon lemon zest (or 1-2 drops dietary grade lemon essential oil)
1/2 teaspoon vanilla extract or unsweetened vanilla powder
5 drops monkfruit extract or liquid stevia
1 teaspoon melted butter (or ghee for dairy free)

1. In a small bowl, combine the first five dry ingredients with a fork until thoroughly mixed.  Add the egg, lemon juice or almond milk, lemon zest (or essential oil), vanilla extract, monkfruit extract or liquid stevia.

2. Melt the butter in an eight-ounce mug or ramekin and add to the batter mixture. With a paper towel, wipe any butter remaining in the mug around the sides and on the bottom of the mug; set aside.

3. With a fork, beat the cake batter until all ingredients are combined and pour into the greased mug or ramekin. Microwave on high for about 45 seconds or until the cake has risen, looks dry and the top springs back when touched lightly in the center. (Note: Cooking may take a bit less or more time, depending on the wattage of your microwave and the mug you are using. You may need to experiment to discover the best amount of time needed to cook your cake. When you have done this, make a note of the mug used and the proper cooking time so, the next time you make a mug cake, you'll know what works best for you.)

4. Allow the cake to cool for a few minutes before running a sharp knife around the edge and inverting your mug to release the shortcake.  Split the cake into two servings, top one half of the shortcake with your favorite berries and whipped cream or whipped coconut cream (recipe below).  Repeat with the other half of the shortcake or cool and store in an airtight container for later. Serve and enjoy.

To make whipped coconut cream: Place a can of full-fat coconut milk in the refrigerator overnight. Do NOT shake the can!! Open and spoon out the thickened coconut cream at the top and discard the liquid (or use for another purpose). Add stevia powder and vanilla to taste and whip with a whisk or fork until well combined and it has the consistency of whipped cream. Serve immediately or store in the refrigerator.

Nutritional Information per 1/2 shortcake (not including berries or topping): 144 calories, 5.3 g carbohydrate (2.2 g dietary fiber, 0.7 g sugars), 11.7 g total fat (2.4 g saturated fat, 0 g trans fat), 99 mg cholesterol, 153 mg sodium, 132 mg calcium, 152 mg potassium, 6.6 g protein. Net carbs per serving: 3.1 grams

Recipe by Kathy Sheehan, copyright 2016