Showing posts with label cupcakes. Show all posts

Friday, April 3, 2026

Low Carb Mini Honey Lemon Cakes

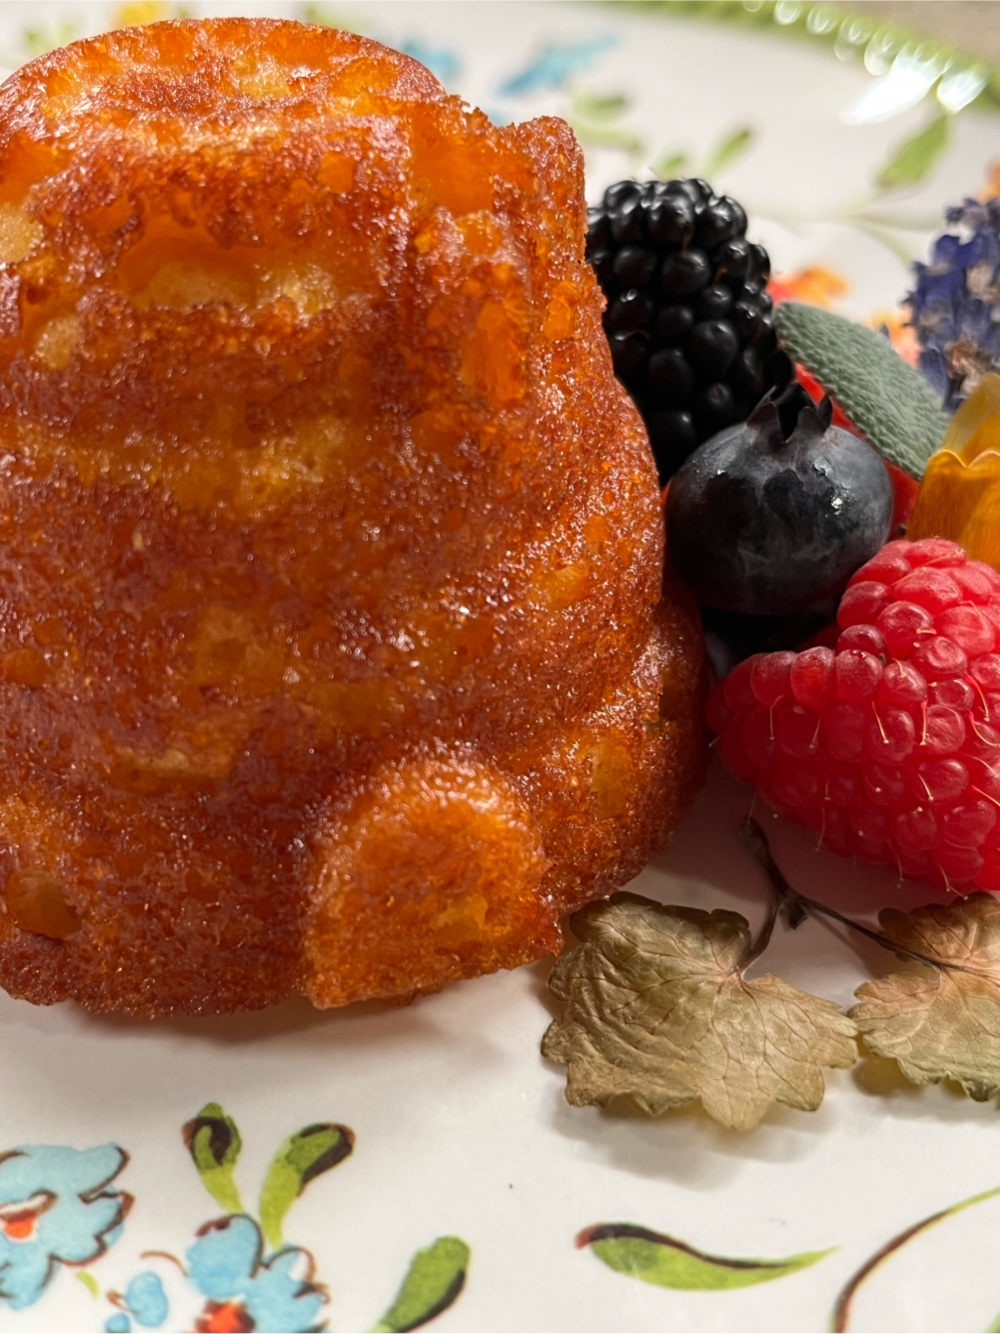
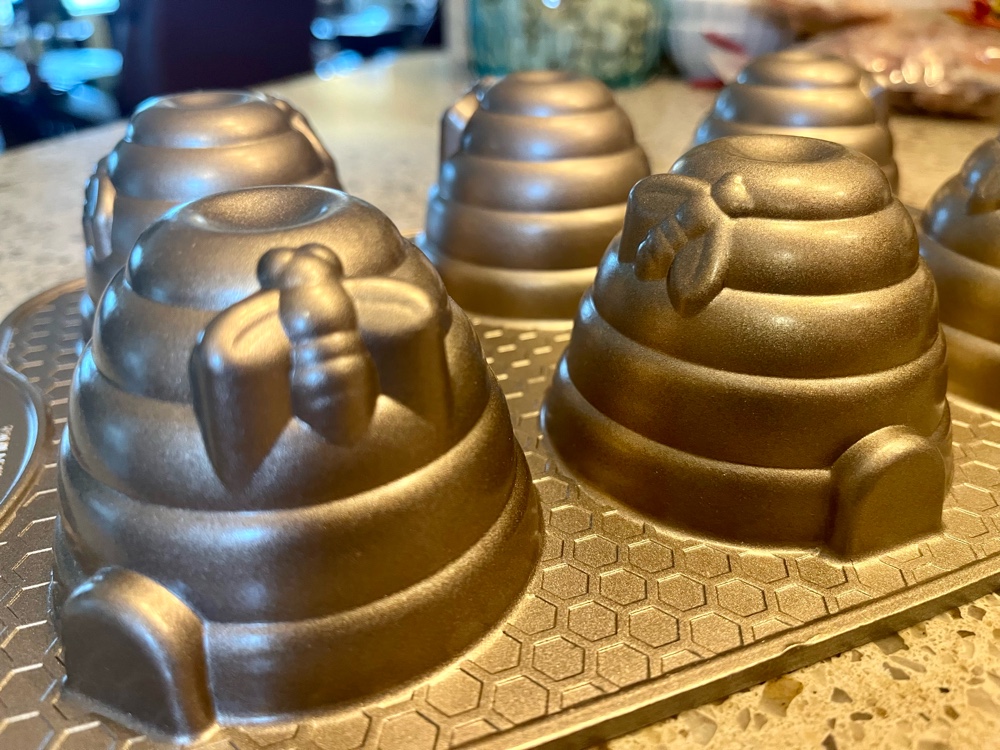
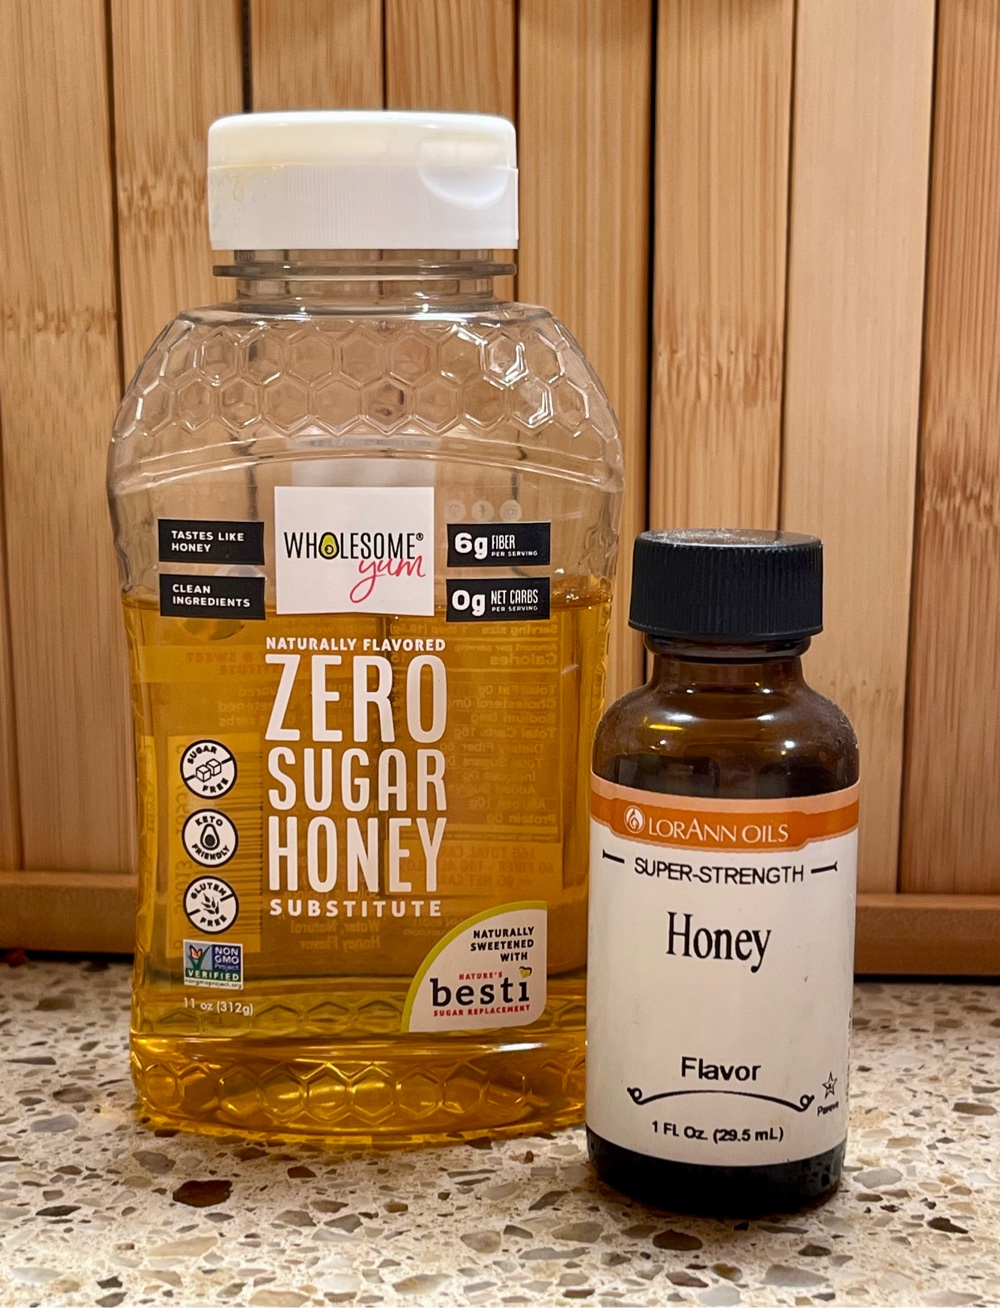
I got an adorable Nordic Ware mini cakelette baking pan in the shape of little beehives, so honey flavored cakes immediately came to my mind. If you’ve never tried sugar free, keto allulose honey, I highly recommend it. It really does taste like honey, but zero carbs! The brand I used is from Wholesome Yum, but you can find other honey flavored liquid allulose online, which would work equally as well in this recipe.


Low Carb Mini Honey Lemon Cakes
Makes 6 cakelettes (or cupcakes)

Cake Ingredients:
7 tablespoons coconut flour
1/4 cup granulated allulose sweetener
3 tablespoons unflavored whey protein powder
1½ teaspoons baking powder
1/8 teaspoon salt
3 large eggs, room temperature 
1/4 cup liquid allulose honey
2 teaspoons lemon zest
1/4 cup unsalted butter, melted and cooled a bit
1/4 cup unsweetened low carb milk of choice
1/4 teaspoon honey flavored extract (or vanilla extract)
1/4 teaspoon lemon extract

Glaze Ingredients:
2 tablespoons liquid allulose honey
1 tablespoon unsalted butter
1½ teaspoons fresh lemon juice


1. Preheat the oven to 325°F. Grease the mini beehive cakelette pan or six wells of a muffin tin, making sure to grease well all the nooks and crannies of the mini cakelette pan.

2. In a medium bowl, sift together the coconut flour, granulated allulose sweetener, whey protein powder, baking powder, and salt and whisk until no lumps remain. In a large bowl and using an electric mixer, beat the eggs and liquid allulose honey on high until light in color and increased in volume. Add the lemon zest, melted butter, low carb milk, and extracts and whisk on low until well combined. Add the dry ingredients and beat on low just until there are no lumps and the batter is smooth.

3. Divide the batter evenly among the prepared pans and tap the pan on the counter to help settle the batter into the bottom of the cake molds and remove any air bubbles. Smooth the tops. Bake for 18 to 22 minutes, until lightly browned, the tops are just firm to the touch and a toothpick comes out clean. (The internal temperature should read between 200°F and 206°F.)

4. Remove from the oven and let the cakes cool in the pan for five minutes. Then flip the cakes out onto a wire rack before glazing.

5. To make the glaze: Combine the 2 tablespoons allulose honey, 1 tablespoon butter and lemon juice in a microwave-safe bowl or in a small sauce pan set over low heat. Heat until the butter is melted and whisk until smooth. Brush the glaze onto the warm cakes. The cakes can be stored at room temperature in a sealed container for up to 3 days, or can be stored in the refrigerator for longer. Serve cakes at room temperature or slightly warmed for the best flavor and texture.

Nutritional Information per serving: 193 calories, 7.5 g carbohydrates (3 g dietary fiber, 1.6 g sugars), 13.9 g total fat (8.5 g saturated fat, 0 g trans fat), 133 mg cholesterol, 260 mg sodium, 70.8 mg calcium, 78 mg potassium, 136 IU Vit A, 1 mg iron, 10.5 g protein. Net carbs per serving: 4.5 grams

Photos and recipe by Kathy Sheehan, copyright 2026
All rights reserved. Please do not duplicate without the author’s permission.


Wednesday, July 12, 2023

Keto Shortcakes

Keto Shortcakes

Strawberry Shortcake is a summer tradition! Some people like theirs on a biscuit but, when I was growing up, we bought the little packaged shortcake cups often displayed near the strawberries in the summer months (see image below). They were light sponge cakes with a hint of lemon that soaked up the juices from the berries. I set out to recreate those iconic snack cakes and have succeeded with this recipe! These lightly sweet mini cakes are soft, have a light and airy texture and, if baked in a shortcake pan (as pictured), are nearly identical to the shortcakes I remember. Of course, if you don’t have a shortcake baking pan, just use a regular muffin pan. Piled high with berries and cream, this is a summer treat everyone will enjoy!

Store bought vs. Homemade Shortcakes

Keto Shortcakes
Makes 6 shortcakes (or muffins)

3 eggs
2 tablespoons lemon juice
1/4 cup heavy cream
½ teaspoon vanilla extract
1/4 teaspoon lemon extract
6 tablespoons Swerve Confectioners or LaKanto Powdered Monkfruit sweetener 
1/4 cup coconut flour
1/4 cup almond flour (or substitute an additional 1 TB coconut flour for nut free)
1 tablespoon unflavored whey protein powder
1½ teaspoons baking powder
1/4 teaspoon baking soda
1/4 teaspoon salt

Suggested Topping:
1 pint fresh strawberries, cut into fourths
1 tablespoon allulose or an erythritol-based powdered sweetener 
Serve with whipped cream


1. Spray a muffin pan with nonstick spray. Preheat overnight to 350 degrees F.

2. Place eggs, lemon juice, cream, vanilla extract, lemon extract and confectioners sweetener into a large bowl. Using an electric mixer, blend until combined or whisk by hand vigorously until well aerated.

3. In a small bowl, whisk together the coconut flour, almond flour, whey protein powder, baking powder, baking soda and salt until no lumps remain. Add the dry ingredients into the wet ingredients all at once and mix on low, then increase to medium speed. Scrap down the sides of the bowl and blend again. Once well combined, evenly pour the batter into the prepared baking pan or into each muffin cup  (¾ full).

4. Bake for 20 to 24 minutes, or until a toothpick in the center comes out clean. Allow to cool in the pan for 10 minutes before removing the cakes or muffins to a wire rack to cool completely.

5. Meanwhile, sprinkle allulose or your sweetener of choice over the strawberries, stir to coat the berries and allow to sit at room temperature for about 30 minutes. To serve, top the cake with strawberries and whipped cream. Enjoy!

6. Storage: These cakes can be stored at room temperature for 2 days, or refrigerate for longer. They can also be well wrapped and frozen up to 3 months. They are best served at room temperature.

Custard Filled Shortcake

Nutritional Information per mini cake (no topping): 106 calories, 4.6 g carbohydrate (1.8 g dietary fiber, 0.6 g sugars, 1 g sugar alcohols), 8.3 g total fat (4 g saturated fat, 0 g trans fat), 106 mg cholesterol, 208 mg sodium, 103 mg calcium, 249 mg potassium, 1 mg iron, 81 IU Vit A, 2 mg Vit C, 4.4 g protein. Net carbs per serving: 1.8 grams

Photos and recipe by Kathy Sheehan, copyright 2023
All rights reserved. Please do not duplicate without the author’s permission. 

Monday, December 19, 2022

Keto Decorative Snack Cakes with Ganache Topping

Keto Decorative Snack Cakes with Ganache Topping
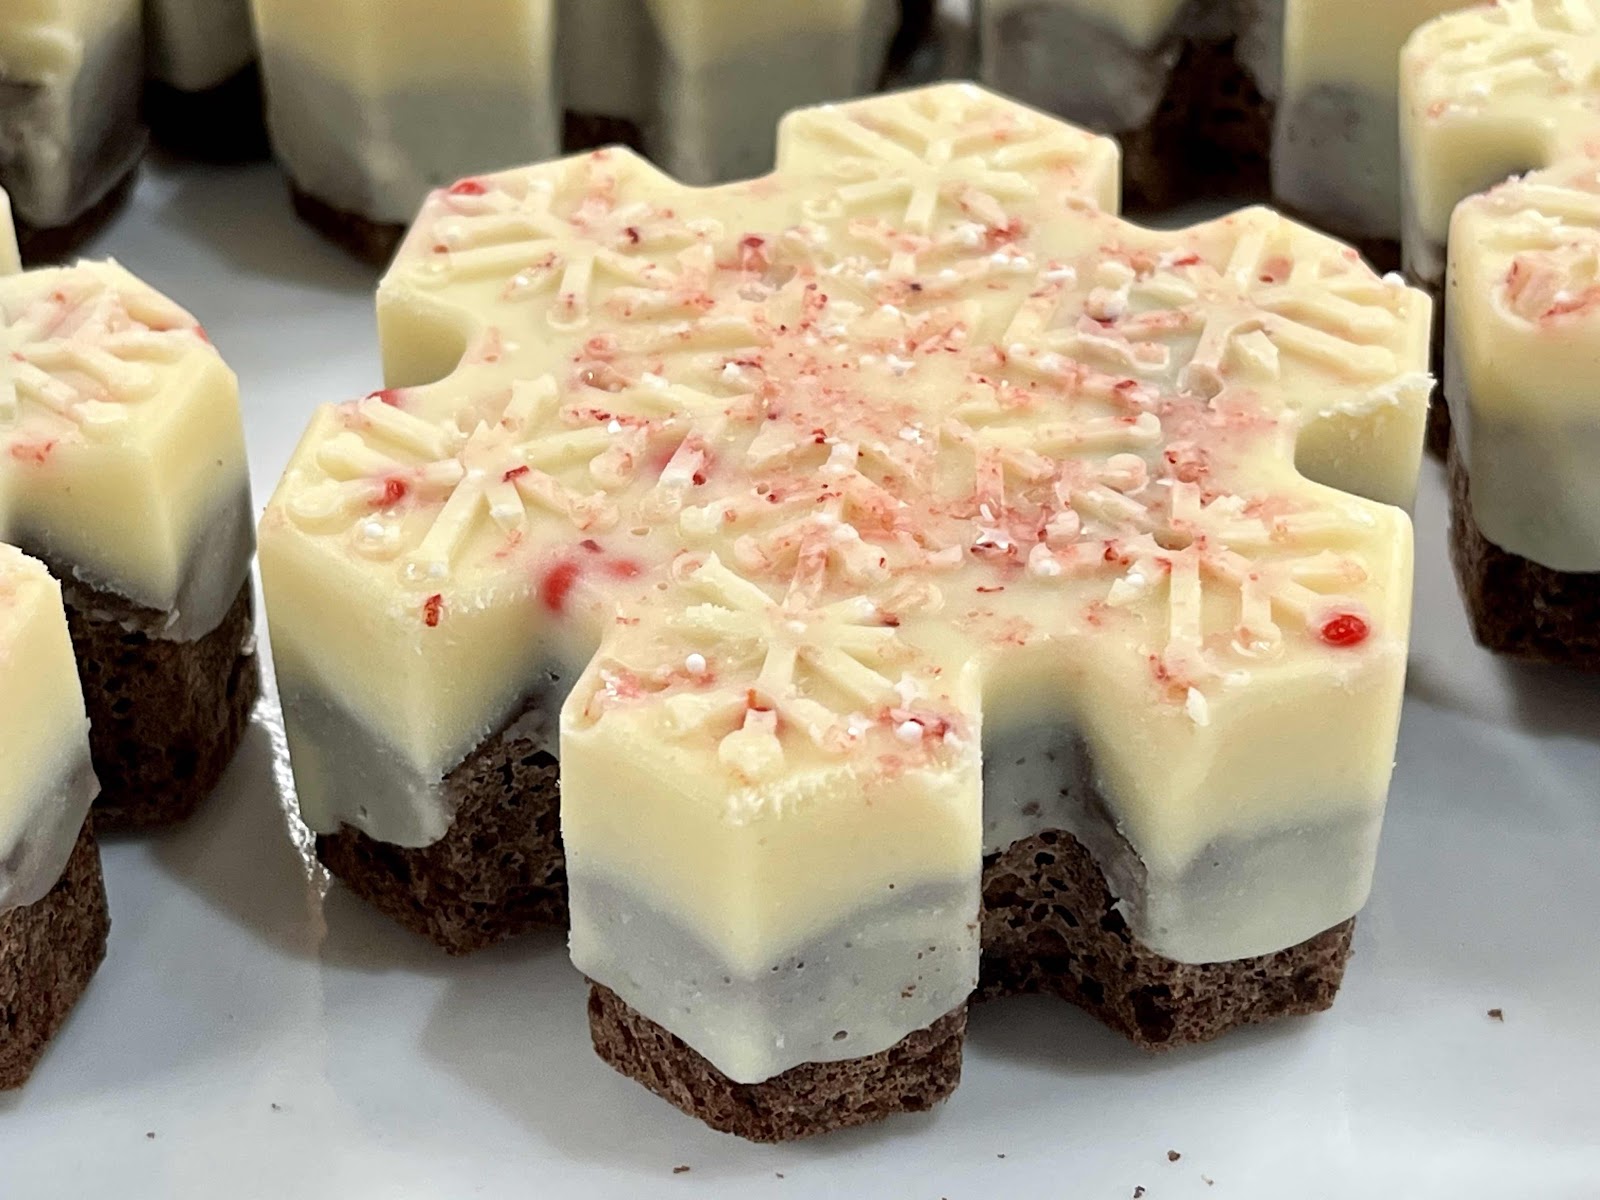
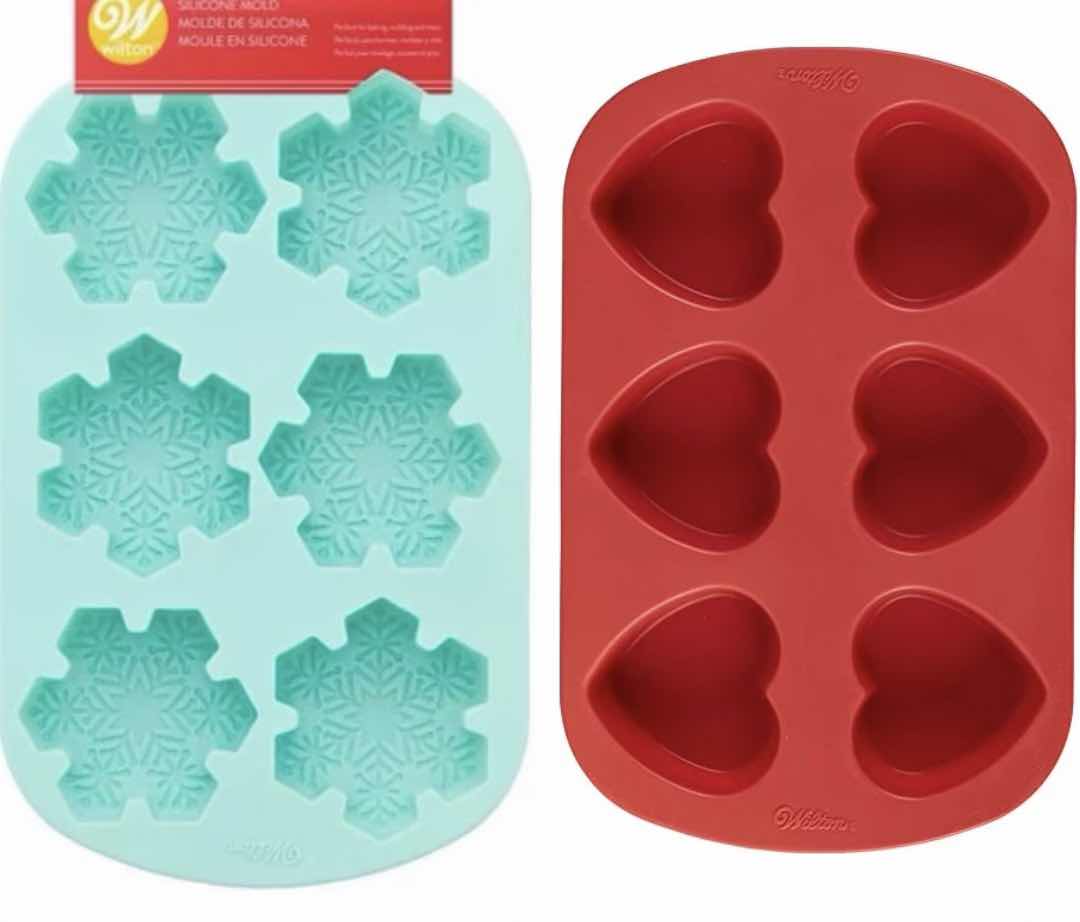
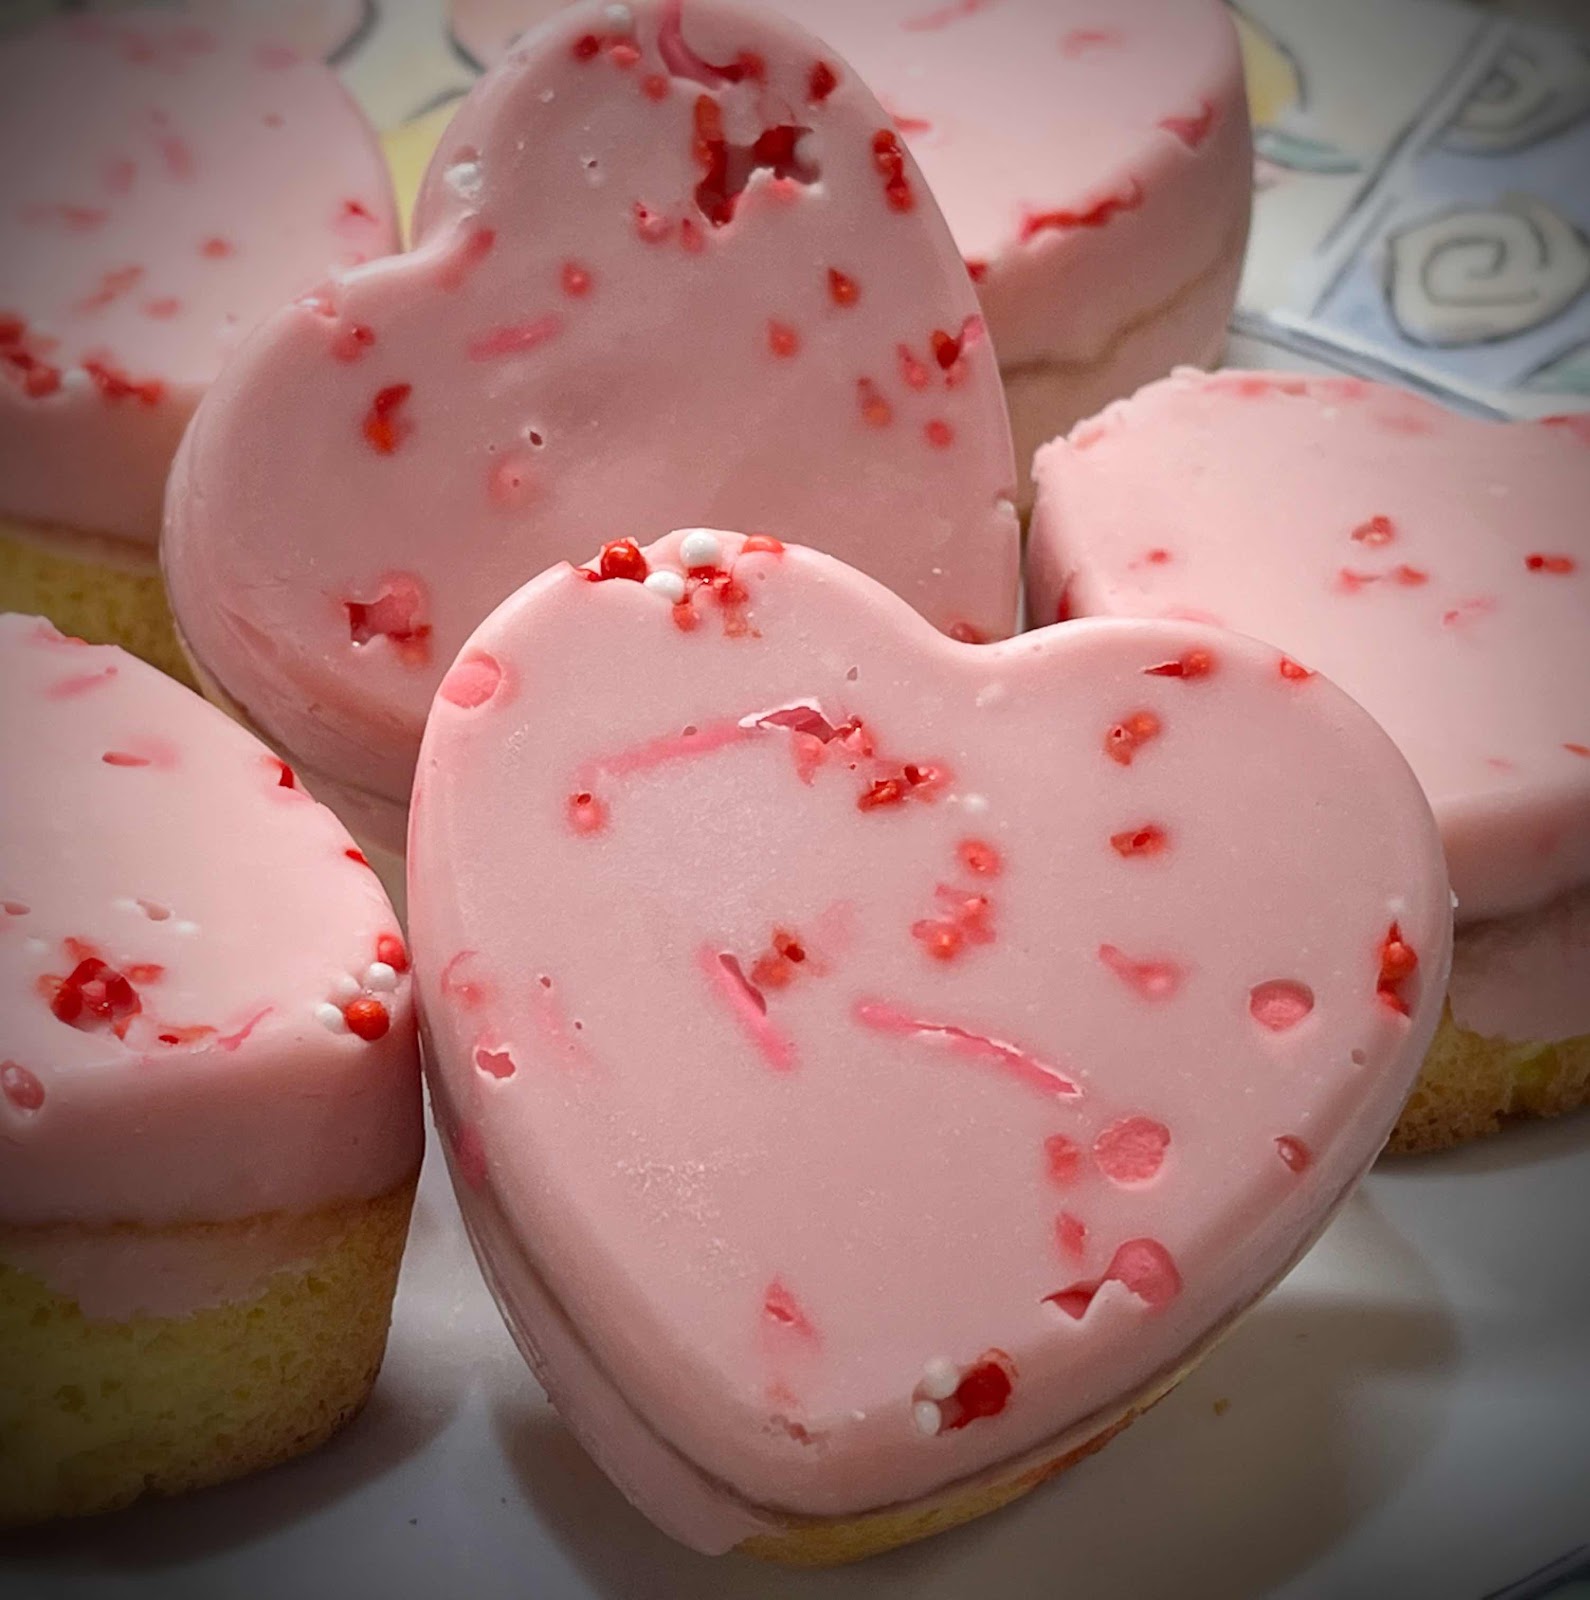
This post describes a technique for making adorable, miniature snack cakes using a decorative, silicone baking mold. You can use any low carb, sugar free cupcake recipe or boxed cake mix. I recently bought the Wilton Winter Snowflake Baking and Candy Mold and Heart Mold and, as you can see, the results are impressive! The warm ganache icing is poured into the mold, topped with a previously baked and cooled cake and then placed in the freezer to set. Later, when the cake is unmolded, the ganache topping is beautifully embossed!! These snack cakes may look fancy, but they’re really quite easy to make. Try this same technique with any silicone baking mold for a healthy, sugar free, low carb dessert that can be customized for any occasion!

Silicone Baking Molds
Keto Decorative Snack Cakes with Ganache Topping
Number of servings depends on your baking mold

Directions:

1. Use any low carb, sugar free cupcake or cake recipe or boxed cake mix to make the mini cakes. Depending on the number of cakes in your mold, the recipe may need to be halved. Since my molds have six snowflakes or hearts, I halved my recipe to make six cakes. Follow the recipe, but be aware the baking time may need to be shortened. Bake until the top springs back when touched and a toothpick comes out clean. Do not make the frosting, if included in the recipe, because it’s not needed. Here are a few links to my favorite recipes I’ve tried in the past and can recommend:


Other Ingredients:
Decorative sprinkles
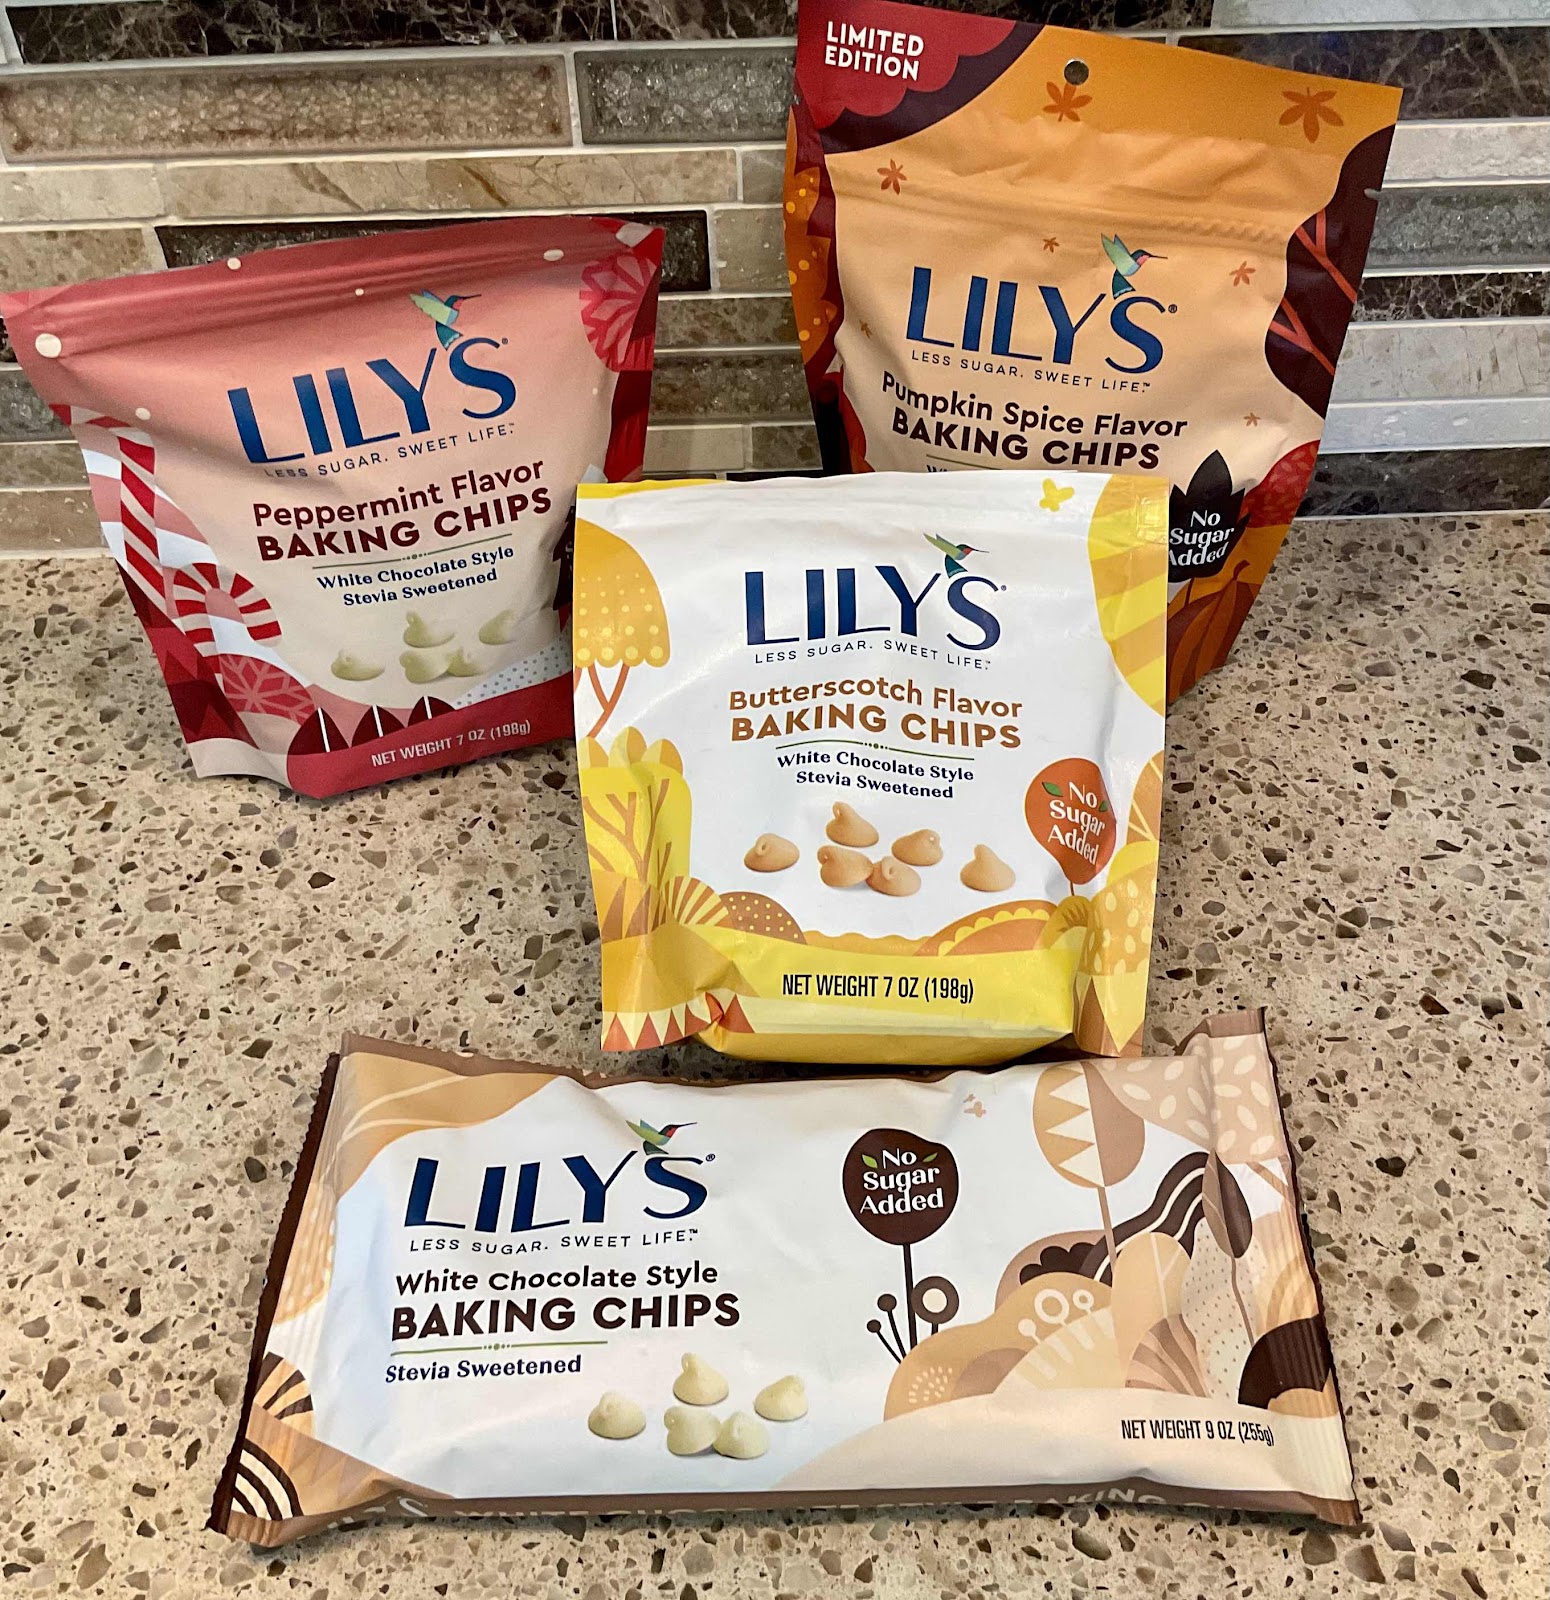
1 cup Lily’s sugar free baking chips (any flavor)
2½ ounces heavy cream (6 tablespoons)

Bake the cakes in your baking mold
2. Spray the silicone baking mold with non-sticking baking spray. Follow the directions in your recipe or on the box to make the cake batter. Spoon batter into each cavity until 3/4 full. Tap the mold on the counter to level out the batter and remove any air bubbles. Bake according to recipe or package directions, until the tops spring back when lightly touched in the center and a toothpick comes out clean. After the cupcakes are baked, take them out of the baking mold and cool completely on a wire rack before proceeding. 

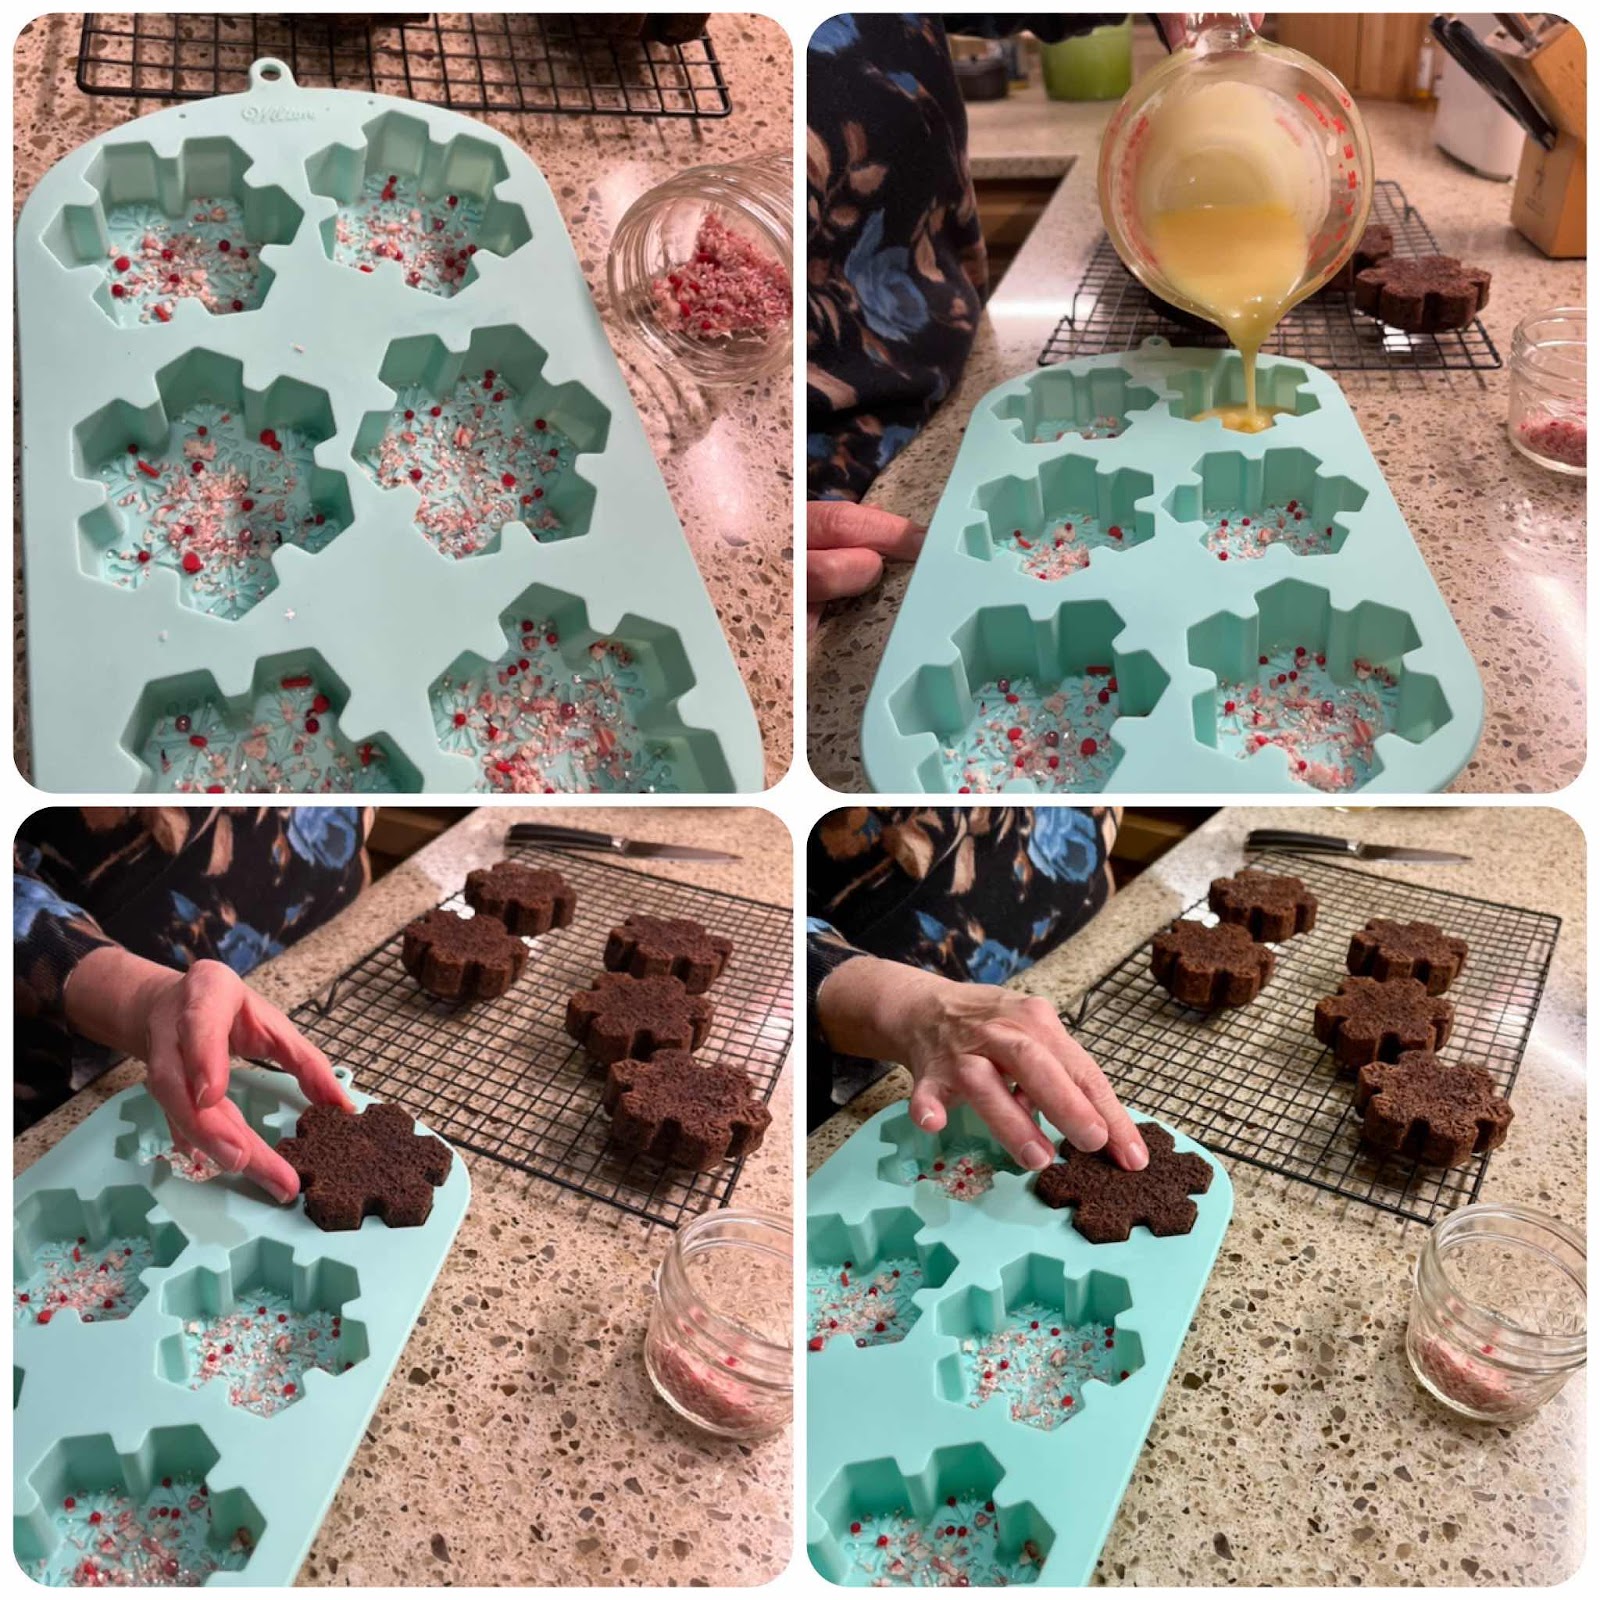
3. Once the cakes are cooled, wash the baking mold to remove any crumbs or oil and dry thoroughly. Spoon 1/8 to 1/4 teaspoon sprinkles into each cavity and set aside. 

Add sprinkles, pour in ganache and top with a cooled cake
4. Make the Chocolate Ganache: In a small saucepan, heat the heavy cream until beginning to simmer. Stir to make sure all of the cream is heated through and bring to a gentle simmer again. Meanwhile, place the sugar free baking chips into a heat-proof bowl. Once the cream is hot, pour over the chocolate chips and allow to sit for 5 minutes. Whisk until smooth. (Note: Lily’s Sugar Free Baking Chips come in a variety of flavors. If you use plain white chocolate, you can add ½ teaspoon of any flavor extract to the ganache to create your own flavor. For example, add caramel extract to make a caramel flavored white chocolate ganache! Also, you can color the ganache with a drop or two of gel food coloring.)

Lily’s Sugar Free Chocolate Baking Chips
5. Carefully, pour the chocolate ganache into the baking mold, covering the sprinkles, until about 1/4 - ½ inch deep (see photo above). Take one of the cooled cakes and insert it into the mold (like a puzzle), on top of the warm ganache, and press down gently. Repeat with the remaining cakes. Place the baking mold on a flat tray or baking sheet and tap on the counter to help settle the warm ganache into the grooves and lines of the mold’s design.

6. Place the mold into the freezer and allow to set for a minimum of 3 hours, and 4 hours is even better. (This is important! You want the chocolate ganache to be completely frozen to make unmolding the cakes easier.)

Heart Cakes
7. Remove from freezer and, while the cakes are frozen, unmold them and place them, cake side down, on a platter. The cakes can be stored in the refrigerator for up to a week. For the best flavor and texture, remove from the refrigerator and allow the cakes to come to room temperature before serving.

Easter Egg Shaped Snack Cake


Flower Shaped Snack Cake

Nutritional Information per cake varies, depending on the recipe used.

Photos and recipe by Kathy Sheehan, copyright 2022
All rights reserved. Please do not duplicate without the author’s permission. 


Tuesday, October 26, 2021

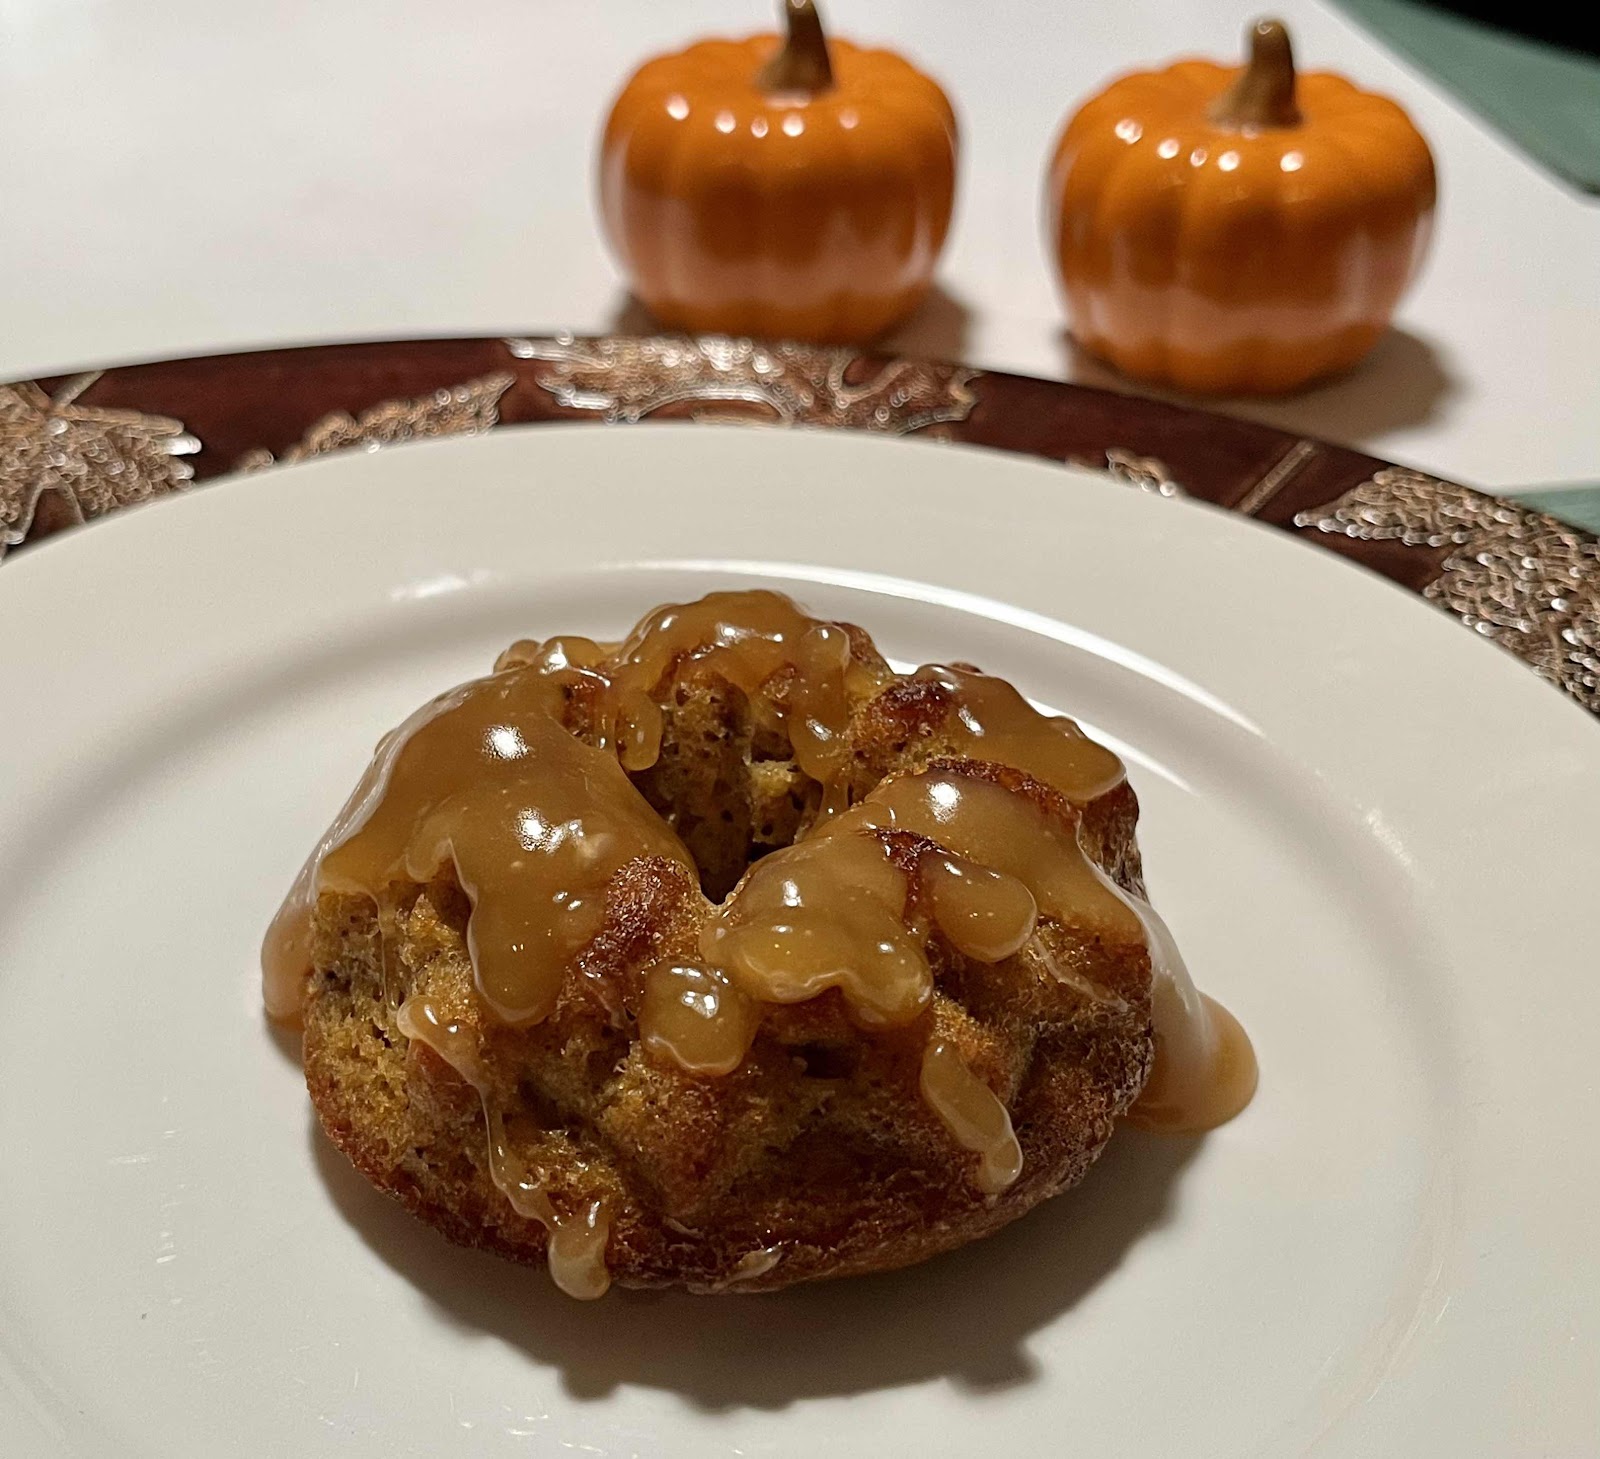
Mini Pumpkin Gingerbread Bundt Cakes with Keto Bourbon Toffee Sauce

Mini Pumpkin Gingerbread Bundt Cakes with Keto Bourbon Toffee Sauce
These little spiced cakes make the perfect fall dessert! If you don’t own a mini bundt cake pan, you can make cupcakes instead. The sauce pairs beautifully with the cakes, but is also delicious served over ice cream. 

Mini Pumpkin Gingerbread Bundt Cakes
Makes 6 mini bundt cakes

4 large eggs
2/3 cup allulose
5 tablespoons unsalted butter, melted and cooled with extracts whisked in
1 teaspoon vanilla extract
1/2 teaspoon molasses extract (or 1 teaspoon regular molasses)
1/4 cup pumpkin puree
1/4 cup + 2 tablespoons coconut flour
3/4 teaspoon xanthan gum
2 tablespoons unflavored whey protein powder
3/4 teaspoon baking powder
1/8 teaspoon salt
1-1/2 teaspoons gingerbread spice blend
1/4 teaspoon ground ginger

1. Preheat the oven to 350 degrees Fahrenheit and adjust the rack to the middle position. Thoroughly butter/grease a mini bundt cake baking pan; set aside.

2. Place the eggs and allulose in the bowl of a standing mixer with a whisk attachment (or use a large bowl and a handheld electric mixer). Whisk on medium-high for 8 minutes, then reduce the mixer to low and slowly drizzle in the melted and cooled butter with the extracts whisked in and the puréed pumpkin. Do not overmix, so as not to deflate the egg mixture. Sift in the coconut flour, xanthan gum, whey protein powder, baking powder, salt and spices. Gently fold the dry ingredients into the egg mixture with a wooden spoon or rubber spatula until incorporated. Let the batter sit at room temperature for a few minutes to hydrate the coconut flour.

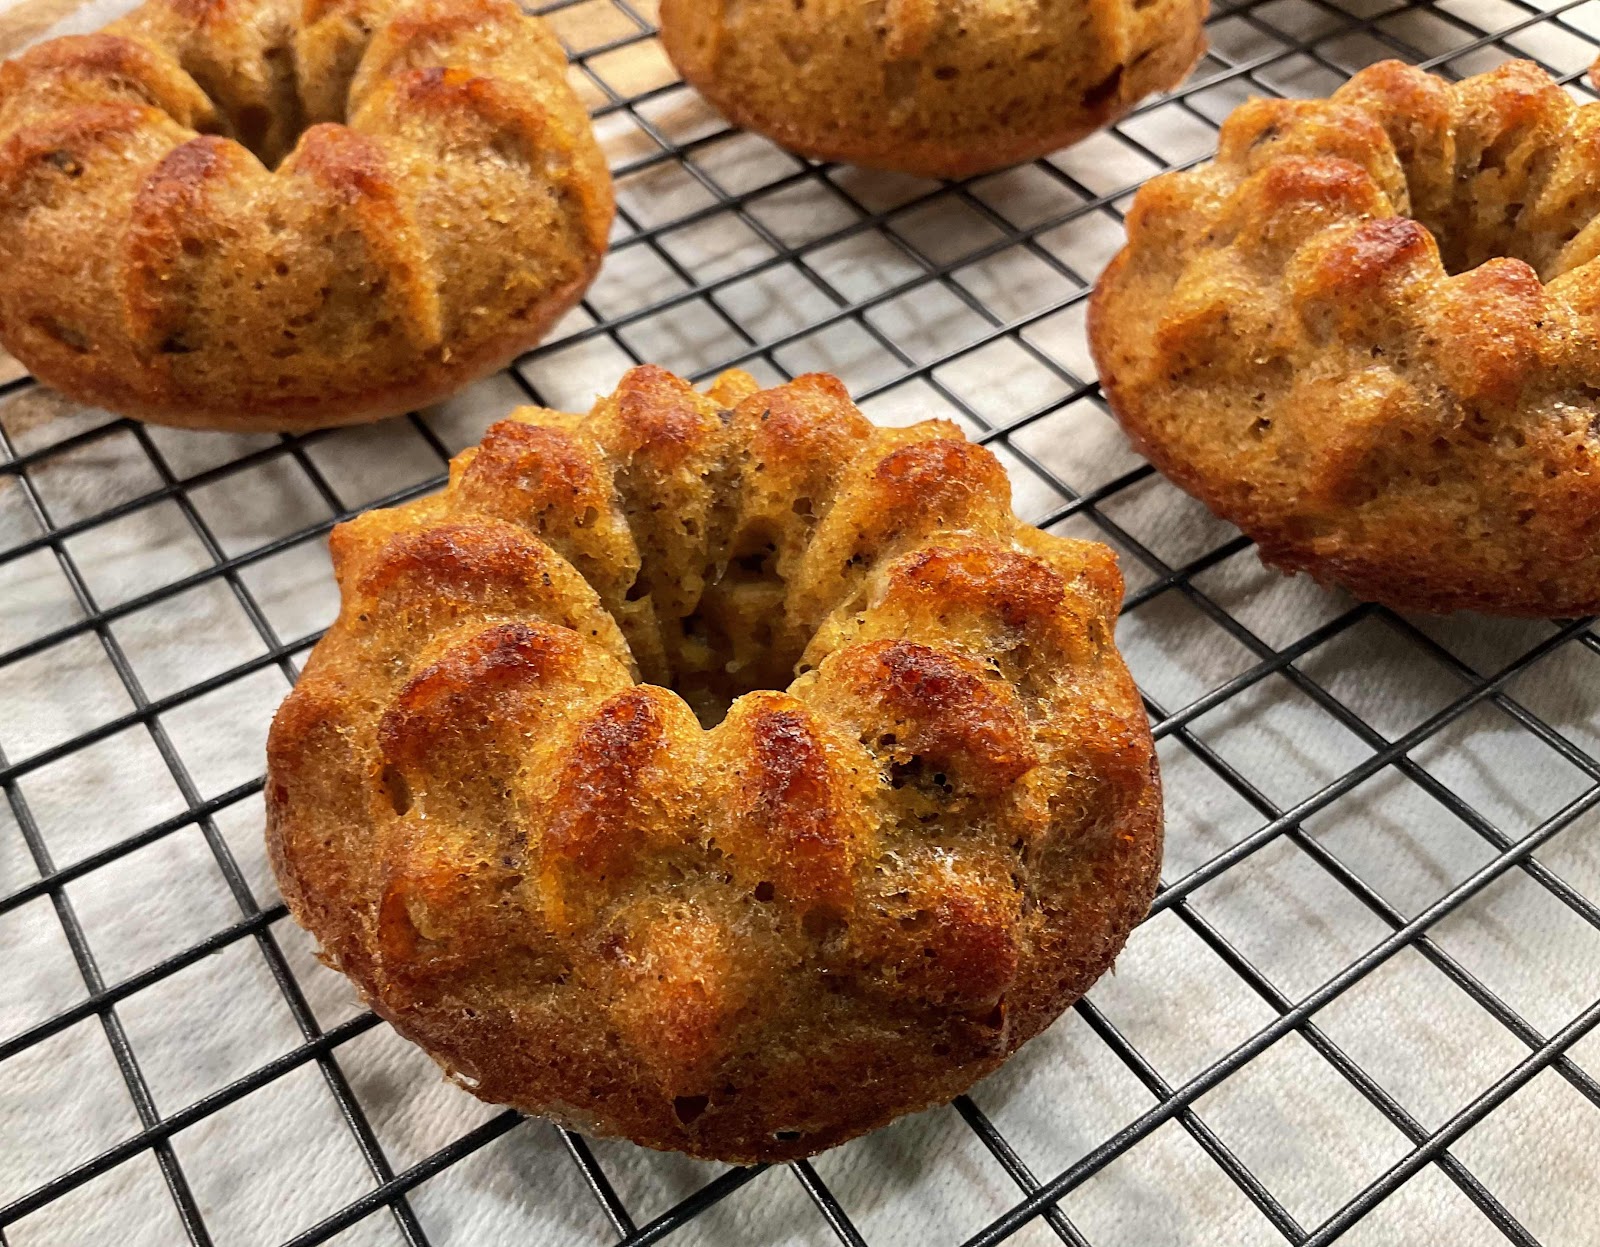
3. Spoon the batter into the buttered pan or put the batter into a large piping bag and pipe the batter into the pan. Bake for 21-23 minutes, or until just turning golden brown around the edges. Let the cakes cool in the pan for 10 minutes and then invert them onto a wire rack. Serve warm or at room temperature with sauce or top with your favorite keto ice cream.

Mini Pumpkin Gingerbread Bundt Cake
Nutritional Information per mini bundt cake (no sauce): 175 calories, 5.9 g carbohydrate (3 g dietary fiber, 1.1 g sugars), 13.9 g total fat (8.2 g saturated fat, 0 g trans fat), 149 mg cholesterol, 132 mg sodium, 75.7 mg calcium, 57 mg potassium, 1 mg iron, 618 IU Vit A, 6.2 g protein. Net carbs per mini cake (no sauce): 2.9 grams

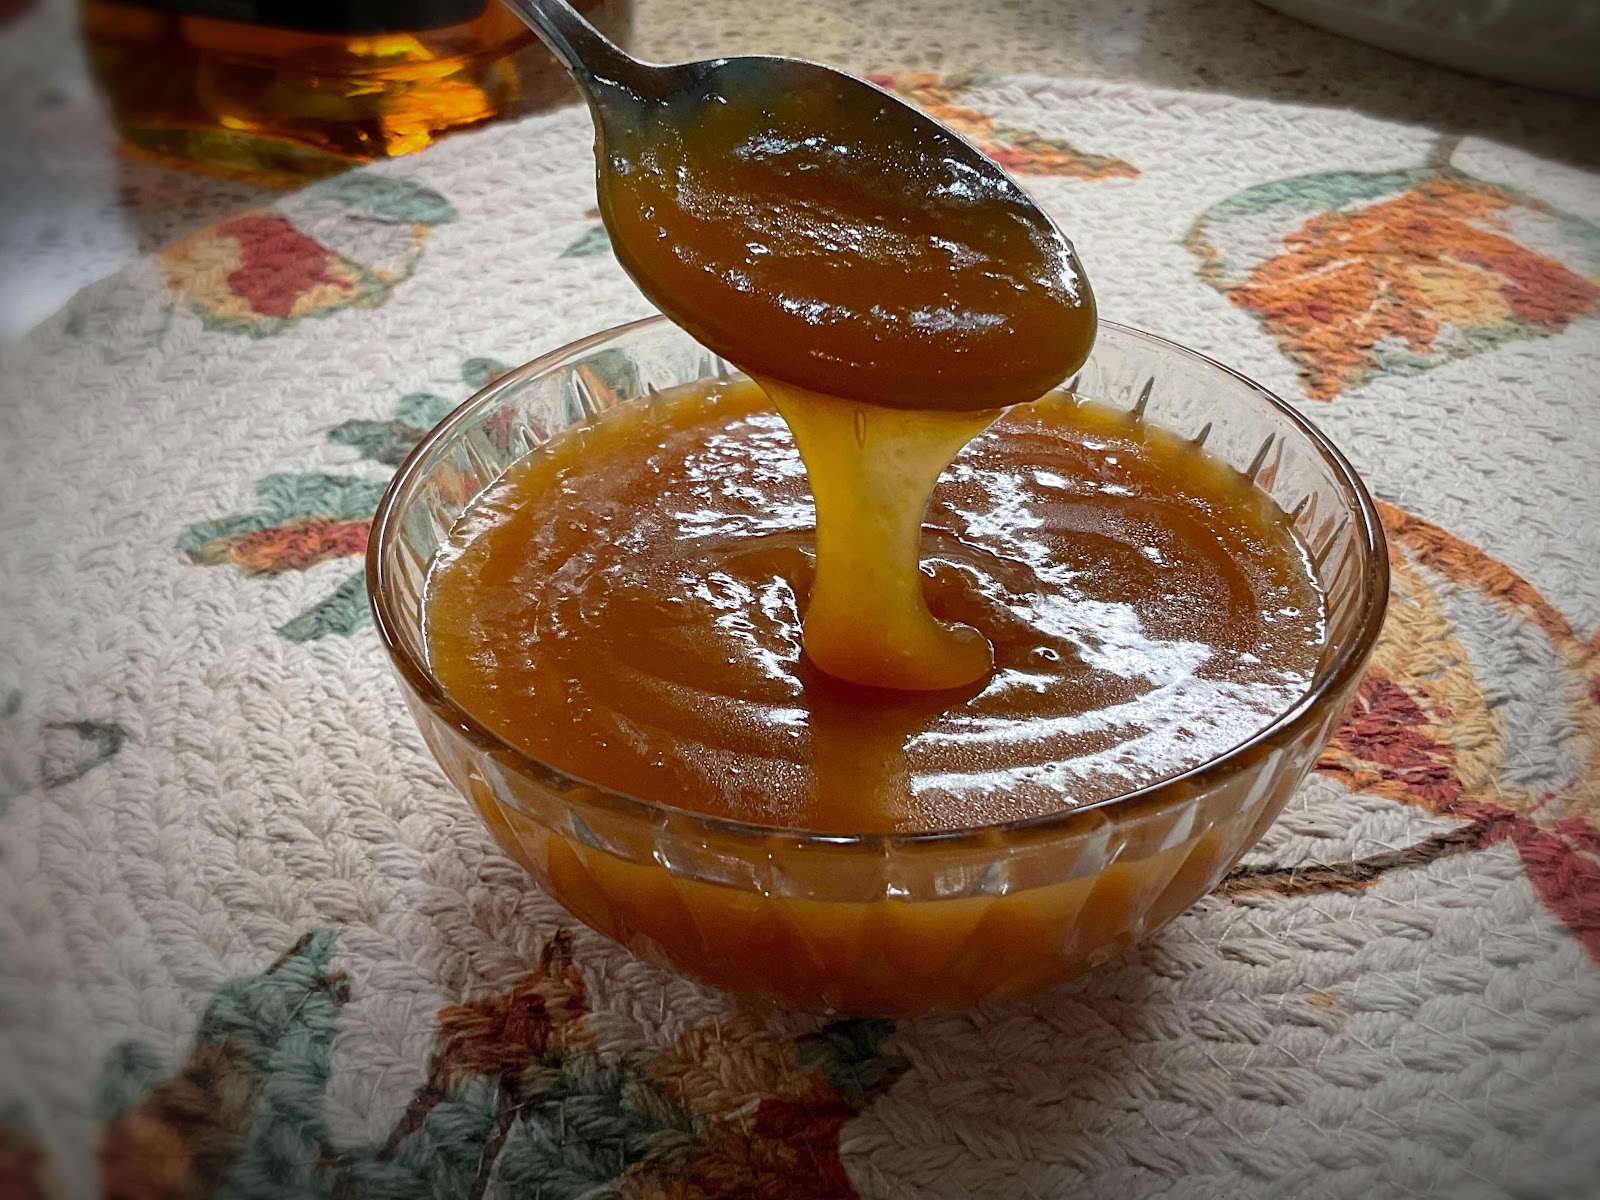
Keto Bourbon Toffee Sauce
Makes 1 cup (16 servings)

1/2 cup (1 stick) unsalted butter
1/4 cup allulose
1/4 cup LaKanto Golden, powdered (blitz in a food processor)
A pinch of salt
1/4 cup heavy whipping cream
3-4 tablespoons bourbon, to taste (or Rum can be substituted, if desired)
1/2 teaspoon vanilla extract
1/4 teaspoon xanthan gum

1. Combine butter, sweeteners and a pinch of salt in a medium saucepan over medium-low heat; allow butter to melt and sweeteners to dissolve. Stir constantly until butter begins to turn light brown (about 5 minutes).

2. Whisk in the cream, bourbon, vanilla and xanthan gum. The sauce will bubble up rapidly, then return to a simmer. Reduce heat to low and whisk constantly until sauce has thickened a bit, about 3-5 minutes. Note: Sauce will continue to thicken further when removed from the heat, so it may not seem as thick as it will be in the end.

3. Remove from heat and allow to cool. Can be stored in the refrigerator for up to 2 weeks and reheated when serving.

Nutritional Information for 1 tablespoon: 71 calories, 0.3 g carbohydrate (0 g fiber, 0 g sugars, 0.3 g sugar alcohols), 7.3 g total fat (4.5 g saturated fat), 20 mg cholesterol, 6 mg sodium, 1.7 mg calcium, 2 mg potassium, 1.1 g alcohol, 68 IU Vit A, 0 g protein. Net carbs per serving: 0 grams

Photos and recipes by Kathy Sheehan, copyright 2021
All rights reserved. Please do not duplicate without the author’s permission. 

Saturday, January 16, 2021

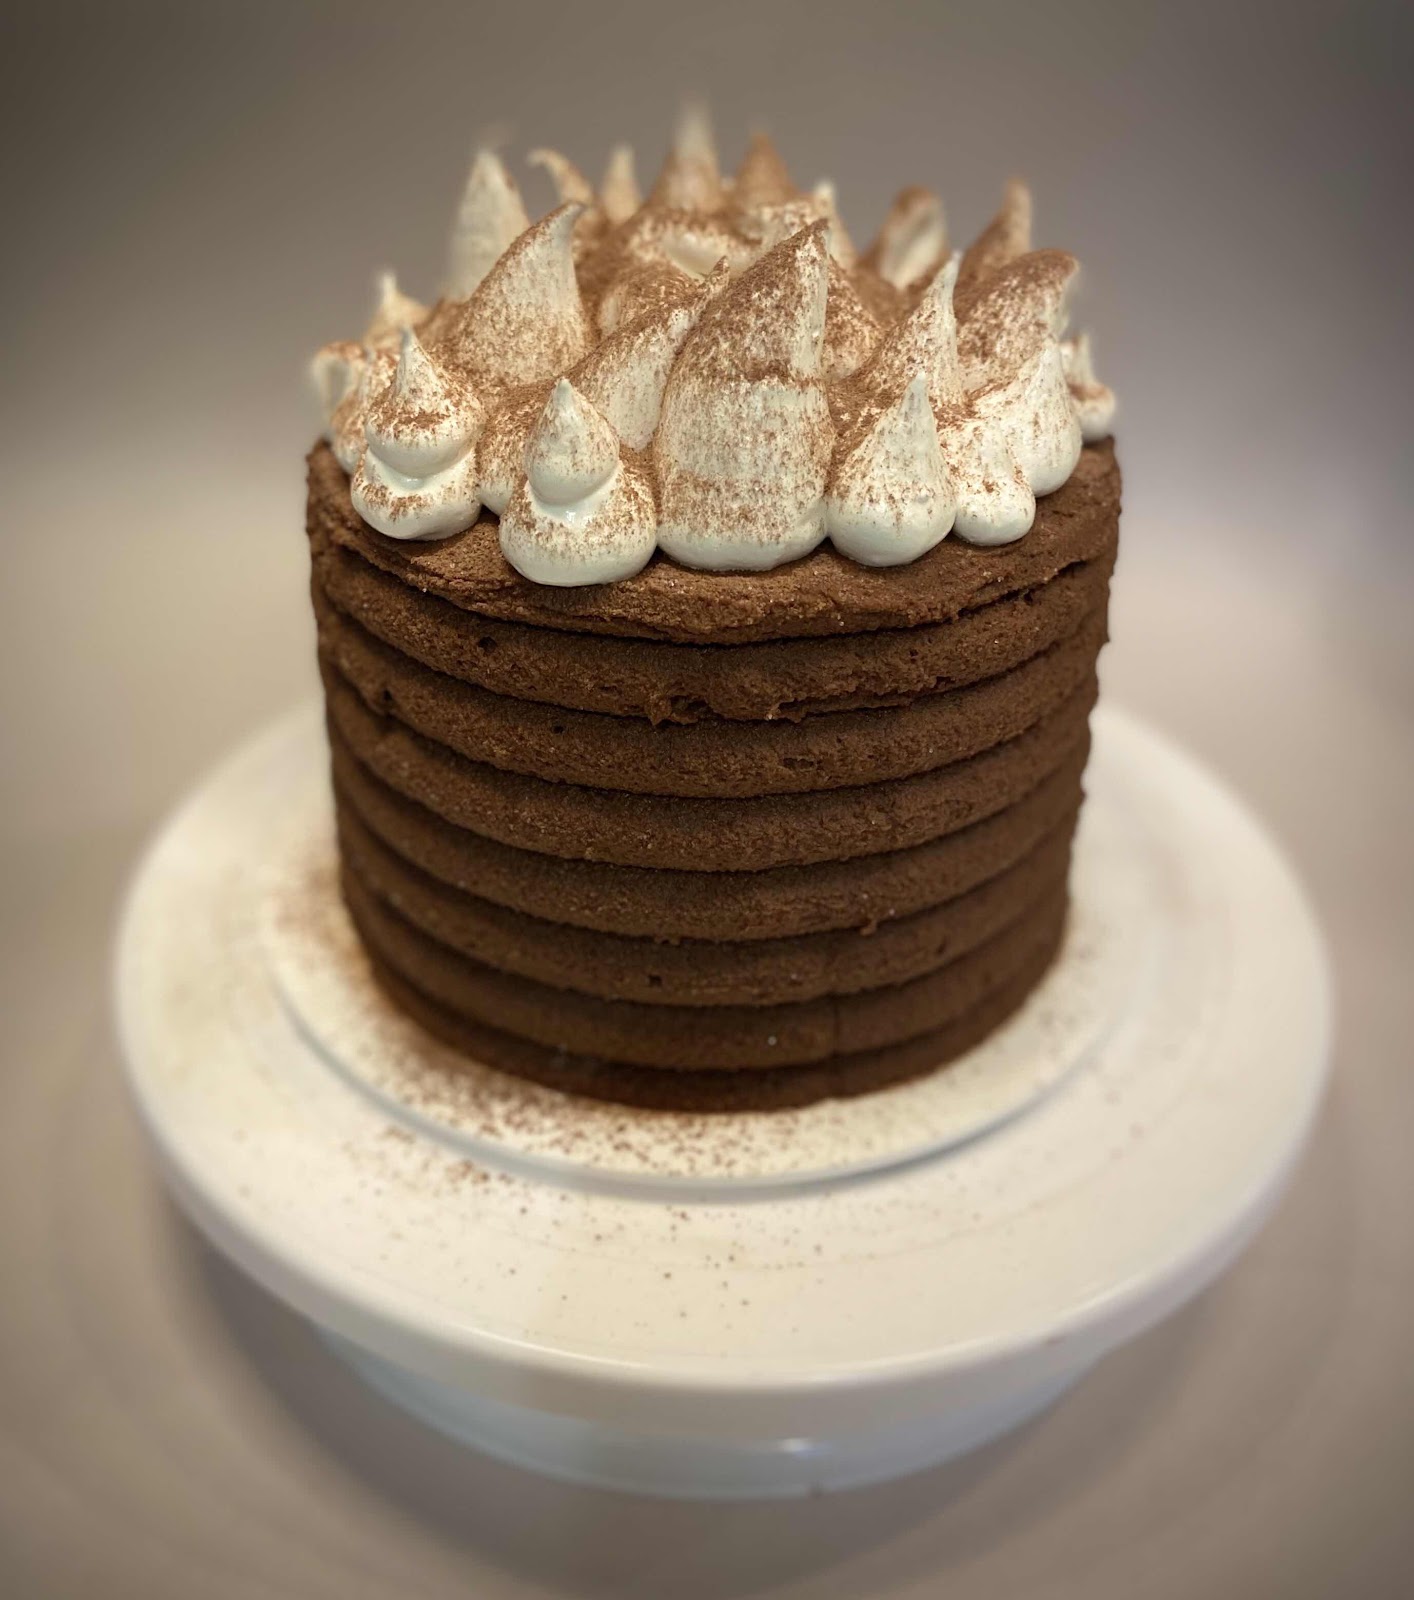
Low Carb Hot Cocoa Cake

Low Carb Hot Cocoa Cake
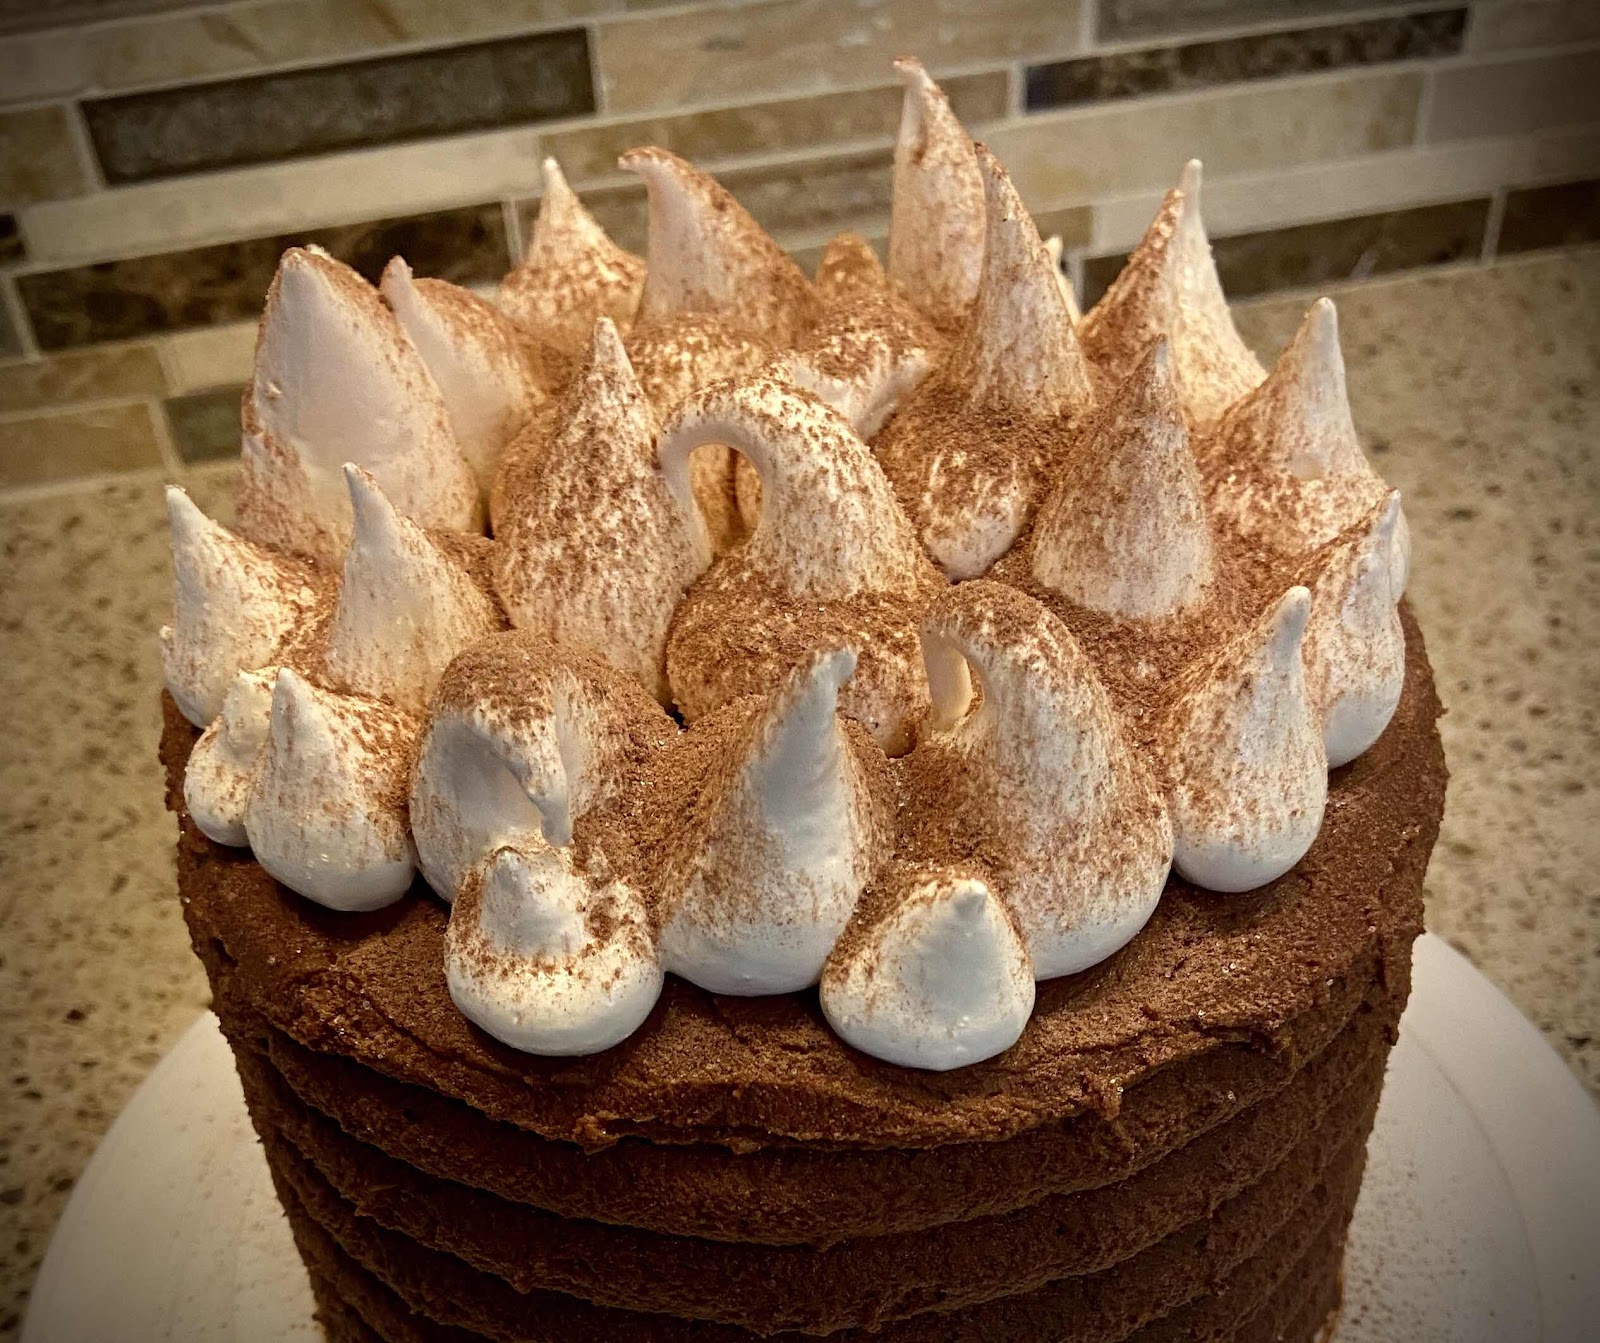
My grown daughter had a birthday last week and I quickly volunteered to make her a birthday cake. I had seen a similar cake online (see the inspiration for this recipe here), but it is made with flour and lots of sugar, and I couldn’t resist making it over using low carb, sugar free and gluten free ingredients. The results were absolutely spectacular! My family has declared that this cake may be the very best to come out of my keto/low carb kitchen, so far! 

The puffs of marshmallow fluff on the top calls for a different sugar alternative called allulose  As much as I dislike purchasing another product to try and fit into my already overstuffed keto baking drawer, in this case, allulose is the best sugar alternative for the job. It won’t recrystalize upon cooling, like erythritol can, leaving the marshmallow puffs soft and pillowy. You can leave them off and still make the best low carb chocolate cake ever!

Low Carb Hot Cocoa Cake
Makes 12 servings

Cake Ingredients:
96 grams coconut flour (about 3/4 cups + 2 tablespoons)
3/4 cup granulated erythritol sweetener 
1/3 cup unsweetened dark cocoa powder
1 tablespoon baking powder
1/2 teaspoon xanthan gum
1/4 teaspoon salt
6 large eggs, room temperature 
1/2 cup unsalted butter, melted and cooled
1/2 cup brewed coffee, cooled to room temperature (regular or decaf is fine)
2 teaspoons vanilla extract (or 1 tsp vanilla and 1 tsp chocolate extract)

Chocolate Frosting:
3 ounces unsweetened 100% cacao baker’s chocolate, chopped
3/4 tablespoon coconut oil (I used refined)
3 tablespoons unsalted butter, room temperature 
6 ounces cream cheese, room temperature 
12 ounces mascarpone cheese, room temperature 
1 cup powdered erythritol sweetener 
3 tablespoons unsweetened cocoa powder 
3/4 teaspoon vanilla extract 
3-4 tablespoons heavy cream, room temperature (or enough to reach desired spreading consistency)

Whipped Marshmallow Topping:
3/4 cup allulose sweetener 
1/3 cup water
1 large egg white
1/2 teaspoon vanilla extract 
A tiny pinch of salt

To Make the Cake:

1. Preheat your oven to 325 degrees Fahrenheit. Prepare two 8” or three 6” baking pans by spraying with non-stick cooking spray and line the bottoms with parchment paper. Spray the parchment paper; set aside.

2. Whisk together the first six ingredients (coconut flour through salt) in a medium bowl. (If you’re not able to weight the coconut flour, use a very light scooping and leveling method to measure.) Set aside.

3. In a large bowl and with an electric mixer, beat the eggs until light, lemon yellow in color and the volume has increased, about 3-5 minutes. Try to beat as much air as possible into the eggs. (If you have standing mixer, you can use a whisk attachment to make this easier, but remove it and replace with your paddle attachment before adding the remaining ingredients, so as not to deflate the eggs too much.) Add the melted and cooled butter, coffee and extract, mixing on low only to combine.

4. Add the dry ingredients all at once and mix on low to medium just until the dry ingredients are incorporated. Divide the batter evenly between the prepared baking pans and spread to the edges and level the batter using an offset spatula or back of a spoon. Bake for 30 minutes or until the tops are just firm to the touch and a toothpick in the center comes out clean. (If using 6-inch pans, check after 25 minutes.)

5. Remove from the oven and allow the cake to cool in their pans for about 10-15 minutes before turning them out on a wire rack to cool completely.

To Make the Chocolate Frosting:

6. In a medium microwave-safe bowl, combine the chopped baking chocolate and coconut oil. Microwave in 15 second intervals to melt the chocolate. Allow to sit for a few minutes before stirring until smooth. (You may also place the chocolate in a heat-proof bowl over barely simmering water to melt.) Set aside to cool to lukewarm.

7. In a large bowl with an electric mixer, beat the butter, cream cheese and mascarpone cheese together until well combined and no lumps remain. (I used my paddle attachment to do this.) Beat in the powdered erythritol and cocoa powder until blended. Add the melted chocolate and extract and beat until smooth. Add 1 tablespoon of the heavy cream at a time until the desired spreading consistency is reached.

To Make the Marshmallow Topping: (This can be made a day ahead and refrigerated. Bring to room temperature before decorating the cake.)

8. To a medium saucepan, add the allulose and water and very gently stir to combine. (The allulose will not dissolve at this point.) If any allulose has gotten on the sides of the pan, use a wet pastry brush to wipe down the sides.

9. Over medium-low heat, bring the allulose and water mixture up to 260 degrees Fahrenheit. DO NOT STIR. Bring the mixture up to temperature slowly, it may take 15 minutes or so. If you see it starting to turn brown, reduce the temperature, you don’t want the allulose to burn. 

10. Using an electric or standing mixer, whip the egg white with a tiny pinch of salt until foamy and soft peaks form. Slowly, and very carefully, while the mixer is on low, pour the hot allulose mixture into the egg white. (This mixture is VERY HOT, so use a potholder and stand away from the mixing bowl as you pour so the hot liquid doesn’t splash on you.) 

11. Turn the mixer to high, add the vanilla extract and whip for 5-6 minutes or until the marshmallow fluff is glossy and holds a stiff peak.

Dollop Marshmallow on top
12. Assemble your cake by placing one layer of your cooled cake on a plate, spread with a generous amount of chocolate frosting, top with the second layer and then spread frosting on the top and sides. (To achieve the banded look in the photo, I used a design scraping tool to create a scalloped edge, but this is optional. See photo below of the tool set by Wilton for adding texture to cakes.) Finally, dollop mounds of the marshmallow on the top, creating puffs. You can do this with a large spoon or place the fluff into a piping or gallon plastic bag and snip off the end and pipe the marshmallow. Dust with cocoa powder.
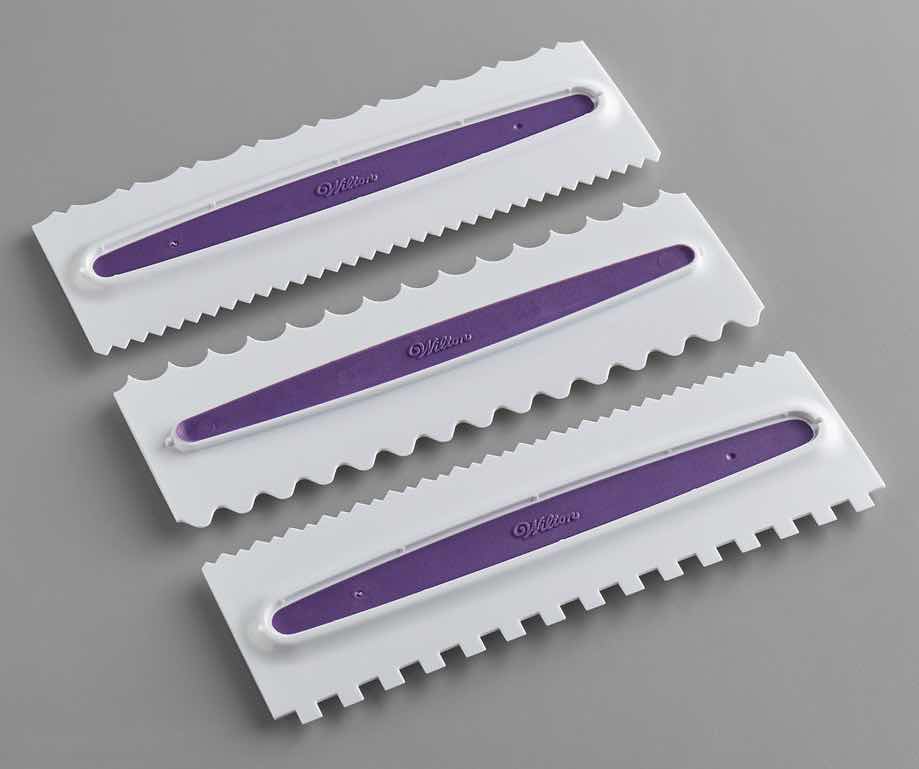
Wilton Design Tools
13. This cake should be stored in the refrigerator. Remove and allow the cake to sit at room temperature for 30-45 minutes before slicing and serving.

Nutritional Information per serving (1/12th of cake): 333 calories, 9.3 g carbohydrate (4.6 g dietary fiber, 1.2 g sugars), 29.3 g total fat (18.4 g saturated fat, 0 g trans fat), 152 mg cholesterol, 249 mg sodium, 111.4 mg calcium, 78 mg potassium, 2 mg iron, 170 IU Vit A, 8.4 g protein. Net carbs per serving: 4.7 grams

Cake photos and recipe by Kathy Sheehan, copyright 2021
All rights reserved. Please do not duplicate without the author’s permission. 
Monday, August 31, 2020

Low Carb Banana Pudding Donuts with Whipped Cream Topping

Low Carb Banana Pudding Donuts with Whipped Cream Topping
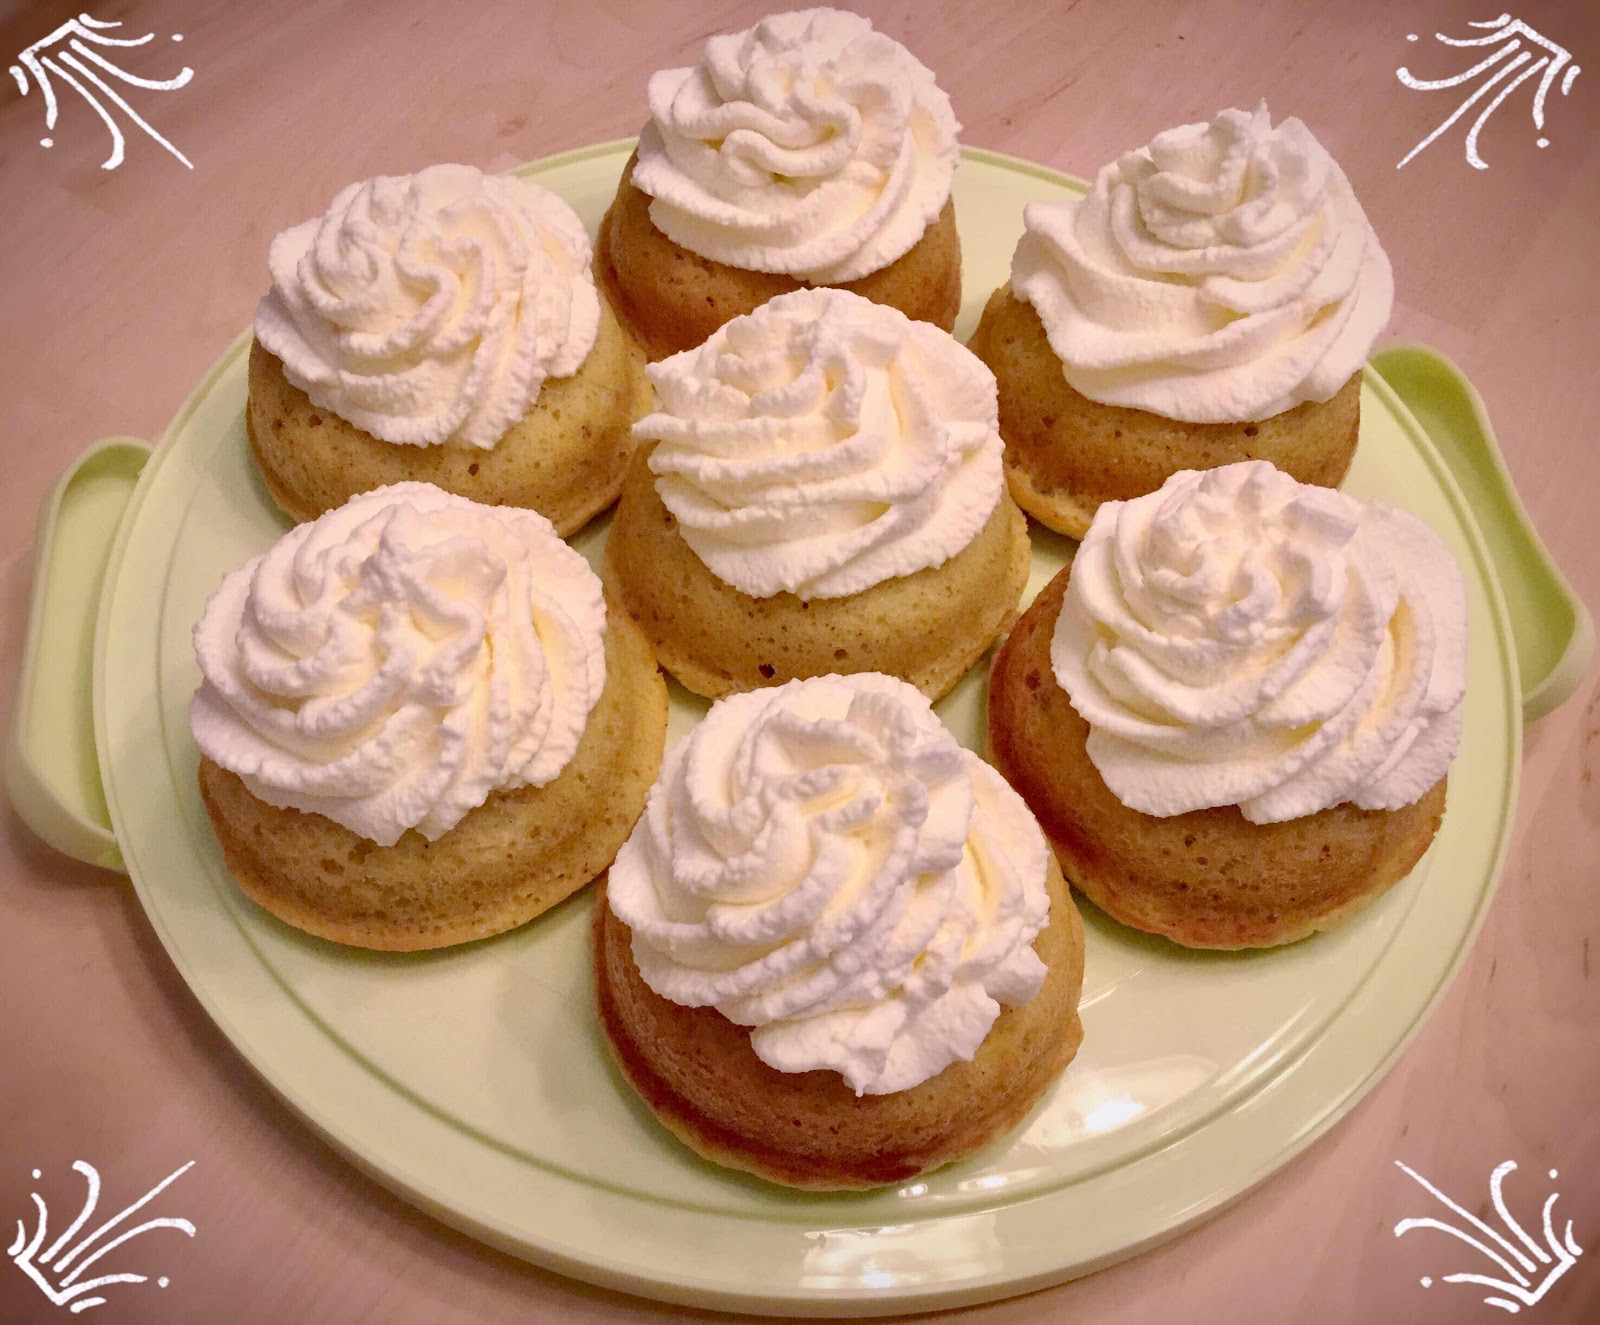
The versatility of a donut baking pan is that it can be used to make more than donuts. In this case, these donuts are really more like cupcakes. (As a matter of fact, you can make these in a cupcake or muffin tin instead.) The reason I like using a donut pan is that when I deliberately overfill each cavity, so that the cake rises and fills in the center hole, it leaves the ideal space to spoon the filling! The result are dainty little cakes perfectly proportioned into individual servings. If you like banana pudding, you’ll love these pudding-filled cakes!

Note: If you don’t want to make homemade pudding, you could certainly use a sugar free boxed mix. The most popular brand has some questionable ingredients, namely modified cornstarch and maltodextrin, both of which will raise blood sugar as high or higher than regular sugar! That’s why I prefer to make my own. You can make the pudding several days ahead and store it in the refrigerator.  That way it’s set and ready to go when it’s time to fill the cakes. The best part is that the pudding part of this recipe will make much more than you’ll need...so you’ll have plenty leftover for snacking!

Low Carb Banana Donuts with Whipped Cream Topping
Makes 10 servings (depending on the size of your donut pan)

Pudding Ingredients:
3/4 cup heavy cream
1/2 cup almond or coconut milk
3 large egg yolks
3 tablespoons powdered erythritol sweetener
A pinch of salt
1-1/2 tablespoons unsalted butter, cut into pieces
1-1/2 teaspoons banana extract
1/2 teaspoon vanilla extract
8 drops monkfruit extract or stevia, to taste
1/2 to 3/4 teaspoon xanthan gum (as needed for thickening)

Donut Ingredients:
1/2 cup + 2 tablespoons coconut flour
6 tablespoons granulated erythritol sweetener 
1-1/2 teaspoons baking powder
1/2 teaspoon vanilla powder (Optional, but adds nice vanilla flecks to the batter. If not using, increase vanilla extract to 1/2 teaspoon.)
1/4 teaspoon salt
5 large eggs
1/2 cup unsweetened almond or coconut milk
1-1/4 teaspoons banana extract
1/4 teaspoon vanilla extract

Whipped Cream Topping Ingredients:
2 tablespoons cold water 
1 teaspoon dry unflavored gelatin powder
1 cup heavy whipping cream
2 tablespoons powdered erythritol sweetener (or 6-8 drops monkfruit extract or stevia)
1/2 teaspoon vanilla extract

1. Pudding Directions (can be made several days ahead): In a medium saucepan over medium heat, combine the heavy cream and almond or coconut milk. Heat until hot and bubbles can be seen around the edges. Meanwhile, whisk together the egg yolks, sweetener and salt in a heat-proof bowl or glass measuring cup until light and thoroughly combined. 

2. Slowly ladle about 1/2 cup of the hot mixture into the egg yolks, whisking continuously, to temper them. Then slowly whisk the tempered egg/milk mixture back onto the saucepan, whisking continuously. Continue to stir and heat until the pudding thickens and will coat the back of a spoon. If the mixture starts to simmer, remove it from the heat and continue whisking (you don’t want scrambled eggs!). Once it has thickened, remove from heat and add the butter, extracts and monkfruit or stevia. Stir until the butter has melted. Sprinkle the xanthan gum over the surface of the pudding while whisking vigorously until it has incorporated and there are no lumps. Pour into a glass bowl or storage container and place in the refrigerator to set up and cool completely.

3. To make the Donuts: Preheat oven to 325 degrees F and grease your donut baking pan well; set aside.

4. In a medium bowl, whisk together the coconut flour, sweetener, baking powder, vanilla powder and salt until no lumps remain (you may sift this mixture, if desired). In a large bowl, whisk the eggs, almond or coconut milk and extracts. Add the dry ingredients to the wet ingredients and whisk vigorously until well incorporated, no lumps are visible and the batter is smooth.

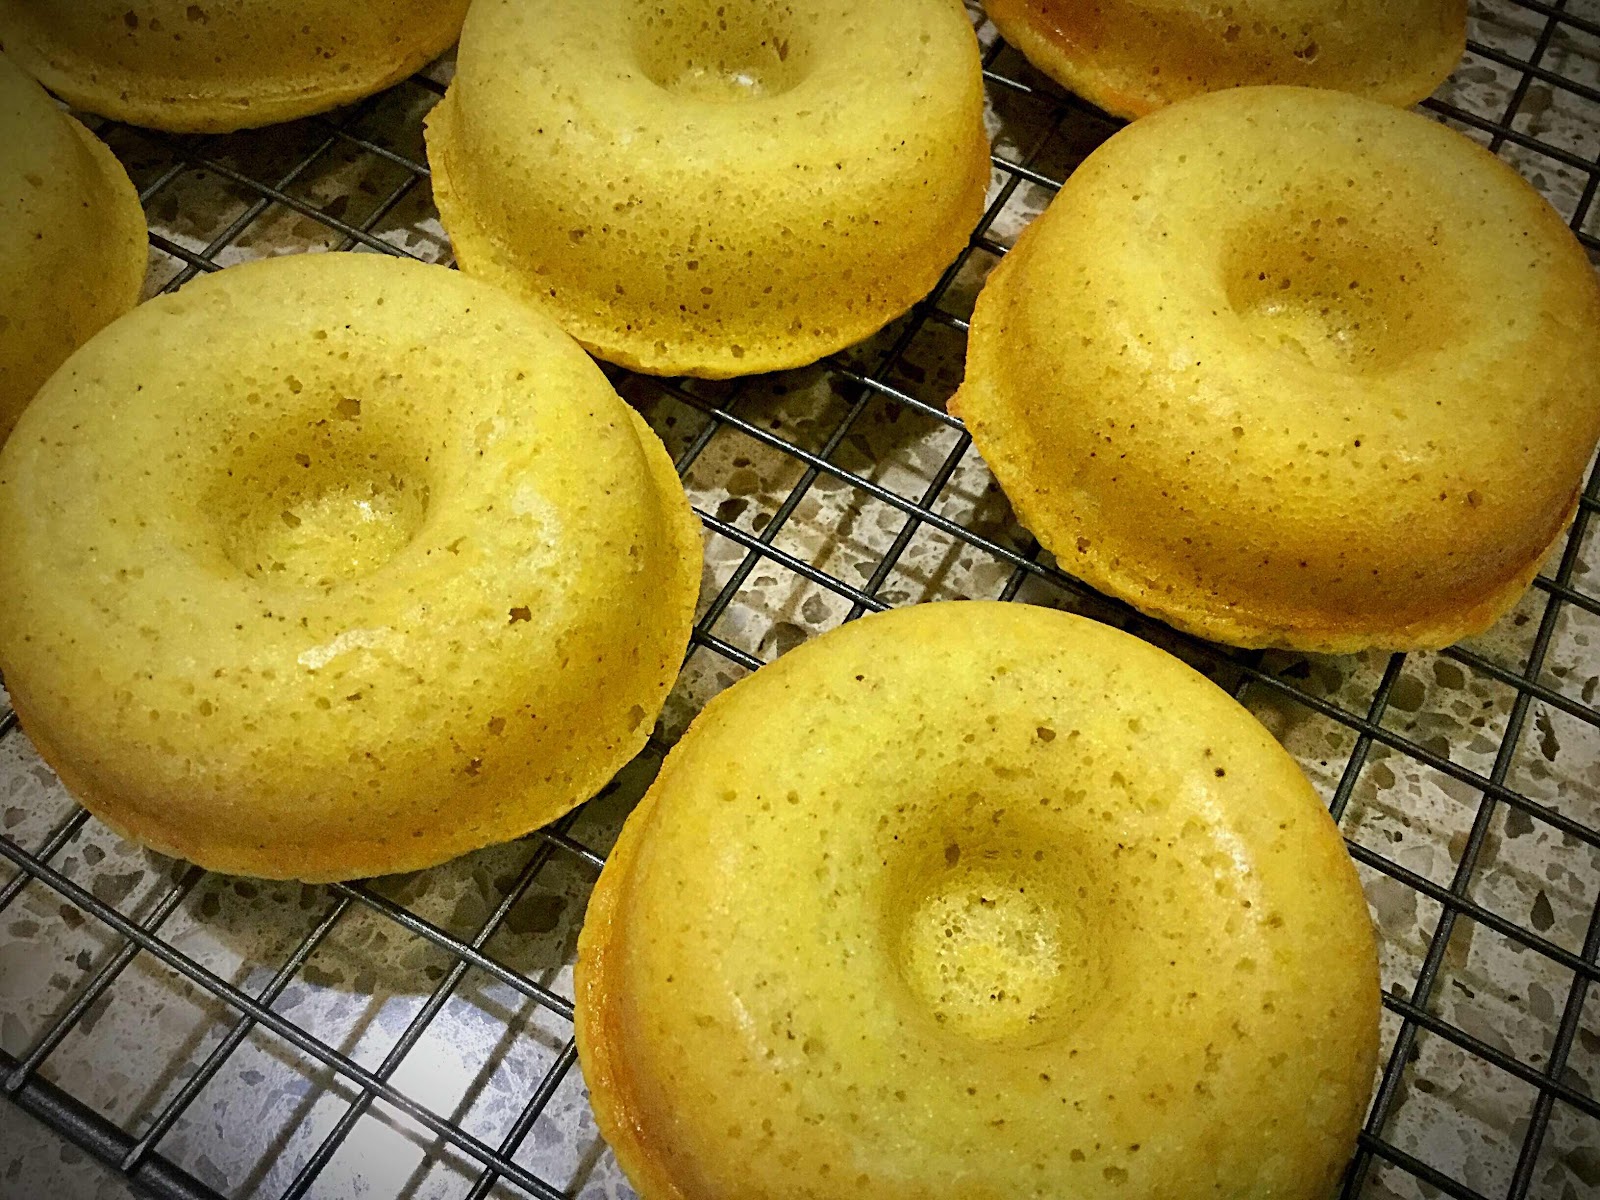
5. Fill each donut cavity until nearly full. Bake for about 15 minutes or until firm to the touch and the edges are golden brown. (You want the center of the donut to puff up and cover the center hole once the donuts are baked to create a well for the pudding filling, see photo below.) Remove from oven and allow the donuts to cool in the pan for 5-10 minutes. Turn them out onto a wire rack to cool completely before filling.

Baked donuts showing well for filling
6. To make the stabilized whipped cream topping: Pour the cold water into a small bowl and sprinkle the dry gelatin powder over the top and allow to sit for a few minutes to “bloom.” Heat in the microwave for about 5 seconds on high, then stir until the gelatin is dissolved; set aside to cool for 5 minutes while you whip the cream.

7. Place the heavy whipping cream, sweetener and vanilla extract into a large bowl. With an electric mixer, beat on high until the cream forms soft peaks. Slowly add the gelatin/water mixture and continue whipping until moderate to firm peaks are achieved. 

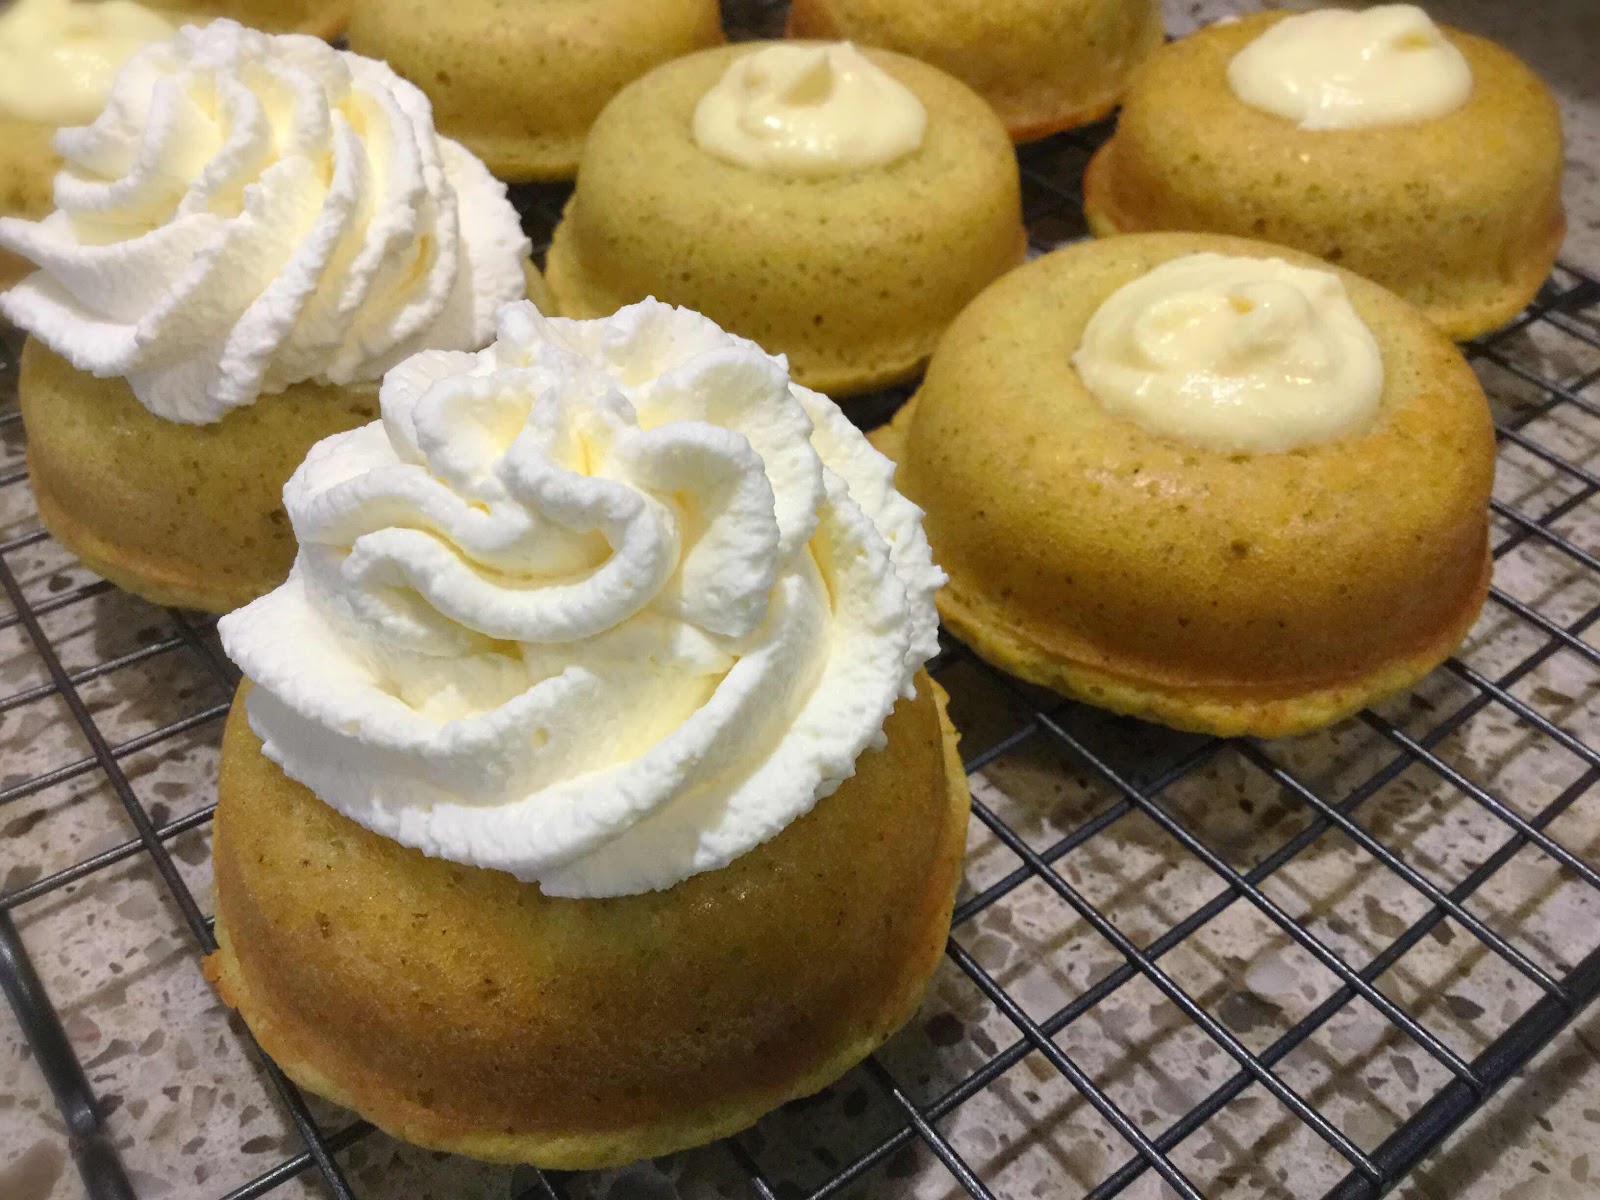
Photo showing filled donuts and finished donuts
8. To assemble: Spoon a tablespoon or so of the banana pudding into the center well of each donut, mounding it slightly. Spoon or pipe the whipped cream over the top, making sure to cover the pudding completely. Because the whipped cream has been stabilized by the gelatin, these donuts will store well in the refrigerator for 2-3 days. When it’s time to serve, allow the donuts to sit out at room temperature for about 15 minutes. Enjoy!

Banana Pudding Donut showing filled center
Nutritional Information per donut with pudding and topping: 228 calories, 4.8 g carbohydrates (2.5 g dietary fiber, 0.8 g sugars), 21.6 g total fat (12.5 g saturated fat, 0 g trans fat), 172 mg cholesterol, 188 mg sodium, 91.5 mg calcium, 95 mg potassium, 1 mg iron, 220 IU Vit A, 4.7 g protein. Net carbs per serving: 2.3 grams

Photos and recipe by Kathy Sheehan, copyright 2020
All rights reserved. Please do not duplicate without the author’s permission. 
Tuesday, August 18, 2020

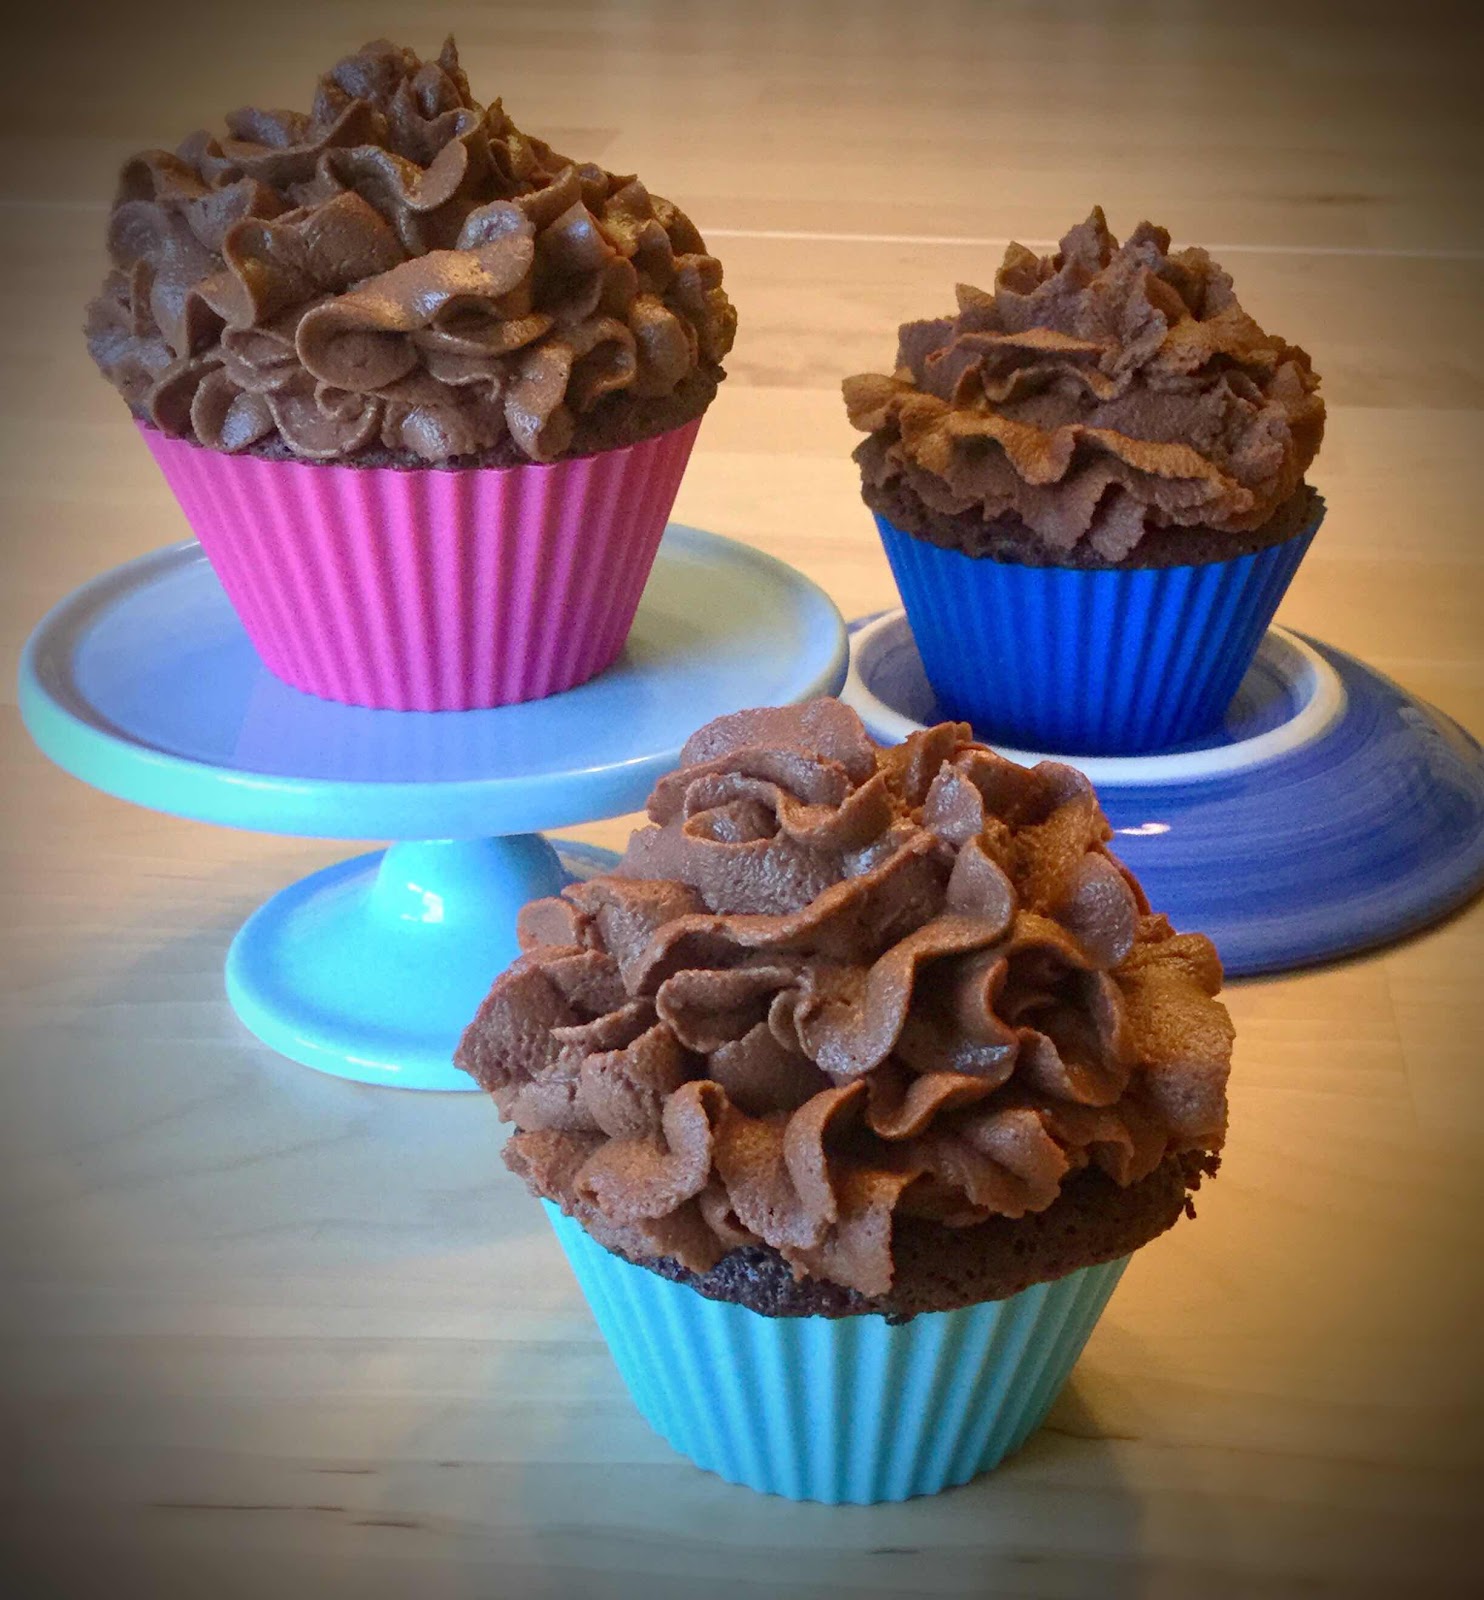
40 Second Keto Dark Chocolate Cupcakes

40 second Dark Chocolate Cupcakes
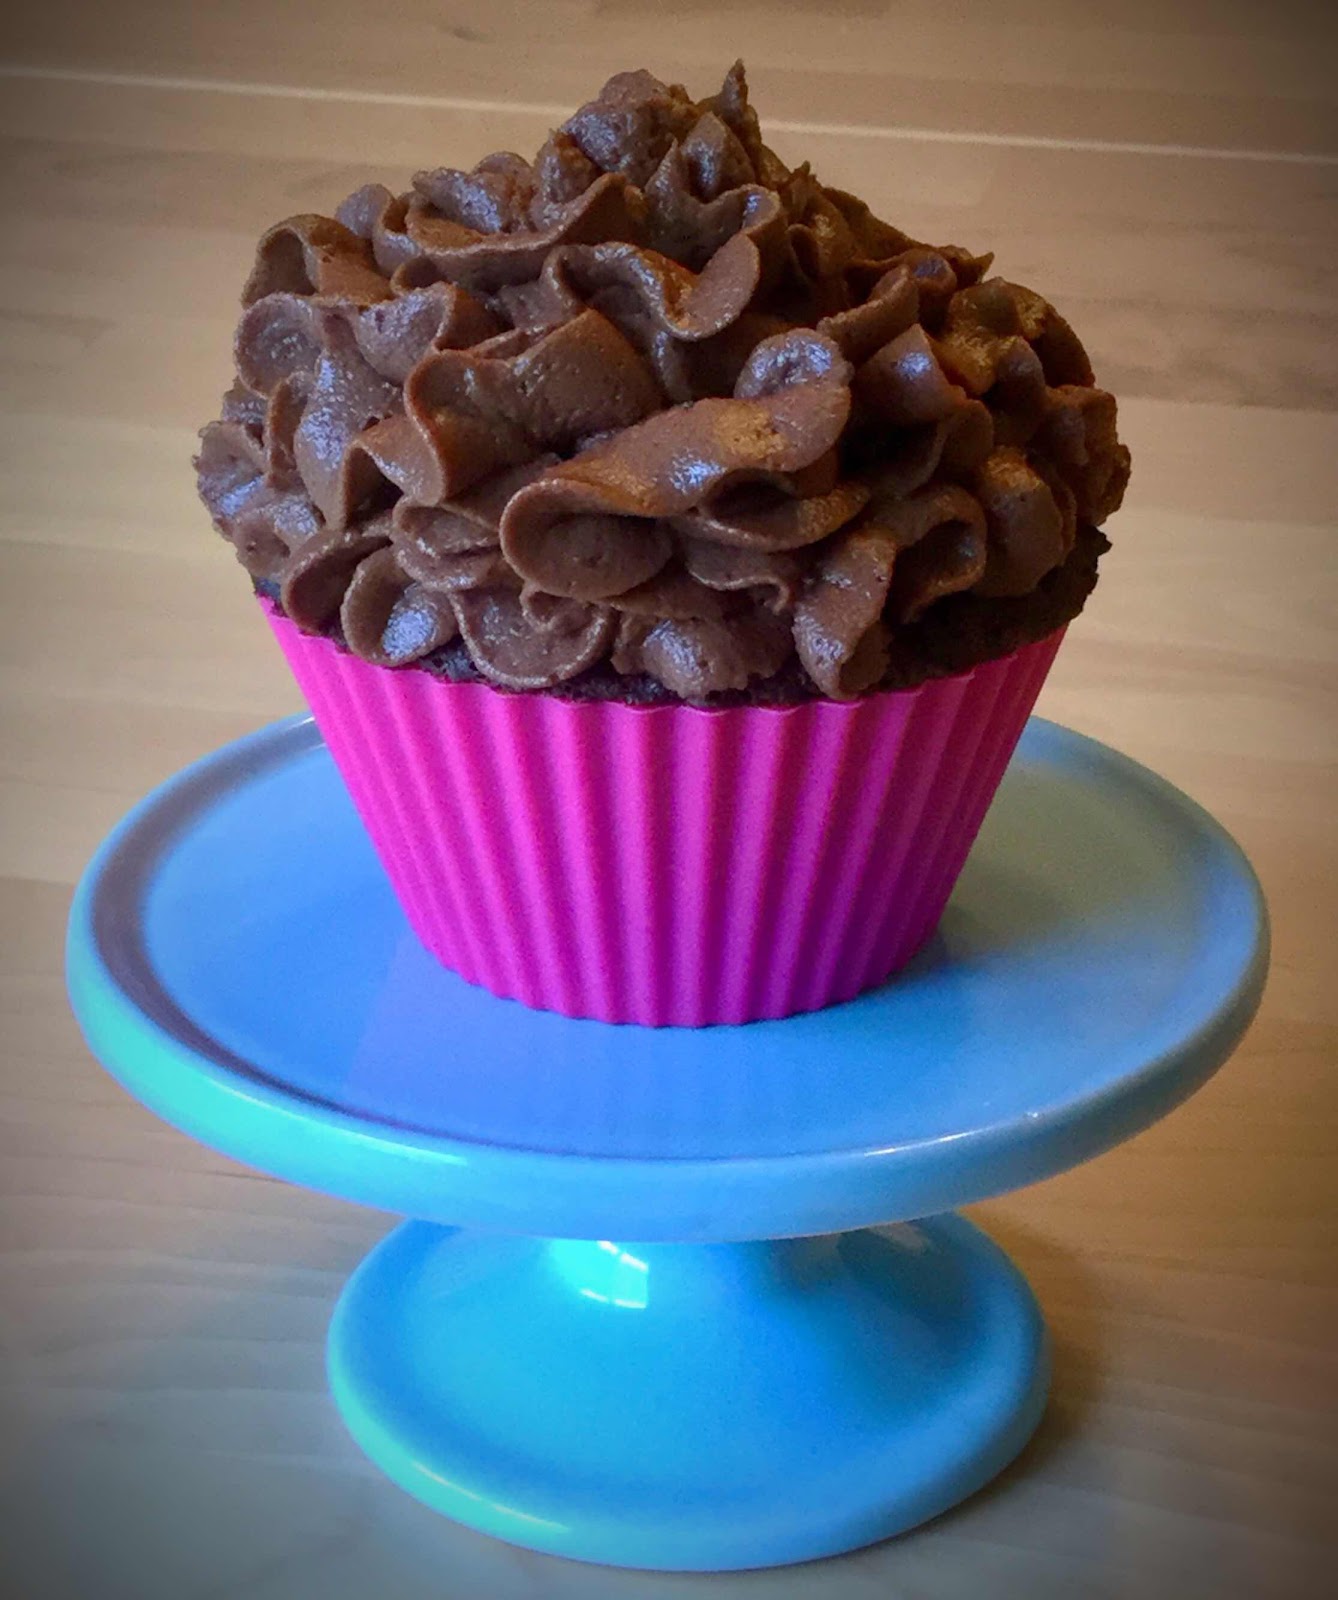
Here’s another quick and easy cupcake recipe that you “bake” in the microwave for 40 seconds! This recipe is a favorite of my chocolate-loving husband. He freely admits that these cupcakes are as rich, decadent and fudgy as a traditional cupcake. He doesn’t miss the sugar at all and neither will you! This recipe yields three cupcakes, so it’s perfect when you want to satisfy a chocolate craving, but don’t want too many extras hanging around to tempt you.

40 Second Keto Dark Chocolate Cupcakes
Makes 3 cupcakes

Cupcakes:
2 tablespoons almond or pecan flour
2 teaspoons coconut flour
1 tablespoon unsweetened dark cocoa powder 
1/4 teaspoon instant coffee powder (optional, but enhances chocolate flavor)
1-1/2 tablespoons granulated erythritol sweetener 
A pinch of salt
1/2 teaspoon baking powder
1 tablespoon butter, melted
1 large egg
5 drops dark chocolate stevia or monkfruit extract, or to taste
1/4 teaspoon vanilla extract
1 tablespoon unsweetened almond or coconut milk (or strong brewed coffee for a mocha flavor)

Dark Chocolate Frosting:
1 oz. unsweetened baker’s chocolate, chopped
3/4 teaspoon refined coconut oil
1 tablespoon unsalted butter, room temperature 
2 oz. cream cheese, room temperature 
4 oz. mascarpone cheese, room temperature 
1/3 cup powdered erythritol sweetener 
1 tablespoon unsweetened cocoa powder 
1/4 teaspoon vanilla extract
1-2 tablespoons heavy cream (or as needed to reach the desired consistency)

1. In a small bowl, combine the almond or pecan flour, coconut flour, cocoa powder, instant coffee powder, granulated sweetener, salt and baking powder. Whisk to combine and remove any lumps.

2. Add the melted butter, egg, stevia or monkfruit drops, vanilla extract and milk or coffee; whisk until well combined.

3. Evenly divide the batter between three silicone muffin cups and microwave on high for 40 seconds or until the cakes have risen, look dry and spring back when touched near the center. (The time needed for cooking may vary, depending on the wattage of your microwave.) Alternatively, you can bake them in a 325 degree Fahrenheit oven for 15-18 minutes. Move to a wire rack and cool completely.

4. To make the frosting, in a medium, microwave-safe bowl, combine the chopped baker’s chocolate and coconut oil. Microwave on high in 15 second intervals to melt the chocolate. Let it sit for a minute or two and then stir until smooth. (If you would prefer, you can melt the chocolate and coconut oil in a heat proof bowl over barely simmering water.) Set melted chocolate aside to cool to lukewarm. 

5. In a large bowl, using an electric mixer, whip the butter, cream cheese and mascarpone cheese together until smooth. Beat in the powdered sweetener and cocoa powder, scraping the sides of the bowl as needed.

6. Add the melted chocolate and vanilla extract and beat until combined. Add the heavy cream, one tablespoon at a time, until a spreadable consistency is achieved. (Note: This icing recipe makes enough to frost 6 cupcakes, so more than you will need. Store any leftovers in an airtight container in the refrigerator for up to a week.)

Microwave Keto Dark Chocolate Cupcake
Nutritional Information per one cupcake with 3 Tbsp frosting: 234 calories, 6.5 g carbohydrate (2.2 g dietary fiber, 0.7 g sugars, 2.1 g sugar alcohols), 21.5 g total fat (12.1 g saturated fat, 0 g trans fat), 102 mg cholesterol, 127 mg sodium, 93.8 mg calcium, 95 mg potassium, 1 mg iron, 106 ug Vit A, 5.9 g protein. Net carbs per serving: 4.3 grams

Photos and recipe by Kathy Sheehan, copyright 2020
All rights reserved. Please do not duplicate without the author’s permission. 
Friday, July 17, 2020

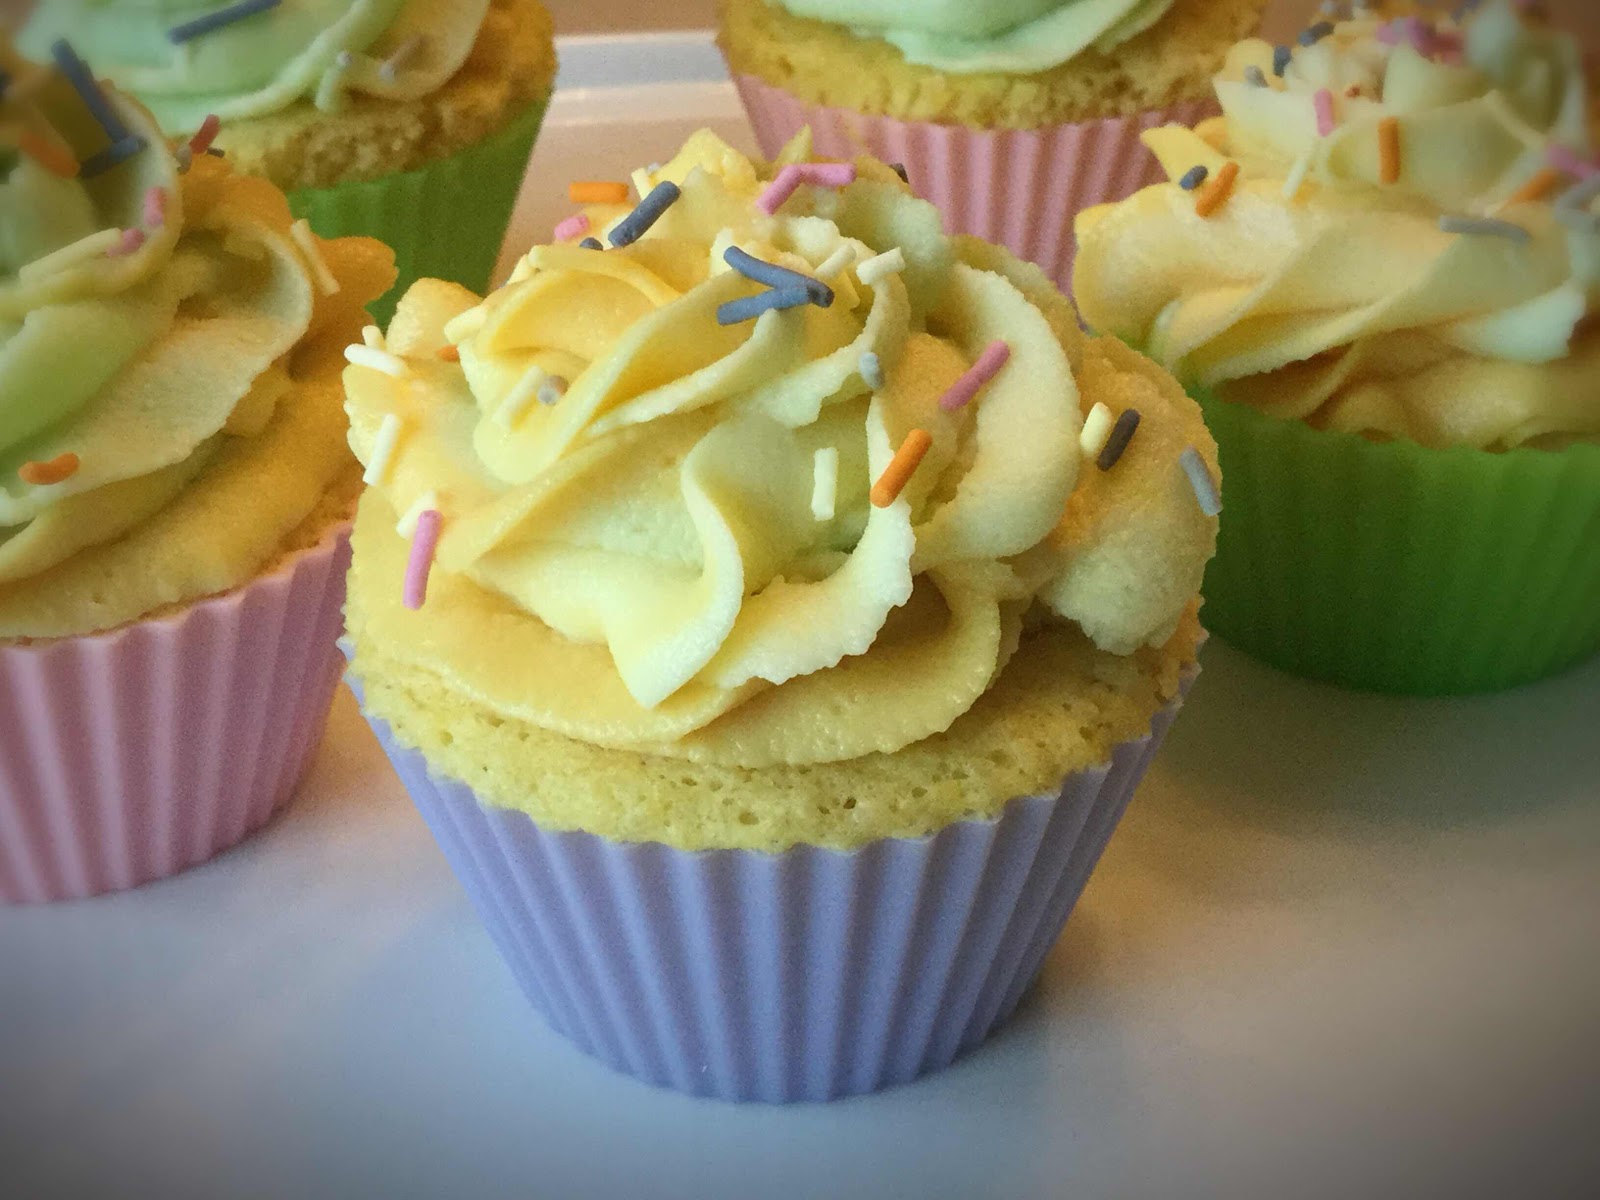
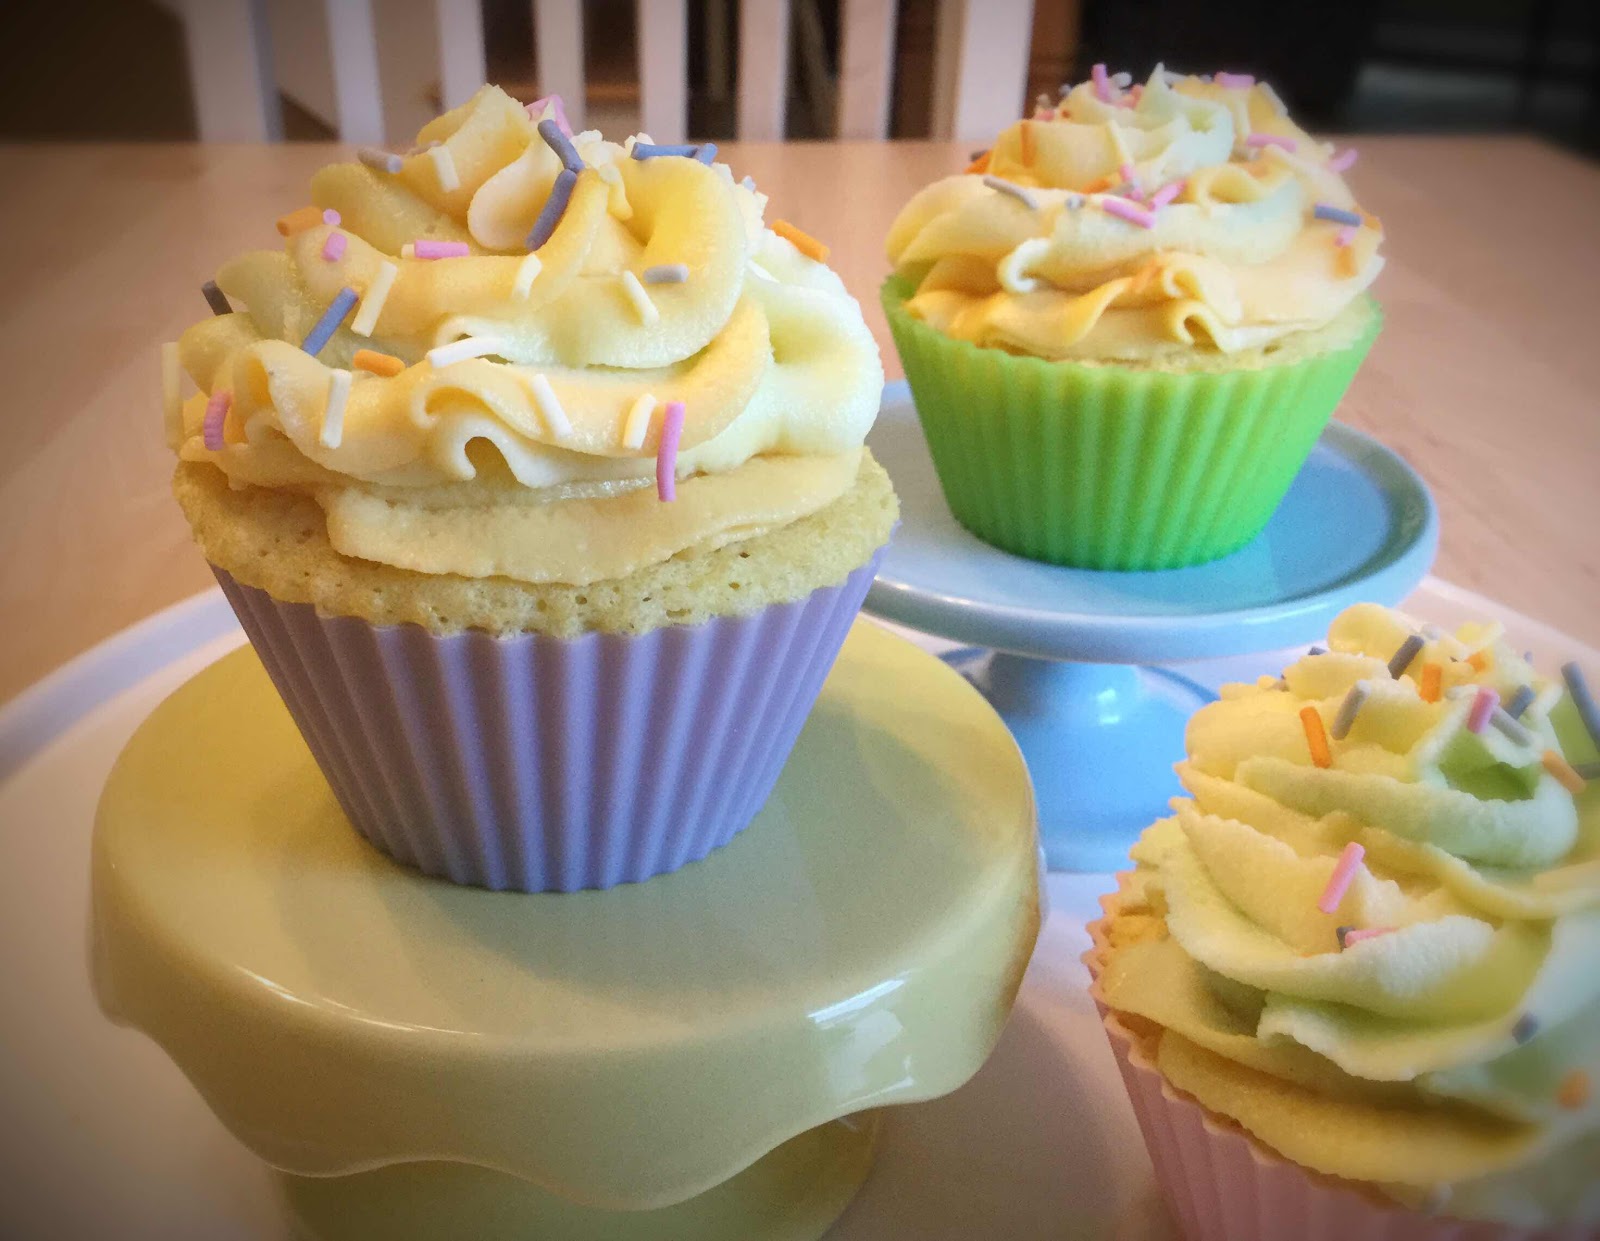
40 Second Keto Lemon Cupcakes

40 Second Keto Lemon Cupcakes
You don’t have to wait for a special occasion or dirty the entire kitchen to enjoy a few cupcakes! These light and delicious cupcakes bake in the microwave in about 40 seconds. Normally, I don’t think about the microwave when I want to bake a cake, but I have found that keto mug cakes made in a microwave rise beautifully and have a light, tender crumb. Just be sure you don’t overcook them or they can become tough. Silicone cupcake liners are microwave-safe, come in a variety of fun colors, are non-stick and hold their shape during cooking, so that’s what I use. (You can use paper liners, but you’ll need to support them in a microwave-safe cup so the cupcakes retain their shape during the cooking process. If you decide to use paper liners, make sure there is no metal in the liner or its printed design.) This quick recipe makes only three cupcakes, which is just enough to share with one or two friends. There’s no reason not to have a little party tonight!

40 Second Keto Lemon Cupcakes
Makes 3 cupcakes

Cupcake Ingredients:
1/4 cup almond flour
2 teaspoons coconut flour
1 tablespoon granulated erythritol sweetener
1/2 teaspoon baking powder
A pinch of salt
1 large egg
1 teaspoon lemon juice (or almond milk)
1/2 teaspoon lemon zest (or 1-2 drops of food grade lemon essential oil)
1/2 teaspoon vanilla extract
5 drops monkfruit extract (or liquid stevia)
1 teaspoon melted butter or ghee

Lemon Cream Frosting:
2 ounces cream cheese, room temperature 
2 tablespoons unsalted butter, softened
4 ounces plain mascarpone cheese, room temperature
1/4 cup powdered erythritol sweetener 
1 teaspoon vanilla extract
1/4 to 1/2 teaspoon lemon extract, to taste
1-2 tablespoons heavy cream

Sugar free sprinkles (optional)

1. In a small bowl, combine the first five dry ingredients (almond flour through salt) with a fork until thoroughly mixed; set aside.

2. In a separate bowl, whisk together the egg, lemon juice or almond milk, lemon zest, vanilla extract, monkfruit extract or stevia and melted butter.

3. Add the dry ingredients to the wet ingredients and whisk until just combined. Divide the batter equally among three silicone cupcake liners (or small greased ramekins). Microwave on high for 35-40 seconds or until the cakes have risen, look dry and the tops spring back when lightly touched in the center. Do not overcook! (Note: Cooking time may vary depending on the wattage of your microwave. Instructions for baking in the oven are provided below.*) Remove the cupcakes from the microwave and cool on a wire rack completely while you make the frosting.

4. To make the frosting: Whip together the room temperature cream cheese, butter and mascarpone cheese with an electric mixer until light and fluffy. Add the powdered sweetener, extracts and beat until combined. Add the heavy cream, one tablespoon at a time, until your frosting reaches the desired consistency. Taste and adjust sweetness to your liking. If desired, spoon the frosting into a piping bag with a decorating tip and frost your cupcakes or spread about 3 tablespoons of frosting onto each cupcake.

5. This frosting recipe yields more than you will need for 3 cupcakes, which allows for dividing into batches and coloring each differently using gel food colors (as shown). Store any leftover frosting in an airtight container in the refrigerator and save for another use. It will keep well for 4-5 days. Bring to room temperature and rewhip if needed to restore spreading consistency. 

*To bake the cupcakes in the oven, bake in a preheated 325 degree F oven for 16-18 minutes or until a toothpick comes out clean when tested and the tops spring back when lightly touched near the center.

40 Second Keto Cupcakes
Nutritional Information per 1 cupcake with 3 TB frosting: 210 calories, 5 g total carbohydrates (1 g dietary fiber, 0.4 g sugars, 2.7 g sugar alcohols), 20.3 g total fat (.8 g saturated fat, 0 g trans fat), 77 mg cholesterol, 278 mg sodium, 217.8 mg calcium, 19 mg potassium, 97 ug Vit A, 2 mg Vit C, 3.6 g protein. Net carbs per serving: 2 grams

Recipe and photos by Kathy Sheehan, copyright 2020
All rights reserved. Please do not duplicate without the author’s permission.

Wednesday, January 31, 2018

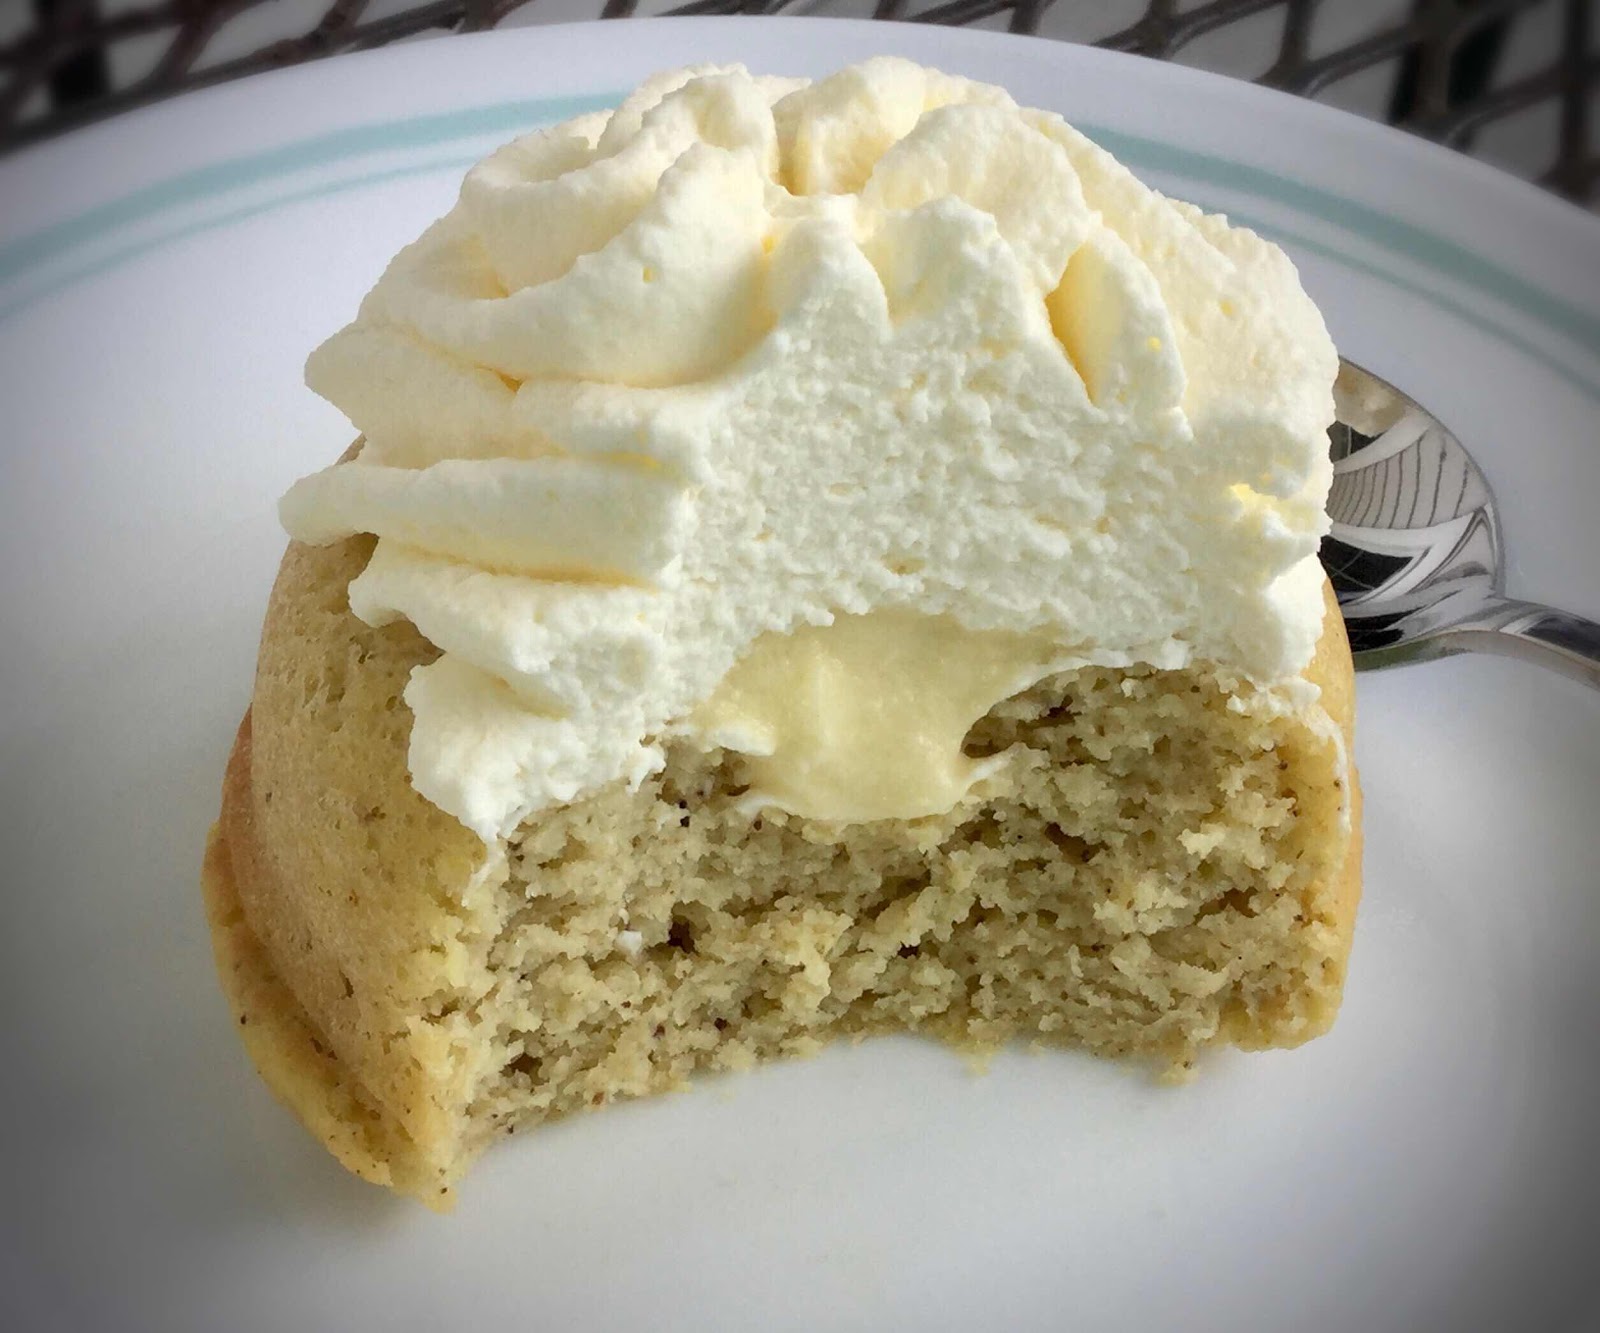
Frosted Vanilla Custard Donuts (Low Carb, Gluten Free)

Frosted Vanilla Custard Donuts
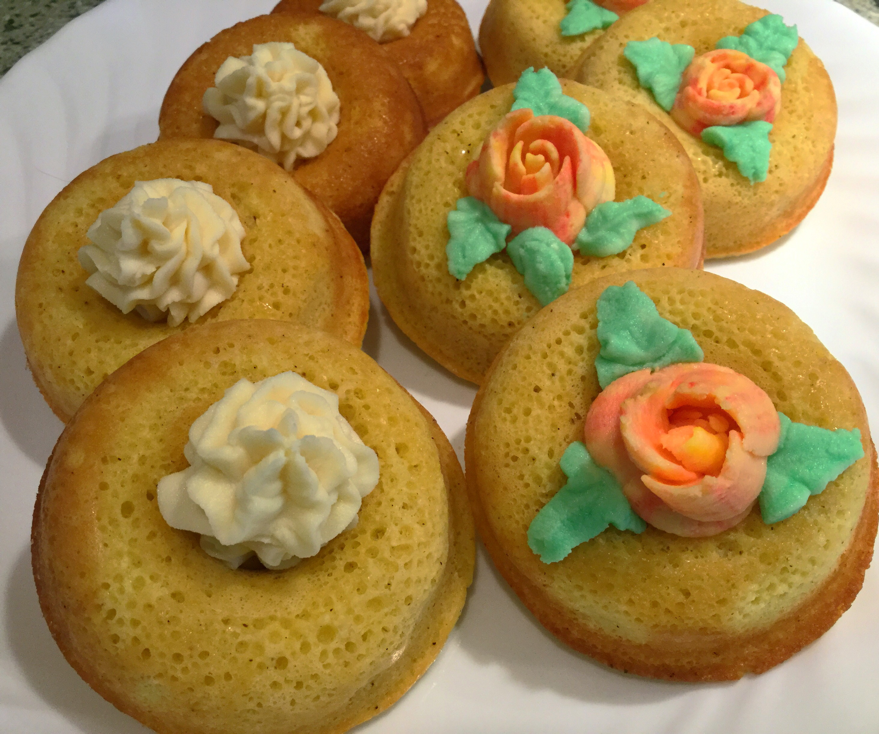
Vanilla custard is traditionally made with plenty of egg yolks, which are what make these donuts so rich and delicious. The batter rises up light and airy, so they have a tender crumb. If desired, this recipe would make wonderful cupcakes, but I like using my donut pan and filling each cavity high enough with batter that the hole of the donut disappears as it bakes, creating the perfect little platform for holding the dab of frosting. I just happen to have some decorating icing tips in my kitchen collection, so I had fun making them fancy and appropriate for Valentine’s Day, but that’s not necessary. Anyway you decorate them, these donuts will be both beautiful and delicious!

Frosted Vanilla Custard Donuts
Makes 8 donuts (more or less depending on your donut pan)

1 cup almond flour
1/4 cup erythritol sweetener, granulated
2 tablespoons unflavored whey protein powder
1 teaspoon baking powder
1/4 teaspoon vanilla powder (or seeds scraped from a vanilla bean)
1/8 teaspoon salt
1 large egg
2 egg yolks
1/4 cup heavy cream
1/4 cup almond or coconut milk
2 tablespoons butter, melted
1/2 teaspoon vanilla extract 

Frosting:
2 ounces cream cheese, room temperature
1 tablespoon butter, softened
4 ounces plain mascarpone cheese, room temperature
1/4 cup powdered erythritol (Confectioners), or to taste
1 teaspoon vanilla extract
2 tablespoons heavy cream

1. Preheat oven to 325 degrees F. Spray each cavity of your donut tin with non-stick cooking spray or grease with butter; set aside.

2. In a large bowl, whisk or sift together the almond flour, erythritol, whey protein powder, baking powder, vanilla powder and salt. Whisk to combine and until no lumps remain.

3. In a separate bowl, whisk together the egg, egg yolks, cream, almond milk, melted butter and vanilla extract. Add the wet ingredients to the dry ingredients and whisk well to combine. 

4. Fill each donut cavity to almost full. Be sure to fill each cavity until almost to the top because you want the donuts to puff up and fill in the hole as they bake, so there’s a place in the center of the donut to hold the frosting later. (see photo below) Bake for 14-16 minutes or until the edges are golden brown and the tops are just firm to the touch. Remove from the oven and let the donuts cool 10 minutes in the pan, then flip them onto a wire rack to cool completely.

Baked donut with center depression
5. To make the frosting: Whip together the room temperature cream cheese, butter and mascarpone cheese until fluffy using a handheld or standing electric mixer. Add the powdered erythritol and vanilla and beat until combined. Add the heavy cream 1 tablespoon at a time until the desired spreading consistency is reached. Taste and adjust sweetness to your taste. If desired, put the frosting into a piping bag with a decorator tip and pipe (or spoon) a tablespoon or so of the frosting into the center of each donut. (Note: This recipe for frosting will yield more than you need for eight donuts, which allows for dividing the frosting into batches and coloring each differently, if desired. Save any leftover frosting in an airtight container in the refrigerator to use for another recipe.)

Frosted Vanilla Custard Donuts
Nutritional Information per donut with 1 tablespoon of frosting (based on eight per recipe): 230 calories, 8.6 g carbohydrate (1.5 g dietary fiber, 0.8 g sugars, 13.5 g sugar alcohols), 21.7 g total fat (9.2 g saturated fat, 0 g trans fat), 114 mg cholesterol, 139 mg sodium, 102 mg calcium, 130 mg potassium, 1 mg iron, 431 mg Vit A, 6.1 g protein. Net carbs per serving: 7.1 grams.

Recipe and photos by Kathy Sheehan, copyright 2018
All rights reserved.  Please do not duplicate without the author’s permission. 

Saturday, July 23, 2016

Coco-Mocha Mug Cake


I just returned from vacation and I'm not quite ready to stop being on vacation! This afternoon, to extend the fun experience, I made this marvelous Keto Mug Cake and ate the whole thing for my lunch. It's grain-free, sugar free and easily can be made dairy free (by substituting ghee for the butter), but it's far from flavor free! The combination of coconut, coffee and chocolate is so delicious. Since Mug Cakes are "baked" in the microwave and can be whipped up in a matter of minutes, I can be spontaneous and carefree about having one. This tender cake is similar to a sweet indulgence I was tempted to have while on vacation, but without all the gluten, sugar, carbs or guilt! Mmmm...this was a great way reward myself for having made healthy choices on my trip and to welcome myself back home.

Coco-Mocha Mug Cake
Makes 2 servings

1-1/2 tablespoons butter, melted (or ghee for dairy free)
2 tablespoons almond flour/meal
2 teaspoons coconut flour
1 tablespoon unsweetened cocoa powder
1/2 teaspoon instant coffee (or substitute 1 tablespoon strong brewed coffee and omit the coconut milk)
2 teaspoons LaKanto Monkfruit sweetener (or other erythritol sweetener)
1/4 teaspoon stevia powder (I used Sweet Leaf brand)
A pinch of salt
1 tablespoon unsweetened shredded coconut
1/2 teaspoon baking powder
1 large egg
5 drops dark chocolate stevia or regular (I used NOW Better Stevia brand)
1 tablespoon coconut milk

Optional toppings (pictured): shaved or chopped dark chocolate (70% or higher), toasted unsweetened shredded coconut or flakes. (Optional toppings are not included in nutritional information.)

1. Prepare your mug by melting the butter or ghee in it (microwave for 15 seconds or so); set aside to cool slightly while you prepare the batter.

2. In a small mixing bowl, combine the almond meal, coconut flour, cocoa powder, instant coffee (if using), sweeteners, salt, shredded coconut, and baking powder until well mixed.  Add the melted butter, egg, stevia drops and coconut milk.  With a fork or whisk, stir until well combined.

3. With a paper towel, coat the inside of your mug with any melted butter still remaining in the mug. Pour in batter and microwave for about 45 seconds until cake is done and springs back when touched near the center. (The time needed for cooking may vary, depending on the mug you use and the wattage of your microwave. It's best to begin with 45 seconds and, if more cooking is needed, microwave in 10 second intervals until done.)

4. Allow to cool in the mug for at least 1 minute, then invert cake onto a serving dish and cool for an additional few minutes until warm, but not too hot.  Sprinkle with optional toppings, if desired. Serve immediately. Store any leftovers in an airtight container at room temperature and eat within 1 day. This recipe makes 2 servings.

Nutritional Information per serving (1/2 recipe without optional toppings): 191 calories, 7.4 g carbohydrate (2.6 g dietary fiber, 0.8 g sugars, 4 g sugar alcohol), 17.5 g total fat (8.9 g saturated fat, 0 g trans fat), 116 mg cholesterol, 172 mg sodium, 120 mg calcium, 137 mg potassium, 5.8 g protein. Net carbs per serving: 4.8 grams

Recipe by Kathy Sheehan, copyright 2016.
All rights reserved. Do not reprint without author's permission.
Saturday, March 20, 2010

Mini Peanut Butter Cupcakes with Chocolate Frosting

Recently I taught a cooking class entitled "How to Love Vegetables." We made main dish salads, vegetable snacks and nutritious side dishes but, just to prove how versatile vegetables can be, we also made these delicious miniature cupcakes that include grated zucchini in the batter. The amazing thing is, when peeled of its green skin, the zucchini is undetectable in the final result! The creamy, nutty peanut butter and sweet chocolate are the only flavors you'll taste. If you like Reese's Peanut Butter Cups, then you'll love these little 4-bite wonders at only 5 net carbs each. They are quick to make and fun to eat. What an ingenious way to sneak a little vegetable into a picky eater's diet!

Mini PB Cupcakes with Chocolate Frosting
(Makes 18 mini cupcakes)

½ cup of all-purpose flour
½ cup almond flour (or finely ground almonds)
1 teaspoon baking powder
1/2 teaspoon baking soda
1/8 teaspoon salt
1 large egg
3 tablespoons creamy peanut butter
½ cup Splenda granular (not the baking blend)
2 tablespoons canola oil
1 teaspoon vanilla extract
½ cup peeled zucchini, finely grated (make sure it is finely grated)
1/3 cup almond milk or skim milk

Chocolate frosting ingredients:
1 tablespoon cocoa powder (I used Hershey’s Special Dark)
1/3 cup almond milk
¼ cup mascarpone cheese (in the specialty cheese display at the grocery)
1½ tablespoons Splenda granular
1 tablespoon sugar-free, fat-free chocolate pudding mix

1. Preheat oven to 350-degrees. Arrange a rack in center of oven. Line muffin tin with paper liners. This recipe makes 18 mini cupcakes.

2. In a small bowl, whisk together the flour, almond flour, baking powder, baking soda and salt; set aside. In a large bowl, beat the egg until light and lemon colored using a handheld or standing mixer. Add the peanut butter, Splenda, canola oil and vanilla. Continue beating on medium-high speed for about 2-3 minutes. (Don't underbeat this step, you need to fluff up the egg mixture with air.) Beat in the grated zucchini on low speed until fully incorporated.

3. Alternate adding the dry ingredients with the milk and beat after each addition, scraping down the bowl occasionally with a rubber spatula. Use a small cookie scoop, spoon batter into the muffin cups until ¾ full (do not overfill).

4. Bake until a toothpick inserted into the center comes out clean. Test after 12 minutes and, if needed, bake another 1 to 2 minutes. The tops will only be slightly browned. Do not overbake because you don't want them to dry out.

5. Remove cupcakes to wire rack and cool completely before icing. To make frosting: Mix together the cocoa powder and almond milk and heat in the microwave for 20 seconds on high. Whisk until cocoa is incorporated and mixture is smooth. Set aside to cool, about 10-15 minutes. Add the mascarpone cheese and Splenda. With a handheld mixer, beat until light and fluffy (it should resemble a soft whipped cream). Add the dry powder from the pudding mix and beat until thickened. Refrigerate for at least 5 minutes until thickened and set. Stir before icing cupcakes.

Nutritional Information per cupcake with 2 generous teaspoons of frosting: 86.1 calories, 5.7 g carbohydrates, 6 g total fat, 1.3 g saturated fat, 0.8 g fiber, 2.4 g protein.

Original recipe by Kathy Sheehan, copyright 2009

Saturday, March 6, 2010

Mocha Cupcakes with Bailey's Irish Cream Frosting

Next weekend, our church is hosting a St. Patrick's Day dinner and I was asked to adapt a dessert recipe that would be appropriate for diabetics and others looking for a healthier alternative. The original recipe was loaded with saturated fat and carbohydrate, so some serious adjustments needed to be made. It was a fun challenge that required several delicious "taste testings" before a perfected recipe was finally obtained. If you can't find any instant espresso powder (which may not be a common ingredient found at the supermarket), you can substitute instant coffee granules and increase amount by ½ tablespoon. Also, if you want the Bailey's Irish Cream taste to really come through, eliminate the final dusting of espresso powder.

Now, the moment you've been waiting for (drum roll, please)...I am happy to present the following winning makeover recipe with only 11.3 net carbs per serving. Happy St. Patrick's Day!

Mocha Cupcakes with Bailey's Irish Cream Frosting
(Makes 15 cupcakes)

1/3 cup boiling water
2 tablespoons instant espresso powder (regular or decaf)
¼ cup almond milk
1¼ cups almond flour (or finely ground almonds)
¾ cup all-purpose flour
1 teaspoon baking powder
½ teaspoon baking soda
¼ teaspoon salt
5 tablespoons unsalted butter, softened
1½ tablespoons canola oil
One 2.5 oz. container of baby food prune puree (about 3 tablespoons)
2 tablespoons sugar
1 cup Splenda granular
½ teaspoon butter flavor extract
2 large eggs (room temperature)

Frosting Ingredients:
½ cup mascarpone cheese (4 oz.)
1/3 cup almond milk
1½ tablespoons Bailey's Irish Cream
1 tablespoon Splenda granular
2 tablespoons sugar-free, fat-free instant white chocolate pudding mix (dry powder)
dust with espresso powder

1. Preheat oven to 350-degrees. Pour boiling water over espresso powder and stir until dissolved. Combine espresso mixture with almond milk and let cool. Meanwhile, line muffin tin with paper liners; set aside. In a small mixing bowl, sift together the flours, baking powder, baking soda and salt; set aside.

2. In a large mixing bowl, cream together the butter, canola oil, sugar, Splenda, butter extract and prune puree until light and fluffy, about 3 minutes. Add eggs one at a time, beating well after each addition. Alternate adding the dry ingredients with the espresso and milk mixture, beginning and ending with flour mixture. Scrape down sides of bowl occasionally. Fill muffin cups ¾ full (do not overfill) and bake for 18-20 minutes until a toothpick inserted in center of cupcake comes out clean. Remove from oven and allow cupcakes to cool in pan for a few minutes, and then remove them to a wire rack to cool completely.

3. After cupcakes have cooled, make the frosting by combining mascarpone cheese, almond milk, Bailey's Irish Cream and Splenda in a mixing bowl. Beat well until mixture thickens to soft peaks. Add 2 tablespoons instant pudding mix and continue beating until well incorporated and thickened. Refrigerate frosting for at least 10 minutes. Spread 1½ tablespoons onto each cupcake and dust with espresso powder. Serve immediately or refrigerate until 15-20 minutes prior to serving.

Nutritional Information per cupcake with frosting: 190.7 calories, 12.6 g carbohydrate, 14 g total fat, 4.9 g saturated fat, 1.3 g fiber, 4.1 g protein.

Make over recipe by Kathy Sheehan, copyright 2010
The original recipe is one that appeared in Martha Living Magazine's March 2010 issue, p. 48.

How does this compare with the original recipe? This makeover recipe is much lower in saturated fat, calories and carbohydrates, plus it has more fiber and protein. For comparison, the nutritional information per cupcake made from the original recipe is 232.6 calories, 27 g carbohydrate, 12.2 g total fat, 7.5 g saturated fat, 0.4 g fiber, 2.6 g protein.

Saturday, February 13, 2010

Cream-Filled Triple Chocolate Cupcakes

Nothing says love like chocolate, at least that's my husband's motto. For Valentine's Day, I always make him a special dessert which must include chocolate in some form. This year, I went all the way! These dark chocolate devil's food cakes are filled with a delicious chocolate cream and topped with velvety, rich chocolate ganache. Ganache is typically a mixture of melted chocolate and heavy cream but, to lower the saturated fat, I used almond milk in place of the cream (or substitute skim milk, if you prefer.) Traditional devil's food cake recipes call for 4 ounces of sweet baker's chocolate, which is loaded with 6 to 9 grams of saturated fat per ounce! Instead, I used a combination of 1 ounce of baker's chocolate and ½ cup cocoa powder, which reduced the saturated fat by two-thirds. For extra dark chocolate cake, the way my husband likes it, try using Hershey's Special Dark cocoa powder which has zero saturated fat, but provides loads of dark chocolate flavor.

The really fun surprise of this recipe is the cream filling INSIDE the cakes! It's easy to do with a pastry bag and a round cake decorating tip. Don't worry if you don't have one because you can still make these chocolate marvels by cutting an inverted cone out of the top, spoon the filling in and replacing the cake on top. It will resemble a "top hat" and taste just as delicious! Have a happy, chocolate Valentine's Day!

Cream-Filled Triple Chocolate Cupcakes
(Makes 16 servings)

Cake Ingredients:
¾ cup almond milk
1 oz. unsweetened or bittersweet baking chocolate (1 square), chopped
1¼ cups almond flour (or finely ground almonds)
¾ cup all purpose flour
½ cup cocoa powder (I used Hershey’s Special Dark)
1 teaspoon baking soda
1½ teaspoon baking powder
¼ teaspoon salt
2 large eggs + 1 egg white
¾ teaspoon instant coffee granules (decaf or regular)
¼ cup sugar
5 tablespoons canola oil
One 2.5 oz. container of baby food prune puree (about 3 tablespoons)
1 cup Splenda granular
1½ teaspoons vanilla extract

Chocolate Filling Ingredients:
1½ tablespoons cocoa powder
½ cup almond milk (original or unsweetened)
½ cup mascarpone cheese
3½ tablespoons Splenda granular
1 teaspoon vanilla extract
2 tablespoons fat-free, sugar-free chocolate instant pudding mix (dry powder)

Chocolate Ganache Topping Ingredients:
1/3 cup almond milk
½ cup semi-sweet chocolate morsels

1. Preheat oven to 350-degrees. Prepare muffin tin by placing a paper liner in each cup or spray with non-stick cooking spray; set aside. In a small saucepan, heat ¾ cup almond milk over medium-low heat to scalding or microwave on high for 60-90 seconds. Remove from heat and add the roughly chopped unsweetened baking chocolate square and instant coffee granules; stir until melted and smooth.

2. In a small mixing bowl, sift together the flours, ½ cup cocoa powder, baking soda, baking powder and salt; set aside. In a large mixing bowl and using a handheld or standing mixer, beat the eggs and egg white until light in color and increased in volume. Add sugar and continue beating until well combined. Slowly add the canola oil and beat on high for 1 minute. Add the prune puree, Splenda and vanilla extract. Beat until well incorporated, stopping to scrape down sides of bowl at least once. Alternate adding the dry ingredients ½ cup at a time and the hot milk and chocolate mixture until well combined, scraping down sides of bowl occasionally.

3. Spoon into prepared muffin cups only until 2/3 full (do not overfill). Bake for 15-18 minutes or until toothpick inserted in center comes out clean. Remove from oven and cool in pan for 4 minutes. Remove a wire rack and cool cakes completely before filling.

4. Meanwhile make cream filling by first melting the 1½ tablespoons cocoa powder in almond milk over low heat or in the microwave for about 45-60 seconds on high. Stir to incorporate cocoa into milk. Set aside until cooled to room temperature. (If desired, place in refrigerator to hasten cooling.) Place mascarpone cheese in a large mixing bowl and add cooled almond milk mixture. Beat with a handheld or standing mixer on high until well combined and mixture is light and fluffy (it will resemble whipped cream). Add Splenda, extract and continue to beat until incorporated. Add the 2 tablespoons of chocolate instant pudding powder and beat well. Place in refrigerator for at least 10 minutes to set. Stir before filling cupcakes.

5. To make chocolate ganache icing, heat milk in microwave for 45-60 seconds on high (or heat in a small saucepan over medium-low heat until beginning to boil). Add chocolate morsels and allow to sit for 2-3 minutes. Stir until chocolate is melted and mixture is smooth; set aside to cool. Mixture will thicken as it cools. To hasten cooling, refrigerate for 10-15 minutes until the consistency of very thick cream, stirring occasionally.

6. When cupcakes are completely cooled, fill a pastry bag with chocolate cream and fix a round decorating tip onto the end of the bag. Insert tip into the top of each cupcake and squeeze about 1 tablespoon of filling into each cake. (If you do not have any cake decorating tips, remove a cone of cake from the top of the cupcake with a small, serrated knife. Fill hole with 1 tablespoon of filling and replace cake on top. The cake will stick up and resemble a top hat.) Dip cupcakes to coat top or drizzle 2 teaspoons of chocolate ganache icing over the top of each cupcake. Allow chocolate ganache to cool and set. If there is any leftover chocolate cream filling, you may decorate the top of each cupcake with additional chocolate cream before serving. Store in refrigerator, but allow to sit at room temperature for 15 minutes before serving.

Nutritional Information per cupcake with chocolate cream filling and ganache topping: 234.6 calories, 21.5 g carbohydrate, 15.9 g total fat, 4.1 g saturated fat, 2.7 g fiber, 5.3 g protein.

Nutritional Information per cupcake with only chocolate cream filling (no ganache topping): 198 calories, 16.4 g carbohydrate, 13.8 g total fat, 3 g saturated fat, 2.7 g fiber, 5 g protein.

Nutritional Information per 1 tablespoon chocolate cream (recipe makes about 20 tablespoons): 31.6 calories, 1.5 g carbohydrate, 2.5 g total fat, 1.4 g saturated fat, 0.2 g fiber, 0.6 g protein.

Original recipe by Kathy Sheehan, copyright 2010

Tuesday, December 29, 2009

Spice Cupcakes with Peanut Butter Frosting

This seems to be the month for making over favorite family recipes. One of my husband's very favorite desserts is a spice cake with penuche-peanut butter frosting lovingly made famous by his Aunt Margie. The cake alone is wonderful and spicy but when topped with penuche, a southern recipe of brown sugar fudge in which Aunt Margie adds a few tablespoons of peanut butter, this cake becomes nothing less than a slice of heaven! To try and reproduce this well-loved recipe in a low-carb version that could pass my husband's taste test was a huge challenge.

To begin with, cake frosting is difficult to make low-carb because it is mostly sugar and butter whipped together. To make a frosting that could stand in for a brown sugar-peanut butter fudge was nearly impossible! My main focus in this makeover recipe was to create a very spicy cake that could stand up to the bold flavor of peanut butter without being overpowered by it. The addition of a single tablespoon of cocoa powder in the batter created a depth of flavor that really made the cake something special. The peanut butter and cream cheese frosting with a hint of molasses really gives this cupcake the unique taste of the traditional recipe. My husband and daughter both loved them...and I think Aunt Margie would be pleased, too!

Spice Cupcakes with Peanut Butter Frosting
(Makes 14 cupcakes)

1 cup almond flour (or finely ground almonds)
½ cup all-purpose flour
1 teaspoon baking powder
¼ teaspoon salt
1 tablespoon unsweetened cocoa powder
2 teaspoons ground cinnamon
1½ teaspoons ground ginger
½ teaspoon nutmeg
¼ teaspoon ground cloves
¼ cup packed dark brown sugar
1 tablespoon honey (or agave nectar can be substituted)
¾ cup Splenda granular (not baking blend)
½ cup canola or vegetable oil
1/3 cup unsweetened applesauce (or “no sugar added” apple butter)
2 eggs
1 teaspoon vanilla extract
½ teaspoon butter flavor extract

Frosting Ingredients:
½ cup creamy peanut butter
¼ cup light cream cheese
2 teaspoons molasses
¼ cup Splenda granular
¼ cup dry milk powder
2-3 tablespoons milk

1. Preheat oven to 350-degrees. Line a muffin pan with paper cupcake liners; set aside. In a medium mixing bowl, combine the flours, baking powder, salt, cocoa powder, and spices. Stir with a fork to break up any lumps in the almond flour; set aside.

2. In a large mixing bowl, beat the eggs with a handheld or standing mixer until light and lemon colored. Add the brown sugar, honey, Splenda, oil, applesauce, vanilla and butter flavor and beat for 2 minutes until well combined. Add the dry ingredients and beat only until blended. Using a ¼ cup measure or large cookie scoop, pour batter into prepared muffin tins (do not overfill). Bake for 14-16 minutes or until a toothpick inserted into the center of a cupcake comes out clean. Cool the cupcakes for a few minutes before removing them to a wire rack to cool completely.

3. To make the frosting, beat together the peanut butter and cream cheese until light and fluffy. Add the molasses, Splenda and milk powder and beat until well blended. Add milk, one tablespoon at a time, until a spreading consistency is reached. Spread approximately 2 tablespoons of frosting on each cooled cupcake and serve. If not eating all the cupcakes within a few hours, only ice the number of cupcakes to be eaten. Store remaining frosting in refrigerator and ice cupcakes as needed. Unfrosted cupcakes can be frozen for longer storage and thawed to room temperature when needed.

Nutritional Information per cupcake (no icing): 170 calories, 12.8 g carbohydrate, 12.4 g total fat, 1 g saturated fat, 1.3 g fiber, 3.1 g protein.

Nutritional Information per cupcake with frosting: 246 calories, 17 g carbohydrate, 17 g total fat, 2.6 g saturated fat, 1.9 g fiber, 6.5 g protein.

Recipe by Kathy Sheehan, copyright 2009
Inspired by a recipe by Margie Fitzpatrick of Tulsa, OK.

How does this compare to the traditional cake recipe? Unfortunately, Aunt Margie's delicious cake is no longer a dessert that can fit into my food plan, even on a rare occasion, because the carbs and fat grams are simply too high. For comparison, the nutritional information for one slice of Aunt Margie's cake is 456 calories, 62.3 g carbohydrate, 20.2 g total fat, 5.3 g saturated fat, 0 g fiber, 5.3 g protein.

Tuesday, December 8, 2009

Gingerbread Cakes

When I'm invited to a party and asked to bring a dish, I always bring something I know will fit into my food plan. This weekend, we will be attending the best Christmas party of the season hosted by a couple of our best friends! We look forward to their gathering every year because we know the company of our friends will be wonderful and the atmosphere will be festive. As always, the food will be abundant and delicious as everyone brings something to share. This year, I will be making these moist, spicy gingerbread cakes that weigh in at only 11.2 net carbs each! As for their taste, no one will ever know that they are a diet dessert.

You can certainly bake these in an ordinary muffin pan, as is suggested in the recipe. For an extra special touch, I have in my bakeware collection a mini bundt cupcake pan that takes the same amount of batter as a traditional muffin tin but the end result are adorable little molded cakes! When I present these at the party, it may look as if I've been baking all day, but you and I will know it was as easy as making a cupcake.

Gingerbread Cakes
(Makes 14 servings)

½ cup water (or boiling water)
1/3 cup molasses
½ teaspoon baking soda
½ cup all-purpose flour
1¼ cup almond flour (or finely ground almonds)
1½ teaspoons baking powder
¼ teaspoon salt
1½ teaspoons ground ginger
1 teaspoon ground cinnamon
¼ teaspoon ground cloves
6 tablespoons butter, softened
½ cup Splenda granular (not baking blend)
1 egg
¼ cup ginger ale (not diet)

1. In a 2-cup measuring cup, mix together the water and molasses. Microwave until very hot (if you do not have a microwave, boil the water first). Add baking soda and stir. Mixture will foam and bubble, so be certain your container is at least two cup capacity or it might bubble over. Allow to cool for about 25 minutes. Meanwhile, assemble the rest of the ingredients and bring to room temperature.

2. Preheat oven to 350-degrees. Spray a muffin pan with non-stick cooking spray; set aside. In a small bowl, sift together the flours, baking powder, salt and spices; set aside.

3. In a large mixing bowl, beat the softened butter until fluffy. Add Splenda and beat until creamed with the butter, about 2 minutes. Add egg and beat well. Alternately add the dry ingredients (in ½ cup increments) with the molasses mixture and ginger ale, beginning and ending with the dry ingredients. Beat well after each addition, stopping to scrape down the sides of the bowl occasionally.

4. Measure ¼ cup into each muffin cup (do not overfill) and bake for 18-20 minutes until a toothpick comes out clean. Remove from oven and allow to cool in pan for about 12 minutes. (Cakes will be very delicate while hot. To prevent breakage, do not rush this step and try to remove from pan prematurely.) Carefully turn cakes out onto a wire rack and allow to cool. Allow to cool for another 15 minutes. Can be eaten warm or at room temperature.

Serving suggestion (optional): To serve, top with a tablespoon of unsweetened applesauce with a sprinkle of cinnamon or real whipped cream laced with ginger and cinnamon. To make whipped topping, beat ½ cup of whipping cream, 2 tablespoons Splenda, ¼ teaspoon ground ginger and ¼ teaspoon cinnamon until light and fluffy (do not overbeat). Serving size of whipped topping is 1 rounded teaspoon: 26.5 calories, 1 carbohydrate, 2.5 g total fat, 1 g saturated fat, 0 g fiber, 0 g protein.

Nutritional Information per serving (no topping): 148 calories, 12.5 g carbohydrate, 10.2 g total fat, 3.4 g saturated fat, 1.3 g fiber, 3 g protein

Original recipe by Kathy Sheehan, copyright 2009

How does this recipe compare with traditional homemade gingerbread? Traditional gingerbread usually contains 1 stick or more of butter, 1 cup molasses, an additional ½ to 1 cup sugar, 1-2 eggs and 2½ cups white flour. All that sugar and flour makes even one small piece a carb overload! My recipe has only ½ the calories and 1/3 the amount of carbohydrate, plus it has more than twice the amount of fiber and more protein. For comparison, the nutritional information for the same size piece of traditional gingerbread is 288 calories, 37.4 g carbohydrate, 15 g total fat, 4.6 g saturated fat, 0.6 g fiber, 2 g protein.

Tuesday, September 29, 2009

Mini Boston Cream Pies

Boston Cream Pie is my all-time favorite dessert. Whenever I have a special occasion to celebrate, this is what I want. The morning after my only child was born, my husband brought a slice of Boston Cream Pie to me in the hospital to celebrate. On Christmas Eve, most often this is the crowning touch to our family meal. However, the spike in my BG that invariably would come after even a small slice took a lot of the enjoyment out of this rare treat. It has been a personal quest of mine for the past few years to come up with a lower carb version that doesn't sacrifice on texture and flavor. There have been some down & out failures, some acceptable but less than satisfactory attempts but, finally, I am happy to report that my mission has been accomplished with this recipe! The best part is that these mini cakes are already portioned and can be assembled as needed, so I won't be tempted to sneak an extra generous slice from a whole cake smiling up at me.

Many people wonder why it's called Boston Cream Pie, instead of cake. The history behind that seems to be that Americans in the mid-1800's most often baked their cakes in pie tins because the average homemaker didn't have specialized cake pans, which were not common until much later. This particular recipe came on the scene around 1856, when the Parker Hotel in Boston first served it under the name "Parker House Chocolate Cream Pie." It's popularity has spread and endured for over 150 years and there's no wondering why: Thick vanilla cream sandwiched between two layers of light, flavorful spongecake and dripping with chocolate. How can anyone say no to that? Especially now, when the total net carbs per serving is 16.2 grams and they're as easy to prepare as cupcakes!

Mini Boston Cream Pies
(Makes 12 individual servings)

¾ cup almond flour (or finely ground blanched almonds)
6 tablespoons all-purpose flour
1½ teaspoons baking powder
¼ teaspoon salt
¼ cup sugar, divided
½ cup Splenda granular (not baking blend)
2 eggs, separated
¼ cup canola oil
1½ teaspoon vanilla extract
3 tablespoons milk
¼ teaspoon cream of tartar

For filling:
2 oz. mascarpone cheese (can be found in the specialty cheese section of grocery)
1 cup milk
1 teaspoon vanilla extract
1 pkg. sugar-free, fat free vanilla pudding mix (the one that makes 4 servings)

For chocolate glaze:
1/3 cup 73% chocolate chips
1/3 cup light cream or half & half

1. Preheat oven to 350-degrees. Prepare muffin pan by spraying with non-stick cooking spray.

2. In a small mixing bowl, measure flours, baking powder and salt; set aside. Separate egg yolks from whites, putting each into separate mixing bowls; set egg whites aside.

3. In the mixing bowl with the egg yolks, add 2 tablespoons sugar and Splenda and beat with a handheld or standing mixer until mixture is very light in color and increased in volume, about 2 minutes. Add the oil and vanilla and beat for another minute. Add milk and beat on low to medium speed until well combined. Add dry ingredients all at once. Beat on low speed only until flour mixture is fully incorporated; set aside.

4. Remove beaters from mixer and wash thoroughly with dishwashing soap and warm water. Rinse thoroughly to remove any residue of soap. (It is important to get them very clean.) Rinse beaters under cold water and then dry completely before reinserting them into your mixer. Beat egg whites and cream of tartar until soft peaks form. Add remaining 2 tablespoons sugar and beat until stiff peaks form. Add 1/3 of the egg whites to batter and fold until batter has been lightened and egg whites are fully incorporated. Add remaining egg whites in two batches and gently fold with each addition just until no streaks remain.

5. Using a ¼ cup measure or ice cream scoop, fill each muffin cup ¾ full. Bake for 16-18 minutes or until toothpick comes out clean. Cupcakes will not brown much, so watch carefully and do not overbake. Allow cupcakes to cool in pan for 3-5 minutes and then remove to wire rack to cool completely.

6. While cupcakes cool, make filling. In a medium mixing bowl, beat the mascarpone cheese, milk and vanilla with a wire whisk until well combined. Add the pudding mix and beat for 2 minutes. Refrigerate for 20-30 minutes until quite thick and set.

7. When cupcakes are completely cooled, take a serrated knife and cut one cupcake in half and place top side down on serving plate. Spread 2 level tablespoons of the vanilla filling on cake, place the bottom half of the cupcake on top of filling. Repeat with remaining cupcakes.

8. Measure chocolate chips into a small bowl. Make chocolate glaze by heating cream until beginning to simmer. (Cream may be heated in a saucepan or in the microwave.) Pour hot cream onto chocolate chips and allow to sit for about 15-20 seconds. With a whisk, stir chocolate mixture until all the chips have melted and the mixture is smooth. Allow to cool for about 5-10 minutes. Glaze should be slightly thick, but still pourable. If too thick, add ½ teaspoon cream and stir. Drizzle or swirl 1 teaspoon glaze over each cupcake allowing it to drip down the sides. Serve immediately or refrigerate for 20-45 minutes. (NOTE: If not serving all the cupcakes, store uncut cakes in an airtight container or freeze. Fill and assemble within an hour of serving time, although assembled cakes can be refrigerated for up to 45 minutes.)

Nutritional Information per serving with filling and glaze: 214 calories, 18 g carbohydrate, 13.8 g total fat, 3.8 g saturated fat, 1.8 g fiber, 4.5 g protein.

Nutritional Information per cupcake only: 128 calories, 10 g carbohydrate, 8.7 g total fat, 0.8 g saturated fat, 0.9 g fiber, 3 g protein.

Original recipe by Kathy Sheehan, copyright 2009

How does this recipe compare with a slice of traditional Boston Cream Pie? It is much lower in calories and fat, appreciably lower in carbohydrates and sugar grams, and higher in fiber. For comparison, the average nutritional information for one slice of Boston Cream Pie made from a traditional recipe is 490 calories, 55.5 g carbohydrate, 27 g total fat, 0.25 g fiber, 5 g protein.