Showing posts with label bacon. Show all posts

Thursday, February 5, 2026

Baked Cottage Cheese Breakfast Bowl

Baked Cottage Cheese Breakfast Bowl
This high protein breakfast pudding can be made either sweet or savory! It makes one generous serving that leaves your body nourished and satisfied for hours.

Baked Cottage Cheese Breakfast Bowl
Makes 1 serving

Base Mixture:
½ cup cottage cheese (4% fat)
1 large egg
1/4 cup almond flour
1/4 teaspoon baking powder
A pinch of salt

Sweet Additions:
½ teaspoon vanilla extract
1-2 tablespoons allulose honey or sugar free maple syrup (or 6 drops monkfruit extract)
1/4 cup strawberries (chopped), or blueberries, fresh or frozen

Savory Additions:
1/4 cup ham, or cooked sausage, bacon or broccoli (chopped)
2 tablespoons shredded cheese
Freshly ground black pepper to taste
½ teaspoon chopped herbs

Preheat the oven to 350°F. Lightly grease one large oven-safe ramekin or small baking dish; set aside.

In a bowl, whisk together the base mixture of cottage cheese, egg, almond flour, baking powder, and salt until smooth.

If making sweet, whisk in your sweetener of choice and vanilla. Then gently fold in the fruit.

If making savory, add the meat or chopped broccoli, cheese, pepper and herbs to the base mixture and stir to combine.

Pour the mixture into the greased ramekin and bake for 25-30 minutes until set and lightly golden on top. Cool for about 10 minutes before serving.

Nutritional Information per serving: Varies, depending on additions to base mixture. Base mixture is 330 calories, 9.7 g carbohydrate (2 g dietary fiber, 5.2 g sugars), 22.8 g total fat (5.6 g saturated fat, 0 g trans fat), 201 mg cholesterol, 607 mg sodium, 255.6 mg calcium, 229 mg potassium, 2 mg iron, 141 IU Vit A, 24.3 g protein. Net carbs per serving: 7.7 grams.

Photo and recipe by Kathy Sheehan, copyright 2026
All rights reserved. Please do not duplicate without the author’s permission.

Saturday, July 1, 2023

Keto Bacon and Cheese Dutch Baby Pancake

Keto Bacon and Cheese Dutch Baby Pancakes

This fluffy, puffy egg pancake is baked in the oven in a preheated, hot skillet. When it comes out of the oven, it is impressive! I use a 6-inch cast iron skillet, which imparts a higher rise and nice crust. Similar to a puffy omelet, but so much easier to make.

Keto Bacon and Cheese Dutch Baby Pancake
Makes 1 serving

1 tablespoon unsalted butter
6 inch heatproof skillet
2 large eggs
2 tablespoons heavy cream
2 tablespoons water
2 tablespoons almond flour (or 1 tablespoon coconut flour for nut free)
Salt and pepper to taste
2 slices cooked bacon, chopped
1 ounce cheddar cheese, shredded
Sugar free maple syrup (optional)

1. Placed the 1 tablespoon of unsalted butter into your skillet. Place the skillet into the oven and preheat to 400°F.

2. Meanwhile, whisk together the eggs, cream, water, almond flour, salt, and pepper. You can do this in a blender or food processor for an extra fluffy pancake.

3. When the oven and pan are preheated, swirl the melted butter all around the bottom and sides of the skillet. Pour the egg mixture into the hot skillet. Sprinkle the chopped bacon and cheese on top. Return the skillet to the oven and bake for 14 minutes until puffy and golden.

4. Remove the skillet from the oven and use a sharp knife to loosen the pancake from the sides of the pan. Transfer the pancake to a serving plate and drizzle sugar-free maple syrup on top, if desired. Eat it immediately. The pancake will deflate as it cools.

Cooked Keto Dutch Baby Pancake

Nutritional Information per serving (entire recipe): 618 calories, 2.5 g carbohydrate (0.9 g dietary fiber, 0.4 g sugars), 56.7 g total fat (27 g saturated fat, 0 g trans fat), 491 mg cholesterol, 723 mg sodium, 270.4 mg calcium, 276 mg potassium, 2 mg iron, 480 IU Vit A, 26.8 g protein. Net carbs per serving: 1.6 grams

Recipe and photos by Kathy Sheehan, copyright 2023
All rights reserved. Please do not duplicate without the author’s permission. 

Sunday, February 6, 2022

Grilled Sauerkraut

Grilled Sauerkraut
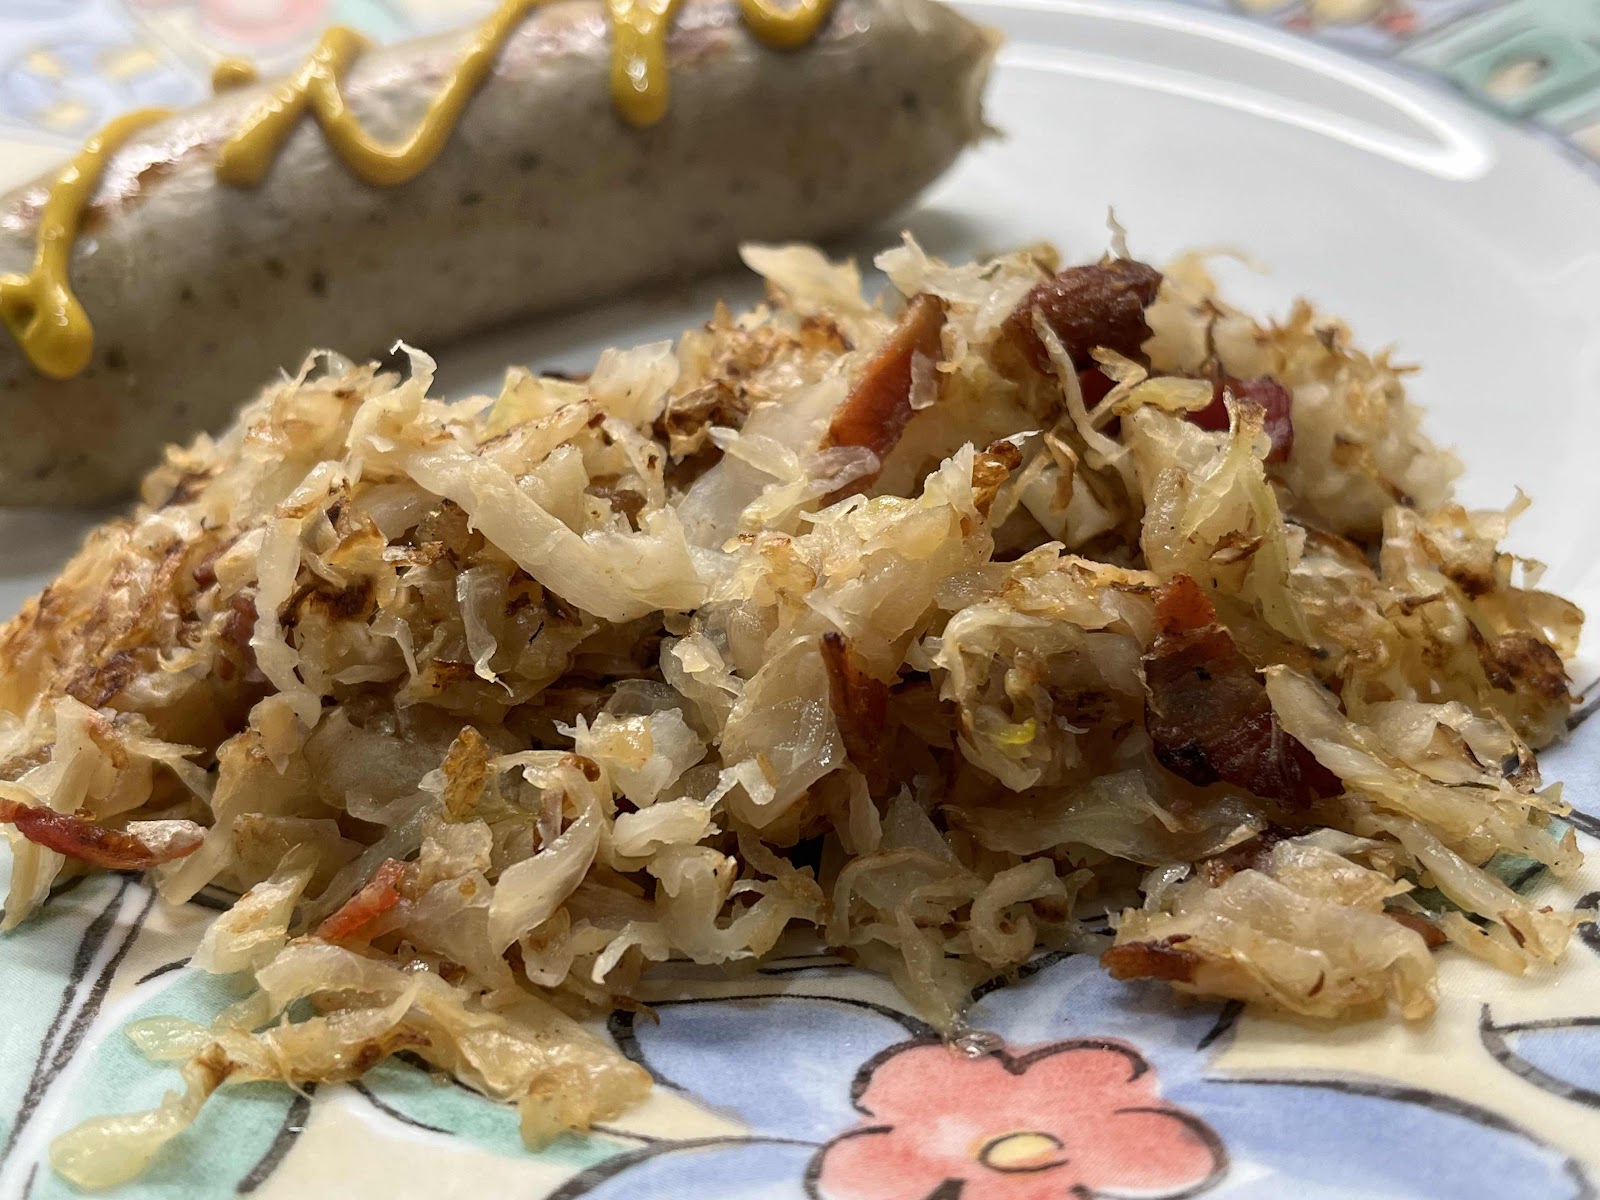
Many years ago, my husband and I had a wonderful meal at Morse’s Sauerkraut, a restaurant in Waldoboro, Maine. Along side the excellent bratwurst and schnitzel, we were served the most unbelievable grilled sauerkraut! This was new to us and it is a dish we have never forgotten, although the restaurant has been closed for several years. This recipe was inspired by this delicious side dish. It’s very quick and simple to make using fresh sauerkraut that you can purchase at the grocery store in the refrigerated section. The result is flavorful, with a touch of sweetness from the caramelized onion. It is one of my favorite side dishes to serve with brats, sausages and kielbasa. 

Grilled Sauerkraut
Makes 2 servings

1/2 onion, thinly sliced
2 slices precooked bacon, chopped
2 tablespoons avocado oil or refined coconut oil
1/2 pound fresh sauerkraut (found in the refrigerated section), drain well and pat dry with paper towels
1 tablespoon unsalted butter
Ground pepper to taste
A pinch of salt, only if needed

1. Heat your pan on medium-high heat. You may use a nonstick or cast iron pan. When it is hot, add the oil and onion, stirring often until softened and starting to brown.

Saute the ingredients until browned and crispy
2. Add the bacon and sauté until beginning to crisp. Stir in the drained sauerkraut, making sure to stir often to prevent burning. When the sauerkraut starts to brown and becomes slightly crisp, add the butter and stir until melted. Continue to cook until the sauerkraut reaches the desired level of browning. Season with pepper and salt to taste. Serve warm.

Nutritional Information per serving: 188 calories, 7 g carbohydrate (4.3 g dietary fiber, 1.2 g sugars), 16.1 g total fat (5.6 g saturated fat, 0 g trans fat), 25 mg cholesterol, 1030 mg sodium, 10.2 g calcium, 95 mg potassium, 54 IU Vit A, 16 mg Vit C, 3.5 g protein. Net carbs per serving: 2.7 grams

Photos and recipe by Kathy Sheehan, copyright 2022
All rights reserved. Please do not duplicate without the authors permission.

Monday, November 8, 2021

Keto Loaded Potato Biscuits

Keto Loaded Potato Biscuits
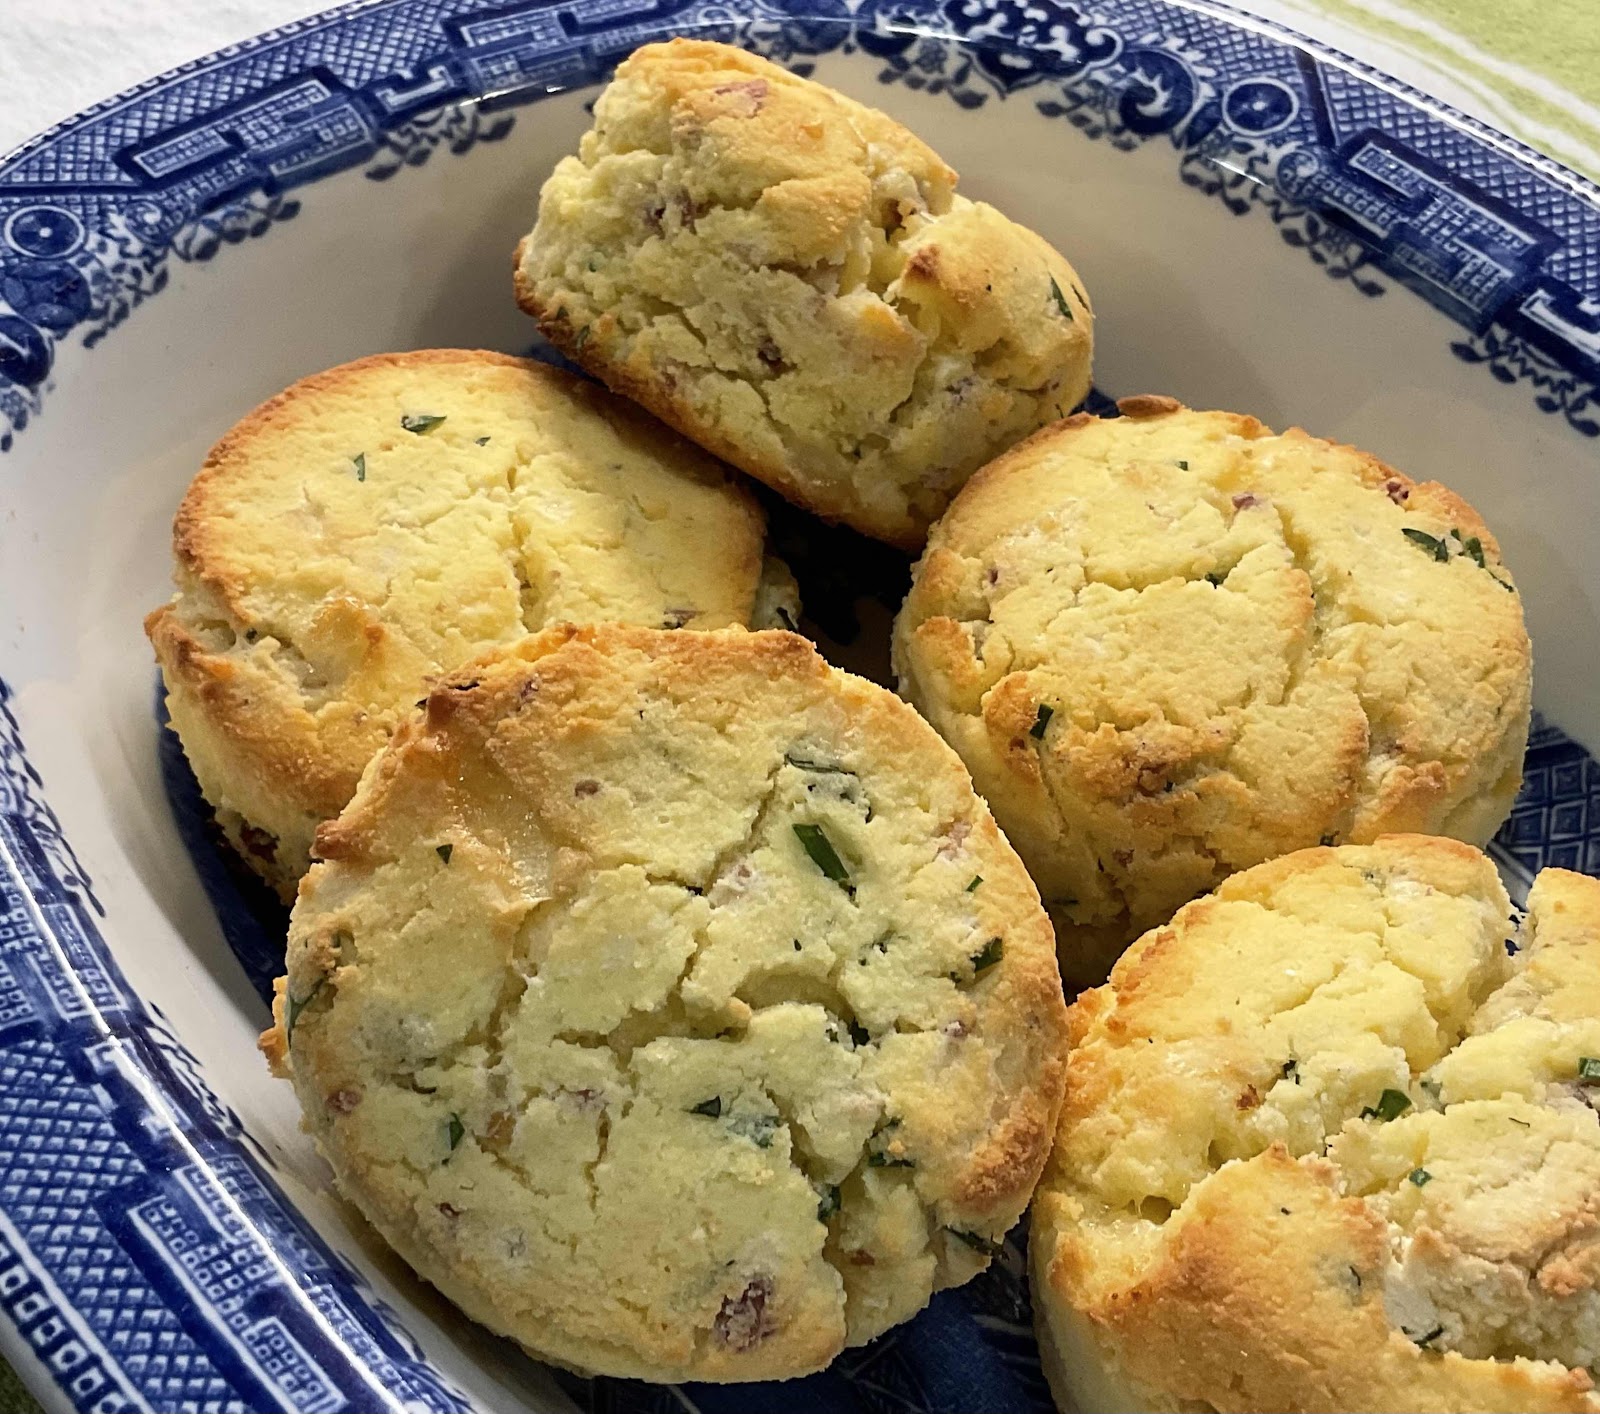
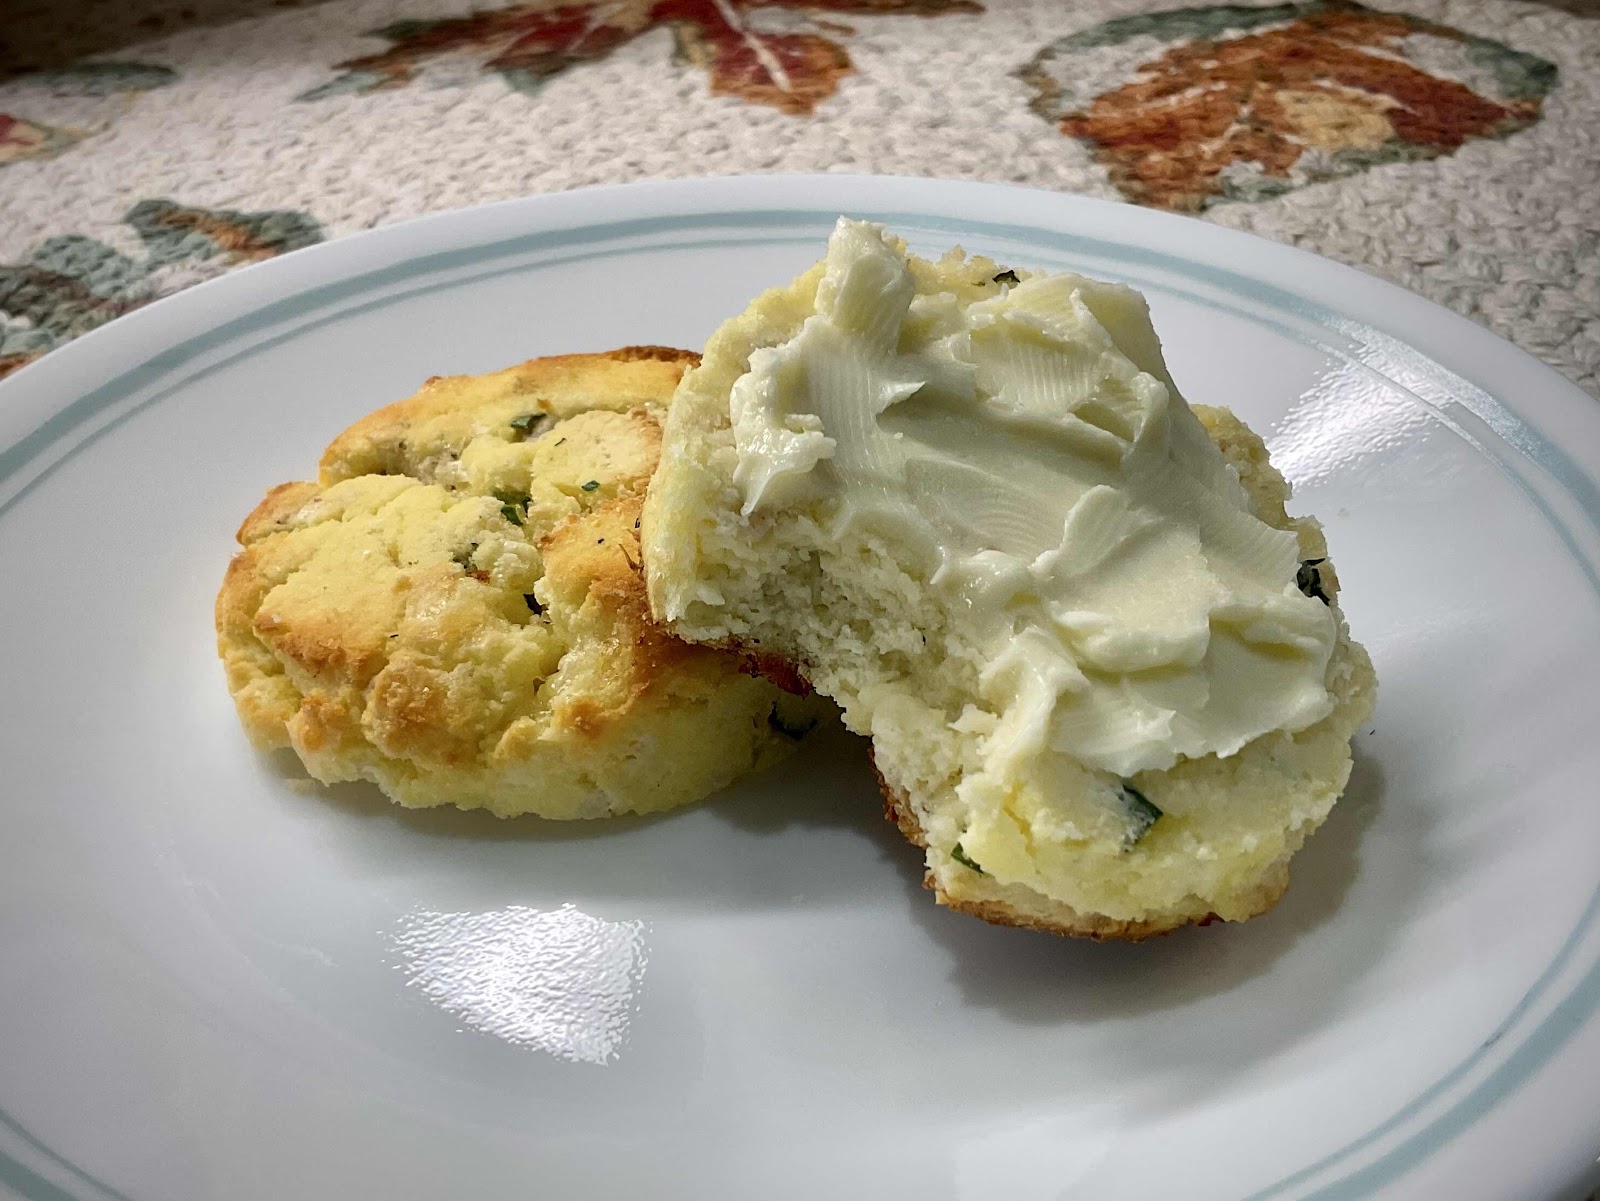
These nut free, coconut flour biscuits taste like a loaded baked potato, with the addition of sour cream, bacon, cheese and herbs…without a potato in sight! They can be made ahead and stored in the refrigerator or freezer. They are a delicious breakfast biscuit topped with poached eggs and hollandaise sauce or as an accompaniment to any meal.

Keto Loaded ‘Potato’ Biscuits
Makes 10 biscuits

1/2 cup mayonnaise 
1/4 cup sour cream
6 large eggs
1/4 teaspoon salt
1/8 teaspoon pepper
5 slices cooked bacon, finely chopped
3 tablespoons chives or green onions, finely chopped
1/2 tablespoon parsley, finely chopped (half that amount if using dried)
1 cup coconut flour
1-1/2 teaspoons baking powder
1/2 cup shredded extra sharp cheddar cheese

1. Preheat oven to 375 degrees F. Line a baking sheet with parchment paper or a silicone mat.

2. Place the mayonnaise, sour cream, eggs, salt, pepper, bacon, chives and parsley in a medium mixing bowl and whisk to combine.

3. Place the coconut flour and baking powder in a small bowl and whisk with a fork until combined, breaking up any lumps. Add the dry ingredients and shredded cheese to the mayonnaise mixture and stir quickly with a fork to fully incorporate the ingredients. Allow the batter to sit for a few minutes until the coconut flour absorbs most of the liquid and the mixture thickens into a soft dough. 

4. Turn out the dough onto the counter and form into a large ball. Pat down gently on the dough ball until it is 1-inch in thickness. Use a small biscuit cutter to make biscuits, reforming scraps into a ball and patting down again as needed until you have created ten 1-inch high biscuits. (Alternatively, you can divide the dough into 10 pieces, roll each piece into a ball, place them on the prepared baking sheet and gently pat down with your fingers until the biscuits are 1-inch thick.)

Keto Potato Biscuits
5. Bake for 18-20 minutes or until the bottom of the biscuits have browned and the tops take on a bit of golden color. Remove from the oven and allow the biscuits to remain on the baking sheet for 5 minutes. Serve warm.

6. The biscuits can be stored in the refrigerator for up to 3 days or, once cooled completely, wrapped well with plastic wrap and stored in the freezer for up to a month. To reheat: If frozen, thaw biscuits at room temperature for 1 hour. Place on a baking sheet and warm in a preheated 300 degree F oven until heated through, about 8-10 minutes.

Potato Biscuits made Low Carb
Nutritional Information per biscuit: 219 calories, 7.3 g carbohydrate (4 g dietary fiber, 0.9 g sugars), 17 g total fat (5.9 g saturated fat, 0 g trans fat), 128 mg cholesterol, 319 mg sodium, 114.7 mg calcium, 76 mg potassium, 1 mg iron, 93 IU Vit A, 8.5 g protein. Net carbs per biscuit: 3.3 grams

Photos and recipe by Kathy Sheehan, copyright 2021
All rights reserved. Please do not duplicate without the author’s permission. 

Saturday, September 19, 2020

Low Carb Parmesan Radish Gratin

Low Carb Parmesan Radish Gratin
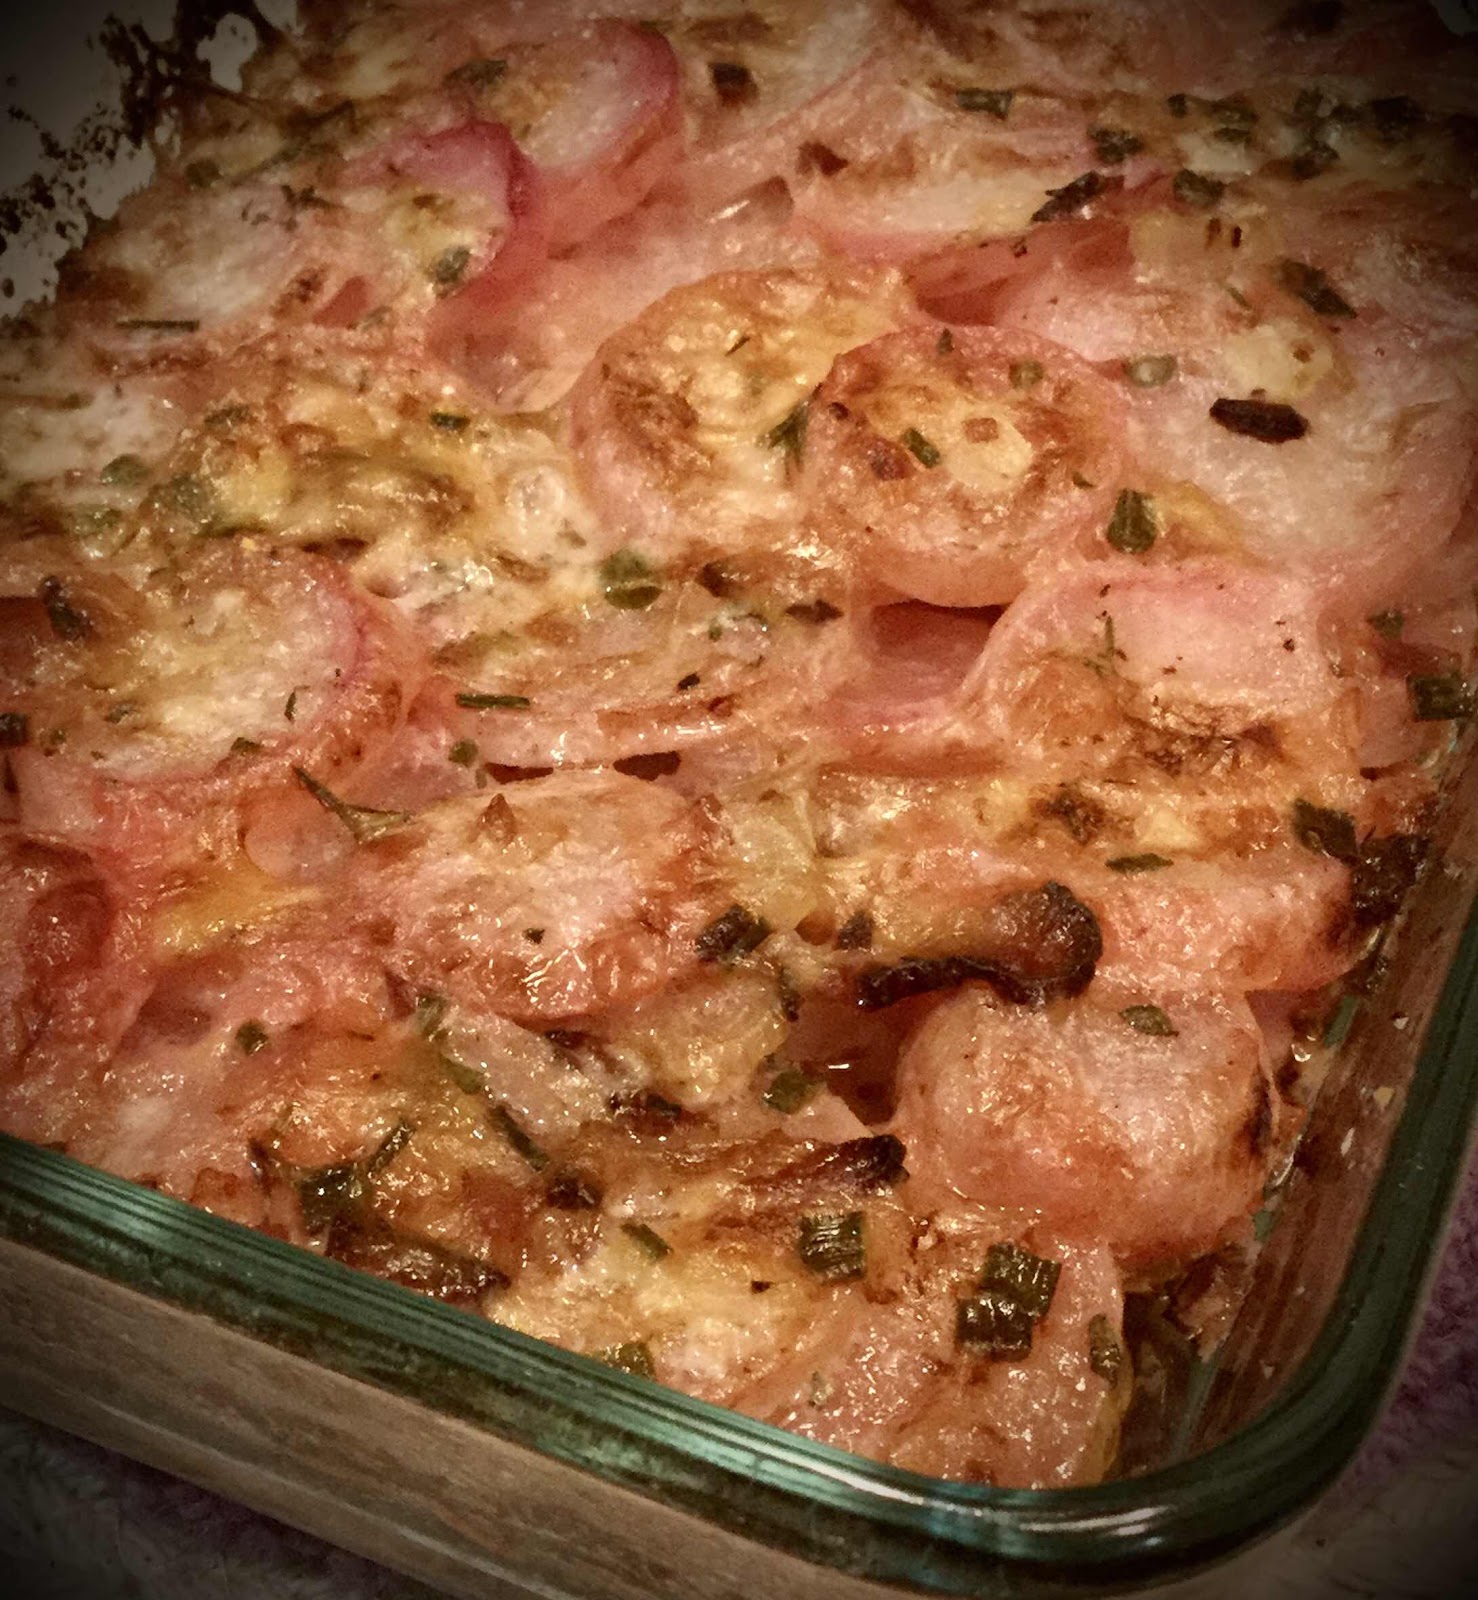
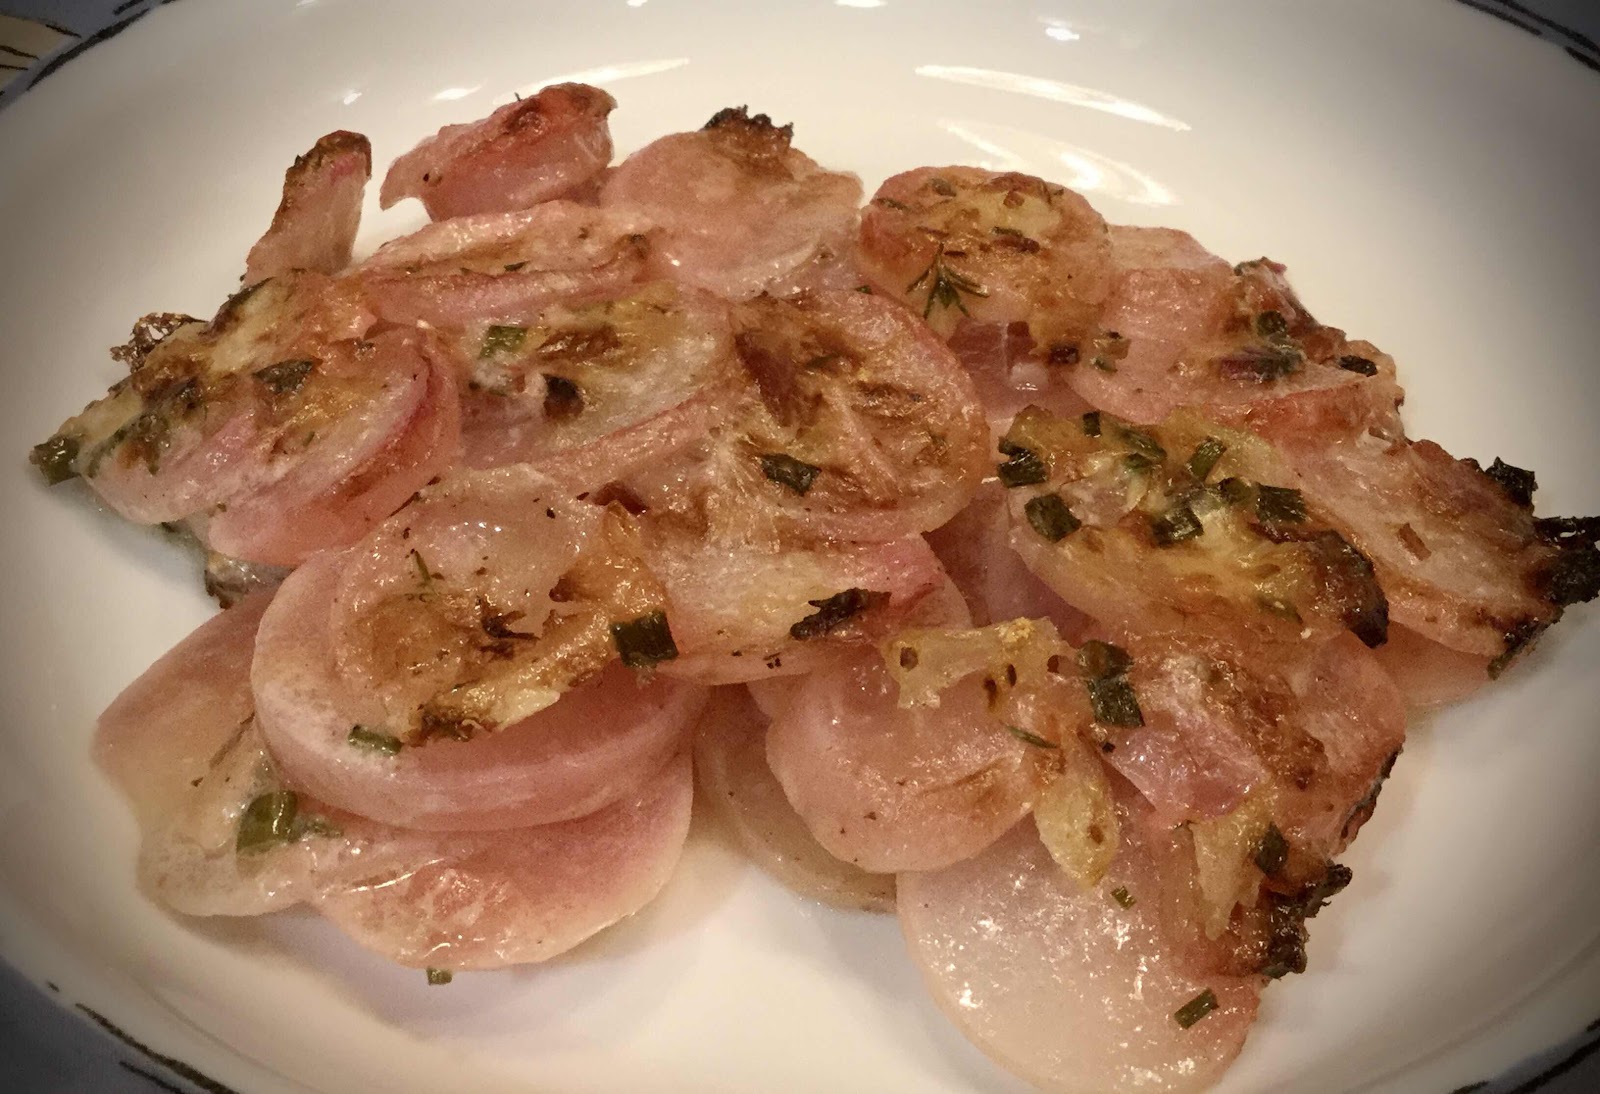
I dislike raw radishes, but LOVE roasted and cooked radishes! In the keto world, radishes and turnips make great substitutes for potatoes in soups and other recipes. The first time I saw a casserole recipe similar to this, it was created for potatoes and contained several high carb ingredients, such as flour and whole milk. I thought it would be worth a try to make a few ingredient substitutions and make it low carb—the result was wonderful! You can make this delicious side dish with red or daikon radishes (or maybe even turnips) and I think you’ll be quite pleased too.

Low Carb Parmesan Radish Gratin
Makes twelve 1/2 cup servings

8 oz. Parmesan cheese
2 slices cooked bacon, crumbled
1 green onion, thinly sliced
1 tablespoon snipped fresh chives
1/2 tablespoon fresh chopped thyme (or use 1 teaspoon dried)
1/2 tablespoon fresh chopped rosemary (or use 1 teaspoon dried)
2 tablespoons unsalted butter, cut into small cubes
6 cups thinly sliced radishes (about 2 lbs, leaves removed)
Salt and pepper
6 tablespoons coconut or almond milk
6 tablespoons heavy cream
1/2 teaspoon xanthan gum
Snipped fresh rosemary and thyme for garnish (optional)

1. Preheat the oven to 325 degrees F and grease a 1.5 quart casserole dish; set aside. Using a wide vegetable peeler, shave the Parmesan cheese (about 2 cups) or use pre-shaved Parmesan; set aside.

2. In a small bowl, combine the crumbled bacon, green onion and chives. Stir to combine. In the prepared baking dish, arrange 1/2 of the radishes to cover the bottom of the dish. Sprinkle with 1/2 teaspoon salt and pepper, half of the bacon mixture and half of the herbs. Top with 1/2 of the Parmesan and dot with half of the butter cubes. Repeat layers.

3. In a medium bowl, whisk together the coconut or almond milk, heavy cream and xanthan gum until the xanthan gum is incorporated and dissolved (you can use a stick blender to make this easier). Pour the cream mixture evenly over the radishes.

4. Bake, covered for 1.5 hours. (If using foil to cover, spray the underside with non-stick cooking spray.) Increase oven temperature to 400 degrees F. Bake, uncovered for 15-20 minutes more or until the radishes are tender and the top is golden brown.

Parmesan Radish Gratin
Nutritional Information per 1/2 cup: 168 calories, 3.7 g carbohydrates (1.3 g dietary fiber, 1.7 g sugars), 14 g total fat (8.5 g saturated fat, 0 g trans fat), 40 mg cholesterol, 400 mg sodium,  264 mg calcium, 206 mg potassium, 1 mg iron, 131 IU Vit A, 12 mg Vit C, 8.3 g protein. Net carbs per serving: 2.4 grams

Photos and recipe by Kathy Sheehan, copyright 2020
All rights reserved. Please do not duplicate without the author’s permission.

Tuesday, July 21, 2020

Brunch Green Bean Salad with Perfect Soft-Boiled Eggs

Brunch Green Bean Salad with Perfect Soft-Boiled Eggs
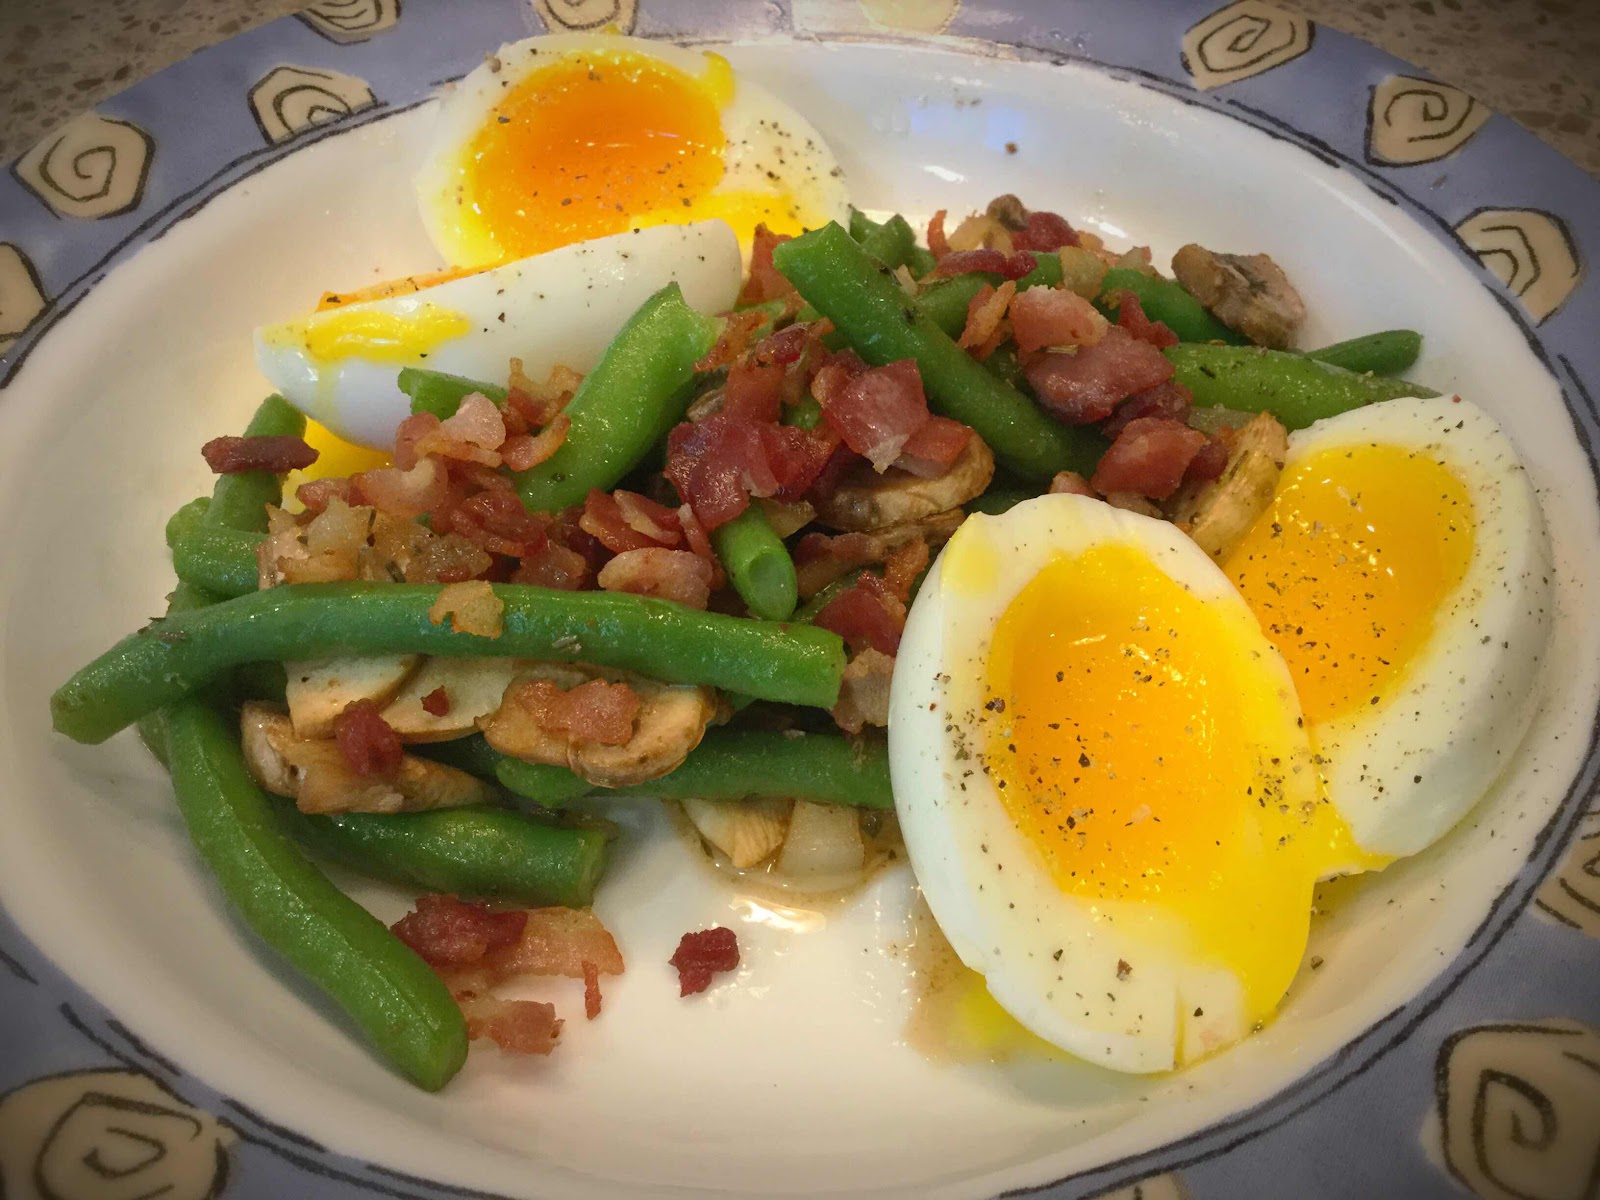
Right now, I’m harvesting a lot of green beans from my garden and am always trying to come up with delicious and varied ways to enjoy them. This breakfast or brunch salad is a great way to start the day! The addition of soft-boiled eggs puts this dish over the top, in my opinion. The tender-crisp green beans and creamy eggs topped with a sweet and sour dressing and crispy bacon go so well together. The method of boiling the green beans and eggs together in the same pot is a clever one, making this a very quick and easy meal. It makes two servings, but can be either halved to serve one or doubled and tripled to serve many.

Brunch Green Bean Salad with Perfect Soft-Boiled Eggs
Makes 2 servings

4 white button mushrooms, sliced
4 slices bacon, cut into small pieces
2 tablespoons onion, minced
1-1/2 tablespoons white wine vinegar
1/2 teaspoon dried thyme
1/2 teaspoon granulated erythritol, or to taste
Salt and black pepper to taste
1-1/2 cups fresh green beans, trimmed
4 eggs, room temperature 

1. Fill a large saucepan or pot 1/2 to 3/4 full of water (enough water to cover the eggs completely as they boil). Add salt and bring to a boil over medium to high heat.

2. Meanwhile, sauté the mushrooms in a small dry skillet over medium heat until they release their moisture, about 3 minutes. Remove the mushrooms to a plate and set aside. In the same skillet, sauté the bacon until crispy. Remove with a slotted spoon to a plate lined with paper towels; set aside.

3. Reserve 2 tablespoons of bacon drippings in the skillet. Add the onion and sauté until translucent. Add the vinegar, thyme, sweetener, salt and pepper. Whisk to combine. Return the mushrooms to the skillet and stir to combine. Keep the dressing warm while the green beans and eggs are cooking.

4. Drop the green beans into the salted, boiling water and set a timer for exactly 8 minutes. At the 5-1/2 minute mark, add the eggs and continue boiling. Drain and rinse under cold running water to stop the cooking. Set the eggs aside in cold water while you pat dry the green beans with a paper towel and divide them evenly between two serving dishes. Toss each serving with 1/2 of the warm dressing and top each portion with crumbled bacon. Carefully peel the eggs, placing two in each serving dish. Cut the eggs in half and season with salt and pepper to taste. Serve immediately.

Nutritional Information per serving (1/2 recipe): 277 calories, 10.8 g carbohydrates (3.5 g dietary fiber, 2.6 g sugars, 1 g sugar alcohols), 17 g total fat (5.5 g saturated fat, 0 g trans fat), 391 mg cholesterol, 506 mg sodium, 107.2 mg calcium, 453 mg potassium, 3 mg iron, 364 ug Vit A, 10 mg Vit C, 21.4 g protein. Net carbs per serving: 6.5 grams

Photo and recipe by Kathy Sheehan, copyright 2020
All rights reserved. Please do not duplicate without the author’s permission.

Thursday, December 19, 2019

Low Carb Christmas Eve Potato Soup (Made with cauliflower, but you’d never know it!)

Low Carb Christmas Eve Potato Soup
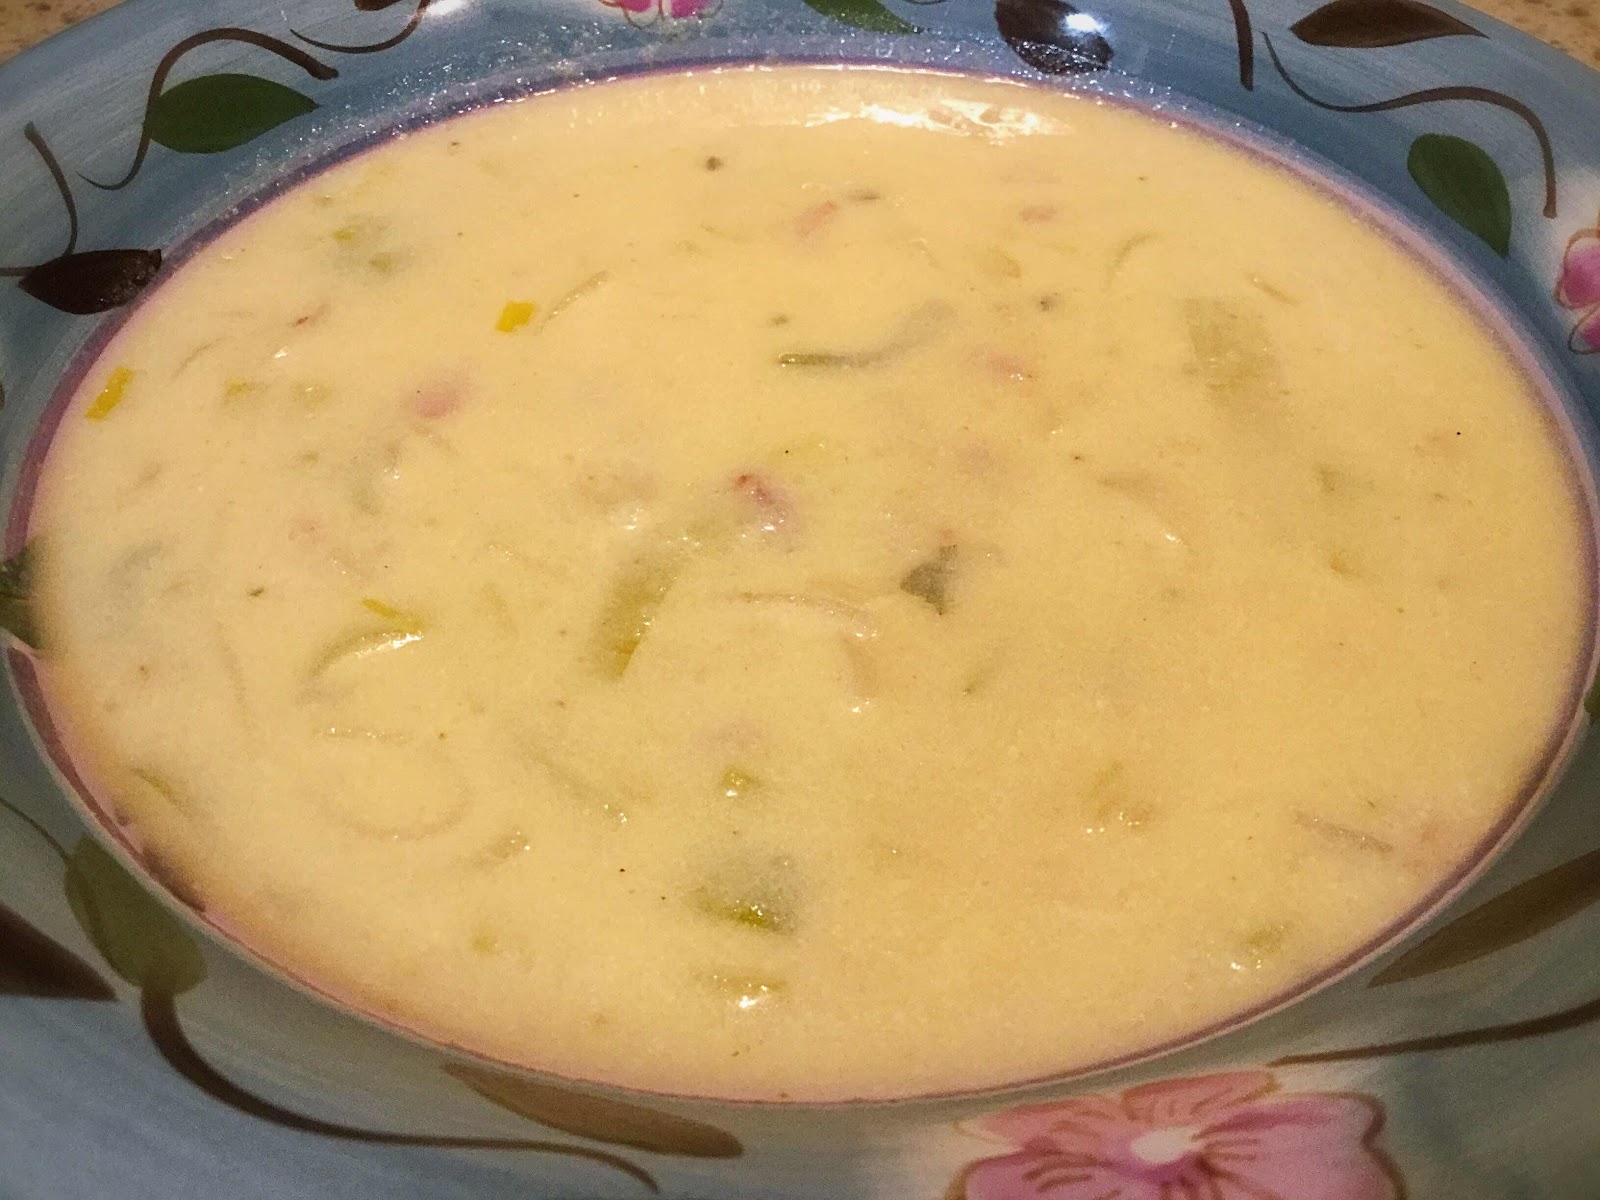
It has been a tradition since I was a child to enjoy a particular heirloom recipe at this time of year, taught to me by my grandmother and simply known as Christmas Eve Potato Soup. Because it is only made once a year, it has remained a family favorite through several generations that is anticipated with joy and excitement, just like Santa Claus. It just wouldn’t be Christmas at my house without it! I have tried many times to reduce the carbs in this special recipe by substituting the potatoes with white beans, turnips or daikon radishes, but the result was always a bit disappointing...until now!! I was going to make the soup with fresh cauliflower florets this year, but then it occurred to me that frozen cauliflower already has been blanched, so it would impart a milder flavor. It turned out to be the perfect potato substitute! I chose frozen riced cauliflower and puréed it with the broth prior to adding it to the soup. Combined with the other ingredients, this low carb version is a winner in every way! Both my husband and daughter agree that it tastes just like the real thing. The best part? It only has 9 net carbs for a generous 2 cup serving! (Compared to the traditional recipe which has over 45 carbs for a smaller serving, it’s quite a reduction.) From now on, this low carb version will have a place of honor on my Christmas Eve dinner table!

Low Carb Christmas Eve Potato Soup (made with cauliflower)
Makes 4 servings

4 slices of bacon, diced
2 trimmed leeks, sliced into half moons
1/4 cup chopped onion
3 cups frozen riced cauliflower, thawed
4 cups chicken broth
1/2 teaspoon xanthan gum
2 beaten egg yolks
1 cup sour cream
1 teaspoon chopped parsley as a garnish
Salt and pepper to taste

1. In a large heavy pot, sauté the bacon until beginning to brown and crisp. Add the onion and leeks and continue to sauté for 5 minutes.

2. Purée the broth with the thawed riced cauliflower in a blender until smooth. Add the purée to the leek mixture and bring to a boil. Reduce heat to low and simmer, covered, for 20 minutes, stirring occasionally.

3. Sprinkle with the xanthan gum while whisking continuously to thicken slightly. Remove from heat.

4. In a small bowl, combine the egg yolks with the sour cream. Spoon a ladle of the hot soup into the egg/sour cream mixture to temper and thin the egg mixture, then slowly add the egg mixture to the soup, stirring constantly until well incorporated. Return soup to the heat and gently simmer, uncovered, for 10 minutes. Add salt and pepper to taste.

NOTES: This soup is actually better the second day, so feel free to make it ahead and reheat before serving. If you need to reduce sodium in your diet, you can use low sodium chicken broth in place of regular.

Nutritional Information per serving (about 2 cups): 250 calories, 11.3 g carbohydrate (2.3 g dietary fiber, 3.9 g sugars), 17.3 g total fat (9.5 g saturated fat), 140 mg cholesterol, 770 mg sodium, 108 mg calcium, 195 mg potassium, 1 mg iron, 259 mg Vit A, 35 mg Vit C, 12.2 g protein. Net carbs per serving: 9 grams

Photo and recipe by Kathy Sheehan, copyright 2019
All rights reserved. Please do not duplicate without the author’s permission.

Saturday, October 19, 2019

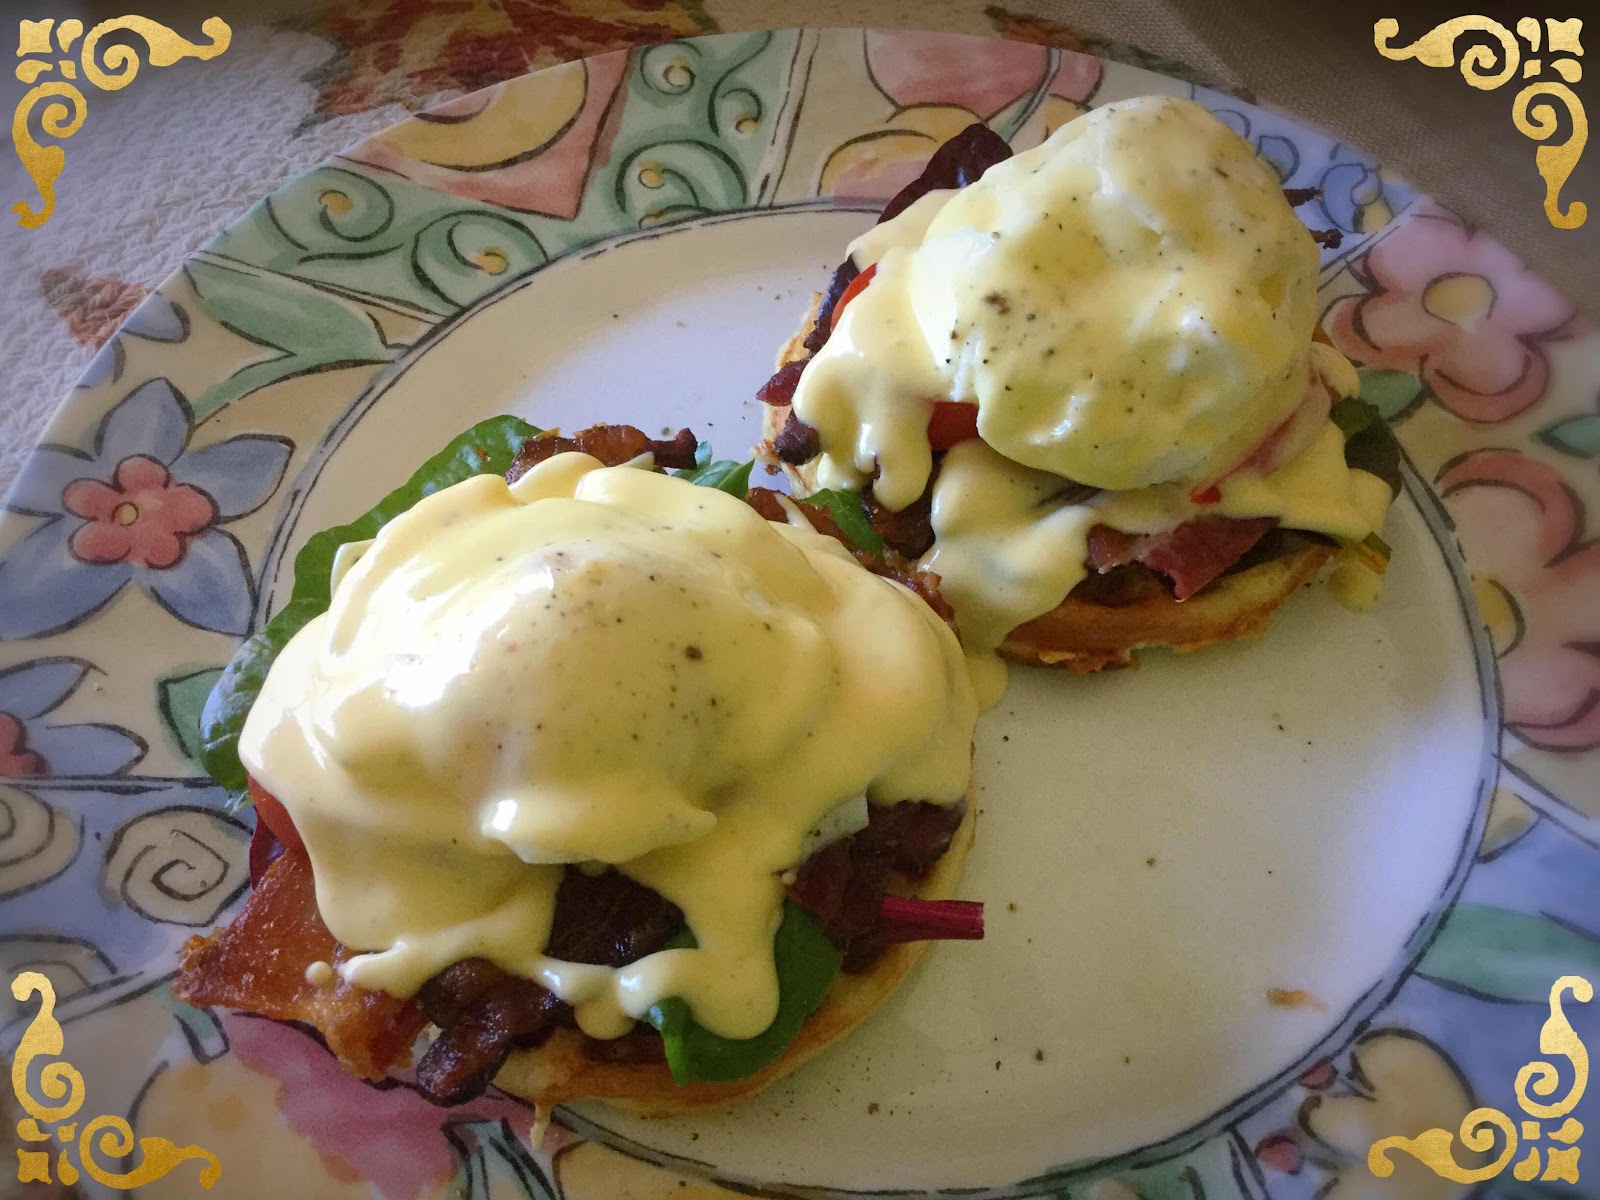
Eggs Benedict Chaffles

Eggs Benedict Chaffles
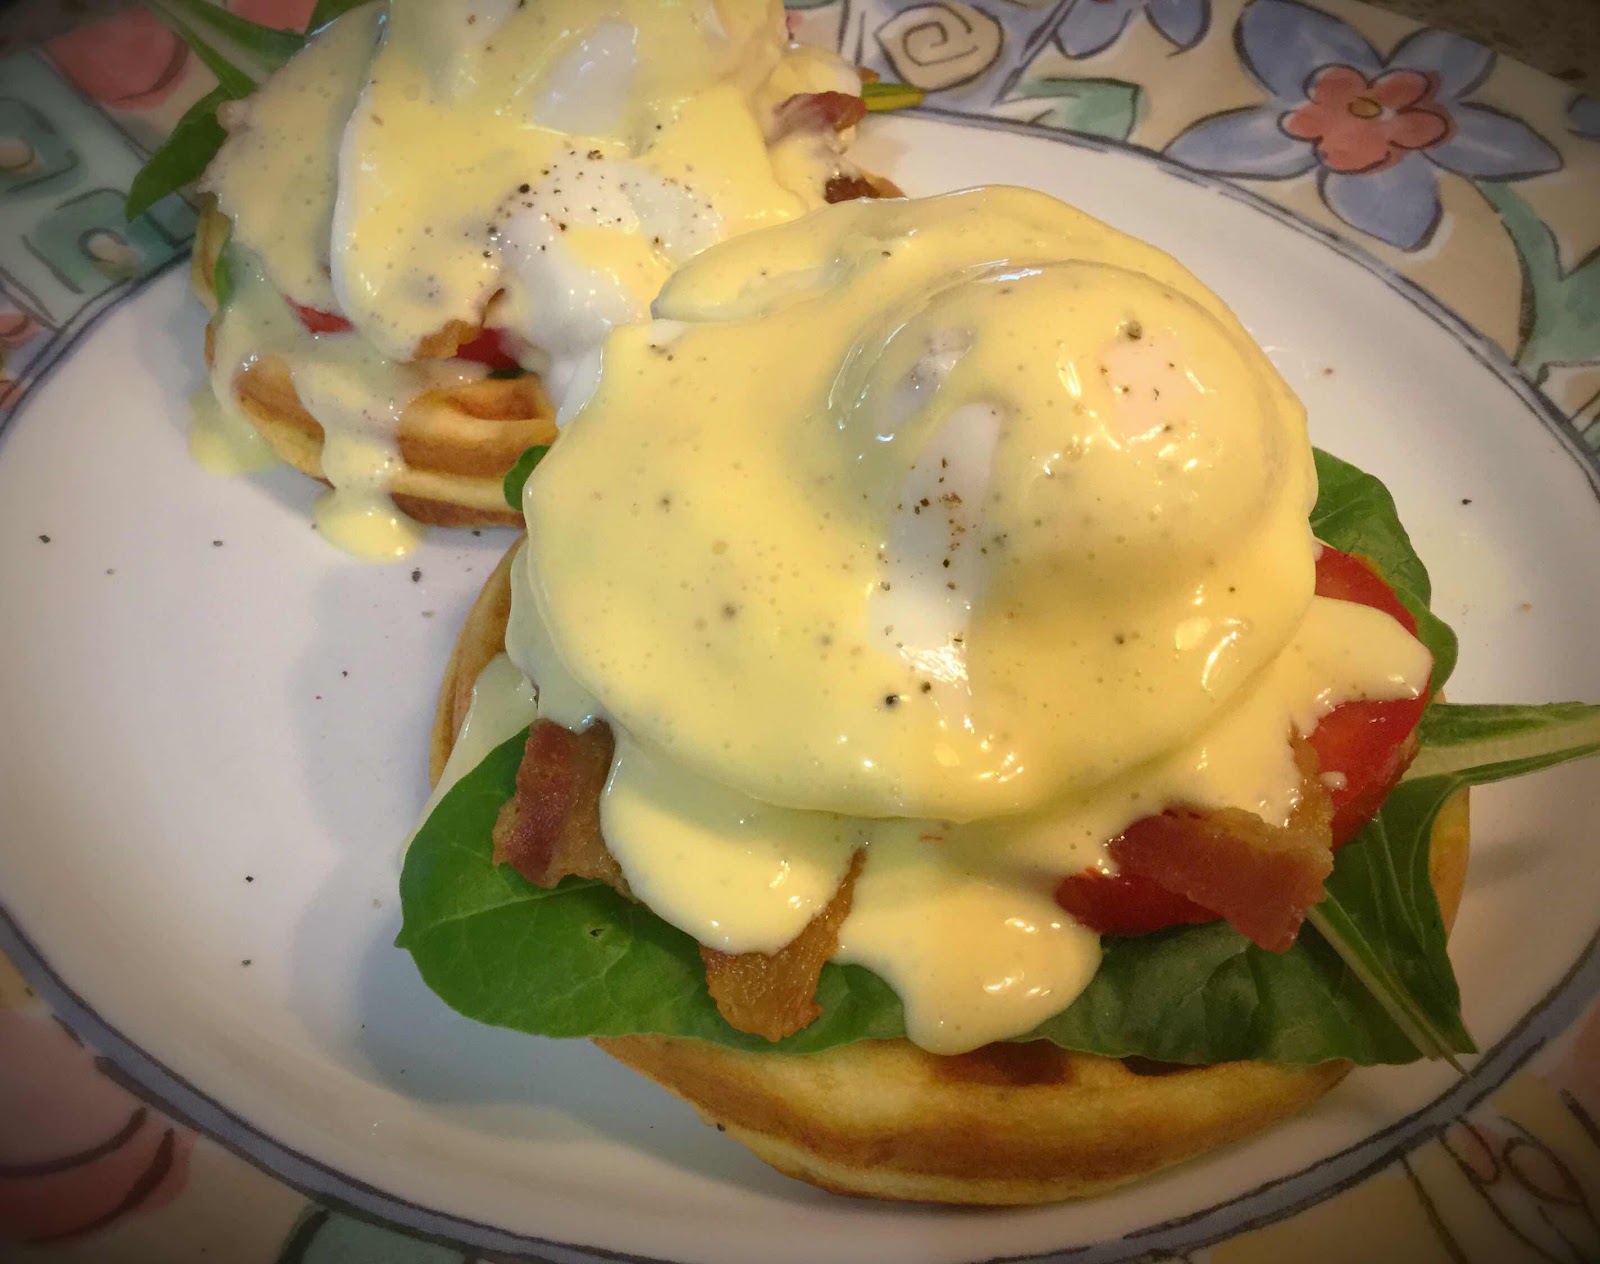
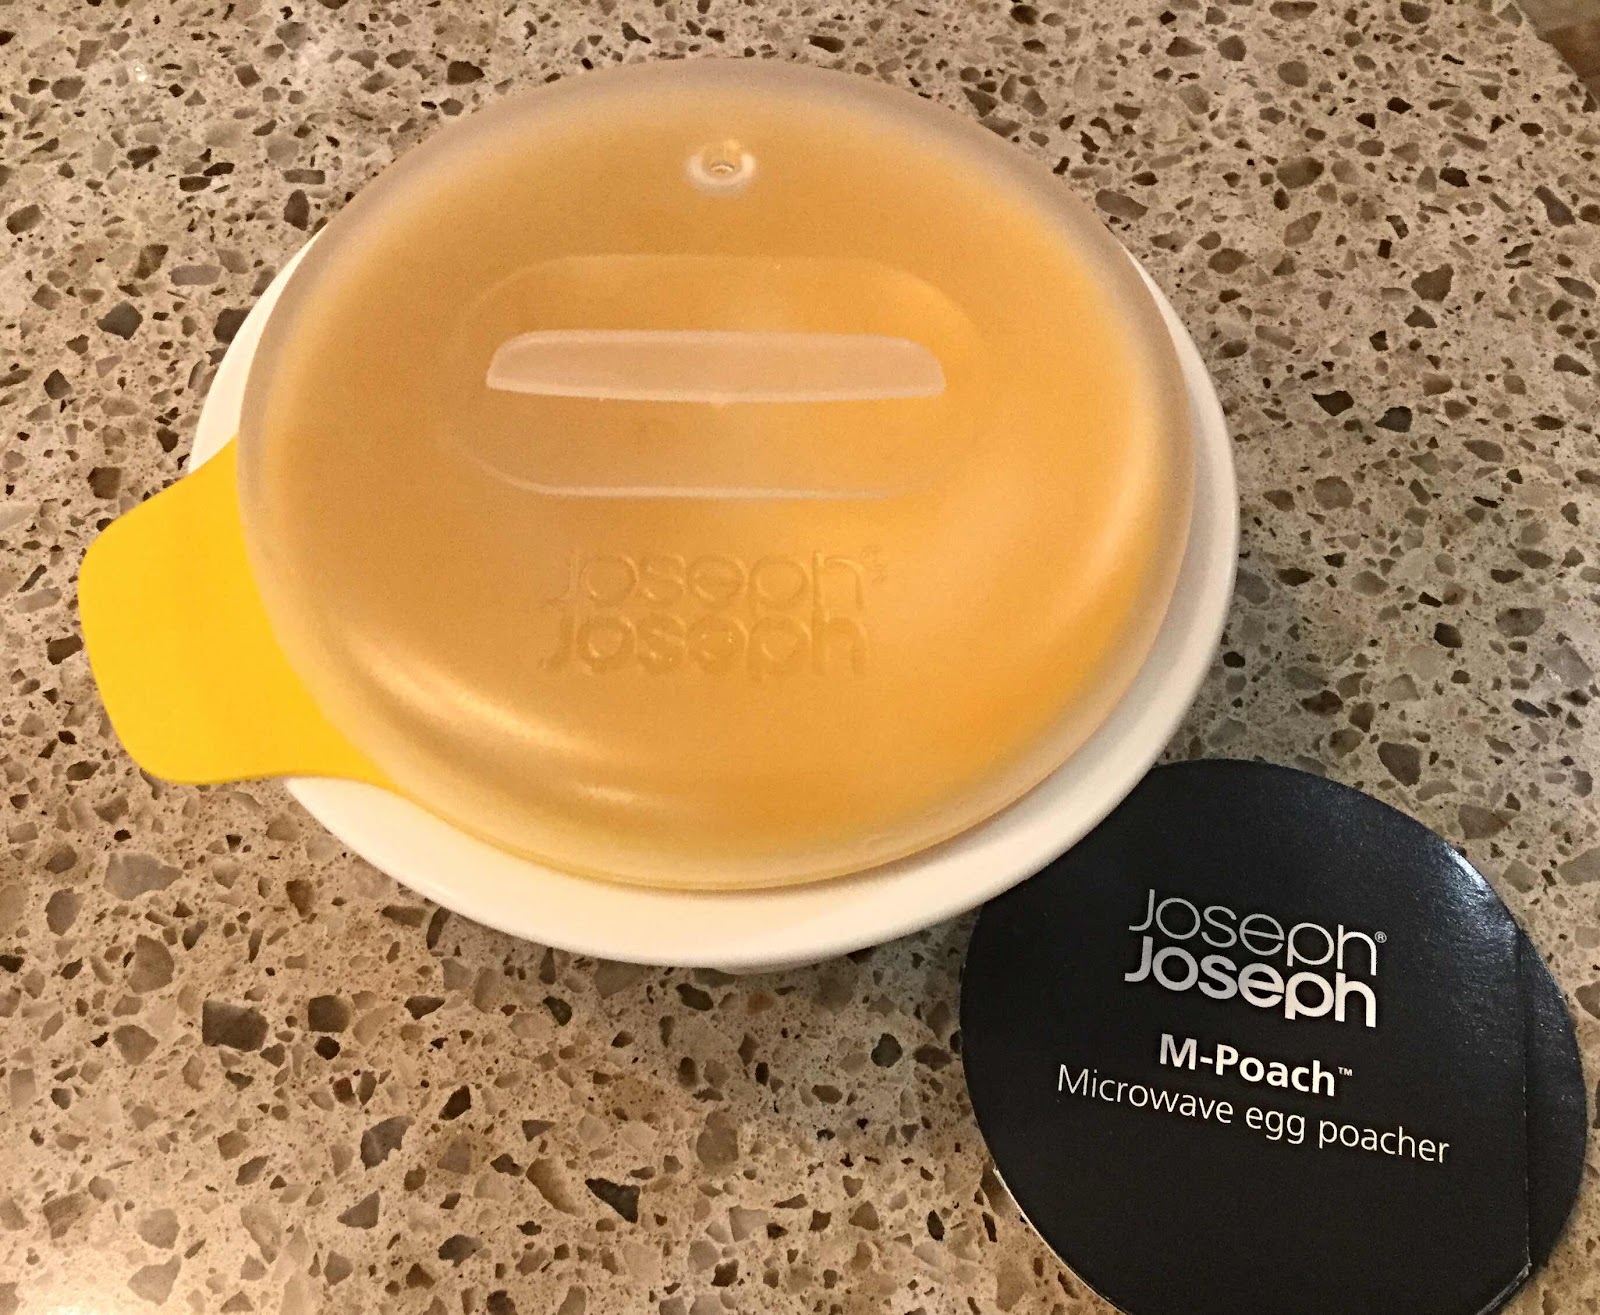
Eggs Benedict is one of my favorite egg dishes. They’re perfect for brunch or a light meal. Traditionally, Eggs Benedict sit on a base of split english muffins, but in this recipe I’ve made 4” White Bread Chaffles with a hint of Everything But the Bagel Seasoning (from Trader Joe’s) and they were the perfect bread substitute. The accompanying Hollandaise Sauce is typically thought to be a difficult or fussy recipe, but when you use an immersion stick blender, it’s quick and easy, taking less than one minute to make! Finally, I recently purchased a microwave egg poacher that makes easy work of creating the perfectly poached egg in 30 seconds, with no mess. Put all of these luscious ingredients together with bacon, spinach and a couple of slices of tomato and you have the BEST, low carb breakfast ever. Elegant enough for company or treat yourself!

White Bread Chaffles
Makes 2 chaffles (1 serving)

1 large egg, beaten
1 tablespoon sour cream, ricotta cheese or mayonnaise 
1 tablespoon almond flour (or coconut flour)
1/8 teaspoon baking powder
3/4 teaspoon Everything But the Bagel Seasoning (optional, but adds a nice flavor)
1 teaspoon water, if needed to thin batter

Preheat a 4” mini waffle maker (I use a Dash Mini). In a small bowl, whisk together all of the ingredients. The batter may be thin, which is fine. Divide the batter in half. Add about 4 tablespoons of the batter to the heated waffle iron and spread around to cover the waffle bumps. Close the lid and cook for 4 minutes. Remove chaffle to a wire rack to cool and repeat with the remaining batter to make a second chaffle. This recipe makes 2 chaffles. (If you’re using a regular size waffle maker, you will need to double or triple this recipe.)

Nutritional Information per 2 chaffles: 202 calories, 2 g carbohydrate (0.8 g dietary fiber, 0.4 g sugars), 18.3 g total fat (3.3 g saturated fat), 7.8 g protein. Net carb per serving: 1.2 grams

Make One Minute Hollandaise Sauce using an immersion stick blender. Watch this excellent YouTube video by The Food Lab to learn how: https://youtu.be/rOWzVV_XrcM

1/2 cup butter
2 egg yolks
1 tablespoon lemon juice
1 tablespoon water
A pinch of salt and pepper to taste

Place the egg yolks, lemon juice, water, salt and pepper into a pint mason jar or the cup that comes with your immersion blender; set aside. Heat the butter in a small saucepan over medium heat until beginning to bubble. Once the butter is heated, pour it into a heat-proof glass measuring cup (alternatively you can melt the butter in the microwave on high for about 30 seconds in the microwave-safe measuring cup covered with a damp paper towel until bubbly). Put your stick immersion blender into the jar or cup with the yolks and turn it on. Slowly add the melted butter and continue to blend until the sauce thickens.

Nutritional Information per 2 tablespoons of sauce: 100 calories, 0.7 g carbohydrate, 0 g fiber, 10 g total fat (6 g saturated fat), 60 mg cholesterol, 197 mg sodium, 0 g protein.

Joseph Joseph Microwave Egg Poacher
Make Poached Eggs using your favorite method. I used a Joseph Joseph Microwave Egg Poacher (see above image).

Now put it all together with your favorite Eggs Benedict toppings:

Bacon
Canadian Bacon
Sliced ham
Sliced tomato
Fresh spinach leaves
Fresh Swiss Chard leaves

Egg Benedict Chaffles
Photos and Recipe by Kathy Sheehan, except where noted, copyright 2019
All rights reserved. Please do not duplicate without the author’s permission. 


Wednesday, May 22, 2019

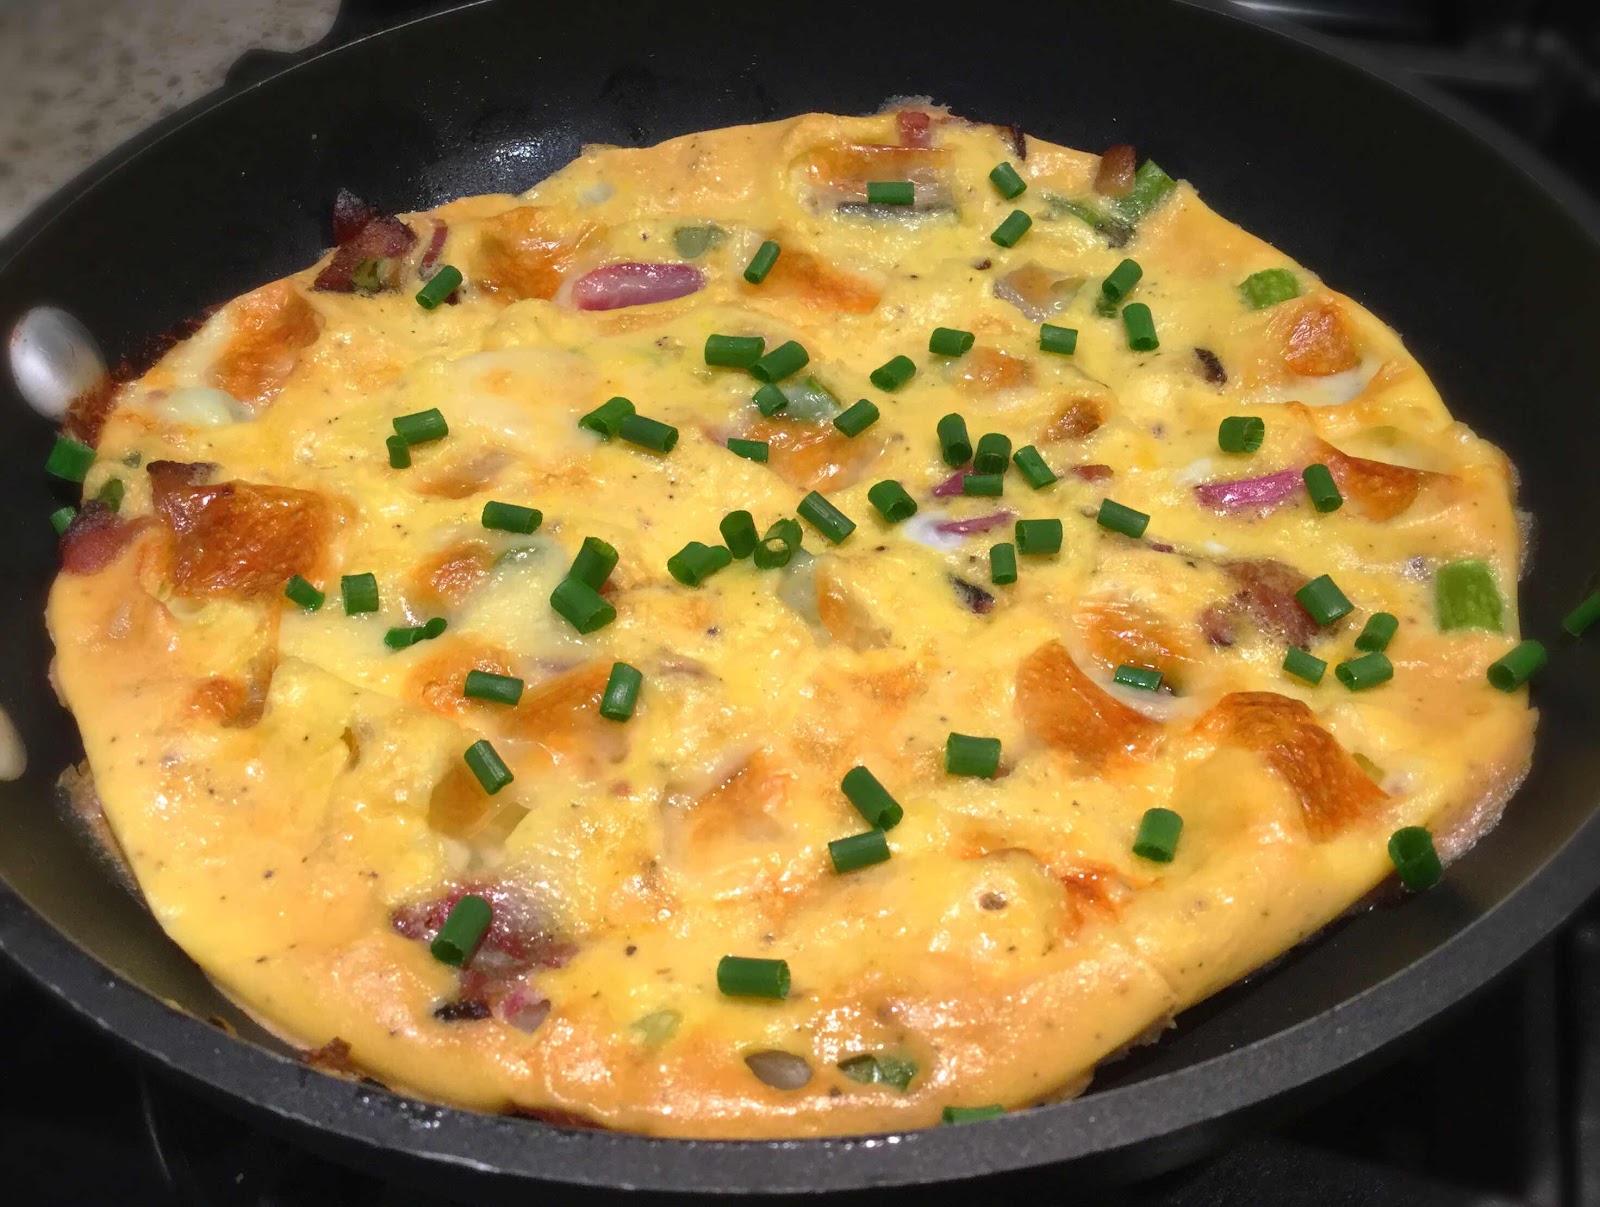
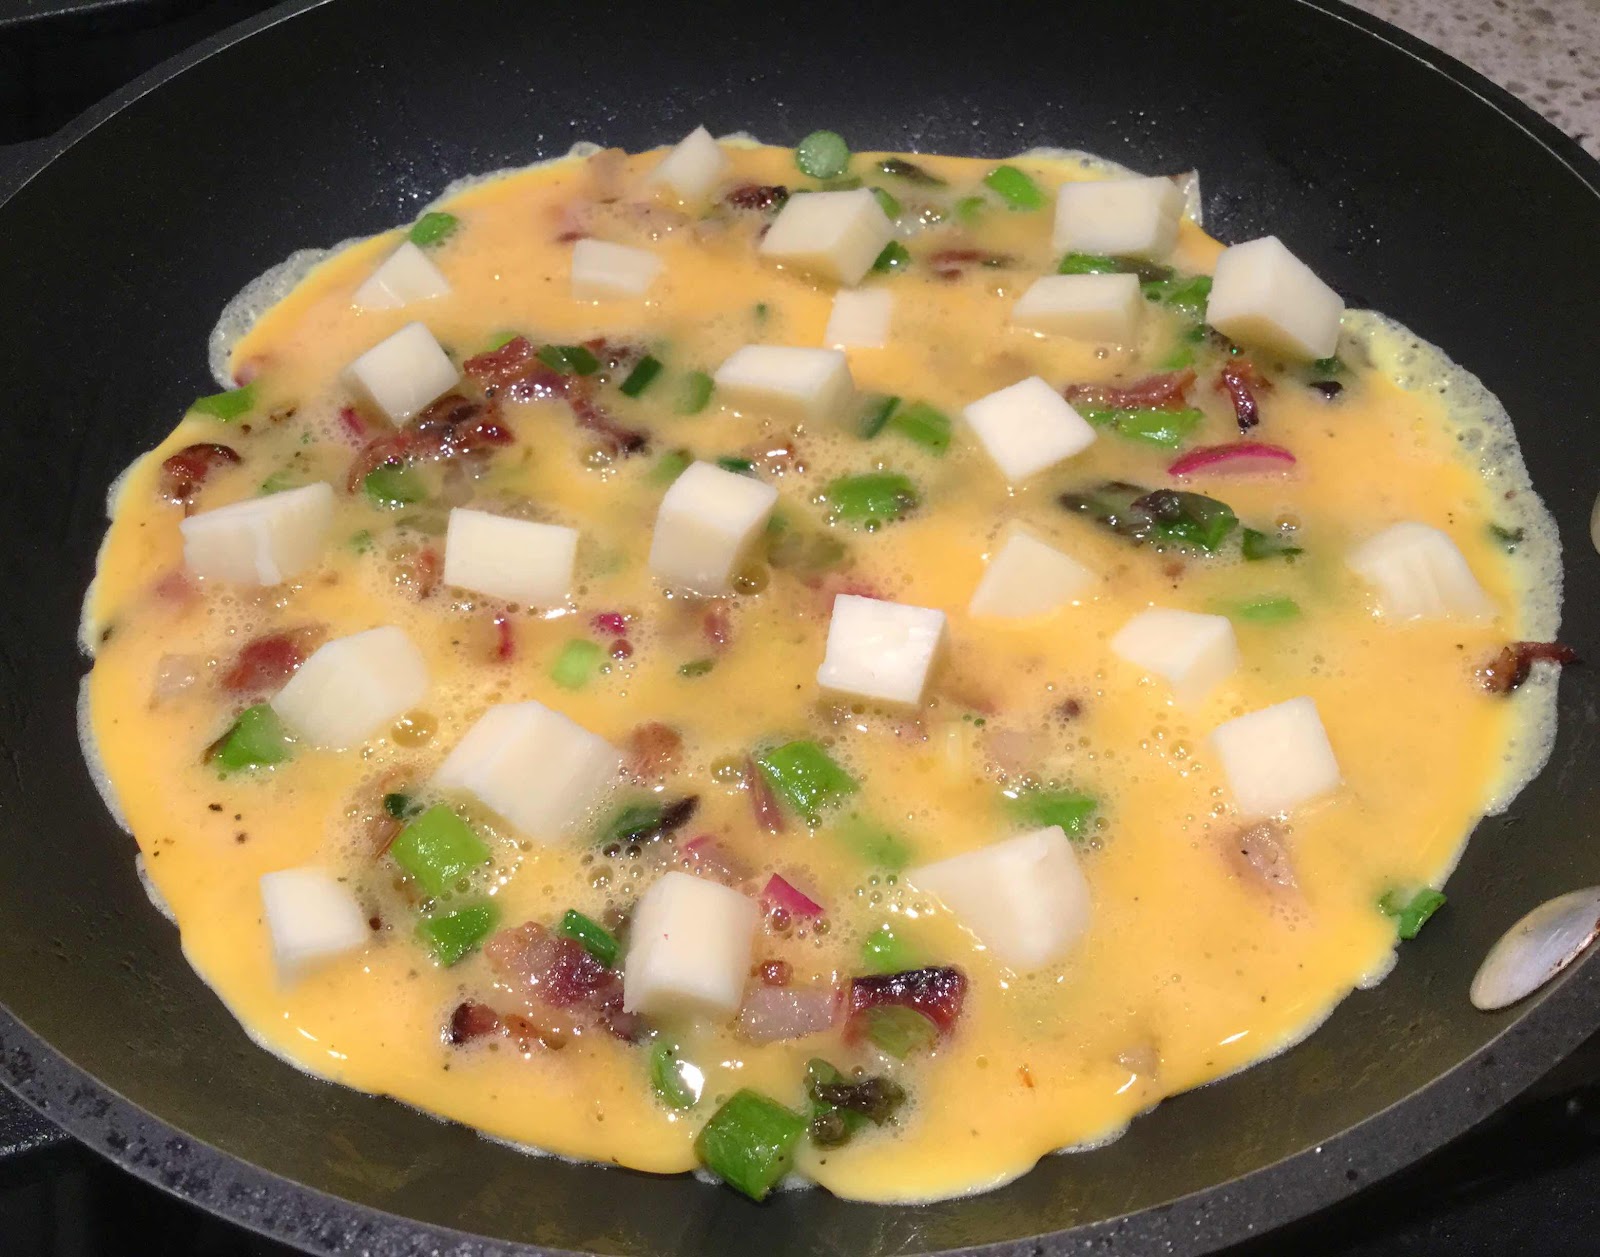
Low Carb Spring Vegetable Frittata with Bacon for One

Spring Vegetable Frittata with Bacon for One
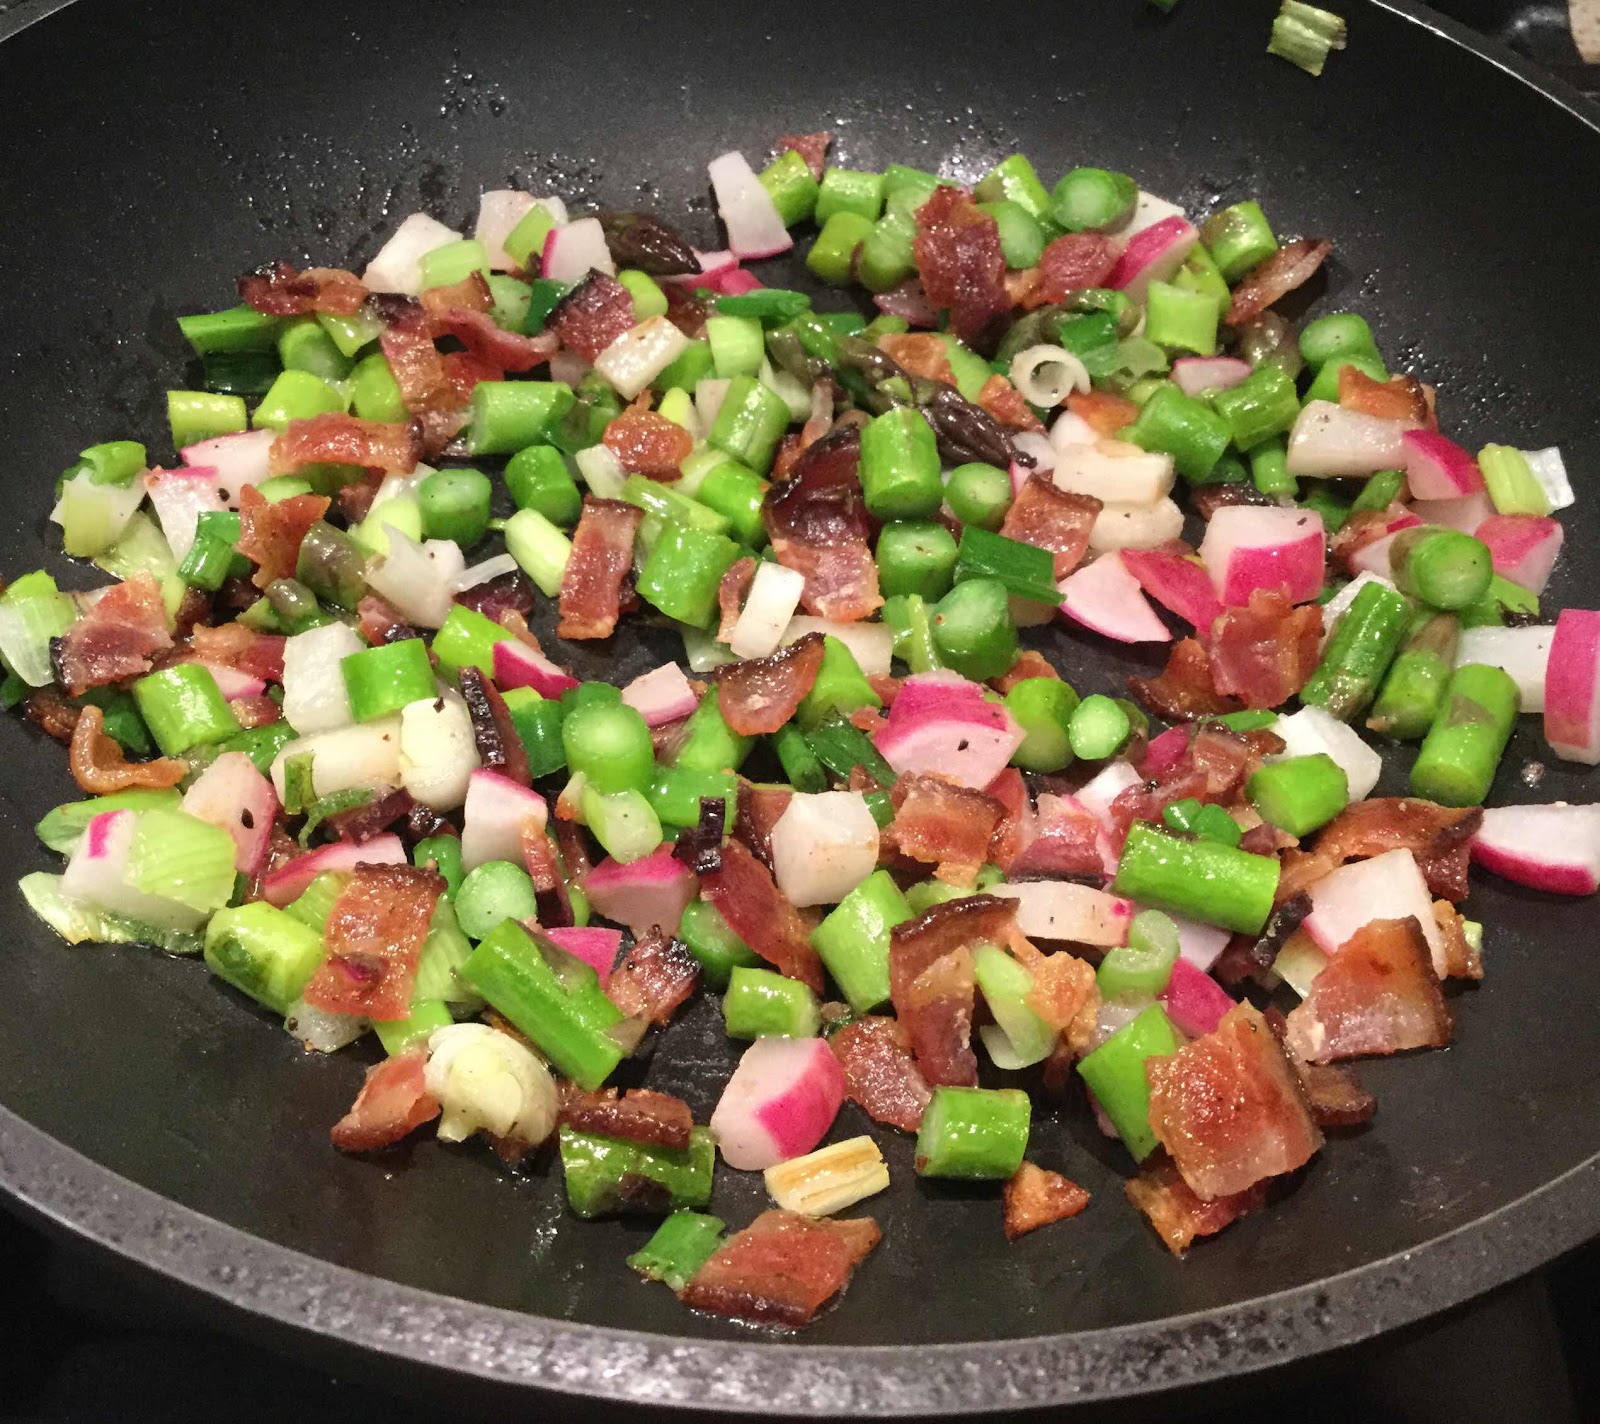
Frittatas are basically just baked omelets. They’re so easy to prepare, they make an excellent quick breakfast or main dish anytime. Often frittatas are made in a large skillet to feed many people, but in this version I prepared it in an 8-inch oven proof omelet pan (or you can use any 8 inch skillet) to create one generous serving. I’ve chosen to highlight the early spring vegetables in this bright and colorful frittata, but feel free to substitute your favorites at any time of year.

Low Carb Spring Vegetable Frittata with Bacon for One
Make 1 serving

2 eggs
1 tablespoon almond milk (or heavy cream)
Salt and pepper to taste
1 tablespoon avocado or coconut oil
4 spears asparagus, cut into 1/2-inch pieces
1 green onion, chopped (green and white parts)
2 medium radishes, cut into matchsticks
2 slices of precooked bacon, chopped (leave out for vegetarian)
1 ounce fontina or cheddar cheese, cubed
1 teaspoon chives, chopped (optional)

1. Preheat oven to 400 degrees Fahrenheit. Beat the eggs, almond milk, salt and pepper together in a small bowl; set aside.

2. In an 8-inch, oven proof skillet, heat oil over medium heat. Add the chopped vegetables and bacon and sauté for about 4-5 minutes until the vegetables begin to soften and brown slightly. Remove from heat and pour the egg mixture over the vegetables and shake the pan to evenly distribute the vegetables. Drop the cubes of cheese on the top of the egg and bake in a preheated oven for 12 minutes, or until set.


3. Remove from oven and transfer frittata to a serving plate. Top with the chopped chives and enjoy.

Nutritional Information per serving (entire recipe): 370 calories, 5.5 g carbohydrate (1.9 g dietary fiber, 2.5 sugars), 26.2 g total fat (11.3 g saturated fat, 0 g trans fat), 425 mg cholesterol, 439 mg sodium, 241.5 mg calcium, 442 mg potassium, 27.8 g protein. Net carbs per serving: 3.6 grams

Photos and Recipe by Kathy Sheehan, copyright 2019
All rights reserved. Please do not duplicate without the author’s permission. 

Saturday, February 11, 2017

Zucchini Noodle Carbonara


The other day, my husband was reminiscing about our trip to Italy many years ago and dreaming about the excellent and authentic pasta carbonara he had there. Every time we talk about that trip, he brings up the carbonara! Tonight, I recreated this special dish for him. He had his over traditional pasta and I had mine over zucchini noodles. We were both delighted with the result! Carbonara is not particularly difficult to make, but can be tricky because, if you cook the egg-parmesan sauce at too high of a temperature, you get carbonara scramble instead of a creamy sauce, so be watchful. The thing I love most about this dish is that when served over zoodles and/or shiritaki noodles, it's an elegant and very low carb meal. I have provided the option to replace one of the zucchini with a package of shiritaki noodles. The shiritaki noodles absorb the sauce nicely and can provide a more noodle-like texture for those who may balk at the thought of an entire plate of vegetables! This low-carb carbonara is a great, quick meal when you want something spectacular that will impress, but don't want to spend too much time in the kitchen. It would make a wonderful Valentine's Day dinner!


Zucchini Noodle Carbonara
Makes 4 servings

4 spirialized zucchini (use spaghetti blade)
1 package Angel Hair shiritaki noodles (optional, but if using, reduce number of zucchini to 3)
4 ounces pancetta, cubed (or substitute bacon)
4 garlic cloves, minced
1 large egg
1/2 cup grated Parmigiano Reggiano cheese, plus more for serving
Freshly ground black pepper to taste
1 handful of fresh, flat-leaf parsley, chopped (or 1 TB dried)

1. In a heavy skillet over medium heat, brown the pancetta or bacon until crispy. Add the garlic and sauté for 1 minute. With a slotted spoon, remove pancetta and garlic to a paper towel-lined plate; set aside. Reduce heat to low. Remove all but about 2 TB of the grease in the skillet and add zucchini noodles. Sauté uncovered, stirring occasionally, to soften the zoodles and allow the zucchini to release some moisure.

2.  Place the drained and rinsed shiritaki noodles (if using) into another dry pan or skillet and stir frequently over high heat until the moisture has evaporated. Remove from heat; set aside and keep warm.

3. When the zoodles are suffiencently soften to your liking, remove skillet from heat and allow to sit while you prepare the sauce ingredients (this is important!). Add the shiritaki noodles and toss to mix. In a small bowl, mix together the 1/2 cup grated cheese and egg; add to the noodle mixture, stirring constantly, until noodles are well coated.  The residual heat from the skillet and noodles will cook the egg. Do not overcook! (If you see the egg beginning to seize up and scramble, immediately remove mixture from heated pan to prevent further cooking.) The sauce should be creamy and smooth. Season the carbonara with black pepper. Mound the carbonara into individual dishes, garnish with chopped parsley and serve immediately.  Pass extra shredded or grated cheese around the table.

Nutritional information per serving (1/4 recipe): 209 calories, 9 g carbohydrate (2.2 g dietary fiber, 5.2 g sugars), 13.7 g total fat (5.5 g saturated fat, 0 g trans fat), 186 mg cholesterol, 470 mg sodium, 191.8 mg calcium, 597 mg potassium, 14.2 G protein. Net carbs per serving: 6.8 grams

Recipe by Kathy Sheehan, copyright 2017
All rights reserved. Please do not duplicate without author's permission.

Wednesday, February 1, 2017

Sautéed Red Cabbage with Bacon and Onions


Part of my strategy for keeping my blood sugar and weight in check is intermittent fasting. Because the body and metabolism resets itself whenever you're on a calorie restricted diet for a period of time (which explains the weight loss plateaus most dieters hit), it's a good idea to keep the body guessing! Intermittent fasting at irregular intervals makes it easier to lose weight and keep it off. Over the holidays, I regained some weight and, as a result, my blood sugar started creeping up to prediabetic levels again. On January 2nd and continuing for 2 weeks, I began an intermittent fasting schedule of skipping breakfast (to allow for 16-18 hour fast between dinner the night before and my next meal) and eating only within a 6 hour window each day. That worked to bring my blood glucose (BG) down a bit and steadied my weight, but it didn't go far enough or act quickly enough for me. Then for the next two weeks, I only ate one meal a day. That brought greater success! I lost 4 pounds and my fasting BG came down 10 points, but still not low enough and, although progress was slow and steady, I wanted faster results. After reading the book The Complete Guide to Fasting by Dr. Jason Fung MD with Jimmy Moore, I was motivated to try an extended fast. Today I just completed a 3-day total fast that only allowed coffee, tea, broth and water and was completely surprised how easy it was to do! In 3 days, I lost 2 pounds, lost inches around my waist and hips and experienced perfectly normal blood glucose. This morning I woke up to a fasting BG of 78! Even tonight, as I was making dinner, I thought I could have gone on for another day or more! I didn't experience any hunger or discomfort and, as a matter-of-fact, I felt GREAT the whole time! If you're struggling with weight or getting your blood sugar under control, I highly recommend that you get Dr. Fung's book and learn about his successful therapy that includes intermittent fasting for reversing diabetes, sometimes as quickly as a couple of weeks.


I wanted to share my break-fast meal, which was really, really delicious after having not eaten for 3 days! In this sweet and sour red cabbage sauté, I replaced the sugar of a traditional recipe with my favorite erythritol sweetener, LaKanto Monkfruit sweetener, and the result was perfection. My non-diabetic husband loved it too. It paired beautifully with an award-winning white wine and herb sausage I bought at my local Whole Foods. This low carb side dish is quick and easy to make and will become favorite of your family, too!

Sautéed Red Cabbage with Bacon and Onions
Makes 4 servings

3 slices of organic bacon, sliced into narrow strips (reserve grease)
1/2 cup onion, thinly sliced
4 cups red cabbage, thinly sliced (about 1/2 head)
3 tablespoons apple cider vinegar
1/2 teaspoon kosher or sea salt
2 teaspoons dried rosemary
3-4 teaspoons LaKanto Monkfruit sweetener, or to taste (or another erythritol sweetener)

1. In a large enameled pot or pan (not cast iron because the vinegar may react with the pan), sauté the bacon until crispy. Remove to drain on a paper towel and reserve bacon grease in the pan. Sauté the onion in the fat. When it is transluscent, add the cabbage and cook, covered and stirring frequently, until the cabbage has begun to soften.

2. Add the vinegar, rosemary and salt. Allow the cabbage mixture to continue cooking until soft and can be pierced with a fork.

3.  Add the sweetener. Start with 3 teaspoons and add more if needed to reach your desired sweetness. Add a tablespoon or two of water if the mixture becomes too dry. Add the bacon back into the pan. Stir and serve.

Nutritional Information per serving (1/4 recipe): 72 calories, 9 g carbohydrate (2.4 g dietary fiber, 4.3 g sugars, 4 g sugar alcohols), 2.9 g total fat (0.9 g saturated fat, 0 g trans fat), 52.8 mg calcium, 461 mg sodium, 287 mg potassium, 1013 mg Vit A, 52 mg Vit C, 1 mg iron, 3.8 g protein. Net carbs per serving: 6.6 grams

Recipe by Kathy Sheehan, copyright 2017
All rights reserved. Please do not duplicate without author's permission.

Saturday, July 18, 2015

Prosciutto Wrapped Zucchini with Pesto and Mozzarella


I've seen many recipes for prosciutto wrapped asparagus spears, but never zucchini.  In this recipe, I created a small hollow down the center of the zucchini and filled it with pesto and firm mozzarella before wrapping it with the prosciutto and sauteing it in a skillet.  The prosciutto becomes crispy and encases the filling nicely.  This makes a wonderful side dish or, if cut into squares, a perfectly delightful appetizer or snack!  If you're looking for another creative way to enjoy your vegetables, I highly recommend you give this recipe a try.

Prosciutto Wrapped Zucchini with Pesto and Mozzarella
Makes 4 side dish servings or about 12 appetizers

1 medium zucchini (about 8" long and not too fat)
2 tablespoons pesto (homemade or store bought)
firm mozzarella, cut into 1/4" x 1/2" sticks
prosciutto slices (about 3-4)
coconut oil (or oil saved from frying bacon)
Optional garnishes for appetizers: basil leaves, grape tomato halves, small mozzarella balls

1.  Wash and dry the zucchini.  Cut a thin portion off one side to create a flat surface (so the zucchini will not roll when placed on that side).  Repeat on the opposite side.  Cut the zucchini lengthwise down the center, between the two flat surfaces.  Set the zucchini halves with the seed sides up and, using a spoon, scrape down the center of each zucchini to remove the seeds and create a hollowed out space.

2.  Spread 1 TB of pesto down the center of each zucchini half in the hollow space.  Top pesto with mozzarella sticks just the length of the hollow space (do not let cheese extend beyond this space).  Wrap each zucchini half with the sliced prosciutto, being careful to overlap and encase the filling completely.

Saute prosciutto wrapped zucchini in skillet
3.  Heat the oil in a skillet to medium-high.  Place the zucchini with seam side down into the pan and saute until the prosciutto is browned and crispy.  Turn over and repeat with second side.  You may also wish to brown edges, as well.  Remove from pan and drain briefly on a paper towel.  Cut each zucchini into serving size pieces.  To serve as a side dish, cut each zucchini half into 2 pieces.  If creating appetizers, cut each zucchini into small squares and top with suggested garnish (as pictured) and secure with a toothpick.

Nutritional Information per side dish serving (1/4 recipe): 106 calories, 2.5 g carbohydrate (0.6 g dietary fiber, 1.5 g sugar), 8.4 g total fat (3.3 g saturated fat, 0 g trans fat), 14 mg cholesterol, 381 mg sodium, 115.3 mg calcium, 128 mg potassium, 6.7 g protein.  Net carbs per serving: 1.9 grams

Recipe by Kathryn Sheehan, copyright 2015

Sunday, December 28, 2014

Bacon Party Cheese Log


The holiday season is drawing to a close, but there's still one more occasion for celebration.  A New Year's Eve party calls for a spectacular appetizer and there's nothing that will please a crowd as much as bacon!  This cheese log can be made with soft goat cheese or cream cheese, whichever is more to your liking.  The outside is rolled in a mixture of crushed pistachios, crispy crumbled bacon and spices. (For a vegetarian option, see below.)  It is delicious served with gluten free crackers (I like Mary's Gone Crackers), English cucumber slices, celery, assorted vegetables or, if shaped into small bite-size balls, even eaten by themselves.  Crumble any leftovers and sprinkle it on salads or steamed vegetables; it's a creamy and delicious addition to an otherwise boring salad.  I made this for my Christmas Eve family dinner and it was a huge hit with everyone!  It's quick and easy to prepare and can be made a day or two ahead of the party.  Enjoy a happy and healthy New Year!

Bacon Party Cheese Log
Makes about 10 servings (2 TB each)

8 oz. soft goat cheese or cream cheese (room temperature)*
1/2 teaspoon paprika (sweet or smoked, whichever you prefer), divided
1 teaspoon dried, chopped basil
3/4 teaspoon ground black pepper, divided
1/4 cup pistachios, shelled and then measured
5 slices of bacon, chopped and fried until crispy and drained*

1.  Using a handheld mixer, whip the cheese until fluffy.  Add 1/4 teaspoon paprika, basil and 1/4 teaspoon ground pepper.  Form into a log and wrap in plastic wrap or form into a ball.  (You can also form small balls using 1 tablespoon cheese mixture for each.)  Chill in the refrigerator until firm.

2.  Fry the chopped bacon until crispy and drain on paper towels.  Place the bacon, pistachios, 1/2 teaspoon ground pepper and 1/4 teaspoon paprika into a food processor and pulse until the pistachios are chopped into small pieces.  (If you don't have a food processor, chop the pistachios and bacon with a sharp knife until the right consistency, then add the spices.)  

3.  Place the bacon mixture into a shallow plate.  Roll the cheese log in the mixture until completely covered.  Refrigerate until party time.  Allow the log to soften for about 30 minutes at room temperature before serving.

Nutritional Information per serving (2 TB), not including crackers or vegetables: 106 calories, 1.9 g carbohydrate (0.4 g dietary fiber, 1.1 g sugar), 8 g total fat (4 g saturated fat, 0 g trans fat), 21 mg cholesterol, 135 mg sodium, 39.8 mg calcium, 64 mg potassium, 6.3 g protein.  Net carbs per serving: 1.5 grams

* To create a dairy-free log, use dairy-free, vegan cream cheese in place of the goat or cream cheese.  For a vegetarian option, you can double the amount of pistachios and omit the bacon.

Recipe by Kathy Sheehan, copyright 2014

Tuesday, August 19, 2014

Bacon Wrapped Chicken with Cucumber in a Creamy Herb Sauce


Finally, after years of trial, some success, backsliding, and continual adjustments to my diet, I am hopeful that I've discovered my personal tolerance level for carbohydrate and protein, both of which act upon insulin and blood sugar.  For the past several months, my blood glucose has been steady, with a fasting BG in the mid-80's, which has prompted a further reduction of diabetic meds!  We all understand the effect of carbs, right?  But protein, you might ask?  You may think protein doesn't affect blood sugar, but an excess of protein does!  Through a process called gluconeogenesis, your body will convert excess dietary protein into glucose.  Have you ever wondered why your BG will rise, even after not eating carb?  Gluconeogenesis could be the culprit!  So, how much protein should a diabetic eat?  Actually, for each person, it is different based on body size, metabolism, diet, etc.  With guidance from my doctor, I determined my level to be around 45 grams a day, but I'm a small person.  For a taller woman or man, it would be different.  The formula for calculating the optimum amount of protein is 1 gram for every kilogram of lean body mass.  If you're an athlete, then about 2 grams. (Click here for an online calculator to determine the approximate amount of protein for your size & activity level.)  So, the ratio of carbs, protein and fat that have brought about normal blood sugar levels for me is about 10-15% carb (under 25 g net carbs), 15% protein and 65-75% healthy fats (about 100 grams), such as olive oil, ghee, coconut oil, avocados, nuts and seeds.  (By the way, even with all that fat, my lipid levels, triglycerides, inflammation markers and blood pressure have dramatically improved, along with my BG!  Based on test results, my risk for heart disease has gone down!)  But, as I said, every person is different and, as nice as it would be to be given the proper ratio for your body to reverse diabetes, it will take some experimentation on your part to discover your personal tolerance levels.  

A good place to start is to reduce carbs to under 100 grams per day (spread throughout the day) and eventually reduce them to under 50.  Eat no more than 20 grams of protein per meal (an excess of that is usually more than a body can use in 4-5 hours) and ramp up your fat intake.  I want to be very clear about one point: a low fat, low carb diet doesn't work!  (And neither does a high carb, high fat diet.) Without enough fat, you'll be hungry and crave carbs, which can sabotage your efforts.  If you cut carbs and moderate your protein intake, then you'll need to increase your fat.  The best gauge is to eat enough fat until you're satisfied and don't experience any hunger, cravings or discomfort between meals.  Also, because your blood sugar and insulin requirements will drop, you'll need to be under a doctor's care because a reduction in medication will likely be necessary.  Another caution is to Type 1 or insulin-dependent T2 diabetics: this type of diet adjustment needs close monitoring by a doctor.  To learn more, I highly recommend The Diabetes Solution by Dr. Richard Bernstein, who is himself a Type 1 diabetic.  His book explains this type of low carb diet in great detail and includes approved food lists and recipes.  Another good book to get you started is The New Atkins for a New You by Drs. Eric Westman, Stephen Phinney and Jeff Volek.

Now, on to my incredible new recipe!  Why is it that when you add bacon to a dish, it instantly becomes the best thing you put into your mouth? Well, that statement says it all.

Bacon Wrapped Chicken with Cucumber in a Creamy Herb Sauce
Makes 4 servings

12 ounces boneless, skinless chicken breasts, cut into 3 oz. medallions
4-6 slices of bacon
1 large cucumber, seeds removed and sliced into 1/8" quarter rounds
1/2 cup chicken stock*
2 tablespoons ghee (or butter)*
1/3 cup high fat coconut milk (or heavy cream)*
2 tablespoons chopped, fresh parsley (or 1 TB dried)
1 teaspoon fresh thyme (or 1/2 tsp dried)
Salt and pepper
6 cups spring mix lettuce, divided among 4 serving plates

1. Pat chicken with a paper towel and cut into 3 oz pieces.  Generously season chicken medallions with salt and pepper.  Wrap one piece of bacon around each medallion.  Heat a heavy skillet to medium and place chicken into the pan.  Meanwhile, heat oven to 350-degrees.  Cook chicken for 5 minutes, flip each medallion and cook for another 5 minutes.  Remove chicken from pan and place in a baking dish.  Continuing heating chicken in the oven while you make the sauce.

2.  Drain all but 2 tablespoons of bacon fat from the skillet.  Add the chicken stock and stir to deglaze the brown bits from the bottom of the skillet.  Add the ghee (or butter) and the cucumber.  Sauté until the cucumber is beginning to soften and the stock has been reduced by half.  Add the coconut milk (or cream) and stir to combine and until slightly thickened. Season with herbs, salt and pepper to taste.  Remove skillet from heat.  Remove chicken from oven and place a chicken medallion on each mound of lettuce.  Pour any drippings from the baking pan into the sauce and stir.  Divide sauce and cucumbers evenly over the four portions and serve immediately.

* For those with food allergies: To create a dairy, lactose and casein free version, use ghee and coconut milk.  To make it gluten free, be sure to purchase a certified GF chicken stock or broth.

Nutritional Information per serving: 292 calories, 5 g carbohydrates (1 g dietary fiber, 2.4 g sugars), 18 g total fat (10.1 g saturated fat, less than 0.1 g trans fat), 75 mg cholesterol, 739 mg sodium, 70.8 mg calcium, 456 mg potassium, 26.8 g protein.  Net carbs per serving: 4 g

Recipe by Kathy Sheehan, copyright 2014
Thursday, August 7, 2014

Faux Colcannon


Colcannon is a traditional Irish dish usually made with mashed potatoes and cabbage (or kale).  It can also contain other ingredients, such as leeks, onions, or chives.  It is often eaten with Irish bacon or boiled ham.  During a recent trip to Ireland, I watched my non-diabetic husband eat this comforting dish time and time again.  It was pure torture!  The traditional recipe is extremely high in carbohydrate, so far beyond my carb allowance for a meal.  I came home determined to create a low carb version with the same creamy texture and combination of flavors.  This recipe does exactly that!  Tonight, when we're eating our bangers and mash, I'll be able to join in without the guilt or the telltale blood sugar spike that is normally associated with the eating of this favorite Irish side dish.

Faux Colcannon
Makes four 3/4 cup servings

1 large head cauliflower
4 slices of bacon
2 teaspoons ghee* (or butter), divided
1/2 leek, sliced into half moons
1 cup chopped cabbage (or chopped coleslaw mix)
2 tablespoons dairy free cream cheese* (or regular)
1-4 tablespoons chicken stock*
Salt and pepper to taste

1.  Remove the outer leaves from the cauliflower and cut off florets.  Place in a steamer basket over an inch or two of water.  Cover pot and steam for 15 minutes. Turn off heat and remove cover; set aside.

2.  Meanwhile, slice bacon into 1/2-inch pieces.  Heat in a large skillet, stirring occasionally, until bacon is crispy.  Remove bacon from pan with a slotted spoon and drain on paper towels; set aside.

3.  After bacon has cooked, drain skillet of all but 1 tablespoon of the bacon fat.  Add 1 teaspoon of ghee.  Add leek, a pinch of salt and steamed cauliflower to the skillet and saute over medium-low heat, stirring frequently, for about 10 minutes or until leek is translucent and cauliflower has dried out a bit.  Place this mixture and the dairy-free cream cheese into a food processor or blender.  Add one tablespoon of chicken stock at a time to the mixture as it is processed until it reaches the consistency of mashed potatoes.  (You may need to stop the food processor or blender occasionally and stir down the mixture to incorporate all the ingredients.)  Remove this mixture to a serving bowl and set aside.

4.  Add 1 teaspoon of ghee to the skillet and, over medium heat, saute chopped cabbage until softened.  Add the cooked cabbage and crispy bacon to the cauliflower mixture and stir to combine.  Season with salt and pepper to taste.  Serve warm.

Nutritional Information per serving: 141 calories, 11.7 g carbohydrate (4.3 g dietary fiber, 4.6 g sugar), 8 g total fat (3.7 g saturated fat, 0 g trans fat), 13 mg cholesterol, 49.2 mg calcium, 560 mg potassium, 768 mg sodium, 7 g protein.  Net carbs: 7.4 grams

*Notes for those with food sensitivities: To create a lactose and casein free dish, use ghee instead of butter and a dairy-free cream cheese.  I used Daiya brand Plain Cream Cheese Style Spread which is gluten free, dairy free, nut free and soy free.  It is free of the top eight food allergens.  Also, if gluten is an issue for you, choose a chicken stock that is certified gluten free.  I used Kitchen Basics brand.

 Original recipe by Kathy Sheehan, copyright 2014