Showing posts with label berries. Show all posts

Thursday, February 5, 2026

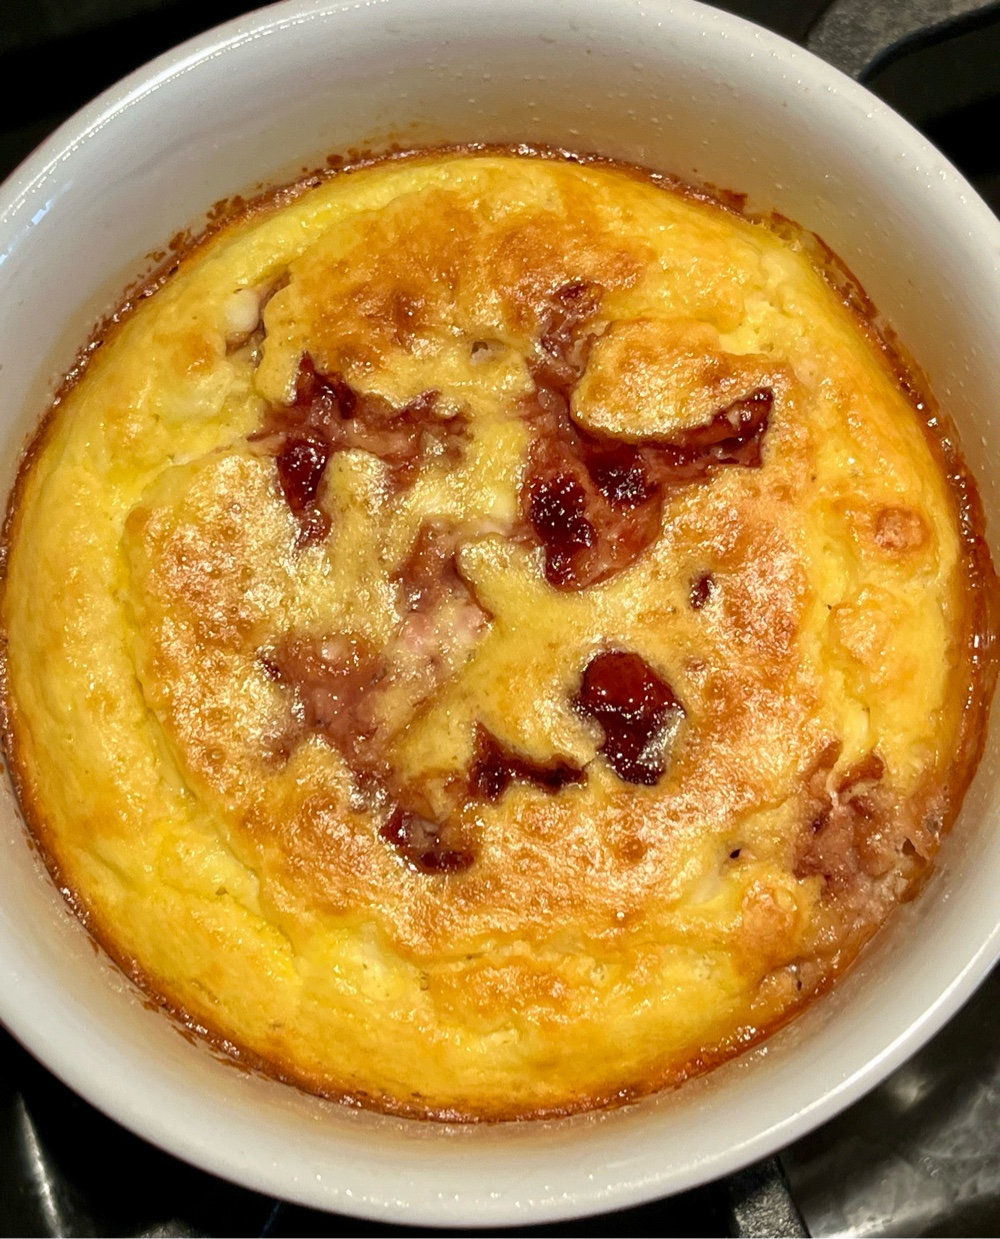
Baked Cottage Cheese Breakfast Bowl

Baked Cottage Cheese Breakfast Bowl
This high protein breakfast pudding can be made either sweet or savory! It makes one generous serving that leaves your body nourished and satisfied for hours.

Baked Cottage Cheese Breakfast Bowl
Makes 1 serving

Base Mixture:
½ cup cottage cheese (4% fat)
1 large egg
1/4 cup almond flour
1/4 teaspoon baking powder
A pinch of salt

Sweet Additions:
½ teaspoon vanilla extract
1-2 tablespoons allulose honey or sugar free maple syrup (or 6 drops monkfruit extract)
1/4 cup strawberries (chopped), or blueberries, fresh or frozen

Savory Additions:
1/4 cup ham, or cooked sausage, bacon or broccoli (chopped)
2 tablespoons shredded cheese
Freshly ground black pepper to taste
½ teaspoon chopped herbs

Preheat the oven to 350°F. Lightly grease one large oven-safe ramekin or small baking dish; set aside.

In a bowl, whisk together the base mixture of cottage cheese, egg, almond flour, baking powder, and salt until smooth.

If making sweet, whisk in your sweetener of choice and vanilla. Then gently fold in the fruit.

If making savory, add the meat or chopped broccoli, cheese, pepper and herbs to the base mixture and stir to combine.

Pour the mixture into the greased ramekin and bake for 25-30 minutes until set and lightly golden on top. Cool for about 10 minutes before serving.

Nutritional Information per serving: Varies, depending on additions to base mixture. Base mixture is 330 calories, 9.7 g carbohydrate (2 g dietary fiber, 5.2 g sugars), 22.8 g total fat (5.6 g saturated fat, 0 g trans fat), 201 mg cholesterol, 607 mg sodium, 255.6 mg calcium, 229 mg potassium, 2 mg iron, 141 IU Vit A, 24.3 g protein. Net carbs per serving: 7.7 grams.

Photo and recipe by Kathy Sheehan, copyright 2026
All rights reserved. Please do not duplicate without the author’s permission.

Friday, August 9, 2024

Low Carb Blueberry Pecan Pancake Bread Pudding

Low Carb Blueberry Pecan Pancake Bread Pudding

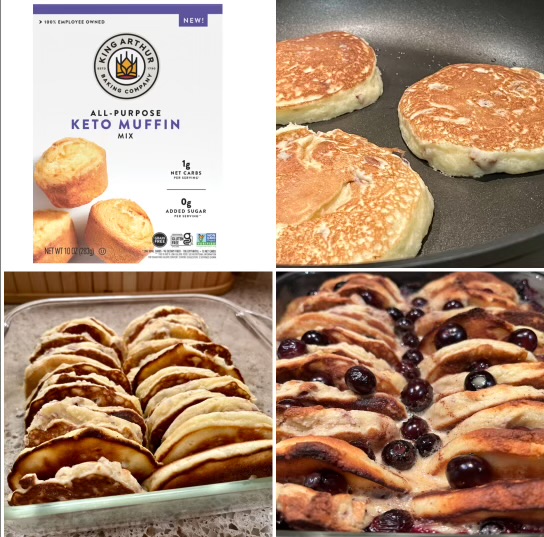
For brunch with my family, I wanted to make something special that mostly could be made ahead, minimizing last minute preparations. When searching online, I found a recipe that used pancakes in place of bread in a bread pudding, so I adapted it to create this outstanding low carb breakfast casserole. The convenience of using a boxed keto muffin mix as the base of the pancake batter was genius! The breakfast pudding was a huge hit with my family and may have tasted even better the second day! You can substitute raspberries or blackberries for the blueberries, if you prefer. The yogurt sauce is optional, but the hit of lemon in the creamy sauce really brightened the dish.

Low Carb Blueberry Pecan Pancake Bread Pudding
Makes 8 servings

Pancakes:
One (10 oz.) box King Arthur’s All-Purpose Keto Muffin Mix
5 large eggs
1½ cups low carb milk of choice
1/3 cup sour cream
2 tablespoons melted unsalted butter or avocado oil
½ cup chopped pecans
6 oz. organic blueberries

Custard:
3 large eggs
2 cups half and half (or a mixture of low carb milk and heavy cream equaling 2 cups)
1/3 cup low carb sweetener of choice (allulose/erythritol blend works well)
1½ teaspoon vanilla extract
½ teaspoon ground cinnamon
1/4 teaspoon salt

Lemon Yogurt Sauce:
1/3 cup plain greek yogurt
2 tablespoons half and half
2 tablespoons allulose honey (or granulated allulose)
2 teaspoons lemon zest (or 2 drops lemon oil)
A pinch of salt

1. Place the muffin mix into a large mixing bowl. Whisk together the low carb milk, sour cream, butter or avocado oil, and five eggs in a large measuring cup. Add the milk mixture to the muffin mix and whisk with a fork until blended and smooth. Fold in the chopped pecans. (If you can’t find King Arthur’s Keto Muffin Mix, you can substitute your favorite low carb pancake recipe.)

2. Heat a griddle or large nonstick skillet over medium heat. Add a teaspoon of avocado oil to grease the pan. Pour about 1/4 cup batter for each pancake onto the hot griddle. Spread the batter into a 4 inch circle using the back of a small spoon. Cook until the edges look dry and the bottoms are golden brown, about 3 minutes. Carefully flip the pancake and cook on the other side until the pancake springs back when touched in the center, another 2-3 minutes. Remove pancakes to a wire rack to cool and repeat with the remaining batter. You should end up with 18-20 pancakes.

Bread Pudding Steps

3. Slice each pancake in half and arrange with the cut side down into two rows in an 8 x 8“ baking dish that has been sprayed with cooking spray. (You may not need all the pancakes to fill the baking dish. Save any unused pancakes to eat later.) Scatter half of the blueberries over the pancakes, tucking a few between each layer. This can be done 1-2 days ahead and then stored in the refrigerator, covered with plastic wrap, until the night before you plan to serve. 

4. The night before you plan to cook and serve, whisk together 3 eggs, the 2 cups half-and-half, sweetener, vanilla, cinnamon and salt. Pour the custard mixture over the pancakes and blueberries in the baking dish. Chill at least four hours and up to overnight to allow the custard to soak into the pancakes.

Cooked Bread Pudding

5. Preheat oven to 350°F. Bake the casserole until puffed and the custard is set, 45 to 50 minutes. Let stand 10 minutes to cool before serving. To serve, sprinkle with remaining blueberries and drizzle with sugar free syrup or Lemon Yogurt Sauce. Serve warm. Leftovers can be stored in the refrigerator and reheated before serving.

6. Lemon Yogurt Sauce: Whisk together the yogurt, half and half, sweetener, lemon zest and a pinch of salt until smooth and not too thick. Of needed, add more liquid a teaspoon at a time until you achieve the proper consistency. Makes about ½ cup.

Nutritional Information per serving (no yogurt sauce): 319 calories, 20.4 g carbohydrates (2.9 g dietary fiber, 4.8 g sugars, 17 g sugar alcohols), 24.7 g total fat (9.9 g saturated fat, 0 g trans fat), 216 mg cholesterol, 498 mg sodium, 173 mg calcium, 308 mg potassium, 3 mg iron, 184 IU Vit A, 3 mg Vit C, 10.9 g protein. Net carbs per serving: 1.5 grams

Photos and recipe by Kathy Sheehan, copyright 2024
All rights reserved. Please do not duplicate without the author’s permission.

Thursday, March 21, 2024

Keto Cake Boats

Keto Cake Boats

This cake was baked in a top-split, New England style hot dog bun baking pan! (Although you could use a 13” x 9” baking pan and cut into buns.) I made two flavors of Whipped Mascarpone Cream and laid out an array of toppings and my family had a blast making custom Cake Boats at a recent party. Whether you prefill these cakes or allow your guests to create their own, this dessert will be a BIG HIT with everyone! (I bought the hot dog bun baking pan on the King Arthur’s Baking Company website.)

Keto Cake Boats
Makes 10 bun-size cakes or 20 smaller cakes

Keto Cake Mix (I recommend King Arthur’s Keto Yellow or Chocolate Cake Mix)*
Ingredients called for on the box (eggs, milk, oil, etc)

Whipped Mascarpone Cream 
Makes about 3 cups of frosting

1 1/4 cups heavy whipping cream, cold
½ cup low carb powdered sweetener (I used LaKanto Monkfruit Confectioners sweetener)
1 teaspoon vanilla extract
8 ounces plain mascarpone cheese (not sweetened), softened but still chilled

Whipped Chocolate Mascarpone Cream
Makes 3 cups

1 1/4 cups heavy whipping cream, cold
½ cup low carb powdered sweetener (I used LaKanto Monkfruit Confectioners sweetener)
1/4 cup unsweetened cocoa powder
1 teaspoon vanilla extract
8 ounces plain mascarpone cheese (not sweetened), softened but still chilled

Garnishes: berries or other low carb fruit, sugar free sprinkles, chopped nuts, my sugar free Keto Chocolate Fudge Sauce (click here to see recipe)

King Arthur’s Keto Yellow Cake Mix

1. Make the cake according to the package directions and bake in the New England style hot dog bun pan or a 13” x 9” pan that has been sprayed with nonstick cooking spray. *NOTE: The King Arthur’s Cake Mix I used wasn’t enough to fill the hot dog pan or a 13” x 9” baking pan. I used two cake mixes and made a double batch of batter, which was more than I needed, so I made cupcakes out of the excess batter and froze them for another time. Fill whichever baking pan you use to about ½” below the rim and then bake according to directions or until a toothpick inserted in the center comes out clean. After 10 minutes, remove cake to a wire rack to cool completely.

New England Hot Dog Bun Baking Pan

2. Make the Whipped Mascarpone Cream: Add the heavy whipping cream, powdered sweetener and vanilla extract to a large mixer bowl and whip on high speed until soft peaks form. If making the chocolate version, also add the cocoa powder.

3. Add the mascarpone cheese to the whipped cream and whip until stiff peaks form. It will happen fairly quickly. (I prefer to use the mascarpone cheese when still chilled, but softened a bit, so that it will incorporate well without chunks. The warmer the mascarpone cheese is, the more likely it is to soften to the point that it won’t firm up well again, and can make too soft of a frosting. I suggest taking it out of the refrigerator about 15 minutes before using so that it softens a bit, but is still cool.)

4. Cut the cooled cake into buns and cut a V-shape along the top of each bun. Fill with mascarpone cream and garnish with berries or other toppings. Drizzle with sugar free chocolate sauce and serve.

Keto Cake Boat with toppings

Nutritional Information will vary, depending on the fruit and other toppings used. One full-size cake boat made from King Arthur’s Keto Yellow Cake Mix according to package directions is 168 calories, 15.6 g carbs (12 g dietary fiber, 2 g sugars), 14.4 g total fat (2.4 g saturated fat, 0 g trans fat), 92 mg cholesterol, 272 mg sodium, 10 mg calcium, 139.2 mg potassium, 1 mg iron, 4.8 g protein. Net carbs per cake (without toppings): 3.6 grams

Recipe and photos by Kathy Sheehan, copyright 2024
All rights reserved. Please do not duplicate without the author’s permission.

Saturday, February 3, 2024

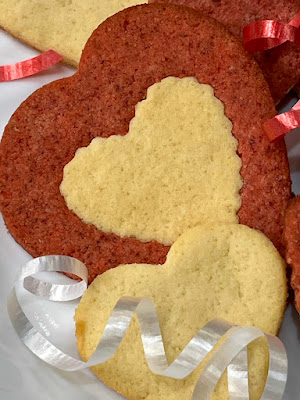
Keto Two-Tone Valentine Heart Cookies

Keto Two-Tone Valentine Heart Cookies
These two-tone Valentine cookies are made with one dough, that is then divided and one half flavored with strawberries! If you use a set of graduated sized cookie cutters, like I did, it’s fun to create small cutouts in the larger cookies and fill them with the same size cutout of a different color. Each heart cookie is a puzzle! Of course, if you don’t have a set of heart cookie cutters, you can make these cookies into any shape using any cookie cutter. These red and white cookies are the perfect Valentine’s Day treat!

Keto Two-Tone Valentine Heart Cookies
Makes approximately 12 servings (depending on the size of your cookie cutters)

1 cup almond flour
5 tablespoons coconut flour
1 tablespoon unflavored protein powder
1/4 teaspoon salt
8 tablespoons unsalted butter, softened (1 stick)
½ cup erythritol sweetener* (see note below)
1 large egg
1 tablespoon low carb milk of choice
½ teaspoon vanilla extract
1 tablespoon unsweetened freeze dried strawberry powder
1/4 teaspoon strawberry extract
1 teaspoon water
2 drops red food coloring
A set of heart cookie cutters in graduated sizes (optional, but that’s what I used. My set is Mrs. Anderson’s brand.)

Mrs. Anderson’s Heart Cookie Cutter Set

1. Before you begin, in a food processor, nut mill, or using a mortar and pestle, grind the unsweetened freeze dried strawberries into a fine powder; set aside.

Freeze Dried Strawberries

2. Prepare two work surfaces, each with a silicone baking mat or a large piece of parchment paper. Dust lightly with coconut flour.

3. In a medium bowl, whisk together the almond flour, coconut flour, protein powder, and salt until no lumps remain. In a large bowl, beat the softened butter and 1/2 cup of erythritol sweetener together until creamy using an electric mixer. Beat in the egg, milk and vanilla extract, and then beat in the dry ingredients until the dough comes together. Remove half of the dough from the bowl and set aside.

4. To the remaining dough, add the 1 tablespoon of strawberry powder, 1/4 teaspoon strawberry extract, 1 teaspoon of water and two drops of red food coloring. Beat until the dough is uniform in color.

5. Turn both doughs out onto the two prepared work surfaces. Pat each into a circle and then top with a large piece of parchment paper. Roll out each ball of dough to about 1/3 inch thickness. Place the rolled out dough and mat on a cookie sheet and chill in the refrigerator for about 30 minutes. (The dough is much easier to handle when cool.) 

6. Preheat the oven to 325°F and line a large baking sheet with a silicone mat or parchment paper. Using heart cookie cutters, cut out cookies and lift carefully with a spatula. For fun and variety, cut a small heart out of the middle of a larger heart, then fill the cut out space with a small heart of a different color, pressing gently to fuse the doughs together.

Keto Valentine Heart Cookies

7. Place cookies on the prepared baking sheet. These cookies do not spread as they bake, so space about 1” apart on the baking sheet. Re-roll your dough when necessary and cut out more cookies. (If your dough gets too soft to work with, you can return it to the refrigerator for a bit to cool and firm up again.)

8. Bake the cookies for about 12 minutes, or until they are just starting to brown around the edges. Remove from the oven and let the cookies cool for 10 minutes on the pan. The cookies will be quite soft right out of the oven, but will firm up as they cool. Remove to a wire rack to cool completely. 

Notes: How many cookies you get depends on the size of your cookie cutters. *I recommend using a sweetener that is erythritol based for a crisper, firmer cookie. Allulose will result in a soft and delicate cookie.

Low Carb Two-Tone Valentine Heart Cookies

Nutritional Information per serving (1/12th of recipe): 117 calories, 3.7 g carbohydrates (1.4 g dietary fiber, 0.9 g sugars, 1 g sugar alcohols), 11.4 g total fat (6.1 g saturated fat, 0 g trans fat), 36 mg cholesterol, 59 mg sodium, 9.1 mg calcium, 22 mg potassium, 78 IU Vit A, 1 mg Vit C, 1.7 g protein. Net carbs per serving: 2.3 grams

Photos and recipe by Kathy Sheehan, copyright 2024
All rights reserved. Please do not duplicate without the author’s permission.

Wednesday, December 20, 2023

Keto Raspberry Almond Mini Breads with Streusel Topping (or Muffins)

Keto Raspberry Almond Mini Breads

Looking for a last minute gift to share with friends or family? These healthier, sugar free mini bread loaves will be enjoyed by anyone, whether they are low carb or not! They’re easy to make because you start with a boxed keto muffin mix!

Raspberry Almond Mini Breads with Streusel Topping (or Muffins)
Makes about 4 mini breads (depending on pan size) or 12 muffins

5 eggs, room temperature 
½ cup neutral oil, such as avocado oil
1 cup low carb milk of choice (non-dairy is fine)
1 teaspoon vanilla extract
½ teaspoon almond extract
8 drops Monkfruit extract (or 2 tablespoons zero carb granulated sweetener)
1 pint fresh raspberries
1 box of King Arthur’s Keto All Purpose Muffin Mix

Streusel Topping:
1/4 cup almond flour
1/4 cup erythritol-based sweetener (I like LaKanto Classic Monkfruit sweetener)
2 tablespoons unsalted butter

King Arthur’s Keto Muffin Mix

1. Using a pastry cutter, mix together the streusel topping ingredients until pea-size crumbles form. Set aside. Spray a muffin tin or mini loaves pan with nonstick spray; set aside. Preheat oven to 350°F.

2. In a standing mixer (using a paddle attachment) or using an electric mixer, mix together the eggs, oil, milk, and extracts. Blend well.

3. Add the muffin mix and mix until combined. Fold in the raspberries and divide the batter evenly between the mini bread pans or muffin cups. Sprinkle streusel topping on top of each loaf or muffin.

4. Bake for about 28 minutes for muffins or 38 to 40 minutes for mini loaves. Bake until the internal temperature reaches 206°F.

Baked Mini Breads

5. Remove from oven and allow the muffins or loaves to cool in the pan for about 15 minutes. Turn out the muffins or loaves onto a wire rack to cool completely before serving. These breads or muffins freeze beautifully. Allow to cool completely, then wrap with plastic wrap and freeze for up to 2 months. Thaw to room temperature before serving.

Slice and enjoy!

Nutritional Information per serving (1/12th of recipe or 1 muffin): 97 calories, 12.5 g total carbohydrates (2.7 g dietary fiber, 2.3 g sugars, 6 g sugar alcohols), 5.5 g total fat (2.9 g saturated fat, 0 g trans fat), 83 mg cholesterol, 99.5 mg calcium, 164 mg potassium, 2 mg iron, 7 mg Vit C, 54 IU Vit A, 4.1 g protein. Net carbs per serving: 3.8 grams

Photos and recipe by Kathy Sheehan, copyright 2023
All rights reserved. Please do not duplicate without the author’s permission.

Wednesday, July 12, 2023

Keto Shortcakes

Keto Shortcakes

Strawberry Shortcake is a summer tradition! Some people like theirs on a biscuit but, when I was growing up, we bought the little packaged shortcake cups often displayed near the strawberries in the summer months (see image below). They were light sponge cakes with a hint of lemon that soaked up the juices from the berries. I set out to recreate those iconic snack cakes and have succeeded with this recipe! These lightly sweet mini cakes are soft, have a light and airy texture and, if baked in a shortcake pan (as pictured), are nearly identical to the shortcakes I remember. Of course, if you don’t have a shortcake baking pan, just use a regular muffin pan. Piled high with berries and cream, this is a summer treat everyone will enjoy!

Store bought vs. Homemade Shortcakes

Keto Shortcakes
Makes 6 shortcakes (or muffins)

3 eggs
2 tablespoons lemon juice
1/4 cup heavy cream
½ teaspoon vanilla extract
1/4 teaspoon lemon extract
6 tablespoons Swerve Confectioners or LaKanto Powdered Monkfruit sweetener 
1/4 cup coconut flour
1/4 cup almond flour (or substitute an additional 1 TB coconut flour for nut free)
1 tablespoon unflavored whey protein powder
1½ teaspoons baking powder
1/4 teaspoon baking soda
1/4 teaspoon salt

Suggested Topping:
1 pint fresh strawberries, cut into fourths
1 tablespoon allulose or an erythritol-based powdered sweetener 
Serve with whipped cream


1. Spray a muffin pan with nonstick spray. Preheat overnight to 350 degrees F.

2. Place eggs, lemon juice, cream, vanilla extract, lemon extract and confectioners sweetener into a large bowl. Using an electric mixer, blend until combined or whisk by hand vigorously until well aerated.

3. In a small bowl, whisk together the coconut flour, almond flour, whey protein powder, baking powder, baking soda and salt until no lumps remain. Add the dry ingredients into the wet ingredients all at once and mix on low, then increase to medium speed. Scrap down the sides of the bowl and blend again. Once well combined, evenly pour the batter into the prepared baking pan or into each muffin cup  (¾ full).

4. Bake for 20 to 24 minutes, or until a toothpick in the center comes out clean. Allow to cool in the pan for 10 minutes before removing the cakes or muffins to a wire rack to cool completely.

5. Meanwhile, sprinkle allulose or your sweetener of choice over the strawberries, stir to coat the berries and allow to sit at room temperature for about 30 minutes. To serve, top the cake with strawberries and whipped cream. Enjoy!

6. Storage: These cakes can be stored at room temperature for 2 days, or refrigerate for longer. They can also be well wrapped and frozen up to 3 months. They are best served at room temperature.

Custard Filled Shortcake

Nutritional Information per mini cake (no topping): 106 calories, 4.6 g carbohydrate (1.8 g dietary fiber, 0.6 g sugars, 1 g sugar alcohols), 8.3 g total fat (4 g saturated fat, 0 g trans fat), 106 mg cholesterol, 208 mg sodium, 103 mg calcium, 249 mg potassium, 1 mg iron, 81 IU Vit A, 2 mg Vit C, 4.4 g protein. Net carbs per serving: 1.8 grams

Photos and recipe by Kathy Sheehan, copyright 2023
All rights reserved. Please do not duplicate without the author’s permission. 

Sunday, November 6, 2022

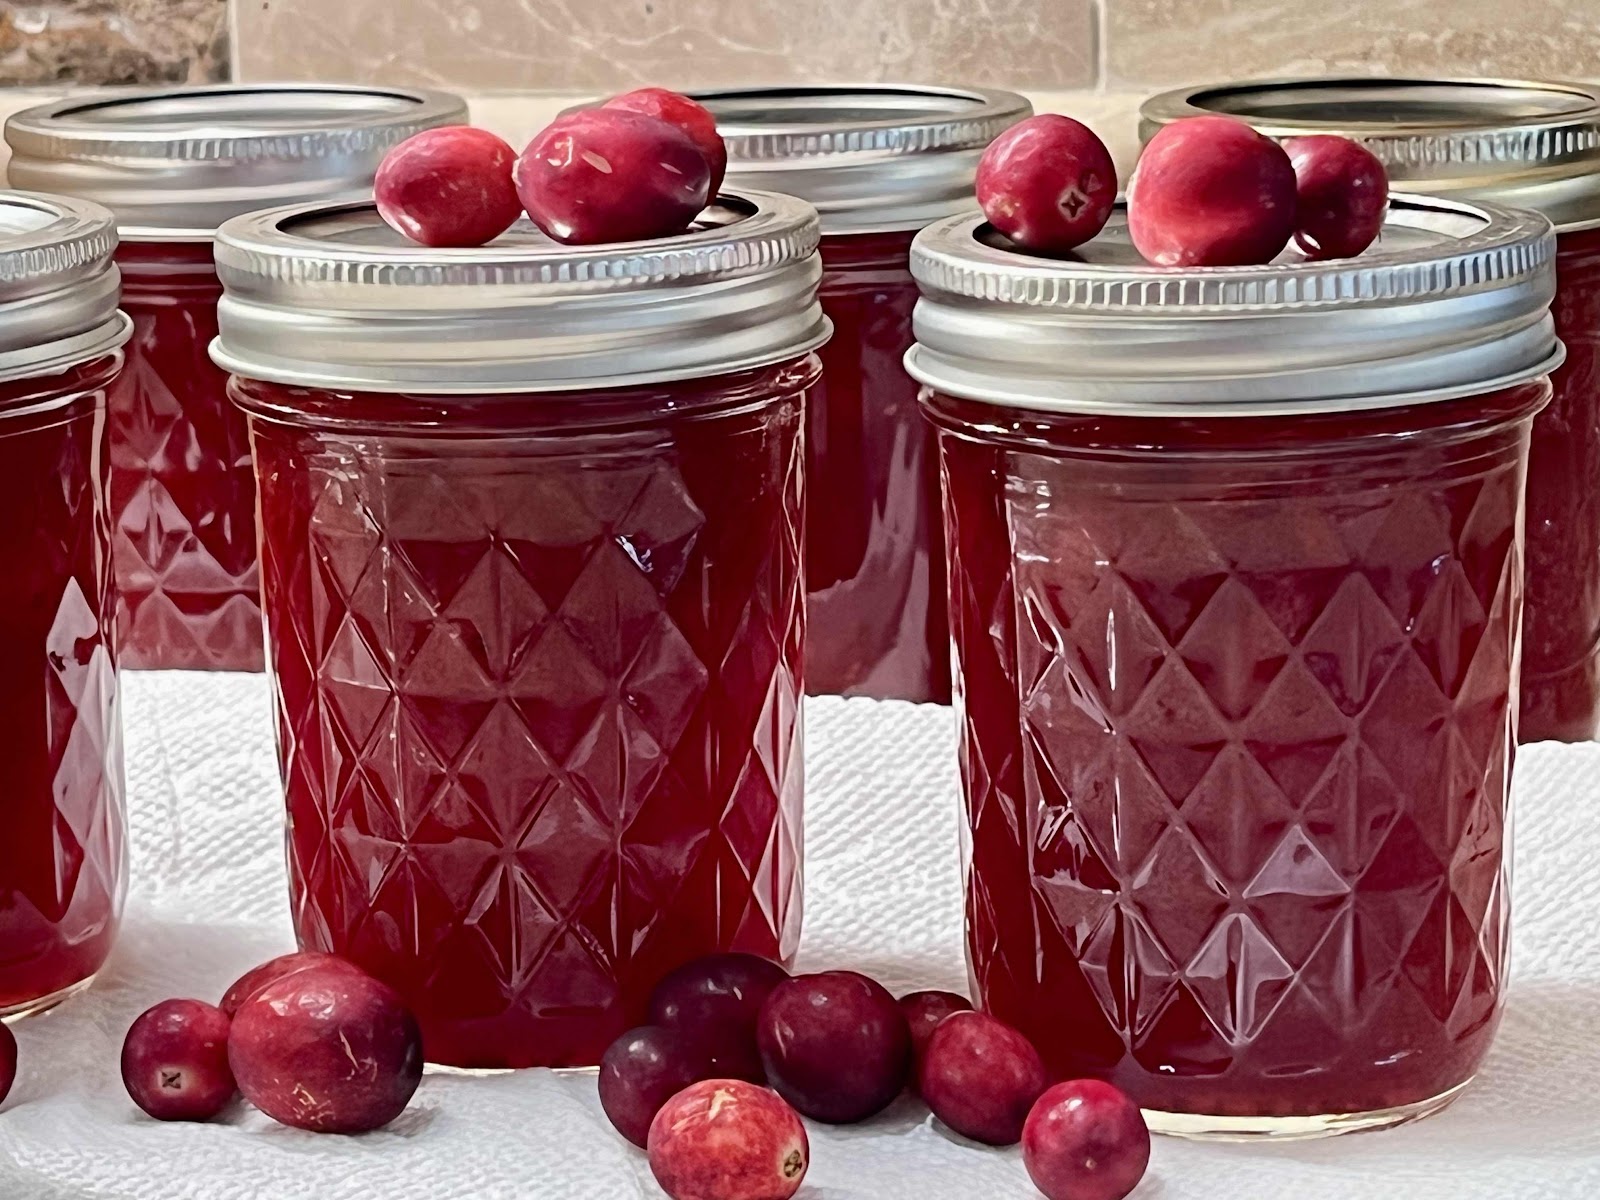
Sugar Free Cranberry Sauce (Jellied or Whole Berry)

Sugar Free Cranberry Sauce
Thanksgiving is approaching! I really like the taste combination of turkey with tart cranberry sauce. But, have you looked at the nutritional information on the back of a can of cranberry sauce? One-fourth cup contains an astonishing 28 grams of carbohydrate, mostly sugar!! Even a spoonful will derail your low carb plans and send your blood sugar skyrocketing. This recipe tastes just like traditional cranberry sauce, but only has 3.6g net carbs per serving. You can make it ahead, process it in a boiling water bath to seal your jars (which makes them shelf stable for a year), or simply refrigerate or freeze. Great idea for gift-giving to your low carb or diabetic friends and family, too!

Sugar Free Cranberry Sauce (Jellied or Whole Berry)
Makes three (8 oz) jars or 12 servings

Pulpy Cranberry Juice Ingredients:
12 ounce bag of fresh cranberries (or frozen), washed
1½ cups water

Cranberry Sauce Ingredients:
2 cups pulpy cranberry juice (see Step #3)
1 teaspoon calcium water (see Step #1)
2 tablespoons bottled lemon juice
1/4 cup liquid allulose or allulose honey (if not using, increase granulated allulose by an additional 1/4 cup)
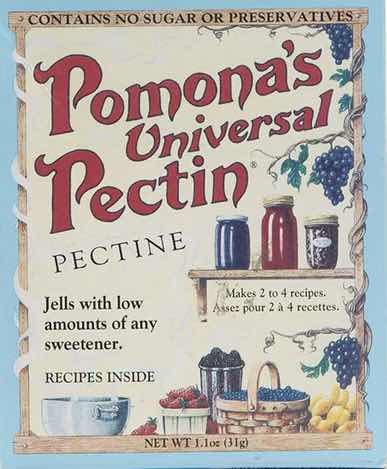
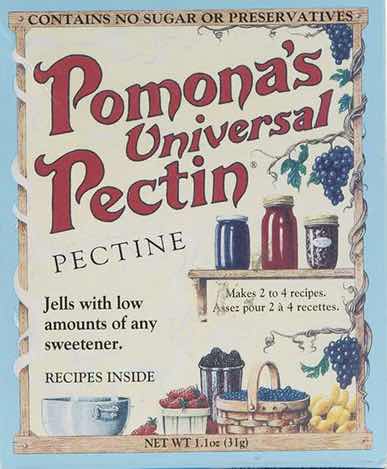
1 teaspoon Pomona’s Universal Pectin
¾ cup granulated allulose sweetener 

1. Before you begin, prepare the calcium water. To do this, combine ½ teaspoon calcium powder (in the small packet in the box of Pomona’s Universal Pectin) with ½ cup water in a small jar with a lid.  Shake well. (Extra calcium water can be stored in the refrigerator indefinitely for future use.)

Pomona’s Universal Pectin
2. Wash your canning jars, lids and bands. Placed jars in a stock pot or canner, fill with water about 2/3 full, and bring to a boil. Boil for 10 minutes to sterilize your jars. Turn off the heat, cover, and keep jars in hot canner water until ready to use. Place lids and bands in water in a small sauce pan, cover and heat to simmer. Turn off heat and keep lids in the hot water until ready to use.

3. To make the pulpy cranberry juice that you will use as a base for your sauce, bring a package of cranberries and water to a boil and simmer, covered, on low until the berries burst and soften. Put the mixture through a food mill or strainer to remove all or most of the skins to create pulpy cranberry juice. (Optional, depending how chunky you want your sauce, see notes.*)

4. Measure and place the pulpy cranberry juice from the previous step into a sauce pan. Add 1 teaspoon calcium water and 2 tablespoons bottled lemon juice; mix well.

5. Measure the granulated allulose into a bowl. Thoroughly stir in the pectin powder until no lumps remain. Set aside.

6. Bring cranberry mixture to a full boil. Add the liquid allulose (or allulose honey) and granulated pectin-allulose mixture, stirring vigorously for 1 to 2 minutes to thoroughly dissolve the pectin.

7. Stir while the sauce comes back up to a boil. Once the sauce returns to a full boil that cannot be stirred down, boil for one minute and remove it from the heat. (If needed, skim any foam and discard.)

8. Fill hot jars to 1/4” from top. Wipe rims clean. Place a lid on each jar and then screw on a rim just until finger-tight. Put the filled jars into boiling water to cover. Boil for 10 minutes (add 1 more minute for every 1000 feet above sea level). Turn off heat and allow the jars to rest in the hot water for 5 minutes. (Note: If you don’t want to process the cranberry sauce in a boiling water bath, you can put it in the refrigerator once it is cooled and it will keep for three weeks. You can also freeze the sauce instead of canning it. For freezing, fill jars to 1/2 inch from top. To prevent cracking, freeze glass jars without a lid to allow for expansion, then screw on a lid once frozen. Defrost in the refrigerator before eating.)

9. Remove jars from hot water using a jar lifter tool and place them on a kitchen towel. Let the jars cool undisturbed for 12 to 24 hours. Check seals; lids should be sucked down and not move or click when pressed. Properly sealed jars can be stored at room temperature for one year. Once opened, refrigerate and consume within three weeks.

*Notes: If you want whole berry or chunky cranberry sauce, do not run all of the cooked cranberries through the food mill or strainer.

Nutritional Information for 1/4 cup: 14 calories, 4.9 g carbohydrate (1.3 g dietary fiber, 1.2 g sugars), 0 g fat, 1 mg sodium, 2.5 mg calcium, 5 IU Vit A, 5 mg Vit C, 0.1 g protein. Net carbs per serving: 3.6 grams

Photo and recipe by Kathy Sheehan, copyright 2022
All rights reserved. Please do not duplicate without the author’s permission. 

Friday, August 5, 2022

No Sugar Added Keto Fruit Jam (Peach, Cherry or Strawberry)

Keto Cherry Jam
I don’t eat a lot of fruit because of the high carb count. But one thing I really enjoy is a teaspoon or two of sticky, gooey jam on my low carb, keto bread. And there are times when I just want a peanut butter and jelly sandwich! In a previous post, I mentioned the excellent keto bread recipe that I found that has made my life normal again. (Click here for the keto bread recipe.) With the bread problem solved, it was now time for me to turn to finding the best keto jam. There are a couple of store brands that are acceptable, but they are watery, taste a little off and, frankly, are nothing like the real thing. Jam making is not really difficult, but it can have special challenges when not using real sugar. I have discovered that allulose is the very best sugar alternative when making fruit jam, with absolutely no aftertaste! My amazing keto jam recipe is easily adaptable to most fruits, with minor adjustments. I provide recipes for cherry, strawberry or peach, but you can change it up to create your favorite flavor!

Tips and Tricks for Sugar Free Jam:

* You must use a pectin made especially for low or no sugar jam. Look for Pomona’s Universal Pectin, which is easy to find in most grocery stores or online. Follow the directions in the package to make the calcium water, which is the secret ingredient to properly thicken sugar free jams and jellies.

Pomona’s Universal Pectin
* Regular jam made with sugar typically reaches a temperature of 220°F when it is ready to be ladled into the jars. With sugar-free jams, the mixture will not rise to this temperature (usually no more than between 212 to 215°F), so you will have to use the “cold plate test” to determine when it is cooked enough to gel properly. Before you begin cooking the fruit mixture, place one or more small plates into the freezer to get cold. When you think your mixture is ready, spoon a small amount onto the cold plate and let it sit for a few minutes. If it forms a skin and begins to thicken and gel, then the jam mixture is ready for canning.

* You can use fresh or frozen fruit to make jam. If using frozen, increase the amount to 6 cups of fruit and proceed with the recipe as directed.

* You do not have to process the finished jam in a boiling water bath, if you want to dig right in! Use sterilized jars, but place the finished jam in the refrigerator to set up and consume within 1-2 weeks. If you want to make your jam shelf-stable at room temperature for up to a year, you must follow the canning directions, always use new lids and submerge the filled jars in boiling water for 10 minutes and test to make sure it sealed properly (add 1 minute to boiling time for every 1000 feet above sea level). After it has cooled completely, check the lids for a seal. They should not flex when the center of the lid is pressed. A properly processed and sealed jar of jam is shelf-stable for 12-18 months. Refrigerate after opening and consume within 1-2 weeks.

The Recipes:
Each recipe yields about 3-1/2 cups

Cherry Jam:
5 cups of cherries, pitted (or 6 cups frozen)
1/2 cup bottled lemon juice
3 teaspoons calcium water (see Tips and Tricks section above)
1 cup allulose
2 teaspoons Pomona’s Universal Pectin powder
1 teaspoon cherry extract (optional), or to taste

Peach Jam:
5 cups peeled and chopped fresh peaches (or 6 cups frozen)
1/4 cup bottled lemon juice
4 teaspoons calcium water
1 cup allulose
2 teaspoons Pomona’s Universal Pectin powder

Strawberry Jam:
5 cups fresh, chopped strawberries (or 6 cups frozen)
1/4 cup bottled lemon juice
4 teaspoons calcium water
1-1/3 cups allulose
2 teaspoons Pomona’s Universal Pectin powder
1/2 to 1 teaspoon strawberry extract (optional), or to taste

Sugar Free Strawberry Jam

Directions:

1. Prepare the boiling water canner. Put the canning rack on the bottom of a large pot, then heat the jars in simmering water until ready to use, for about 10 minutes. Wash the lids in soapy, hot water and set aside with the bands until you are ready to use them. (Do not boil the lids, but you can leave them in very hot water until you’re ready to use them.)

2. In a bowl, combine the allulose and pectin powder; set aside.

3. Prepare the fruit by peeling, pitting and chopping into chunks, whatever is required, and measure out the required amount (either 5 cups fresh fruit or 6 cups frozen). Put the fruit in a large pot over medium heat. Add the lemon juice and calcium water and stir. Bring to a boil, then use a potato masher to crush up the fruit to the desired consistency. If you like your jam chunky, then leave larger pieces of fruit. Bring to a rolling boil and, if needed, skim the foam and discard.
 
4. Gradually stir in the allulose/pectin mixture and continue to stir until the sweetener and pectin dissolves.

5. Bring the fruit mixture to a full rolling boil that cannot be stirred down. Boil hard for at least one minute, stirring constantly. Remove from the heat and skim any additional foam off the top if necessary. To test for the proper consistency, use the “cold plate test” as described in the Tips and Tricks section above.

6. Using a jar lifter, lift one jar out of the hot water and place it on a towel or wooden cutting board. Ladle the hot jam into the hot jar using a canning funnel. Leave 1/4 inch of head space at the top. Remove any air bubbles and wipe the jar rim with a paper towel or a clean cloth. Center a lid on the jar and apply the band, screwing it down until it is just fingertip tight. Repeat the process with the other jars until all of the jars are filled.

7. Process the jars in boiling water for 10 minutes, adjusting for altitude (add 1 minute to boiling time for every 1000 feet above sea level). Turn off the heat and let the jars sit in the canner, uncovered, until the water stops boiling or for several minutes. Very carefully remove the jars with the jar lifter, lifting them straight up (do not tilt jars as you lift them) and place them on a clean towel. You can gently blot any excess water from the top of each jar with a kitchen towel, but do not press down on the lid.

No Sugar Added Peach Jam
8. Let the jars cool undisturbed for 12 to 24 hours. You will hear a popping sound as the jars cool and create a vacuum seal. This is normal. After 12-24 hours, check the lids for a proper seal, they should not flex when the center is pressed. If any jars did not seal properly, you may put them in the refrigerator and use the jam immediately or you can reprocess them with a new lid.
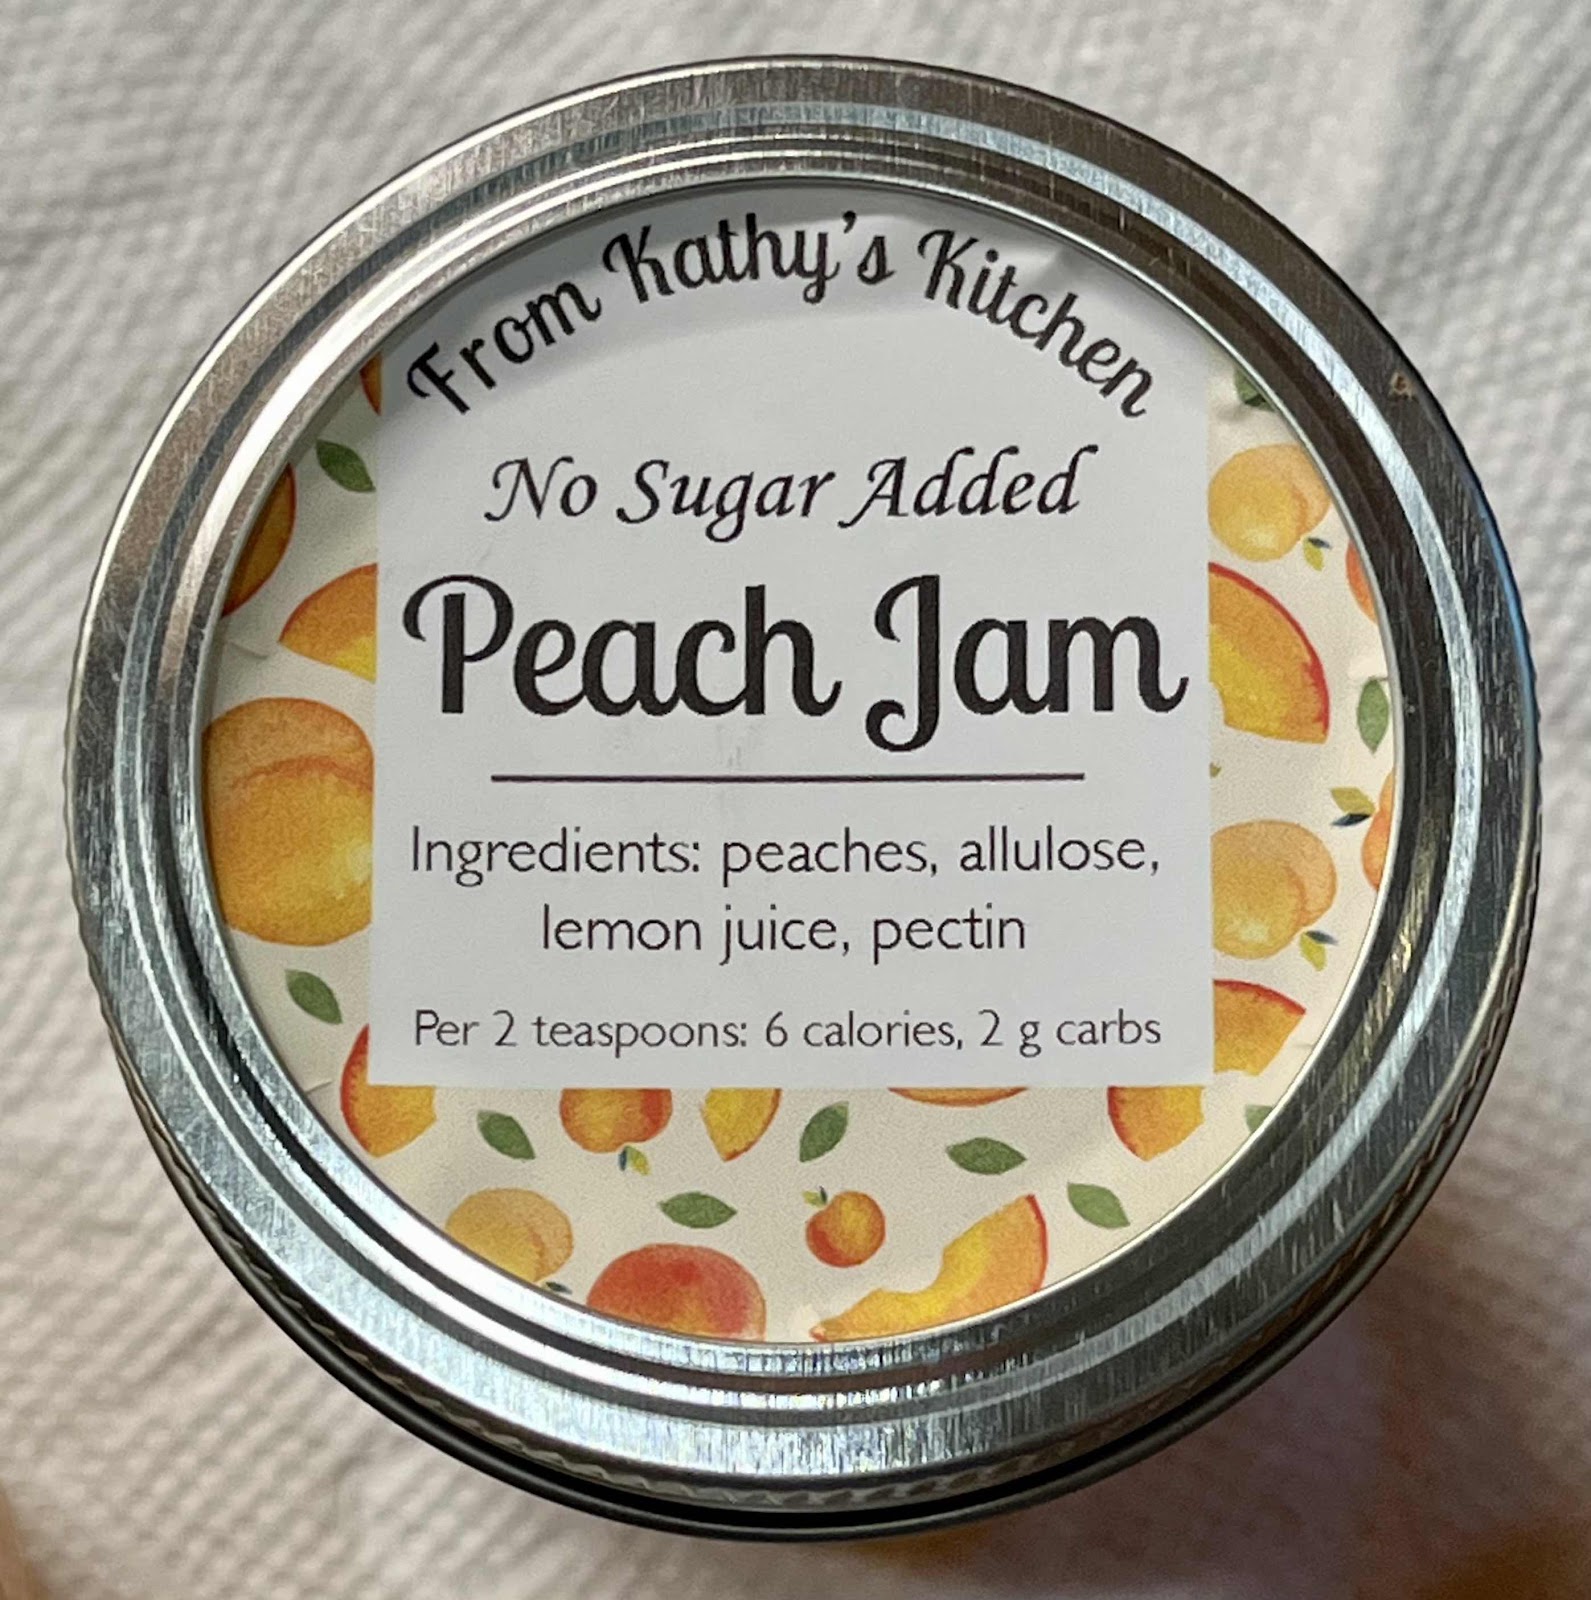
Peach Jam Label
Nutritional Information for Cherry Jam (2 teaspoons): Calories: 8 / 2 g carbohydrate / 0 g dietary fiber / 0 g fat / 0 g protein

Nutritional Information for Peach Jam (2 teaspoons): Calories: 6 / 2 g carbohydrate / 0 g dietary fiber / 0 g fat / 0 g protein 

Nutritional Information for Strawberry Jam (2 teaspoons): Calories: 4 / 1 g carbohydrate / 0 g dietary fiber / 0 g fat / 0 g protein

Photos and recipes by Kathy Sheehan, copyright 2022
All rights reserved. Please do not duplicate without the author’s permission.
Monday, June 27, 2022

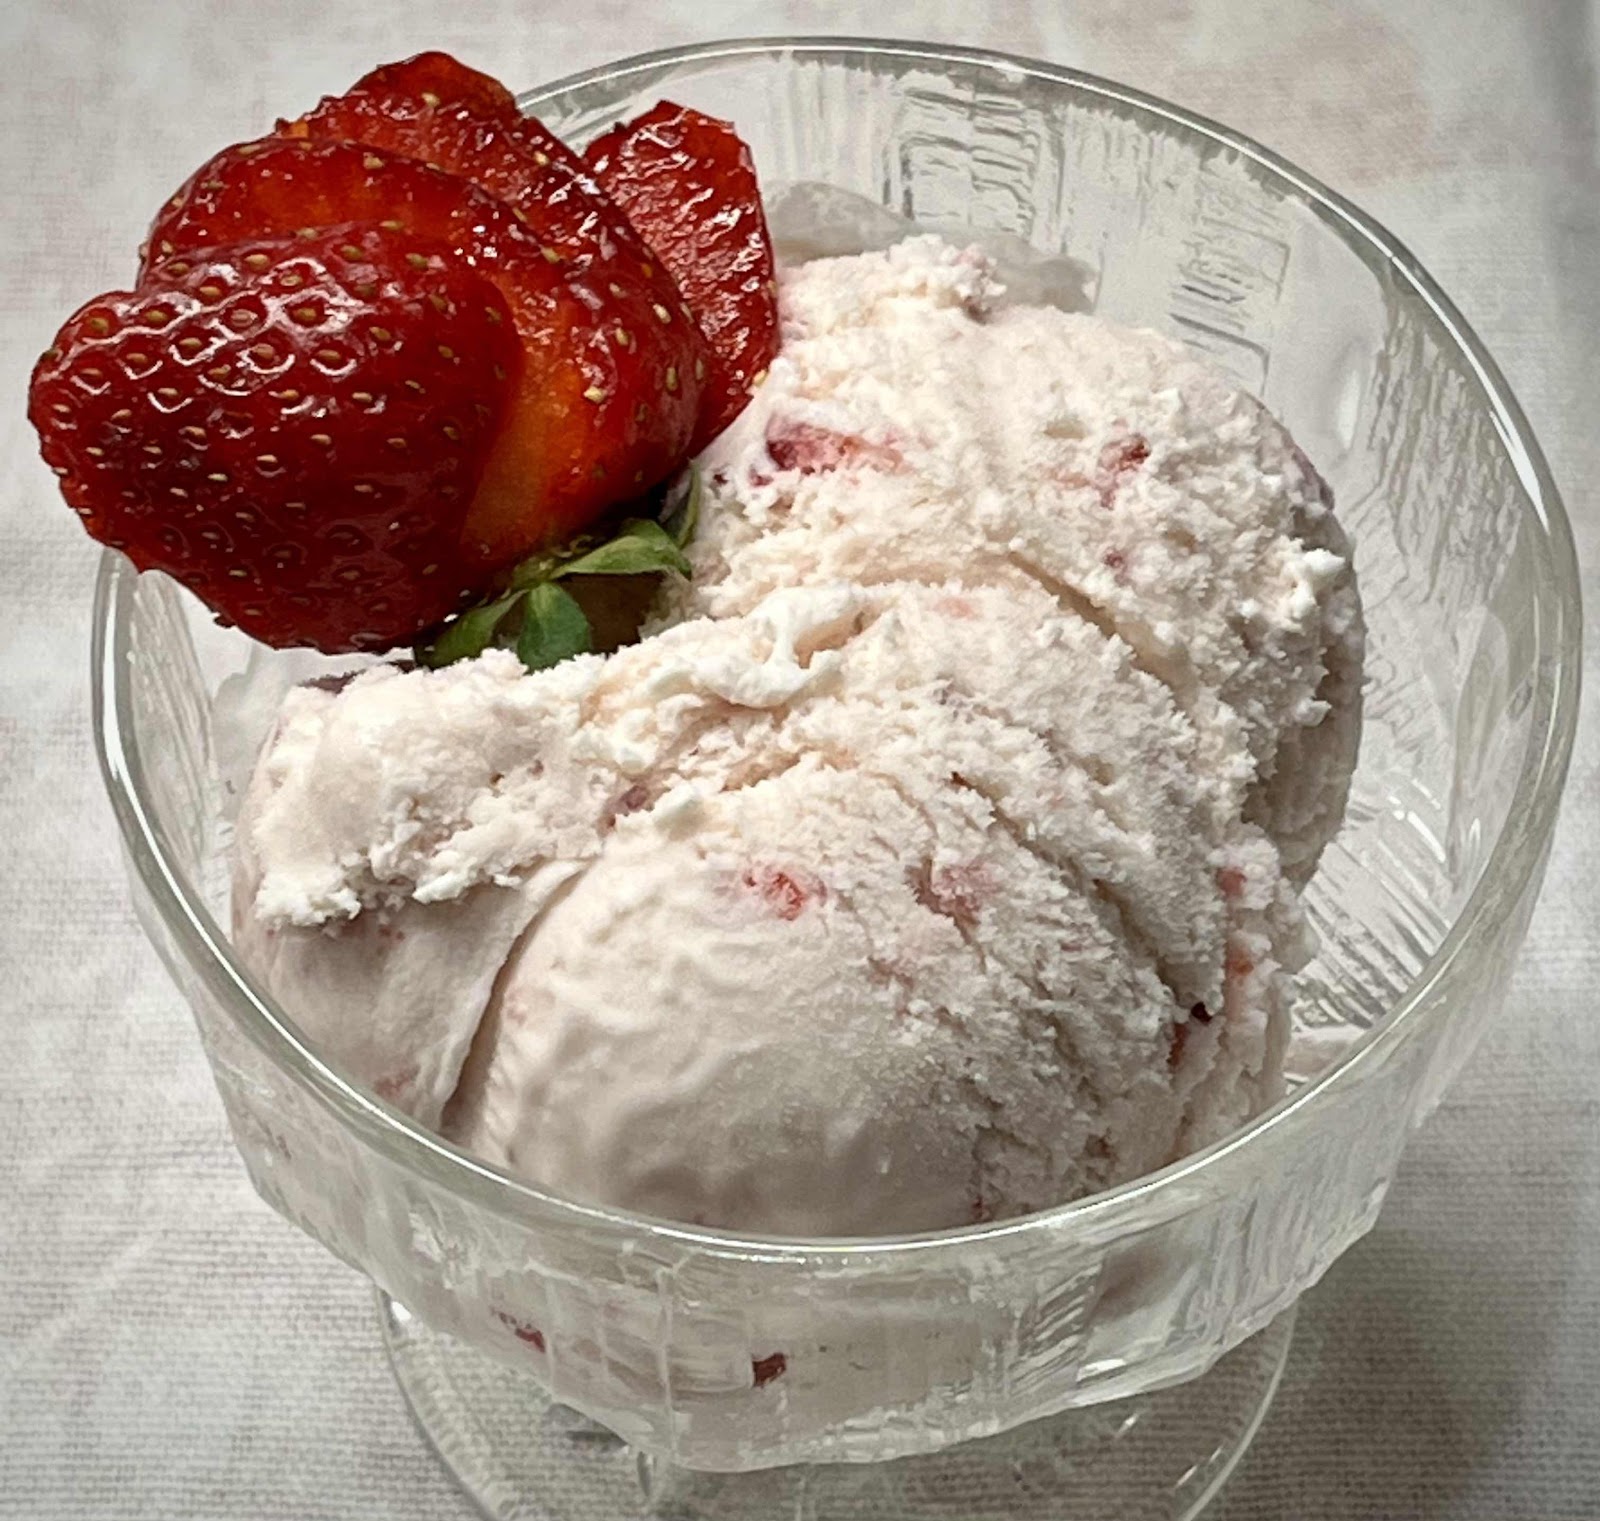
Keto Strawberry Ice Cream

Keto Strawberry Ice Cream
It’s strawberry season in Maine! I normally do not eat a lot of fruit, but I make an exception for a few weeks when our local strawberries are in season. When they are freshly picked and ripe, you can taste the sunshine in every bite! However, to keep the carb count low enough to fit into a keto diet, the use of a little strawberry extract is necessary to give this ice cream more strawberry flavor. Creamy and SO DELICIOUS, this dessert is the perfect ending to a warm summer day! 

Keto Strawberry Ice Cream
Makes 8 servings

2/3 cup puréed ripe strawberries (or mashed with a potato masher into small chunks)
1/2 cup whole milk* (see notes)
3 tablespoons powdered monkfruit sweetener (I like LaKanto Monkfruit sweetener)
6 tablespoons allulose
A pinch of salt 
2 cups heavy cream
1-1/4 teaspoons strawberry extract (or to taste)
1/2 teaspoon vanilla extract
1 tablespoon vodka (optional, but reduces iciness from the strawberries)

1. In a medium bowl, whisk to combine the puréed strawberries, milk, sweeteners and salt until the sweeteners are dissolved. Stir in the heavy cream, extracts and vodka (if using). Cover and refrigerate a minimum of two hours. Whisk mixture together again before continuing.

2. Churn according to the manufacturer’s instructions for your ice cream maker. Churn until thickened, about 15 to 20 minutes. The ice cream will have a soft, creamy texture. If a firmer consistency is desired, transfer the ice cream to an airtight container and place in the freezer for 5 to 6 hours.

*Notes: I suggest the brand Fairlife Whole Milk, which has less sugar and is half the carbs of regular whole milk. If using regular whole milk, add 1-1/2 carbs per serving. For the whole milk, you can substitute unsweetened nut milk of your choice. To obtain the creamiest result, I suggest full fat, canned coconut milk.

Nutritional Information per 1/2 cup: 215 calories, 2.5 g carbohydrate (0.3 g dietary fiber, 1 g sugars, 0.5 g sugar alcohols), 24.5 g total fat (14.3 g saturated fat, 0 g trans fat), 82 mg cholesterol, 48 mg sodium, 11.4 mg calcium, 30 mg potassium, 237 IU Vit A, 0.5 g protein. Net carbs per serving: 2.2 grams

Photo and recipe by Kathy Sheehan, copyright 2022
All rights reserved. Please do not duplicate without the author’s permission. 

Saturday, March 19, 2022

Strawberry and Mascarpone Cream Cake

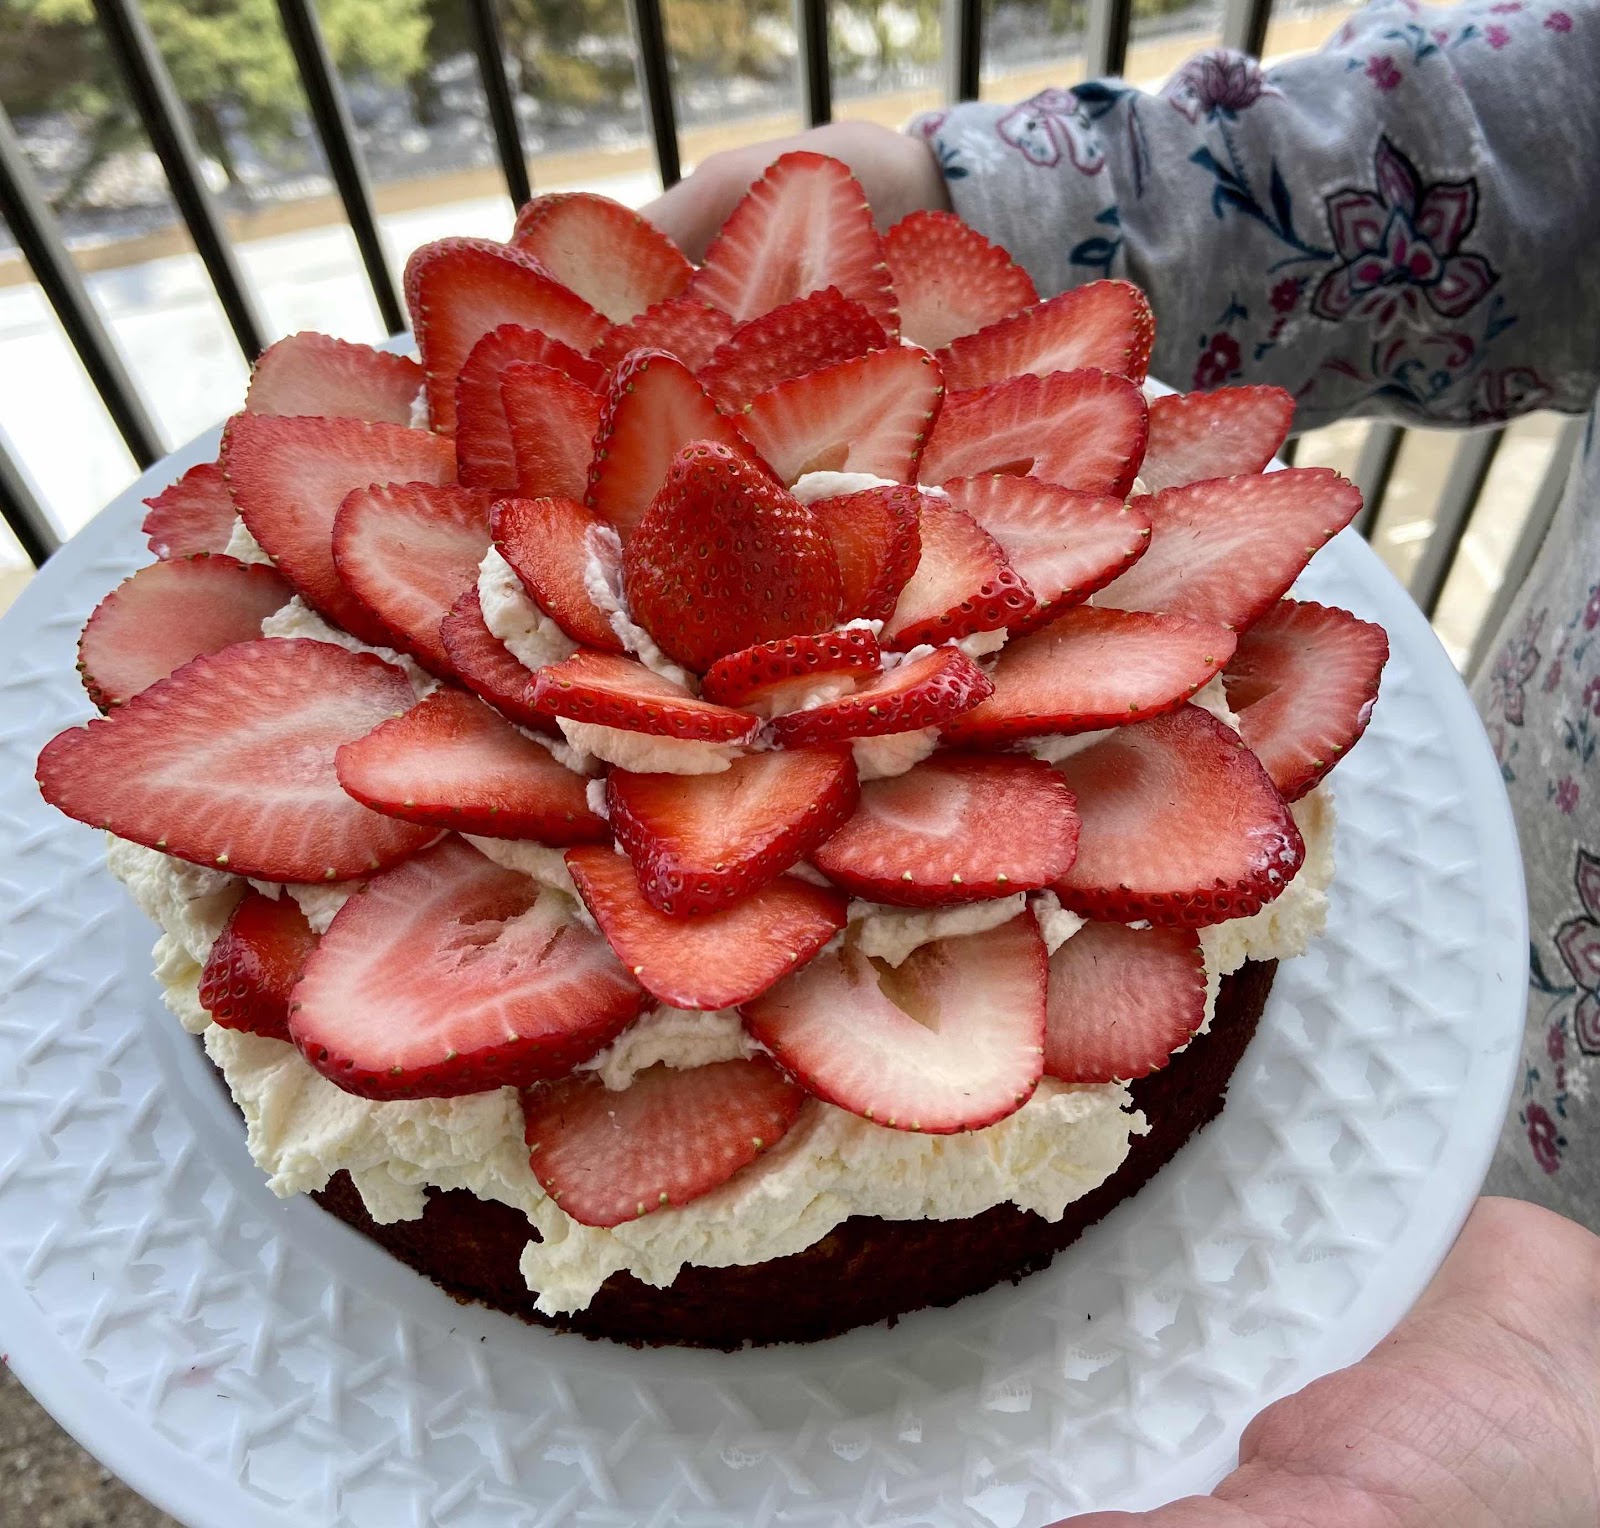
Strawberry Mascarpone Cream Cake
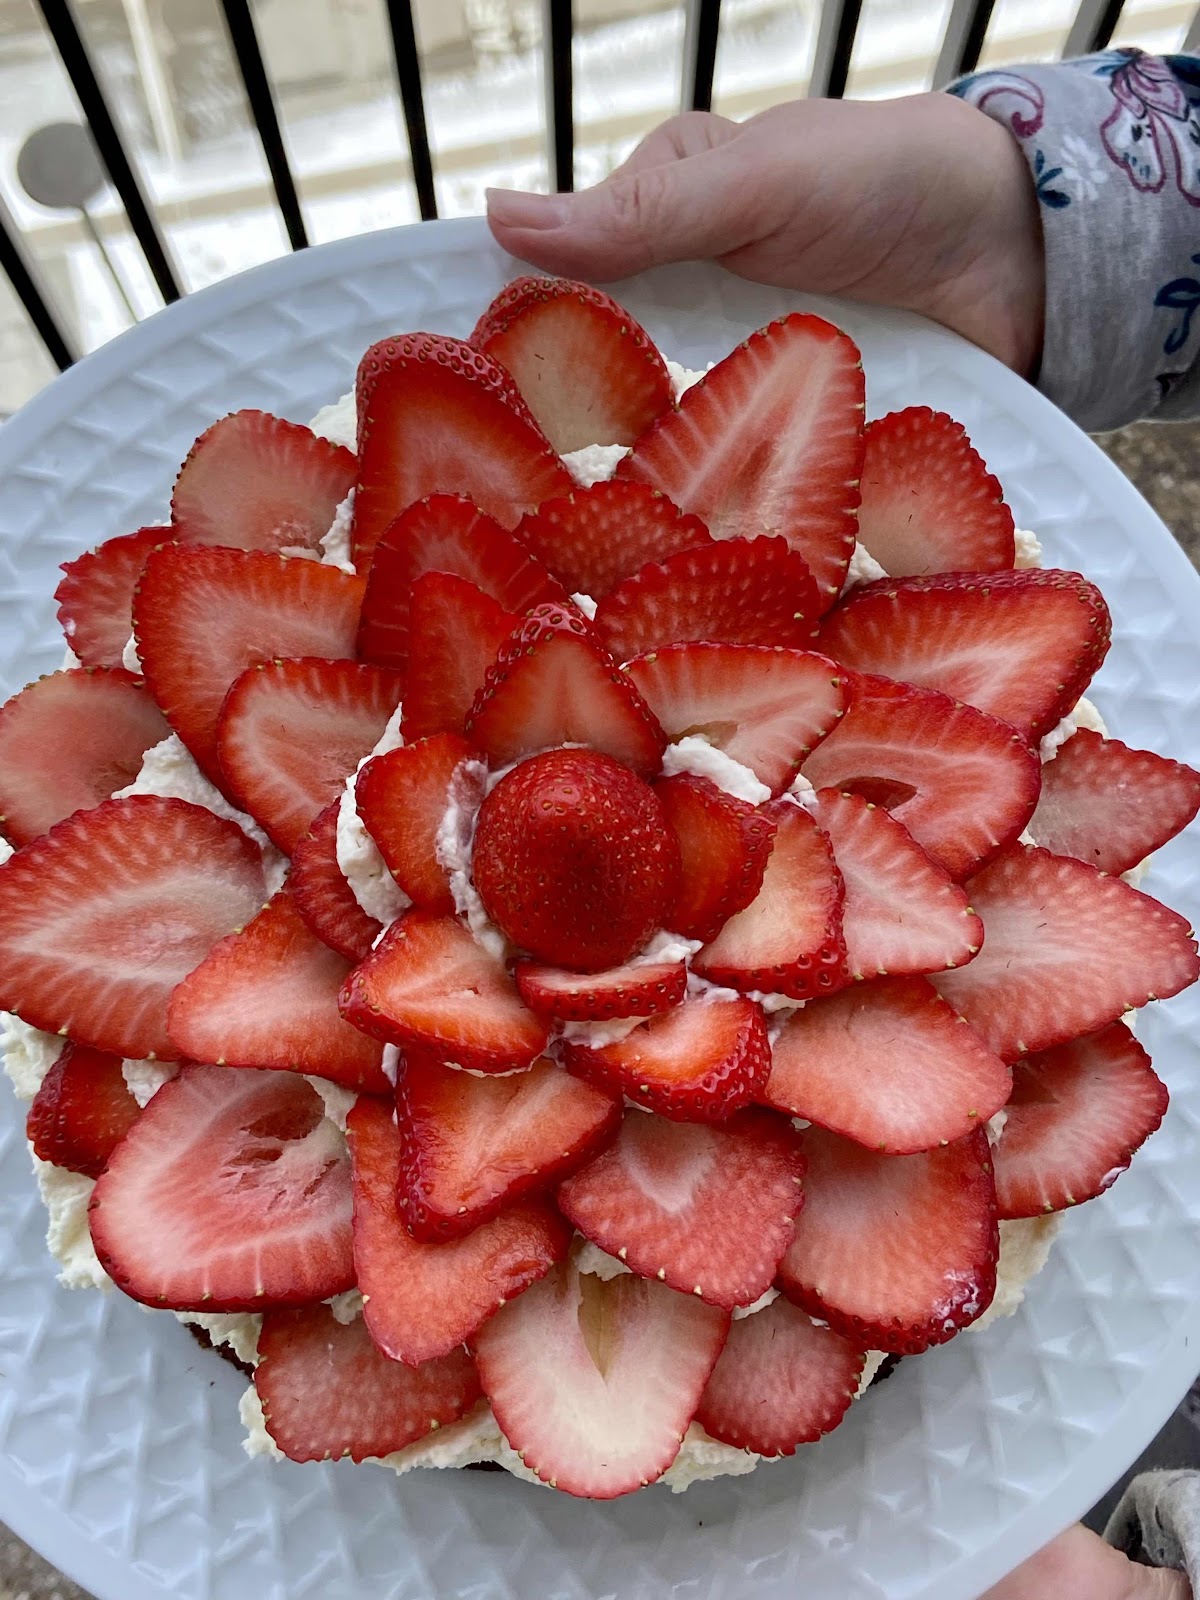
Last month, my mother celebrated her 86th birthday! It was my privilege to make her birthday cake so, of course, I wanted it to be extra special. This cake is not only delicious, it is extraordinarily beautiful being topped with sliced strawberries arranged in a flower design. I know you will WOW your family and guests whenever you serve this spectacular dessert! Mascarpone cream makes a wonderful frosting for any cake but, paired with strawberries, it is especially bright and refreshing. Perfect for a spring occasion!

Strawberry and Mascarpone Cream Cake
Makes one 8” cake (8 servings)

Cake:
48 grams coconut flour (about 7 tablespoons, lightly scooped and leveled)
6 tablespoons granulated erythritol sweetener (I like LaKanto Monkfruit Classic)
2-1/2 tablespoons unflavored whey protein powder 
1-1/2 teaspoons baking powder
1/8 teaspoon salt
3 large eggs
1/4 cup unsalted butter, melted and cooled
1/4 cup unsweetened coconut or almond milk
1 teaspoon vanilla extract

Mascarpone Cream Filling:
1-1/4 cups heavy whipping cream, cold
1/2 cup powdered erythritol sweetener 
1 teaspoon vanilla extract
8 oz. Plain, unsweetened mascarpone cheese, softened but still chilled

Topping:
About 1 quart fresh strawberries, leaves removed and sliced thinly lengthwise

1. Make the Cake: Preheat the oven to 325°F. Grease an 8 inch* cake pan well. Line the bottom with parchment paper and grease the paper.

2. In a medium bowl, sift together the coconut flour, sweetener, whey protein powder, baking powder and salt or whisk until no lumps remain. In a large bowl and using an electric mixer, beat the eggs, melted butter, coconut milk and vanilla extract until well combined. Add the dry ingredients and beat just until there are no lumps and the batter is smooth.

3. Pour the batter into the prepared pan and spread to the edges. Smooth the top. Bake about 30 minutes or until lightly browned around the edges, the top is slightly firm to the touch and a toothpick comes out clean. Do not over bake.

4. Remove from the oven and let cool in the pan for 10 minutes, then run a sharp knife around the inside of the pan and flip the cake out onto a wire rack to cool completely before frosting.

5. Make the Mascarpone Cream: Add the heavy whipping cream, powdered sweetener and vanilla extract to a large mixer bowl and whip on high speed until soft peaks form. Add the mascarpone cheese to the whipped cream and whip until stiff peaks form. It will happen fairly quickly.

6. Assemble the Cake: Spread or pipe the mascarpone cream thickly onto the cake. Arrange the strawberry slices on top of the mascarpone cream, starting from the outside edge and working to the center, overlapping slightly to create a flower pattern.

Flower Design with strawberries
7. Cover loosely with plastic wrap and refrigerate. About 30 to 40 minutes before you plan to serve, remove the cake from the refrigerator and allow to sit at room temperature. Slice with a large, sharp knife. For a clean, pretty slices, wipe your knife between each cut.

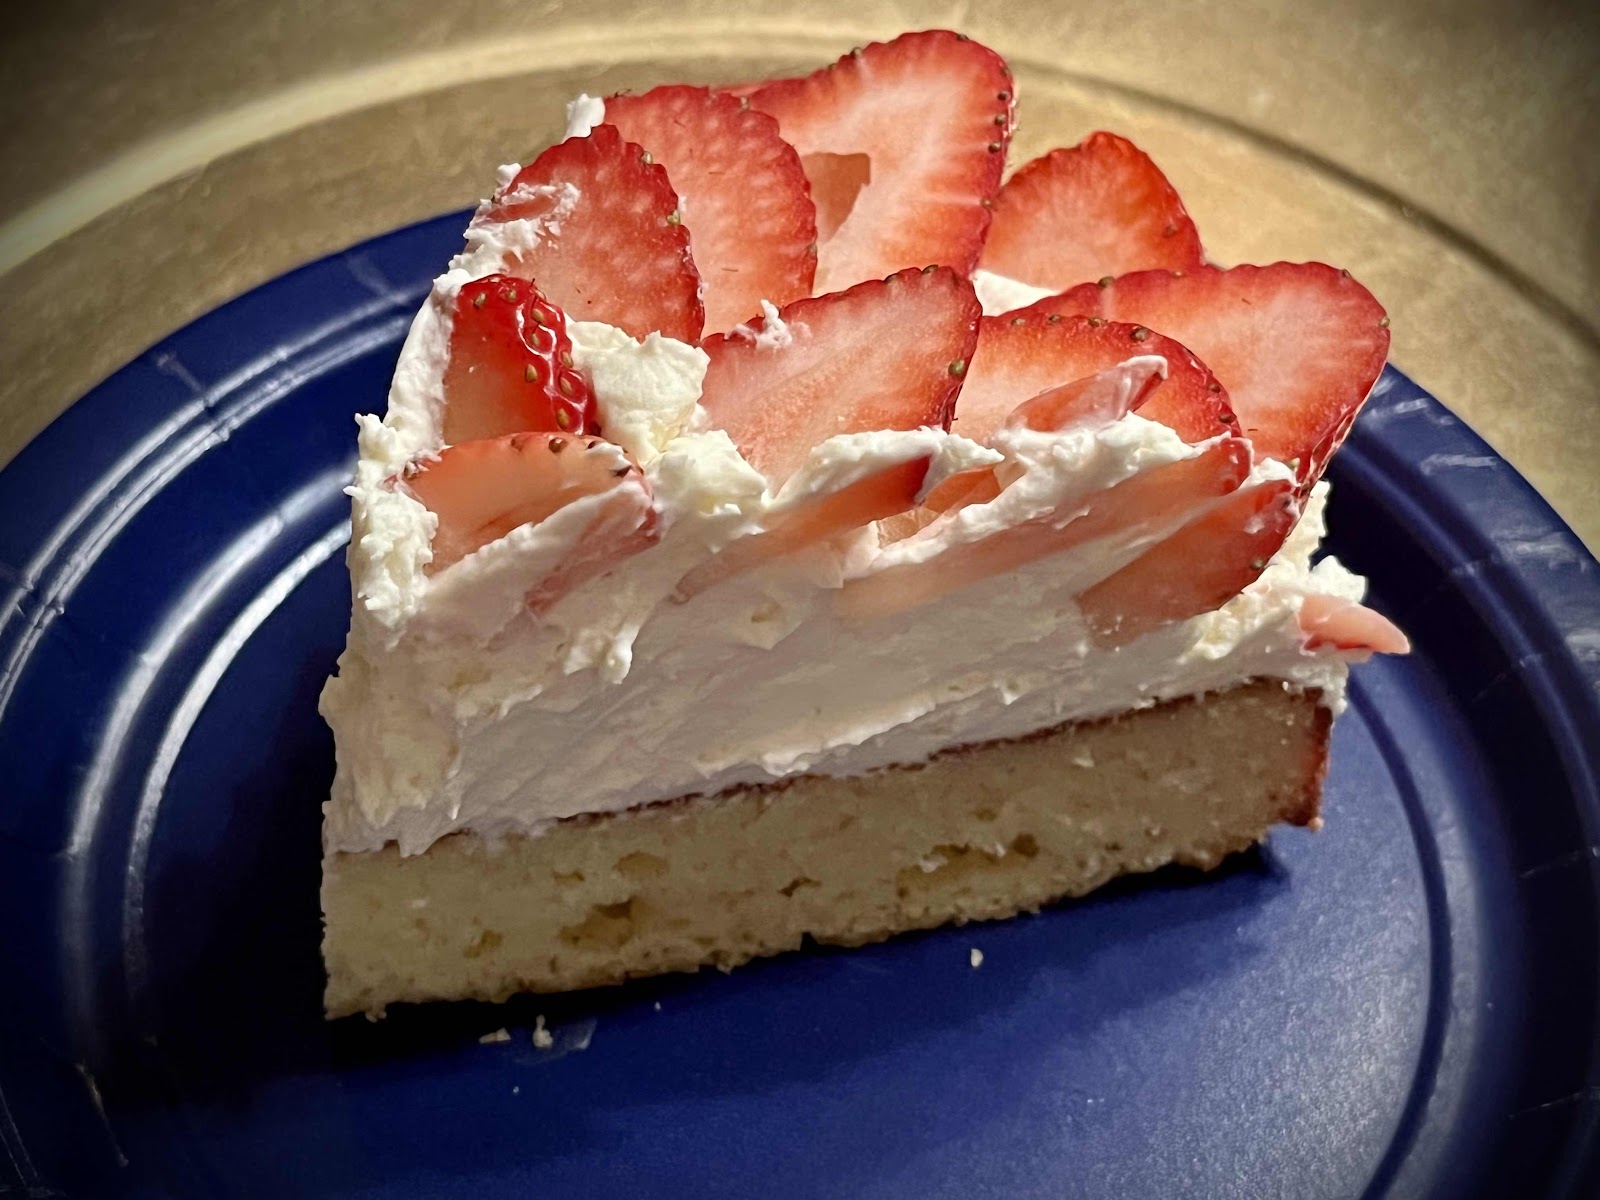
Slice of Strawberry Mascarpone Cream Cake
*Notes: It’s important to use an 8 inch cake pan to achieve the proper height to your cake layer. If you use a 9 inch pan, bake for a shorter period of time. The result will be a thinner cake, resembling a tart more than a cake.

Nutritional Information per serving (1/8th cake): 376 calories, 10.7 g carbohydrates (3 g dietary fiber, 2 g sugars, 3.5 g sugar alcohols), 36.3 g total fat (21.8 g saturated fat, 0 g trans fat), 163 mg cholesterol, 174 mg sodium, 91.2 mg calcium, 97 mg potassium, 237 IU Vit A, 1 mg iron, 6.4 g protein. Net carbs per serving: 5.2 grams

Photos and recipe by Kathy Sheehan, copyright 2022
All rights reserved. Please do not duplicate without the author’s permission. 
Wednesday, February 9, 2022

Burrata with Strawberry and Balsamic

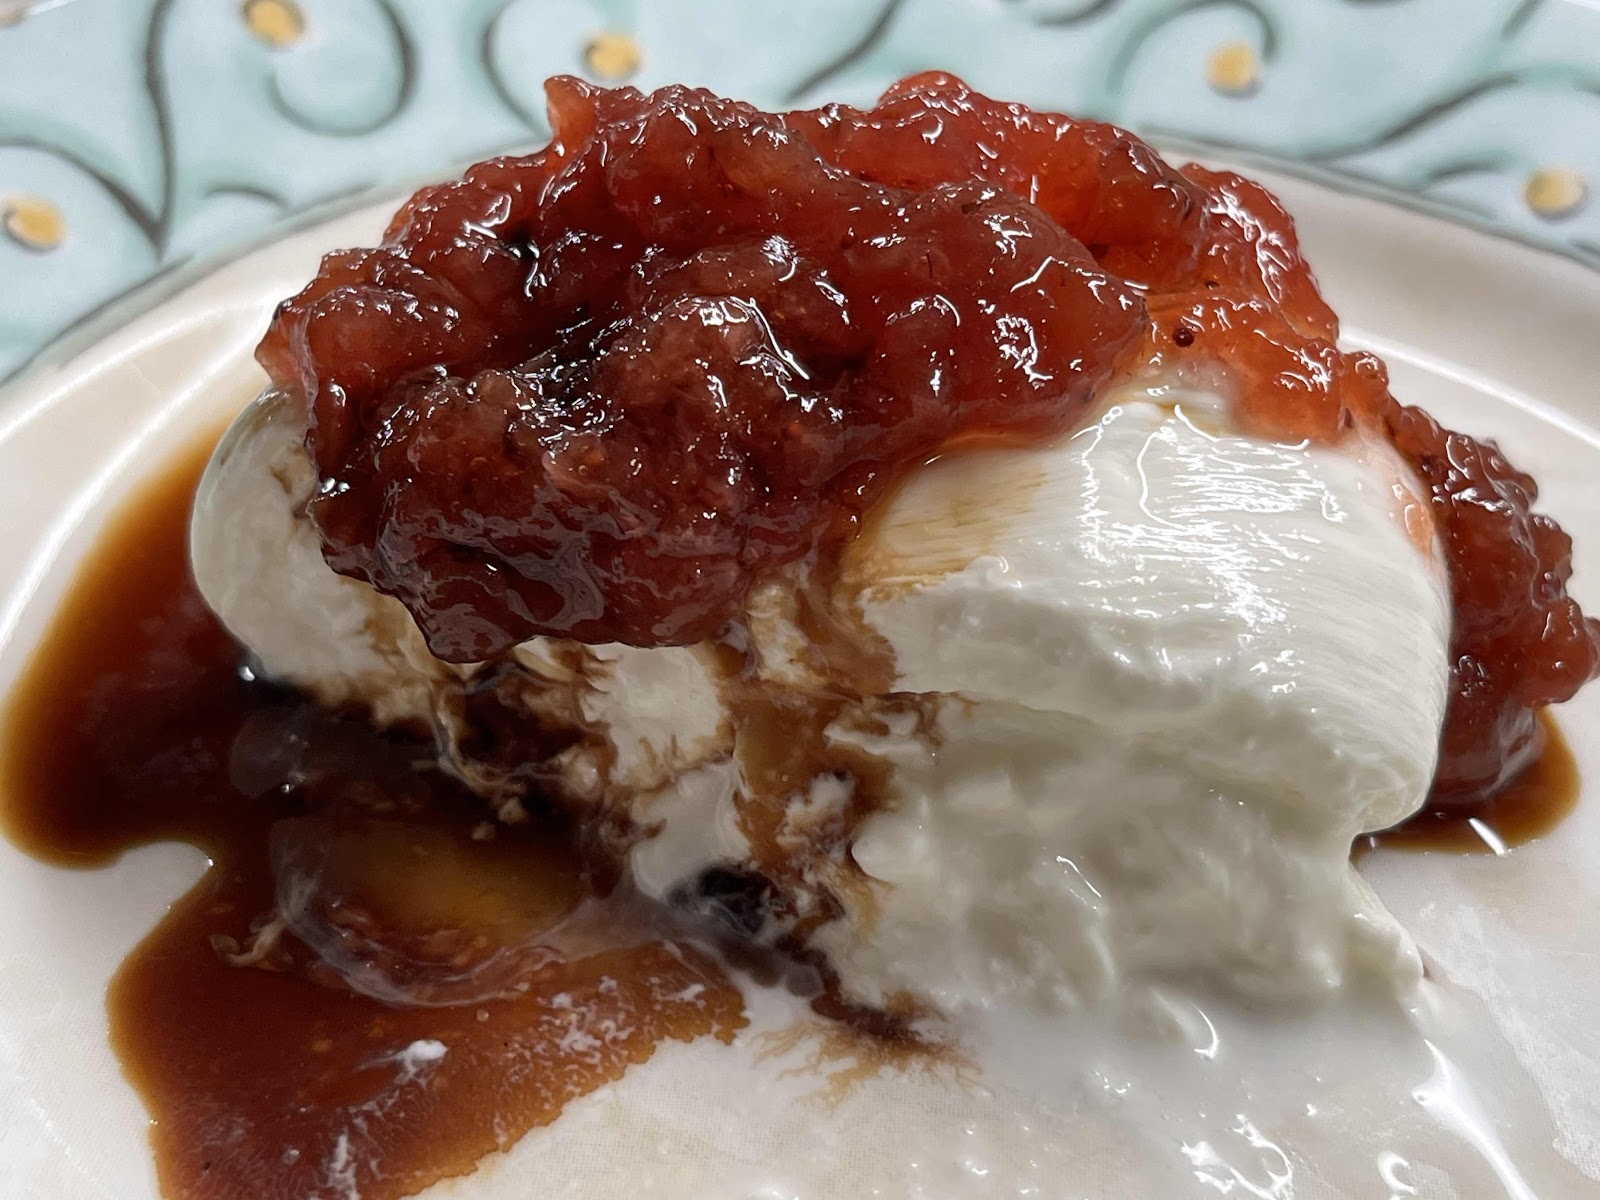
Burrata with Strawberry and Balsamic
With Valentine’s Day coming soon, you might find this easy recipe perfect to serve as a special appetizer, breakfast or dessert. Only three ingredients needed! Burrata cheese is a thin layer of fresh mozzarella wrapped around a creamy center. It’s perfect served with savory ingredients, but is also excellent with this combination of sweet strawberries and tangy balsamic vinegar. Choose a sugar-free strawberry jam that has no more than four carbs per tablespoon. My favorite is No Sugar Added Strawberry Jam made by Good Good. Stir it up and use it like a sauce. Then drizzle balsamic over all. You can serve this with low carb crackers or it’s excellent eaten directly from a spoon!

Burrata with Strawberry and Balsamic
Makes 2 servings

1 (4 oz.) Burrata Cheese Ball (can be purchased in the cheese section)
1 tablespoon No Sugar Added Strawberry Jam
1 teaspoon balsamic vinegar

Burrata Cheese
1. Place the Burrata cheese ball on a serving plate and allow it to sit at room temperature for at least 15-20 minutes. 

2. Stir the sugar free jam to loosen it up and spoon over the top of the cheese ball. Drizzle 1 teaspoon of balsamic vinegar over all. Enjoy!

No Sugar Added Strawberry Jam by Good Good
Nutritional Information per serving (1/2 cheese ball with toppings): 145 calories, 4.4 g carbohydrate (0 g fiber, 0.9 g sugars), 12 g total fat (8 g saturated fat, 0 g trans fat), 40 mg cholesterol, 121 mg sodium, 0.6 mg calcium, 3 mg potassium, 6 g protein. 

Recipe by Kathy Sheehan, copyright 2022
All rights reserved. Please do not duplicate without the author’s permission.

Thursday, August 19, 2021

Low Carb Blueberry Pie a la mode Ice Cream

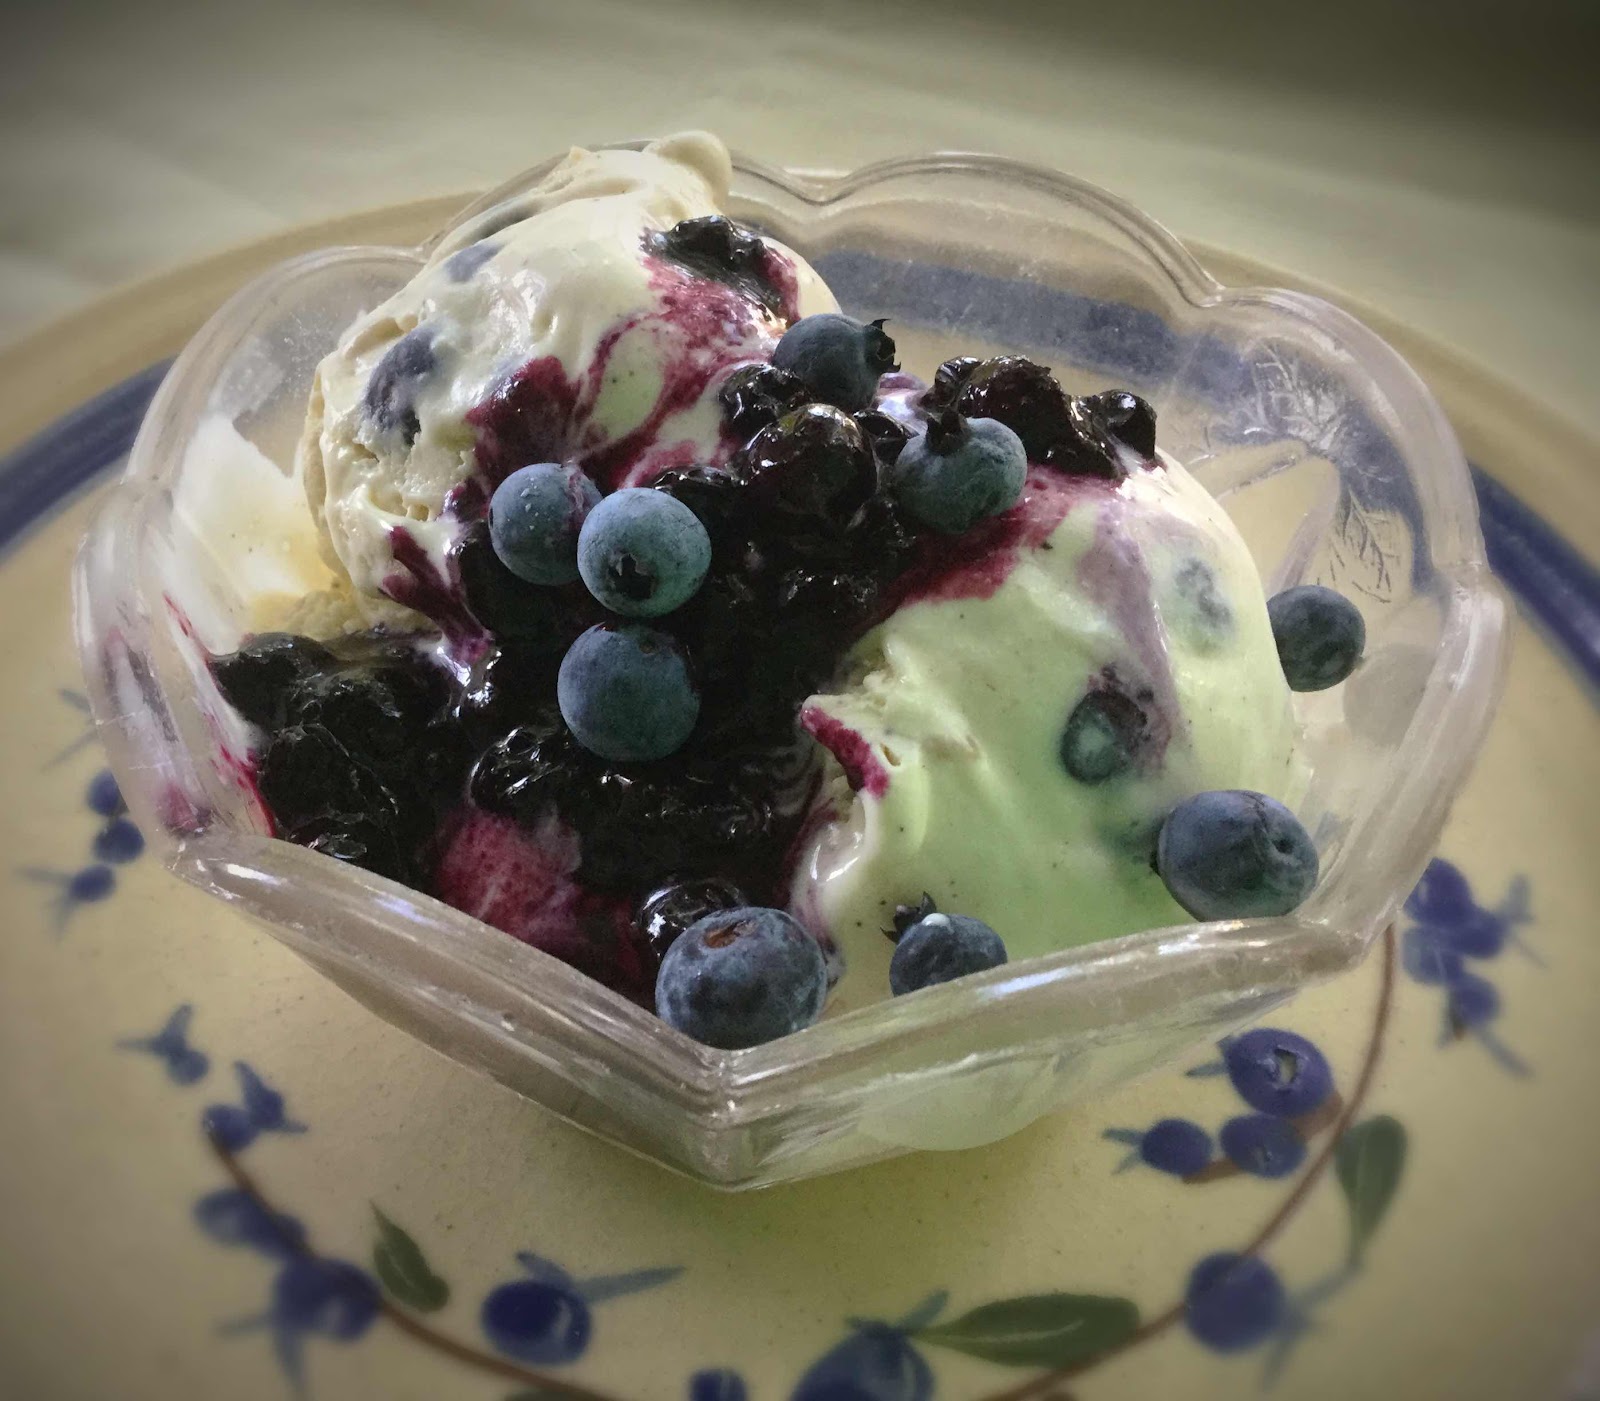
Low Carb Blueberry Pie a la mode Ice Cream
“I scream! You scream! We all scream for ice cream!” Every since I learned the right combination of sweeteners to create the best scoopable, sugar free ice cream right from the freezer, I’ve been having a wonderful time experimenting in my kitchen. Wild Maine blueberries are just hitting the Farmer’s Markets so, of course, I had to make my own version of Blueberry Ice Cream! It includes those juicy, little berries and chunks of keto ‘pie crust’ all swirled into creamy vanilla ice cream. The sauce is optional, but it really makes a wonderful ice cream sundae topping. This ice cream flavor just screams SUMMER where I live!

Low Carb Blueberry Pie a la mode Ice Cream
Makes 8 servings

Ice Cream Base:
1 cup whole milk* (I suggest Fairlife, see note)
3 tablespoons powdered erythritol-based sweetener
6 tablespoons allulose
A pinch of salt
2 cups heavy cream
1 tablespoon vanilla extract
The beans scraped from a vanilla bean (or 1/8 teaspoon vanilla seed powder), optional

Pie Crust Stir In:
1/3 cup almond flour (or sunflower seed flour for low oxalate)
2 teaspoons powdered erythritol sweetener
A pinch of salt
1 tablespoon unsalted butter, melted

Other Stir In:
3/4 cup Wild Maine blueberries (small berries), fresh or frozen

Blueberry Sauce (optional):
2 cups blueberries, fresh or frozen
2 tablespoons water
6-8 drops monkfruit extract or stevia, to taste

1. Make the ice cream base: In a medium bowl, use a whisk to combine the milk, sweeteners and salt. Whisk until the sweeteners are dissolved. Add the heavy cream and vanilla extract and whisk to combine. Cover and refrigerate for at least 2 hours or overnight, until well chilled. Whisk together again and add the vanilla beans, if using, just before churning.

2. While the ice cream base is chilling, make the Pie Crust Stir In: Preheat oven to 300 degrees Fahrenheit. In a medium bowl, whisk together the almond flour, sweetener and salt. Add the melted butter and stir until it resembles coarse crumbs. 

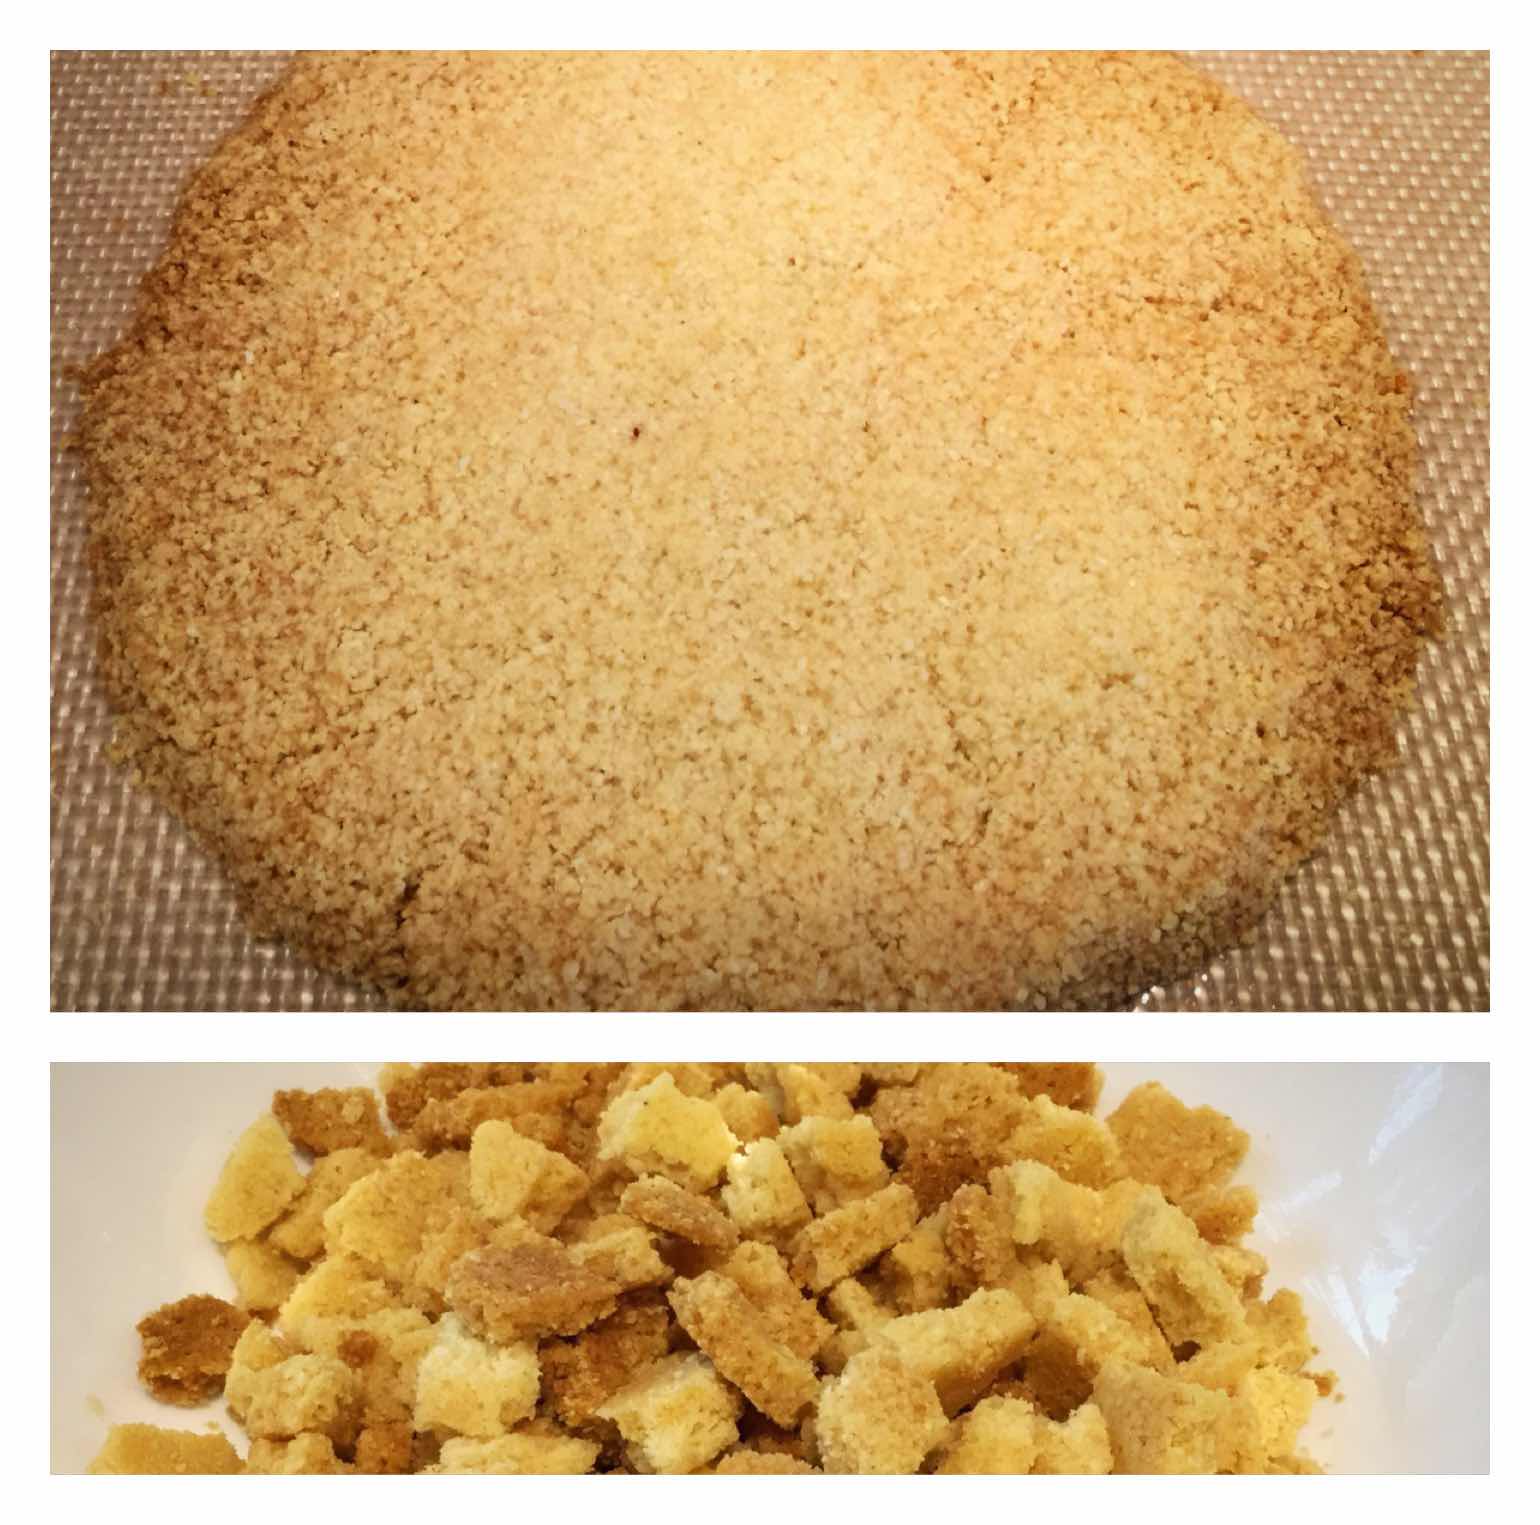
3. Pour the mixture in a mound onto a cookie sheet lined with parchment paper or a silicone baking mat. Press down with your fingers to flatten into a circle or oval (the shape really doesn’t matter) until it is between 1/8” to 1/4” in thickness. Bake in the preheated oven for 7-10 minutes or until the edges are golden brown. Watch carefully because once it starts to turn golden, it can brown quickly and you don’t want the edges to burn.

Pie Crust Stir In4. Allow the crust to cool on the baking sheet for 5 minutes, then remove the parchment paper or silicone mat to a wire rack to finish cooling completely (keep crust on paper to prevent crumbling). The crust will firm up and crisp as it cools. Once cool, carefully break the crust into small pieces and set aside until it’s time to add them to the ice cream at the end of the churning process.

5. Churn the Ice Cream: Following the manufacturer’s instructions for your machine, churn the ice cream base. When it has thickened sufficiently, slowly add the pie crust pieces and blueberries. Continue churning until quite thick. Serve immediately as a soft-serve ice cream or spoon into an air-tight container and place in the freezer for 4 hours or more until set.

6. To make the Blueberry Sauce (optional): Place 2 cups of blueberries and water into a saucepan and heat over medium-low heat until the berries burst. Mash with a potato masher or the tines of a fork to break up the berries. Simmer for a few minutes to thicken slightly. Remove from heat and allow to cool. Taste and add monkfruit extract or stevia if desired. Store in a glass jar in the refrigerator. Spoon over ice cream to serve. Makes about 1 cup.

*Note: I recommend Fairlife brand Whole Milk, which is lactose free and has half the carbs of regular milk. If using regular whole milk, add 1-1/2 carbs per serving.

Nutritional Information per 1/2 cup ice cream (no sauce): 210 calories, 3.7 g carbohydrate (0.5 g dietary fiber, 1.9 g sugars, 0.8 g sugar alcohols), 22.7 g total fat (12.5 g saturated fat, 0 g trans fat), 70 mg cholesterol, 54 mg sodium, 42.8 mg calcium, 19 mg potassium, 206 IU Vit A, 1.6 g protein.  Net carbs per serving: 2.4 grams

Blueberry Sauce per 1 tablespoon: 11 calories, 2.7 g carbohydrate (0.4 g dietary fiber, 1.8 g sugars), 0.1 g total fat, 0 mg cholesterol, 0 mg sodium, 1.1 mg calcium, 14 mg potassium, 3 IU Vit A, 2 mg Vit C, 0.1 g protein. Net carbs per serving: 2.3 grams

Photos and recipe by Kathy Sheehan, copyright 2021
All rights reserved. Please do not duplicate without the author’s permission. 

Saturday, July 20, 2019

Low Carb Strawberry Mousse Shortcake Cups

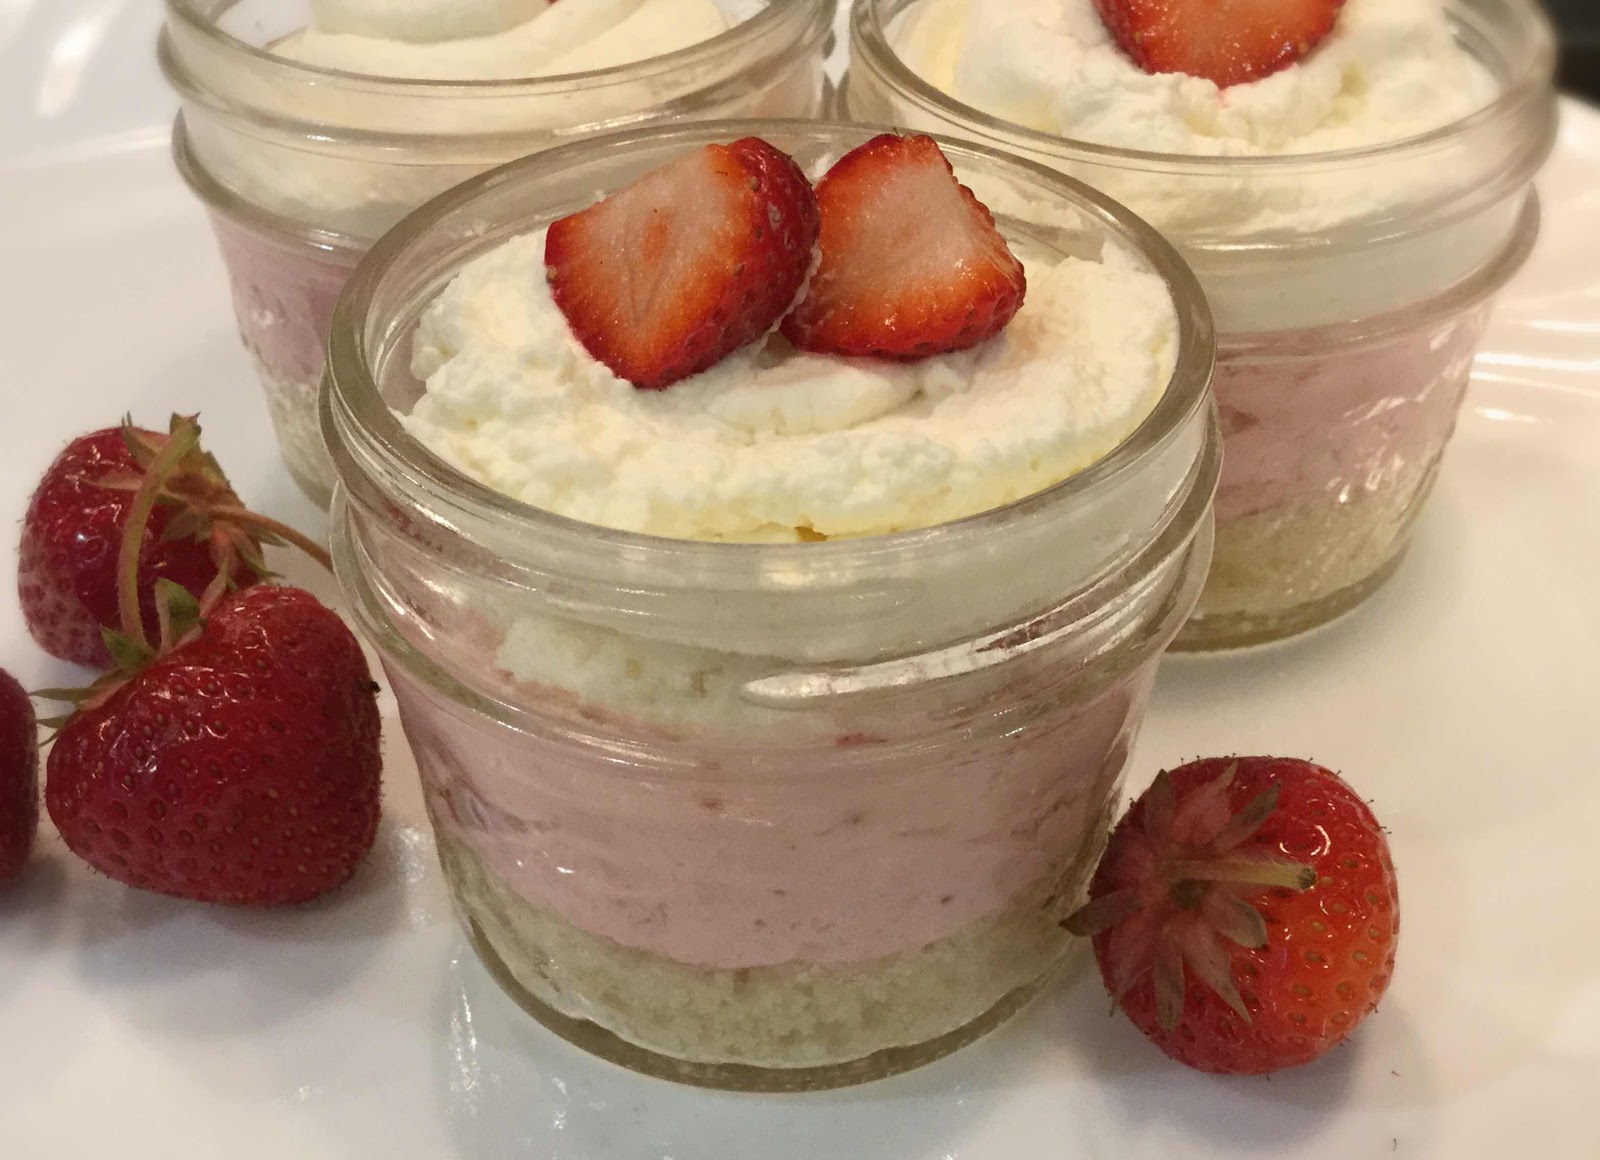
Low Carb Strawberry Mousse Shortcake Cups
The strawberry harvest is coming to an end in Maine. I created these very special dessert cups, with the sweet and creamy flavors of strawberry shortcake, as a last hurrah! They store well and will last for many days covered in the refrigerator, so I can extend the enjoyment of one of my favorite fruits for a bit longer. Since I only eat fruit when it is local and in season (I don’t eat fruit during the winter), I’m savoring the last strawberries of the season and these individual dessert cups are a great way to do it!

Low Carb Strawberry Mousse Shortcake Cups
Makes 8 servings

Crust Ingredients:
3/4 cup almond flour
2 tablespoons butter, chilled and cubed
2 tablespoons granulated or powdered erythritol 
1/4 teaspoon xanthan gum
1/8 teaspoon salt
1/4 teaspoon lemon extract

Strawberry Mousse Filling:
4 ounces cream cheese, softened
15 small to medium strawberries, sliced
3 tablespoons powdered erythritol 
1/2 cup heavy whipping cream
10 drops of monkfruit extract or liquid stevia if needed for additional sweetness (optional)
1/8 teaspoon xanthan gum (optional and only if needed)

Whipped Cream Topping:
1/2 teaspoon dry gelatin powder
2 teaspoons water
1/2 cup heavy whipping cream
1/2 teaspoon vanilla extract
8-10 drops of monkfruit extract or stevia to taste

1. For the crust, preheat the oven to 350 degrees Fahrenheit. Lightly spray the bottom of eight 4 ounce glass jelly jars or oven-proof dessert cups with non-stick coconut oil spray and place on a baking sheet: set aside.

2. Combine the almond flour, chilled butter cubes, 2 tablespoons erythritol, xanthan gum, salt and lemon extract in a food processor. Pulse until mixture resembles fine crumbs. Divide the mixture evenly between the eight jars and gently tamp down to create an even layer. Bake for 10 minutes in the preheated oven. Remove from the oven and cool completely.

3. After the crust has cooled, prepare the strawberry mousse by first mashing the strawberries with a potato masher or the tines of a fork until you have small pieces and the strawberries and their liquid measures about 2/3 cup (do not use more than 2/3 cup). Set aside.

4. In a large mixing bowl, beat the softened cream cheese and 3 tablespoons powdered erythritol with an electric mixer until light and fluffy. Add the strawberries and their liquid and 1/2 cup heavy cream and beat vigorously until the mixture increases in volume and is thick with the consistency of whipped frosting. Taste and add additional sweetening if needed (this is optional and will depend on the natural sweetness of the strawberries).

5. Optional and only if additional thickening is needed, sprinkle 1/8 teaspoon xanthan gum over the mousse and beat vigorously to incorporate. You will notice an immediate slight thickening of the mixture, but do not add more because once refrigerated the mousse with thicken further. Divide the mousse equally between the eight jars and refrigerate for at least 30 minutes to firm up.

6. To make the cream topping, first sprinkle the 1/2 teaspoon dry gelatin powder over 2 teaspoons of cool or room temperature water and then heating in the microwave for about 5 seconds, stir until dissolved: set aside.

7. Pour 1/2 cup heavy cream into a large mixing bowl. Add the vanilla extract and monkfruit or stevia drops. Beat until soft peaks form. While mixing on low, slowly drizzle in the dissolved gelatin and increase the speed of the mixer and beat on high until thick peaks have formed. Spoon or pipe the whipped cream over the mousse and refrigerate the dessert cups until ready to serve.

8. These desserts can be covered and stored in the refrigerator for up for 4 days. If desired, top each dessert with a small strawberry as garnish before serving.

Nutritional Information per serving: 223 calories, 4.4 g carbohydrate (1.4 g dietary fiber, 1.3 g sugars), 22.5 g total fat (10.9 g saturated fat, 0 g trans fat), 59 mg cholesterol, 105 mg sodium, 35 mg calcium, 98 mg potassium, 574 mg Vit A, 3.5 g protein. Net carbs per serving: 3 grams.

Photo and recipe by Kathy Sheehan, copyright 2019
All rights reserved. Please do not duplicate without the author’s permission. 

Tuesday, August 15, 2017

Chocolate-Covered Blueberries Smoothie


Right now the wild Maine blueberries are in season and abundant in the local stores and Farmer's Markets. On my low carb/high healthy fat/moderate protein diet (LCHF) I don't eat a lot of fruit, but these tiny sapphire jewels are carb-worthy in my opinion, so I indulge in a couple of pints every summer while they're fresh. I am picky about my berries though and only buy organic. This morning I made a smoothie with one of my favorite flavor combinations. This smoothie is packed with antioxidants from both the raw cacao and the berries, not to mention the fiber and other goodness from the freshly-picked kale from my garden! The deep, dark purple color is both pleasing to the eye and lets me know that this is a nutrient-dense, healthy way to start my day. Cheers!

Chocolate-Covered Blueberries Smoothie
Makes 1 adult-size serving (or 2 child-size servings)

1/2 cup plain unsweetened kefir or yogurt
1/4 cup organic blueberries, fresh or frozen
1 cup coconut milk or almond milk
2 tablespoons unsweetened raw cacao or cocoa powder
1 tablespoon cacao nibs (optional, but adds an additional depth of chocolate flavor)
1/2 teaspoon vanilla extract
1/4 to 1/2 teaspoon stevia powder to taste (I used Sweet Leaf brand)
2-3 kale leaves, roughly chopped (or substitute 1/2 cup any leafy green)
1/2 tablespoon collagen hydrolysate (or your favorite protein powder)
1 pinch of sea or pink Himalayan salt
1 tablespoon coconut or flax oil (healthy fat keeps you fuller for longer)
4-5 ice cubes
Water, if needed, to achieve desired consistency

Place all of the ingredients in your blender and blend on high speed until smooth.

Nutritional Information per entire recipe: 282 calories, 20 g carbohydrate, 12 g dietary fiber, 13 g protein. Net carbs per serving: 8 grams

Recipe and photo by Kathy Sheehan, copyright 2017
All rights reserved. Please do not duplicate without the author's permission. 

Friday, July 29, 2016

Blueberry Mug Muffin with Easy Cultured Butter


I was lying in bed this morning, thinking about what I might want for breakfast, when an idea flashed into my mind: Blueberry Muffin. This is a twist on my favorite Mug Cake recipes but, instead, it's a Mug Muffin! And to make it even extra healthy, I mixed together kefir cheese and butter to create a simple and quick cultured butter as a spread. YUM...so delicious! I highly recommend using the smaller wild Maine blueberries for this recipe so they won't sink to the bottom (like mine did in this picture) but, even if the bigger variety of berry is all you have, it will still taste amazing, especially topped with creamy butter. (It would also be great made with raspberries.) This delightful breakfast was a great way to start a beautiful summer day in Maine!

Blueberry Mug Muffin
Makes 2 servings

2 tablespoons almond flour/meal
2 teaspoons coconut flour
2 teaspoons LaKanto Monkfruit sweetener (or other erythritol sweetener)
1/4 + 1/8 teaspoon stevia powder (I used Sweet Leaf brand)
A pinch of salt
1/2 teaspoon baking powder
1/8 teaspoon lemon extract or 1 teaspoon lemon zest (or 2 drops dietary-grade lemon essential oil)
1/2 teaspoon vanilla extract
5 drops Lemon Drop stevia (I used Sweet Leaf brand)
1 large egg
1 tablespoon butter, melted (use ghee for dairy-free)
1 tablespoon small wild blueberries (fresh or frozen)

1. Melt the 1 tablespoon of butter in a mug by microwaving on high for about 15 seconds; set aside.

2. In a small mixing bowl, combine the almond flour, coconut flour, sweeteners, salt and baking powder. Stir with a fork until well combined and no lumps are visible.

3.  Add the melted butter, extracts, lemon stevia drops, and egg. Whisk with a fork until a smooth batter forms. Take a paper towel and coat the bottom and sides of the mug with any butter remaining in the mug. Add 1/2 of the blueberries to the batter and gently fold to incorporate and pour into the prepared mug. Top batter with remaining berries.

4. Microwave on high for about 45 seconds.* Remove and test by touching the muffin near the center. It is done when the batter on top of the muffin looks set and springs back when touched lightly. If additional cooking time is needed, microwave at 10 second intervals and retest. Do not overcook. Allow the muffin to cool in the mug for 1 minute.

5. Invert the muffin onto a serving plate and allow to cool for 1-2 minutes. Serve immediately with butter or store leftovers in an airtight container at room temperature for 1 day. This recipe makes 2 servings.

*To bake in the oven, divide batter into two greased muffin tins or ramekins and bake at 325-degree Fahrenheit for 16-18 minutes or until toothpick comes out clean when tested or muffins spring back when touched near the center. 

These muffins can be microwaved or baked in the oven. Both methods are equally delicious!
Nutritional Information per 1/2 recipe: 143 calories, 6 g carbohydrate (1.7 g dietary fiber, 0.9 g sugars, 4 g sugar alcohols), 11.7 g total fat (4.9 g saturated fat, 0 g trans fat), 113 mg cholesterol, 173 mg sodium, 114.5 mg calcium, 88 mg potassium, 5 g protein.  Net carbs per serving: 4.3 grams

Easy and Quick Cultured Butter: Mix together 2 tablespoons softened butter, 1 tablespoon kefir cheese (to make kefir cheese, click here) and 1/4 teaspoon honey.  This probiotic-rich buttery spread is excellent on muffins, pancakes and waffles.

Recipes by Kathy Sheehan, copyright 2016
All rights reserved. Do not duplicate without author's permission.
Sunday, July 3, 2016

Cherry Chocolate Chip Kefir Ice Cream with Macadamia


Summer just isn't summer without ice cream! For a long time, I only would allow myself a single dip of ice cream once a year as a treat. (How sad and un-American is that?) I felt deprived and certainly left out of the whole social experience of eating ice cream with family and friends. I wanted more freedom to enjoy the short, warm season in Maine like everyone else...and that means having plenty of ice cream. The only difference now is that I make it myself. For my birthday last year, I received an ice cream maker and have been having a grand time creating healthy, sugar free ice cream in every season. My imagination has been the only limit to the variety of flavors I've enjoyed! The one ingredient I add to all my recipes is plain milk kefir because it's a delicious way to consume more probiotics. My ice cream is similar to frozen yogurt, but it contains many more beneficial microorganisms to boost digestive health, which is very important for a person with diabetes. This recipe highlights fresh cherries that are in season and at the lowest price right now. Combined with chocolate chips, cacao nibs and chopped macadamia nuts, it is bursting with real summertime flavor! If you don't have an ice cream maker, you can make this mixture into ice pops instead, but I highly recommend you consider getting one for all the ice cream you'll want to make in the future after you taste this!  To browse my other low carb, delicious and healthy ice cream recipes, click here.

Cherry Chocolate Chip Kefir Ice Cream with Macadamia
Makes eight (1/2 cup) servings

Ice cream base:

1 cup plain milk kefir (to learn how to make your own, click here) or use plain yogurt
2 cups full-fat coconut milk (I used A-Roy D brand)
1 tablespoon Lakanto Monkfruit sweetener (or other erythirtol sweetener)
3/4 teaspoon stevia powder, or to taste (I use Sweet Leaf brand)
1 heaping tablespoon raw cacao powder (or unsweetened cocoa powder)
5-8 drops of Cherry flavored liquid stevia (or regular)
1 tablespoon macadamia nut butter (or cashew butter)
12 fresh red sweet cherries, pitted (divided)

Stir-Ins:

2 tablespoons 70% or higher dark chocolate, chopped (I used 5 squares of Green and Black's 85% Organic Chocolate bar)
1 tablespoon raw cacao nibs
1/4 cup chopped macadamia nuts

1. In a blender, blend together the kefir, coconut milk, sweeteners, cacao powder, macadamia nut butter and 8 of the pitted cherries. Blend until well combined and smooth. Taste and adjust sweetening, if desired. Lastly, add the remaining 4 cherries and pulse blender only until cherries are roughly chopped (you want some chopped cherry pieces visible in the mixture). Pour into a glass jar and refrigerate for at least 1 hour.

2. Meanwhile, prepare stir-in ingredients and put them in a small bowl; set aside. (I like using cacao nibs with the chopped dark chocolate because it adds a nice crunchy texture to the finished ice cream but, if you don't have them, you can leave them out and add another 1 tablespoon of chopped chocolate instead.)

3. According to the manufacturer's instructions for your ice cream maker, churn the ice cream base until beginning to solidify.  Add the stir-ins and continue churning until a soft serve consistency is reached. At this point, you can serve immediately or, if you wish to scoop the ice cream, pour into a container and place in the freezer for about 15 minutes, but do not allow it to freeze completely (see note below). 

NOTE: This ice cream is best served right away because, if it is completely frozen, it will be too hard to scoop. Fill ice pop molds with any leftover ice cream and freeze to be eaten as popsicles later.

Nutritional Information per 1/2 cup: 202 calories, 6.8 g carbohydrate (1.3 g dietary fiber, 3.7 g sugars, 1.5 g sugar alcohol), 19 g total fat (10.9 g saturated fat, 0 g trans fat) 0 mg cholesterol, 13 mg sodium, 21.7 mg calcium, 51 mg potassium, 1.8 g protein. Net carbs per serving: 5.5 grams

Recipe by Kathy Sheehan, copyright 2016

Monday, June 20, 2016

Shortcake in a Mug


It's strawberry season again and there's nothing that says summer like Strawberry Shortcake! I normally don't eat a lot of fruit but, when it's fresh, in season and local, I usually indulge in a pint or two. This is my favorite way to eat strawberries. The best part about this recipe is how quick and easy it is to make the shortcakes. Taking only 45 seconds in the microwave, this mug cake will be ready in minutes to split and share with a friend, topped with sweet berries and a dollop of whipped coconut cream laced with vanilla. (If you can't find a friend to share it with, save half of the shortcake for later.) The cake itself isn't overly sweet, so the flavor of the berries will shine forth. The slight hint of lemon gives it a nice touch and will go well with any fruit. Enjoy the summer!

Shortcake in a Mug
Makes 2 servings

1/4 cup almond flour
2 teaspoons golden flaxseed meal or coconut flour
1 tablespoon Lakanto Monkfruit sweetener (or other erythritol sweetener)
1/2 teaspoon baking powder
A pinch of salt
1 egg, slightly beaten
1 teaspoon lemon juice (or almond milk)
1/2 teaspoon lemon zest (or 1-2 drops dietary grade lemon essential oil)
1/2 teaspoon vanilla extract or unsweetened vanilla powder
5 drops monkfruit extract or liquid stevia
1 teaspoon melted butter (or ghee for dairy free)

1. In a small bowl, combine the first five dry ingredients with a fork until thoroughly mixed.  Add the egg, lemon juice or almond milk, lemon zest (or essential oil), vanilla extract, monkfruit extract or liquid stevia.

2. Melt the butter in an eight-ounce mug or ramekin and add to the batter mixture. With a paper towel, wipe any butter remaining in the mug around the sides and on the bottom of the mug; set aside.

3. With a fork, beat the cake batter until all ingredients are combined and pour into the greased mug or ramekin. Microwave on high for about 45 seconds or until the cake has risen, looks dry and the top springs back when touched lightly in the center. (Note: Cooking may take a bit less or more time, depending on the wattage of your microwave and the mug you are using. You may need to experiment to discover the best amount of time needed to cook your cake. When you have done this, make a note of the mug used and the proper cooking time so, the next time you make a mug cake, you'll know what works best for you.)

4. Allow the cake to cool for a few minutes before running a sharp knife around the edge and inverting your mug to release the shortcake.  Split the cake into two servings, top one half of the shortcake with your favorite berries and whipped cream or whipped coconut cream (recipe below).  Repeat with the other half of the shortcake or cool and store in an airtight container for later. Serve and enjoy.

To make whipped coconut cream: Place a can of full-fat coconut milk in the refrigerator overnight. Do NOT shake the can!! Open and spoon out the thickened coconut cream at the top and discard the liquid (or use for another purpose). Add stevia powder and vanilla to taste and whip with a whisk or fork until well combined and it has the consistency of whipped cream. Serve immediately or store in the refrigerator.

Nutritional Information per 1/2 shortcake (not including berries or topping): 144 calories, 5.3 g carbohydrate (2.2 g dietary fiber, 0.7 g sugars), 11.7 g total fat (2.4 g saturated fat, 0 g trans fat), 99 mg cholesterol, 153 mg sodium, 132 mg calcium, 152 mg potassium, 6.6 g protein. Net carbs per serving: 3.1 grams

Recipe by Kathy Sheehan, copyright 2016