Showing posts with label beef. Show all posts

Wednesday, May 22, 2024

Keto Dutch Stamppot

Keto Dutch Stamppot

Stamppot is a Dutch comfort dish that is traditionally made with mashed potatoes, mixed with vegetables and topped with smoked sausage, meatballs and sometimes gravy. Recently my daughter and I took a trip to The Netherlands where she enjoyed this meal of pure warmth and comfort on a chilly night in Amsterdam. I returned home determined to make a low carb version. It was so easy to remake it with low carb substitutions without sacrificing texture or flavor! I couldn’t be more delighted with the result! I made mine with meatballs, but feel free to substitute smoked sausage, fish or whatever sounds right to you.

Keto Dutch Stamppot
Makes 4 servings

1 recipe of Quick and Easy Mashed Cauliflower (click here for the recipe)
1 cup endive, chopped
½ cup kale leaves, cabbage or sauerkraut, chopped into small pieces

Meatballs:
1 pound 85% ground beef
½ cup onion, finely chopped
1/4 cup fresh parsley, chopped
½ teaspoon salt
1/4 teaspoon black pepper

Gravy:
1½ cups beef broth (to reduce sodium, you can substitute low sodium broth)
3 tablespoons heavy cream
¾ teaspoon xanthan gum
Salt and pepper to taste

1. Prepare the mashed cauliflower as directed. While hot, stir in the endive and kale. Set aside. (This can be made ahead.)

2. To make the meatballs, mix together the ground beef, onion, parsley, salt and pepper. Form into 8 balls. Place on a baking sheet and bake in an oven that has been preheated to 350 degrees F. Bake for about 20-25 minutes, turning half way through cooking, until the internal temperature reaches 145 degrees F. 

3. Meanwhile, make the gravy in a saucepan. Whisk together the beef broth and heavy cream and bring to a simmer over medium heat. Sprinkle the xanthan gum over the top and whisk vigorously until well incorporated. Bring to a boil and cook, stirring often, until the gravy has thickened to the desired consistency. Season with salt and pepper to taste.

4. To serve, spoon 1/2 cup of mashed cauliflower into a serving bowl, top with 2 meatballs and couple of spoonfuls of hot gravy. Enjoy!

5. Leftovers can be stored in airtight containers and refrigerated for up to 4 days. I recommend storing the mashed cauliflower separate from the meatballs and gravy. Reheat to enjoy again!

Keto Stamppot

Nutritional Information per serving: 443 calories, 8.5 g carbohydrate (3.3 g dietary fiber, 3.4 g sugars), 33.7 g total fat (17 g saturated fat, 0 g trans fat), 126 mg cholesterol, 1120 mg sodium, 135.4 mg calcium, 498 mg potassium, 3 mg iron, 345 IU Vit A, 61 mg Vit C, 27.4 g protein. Net carbs per serving: 5.2 grams

Recipe and photos by Kathy Sheehan, copyright 2024
All rights reserved. Please do not duplicate without the author’s permission.

Saturday, December 4, 2021

Keto Braised Italian Meatballs

Braised Italian Meatballs
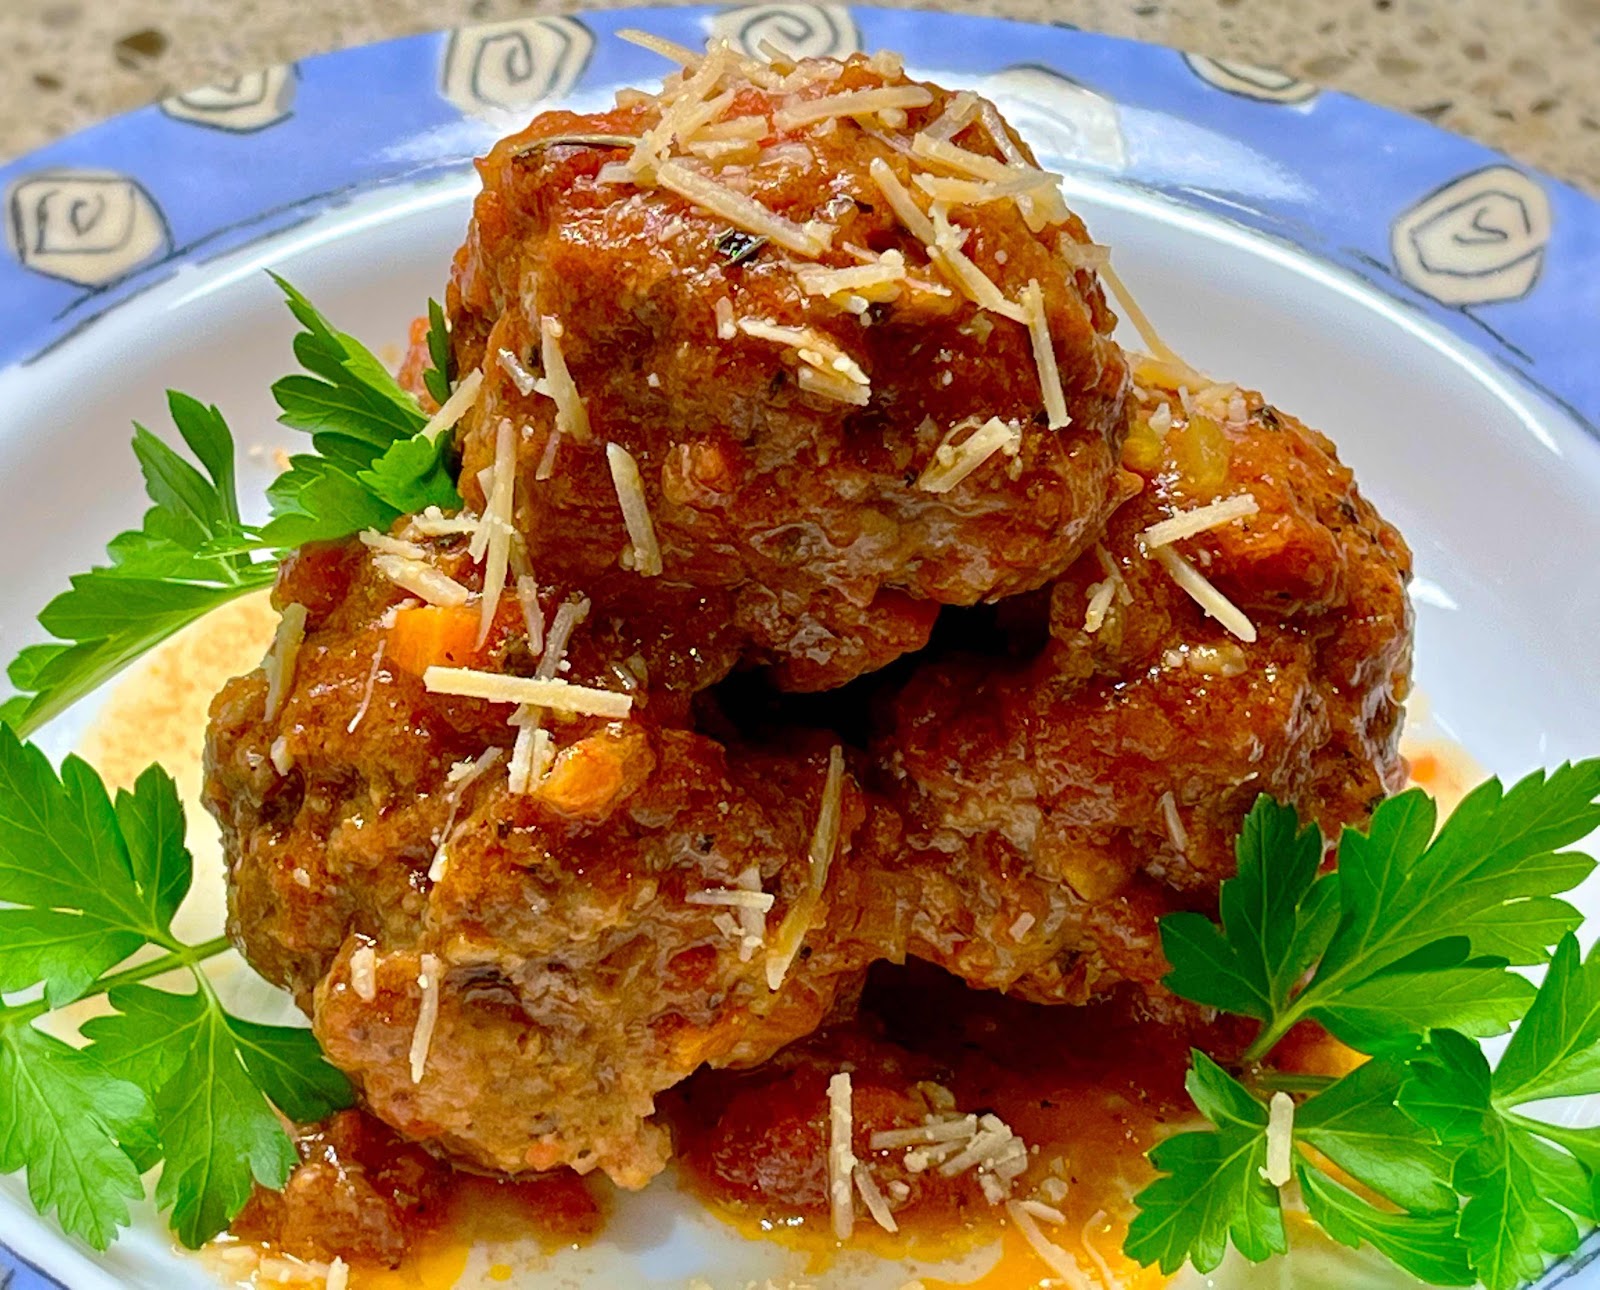
One year, when I vacationed in Italy, I found a restaurant that served the best meatballs I had ever tasted. They were tender and so flavorful! Since then, I discovered that braising meatballs, instead of baking or browning them in a skillet, is the best method for cooking them. Braising is a method of cooking in which the meat is simmered in a cooking liquid or, in this case, a delicious sauce. It is safe to add raw meat to the braising liquid as long as it continues simmering until the meatballs are cooked through. These are hearty, good-sized meatballs so, for me, two are plenty! The sauce is a light tomato-based sauce that also has wine and beef broth. As the meatballs cook in the sauce, a twofold exchange is going on: First, the meatballs become more flavorful by absorbing the sauce as they cook. Secondly, the sauce reduces and deepens in flavor as the meat releases its juices. I think you’ll agree with me that these tender and delicious meatballs are some of the best you’ve ever had!

Keto Braised Italian Meatballs
Makes 6 servings

Meatballs:
1/2 pound ground pork
1 pound ground beef
2 slices of low carb bread (or 2 chaffles), lightly toasted or dried out
1/2 cup riced cauliflower, thawed and excess liquid removed
1 egg
1 cup parmesan cheese, grated
1 teaspoon dried Italian herb seasoning
3/4 teaspoon fennel seeds

Sauce:
1 can (14.5 or 15 oz) diced tomatoes (with liquid), blitzed in a food processor to make a smooth sauce (or 1-1/2 cups tomato sauce)
1 tablespoon tomato paste
2 tablespoons olive oil
1/4 cup carrots, finely chopped
1/4 cup onions, finely chopped
1 stalk celery, finely chopped
2 cloves garlic, minced
1/4 teaspoon salt
1/2 teaspoon black pepper
1/2 teaspoon zero-carb brown sugar substitute, such as Swerve Brown
1 tablespoon fresh sage leaves, chopped (if using dried herbs, use 1/2 the amount called for)
1 tablespoon fresh thyme, chopped
1 tablespoon fresh parsley, chopped 
1/2 cup dry white wine
1 cup beef stock

1. Tear the dried low carb bread (or chaffles) into pieces and place in a food processor. Add the drained riced cauliflower and pulse together until crumbs; set aside.

2. Placed the ground pork and beef into a large bowl and mix well. Mix in the bread or chaffle crumbs, the egg and mix. Add the grated cheese, herbs and fennel seeds and mix well with your hands until all the ingredients are well distributed.

3. Using your hands, shape into meatballs about 2-1/2 inches in diameter or use slightly less than 1/3 cup measuring cup to form 12 equal-sized meatballs. Set aside. (This step can be done one day ahead and refrigerated. Allow the meatballs to sit at room temperature for at least 30 minutes before cooking.)

4. To make the sauce: Pour the diced tomatoes and tomato paste into the food processor and blitz until it forms a smooth sauce. Measure to make sure you have at least 1-1/2 cups of tomato sauce (a little more is fine); set aside.

5. Add the olive oil to a wide, deep, heavy sauce pan and warm over medium heat. Add the carrots, celery and onion. Stir and cook for 2 minutes. Add the garlic and stir briefly until fragrant.

6. Add the salt, pepper, brown sugar substitute, sage, thyme and parsley. Stir well and cook for 2 minutes. Stir in the wine and cook for 2 minutes. Add the tomato sauce mixture and beef stock; stir to combine. Increase heat to medium-high and bring to a boil. After reaching a boil, add the meatballs and return to a boil. Reduce the heat to medium-low or low and simmer, uncovered, for 35 minutes.

7. Carefully, remove the meatballs to a serving plate or bowl with a slotted spoon. If necessary, continue to boil and reduce the sauce until it reaches the desired consistency. For extra flavor and color, you may garnish with chopped chives or parsley.

Braised Meatballs with Zucchini
Nutritional Information per 2 meatballs with 1/2 cup sauce: 548 calories, 6 g carbohydrate (1.5 g dietary fiber, 2.8 g sugars), 33.1 g total fat (11.8 g saturated fat, 0 g trans fat), 191 mg cholesterol, 754 mg sodium, 235.5 mg calcium, 456 mg potassium, 11 mg iron, 416 IU Vit A, 12 mg Vit C, 53.8 g protein. Net carbs per serving: 4.5 grams

Photo and recipe by Kathy Sheehan, copyright 2021
All rights reserved. Please do not duplicate without the author’s permission.
Tuesday, February 23, 2021

Low Carb Beef Burgundy

Low Carb Beef Burgundy
This is one of my favorite recipes that goes way back! Beef Burgundy from the long-gone Cheechako Restaurant in Damariscotta, Maine. It takes time, but is a very easy recipe and your house will smell heavenly while it cooks! You can use chuck beef roast, chuck stew meat or go all-out and use sirloin, the extended cooking time will tenderize the meat beautifully. (Do not use beef round, it’s too lean and the result will be tough.) Simple to make any day, but elegant enough for company, this dish will become a family favorite at your house, too.

Low Carb Beef Burgundy
Makes 6 servings

2½ pounds trimmed beef, cut into cubes
1½ cups water
1 cup Burgundy or other dark red wine, such as Cabernet Sauvignon
1 teaspoon beef stock extract (Better Than Bouillon Beef Flavor will work fine too)
½ teaspoon xanthan gum to thicken
Salt and pepper to taste

1. Sear beef cubes over medium high to high heat in batches in a heavy 4-quart saucepan with a tight-fitting lid or Dutch oven, stirring and turning beef to brown on all sides. Reduce heat to low and add water and stir to deglaze the pan. Return seared beef to the pan, add red wine and beef extract and stir. The amount of liquid should just be visible among the beef cubes. Cover and simmer for 1 hour until tender.

2. Use a slotted spoon to remove beef cubes to a plate. While the liquid in the saucepan is simmering, whisk vigorously and slowly sprinkle the xanthan gum into the sauce. Whisk until incorporated, no lumps remain and the sauce thickens. Sample the sauce and add salt and pepper to taste.

3. Return beef to the saucepan and simmer for a few minutes to reheat the beef. 

4. Serve over riced cauliflower that has been seasoned with parsley.

Nutritional Information per serving of beef with sauce (not including riced cauliflower): 205 calories, 0.7 g carbohydrate (0 g dietary fiber, 0 g sugars), 4.7 g total fat (1.3 g saturated fat, 0 g trans fat), 87 mg cholesterol, 86 mg sodium, 1 mg potassium, 34.7 g protein. Net carbs per serving: 0.7 grams

Photo and recipe by Kathy Sheehan, copyright 2021
All rights reserved. Please do not duplicate without the author’s permission. 

Saturday, August 8, 2020

Taco Salad with Quest Protein Chips

Taco Salad with Quest Protein Chips
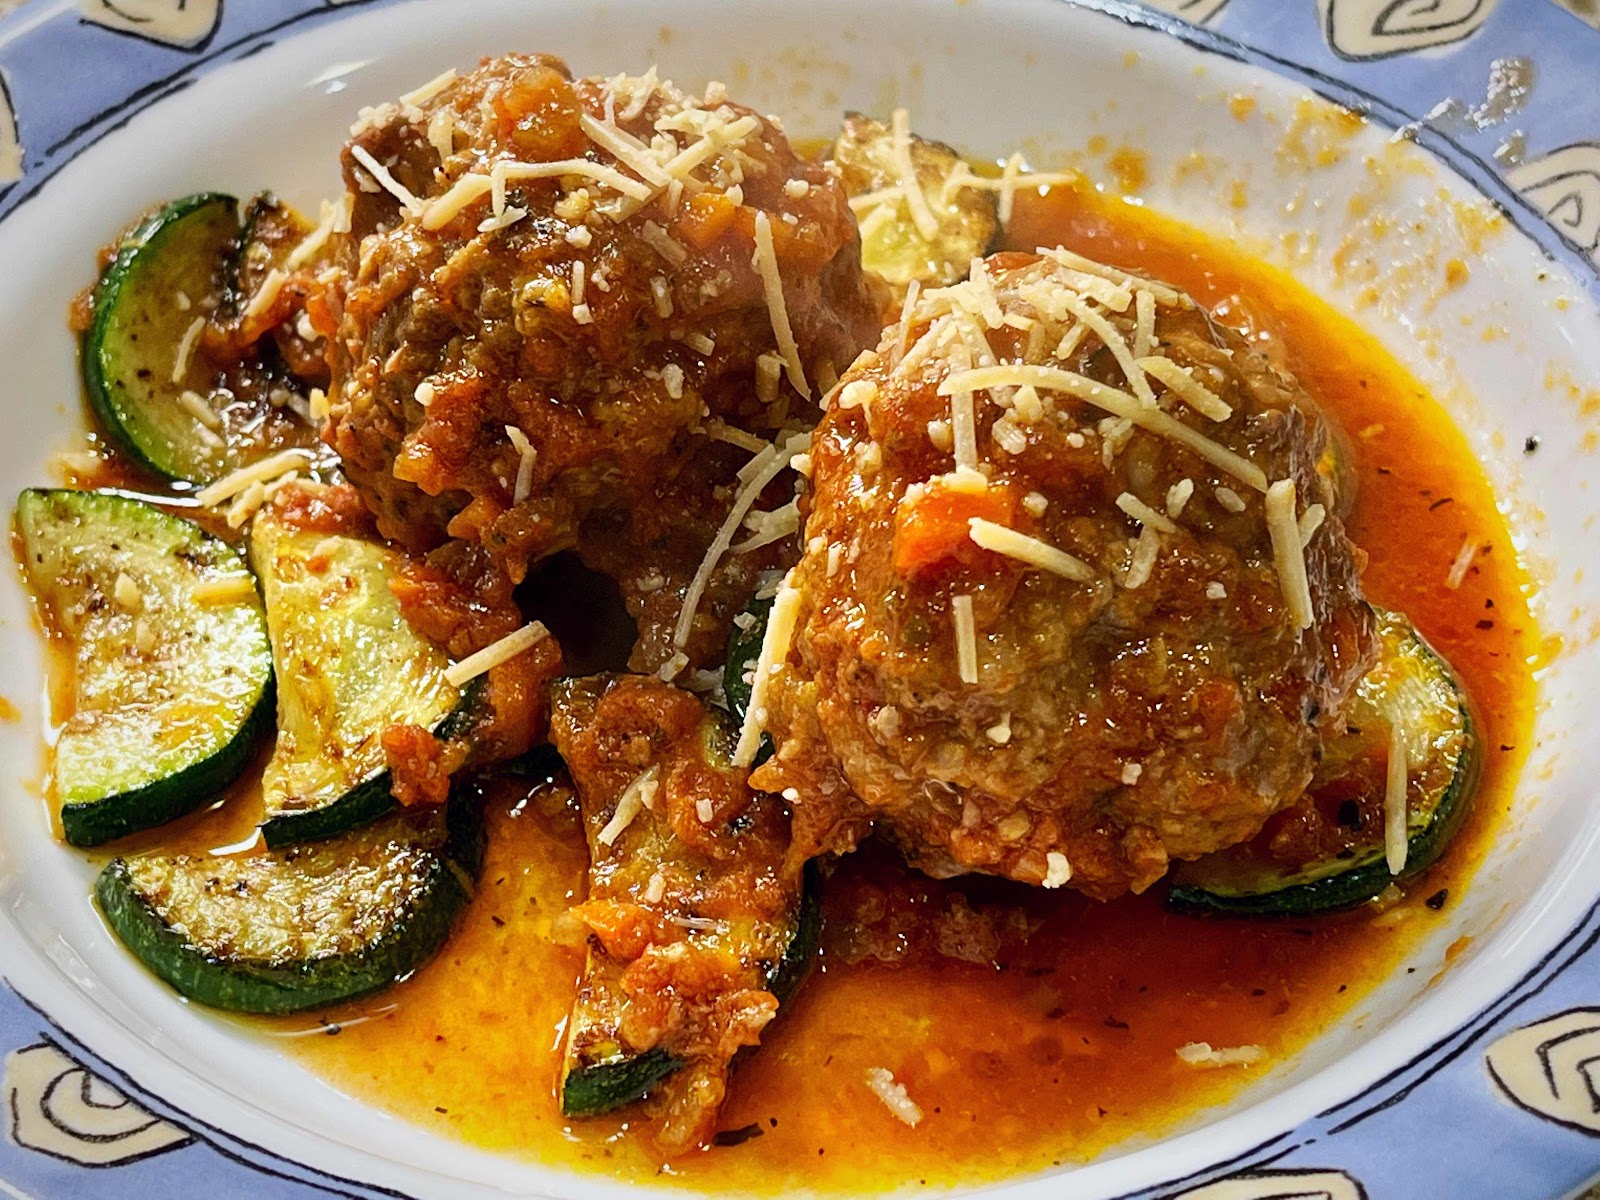
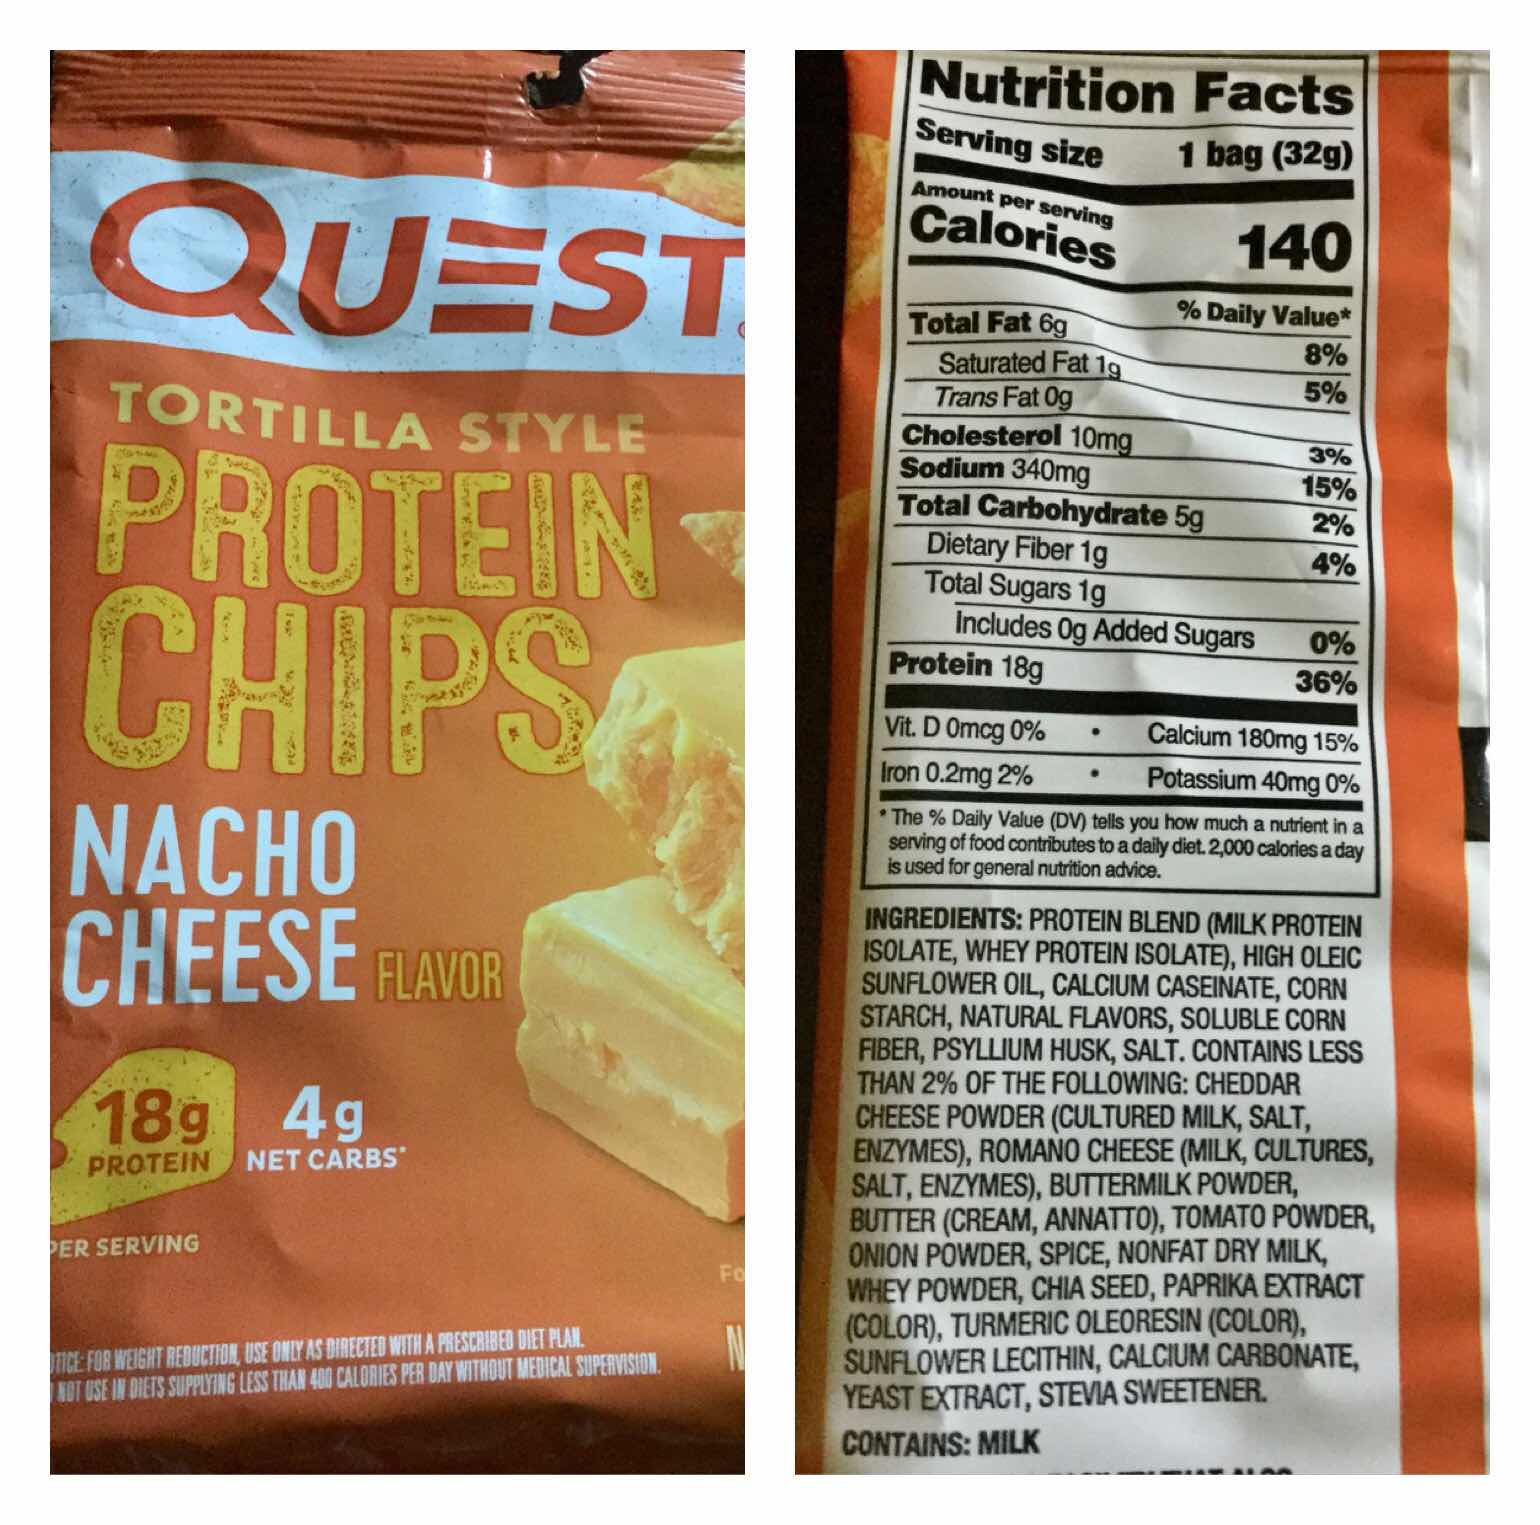
Here’s an easy dinner that is entirely satisfying and tastes just like a higher carb version. The secret is to use Quest Protein Tortilla-Style Chips in place of corn tortilla chips (I chose Nacho Cheese flavor, but you can substitute your favorite). This delicious salad has become a hands-down favorite on my keto diet, especially when I don’t feel like cooking!

Taco Salad with Quest Protein Chips
Makes 1 serving

3 oz. ground beef
1-2 teaspoons taco seasoning, to taste
1 tablespoon water
1 tablespoon chopped onion
1 bag Quest Protein Tortilla-style Chips, Nacho Cheese (see image below)
1 cup lettuce, torn into bite-size pieces
1/4 cup chopped tomato
1/2 oz. shredded cheddar cheese
2 tablespoons sour cream

1. In a skillet over medium heat, brown the ground beef. Add the taco seasoning to taste. Add the water and chopped onion; stir to combine.

2. Pour the entire bag of Quest Protein chips into a large serving bowl. Top with the seasoned beef, lettuce, chopped tomato and shredded cheese. Dollop with sour cream and serve.

Quest Protein Chips
Nutritional Information: 445 calories, 9.6 g carbohydrates (2.2 g dietary fiber, 2.9 g sugars), 28.5 g total fat (12.2 g saturated fat, 0 g trans fat), 93 mg cholesterol, 498 mg sodium, 335 mg calcium, 505 mg potassium, 2 mg iron, 614 ug Vit A, 12 mg Vit C, 38.8 g protein. Net carbs per serving: 7.4 grams

Photos and recipe by Kathy Sheehan, copyright 2020
All rights reserved. Please do not duplicate without the author’s permission. 
Friday, June 15, 2018

Low Carb Taco Salad in a Grilled Cheese Bowl

Taco Salad in a Grilled Cheese Bowl
There are many variations of similar recipes online, but this salad is so much fun to make and eat, I had to share my own experience. I’ve seen other intriguing posts describing how to make taco shells with cheese, so I had to try it for myself. I prefer a taco salad in a bowl because it’s less messy to eat. This is an easy, foolproof, stovetop method that takes less than 10 minutes start to finish! Fill it with whatever taco salad fixings you like and, I think you’ll discover as I did, that the delicious, crispy grilled cheese bowl adds a lot of flavor to this festive salad!

Grilled Cheese Bowl
Makes 1 edible bowl

1/2 cup shredded cheddar cheese, or a blend (I used a Mexican blend)

1. Evenly spread 1/2 cup of shredded cheese into an 8-inch non-stick skillet.
2. Heat over medium heat until the cheese is bubbly and turns a dark golden brown. (Do not stir or disturb the cheese during the cooking process.) Watch carefully so the cheese doesn’t burn, but you’re looking for a dark golden color that indicates it’s well done and will be crispy when cooled.
3. Meanwhile, place an inverted 8 ounce bowl onto a plate.
4. Remove skillet from the heat and allow the bubbling cheese to cool slightly, but not harden. Drape the still warm and flexible cheese disk over the inverted bowl and gently press down the sides to create a bowl shape.
5. Allow to cool for a few minutes until the cheese hardens. Remove the cheese bowl from your mold, fill and enjoy!


Low Carb Taco Salad in a Grilled Cheese Bowl
Makes 1 serving

1 Grilled Cheese Bowl (see above)
1 cup of chopped romaine or iceberg lettuce
3 ounces of cooked ground beef seasoned with 3/4 teaspoon of taco seasoning
1/4 avocado, cut into cubes
4 grape tomatoes, chopped
1-2 teaspoons of chopped red onion
1-2 teaspoons of chopped fresh cilantro or parsley
1 teaspoon shredded cheddar cheese
2 tablespoonfuls of sour cream

Place all of the salad ingredients into the Grilled Cheese Bowl and enjoy!

Nutritional Information per salad in cheese bowl: 534 calories, 12.9 g carbohydrate (4.7 g dietary fiber, 3.8 g sugars), 41.2 g total fat (20.8 g saturated fat, 0 g trans fat), 128 mg cholesterol, 588 mg sodium, 473.4 mg calcium, 661 mg potassium, 2 mg iron, 3345 mg Vit A, 20 mg Vit C, 30.3 g protein. Net carbs per serving: 8.2 grams

Recipe and photos by Kathy Sheehan, copyright 2018
All rights reserved. Please do not duplicate without the author’s permission. 
Monday, February 26, 2018

Slow Cooker Beef (or Lamb) with Onions and Gravy

Slow Cooker Beef (or Lamb) with Onions and Gravy
There are some days I just need some comfort food. This easy slow cooker recipe definitely fits that description. It fills my kitchen with a savory aroma that just enhances my anticipation of enjoying this hearty and healthy meal at the end of a long day. The meat is so tender, it just falls apart! I recently learned the trick of sprinkling meat with a little baking soda to ensure perfect browning. It is optional, but it really works. I serve this meat and gravy dish over cooked riced cauliflower or, for even more nutrition, I choose a riced cauliflower-broccoli blend (as pictured). When covered with silky gravy, I never miss the starchy rice and, even more important, my post-meal blood sugar doesn’t spike. I’ve listed two options, using beef or lamb, and you will use either red wine and beef broth (for beef) or white wine and chicken broth (for lamb). There is a distinct difference in flavor, but both are equally delicious, so choose your favorite combination and enjoy!

Slow Cooker Beef (or Lamb) with Onions and Gravy
Makes 6 servings

2 pounds beef or lamb chunks (stew meat)
1 teaspoon salt
3/4 teaspoon baking soda
2 tablespoons coconut oil
1 onion, sliced into 1/2 rounds or chunks
1 teaspoon dried thyme
1/2 teaspoon black pepper, or to taste
1 cup red or white wine
2-3 cups beef or chicken broth
1/4 - 1/2 teaspoon Thick-It-Up (or xanthan gum)
6 cups cooked cauliflower rice (or cauliflower-broccoli rice blend)
Fresh parsley, chopped (optional garnish)

1. Toss together the meat, salt and baking soda. Allow to sit for a few minutes while you slice the onions and put them into the crock pot to cover the bottom. Heat up a heavy skillet over medium-high heat and add the coconut oil. Add beef or lamb to the heated skillet and brown all sides. Add the browned meat to the slow cooker. Sprinkle with thyme and black pepper.

2. Add 1 cup of wine to the hot skillet and deglaze the pan (red wine for beef or white wine for lamb). Add 2 cups of broth (beef broth for beef or chicken broth for lamb) and stir. Pour the liquid over the meat and onions in the crock pot. Add just enough additional broth to the crock pot until it almost covers the meat. Cook on low heat for 8 hours or on high heat for 4 hours.

3. About 10-15 minutes before serving, transfer the liquid from the crock pot to a large saucepan and bring to a simmer. While whisking, sprinkle the Thick-It-Up or xanthan gum over the liquid and whisk constantly until thickened into a nice sauce (use a tiny bit more or less Thick-It-Up or xanthan gum as needed to reach a gravy consistency). Add the sauce to the cooked meat and remaining ingredients in the crock pot and stir to coat the meat. Serve over the cooked cauliflower rice. Sprinkle with chopped parsley, if desired.

Nutritional Information per serving (including 1 cup of cooked cauliflower rice): 323 calories, 8.4 g carbohydrates (2.5 g dietary fiber, 3.5 g sugars), 11 g total fat (5.1 g saturated fat, 0 g trans fat), 82 mg cholesterol, 825 mg sodium, 54.8 mg calcium, 365 mg potassium, 4 mg iron, 7 mg Vit A, 43 mg Vit C, 40 g protein. Net carbs per serving: 5.9 grams

Photo and recipe by Kathy Sheehan, copyright 2018
All rights reserved. Please do not duplicate without the author’s permission.

Wednesday, April 26, 2017

Low Carb Zucchini Lasagna (or Hearts of Palm)


It's been eight years since I posted a lasagna recipe and, now that I'm living gluten and grain free, it's time for an updated version. My husband brought home two gorgeous, organic zucchini the other day and my plan was to spiralize them and make spaghetti. But because today was a cold and rainy spring day in Maine, I decided to make a warm and comforting baked lasagna instead. Instead of pasta noodles, I cut my zucchini lengthwise into narrow slices and used them between the layers of cheese and sauce. (You can substitute hearts of palm noodles in place of the zucchini.) It's important to place the zucchini slices between paper towels and leave at room temperature for at least an hour (or longer) to allow the moisture to be drawn out of this watery vegetable before assembling the casserole. The ricotta cheese mixture and meat sauce can be made a day or two ahead so, when it's time to assemble and bake, the prep time is minimal. Whether made with zucchini or hearts of palm noodles, this recipe is definitely a keeper! The lasagna was so delicious and, because it is a complete and balanced meal by itself, you don't even need to worry about a side dish. Keep life simple!

Low Carb Zucchini Lasagna (or Hearts of Palm)
Makes 6 servings

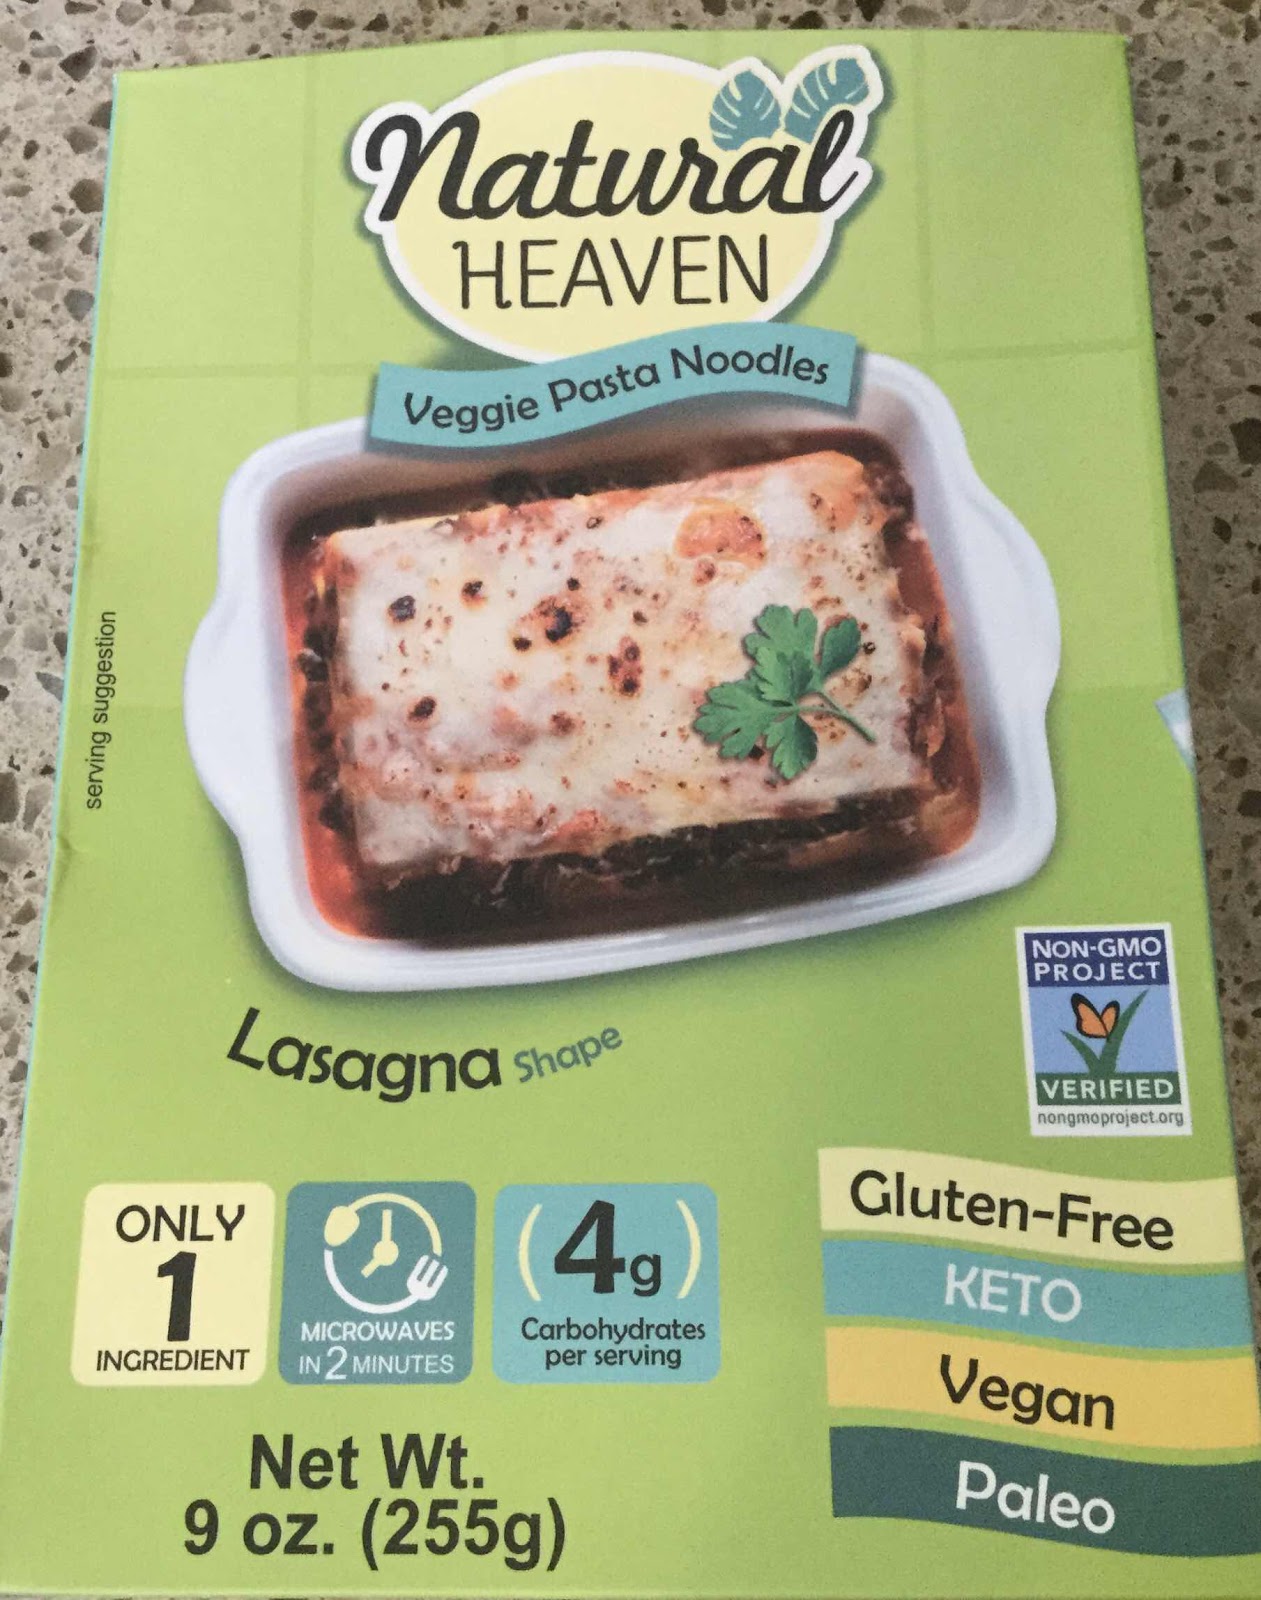
2 large zucchini, about 9 inches long or 9 oz package of hearts of palm lasagna noodles (drained, rinsed and dried), such as Palmini or Natural Heaven brand)
1 cup shredded mozzarella cheese

Ricotta Cheese Filling:
15 oz. of whole milk or part-skim ricotta cheese
1 cup of chopped fresh spinach (or 1/2 cup frozen, squeezed and drained of moisture)
1/4 cup grated Parmesan cheese
1/2 teaspoon dried basil
1 teaspoon of Italian herb seasoning
1/8 teaspoon nutmeg
1/4 teaspoon black pepper
2 cloves garlic, minced (or 1/2 teaspoon garlic powder)
1 egg, slightly beaten

Meat Sauce:
3/4 pound of sweet Italian sausage, casings removed (or substitute ground beef)
2 cups marinara or your favorite pasta sauce, no sugar added

1. Prepare the zucchini ahead of time by slicing lengthwise into thin slices (about 3/16-inch wide). If you have one, a mandoline works well to make even, thin slices, otherwise cut with a large knife. Lay the slices in a single layer on several layers of paper towel, sprinkle very sparingly with salt and cover with several more layers of paper towel. If desired, you can place a baking sheet over them and weight it with canned goods or other objects. Allow the zucchini slices to remain at room temperature between the paper towels for at least one hour (or longer) to draw out the excess moisture. Wipe off any excess salt before assembling the lasagna. (If using hearts of palm noodles, you can skip this step.)
Step by Step Pictorial

2. In a medium bowl, mix together the Ricotta Cheese Filling ingredients and stir until well combined. Set aside. (If making ahead, refrigerate until you're ready to assemble the lasagna.)

3. In a large skillet, brown the sausage and add the pasta sauce. Stir to combine and set aside. (This can be made ahead and refrigerated, if desired.)

4. Preheat oven to 375 degrees Fahrenheit. To assemble the lasagna, spray a baking pan with non-stick spray or grease with coconut oil or butter. Spoon in about 1/2 cup of the pasta sauce (no sausage) and spread to cover the bottom of the pan. Lay down a layer of the zucchini slices or hearts of palm noodles, overlapping just slightly, until the bottom of the pan is covered. Spread 1/3 of the ricotta filling over the zucchini or noodles and spread into an even layer, covering the slices. Top with 1/3 of the meat sauce and spread to edges. Sprinkle sauce with 1/4 cup shredded mozzarella cheese.

5. Repeat with a layer of zucchini slices or noodles, 1/3 of the ricotta filling, 1/3 of the meat sauce and 1/4 cup mozzarella.

6. Repeat a final time with a layer of zucchini slices or noodles, the remaining ricotta filling, the remaining meat sauce and sprinkle with the remaining 1/2 cup mozzarella.

7. Cover with the pan lid or tightly with foil (spray the foil with non-stick spray to prevent the cheese from sticking). Bake for 50-60 minutes. Remove foil and continue baking for 10 minutes until cheese is bubbly and beginning to brown. Remove from oven and allow to rest for at least 10-15 minutes before slicing and serving.

Natural Heaven Hearts of Palm Lasagna Noodles
Nutritional Information per serving made with zucchini (1/6th of recipe): 482 calories, 14 g carbohydrate (3 g dietary fiber, 6.8 g sugars), 36.6 g total fat (15.5 g saturated fat, 0 g trans fat), 120 mg cholesterol, 968 mg sodium, 376 mg calcium, 560 mg potassium, 277 mg Vit A, 1 mg iron, 26.8 g protein. Net carbs per serving: 11 grams

Nutritional Information made with hearts of palm noodles (1/6th of recipe): 478 calories, 10.1 g carbohydrate (1.7 g dietary fiber, 3.4 g sugars), 36.2 g total fat (15.4 g saturated fat, 0 g trans fat), 120 mg cholesterol, 981 mg sodium, 369 mg calcium, 386 mg potassium, 1 mg iron, 708 mg Vit A, 26.4 g protein. Net carbs per serving: 8.4 grams.

Photos and recipe by Kathy Sheehan, copyright 2017, updated 2020
All rights reserved. Please do not duplicate without author's permission.

Wednesday, October 5, 2016

Rainbow Chili


 A cool, autumn day calls for a comforting meal that is warming, all the way to my toes! This spicy meat chili has the added health benefit of assorted vegetables to nourish the body, but don't overlook the fact that their bright colors are appealing to the eye, as well. The purple of red cabbage, the bright orange of carrots, the bold red of tomatoes, the white of onion, the spring green of celery and the summer yellow of squash all come together in a rainbow of flavor! Mix them up and use whatever vegetables you have on hand or choose your family's favorites. I enjoy this hearty chili with a sprinkling of shredded cheese or topped with guacamole and sour cream.

I'm often asked how I fulfill the various tastes and dietary requirements of different family members at mealtime, since not everyone chooses to eat low carb. This meal is a great example! My carb-loving husband (who is not diabetic) loves his chili over boiled potatoes. We usually keep some starchy side dish in the fridge to add to his meals, such as boiled potatoes, pasta or rice.  This arrangement works well for us. It's easy for me to stay on my low-carb diet, while still satisfying his desire for a starch...that way we're both happy!

Rainbow Chili
Makes about 10 cups

2 teaspoons coconut oil
1 pound grass-fed, organic ground beef
1 medium onion, chopped
2 celery stalks, chopped
2 carrots, chopped
1 cup chopped red cabbage
1 cup chopped yellow summer squash
2 cloves garlic, minced
1 can diced tomatoes (14.5 oz.)
1 can organic black soy beans (15 oz.), drained and rinsed
1/2 teaspoon beef concentrate (optional)
1 teaspoon dried oregano
1 teaspoon sea salt, or to taste
1/2 teaspoons ground black pepper, or to taste
1-1/2 teaspoons chili powder, or to taste
1 to 1-1/2 teaspoons ground cumin, or to taste
1/16 teaspoon cayenne pepper, to more if you like it hot
1-1/2 cups to 2 cups beef broth (until desired consistency is reached)

Heat the coconut oil in a heavy Dutch oven. Brown the ground beef. Add the onions, celery and carrots and sauté, stirring occasionally, until the onion becomes translucent. Add the remaining chopped vegetables, garlic, tomatoes, beans, beef concentrate (if using), salt, pepper, herbs and spices. Stir to combine and sauté briefly. Add enough beef broth to reach the desired consistency. Taste and adjust seasonings to taste.  (I'm a wimp and like my chili mild, but if you like yours hot, you may need to add more chili powder, cumin and cayenne.) Cover and simmer for at least 30 minutes, stirring occasionally, before serving.

Nutritional Information per cup: 166 calories, 7.3 g carbohydrate (3.5 g dietary fiber, 2.6 g sugars), 9.6 g total fat (3.7 g saturated fat, 0 g trans fat), 28 mg cholesterol, 478 mg sodium, 48.6 mg calcium, 273 mg potassium, 13.3 g protein.  Net carbs per serving: 3.8 grams

Recipe by Kathy Sheehan, copyright 2016
All rights reserved. Please do not duplicate without author's permission.

Saturday, November 8, 2014

Roasted Garlic Burgers Topped with Caramelized Onion


Rummaging through my vegetable bin today, I found an overlooked bulb of elephant garlic.  It had begun to sprout, so I knew I had to cook it or plant it immediately.  I chopped the top off, drizzled it with olive oil, wrapped it loosely in a tent of foil and baked it in a 400-degree F oven for about 45 minutes until the cloves were soft and golden brown.  It is common to serve roasted garlic spread on bread but, because I don't eat bread, I needed to find another use for it and this recipe came to mind.  The caramelized onion pairs beautifully with the garlic-infused beef.  I served it with an optional drizzle of reduced sugar ketchup, which added another layer of flavor.  This recipe will undoubtedly become one of my favorite weekday meals!

Roasted Garlic Burgers Topped with Caramelized Onion
Makes 4 servings

1 large bulb of garlic, roasted (see directions above)
1 pound of grass fed ground beef
1 tablespoon tomato paste
1/2 tablespoon Worcestershire sauce (gluten free)
1 tablespoon fresh parsley, chopped (or 1/2 TB dried)
1/2 teaspoon black pepper
3/4 teaspoon Himalayan salt
2 teaspoons butter or ghee* (or substitute coconut oil)
1 large onion, sliced
1/4 teaspoon salt
3 drops molasses
1/2 teaspoon apple cider vinegar
Sprinkle of cayenne to taste
1 tablespoon coconut oil
Reduced sugar or sugar free ketchup, optional

1.  Remove the cloves from the roasted garlic bulb when cooled and chop into small pieces.  Place the garlic into a large bowl, add the ground beef, tomato paste, pepper, Himalayan salt, Worcestershire sauce and parsley.  Mix until ingredients are well distributed throughout the ground beef and form into four hamburger patties.  Set aside.  (You can place the patties in the refrigerator for later.  Allow them to come to room temperature before cooking.)

2.  In a skillet, melt the butter or ghee.  Add the sliced onion, add 1/4 teaspoon salt and heat over low heat, stirring occasionally.  The best method for caramelizing onions is to cook them low and slow to allow the natural sugars to be drawn out.  (When the onions are translucent and begin to color, you can begin cooking the patties in another skillet.)  Add the molasses, vinegar and cayenne to the onions at the end of their cooking time, a few minutes before the beef is done.

3.  In a separate skillet, heat a tablespoon of coconut oil over medium to high heat.  Add the patties and allow to cook, without disturbing, until seared and well colored.  Turn and repeat on second side and until done to your satisfaction.  (I like mine medium, with a hot pink center.)

4.  Remove patties to serving plates and top with 2 tablespoons of caramelized onion per serving.  Provide reduced or sugar free ketchup (2 carbs or less per serving), optional.  Serve immediately.

Nutritional Information per serving (no ketchup and no bun): 296 calories, 7.5 g carbohydrate (1.1 g dietary fiber, 2.9 g sugar), 19.6 g total fat (8.5 g saturated fat, 0 g trans fat), 74 mg cholesterol, 114 mg sodium, 27.2 mg calcium, 150 mg potassium, 22.1 g protein.  Net carbs per serving: 6.4 grams

* For those with food allergies: To create a dairy, lactose and casein free meal, use ghee (clarified butter) or coconut oil instead of dairy butter.

Recipe by Kathy Sheehan, copyright 2014.

Sunday, June 15, 2014

Bolognese Sauce over Shirataki No-Carb Noodles


Zero net carbs, 15 calories per serving, gluten free noodles that can actually aid in blood sugar control?  I'll admit, I was skeptical.  Shirataki noodles sound too good to be true, but I'm an adventurous cook and always on the lookout for low carb ways to eat my favorite foods, so I gave them a try.  The verdict?  Very good!  You can find them in Asian markets or in your grocery produce section with tofu or vegetarian products.  They come in a water-filled pouch and are made from a high fiber root vegetable called konjac.  (The noodles also come in a variety that has been combined with tofu, but those have more carbs and a few more calories per serving.  I suggest purchasing the noodles that are soy-free.). When you open the package, strain the noodles in a fine mesh strainer and run hot water over them.  You can either boil them for a few minutes or dry pan fry them to improve their texture to be more like wheat noodles.  Simply spray a dry skillet with non-stick cooking spray and sauté for a few minutes on medium high heat until most of the moisture has evaporated and the noodles are dry.  Use them in recipes or top with your favorite sauce, like the meat sauce recipe below, which is one of my family's favorites.  The noodles are bland, have no flavor of their own and will take a backseat to the flavor of the other ingredients in the dish.  The best part is that they are quite filling!  By using these magic noodles, the carbs in this traditional pasta dish were slashed dramatically, from over 50 grams per serving to a mere 10 net carbs, including the sauce!  I'm amazed and delighted by this new find!

Low Carb Bolognese Sauce
Makes 6 servings

3 Tablespoons olive oil
1/2 onion, chopped
1 pound grass-fed ground beef
3 teaspoons minced garlic
26 ounces chopped tomatoes, with liquid (I use Pomi Italian tomatoes)
2 Tablespoons tomato paste
2 teaspoons dried oregano
1 teaspoon dried basil or 1 TB fresh, chopped
1 Tablespoon dried parsley or 1/4 cup fresh, chopped
1 bay leaf
Salt and pepper to taste

1.  In a large Dutch oven, heat the oil and add the chopped onion.  Add a dash of salt and sauté until onion is soft and translucent.  Add the ground beef and break apart into small pieces, stirring until the meat is cooked and no longer pink.  Add the garlic and sauté until fragrant.

2.  Add the tomatoes, tomato paste, herbs, and bay leaf.  Stir to combine. Cover and reduce heat to low.  Simmer, stirring occasionally, for 40 minutes.  Remove the cover and continue simmering for another 20 minutes or until thickened.  Add salt and pepper to taste.  Remove bay leaf and serve over boiled or dry pan fried shirataki noodles or your favorite pasta.

Nutritional Information per serving (for sauce only): 261 calories, 9.1 g carbohydrate (2.7 g dietary fiber, 5.2 g sugar), 18.4 g total fat (5.7 g saturated fat, 0 g trans fat), 50 mg cholesterol, 172 mg sodium, 23 mg calcium, 88 mg potassium, 15.4 g protein.  Net carbs per serving: 6.4

Recipe by Kathy Sheehan, copyright 2014

Friday, April 25, 2014

Saucy Stroganoff


This is a hubby favorite that goes way back!  When we were first married (over 30 years ago), I was an adventurous new cook and sometimes enjoyed trying challenging recipes.  Once for a special occasion, I made classic Beef Stroganoff and, it was such a hit, that it soon became a favorite.  In this more casual, weekday version, instead of using sliced steak, I use ground beef.  Because of the lower price tag, I can make it more often and I don't hear my husband complaining about that!  For an added health benefit, I suggest using grass-fed ground beef which has a healthier combination of fats than commercially processed beef, plus it gives this dish a richer flavor.  Ground turkey can be substituted, if you prefer.  This is a quick and easy recipe that I'm sure will become a favorite of your family, too.

Saucy Stroganoff
(Makes 4 servings)

2 cups sliced mushrooms
1/2 TB coconut or grape seed oil
1 large onion, roughly chopped
1 lb. grass-fed ground beef or ground sirloin
2 cloves garlic, minced
1-1/2 cups beef stock
2 TB gluten free flour mix or cornstarch
1 TB gluten free Worcestershire sauce
1/2 tsp. dried thyme
1/2 tsp. dried rubbed sage
1/2 cup sour cream (or Tofutti, for a dairy free version)
Salt and pepper to taste

1.  In a dry skillet heated to medium, sweat the sliced mushrooms until the moisture has evaporated.  Spoon mushrooms into a bowl; set aside.

2.  Add the oil and swirl to coat the bottom of the pan.  Add the onions and sauté until translucent, approximately 5 minutes.  Remove onions to the bowl with the mushrooms; set aside.

3.  Heat skillet to medium-high and add ground beef.  Sauté until no longer pink and the meat has begun to brown.  Meanwhile, while the meat is cooking, in a small bowl stir together the beef stock, Worcestershire sauce and GF flour or cornstarch until lumps no longer remain; set aside.  

4.  Add the minced garlic, thyme, sage, onion and mushrooms to the meat and sauté for 1-2 minutes.  Stir the beef stock mixture well before adding it to the pan and then stir constantly until it reaches a boil.  When the mixture boils, turn heat to low and simmer for about 5 minutes until sauce is thickened.

5.  Remove skillet from heat and stir in the sour cream until well combined.  Taste and adjust seasonings, if necessary.  Serve immediately.  Optional: Serve over brown rice, gluten free noodles or vegetable noodles.  (Pictured here with oven roasted carrot ribbons, based on this recipe by Sally Cameron: http://afoodcentriclife.com/roasted-carrots-with-thyme/)

Nutritional Information per serving (not including rice or noodles): 333 calories, 11 carbohydrates (1.6 g dietary fiber, 4.3 g sugar), 15 g total fat (7.7 g saturated fat, 0 g trans fat), 114 mg cholesterol, 468 mg sodium, 68.4 mg calcium, 778 mg potassium, 37.2 g protein.

Recipe by Kathy Sheehan, copyright 2014

Monday, May 13, 2013

Beef & Vegetable Cottage Pie with Veggie Mash


I adore mashed potatoes!  Ever since I was a little girl, if you asked me to name my top ten favorite foods, mashed potatoes would be high on the list.  So, it's only natural that I would love Cottage Pie, a savory ground beef mixture topped with mashed potatoes.  Sadly, since my diagnosis of Type 2 diabetes, potatoes are rarely on the menu at my house.  In this wonderful recipe, the veggie mash that tops this healthy Cottage Pie can go solo as a side dish, too.  This recipe is an excellent make-ahead meal because it can be assembled and refrigerated the night before, then served the next day.  When I served this dish tonight, it got rave reviews from my family.  As my husband said, "This one is a keeper!"

Beef and Vegetable Cottage Pie with Veggie Mash
Makes 4 servings

2 teaspoons olive oil
1 large onion, chopped
8 oz. baby bella or button mushrooms, chopped
1/2 lb. lean ground beef (90% lean or higher)
8 oz. frozen chopped spinach, thawed
3 cloves garlic, chopped and divided
3 tablespoons tomato paste
1 tablespoon Worcestershire sauce
1 cup hot water
8 oz. yellow Yukon potatoes, large diced
8 oz. carrots, peeled and diced
8 oz. cauliflower florets
2 cups beef or chicken broth
2 tablespoons unsalted butter
salt and pepper to taste

1.  In a large, heavy skillet, heat the oil on medium heat and add the chopped onion.  Saute until translucent, about 5 minutes.  Add the chopped mushrooms and a little salt.  Continue to saute until the moisture is released from the mushrooms and evaporates.  Move the onion mixture to one side and add the beef to the pan.  Break onto small pieces and cook until no longer pink.  Mix together the ground beef and onion mixture, add the chopped spinach and continue cooking until most of the moisture is evaporated from the pan and beef is very well browned.  Add one clove of garlic to the pan and mix together.  Add the tomato paste, Worcestershire sauce and water to the pan and stir to deglaze the brown bits.  Continue cooking and stirring until liquid thickens into a gravy.  Season with salt and pepper to taste.  Remove from heat and set aside.

2. Place the potatoes, carrots and cauliflower into a large pot.  Add the broth and remaining garlic.  Add water until vegetables are covered.  Boil vegetables until soft and fork-tender, about 15 minutes.  Strain the cooked vegetables in a colander and allow them to sit and release steam for 5 minutes until all the excess liquid has evaporated.  Meanwhile, add the butter to the hot pot to melt.  Return the vegetables to the pot and mash well. (I suggest using a handheld mixer for a smoother mash.)  Add salt and pepper to taste.

3.  To assemble the cottage pie, first spread the beef mixture evenly into a 9" square baking pan that has been sprayed with canola oil spray.  Top beef mixture with the veggie mash and spread evenly to cover beef mixture completely. (If desired, you can refrigerate the assembled casserole for up to one day before cooking.)

4.  To cook, bake in a preheated 350-degree oven for 35-40 minutes or until heated through.  Remove from oven and allow to sit for a few minutes before serving.

Nutritional Information per serving: 294 calories, 30.4 g carbohydrates (7 g dietary fiber, 10.1 g sugars), 10.9 g total fat (5.3 g saturated fat, less than 0.1 g trans fat), 50 mg cholesterol, 817 mg sodium, 126.1 mg calcium, 1180 mg potassium, 18.4 g protein.

Recipe by Kathy Sheehan, copyright 2013.

How does this recipe compare with traditional Cottage Pie?  This recipe is considerably less in calories, carbs and fat, plus it contains two servings of vegetables!  For comparison, the nutritional information for the same size serving of traditional Cottage Pie is an astonishing 546 calories, 36 g carbohydrate, 34.5 g total fat, 16.5 g sat. fat, 6 g fiber and 27 g protein.

Monday, February 14, 2011

Enchiladas Your Way!

One cold afternoon late last week, I made a slow-cooking pot roast. I love doing this because it provides me with lots of leftover roast to make other meals during the week. A favorite "leftover" were these delicious beef enchiladas made better with the substitution of healthier ingredients. First, the roast was top round, which is extremely lean to begin with but made melt-in-your-mouth tender by the slow-cooking process. Also, I used reduced-fat cheese in place of full-fat. Another addition was the V-8 juice to extend the store-bought enchilada sauce and increase the amount of vegetables. The final result was every bit as wonderful as my favorite Mexican restaurant, but with many fewer calories, carbs and fat.

If beef is not your thing, then chicken or a firm, white fish (such as cod or halibut) is easily substituted. You can use leftover chicken or braise boneless, skinless breasts in place of the beef. If you like fish tacos, then I guarantee you'll enjoy fish enchiladas just as much. Be certain to select a firm, white fish that will be "meaty" enough not get overlooked when mixed with the other ingredients. Finally, if you want a totally meatless version, omit the meat and add more beans and possibly some chopped spinach. Anyway you prepare these spicy enchiladas, I'm sure they'll become an often-requested, go-to recipe to feed your hungry family.

Enchiladas Your Way!
(Makes 8 enchiladas)

¼ cup chopped onion
2 teaspoons olive oil
2/3 cup V-8 vegetable juice
¾ cup salsa (in strength of your choice)
½ pound left-over roast or blade steaks (chicken or fish can be substituted)
8 ounces enchilada sauce (1 cup)
8 corn tortillas
1½ cups shredded reduced-fat cheddar, divided
½ cup canned pinto or kidney beans (drained and rinsed)
Chopped cilantro (optional)

1. In a heavy saucepan, heat the oil over medium heat and add the onion. Saute until soft and translucent. Add the vegetable juice and salsa; stir to combine.

2. If using blade steaks, cut the steaks into two strips and discard the center membrane that runs down the middle. Place into the saucepan and simmer over low heat for 1½ hours. If using leftover roast, simmer for 25-30 minutes until the meat shreds easily. (If using chicken, place ½ pound of skinless, boneless chicken breasts into the mixture and simmer for 20-25 minutes. If using fish, place fillets into mixture and simmer for about 12-15 minutes or until flaky.)

3. Remove meat to a plate and shred with two forks. (If using fish, break into bite-size chunks.) Strain the sauce through a sieve and catch the liquid in a bowl and reserve. Mix the reserved liquid with the enchilada sauce; stir to combine and set aside. Add the solids to the shredded meat and cool for 10-15 minutes. Meanwhile, preheat oven to 350-degrees. Once the meat mixture is cooled, add ½ cup of the shredded cheese and the drained beans; stir to combine. Taste to adjust seasonings and add more salt, pepper, hot sauce, chopped cilantro or chili powder to your liking.

4. Place several large spoonfuls of the smooth enchilada sauce into the bottom of a 9" x 13" baking dish. Spread sauce to edges. Follow the directions on the package to heat the tortillas and make them pliable. (Keep the warm tortillas covered with a damp cloth until you fill them so they don't dry out.) Place a large spoonful of filling down the center of one tortilla, fold ends over filling and place into the baking dish with seam side down. Repeat with remaining tortillas.*

5. Pour and spread the enchilada sauce over the top of the filled tortillas being certain to spread until any exposed tortilla is covered with sauce (this will prevent the tortilla from drying and cracking during the baking process). Sprinkle the remaining 1 cup of cheese and chopped cilantro over the top and cover tightly with foil. Bake in preheated oven for 20 minutes. Remove foil and bake for another 4-5 minutes until cheese has browned slightly. Serve immediately.

*The beauty of this dish is that you can make only the number of servings you need, and then refrigerate the leftover filling, enchilada sauce, cheese and corn tortillas to make another meal later in the week.

Nutritional Information per 1 beef enchilada: 229 calories, 16.3 g carbohydrate, 9.2 g total fat, 4 g saturated fat, 559 mg sodium, 3 g fiber, 16.9 g protein.

Nutritional Information per 1 chicken enchilada: 184 calories, 16 g carbohydrate, 5 g total fat, 2 g saturated fat, 596 mg sodium, 3 g fiber, 15 g protein.

Nutritional Information per 1 fish enchilada (made with cod): 206 calories, 16 g carbohydrate, 6 g total fat, 2 g saturated fat, 553 mg sodium, 3 g fiber, 22 protein

Original recipe by Kathy Sheehan, copyright 2011

Wednesday, November 17, 2010

Stout Stew Topped with Cheese Toast

I have recently returned from a wonderful vacation in Rome! Every meal was a culinary delight and I happily gained two pounds, in spite of the many miles of walking every day. Of course, it was nearly impossible to eat anything but marvelous Italian food, but I was fortunate to discover an unassuming family-run place called Tattoria Antonio near the Patheon that offered Italian favorites with beans, instead of pasta, which ended up being my favorite restaurant of the trip. On the flight home, my husband said he wanted a big steak for dinner the next day because he was all "pasta-ed out" and I couldn't have agreed more!

Instead of the traditional steak and potatoes, I wanted to quickly resume my diet of healthful eating, so I made this incredible, thick stew which was just as satisfying. It's based on a traditional Irish stew, but has a lot more vegetables, fiber from the beans and considerably less fat because I chose a lean cut of beef. The house was filled with the delicious aroma of the cooking stew all afternoon and the lean meat ended up being melt-in-your-mouth tender! I served it like a French Onion Soup with the cheese toast in the stew to soak up the flavor. If you're looking for an alternative to the turkey we'll all be stuffed with come next Thursday, try this recipe. I guarantee it will make any cold, rainy November day worthwhile!

Stout Stew Topped with Cheese Toast
(Makes 8 servings)

1½ tablespoons olive oil, divided
3 red onions, chopped
4 carrots, sliced
4 stalks celery, sliced
3 cloves garlic, finely chopped
1½ cups baby bella mushrooms, sliced
1 teaspoon dried rosemary
1½ pounds lean stewing beef, cut into ¾" pieces
16 oz. (2 cups) dark beer, such as Guinness (not lager)
2 tablespoons flour mixed with cold water
1 teaspoon black pepper
½ teaspoon salt (or to taste)
1½ cups frozen peas
1½ cups canned pinto beans, drained and rinsed
Eight ½" thick slices of hearty bread
1 cup shredded 2% reduced-fat sharp cheddar cheese

1. Preheat oven to 375-degrees. In a large Dutch oven or heavy oven-proof pot, heat ½ tablespoon olive oil over medium-low heat. Add onions and saute for about 10 minutes until soft and translucent. Do not color onions too much. Add carrots, celery, garlic, mushrooms and rosemary and continue cooking for another 5 minutes. Transfer cooked vegetables to a bowl and increase heat to medium-high.

2. Add the remaining 1 tablespoon of oil to the pot and add beef. Quickly sear beef on all sides, and then remove pot from heat. Return cooked vegetables to pot, add pepper and salt and stir to combine. Slowly add the dark beer, trying not to cause too much foaming. Add the flour dissolved in water, plus just enough extra water to cover beef and vegetables and slowly stir. (If beer has foamed too much, allow to settle before placing in oven.) Cover pot and place in the preheated oven for 1½ hours.

3. Stir stew, check liquid level and add a small amount water if necessary. Cover pot and return to oven for another 30 minutes until meat is tender. Once again, stir stew and return to oven uncovered for 20 minutes to allow the stew to thicken. Add frozen peas and drained beans and return to over for another 10 minutes, or until desired consistency is reached. Remove from oven and allow stew to rest while you prepare the cheese toast.

4. Top each slice of bread with 2 tablespoons of shredded cheddar cheese. Toast bread in the oven until cheese is melted and beginning to brown. To serve, spoon about 1¼ cups of stew into each serving bowl and place a cheese toast directly in the middle of each, allowing the bread to soak up some of the liquid. (Alternative: If you own sturdy, oven-proof serving bowls, spoon stew into bowls, top with a slice of hearty bread and sprinkle with cheese. Heat under a broiler at least 4-6 inches away from coils until cheese is melted.)

Nutritional Information per serving: 479.3 calories, 45 g carbohydrate, 10 g total fat, 4.5 g saturated fat, 639 mg sodium, 7.1 g fiber, 41.5 g protein.

Recipe by Kathy Sheehan, copyright 2010

Wednesday, June 30, 2010

Don't forget Kabobs!

Already, on several occasions this summer, my husband and I have cooked shish kabobs on the grill. They are so much fun to make and eat...and talk about EASY! Simply marinate chicken, shrimp or scallops for an hour. Another method for adding flavor is to apply a dry rub on beef, chicken or scallops. Then pick and choose your favorite vegetables, toss them in a tablespoon of olive oil and season with salt and pepper and start lining them up on soaked bamboo skewers. Grill them directly over hot coals for about 3-4 minutes per side and you'll be ready to eat in no time!

Some of our favorite combinations are teriyaki chicken with fresh pineapple, peppers and onions. Sirloin chunks that have been tossed in a seasoned dry rub are excellent paired with zucchini, mushrooms and cherry tomatoes. Also, jumbo shrimp and scallop kabobs would be a fun and delicious way to introduce more fish into your diet. For a meatless meal, skewer and grill a variety of your favorite vegetables. The possibilities are endless and limited only by your imagination!

Nutritional Information: The nutritional information per kabob will vary, depending on the type of meat, vegetables and marinades used. But whatever the combination, shish kabobs are typically low in calories, carbohydrate and fat because they are mostly grilled vegetables with a small amount of meat or fish. You can feel good about eating this meal, so enjoy and don't worry about the numbers.

Saturday, March 13, 2010

Cowboy's Roast Beef Hash

Although the main focus of my diet is plant-based or consisting of lean protein, I am not a vegetarian and, on occasion, will get a craving for beef. My "meat & potatoes" husband is extremely supportive and never complains about how little meat and potatoes he gets these days but, when my beef craving hits, he enjoys it immensely! Recently, the supermarket had a special on pot roast, so I made one with enough left over for one of my husband's favorite dishes, Roast Beef Hash.

The best traditionally-prepared roast beef hash is pan-fried onions and potatoes with herbs, beef and finished with heavy cream. I took that same recipe and made substitutions to create a healthier version. Instead of potatoes, I used canned black-eyed peas (or try pinto beans) and a smaller amount of light cream, otherwise the recipe remained basically the same. I thought my husband would be disappointed not to be getting his potatoes, but he loved it! We both agreed the beans provided a similar flavor and texture, making this makeover recipe taste just as delicious as the original. The next day, I took the leftover Cowboy's Roast Beef Hash and served it with fried eggs for a super quick and easy breakfast. I guarantee, these hearty recipes will satisfy any meat & potato lover in your house, too.

Cowboy's Roast Beef Hash
(Makes 4 servings)

2 teaspoons olive oil
1 medium onion, chopped
1½ cups canned black-eyed peas or pinto beans, drained and rinsed
2 cloves garlic, minced
2 cups cooked lean beef, diced
1 teaspoon dried thyme
Salt and pepper to taste
½ cup beef stock
¼ cup light cream

1. Heat olive oil in a heavy non-stick skillet or cast iron pan. Add chopped onion and a pinch of salt. Saute over medium heat until translucent. Add beans and garlic and cook, stirring occasionally for 2-3 minutes.

2. Raise heat to medium-high and add roast beef, thyme, salt and pepper; stir to combine. Add beef stock and stir briefly. Spread mixture into an even layer and press into pan. Allow to cook until stock is evaporated by half, about 4 minutes. Turn mixture over with a spatula and continue cooking until liquid is nearly evaporated.

3. Add light cream and turn mixture again to incorporate cream. Press into skillet and continue cooking until the bottom is brown and beginning to crisp. Turn mixture one last time, again pressing into skillet, and cook until cream is evaporated and mixture is brown and crispy, but not too dry. Watch carefully and, if necessary, reduce heat so mixture doesn't brown too much or burn. Serve immediately.

Nutritional Information per serving: 250.5 calories, 17.8 g carbohydrate, 8 g total fat, 3.4 g fiber, 24.8 g protein.

Original recipe by Kathy Sheehan, copyright 2010

How does this compare with traditional Roast Beef Hash? This recipe is less than half the calories, fewer carbs, 2/3 less fat and more fiber. A traditional roast beef hash recipe calls for beef with marbling, potatoes and heavy cream which makes the calories and saturated fat content soar to unhealthy levels. For comparison, the nutritional information per serving of traditional roast beef hash is 516.2 calories, 20.8 g carbohydrate, 29 g total fat, 2 g fiber, 39 g protein.

Saturday, October 3, 2009

Beef Burgundy with Roasted Vegetables

This dish is so satisfying and delicious on a cold or rainy autumn day, when you can feel winter starting to creep in. Normally, Beef Burgundy is served over rice or pasta but, since I avoid white starches, I prefer to eat mine with vegetables like a stew. Oven roasting is one of the easiest and tastiest ways to prepare vegetables, so I hope you'll give these a try. Of course, feel free to substitute and use whatever vegetables you have on hand or your favorites.

Another thing that is different in this recipe is the use of pureed cannellini beans as a thickener. The reason is to introduce more fiber and nutrition. The ingredient most often used to make a gravy is white flour, which really only adds carbs and very little else. Also, by doing this, it makes this recipe gluten-free. (For some people, the gluten in wheat products causes digestive discomfort and inflammation.) Since Beef Burgundy is a long time favorite of my husband's, I worried that he might be able to detect the difference and turn up his nose. I worried needlessly because he loved it!

Beef Burgundy with Roasted Vegetables
(Makes 4 servings)

1¼ pound high-quality stew meat or sirloin tips
1 tablespoon canola oil
1¼ cup very hot or boiling water
½ cup burgundy wine
1 tablespoon Gravy Master (seasoning & browning sauce)
¾ cup canned cannellini beans, drained and rinsed
Salt and pepper to taste

Roasted Vegetables:
2 carrots, peeled and cut into 1-inch pieces
2 parsnips, peeled and cut into ½-inch pieces (or 2 small turnips)
1 medium to large onion, cut into chunks
1 medium zucchini, cut into 1-inch pieces
1½ cup butternut squash, cut into 1-inch pieces
2 plum tomatoes, cut into large chunks
2 fingerling or small new potatoes, quartered (about ½ cup)
2 tablespoons olive oil
Salt and pepper to taste

1. In a heavy Dutch oven, heat ½ tablespoon canola oil on high heat. Add half of the meat and sear on all sides. Remove to plate. Heat remaining oil in pan and sear the remaining beef until well browned on all sides. Return meat to pan and immediately pour in hot water and stir to loosen brown bits from bottom of pan. Add the wine and Gravy Master to pot (liquid should just cover meat). Reduce heat to low, cover and simmer for 1 hour or until beef is tender.

2. After beef has simmered for about 30 minutes, begin preparing roasted vegetables. Preheat oven to 425-degrees. Prepare vegetables and toss with olive oil, salt and pepper until evenly coated. Spread out on a cookie sheet in a single layer. Arrange potatoes and zucchini cut side down. Roast in oven for 30 minutes, stirring once halfway through cooking time.

3. When beef is tender and while vegetables are finishing in the oven, take the cannellini beans and puree in a food processor or blender with several large spoonfuls of cooking liquid until completely smooth. Pour pureed beans into beef mixture and stir to combine. Continue simmering uncovered until liquid has reduced into gravy. (If too thick, add more water until proper consistency has been reached.) Add salt and pepper to taste.

4. Divide roasted vegetables evenly among serving plates. You may spoon beef burgundy over vegetables or on side to serve.

Nutritional Information per serving beef burgundy only, no vegetables: 272 calories, 7.8 g carbohydrate, 5.3 g total fat, 2.25 g fiber, 40 g protein.

Nutritional Information per serving with roasted vegetables and beef: 403 calories, 29.8 g carbohydrate, 10.4 g total fat, 6.6 g fiber, 41.9 g protein.


Original recipe by Kathy Sheehan, copyright 2009