Showing posts with label cake frosting. Show all posts

Monday, December 19, 2022

Keto Decorative Snack Cakes with Ganache Topping

Keto Decorative Snack Cakes with Ganache Topping
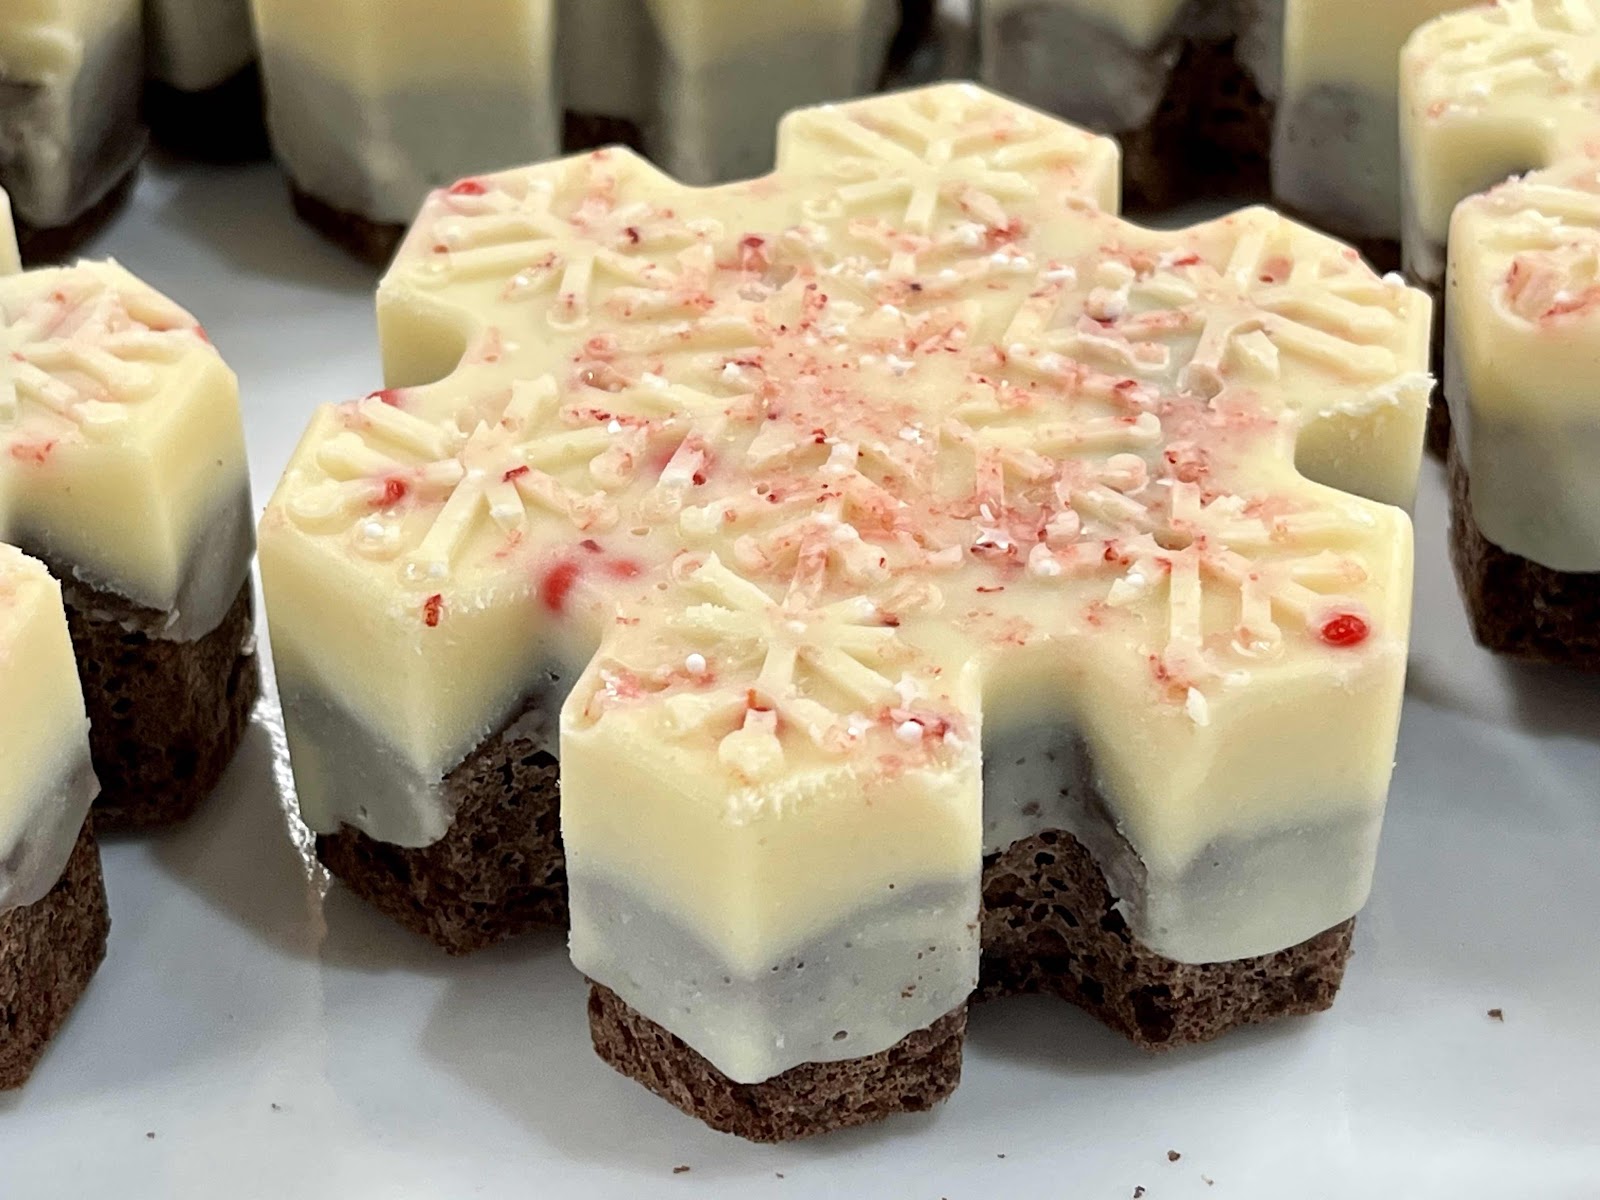
This post describes a technique for making adorable, miniature snack cakes using a decorative, silicone baking mold. You can use any low carb, sugar free cupcake recipe or boxed cake mix. I recently bought the Wilton Winter Snowflake Baking and Candy Mold and Heart Mold and, as you can see, the results are impressive! The warm ganache icing is poured into the mold, topped with a previously baked and cooled cake and then placed in the freezer to set. Later, when the cake is unmolded, the ganache topping is beautifully embossed!! These snack cakes may look fancy, but they’re really quite easy to make. Try this same technique with any silicone baking mold for a healthy, sugar free, low carb dessert that can be customized for any occasion!
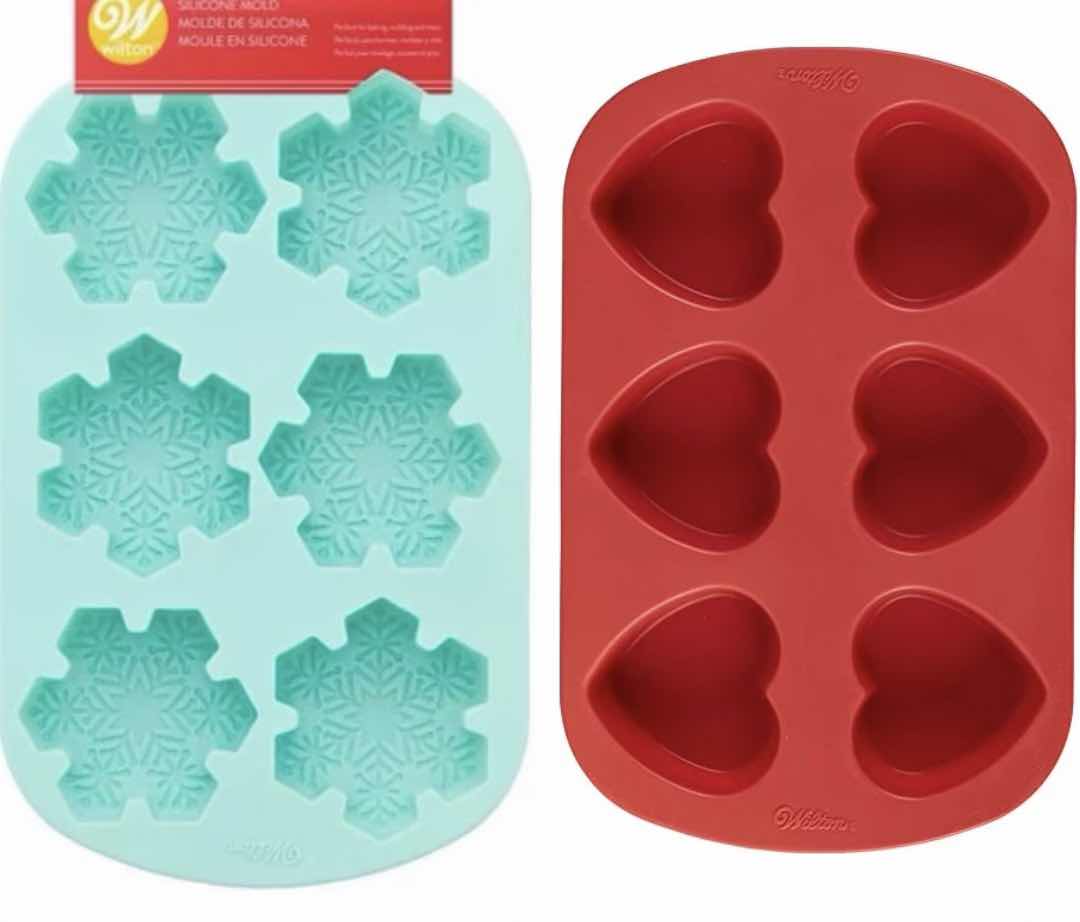
Silicone Baking Molds
Keto Decorative Snack Cakes with Ganache Topping
Number of servings depends on your baking mold

Directions:

1. Use any low carb, sugar free cupcake or cake recipe or boxed cake mix to make the mini cakes. Depending on the number of cakes in your mold, the recipe may need to be halved. Since my molds have six snowflakes or hearts, I halved my recipe to make six cakes. Follow the recipe, but be aware the baking time may need to be shortened. Bake until the top springs back when touched and a toothpick comes out clean. Do not make the frosting, if included in the recipe, because it’s not needed. Here are a few links to my favorite recipes I’ve tried in the past and can recommend:


Other Ingredients:
Decorative sprinkles
1 cup Lily’s sugar free baking chips (any flavor)
2½ ounces heavy cream (6 tablespoons)

Bake the cakes in your baking mold
2. Spray the silicone baking mold with non-sticking baking spray. Follow the directions in your recipe or on the box to make the cake batter. Spoon batter into each cavity until 3/4 full. Tap the mold on the counter to level out the batter and remove any air bubbles. Bake according to recipe or package directions, until the tops spring back when lightly touched in the center and a toothpick comes out clean. After the cupcakes are baked, take them out of the baking mold and cool completely on a wire rack before proceeding. 

3. Once the cakes are cooled, wash the baking mold to remove any crumbs or oil and dry thoroughly. Spoon 1/8 to 1/4 teaspoon sprinkles into each cavity and set aside. 
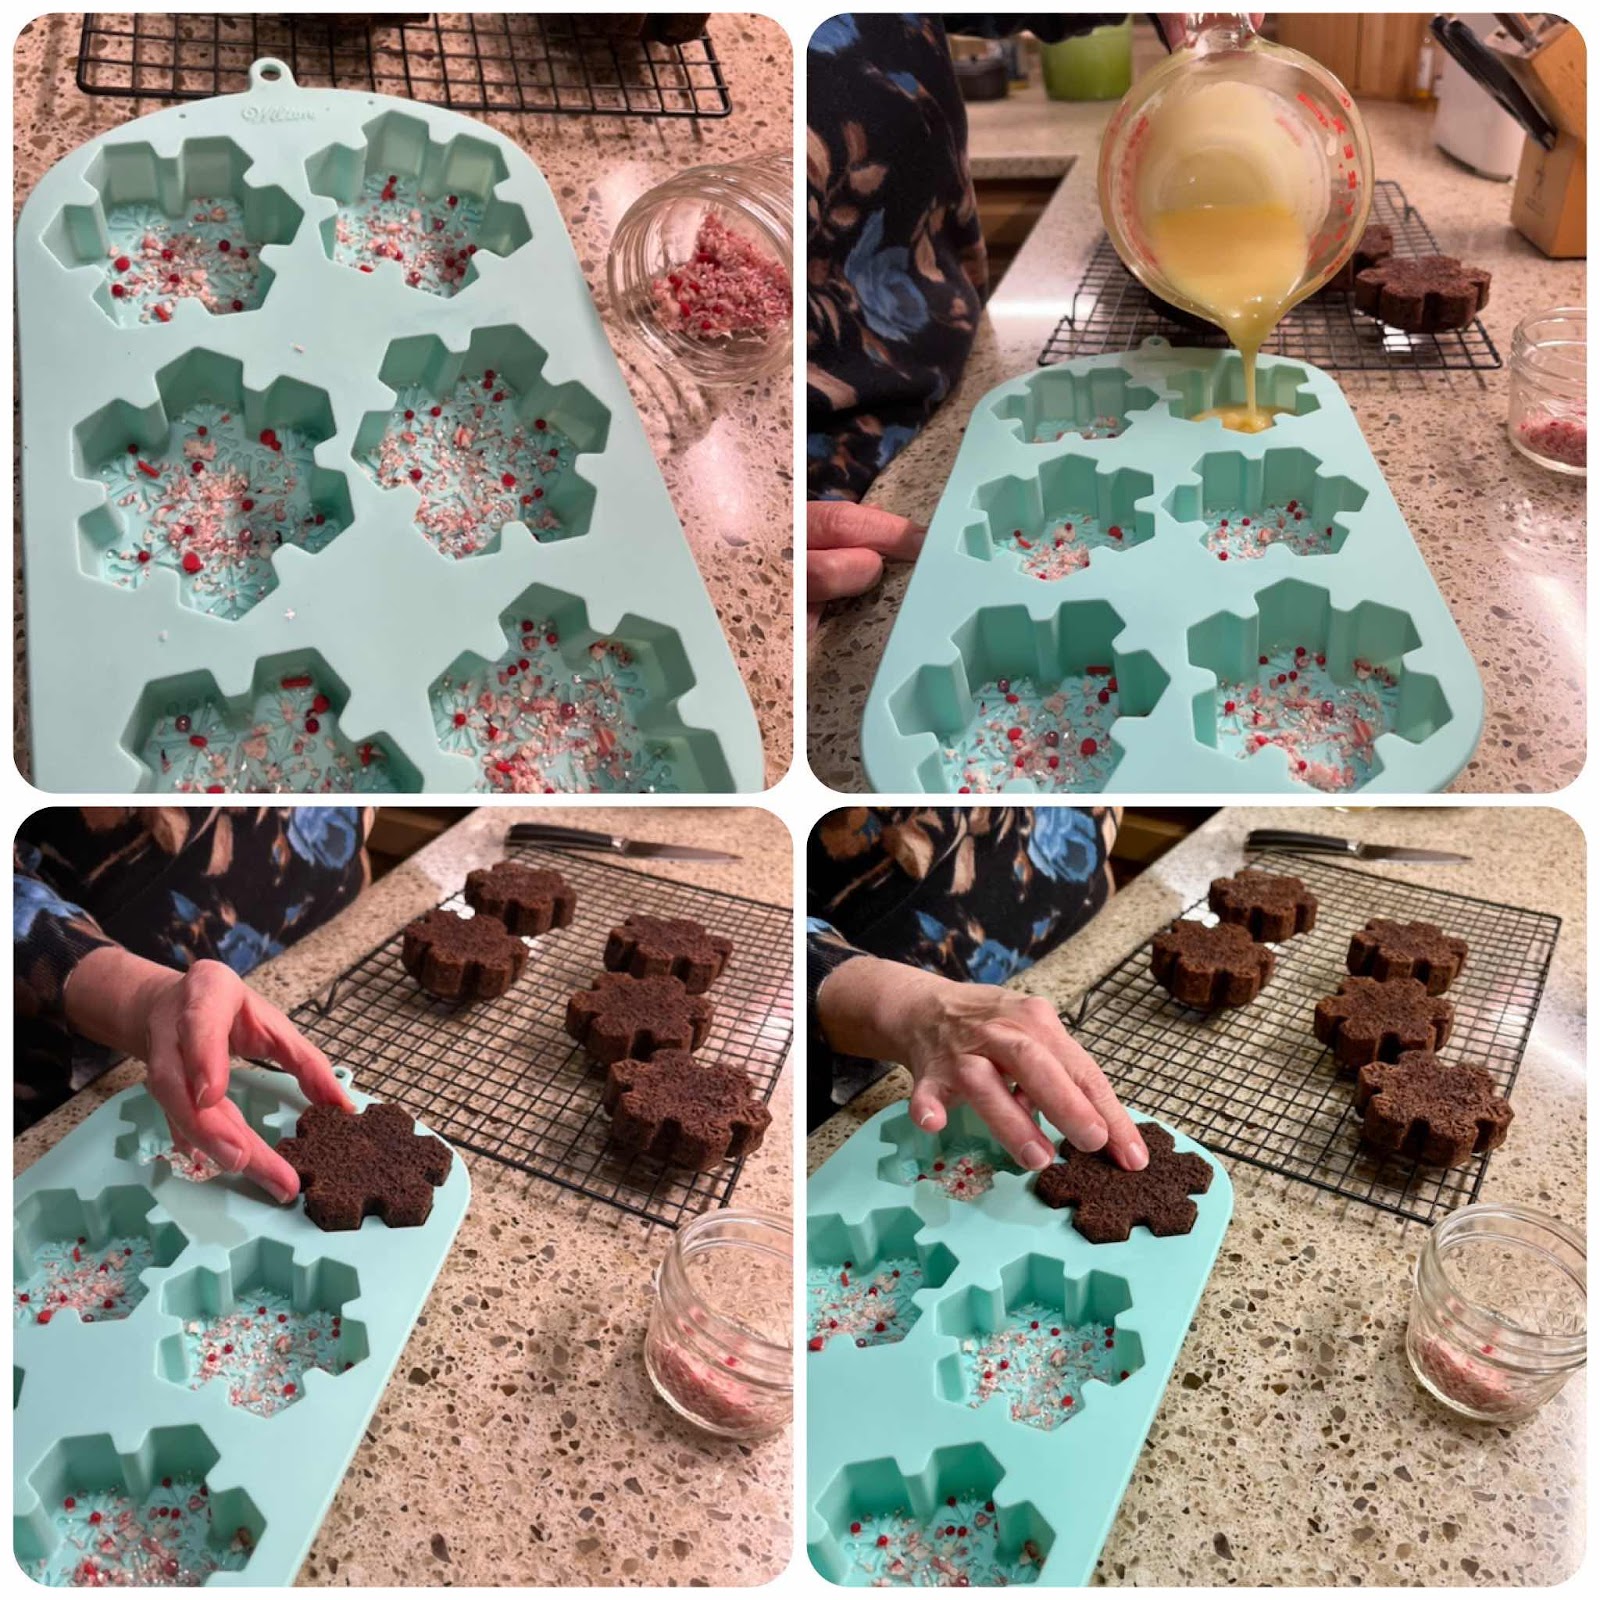
Add sprinkles, pour in ganache and top with a cooled cake
4. Make the Chocolate Ganache: In a small saucepan, heat the heavy cream until beginning to simmer. Stir to make sure all of the cream is heated through and bring to a gentle simmer again. Meanwhile, place the sugar free baking chips into a heat-proof bowl. Once the cream is hot, pour over the chocolate chips and allow to sit for 5 minutes. Whisk until smooth. (Note: Lily’s Sugar Free Baking Chips come in a variety of flavors. If you use plain white chocolate, you can add ½ teaspoon of any flavor extract to the ganache to create your own flavor. For example, add caramel extract to make a caramel flavored white chocolate ganache! Also, you can color the ganache with a drop or two of gel food coloring.)
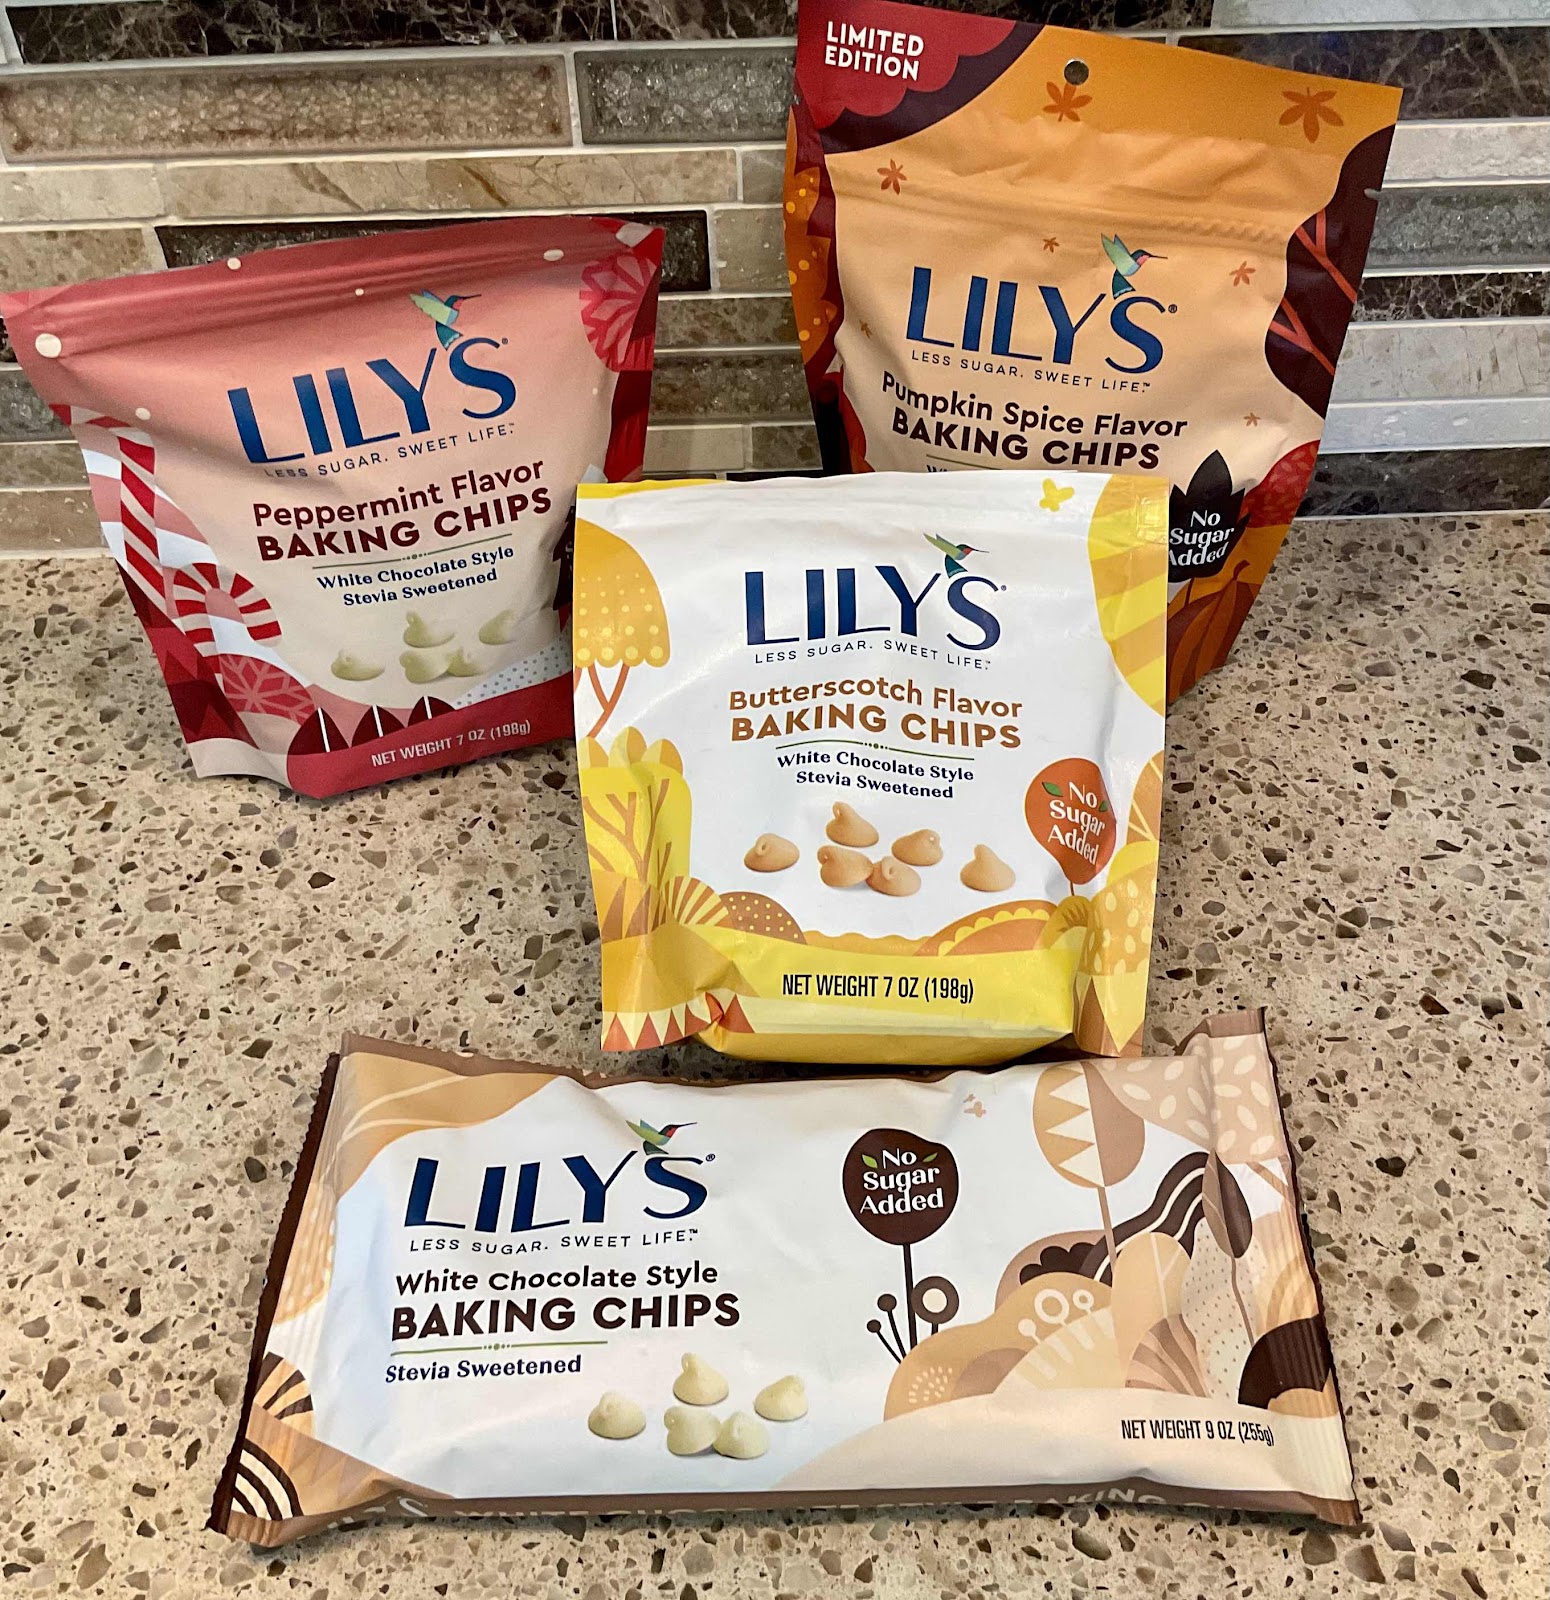
Lily’s Sugar Free Chocolate Baking Chips
5. Carefully, pour the chocolate ganache into the baking mold, covering the sprinkles, until about 1/4 - ½ inch deep (see photo above). Take one of the cooled cakes and insert it into the mold (like a puzzle), on top of the warm ganache, and press down gently. Repeat with the remaining cakes. Place the baking mold on a flat tray or baking sheet and tap on the counter to help settle the warm ganache into the grooves and lines of the mold’s design.

6. Place the mold into the freezer and allow to set for a minimum of 3 hours, and 4 hours is even better. (This is important! You want the chocolate ganache to be completely frozen to make unmolding the cakes easier.)
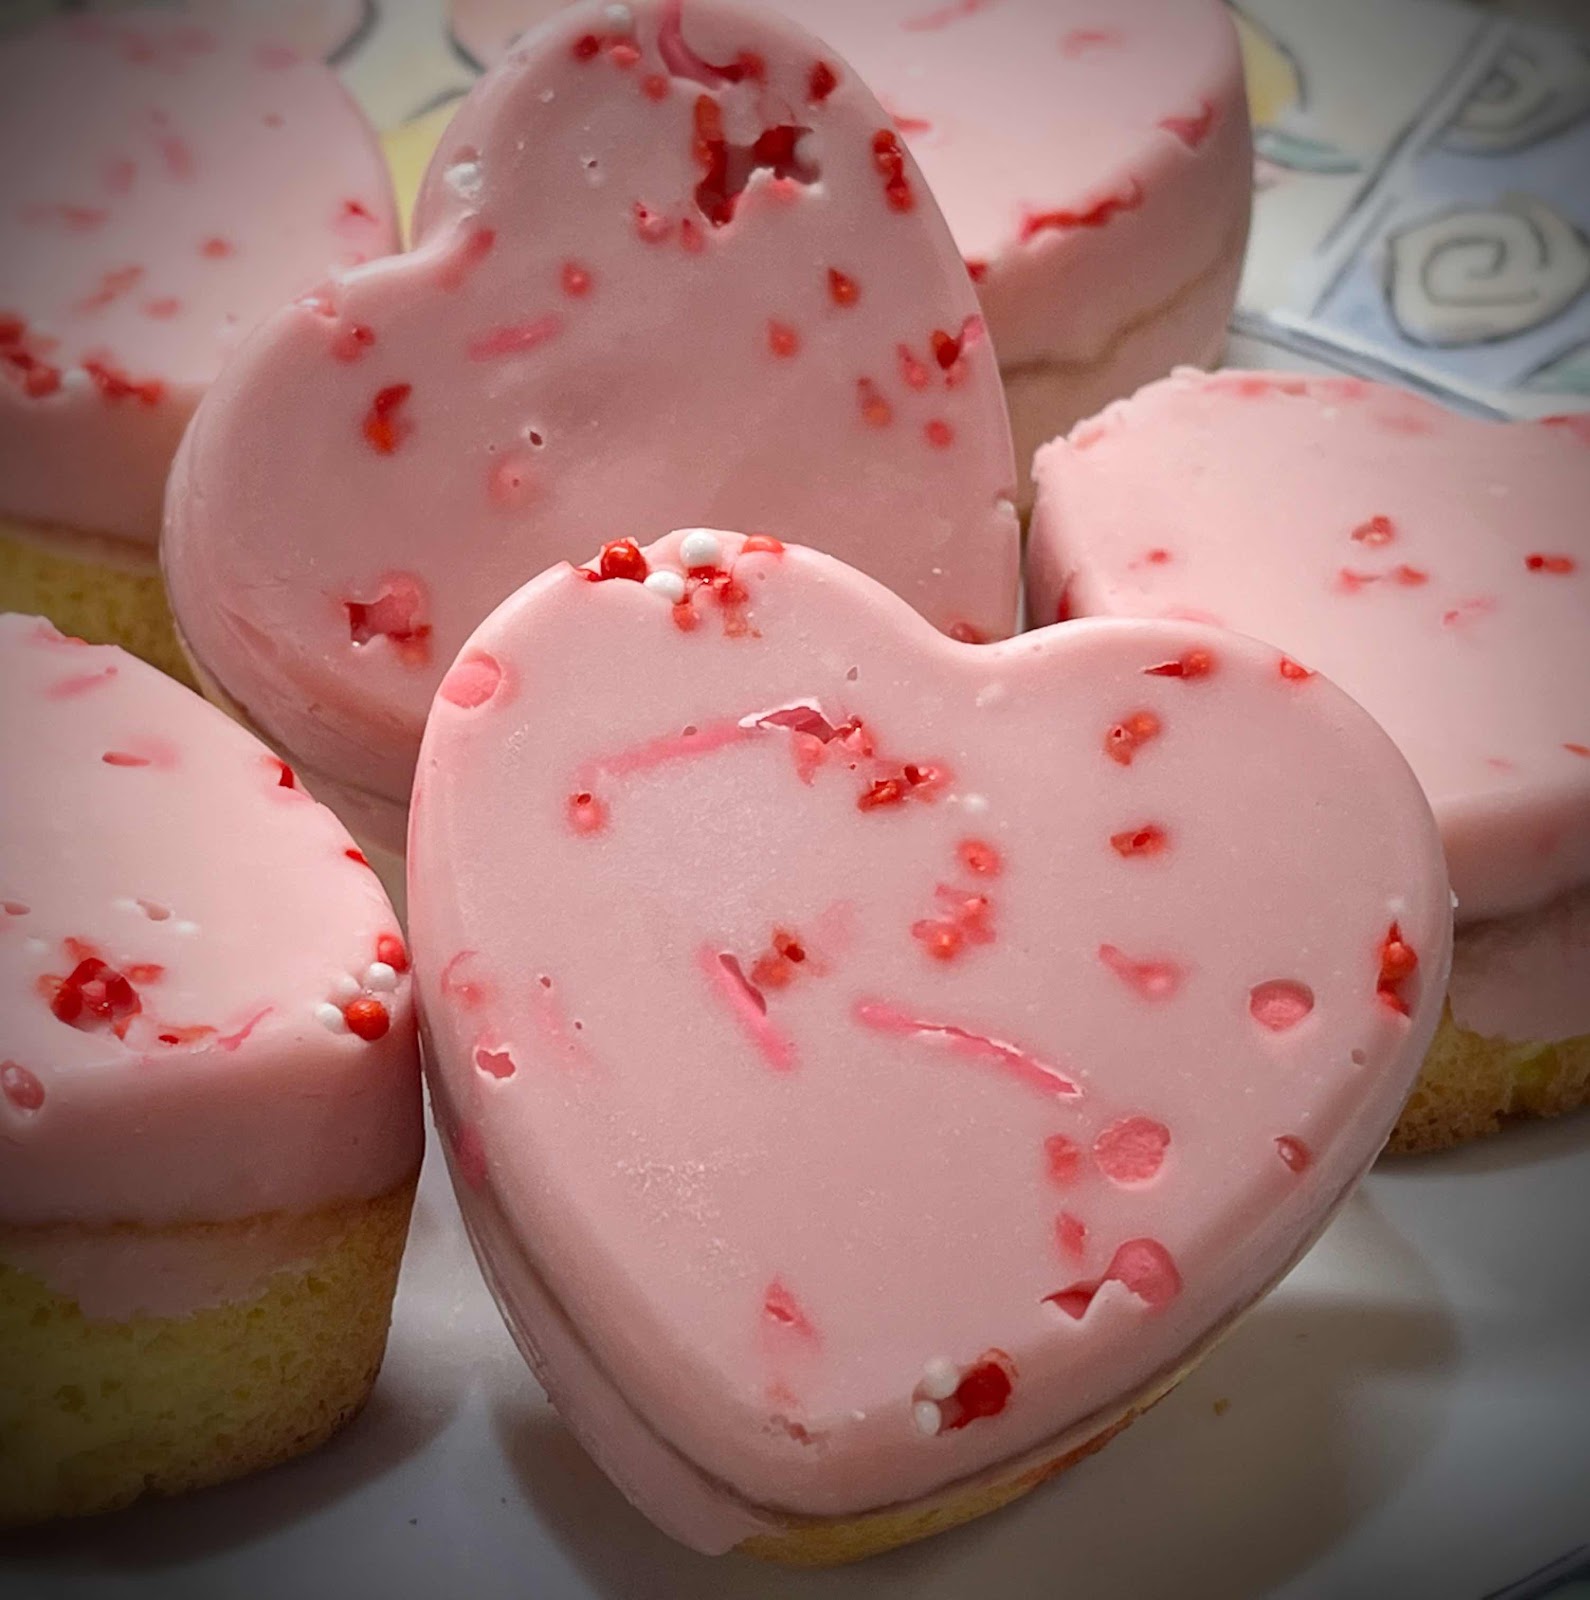
Heart Cakes
7. Remove from freezer and, while the cakes are frozen, unmold them and place them, cake side down, on a platter. The cakes can be stored in the refrigerator for up to a week. For the best flavor and texture, remove from the refrigerator and allow the cakes to come to room temperature before serving.

Easter Egg Shaped Snack Cake


Flower Shaped Snack Cake

Nutritional Information per cake varies, depending on the recipe used.

Photos and recipe by Kathy Sheehan, copyright 2022
All rights reserved. Please do not duplicate without the author’s permission. 


Saturday, November 19, 2022

Keto Chocolate Drop Cookies

Keto Chocolate Drop Cookies
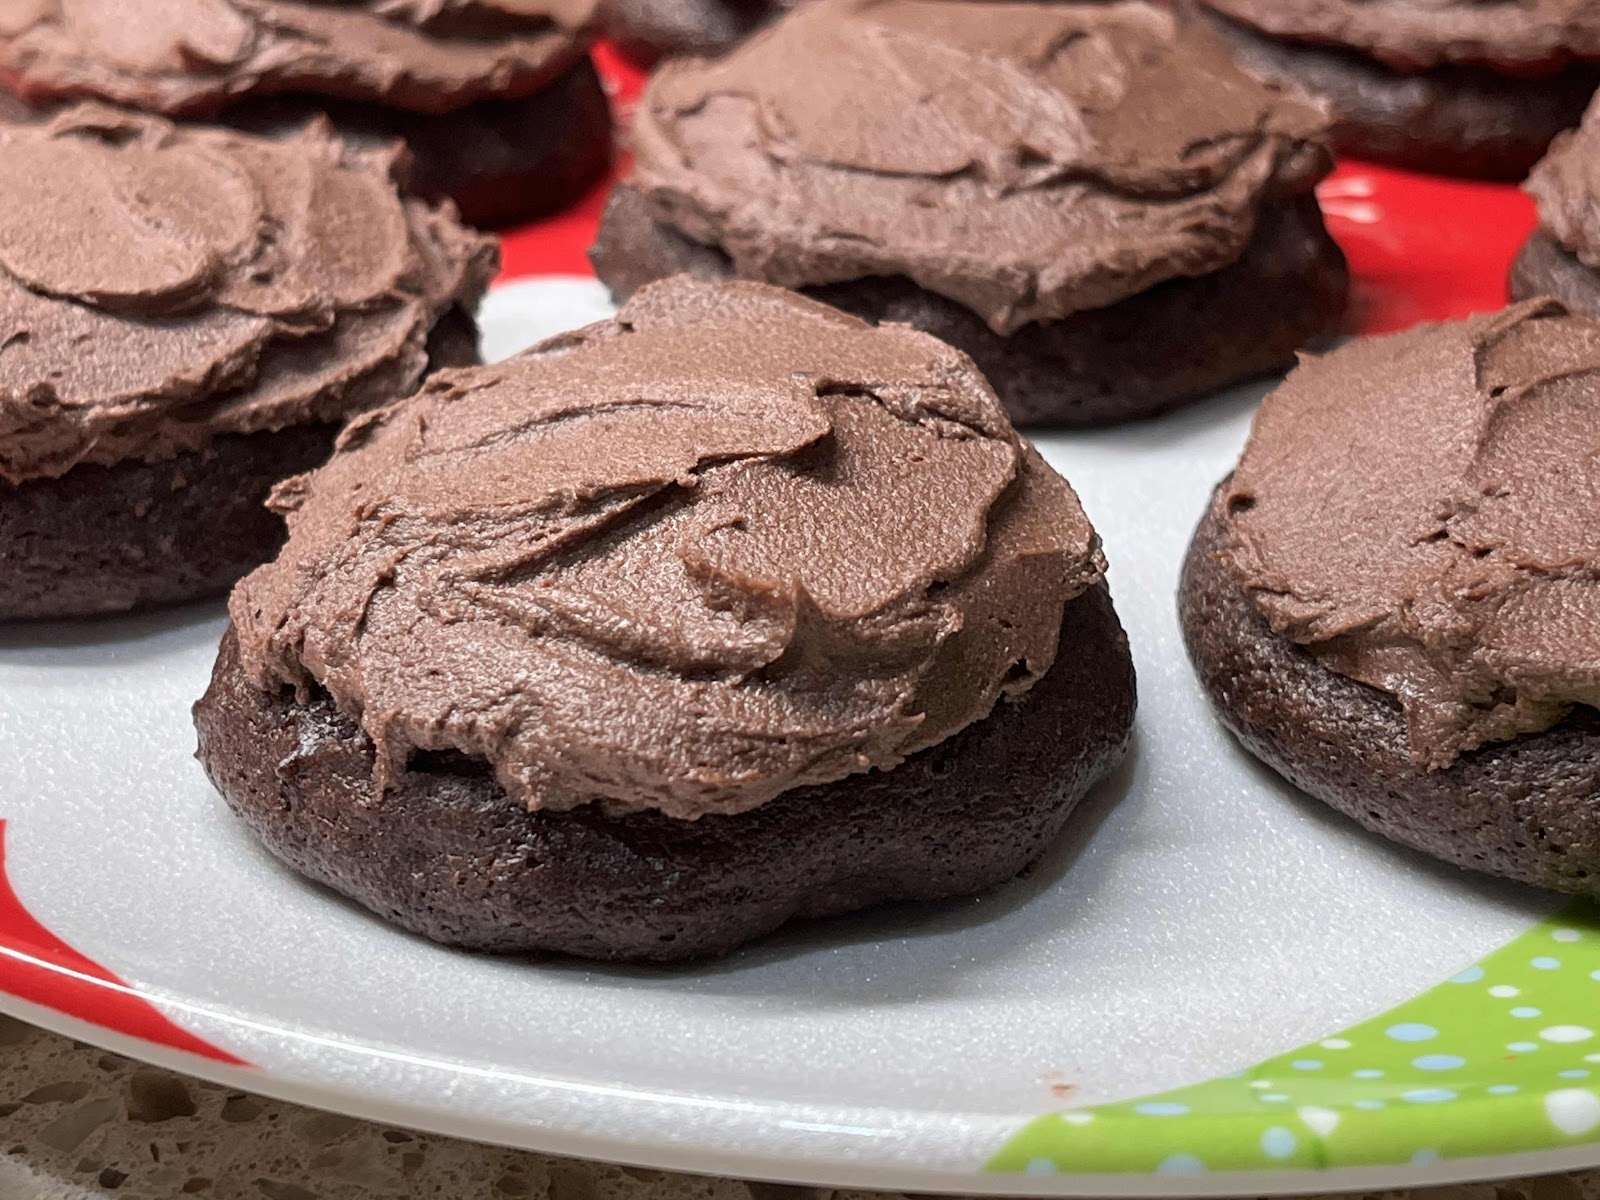
When I was growing up in Tulsa, Oklahoma, there was a wonderful store in Utica Square called Petty‘s Fine Foods. They had an in-store bakery that made the best cookies in town! One of my favorites was their Frosted Chocolate Drop Cookies. They only made them once a week, so you had to make sure you got there early enough in the day to grab a bag. Sadly, Petty’s is no longer in business, but the memory of those cookies have stayed with me all these years. Recently, I was experimenting with a cookie recipe, trying to make it lower in oxalates by not using almond flour. Macadamia nuts are much lower in oxalates than almonds, but finely ground macadamia nut flour is not available commercially. Instead, I took raw macadamia nuts and quickly processed them in my blender to make macadamia nut butter, which I then used as a base for my cookie dough. If you don’t want to go to the trouble of making your own macadamia nut butter, you can purchase it or substitute cashew butter in it’s place (although be aware that cashew butter is higher in oxalate). The result was spectacular! The cookies were light, soft and cake-like, just like the Chocolate Drop Cookies I remember!

Keto Chocolate Drop Cookies
Makes 20 cookies

Cookie Ingredients:
1 cup macadamia nut butter (homemade, store bought or substitute cashew butter)
¾ cup powdered erythritol-based sweetener (such as LaKanto Monkfruit sweetener or Swerve)
2½ tablespoons unsweetened cocoa powder
2 tablespoons unsweetened peanut butter powder
1½ tablespoons oat fiber powder (not oat flour!)
1 tablespoon coconut flour
1 tablespoon unflavored whey protein powder
1 teaspoon baking soda
2 large eggs
1 tablespoon salted butter, melted and cooled a bit
1½ teaspoons vanilla extract
1 - 2 tablespoons water, as needed
½ cup pecans, chopped

Chocolate Frosting:
½ recipe of my Best Low Carb Chocolate Fudge Frosting (see separate recipe here)
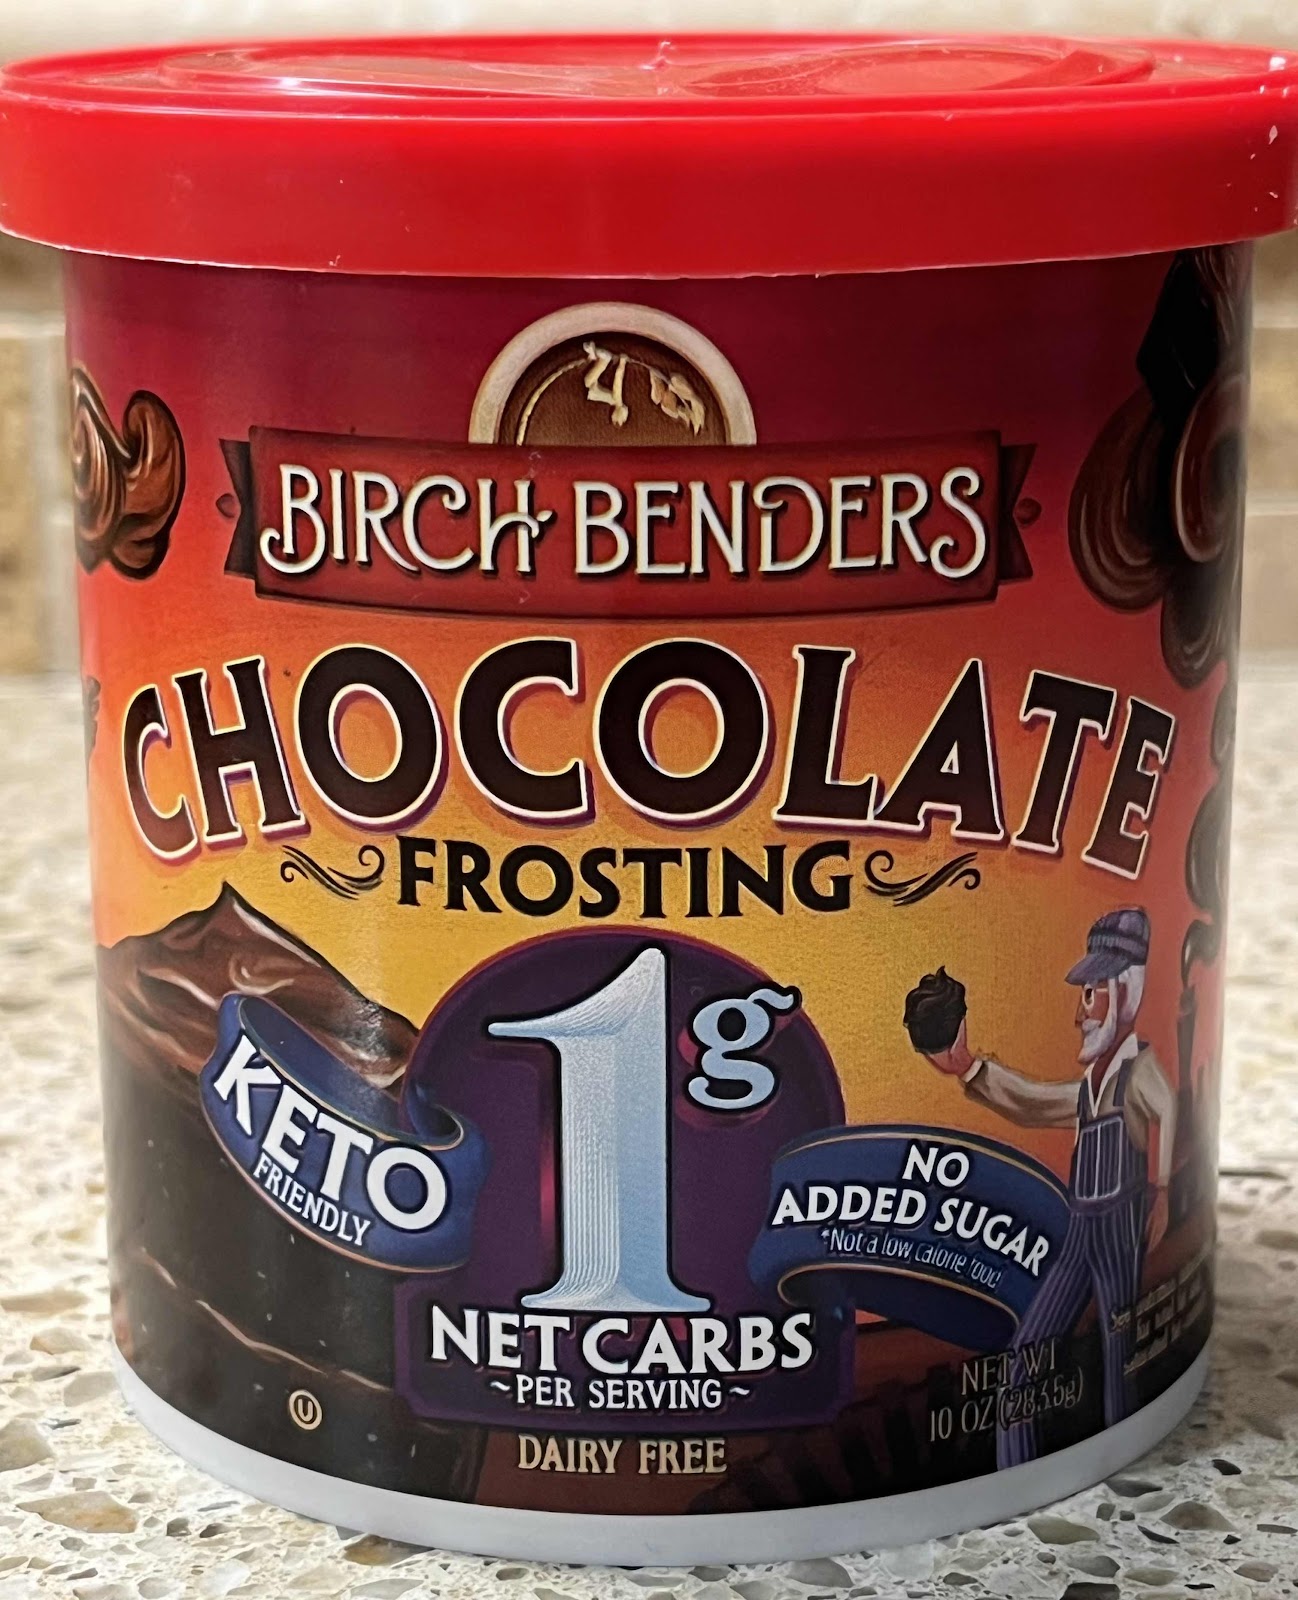
OR use your favorite store-bought sugar free chocolate frosting (I recommend Birch Benders, see below)

1. Preheat oven to 350°F. Line a rimmed baking sheet with a silicone baking mat or parchment paper.

2. In a large mixing bowl, combine all of the cookie ingredients, except the water and chopped nuts. Using an electric mixer, mix until the ingredients are well combined and a thick, sticky, but cohesive batter is formed (what you are looking for is a thick cake batter, slightly looser than a dough). If needed, add water 1 teaspoon at a time until the proper consistency is reached. The amount of water necessary will depend on the nut butter that you have chosen to use. Homemade macadamia nut butter is very runny, but commercially available macadamia nut butter is often mixed with cashew butter to make it thicker and spreadable. If you are using store-bought macadamia nut or cashew butter, you may need to use the full 2 tablespoons of water suggested in the recipe, or maybe even a little bit more, to achieve the proper consistency. The dough should not be stiff. It should be like a thick, gooey cake batter.

3. Fold in the chopped pecans. Using a 1½ tablespoon cookie scoop (size 40), drop the thick cookie batter onto the lined cookie sheet, about 1½ inches apart. The cookies really do not spread much as they bake.

Baked cookies, no frosting
4. Bake in the preheated oven for 9 to 11 minutes, begin checking on them at 9 minutes. Bake until they are slightly cracked and the tops are just firm and bounces back slightly when touched. Remove the baking sheet from the oven and allow the cookies to remain on the baking sheet for a few minutes. Remove the cookies to a wire rack to cool completely before frosting.

5. You can make your own low carb, sugar free chocolate frosting following this link (click here), or you can substitute your favorite store-bought chocolate, sugar free frosting. Store-bought, sugar-free frosting is convenient, but they are not all created equal! Please be sure to look at the list of ingredients and, if it includes maltitol, sorbitol or mannitol, put it back on the shelf! These offending sugar alcohols can cause uncomfortable digestive problems for many people. I recommend Birch Benders brand. It does not include any unfavorable sugar alcohols and I find the taste and consistency is very good. Stir to restore creaminess before spreading on the cooled cookies.

Birch Benders Keto Chocolate Frosting
Nutritional Information per cookie (no frosting): 111 calories, 4.1 g carbohydrate (2 g dietary fiber, 0.8 g sugars, 1 g sugar alcohols), 11 g total fat (2.1 g saturated fat, 0 g trans fat), 20 mg cholesterol, 75 mg sodium, 15.4 mg calcium, 67 mg potassium, 1 mg iron, 14 IU Vit A, 2.3 g protein. Net carbs (not counting frosting): 2.1 grams

Photos and recipe by Kathy Sheehan, copyright 2022
All rights reserved. Please do not duplicate without the author’s permission. 
Saturday, March 19, 2022

Strawberry and Mascarpone Cream Cake

Strawberry Mascarpone Cream Cake
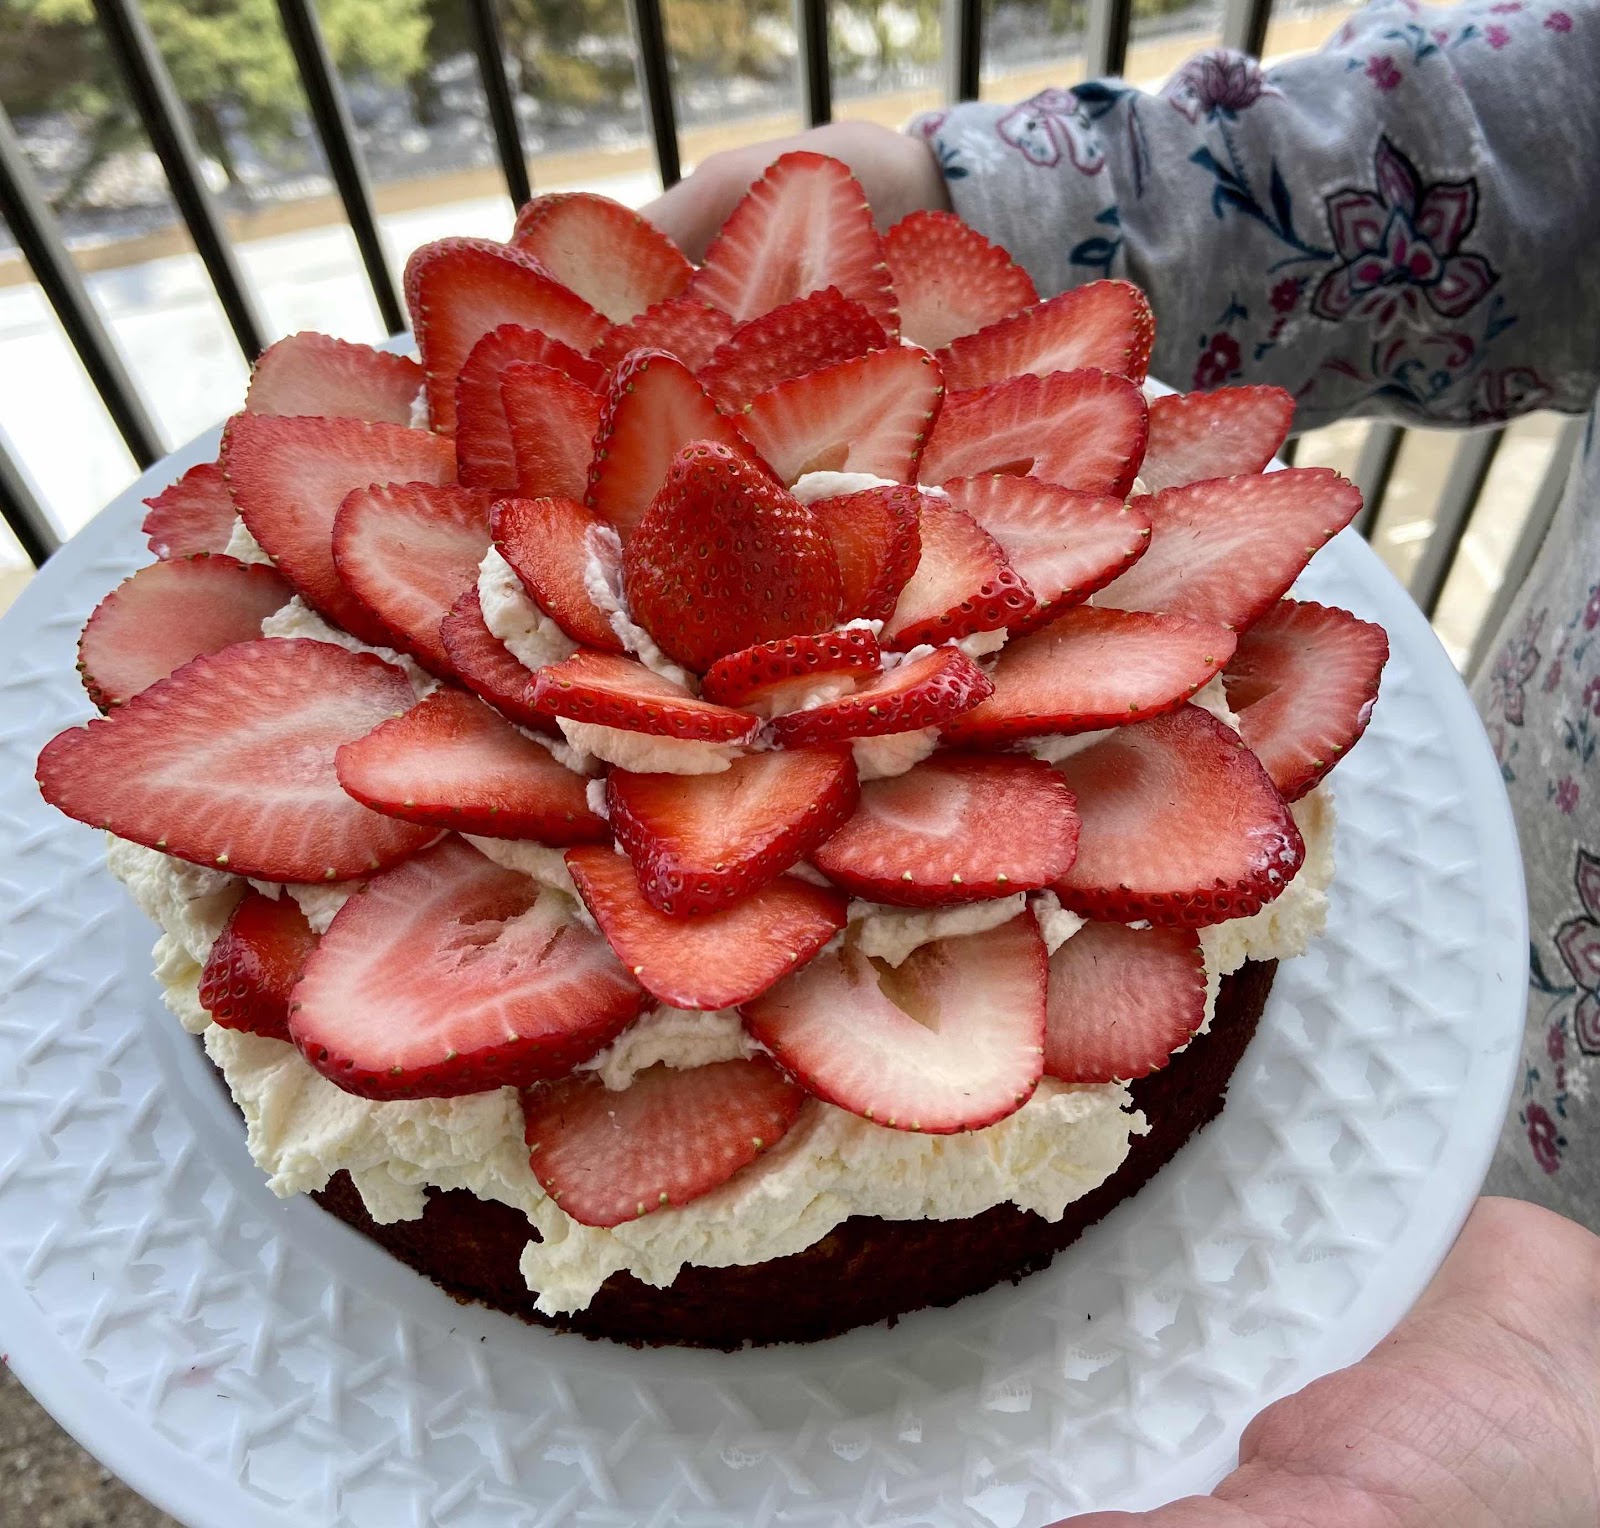
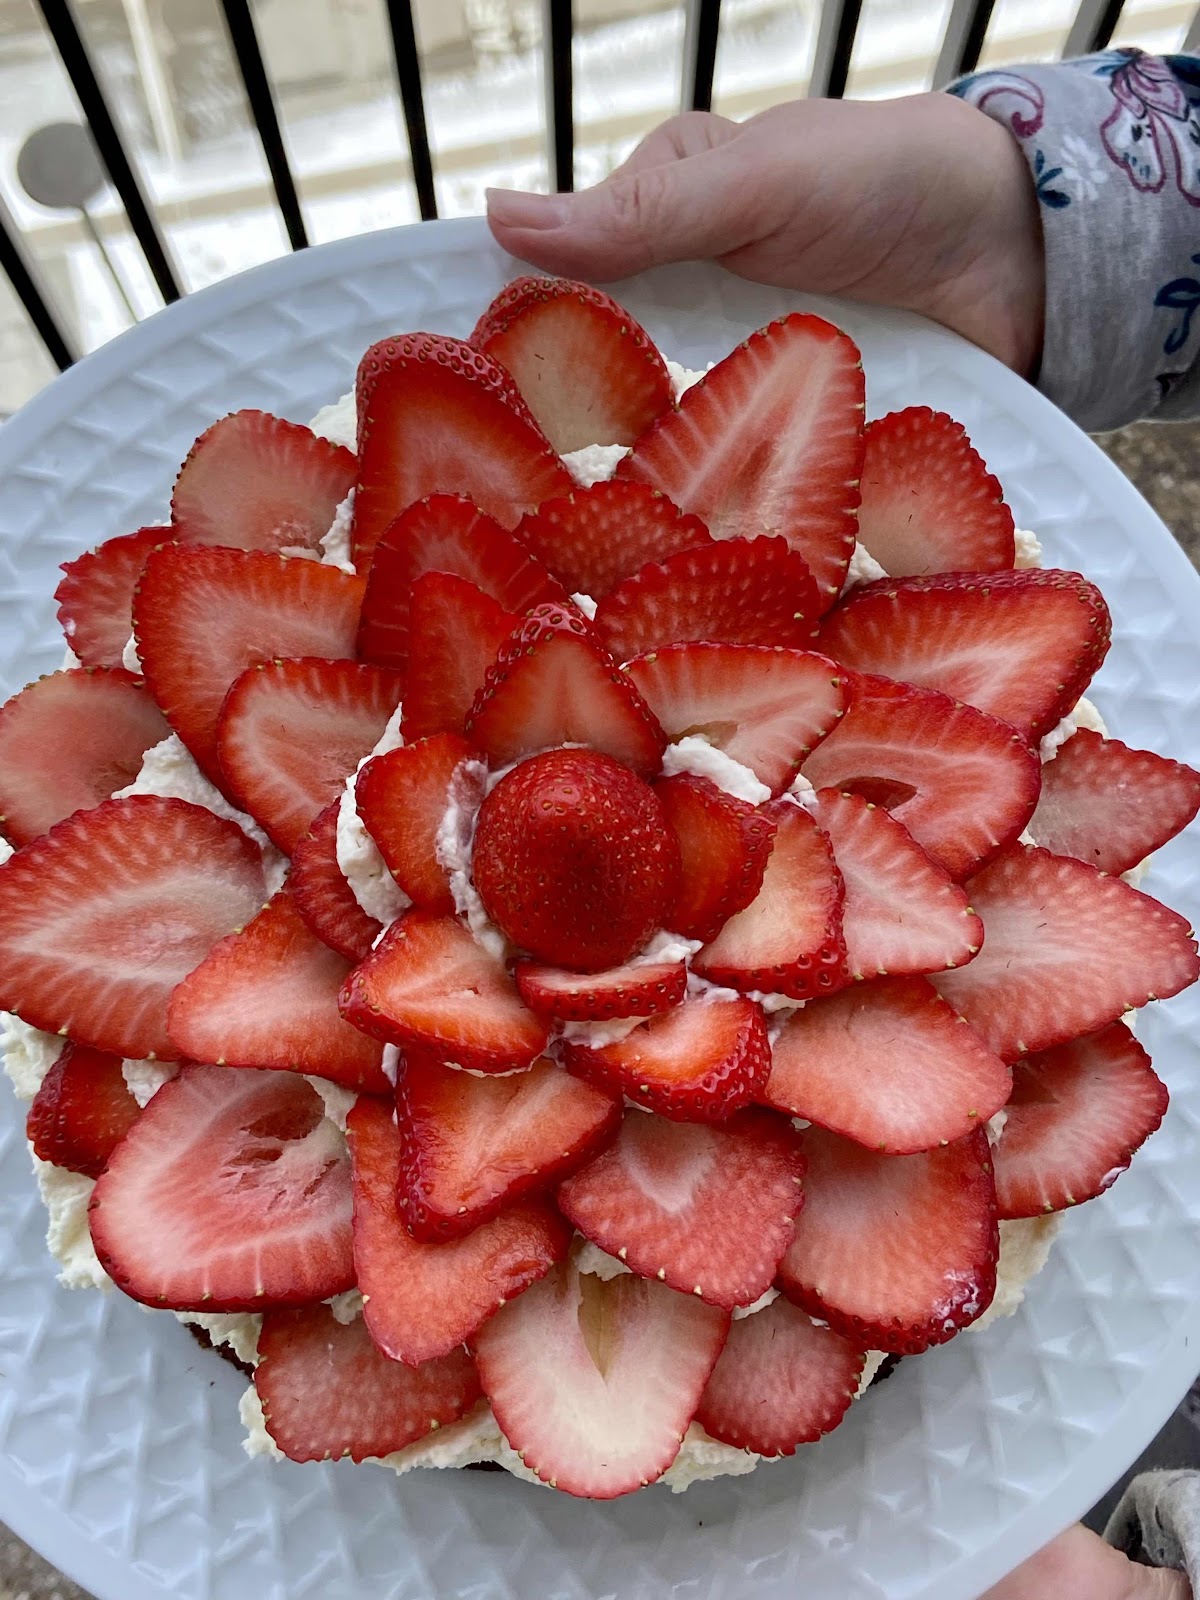
Last month, my mother celebrated her 86th birthday! It was my privilege to make her birthday cake so, of course, I wanted it to be extra special. This cake is not only delicious, it is extraordinarily beautiful being topped with sliced strawberries arranged in a flower design. I know you will WOW your family and guests whenever you serve this spectacular dessert! Mascarpone cream makes a wonderful frosting for any cake but, paired with strawberries, it is especially bright and refreshing. Perfect for a spring occasion!

Strawberry and Mascarpone Cream Cake
Makes one 8” cake (8 servings)

Cake:
48 grams coconut flour (about 7 tablespoons, lightly scooped and leveled)
6 tablespoons granulated erythritol sweetener (I like LaKanto Monkfruit Classic)
2-1/2 tablespoons unflavored whey protein powder 
1-1/2 teaspoons baking powder
1/8 teaspoon salt
3 large eggs
1/4 cup unsalted butter, melted and cooled
1/4 cup unsweetened coconut or almond milk
1 teaspoon vanilla extract

Mascarpone Cream Filling:
1-1/4 cups heavy whipping cream, cold
1/2 cup powdered erythritol sweetener 
1 teaspoon vanilla extract
8 oz. Plain, unsweetened mascarpone cheese, softened but still chilled

Topping:
About 1 quart fresh strawberries, leaves removed and sliced thinly lengthwise

1. Make the Cake: Preheat the oven to 325°F. Grease an 8 inch* cake pan well. Line the bottom with parchment paper and grease the paper.

2. In a medium bowl, sift together the coconut flour, sweetener, whey protein powder, baking powder and salt or whisk until no lumps remain. In a large bowl and using an electric mixer, beat the eggs, melted butter, coconut milk and vanilla extract until well combined. Add the dry ingredients and beat just until there are no lumps and the batter is smooth.

3. Pour the batter into the prepared pan and spread to the edges. Smooth the top. Bake about 30 minutes or until lightly browned around the edges, the top is slightly firm to the touch and a toothpick comes out clean. Do not over bake.

4. Remove from the oven and let cool in the pan for 10 minutes, then run a sharp knife around the inside of the pan and flip the cake out onto a wire rack to cool completely before frosting.

5. Make the Mascarpone Cream: Add the heavy whipping cream, powdered sweetener and vanilla extract to a large mixer bowl and whip on high speed until soft peaks form. Add the mascarpone cheese to the whipped cream and whip until stiff peaks form. It will happen fairly quickly.

6. Assemble the Cake: Spread or pipe the mascarpone cream thickly onto the cake. Arrange the strawberry slices on top of the mascarpone cream, starting from the outside edge and working to the center, overlapping slightly to create a flower pattern.

Flower Design with strawberries
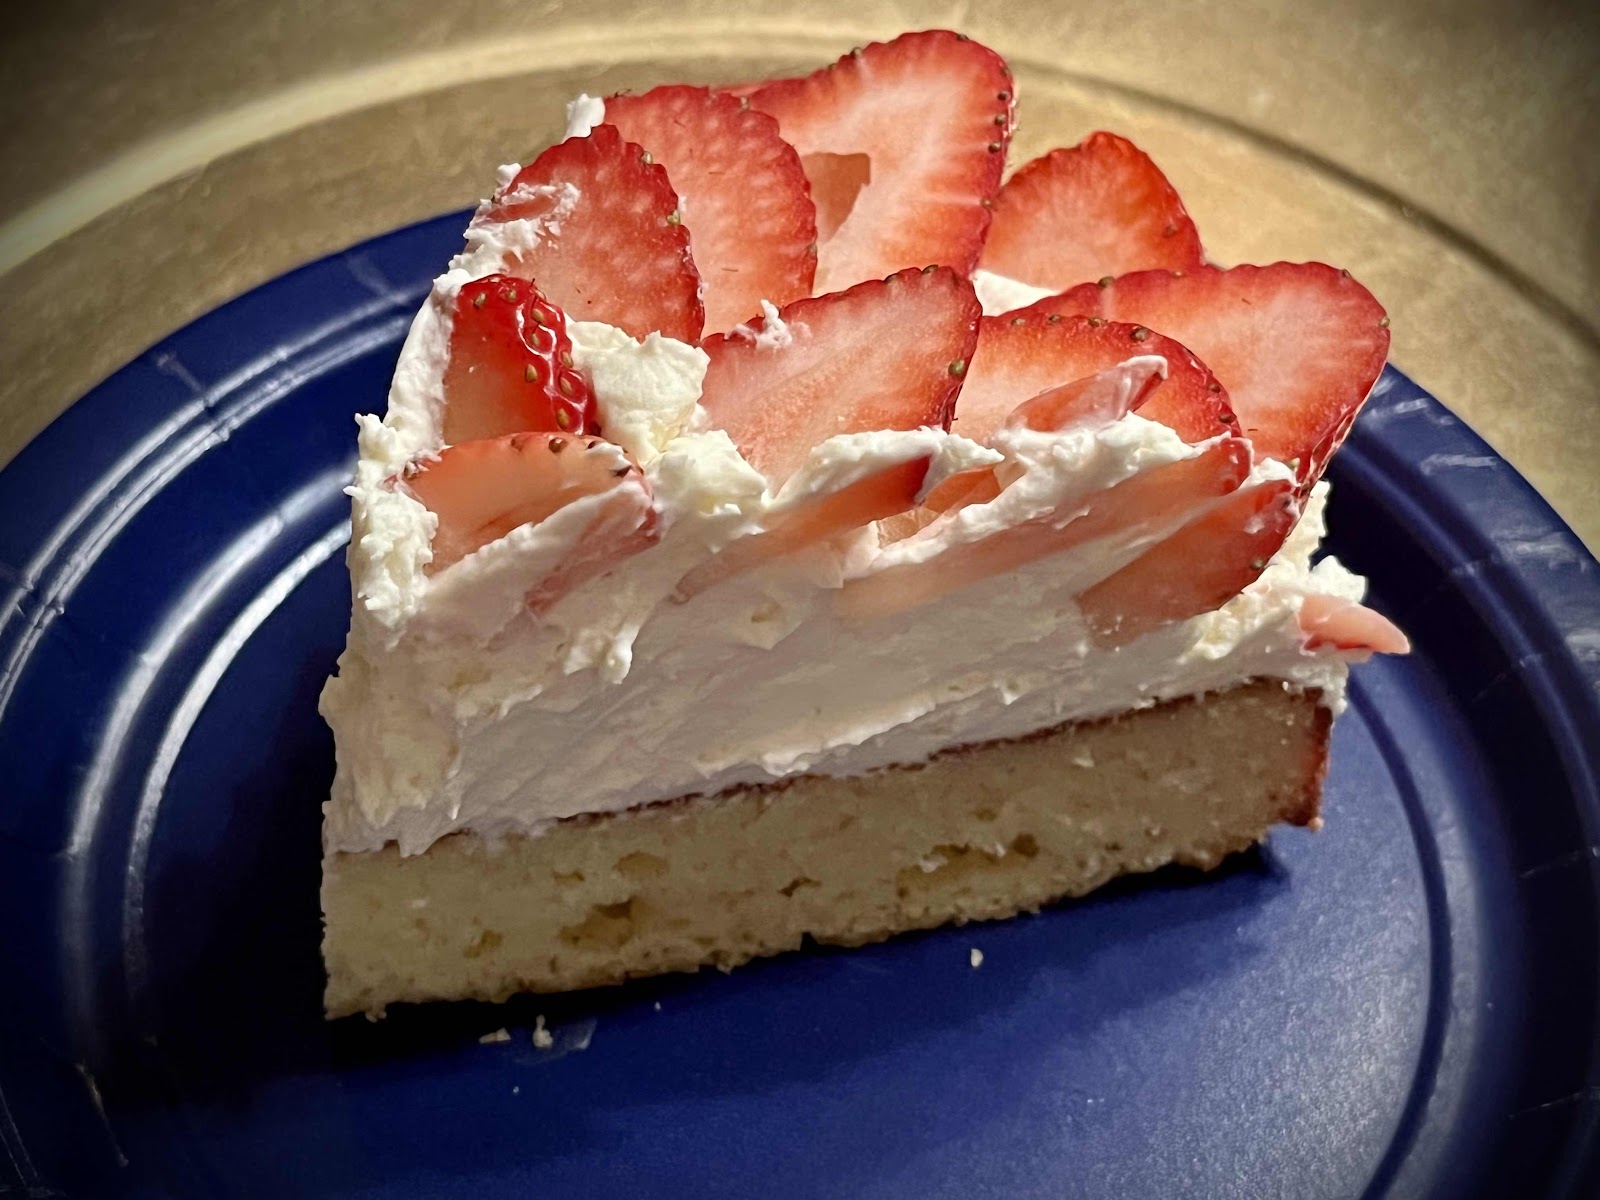
7. Cover loosely with plastic wrap and refrigerate. About 30 to 40 minutes before you plan to serve, remove the cake from the refrigerator and allow to sit at room temperature. Slice with a large, sharp knife. For a clean, pretty slices, wipe your knife between each cut.

Slice of Strawberry Mascarpone Cream Cake
*Notes: It’s important to use an 8 inch cake pan to achieve the proper height to your cake layer. If you use a 9 inch pan, bake for a shorter period of time. The result will be a thinner cake, resembling a tart more than a cake.

Nutritional Information per serving (1/8th cake): 376 calories, 10.7 g carbohydrates (3 g dietary fiber, 2 g sugars, 3.5 g sugar alcohols), 36.3 g total fat (21.8 g saturated fat, 0 g trans fat), 163 mg cholesterol, 174 mg sodium, 91.2 mg calcium, 97 mg potassium, 237 IU Vit A, 1 mg iron, 6.4 g protein. Net carbs per serving: 5.2 grams

Photos and recipe by Kathy Sheehan, copyright 2022
All rights reserved. Please do not duplicate without the author’s permission. 

Wednesday, February 17, 2021

Low Carb Red Velvet Cake Pops

Low Carb Red Velvet Cake Pop
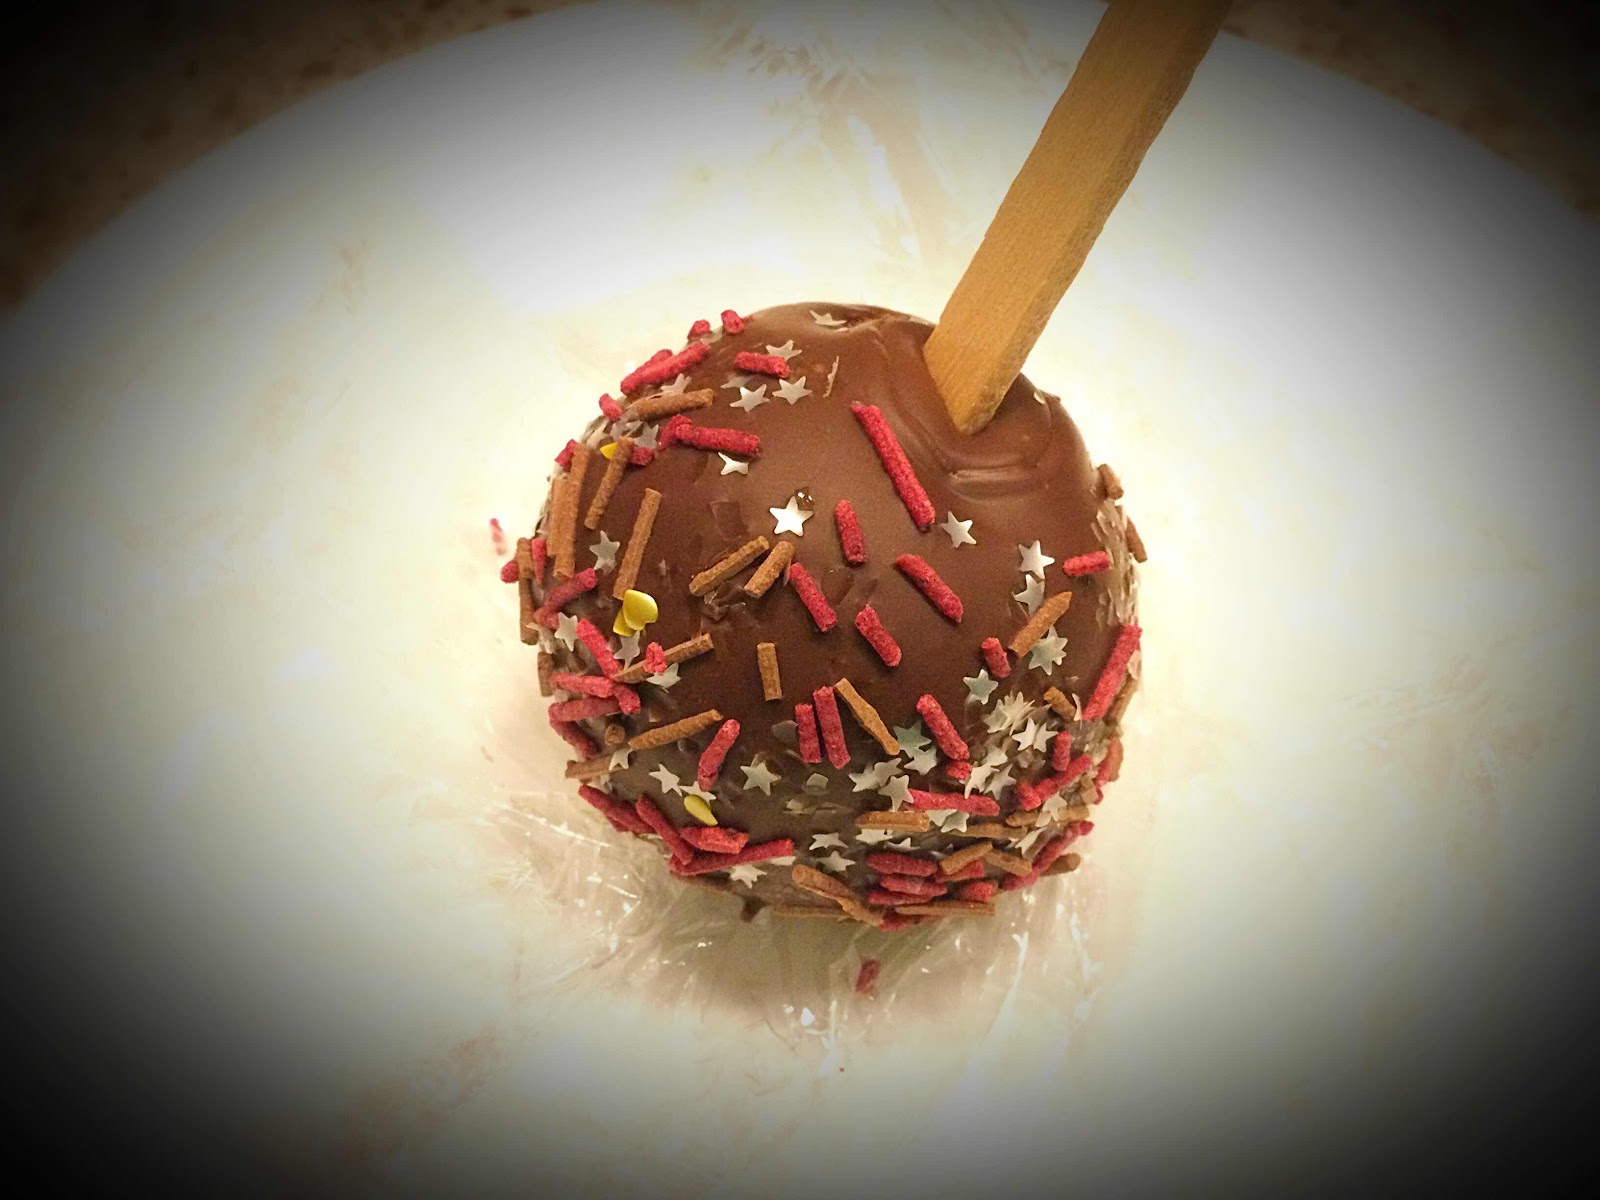
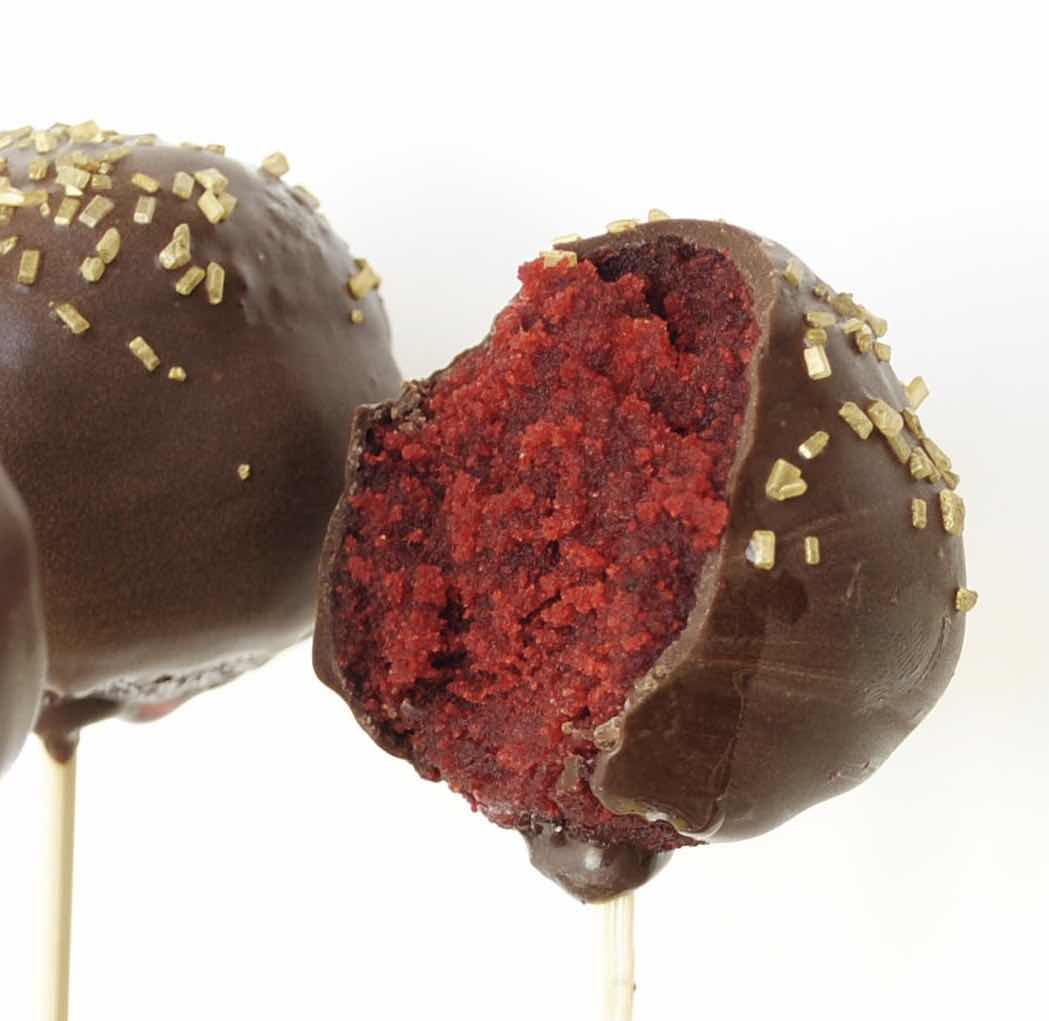
Oh boy! These Red Velvet Cake Pops are delicious and so much fun to make and eat! You can use any low carb cake recipe you like; the technique is the same for any flavor. I had some leftover Keto Red Velvet Cake from Valentine’s Day. It was a couple of days old, so I turned it into cake pops and I’m so glad I did. My daughter and I had a lot of fun one afternoon making, decorating and eating them. This would be a great project to do with young children and would be especially fun as a treat for parties.

Low Carb Red Velvet Cake Pops
Makes about 10 cake pops (more or less, depending on size)

Cake Ingredients:
48 grams coconut flour (about 7 tablespoons)
1 tablespoon unflavored whey protein powder
6 tablespoons granulated erythritol sweetener 
1 tablespoon unsweetened cocoa powder
1/2 tablespoon baking powder
1/4 teaspoon xanthan gum
1/8 teaspoon salt
3 large eggs, room temperature 
1/4 cup unsalted butter, melted and cooled a bit
1/4 cup coconut or almond milk, room temperature 
1 teaspoon vanilla extract 
5-6 drops red food coloring

Cream Cheese Frosting:
4 ounces cream cheese, softened
2 tablespoons unsalted butter, softened
1 teaspoon sour cream or plain yogurt
3 tablespoons powdered erythritol sweetener 
1/4 teaspoon vanilla extract 
Heavy cream, only if needed

Chocolate Coating:
3 ounces sugar free milk chocolate chips (or white chocolate chips for lower oxalate)
1 teaspoon refined coconut oil (you can also use unrefined or virgin, but it will lend a coconut flavor to the coating)

Decorative Embellishments:
chopped nuts or sugar free sprinkles

1. Make the cake (this can be done 1-2 days ahead of time). Preheat the oven to 325 degrees Fahrenheit. Prepare an 8 inch cake pan by greasing or spraying with nonstick spray. Line the bottom with parchment paper and set aside.

2. In a medium bowl, whisk together the coconut flour, whey protein powder, sweetener, cocoa powder, baking powder, xanthan gum and salt. Whisk until well combined and no lumps remain.

3. In a large bowl, beat the eggs until light and increased in volume. Add the melted butter, coconut milk, extract and food coloring. Mix on low to combine, trying not to deflate the eggs. All at once add the dry ingredients and mix on low just until combined and no dry pockets of the flour mixture remain.

4. Spoon the batter into the prepared cake pan and bake for 30-35 minutes or until no indentation remains when lightly touched in the center and a toothpick comes out clean. Remove from oven and allow to cool in the pan for at least 10 minutes. Turn out onto a wire rack and cool completely.

5. To make the frosting, beat together the softened cream cheese, butter and sour cream until fluffy. Add the powdered sweetener and vanilla extract. If your frosting is too stiff, add 1 teaspoon of heavy cream at a time until the desired consistency is reached. (Note: You will not need this entire batch of frosting to make the cake pops. Store any leftover in the refrigerator for another use.)

6. To make the cake pops, crumble the cooled cake into a large bowl and use your fingers to break up any large pieces. You want the mixture to be small crumbs. Add 1 heaping tablespoon of frosting and mix with your fingers or a fork to distribute it throughout the crumb mixture. You want the mixture to clump together and hold its shape when formed into a ball. If additional frosting is needed to reach the desired consistency, add it one teaspoon at a time. Do not add too much frosting, but just enough until it can be molded. Form the cake mixture into balls and place on a tray.

Cake Pop Balls
7. Melt 2 tablespoons of chocolate chips in a heatproof bowl or cup by microwaving for 15 seconds. Allow to sit for a minute or two and stir until smooth. Dip the end of a lollipop stick into the melted chocolate and push into a cake ball. Repeat with remaining balls and then freeze the balls for 20-30 minutes. (Note: You can shape the cake mixture into any shape! Try using cookie cutters or silicone candy or ice pop molds, the possibilities are endless.)

8. Heat the remaining chocolate chips and coconut oil in a heat proof bowl or cup by microwaving for 15 seconds, then allow the chips to sit for a minute or two and then stir. If additional heating is needed, microwave at 10 second intervals, allowing the mixture to sit and then stirring between each heating, until completely melted and smooth. (You may also melt your chocolate in a heatproof bowl over 1” of barely simmering water, but be sure to prevent any water from getting into your chocolate or it will seize.)

9. Get any chopped nuts, sugar free sprinkles or decorative garnish ready. Dip each ball into the melted chocolate, turning and coating the entire cake ball, then allowing the excess chocolate to drip off. Before the chocolate sets, sprinkle with decorative embellishments. Allow the chocolate to set before enjoying!

Inside of a cake pop
If you’d like to watch a Cake Pop Making tutorial on YouTube, here is a good one I recommend: https://youtu.be/nugZZmkxcEI

Nutritional Information per Cake Pop (based on 10 per recipe dipped in sugar free milk chocolate): 98 calories, 5.1 g carbohydrate (2.7 g dietary fiber, 1.1 g sugars, 1.2 g sugar alcohols), 8.4 g total fat (5.2 g saturated fat, 0 g trans fat), 73 mg cholesterol, 107 mg sodium, 69.6 mg calcium, 36 mg potassium, 1 mg iron, 83 IU Vit A, 3.6 g protein. Net carbs per serving: 1.2 grams

Recipe by Kathy Sheehan, copyright 2021
All rights reserved. Please do not duplicate without the author’s permission.
Sunday, January 24, 2021

Low Carb Strawberry Mousse Chaffle Cake

Low Carb Strawberry Mousse Chaffle Cake
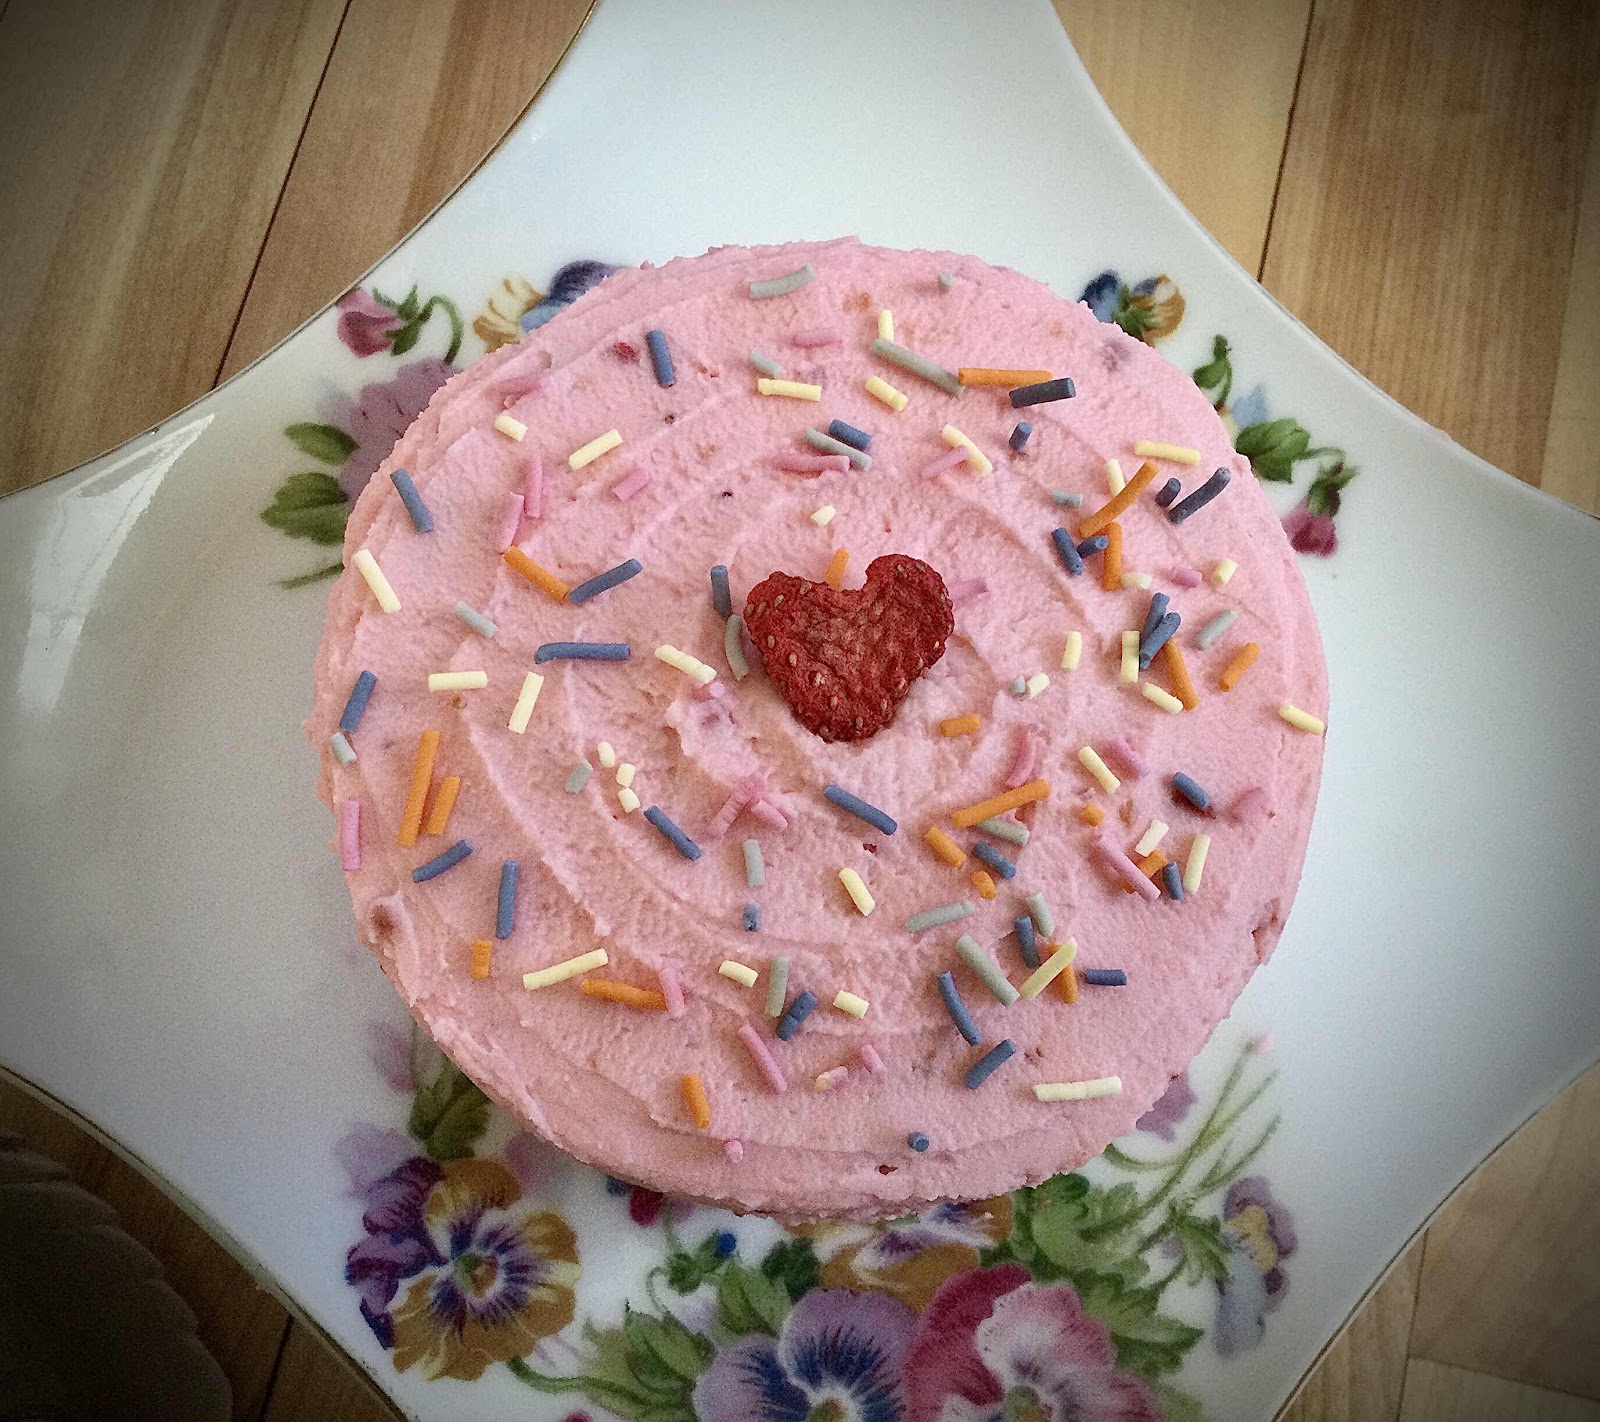
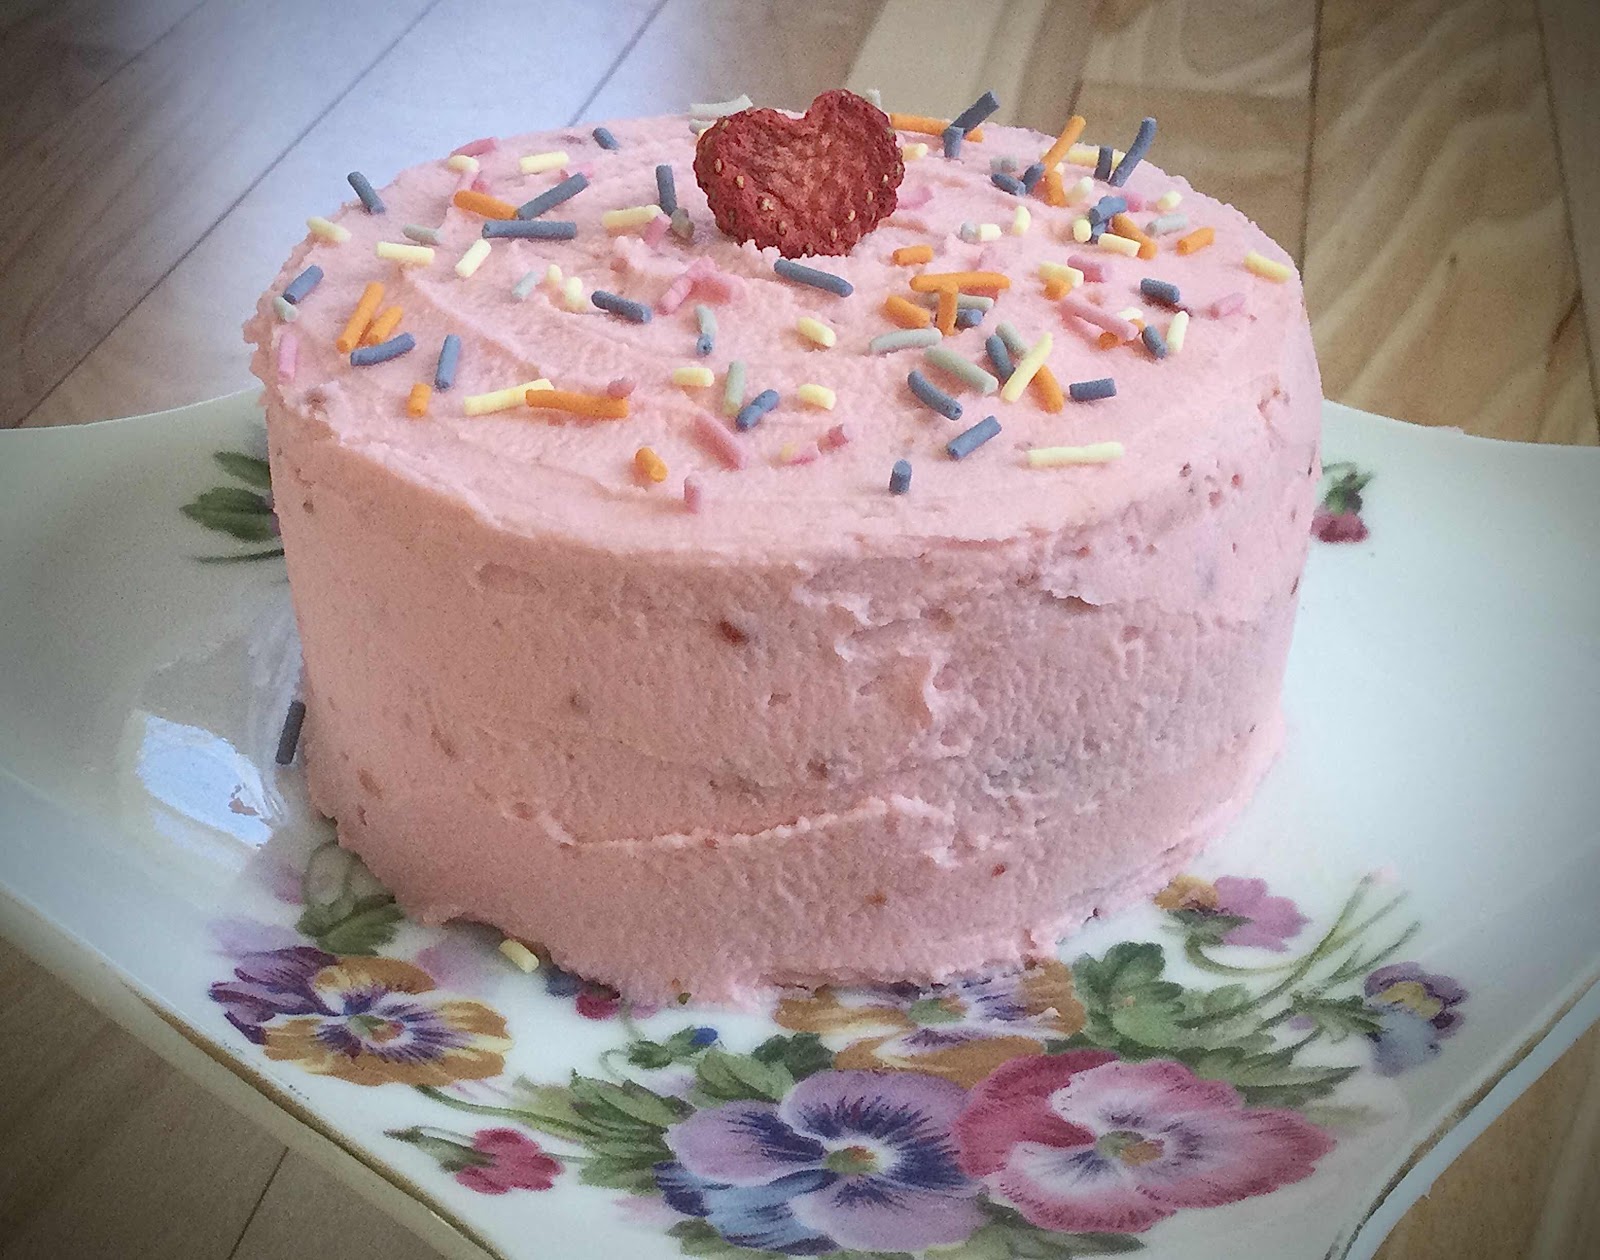
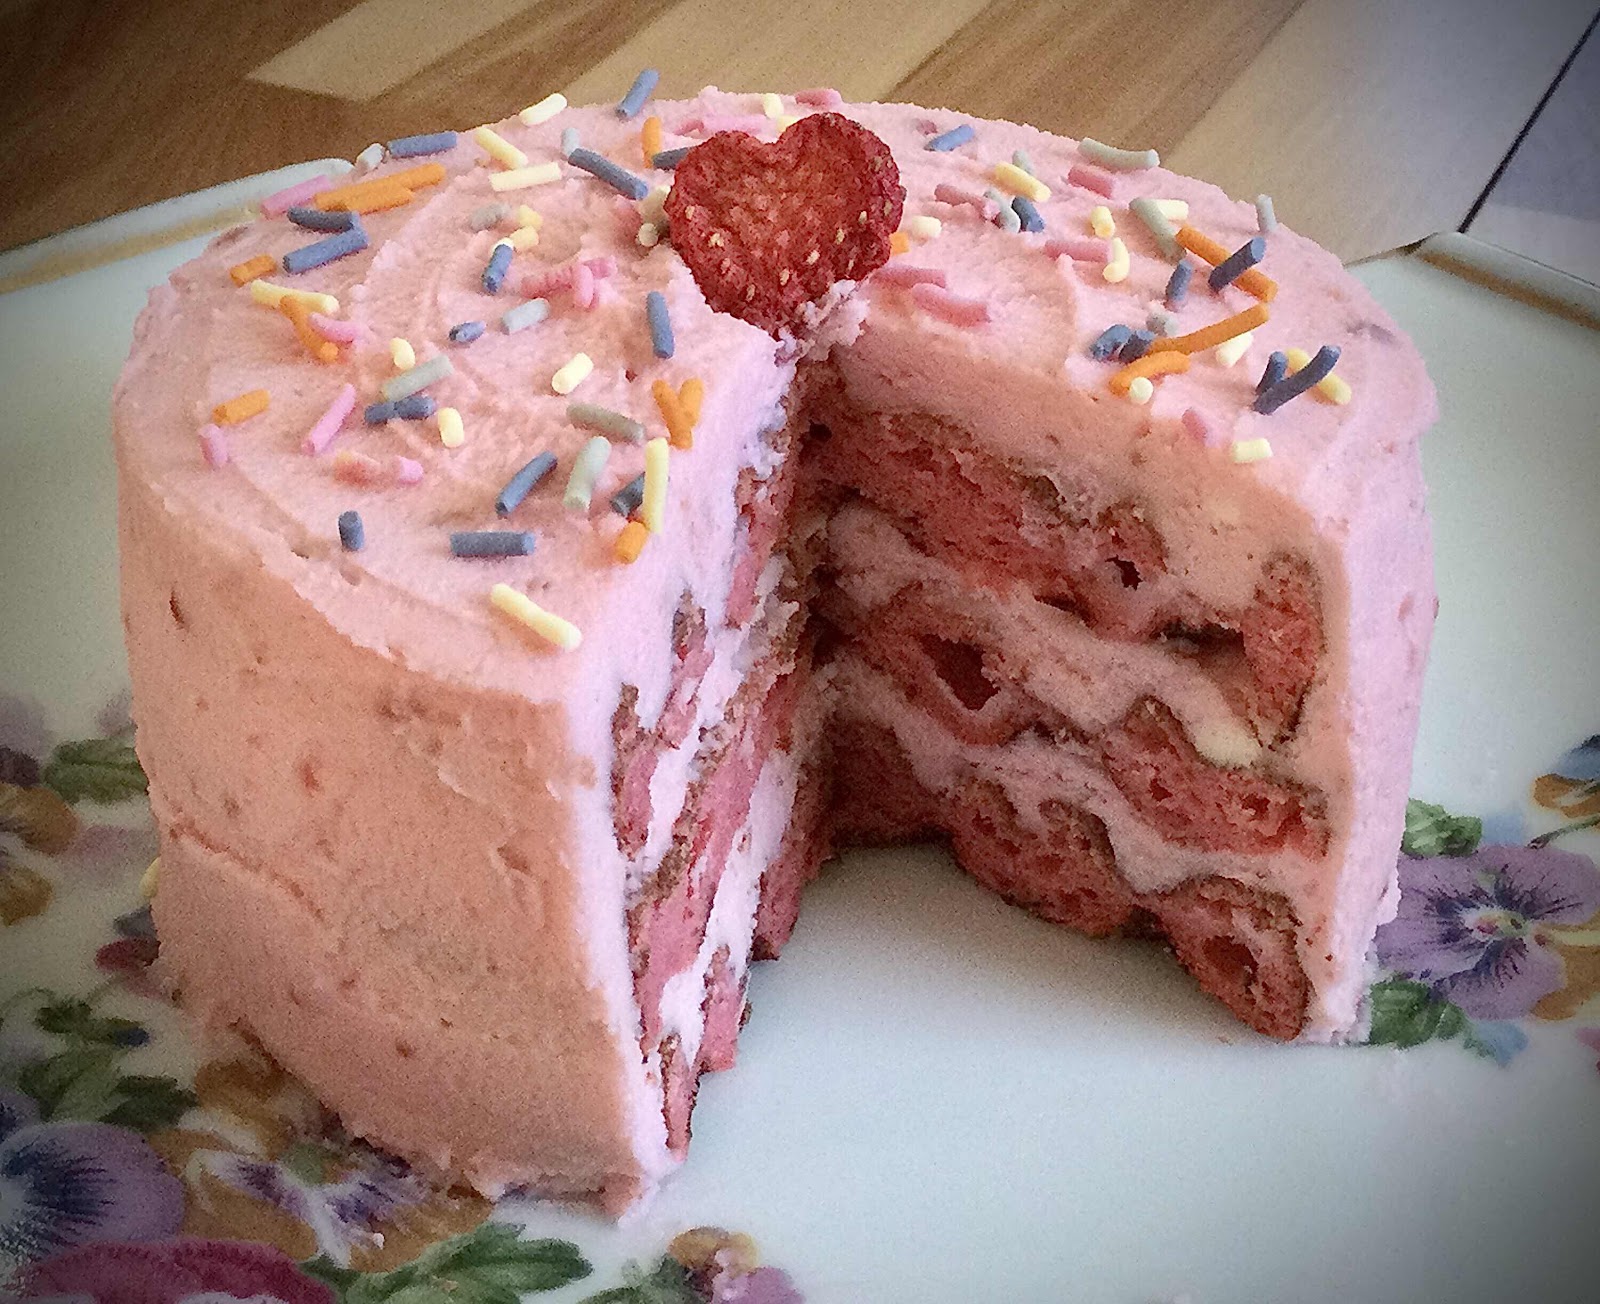
My daughter likes to joke and say, “You eat more cake than any diabetic I know!” When they’re gluten free, low carb/keto and sugar free, why not? I especially enjoy making tiny cakes because I don’t have a large crowd to feed, it’s just me and my husband, so a mini cake will provide a serving or two and then we’re done. No leftovers to get stale or tempt me for a week! Chaffle cakes are so quick and easy, they’re even lower carb than my other cakes, and they’re fun! This recipe is bright and refreshing on a winter’s day. To give it an extra strawberry boost, I crushed unsweetened, dried strawberries into a powder and added it to both the batter and the frosting. It lends a pretty pink color, too. The mousse frosting can be made by itself and served in a dish or the strawberry chaffles are excellent eaten as they are, but the combination is truly a special Valentine’s Day treat!

Low Carb Strawberry Mousse Chaffle Cake
The cake makes 3 servings, plus extra chaffles for snacking

Strawberry Chaffle Ingredients:
2 eggs, room temperature 
2 ounces cream cheese, softened
1 tablespoon coconut flour
1/2 teaspoon baking powder
2 tablespoons granulated erythritol sweetener 
1 teaspoon vanilla extract
1/2 teaspoon strawberry extract (I used McCormick brand)
1/8 teaspoon cake batter extract, optional (but gives a nice flavor. I used McCormick brand)
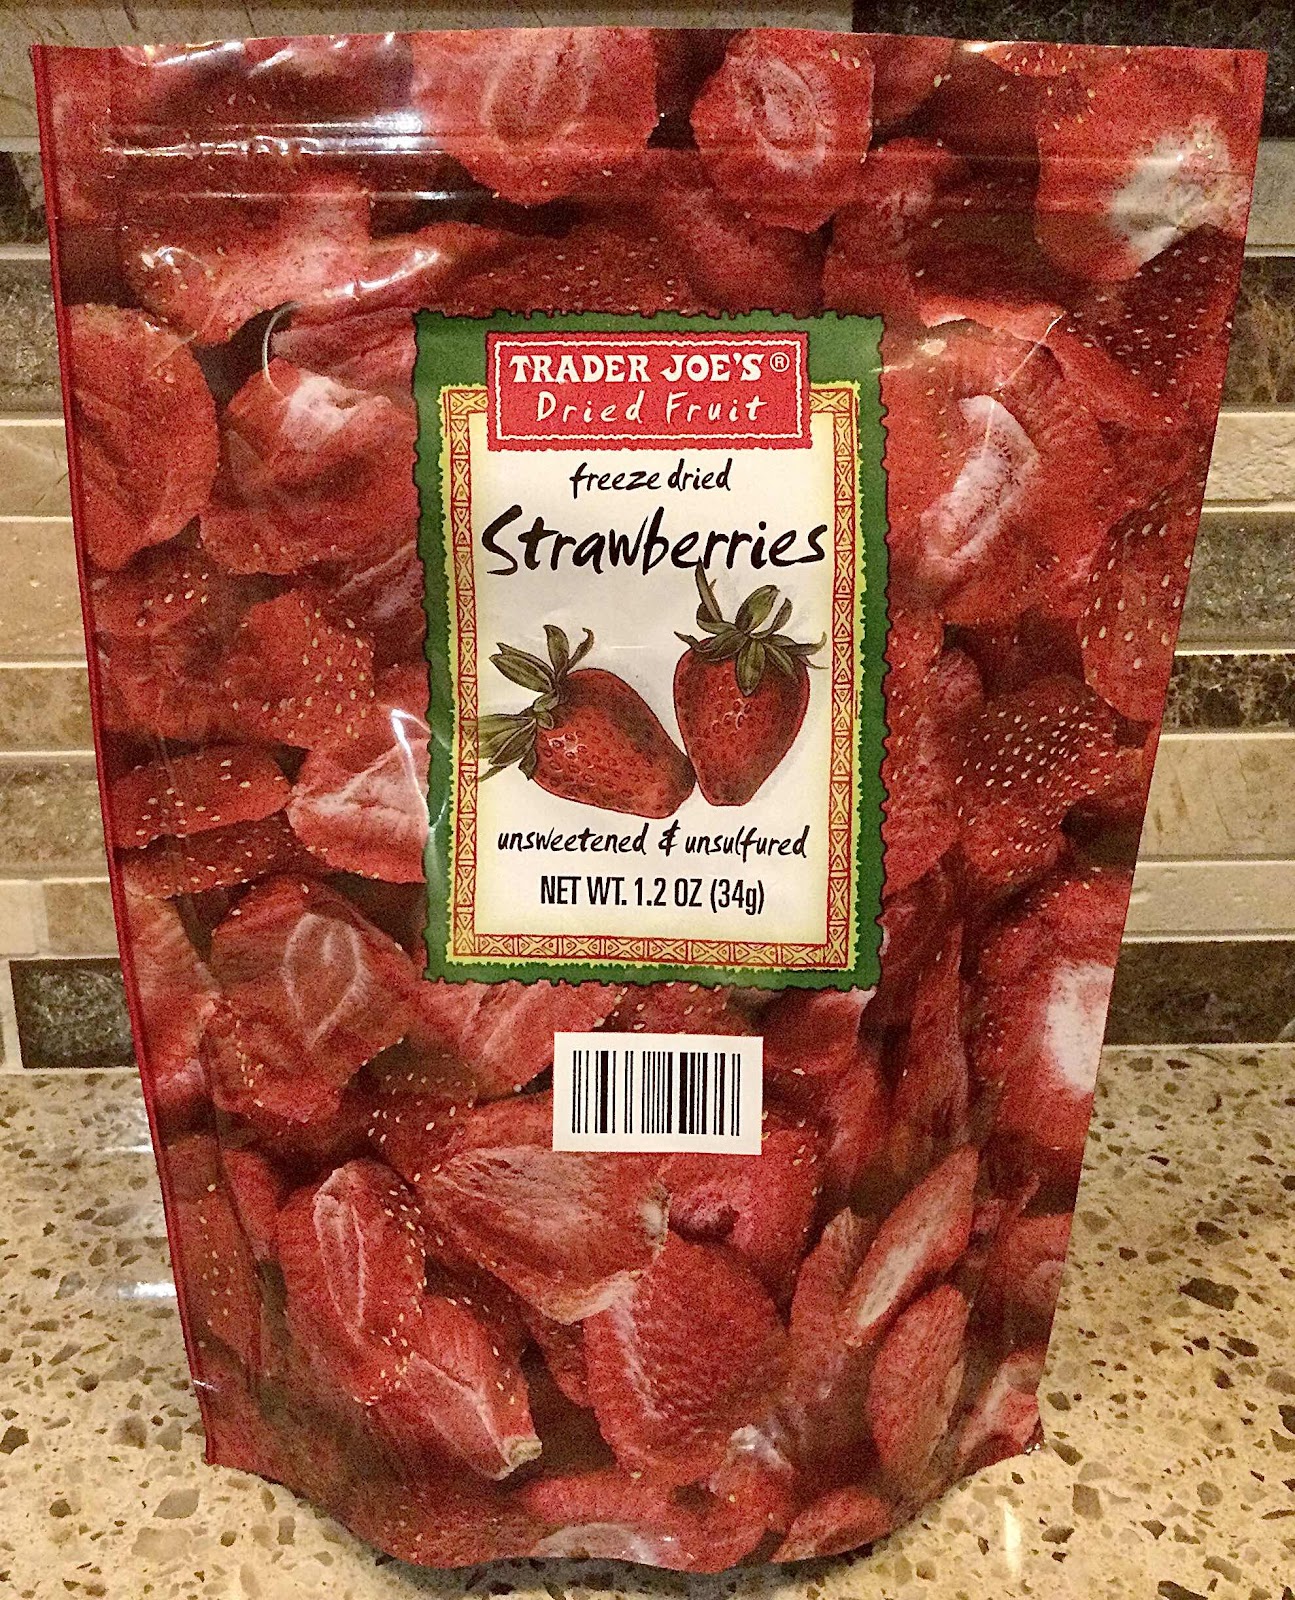
2 teaspoons unsweetened, dried strawberries, crushed into a powder (I used Trader Joe’s, see photo below)
1 tablespoon water
2 drops red food coloring, optional

Strawberry Mousse Frosting:
1/4 cup cold heavy cream
2 tablespoons cream cheese, softened
2 tablespoons unsalted butter, softened
2 tablespoons powdered erythritol sweetener 
1/4 teaspoon strawberry extract 
1 teaspoon unsweetened, dried strawberries, crushed into a powder
1-2 drops light pink food coloring, optional

Decorative Toppings (optional):
Sliced strawberries
Sugar free sprinkles

Inside of Strawberry Mousse Chaffle Cake
To make the chaffles:
1. Preheat a mini 4-inch waffle maker (I used a Dash Mini). In a mixing bowl or a 2-cup glass measuring cup (or a straight-sided pint mason jar), add all of the chaffle ingredients and whisk thoroughly to combine. I find it easier to do this with an immersion blender in a tall measuring cup or mason jar, but a hand whisk will do fine. Just be sure to whisk until no lumps remain and the batter is smooth. (Below is a picture of the dried strawberries I used to make the strawberry powder.)

Trader Joe’s Unsweetened Dried Strawberries
2. Spoon 3-4 tablespoons of the batter into your preheated mini waffle maker. Close the lid and cook for about 3 minutes and 15 seconds or until cooked through. You don’t want to cook your waffle until crispy or too brown because it will make your cake tough and dry. The chaffle will be soft when it is removed from the waffle maker, but will firm up a bit upon cooling. Place the chaffle on a wire rack to cool.

3. Repeat to make another 3-4 strawberry chaffles (I made 5 chaffles). Allow the cooked chaffles to cool completely before assembling your cake.

Make the Strawberry Mousse Frosting. This recipe makes enough to frost a 3-layer mini cake (between the layers, top and sides), as pictured. Or will frost a 4-5 layer cake (between the layers and top), if the sides are left bare. Double the recipe if you like a lot of frosting or want to cover a taller cake completely.

4. In a small and deep bowl, whip the cold heavy cream using an electric mixer on high until stiff peaks are formed; set aside.

5. In a separate medium bowl, beat the cream cheese and butter with an electric mixer until fluffy and no lumps remain. Add the powdered sweetener, strawberry extract, strawberry powder and food coloring (if using) and beat until well combined and the mixture is smooth and fluffy.

6. Add 1/3 of the whipped cream to the cream cheese mixture and beat briefly with an electric mixer on low until well incorporated and the cream cheese mixture is creamier and not as stiff.

7. Switch to a rubber spatula and gently fold the remaining whipped cream into the cream cheese mixture until no streaks remain and a spreadable consistency is reached.

8. Frost your cake and decorate with sliced strawberries or sugar free sprinkles, as desired.

Top of Mini Cake
Nutritional Information per serving (1/3 of a 3-layer cake with frosting): 284 calories, 5.8 g carbohydrate (0.6 g dietary fiber, 1.1 g sugars, 2.9 g sugar alcohols), 27.5 g total fat (16.8 g saturated fat, 0 g trans fat), 159 mg cholesterol, 189 mg sodium, 69.4 mg calcium, 33 mg potassium, 281 IU Vit A, 1 mg Vit C, 5 g protein. Net carbs per serving: 2.3 grams

Nutritional Information per 1 chaffle (no frosting): 80 calories, 3 g carbohydrate (0.5 g fiber, 0.6 g sugars, 1.6 g sugar alcohols), 5.7 g total fat (3.3 g saturated fat), 3.5 g protein. Net carbs per 1 chaffle: 0.9 grams

Nutritional Information for Strawberry Mousse Frosting only (1/3 recipe): 204 calories, 2.9 g carbohydrate (0 g fiber, 0.5 g sugars, 1.6 g sugar alcohols), 28.8 g total fat (13.6 g saturated fat), 1.4 g protein. Net carbs per serving of frosting only: 1.6 grams

Photos and recipe by Kathy Sheehan, copyright 2021
All rights reserved. Please do not duplicate without the author’s permission.
Saturday, January 16, 2021

Low Carb Hot Cocoa Cake

Low Carb Hot Cocoa Cake
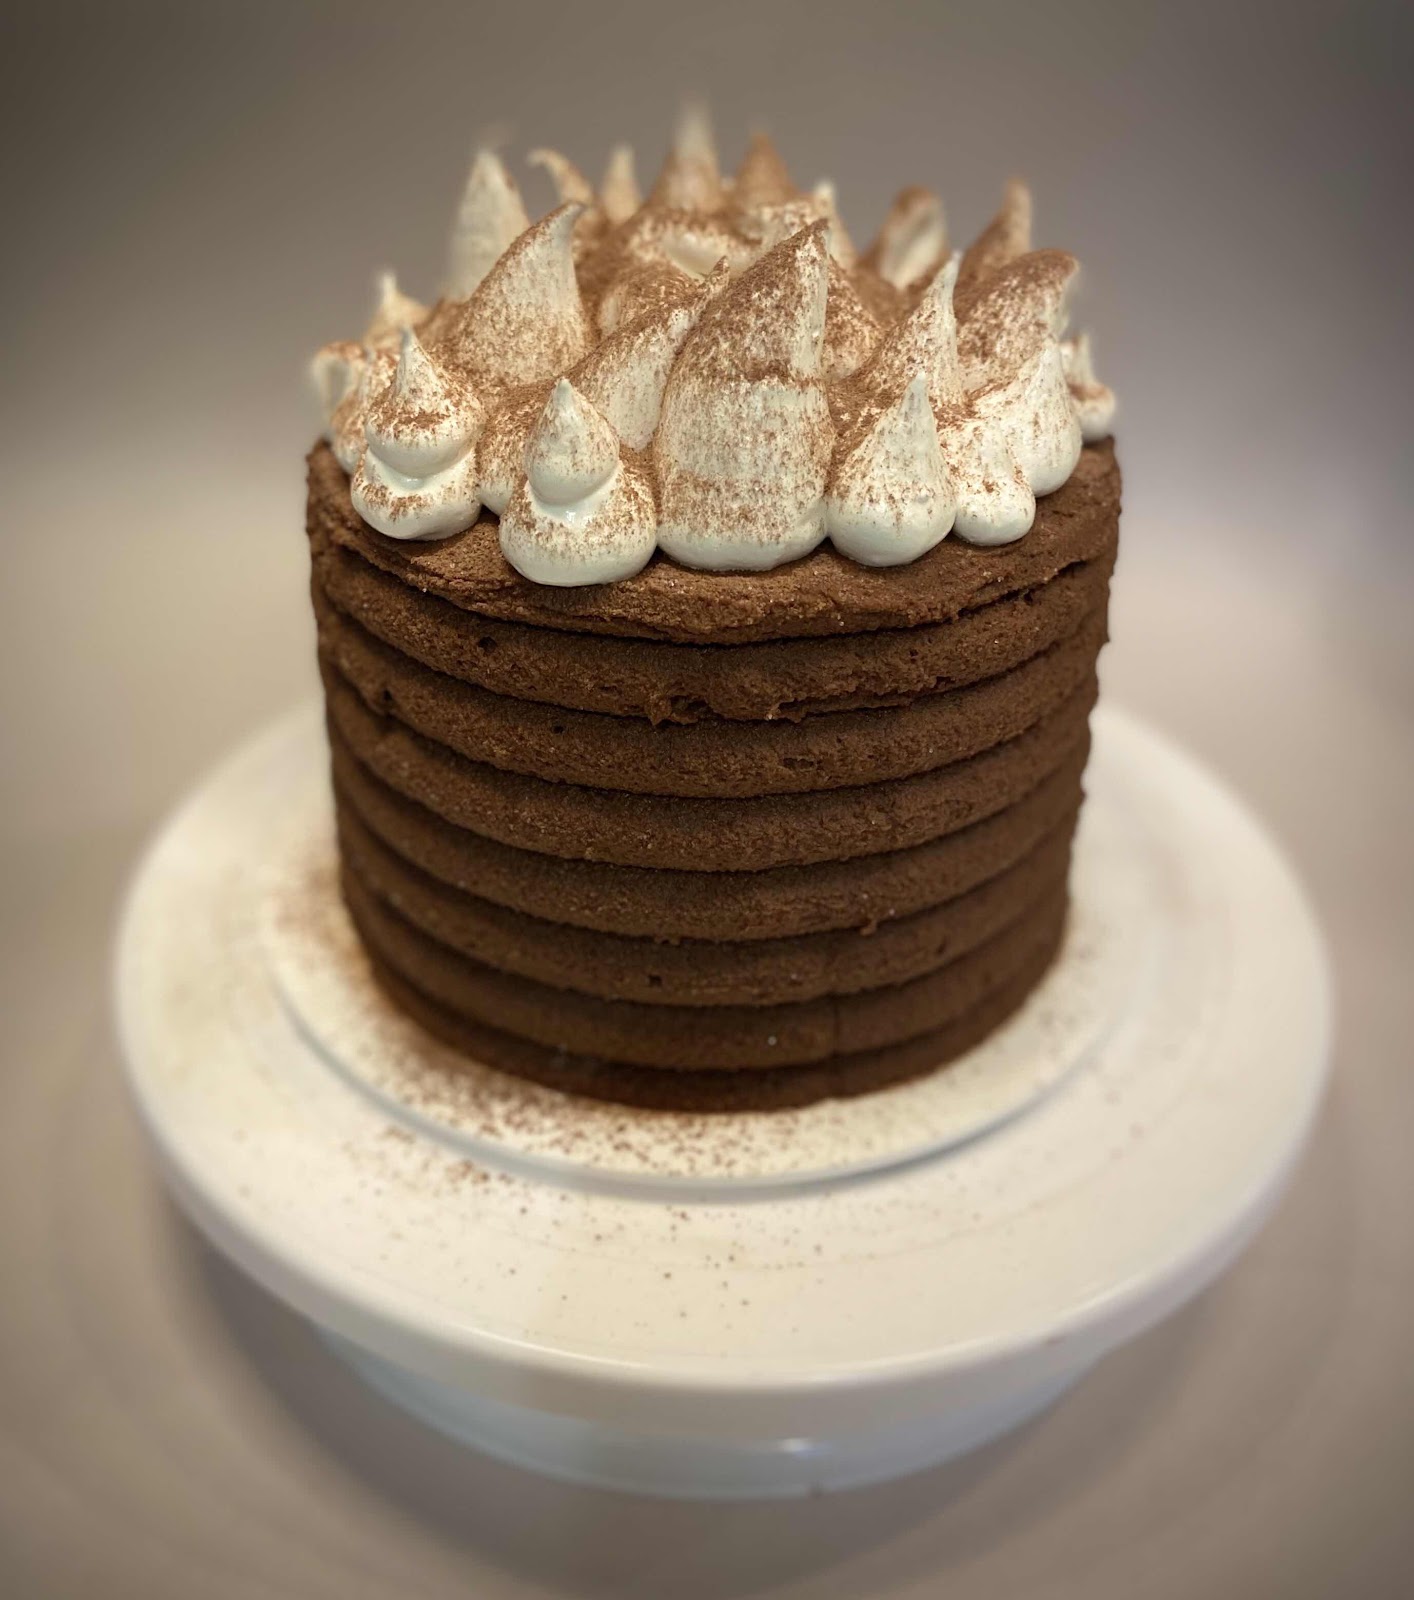
My grown daughter had a birthday last week and I quickly volunteered to make her a birthday cake. I had seen a similar cake online (see the inspiration for this recipe here), but it is made with flour and lots of sugar, and I couldn’t resist making it over using low carb, sugar free and gluten free ingredients. The results were absolutely spectacular! My family has declared that this cake may be the very best to come out of my keto/low carb kitchen, so far! 

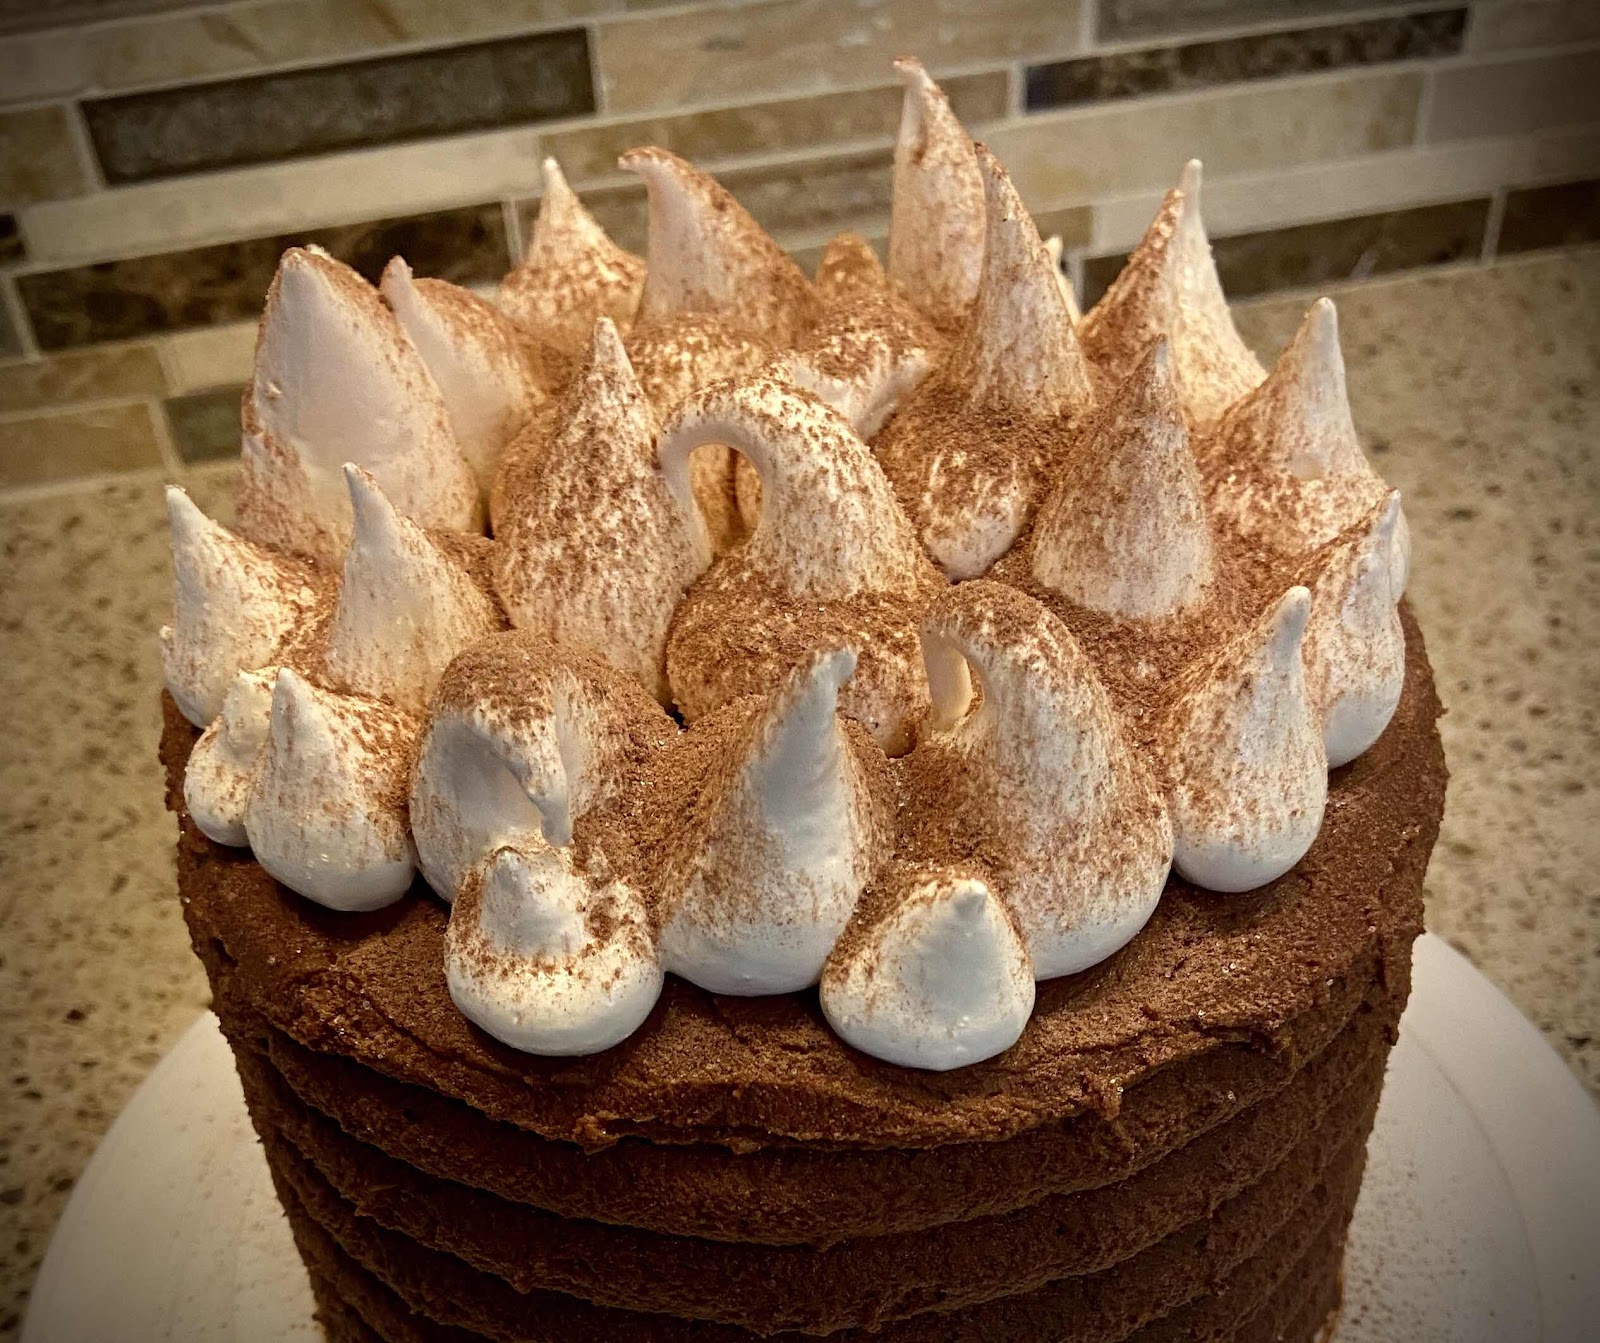
The puffs of marshmallow fluff on the top calls for a different sugar alternative called allulose  As much as I dislike purchasing another product to try and fit into my already overstuffed keto baking drawer, in this case, allulose is the best sugar alternative for the job. It won’t recrystalize upon cooling, like erythritol can, leaving the marshmallow puffs soft and pillowy. You can leave them off and still make the best low carb chocolate cake ever!

Low Carb Hot Cocoa Cake
Makes 12 servings

Cake Ingredients:
96 grams coconut flour (about 3/4 cups + 2 tablespoons)
3/4 cup granulated erythritol sweetener 
1/3 cup unsweetened dark cocoa powder
1 tablespoon baking powder
1/2 teaspoon xanthan gum
1/4 teaspoon salt
6 large eggs, room temperature 
1/2 cup unsalted butter, melted and cooled
1/2 cup brewed coffee, cooled to room temperature (regular or decaf is fine)
2 teaspoons vanilla extract (or 1 tsp vanilla and 1 tsp chocolate extract)

Chocolate Frosting:
3 ounces unsweetened 100% cacao baker’s chocolate, chopped
3/4 tablespoon coconut oil (I used refined)
3 tablespoons unsalted butter, room temperature 
6 ounces cream cheese, room temperature 
12 ounces mascarpone cheese, room temperature 
1 cup powdered erythritol sweetener 
3 tablespoons unsweetened cocoa powder 
3/4 teaspoon vanilla extract 
3-4 tablespoons heavy cream, room temperature (or enough to reach desired spreading consistency)

Whipped Marshmallow Topping:
3/4 cup allulose sweetener 
1/3 cup water
1 large egg white
1/2 teaspoon vanilla extract 
A tiny pinch of salt

To Make the Cake:

1. Preheat your oven to 325 degrees Fahrenheit. Prepare two 8” or three 6” baking pans by spraying with non-stick cooking spray and line the bottoms with parchment paper. Spray the parchment paper; set aside.

2. Whisk together the first six ingredients (coconut flour through salt) in a medium bowl. (If you’re not able to weight the coconut flour, use a very light scooping and leveling method to measure.) Set aside.

3. In a large bowl and with an electric mixer, beat the eggs until light, lemon yellow in color and the volume has increased, about 3-5 minutes. Try to beat as much air as possible into the eggs. (If you have standing mixer, you can use a whisk attachment to make this easier, but remove it and replace with your paddle attachment before adding the remaining ingredients, so as not to deflate the eggs too much.) Add the melted and cooled butter, coffee and extract, mixing on low only to combine.

4. Add the dry ingredients all at once and mix on low to medium just until the dry ingredients are incorporated. Divide the batter evenly between the prepared baking pans and spread to the edges and level the batter using an offset spatula or back of a spoon. Bake for 30 minutes or until the tops are just firm to the touch and a toothpick in the center comes out clean. (If using 6-inch pans, check after 25 minutes.)

5. Remove from the oven and allow the cake to cool in their pans for about 10-15 minutes before turning them out on a wire rack to cool completely.

To Make the Chocolate Frosting:

6. In a medium microwave-safe bowl, combine the chopped baking chocolate and coconut oil. Microwave in 15 second intervals to melt the chocolate. Allow to sit for a few minutes before stirring until smooth. (You may also place the chocolate in a heat-proof bowl over barely simmering water to melt.) Set aside to cool to lukewarm.

7. In a large bowl with an electric mixer, beat the butter, cream cheese and mascarpone cheese together until well combined and no lumps remain. (I used my paddle attachment to do this.) Beat in the powdered erythritol and cocoa powder until blended. Add the melted chocolate and extract and beat until smooth. Add 1 tablespoon of the heavy cream at a time until the desired spreading consistency is reached.

To Make the Marshmallow Topping: (This can be made a day ahead and refrigerated. Bring to room temperature before decorating the cake.)

8. To a medium saucepan, add the allulose and water and very gently stir to combine. (The allulose will not dissolve at this point.) If any allulose has gotten on the sides of the pan, use a wet pastry brush to wipe down the sides.

9. Over medium-low heat, bring the allulose and water mixture up to 260 degrees Fahrenheit. DO NOT STIR. Bring the mixture up to temperature slowly, it may take 15 minutes or so. If you see it starting to turn brown, reduce the temperature, you don’t want the allulose to burn. 

10. Using an electric or standing mixer, whip the egg white with a tiny pinch of salt until foamy and soft peaks form. Slowly, and very carefully, while the mixer is on low, pour the hot allulose mixture into the egg white. (This mixture is VERY HOT, so use a potholder and stand away from the mixing bowl as you pour so the hot liquid doesn’t splash on you.) 

11. Turn the mixer to high, add the vanilla extract and whip for 5-6 minutes or until the marshmallow fluff is glossy and holds a stiff peak.

Dollop Marshmallow on top
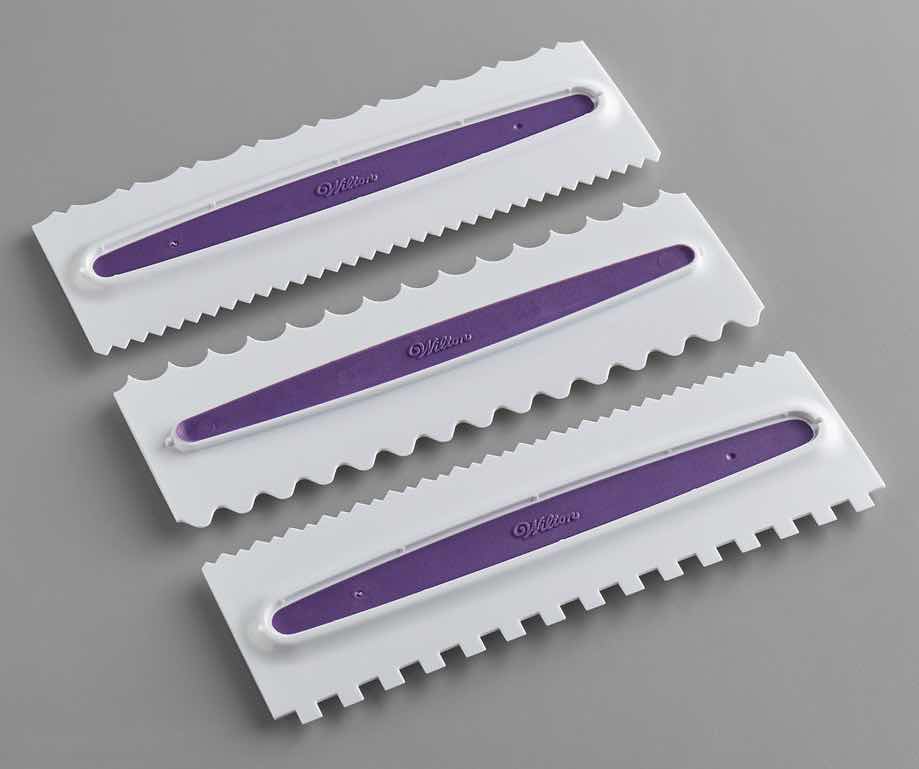
12. Assemble your cake by placing one layer of your cooled cake on a plate, spread with a generous amount of chocolate frosting, top with the second layer and then spread frosting on the top and sides. (To achieve the banded look in the photo, I used a design scraping tool to create a scalloped edge, but this is optional. See photo below of the tool set by Wilton for adding texture to cakes.) Finally, dollop mounds of the marshmallow on the top, creating puffs. You can do this with a large spoon or place the fluff into a piping or gallon plastic bag and snip off the end and pipe the marshmallow. Dust with cocoa powder.

Wilton Design Tools
13. This cake should be stored in the refrigerator. Remove and allow the cake to sit at room temperature for 30-45 minutes before slicing and serving.

Nutritional Information per serving (1/12th of cake): 333 calories, 9.3 g carbohydrate (4.6 g dietary fiber, 1.2 g sugars), 29.3 g total fat (18.4 g saturated fat, 0 g trans fat), 152 mg cholesterol, 249 mg sodium, 111.4 mg calcium, 78 mg potassium, 2 mg iron, 170 IU Vit A, 8.4 g protein. Net carbs per serving: 4.7 grams

Cake photos and recipe by Kathy Sheehan, copyright 2021
All rights reserved. Please do not duplicate without the author’s permission. 
Tuesday, August 18, 2020

40 Second Keto Dark Chocolate Cupcakes

40 second Dark Chocolate Cupcakes
Here’s another quick and easy cupcake recipe that you “bake” in the microwave for 40 seconds! This recipe is a favorite of my chocolate-loving husband. He freely admits that these cupcakes are as rich, decadent and fudgy as a traditional cupcake. He doesn’t miss the sugar at all and neither will you! This recipe yields three cupcakes, so it’s perfect when you want to satisfy a chocolate craving, but don’t want too many extras hanging around to tempt you.

40 Second Keto Dark Chocolate Cupcakes
Makes 3 cupcakes

Cupcakes:
2 tablespoons almond or pecan flour
2 teaspoons coconut flour
1 tablespoon unsweetened dark cocoa powder 
1/4 teaspoon instant coffee powder (optional, but enhances chocolate flavor)
1-1/2 tablespoons granulated erythritol sweetener 
A pinch of salt
1/2 teaspoon baking powder
1 tablespoon butter, melted
1 large egg
5 drops dark chocolate stevia or monkfruit extract, or to taste
1/4 teaspoon vanilla extract
1 tablespoon unsweetened almond or coconut milk (or strong brewed coffee for a mocha flavor)

Dark Chocolate Frosting:
1 oz. unsweetened baker’s chocolate, chopped
3/4 teaspoon refined coconut oil
1 tablespoon unsalted butter, room temperature 
2 oz. cream cheese, room temperature 
4 oz. mascarpone cheese, room temperature 
1/3 cup powdered erythritol sweetener 
1 tablespoon unsweetened cocoa powder 
1/4 teaspoon vanilla extract
1-2 tablespoons heavy cream (or as needed to reach the desired consistency)

1. In a small bowl, combine the almond or pecan flour, coconut flour, cocoa powder, instant coffee powder, granulated sweetener, salt and baking powder. Whisk to combine and remove any lumps.

2. Add the melted butter, egg, stevia or monkfruit drops, vanilla extract and milk or coffee; whisk until well combined.

3. Evenly divide the batter between three silicone muffin cups and microwave on high for 40 seconds or until the cakes have risen, look dry and spring back when touched near the center. (The time needed for cooking may vary, depending on the wattage of your microwave.) Alternatively, you can bake them in a 325 degree Fahrenheit oven for 15-18 minutes. Move to a wire rack and cool completely.

4. To make the frosting, in a medium, microwave-safe bowl, combine the chopped baker’s chocolate and coconut oil. Microwave on high in 15 second intervals to melt the chocolate. Let it sit for a minute or two and then stir until smooth. (If you would prefer, you can melt the chocolate and coconut oil in a heat proof bowl over barely simmering water.) Set melted chocolate aside to cool to lukewarm. 

5. In a large bowl, using an electric mixer, whip the butter, cream cheese and mascarpone cheese together until smooth. Beat in the powdered sweetener and cocoa powder, scraping the sides of the bowl as needed.

6. Add the melted chocolate and vanilla extract and beat until combined. Add the heavy cream, one tablespoon at a time, until a spreadable consistency is achieved. (Note: This icing recipe makes enough to frost 6 cupcakes, so more than you will need. Store any leftovers in an airtight container in the refrigerator for up to a week.)

Microwave Keto Dark Chocolate Cupcake
Nutritional Information per one cupcake with 3 Tbsp frosting: 234 calories, 6.5 g carbohydrate (2.2 g dietary fiber, 0.7 g sugars, 2.1 g sugar alcohols), 21.5 g total fat (12.1 g saturated fat, 0 g trans fat), 102 mg cholesterol, 127 mg sodium, 93.8 mg calcium, 95 mg potassium, 1 mg iron, 106 ug Vit A, 5.9 g protein. Net carbs per serving: 4.3 grams

Photos and recipe by Kathy Sheehan, copyright 2020
All rights reserved. Please do not duplicate without the author’s permission. 
Friday, July 17, 2020

40 Second Keto Lemon Cupcakes

40 Second Keto Lemon Cupcakes
You don’t have to wait for a special occasion or dirty the entire kitchen to enjoy a few cupcakes! These light and delicious cupcakes bake in the microwave in about 40 seconds. Normally, I don’t think about the microwave when I want to bake a cake, but I have found that keto mug cakes made in a microwave rise beautifully and have a light, tender crumb. Just be sure you don’t overcook them or they can become tough. Silicone cupcake liners are microwave-safe, come in a variety of fun colors, are non-stick and hold their shape during cooking, so that’s what I use. (You can use paper liners, but you’ll need to support them in a microwave-safe cup so the cupcakes retain their shape during the cooking process. If you decide to use paper liners, make sure there is no metal in the liner or its printed design.) This quick recipe makes only three cupcakes, which is just enough to share with one or two friends. There’s no reason not to have a little party tonight!

40 Second Keto Lemon Cupcakes
Makes 3 cupcakes

Cupcake Ingredients:
1/4 cup almond flour
2 teaspoons coconut flour
1 tablespoon granulated erythritol sweetener
1/2 teaspoon baking powder
A pinch of salt
1 large egg
1 teaspoon lemon juice (or almond milk)
1/2 teaspoon lemon zest (or 1-2 drops of food grade lemon essential oil)
1/2 teaspoon vanilla extract
5 drops monkfruit extract (or liquid stevia)
1 teaspoon melted butter or ghee

Lemon Cream Frosting:
2 ounces cream cheese, room temperature 
2 tablespoons unsalted butter, softened
4 ounces plain mascarpone cheese, room temperature
1/4 cup powdered erythritol sweetener 
1 teaspoon vanilla extract
1/4 to 1/2 teaspoon lemon extract, to taste
1-2 tablespoons heavy cream

Sugar free sprinkles (optional)

1. In a small bowl, combine the first five dry ingredients (almond flour through salt) with a fork until thoroughly mixed; set aside.

2. In a separate bowl, whisk together the egg, lemon juice or almond milk, lemon zest, vanilla extract, monkfruit extract or stevia and melted butter.

3. Add the dry ingredients to the wet ingredients and whisk until just combined. Divide the batter equally among three silicone cupcake liners (or small greased ramekins). Microwave on high for 35-40 seconds or until the cakes have risen, look dry and the tops spring back when lightly touched in the center. Do not overcook! (Note: Cooking time may vary depending on the wattage of your microwave. Instructions for baking in the oven are provided below.*) Remove the cupcakes from the microwave and cool on a wire rack completely while you make the frosting.

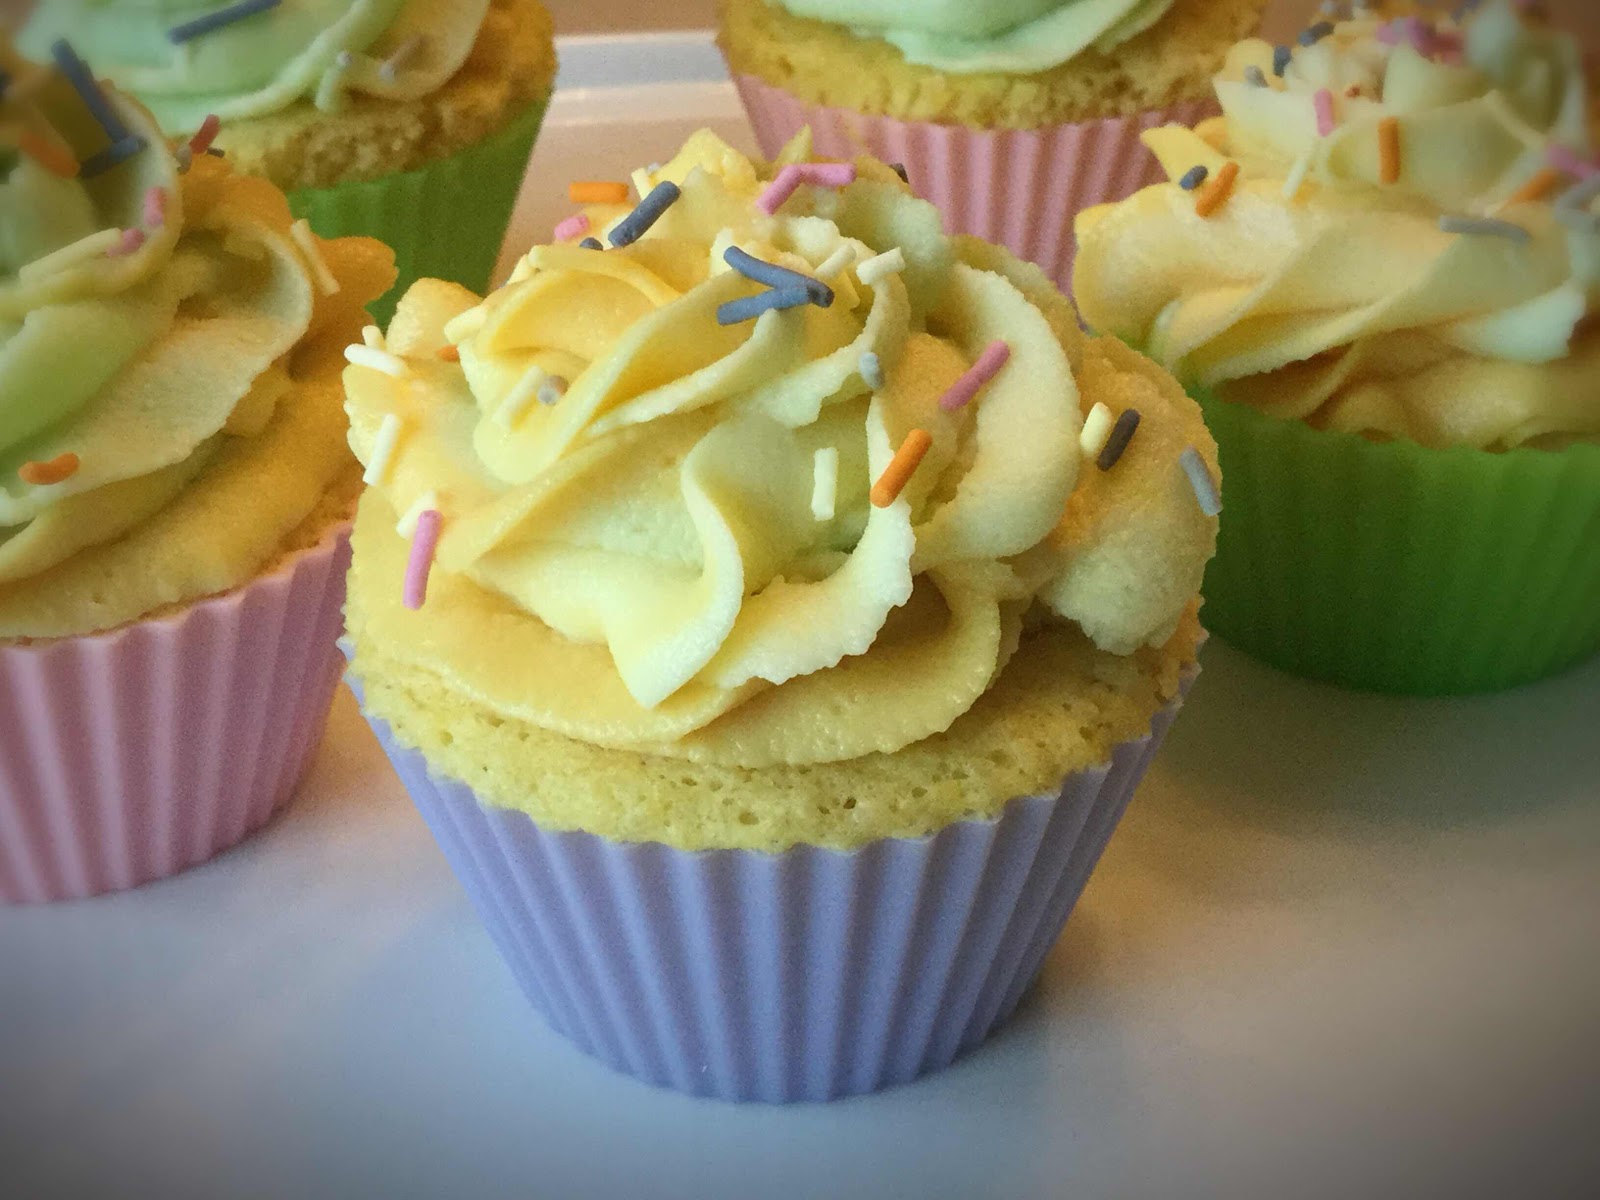
4. To make the frosting: Whip together the room temperature cream cheese, butter and mascarpone cheese with an electric mixer until light and fluffy. Add the powdered sweetener, extracts and beat until combined. Add the heavy cream, one tablespoon at a time, until your frosting reaches the desired consistency. Taste and adjust sweetness to your liking. If desired, spoon the frosting into a piping bag with a decorating tip and frost your cupcakes or spread about 3 tablespoons of frosting onto each cupcake.

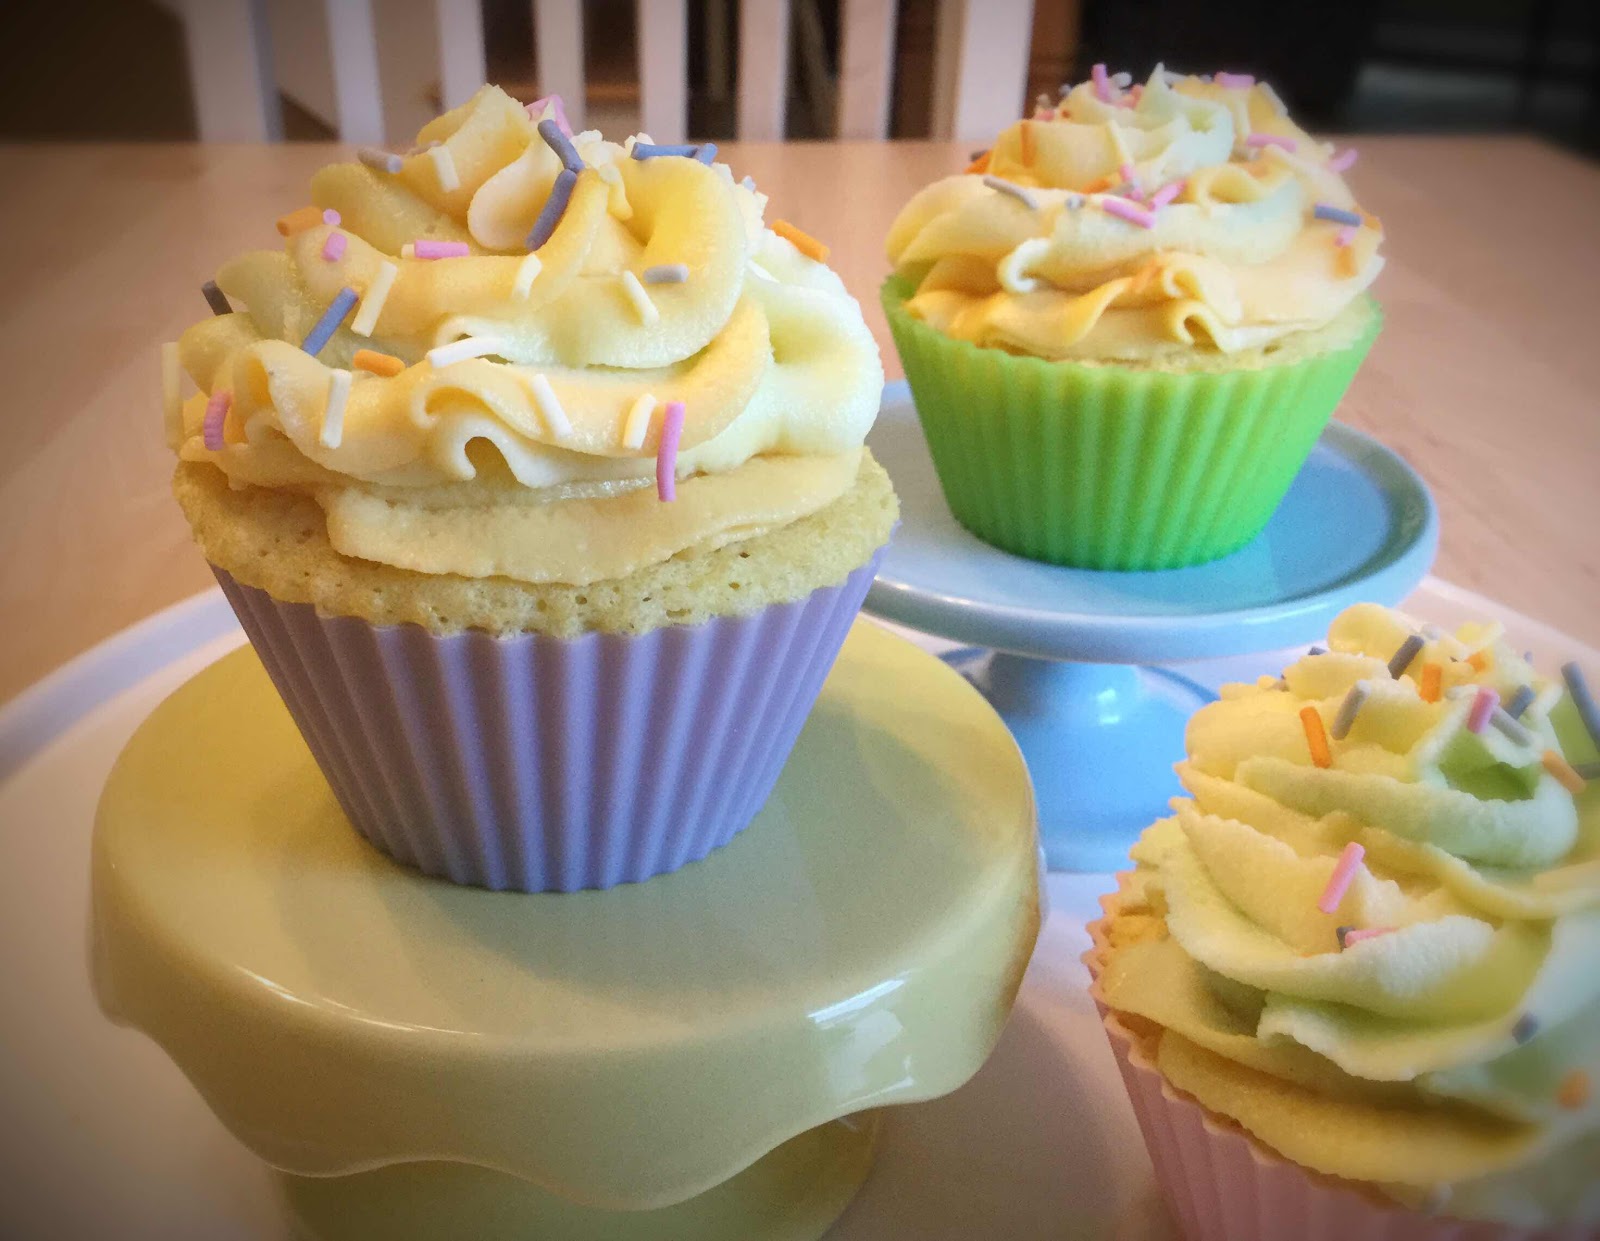
5. This frosting recipe yields more than you will need for 3 cupcakes, which allows for dividing into batches and coloring each differently using gel food colors (as shown). Store any leftover frosting in an airtight container in the refrigerator and save for another use. It will keep well for 4-5 days. Bring to room temperature and rewhip if needed to restore spreading consistency. 

*To bake the cupcakes in the oven, bake in a preheated 325 degree F oven for 16-18 minutes or until a toothpick comes out clean when tested and the tops spring back when lightly touched near the center.

40 Second Keto Cupcakes
Nutritional Information per 1 cupcake with 3 TB frosting: 210 calories, 5 g total carbohydrates (1 g dietary fiber, 0.4 g sugars, 2.7 g sugar alcohols), 20.3 g total fat (.8 g saturated fat, 0 g trans fat), 77 mg cholesterol, 278 mg sodium, 217.8 mg calcium, 19 mg potassium, 97 ug Vit A, 2 mg Vit C, 3.6 g protein. Net carbs per serving: 2 grams

Recipe and photos by Kathy Sheehan, copyright 2020
All rights reserved. Please do not duplicate without the author’s permission.
Saturday, June 20, 2020

The Best Low Carb Chocolate Fudge Frosting

Best Low Carb Chocolate Fudge Frosting
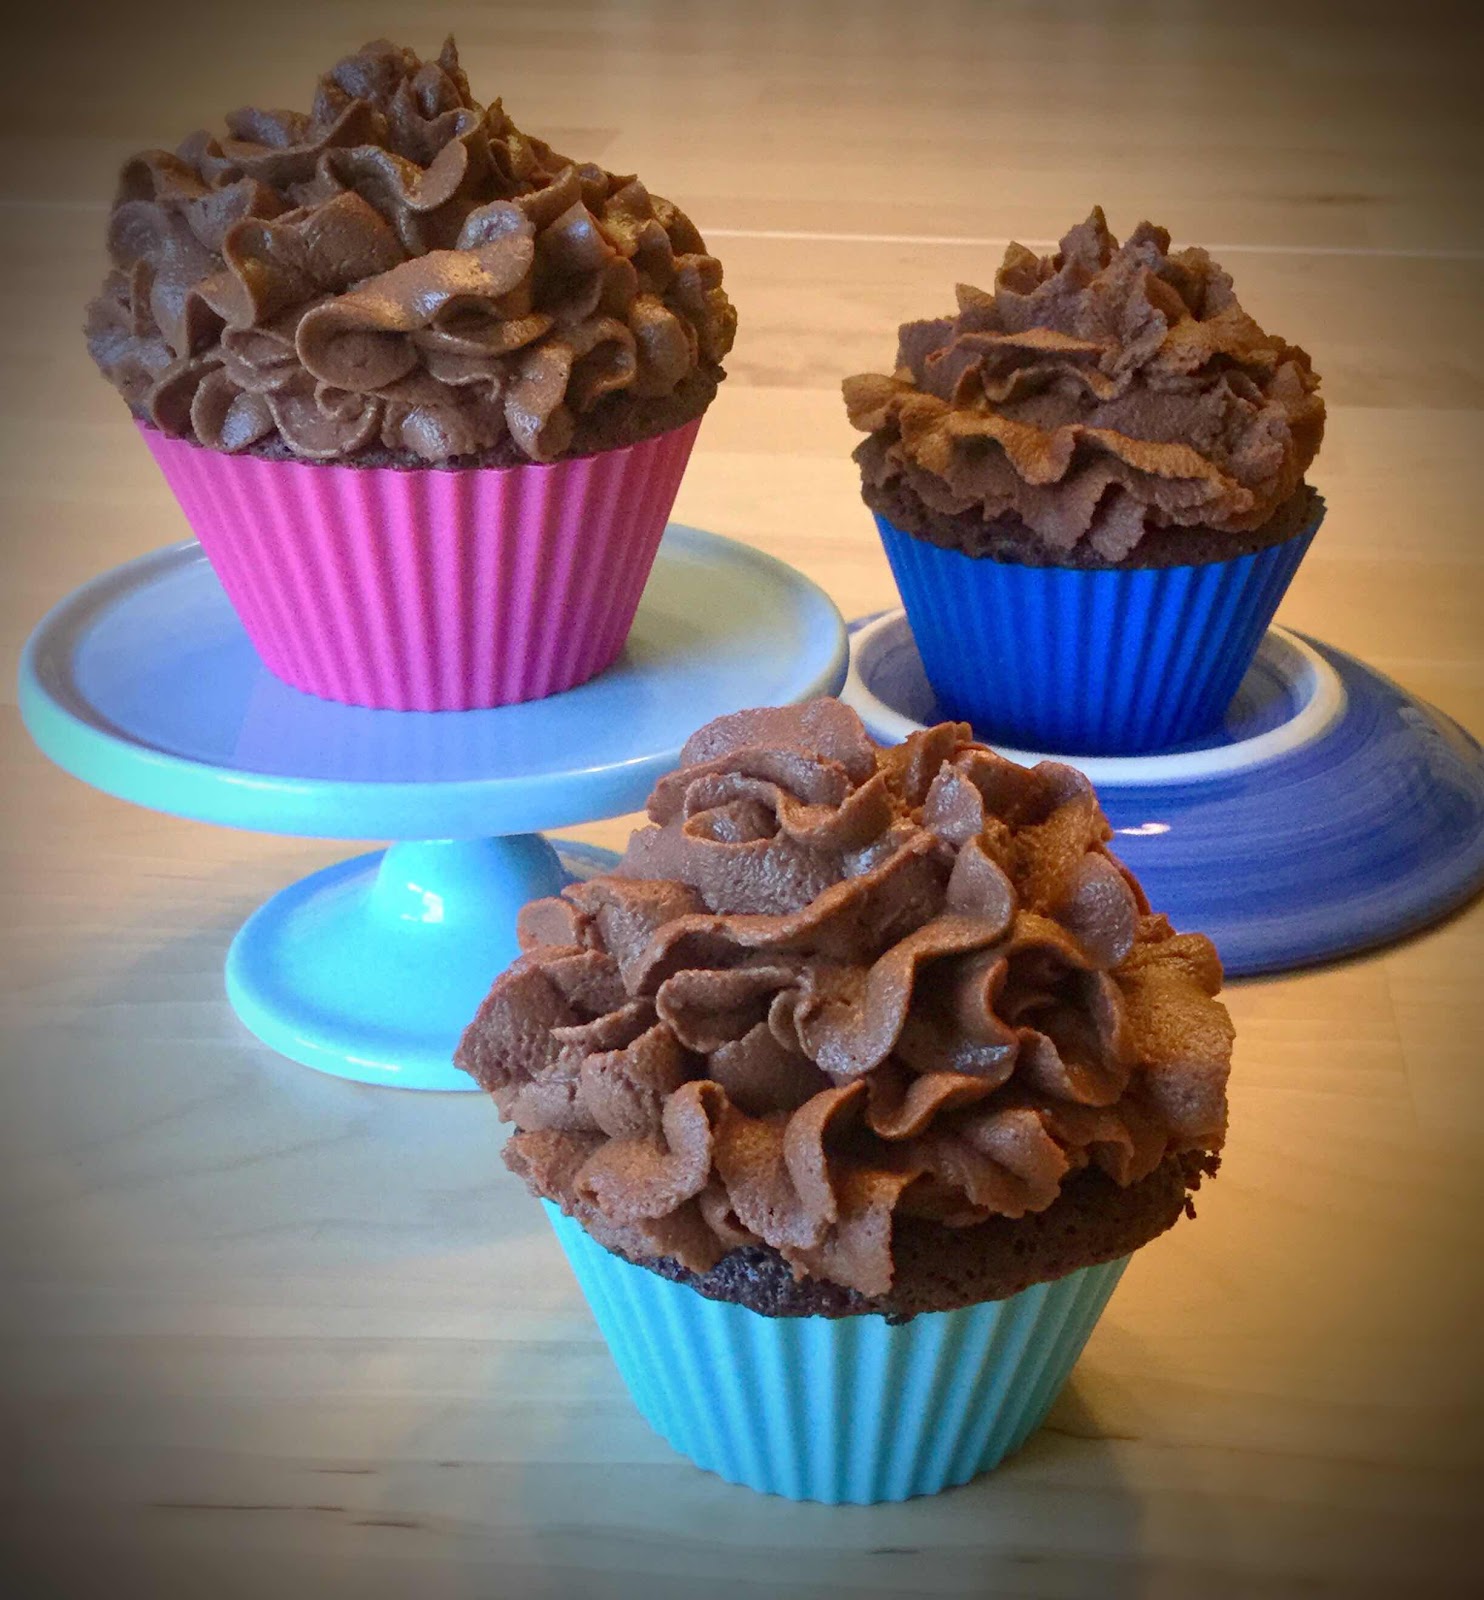
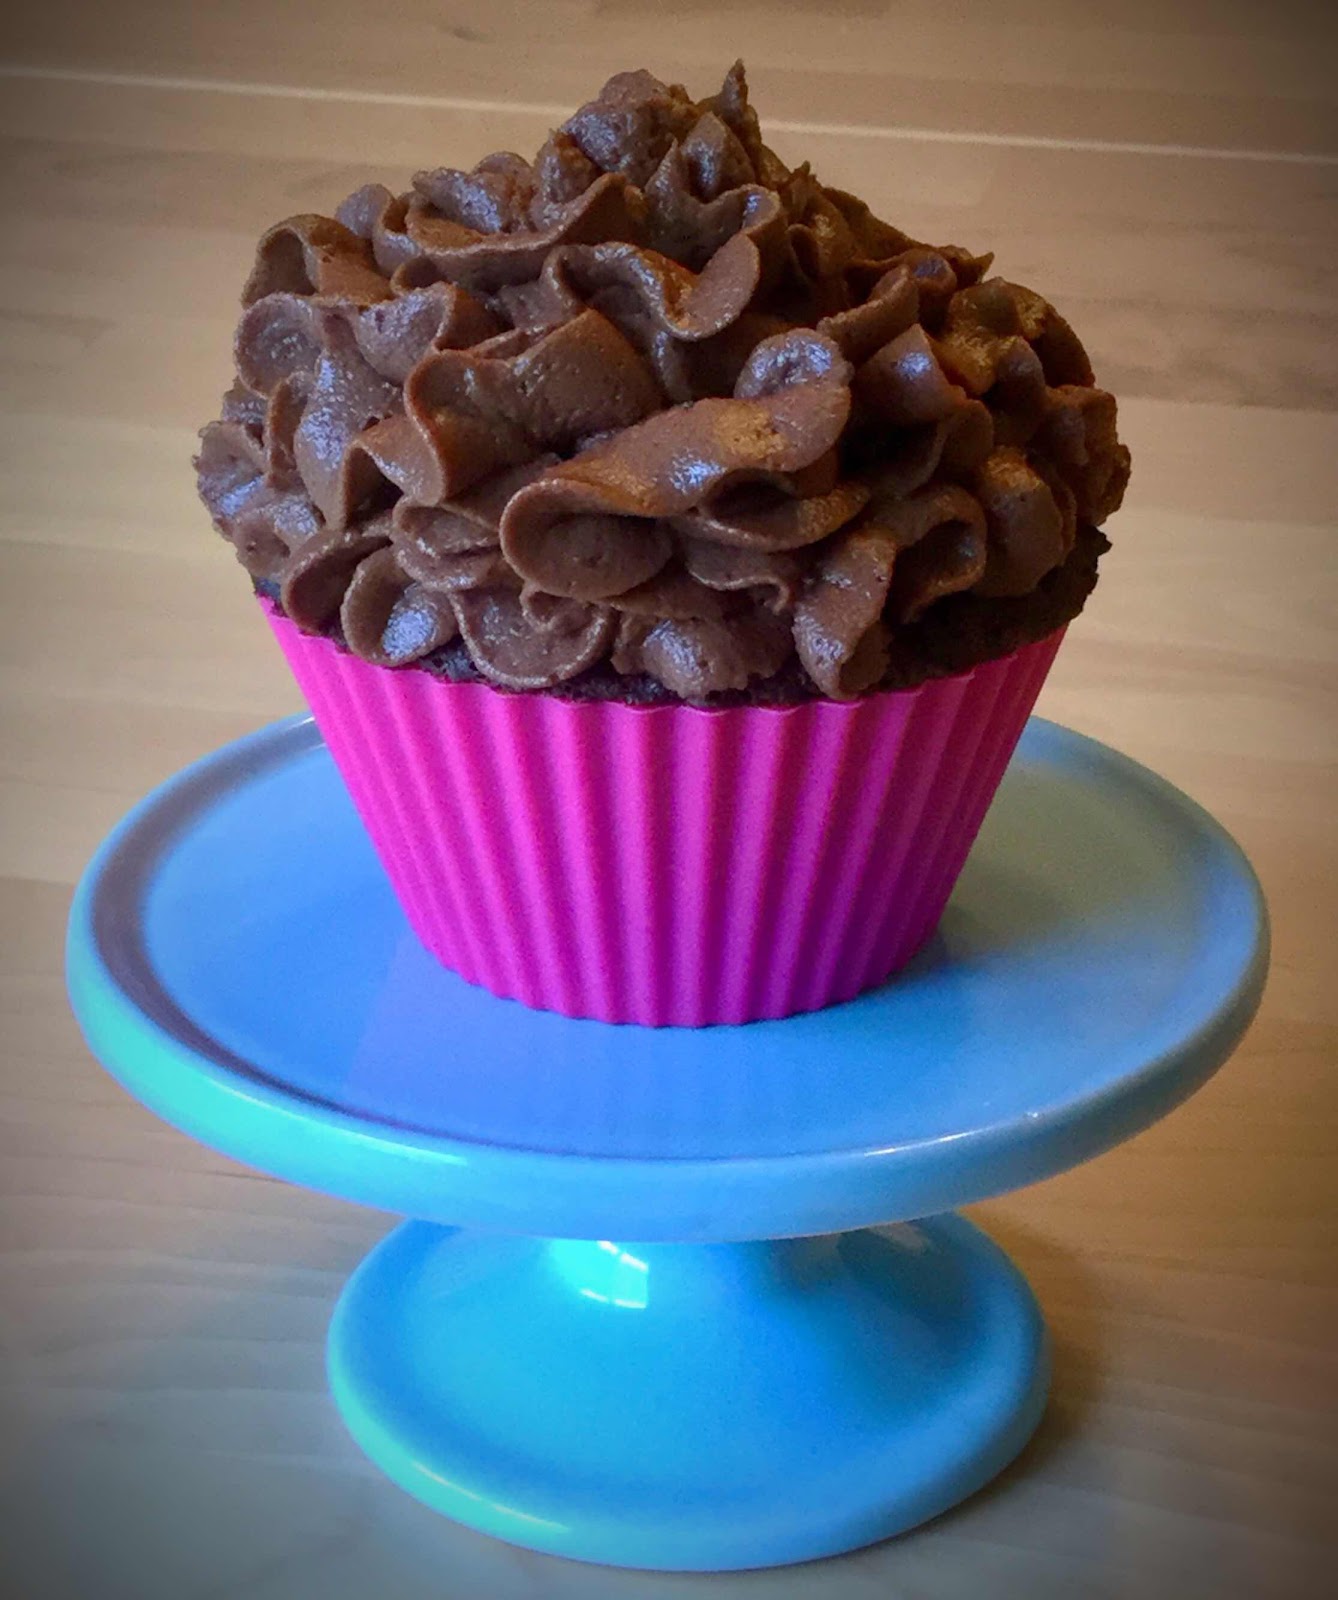
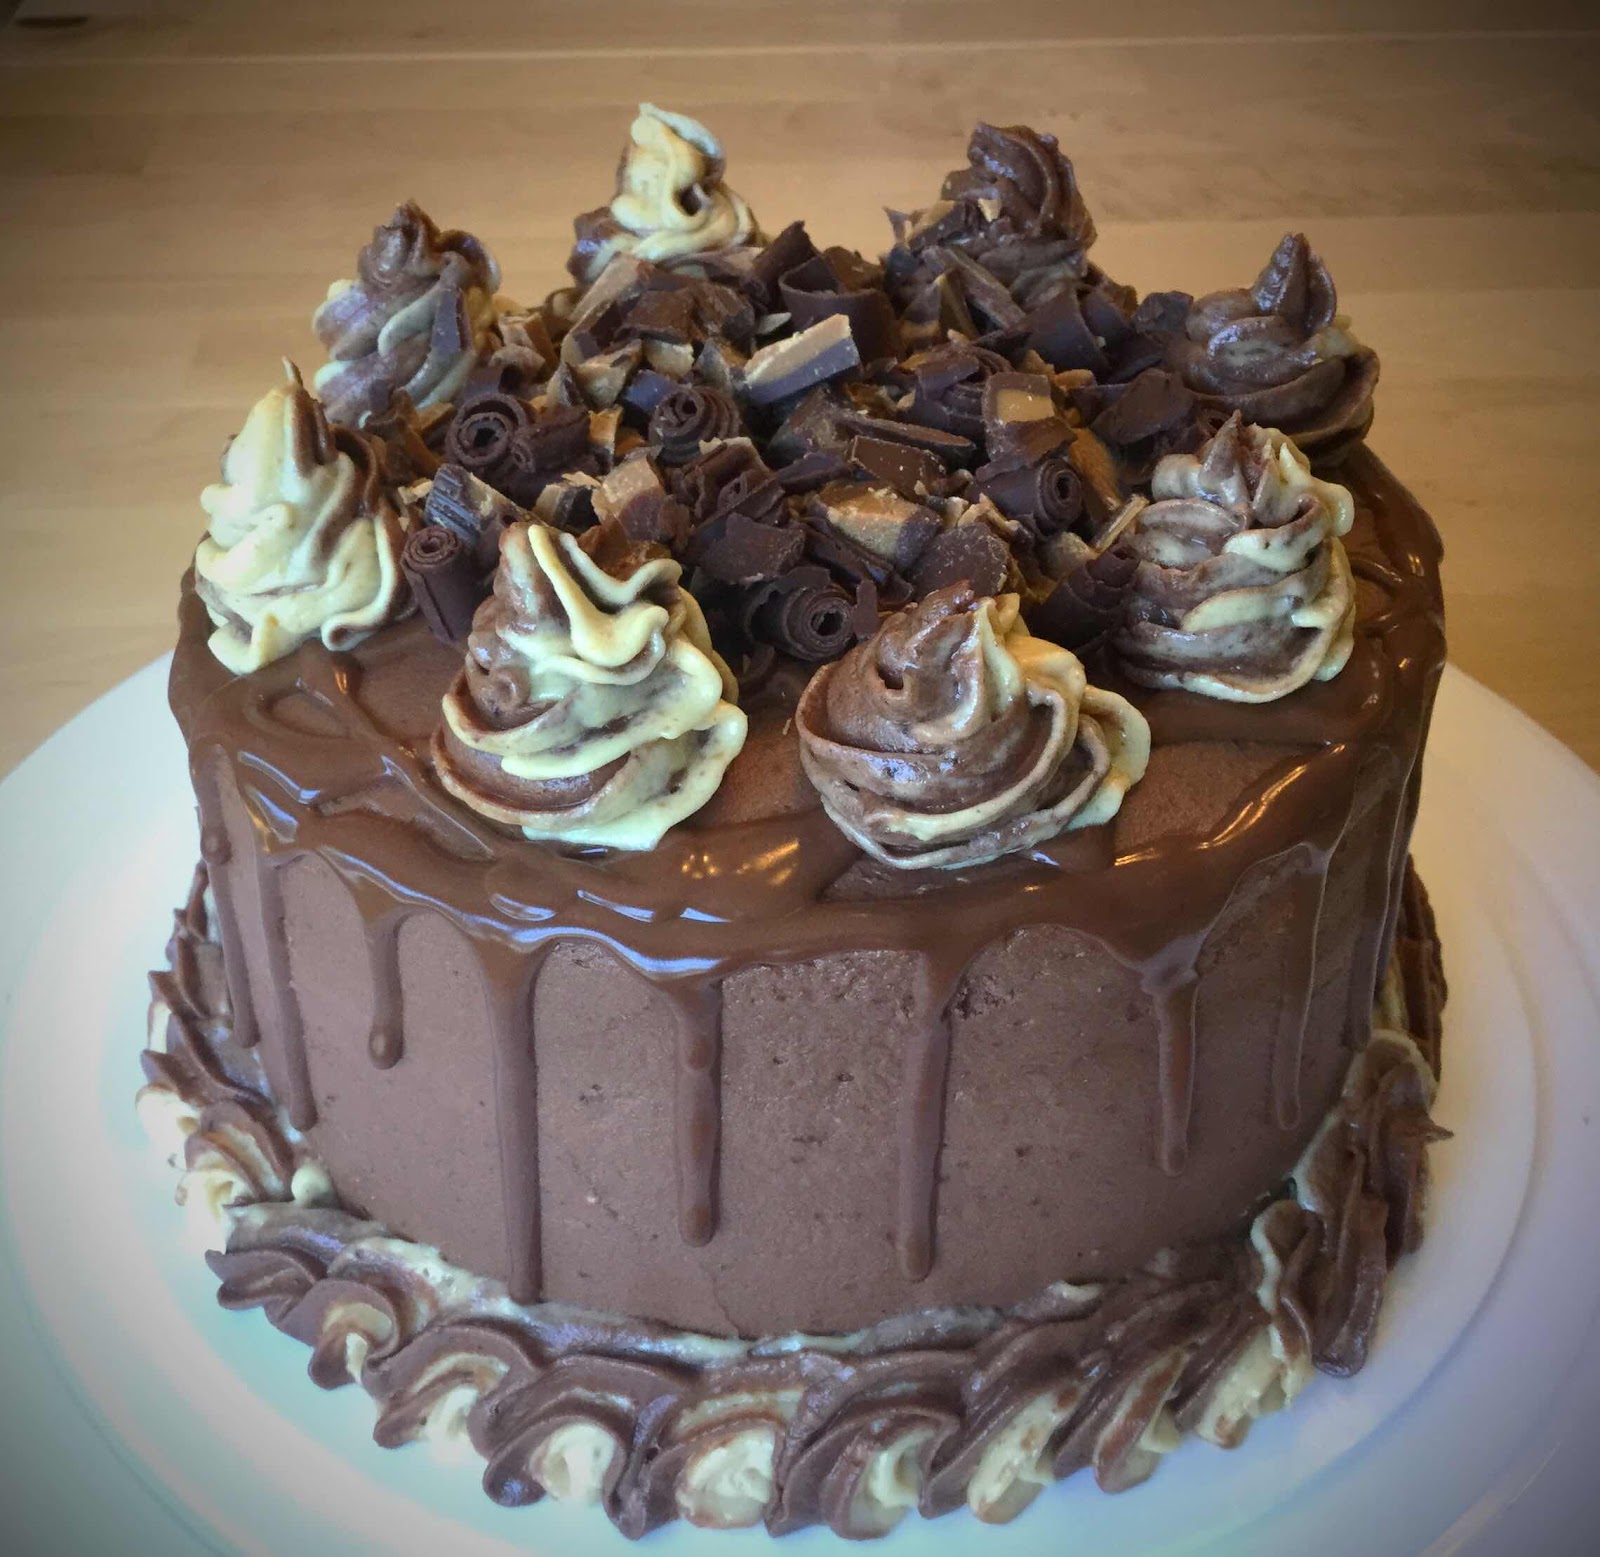
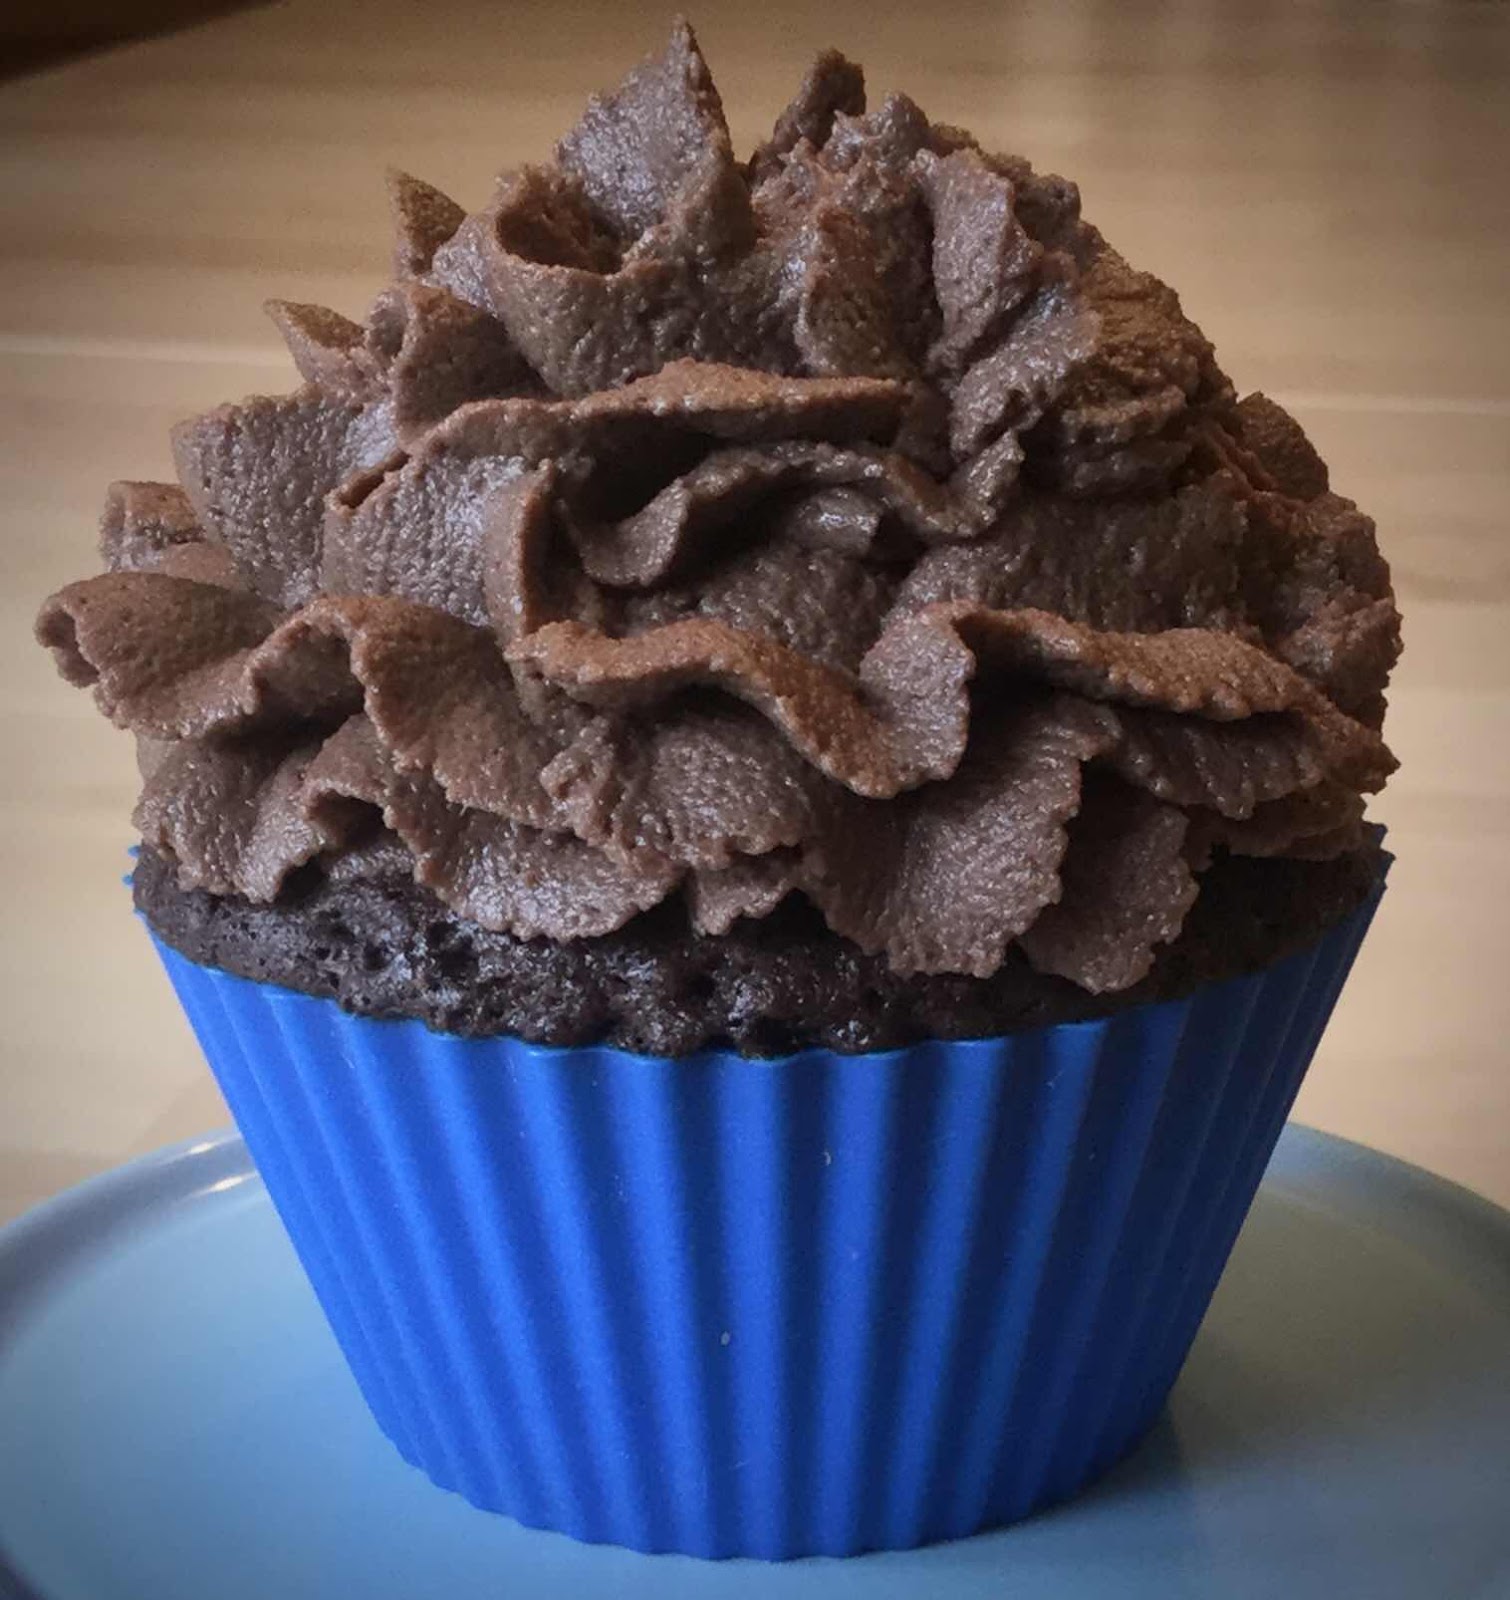
Lately I’ve enjoyed learning about cake decorating. I bought an inexpensive kit that includes a lot of fun decorating piping tips and a cake turntable, so now my keto cakes can look more professional. My first few attempts have turned out remarkably well! The biggest problem about making low carb cakes or cupcakes is that it can be difficult to get the frosting just right. I’ve tried many recipes, but have finally come up with the very best! It has the taste and consistency of a true buttercream, but only 4 carbs (3 net carbs) for a generous 1/4 cup serving. This chocolate frosting is fudgy and so rich and delicious that my non-keto family really cannot tell this is sugar free. My husband is a serious chocoholic and gave this frosting his enthusiastic nod of approval when I made him this Chocolate Peanut Butter Cake for Father’s Day.

The Best Low Carb Chocolate Fudge Frosting
Makes about 12 servings

2 ounces unsweetened baker’s chocolate, chopped
1/2 tablespoon refined coconut oil
2 tablespoons unsalted butter, room temperature
4 ounces cream cheese, softened 
8 ounces mascarpone cheese, room temperature 
2/3 cup powdered erythritol sweetener (LaKanto or Swerve)
2 tablespoons unsweetened cocoa powder
1/2 teaspoon vanilla extract
2-3 tablespoons heavy cream, room temperature (or as needed to reach the desired consistency)

1. Place the chopped baker’s chocolate and coconut oil in a microwaveable bowl. Microwave on high in 15-20 second increments until chocolate has melted. Stir until smooth. Set aside to cool to lukewarm.

2. In a large bowl and using an electric mixer, whip together the butter, cream cheese and mascarpone cheese until combined and fluffy. Add the sweetener and cocoa powder and continue beating until well combined. You may need to scrap down the sides of the bowl occasionally. 

3. Add the vanilla extract and melted chocolate and beat again to combine. Add one tablespoon of the heavy cream at a time and beat until your frosting reaches the desired, spreadable consistency. (If you’re using piping tips, make sure your frosting isn’t too stiff or thick because it may be difficult to pipe it through the tip.)

4. This recipe makes enough frosting for 16-18 cupcakes, a single layer 9” round or 13”x9” sheet cake or a double layer 6” cake. The frosting can be refrigerated but, for best results, allow to come to room temperature before frosting your cake.

Low Carb Chocolate Fudge Frosting
Nutritional Information per 1/4 cup: 186 calories, 3.7 g carbohydrates (1 g dietary fiber, 0.4 g sugars, 1 g sugar alcohols), 17.8 g total fat (11.5 g saturated fat, 0 g trans fat), 39 mg cholesterol, 47 mg sodium, 7.3 mg calcium, 1 mg potassium, 58 ug Vit A, 3.2 g protein. Net carbs per serving: 2.7 grams

Recipe and photos by Kathy Sheehan, copyright 2020
All rights reserved. Please do not duplicate without the author’s permission. 
Saturday, March 21, 2020

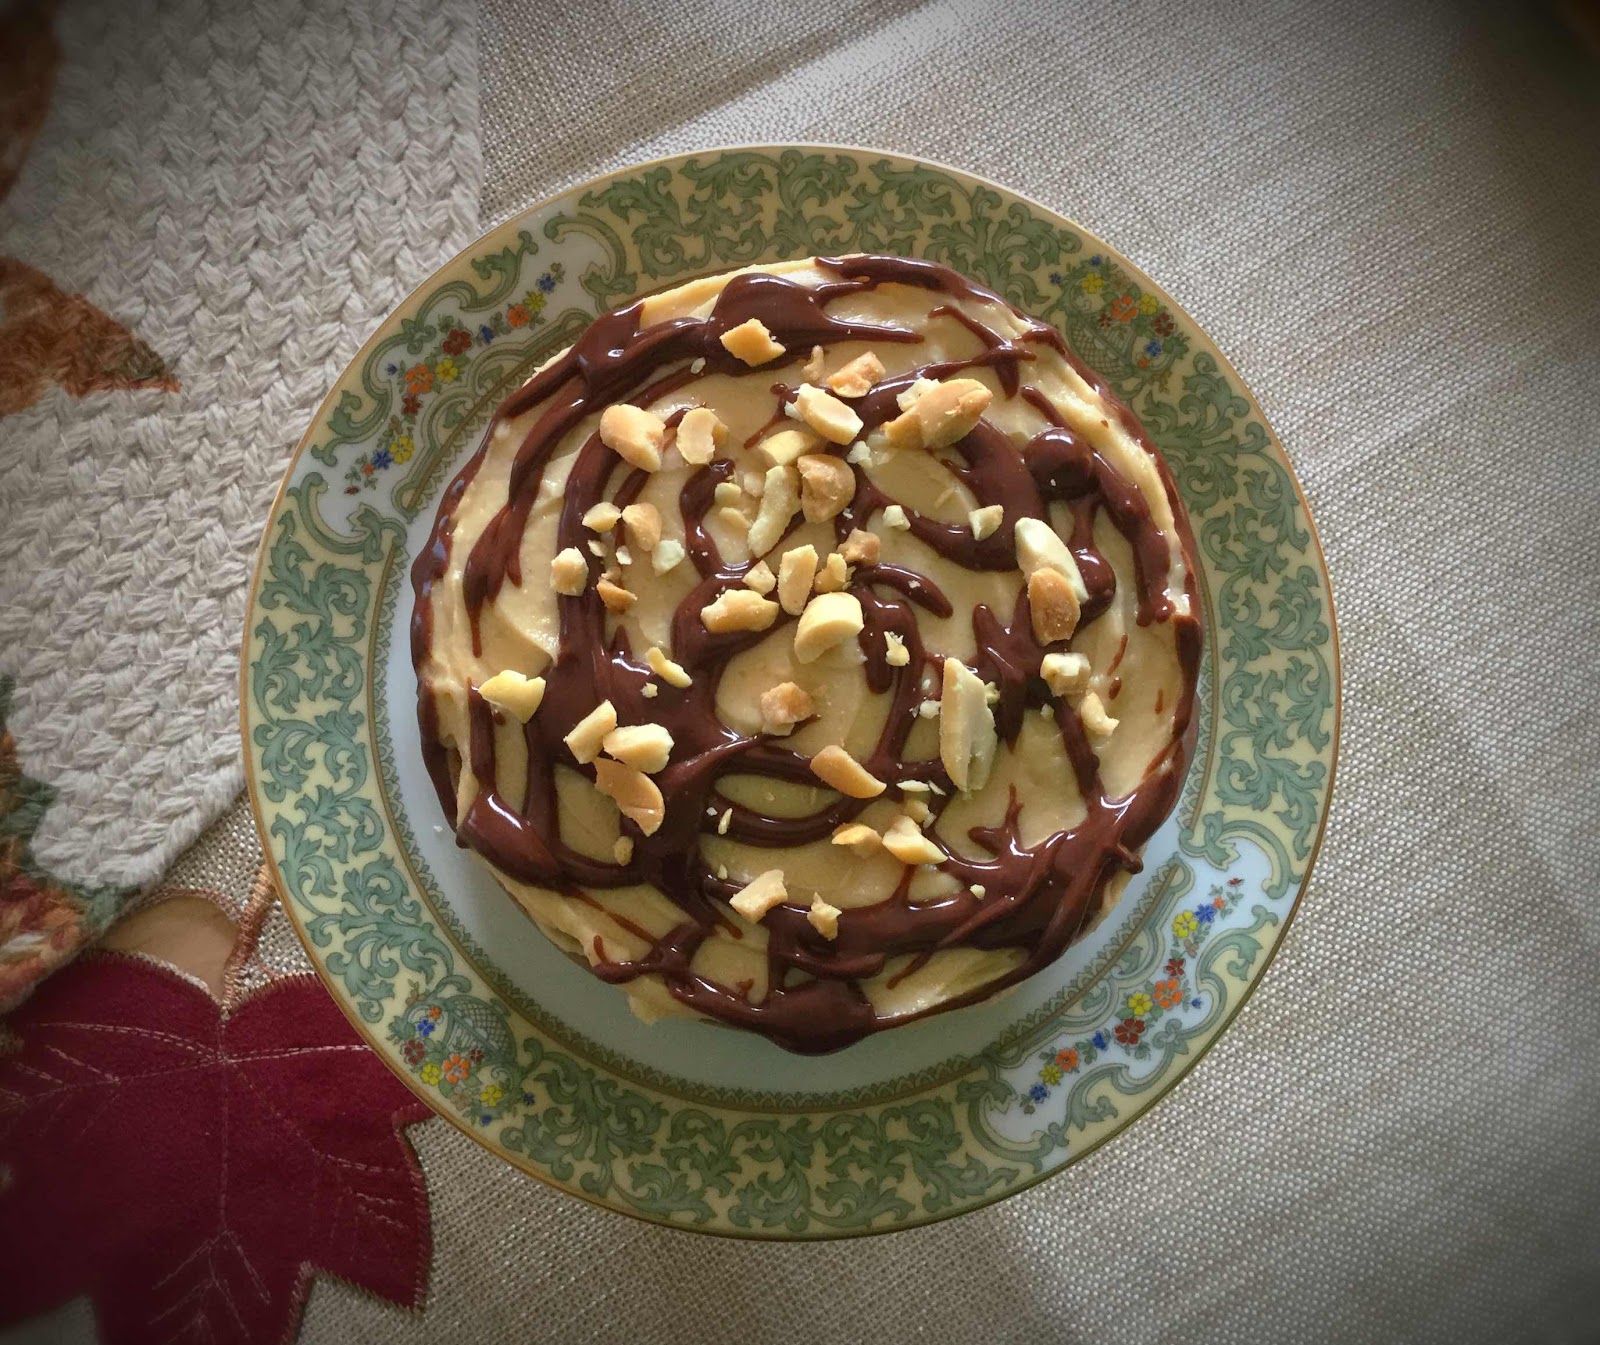
Chocolate Peanut Butter Chaffle Cake

Chocolate Peanut Butter Chaffle Cake
I love mini desserts and chaffles make it so easy to make a luscious, decadent little cake, without having a lot of leftovers to worry about. This particular cake includes my favorite flavors, and probably yours too: chocolate and peanut butter! You can’t go wrong with this little gem of a dessert for a special occasion or just because....

Chocolate Peanut Butter Chaffle Cake
Makes 1 mini cake (2 servings)

Chaffles:
1 teaspoon coconut flour
1 teaspoon unsweetened dark cocoa powder
1/8 teaspoon baking powder
1 tablespoon granulated erythritol sweetener
1 large egg, beaten (or 2 egg whites)
2 teaspoons creamy peanut butter, no sugar added
1 teaspoon water
1/8 teaspoon chocolate or vanilla extract
1 drop of peanut butter flavoring (optional)

Peanut Butter Frosting:
1 ounce cream cheese, softened
1 1/2 tablespoons creamy peanut butter, no sugar added and at room temperature 
1 tablespoon butter, softened 
1 1/2 tablespoons powdered erythritol sweetener 
1/8 teaspoon vanilla extract
2 to 2 1/2 tablespoons heavy cream

Chocolate Ganache Drizzle:
2-3 tablespoons heavy cream
3 tablespoons semi-sweet, sugar free chocolate chips, chopped (such as Lily’s or Bake Believe)
Additional hot heavy cream, if needed

1-2 teaspoons chopped peanuts to garnish, if desired

1. Preheat a 4-inch mini waffle maker. Whisk together all of the chaffle ingredients until a smooth batter is formed. Divide the batter in half and spoon about 4 tablespoons of batter in the waffle maker, spreading it around with the back of a spoon to cover all the waffle bumps. Close and cook for 3 to 3 1/2 minutes. Remove to a wire rack to cool. Repeat with the remaining batter to make a second chaffle. This recipe makes two chaffles. Cool completely before frosting.

2. Peanut Butter Frosting: In a medium bowl, beat the cream cheese, peanut butter and butter with an electric mixer until light and fluffy. Beat in the powdered sweetener and vanilla extract. Beat in the cream, one tablespoon at a time, until a fluffy and spreadable consistency is achieved.

3. Place one chaffle on a plate and spread with about 1/2 of the frosting. Add the second layer and top with the remaining frosting. Refrigerate for about 20 minutes.

4. Meanwhile, make the Chocolate Ganache: In a small bowl or saucepan, heat the heavy cream in the microwave or on the stovetop until hot and beginning to bubble at the edges. Add the chocolate chips and allow to sit for a few minutes to melt before stirring. Whisk until smooth. If your ganache is too thick, add additional hot cream, 1 teaspoon at a time, and whisk until you achieve at smooth and pourable consistency. (Note: This recipe will make more ganache than you need. Store the leftover in an airtight container at room temperature for up to 3 days. Simply reheat gently in the microwave, 10 seconds at a time, until melted.)

5. Drizzle about 1 tablespoon of ganache over the top of the cake and sprinkle with chopped peanuts. 

Chocolate Peanut Butter Chaffle Cake (top view)
Nutritional Information per 1/2 cake: 367 calories, 7.2 g carbohydrates (2.5 g dietary fiber, 1.2 g sugars), 33.8 g total fat (14.3 g saturated fat, 0 g trans fat), 153 mg cholesterol, 212 mg sodium, 55.8 mg calcium, 48 mg potassium, 222 mg Vit A, 1 mg iron, 9.7 g protein. Net carbs per serving: 4.7 grams

Photos and recipe by Kathy Sheehan, copyright 2020
All rights reserved. Please do not duplicate without the author’s permission. 
Saturday, December 14, 2019

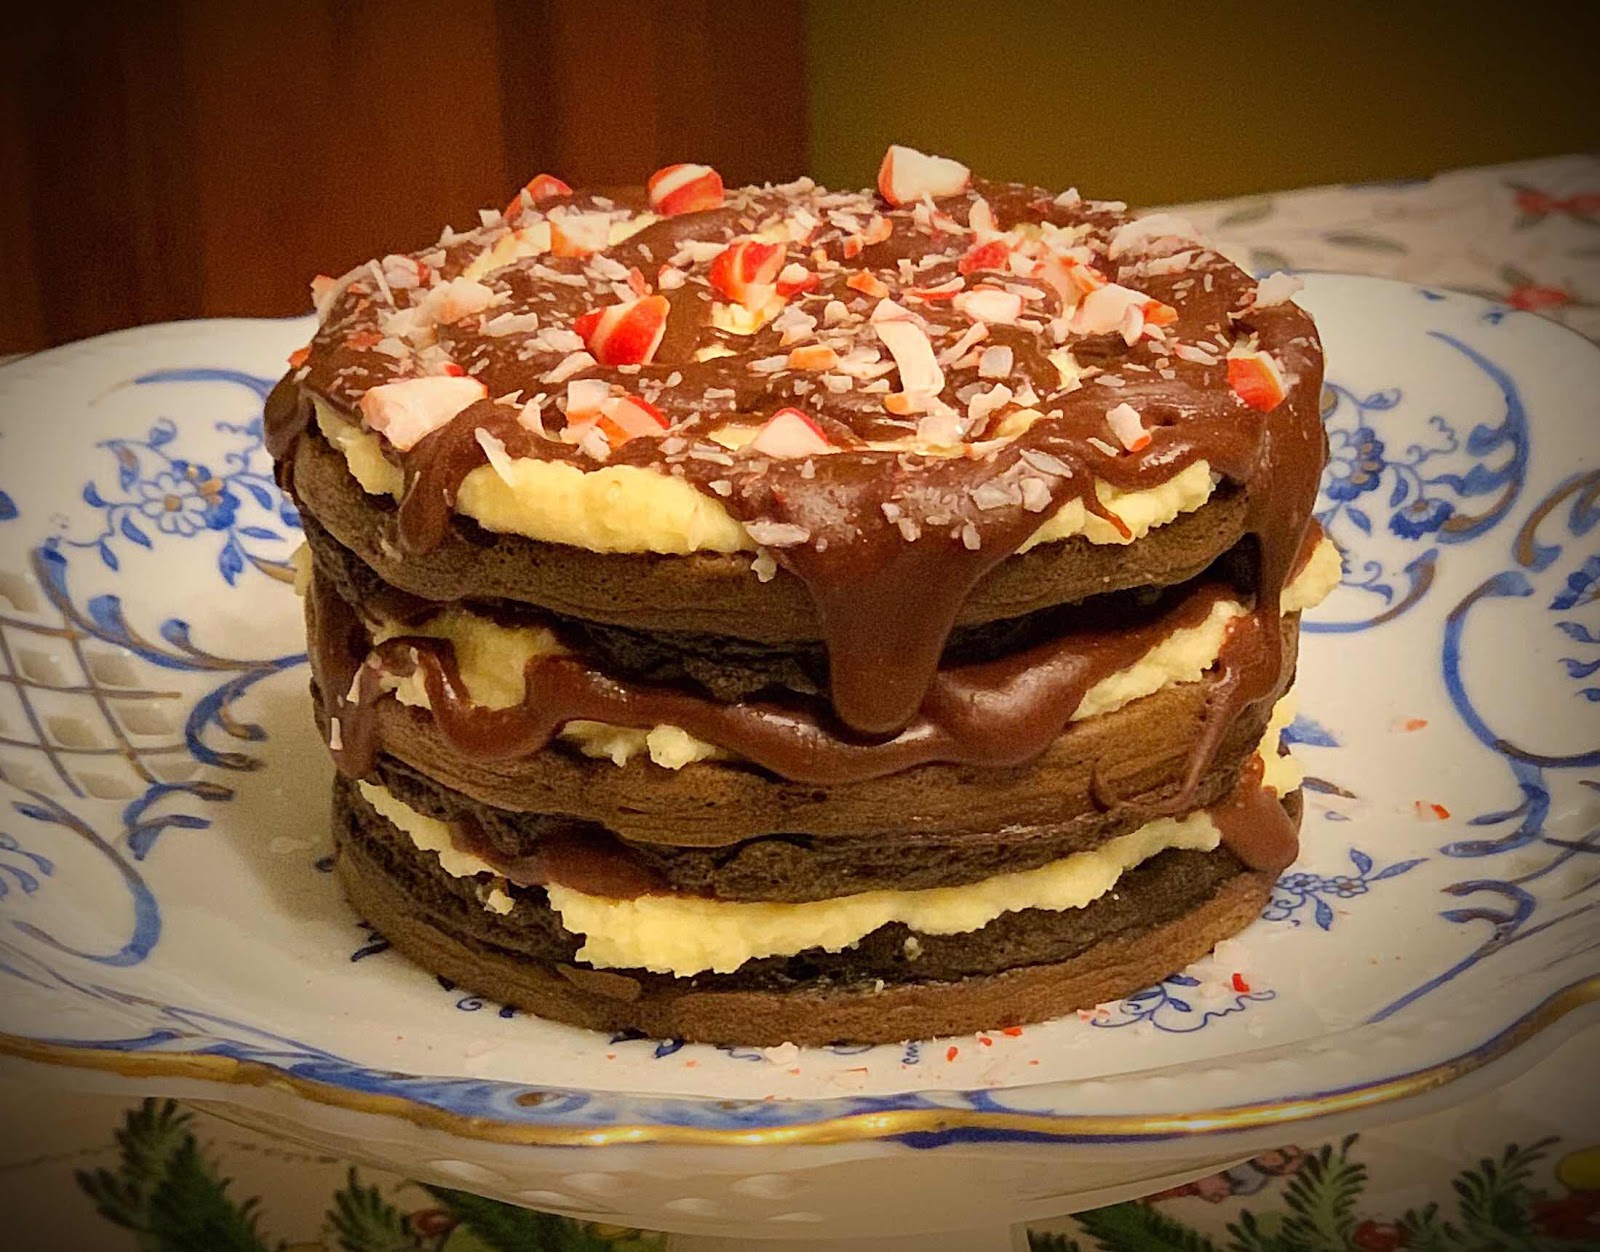
Chocolate Peppermint Bark Chaffle Cake

Chocolate Peppermint Bark Chaffle Cake
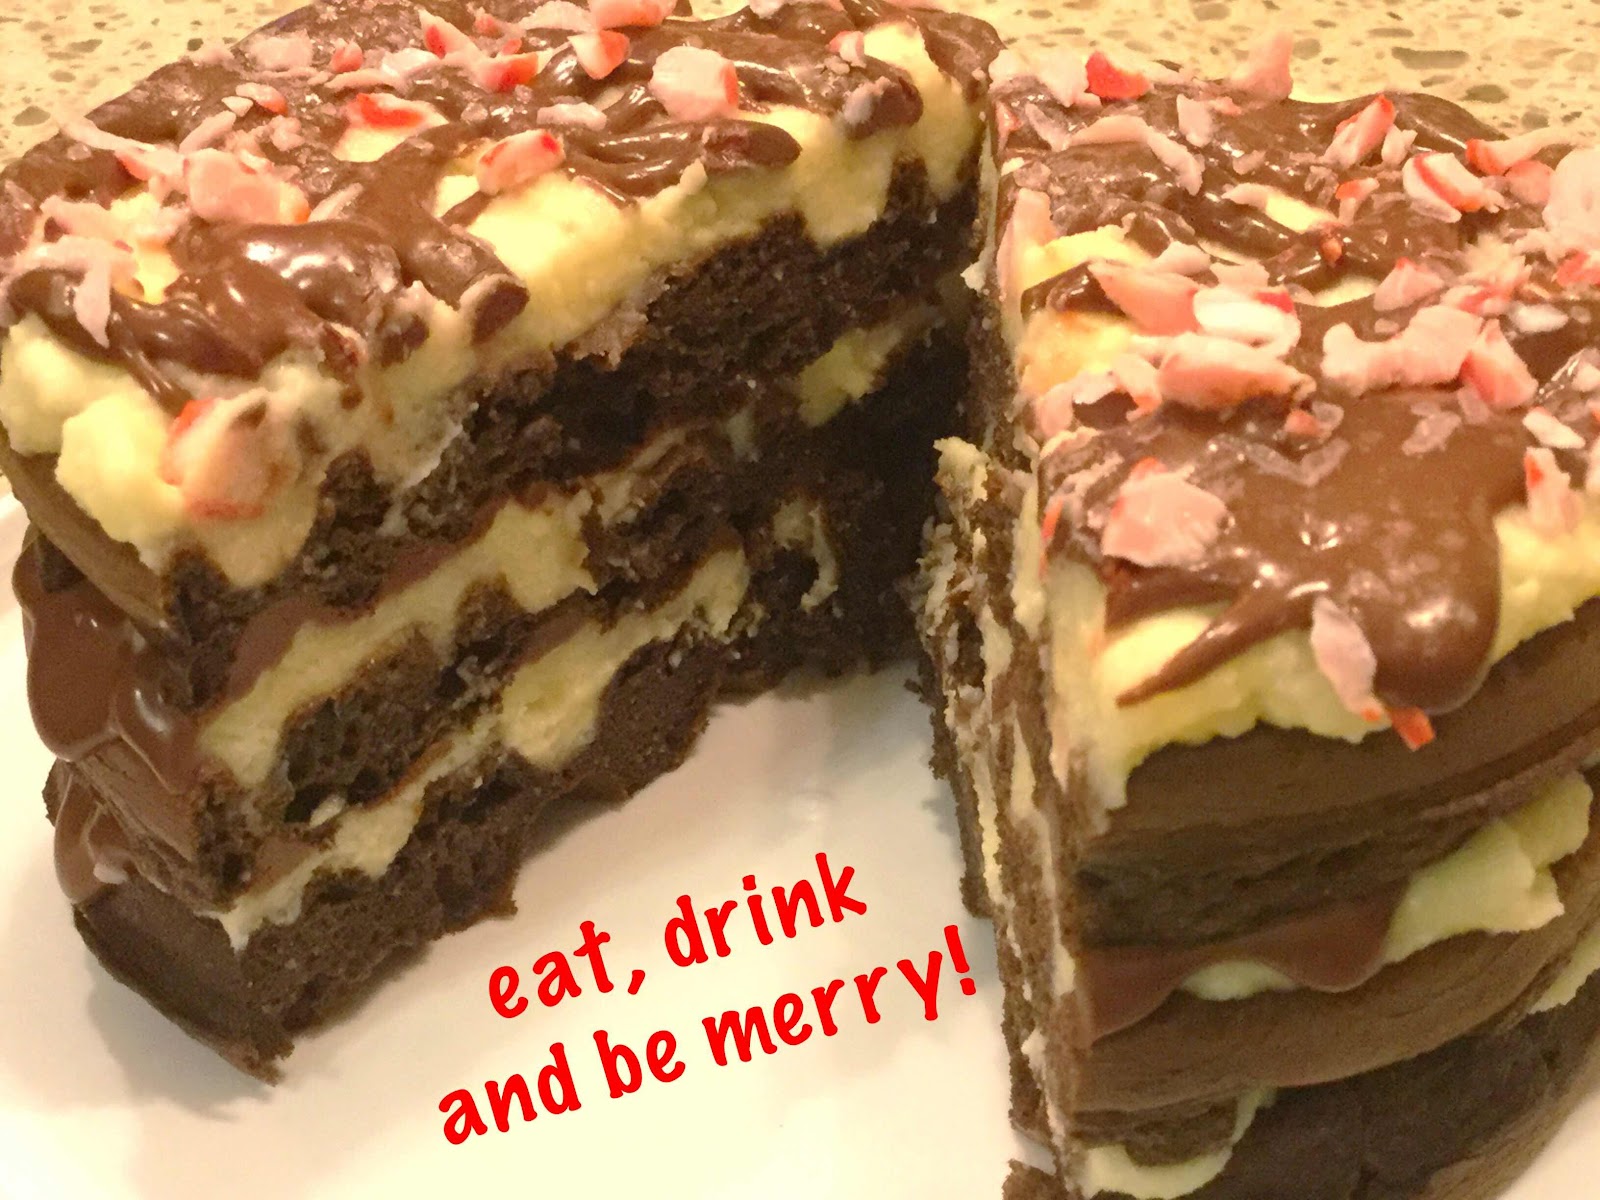
Wherever you go at this time of year, you’ll see boxes of Peppermint Bark candy. The combination of chocolate, vanilla or white chocolate with peppermint is a classic holiday treat. This low carb chaffle cake will definitely please anyone who loves this flavor combo. The sugar free peppermint candy sprinkled on top of the finished cake gives it a festive look. This triple-layer, mini cake is perfect for sharing a bit of Christmas cheer with your best friend!

Chocolate Peppermint Bark Chaffle Cake
Makes 2 servings

Chaffle Ingredients:
1 large egg, room temperature
2 tablespoons cream cheese, softened (or substitute sour cream)
1 tablespoon dark cocoa powder, unsweetened
2 tablespoons almond flour
1/4 teaspoon baking powder
2 teaspoons monkfruit-erythritol sweetener, granulated
1/8 teaspoon instant coffee powder (optional)
8 drops monkfruit extract (or add another teaspoon of granulated sweetener)
1/4 teaspoon pure peppermint extract
1 teaspoon water

Vanilla Buttercream Frosting:
1 ounce cream cheese, softened
3 tablespoons unsalted butter, room temperature
3 tablespoons powdered erythritol sweetener
1/2 teaspoon vanilla extract
2 1/2 tablespoons heavy whipping cream (plus more, if needed)

Chocolate Peppermint Ganache: (see *Note)
4 tablespoons heavy whipping cream
3 tablespoons sugar free dark or semi-sweet chocolate chips
1/4 teaspoon pure peppermint extract
Additional heavy cream, if needed

Topping:
1 teaspoon sugar free peppermint candy, crushed into small pieces

1. Preheat a mini waffle maker. (If using a larger waffle maker, you will need to double or triple this recipe.)

2. Mix together all of the chaffle ingredients and whisk until a smooth batter forms. Divide the mixture into thirds and spoon about 3-4 tablespoons of the batter onto the heated waffle maker. Close the lid and cook for 3 to 3 1/2 minutes. Remove chaffle to a wire rack to cool completely while you make two more chaffles. (This recipe makes 3 mini waffles.)

3. To make the Vanilla Buttercream Frosting, whip together the softened cream cheese and butter using a handheld or standing mixer until well combined. Beat in the sweetener and vanilla extract, then add the heavy cream 1 tablespoon at a time until a spreadable consistency is achieved. 

4. To make the Chocolate Peppermint Ganache, heat the heavy whipping cream in a small bowl and microwave in 15 second intervals until the cream is very hot and beginning to bubble around the edges. (You can also heat the cream in a small saucepan on the stove.) Add the chocolate chips and allow to sit for 5-8 minutes until the chocolate has melted, then whisk until smooth. Add the peppermint extract and stir to combine. If your ganache is too thick, add 1-2 teaspoons of hot cream and whisk until it is pourable. If needed, you can reheat for 6-8 seconds in the microwave, but do not allow the mixture to boil.

5. To assemble cake: Place one chaffle onto a plate, spread with about 1/3 of the buttercream frosting and drizzle with 1 tablespoon of ganache. Top with a second layer and spread with frosting and drizzle with ganache. Finally, add the last layer, spread with the remaining frosting and drizzle with 1-2 tablespoons of ganache and sprinkle the top with 1 teaspoon of crushed sugar free peppermint candy. 

6. The cake can be served immediately or cover in an airtight container and refrigerate. Bring to room temperature before serving.

*Note: This recipe for ganache makes more than you will need, so set the remaining aside for another use. Store in an airtight container at room temperature for up to 3 days. Gently reheat in the microwave for about 10 seconds.

Eat, Drink and Be Merry!

Nutritional Information per 1/2 cake: 446 calories, 6.9 g carbohydrates (2.4 g dietary fiber, 1.1 g sugars), 44.4 g total fat (25 g saturated fat, 0 g trans fat), 214 mg cholesterol, 209 mg sodium, 75 mg calcium, 43 mg potassium, 411 mg Vit A, 2 g iron, 7.7 g protein. Net carb per serving: 4.5 grams

Photo and recipe by Kathy Sheehan, copyright 2019
All rights reserved. Please do not duplicate without the author’s permission. 
Wednesday, January 31, 2018

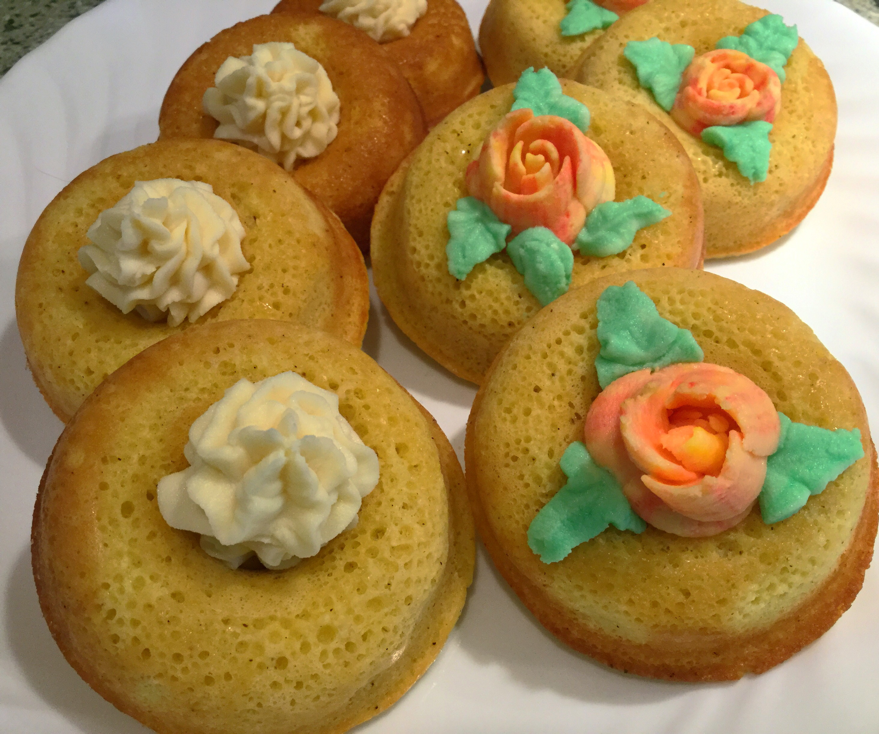
Frosted Vanilla Custard Donuts (Low Carb, Gluten Free)

Frosted Vanilla Custard Donuts
Vanilla custard is traditionally made with plenty of egg yolks, which are what make these donuts so rich and delicious. The batter rises up light and airy, so they have a tender crumb. If desired, this recipe would make wonderful cupcakes, but I like using my donut pan and filling each cavity high enough with batter that the hole of the donut disappears as it bakes, creating the perfect little platform for holding the dab of frosting. I just happen to have some decorating icing tips in my kitchen collection, so I had fun making them fancy and appropriate for Valentine’s Day, but that’s not necessary. Anyway you decorate them, these donuts will be both beautiful and delicious!

Frosted Vanilla Custard Donuts
Makes 8 donuts (more or less depending on your donut pan)

1 cup almond flour
1/4 cup erythritol sweetener, granulated
2 tablespoons unflavored whey protein powder
1 teaspoon baking powder
1/4 teaspoon vanilla powder (or seeds scraped from a vanilla bean)
1/8 teaspoon salt
1 large egg
2 egg yolks
1/4 cup heavy cream
1/4 cup almond or coconut milk
2 tablespoons butter, melted
1/2 teaspoon vanilla extract 

Frosting:
2 ounces cream cheese, room temperature
1 tablespoon butter, softened
4 ounces plain mascarpone cheese, room temperature
1/4 cup powdered erythritol (Confectioners), or to taste
1 teaspoon vanilla extract
2 tablespoons heavy cream

1. Preheat oven to 325 degrees F. Spray each cavity of your donut tin with non-stick cooking spray or grease with butter; set aside.

2. In a large bowl, whisk or sift together the almond flour, erythritol, whey protein powder, baking powder, vanilla powder and salt. Whisk to combine and until no lumps remain.

3. In a separate bowl, whisk together the egg, egg yolks, cream, almond milk, melted butter and vanilla extract. Add the wet ingredients to the dry ingredients and whisk well to combine. 

4. Fill each donut cavity to almost full. Be sure to fill each cavity until almost to the top because you want the donuts to puff up and fill in the hole as they bake, so there’s a place in the center of the donut to hold the frosting later. (see photo below) Bake for 14-16 minutes or until the edges are golden brown and the tops are just firm to the touch. Remove from the oven and let the donuts cool 10 minutes in the pan, then flip them onto a wire rack to cool completely.

Baked donut with center depression
5. To make the frosting: Whip together the room temperature cream cheese, butter and mascarpone cheese until fluffy using a handheld or standing electric mixer. Add the powdered erythritol and vanilla and beat until combined. Add the heavy cream 1 tablespoon at a time until the desired spreading consistency is reached. Taste and adjust sweetness to your taste. If desired, put the frosting into a piping bag with a decorator tip and pipe (or spoon) a tablespoon or so of the frosting into the center of each donut. (Note: This recipe for frosting will yield more than you need for eight donuts, which allows for dividing the frosting into batches and coloring each differently, if desired. Save any leftover frosting in an airtight container in the refrigerator to use for another recipe.)

Frosted Vanilla Custard Donuts
Nutritional Information per donut with 1 tablespoon of frosting (based on eight per recipe): 230 calories, 8.6 g carbohydrate (1.5 g dietary fiber, 0.8 g sugars, 13.5 g sugar alcohols), 21.7 g total fat (9.2 g saturated fat, 0 g trans fat), 114 mg cholesterol, 139 mg sodium, 102 mg calcium, 130 mg potassium, 1 mg iron, 431 mg Vit A, 6.1 g protein. Net carbs per serving: 7.1 grams.

Recipe and photos by Kathy Sheehan, copyright 2018
All rights reserved.  Please do not duplicate without the author’s permission. 
Monday, September 25, 2017

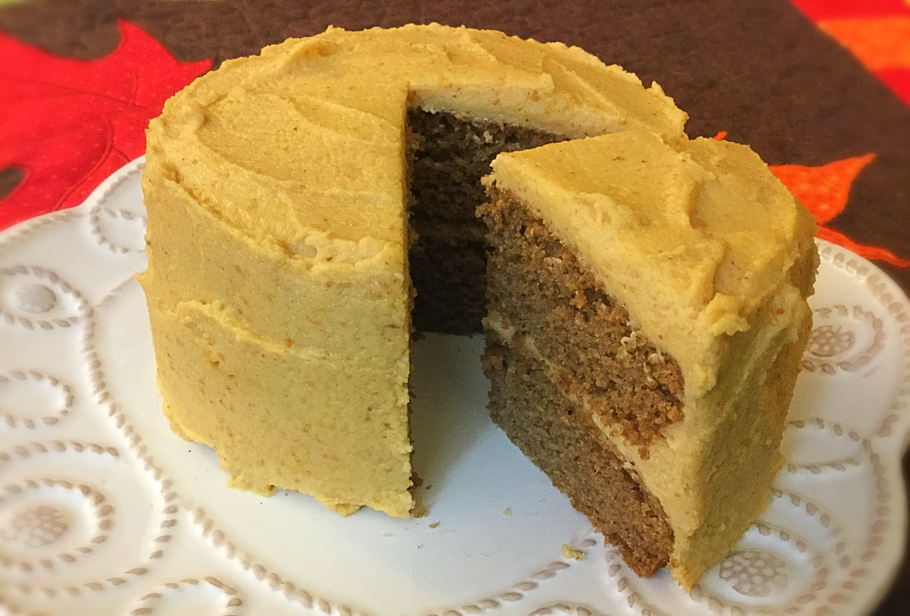
Mini Spice Cake with Caramel Frosting

Mini Spice Cake
I have a set of adorable 4-inch springform pans, which are the perfect size for making mini desserts. When I want a little something sweet, but don't want an entire cake calling my name every time I walk through the kitchen, I reach for my mini pans. Four small servings, just enough for my small family, and the craving is satisfied and the temptation is gone. This particular cake was inspired by my husband's Aunt Margie. She made a spice cake with penuche frosting that he remembers fondly. Penuche is a brown sugar fudge similar in taste to pralines and is a southern favorite. Of course, brown sugar was not an option for me, so I recreated the flavor of her beloved frosting using low carb ingredients that passes the husband taste test! The addition of caramel flavoring gives the frosting a richer, more authentic flavor and tones down the peanut butter a bit, but it's just as delicious without it. I think you'll agree that this flavor combination of warm spices and caramel is a perfect fall treat.

Mini Spice Cake with Caramel Frosting (Low Carb, Gluten Free)
Makes 1 mini cake (4 servings)

Cake Ingredients:

5 tablespoons almond flour
1 tablespoon coconut flour
1 tablespoon unflavored whey protein powder
1 teaspoon unsweetened cocoa powder
1/2 teaspoon baking powder
1/2 teaspoon ground cinnamon
1/4 teaspoon ground ginger
1/4 teaspoon ground nutmeg
1/8 teaspoon ground cloves
A pinch of salt
2 tablespoons butter, room temperature
2 tablespoons Golden LaKanto Monkfruit Sweetener (or other erythritol sweetener)
1 large egg
1/2 teaspoon vanilla extract
2 1/2 tablespoons heavy cream or almond milk

Frosting Ingredients:

2 ounces cream cheese, room temperature 
2 tablespoons butter, room temperature
2 tablespoons peanut butter, no sugar added
2 tablespoons powdered erythritol (I used Swerve Confectioners)
4 drops English Toffee stevia (I used Sweet Leaf brand)
1/4 teaspoon vanilla extract
2 drops caramel flavoring or extract, optional (I used Capella brand, see photo below)
2 tablespoons heavy whipping cream

1. To make the cake: Preheat the oven to 325 degrees Fahrenheit. Grease two 4-inch springform pans or ramekins well; set aside.

2. In a medium bowl, whisk together the almond flour, coconut flour, whey protein powder, cocoa powder, baking powder, spices and salt; set aside. In a separate bowl, cream together the butter and erythritol. Add the egg and vanilla and beat on high until well combined. Add 1/2 of the dry ingredients and beat well. Add 1 tablespoon of cream (or almond milk) and beat again. Repeat with the remaining dry ingredients and cream, beating well between each addition until a smooth batter is formed. Divide the batter equally between the two prepared pans and level out.

3. Bake for 20-23 minutes or until the center is set. Remove from the oven and cool in the pans for about 10 minutes, then run a sharp knife around the edges and remove the cakes from the pans and allow to cool completely on a wire rack before frosting.

4. To make the frosting: In a medium bowl, beat the softened cream cheese, peanut butter and butter. Add the powdered sweetener, stevia drops, vanilla extract and caramel flavoring (if using) and beat until well combined. Add the whipping cream one tablespoon at a time, whipping after each addition, until fluffy and a spreadable consistency is reached.

5. Assemble the cake by placing one layer on a serving plate and spread with frosting. Place the second layer on top and spread the remaining frosting on the top and sides. Chill the cake for about 30 minutes to set the frosting before serving. 

Caramel Flavoring
Nutritional Information per serving (1/4 cake): 311 calories, 7.9 g carbohydrates (2.1 g dietary fiber, 1.4 g sugars, 6.8 g sugar alcohols), 28.5 g total fat (14 g saturated fat, 0 g trans fat), 107 mg cholesterol, 167 mg sodium, 103.5 mg calcium, 42 mg potassium, 1 mg iron, 711 mg Vit A, 7.7 g protein. Net carbs per serving: 5.8 grams

Recipe and photo by Kathy Sheehan, copyright 2017
All rights reserved. Please do not duplicate without the author's permission.
Tuesday, December 14, 2010

Peppermint Bark Cake

On Christmas Eve, it is a tradition in our family to have a simple meal of soup, salad and rolls. The idea is to make things easy and restful before the big day and allow us to attend evening church services without the hassle of preparing a large meal. With that simple fare, I always like to prepare a very special and memorable dessert, since it is usually the highlight of the meal. This year, I was inspired by the Chocolate-Peppermint Bark candy that is a holiday favorite of many and transformed it into a cake that sparkles with peppermint crystals!

If you're making this ahead, sprinkle the candy on top just before serving to preserve it's sparkle and freshness. To create the peppermint crystals, I broke four ½-ounce candy canes into a plastic bag and gently hammered them with the smooth side of my meat mallet (or use the side of a rolling pin) until they were the size I wanted. I removed 2 tablespoons and reserve it for the topping, then continued hammering until the candy was finely crushed (this I used in the batter).

This beautiful dessert not only makes a festive centerpiece, it is rich and decadent. The dark chocolate cake is fudge-like with the slightest hint of peppermint, the filling is creamy and the white chocolate topping is smooth and delicious. The grand finale is the sweet, minty crunch from the crushed candy canes. I already know it will be a hit with my family this year. (From sampling my "test cake," my non-diabetic husband has declared this the best recipe I've created so far!) I hope it will be enjoyed by your family, as well. Merry Christmas!

Peppermint Bark Cake
(Makes 12 servings)

Cake Ingredients:
¾ cup almond milk
1 oz. unsweetened or bittersweet baking chocolate (1 square), chopped
¾ teaspoon instant coffee granules (decaf or regular)
1¼ cups almond flour (or finely ground almonds)
¾ cup all purpose flour
½ cup cocoa powder
1 teaspoon baking soda
1½ teaspoon baking powder
¼ teaspoon salt
3 tablespoons finely crushed peppermint candies
6 tablespoons butter, softened
¼ cup sugar
3 large eggs
One 2.5 oz. container of baby food prune puree (about 3 tablespoons)
1 cup Splenda granular
¼ teaspoon peppermint extract
1 teaspoon vanilla extract

Chocolate Cream Filling Ingredients:
1½ tablespoons cocoa powder
½ cup almond milk (original or unsweetened)
½ cup mascarpone cheese
3½ tablespoons Splenda granular
1 teaspoon vanilla extract
2 tablespoons fat-free, sugar-free chocolate fudge instant pudding mix (dry powder)

Topping Ingredients:
1½ tablespoons almond milk (or fat-free ½ & ½ can be substituted)
½ cup white chocolate morsels
2 tablespoons crushed peppermint candies

1. Prepare an 8" springform cake pan by placing a circle cut from parchment or wax paper in the bottom of the pan and spray sides with non-stick cooking spray; set aside. In a small saucepan, heat ¾ cup almond milk over medium-low heat to scalding or microwave on high for 60-90 seconds. Remove from heat and add the roughly chopped unsweetened baking chocolate square and instant coffee granules; stir until melted and smooth. Allow to cool for 20 minutes before proceeding; meanwhile preheat oven to 350-degrees and assemble the remaining cake ingredients.

2. In a small mixing bowl, sift together the flours, ½ cup cocoa powder, baking soda, baking powder, salt and 3 tablespoons finely crushed peppermint candies; set aside. In a large mixing bowl and using a handheld or standing mixer, cream the butter and sugar until light and fluffy. Add the eggs, one at a time, beating well after each addition. Add the prune puree, Splenda and extracts. Beat until well incorporated, stopping to scrape down sides of bowl at least once. Alternate adding the dry ingredients ½ cup at a time and the cooled milk and chocolate mixture until well combined, scraping down sides of bowl occasionally.

3. Spoon into prepared cake pan and bake for 38-42 minutes or until toothpick inserted in center comes out clean. Remove from oven and cool in pan for 10 minutes. Carefully remove cake from pan and move to a wire rack to cool completely.

4. Meanwhile make chocolate cream filling by first melting the 1½ tablespoons cocoa powder in almond milk over low heat or in the microwave for about 45-60 seconds on high. Stir to incorporate cocoa into milk. Set aside until cooled to room temperature. (If desired, place in refrigerator to hasten cooling.) Place mascarpone cheese in a large mixing bowl and add cooled almond milk mixture. Beat with a handheld or standing mixer on high until well combined and mixture is light and fluffy (it will resemble whipped cream). Add Splenda, extract and continue to beat until incorporated. Add the 2 tablespoons of chocolate instant pudding powder and beat well. Place in refrigerator for at least 10 minutes to set. With a serrated knife, cut cake into two layers. Stir chocolate pudding mixture before spreading onto lower half of cake. Top with top layer; set aside.

5. To make white chocolate topping, heat 1½ tablespoons milk and morsels in microwave for 15 seconds on high. Repeat if necessary. Allow to sit for 1-2 minutes. Stir until morsels are melted and mixture is smooth; set aside to cool. Mixture will thicken as it cools. To hasten cooling, refrigerate for 10-15 minutes until the consistency of a very thick, but pourable glaze, stirring occasionally.

6. Pour white chocolate topping onto the center of the top layer of cake and spread to edges if it doesn't spread out to cover top of cake and allow it to drip over the sides. Sprinkle with 2 tablespoons crushed peppermint candies. Allow topping to cool completely and set. Store in refrigerator, but allow to stand at room temperature for 15 minutes before serving.

Nutritional Information per serving (1/12th of cake): 325 calories, 31.3 g carbohydrate, 21 g total fat, 9.2 g saturated fat, 3.5 g fiber, 6.8 g protein.

Original recipe by Kathy Sheehan, copyright 2010

How does this cake recipe compare with a traditionally prepared cake? I've substituted almond flour for a large portion of the white flour and eliminated most of the high-carb sugar. These substitutions alone make a huge difference! For comparison, the same size serving of a similar cake made with traditional ingredients is 489.5 calories, 78.7 g carbohydrate, 24 g total fat, 14 g saturated fat, 2.2 g fiber and 4.8 g protein.

Saturday, March 20, 2010

Mini Peanut Butter Cupcakes with Chocolate Frosting

Recently I taught a cooking class entitled "How to Love Vegetables." We made main dish salads, vegetable snacks and nutritious side dishes but, just to prove how versatile vegetables can be, we also made these delicious miniature cupcakes that include grated zucchini in the batter. The amazing thing is, when peeled of its green skin, the zucchini is undetectable in the final result! The creamy, nutty peanut butter and sweet chocolate are the only flavors you'll taste. If you like Reese's Peanut Butter Cups, then you'll love these little 4-bite wonders at only 5 net carbs each. They are quick to make and fun to eat. What an ingenious way to sneak a little vegetable into a picky eater's diet!

Mini PB Cupcakes with Chocolate Frosting
(Makes 18 mini cupcakes)

½ cup of all-purpose flour
½ cup almond flour (or finely ground almonds)
1 teaspoon baking powder
1/2 teaspoon baking soda
1/8 teaspoon salt
1 large egg
3 tablespoons creamy peanut butter
½ cup Splenda granular (not the baking blend)
2 tablespoons canola oil
1 teaspoon vanilla extract
½ cup peeled zucchini, finely grated (make sure it is finely grated)
1/3 cup almond milk or skim milk

Chocolate frosting ingredients:
1 tablespoon cocoa powder (I used Hershey’s Special Dark)
1/3 cup almond milk
¼ cup mascarpone cheese (in the specialty cheese display at the grocery)
1½ tablespoons Splenda granular
1 tablespoon sugar-free, fat-free chocolate pudding mix

1. Preheat oven to 350-degrees. Arrange a rack in center of oven. Line muffin tin with paper liners. This recipe makes 18 mini cupcakes.

2. In a small bowl, whisk together the flour, almond flour, baking powder, baking soda and salt; set aside. In a large bowl, beat the egg until light and lemon colored using a handheld or standing mixer. Add the peanut butter, Splenda, canola oil and vanilla. Continue beating on medium-high speed for about 2-3 minutes. (Don't underbeat this step, you need to fluff up the egg mixture with air.) Beat in the grated zucchini on low speed until fully incorporated.

3. Alternate adding the dry ingredients with the milk and beat after each addition, scraping down the bowl occasionally with a rubber spatula. Use a small cookie scoop, spoon batter into the muffin cups until ¾ full (do not overfill).

4. Bake until a toothpick inserted into the center comes out clean. Test after 12 minutes and, if needed, bake another 1 to 2 minutes. The tops will only be slightly browned. Do not overbake because you don't want them to dry out.

5. Remove cupcakes to wire rack and cool completely before icing. To make frosting: Mix together the cocoa powder and almond milk and heat in the microwave for 20 seconds on high. Whisk until cocoa is incorporated and mixture is smooth. Set aside to cool, about 10-15 minutes. Add the mascarpone cheese and Splenda. With a handheld mixer, beat until light and fluffy (it should resemble a soft whipped cream). Add the dry powder from the pudding mix and beat until thickened. Refrigerate for at least 5 minutes until thickened and set. Stir before icing cupcakes.

Nutritional Information per cupcake with 2 generous teaspoons of frosting: 86.1 calories, 5.7 g carbohydrates, 6 g total fat, 1.3 g saturated fat, 0.8 g fiber, 2.4 g protein.

Original recipe by Kathy Sheehan, copyright 2009

Saturday, March 6, 2010

Mocha Cupcakes with Bailey's Irish Cream Frosting

Next weekend, our church is hosting a St. Patrick's Day dinner and I was asked to adapt a dessert recipe that would be appropriate for diabetics and others looking for a healthier alternative. The original recipe was loaded with saturated fat and carbohydrate, so some serious adjustments needed to be made. It was a fun challenge that required several delicious "taste testings" before a perfected recipe was finally obtained. If you can't find any instant espresso powder (which may not be a common ingredient found at the supermarket), you can substitute instant coffee granules and increase amount by ½ tablespoon. Also, if you want the Bailey's Irish Cream taste to really come through, eliminate the final dusting of espresso powder.

Now, the moment you've been waiting for (drum roll, please)...I am happy to present the following winning makeover recipe with only 11.3 net carbs per serving. Happy St. Patrick's Day!

Mocha Cupcakes with Bailey's Irish Cream Frosting
(Makes 15 cupcakes)

1/3 cup boiling water
2 tablespoons instant espresso powder (regular or decaf)
¼ cup almond milk
1¼ cups almond flour (or finely ground almonds)
¾ cup all-purpose flour
1 teaspoon baking powder
½ teaspoon baking soda
¼ teaspoon salt
5 tablespoons unsalted butter, softened
1½ tablespoons canola oil
One 2.5 oz. container of baby food prune puree (about 3 tablespoons)
2 tablespoons sugar
1 cup Splenda granular
½ teaspoon butter flavor extract
2 large eggs (room temperature)

Frosting Ingredients:
½ cup mascarpone cheese (4 oz.)
1/3 cup almond milk
1½ tablespoons Bailey's Irish Cream
1 tablespoon Splenda granular
2 tablespoons sugar-free, fat-free instant white chocolate pudding mix (dry powder)
dust with espresso powder

1. Preheat oven to 350-degrees. Pour boiling water over espresso powder and stir until dissolved. Combine espresso mixture with almond milk and let cool. Meanwhile, line muffin tin with paper liners; set aside. In a small mixing bowl, sift together the flours, baking powder, baking soda and salt; set aside.

2. In a large mixing bowl, cream together the butter, canola oil, sugar, Splenda, butter extract and prune puree until light and fluffy, about 3 minutes. Add eggs one at a time, beating well after each addition. Alternate adding the dry ingredients with the espresso and milk mixture, beginning and ending with flour mixture. Scrape down sides of bowl occasionally. Fill muffin cups ¾ full (do not overfill) and bake for 18-20 minutes until a toothpick inserted in center of cupcake comes out clean. Remove from oven and allow cupcakes to cool in pan for a few minutes, and then remove them to a wire rack to cool completely.

3. After cupcakes have cooled, make the frosting by combining mascarpone cheese, almond milk, Bailey's Irish Cream and Splenda in a mixing bowl. Beat well until mixture thickens to soft peaks. Add 2 tablespoons instant pudding mix and continue beating until well incorporated and thickened. Refrigerate frosting for at least 10 minutes. Spread 1½ tablespoons onto each cupcake and dust with espresso powder. Serve immediately or refrigerate until 15-20 minutes prior to serving.

Nutritional Information per cupcake with frosting: 190.7 calories, 12.6 g carbohydrate, 14 g total fat, 4.9 g saturated fat, 1.3 g fiber, 4.1 g protein.

Make over recipe by Kathy Sheehan, copyright 2010
The original recipe is one that appeared in Martha Living Magazine's March 2010 issue, p. 48.

How does this compare with the original recipe? This makeover recipe is much lower in saturated fat, calories and carbohydrates, plus it has more fiber and protein. For comparison, the nutritional information per cupcake made from the original recipe is 232.6 calories, 27 g carbohydrate, 12.2 g total fat, 7.5 g saturated fat, 0.4 g fiber, 2.6 g protein.

Saturday, February 13, 2010

Cream-Filled Triple Chocolate Cupcakes

Nothing says love like chocolate, at least that's my husband's motto. For Valentine's Day, I always make him a special dessert which must include chocolate in some form. This year, I went all the way! These dark chocolate devil's food cakes are filled with a delicious chocolate cream and topped with velvety, rich chocolate ganache. Ganache is typically a mixture of melted chocolate and heavy cream but, to lower the saturated fat, I used almond milk in place of the cream (or substitute skim milk, if you prefer.) Traditional devil's food cake recipes call for 4 ounces of sweet baker's chocolate, which is loaded with 6 to 9 grams of saturated fat per ounce! Instead, I used a combination of 1 ounce of baker's chocolate and ½ cup cocoa powder, which reduced the saturated fat by two-thirds. For extra dark chocolate cake, the way my husband likes it, try using Hershey's Special Dark cocoa powder which has zero saturated fat, but provides loads of dark chocolate flavor.

The really fun surprise of this recipe is the cream filling INSIDE the cakes! It's easy to do with a pastry bag and a round cake decorating tip. Don't worry if you don't have one because you can still make these chocolate marvels by cutting an inverted cone out of the top, spoon the filling in and replacing the cake on top. It will resemble a "top hat" and taste just as delicious! Have a happy, chocolate Valentine's Day!

Cream-Filled Triple Chocolate Cupcakes
(Makes 16 servings)

Cake Ingredients:
¾ cup almond milk
1 oz. unsweetened or bittersweet baking chocolate (1 square), chopped
1¼ cups almond flour (or finely ground almonds)
¾ cup all purpose flour
½ cup cocoa powder (I used Hershey’s Special Dark)
1 teaspoon baking soda
1½ teaspoon baking powder
¼ teaspoon salt
2 large eggs + 1 egg white
¾ teaspoon instant coffee granules (decaf or regular)
¼ cup sugar
5 tablespoons canola oil
One 2.5 oz. container of baby food prune puree (about 3 tablespoons)
1 cup Splenda granular
1½ teaspoons vanilla extract

Chocolate Filling Ingredients:
1½ tablespoons cocoa powder
½ cup almond milk (original or unsweetened)
½ cup mascarpone cheese
3½ tablespoons Splenda granular
1 teaspoon vanilla extract
2 tablespoons fat-free, sugar-free chocolate instant pudding mix (dry powder)

Chocolate Ganache Topping Ingredients:
1/3 cup almond milk
½ cup semi-sweet chocolate morsels

1. Preheat oven to 350-degrees. Prepare muffin tin by placing a paper liner in each cup or spray with non-stick cooking spray; set aside. In a small saucepan, heat ¾ cup almond milk over medium-low heat to scalding or microwave on high for 60-90 seconds. Remove from heat and add the roughly chopped unsweetened baking chocolate square and instant coffee granules; stir until melted and smooth.

2. In a small mixing bowl, sift together the flours, ½ cup cocoa powder, baking soda, baking powder and salt; set aside. In a large mixing bowl and using a handheld or standing mixer, beat the eggs and egg white until light in color and increased in volume. Add sugar and continue beating until well combined. Slowly add the canola oil and beat on high for 1 minute. Add the prune puree, Splenda and vanilla extract. Beat until well incorporated, stopping to scrape down sides of bowl at least once. Alternate adding the dry ingredients ½ cup at a time and the hot milk and chocolate mixture until well combined, scraping down sides of bowl occasionally.

3. Spoon into prepared muffin cups only until 2/3 full (do not overfill). Bake for 15-18 minutes or until toothpick inserted in center comes out clean. Remove from oven and cool in pan for 4 minutes. Remove a wire rack and cool cakes completely before filling.

4. Meanwhile make cream filling by first melting the 1½ tablespoons cocoa powder in almond milk over low heat or in the microwave for about 45-60 seconds on high. Stir to incorporate cocoa into milk. Set aside until cooled to room temperature. (If desired, place in refrigerator to hasten cooling.) Place mascarpone cheese in a large mixing bowl and add cooled almond milk mixture. Beat with a handheld or standing mixer on high until well combined and mixture is light and fluffy (it will resemble whipped cream). Add Splenda, extract and continue to beat until incorporated. Add the 2 tablespoons of chocolate instant pudding powder and beat well. Place in refrigerator for at least 10 minutes to set. Stir before filling cupcakes.

5. To make chocolate ganache icing, heat milk in microwave for 45-60 seconds on high (or heat in a small saucepan over medium-low heat until beginning to boil). Add chocolate morsels and allow to sit for 2-3 minutes. Stir until chocolate is melted and mixture is smooth; set aside to cool. Mixture will thicken as it cools. To hasten cooling, refrigerate for 10-15 minutes until the consistency of very thick cream, stirring occasionally.

6. When cupcakes are completely cooled, fill a pastry bag with chocolate cream and fix a round decorating tip onto the end of the bag. Insert tip into the top of each cupcake and squeeze about 1 tablespoon of filling into each cake. (If you do not have any cake decorating tips, remove a cone of cake from the top of the cupcake with a small, serrated knife. Fill hole with 1 tablespoon of filling and replace cake on top. The cake will stick up and resemble a top hat.) Dip cupcakes to coat top or drizzle 2 teaspoons of chocolate ganache icing over the top of each cupcake. Allow chocolate ganache to cool and set. If there is any leftover chocolate cream filling, you may decorate the top of each cupcake with additional chocolate cream before serving. Store in refrigerator, but allow to sit at room temperature for 15 minutes before serving.

Nutritional Information per cupcake with chocolate cream filling and ganache topping: 234.6 calories, 21.5 g carbohydrate, 15.9 g total fat, 4.1 g saturated fat, 2.7 g fiber, 5.3 g protein.

Nutritional Information per cupcake with only chocolate cream filling (no ganache topping): 198 calories, 16.4 g carbohydrate, 13.8 g total fat, 3 g saturated fat, 2.7 g fiber, 5 g protein.

Nutritional Information per 1 tablespoon chocolate cream (recipe makes about 20 tablespoons): 31.6 calories, 1.5 g carbohydrate, 2.5 g total fat, 1.4 g saturated fat, 0.2 g fiber, 0.6 g protein.

Original recipe by Kathy Sheehan, copyright 2010