Monday, December 20, 2021

Keto Peppermint Stick Ice Cream

Keto Peppermint Stick Ice Cream
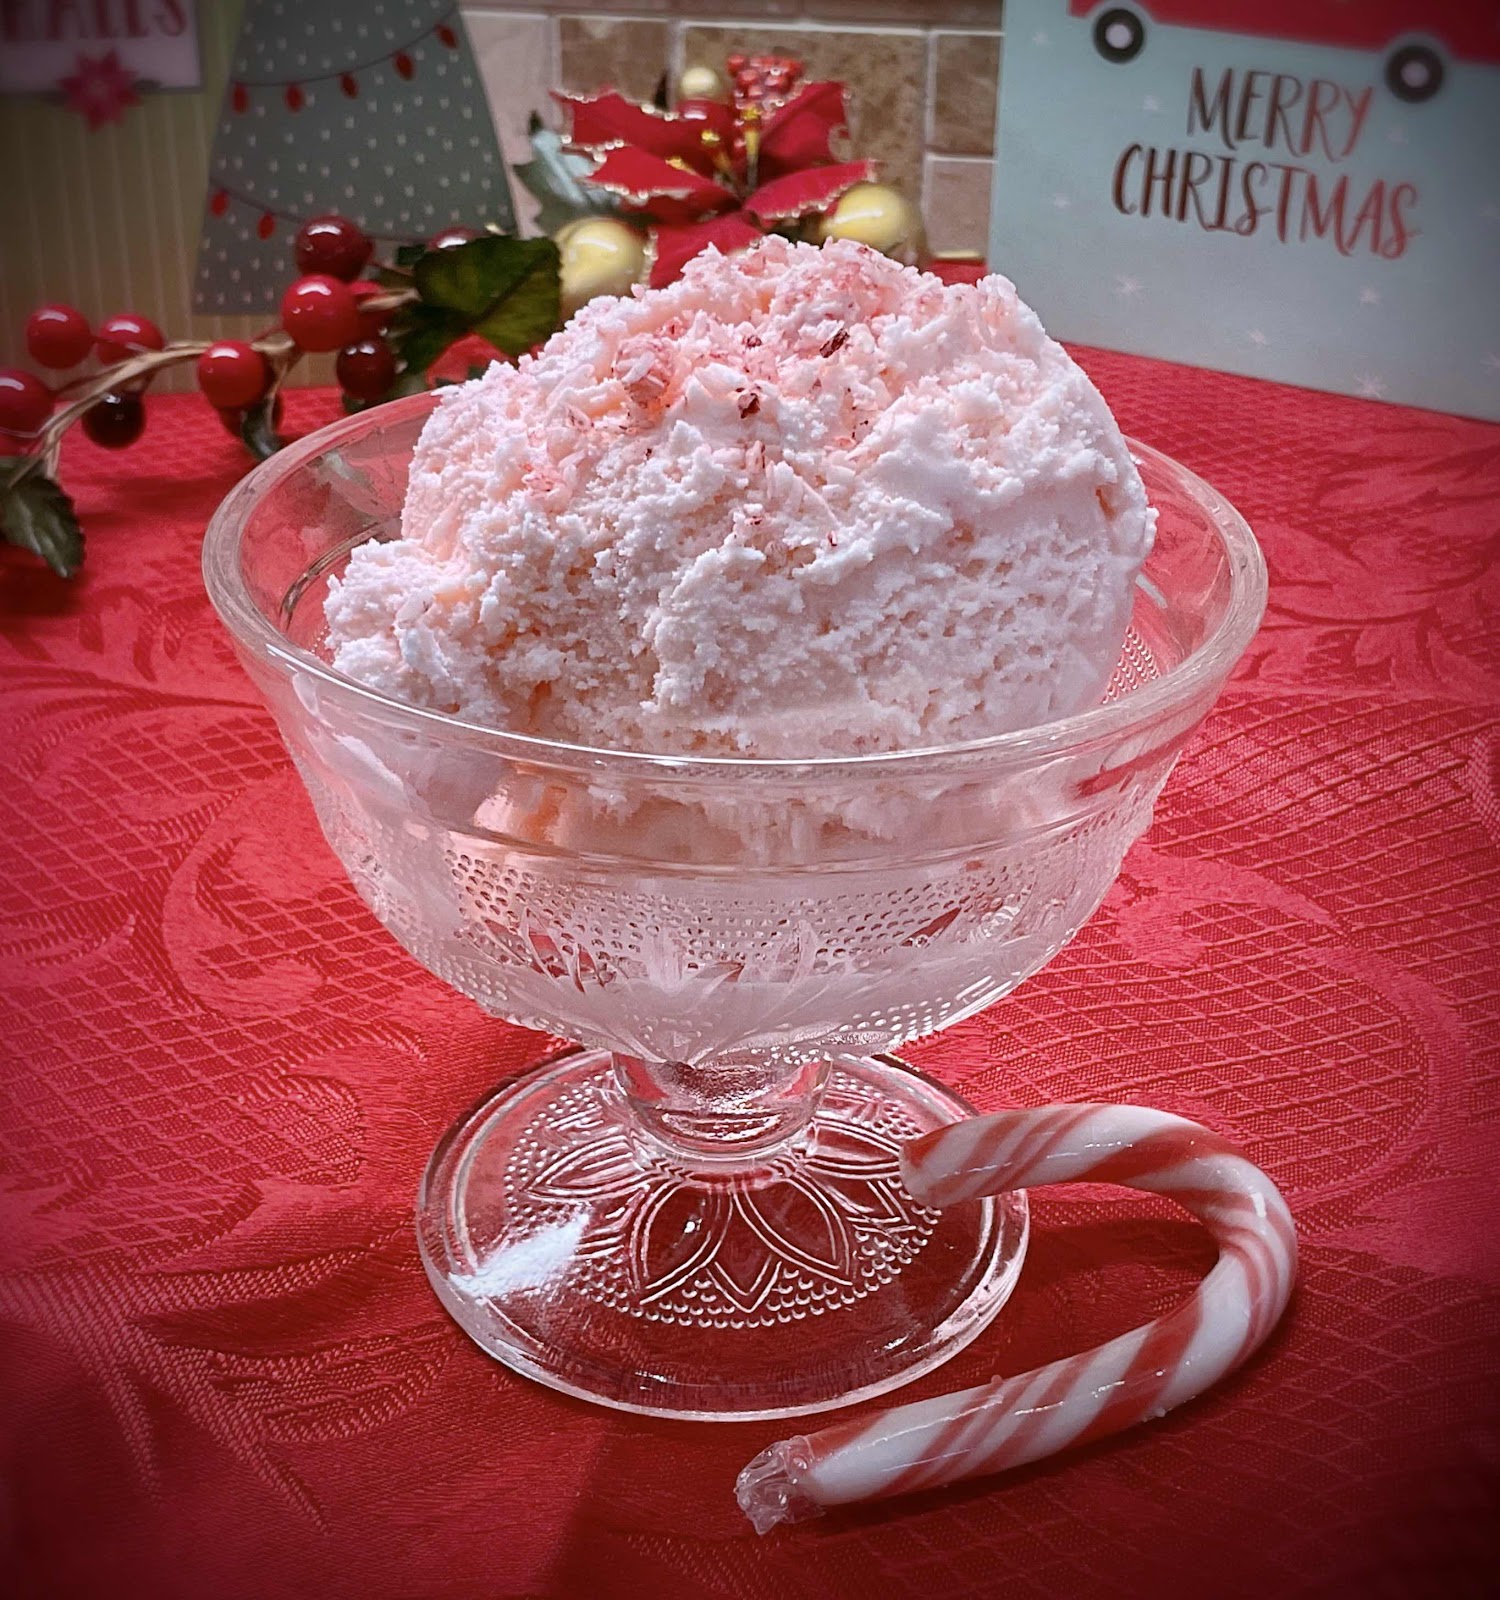
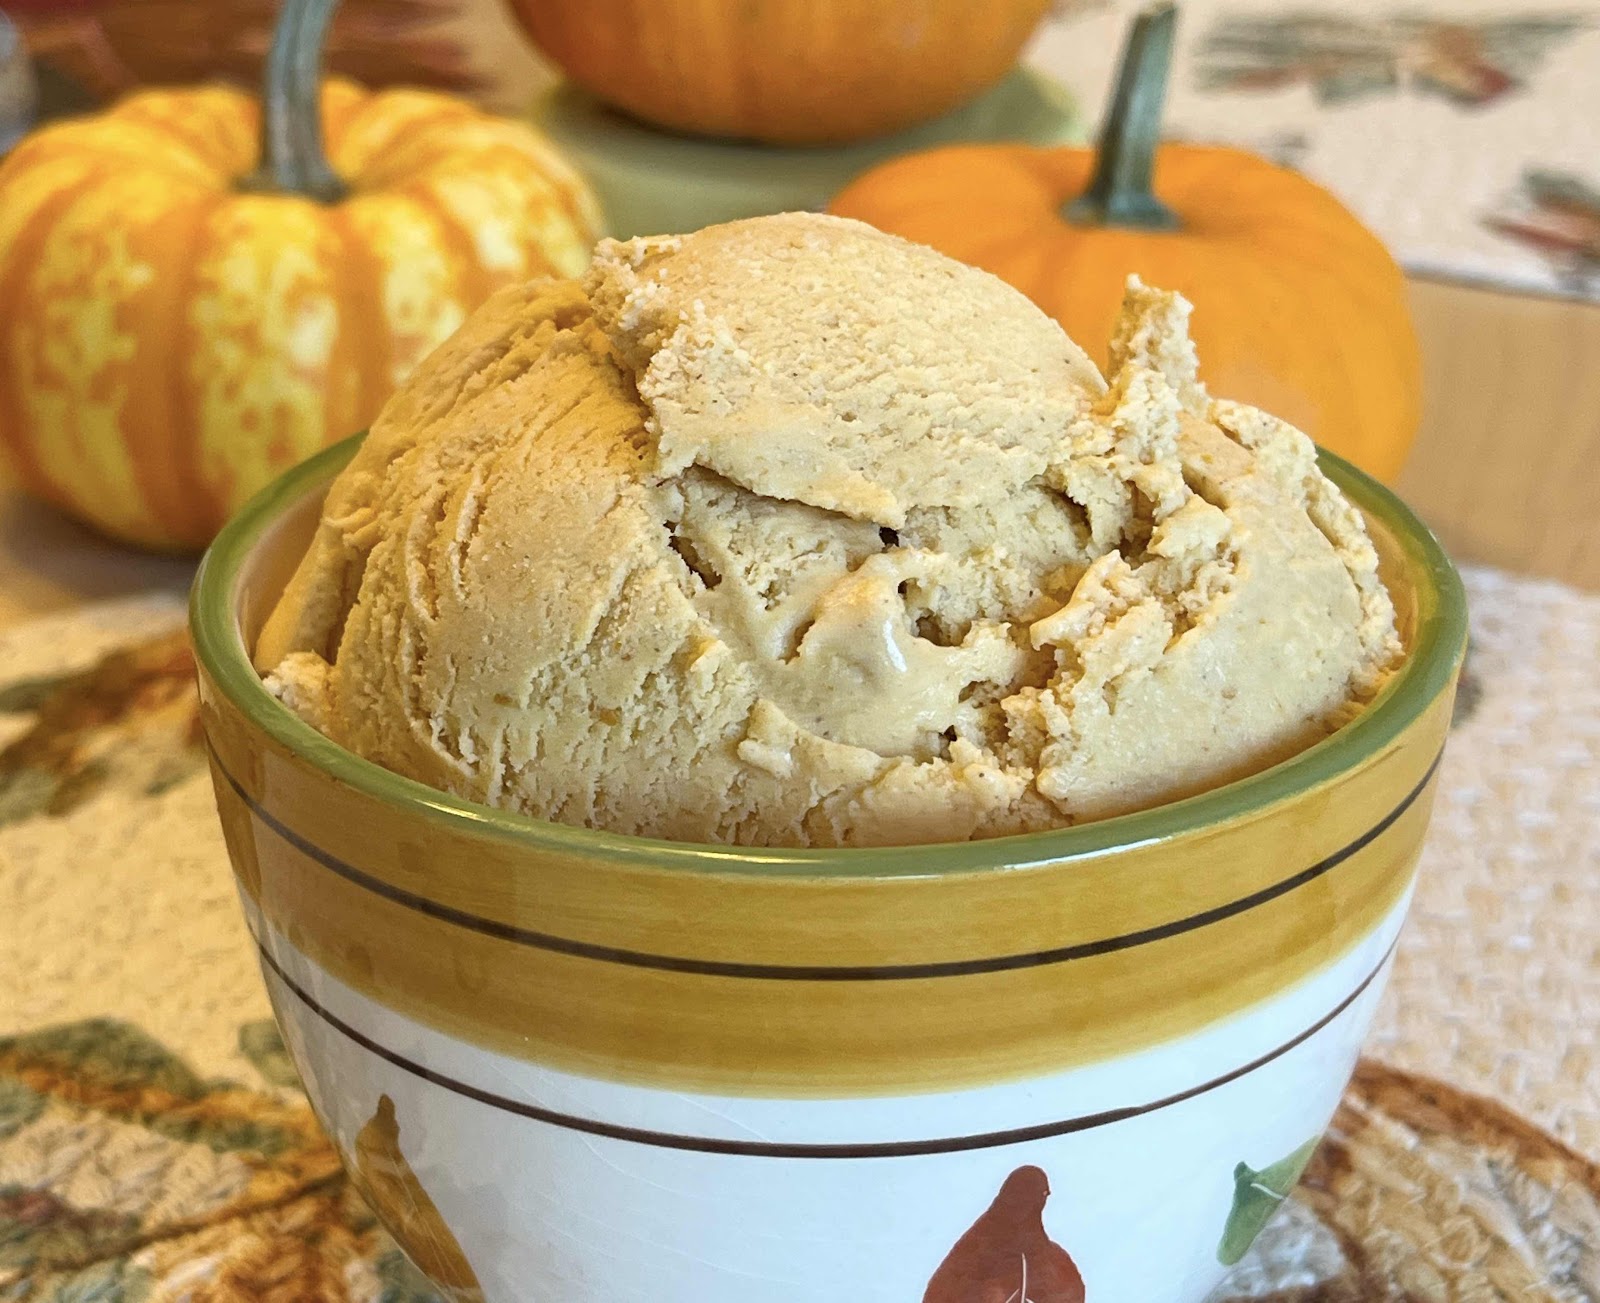
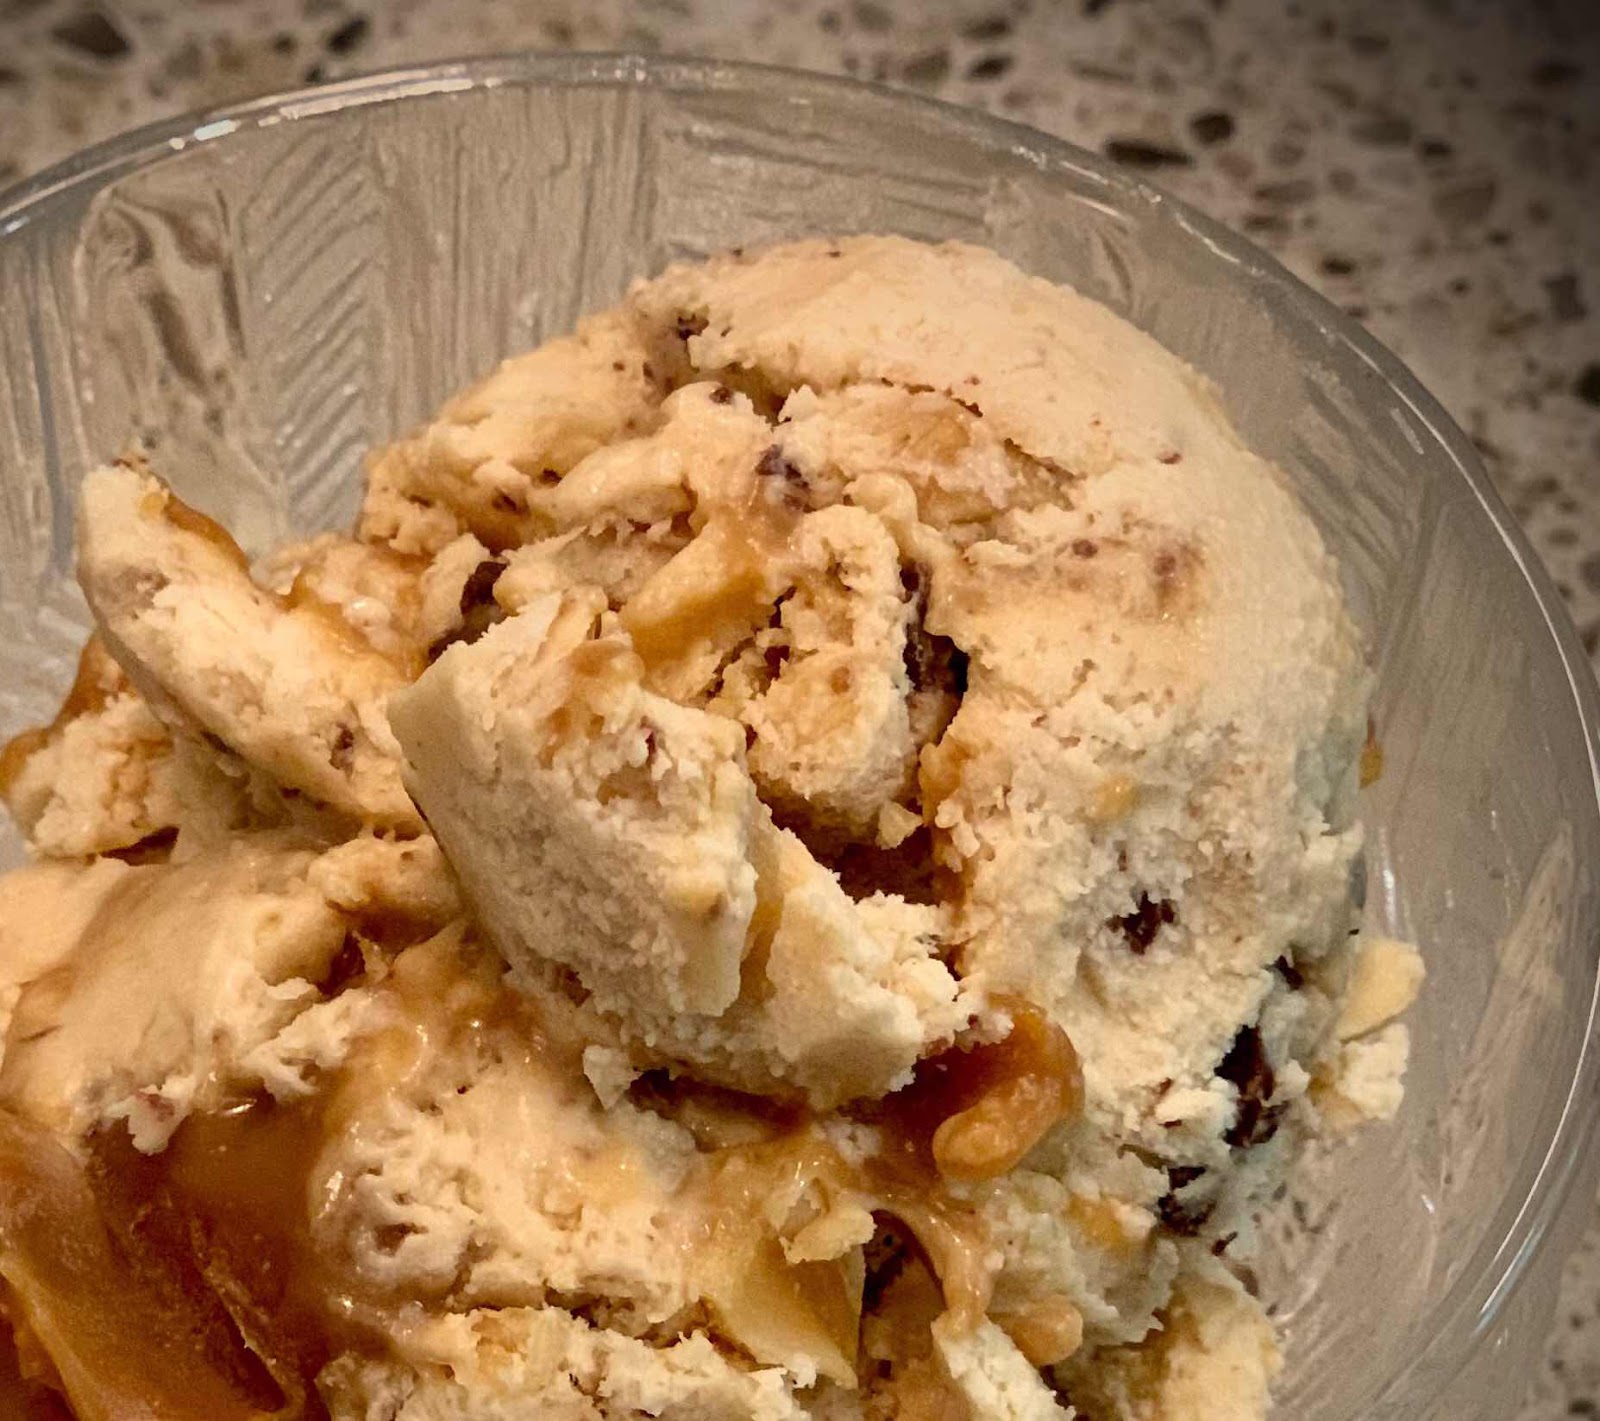
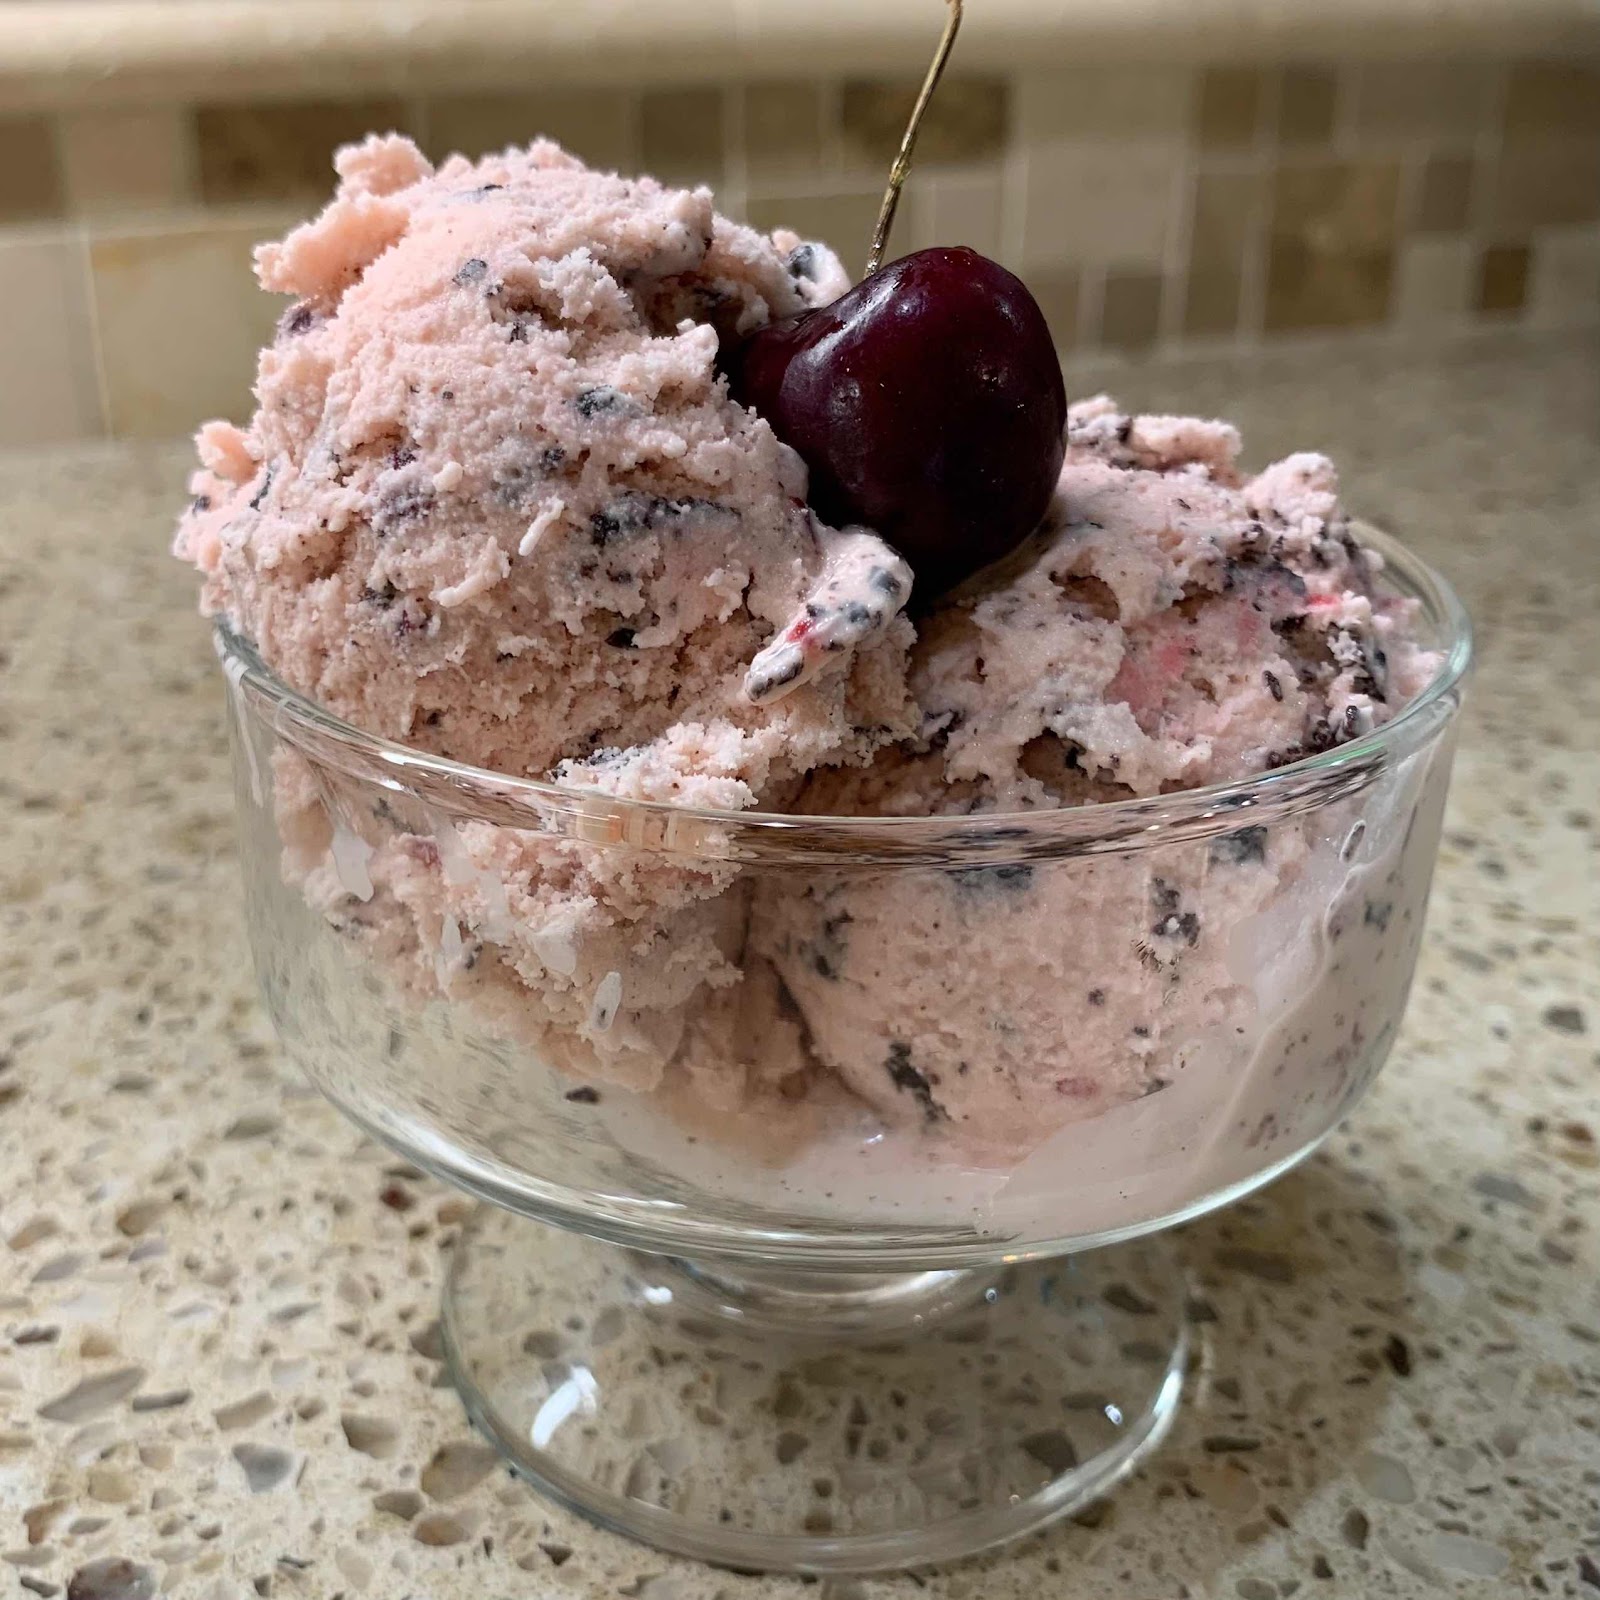
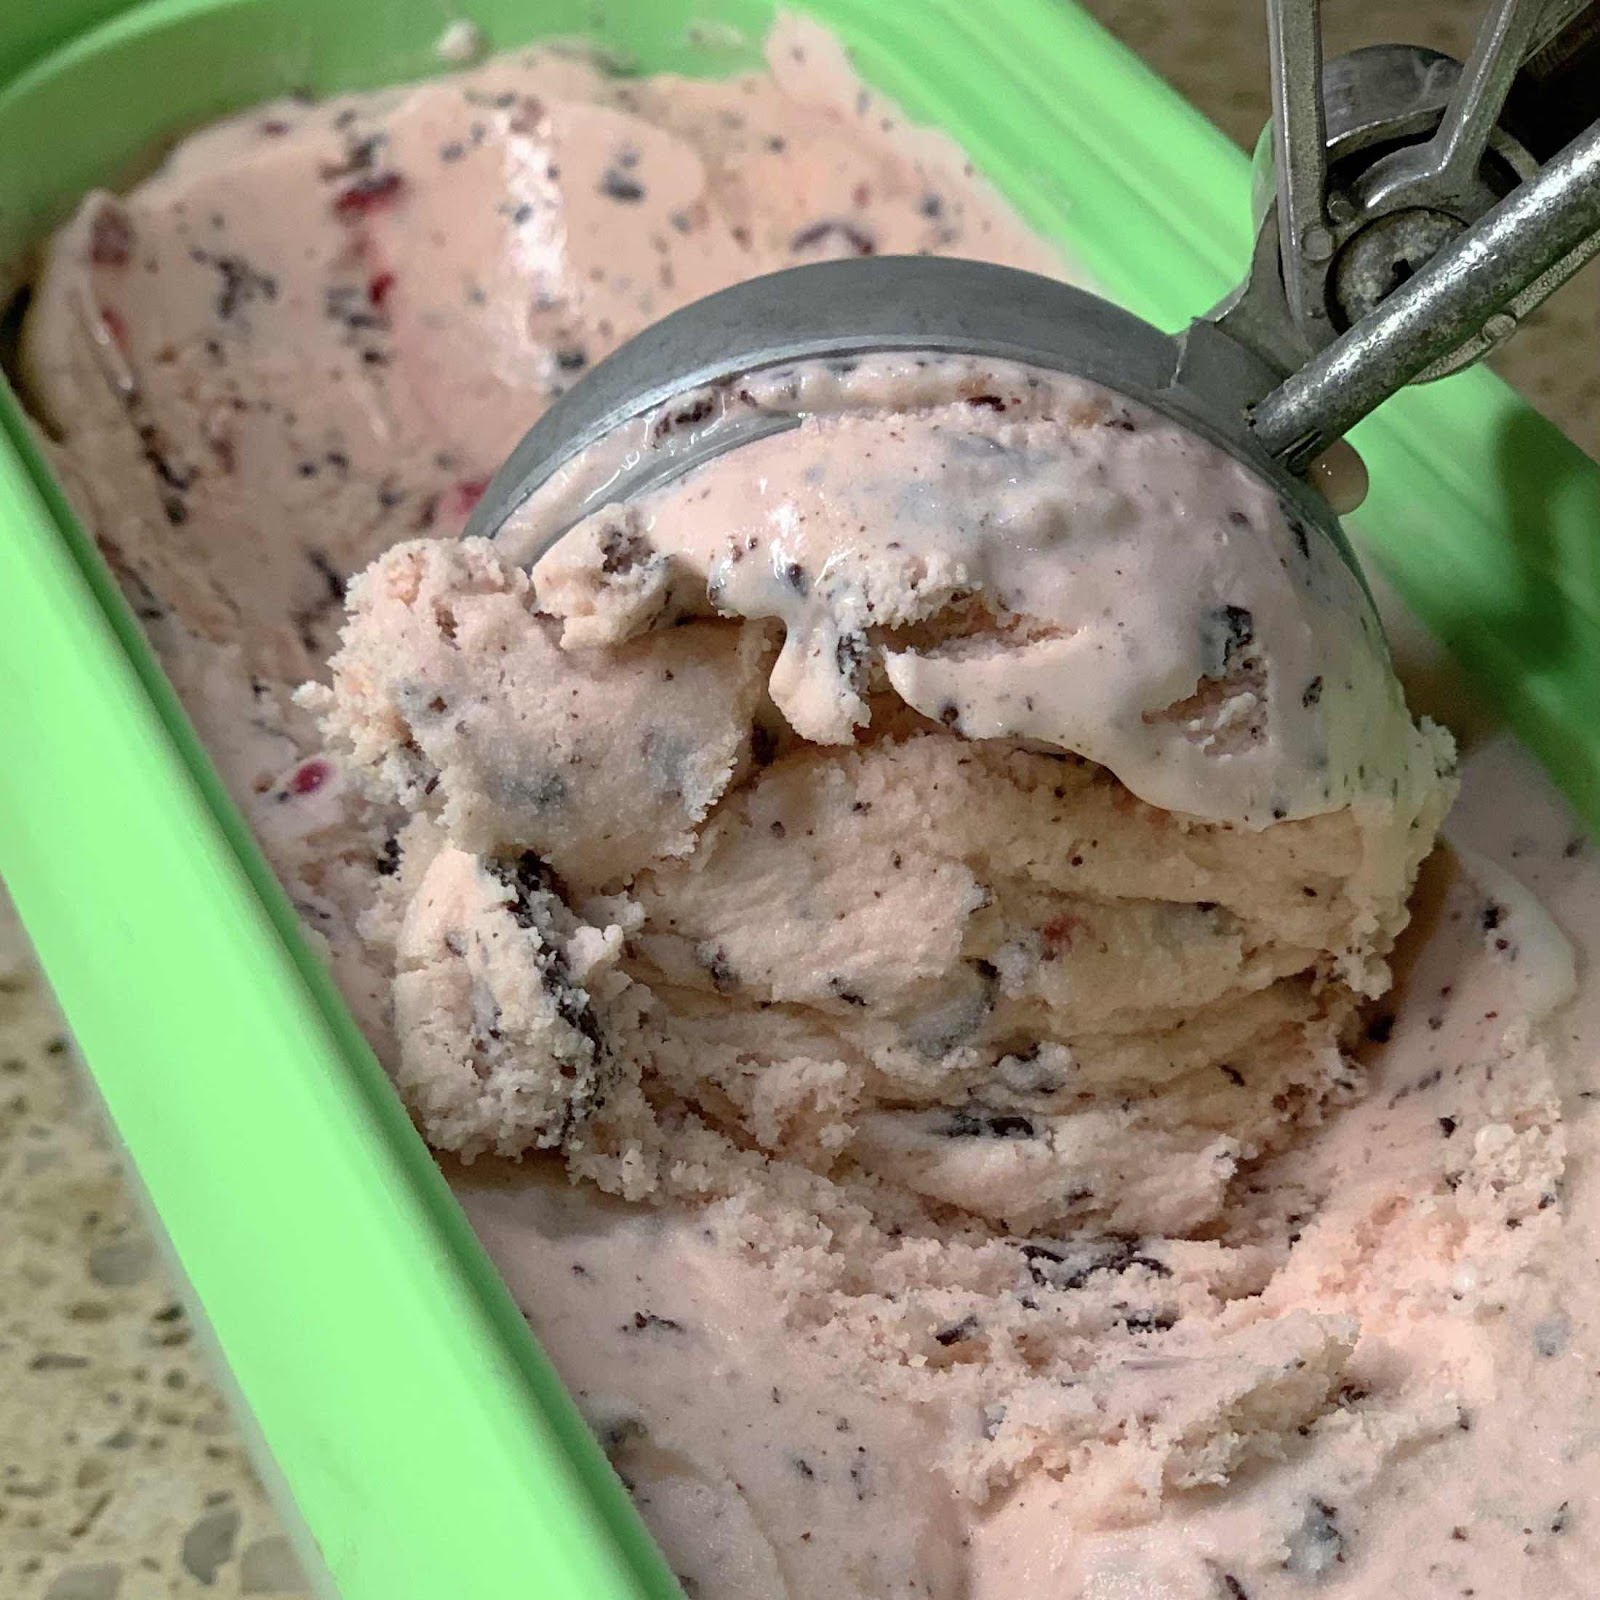
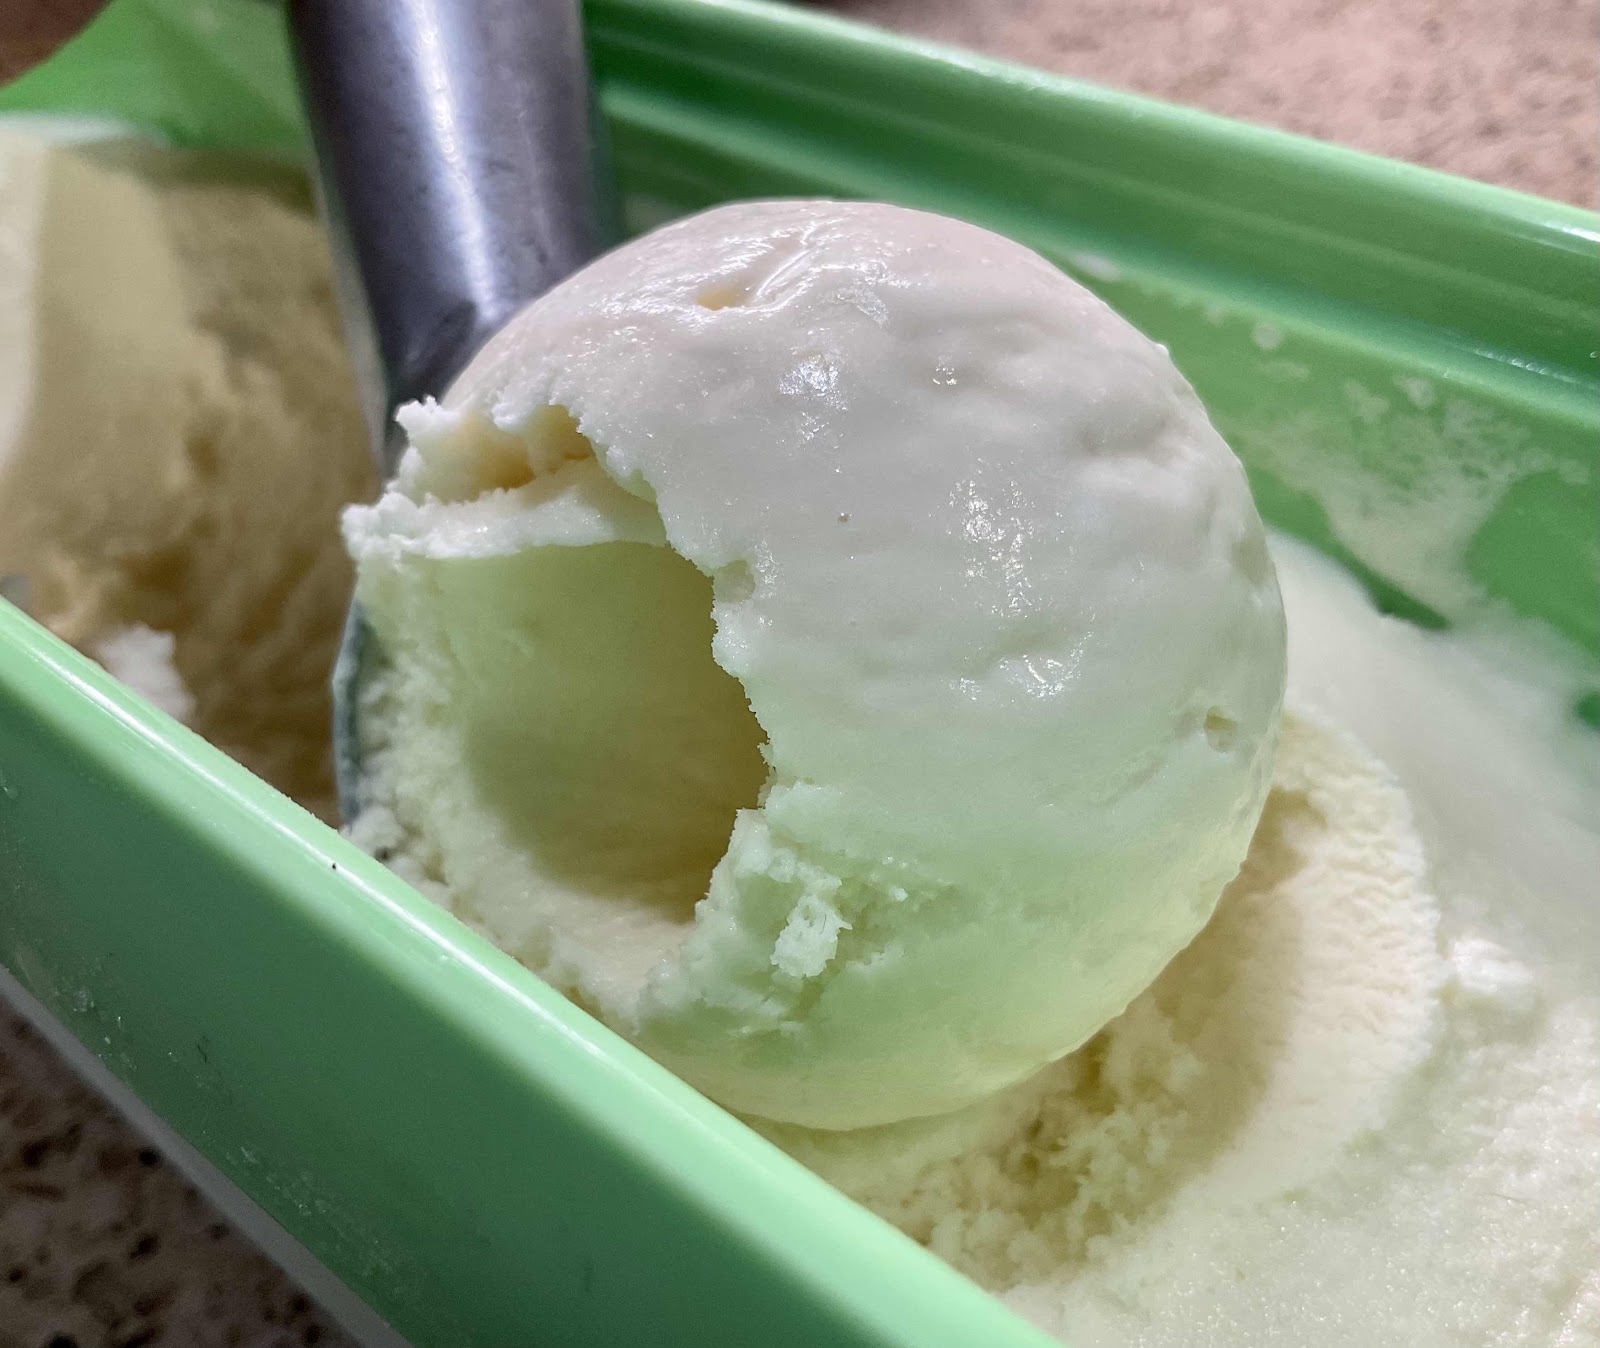
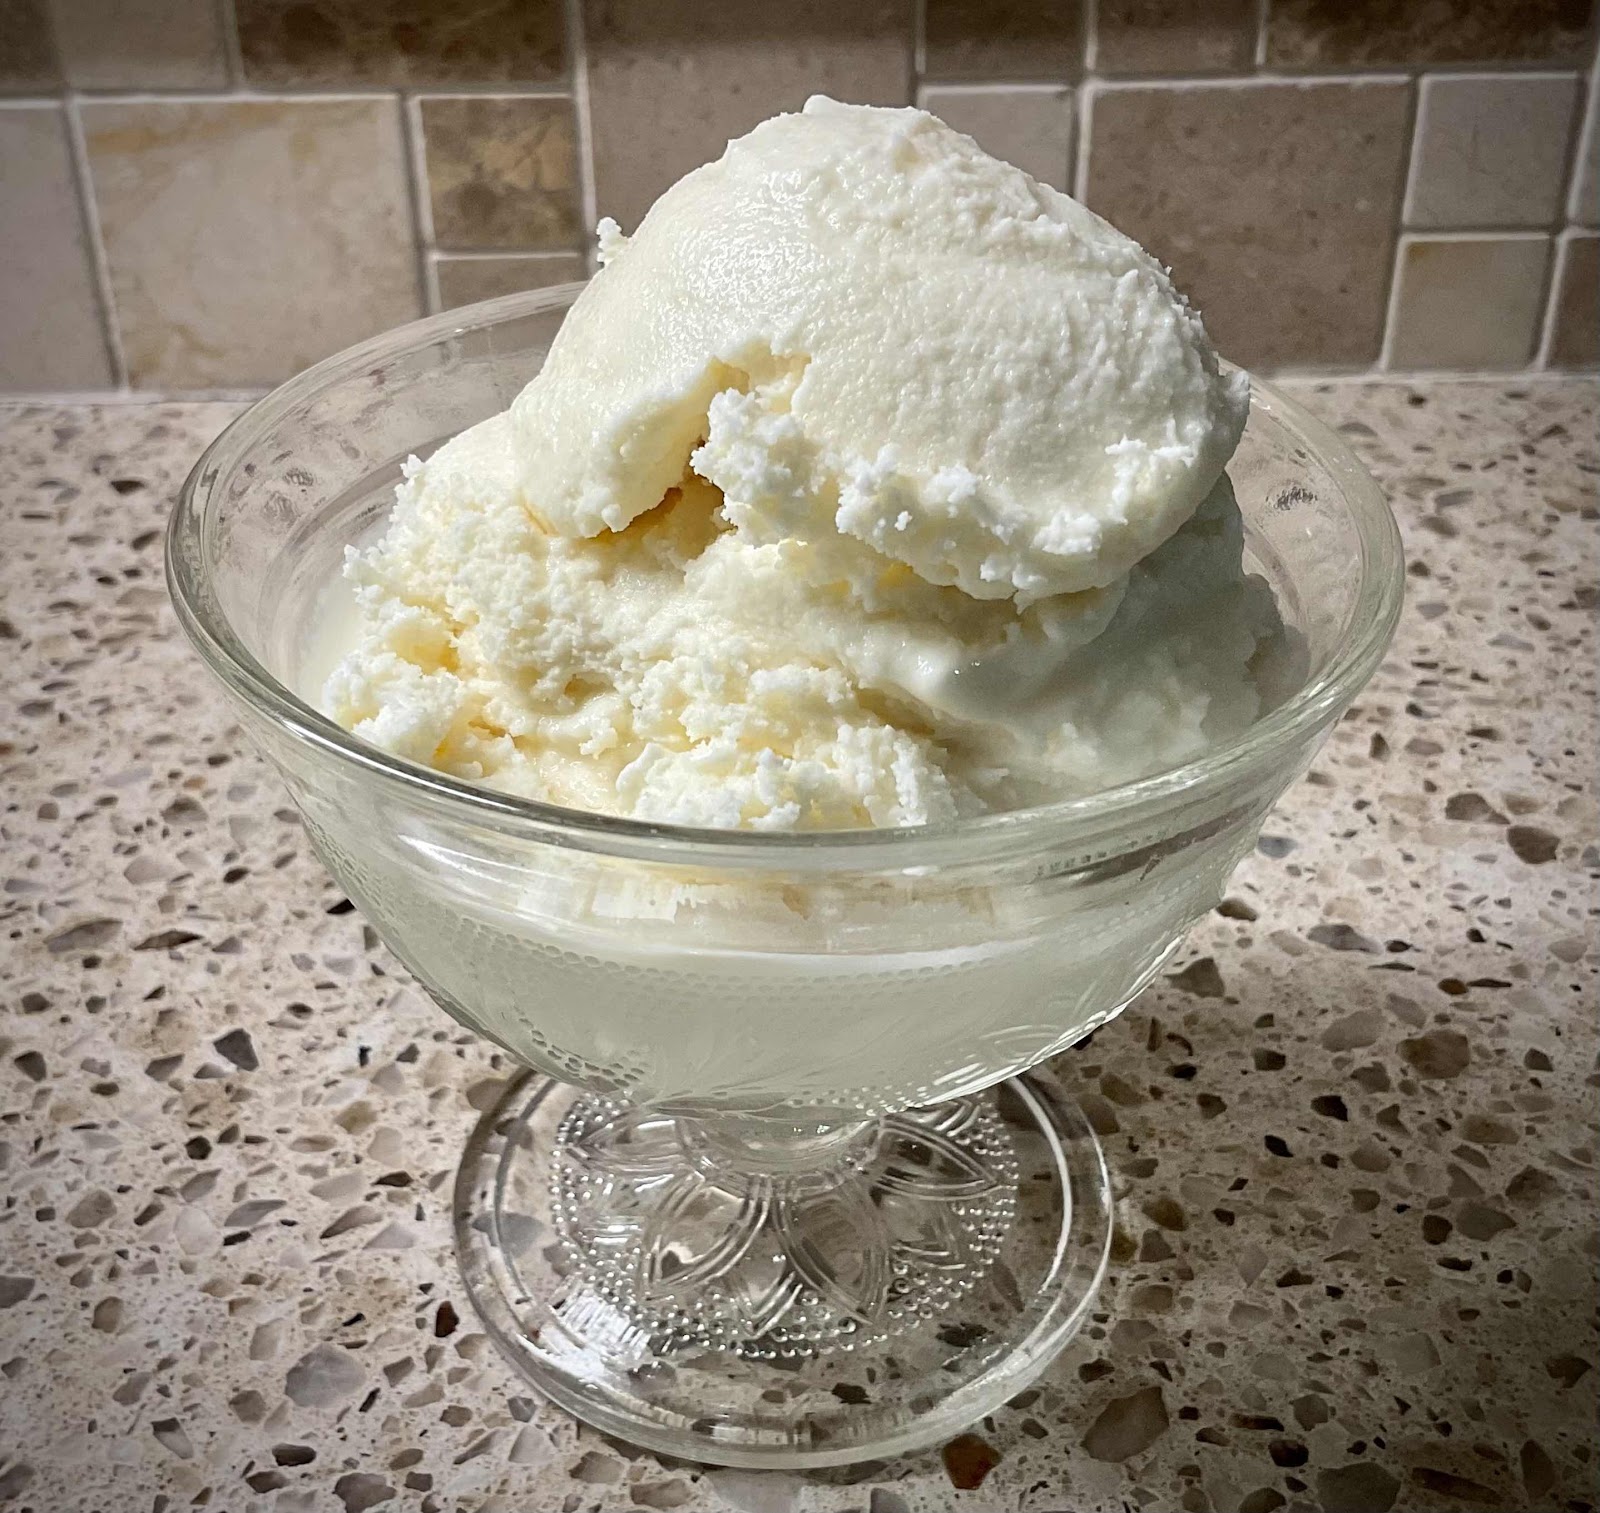
Since I was a little girl, my absolute favorite flavor of ice cream has always been Peppermint Stick. I have tried for many years to perfect a peppermint ice cream and, I’m happy to announce, I’ve finally done it! This is exactly like the peppermint stick ice cream I remember from Braum’s in Tulsa, Oklahoma, where I grew up. Crunchy candies throughout in a creamy peppermint ice cream base that is both sugar-free and so low in carbs you won’t believe it! I don’t have to only dream about having my favorite ice cream ever again!

Keto Peppermint Stick Ice Cream
Makes 8 servings

Ice Cream Base:
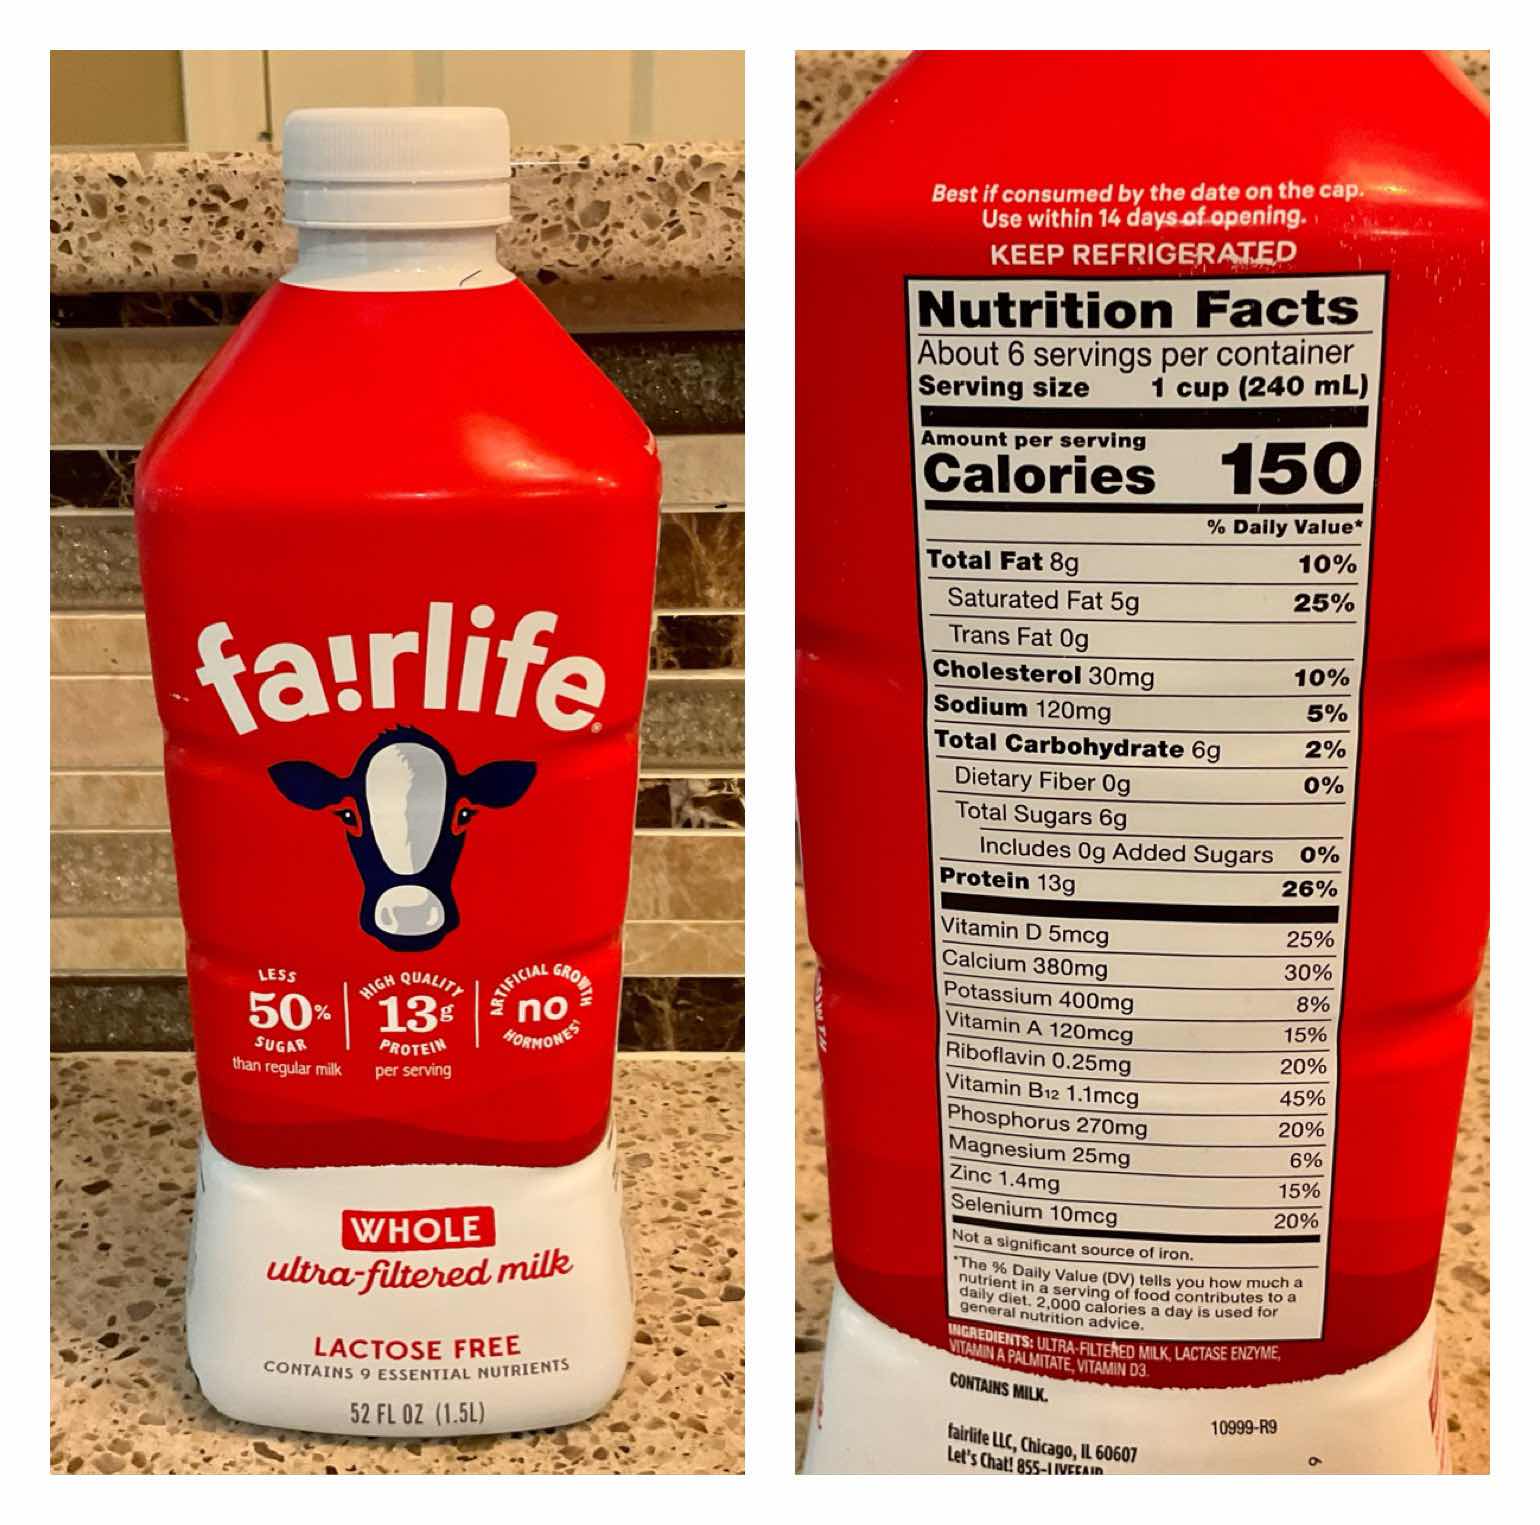
1 cup whole milk (I suggest Fairlife or Maple Hill Zero Sugar Whole milk, see note*)
3 tablespoons powdered erythritol sweetener (I used LaKanto Monkfruit Powdered sweetener)
6 tablespoons allulose
A pinch of salt
2 cups heavy cream
3/4 teaspoon peppermint extract, or to taste
1 drop red gel food coloring (optional)

Candy Cane Mix-Ins:
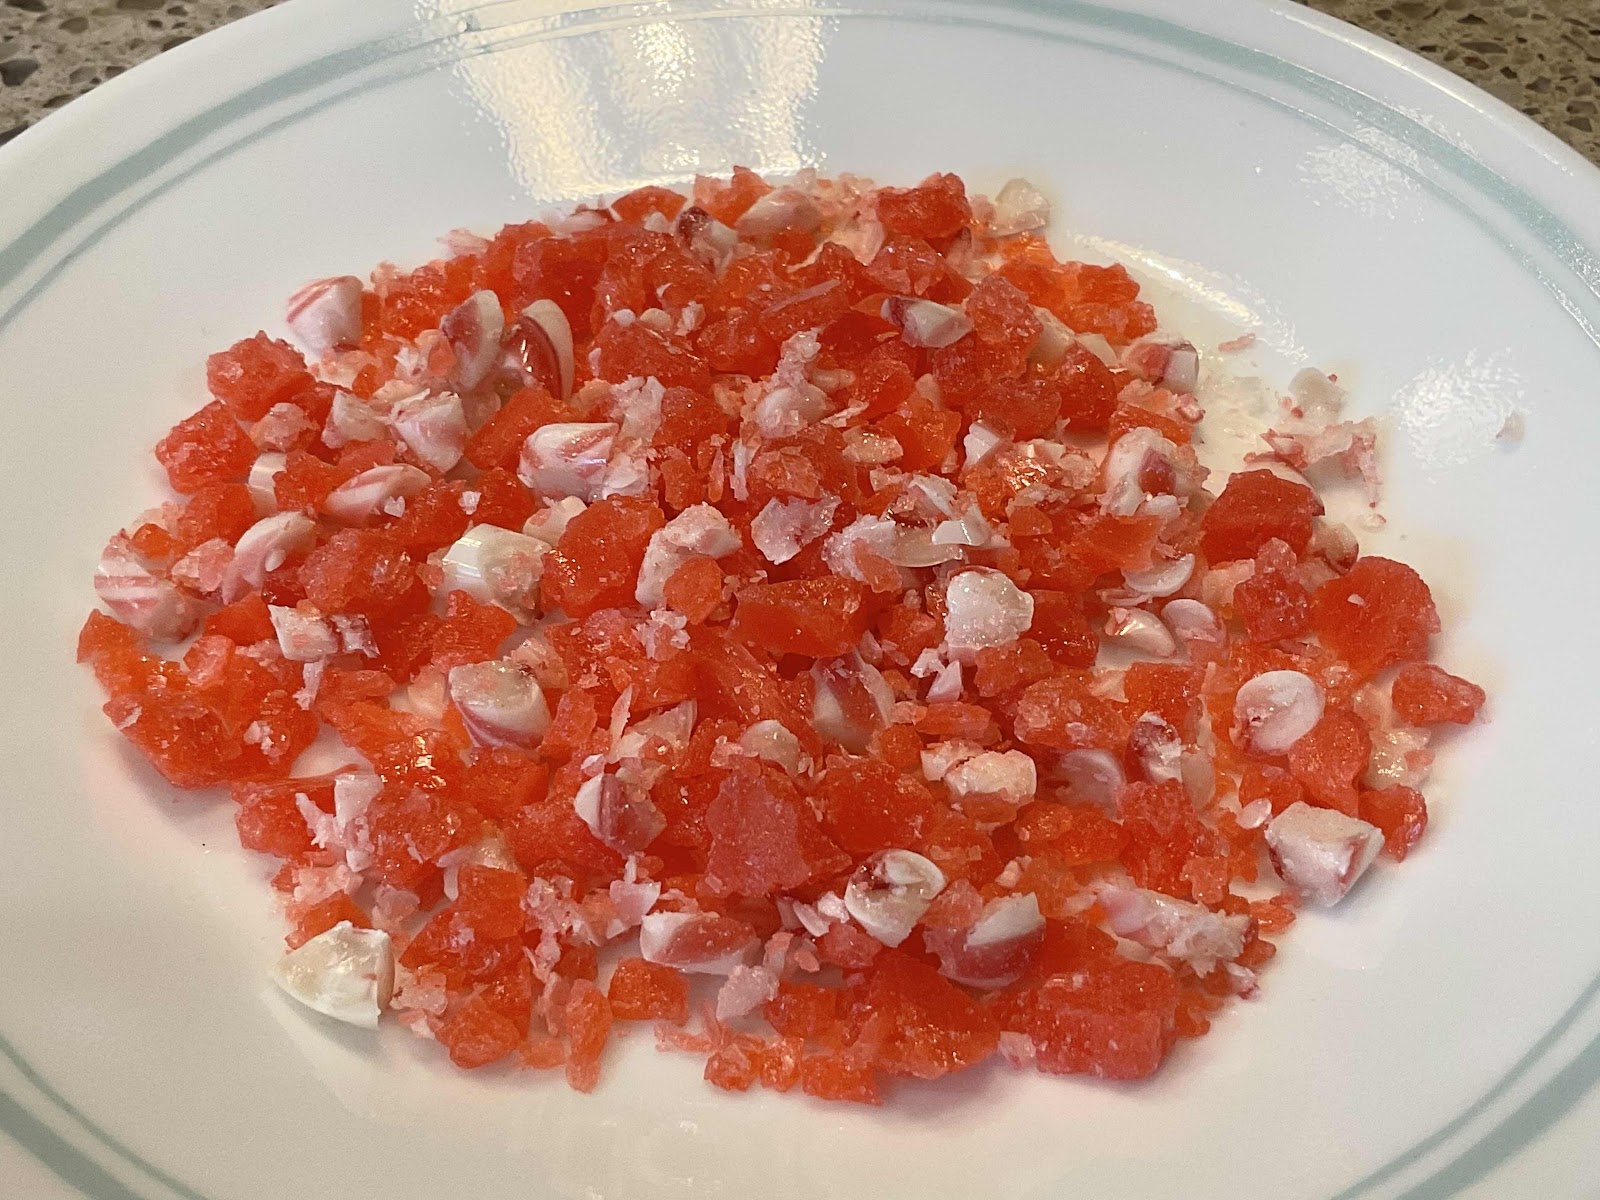
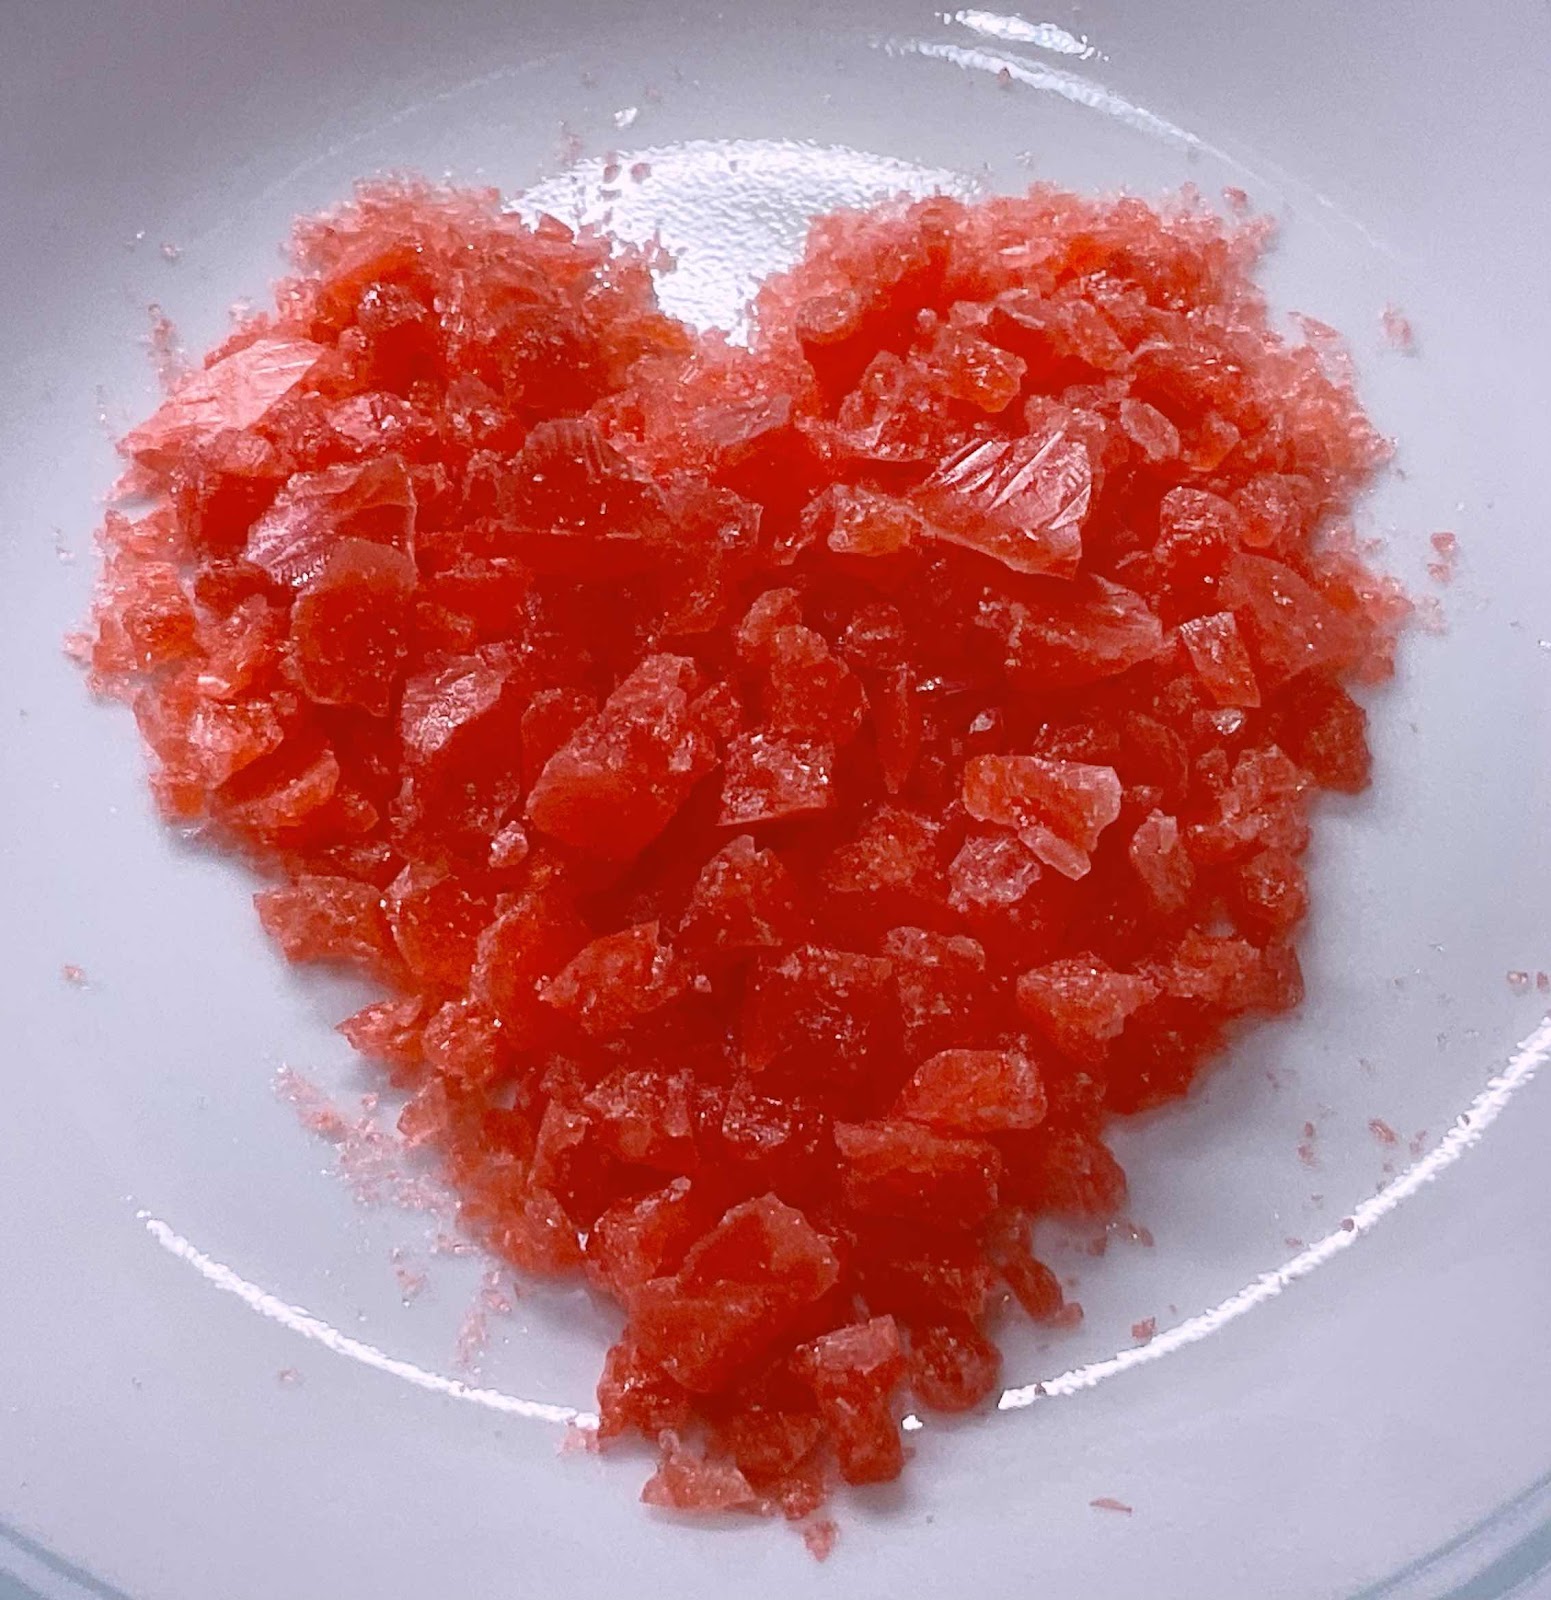
2 real mini peppermint candy canes, crushed (about 1 tablespoon or a serving size of candy equaling 8 g carb, see note**)
2 tablespoons Sugar Free Peppermint Hard Candy, crushed into tiny pieces (1/2 of my peppermint hard candy, click here for recipe)

1. In a medium bowl, use a whisk to combine the milk, sweeteners and salt until the sweeteners are dissolved. Stir in the heavy cream, peppermint extract and a drop of food coloring, if using. Taste and adjust the level of peppermint flavor to your liking. Cover and refrigerate a minimum of two hours, preferably overnight. Whisk mixture together again before continuing.

2. Meanwhile, make a batch of my Sugar-Free Peppermint Hard Candy (see separate recipe here). You may also use commercially available sugar free peppermint candy, but be aware that the sweeteners they use (isomalt, sorbitol and mannitol) cause digestive upset, gas, bloating and loose stools in many people. I am one of those sensitive people, so I make my own peppermint candy using erythritol.)

3. Crush the two mini real candy canes and 1/2 recipe of the sugar-free peppermint hard candy and set aside until needed in the churning process.

Crushed sugar free peppermint candies
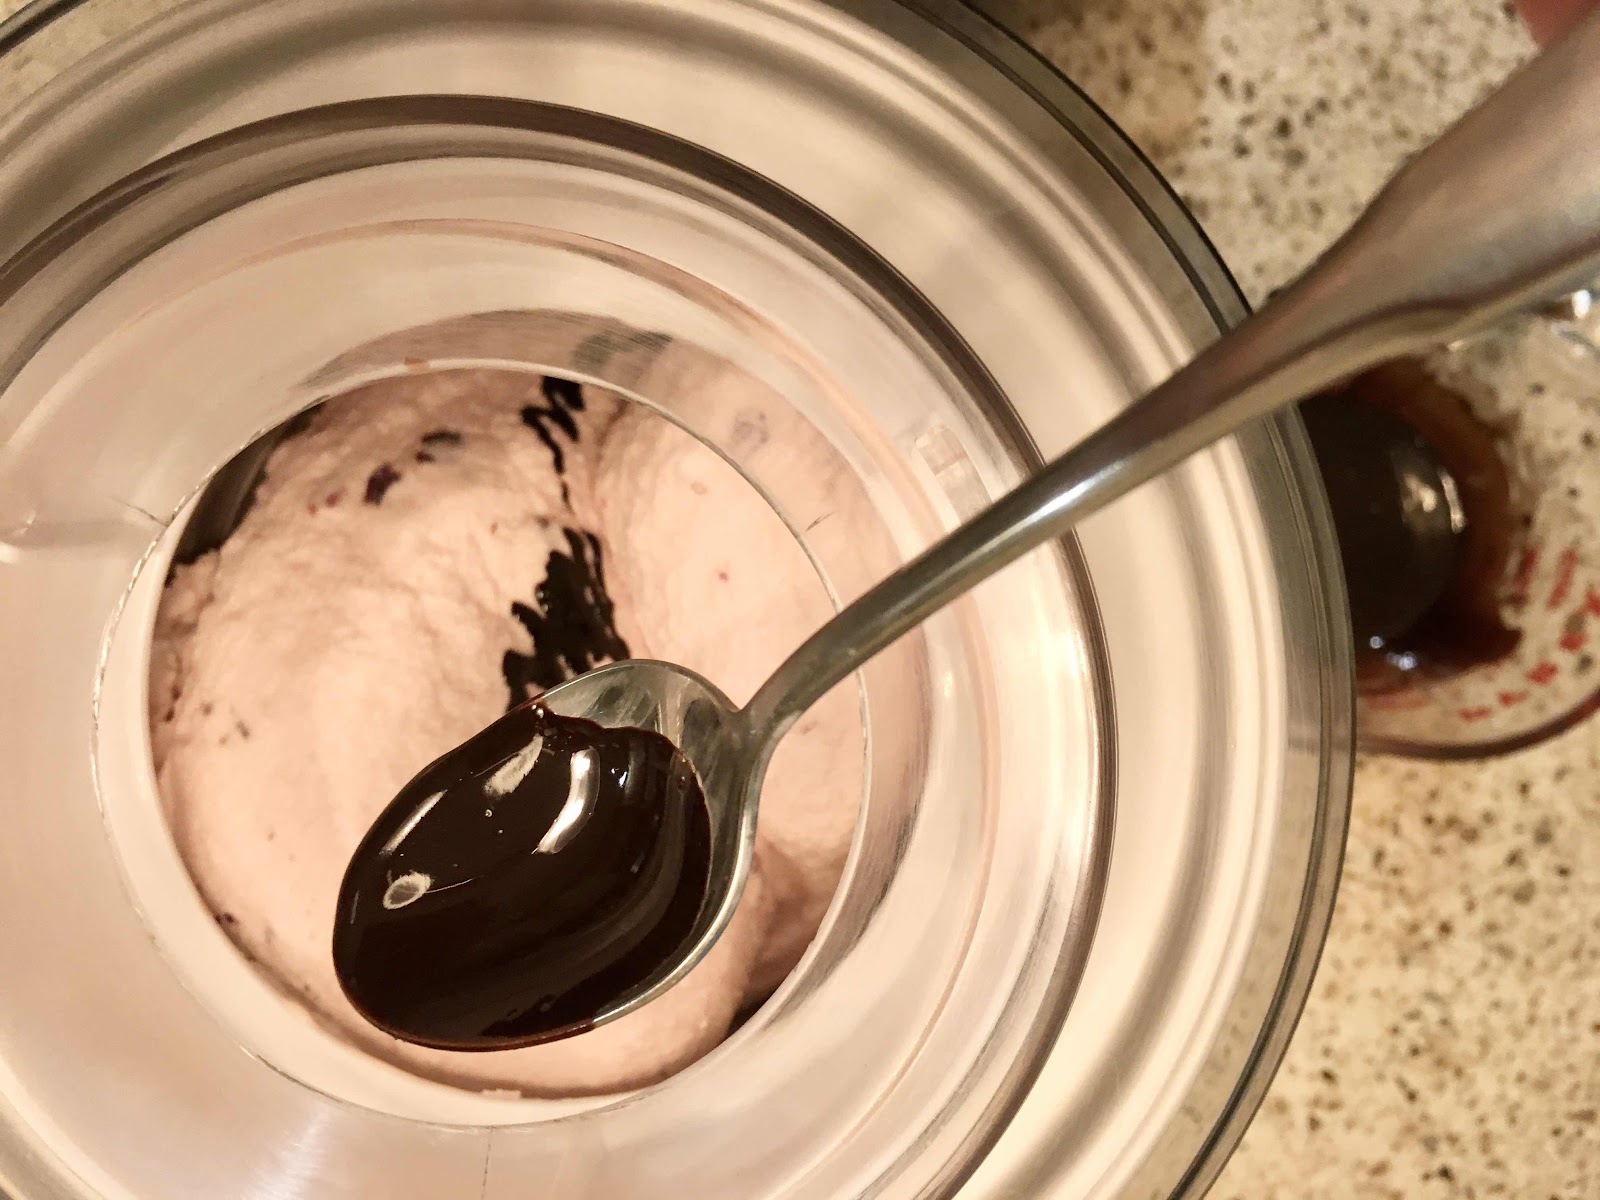
4. Follow the directions for your ice cream maker. Pour the chilled ice cream base into the ice cream maker and churn until thickened and beginning to set. Add the crushed peppermint candies, a teaspoon at a time, and continue to churn until quite thick. Spoon the ice cream into an airtight container and place in the freezer for six hours or more to set up before serving.

Notes:
* I suggest the brand Fairlife whole milk, which has less sugar, is lactose free and is half the carbs of regular whole milk. If using regular whole milk, add 1 1/2 carbs per serving.

Fairlife Whole Milk

** You can use sugar-free peppermint candies in place of the mini candy canes, but be aware that sugar-free candies contain isomalt, sorbitol or mannitol, all of which can cause digestive upset. Personally, I am so sensitive to those offending sugar alcohols that I prefer using a small amount of regular peppermint candy to avoid any risk of digestive upset, also you can choose to omit the peppermint candy altogether and reduce the carbs per serving by 1 gram. 

Keto Peppermint and Hot Fudge Sundae
Nutritional Information per 1/2 cup serving (made with Fairlife whole milk): 225 calories, 2.9 g carbohydrate (0 g fiber, 1.7 g sugars, 0.5 g sugar alcohols), 24.7 g total fat (14.4 g saturated fat, 0 g trans fat), 83 mg cholesterol, 49 mg sodium, 50.2 mg calcium, 3 mg potassium, 255 IU Vit A, 1.6 g protein. Net carbs per serving: 2.4 grams

Photos and recipe by Kathy Sheehan, copyright 2021
All rights reserved. Please do not duplicate without the authors permission.

Saturday, December 18, 2021

Sugar Free Peppermint Hard Candy

Sugar Free Peppermint Hard Candy
I love the taste of candy cane at this time of year. But, unfortunately, the sugar-free peppermint candies available in the stores are sweetened with the offending sugar alcohols isomalt, sorbitol or mannitol, all of which can cause embarrassing gas, bloating and loose stools… not the fun side effect you hope to experience from eating candy! I made these candies, not only for eating, but for sprinkling on my holiday baked goods or adding to my favorite ice cream flavor: Peppermint Stick Ice Cream! It is necessary to have a candy thermometer or probe thermometer to achieve correct hard-crack stage this candy requires. Also, erythritol-based sugar substitute is a must.  I’ve tried making this candy with allulose, but it turned out softer and chewy, like taffy, instead of a hard candy. Not bad, but not exactly what I was looking for. If you would like an alternative to the sugar-free candies available commercially, to crush and add to your ice cream or sprinkle on top of your keto baked goods, this is the recipe for you!

Sugar Free Peppermint Hard Candy
Number of servings varies (Yields 1/2 cup crushed candies)

1/2 cup erythritol-based powdered sweetener (I prefer Lakanto Monkfruit Powdered Sweetener)
1/16 teaspoon cream of tartar
1/3 cup water
1/2 teaspoon peppermint extract, or to taste
1 drop of gel food coloring (optional)

Equipment Needed:
Candy thermometer or Digital Probe thermometer*

1. In a small, heavy saucepan, very gently stir together the sweetener, cream of tartar and water over medium high heat just until the dry ingredients are dissolved. Stop stirring and allow to come to a boil. Continue to boil, without stirring, until the mixture reaches between 300 - 310°F. The mixture will remain clear and not thicken into a syrup. Temperature is the only way to determine if it has reached the hard crack stage. (Do not overcook or the mixture will begin to take on a bitter, burnt flavor.) Remove from heat.

Boil until mixture reaches between 300 to 310 degrees
2. While the mixture is boiling, line a small heatproof bowl with foil and set aside. You may also use silicone candy molds to create individual, bite-sized candies.

3. When the mixture stops bubbling, add the extract and food coloring (if using) and stir to combine. Pour the mixture into the foil-lined bowl and allow to cool for about 15 minutes. (Or pour into a silicone candy mold to make individual candies.) Refrigerate the mixture several hours until completely set and hardened.

4. Remove the foil or pop out the individual candies from the silicone mold. To make peppermint candy sprinkles, place the harden candy disc in a plastic bag and gently break apart by lightly pounding with the handle of a butter knife. (This candy has a more delicate structure than hard candy made from real sugar, so don’t pound too aggressively.) The broken, gently crush candy makes an excellent mix-in for my Keto Peppermint Stick Ice Cream or as a topping on keto baked goods.

Crushed Sugar Free Peppermint Candies
*Note: To achieve a hard candy, you need to use an erythritol-based sweetener. Allulose or Bocha Sweet will not firm up properly. (These two sweeteners make great taffy or chewy caramel, but not hard candies.) Also, you really need a candy thermometer or digital thermometer to make sure the boiling mixture reaches the right temperature, between 300-310°F, so it will set up correctly. Erythritol-based sweetener will not act like real sugar. It doesn’t thicken up into a syrup and will not ball up when added to cold water, so temperature is the only way to determine when you’ve reached the hard crack stage.

Keto Peppermint Hard Candy

Nutritional Information per 1 tablespoon of crushed candy: 1 calorie, 6 g carbohydrate (0 g fiber, 0 g sugars, 12 g sugar alcohols), 0 g fat, 0 mg sodium, 10 mg potassium, 0 g protein. Net carbs per serving: 0 grams

Photos and recipe by Kathy Sheehan, copyright 2021
All rights reserved. Please do not duplicate without the author’s permission.

Thursday, December 9, 2021

Keto Graham Cracker Pie Crust

Keto Graham Cracker Pie Crust
There are a lot of great keto pie crust recipes out there. But I haven’t found one that has a true graham cracker crust taste and texture, until now! By substituting keto cinnamon toast cereal for the graham crackers, you will be amazed how this recipe has the same flavor as one made with real graham crackers. Don’t forget this game-changing tip next time you need a graham cracker crust for a pie or cheesecake!

Keto “Graham Cracker” Pie Crust
Makes one 9” pie crust

2 cups crushed Catalina Crunch Cinnamon Toast Keto Cereal (or substitute their chocolate cereal for a chocolate crust)*
6 tablespoons unsalted butter, melted

Catalina Crunch Keto Cereal
1. Preheat the oven to 350°F.

2. Pulse the cereal in a food processor until very fine crumbs, almost a powder. Measure crumbs. You want to have 2 cups of crumbs; transfer to a medium bowl. Mix cereal crumbs and melted butter in the bowl until the mixture looks like wet sand.

3. Pour crumb mixture into a 9-inch pie pan and use the back of a measuring cup or large spoon to press it firmly in the bottom of the pan and a little bit up the sides.

4. Bake for 10 minutes. Remove from oven and allow to cool. The crust will be delicate while still hot from the oven. It will set up as it cools.

*Notes: You can use any flavor or brand of keto cereal to make a pie crust. 

Make ahead instructions: This crust is a great make ahead recipe. You can prep the crust 1 to 2 days ahead of time and store it in the refrigerator until ready to use. 

Freezing instructions: Prepare the crust and do not bake it. Cover it well and freeze for 2 to 3 months. Allow to thaw completely before baking and filling.

Sugar Free Pumpkin Pie with Keto Graham Cracker Crust
Nutritional Information per serving made with Catalina Crunch Keto Cereal (1/12th of recipe): 88 calories, 4.7 g carbohydrate (3 g fiber, 0.1 g sugars), 7.4 g total fat (3.8 g saturated fat, 0 g trans fat), 15 mg cholesterol, 37 mg sodium, 18.4 mg calcium, 12 mg potassium, 1 mg iron, 53 IU Vit A, 3.7 g protein. Net carbs per serving: 1.7 grams

Photos and recipe by Kathy Sheehan, copyright 2021
All rights reserved. Please do not duplicate without the author’s permission. 

Saturday, December 4, 2021

Keto Braised Italian Meatballs

Braised Italian Meatballs
One year, when I vacationed in Italy, I found a restaurant that served the best meatballs I had ever tasted. They were tender and so flavorful! Since then, I discovered that braising meatballs, instead of baking or browning them in a skillet, is the best method for cooking them. Braising is a method of cooking in which the meat is simmered in a cooking liquid or, in this case, a delicious sauce. It is safe to add raw meat to the braising liquid as long as it continues simmering until the meatballs are cooked through. These are hearty, good-sized meatballs so, for me, two are plenty! The sauce is a light tomato-based sauce that also has wine and beef broth. As the meatballs cook in the sauce, a twofold exchange is going on: First, the meatballs become more flavorful by absorbing the sauce as they cook. Secondly, the sauce reduces and deepens in flavor as the meat releases its juices. I think you’ll agree with me that these tender and delicious meatballs are some of the best you’ve ever had!

Keto Braised Italian Meatballs
Makes 6 servings

Meatballs:
1/2 pound ground pork
1 pound ground beef
2 slices of low carb bread (or 2 chaffles), lightly toasted or dried out
1/2 cup riced cauliflower, thawed and excess liquid removed
1 egg
1 cup parmesan cheese, grated
1 teaspoon dried Italian herb seasoning
3/4 teaspoon fennel seeds

Sauce:
1 can (14.5 or 15 oz) diced tomatoes (with liquid), blitzed in a food processor to make a smooth sauce (or 1-1/2 cups tomato sauce)
1 tablespoon tomato paste
2 tablespoons olive oil
1/4 cup carrots, finely chopped
1/4 cup onions, finely chopped
1 stalk celery, finely chopped
2 cloves garlic, minced
1/4 teaspoon salt
1/2 teaspoon black pepper
1/2 teaspoon zero-carb brown sugar substitute, such as Swerve Brown
1 tablespoon fresh sage leaves, chopped (if using dried herbs, use 1/2 the amount called for)
1 tablespoon fresh thyme, chopped
1 tablespoon fresh parsley, chopped 
1/2 cup dry white wine
1 cup beef stock

1. Tear the dried low carb bread (or chaffles) into pieces and place in a food processor. Add the drained riced cauliflower and pulse together until crumbs; set aside.

2. Placed the ground pork and beef into a large bowl and mix well. Mix in the bread or chaffle crumbs, the egg and mix. Add the grated cheese, herbs and fennel seeds and mix well with your hands until all the ingredients are well distributed.

3. Using your hands, shape into meatballs about 2-1/2 inches in diameter or use slightly less than 1/3 cup measuring cup to form 12 equal-sized meatballs. Set aside. (This step can be done one day ahead and refrigerated. Allow the meatballs to sit at room temperature for at least 30 minutes before cooking.)

4. To make the sauce: Pour the diced tomatoes and tomato paste into the food processor and blitz until it forms a smooth sauce. Measure to make sure you have at least 1-1/2 cups of tomato sauce (a little more is fine); set aside.

5. Add the olive oil to a wide, deep, heavy sauce pan and warm over medium heat. Add the carrots, celery and onion. Stir and cook for 2 minutes. Add the garlic and stir briefly until fragrant.

6. Add the salt, pepper, brown sugar substitute, sage, thyme and parsley. Stir well and cook for 2 minutes. Stir in the wine and cook for 2 minutes. Add the tomato sauce mixture and beef stock; stir to combine. Increase heat to medium-high and bring to a boil. After reaching a boil, add the meatballs and return to a boil. Reduce the heat to medium-low or low and simmer, uncovered, for 35 minutes.

7. Carefully, remove the meatballs to a serving plate or bowl with a slotted spoon. If necessary, continue to boil and reduce the sauce until it reaches the desired consistency. For extra flavor and color, you may garnish with chopped chives or parsley.

Braised Meatballs with Zucchini
Nutritional Information per 2 meatballs with 1/2 cup sauce: 548 calories, 6 g carbohydrate (1.5 g dietary fiber, 2.8 g sugars), 33.1 g total fat (11.8 g saturated fat, 0 g trans fat), 191 mg cholesterol, 754 mg sodium, 235.5 mg calcium, 456 mg potassium, 11 mg iron, 416 IU Vit A, 12 mg Vit C, 53.8 g protein. Net carbs per serving: 4.5 grams

Photo and recipe by Kathy Sheehan, copyright 2021
All rights reserved. Please do not duplicate without the author’s permission.

Friday, November 19, 2021

Keto Mini Cranberry Orange Bundt Cakes (Nut free!)

Keto Mini Cranberry Orange Bundt Cakes
Every year I make a batch of sugar-free dried cranberries to use in my recipes and baking for the holiday season. (Click here for the best recipe I’ve found and the one I have used for years, by Carolyn Ketchum.) These little cakes are a great way to use these tart, ruby red berries. I love the combination of orange and cranberry, especially around Christmas time. Serve these cakes as a dessert or with coffee for breakfast. Either way I think you and your family will love them as much as I do! (Tip: Double the recipe to make 4 mini cakes and triple the recipe if you’d like to make a full-size bundt cake and extend the baking time accordingly.)

Keto Mini Cranberry Orange Bundt Cakes (Nut Free!)
Makes four servings. (1/2 mini cake per serving)

Cakes:
1/4 cup plus 2 teaspoons coconut flour (32 grams in weight)
1/4 cup erythritol or allulose sweetener 
2 tablespoons unflavored whey protein powder
1 teaspoon baking powder
A pinch of salt
2 tablespoons sugar free dried cranberries, chopped
Zest of 1/2 orange (reserve 1/2 teaspoon for glaze)
2 eggs, room temperature 
2-1/2 tablespoons unsalted butter, melted and cooled
2 tablespoons fresh orange juice (or orange spice herbal tea, brewed and cooled, for slightly lower carbs, see note*)
1 tablespoon water
1/2 teaspoon orange extract (or 3-4 drops orange essential oil)

Glaze:
1/4 cup powdered erythritol or powdered allulose sweetener 
1/2 teaspoon reserved orange zest
1/8 teaspoon orange extract (or 1-2 drops orange essential oil)
1 tablespoon coconut or almond milk

1. Preheat the oven to 325°F and grease two (4” wide by 2” deep) mini bundt cake pans well; set aside. (This recipe can also be baked into muffins or donuts, just reduce the cooking time accordingly.)

2. In a small bowl, whisk together the coconut flour, sweetener, whey protein powder, baking powder and salt. Add the dried cranberries and orange zest and stir until the cranberries are coated in the flour mixture.

3. In a medium or larger bowl, beat the eggs well. Add the melted butter, orange juice or tea, water and orange extract until well combined. Add the dry ingredients all at once and beat just until there are no lumps and the batter is smooth. Do this quickly before the coconut flour absorbs the liquid and thickens the batter.

Silicone Mini Bundt Baking Pan
4. Divide the batter evenly among the pans and spread to the edges. Smooth the tops with the back of a small spoon. Bake 25 to 28 minutes, until lightly browned around the edges and the tops are just firm to the touch and a toothpick in the center comes out clean. (The baking time may be different if using a metal baking pan, so watch carefully and do not overbake.)

5. Remove from the oven and let cool in the pans for 10 minutes before flipping the mini cakes onto a wire rack. Cool completely before drizzling the glaze over the top, allowing some drips to cascade down the sides.

Baked Mini Bundt Cakes
6. To make the glaze: Whisk together all of the glaze ingredients until a pourable, but slightly thick glaze is created. If too thin, add more powdered sweetener. If too thick, add more milk, a tiny bit at a time.

7. When is the best time to drizzle the glaze? If you glaze the cakes too far ahead, the glaze will soak into the cakes as it sits and become translucent. Still quite delicious, but not creamy looking and cascading beautifully down the sides. If you want the glaze to be quite noticeable, as in the picture, then glaze the cakes just prior to serving. The best alternative is to use half the glaze and allow it to soak in to keep the cakes moist and then, just before serving, drizzle the remaining glaze over the top for a beautiful presentation.

*Note: The 2 tablespoons of real orange juice add 3 carbs to the entire recipe, so 3/4 (0.75) carb per serving. If you wish, you can substitute orange spice herbal tea that has been brewed and cooled and subtract 0.75 carb from the nutritional information provided.

Interior of Mini Bundt Cake
Nutritional  Information per serving (1/2 mini cake): 147 calories, 8.4 g carbohydrate (3.5 g dietary fiber, 1.4 g sugars, 1 g sugar alcohols), 11 g total fat (6.6 g saturated fat, 0 g trans fat), 112 mg cholesterol, 174 mg sodium, 111.4 mg calcium, 61 mg potassium, 1 mg iron, 113 IU Vit A, 5 mg Vit C, 5.7 g protein. Net carbs per serving: 3.9 grams

Photos and recipe by Kathy Sheehan, copyright 2021
All rights reserved. Please do not duplicate without the author’s permission. 

Wednesday, November 17, 2021

Keto Pumpkin Ice Cream

Keto Pumpkin Ice Cream
Dreaming of pumpkin pie? This ice cream really satisfies that craving and is perfect to serve during the holiday season!

Keto Pumpkin Ice Cream
Makes eight servings (1/2 cup each)

1 cup puréed pumpkin (no sugar added)
1/2 cup whole milk (I suggest Fairlife brand, see note*)
1-1/2 cups heavy cream
1 teaspoon pumpkin pie spice
A pinch of salt
3 tablespoons powdered erythritol sweetener 
6 tablespoons allulose
1 teaspoon vanilla extract
1 teaspoon pumpkin pie extract (I suggest Olive Nation brand)

1. Whisk all of the ingredients together in a medium bowl or large measuring cup. Cover and refrigerate for at least 2 hours or until thoroughly chilled. Whisk the mixture again just before churning. 

2. Churn in an ice cream maker according to the manufacturer’s directions. Once quite thick, remove to a container and place in the freezer to set up for at least 6 hours or overnight.

*Note: I recommend Fairlife Whole Milk because it is lactose free and half the carbs of regular milk. If using regular whole milk, add 3/4 carb (0.75) per serving.

Nutritional Information per 1/2 cup: 173 calories, 4.2 g carbohydrate (1 g dietary fiber, 1.5 g sugars), 18.3 g total fat (10.7 g saturated fat, 0 g trans fat), 61 mg cholesterol, 38 mg sodium, 36.6 mg calcium, 3 mg potassium, 1612 IU Vit A, 1 mg Vit C, 1.1 g protein. Net carbs per serving: 3.2 grams

Photo and recipe by Kathy Sheehan, copyright 2021
All rights reserved. Please do not duplicate without the author’s permission.

Monday, November 8, 2021

Keto Loaded Potato Biscuits

Keto Loaded Potato Biscuits
These nut free, coconut flour biscuits taste like a loaded baked potato, with the addition of sour cream, bacon, cheese and herbs…without a potato in sight! They can be made ahead and stored in the refrigerator or freezer. They are a delicious breakfast biscuit topped with poached eggs and hollandaise sauce or as an accompaniment to any meal.

Keto Loaded ‘Potato’ Biscuits
Makes 10 biscuits

1/2 cup mayonnaise 
1/4 cup sour cream
6 large eggs
1/4 teaspoon salt
1/8 teaspoon pepper
5 slices cooked bacon, finely chopped
3 tablespoons chives or green onions, finely chopped
1/2 tablespoon parsley, finely chopped (half that amount if using dried)
1 cup coconut flour
1-1/2 teaspoons baking powder
1/2 cup shredded extra sharp cheddar cheese

1. Preheat oven to 375 degrees F. Line a baking sheet with parchment paper or a silicone mat.

2. Place the mayonnaise, sour cream, eggs, salt, pepper, bacon, chives and parsley in a medium mixing bowl and whisk to combine.

3. Place the coconut flour and baking powder in a small bowl and whisk with a fork until combined, breaking up any lumps. Add the dry ingredients and shredded cheese to the mayonnaise mixture and stir quickly with a fork to fully incorporate the ingredients. Allow the batter to sit for a few minutes until the coconut flour absorbs most of the liquid and the mixture thickens into a soft dough. 

4. Turn out the dough onto the counter and form into a large ball. Pat down gently on the dough ball until it is 1-inch in thickness. Use a small biscuit cutter to make biscuits, reforming scraps into a ball and patting down again as needed until you have created ten 1-inch high biscuits. (Alternatively, you can divide the dough into 10 pieces, roll each piece into a ball, place them on the prepared baking sheet and gently pat down with your fingers until the biscuits are 1-inch thick.)

Keto Potato Biscuits
5. Bake for 18-20 minutes or until the bottom of the biscuits have browned and the tops take on a bit of golden color. Remove from the oven and allow the biscuits to remain on the baking sheet for 5 minutes. Serve warm.

6. The biscuits can be stored in the refrigerator for up to 3 days or, once cooled completely, wrapped well with plastic wrap and stored in the freezer for up to a month. To reheat: If frozen, thaw biscuits at room temperature for 1 hour. Place on a baking sheet and warm in a preheated 300 degree F oven until heated through, about 8-10 minutes.

Potato Biscuits made Low Carb
Nutritional Information per biscuit: 219 calories, 7.3 g carbohydrate (4 g dietary fiber, 0.9 g sugars), 17 g total fat (5.9 g saturated fat, 0 g trans fat), 128 mg cholesterol, 319 mg sodium, 114.7 mg calcium, 76 mg potassium, 1 mg iron, 93 IU Vit A, 8.5 g protein. Net carbs per biscuit: 3.3 grams

Photos and recipe by Kathy Sheehan, copyright 2021
All rights reserved. Please do not duplicate without the author’s permission. 

Thursday, November 4, 2021

Keto Radish and Egg Frico

Radish and Egg Frico
Frico is a traditional dish from north eastern Italy usually made with potatoes. I modified the recipe to make it keto by replacing the potatoes with radishes. This quick meal for any time of day is basically a crispy, double-crusted cheese pie filled with vegetables and made in a skillet. It is rustic comfort food that is filling and SO DELICIOUS!

Radish and Egg Frico, cut into quarters
Keto Radish and Egg Frico
Makes 2 servings

1/2 tablespoon avocado oil or bacon grease
3/4 cup sliced radishes
1/2 small onion, sliced
4 ounces shredded cheese, about 1-1/2 cup (Cheddar, Asiago and Gruyere are good choices)
2 eggs
2 slices cooked bacon, chopped
Salt and pepper to taste

1. Melt the oil in an 8-inch, non-stick skillet over medium heat. Add the sliced onions and radishes and cover, stirring occasionally, until the vegetables are browned and tender. 

Sauteed radishes and onions
2. Remove lid and reduce heat to low. Remove the cooked vegetables to a plate and, into the hot skillet, sprinkle 1/2 of the shredded cheese.

Sprinkle skillet with cheese
3. Return the sautéed vegetable to the skillet, carefully arranging the vegetables on top of the shredded cheese.

Return vegetables to skillet
4. Crack two eggs on top of the vegetables. Season the eggs with salt and pepper. Add the chopped bacon on top of the eggs.

Add eggs and bacon
5. Finally, sprinkle the remaining shredded cheese over the top. Continue cooking until the bottom layer of cheese is firm and crispy.

Top with remaining cheese
6. Very carefully, flip the frico with a spatula. Cook on the second side until the cheese is firm and crispy. Remove to a serving plate, cut in half or quarters and enjoy!

Whole Radish and Egg Frico
Nutritional Information per serving (1/2 recipe): 357 calories, 5.1 g carbohydrate (1.1 g dietary fiber, 2.3 g sugars), 26.4 g total fat (14.8 g saturated fat, 0 g trans fat), 255 mg cholesterol, 655 mg sodium, 446.7 mg calcium, 262 mg potassium, 1 mg iron, 263 IU Vit A, 8 mg Vit C, 24 g protein. Net carbs per serving: 4 grams

Photos and recipe by Kathy Sheehan, copyright 2021
All rights reserved. Please do not duplicate without the author’s permission. 

Tuesday, October 26, 2021

Mini Pumpkin Gingerbread Bundt Cakes with Keto Bourbon Toffee Sauce

Mini Pumpkin Gingerbread Bundt Cakes with Keto Bourbon Toffee Sauce
These little spiced cakes make the perfect fall dessert! If you don’t own a mini bundt cake pan, you can make cupcakes instead. The sauce pairs beautifully with the cakes, but is also delicious served over ice cream. 

Mini Pumpkin Gingerbread Bundt Cakes
Makes 6 mini bundt cakes

4 large eggs
2/3 cup allulose
5 tablespoons unsalted butter, melted and cooled with extracts whisked in
1 teaspoon vanilla extract
1/2 teaspoon molasses extract (or 1 teaspoon regular molasses)
1/4 cup pumpkin puree
1/4 cup + 2 tablespoons coconut flour
3/4 teaspoon xanthan gum
2 tablespoons unflavored whey protein powder
3/4 teaspoon baking powder
1/8 teaspoon salt
1-1/2 teaspoons gingerbread spice blend
1/4 teaspoon ground ginger

1. Preheat the oven to 350 degrees Fahrenheit and adjust the rack to the middle position. Thoroughly butter/grease a mini bundt cake baking pan; set aside.

2. Place the eggs and allulose in the bowl of a standing mixer with a whisk attachment (or use a large bowl and a handheld electric mixer). Whisk on medium-high for 8 minutes, then reduce the mixer to low and slowly drizzle in the melted and cooled butter with the extracts whisked in and the puréed pumpkin. Do not overmix, so as not to deflate the egg mixture. Sift in the coconut flour, xanthan gum, whey protein powder, baking powder, salt and spices. Gently fold the dry ingredients into the egg mixture with a wooden spoon or rubber spatula until incorporated. Let the batter sit at room temperature for a few minutes to hydrate the coconut flour.

3. Spoon the batter into the buttered pan or put the batter into a large piping bag and pipe the batter into the pan. Bake for 21-23 minutes, or until just turning golden brown around the edges. Let the cakes cool in the pan for 10 minutes and then invert them onto a wire rack. Serve warm or at room temperature with sauce or top with your favorite keto ice cream.

Mini Pumpkin Gingerbread Bundt Cake
Nutritional Information per mini bundt cake (no sauce): 175 calories, 5.9 g carbohydrate (3 g dietary fiber, 1.1 g sugars), 13.9 g total fat (8.2 g saturated fat, 0 g trans fat), 149 mg cholesterol, 132 mg sodium, 75.7 mg calcium, 57 mg potassium, 1 mg iron, 618 IU Vit A, 6.2 g protein. Net carbs per mini cake (no sauce): 2.9 grams

Keto Bourbon Toffee Sauce
Makes 1 cup (16 servings)

1/2 cup (1 stick) unsalted butter
1/4 cup allulose
1/4 cup LaKanto Golden, powdered (blitz in a food processor)
A pinch of salt
1/4 cup heavy whipping cream
3-4 tablespoons bourbon, to taste (or Rum can be substituted, if desired)
1/2 teaspoon vanilla extract
1/4 teaspoon xanthan gum

1. Combine butter, sweeteners and a pinch of salt in a medium saucepan over medium-low heat; allow butter to melt and sweeteners to dissolve. Stir constantly until butter begins to turn light brown (about 5 minutes).

2. Whisk in the cream, bourbon, vanilla and xanthan gum. The sauce will bubble up rapidly, then return to a simmer. Reduce heat to low and whisk constantly until sauce has thickened a bit, about 3-5 minutes. Note: Sauce will continue to thicken further when removed from the heat, so it may not seem as thick as it will be in the end.

3. Remove from heat and allow to cool. Can be stored in the refrigerator for up to 2 weeks and reheated when serving.

Nutritional Information for 1 tablespoon: 71 calories, 0.3 g carbohydrate (0 g fiber, 0 g sugars, 0.3 g sugar alcohols), 7.3 g total fat (4.5 g saturated fat), 20 mg cholesterol, 6 mg sodium, 1.7 mg calcium, 2 mg potassium, 1.1 g alcohol, 68 IU Vit A, 0 g protein. Net carbs per serving: 0 grams

Photos and recipes by Kathy Sheehan, copyright 2021
All rights reserved. Please do not duplicate without the author’s permission. 

Saturday, September 11, 2021

Microwave Keto Lemon Curd

Microwave Keto Lemon Curd
Making homemade Lemon Curd couldn’t be easier than using this quick microwave method! This tart, refreshing spread is excellent on low carb pancakes, toast, chaffles, as a topping for ice cream, cottage cheese or yogurt, as a filling for tarts, thumbprint cookies or between layers of a cake. My grandmother loved it on peaches. Eating it straight from the jar by the spoonful is another way! It also makes an excellent gift to share with your keto friends and family. The list could go on and on…

Microwave Keto Lemon Curd
Makes 3/4 cup (12 servings)

1/4 cup unsalted butter, very soft or melted and cooled
1/4 cup powdered erythritol
1/4 cup allulose (or Bocha Sweet)
1/2 teaspoon lemon zest
1/2 cup fresh lemon juice (it’s important that it be fresh, not bottled!)
1 large egg + 1 egg yolk
1/4 or 1/2 xanthan gum (*see note below)
4-6 drops monkfruit extract
1/8 to 1/4 teaspoon stevia glycerite (or more monkfruit extract to taste)

1. Whisk together the butter, powdered erythritol, allulose, lemon zest, lemon juice and egg in a large microwave-safe bowl. (The mixture will expand considerably during the cooking process, so it’s best to use a large bowl to prevent any overflow.)

2. Microwave on high in 45 second intervals, stopping between intervals to whisk thoroughly, until the mixture has thickened and coats the back of a spoon, about 4-5 minutes in total. (The mixture will thicken more once cooled.) 

3. After cooking, add the xanthan gum and whisk vigorously until incorporated and dissolved. Add the stevia glycerite and monkfruit extract to taste.

4. Using a fine mesh strainer, strain the warm mixture into a clean bowl, using a rubber spatula to press the curd through the strainer. Discard any remaining solids. Cover the surface with plastic wrap, pressing down to make sure the wrap touches the top of the curd to prevent a skin forming. Refrigerate until set, overnight is best. Remove from the refrigerator and, if desired, spoon into a glass jar or other airtight container for storage. Keep refrigerated. Can be stored for 7-10 days.

Note: If you’ll be using this Lemon Curd as a filling between cake layers or for a tart, use the 1/2 teaspoon amount of xanthan gum for the extra thickening power it provides. If serving as a spread or sauce, the 1/4 teaspoon measurement is adequate. 

Lemon curd on pancakes

Keto Lemon Curd
Nutritional Information per tablespoon: 76 calories, 1.3 g carbohydrate (0 g dietary fiber, 0.3 g sugars, 0.7 g sugar alcohol), 8.1 g total fat (5 g saturated fat, 0 g trans fat), 36 mg cholesterol, 8 mg sodium, 5.4 mg calcium, 21 mg potassium, 78 IU Vit A, 5 mg Vit C, 0.6 g protein. Net carbs per serving: 0.6 grams

Photos and recipe by Kathy Sheehan, copyright 2021
All rights reserved. Please do not duplicate without the author’s permission. 

Sunday, August 29, 2021

Keto Home Fries

Keto Home Fries
These pan-roasted radishes taste just like home fries! I think the real trick is adding some onion, so the radishes and onions caramelize together. Even my husband, who does not eat keto and is basically a meat & potatoes man, loved them! He commented that they tasted like fried potatoes—and they really do!

Keto Home Fries
Makes 2 servings

1-2 tablespoons avocado oil or bacon grease
2 cups cubed or sliced radishes
1/4 cup onion, cut into chunky pieces
Salt and pepper to taste
Chopped fresh chives and thyme, if desired

1. Place avocado oil or bacon grease into a skillet. Add cubed or sliced radishes and season with salt and pepper. Cover and cook for a few minutes until the radishes begin to release some of their moisture and start to soften.

2. Remove lid and add onion. Sauté uncovered over medium-low heat until the radishes and onions have browned and caramelized, stirring occasionally, making sure the radishes have browned nicely on all sides. Season with additional salt and pepper to taste. Sprinkle with herbs just before serving, if desired.

Nutritional Information per serving (1/2 recipe): 81 calories, 5.8 g carbohydrate (2.1 g dietary fiber, 3.1 g sugars), 6.4 g total fat (2.9 g saturated fat, 0 g trans fat), 6 mg cholesterol, 140 mg sodium, 32.2 mg calcium, 291 mg potassium, 2 IU Vit A, 1 g protein. Net carbs per serving: 3.7 grams

Photo and recipe by Kathy Sheehan, copyright 2021
All rights reserved. Please do not duplicate without the author’s permission. 

Wednesday, August 25, 2021

Better Than Snickers Ice Cream (Low Carb, Sugar Free!)

Better Than Snickers Low Carb Ice Cream
We’ve had a stretch of warm and muggy weather lately, so my ice cream maker has been working overtime. When you’re looking for a low carb ice cream recipe to WOW your friends and family, this is the one! No need for toppings because all the toppings are IN the ice cream: chopped peanuts, chocolate chips and gooey caramel swirled into a base of creamy, rich peanut butter ice cream. When I say it’s better than a candy bar, I mean it! There is the extra step of making the caramel just before churning, but your effort will be rewarded. I’ve made this ice cream a few times now and it has quickly become my daughter’s favorite. If you love the candy bar, you’ll love this ice cream, too! 

Low Carb “Better Than Snickers” Ice Cream
Makes 8 servings

Ice Cream Base:
1 cup whole milk (I suggest Fairlife brand, see note below*)
3 tablespoons powdered erythritol-based sweetener (I used LaKanto Monkfruit sweetener)
6 tablespoons allulose
1/3 cup no-stir, creamy peanut butter (no sugar added)
1/4 teaspoon salt
1/2 teaspoon vanilla extract
1/4 teaspoon caramel extract
1-2/3 cup heavy cream

Caramel Sauce:
6 tablespoons allulose 
1 tablespoon water
3 tablespoons unsalted butter, softened
2 tablespoons heavy cream
A pinch of salt (to taste)
1 tablespoon creamy peanut butter

Stir Ins:
1/3 cup roasted peanuts, roughly chopped (chill in refrigerator)
1/3 cup sugar free milk chocolate chips, chopped into small pieces (chill in refrigerator)

1. In a blender, blend together the whole milk, sweeteners, 1/3 cup peanut butter, salt and extracts. Blend until smooth. Add the heavy cream and blend again to combine. Taste and adjust sweetening, if desired. Pour into a container and refrigerate for 3 hours or until chilled.

2. Just before you churn the ice cream, make the Caramel Sauce: Heat over medium heat the 6 tablespoons of allulose and water in a heavy saucepan until it melts and gets bubbly. Swirl the pan occasionally to prevent hot spots and simmer until the mixture caramelizes and turns amber in color (if using a candy thermometer, the temperature should be about 340-350 degrees Fahrenheit). Watch carefully because it can go from amber to burned quickly! Remove from heat and immediately add the butter and whisk until incorporated, add the heavy cream and pinch of salt. The caramel will steam and bubble up as you stir. Add the tablespoon of peanut butter and whisk until completely smooth. Set aside to cool a bit, stirring occasionally.

Caramel Sauce
3. According to the manufacturer’s instructions for your ice cream maker, churn the ice cream base until quite thick. Add the chopped peanuts and chocolate chips and continue churning until very thick and cold.

Swirl in the caramel sauce
4. When the ice cream has finished churning, transfer to a wide, flat container (like a loaf pan). Add ice cream in three separate layers, drizzling caramel sauce between each layer and then swirl in with a knife before adding the next layer. Work quickly and transfer the container to the freezer to set up for at least 6 hours before serving.

Note: I recommend using Fairlife brand of whole milk. It is lactose free and has half the carbs of regular milk. If using regular whole milk, add 1-1/2 carbs per serving. 

Nutritional Information per 1/2 cup (using Fairlife milk): 279 calories, 5.5 g carbohydrate (1.6 g dietary fiber, 1.1 g sugars), 28.8 g total fat (14.1 g saturated fat, 0 g trans fat), 70 mg cholesterol, 184 mg sodium, 69.2 mg calcium, 36 mg potassium, 219 IU Vit A, 4.5 g protein. Net carbs per serving: 3.9 grams

Photos and recipe by Kathy Sheehan, copyright 2021
All rights reserved. Please do not duplicate without the author’s permission. 

Thursday, August 19, 2021

Low Carb Blueberry Pie a la mode Ice Cream

Low Carb Blueberry Pie a la mode Ice Cream
“I scream! You scream! We all scream for ice cream!” Every since I learned the right combination of sweeteners to create the best scoopable, sugar free ice cream right from the freezer, I’ve been having a wonderful time experimenting in my kitchen. Wild Maine blueberries are just hitting the Farmer’s Markets so, of course, I had to make my own version of Blueberry Ice Cream! It includes those juicy, little berries and chunks of keto ‘pie crust’ all swirled into creamy vanilla ice cream. The sauce is optional, but it really makes a wonderful ice cream sundae topping. This ice cream flavor just screams SUMMER where I live!

Low Carb Blueberry Pie a la mode Ice Cream
Makes 8 servings

Ice Cream Base:
1 cup whole milk* (I suggest Fairlife, see note)
3 tablespoons powdered erythritol-based sweetener
6 tablespoons allulose
A pinch of salt
2 cups heavy cream
1 tablespoon vanilla extract
The beans scraped from a vanilla bean (or 1/8 teaspoon vanilla seed powder), optional

Pie Crust Stir In:
1/3 cup almond flour (or sunflower seed flour for low oxalate)
2 teaspoons powdered erythritol sweetener
A pinch of salt
1 tablespoon unsalted butter, melted

Other Stir In:
3/4 cup Wild Maine blueberries (small berries), fresh or frozen

Blueberry Sauce (optional):
2 cups blueberries, fresh or frozen
2 tablespoons water
6-8 drops monkfruit extract or stevia, to taste

1. Make the ice cream base: In a medium bowl, use a whisk to combine the milk, sweeteners and salt. Whisk until the sweeteners are dissolved. Add the heavy cream and vanilla extract and whisk to combine. Cover and refrigerate for at least 2 hours or overnight, until well chilled. Whisk together again and add the vanilla beans, if using, just before churning.

2. While the ice cream base is chilling, make the Pie Crust Stir In: Preheat oven to 300 degrees Fahrenheit. In a medium bowl, whisk together the almond flour, sweetener and salt. Add the melted butter and stir until it resembles coarse crumbs. 

3. Pour the mixture in a mound onto a cookie sheet lined with parchment paper or a silicone baking mat. Press down with your fingers to flatten into a circle or oval (the shape really doesn’t matter) until it is between 1/8” to 1/4” in thickness. Bake in the preheated oven for 7-10 minutes or until the edges are golden brown. Watch carefully because once it starts to turn golden, it can brown quickly and you don’t want the edges to burn.

Pie Crust Stir In
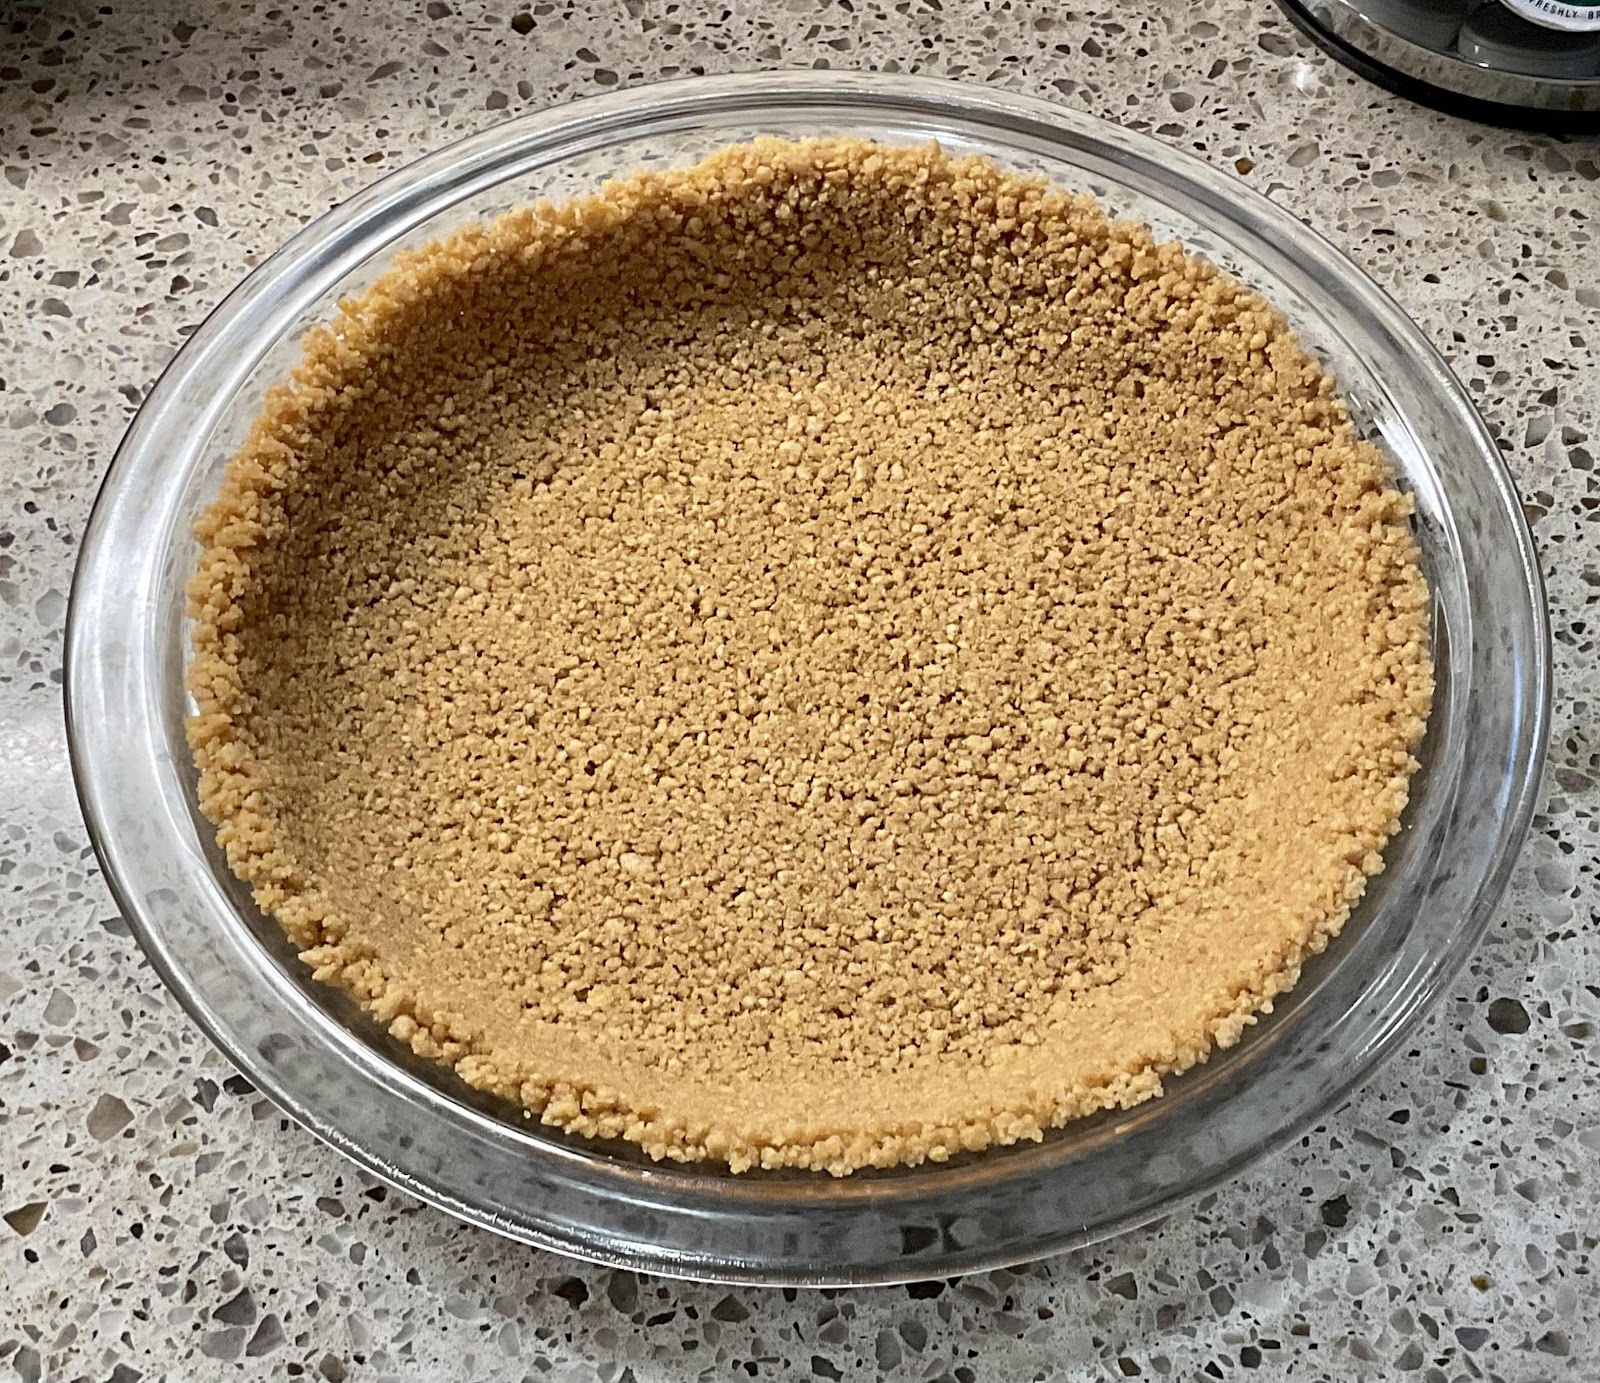
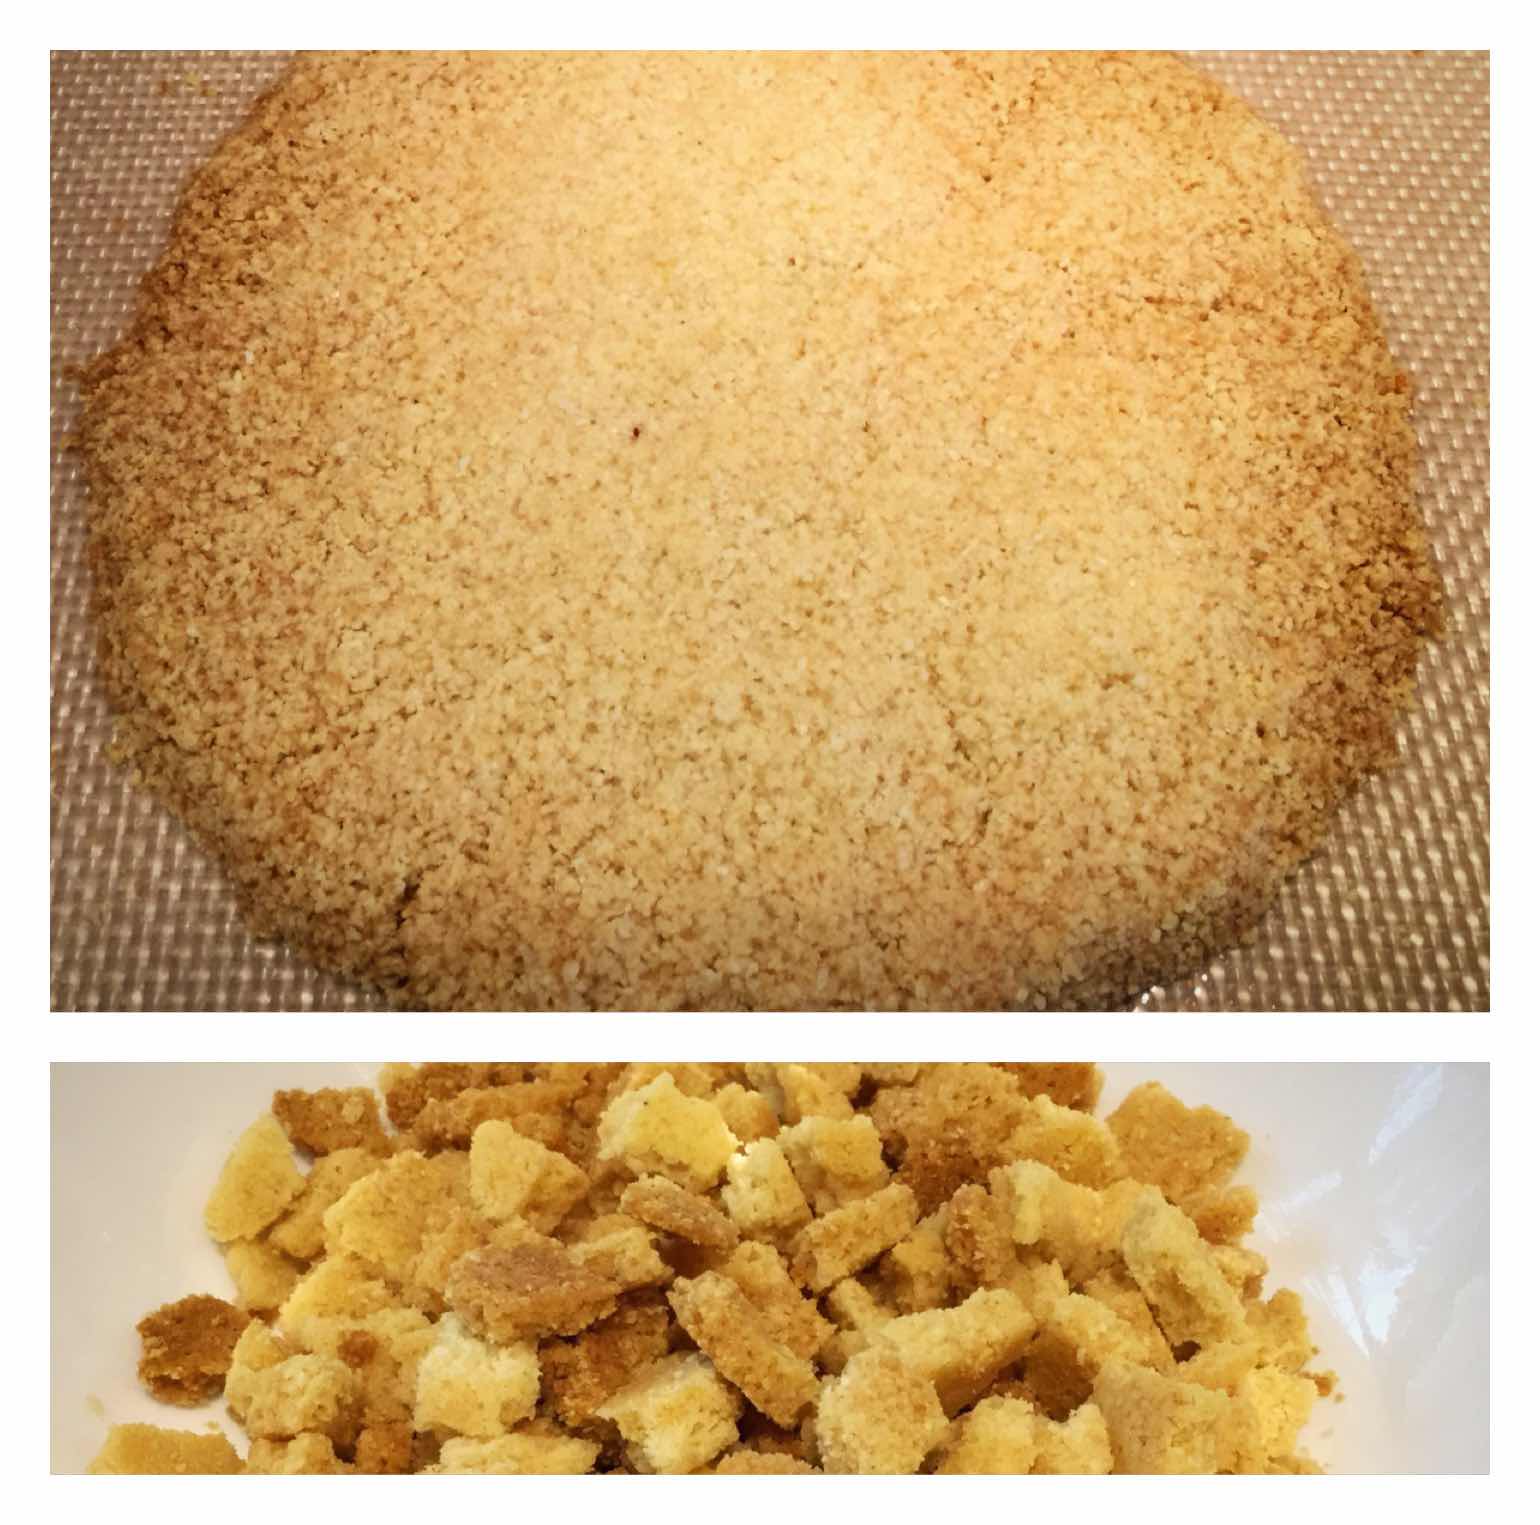
4. Allow the crust to cool on the baking sheet for 5 minutes, then remove the parchment paper or silicone mat to a wire rack to finish cooling completely (keep crust on paper to prevent crumbling). The crust will firm up and crisp as it cools. Once cool, carefully break the crust into small pieces and set aside until it’s time to add them to the ice cream at the end of the churning process.

5. Churn the Ice Cream: Following the manufacturer’s instructions for your machine, churn the ice cream base. When it has thickened sufficiently, slowly add the pie crust pieces and blueberries. Continue churning until quite thick. Serve immediately as a soft-serve ice cream or spoon into an air-tight container and place in the freezer for 4 hours or more until set.

6. To make the Blueberry Sauce (optional): Place 2 cups of blueberries and water into a saucepan and heat over medium-low heat until the berries burst. Mash with a potato masher or the tines of a fork to break up the berries. Simmer for a few minutes to thicken slightly. Remove from heat and allow to cool. Taste and add monkfruit extract or stevia if desired. Store in a glass jar in the refrigerator. Spoon over ice cream to serve. Makes about 1 cup.

*Note: I recommend Fairlife brand Whole Milk, which is lactose free and has half the carbs of regular milk. If using regular whole milk, add 1-1/2 carbs per serving.

Nutritional Information per 1/2 cup ice cream (no sauce): 210 calories, 3.7 g carbohydrate (0.5 g dietary fiber, 1.9 g sugars, 0.8 g sugar alcohols), 22.7 g total fat (12.5 g saturated fat, 0 g trans fat), 70 mg cholesterol, 54 mg sodium, 42.8 mg calcium, 19 mg potassium, 206 IU Vit A, 1.6 g protein.  Net carbs per serving: 2.4 grams

Blueberry Sauce per 1 tablespoon: 11 calories, 2.7 g carbohydrate (0.4 g dietary fiber, 1.8 g sugars), 0.1 g total fat, 0 mg cholesterol, 0 mg sodium, 1.1 mg calcium, 14 mg potassium, 3 IU Vit A, 2 mg Vit C, 0.1 g protein. Net carbs per serving: 2.3 grams

Photos and recipe by Kathy Sheehan, copyright 2021
All rights reserved. Please do not duplicate without the author’s permission. 

Friday, August 13, 2021

Scrambled Egg Creamy Lemon Pudding

Scrambled Egg Creamy Lemon Pudding
Another simple keto pudding recipe using the fool-proof scrambled egg method! Lemon is the perfect flavor for a warm day; it’s so refreshing and light.

Scrambled Egg Creamy Lemon Pudding
Makes 3 generous servings (or 4 slightly smaller servings)

3 eggs, scrambled in 1 tablespoon of unsalted butter
1/4 cup powdered erythritol-based sweetener (I like LaKanto Monkfruit sweetener)
1/2 cup heavy cream
1/4 cup lemon juice (fresh or bottled)
1/4 cup sour cream
2 tablespoons unsweetened almond or coconut milk
A pinch of salt
1 teaspoon lemon zest (or 2 drops lemon essential oil for low oxalate)
1/2 teaspoon liquid stevia or monkfruit extract
1/4 teaspoon lemon extract (or to taste)
3/4 teaspoon unflavored gelatin powder
3/4 teaspoon xanthan gum

1. In a skillet, melt the 1 tablespoon of butter and add your whisked eggs to scramble. Stir and cook until the eggs no longer look wet and glossy. Spoon the scrambled eggs into a blender.

2. Add the remaining ingredients and blend on high, scraping the sides of the blender occasionally, until the mixture is completely smooth. It may look like the mixture is curdling at the beginning, but keep blending and it will smooth out. Taste and adjust sweetening and lemon flavoring, if needed to suit your taste. (I like mine tart!)

3. Pour into three ramekins or serving dishes and refrigerate for at least 3 hours, or overnight is even better. The longer it sets, the thicker your pudding will be. Enjoy with a dollop of whipped cream and berries (optional). This pudding can be stored in the refrigerator for up to 5 days.

Top View of Cream Lemon Pudding
Nutritional Information per serving (based on 3 servings): 210 calories, 3.8 g carbohydrate (0.3 g dietary fiber, 0.6 g sugars, 1 g sugar alcohols), 23.2 g total fat (13.9 g saturated fat, 0 g trans fat), 70 mg cholesterol, 60 mg sodium, 26.1 mg calcium, 52 mg potassium, 10 mg Vit C, 232 IU Vit A, 1.1 g protein. Net carbs per serving: 2.5 grams

Photos and recipe by Kathy Sheehan, copyright 2021
All rights reserved. Please do not duplicate without the author’s permission. 

Tuesday, August 3, 2021

Low Carb Cherry Stracciatella Ice Cream (Cherry Chip)

Low Carb Cherry Stracciatella Ice Cream
In Italian, the word stracciatella literally means, “rags or shards.” Stracciatella is made by drizzling a fine stream of chocolate into cold, churning ice cream. The chocolate thread instantly solidifies and, as it continues to be churned, breaks into flakes of melt-in-your-mouth, rich chocolate. This isn’t like any ordinary chocolate chip ice cream; it is luxurious! Normally, Stracciatella Gelato is vanilla-based. I wanted to take advantage of the gorgeous, ripe cherries available right now, so I made mine cherry-based instead. Because cherries are higher carb than berries, I take advantage of a high quality cherry extract to enhance the cherry flavor, so only a few chopped cherries are needed as a final mix-in. (I recommend Olive Nation brand, which can be purchased online.) This beautiful, delicately pink ice cream, laced with bits of cherry and sumptuous chocolate is quickly becoming a summer favorite at my house!

Remains scoopable, even when frozen
Low Carb Cherry Stracciatella Ice Cream (Cherry Chip)
Makes 8 servings

Cherry Ice Cream Base:
1 cup whole milk* (see note)
3 tablespoons erythritol-based sweetener (I used LaKanto Monkfruit sweetener)
6 tablespoons allulose
A pinch of salt
2 cups heavy cream
1 teaspoon vanilla extract
1 teaspoon cherry extract (I recommend Olive Nation brand)
1 drop of red food coloring (optional)
10 sweet, dark cherries (fresh or thawed from frozen), pitted and chopped

Chocolate Stracciatella:
2 tablespoons refined coconut oil, melted
3 squares of Lily’s sugar free dark chocolate bar, chopped (about 1 tablespoon)
2 tablespoons unsweetened cocoa powder
1/8 teaspoon vanilla extract
6-8 drops stevia or monkfruit extract, or to taste

1. In a medium bowl, whisk together the whole milk, sweeteners and salt. Whisk until the sweeteners are dissolved. Add the heavy cream, extracts and food coloring, if using. Cover and refrigerate a minimum of 2 hours, or overnight. Whisk mixture together again just before churning. 

2. Pit and chop the cherries, or pulse in a food processor, to desired consistency. Place the chopped cherries and any accumulated juices into an airtight container and refrigerate until called for in the churning process.

3. When the ice cream base is almost ready to churn, make the Chocolate Stracciatella by melting the coconut oil in a glass or microwave-safe measuring cup. Add the chopped chocolate and stir until melted and smooth. Add the cocoa powder, vanilla extract and stevia or monkfruit extract. Stir until completely smooth. Taste and adjust sweetening as desired; set aside to cool a bit before proceeding. Just prior to churning the ice cream, whisk and, only if necessary, microwave for a few seconds. You want the chocolate in a liquid state, but not too warm, so it will solidify quickly and create a flaked effect when added to the cold ice cream at the end of the churning process.

4. Follow the directions for your ice cream maker. Pour the chilled ice cream base into your ice cream maker and churn until thickened and beginning to set. Add the chopped cherries and any accumulated juices and continue churning until quite cold, very thick and nearly set. Slowly drizzle the Chocolate Stracciatella, as the ice cream is churning, 1 teaspoon at a time, waiting for the previous teaspoon of chocolate to solidify and move on before adding the next teaspoon.

Drizzle in the Chocolate Stracciatella
5. Spoon the ice cream into an airtight container and place in the freezer for a minimum of 3-4 hours or more before serving.

*Note about milk: I recommend the brand Fairlife Whole Milk because it has less sugar, is lactose free and has half the carbs of regular milk. If using regular whole milk, add 1.5 g carb per serving.

Fairlife Milk
Nutritional Information per serving (1/2 cup): 257 calories, 4.6 g carbohydrate (0.8 g dietary fiber, 2 g sugar, 0.6 g sugar alcohols), 27.1 g total fat (16.4 g saturated fat, 0 g trans fat), 83 mg cholesterol, 49 mg sodium, 53.6 mg calcium, 21 mg potassium, 257 IU Vit A, 1 mg Vit C, 2.1 g protein. Net carbs per serving: 3.2 grams

Recipe and Photos by Kathy Sheehan, copyright 2021
All rights reserved. Please do not duplicate without the author’s permission. 

Friday, July 30, 2021

Simple Keto Vanilla Ice Cream (Chipper Ice Milk)

Simple Keto Vanilla Ice Cream
Growing up in Oklahoma in the 1960’s and 70’s, I have a fond memory of a local dairy’s Chipper Ice Milk. Every time I stayed at my Grandmother’s house, she’d be sure to have a quart on hand because she knew it was a favorite treat that we didn’t get at home. I recently visited relatives in Oklahoma and a dear family friend introduced me to her keto vanilla ice cream, that tastes amazingly like the Chipper Ice Milk we all remembered and loved! Her homemade ice cream was so delicious, I asked for the recipe and her permission to post it. It’s just too delicious not to share! The best part is that it remains creamy and easy to scoop right out of the freezer, even after many days. The trick is the right ratio of sweeteners, both powdered erythritol (or LaKanto monkfruit-erythritol blend) and allulose are required. It is key that you use the right amount of allulose, no other sweetener will do, because it prevents the ice cream from turning into a block of ice! (Bocha Sweet might work, although I’ve never tried it.) No tempering of eggs, just whisk the ingredients together and churn! Keto never tasted so good!

Scoopable right from the freezer!
Simple Keto Vanilla Ice Cream (Chipper Ice Milk)
Makes 8 servings

1 cup whole milk* (I used Fairlife brand, see note below)
3 tablespoons powdered erythritol sweetener (I used Powdered LaKanto Monkfruit-Erythritol sweetener)
6 tablespoons allulose
A pinch of salt
2 cups heavy cream
1 tablespoon pure vanilla extract

1. In a medium bowl, whisk together the milk, sweeteners and salt until the sweeteners are dissolved. Stir in the heavy cream and vanilla extract. Cover and refrigerate a minimum of 2 hours, or overnight is even better. Whisk mixture again before churning.

2. Follow the manufacturer’s directions for your ice cream maker and churn the mixture until quite thickened, about 15-20 minutes. At this stage, your ice cream will have a soft, creamy texture and can be eaten right away as a soft-serve, although it is preferred that you remove the churned ice cream to an airtight container and freeze for a minimum of 3-4 hours.

Keto Chipper Ice Milk
*Note about milk: You might be saying, “Hey, wait a minute! Milk is not keto!” That’s true. Regular Whole Milk is about 12-13 grams of carbohydrate per cup, all of which is lactose (sugar). I suggest Fairlife Whole Milk, which has less sugar and is half the carbs of regular whole milk. Because Fairlife is 6 g carbs per cup, when divided into the number of servings, it imparts less than 1 gram of carb per serving. If using regular whole milk, add 1.5 carbs per serving.

For the whole milk you can substitute unsweetened nut milk of choice, although the ice cream will be firmer when frozen due to the higher water content. To obtain the creamiest result, I suggest full-fat canned coconut milk. If using coconut milk, it will impart a slight coconut flavor. Also, if using coconut milk, the nutritional information per serving changes to: 257 calories, 2 g carbs (0 g fiber, 0.2 g sugars, 0.5 g sugar alcohols), 29.7 g total fat (19.1 g saturated fat), 79 mg cholesterol, 38 mg sodium, 5.3 mg calcium, 64 mg potassium, 1 mg iron, 236 IU Vit A, 0.6 g protein. 

Fairlife Milk has less sugarNutritional Information per 1/2 cup (made with Fairlife milk): 220 calories, 1.9 g carbohydrate (0 g dietary fiber, 0.9 g sugars, 0.5 g sugar alcohols), 24.7 g total fat (14.7 g saturated fat, 0 g trans fat), 83 mg cholesterol, 48 mg sodium, 50.2 mg calcium, 2 mg potassium, 255 IU Vit A, 1.6 g protein. Net carbs per serving: 1.4 grams

Recipe by Debbie Davidson, copyright 2021
Photos by Debbie Davidson and Kathy Sheehan
All rights reserved. Please do not duplicate without the author’s permission.