Showing posts with label nuts. Show all posts

Wednesday, March 6, 2024

Keto Peanut Butter Thumbprint Cookies

Keto Peanut Butter Thumbprint Cookies

I am not a professional baker, but I do like to create delicious and beautiful desserts. For typical Thumbprint Cookies, you simply roll the dough into balls and press your thumb to make an indentation for the filling. I could have done that with this recipe but, recently on vacation, I visited my favorite cooking/kitchen store and found a set of thumbprint cookie presses that take these simple cookies to a new level of elegance. (I found these cookie presses at Williams Sonoma, but you can find similar presses online, in other stores or on Amazon.) Fill them with either sugar free jam or chocolate ganache. Both pair exceptionally well with the peanut butter cookie base. Peanut butter & jelly? Peanut butter & chocolate? Which will be your favorite?

Keto Peanut Butter Thumbprint Cookies
Makes 20 cookies

Cookies:
1 cup almond flour
1/4 cup peanut butter powder (no sugar added)
1 tablespoon unflavored whey protein powder
2 tablespoons oat fiber powder (not oat flour!)
2 tablespoons coconut flour
1/4 teaspoon salt
8 tablespoons unsalted butter, softened (1 stick)
½ cup erythritol-based granulated sweetener (I used LaKanto Monkfruit Classic)
1 large egg
1 tablespoon low carb milk of choice
½ teaspoon vanilla extract

Jam Filling:
Sugar free jam (any flavor)

Chocolate Ganache Filling:
1 ounce heavy cream
1 ounce sugar free chocolate chips (such as Lily’s brand or Guittard Keto Chips)

1. In a medium bowl, whisk together the almond flour, peanut butter powder, whey protein powder, oat fiber, coconut flour and salt until no lumps remain; set aside. In a large bowl, beat the softened butter and 1/2 cup of erythritol sweetener together until creamy, using an electric mixer with a paddle attachment, if you have one. Beat in the egg, milk, and vanilla extract, and then beat in the dry ingredients until the dough comes together. 

2. Turn dough out onto a silicone mat or parchment paper that has been dusted with coconut flour. Pat dough into a rough circle and then top with a large piece of parchment paper or plastic wrap. Roll out the dough to about 5/8 inch thickness. Place the rolled out dough on a cookie sheet and chill in the refrigerator for about 30 minutes or in the freezer for 10 to 15 minutes. The dough is much easier to handle and will not stick to the cookie presses when cold. 

3. Preheat the oven to 325°F and line one large baking sheet with a silicone baking mat or parchment paper.

4. Using cookie presses with indentations in the center, cut out cookies and lift carefully with a spatula or knife and place on the lined cookie sheet. (Or roll into balls and press into the center with your thumb to create a depression to be filled with jam or chocolate ganache.) These cookies do not spread or puff up during baking.

Williams Sonoma Thumbprint Cookie Presses

5. Re-roll your dough and cut out more cookies. If your dough gets too soft to work with or begins sticking to the cookie cutters, roll it out to the proper thickness and return it to the refrigerator or freezer for a bit to cool and firm up again.

6. If using jam, go ahead and fill the depression with sugar free jam before baking (see photo below). If using chocolate ganache, bake the cookies first and allow them to cool completely before filling the indentation with ganache.

Fill cookies with jam before baking

7. Bake the cookies for 14 to 16 minutes, or until they are golden brown around the edges. Remove from the oven and let the cookies cool on the pan until firm. The cookies will be quite soft when warm from the oven, but they will firm up as they cool. Remove to a wire rack to cool completely.

8. To make the chocolate ganache filling: Heat up the heavy cream until bubbles appear at the edges and the cream is quite hot and steamy. Remove from heat and add the chocolate chips. Allow the mixture to sit for several minutes undisturbed and then whisk until the chocolate is completely melted and the ganache is thick and creamy. Use a small spoon to carefully fill the center of each cookie. Refrigerate the cookies for 15 minutes or allow them to sit at room temperature until the ganache has cooled completely and firmed up. 

Notes: How many cookies you get depends on the size of your cookie cutters. It is best to use an erythritol-based sweetener for this recipe. Allulose can be substituted, or a combination of erythritol and allulose, but the cookies will be softer and more delicate when cooled. 

Keto Thumbprint Cookies

Nutritional information per cookie: 72 calories, 2.7 g carbohydrate (1.5 g dietary fiber, 0.2 g sugars, 1 g sugar alcohols), 7.1 g total fat (3.6 g saturated fat, 0 g trans fat), 23 mg cholesterol, 37 mg sodium, 5.8 mg calcium, 14 mg potassium, 50 IU Vit A, 1 mg Vit C (if using jam filling), 1.3 g protein. Net carbs per cookie: 1.2 grams

Recipe and photos by Kathy Sheehan, copyright 2024
All rights reserved. Please do not duplicate without the author’s permission. 

Monday, January 22, 2024

Easy Keto Granola Bread

Easy Keto Granola Bread

This low carb bread recipe is so versatile! You can bake it in a loaf pan, an 8 x 8“ square pan, a muffin tin or mini bread baking pan. The streusel topping is nutty and crunchy, making this a delicious coffee cake or tea bread. You can make your own low carb granola or use one of the keto granola mixes already available commercially. You might even choose to make it nut free by choosing a nut free granola. Like I said, this recipe is versatile! The addition of flaxseed meal is optional, but it adds a wheat-like color and nutty flavor to the final product. The thing that makes this recipe so easy, is that you start with a boxed keto muffin mix. I highly recommend the King Arthur’s All Purpose Keto Muffin Mix. I have use this mix several times to create muffins and quick breads and it is excellent! Most of the dry ingredients are already included in the mix and measured out for you. Enjoy this as a delicious accompaniment to your coffee in the morning for breakfast or serve it as a dessert. Either way, I think that you will enjoy this quick bread. 

Easy Keto Granola Bread
Makes 12 servings

5 large eggs, room temperature 
1/4 cup neutral oil, such as avocado oil
1/4 cup unsalted butter, melted
1 cup low carb milk of choice (or substitute ½ cup water + ½ cup heavy cream)
½ teaspoon vanilla extract
1/3 cup low carb brown sweetener (such as Swerve Brown)
¾ teaspoon ground cinnamon
1 tablespoon flaxseed meal
½ cup low carb granola (chopped, if needed) see photo of different keto granola brands below
1 box King Arthur’s Keto All-Purpose Muffin Mix

Streusel Topping:
1/4 cup low carb granola (chopped, if needed)
1/4 cup erythritol-based brown or classic sweetener
2 tablespoons cold unsalted butter, cubed

Examples of Keto Granola available commercially

1. Preheat oven to 350°F. Spray an 8 inch loaf pan, mini bread loaf pan, 8 x 8” baking pan, or 12 cup muffin tin with nonstick spray; set aside.

2. Using a pastry cutter or two knives, mix together the streusel topping ingredients in a medium bowl until pea-sized crumbles form; set aside.

3. In a separate bowl, whisk together the keto muffin mix, 1/3 cup brown sweetener, flaxseed meal, cinnamon and low carb granola; set aside.

King Arthur’s Keto Muffin Mix and Flaxseed meal

4. In a large bowl and using an electric mixer, or a standing mixer with paddle attachment, mixed together the eggs, oil, melted butter, low carb milk, and vanilla extract. Blend very well.

5. Add the dry ingredients and mix until well combined and no dry pockets remain. Divide the batter evenly between the prepared baking pan or muffin tin that has been greased. Sprinkle the streusel topping on top of each muffin or loaf.

Sprinkle streusel on top

6. Bake at 350° for 32-35 minutes for mini loaves or about 24 minutes for muffins. For a large loaf, bake about 38-48 minutes. For an 8 x 8“ baking pan, bake for about 35 minutes. Bake until the internal temperature reaches between 200-205°F. 

7. Remove from oven and allow the loaves or muffins to cool in the pan for about 15 minutes. Turn out the loaves or muffins onto a wire rack to cool completely before serving.

Cool baked loaves on wire rack

Nutritional Information per muffin or 1/12th of recipe: 215 calories, 11.8 g total carbohydrates (2 g dietary fiber, 1.5 g sugars, 14 g sugar alcohols), 19 g total fat (8.8 g saturated fat, 0 g trans fat), 97 mg cholesterol, 201 mg sodium, 68.8 mg calcium, 141 mg potassium, 2 mg iron, 100 IU Vit A, 5 g protein. Net carbs per serving: 2.8 grams

Photos and recipe by Kathy Sheehan, copyright 2024
All rights reserved. Please do not duplicate without the author’s permission. 

Tuesday, January 9, 2024

Keto Dutch Speculaas Spice Cookies

Keto Dutch Speculaas Cookies

These delightfully spiced cookies are a traditional favorite in the Netherlands, a recipe that originates from the 17th century! If you’ve ever flown on an airplane, you might have been offered Speculaas cookies as a snack. Although not as crispy as the original, this low-carb version has the same delicious buttery, spice flavors! The advantage of starting with a boxed keto cake mix is that it includes ingredients that you might normally not have in your pantry, such as a psyllium fiber blend or fructan fiber. These ingredients provide structure, improves texture and increases the nutritional benefit without the hassle or expense of going out and buying each individual ingredient. Enjoy these cookies with a cup of tea or coffee on a cold winter’s day or they make a wonderful gift to share with your friends and family committed to living a healthier lifestyle! 

Keto Dutch Speculaas Spice Cookies
Makes 24 cookies

Cookies:
6 tablespoons erythritol-based brown sweetener (such as Swerve Brown)
5 teaspoons Speculaas spice mix
16 tablespoons unsalted butter (2 sticks)
1/4 cup water
1 large egg, beaten
1 tablespoon low carb milk of choice or water

Add-ins and Garnish:
2/3 cup sliced almonds (or pecans for lower oxalate), chopped
Whole sliced almonds for garnish, optional

1. Preheat the oven to 350°F. Lightly grease, or line with parchment paper, two large baking sheets.

2. Put the butter and water into a small saucepan or measuring cup. Warm over medium heat on the stove or in the microwave until the butter melts. Remove from the heat and allow to cool a bit.

King Arthur’s Keto Yellow Cake Mix

3. Using a stand mixer fitted with the flat beater, combine the cake mix, erythritol-based brown sweetener, Speculaas spice and melted butter, and beat gently until the dough forms into large clumps.

4. Add the egg and milk (or water) and mix briefly to combine. Scrape the bottom and sides of the bowl and beat at medium speed until the dough is smooth. Cover the bowl and allow the dough to rest at room temperature for about 15 minutes. This will allow the coconut flour and fiber blends in the mix to absorb any excess liquid. 

Fluted Biscuit Cutters

5. Mix briefly, then fold in the chopped nuts. Scoop large, heaping tablespoonfuls of dough onto the prepared baking sheets, leaving about 2” between them. (I like using a large cookie scoop for this.) With the bottom of a greased measuring cup or spatula, flatten each mound of dough until about 1/4” thick. If you’d like a fluted edge to your cookies, then use a fluted biscuit or cookie cutter and press into the flatten disc of dough and remove any excess dough from around the edge of the cutter and return it to the mixing bowl to be reused. These cookies will not puff up or spread while baking. If desired, you may garnish each cookie in the center with whole sliced almonds laid out in a flower or star pattern.

Garnish with Whole Sliced Almonds

6. Bake the cookies until the edges are browned and the centers are set, but still soft, 13 to 15 minutes. Remove them from the oven and allow the cookies to cool completely on the baking sheets. Note: These cookies are very soft when warm. They will firm up as they cool, although they will not be super crisp.

7. Store the cooled cookies, well wrapped or in a sealed container, at room temperature for several days. They freeze well for longer storage.

Baked Keto Dutch Speculaas Cookies

Nutritional Information per cookie: 131 calories, 5.7 g carbohydrate (4.4 g dietary fiber, 0.8 g sugars, 1.7 g sugar alcohols), 13.1 g total fat (7.1 g saturated fat, 0 g trans fat), 28 mg cholesterol, 94 mg sodium, 28.4 mg calcium, 56 mg potassium, 1 mg iron, 75 IU Vit A, 1.3 g protein. Net carbs per serving: 2.3 grams

Photos and recipe by Kathy Sheehan, copyright 2024
All rights reserved. Please do not duplicate without the author’s permission. 

Monday, June 12, 2023

Keto Black and White Cookies

Keto Black and White Cookies

I’ve been trying for years to create an authentic, sugar free, Black and White cookie. Well, this is it! In this recipe, I start with raw macadamia nuts and process them in a food processor (or blender) to make smooth and creamy macadamia nut butter. This is the key to making these light, puffy, tender and cake-like cookies, which are the base of this iconic cookie. I chose macadamia nuts for the base of my cookie batter because they are the lowest carb and highest fat of all the nuts, mild in flavor, plus they’re much lower in oxalates, minimizing the need for almond flour. This cookie is a dream come true!

Keto Black and White Cookies
Makes 18 cookies

Cookies:
1½ cups raw macadamia nuts
2 large eggs
1 tablespoon unsalted butter, very soft or melted
1 teaspoon lemon juice
1½ teaspoons vanilla extract 
¾ cup powdered low carb sweetener (I used Confectioners LaKanto Monkfruit sweetener)
1/4 cup almond flour
1½ tablespoons oat fiber powder (not oat flour!)
2 tablespoons coconut flour
1 tablespoon unflavored whey protein powder
1 teaspoon baking powder
1/4 teaspoon baking soda
A pinch of salt
1-2 tablespoons water, only if needed!

Glaze:
1½ cups powdered low carb sweetener* (see note)
1 tablespoon vegetable glycerin or liquid allulose (it adds shine to the glaze, omit if you don’t have any)
¾ teaspoon lemon juice
½ teaspoon vanilla extract 
2-3 tablespoons water (or more, if needed)
1/4 cup unsweetened Dutch-process cocoa powder
More water for chocolate glaze, as needed

1. Preheat oven to 350°F. Line a rimmed baking sheet with a silicone baking mat or parchment paper.

2. In a food processor or powerful blender, process the macadamia nuts until a smooth nut butter forms, scraping down the sides occasionally. Add the eggs, softened butter, lemon juice and vanilla extract. Process until the mixture is completely smooth and no lumps remain.

3. Transfer the nut mixture to a large mixing bowl. Add the powdered sweetener and, using an electric mixer with the paddle attachment (if you have one), mix until the sweetener is completely incorporated.

4. In a small bowl, combine the almond flour, oat fiber powder, coconut flour, whey protein powder, baking powder, baking soda and salt. All at once, add the dry ingredients to the nut mixture and mix until the ingredients are well combined. Let the batter rest for a few minutes to allow the coconut flour to absorb the liquid, then mix again. What you’re looking for is a thick, but cohesive batter that is like a thick cake batter, slightly looser than a dough. (Only if needed, add water 1 teaspoon at a time until the proper consistency is reached.)

5. Using a 1½ tablespoon cookie scoop (size 40), drop the cookie batter onto the lined cookie sheet about 1½ inches apart. The cookies will spread a bit as they bake.

6. Bake for 12 to 14 minutes (begin checking them at 12 minutes). Bake until they’re lightly golden and the tops are just firm and spring back slightly when touched in the center. Remove the baking sheet from the oven and allow the cookies to remain on the baking sheet for a few minutes. Remove the cookies to a wire rack to cool completely before glazing.

7. To make the glaze, add the powdered sugar substitute, vegetable glycerin or liquid allulose, lemon juice, vanilla, and 2-3 tablespoons of water in a small bowl, and stir until smooth and easily spreadable. Then divide the glaze equally into two bowls. Add the cocoa powder to one and add just enough water until the consistency is the same as the vanilla glaze (adding 1 teaspoon of water at a time; it may take 3-6 teaspoons or more, judge by its consistency).

8. To ice the cookies, use the flat side (bottom) of the cookie and spread each half of the cookie with one of the icings, starting with the vanilla icing. Spread the vanilla on one half of all the cookies first, then coming back later after the vanilla has hardened, and adding chocolate icing to them on the remaining half, so you avoid the colors mixing.

9. Cookies can be stored at room temperature for 2-3 days, or refrigerate for longer periods, but allow the cookies to come to room temperature before enjoying. If stacking cookies in a cookie jar or storage container, place parchment paper between layers to prevent the icing from sticking.

Spread vanilla frosting first, then spread chocolate frosting last

*Notes: You can use an erythritol-based powdered sweetener (best option), such as Confectioners LaKanto Monkfruit sweetener. But because of the slight cooling effect, some people put off by that sensation might wish to use powdered allulose for the glaze. Allulose doesn’t have a cooling affect or aftertaste. If you can’t find powdered allulose, you can powder it yourself in a food processor. But NOTE: Allulose doesn’t absorb liquid in the same way as erythritol. Use less liquid, if using allulose. Also, icing made with allulose really doesn’t set up. It remains soft and sticky. Tastes delicious, but if you want to store them on top of each other in a cookie jar, don’t use allulose. 

Nutritional Information per cookie (with glaze): 106 calories, 6.1 g carbohydrate (1.8 g dietary fiber, 0.6 g sugars, 2.4 g sugar alcohols), 10.2 g total fat (2.1 g saturated fat, 0 g trans fat), 22 mg cholesterol, 87 mg sodium, 15.8 mg calcium, 71 mg potassium, 1 mg iron, 15 IU Vit A, 2 g protein. Net carbs per serving: 1.9 grams

Photos and recipe by Kathy Sheehan, copyright 2023
All rights reserved. Please do not duplicate without the author’s permission. 

Saturday, May 20, 2023

Keto Dairy Milk

Keto Dairy Milk

I love the taste of real dairy milk with a homemade keto cookie or slice of sugar free cake. I find the low carb, nut milk alternatives are just not appealing or satisfying for drinking. In the past, I have purchased and enjoyed some keto milk, but every company that has tried to introduce keto milk on the market has failed and quickly discontinue it. Regular cow’s milk is not an option, due to its high carb and sugar content (12g per cup). Fairlife brand is a lower carb option (6g per cup), but that’s still too high for me to drink by the glassful. So I decided I’d better try making my own low carb, real dairy milk and, after some experimentation, this recipe is the winner! It has enough real dairy in it to give it the taste of real milk, but without the carbs!! It’s a good source of calcium and great for drinking and cooking!

Keto Dairy Milk
Makes 1 pint (2 servings)

1 cup unsweetened nut milk of choice (I used homemade macadamia nut milk)
1/4 cup water
1/4 cup heavy cream
½ cup Fairlife brand Whole Milk
A tiny pinch of salt
1-2 drops vanilla extract
1-2 drops monkfruit extract or stevia

Mix all of the ingredients together and stir to combine. Refrigerate in a glass container for up to a week. (This recipe can be doubled to make a quart.)

Fairlife Whole Milk

Nutritional Information per 1 cup: 166 calories, 2.1 g carbohydrate (0.3 g dietary fiber, 1.7 g sugars), 15 g total fat (8.7 g saturated fat, 0 g trans fat), 48 mg cholesterol, 70 mg sodium, 103.4 mg calcium, 15 mg potassium, 158 IU Vit A, 3.6 g protein. Net carbs per serving: 1.8 grams

Recipe and photos by Kathy Sheehan, copyright 2023
All rights reserved. Please do not duplicate without the author’s permission.

Tuesday, March 14, 2023

Low Carb Peanut Butter and Chocolate Mousse Pie in a Jar

Low Carb Peanut Butter and Chocolate Mousse Pie in a Jar
These grab-and-go dessert cups are the perfect size! They may look small, but they deliver BIG FLAVOR and are rich and decadent! And who doesn’t love the combination of peanut butter and chocolate?

Low Carb Peanut Butter and Chocolate Mousse Pie in a Jar
Makes 6 servings

Peanut Butter Crumb Crust (Bottom Layer):
¾ cup almond flour (or sunflower seed flour for lower oxalate)
2 tablespoons unsweetened peanut butter powder
1 tablespoon powdered erythritol sweetener (Confectioners sweetener)
A pinch of salt
1 teaspoon vanilla extract
2 tablespoons refined coconut oil, melted (or unsalted butter)

Chocolate Cream Cheese Mousse (Middle Layer):
4 ounces cream cheese, room temperature 
2 tablespoons butter, room temperature (use unsalted or salted, your preference)
1/4 cup creamy peanut butter, no sugar added
2 tablespoons unsweetened cocoa powder
2 tablespoons powdered erythritol sweetener 
15 drops Monkfruit Extract (or ½ teaspoon liquid stevia), or to taste
1½ teaspoons vanilla extract 
½ cup heavy cream
3 tablespoons sugar free chocolate chips, chopped (Such as Lily’s brand)

White Chocolate Peanut Butter Ganache (Top Layer):
1/3 cup heavy cream
1/3 cup sugar free white chocolate chips 
1/4 cup creamy peanut butter, no sugar added
4 drops Monkfruit Extract or stevia
½ teaspoon vanilla extract 

1. To make the Peanut Butter Crumb Crust: With a fork, mix together the almond flour, peanut butter powder, erythritol sweetener and salt in a medium bowl until no lumps remain (you may sift the mixture to easily remove lumps). Add the vanilla extract and melted coconut oil and stir with a fork until the mixture is coated and resembles coarse crumbs. Divide equally between six small jelly jars (4 oz) or serving dishes (about 2 generous tablespoons in each jar). Gently press down to create an even layer; set aside.

2. To make the Chocolate Cream Cheese Mousse: Add the room temperature cream cheese, butter, and peanut butter to a mixing bowl. With a hand-held or standing mixer, whip on high until the mixture is well combined and smooth. Add the cocoa powder, powdered sweetener, Monkfruit extract drops or stevia, vanilla extract, and heavy cream. Beat until the mousse is quite fluffy and smooth. Taste and adjust sweetening, if needed. Fold in the chopped, sugar-free chocolate chips. Divide the mousse equally between the six jars or serving dishes. 

Layers of dessert cup
3. To make the White Chocolate Peanut Butter Ganache: Microwave the heavy cream in a heat-proof measuring cup or bowl until hot and bubbly around the edges (about 20-30 seconds on high) or heat in a small saucepan over medium heat, if not using a microwave. Pour the hot cream over the white chocolate chips in a bowl and allow to stand for several minutes. Whisk until smooth. Add the 1/4 cup peanut butter, Monkfruit extract or stevia drops, and vanilla. Whisk until the peanut butter is melted and the ganache is smooth.

4. While warm, pour the ganache over the chocolate mousse layer, dividing the ganache evenly among the six containers. Place the dessert cups into the refrigerator to set for two hours before serving.

5. To serve, you may garnish with optional whip cream, chopped chocolate, or chopped peanuts. Enjoy!

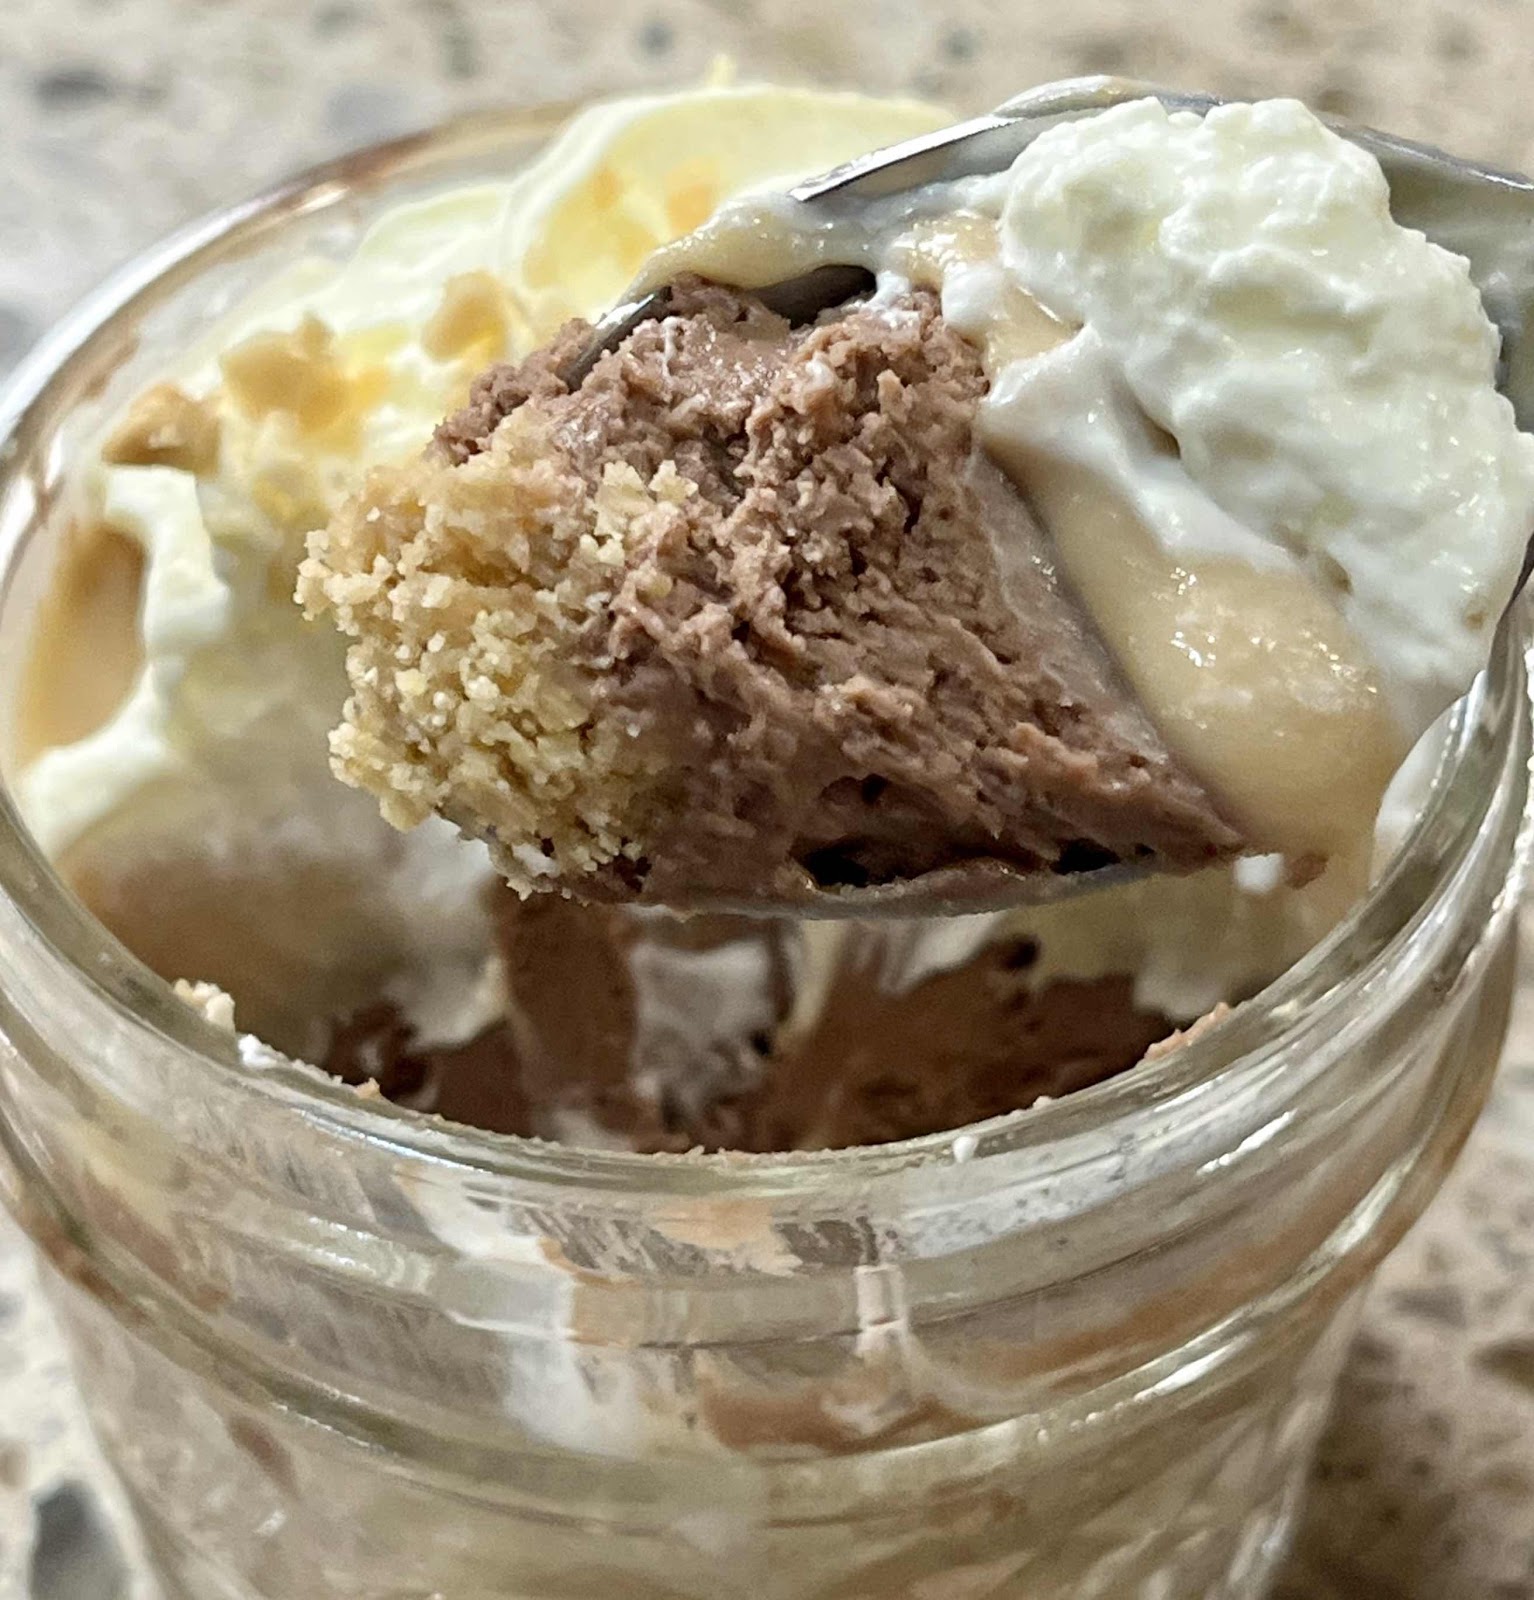
See pie layers in a spoonful
Nutritional Information per serving: 457 calories, 9.7 g carbohydrate (4 g dietary fiber, 1.7 g sugars, 2 g sugar alcohols), 44.2 g total fat (21.1 g saturated fat, 0 g trans fat), 79 mg cholesterol, 119 mg sodium, 24.8 mg calcium, 56 mg potassium, 228 IU Vit A, 1 mg iron, 8 g protein. Net carbs per serving: 5.7 grams

Recipe and photos by Kathy Sheehan, copyright 2023
All rights reserved. Please do not duplicate without the author’s permission.

Saturday, November 19, 2022

Keto Chocolate Drop Cookies

Keto Chocolate Drop Cookies
When I was growing up in Tulsa, Oklahoma, there was a wonderful store in Utica Square called Petty‘s Fine Foods. They had an in-store bakery that made the best cookies in town! One of my favorites was their Frosted Chocolate Drop Cookies. They only made them once a week, so you had to make sure you got there early enough in the day to grab a bag. Sadly, Petty’s is no longer in business, but the memory of those cookies have stayed with me all these years. Recently, I was experimenting with a cookie recipe, trying to make it lower in oxalates by not using almond flour. Macadamia nuts are much lower in oxalates than almonds, but finely ground macadamia nut flour is not available commercially. Instead, I took raw macadamia nuts and quickly processed them in my blender to make macadamia nut butter, which I then used as a base for my cookie dough. If you don’t want to go to the trouble of making your own macadamia nut butter, you can purchase it or substitute cashew butter in it’s place (although be aware that cashew butter is higher in oxalate). The result was spectacular! The cookies were light, soft and cake-like, just like the Chocolate Drop Cookies I remember!

Keto Chocolate Drop Cookies
Makes 20 cookies

Cookie Ingredients:
1 cup macadamia nut butter (homemade, store bought or substitute cashew butter)
¾ cup powdered erythritol-based sweetener (such as LaKanto Monkfruit sweetener or Swerve)
2½ tablespoons unsweetened cocoa powder
2 tablespoons unsweetened peanut butter powder
1½ tablespoons oat fiber powder (not oat flour!)
1 tablespoon coconut flour
1 tablespoon unflavored whey protein powder
1 teaspoon baking soda
2 large eggs
1 tablespoon salted butter, melted and cooled a bit
1½ teaspoons vanilla extract
1 - 2 tablespoons water, as needed
½ cup pecans, chopped

Chocolate Frosting:
½ recipe of my Best Low Carb Chocolate Fudge Frosting (see separate recipe here)
OR use your favorite store-bought sugar free chocolate frosting (I recommend Birch Benders, see below)

1. Preheat oven to 350°F. Line a rimmed baking sheet with a silicone baking mat or parchment paper.

2. In a large mixing bowl, combine all of the cookie ingredients, except the water and chopped nuts. Using an electric mixer, mix until the ingredients are well combined and a thick, sticky, but cohesive batter is formed (what you are looking for is a thick cake batter, slightly looser than a dough). If needed, add water 1 teaspoon at a time until the proper consistency is reached. The amount of water necessary will depend on the nut butter that you have chosen to use. Homemade macadamia nut butter is very runny, but commercially available macadamia nut butter is often mixed with cashew butter to make it thicker and spreadable. If you are using store-bought macadamia nut or cashew butter, you may need to use the full 2 tablespoons of water suggested in the recipe, or maybe even a little bit more, to achieve the proper consistency. The dough should not be stiff. It should be like a thick, gooey cake batter.

3. Fold in the chopped pecans. Using a 1½ tablespoon cookie scoop (size 40), drop the thick cookie batter onto the lined cookie sheet, about 1½ inches apart. The cookies really do not spread much as they bake.

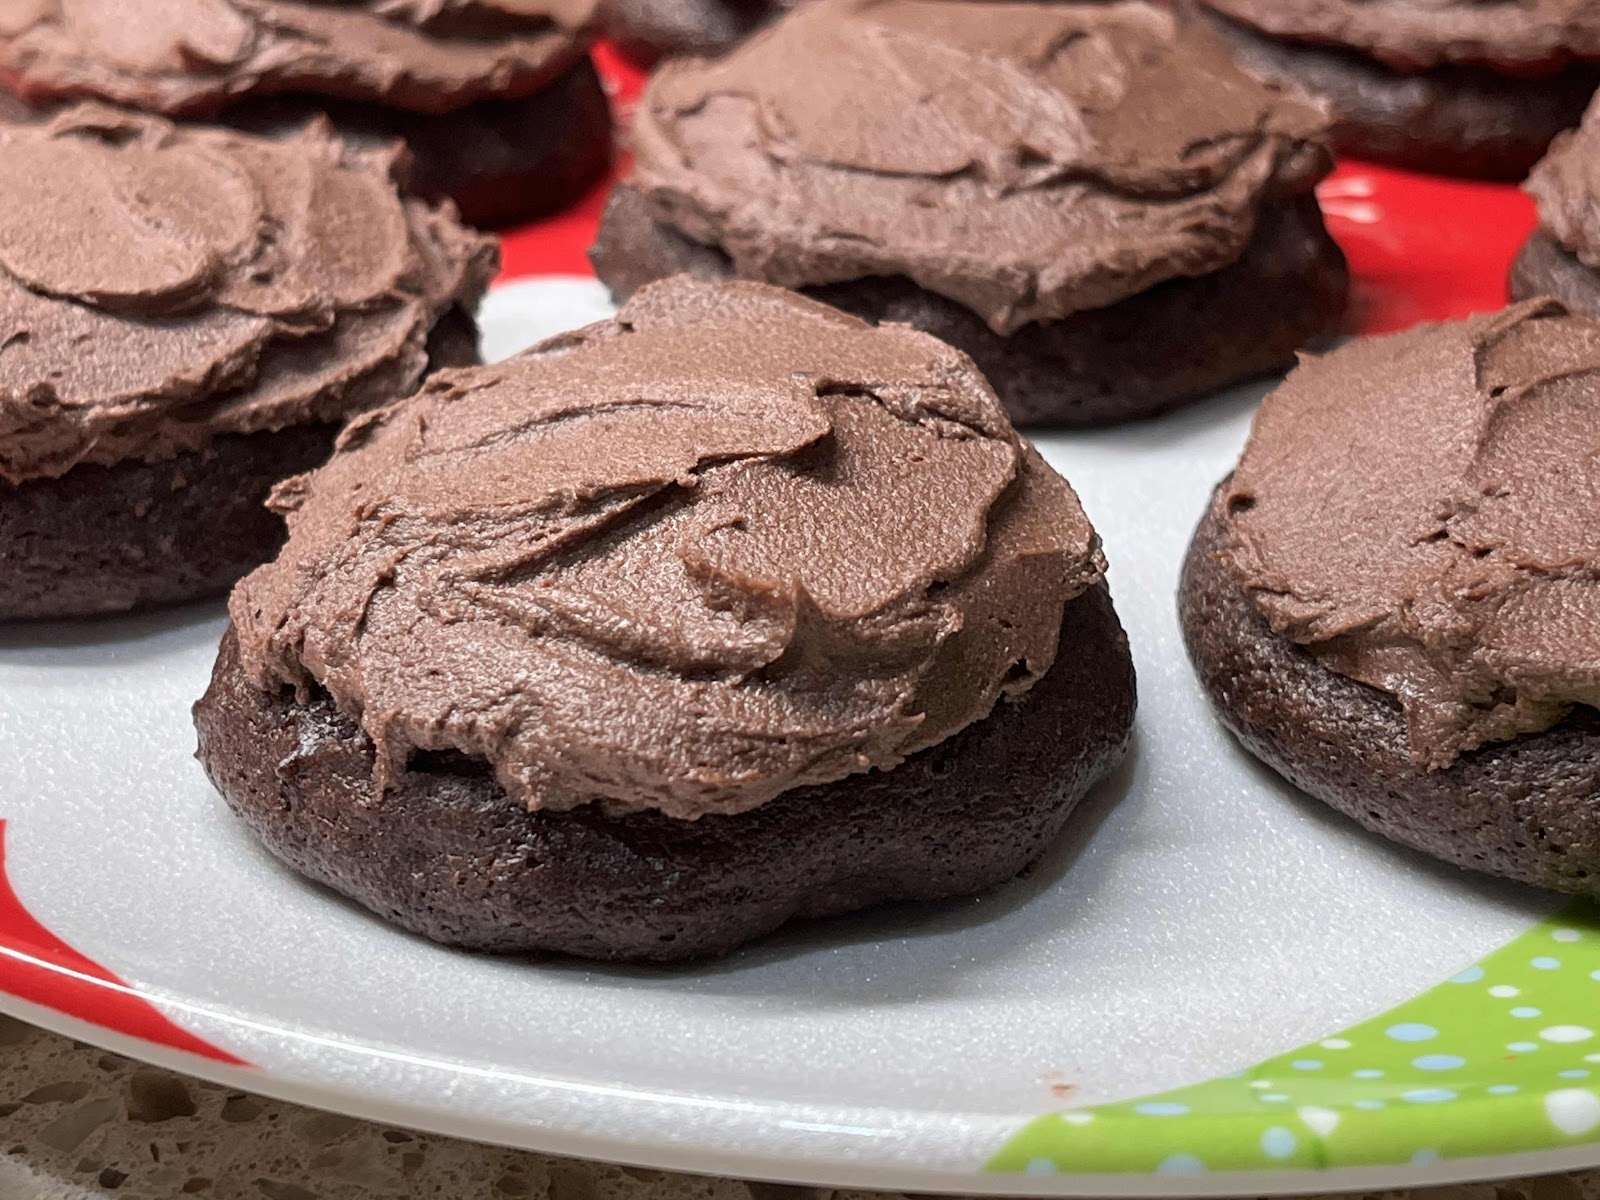
Baked cookies, no frosting
4. Bake in the preheated oven for 9 to 11 minutes, begin checking on them at 9 minutes. Bake until they are slightly cracked and the tops are just firm and bounces back slightly when touched. Remove the baking sheet from the oven and allow the cookies to remain on the baking sheet for a few minutes. Remove the cookies to a wire rack to cool completely before frosting.

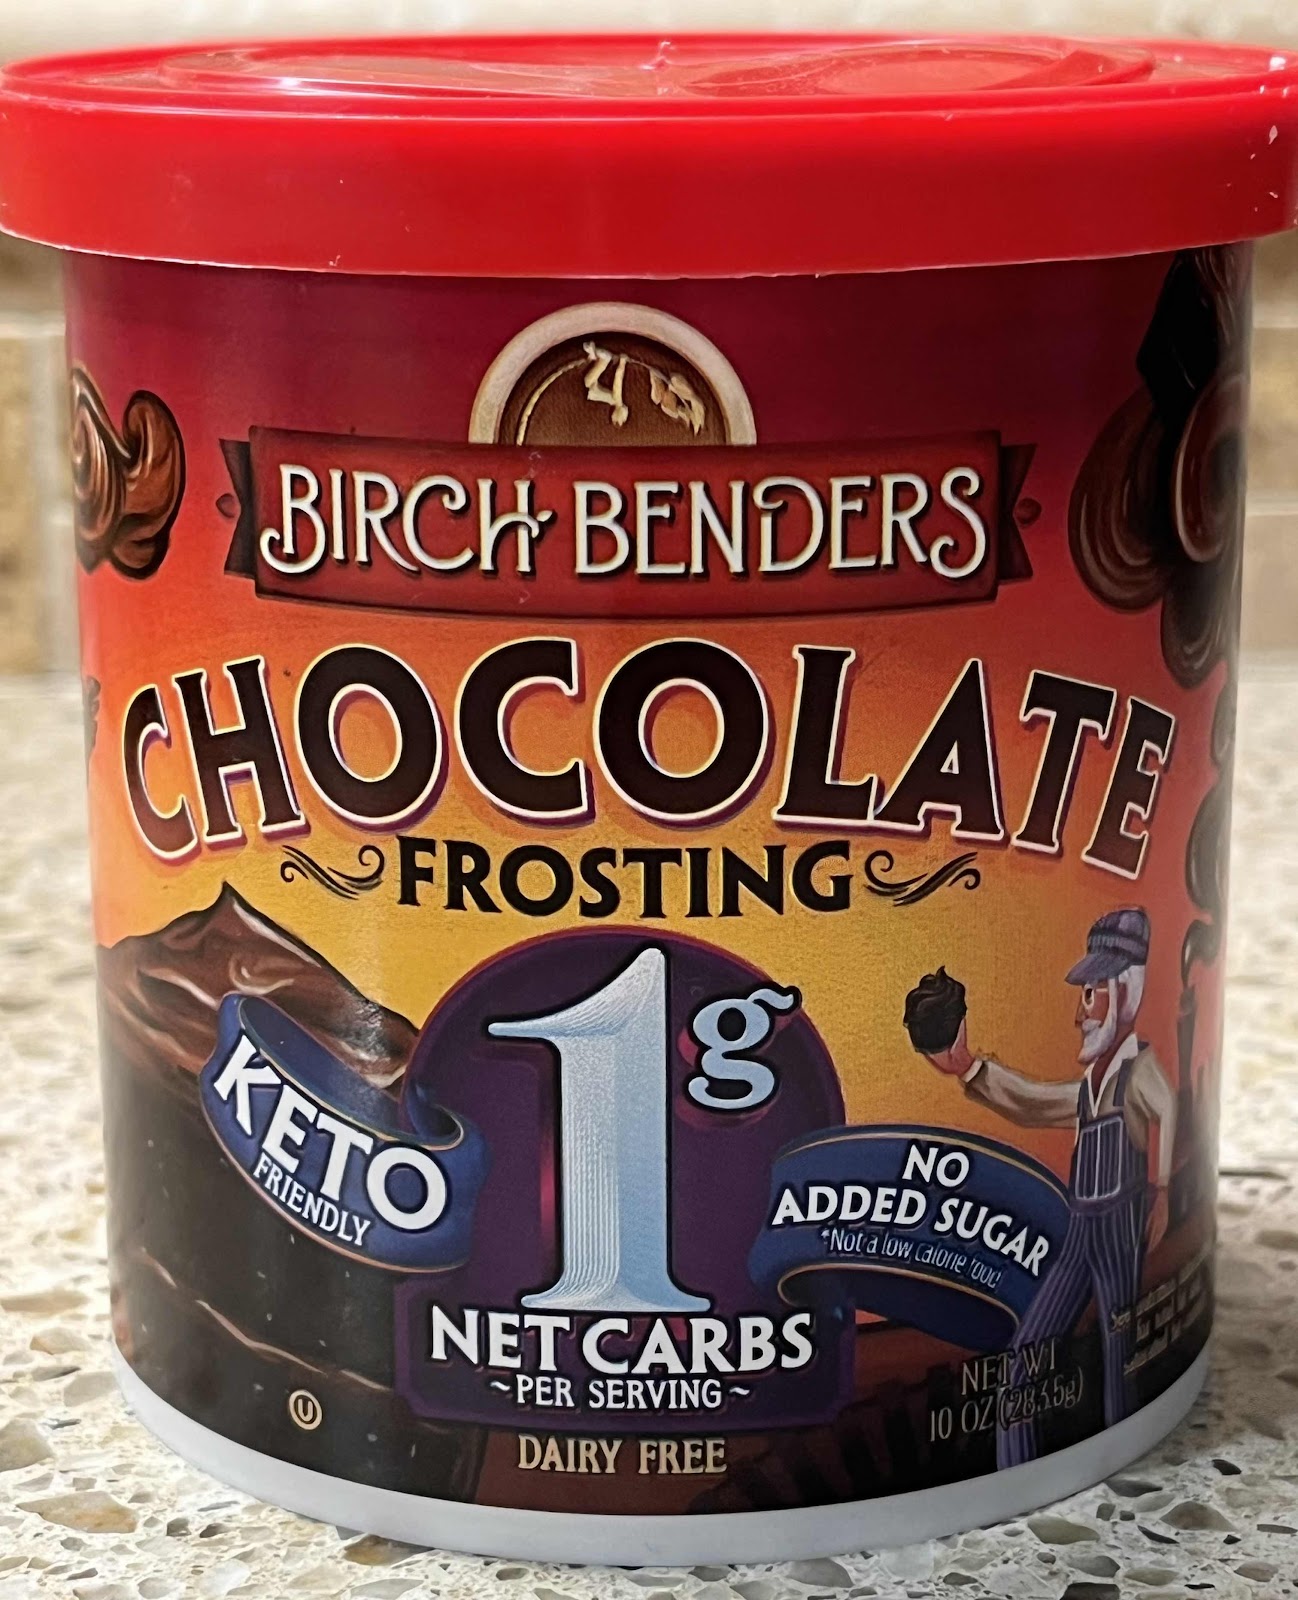
5. You can make your own low carb, sugar free chocolate frosting following this link (click here), or you can substitute your favorite store-bought chocolate, sugar free frosting. Store-bought, sugar-free frosting is convenient, but they are not all created equal! Please be sure to look at the list of ingredients and, if it includes maltitol, sorbitol or mannitol, put it back on the shelf! These offending sugar alcohols can cause uncomfortable digestive problems for many people. I recommend Birch Benders brand. It does not include any unfavorable sugar alcohols and I find the taste and consistency is very good. Stir to restore creaminess before spreading on the cooled cookies.

Birch Benders Keto Chocolate Frosting
Nutritional Information per cookie (no frosting): 111 calories, 4.1 g carbohydrate (2 g dietary fiber, 0.8 g sugars, 1 g sugar alcohols), 11 g total fat (2.1 g saturated fat, 0 g trans fat), 20 mg cholesterol, 75 mg sodium, 15.4 mg calcium, 67 mg potassium, 1 mg iron, 14 IU Vit A, 2.3 g protein. Net carbs (not counting frosting): 2.1 grams

Photos and recipe by Kathy Sheehan, copyright 2022
All rights reserved. Please do not duplicate without the author’s permission. 

Wednesday, August 25, 2021

Better Than Snickers Ice Cream (Low Carb, Sugar Free!)

Better Than Snickers Low Carb Ice Cream
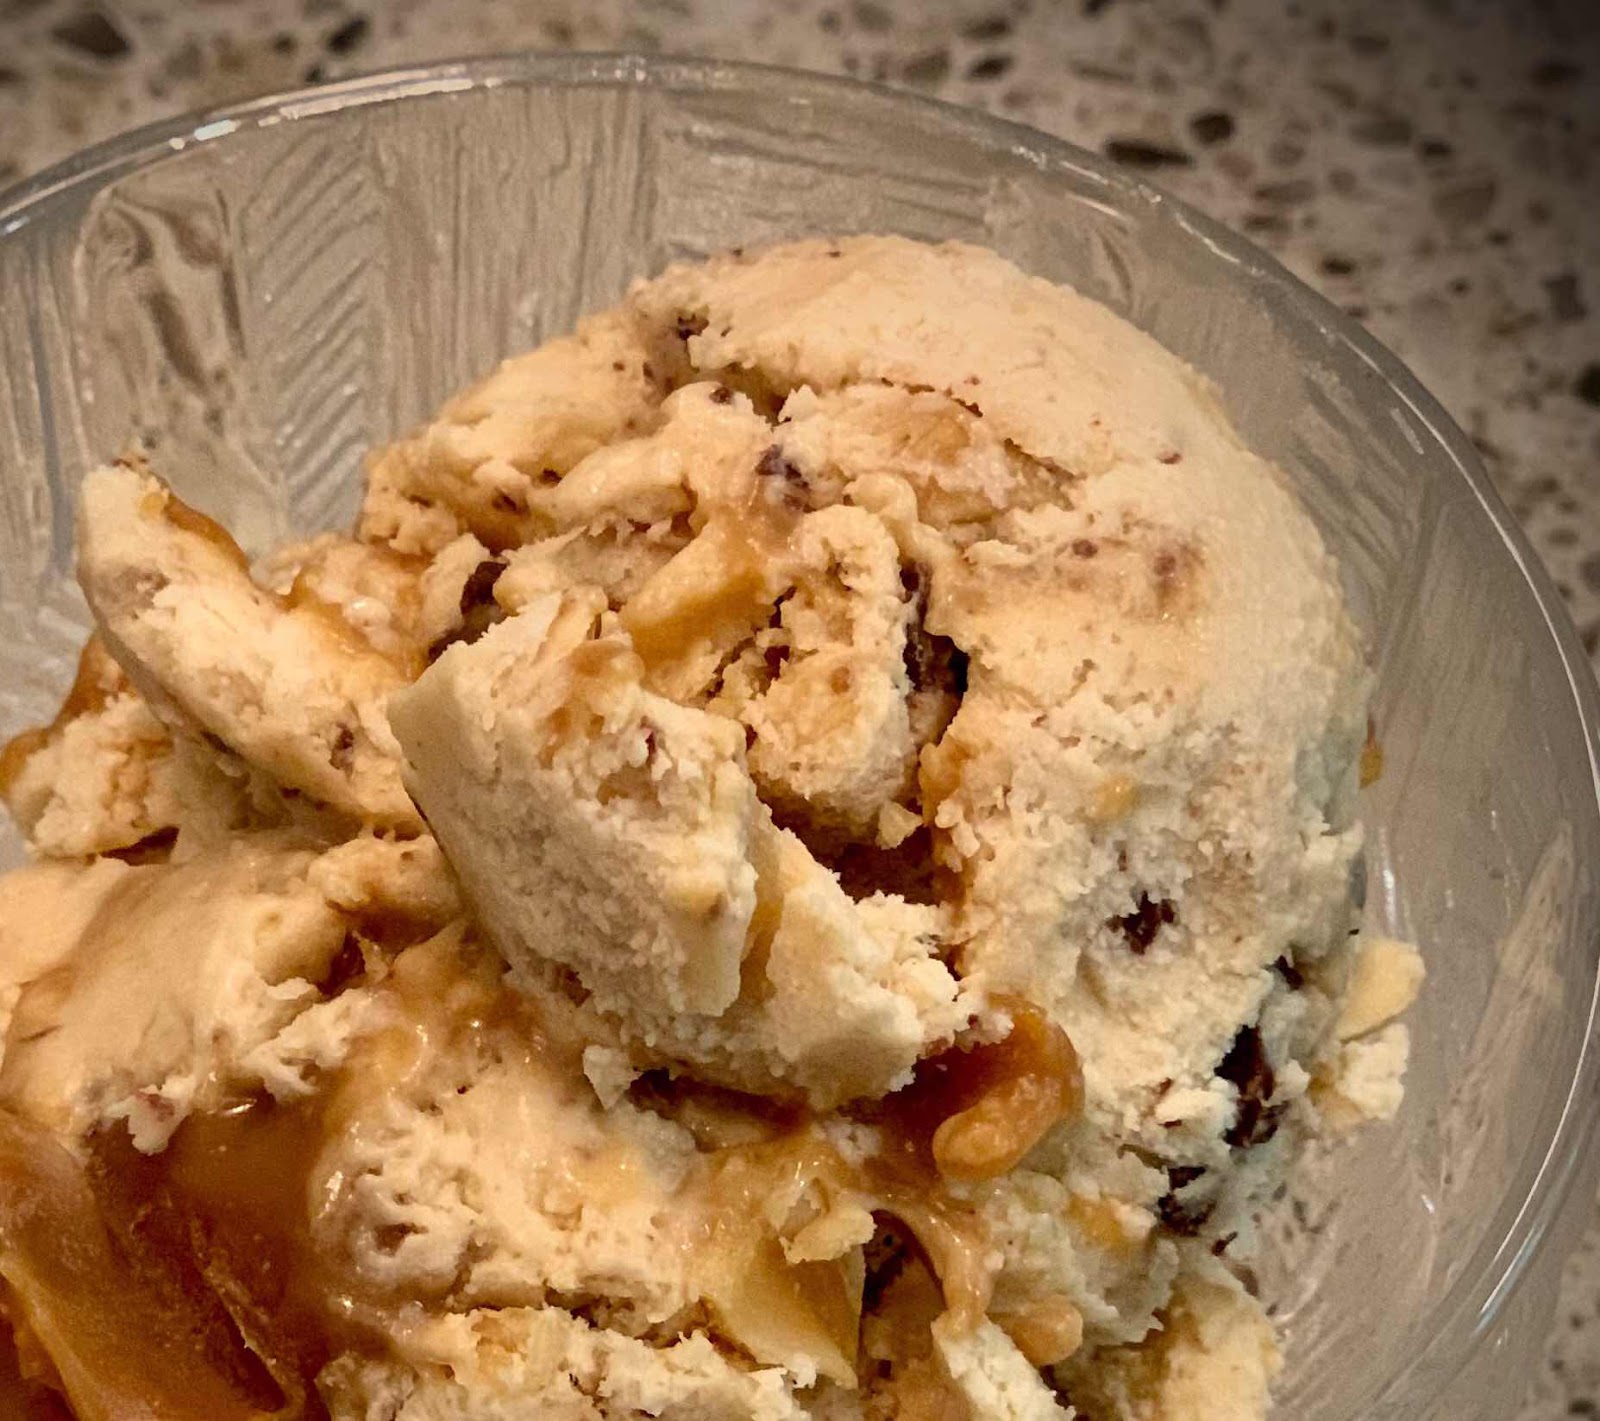
We’ve had a stretch of warm and muggy weather lately, so my ice cream maker has been working overtime. When you’re looking for a low carb ice cream recipe to WOW your friends and family, this is the one! No need for toppings because all the toppings are IN the ice cream: chopped peanuts, chocolate chips and gooey caramel swirled into a base of creamy, rich peanut butter ice cream. When I say it’s better than a candy bar, I mean it! There is the extra step of making the caramel just before churning, but your effort will be rewarded. I’ve made this ice cream a few times now and it has quickly become my daughter’s favorite. If you love the candy bar, you’ll love this ice cream, too! 

Low Carb “Better Than Snickers” Ice Cream
Makes 8 servings

Ice Cream Base:
1 cup whole milk (I suggest Fairlife brand, see note below*)
3 tablespoons powdered erythritol-based sweetener (I used LaKanto Monkfruit sweetener)
6 tablespoons allulose
1/3 cup no-stir, creamy peanut butter (no sugar added)
1/4 teaspoon salt
1/2 teaspoon vanilla extract
1/4 teaspoon caramel extract
1-2/3 cup heavy cream

Caramel Sauce:
6 tablespoons allulose 
1 tablespoon water
3 tablespoons unsalted butter, softened
2 tablespoons heavy cream
A pinch of salt (to taste)
1 tablespoon creamy peanut butter

Stir Ins:
1/3 cup roasted peanuts, roughly chopped (chill in refrigerator)
1/3 cup sugar free milk chocolate chips, chopped into small pieces (chill in refrigerator)

1. In a blender, blend together the whole milk, sweeteners, 1/3 cup peanut butter, salt and extracts. Blend until smooth. Add the heavy cream and blend again to combine. Taste and adjust sweetening, if desired. Pour into a container and refrigerate for 3 hours or until chilled.

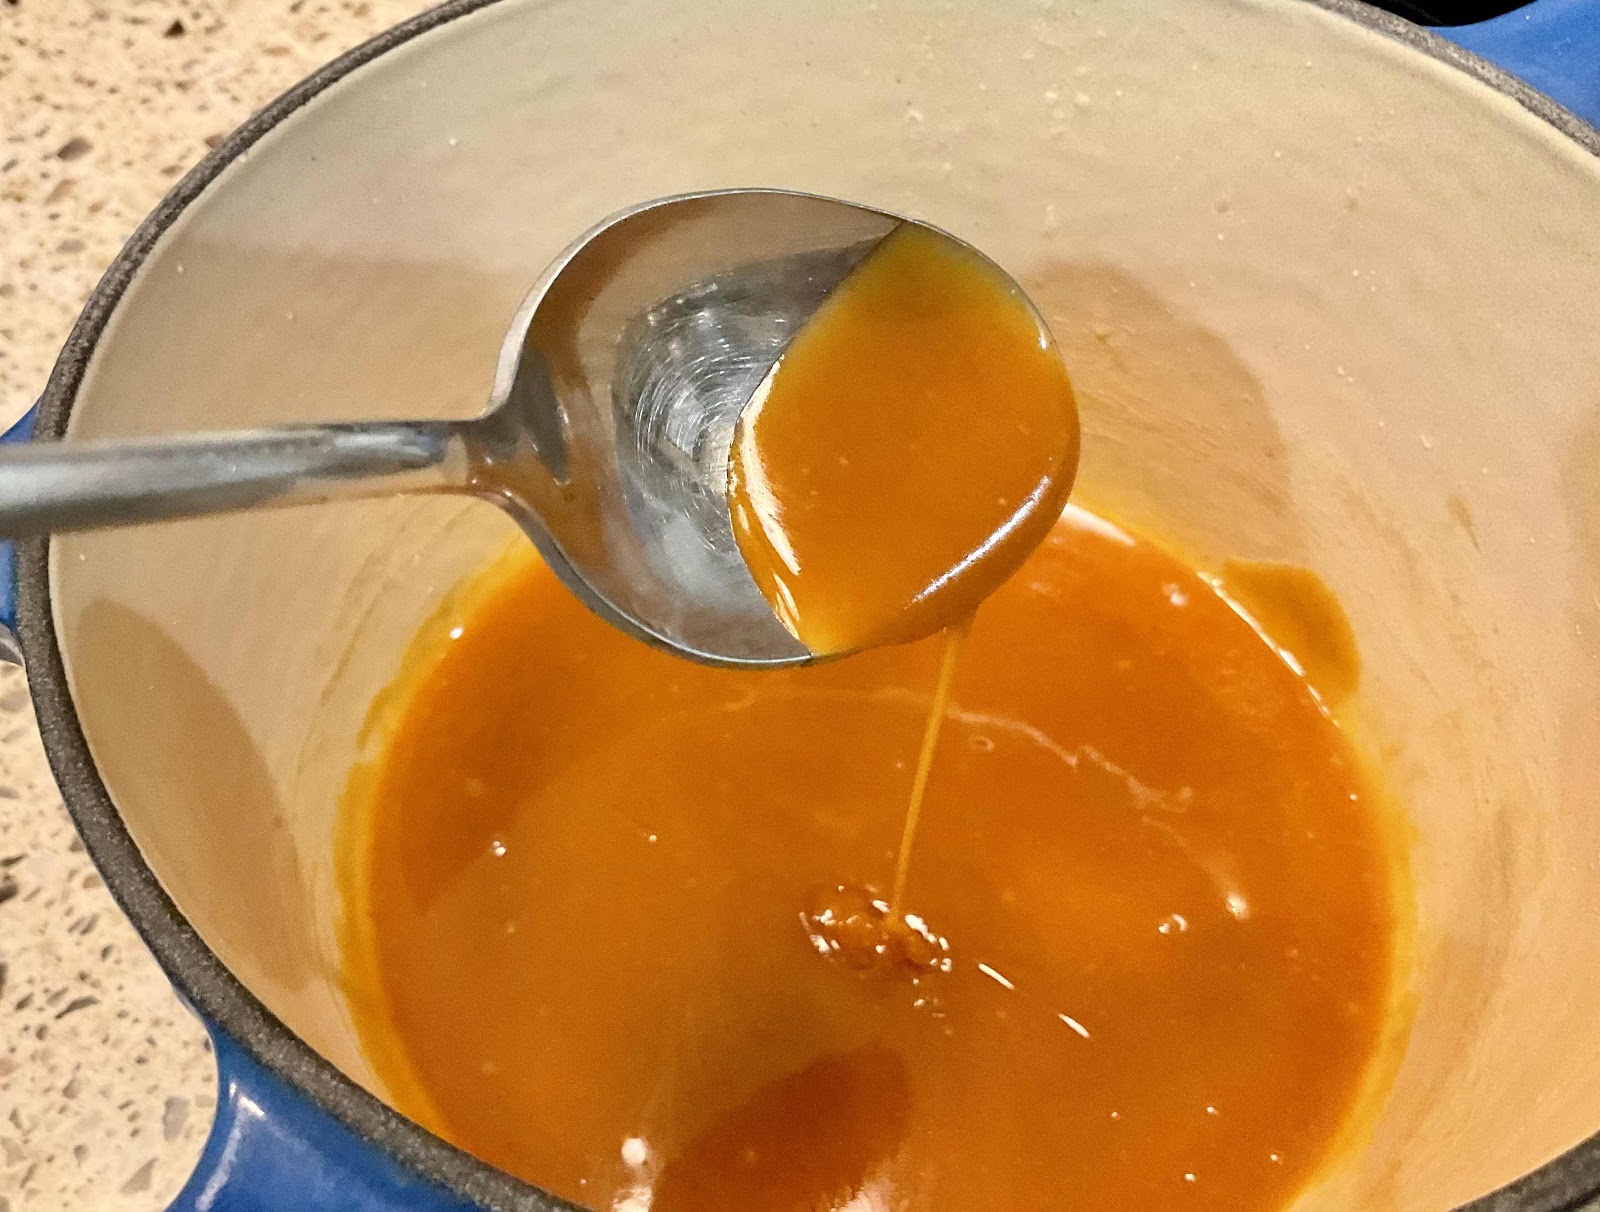
2. Just before you churn the ice cream, make the Caramel Sauce: Heat over medium heat the 6 tablespoons of allulose and water in a heavy saucepan until it melts and gets bubbly. Swirl the pan occasionally to prevent hot spots and simmer until the mixture caramelizes and turns amber in color (if using a candy thermometer, the temperature should be about 340-350 degrees Fahrenheit). Watch carefully because it can go from amber to burned quickly! Remove from heat and immediately add the butter and whisk until incorporated, add the heavy cream and pinch of salt. The caramel will steam and bubble up as you stir. Add the tablespoon of peanut butter and whisk until completely smooth. Set aside to cool a bit, stirring occasionally.

Caramel Sauce
3. According to the manufacturer’s instructions for your ice cream maker, churn the ice cream base until quite thick. Add the chopped peanuts and chocolate chips and continue churning until very thick and cold.

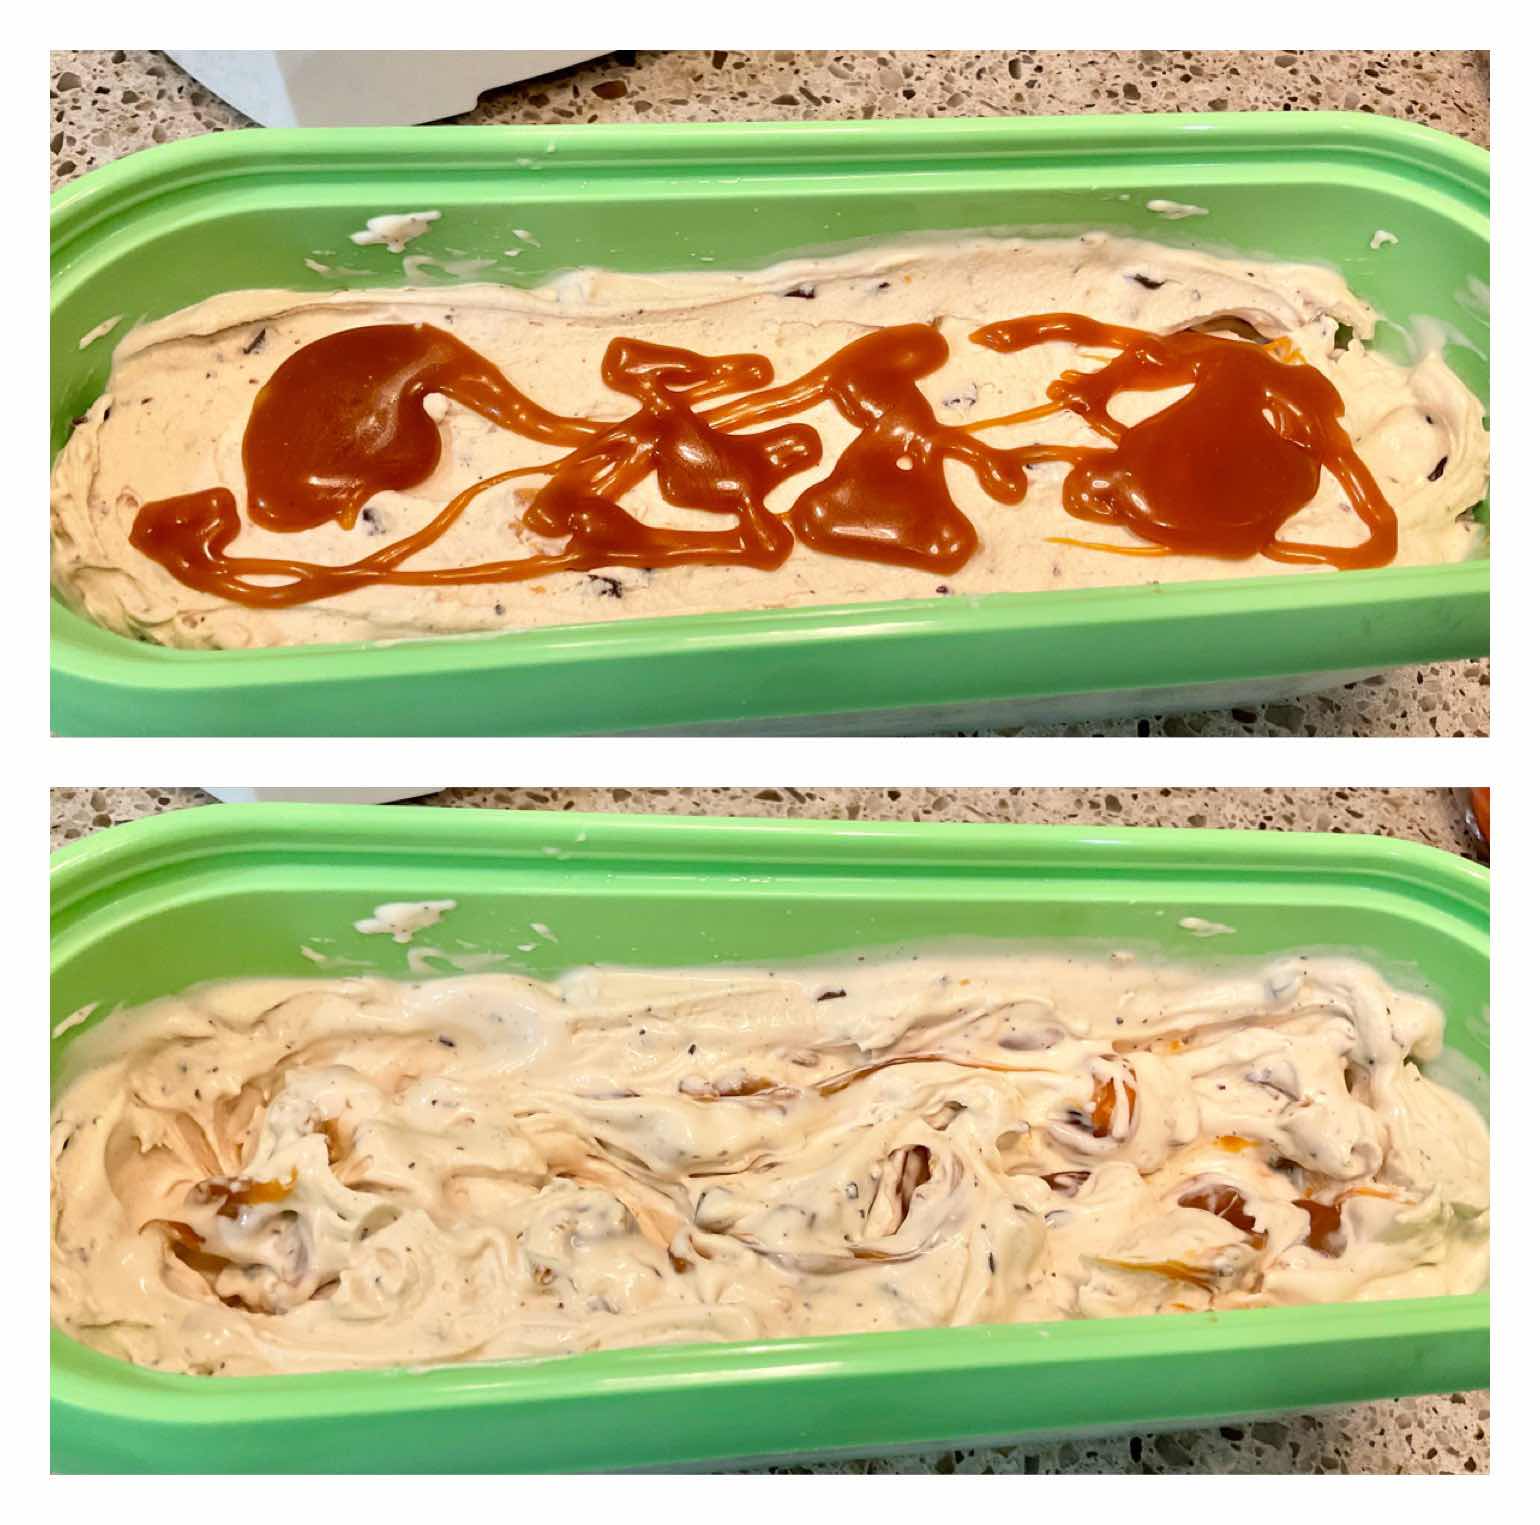
Swirl in the caramel sauce
4. When the ice cream has finished churning, transfer to a wide, flat container (like a loaf pan). Add ice cream in three separate layers, drizzling caramel sauce between each layer and then swirl in with a knife before adding the next layer. Work quickly and transfer the container to the freezer to set up for at least 6 hours before serving.

Note: I recommend using Fairlife brand of whole milk. It is lactose free and has half the carbs of regular milk. If using regular whole milk, add 1-1/2 carbs per serving. 

Nutritional Information per 1/2 cup (using Fairlife milk): 279 calories, 5.5 g carbohydrate (1.6 g dietary fiber, 1.1 g sugars), 28.8 g total fat (14.1 g saturated fat, 0 g trans fat), 70 mg cholesterol, 184 mg sodium, 69.2 mg calcium, 36 mg potassium, 219 IU Vit A, 4.5 g protein. Net carbs per serving: 3.9 grams

Photos and recipe by Kathy Sheehan, copyright 2021
All rights reserved. Please do not duplicate without the author’s permission. 

Friday, March 5, 2021

Make Your Own Low Oxalate, Low Carb Macadamia Nut Flour

Low Oxalate, Low Carb Macadamia Nut Flour
I am a Type 1 diabetic and a kidney stone former. My doctor has recommended a low oxalate diet to prevent (or at least reduce or slow down) the formation of calcium oxalate stones in the future. This new development was a blow to me since I eat a very low carb, ketogenic diet to control my blood glucose, which typically includes a lot of nuts! Almond flour was my go-to alternative to wheat flour and I’ve been living on it for the past 8 years, consuming it almost every day. I was told that all nuts have oxalate, some more than others. I’ve since learned that almonds are the nut that is highest in oxalate content, about 400mg per 1/2 cup of almond flour! (Goodbye almonds.) Macadamia nuts, on the other hand, contain oxalate but at a much lower level, about 32mg per 1/2 cup of raw nuts. I’ve switched from making homemade almond milk to making a macadamia-coconut milk blend and like it even better. The best part is that the leftover solids, after straining the nut milk, give me a beautiful, finely ground macadamia nut flour that can’t be purchased anywhere. One-half cup of my macadamia nut flour weighs 20 grams and only contains 9.5mg of oxalate! Even lower is coconut flour which contains 4.5mg of oxalate per 1/2 cup. By substituting macadamia nut flour for almond flour in recipes really has lightened my oxalate load, while still allowing me to enjoy baking low carb, gluten free treats.

Low Oxalate, Low Carb Macadamia Nut Flour
Makes about 1 cup of flour

1 cup of raw macadamia nuts, soaked overnight
4 cups of water

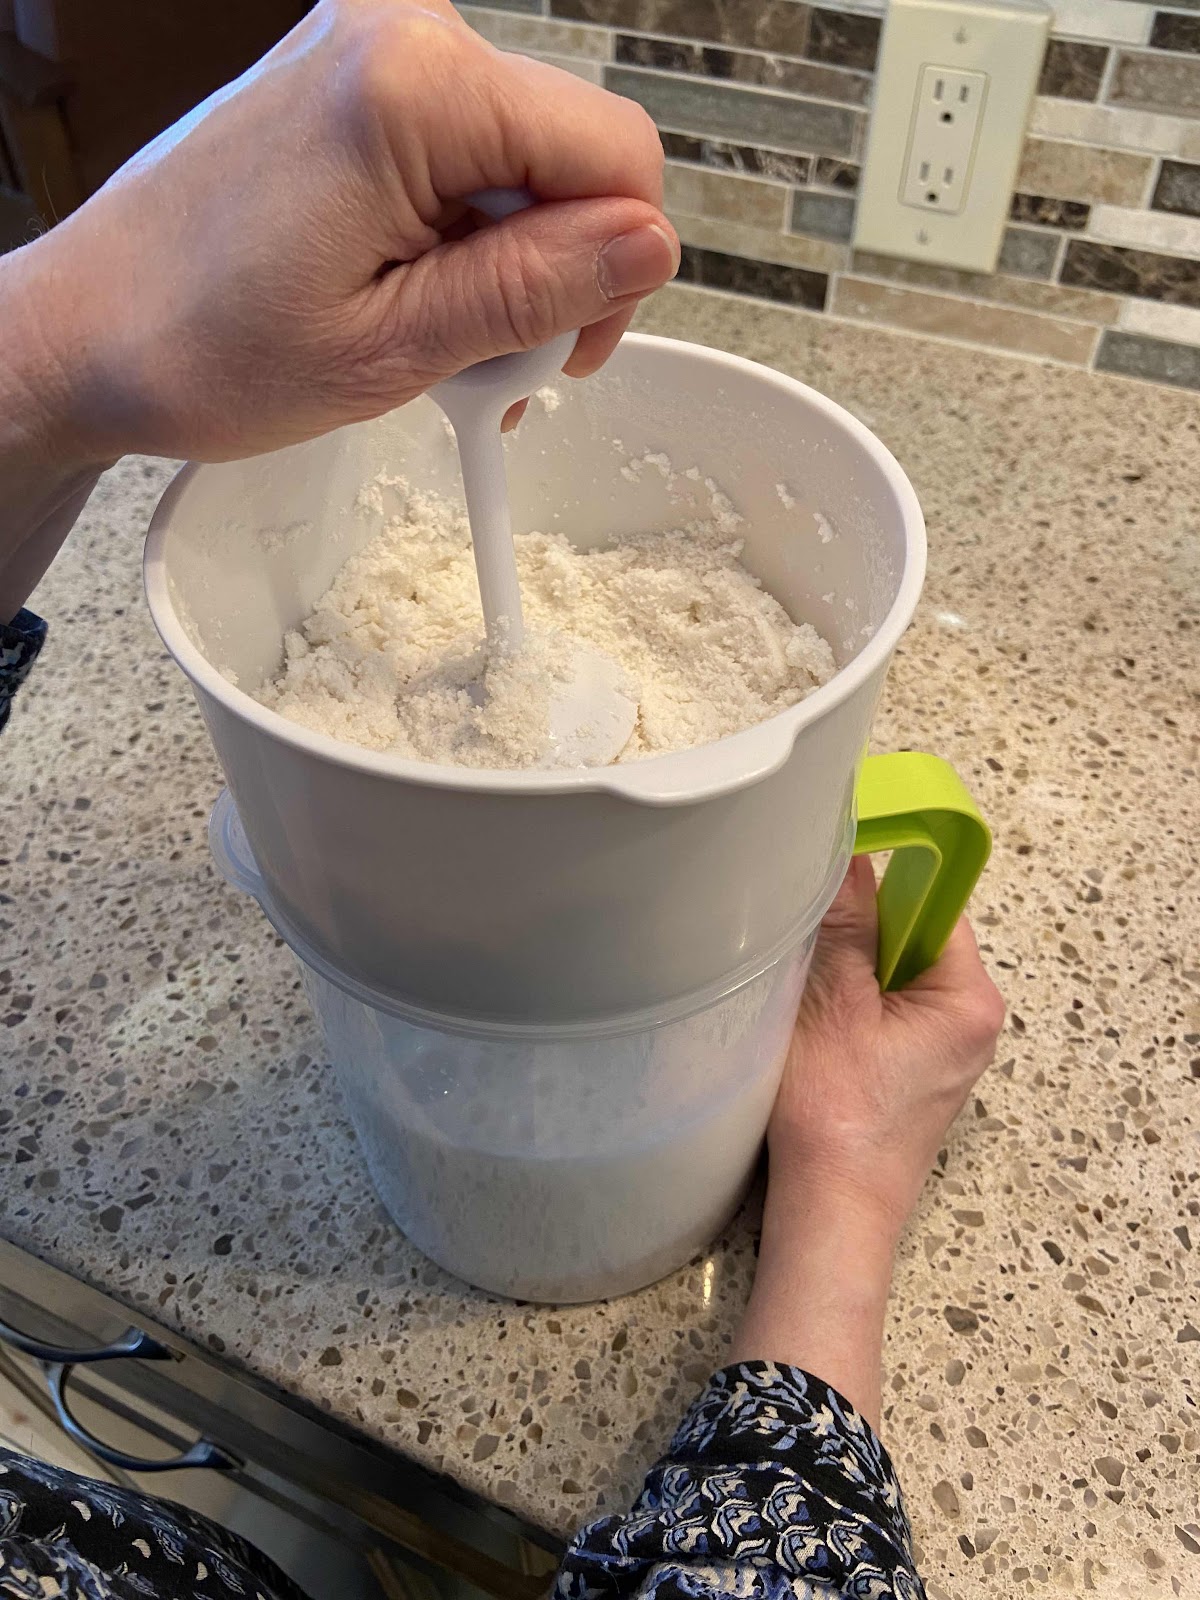
1. First, make a batch of macadamia nut milk by draining the soaked nuts, then blitzing them with 4 cups of water in a blender on high. This only takes a couple of minutes. Using a nut milk bag or other fine mesh strainer, strain the nut solids from the milk. Add a pinch of salt and a couple of drops of vanilla to your macadamia nut milk and stir. (If desired, add 1-2 drops of monkfruit extract or stevia). Pour the milk into a glass container or quart mason jar and refrigerate. Consume the milk within 5 days.

Straining the nut solids from the milk
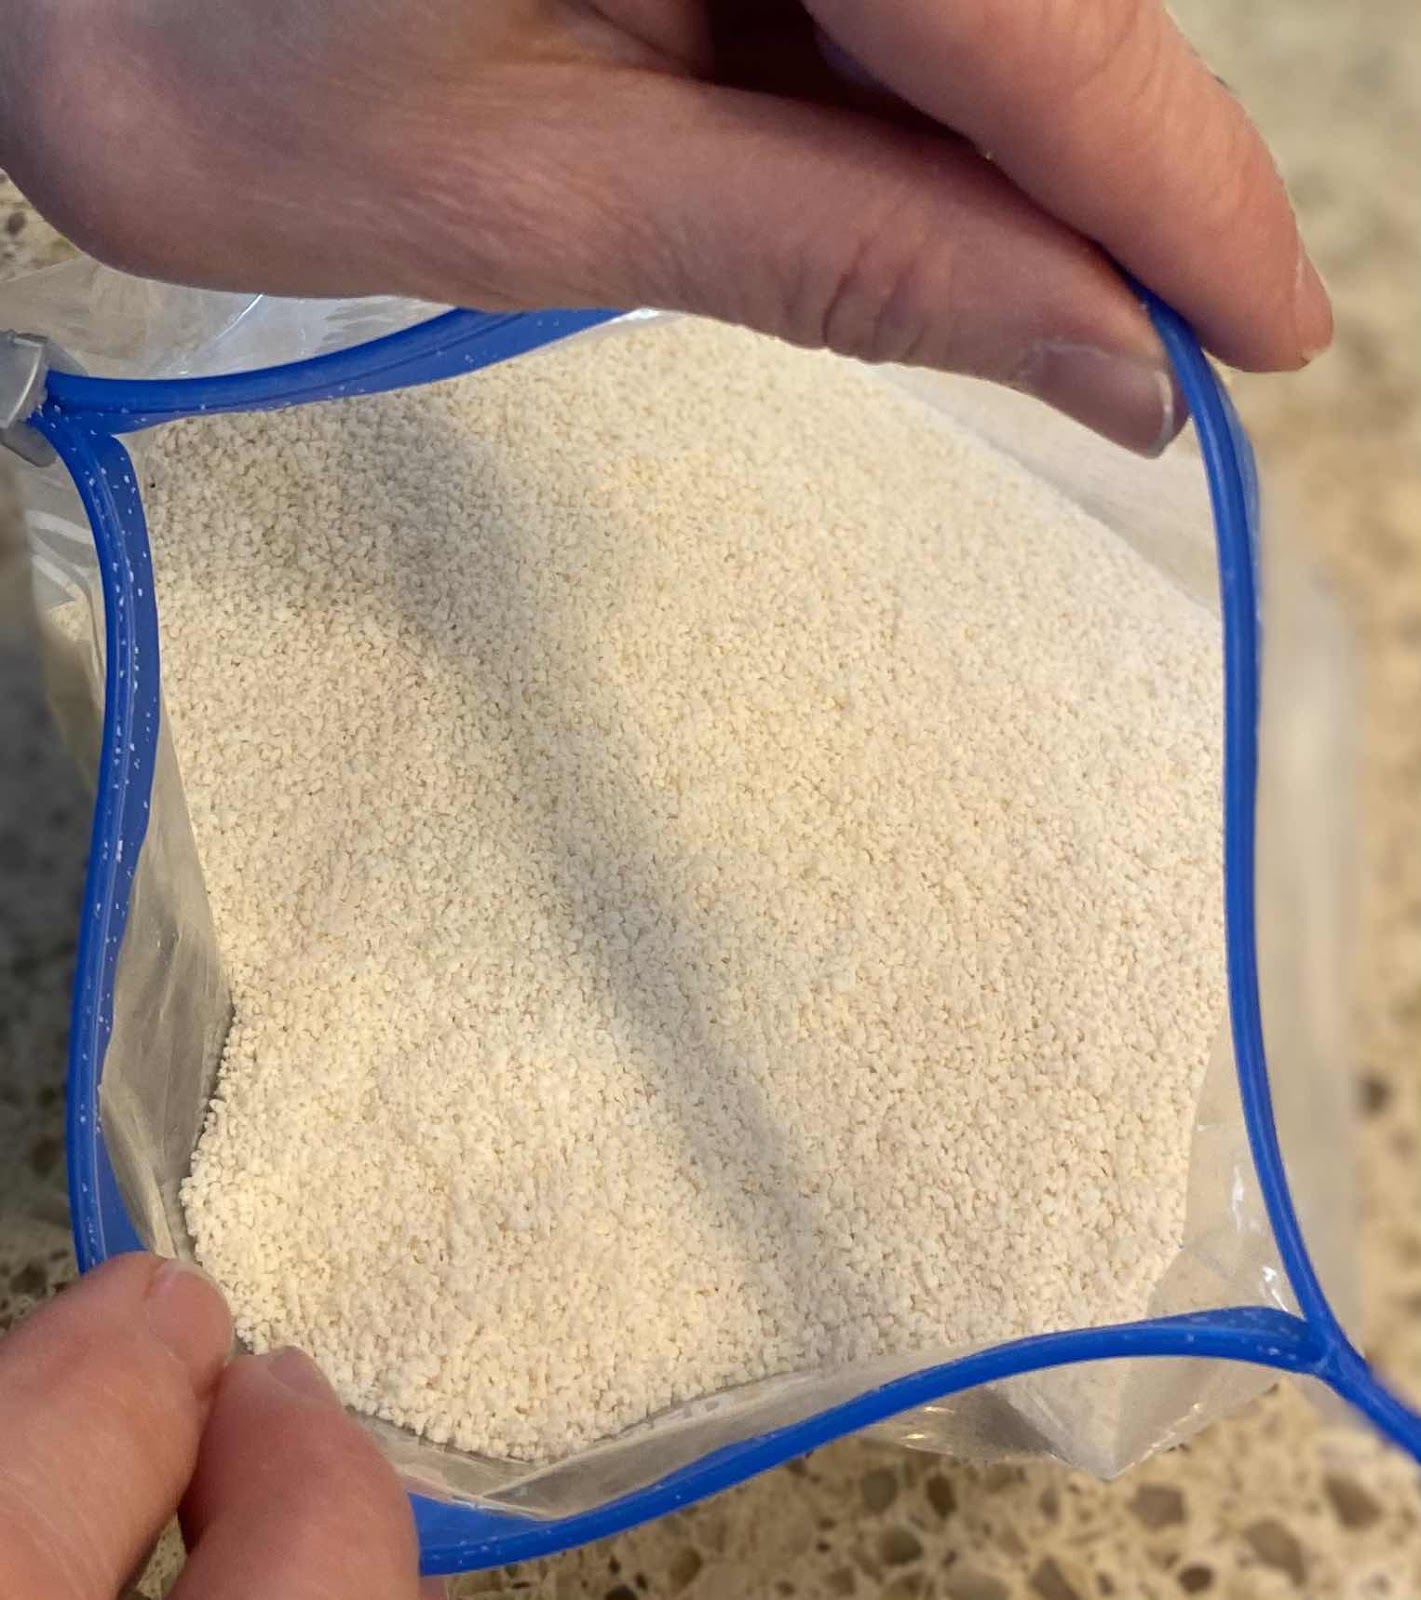
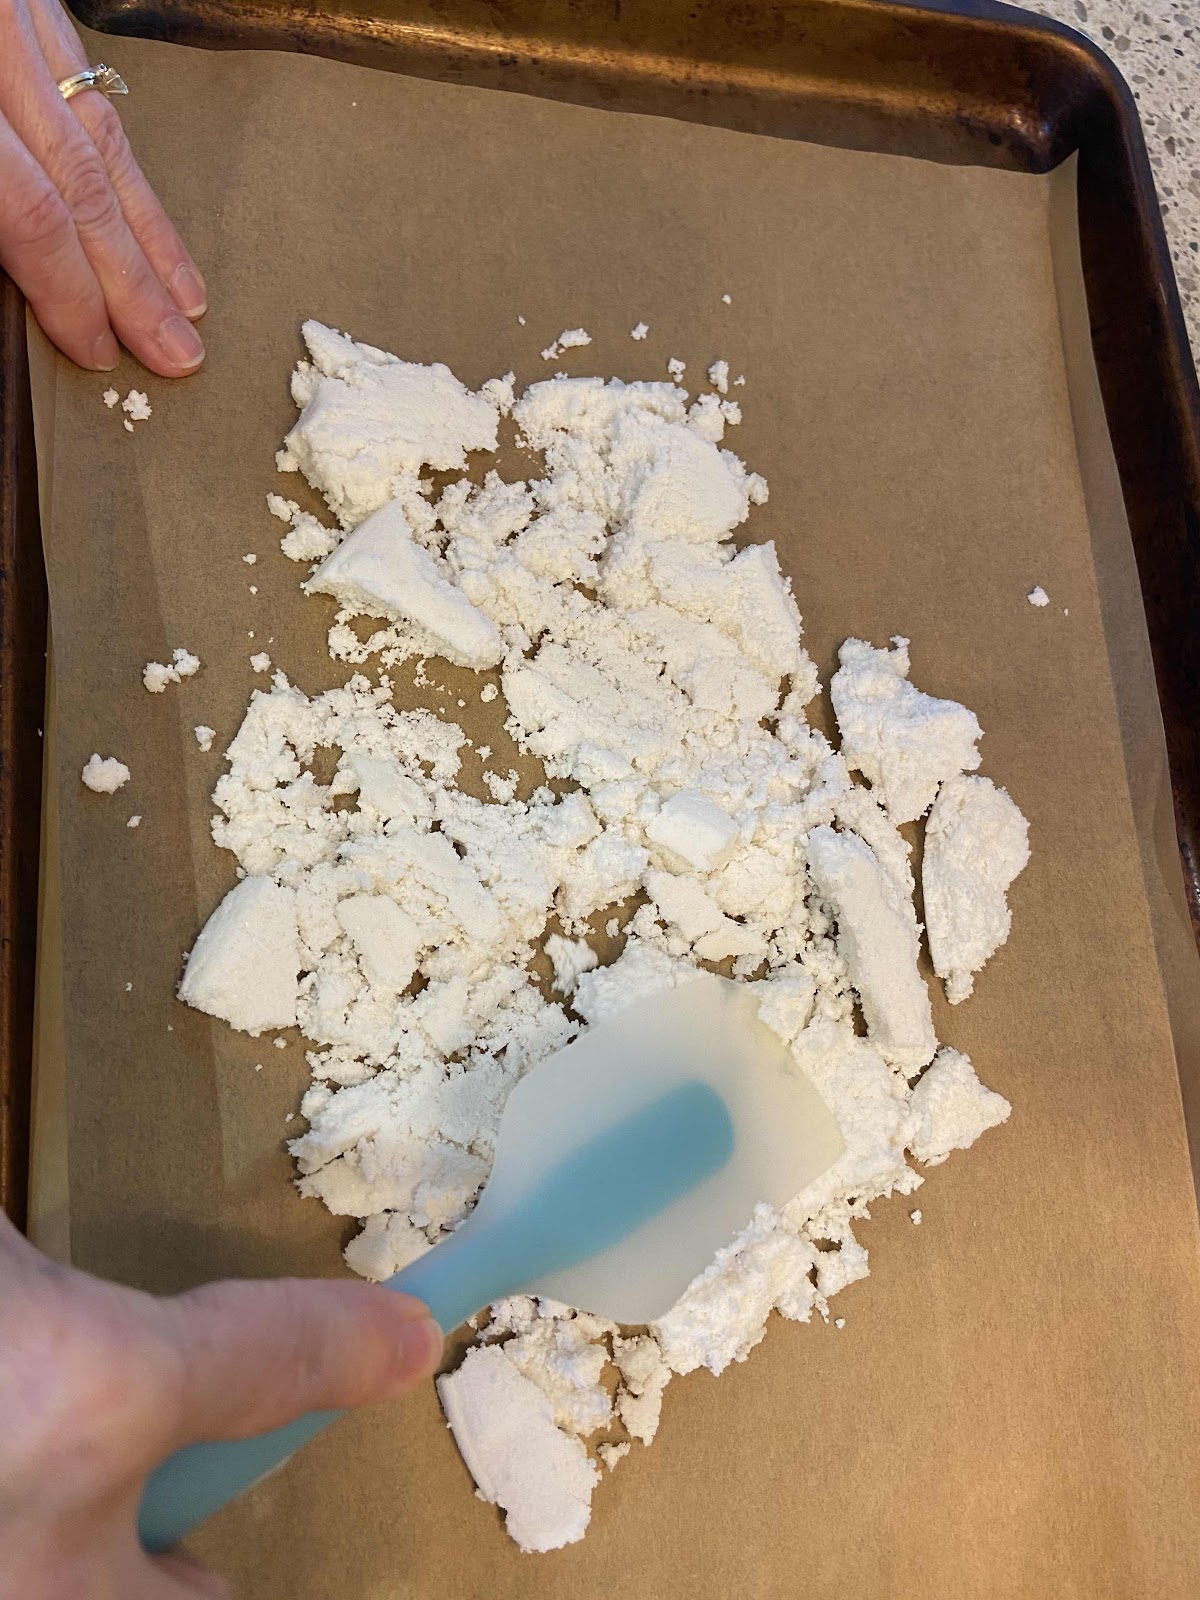
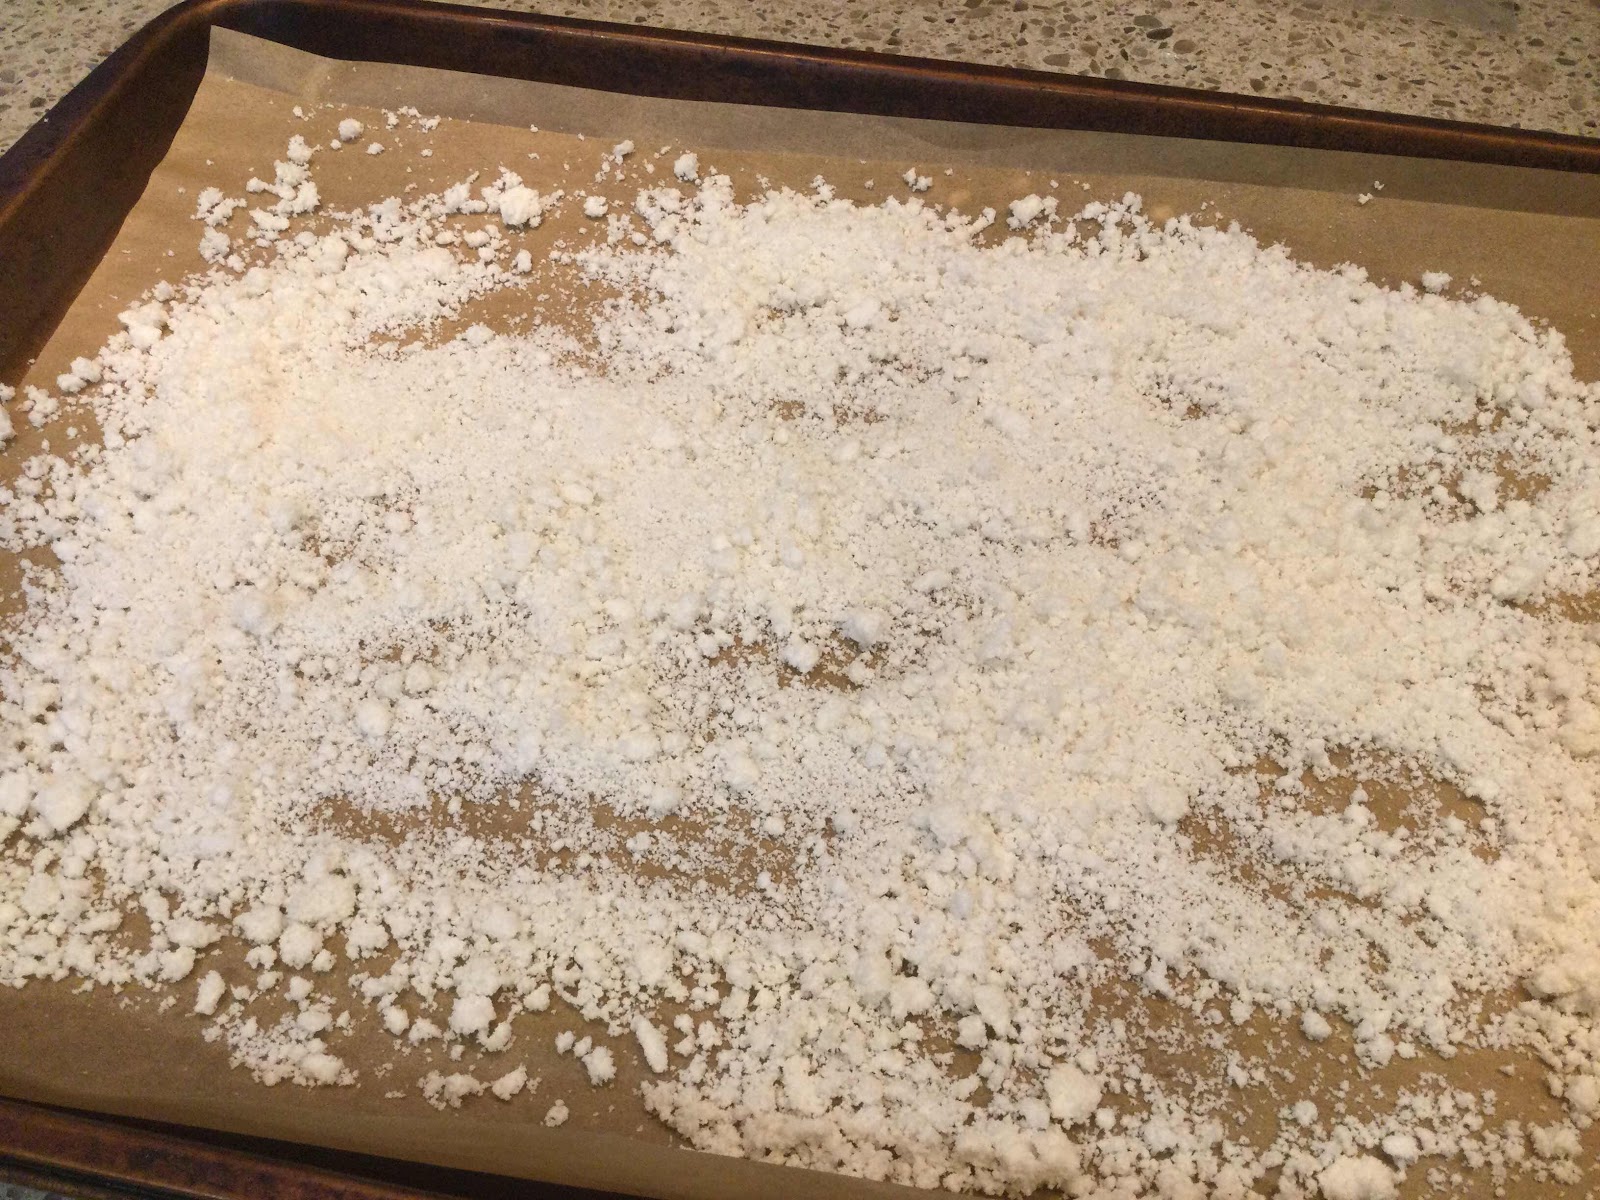
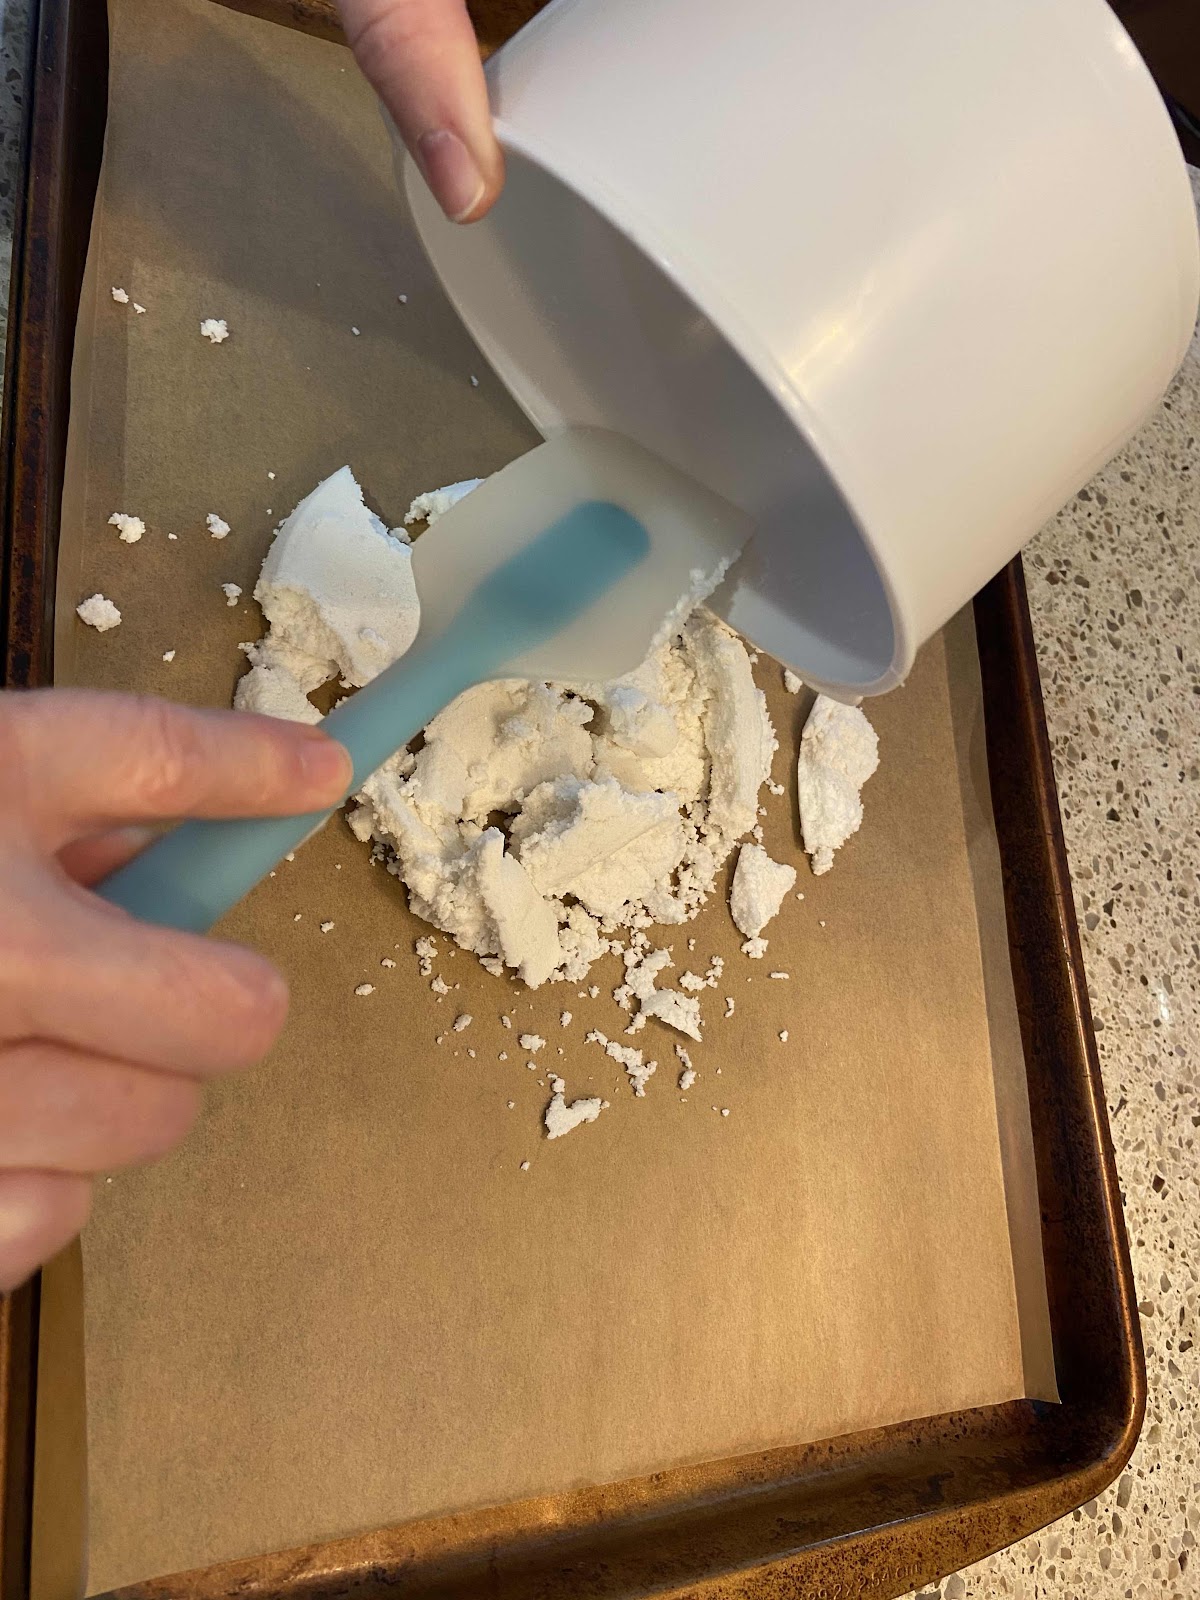
2. Take the reserved nut solids that have been finely ground and spread them on a cookie sheet in a thin layer. Preheat your oven to 200 degrees Fahrenheit and then turn it off. Place the cookie sheet into the oven to dry out the nut flour, stirring occasionally and breaking up any clumps. Every once in a while, turn the oven to 200 degrees and let it heat up, but then immediately turn it off, so the oven is warm. You want to dry out the nut flour, not cook it! I usually leave mine in the oven overnight. However long it takes, you want the mixture completely dry.

Spread the nut solids on a cookie sheet
Spread nut flour into a thin layer
3. After the nut flour is completely dry, sift it into a fine powder and store in an airtight container or plastic ziplock bag. Store your macadamia nut flour in the refrigerator to assure its freshness. Use within 3 months. You may use this flour in a 1:1 ratio to replace almond flour in any recipe.

The nut flour dried out, but not sifted yet
Nutritional Information per 1/2 cup (20 grams): 143.6 calories, 2.8 g carbohydrate (1.7 g dietary fiber, 0.9 g sugars), 15.1 g total fat (2.42 g saturated fat, 0 g trans fat), 0 mg cholesterol, 1 mg sodium, 17 mg calcium, 73.6 mg potassium, 1.6 g protein. Net carbs per 1/2 cup: 1.1 grams

Total Oxalate per 1/2 cup (20 grams): 9.5 mg;  Soluble Oxalate per 1/2 cup: 7.02 mg

Photos and recipe by Kathy Sheehan, copyright 2021
All rights reserved. Please do not duplicate without the author’s permission. 


Friday, October 16, 2020

Low Carb Caramel and Spice Granola (Low Oxalate too)

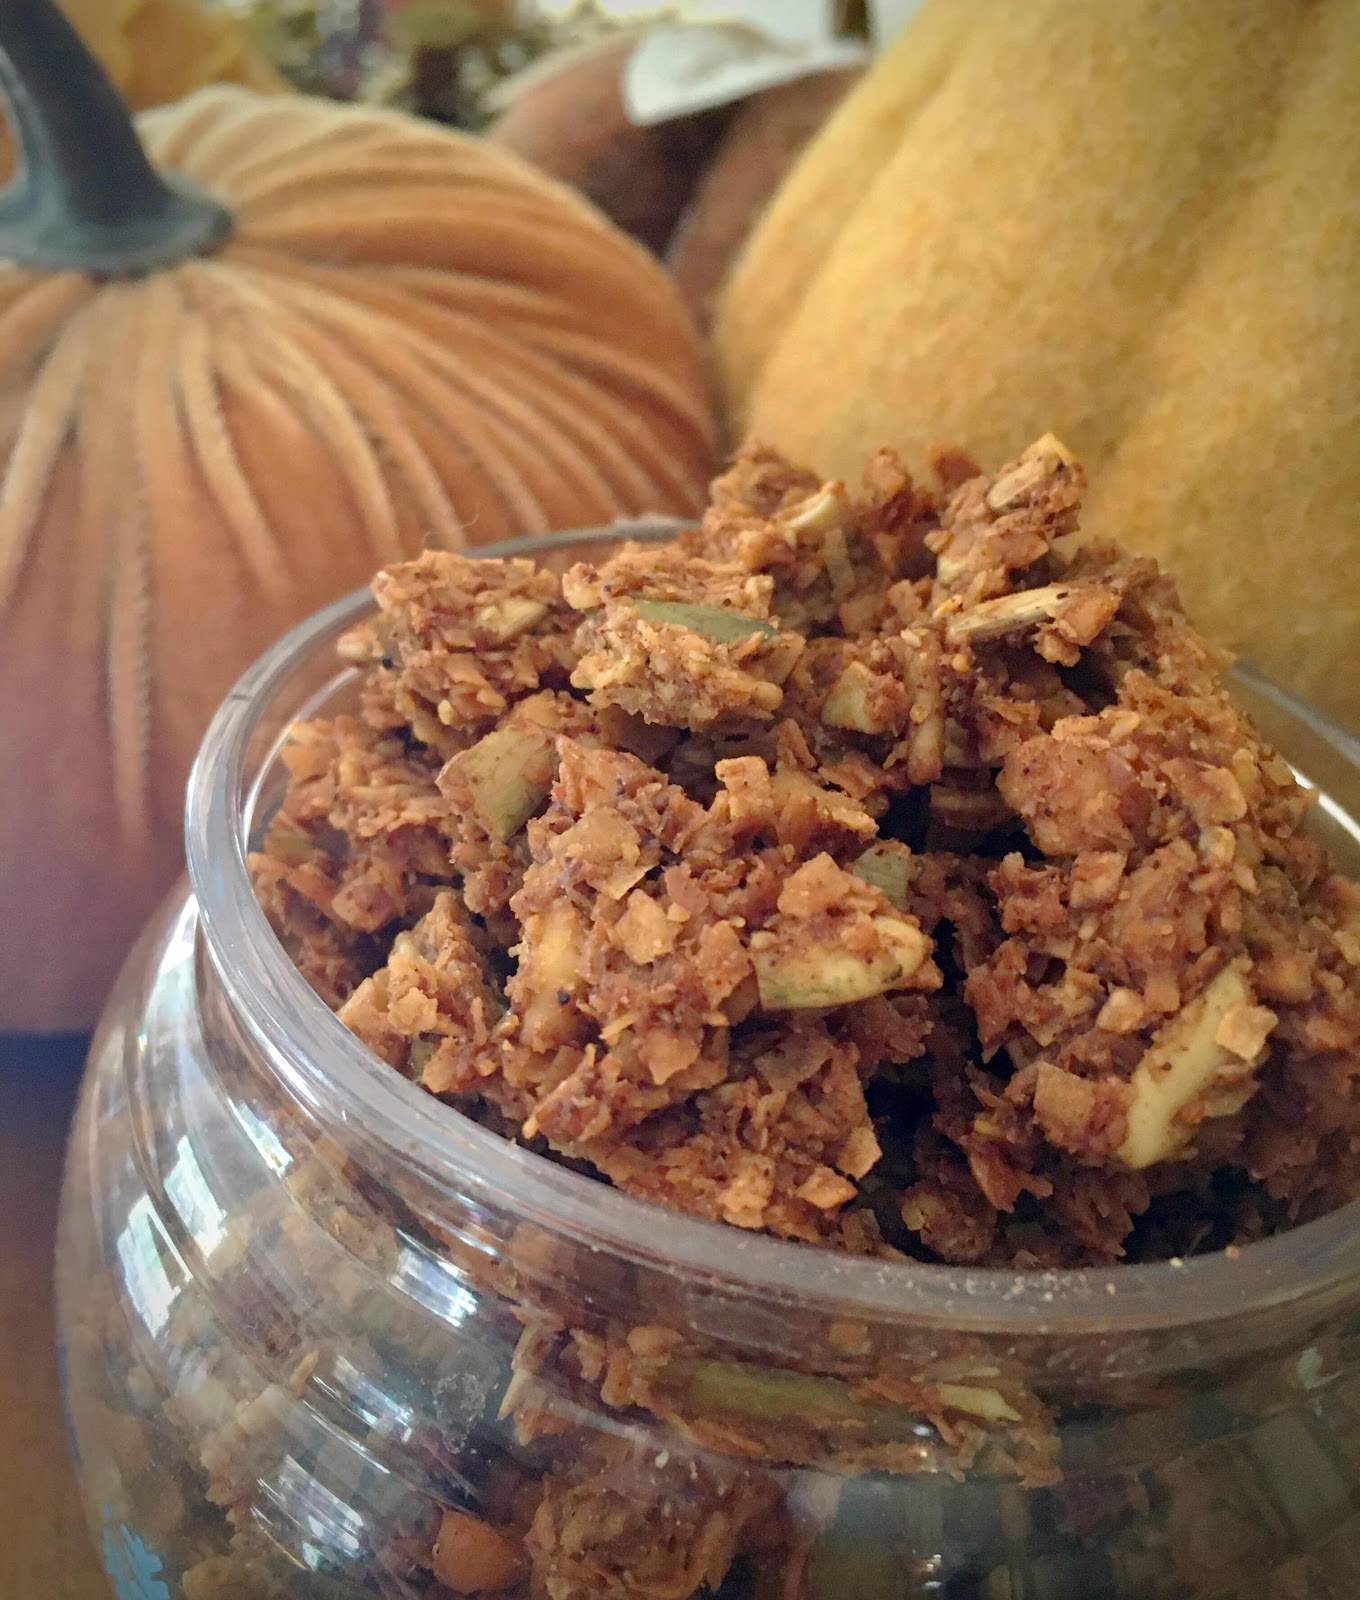
Low Carb Caramel and Spice Granola
Here’s another great granola recipe! This caramel and spice flavor is perfect for the fall. It is baked at a lower temperature for a longer time resulting in a very crunchy granola. One thing I often miss on a low carb/keto diet is something crisp and crunchy! This granola satisfies that craving. Serve it for breakfast or enjoy it as a snack.

Low Carb Caramel and Spice Granola (Low Oxalate too!)
Makes 12 servings (1/4 cup each)

1-1/2 cups unsweetened shredded coconut
1/3 cup sunflower seeds
1/3 cup pumpkin seeds (pepitas)
1/2 cup macadamia nuts (or pecans)
1/2 cup golden flaxseed meal
1/2 cup LaKanto Golden Monkfruit sweetener (or Swerve Brown)*
1/2 teaspoon salt
2 egg whites
2 tablespoons butter, melted (use coconut oil for dairy free)
3 tablespoons sugar free maple syrup
1/2 teaspoon Pumpkin Spice extract (or 1-1/2 tsp pumpkin pie spice, if not concerned with oxalates)
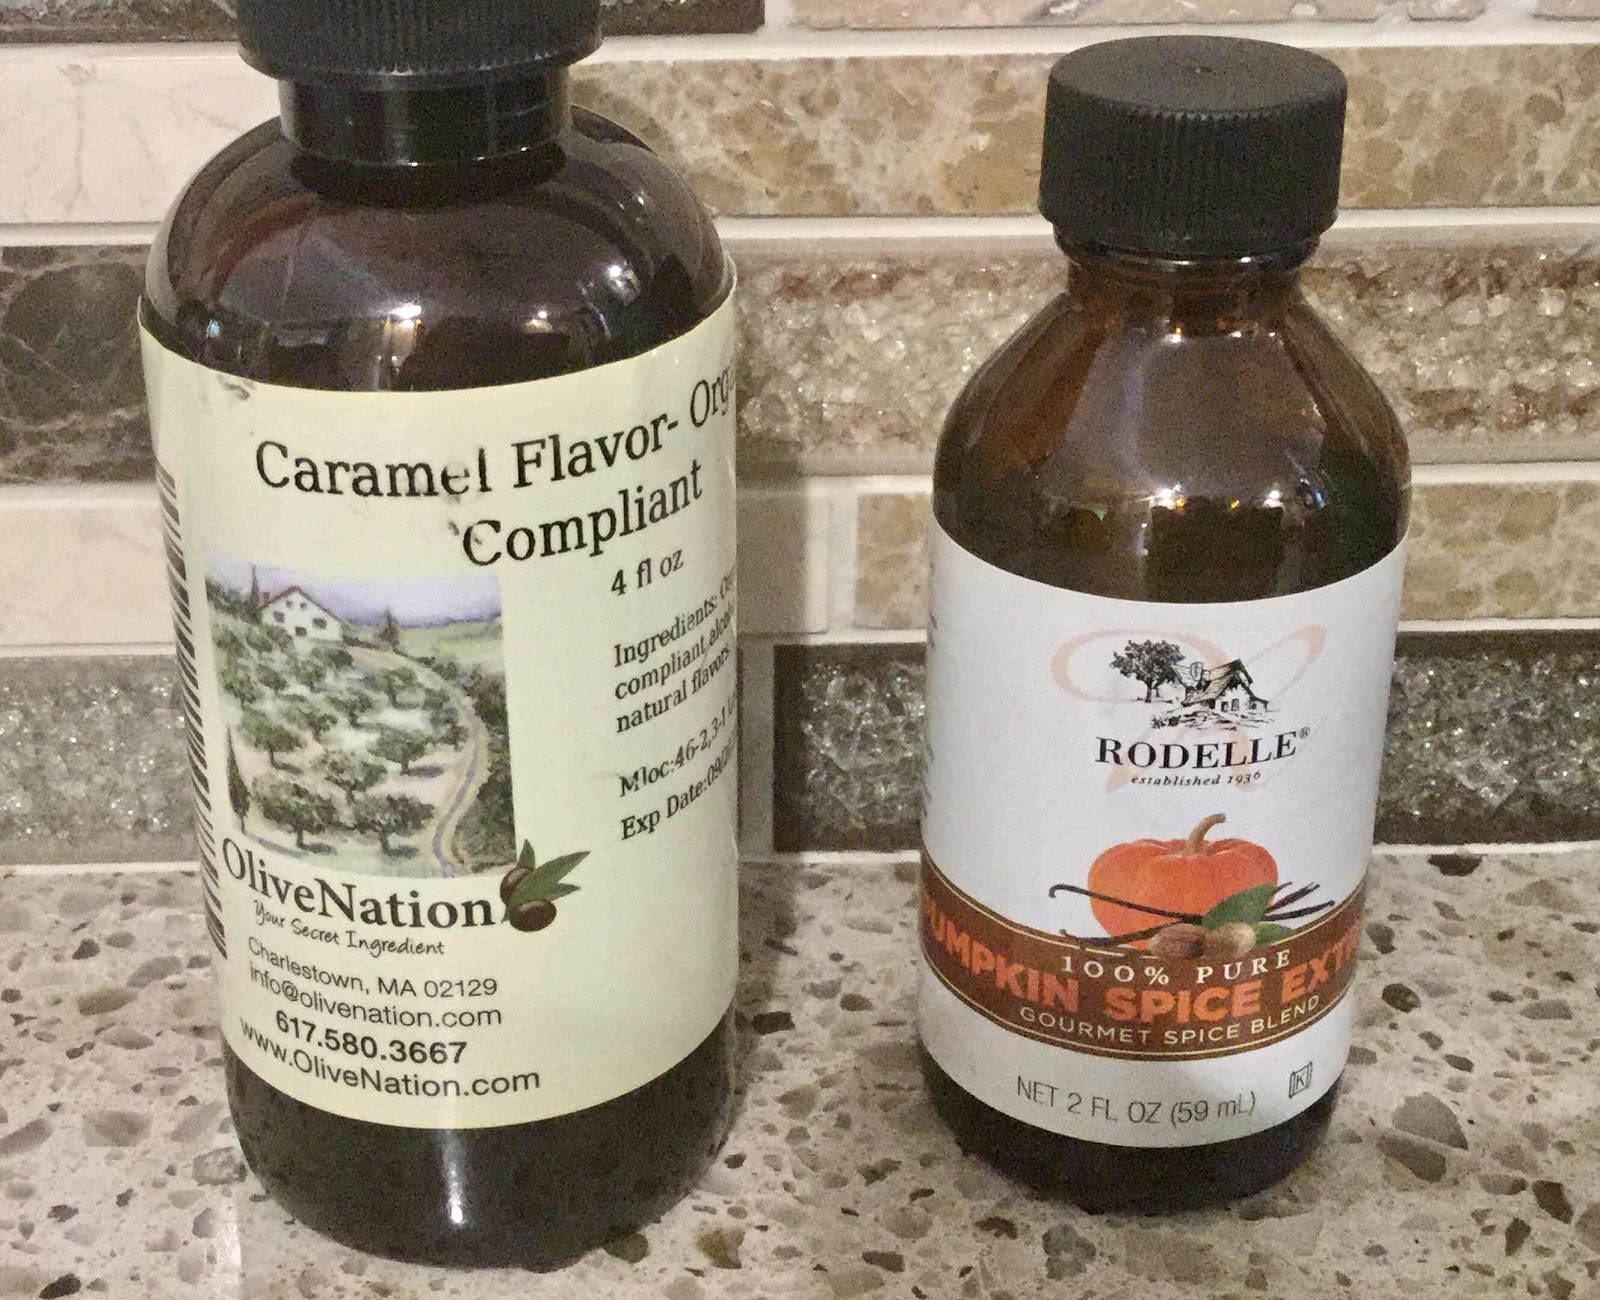
1 teaspoon caramel extract (see photo below)
1 teaspoon vanilla extract

1. Preheat the oven to 250 degrees Fahrenheit. Place the coconut, sunflower seeds, pumpkin seeds and macadamia nuts (or pecans) into a food processor. Pulse until the mixture resembles coarse oatmeal. Transfer to a large mixing bowl.

2. Add the flaxseed meal, monkfruit sweetener, pumpkin pie spice (if using in place of extract) and salt. Stir to combine.

3. In a separate bowl, whisk the egg whites until frothy. In another bowl, whisk together the melted butter, sugar free maple syrup and extracts.

4. Add the egg whites and butter/syrup mixture to the nut mixture and stir until well coated.

5. Once the granola is evenly coated, spread it into an even, thin layer in a large rimmed baking sheet. Bake for 90 minutes to 115 minutes, turning and mixing half way through cooking and again at the end of cooking (moving the darker pieces into the center). It is ready when the granola has reached a deep, golden brown color.

6. Turn off the oven and leave the baking sheet in the oven until it cools; stirring occasionally. The granola will crisp up as it cools. Once completely cooled, break into small pieces and place in an airtight container. Store at room temperature for up to two weeks.

*You’ll want to use an erythritol-based granulated sweetener to achieve a crispy texture. Other sweeteners may not crisp up as well.

Extracts
Nutritional Information per 1/4 cup: 164 calories, 6 g carbohydrate (3.1 g dietary fiber, 1.3 g sugars), 14.6 g total fat (6.3 g saturated fat, 0 g trans fat), 2 mg cholesterol, 113 mg sodium, 10.4 mg calcium, 31 mg potassium, 1 mg iron, 8 IU Vit A, 4.2 g protein. Net carbs per serving: 2.9 grams

Total Oxalate per serving: 3.81 mg; Soluble oxalate 2.13 mg

Photos and recipe by Kathy Sheehan, copyright 2020
All rights reserved. Please do not duplicate without the author’s permission. 

Friday, September 11, 2020

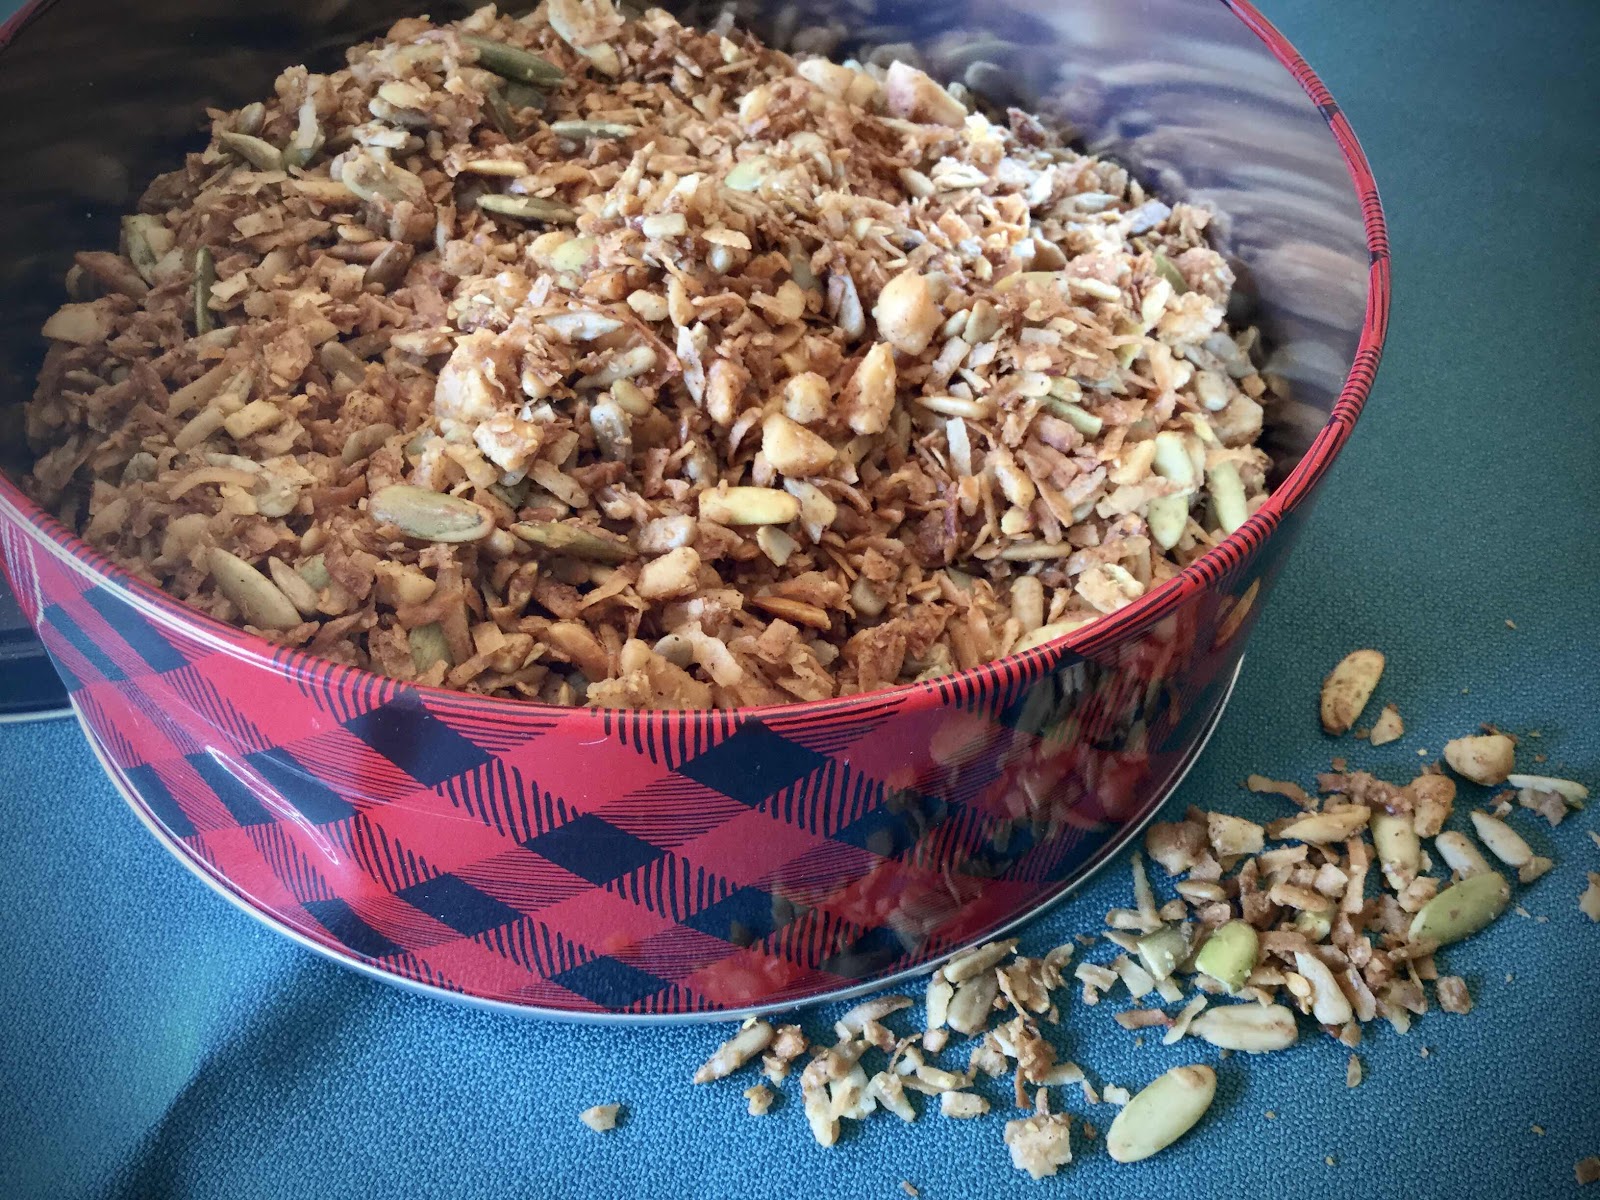
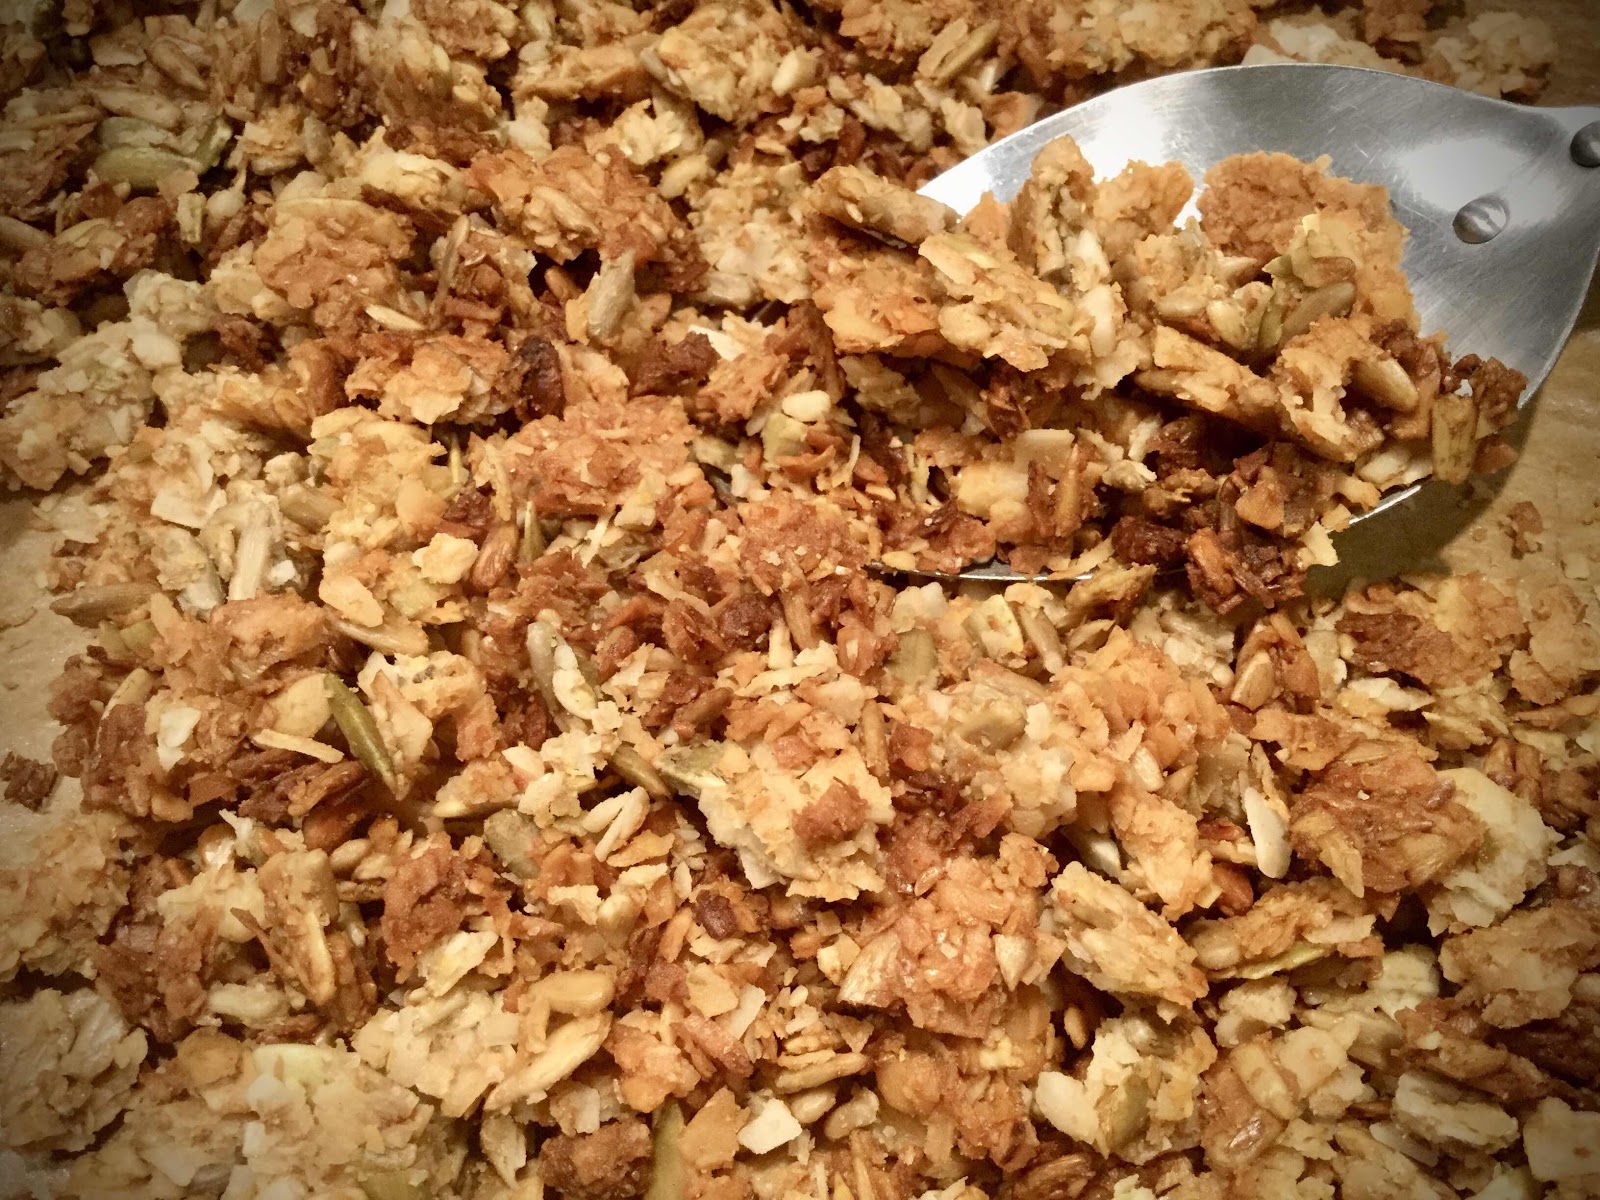
Low Carb, Low Oxalate Maple Cinnamon Granola

Low Carb, Low Oxalate Maple Cinnamon Granola
Granola is the easiest thing to make! Simply mix all the ingredients together, spread onto a baking sheet and bake...it’s really that simple! I have other granola recipes on my blog but, now that I have to reduce the oxalate in my diet (due to reoccurring kidney stones), the nuts most often used to make granola are extremely high in oxalates and are no longer an option (almonds are the worst!). I love sprinkling granola on my homemade yogurt, eating it as a snack or even as breakfast cereal, so I was perplexed as to how I could still have granola without the oxalates...thus this recipe was born! Macadamia nuts are moderate oxalate, but when you divide the amount called for into 12 servings, you’re really getting very little. Pumpkin seeds, sunflower seeds and coconut are all low oxalate. The other trick is to use cinnamon extract, not ground cinnamon which is shockingly high in oxalate. The result is an excellent and delicious granola that I can feel good about eating!

Low Carb, Low Oxalate Maple Cinnamon Granola
Makes 12 servings (1/4 cup each)

1-1/2 cups unsweetened shredded coconut
1/3 cup pumpkin seeds (pepitas)
1/3 cup sunflower seeds
1/2 cup macadamia nuts, roughly chopped
1/4 cup flaxseed meal
1/2 teaspoon ground ginger
A pinch of salt
1 egg white
2-3 tablespoons granulated erythritol sweetener, to your taste
2 tablespoons sugar free maple syrup
1/2 teaspoon vanilla or pumpkin spice extract
3/4 teaspoon cinnamon extract, or to taste
2 tablespoons coconut oil, melted

1. Preheat the oven to 350 degrees F. Place all of the coconut, pumpkin seeds, sunflower seeds and macadamia nuts in a food processor and pulse until coarsely chopped and the mixture has the texture of oatmeal. Place the mixture into a large bowl and add the flaxseed meal, ginger and salt. Stir to combine.

2. In a separate small bowl, whisk together the egg white, sweetener, sugar free maple syrup and extracts until frothy. Add the coconut oil and whisk again to combine. 

3. Add the egg white mixture to the nut/coconut mixture and stir. Mix thoroughly, making sure all of the mixture is lightly coated. 

4. Pour the mixture onto a cookie sheet (lined with parchment paper for easier clean up) and spread into an even, thin layer. Bake for a total of 15-18 minutes, turning and lightly breaking up with a spatula after about 10-12 minutes. Continue baking, but watch carefully for the last 5-8 minutes because it can turn dark and burn quite quickly. It is ready when the granola is toasty brown in color. 

5. Remove from the oven and cool completely on the cookie sheet. The granola will crisp up as it cools. Break apart any larger chunks and store in an airtight container at room temperature for up to 2 weeks. 

Low Carb, Low Ox Granola
Nutritional Information per 1/4 cup serving: 177 calories, 5.1 g carbohydrate (2.8 g dietary fiber, 0.7 g sugars), 16.5 g total fat (9 g saturated fat, 0 g trans fat), 0 mg cholesterol, 18 mg sodium, 12 mg calcium, 70 mg potassium, 1 mg iron, 3.2 g protein. Net carbs per serving: 2.3 grams

Total Oxalate per serving is 3.71mg, Soluble oxalate is 2.03mg

Photos and recipe by Kathy Sheehan, copyright 2020
All rights reserved. Please do not duplicate without the author’s permission. 

Wednesday, September 25, 2019

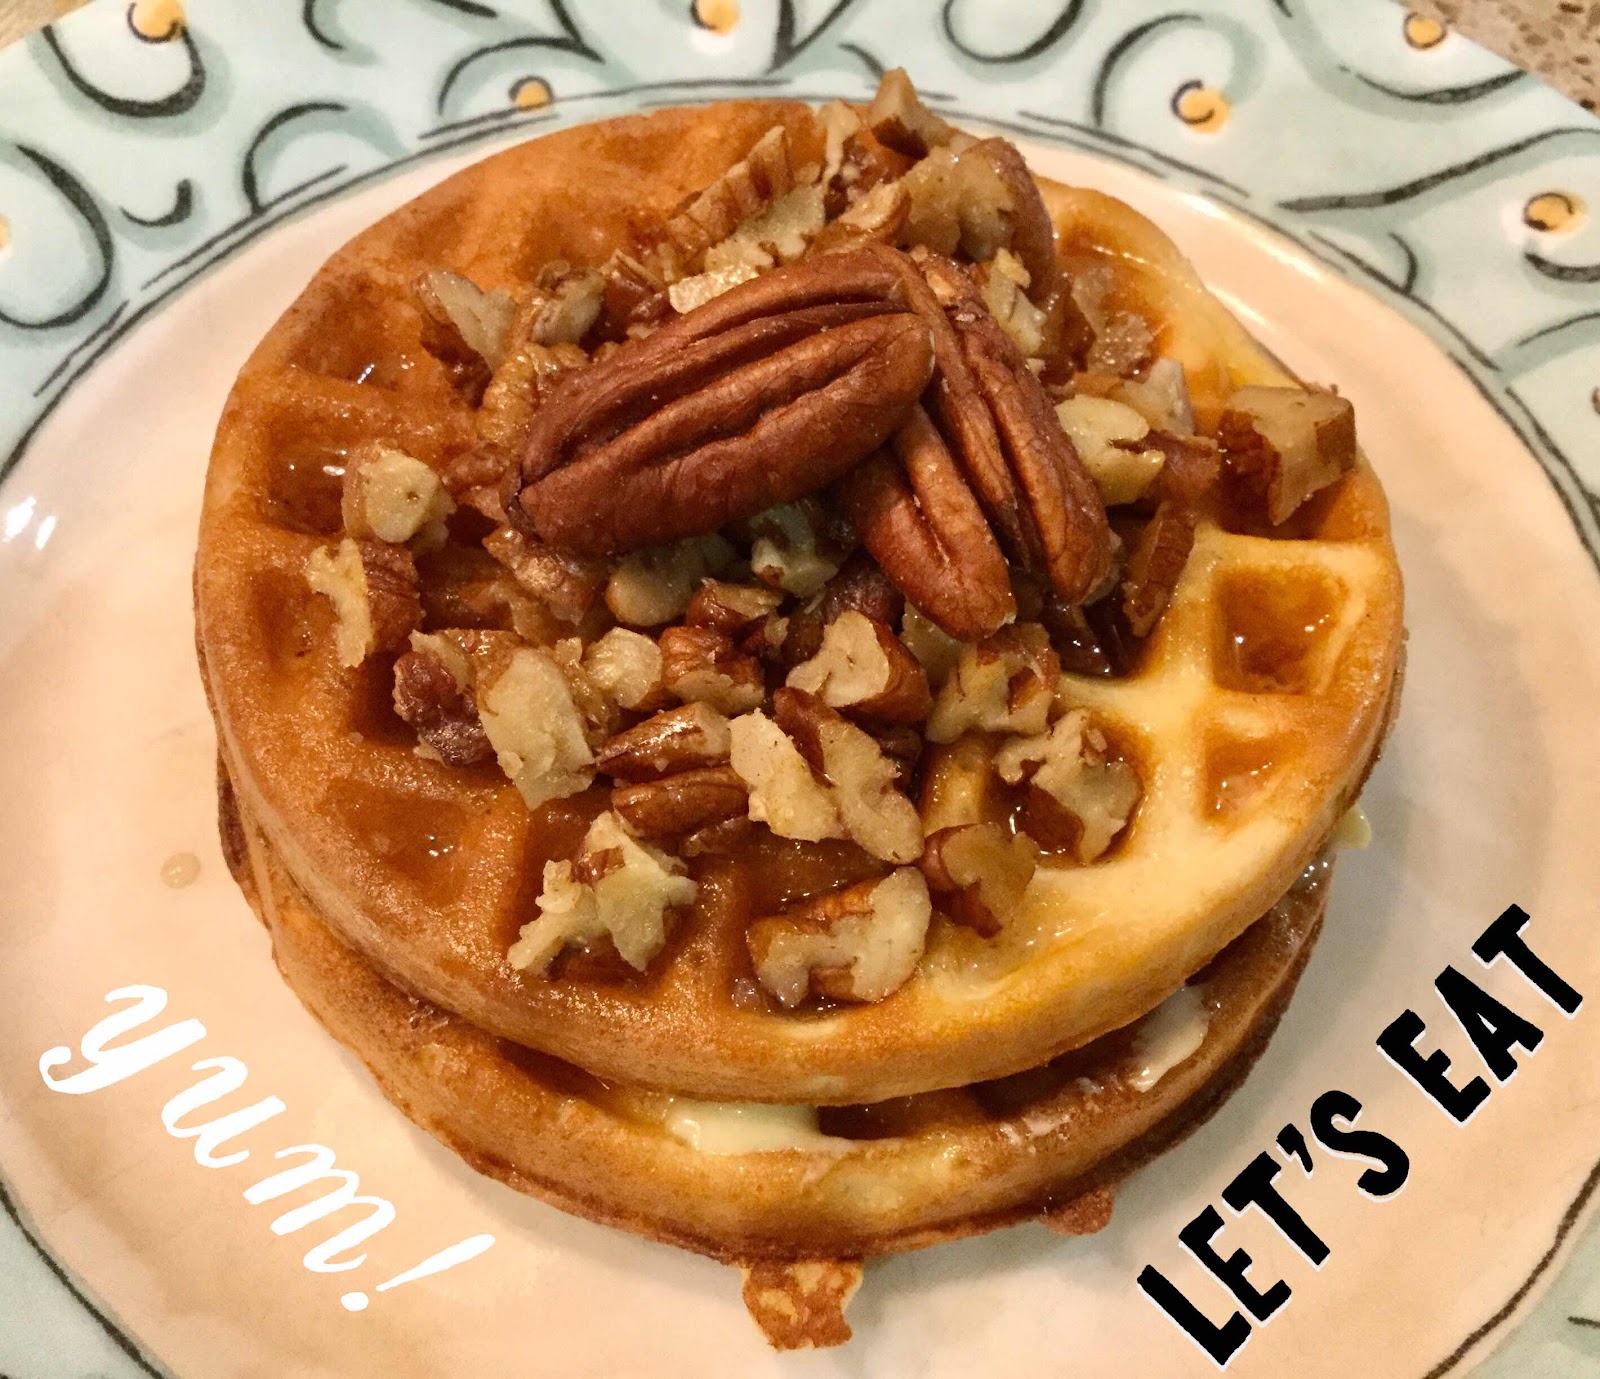
Banana Nut Chaffles

Banana Nut Chaffles
The magic of chaffles is that they’re very low carb and, when made in a mini waffle maker, they are a single serving. Since I’m the only person in my house eating a very low carb/keto diet, they’re the perfect breakfast that is quick and easy to whip together! (If you’re using a regular size waffle maker, you will need to double or triple this recipe.) I’ve heard people complain that cleaning their waffle maker is a chore. My tip is to unplug your waffle maker and, while it’s still hot, place a double layer of wet paper towel on the grill and close the lid. The steam loosens any stuck on mess and when the plates have cooled enough to touch, it is easily wiped away! Here’s my take on Banana Nut Chaffles (inspired by the recipe from lowcarbinspirations.com). These chaffles have a true bread-like texture and the taste is divine!

Banana Nut Chaffles
Makes 1 serving (2 chaffles)

1 large egg
1/2 ounce (1 tbsp) cream cheese, softened (or sour cream)
2 tablespoons almond flour (or 1 tbsp coconut flour)
1 teaspoon LaKanto Golden Monkfruit sweetener (or other brown sugar substitute)
6 drops monkfruit extract (or add another tsp Monkfruit sweetener)
3/4 teaspoon banana extract
1/4 teaspoon vanilla extract
Pinch of ground mace or cinnamon (optional, but adds a nice flavor)

Optional Toppings:
Butter and cinnamon
Sugar free maple syrup flavored with caramel extract to taste
Chopped toasted pecans
Sugar free caramel sauce
Candied Butter Pecans (see instructions in recipe)

1. Preheat the mini waffle maker. In a small bowl or using a tall cup with an immersion stick blender, whisk together the egg, then add the remaining chaffle ingredients and blend until smooth (the batter will be thin). Divide the batter in half and add about 3-4 tablespoons of batter to the preheated waffle maker. Cook for at least 4 minutes until well browned. Remove to a wire rack while you prepare the second chaffle. This recipe makes 2 chaffles. Top with optional toppings and enjoy!

2. To make Candied Butter Pecans, chop 2 tablespoons of pecans and add to a small skillet over low to medium-low heat. Toast the pecans for about 1 minute being careful not to burn. Add 1 teaspoon of butter and 1/2 teaspoon of Golden Monkfruit sweetener. Stir until the butter and sugar have melted and the mixture coats the pecans. Remove to a plate to cool. The sugar will harden as it cools. Serve as an optional topping, if desired.

Nutritional Information per 2 chaffles (no topping): 211 calories, 4.8 g carbohydrate (1.5 g dietary fiber, 1.3 g sugars), 16.3 g total fat (5.1 g saturated fat), 204 mg cholesterol, 129 mg sodium, 68.5 mg calcium, 176 mg potassium, 1 mg iron, 422 mg Vit A, 10.3 g protein. Net carbs per serving: 3.3 grams

Nutritional Information for 2 TB Candied Buttered Pecans: 113 calories, 2.1 g carbohydrate (1.1 g dietary fiber, 1 g sugars), 12 g total fat (2.9 g saturated fat), 9 mg cholesterol, 25 mg sodium, 9.3 mg calcium, 50 mg potassium, 113 mg Vit A, 1.1 g protein. Net carbs per serving: 1 gram

Photo and recipe by Kathy Sheehan, copyright 2019
All rights reserved. Please do not duplicate without the author’s permission. 

Friday, August 24, 2018

Extra Creamy Homemade Almond Coconut Milk (or Cashew)

Extra Creamy Homemade Almond Coconut Milk
Sometimes having the right tools in your kitchen make all the difference between whether you buy premade, processed food or make it yourself at home. A fine example is today’s recipe of homemade almond coconut milk (or cashew). I find that store bought nut milks are fine to use in cooking, but are otherwise undrinkable. Using a high-speed blender or a nut milk maker machine (such as the SoyaPower G4 pictured above) allows me to create my own organic, additive and preservative-free nut milks in a few minutes! Last Christmas I received this nut milk maker machine, which I love and have been using consistently every week. The resulting almond coconut milk (or cashew) is naturally creamy, extremely low carb and more delicious than any store bought I’ve ever tried. Although my recipe contains heavy cream, it is virtually lactose and casein free. (Of course, you could leave out the cream if you wish, but it adds a richness to the milk that I highly recommend without adding any carbs.) The only thing that takes prior planning and time is soaking the nuts beforehand, but that’s easily done overnight while I sleep. Take it from me, homemade almond milk is worth the effort!  

Extra Creamy Homemade Almond Coconut Milk (or Cashew)
Makes about 5 cups

1/2 cup raw almonds, soaked in water for 12 hours
1/2 cup unsweetened shredded coconut
4-1/2 cups water
1/2 cup organic heavy whipping cream (can omit, if desired)
1/4 teaspoon pink Himalayan or sea salt
5 drops stevia or LaKanto Monkfruit extract
1/2 teaspoon vanilla

1. Presoak your almonds for 12 hours prior to making your nut milk (if using cashews, soak for 4-8 hours). Drain and rinse the soaked almonds. Place them into your high-speed blender or nut milk maker machine. Add the unsweetened shredded coconut and water. If using a blender, blend on high for 4 minutes. If using a nut milk maker machine, add enough water to reach the specified line in your pitcher. Turn the machine on and select raw/juice and press start (see your instruction manual for the correct procedure for making nut milk). The machine will turn off automatically when the milk is done.

2. Using a very fine mesh strainer or a nut milk bag, strain the solids out of the blended milk and discard. Add the whipping cream, salt, sweetener and vanilla to the strained milk and stir. Pour into a glass container and place in the refrigerator to cool completely before drinking or it can be used right away for cooking. The milk can be stored in the refrigerator for 5-7 days.

Nutritional Information per 1 cup almond coconut milk: 117 calories, 1.3 g carbohydrate (0.7 g dietary fiber, 0.3 g sugars), 12.8 g total fat (7.1 g saturated fat, 0 g trans fat), 32 mg cholesterol, 37 mg sodium, 8.5 mg calcium, 25 mg potassium, 316 mg Vit A, 0.9 g protein. Net carbs per serving: 0.6 grams.

Nutritional Information per 1 cup cashew coconut milk: 169 calories, 4.4 g carbohydrate (1.8 g dietary fiber, 1.1 g sugars), 16 g total fat (10.8 g saturated fat, 0 g trans fat), 32 mg cholesterol, 137 mg sodium, 6.2 mg calcium, 46 mg potassium, 1 mg iron, 316 mg Vit A, 1.6 g protein. Net carbs per serving: 2.6 grams

Recipe and photo by Kathy Sheehan, copyright 2018
All rights reserved. Please do not duplicate without the author’s permission. 

Thursday, June 7, 2018

Chocolate Turtle Pecans

Chocolate Turtle Pecans
These toasted buttered pecans have just a hint of caramel and are lightly glazed with sugar free chocolate to give them the taste of old-fashioned Chocolate Turtle Candies. The nice part is that they’re quick and easy! No messy or tricky caramel to make, just toast the pecans in a skillet, bake in the oven to crisp up and stir in chocolate chips...that’s it! You’ll want to have this low carb treat on hand for snacking or as a simple dessert anytime.

Chocolate Turtle Pecans
Makes 12 servings (1/4 cup each)

3 cups pecan halves (or you can use 1/2 walnuts and 1/2 pecans)
3 tablespoons butter
1/2 teaspoon salt, or to taste
1 teaspoon granulated erythritol (I used Golden LaKanto Monkfruit sweetener)
3-4 drops caramel flavoring, or to taste (I used Capella, see photo below)
1/4 cup sugar free chocolate chips (I used Lily’s)

Capella Caramel Flavoring
1. Preheat oven to 350 degrees F. In an oven-proof or cast iron skillet, melt the butter over medium heat and add the nuts. Stir to coat. Sprinkle with the salt, erythritol sweetener and caramel flavoring. Stir to coat the nuts evenly. Taste and adjust sweetness and flavorings, if desired. Toast the nuts, stirring frequently, until fragrant.

2. Place the skillet with the nuts into the preheated oven and cook for 10 minutes, stirring once halfway through the cooking time. Cook until lightly toasted, but not burned.

3. Remove from the oven and spoon the hot nuts into a large bowl. Immediately add the chocolate chips and stir. When the nuts are nicely coated with the melted chocolate, spread the nuts in a single layer onto a parchment-lined cookie sheet to cool completely. To hasten the process, you can refrigerate for about 10-15 minutes. 

4. Once cooled and the chocolate has set, store the nuts in an airtight container at room temperature or in the refrigerator for up to 4 weeks. The nuts are most flavorful when served at room temperature. 

Nutritional Information per 1/4 cup serving: 213 calories, 5.5 g carbohydrate (3 g dietary fiber, 1 g sugar, 1 g sugar alcohols), 22 g total fat (4 g saturated fat, 0 g trans fat), 7.5 mg cholesterol, 122 mg sodium, 111 mg potassium, 35.2 mg magnesium, 3.1 g protein. Net carbs per serving: 2.5 grams

Recipe and photos by Kathy Sheehan, copyright 2018
All rights reserved. Please do not duplicate without the author’s permission. 

Thursday, November 2, 2017

Cranberry Nut Donuts with Orange Glaze

Cranberry Nut Donuts with Orange Glaze
For me, tart cranberries with nuts and sweet orange are an autumn or holiday flavor combination. For many years, I’ve avoided using dried cranberries due to their extremely high sugar and carb content. (You’d think that someone would have figured out to make dried cranberries without sugar, but I guess not. I’ve searched and they are not available in stores or online.) The other day, I discovered a very easy recipe for making my own sugar-free dried cranberries at home (click here for the recipe) and they turned out perfectly! I’m so delighted once again to have this pantry staple on hand to use in muffins, salads, cookies and my husband’s famous Thanksgiving dressing. Also, because they are so delicious, I was inspired to use them this morning to create these marvelous low carb donuts. I’m ready now! Bring on the holidays!!

Cranberry Nut Donuts with Orange Glaze
Makes 6 donuts (more or less, depending on your pan)

1/2 cup almond flour
1 tablespoon coconut flour
1 tablespoon unflavored whey protein powder
1 tbsp + 1 tsp granulated erythritol (I used LaKanto Monkfruit Sweetener)
3/4 teaspoon stevia powder (I used SweetLeaf brand)
1 teaspoon baking powder
A pinch of salt
2 tablespoons butter, melted
1 large egg, lightly beaten
2 tablespoons water
1/8 teaspoon orange extract
1 teaspoon orange zest
2 tablespoons finely chopped pecans
3 tablespoons sugar free dried cranberries, chopped (see recipe here)

Orange Glaze:

1/4 cup powdered erythritol (I used Swerve Confectioner’s)
1 tablespoon orange juice (or water)
1/8 teaspoon orange extract (if using water, increase to 1/4 teaspoon)

1. For the donuts, lightly grease a donut baking pan and preheat the oven to 325 degrees Fahrenheit. In a medium bowl, whisk together the almond flour, coconut flour, whey protein powder, erythritol, stevia, baking powder and salt until no lumps remain and the ingredients are well combined.

2. In a separate small bowl, whisk together the melted butter, egg, water, orange extract and orange zest. Add the wet ingredients to the dry ingredients and whisk thoroughly to combine. Fold in the chopped pecans and cranberries until well distributed.

3. Fill the donut holes approximately 2/3 to 3/4 full (do not overfill). Bake for 16-18 minutes or until the donuts are browned on the edges and spring back when touched. Let cool in the pan for 5 minutes, then flip out onto a wire rack to cool completely before glazing.

4. To make the glaze, whisk together the powdered erythritol, orange juice and extract in a shallow bowl until smooth. If too thin, add more erythritol. If too thick, add more liquid, a few drops at a time, until the desired consistency is reached.

5. Dip the tops of the cooled donuts into the glaze. (Be sure to hold the donuts carefully because they may be delicate. The distribution of the cranberries and pecans might have created some weak spots and you don’t want them to fall apart.) Place the glazed donuts on a wire rack for a few minutes until the glaze is set. Leftover donuts can be stored in an airtight container at room temperature for up to 2 days.

Cranberry Nut Donuts with Orange Glaze
Nutritional Information per donut (based on six per recipe): 127 calories, 6.8 g carbohydrate (2.1 g dietary fiber, 1.1 g sugars, 8 g sugar alcohols), 11.2 g total fat (3.4 g saturated fat, 0 g trans fat), 41 mg cholesterol, 107 mg sodium, 31.6 mg calcium, 104 mg potassium, 1 mg iron, 175 mg Vit A, 3 mg Vit C, 3.9 g protein. Net carbs per serving: 4.7 grams

Recipe and photos by Kathy Sheehan, copyright 2017
All rights reserved. Please do not duplicate without the author’s permission.

Thursday, June 1, 2017

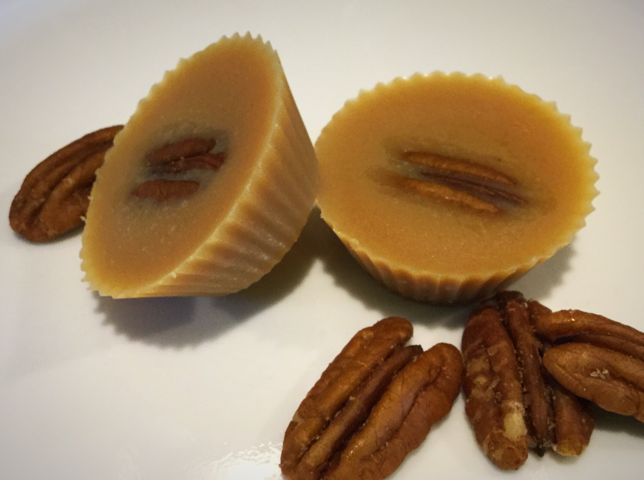
Triple Butter Caramel Pecan Fat Bombs

Triple Butter Caramel Pecan Fat Bomb
On my low carb/high healthy fat (LCHF) Keto diet, Fat Bombs offer me a quick energy boost or even can replace a meal without raising my insulin levels if I'm in a hurry to get out the door. Also, they're great on a day when I'm intermittent fasting, but I need a little something to keep going. If I experience that afternoon slump about 3:00 PM, just one fat bomb wakes me up and provides instant energy without caffeine! I always have a batch of Fat Bombs in my refrigerator. They are delicious, have so many uses and are my secret weapon to reduce cravings and keep me on track!

Triple Butter Caramel Pecan Fat Bombs
Makes 10 servings

2 tablespoons coconut oil
2 tablespoons butter
2 ounces unsweetened cocoa butter
3 tablespoons nut butter of choice (I used peanut butter)
1/4 teaspoon vanilla extract
1/8 teaspoon Caramel Sweet Drops, or 8-10 drops English Toffee liquid stevia to taste
10 pecan halves

1. Melt coconut oil, butter, cocoa butter and nut butter together in a small saucepan until melted or in a glass measuring cup in the microwave.

2. Add in the vanilla extract and liquid stevia and whisk until combined. Divide equally between ten mini-size silicone muffin liners and place in the freezer for a few minutes or the refrigerator for about 15 minutes until just beginning to set.

3. Remove and place one pecan half on the top of each fat bomb. Return to the freezer or refrigerator and chill until completely set. These fat bombs must be stored in the refrigerator until just prior to serving because they can melt quickly.

Nutritional Information per fat bomb: 109 calories, 1.1 g carbohydrate (0.4 g dietary fiber, 0.2 g sugars), 11.4 g total fat (5.9 g saturated fat, 0 g trans fat), 6 mg cholesterol, 8 mg sodium, 1.7 mg calcium, 7 mg potassium, 72 mg Vit A, 1.2 g protein. Net carbs per serving: 0.7 g

Recipe by Kathy Sheehan, copyright 2017
All rights reserved. Please do not duplicate without the author's permission.
Friday, April 21, 2017

Low Carb, Grain Free Cheese and Onion Enchiladas

  
This is a super simple, low-carb meal that can be assembled ahead and then baked just prior to serving. I recently made several trays of enchiladas for a large gathering and everyone raved and asked for the recipe. The tortillas (or Mexican-style crepes) were made a day or two ahead and the red sauce was whipped up in the blender in a matter of minutes, so it took no time at all to prepare a delicious and satisfying meal for a party of over a dozen people. The nice part was that I assembled the enchiladas in their baking pans on the morning of the event, then just popped them in the oven to bake later, which allowed me to socialize with my guests instead of being stuck in the kitchen. Served with a big salad, some non-GMO corn chips for the carb-eaters and a simple dessert, the evening was a huge success and I never broke a sweat! Cinco de Mayo is coming up on May 5th. If you're looking for a stress-free, festive meal to feed your family or a crowd, then this is the recipe for you.

Grain Free, Mexican-Style Tortillas (or Crepes)
Makes 6 tortillas

1/4 cup mild-flavored nut butter (room temperature), such as cashew, macadamia or almond
2 large eggs
3 tablespoons milk (or non-dairy milk)
1 tablespoon melted butter, ghee or coconut oil
1/8 teaspoon sea salt
1/2 teaspoon chili powder
1/2 teaspoon ground cumin
1/8 teaspoon onion powder
1/4 teaspoon dried oregano
1/8 teaspoon black pepper
Melted butter or coconut oil for cooking

Whisk together all of the ingredients until the nut butter is fully incorporated and the batter is smooth (it will be somewhat thin). Using a small sauté pan, heat over medium-low heat and brush a thin layer of the melted butter or coconut oil around the inside of the heated pan to prevent sticking. (I used an inexpensive, 8" non-stick omelet pan which only required a thin coating of oil. Adjust this amount if needed for your pan.) While holding the heated pan off the heat in your dominant hand, quickly pour a scant 1/4 cup of batter into the center of the pan and immediately begin to swirl the batter around to create a round, very thin tortilla. Keep swirling until the batter firms up in the shape you desire. (To see my YouTube video demonstrating this crepe-making technique, click here: https://www.youtube.com/watch?v=jhzXjJ2HVeM). Replace pan onto the heat and cook the tortilla for about 1 minute until slightly brown around the edges. Very carefully flip the tortilla and cook the second side for about 45 seconds. Remove tortilla to a plate to cool. Repeat until all the batter is gone. Set aside tortillas until you're ready to assemble the enchiladas. For storage, place a piece of parchment paper between each tortilla to prevent them from sticking together. These can be made 1-2 days ahead and refrigerated, although bring to room temperature before rolling the enchiladas for the greatest flexibility. 

Nutritional Information per tortilla (no filling): 117 calories, 2.3 g carbohydrate (0.6 g dietary fiber, 0.2 g sugar) 10.8 g total fat (3.2 g saturated fat, 0 g trans fat), 66 mg cholesterol, 50 mg sodium, 24 mg calcium, 52 mg potassium, 3.4 g protein. Net carbs per serving: 1.7 grams


Easy Blender Enchilada Red Sauce
Makes 2-1/2 cups (10 servings)

2 (8 ounce) cans tomato sauce (no sugar added)
1/2 cup water
1/4-1/2 teaspoon stevia powder (or 2-4 teaspoons erythritol sweetener), to taste
1/2 teaspoon onion powder
1/2 teaspoon garlic powder
1-3 tablespoons chili powder, to taste
1-2 teaspoons ground coriander, or to taste
1-2 teaspoons ground cumin, or to taste
1/8 teaspoon sea salt, optional or to taste

Place all of the ingredients in a blender and blend until smooth. (When a measurement range is given for a spice, start with the smallest amount and add more if you like yours spicier. I admit, I'm a wimp and like my sauce mild.) Taste and adjust seasonings, if necessary.

Nutritional Information per 1/4 cup serving (no salt added): 20 calories, 4 g carbohydrate (1.2 g dietary fiber, 1.7 g sugars), 0.2 g total fat (0 g saturated fat, 0 g trans fat), 0 mg cholesterol, 336 mg sodium, 5.3 mg calcium, 150 mg potassium, 0.6 G protein.  Net carbs per serving: 2.8 grams
 
Low Carb, Grain Free Cheese and Onion Enchiladas
Makes 6 enchiladas

6 Grain Free, Mexican-Style Tortillas, room temperature (see recipe above)
1-1/4 cups Easy Blender Enchilada Red Sauce (see recipe above)
1/2 pound sharp cheddar, cut into six 3/4" logs
1 cup shredded Cheddar-Monterey Jack Cheese Blend
6 green onions, chopped (separate white part from green part)

Place 1/2 cup of the Enchilada Red Sauce into a baking pan and spread around to cover the bottom of the pan. Take one cheddar cheese log, roll it inside one tortilla and place it into the sauce-covered baking pan. Repeat with remaining cheese logs and tortillas. Top each enchilada with about 3 tablespoons of the red sauce and spread with a spoon to cover. Evenly divide the white part of the chopped onion over the enchiladas, then sprinkle 1 cup of the Cheddar-Monterey Jack cheese over all.  Cover the pan tightly with foil and bake in a preheated 350-degree Fahrenheit oven for 30 minutes. Remove from oven and top with the chopped green onion and serve.

Nutritional Information per enchilada: 324 calories, 8 g carbohydrate (2 g dietary fiber, 2 g sugars), 25.8 g total fat (12.9 g saturated fat, 0 g trans fat), 86 mg cholesterol, 659 mg sodium, 437 mg calcium, 205 potassium, 1119 mg Vit A, 6 mg Vit C, 17 g protein. Net carbs per enchilada: 6 grams

Recipes by Kathy Sheehan, copyright 2017
All rights reserved. Please do not duplicate without author's permission.