Showing posts with label breakfast. Show all posts

Wednesday, October 14, 2026

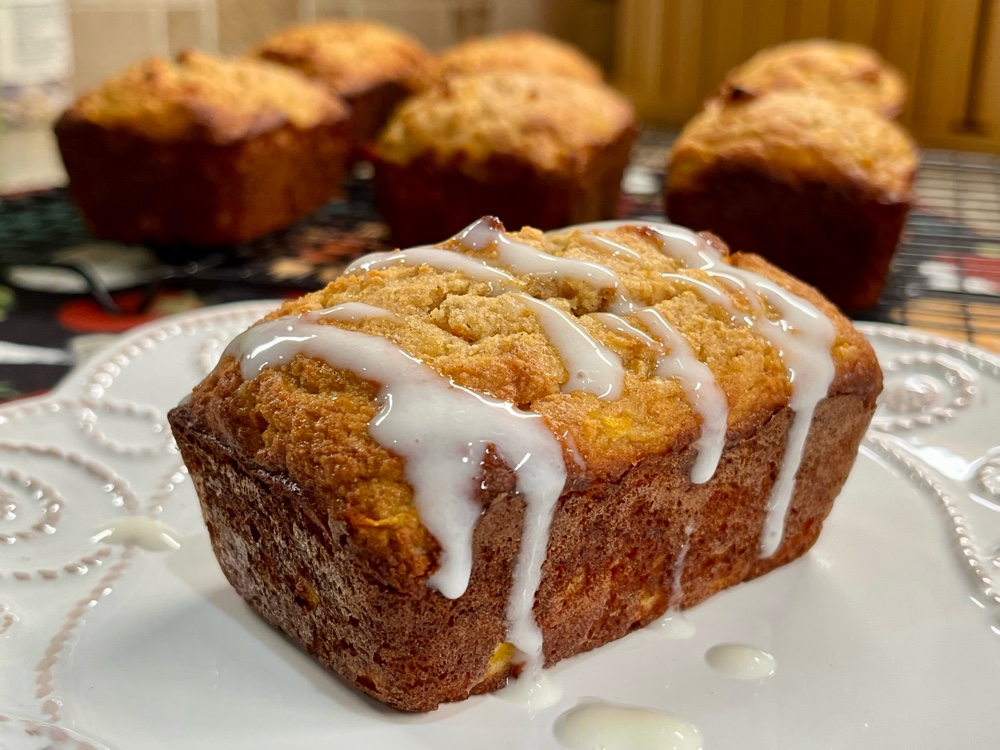
Low Carb Carrot Nut Bread with Sour Cream Glaze

Low Carb Carrot Nut Bread with Sour Cream Glaze

If you’ve never had a fresh carrot directly from the garden, you’ve really never had a good carrot! The bagged carrots are weeks or more old by the time you buy them in your grocery store. The taste difference is truly remarkable! This is the season for fresh carrots and this delicious tea bread is a great way to enjoy them. Also, this bread makes a wonderful gift for the holidays! And because it freezes well, it can be made ahead of time.

Low Carb Carrot Nut Bread with Sour Cream Glaze
Makes 1 large loaf or multiple mini loaves (12 servings)

For the Bread:
½ cup chopped walnuts (or pecans)
90 grams coconut flour (about ¾ cup)
1/3 cup unflavored whey protein powder
½ teaspoon salt
1 teaspoon ground cinnamon
1/4 teaspoon ground mace (or nutmeg)
½ teaspoon baking soda
1 ½ teaspoon baking powder 
1/4 teaspoon xanthan gum 
6 large eggs, room temperature 
2/3 cup brown sugar alternative sweetener, packed
½ cup avocado oil
1/4 cup sour cream
1 ½ cups grated carrots (from about 2 carrots)

For the Glaze:
6 tablespoons allulose sweetener 
1/4 cup sour cream
1/4 teaspoon vanilla extract
2 teaspoons water

1. Preheat the oven to 350°F. Lightly grease an 8 1/2“ x 4 1/2“ loaf pan; line with parchment paper, leaving a 2 inch overhang on long sides. (Or grease the cavities in a mini loaf pan. This recipe makes four mini loaves or eight individual size mini bread loaves.) Spread the walnuts or pecans on a rimmed baking sheet and toast until fragrant, 5 to 7 minutes. Chop them and set aside.

2. Whisk together the coconut flour, whey protein powder, salt, cinnamon, mace or nutmeg, baking soda, baking powder, and xanthan gum in a bowl. In another bowl, or in the bowl of your standing electric mixer, whisk together the eggs, brown sugar substitute, oil, and sour cream. Add the dry ingredients to the wet ingredients and whisk to combine. Fold in the carrots and walnuts. Transfer the batter to the prepared pan(s); smooth the top.

3. Bake for 1 hour to 1 hour and 10 minutes or until the internal temperature is between 200–206°F. Cool in pan on wire rack for 10 minutes. (Adjust time if baking mini loaves, about 20 to 25 minutes depending on size. Internal temperature will determine when they are done.)

4. Make the glaze by whisking together the allulose sweetener, sour cream, vanilla, and water in a bowl until smooth. Pour over loaf and cool completely in pan. Or, if you prefer, top the cooled bread with glaze when served. (This is especially nice when serving individual size mini breads.)
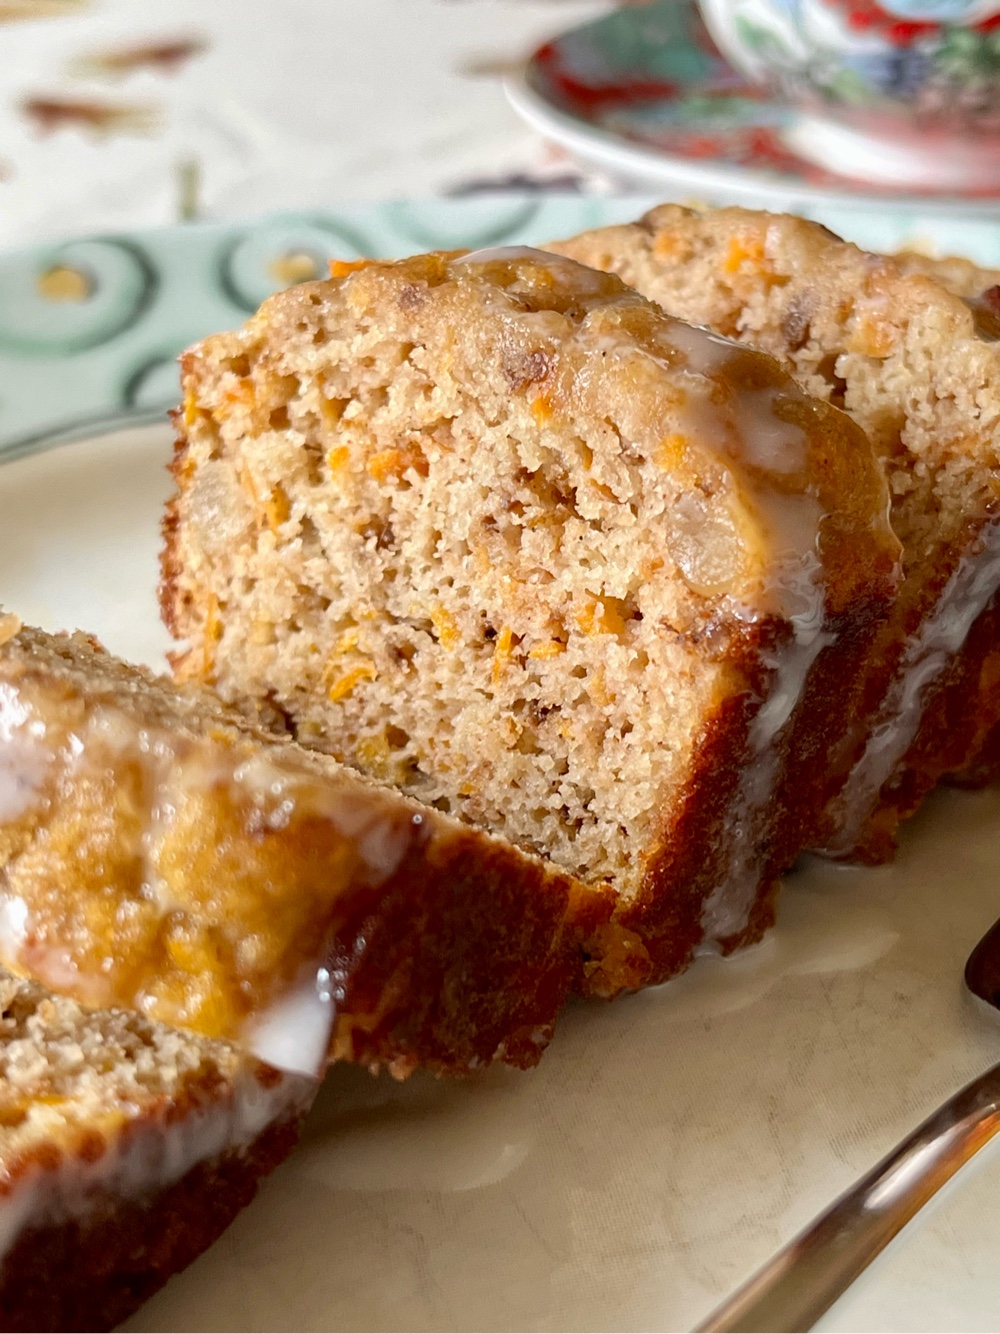
Sliced Carrot Nut Bread

5. Bread can be well wrapped and stored at room temperature for 3 days. Refrigerate for longer storage. Unglazed bread freezes beautifully. Wrap very well and freeze for up to two months. Thaw and serve at room temperature.
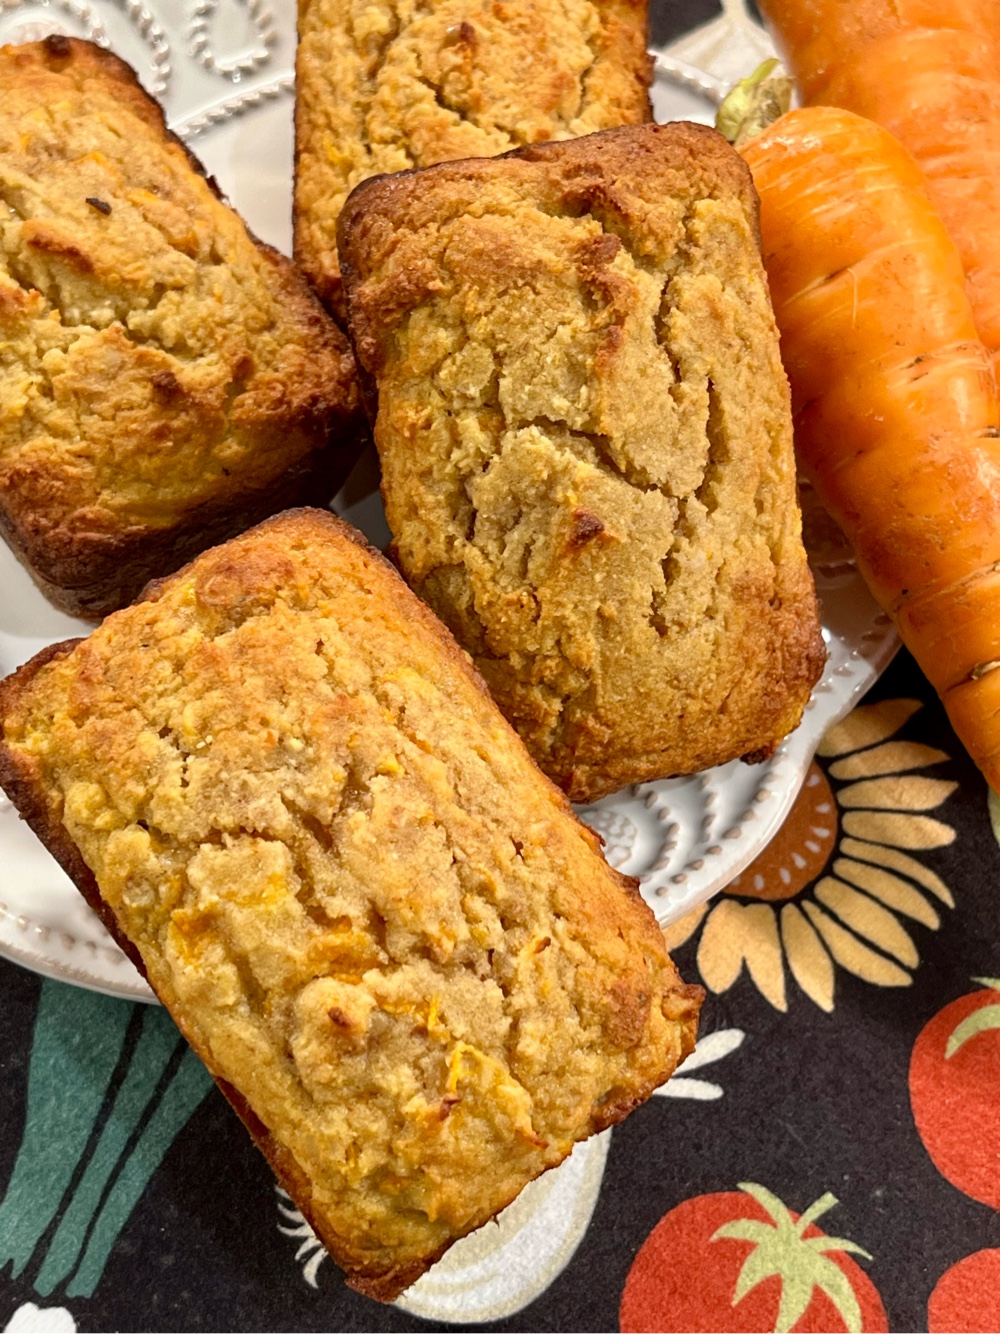
Unglazed Carrot Nut Mini Breads

Nutritional Information per 1/12th of recipe with glaze: 231 calories, 8.6 g carbohydrate (3.5 g dietary fiber, 2.2 g sugars), 17.9 g total fat (4.6 g saturated fat, 0 g trans fat), 111 mg cholesterol, 186 mg sodium, 95.2 mg calcium, 110 mg potassium, 1 mg iron, 1 mg Vit C, 754 IU Vit A, 10.1 g protein. Net carbs per serving: 5.1 grams

Recipe and photos by Kathy Sheehan, copyright 2026
All rights reserved. Please do not duplicate without the author’s permission.

Thursday, February 5, 2026

Baked Cottage Cheese Breakfast Bowl

Baked Cottage Cheese Breakfast Bowl
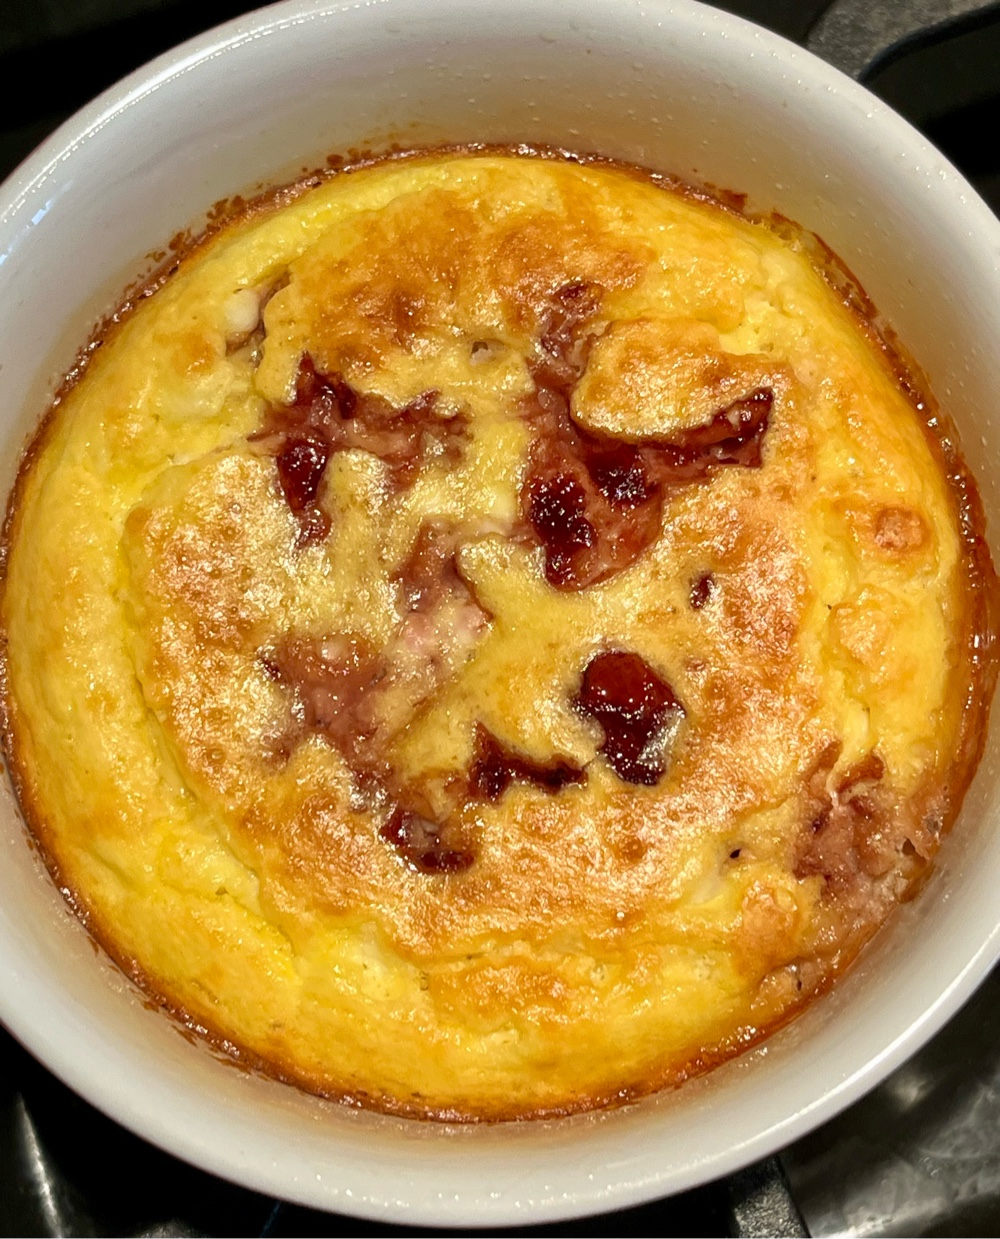
This high protein breakfast pudding can be made either sweet or savory! It makes one generous serving that leaves your body nourished and satisfied for hours.

Baked Cottage Cheese Breakfast Bowl
Makes 1 serving

Base Mixture:
½ cup cottage cheese (4% fat)
1 large egg
1/4 cup almond flour
1/4 teaspoon baking powder
A pinch of salt

Sweet Additions:
½ teaspoon vanilla extract
1-2 tablespoons allulose honey or sugar free maple syrup (or 6 drops monkfruit extract)
1/4 cup strawberries (chopped), or blueberries, fresh or frozen

Savory Additions:
1/4 cup ham, or cooked sausage, bacon or broccoli (chopped)
2 tablespoons shredded cheese
Freshly ground black pepper to taste
½ teaspoon chopped herbs

Preheat the oven to 350°F. Lightly grease one large oven-safe ramekin or small baking dish; set aside.

In a bowl, whisk together the base mixture of cottage cheese, egg, almond flour, baking powder, and salt until smooth.

If making sweet, whisk in your sweetener of choice and vanilla. Then gently fold in the fruit.

If making savory, add the meat or chopped broccoli, cheese, pepper and herbs to the base mixture and stir to combine.

Pour the mixture into the greased ramekin and bake for 25-30 minutes until set and lightly golden on top. Cool for about 10 minutes before serving.

Nutritional Information per serving: Varies, depending on additions to base mixture. Base mixture is 330 calories, 9.7 g carbohydrate (2 g dietary fiber, 5.2 g sugars), 22.8 g total fat (5.6 g saturated fat, 0 g trans fat), 201 mg cholesterol, 607 mg sodium, 255.6 mg calcium, 229 mg potassium, 2 mg iron, 141 IU Vit A, 24.3 g protein. Net carbs per serving: 7.7 grams.

Photo and recipe by Kathy Sheehan, copyright 2026
All rights reserved. Please do not duplicate without the author’s permission.

Friday, February 7, 2025

Strawberry Coconut Flour Scones

Strawberry Coconut Flour Scones

Scones served with a cup of tea or coffee in the morning is the perfect way to start the day! These Strawberry Scones are not too sweet, but the burst of real summer strawberries in every bite makes them welcome on a cold, winter day. I used a set of heart-shaped cookie cutters to make these extra special and a fun treat to serve at a Valentine’s Day afternoon tea! 

Strawberry Coconut Flour Scones
Makes 12 servings

1 cup coconut flour (122 grams)
1/4 cup granulated sweetener (I used a combination of powdered monkfruit sweetener and allulose), adjust to taste
1 tablespoon baking powder
1/4 teaspoon salt
3 large eggs, room temperature 
8 tablespoons (1 stick) unsalted butter, room temperature 
1/3 cup (23 grams) freeze dried, no sugar added strawberries, roughly chopped 
½ cup (126 grams) sour cream or plain Greek yogurt, room temperature 
½ teaspoon strawberry extract 

Freeze dried strawberries

1. Preheat the oven to 400° Fahrenheit. Line a large baking sheet with parchment paper; set aside.

2. Sift dry ingredients into a large mixing bowl until there are no lumps. Stir in the eggs until fully combined and dry ingredients are moist.

3. Cut in the butter until fully combined. Using a pastry cutter can be a helpful tool.

4. Stir together the sour cream and strawberry extract. Add the sour cream mixture to the dough and stir until fully combined and a smooth dough as formed.

5. Form dough into a ball and knead gently for about 1-2 minutes to allow the moisture to be absorbed into the coconut flour. Place the dough back into the mixing bowl and allow to sit at room temperature for about five minutes before proceeding.

6. Line a clean work surface with parchment paper or a silicone baking mat. Carefully press the dough out into a circle until about 1-1/4 inch thick. Using a round biscuit cutter (or any shaped cookie cutter), cut out 12 scones. (Alternately, you can use a pizza cutter and cut the circle of dough into triangles.)

7. Transfer the scones onto the prepared baking sheet. Leave space between the scones. If desired, brush the tops of the scones with melted unsalted butter. Bake in the preheated oven for 15 to 20 minutes or until golden.

8. Remove from the oven and allow to cool on the pan for about 10 minutes. Transfer to a wire rack and allow to cool completely. The scones may be served warm or at room temperature. Store any leftovers in an airtight container at room temperature for 3 days or in the refrigerator for up to a week.

Strawberry Coconut Flour Scones with butter

Nutritional Information per scone: 144 calories, 10.5 g carbohydrate (5.7 g dietary fiber, 2.9 g sugars), 12.2 g total fat (7.8 g saturated fat, 0 g trans fat), 71 mg cholesterol, 177 mg sodium, 107.3 mg calcium, 34 mg potassium, 1 mg iron, 112 IU Vit A, 8 mg Vit C, 4.7 g protein. Net carbs per serving: 4.8 grams

Recipe and photos by Kathy Sheehan, copyright 2025
All rights reserved. Please do not duplicate without the author’s permission. 

Friday, August 9, 2024

Low Carb Blueberry Pecan Pancake Bread Pudding

Low Carb Blueberry Pecan Pancake Bread Pudding

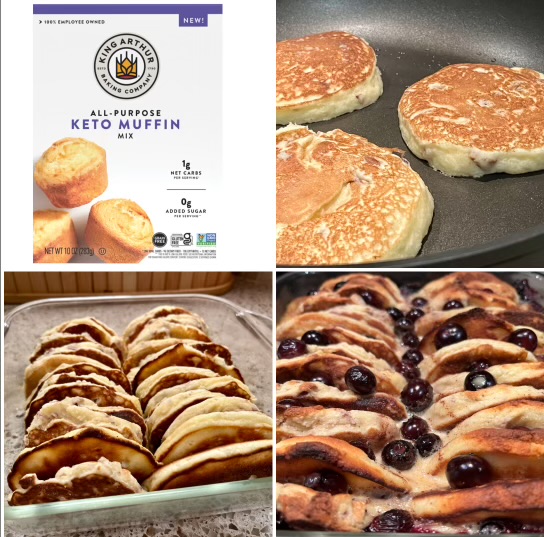
For brunch with my family, I wanted to make something special that mostly could be made ahead, minimizing last minute preparations. When searching online, I found a recipe that used pancakes in place of bread in a bread pudding, so I adapted it to create this outstanding low carb breakfast casserole. The convenience of using a boxed keto muffin mix as the base of the pancake batter was genius! The breakfast pudding was a huge hit with my family and may have tasted even better the second day! You can substitute raspberries or blackberries for the blueberries, if you prefer. The yogurt sauce is optional, but the hit of lemon in the creamy sauce really brightened the dish.

Low Carb Blueberry Pecan Pancake Bread Pudding
Makes 8 servings

Pancakes:
One (10 oz.) box King Arthur’s All-Purpose Keto Muffin Mix
5 large eggs
1½ cups low carb milk of choice
1/3 cup sour cream
2 tablespoons melted unsalted butter or avocado oil
½ cup chopped pecans
6 oz. organic blueberries

Custard:
3 large eggs
2 cups half and half (or a mixture of low carb milk and heavy cream equaling 2 cups)
1/3 cup low carb sweetener of choice (allulose/erythritol blend works well)
1½ teaspoon vanilla extract
½ teaspoon ground cinnamon
1/4 teaspoon salt

Lemon Yogurt Sauce:
1/3 cup plain greek yogurt
2 tablespoons half and half
2 tablespoons allulose honey (or granulated allulose)
2 teaspoons lemon zest (or 2 drops lemon oil)
A pinch of salt

1. Place the muffin mix into a large mixing bowl. Whisk together the low carb milk, sour cream, butter or avocado oil, and five eggs in a large measuring cup. Add the milk mixture to the muffin mix and whisk with a fork until blended and smooth. Fold in the chopped pecans. (If you can’t find King Arthur’s Keto Muffin Mix, you can substitute your favorite low carb pancake recipe.)

2. Heat a griddle or large nonstick skillet over medium heat. Add a teaspoon of avocado oil to grease the pan. Pour about 1/4 cup batter for each pancake onto the hot griddle. Spread the batter into a 4 inch circle using the back of a small spoon. Cook until the edges look dry and the bottoms are golden brown, about 3 minutes. Carefully flip the pancake and cook on the other side until the pancake springs back when touched in the center, another 2-3 minutes. Remove pancakes to a wire rack to cool and repeat with the remaining batter. You should end up with 18-20 pancakes.

Bread Pudding Steps

3. Slice each pancake in half and arrange with the cut side down into two rows in an 8 x 8“ baking dish that has been sprayed with cooking spray. (You may not need all the pancakes to fill the baking dish. Save any unused pancakes to eat later.) Scatter half of the blueberries over the pancakes, tucking a few between each layer. This can be done 1-2 days ahead and then stored in the refrigerator, covered with plastic wrap, until the night before you plan to serve. 

4. The night before you plan to cook and serve, whisk together 3 eggs, the 2 cups half-and-half, sweetener, vanilla, cinnamon and salt. Pour the custard mixture over the pancakes and blueberries in the baking dish. Chill at least four hours and up to overnight to allow the custard to soak into the pancakes.

Cooked Bread Pudding

5. Preheat oven to 350°F. Bake the casserole until puffed and the custard is set, 45 to 50 minutes. Let stand 10 minutes to cool before serving. To serve, sprinkle with remaining blueberries and drizzle with sugar free syrup or Lemon Yogurt Sauce. Serve warm. Leftovers can be stored in the refrigerator and reheated before serving.

6. Lemon Yogurt Sauce: Whisk together the yogurt, half and half, sweetener, lemon zest and a pinch of salt until smooth and not too thick. Of needed, add more liquid a teaspoon at a time until you achieve the proper consistency. Makes about ½ cup.

Nutritional Information per serving (no yogurt sauce): 319 calories, 20.4 g carbohydrates (2.9 g dietary fiber, 4.8 g sugars, 17 g sugar alcohols), 24.7 g total fat (9.9 g saturated fat, 0 g trans fat), 216 mg cholesterol, 498 mg sodium, 173 mg calcium, 308 mg potassium, 3 mg iron, 184 IU Vit A, 3 mg Vit C, 10.9 g protein. Net carbs per serving: 1.5 grams

Photos and recipe by Kathy Sheehan, copyright 2024
All rights reserved. Please do not duplicate without the author’s permission.

Saturday, July 6, 2024

Instant Pot Keto Bread Pudding (or Oven Baked)

Instant Pot Keto Bread Pudding (or Oven Baked)

For as long as I can remember, Classic Bread Pudding has been a favorite comfort food of mine. This low carb, gluten free bread pudding is every bit as comforting as a traditional recipe! You can use any low carb bread of your choice, but I actually prefer using leftover keto yellow cake as a base, or a mixture of keto cake and low carb bread. My favorite boxed Keto Cake Mix is King Arthur’s brand, but any keto yellow cake (made from scratch or a mix) will work in this recipe. It’s very easy to make this pudding in an Instant Pot, but baking it in an oven works just as well. Instead of traditional raisins, I sprinkled one tablespoon of black Zante currants over the pudding before cooking. They only add 1 carb per serving, while maintaining that authentic flavor (feel free to leave them out, if you wish). Whether made in an Instant Pot or in the oven, this simple classic dessert will warm your heart!

Instant Pot Keto Bread Pudding (or Oven Baked)
Makes 6 servings

4 cups low carb bread (or leftover keto yellow cake), cubed and dried out
2 large eggs, beaten
1½ cups low carb milk of choice
1/4 cup low carb brown sugar substitute, packed (use only 2 tablespoons if using cake)
1/8 teaspoon salt 
1/8 teaspoon nutmeg
½ teaspoon ground cinnamon
A pinch of mace (optional)
½ teaspoon vanilla extract
1 tablespoon black Zante currants*

1. Spray a 7-inch (1½ quart) baking dish or Bundt pan with non-stick spray or grease well with butter; set aside. If bread or cake is fresh, break into pieces or cut into cubes and spread out on a cookie sheet. Bake in a 300° oven for 10 minutes to dry out a bit before proceeding.

2. Place the bread in the greased 7-inch baking dish or Bundt pan. Whisk together the remaining ingredients, except the currants. Pour the custard mixture over the bread and let it soak in for a few minutes. Sprinkle the currants over the bread. Cover loosely with a “tin foil hat” so condensation doesn’t build up on the pudding as it cooks in the Instant Pot. (If baking in the oven, do not cover with foil.)

3. Pour 1½ cups of water into the Instant Pot. Put the pudding on a trivet and lower it into the pot. Close the lid. Set controls to PRESSURE COOK on HIGH (or Manual) for 15 minutes. Make sure the seal valve is closed and press start.

4. When the cooking is done, leave it to release pressure naturally. When the pin drops, open the pot. Lift the pudding out and remove the foil. Leave it to cool on the counter for a few minutes and, if cooked in a Bundt pan, then you may invert it onto a plate. Serve warm or chilled with whipped cream, low carb ice cream or sugar free caramel sauce.

5. Oven Baking Directions: Follow steps 1 and 2. (Do not cover pudding with foil.) Place pudding in a preheated 350° oven and bake for 30 minutes, or until custard is set but still a little wobbly in the center. Remove from oven and cool on a wire rack.

*Note: If you choose to omit the currants, you may subtract 1 g of carb from the nutritional information per serving.

IP Keto Bread Pudding

Nutritional Information per serving (1/6th of recipe): 112 calories, 3.3 g carbohydrate (0.9 g dietary fiber, 1.8 g sugars, 2 g sugar alcohols), 8.2 g total fat (1.2 g saturated fat, 0 g trans fat), 115 mg cholesterol, 176 mg sodium, 137 mg calcium, 76 mg potassium, 1 mg iron, 95 IU Vit A, 7.7 g protein. Net carbs per serving: 2.4 grams

Recipe and photos by Kathy Sheehan, copyright 2024
All rights reserved. Please do not duplicate without the author’s permission.

Thursday, February 8, 2024

Low Carb Savory Amish Onion Cake

Low Carb Savory Amish Onion Cake

This delicious savory bread makes a great accompaniment with soup or stew on a cold winter day. It’s also excellent grilled and topped with poached eggs for breakfast or brunch. It’s based on a traditional Amish recipe in which the cake is meant to be slightly sweet, while the topping of caramelized onions are seasoned so that they’re savory with a slight peppery kick. The combination is wonderful! This low carb remake of the traditional recipe is made very easy because it uses a boxed keto muffin mix as its base! The bread is soft and cake-like, hence the name. You can bake it in any 8” baking dish or cast iron skillet, but I like using a springform pan. When it’s removed from the mold, it makes an impressive presentation at the table.

Slice of Low Carb Amish Onion Cake

Low Carb Savory Amish Onion Cake
Makes 12 servings

Onion Topping:
3 medium onions, chopped
3 tablespoons unsalted butter
1 ½ teaspoons poppy seeds (optional)
½ teaspoon salt
1 teaspoon paprika
½ teaspoon coarsely ground black pepper

Bread Batter:
5 large eggs
1/4 cup avocado oil
½ cup sour cream
¾ cup low carb milk of choice
¾ teaspoon onion powder
¾ teaspoon paprika
1/4 teaspoon black pepper
1 pkg. (10 oz.) King Arthur All-Purpose Keto Muffin Mix

King Arthur All-Purpose Keto Muffin Mix

1. In a large skillet, cook onions and 3 tablespoons unsalted butter over low heat for 10 minutes until softened. Stir in the 1/2 teaspoon salt, 1 teaspoon paprika, 1/2 teaspoon coarsely ground black pepper and poppy seeds, if using. Cook on low to medium-low until the onions are golden brown, stirring occasionally. Remove from heat; set aside.

2. Whisk together the eggs, avocado oil and sour cream using an electric mixer. Add the milk and whisk to blend well. Add the onion powder, paprika, black pepper, and keto muffin mix. Beat until well combined.

3. Spread the batter into a greased 8 inch cast iron skillet, baking pan or spring form pan. Spoon onion mixture over the batter. Bake at 350°F for 45 to 55 minutes or until a toothpick inserted in the center comes out clean and the internal temperature reaches between 200°- 205°F. Cool for about 20 minutes. Serve warm. 

4. Store any leftovers in an airtight container or cake keeper. It can be stored at room temperature for 2 days. Refrigerate for longer storage. Always warm to room temperature before serving.

Grilled Onion Cake Topped with Poached Eggs

Nutritional Information per serving: 161 calories, 12.9 g carbohydrate (1.6 g dietary fiber, 2.4 g sugars, 10 g sugar alcohols), 12.6 g total fat (5.3 g saturated fat, 0 g trans fat), 89 mg cholesterol, 304 mg sodium, 101.6 mg calcium, 186 mg potassium, 2 mg iron, 128 IU Vit A, 2 mg Vit C, 4.3 g protein. Net carbs per serving: 1.3 grams

Photos and recipe by Kathy Sheehan, copyright 2024
All rights reserved. Please do not duplicate without the author’s permission. 
Monday, January 22, 2024

Easy Keto Granola Bread

Easy Keto Granola Bread

This low carb bread recipe is so versatile! You can bake it in a loaf pan, an 8 x 8“ square pan, a muffin tin or mini bread baking pan. The streusel topping is nutty and crunchy, making this a delicious coffee cake or tea bread. You can make your own low carb granola or use one of the keto granola mixes already available commercially. You might even choose to make it nut free by choosing a nut free granola. Like I said, this recipe is versatile! The addition of flaxseed meal is optional, but it adds a wheat-like color and nutty flavor to the final product. The thing that makes this recipe so easy, is that you start with a boxed keto muffin mix. I highly recommend the King Arthur’s All Purpose Keto Muffin Mix. I have use this mix several times to create muffins and quick breads and it is excellent! Most of the dry ingredients are already included in the mix and measured out for you. Enjoy this as a delicious accompaniment to your coffee in the morning for breakfast or serve it as a dessert. Either way, I think that you will enjoy this quick bread. 

Easy Keto Granola Bread
Makes 12 servings

5 large eggs, room temperature 
1/4 cup neutral oil, such as avocado oil
1/4 cup unsalted butter, melted
1 cup low carb milk of choice (or substitute ½ cup water + ½ cup heavy cream)
½ teaspoon vanilla extract
1/3 cup low carb brown sweetener (such as Swerve Brown)
¾ teaspoon ground cinnamon
1 tablespoon flaxseed meal
½ cup low carb granola (chopped, if needed) see photo of different keto granola brands below
1 box King Arthur’s Keto All-Purpose Muffin Mix

Streusel Topping:
1/4 cup low carb granola (chopped, if needed)
1/4 cup erythritol-based brown or classic sweetener
2 tablespoons cold unsalted butter, cubed

Examples of Keto Granola available commercially

1. Preheat oven to 350°F. Spray an 8 inch loaf pan, mini bread loaf pan, 8 x 8” baking pan, or 12 cup muffin tin with nonstick spray; set aside.

2. Using a pastry cutter or two knives, mix together the streusel topping ingredients in a medium bowl until pea-sized crumbles form; set aside.

3. In a separate bowl, whisk together the keto muffin mix, 1/3 cup brown sweetener, flaxseed meal, cinnamon and low carb granola; set aside.

King Arthur’s Keto Muffin Mix and Flaxseed meal

4. In a large bowl and using an electric mixer, or a standing mixer with paddle attachment, mixed together the eggs, oil, melted butter, low carb milk, and vanilla extract. Blend very well.

5. Add the dry ingredients and mix until well combined and no dry pockets remain. Divide the batter evenly between the prepared baking pan or muffin tin that has been greased. Sprinkle the streusel topping on top of each muffin or loaf.

Sprinkle streusel on top

6. Bake at 350° for 32-35 minutes for mini loaves or about 24 minutes for muffins. For a large loaf, bake about 38-48 minutes. For an 8 x 8“ baking pan, bake for about 35 minutes. Bake until the internal temperature reaches between 200-205°F. 

7. Remove from oven and allow the loaves or muffins to cool in the pan for about 15 minutes. Turn out the loaves or muffins onto a wire rack to cool completely before serving.

Cool baked loaves on wire rack

Nutritional Information per muffin or 1/12th of recipe: 215 calories, 11.8 g total carbohydrates (2 g dietary fiber, 1.5 g sugars, 14 g sugar alcohols), 19 g total fat (8.8 g saturated fat, 0 g trans fat), 97 mg cholesterol, 201 mg sodium, 68.8 mg calcium, 141 mg potassium, 2 mg iron, 100 IU Vit A, 5 g protein. Net carbs per serving: 2.8 grams

Photos and recipe by Kathy Sheehan, copyright 2024
All rights reserved. Please do not duplicate without the author’s permission. 

Tuesday, November 7, 2023

Keto Crispy Cheese Egg In a Nest


Keto Crispy Cheese Egg in a Nest

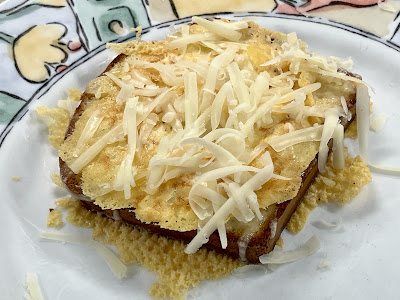
Cheese is a familiar addition to a traditional Egg in a Nest, but what about super crispy, crunchy cheese? This method of cooking allows the cheese in the pan to sizzle and crisp up, adding an unforgettable texture and flavor to this favorite breakfast food. For best results, use a nonstick skillet. You can use any aged cheese. My favorite is sharp cheddar.

Keto Crispy Cheese Egg In a Nest
Makes 1 serving

1 slice of low carb bread, with a hole cut out of the center
1 large egg
1½ ounces cheddar, shredded
Salt and pepper

Step by step Process

1. Preheat a nonstick skillet to medium to medium-high. Sprinkle a bit more than 1/3 of the shredded cheese onto the preheated skillet.

2. When it starts to sizzle, place a piece of low carb bread on top.

3. Crack an egg into the hole and sprinkle with salt and pepper.

4. Sprinkle more cheese on top of the bread and egg, reserving some for serving. Cover the skillet to allow the cheese over the top to melt a bit.

Flip when cheese is crispy

5. Once the cheese on the bottom is golden brown and crispy, flip and continue cooking until the cheese on the flip side is crispy and the egg is done to your liking. To serve, sprinkle reserved cheese over the top to melt. Enjoy!

Crispy Cheese Egg in a Nest (cooked)

Nutritional Information (may vary, depending on the low carb bread used): 349 Calories, 1.4 g carbohydrate (1 g dietary fiber, 1.2 g sugars), 27.3 g total fat (11.6 g saturated fat, 0 g trans fat), 310 mg cholesterol, 448 mg sodium, 345.6 mg calcium, 129 mg potassium, 2 mg iron, 318 IU Vit A, 24.8 g protein. Net carbs per serving: 0.4 grams

Photos and recipe by Kathy Sheehan, copyright 2023
All rights reserved. Please do not duplicate without the author’s permission. 

Saturday, July 1, 2023

Keto Bacon and Cheese Dutch Baby Pancake

Keto Bacon and Cheese Dutch Baby Pancakes

This fluffy, puffy egg pancake is baked in the oven in a preheated, hot skillet. When it comes out of the oven, it is impressive! I use a 6-inch cast iron skillet, which imparts a higher rise and nice crust. Similar to a puffy omelet, but so much easier to make.

Keto Bacon and Cheese Dutch Baby Pancake
Makes 1 serving

1 tablespoon unsalted butter
6 inch heatproof skillet
2 large eggs
2 tablespoons heavy cream
2 tablespoons water
2 tablespoons almond flour (or 1 tablespoon coconut flour for nut free)
Salt and pepper to taste
2 slices cooked bacon, chopped
1 ounce cheddar cheese, shredded
Sugar free maple syrup (optional)

1. Placed the 1 tablespoon of unsalted butter into your skillet. Place the skillet into the oven and preheat to 400°F.

2. Meanwhile, whisk together the eggs, cream, water, almond flour, salt, and pepper. You can do this in a blender or food processor for an extra fluffy pancake.

3. When the oven and pan are preheated, swirl the melted butter all around the bottom and sides of the skillet. Pour the egg mixture into the hot skillet. Sprinkle the chopped bacon and cheese on top. Return the skillet to the oven and bake for 14 minutes until puffy and golden.

4. Remove the skillet from the oven and use a sharp knife to loosen the pancake from the sides of the pan. Transfer the pancake to a serving plate and drizzle sugar-free maple syrup on top, if desired. Eat it immediately. The pancake will deflate as it cools.

Cooked Keto Dutch Baby Pancake

Nutritional Information per serving (entire recipe): 618 calories, 2.5 g carbohydrate (0.9 g dietary fiber, 0.4 g sugars), 56.7 g total fat (27 g saturated fat, 0 g trans fat), 491 mg cholesterol, 723 mg sodium, 270.4 mg calcium, 276 mg potassium, 2 mg iron, 480 IU Vit A, 26.8 g protein. Net carbs per serving: 1.6 grams

Recipe and photos by Kathy Sheehan, copyright 2023
All rights reserved. Please do not duplicate without the author’s permission. 

Monday, January 30, 2023

Sugar Free Pink Grapefruit Marmalade (Low Carb, Keto)

Sugar Free Pink Grapefruit Marmalade
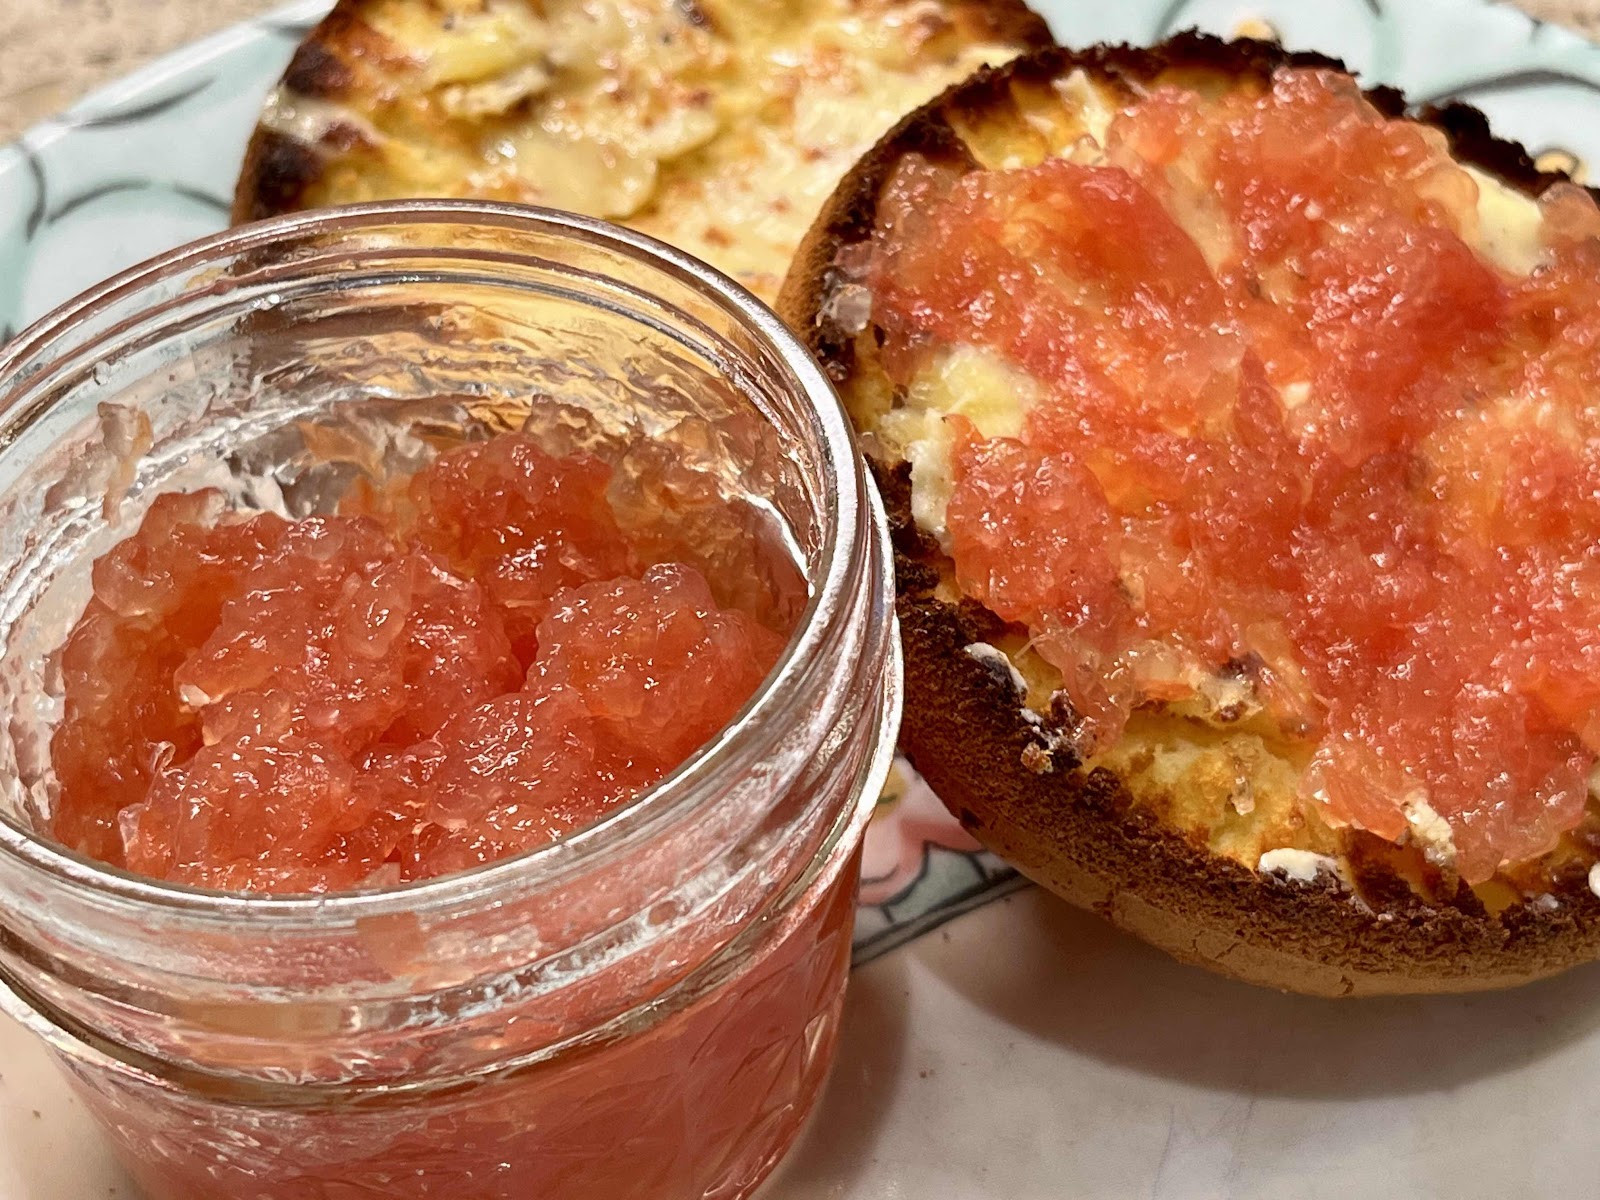
I am loving my sugar free jams and jellies! They are easy and fun to make. When you use naturally sweet ruby red grapefruit, this marmalade is not too tart and utterly refreshing. Winter is the best time for buying citrus fruits. They are in season and at their peak of sweetness! This grapefruit marmalade is delicious served on low carb bread, crackers and pancakes, but it’s also excellent mixed with sugar free BBQ sauce and used as a glaze on ribs, chicken or pork tenderloin. 

Sugar Free Pink Grapefruit Marmalade 
Makes 4-5 half-pint jars

5-6 large red grapefruit, supremed (all rind and membrane removed and discarded)
2 tablespoons bottled lemon juice
3 teaspoons calcium water (see Step #1)
1 cup allulose (or substitute ½ cup allulose-based honey + ½ cup granulated allulose)
4 teaspoons Pomona’s Universal Pectin powder (made especially for low to no sugar jams)

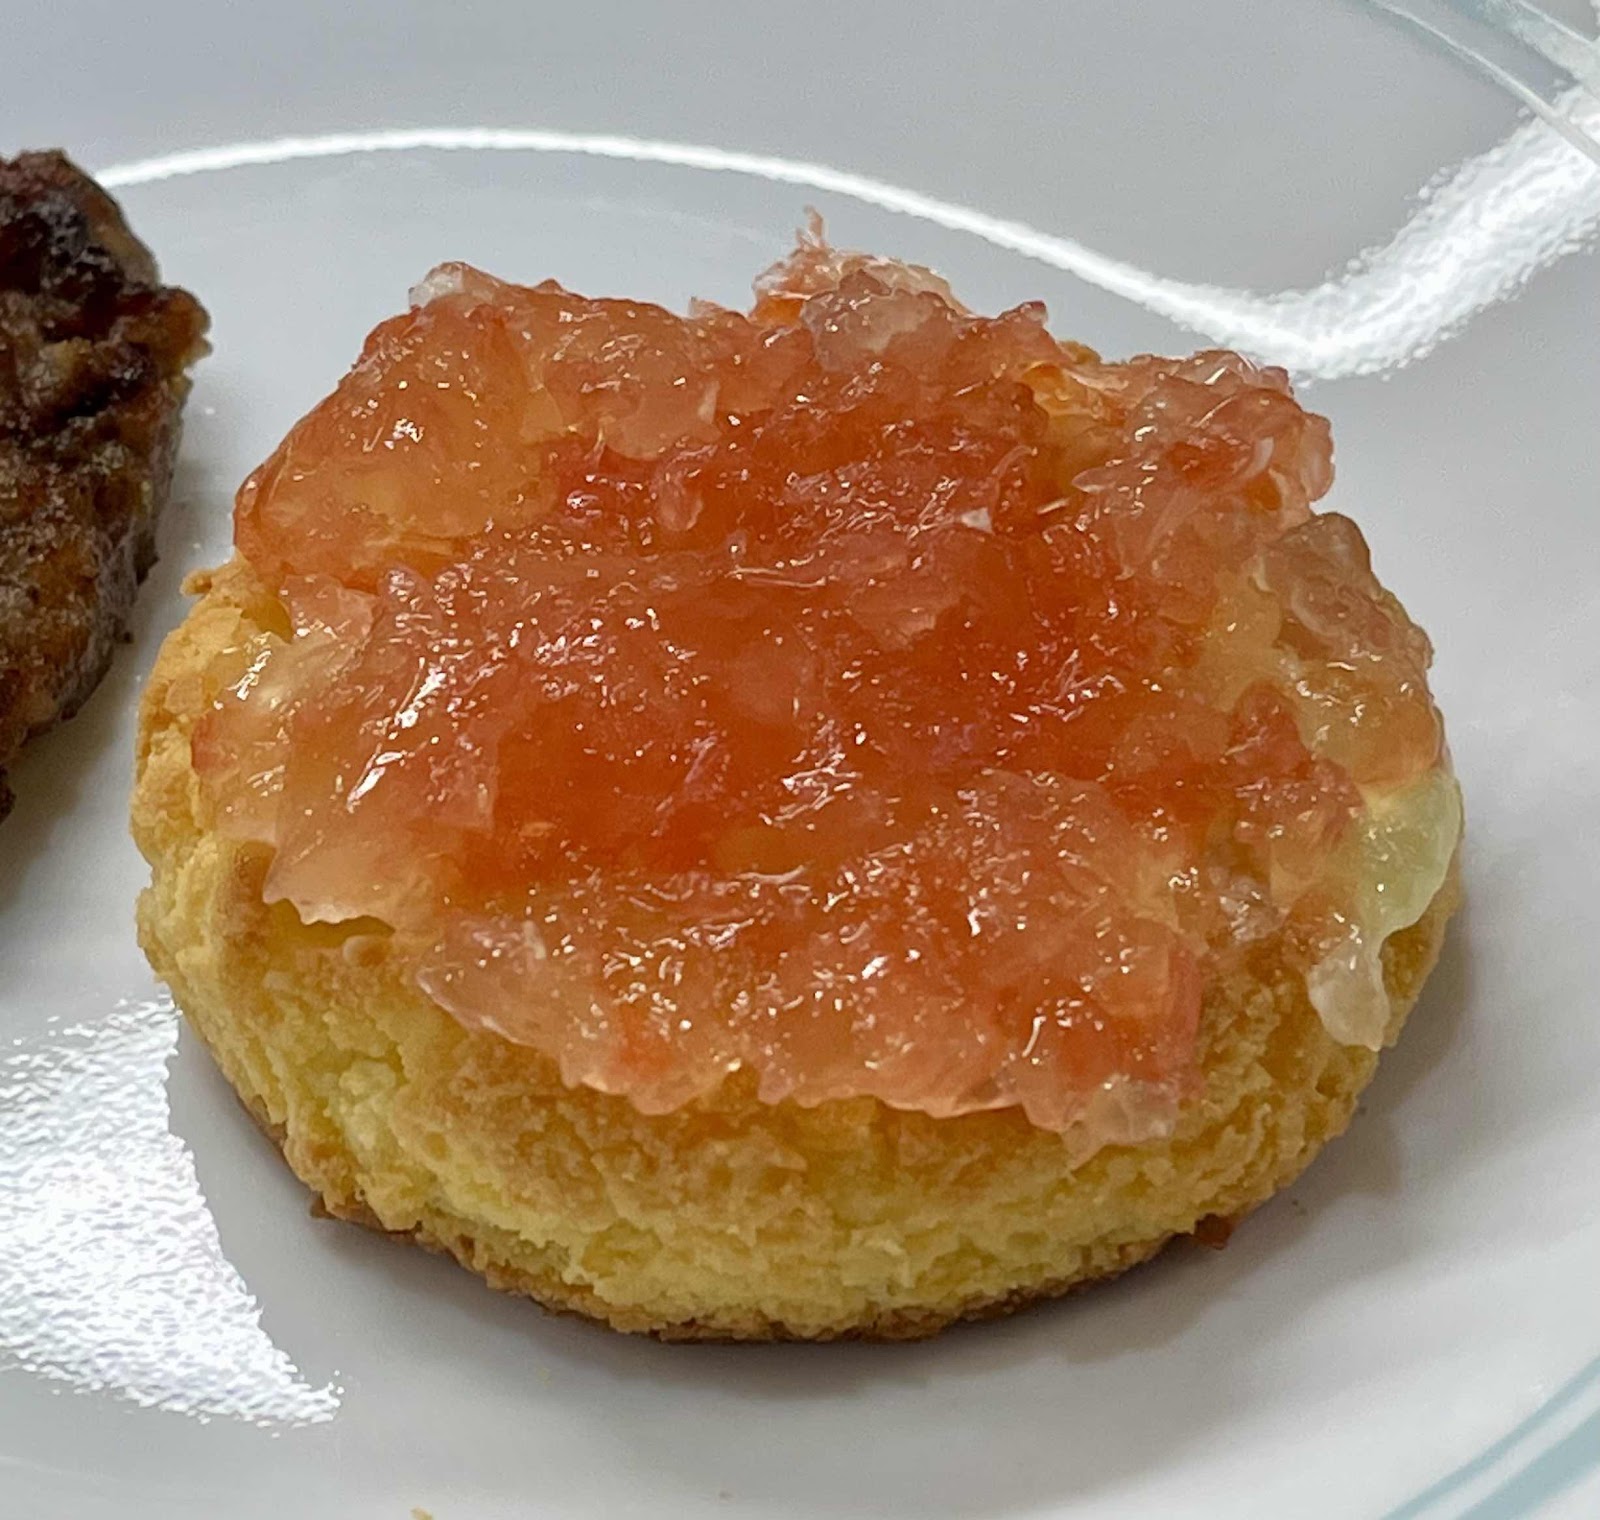
Grapefruit Marmalade on a keto biscuit
1. Before you begin, prepare the calcium water. To do this, combine ½ teaspoon calcium powder (in the small packet that comes in the box of Pomona’s Universal Pectin) with ½ cup water in a small jar with a lid. Shake well. (Extra calcium water can be stored in the refrigerator indefinitely for future use.)

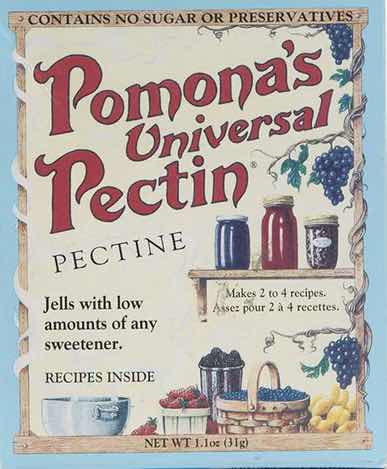
Pomona’s Universal Pectin
2. Wash your canning jars, lids and bands. Place jars in a stock pot or canner, filled with water about 2/3 full, and bring to a boil. Boil for 10 minutes to sterilize your jars. Turn off the heat, cover, and keep jars in the hot water until ready to use. Place lids and bands in water in a small saucepan, cover and heat to simmer. Turn off heat and keep lids in the hot water until ready to use.

3. Cut away the rind and section the grapefruit, discarding all of the membrane and rind. Break the grapefruit sections into chunks and place them in a large measuring cup; you will need 4 cups of grapefruit and any accumulated juices. Place the 4 cups of grapefruit pieces and accumulated juice in a large saucepan with the lemon juice and calcium water. Mix well. Bring to a boil over high heat, stirring occasionally to prevent the grapefruit from scorching. 

4. Meanwhile, in a separate bowl, mix together the allulose and Pomona’s Universal Pectin powder, stirring to combine. (If you like the flavor of honey with your grapefruit, you can substitute ½ of the sweetener with sugar free allulose honey.)

5. Once the grapefruit mixture is boiling rapidly, slowly add the allulose and pectin mixture, stirring continuously until the sweetener and pectin have dissolved. Bring the mixture back up to a full boil, stirring constantly. Once the marmalade returns to a full boil, that cannot be stirred down, boil for one minute and remove move it from the heat. (If needed, skim any foam and discard.)

6. Fill hot, sterilized jars to 1/4” from the top. Wipe rims clean with a wet paper towel. Place a lid on each jar and then screw on a rim just until finger-tight. Put the filled jars into boiling water to cover. Boil for 10 minutes (add 1 more minute for every 1000 feet above sea level). Turn off heat and allow the jars to rest in the hot water for five minutes. (Note: if you don’t want to process the marmalade in a boiling water bath, you can put it in the refrigerator once it is cooled and it will keep for three weeks. You can also freeze the marmalade instead of canning it. For freezing, fill jars to 1/2 inch from top. To prevent the glass jars from cracking, freeze jars without a lid to allow for expansion, then screw on a lid once frozen. Defrost in the refrigerator before eating.)

7. Remove jars from hot water using a jar lifter tool and place them on a kitchen towel. Let the jars cool undisturbed on the kitchen counter for 12 to 24 hours. Check seals; lids should be sucked down and not move or click when pressed in the center. Properly sealed jars can be stored at room temperature for one year. Once opened, refrigerate and consume within three weeks. (Note: It is normal for this marmalade to separate as it cools. Simply stir before serving.)

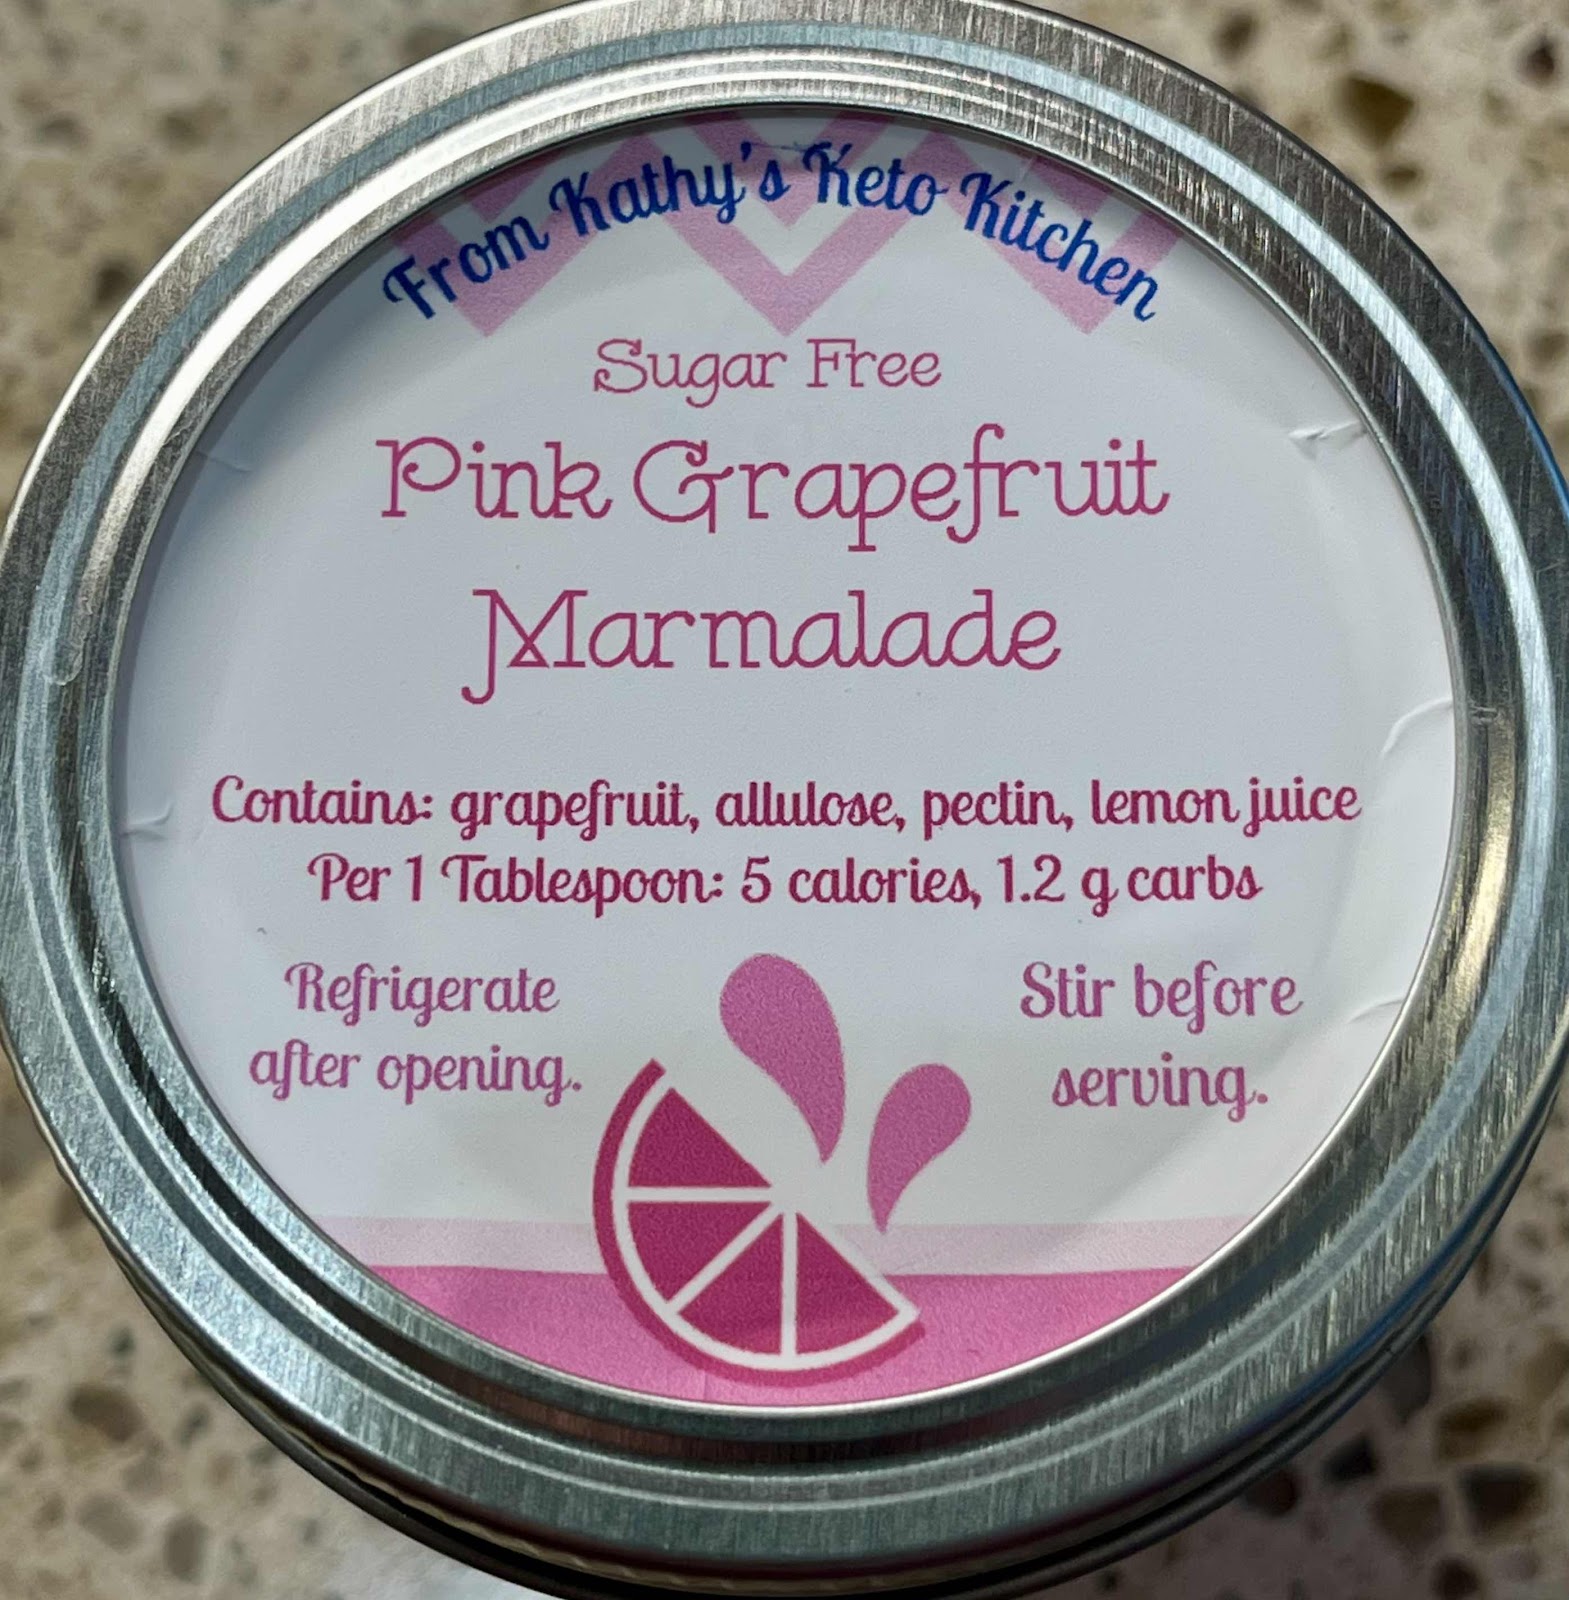
Pink Grapefruit Marmalade Label
Nutritional Information per 1 tablespoon: 5 calories, 1.4 g carbohydrate (0.2 g dietary fiber, 0.9 g sugars), 0 g total fat, 0 mg cholesterol, 0 mg sodium, 1.6 mg calcium, 18 mg potassium, 35 IU Vit A, 5 mg Vit C, 0 g protein. Net carbs per serving: 1.2 grams

Recipe and photos by Kathy Sheehan, copyright 2023
All rights reserved. Please do not duplicate without the author’s permission.

Monday, December 26, 2022

Old Fashioned Low Carb Hot Chocolate (based on Tasha Tudor’s recipe)

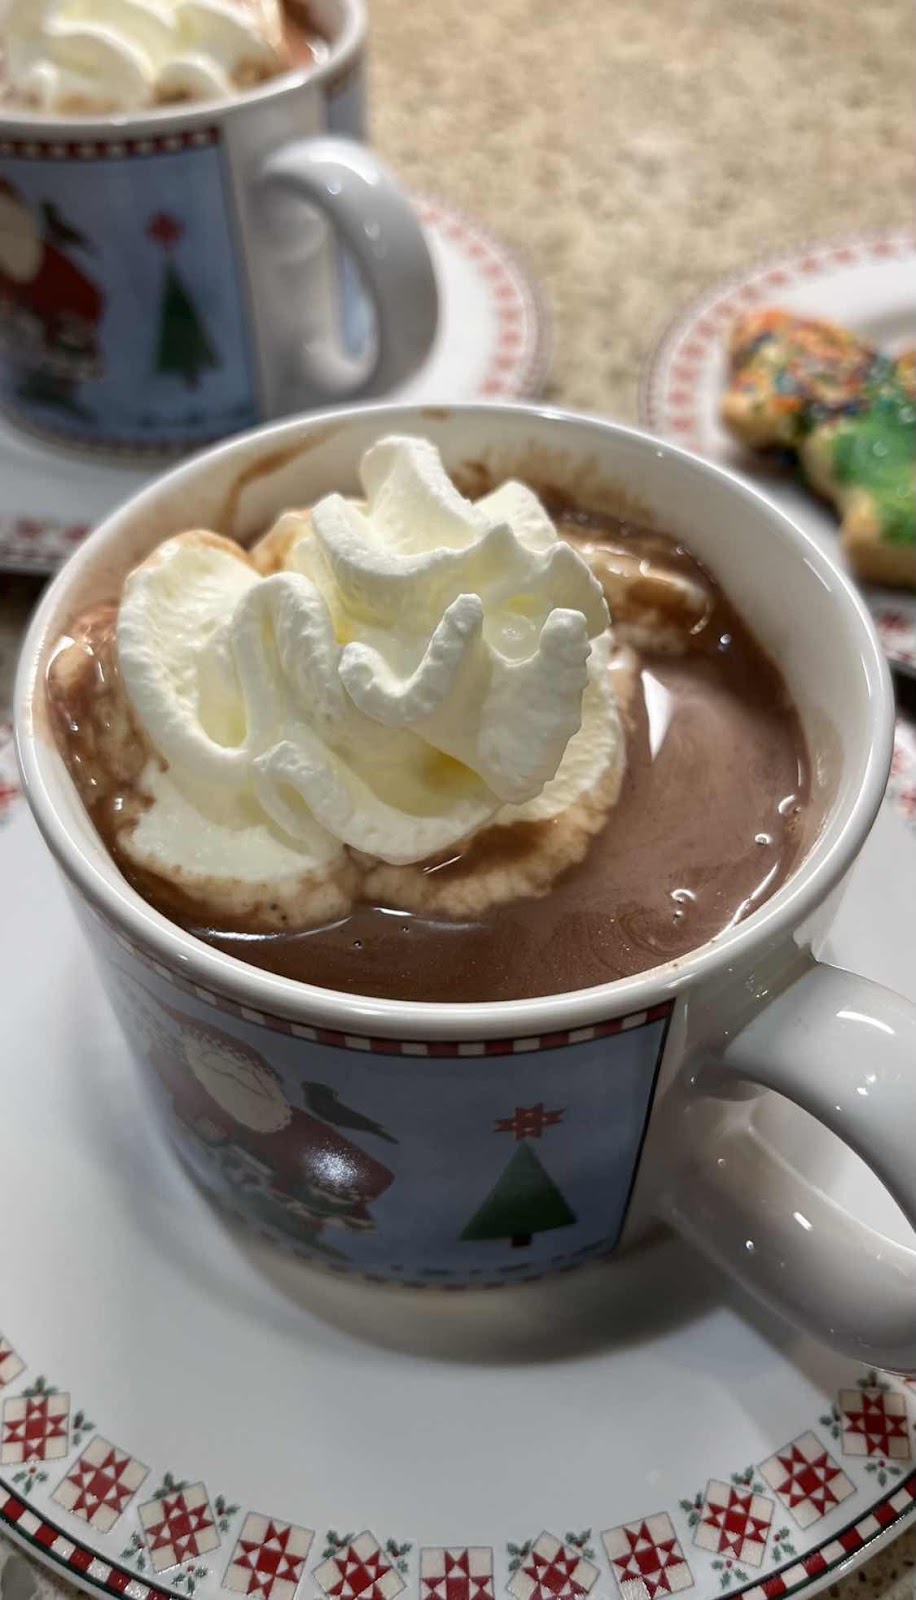
Old Fashioned Low Carb Hot Chocolate
Before the invention of processed hot cocoa powder mix in a box, when you wanted hot chocolate, you got out your saucepan! Sadly, hardly anyone makes real hot chocolate from scratch anymore, which is too bad because the powdered mix is a pale comparison to the real thing! Recently, I was reading my first edition copy of Take Joy! by Tasha Tudor, one of my favorite holiday books since childhood, and her book The Tasha Tudor Cookbook. Her recipe for hot chocolate, made the old fashioned way, inspired this sugar free, low carb version. This hot chocolate is so rich, creamy and decadent, you’ll never guess it is sugar free and only 3g net carbs per serving. (I prefer using a combination of sweeteners in this recipe, but feel free to use whatever zero carb sweetener you like and have on hand equivalent to 6-8 tablespoons, or to taste.) Add some of this hot chocolate to your coffee for a mocha that is out of this world!

Old Fashioned Low Carb Hot Chocolate
Makes 4 servings

2½ cups low carb milk of choice
½ cup heavy cream
1/4 teaspoon xanthan gum
2 ounces unsweetened baker’s chocolate, chopped
2 tablespoons allulose
2 tablespoons powdered erythritol sweetener 
½ teaspoon stevia powder (or add an additional tablespoon erythritol)
A pinch of salt
1 cup boiling water
1½ tablespoons unsweetened cocoa powder
1 teaspoon vanilla extract
10 drops monkfruit extract or stevia drops, to taste

1. Place the milk and cream into a sauce pan and scald over medium low heat. Add the xanthan gum and whisk until combined. Set aside and keep warm.

2. Meanwhile, pour 1 cup of water into a sauce pan and bring to a boil, then remove from heat. Place the chopped chocolate in a heat proof bowl and set it over the hot water until the chocolate has melted. (You can use a double boiler for this step, if you have one.)

3. Stir the sweeteners, salt and cocoa powder into the melted chocolate. Slowly whisk in the boiling water until the sweeteners and cocoa powder have dissolved. Pour the chocolate mixture back into the sauce pan. Boil the chocolate mixture for five minutes over low heat, stirring frequently.

4. Add the chocolate mixture to the hot milk and whisk until combined. Add the vanilla and monkfruit extract (or stevia drops). Whisk again until frothy and taste. Adjust sweetness to your liking. Serve warm topped with whip cream, if desired. (If you have any leftover, it can be stored in the refrigerator for up to 4 days. Reheat to serve.)

Tasha Tudor’s Hot Chocolate illustration
Nutritional Information per 1 cup serving: 212 calories, 8 g carbohydrate (2.8 g dietary fiber, 0.2 g sugars, 2 g sugar alcohols), 18.7 g total fat (11.8 g saturated fat, 0 g trans fat), 39 mg cholesterol, 163 mg sodium, 284 mg calcium, 33 mg potassium, 2 mg iron, 118 IU Vit A, 5 mg caffeine, 3 g protein. Net carbs per serving: 3.2 grams

Recipe and photo by Kathy Sheehan, copyright 2022
All rights reserved. Please do not duplicate without the author’s permission.

Saturday, September 17, 2022

Keto Spiced Dutch Apple Jam

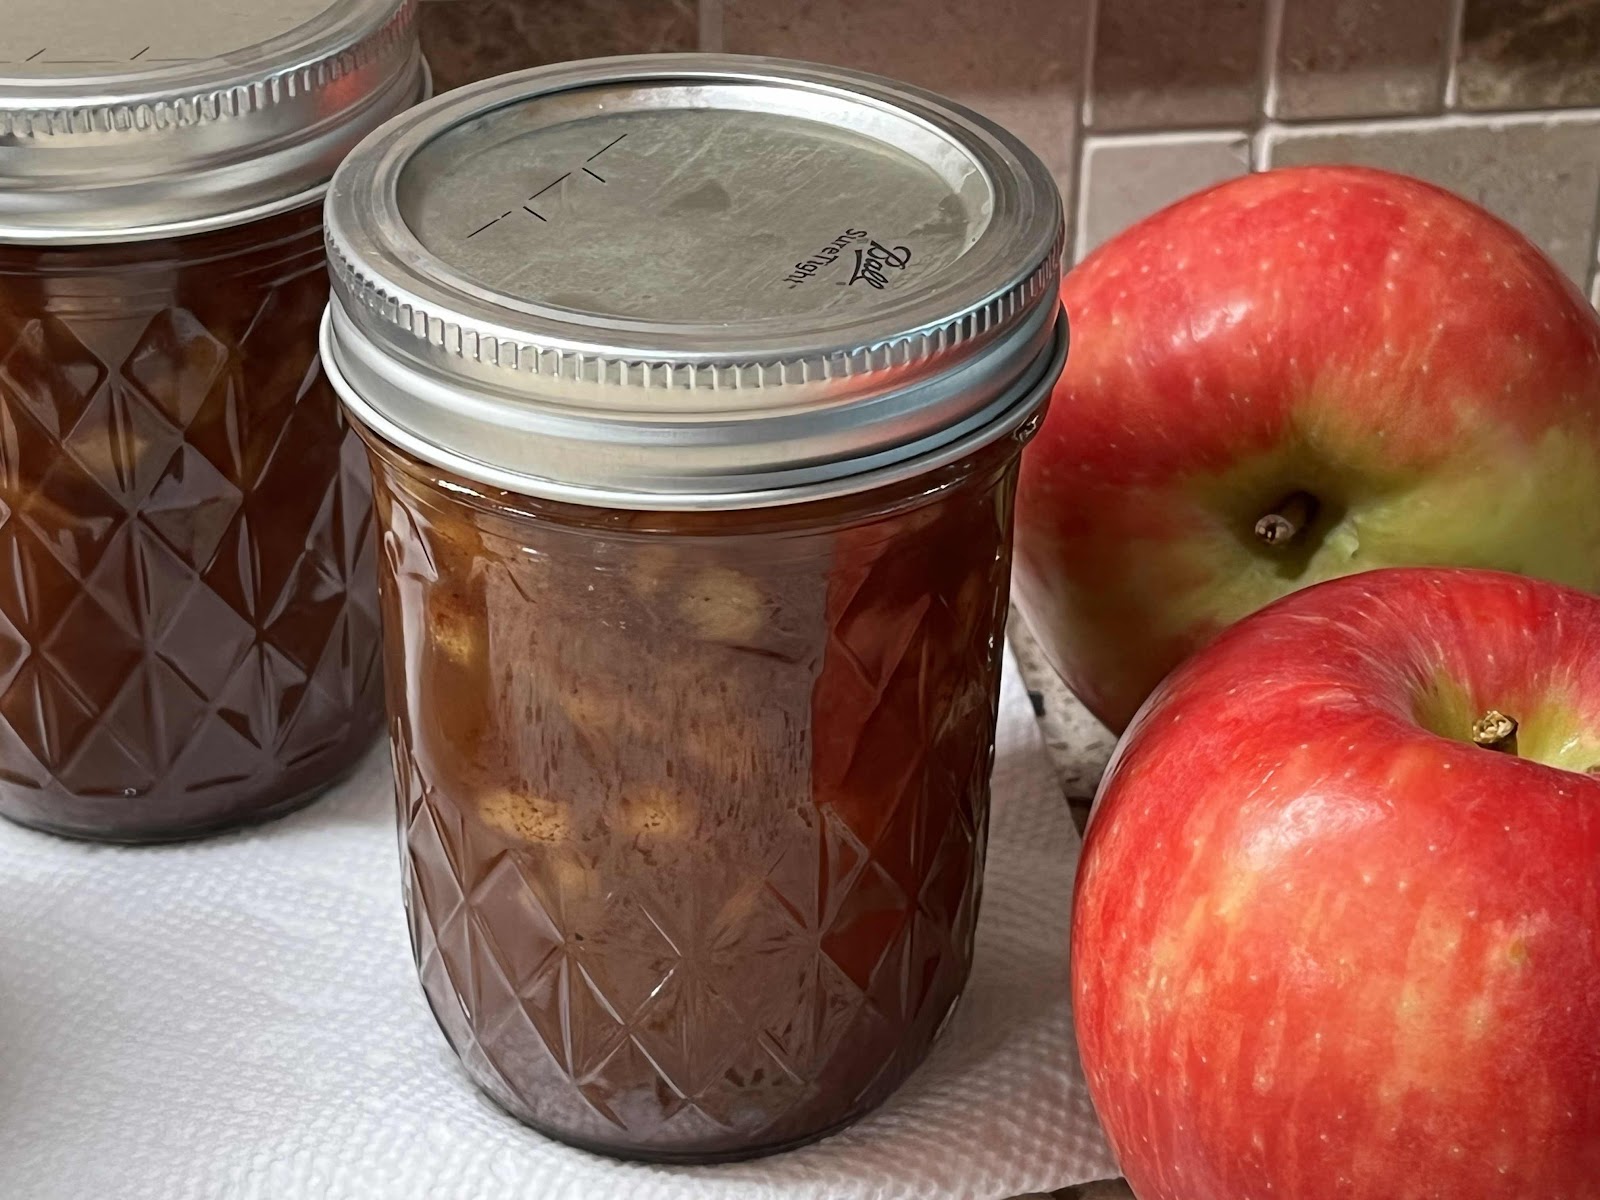
Keto Spiced Dutch Apple Jam
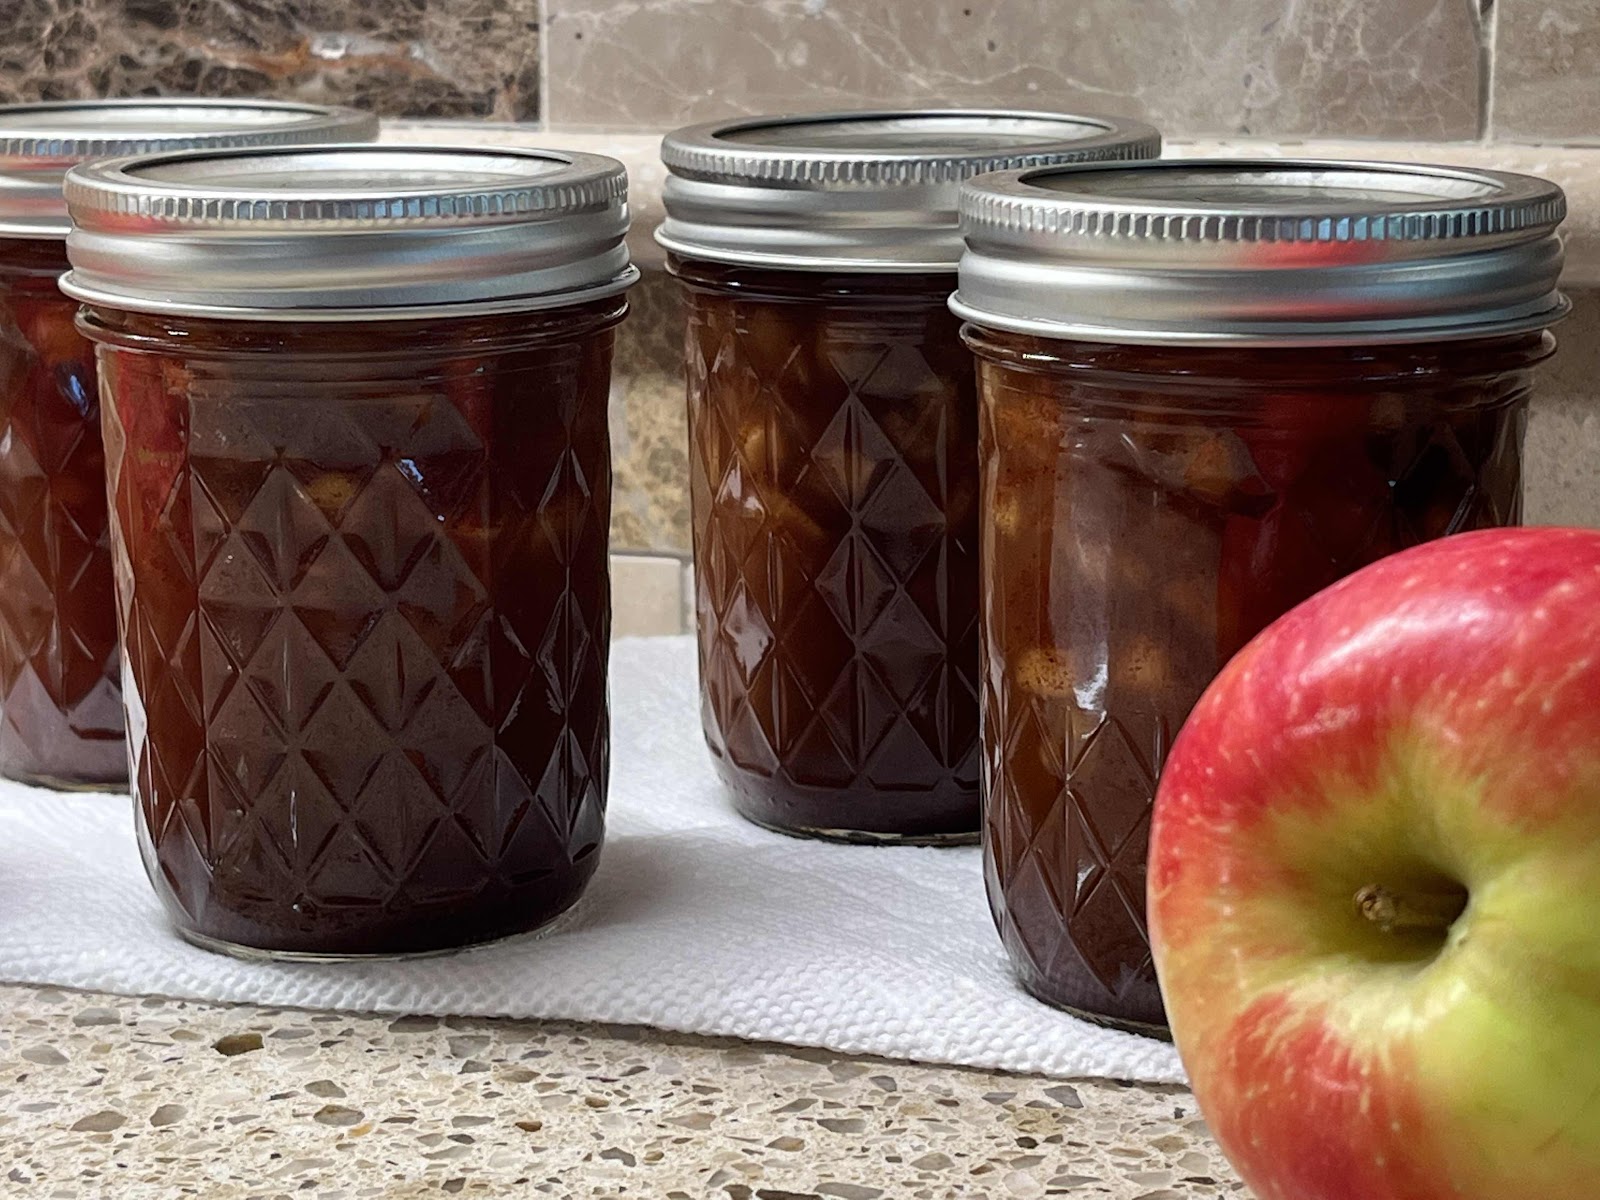
The weather is turning cooler and it’s apple picking season in Maine! Recently, I took a class at my Cooperative Extension Office where we learned to make Spiced Dutch Apple Jam. I had a wonderful time and learned a lot more about safe canning practices. But the recipe they used called for 7 cups of sugar! I came home and figured out that the amount of carbs per tablespoon was 16 grams! (That is equivalent to 4 teaspoons of sugar per tablespoon!!) With their recipe in hand, I went about making the necessary adjustments to make a batch that was sugar free. The final result is every bit as good as their recipe, but my recipe only has 2 grams of carb per tablespoon. This incredible jam tastes just like apple pie and is excellent on your low carb toast or spooned over low carb yogurt or ice cream. Also, share some with your keto friends! This makes an excellent gift for the holidays.

Keto Spiced Dutch Apple Jam
Makes four (8 oz) jars, 64 servings

4 cups apples, peeled, cored and diced small (about 5 medium apples)
1-1/4 cups allulose (or to taste)
2-1/2 teaspoons Pomona’s Universal Pectin (made especially for low sugar jams)
2 cups water
1/4 cup bottled lemon juice
3 teaspoons calcium water (see directions in Pomona’s Universal Pectin box)
1 teaspoon allspice
2 tablespoons + 2 teaspoons ground cinnamon
1 teaspoon ground nutmeg

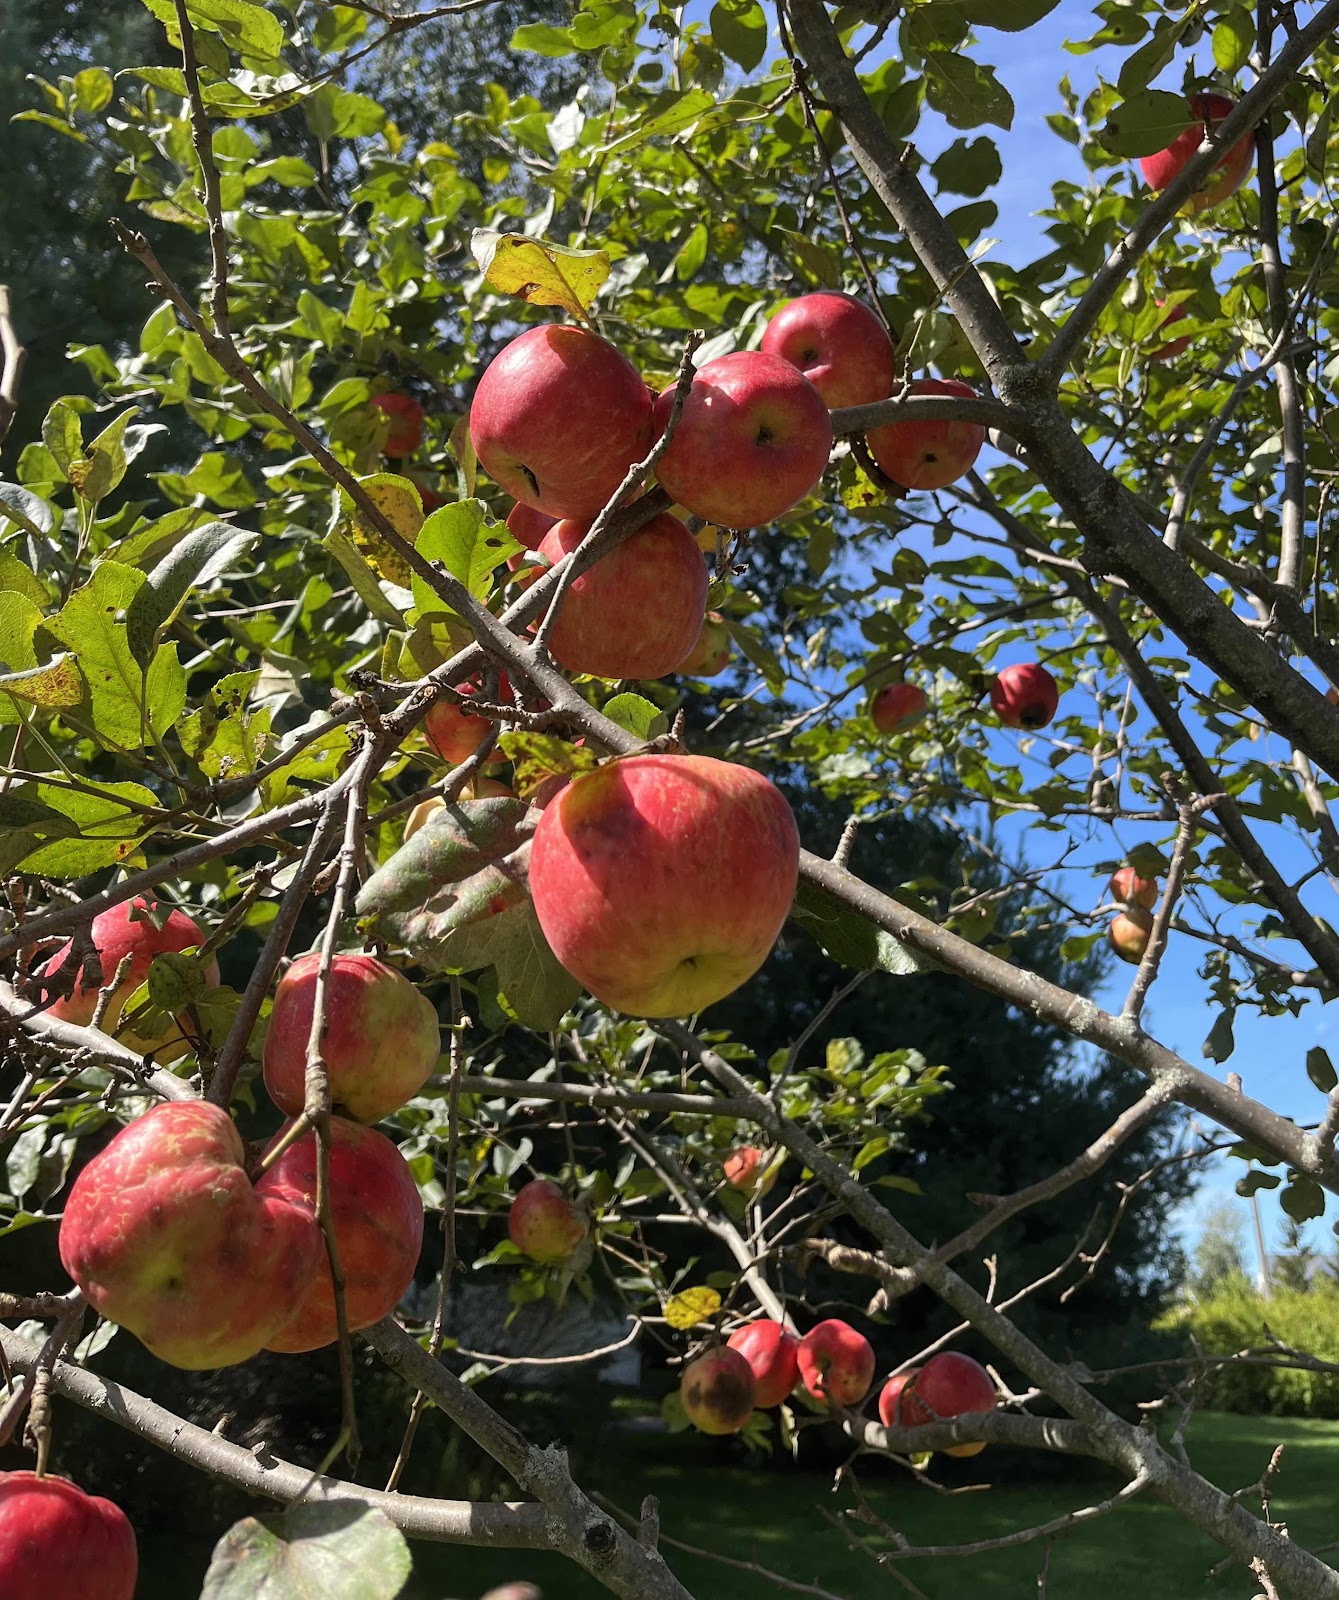
Apple Picking in Maine
1. Prepare the boiling water canner. Put the canning rack on the bottom of a large pot, then heat the jars in simmering water until ready to use, or for at least 10 minutes to sterilize the jars. Wash the lids in warm soapy water and set aside with the bands until you are ready to use them. (If you don’t want to process your jars in a water bath, your jam can be stored in the refrigerator for several months.)

2. In a bowl, combine the allulose and pectin; set aside. Place 1-2 small plates into your freezer to get cold. (These will be used for the “cold plate” test later.)

3. Place the diced apples into a large stainless steel saucepan or non-reactive cooking pot (not aluminum). Add the lemon juice, water and calcium water to the pot with the apples. Add the allspice, cinnamon and nutmeg. Stir to combine. Bring to a rolling boil over medium to high heat stirring often. (A rolling boil is a vigorous boil that cannot be stirred down, but continues to boil even as you stir.)

4. Once the apple mixture has reached a rolling boil, gradually stir in the allulose/pectin mixture and continue to stir until the sweetener and pectin dissolves.

5. Bring the mixture back to a full rolling boil that cannot be stirred down. Set a timer and boil hard for one minute, stirring constantly. Remove from the heat and check the jam using a cold plate from your freezer to be sure it will gel properly when set. Spoon a small amount onto a cold plate and allow to sit for a few minutes. Run your finger through the mixture and if a skin has formed and the jam is starting to set up, you have reached the proper temperature.

6. Using a jar lifter, lift one jar out of the simmering water and place it on a towel or wooden cutting board. Ladle the hot jam into a hot jar using a canning funnel. Leave 1/4 inch of headspace at the top. Remove any air bubbles and wipe the top of the jar rim clean. Center a lid on the jar and apply the band, adjusting to fingertip tight. Place the filled jar into the boiling water canner, then repeat the process until all of the jars are filled.

7. Process the jars in boiling water for 10 minutes, adjusting for altitude (search online for an altitude adjustment chart). Turn off the heat and let the jars sit in the canner, uncovered, for five minutes.

8. Very carefully remove the jars with a jar lifter, lifting them straight up (do not tilt jar!) and place them on a clean towel. Don’t worry about any water on the lid, that will evaporate quickly. Let the jam cool for 12 to 24 hours. Check the lids for a seal, they should not flex when the center is pressed.

9. A properly processed and sealed jar of jam is shelf stable for 12 to 18 months. Refrigerate after opening.

Recipe makes four jars
Nutritional Information per tablespoon: 6 calories, 2.3 g carbohydrate (0.2 g dietary fiber, 1.1 g sugars), 0.1 g total fat (0 g saturated fat, 0 g trans fat), 0 mg cholesterol, 0 mg sodium, 2 mg calcium, 11 mg potassium, 1 mg Vit C, 1 IU Vit A, 0 g protein. Net carbs per tablespoon: 2.1 grams

Photos and recipe by Kathy Sheehan, copyright 2022
All rights reserved. Please do not duplicate without the author’s permission. 

Monday, August 8, 2022

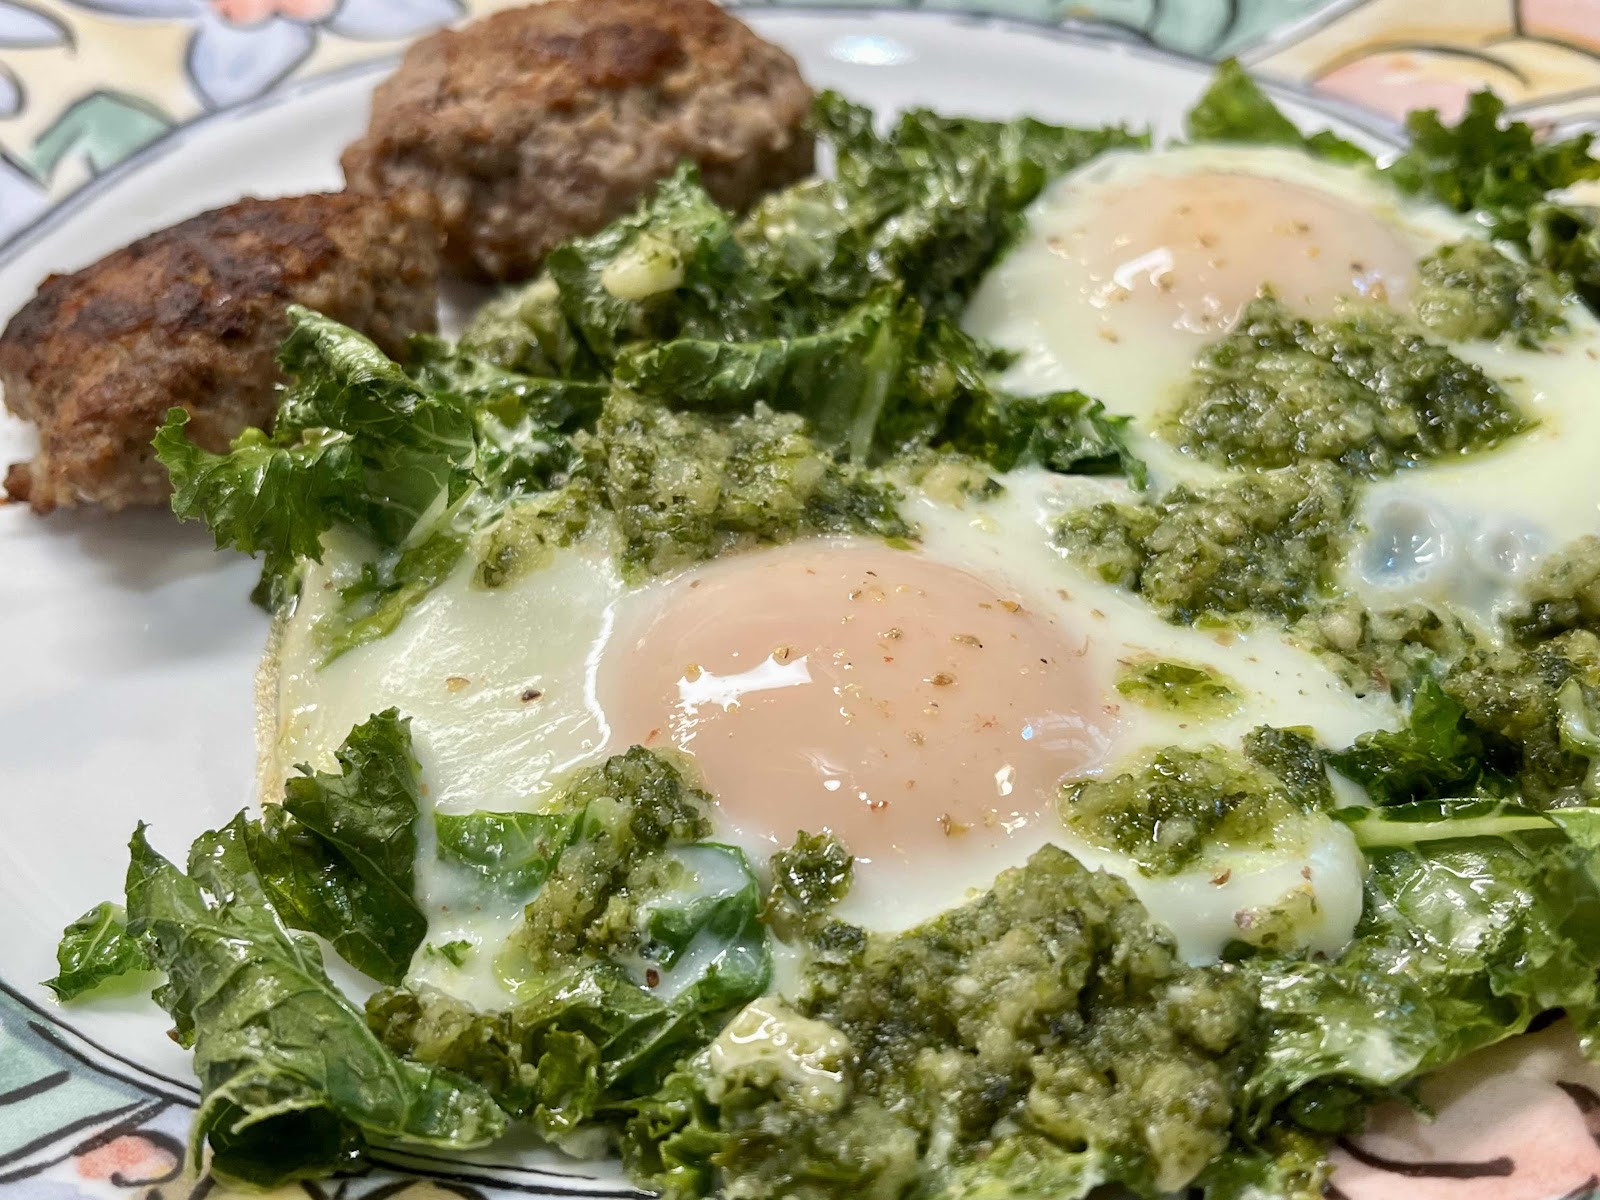
Creamed Kale and Eggs with Pesto

Creamed Kale and Eggs with Pesto
In the summertime, I have a small, backyard garden and kale is one of the most robust and easiest vegetables to grow! This baked egg dish is one of my very favorites and shows up on my breakfast table often while my kale is in season. As the kale bakes, it becomes crispy around the edges, similar to kale chips! The combination of flavors and textures makes this a deeply satisfying way to start the day.

Creamed Kale and Eggs with Pesto
Makes 1 serving

2 teaspoons olive or avocado oil
A large handful of fresh kale, washed and torn into pieces (you can substitute spinach or any leafy green)
2-3 tablespoons of heavy cream (or full fat coconut milk for dairy free)
Salt and pepper
2 eggs
2 tablespoons pesto (homemade or store bought)

1. Preheat the oven to 350°F.

2. In an 8 inch, oven proof skillet over medium heat, heat the oil and add the kale. As the kale wilts, toss it in the oil and season with salt and pepper.

3. Add heavy cream and stir to coat the kale. Create two wells and crack one egg into each well. Season the eggs with salt and pepper. Drizzle the pesto onto the top of the eggs and kale mixture.

4. Remove the skillet from the heat and bake in a 350° oven for seven minutes or until the eggs are done to your liking.

Nutritional Information per serving: 503 calories, 5.8 g carbohydrate (1.4 g dietary fiber, 0.6 g sugars), 48 g total fat (14.3 g saturated fat, 0 g trans fat), 414 mg cholesterol, 595 mg sodium, 156.5 mg calcium, 347 mg potassium, 3 mg iron, 42 mg Vit C, 1928 IU Vit A, 15.5 g protein. Net carbs per serving: 4.4 grams

Photo and recipe by Kathy Sheehan, copyright 2022
All rights reserved. Please do not duplicate without the author’s permission. 

Sunday, July 24, 2022

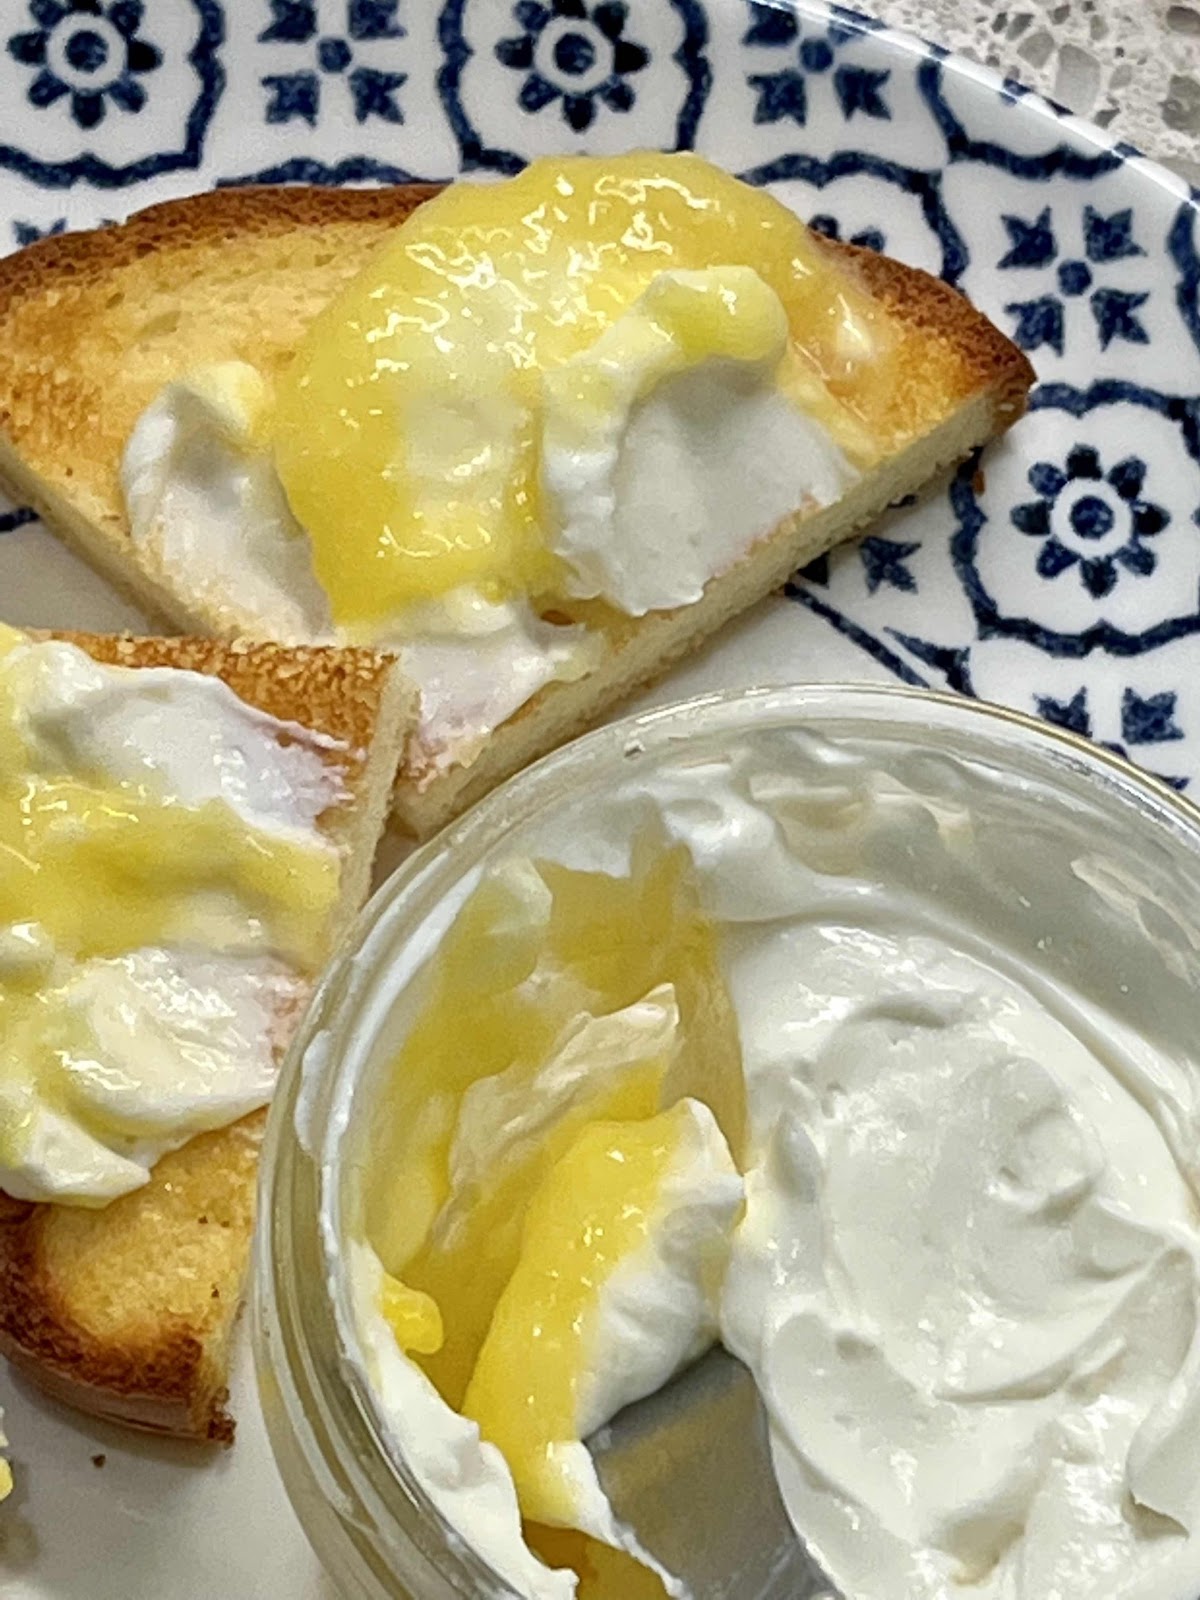
Keto Lemon Curd and Goat Cheese Spread

Keto Lemon Curd and Goat Cheese Spread
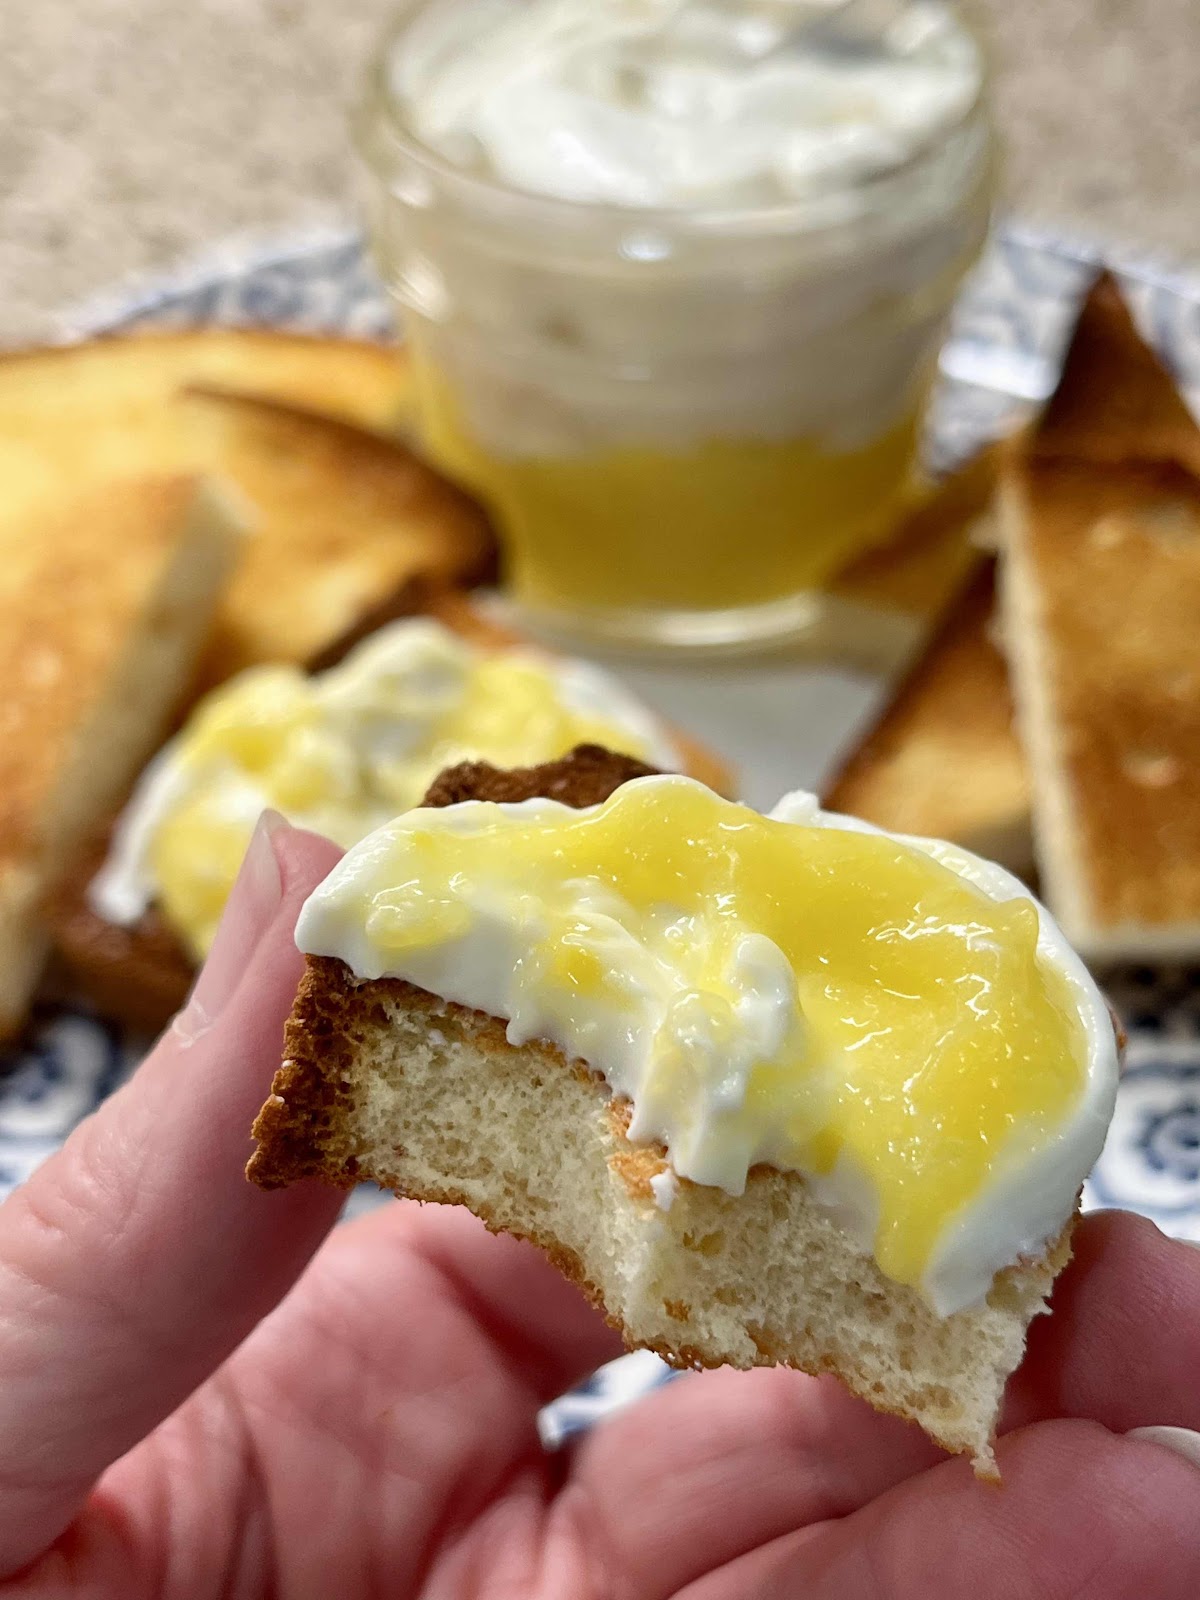
The other day I went to a party and the hostess served a delicious spread that was lemon curd topped with goat cheese that she had picked up at the Farmer’s Market. It was really good! Traditional lemon curd is mostly sugar, so I couldn’t do more than sample it at the party. I came home and, the very next day, made myself some sugar-free lemon curd using my easy, microwave method and topped it with plain, soft goat cheese. If you are not a fan of goat cheese, like my husband, you can blend together a combination of cream cheese and ricotta to replace the goat cheese. The taste is very similar, but it is even creamier and more spreadable. This makes a wonderful appetizer served with low carb crackers or spread it on your keto toast or pancakes for breakfast.

Keto Lemon Curd and Goat Cheese Spread
Makes 1 1/2 cups

1/2 cup (or more) sugar free Microwave Keto Lemon Curd (click here for the recipe)

Topping:
8 oz. plain, soft goat cheese

OR

Process in a food processor until smooth:

4 oz. cream cheese, softened
1/2 cup whole milk ricotta cheese
A pinch of salt
2 drops monkfruit extract or stevia (optional)
1/8 teaspoon vanilla extract (optional)

1. Allow the lemon curd to set up and cool completely in the refrigerator. To prevent a skin forming on the top, place plastic wrap directly on the lemon curd as it cools.

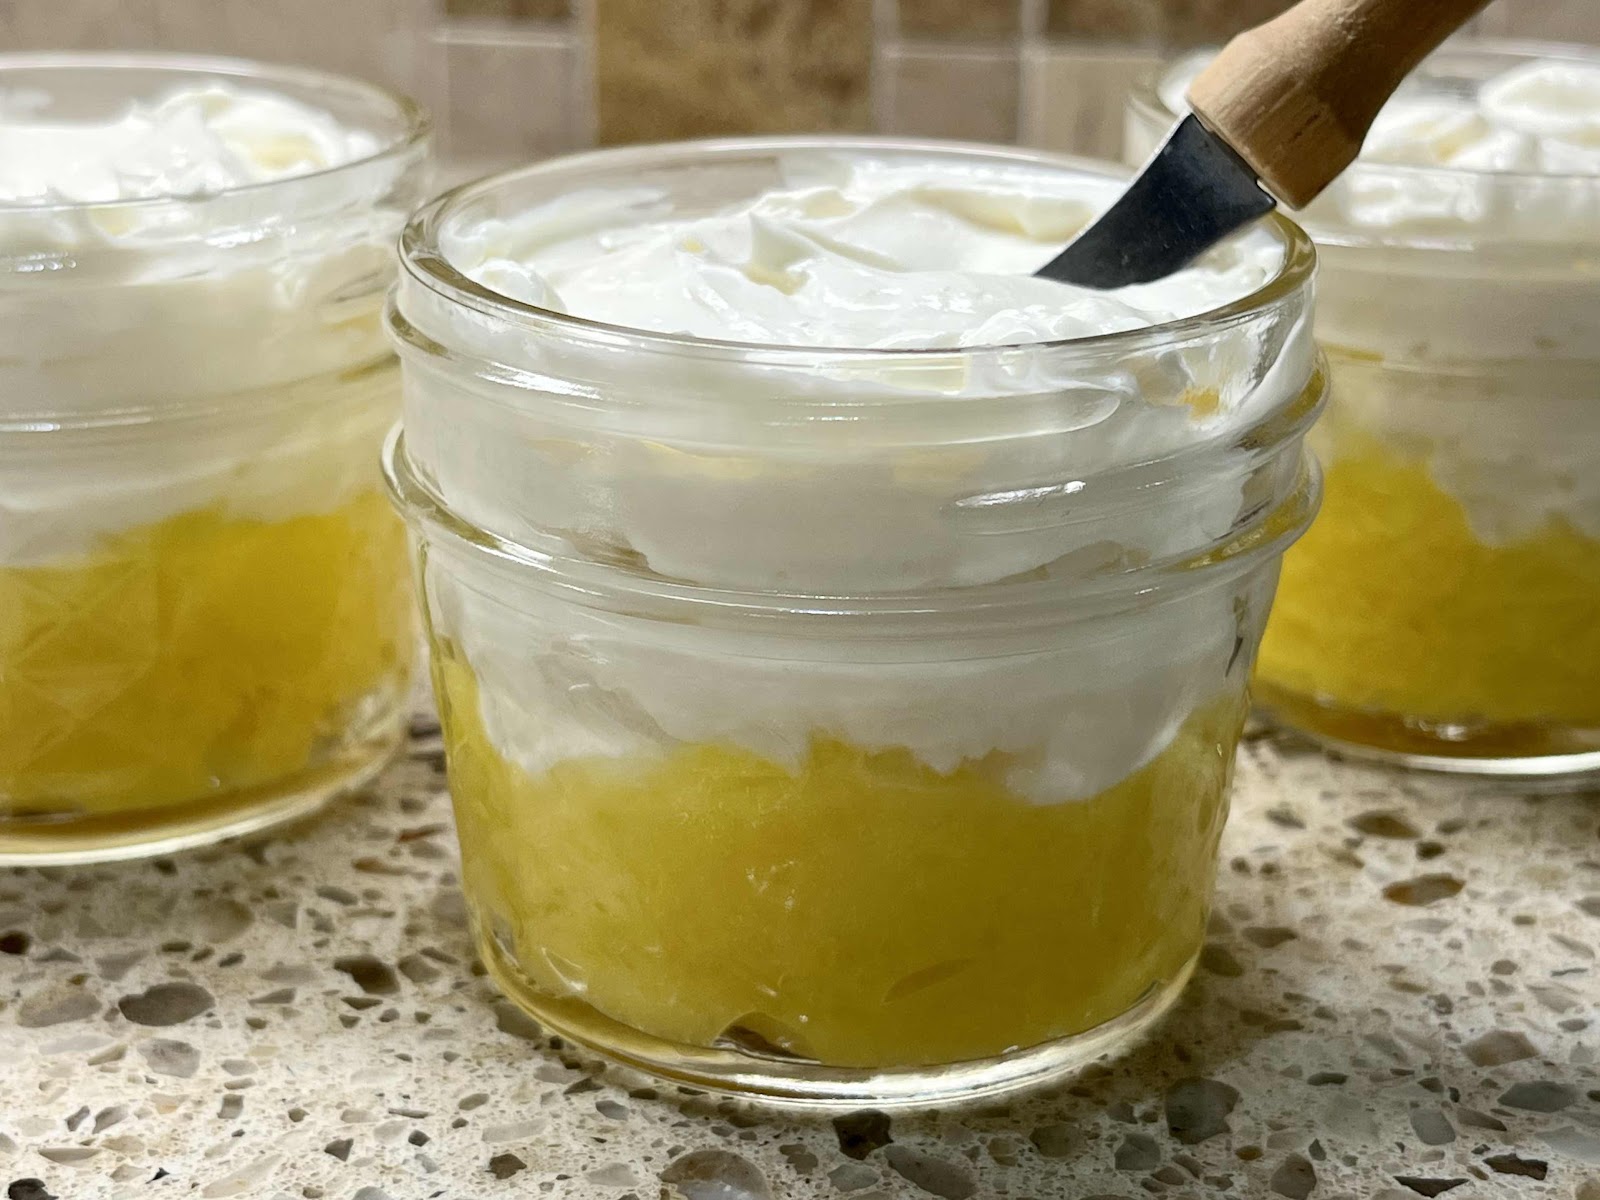
2. In a small glass serving bowl, spread the cooled lemon curd on the bottom of the bowl. Depending on the size of your bowl, you will use 1/2 cup or more. You want the lemon curd to come up the side of the bowl about 1/4th of the way. (I put mine into three 4 oz. Mason jars because I didn’t plan to serve it all at once, see photo below.)

Place lemon curd on the bottom and top with the goat cheese
3. Carefully, spoon in the goat cheese or the cream cheese/ricotta mixture and smooth the top with the back of a spoon or an offset spatula. Cover and store in the refrigerator until ready to serve.

Lemon Curd Spread on keto toast
Nutritional Information per 2 tablespoons: 102 calories, 1.9 g carbohydrate (0 g dietary fiber, 0.4 g sugars, 0.4 g sugar alcohols), 9.7 g total fat (6.2 g saturated fat, 0 g trans fat), 41 mg cholesterol, 50 mg sodium, 31.6 mg calcium, 25 mg potassium, 96 IU Vit A, 2.3 g protein. Net carbs per serving: 1.5 grams

Photos and recipe by Kathy Sheehan, copyright 2022
All rights reserved. Please do not duplicate without the author’s permission. 

Friday, July 8, 2022

Keto Strawberry Milk

Keto Strawberry Milk
I have a confession to make: When I was young, I loved Nestle’s Strawberry Milk powder to make strawberry milk. I still enjoy the flavor, but don’t want all the sugar and carbs. I created this recipe to satisfy my craving for something sweet, nostalgic and bursting with fresh strawberry flavor!

Keto Strawberry Milk
Makes 1 serving

3 ripe medium strawberries
8 oz. Keto Dairy Milk, click here for recipe (or unsweetened almond or coconut milk)
8 drops monkfruit extract or liquid Stevia, to taste
1/4 teaspoon vanilla extract
1/2 teaspoon strawberry extract
2 tablespoons heavy whipping cream

1. Place the strawberries, low carb milk of choice, monkfruit sweetener and extracts into a blender and blend on high until the strawberries are completely incorporated into the milk mixture.*

2. Add heavy cream and blend on low until incorporated. Pour into a glass and enjoy!

*Alternative Suggestion: If you’d like to turn this into a breakfast or meal replacement smoothie, add a scoop of protein powder to the blender in step 1.

Nutritional Information per serving (entire recipe): 251 calories, 3.7 g carbohydrate (0.7 g dietary fiber, 2.8 g sugars), 24.1 g total fat (15 g saturated fat, 0 g trans fat), 90 mg cholesterol, 146 mg sodium, 141.9 mg calcium, 84 mg potassium, 121 IU Vit A, 6.2 g protein. Net carbs per serving: 3 grams

Photo and recipe by Kathy Sheehan, copyright 2022
All rights reserved. Please do not duplicate without the author’s permission. 

Sunday, April 10, 2022

Keto Lemon Soufflé Pancakes

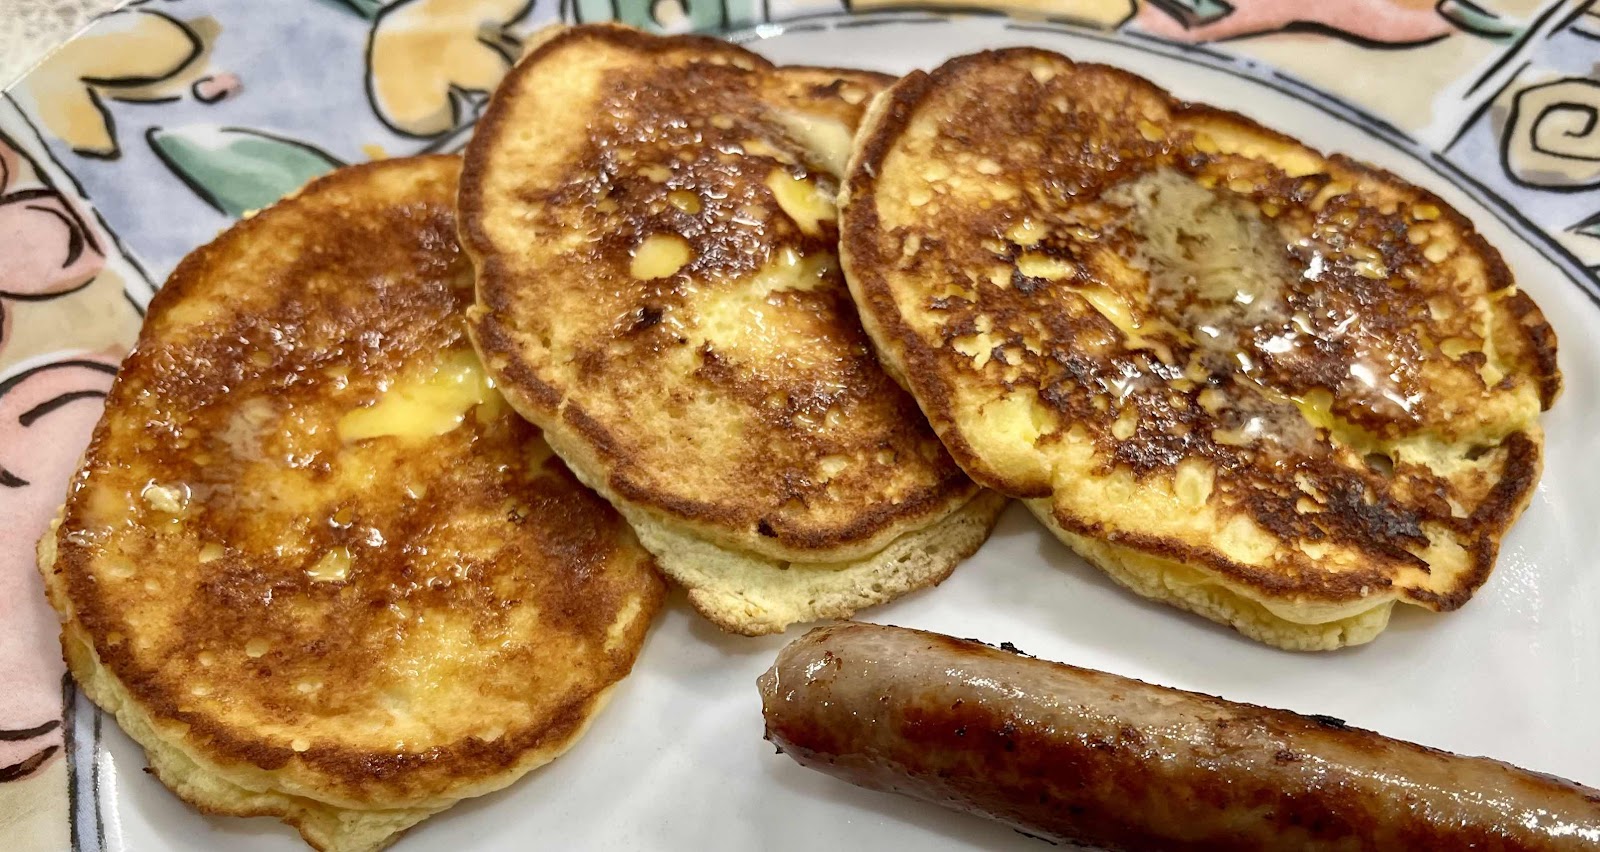
Keto Lemon Soufflé Pancakes
Earlier this week, I saw a recipe online for lemon soufflé pancakes. Of course, they contained flour and sugar. I adapted that recipe to make these keto pancakes, which I am sure are just as delicious as the original recipe. They are so delicate and light, almost like feasting on a cloud! They can be made ahead, then stored between wax paper or parchment paper in the refrigerator. Reheating them is a quick and easy process. Some people, as soon as they see that egg whites need to be whipped, turn away from a recipe. I can assure you that whipping egg whites is very easy, especially when you add a little cream of tartar which stabilizes them and prevents them from being overwhipped. I find it easier to separate eggs when they are at room temperature, but it’s not necessary. Be sure to separate each egg over a small bowl to catch the whites, then add the whites to your larger mixing bowl before cracking the next egg. The only trick is to make sure there are no bits of egg yolk (or oil) in the whites! Besides that, use a clean bowl, clean beaters and it’s easy-peasy!

Keto Lemon Soufflé Pancakes
Makes 6 servings (2 pancakes each)

3 large eggs, separated
1/8 teaspoon cream of tartar
2 tablespoons avocado oil
1/8 teaspoon salt
2 teaspoons baking powder
1 cup 4% cottage cheese (not low fat)
1 tablespoon sugar free maple syrup
2 tablespoons lemon juice
1 tablespoon lemon zest (or 2-3 drops lemon essential oil for low oxalate)
2 tablespoons coconut flour
Warm sugar free maple syrup, for serving

1. Beat the egg whites and cream of tartar until stiff, then set aside.

2. Combine in a food processor or blender the egg yolks, oil, salt, baking powder, cottage cheese, sugar-free maple syrup, lemon juice, lemon zest and coconut flour, blending until smooth. Pour the batter into a bowl and fold in the egg whites with a rubber spatula until no more white streaks remain.

3. Melt a teaspoon of butter and a teaspoon of avocado oil in a non-stick skillet over medium heat. Swirl around to coat the skillet. Drop batter by spoonfuls onto the greased skillet. (Make the pancakes about 4 inches across. A smaller pancake is easier to flip than a larger one.) Cook the first side for about three minutes until nicely browned. Very carefully, flip the pancakes and brown the other side. Please note that these pancakes are very delicate, so take your time and be gentle as you flip them.

4. Serve with the warmed sugar-free maple syrup. These pancakes can be stored in the refrigerator, layered between sheets of wax paper or parchment paper, for up to two days. To reheat, place them on a wire rack that is set inside a rimmed cookie sheet. Place in a preheated 250° oven for about 15 minutes.

Lemon Pancakes
Nutritional Information per 2 pancakes (based on recipe making 12 pancakes): 129 calories, 4.1 g carbohydrate (1.3 g dietary fiber, 0.8 g sugars), 9.2 g total fat (2.8 g saturated fat, 0 g trans fat), 98 mg cholesterol, 354 mg sodium, 149.2 mg calcium, 88 mg potassium, 1 mg iron, 58 IU Vit A, 3 mg Vit C, 8 g protein. Net carbs per serving: 2.8 grams

Photos and recipe by Kathy Sheehan, copyright 2022
All rights reserved. Please do not duplicate author’s permission.

Saturday, March 26, 2022

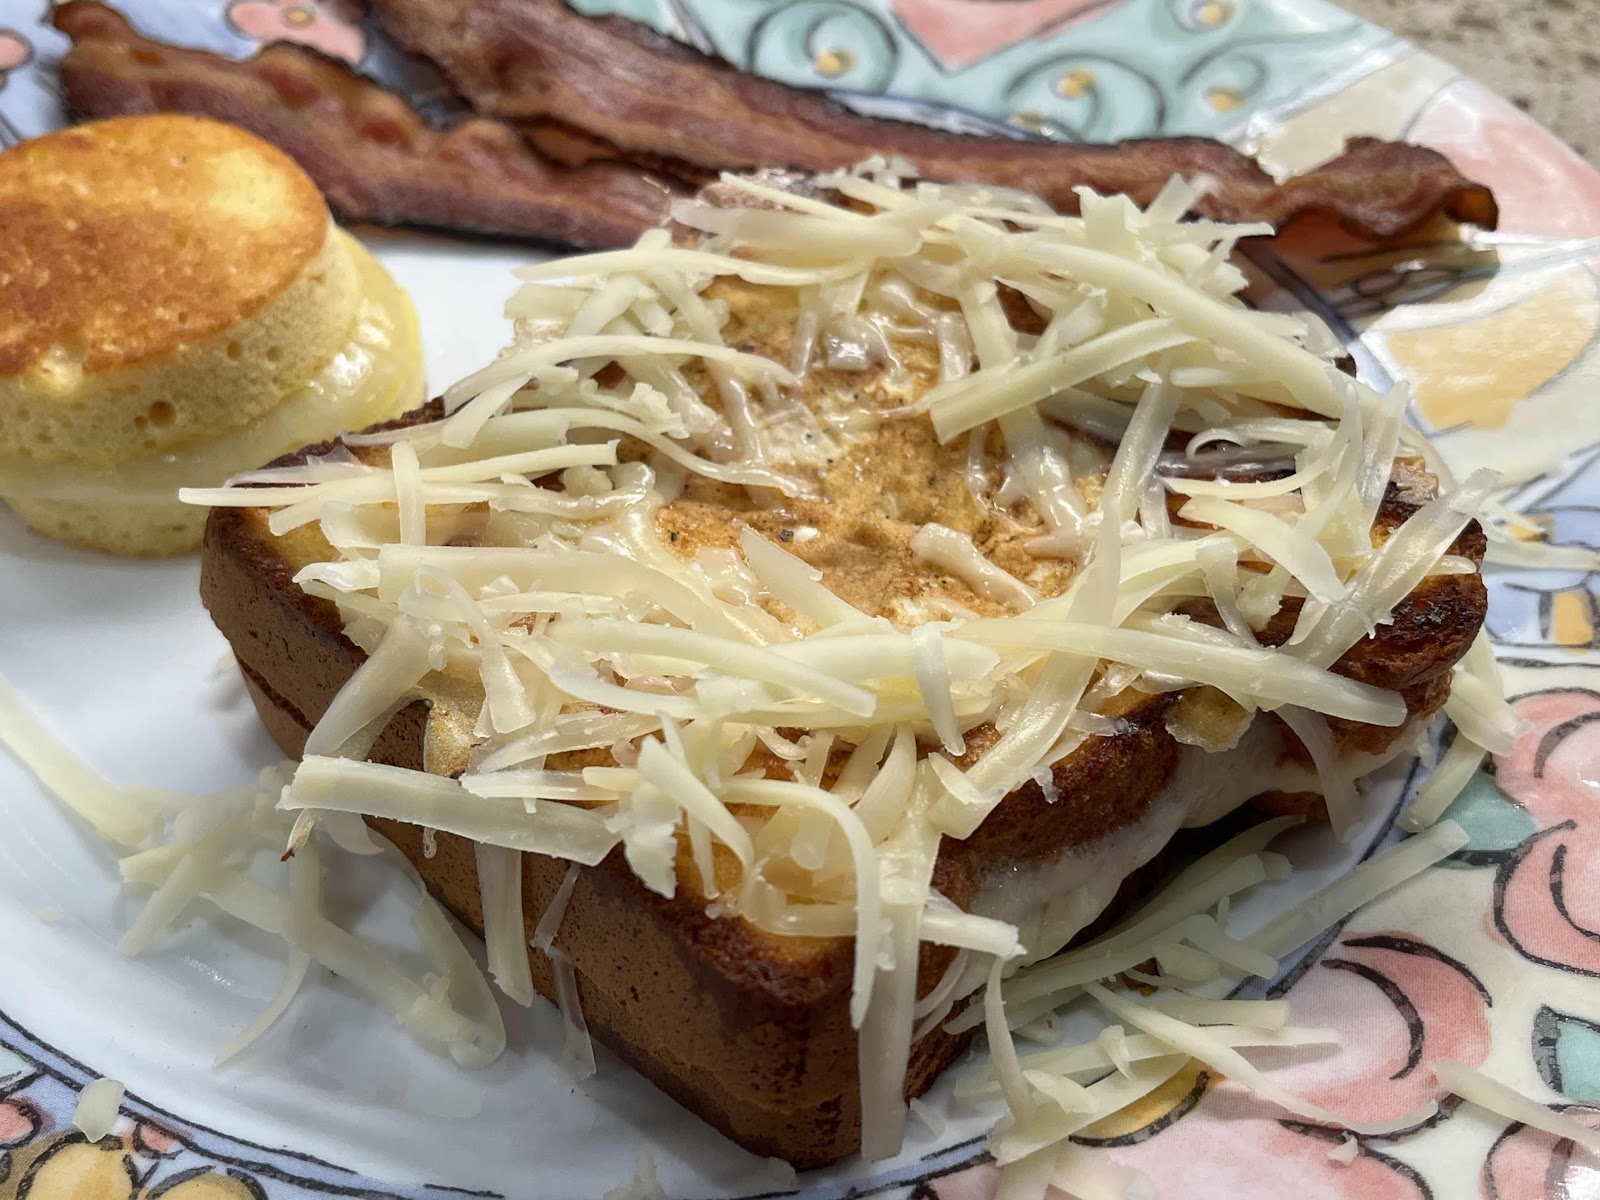
The Ultimate Keto Grilled Cheese Egg in a Nest

Ultimate Keto Grilled Cheese Egg In a Nest
I have recently discovered the best keto bread recipe I’ve ever tried! (Click here for the recipe.) Now, I have real bread that I can use in a variety of ways in my meals. I have always loved Egg In a Nest, but this recipe takes it a step further. It has all the best flavors of a grilled cheese and tomato sandwich with Egg In a Nest! By itself, it makes a great quick and easy meal. Of course, you can use any keto bread that you like in place of homemade, but be aware the nutritional information may change depending on the bread you use.

The Ultimate Keto Grilled Cheese Egg In a Nest
Makes 1 serving

2 slices of keto bread (I used this recipe for Cloud Bread Loaf)
1 teaspoon yellow mustard
2 teaspoons butter, softened (I prefer salted butter)
1 slice tomato
1 ounce sliced cheese (I prefer sharp cheddar)
1/2 teaspoon olive or avocado oil
1 egg
Salt and pepper to taste
1 ounce shredded cheddar cheese

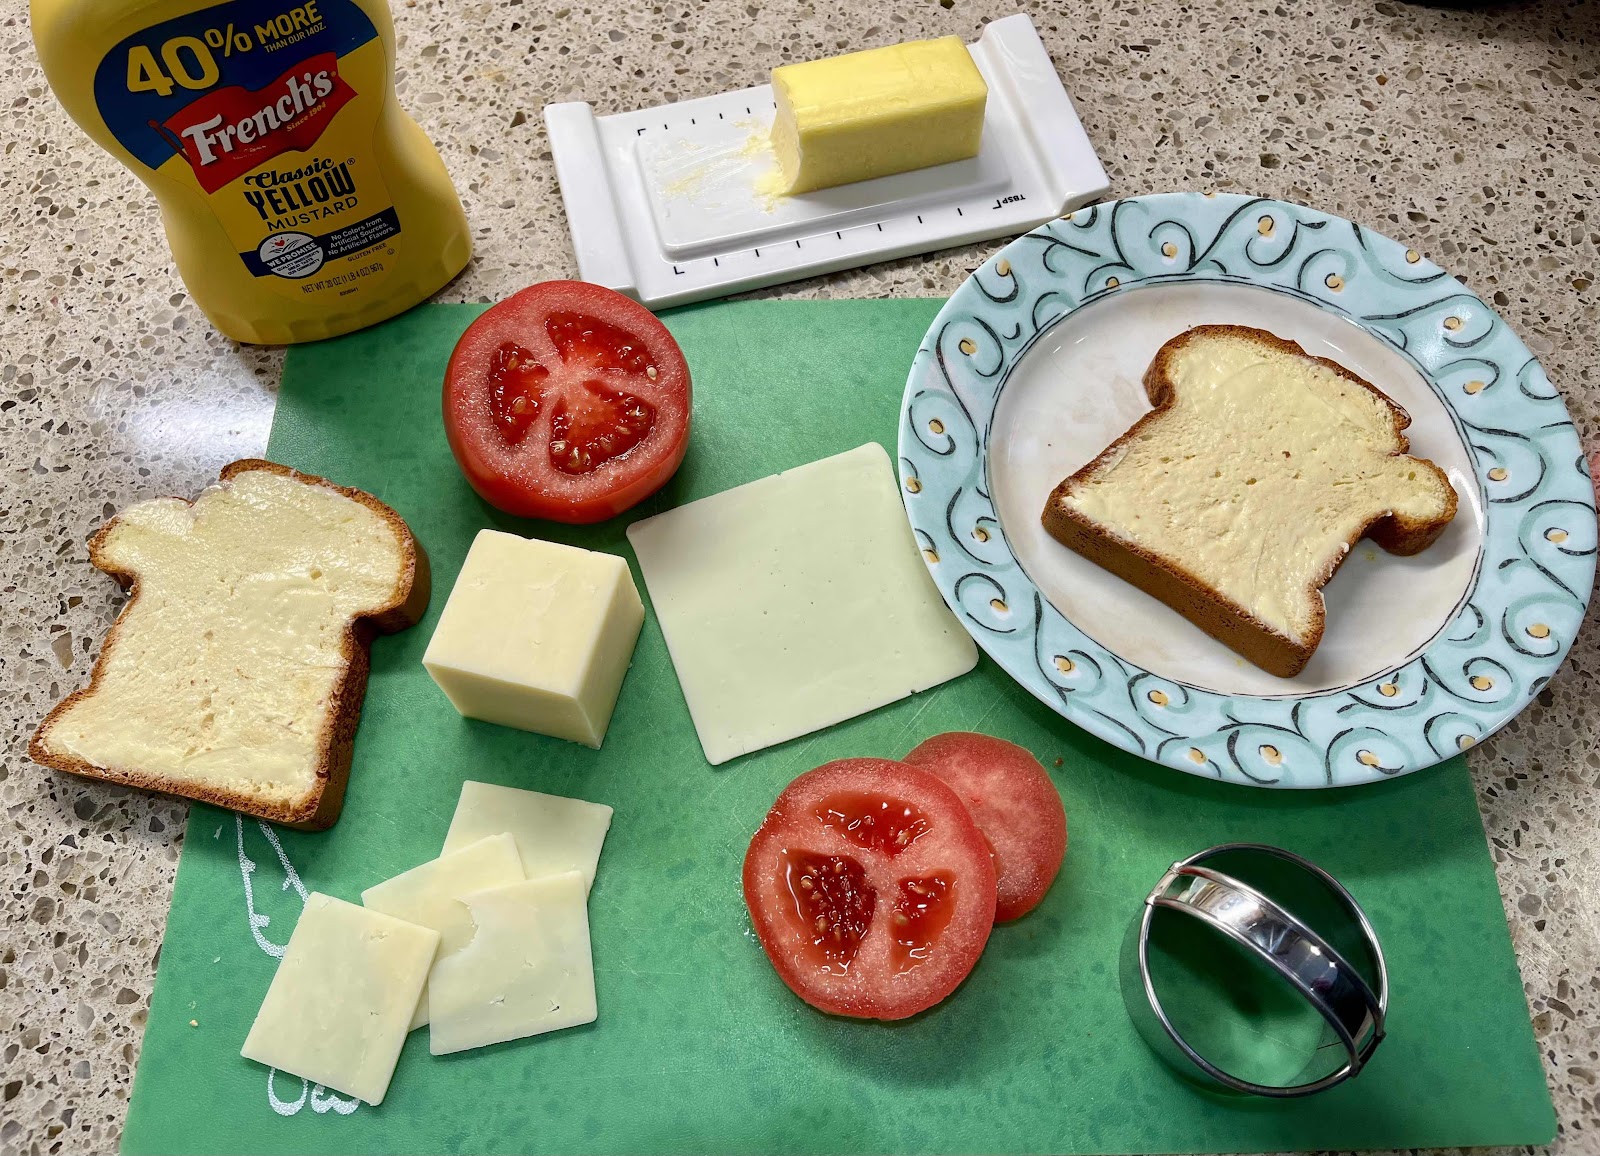
Equipment Needed: small biscuit cutter

Ingredients needed
1. Spread the mustard on both slices of the bread, on the side that will become the inside of the grilled cheese sandwich. Spread the softened butter on both sides of the bread, on the sides that will become the outside of the grilled cheese sandwich.

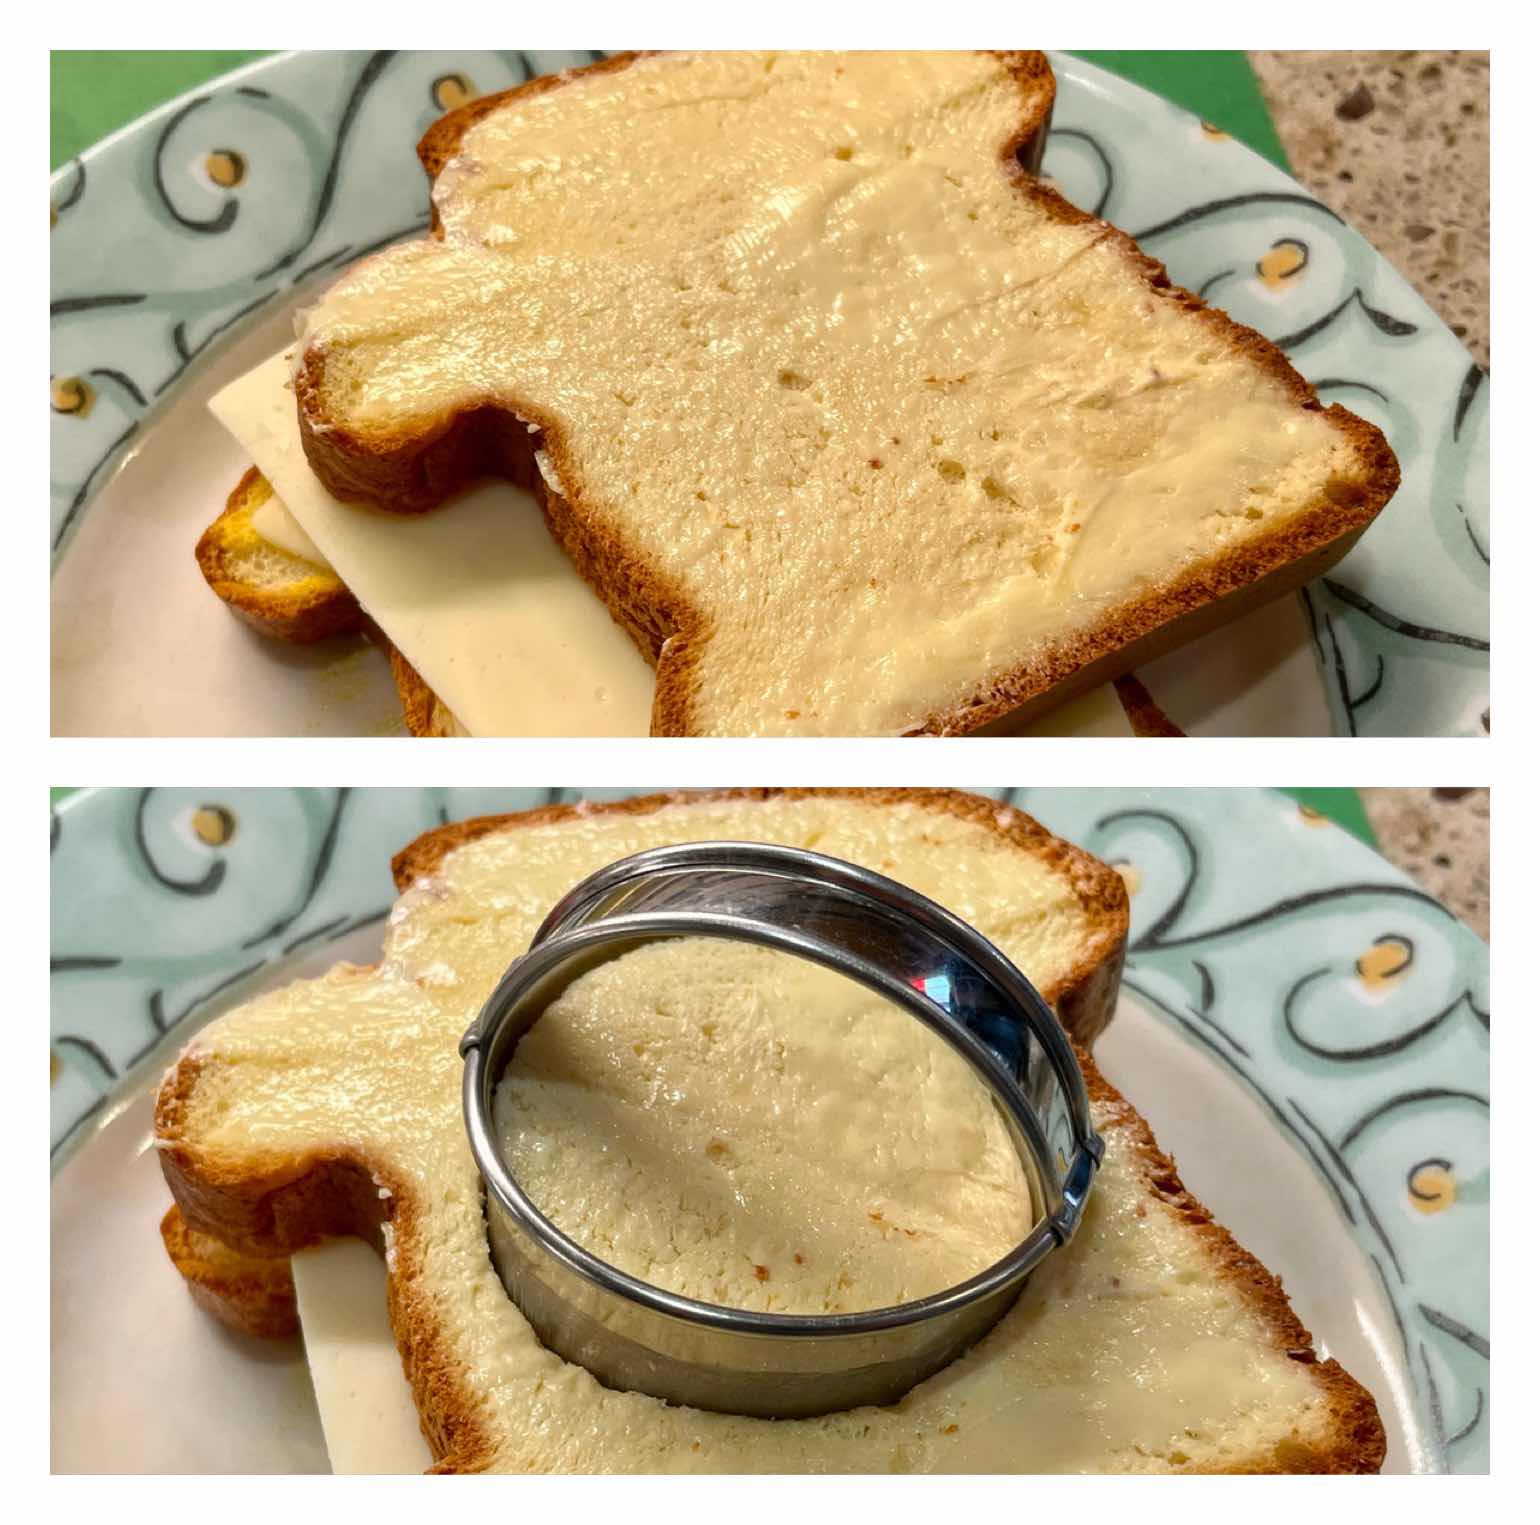
Make cheese sandwich
2. Place one slice of bread, butter side down, on a small plate or cutting board. Top with cheese and place the remaining slice of bread, butter side up, onto the cheese. Use the small biscuit cutter to cut a hole in the center of the cheese sandwich. Save the center circle to be grilled along side the Egg in a Nest.

Cut tomato to fit hole
3. If your tomato slice is larger than the hole you created, use the biscuit cutter to make it the correct size. You want it to fit inside the circle.

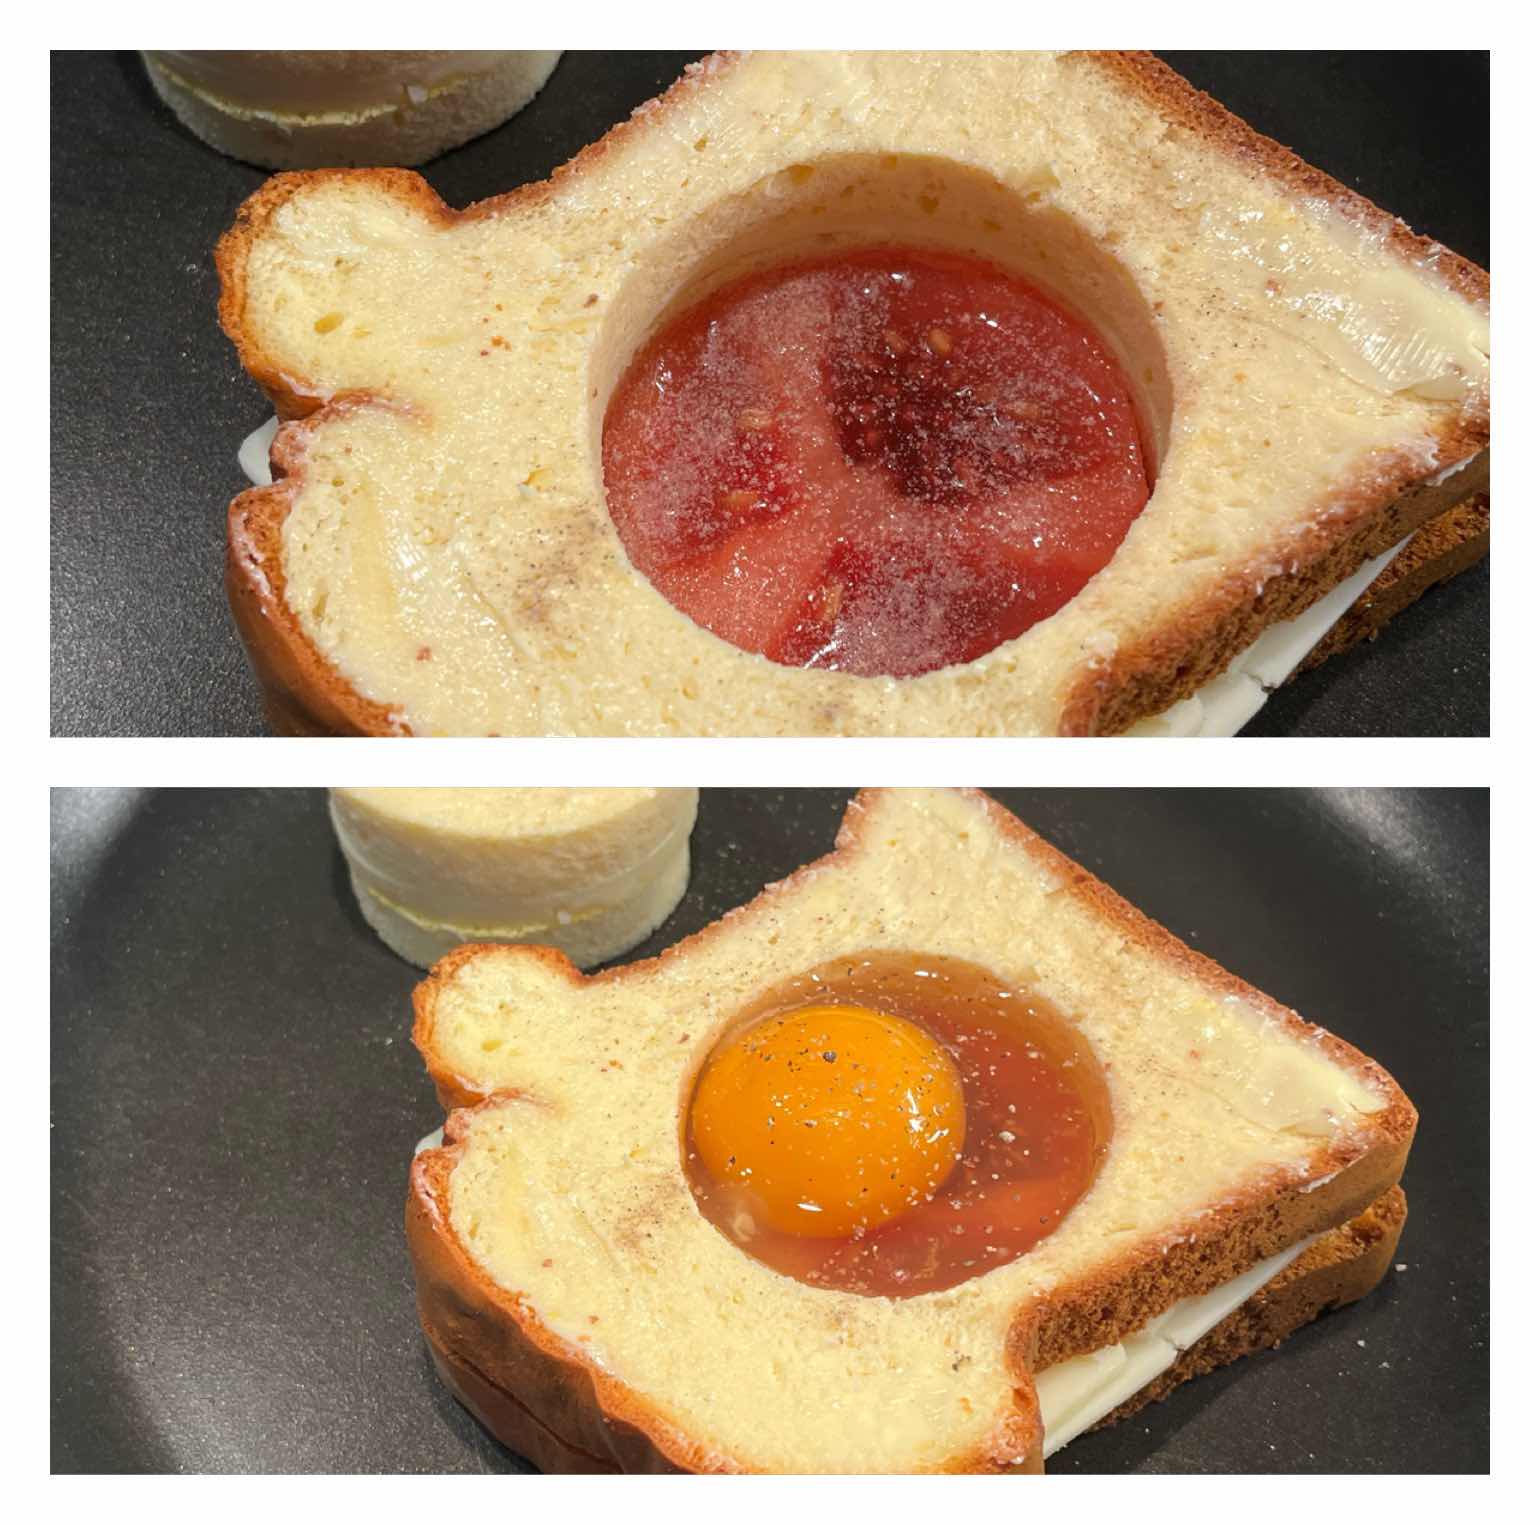
Place tomato in hole and top with egg
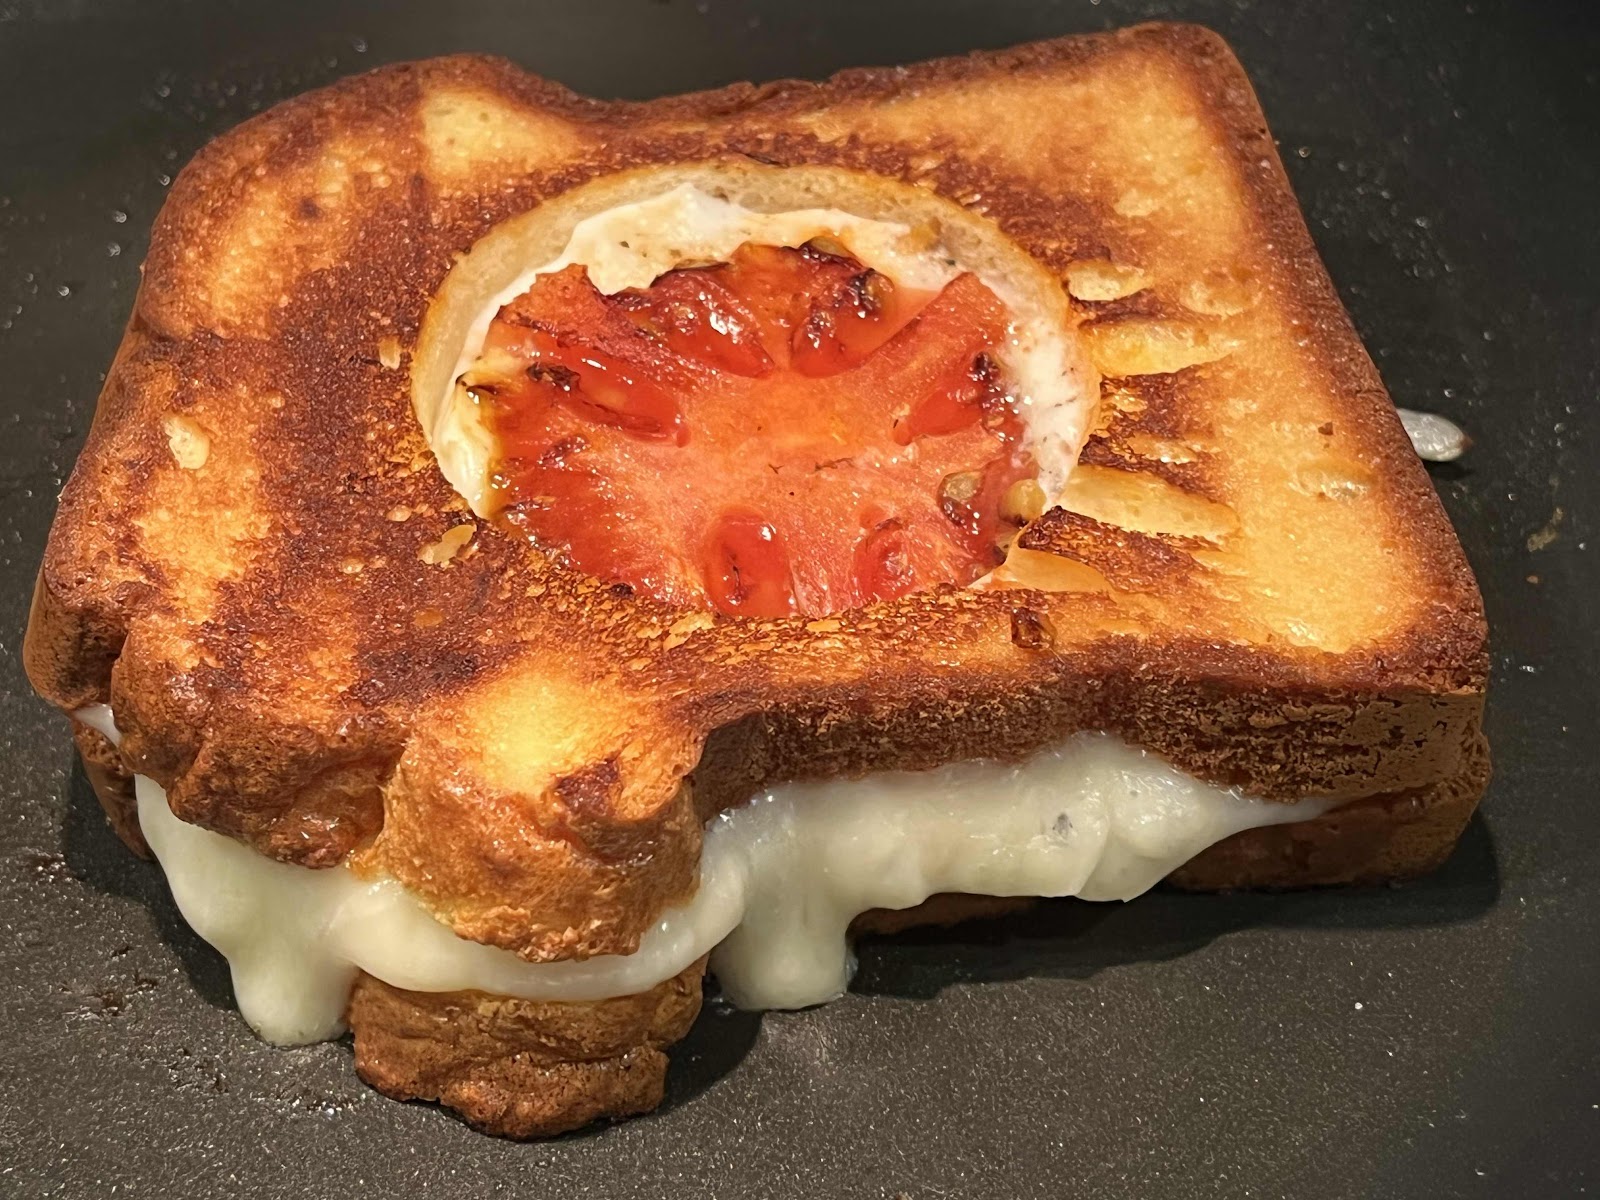
4. Place the cheese sandwich, with the hole in it, into a non-stick skillet (I start with a cold skillet). Drizzle 1/2 teaspoon of oil into the hole, then insert the tomato slice into the hole. Season with salt and pepper to taste. Crack an egg over the tomato slice and again season the egg with salt and pepper. Turn the heat to low (or medium-low). Cover the skillet with a lid to trap the heat and help melt the cheese. Grill until the bread has browned nicely. At the same time, grill the round cheese sandwich that you cut from the center.

Flip Egg In a Nest
5. With a spatula, carefully flip the sandwich and continue grilling on the second side until the bread has browned and the egg is done to your liking. (Again, I like to cover the skillet to trap the heat.) Flip the small round cheese sandwich and brown the second side, as well.

Grilled Cheese Egg In a Nest
6. Remove the Egg In a Nest and the round grilled cheese sandwich to a serving plate. Sprinkle the shredded cheese over the Egg In a Nest and serve! YUM!

Nutritional Information per serving (made with 2 slices Cloud Bread Loaf): 603 calories, 3.6 g carbohydrate (2.4 g dietary fiber, 2.9 g sugars), 49.8 g total fat (20 g saturated fat, 0 g trans fat), 428 mg cholesterol, 690 mg sodium, 466.9 mg calcium, 254 mg potassium, 533 IU Vit A, 3 mg Vit C, 3 mg iron, 36.7 g protein. Net carbs per serving: 1.2 grams
Photos and recipe by Kathy Sheehan, copyright 2022
All rights reserved. Please do not duplicate without the author’s permission.