Showing posts with label pudding. Show all posts

Saturday, July 6, 2024

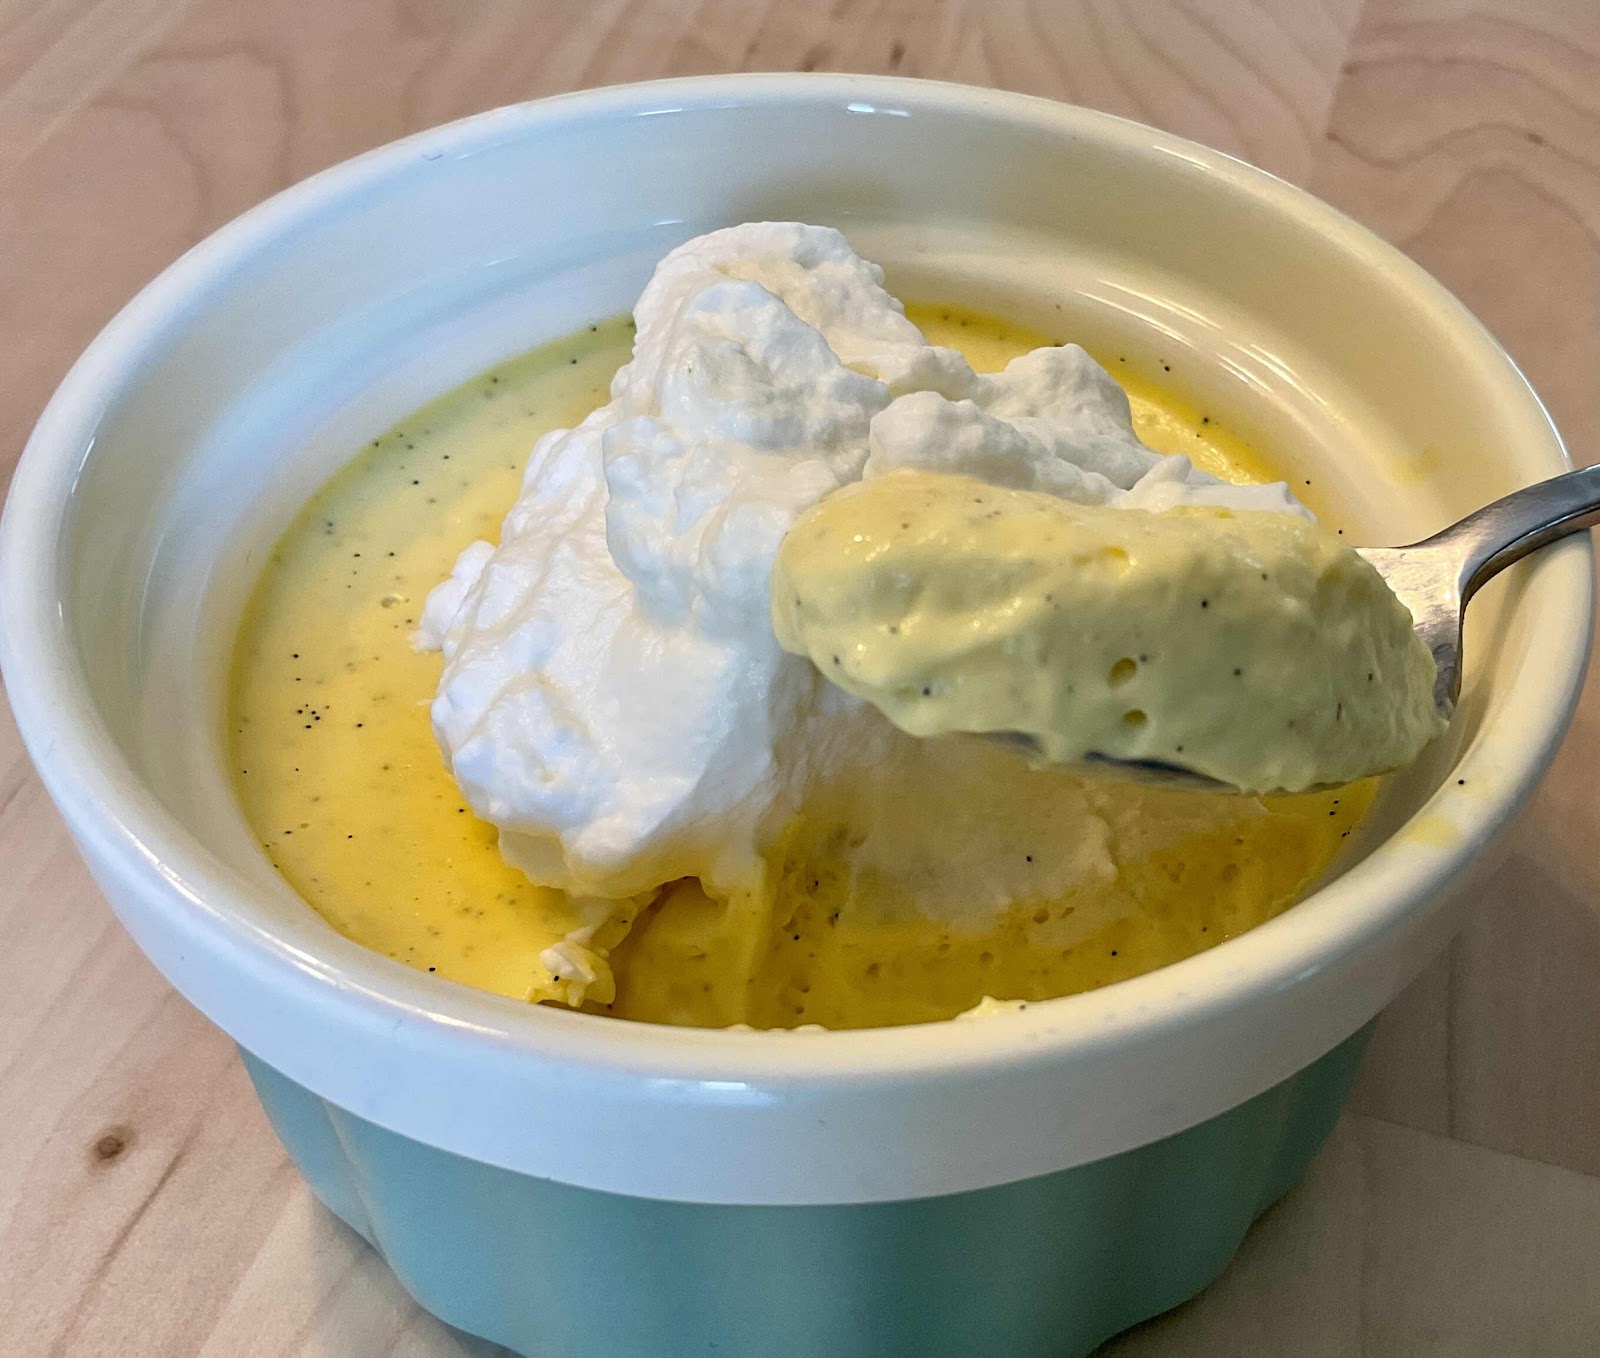
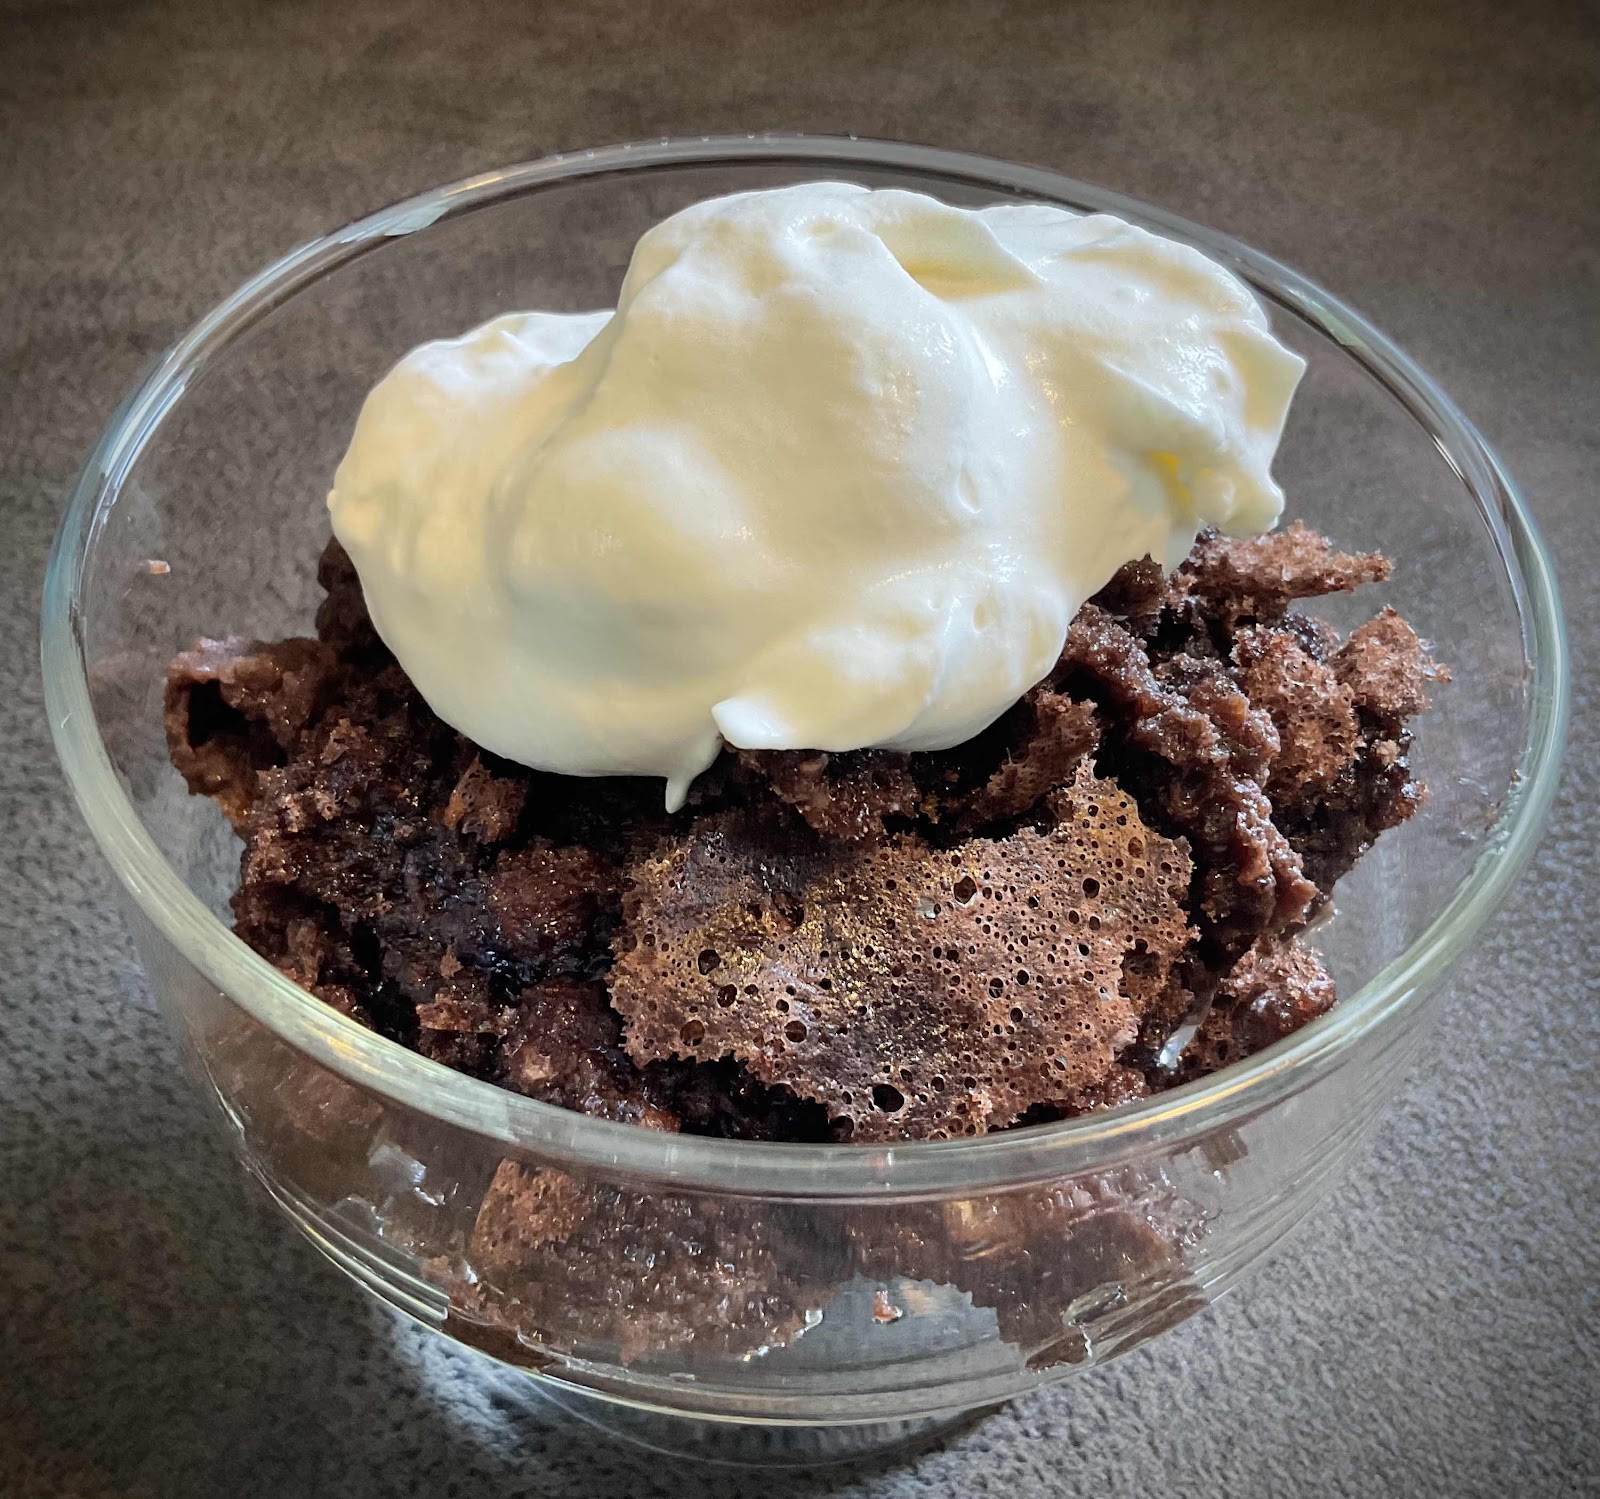
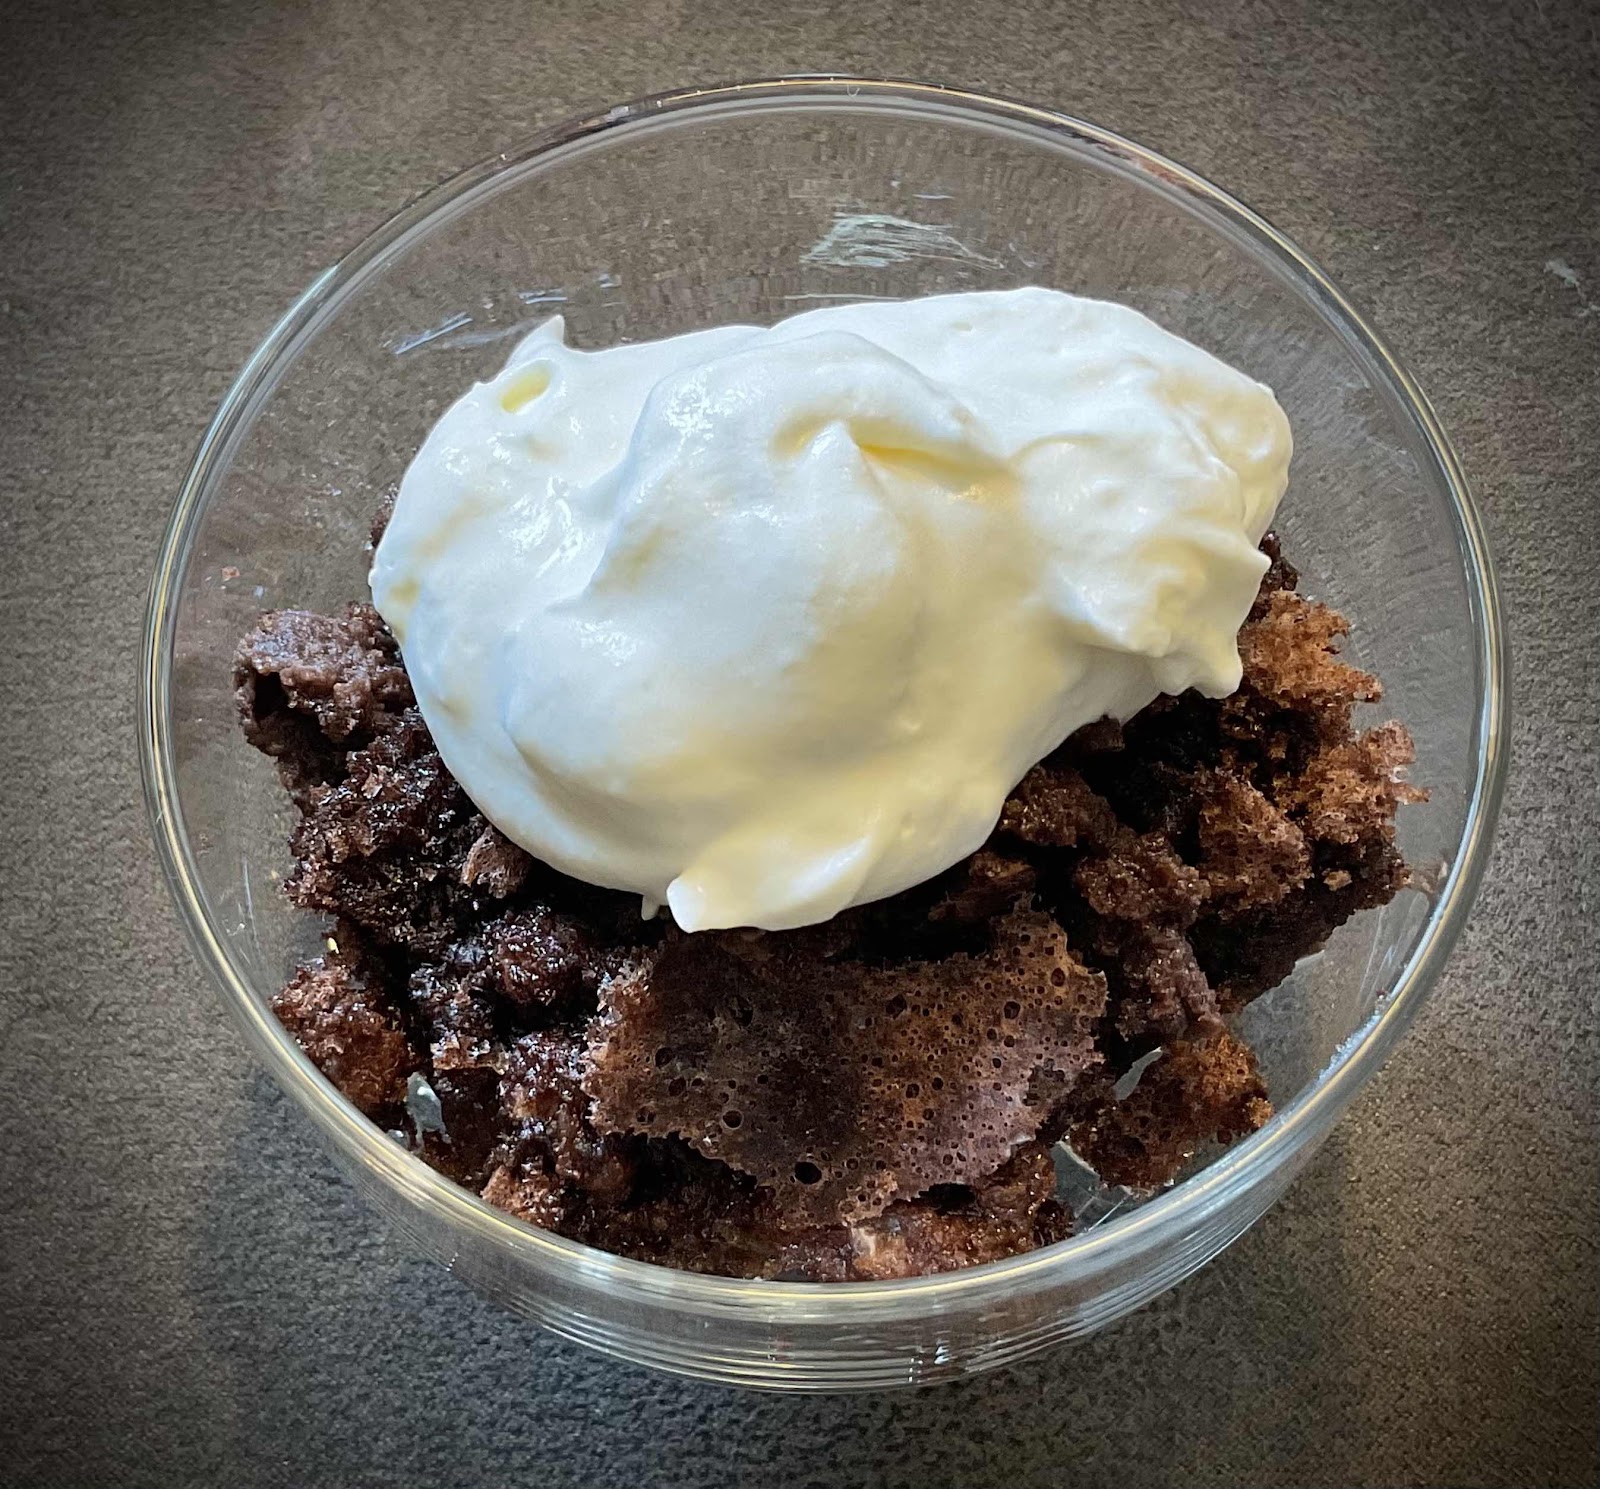
Instant Pot Keto Bread Pudding (or Oven Baked)

Instant Pot Keto Bread Pudding (or Oven Baked)

For as long as I can remember, Classic Bread Pudding has been a favorite comfort food of mine. This low carb, gluten free bread pudding is every bit as comforting as a traditional recipe! You can use any low carb bread of your choice, but I actually prefer using leftover keto yellow cake as a base, or a mixture of keto cake and low carb bread. My favorite boxed Keto Cake Mix is King Arthur’s brand, but any keto yellow cake (made from scratch or a mix) will work in this recipe. It’s very easy to make this pudding in an Instant Pot, but baking it in an oven works just as well. Instead of traditional raisins, I sprinkled one tablespoon of black Zante currants over the pudding before cooking. They only add 1 carb per serving, while maintaining that authentic flavor (feel free to leave them out, if you wish). Whether made in an Instant Pot or in the oven, this simple classic dessert will warm your heart!

Instant Pot Keto Bread Pudding (or Oven Baked)
Makes 6 servings

4 cups low carb bread (or leftover keto yellow cake), cubed and dried out
2 large eggs, beaten
1½ cups low carb milk of choice
1/4 cup low carb brown sugar substitute, packed (use only 2 tablespoons if using cake)
1/8 teaspoon salt 
1/8 teaspoon nutmeg
½ teaspoon ground cinnamon
A pinch of mace (optional)
½ teaspoon vanilla extract
1 tablespoon black Zante currants*

1. Spray a 7-inch (1½ quart) baking dish or Bundt pan with non-stick spray or grease well with butter; set aside. If bread or cake is fresh, break into pieces or cut into cubes and spread out on a cookie sheet. Bake in a 300° oven for 10 minutes to dry out a bit before proceeding.

2. Place the bread in the greased 7-inch baking dish or Bundt pan. Whisk together the remaining ingredients, except the currants. Pour the custard mixture over the bread and let it soak in for a few minutes. Sprinkle the currants over the bread. Cover loosely with a “tin foil hat” so condensation doesn’t build up on the pudding as it cooks in the Instant Pot. (If baking in the oven, do not cover with foil.)

3. Pour 1½ cups of water into the Instant Pot. Put the pudding on a trivet and lower it into the pot. Close the lid. Set controls to PRESSURE COOK on HIGH (or Manual) for 15 minutes. Make sure the seal valve is closed and press start.

4. When the cooking is done, leave it to release pressure naturally. When the pin drops, open the pot. Lift the pudding out and remove the foil. Leave it to cool on the counter for a few minutes and, if cooked in a Bundt pan, then you may invert it onto a plate. Serve warm or chilled with whipped cream, low carb ice cream or sugar free caramel sauce.

5. Oven Baking Directions: Follow steps 1 and 2. (Do not cover pudding with foil.) Place pudding in a preheated 350° oven and bake for 30 minutes, or until custard is set but still a little wobbly in the center. Remove from oven and cool on a wire rack.

*Note: If you choose to omit the currants, you may subtract 1 g of carb from the nutritional information per serving.

IP Keto Bread Pudding

Nutritional Information per serving (1/6th of recipe): 112 calories, 3.3 g carbohydrate (0.9 g dietary fiber, 1.8 g sugars, 2 g sugar alcohols), 8.2 g total fat (1.2 g saturated fat, 0 g trans fat), 115 mg cholesterol, 176 mg sodium, 137 mg calcium, 76 mg potassium, 1 mg iron, 95 IU Vit A, 7.7 g protein. Net carbs per serving: 2.4 grams

Recipe and photos by Kathy Sheehan, copyright 2024
All rights reserved. Please do not duplicate without the author’s permission.

Wednesday, May 3, 2023

Keto Dark Chocolate Pots de Crème (No cook Chocolate Mousse)

Keto Dark Chocolate Pots de Creme

This impressive dessert may sound fancy, but it’s quick and easy to make! I love to make them for a crowd or a party because they can be made ahead of time. They’re so rich and decadent that their small size is just enough. It uses a combination of zero carb sweeteners for the best flavor and smooth texture when chilled. Instead of being overly sweet, this thick mousse is somewhere between bittersweet and semi-sweet, but you can adjust the sweetness to your own taste. This recipe makes ten, small shooter-size dessert cups.

Keto Dark Chocolate Pots de Crème (Chocolate Mousse)
Makes 10 servings

9 ounces 100% unsweetened chocolate chips (or baking chocolate, roughly chopped)
3 large eggs
20 drops monkfruit extract or stevia drops
¾ teaspoon stevia powder
2 tablespoons powdered erythritol sweetener 
1½ teaspoons vanilla extract 
A good pinch of sea salt
¾ cup almond milk, coconut milk or other low carb milk of choice
¾ cup heavy cream
½ cup allulose

1. Put milk, heavy cream, and allulose into a small saucepan and bring to a boil.

2. Meanwhile, placed the chocolate chips into a food processor or blender. Pulse to chop chocolate into small pieces.

3. Add eggs, monkfruit extract, stevia powder, powdered erythritol, vanilla and salt. Process on low until ingredients are combined.

4. While the blender or food processor is running, pour boiling hot milk mixture through the opening at the top. Process until mixture is completely smooth and all of the chocolate has melted. The hot liquid will cook the eggs.

5. Divide the chocolate mixture into individual small dishes or cups (I use shooter size dessert cups) and place in the refrigerator to cool completely, about 3-4 hours. The mixture will solidify into a rich, thick, mousse-like consistency. Serve cold, and top with whipped cream, if desired.

Shooter Size Dessert

Nutritional information per serving (no whipped topping): 218 calories, 8.2 g carbohydrate (4.5 g dietary fiber, 0.2 g sugars, 0.8 g sugar alcohols), 22.9 g total fat (14.2 g saturated fat, 0 g trans fat), 83 mg cholesterol, 49 mg sodium, 18.7 mg calcium, 24 mg potassium, 95 IU Vit A, 5.9 g protein. Net carbs per serving: 3.7 grams.

Recipe and photos by Kathy Sheehan, copyright 2023
All rights reserved. Please do not duplicate without the author’s permission. 

Monday, January 2, 2023

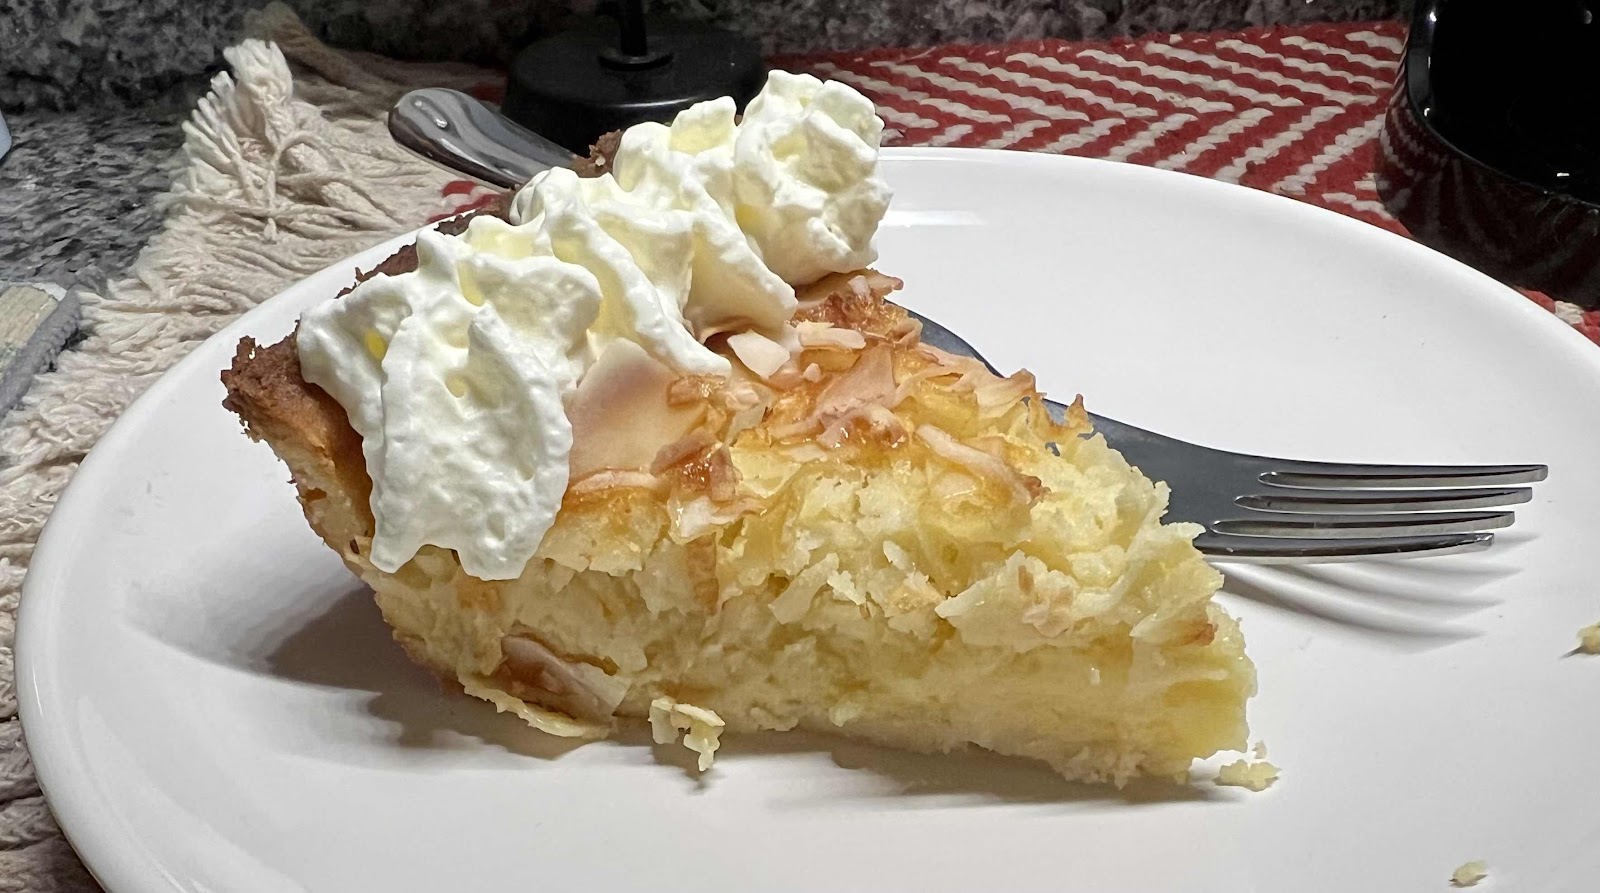
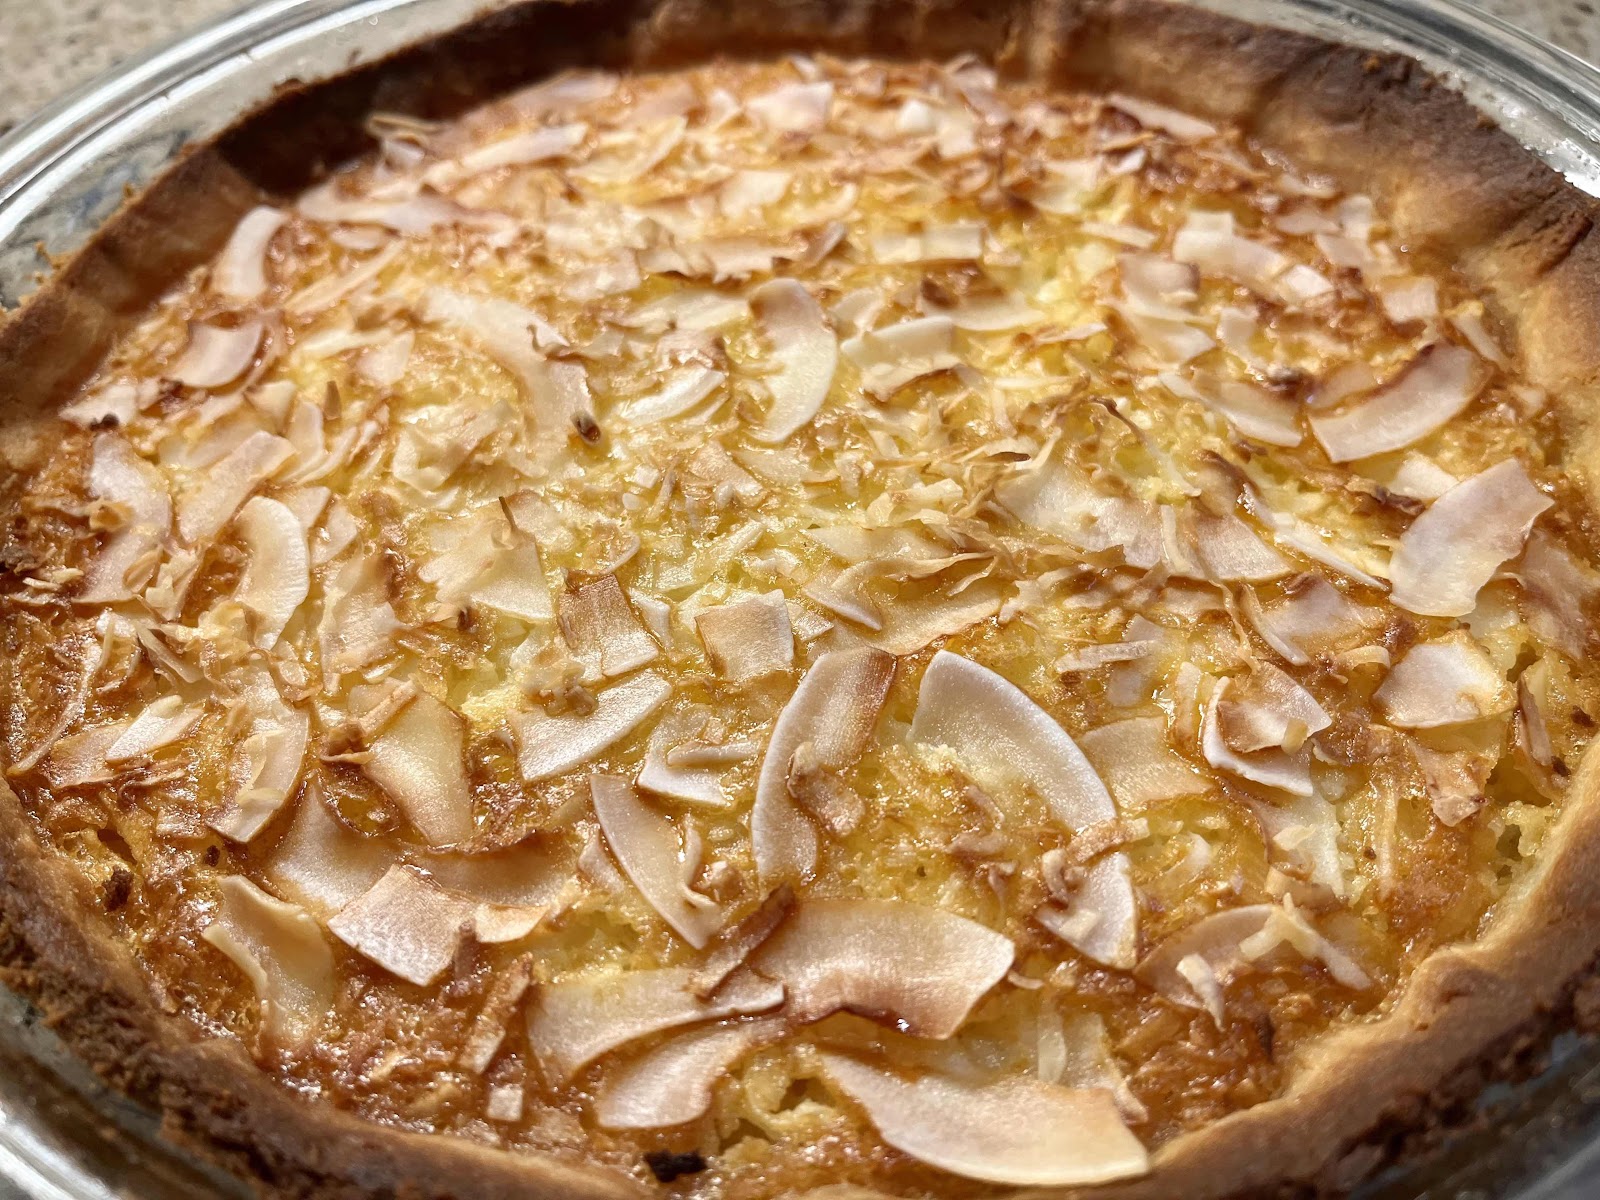
Low Carb Coconut Custard Pie (or Pudding)

Low Carb Coconut Custard Pie
My husband recently requested Coconut Custard Pie for a special dessert. It wasn’t difficult to remake a traditional Coconut Custard Pie recipe substituting low-carb ingredients. The result was spectacular! This pie can be made using your favorite low-carb piecrust, or it can be eaten as a pudding without a crust to save even more carbs. Topped with whipped cream, this is indeed a special dessert!

Low Carb Coconut Custard Pie (or Pudding)
Makes 10 servings

3 eggs, room temperature 
½ cup unsalted butter, cubed then allowed to softened slightly
1/8 teaspoon salt
½ cup allulose
1/4 cup powdered erythritol-based sweetener 
1 tablespoon coconut flour
½ teaspoon xanthan gum
1 cup low carb, unsweetened milk of choice (coconut milk works nicely in this recipe)
1 cup + 3 tablespoons flaked, unsweetened coconut
¾ teaspoon vanilla extract
One 9” low carb pie crust (your favorite recipe), par-baked for 15 minutes (optional)
Whipped Cream for serving (optional)

1. Preheat the oven to 350°F. In a large bowl, beat the eggs lightly. Cut the butter into small cubes and add to the bowl along with the salt and sweeteners. Set an electric mixer to medium speed and mix until blended. The mixture will be lumpy because of the butter, which is normal.

2. Add in the coconut flour and xanthan gum, and blend again. Add the milk, and blend again.

3. Stir in the 1 cup of unsweetened flaked coconut and vanilla. Pour the coconut custard into a buttered pie dish or a par-baked pie crust. Top with the remaining 3 tablespoons of coconut.

4. Bake on a baking sheet for 45 to 50 minutes, until firm. Let the pie cool for one hour before slicing and serving. Top with whipped cream, if desired.

Baked Low Carb Coconut Custard Pie
Nutritional Information for Filling (no crust), 1/10th of recipe: 177 calories, 4.3 g carbohydrate (1.5 g dietary fiber, 0.4 g sugars, 1.5 g sugar alcohols), 17.2 g total fat (12.2 g saturated fat, 0 g trans fat), 80 mg cholesterol, 30 mg sodium, 21.2 mg calcium, 24 mg potassium, 124 IU Vit A, 2.8 g protein. Net carbs per serving (not counting optional crust): 2.8 grams

Photos and recipe by Kathy Sheehan, copyright 2023
All rights reserved. Please do not duplicate without the author’s permission. 
Sunday, June 12, 2022

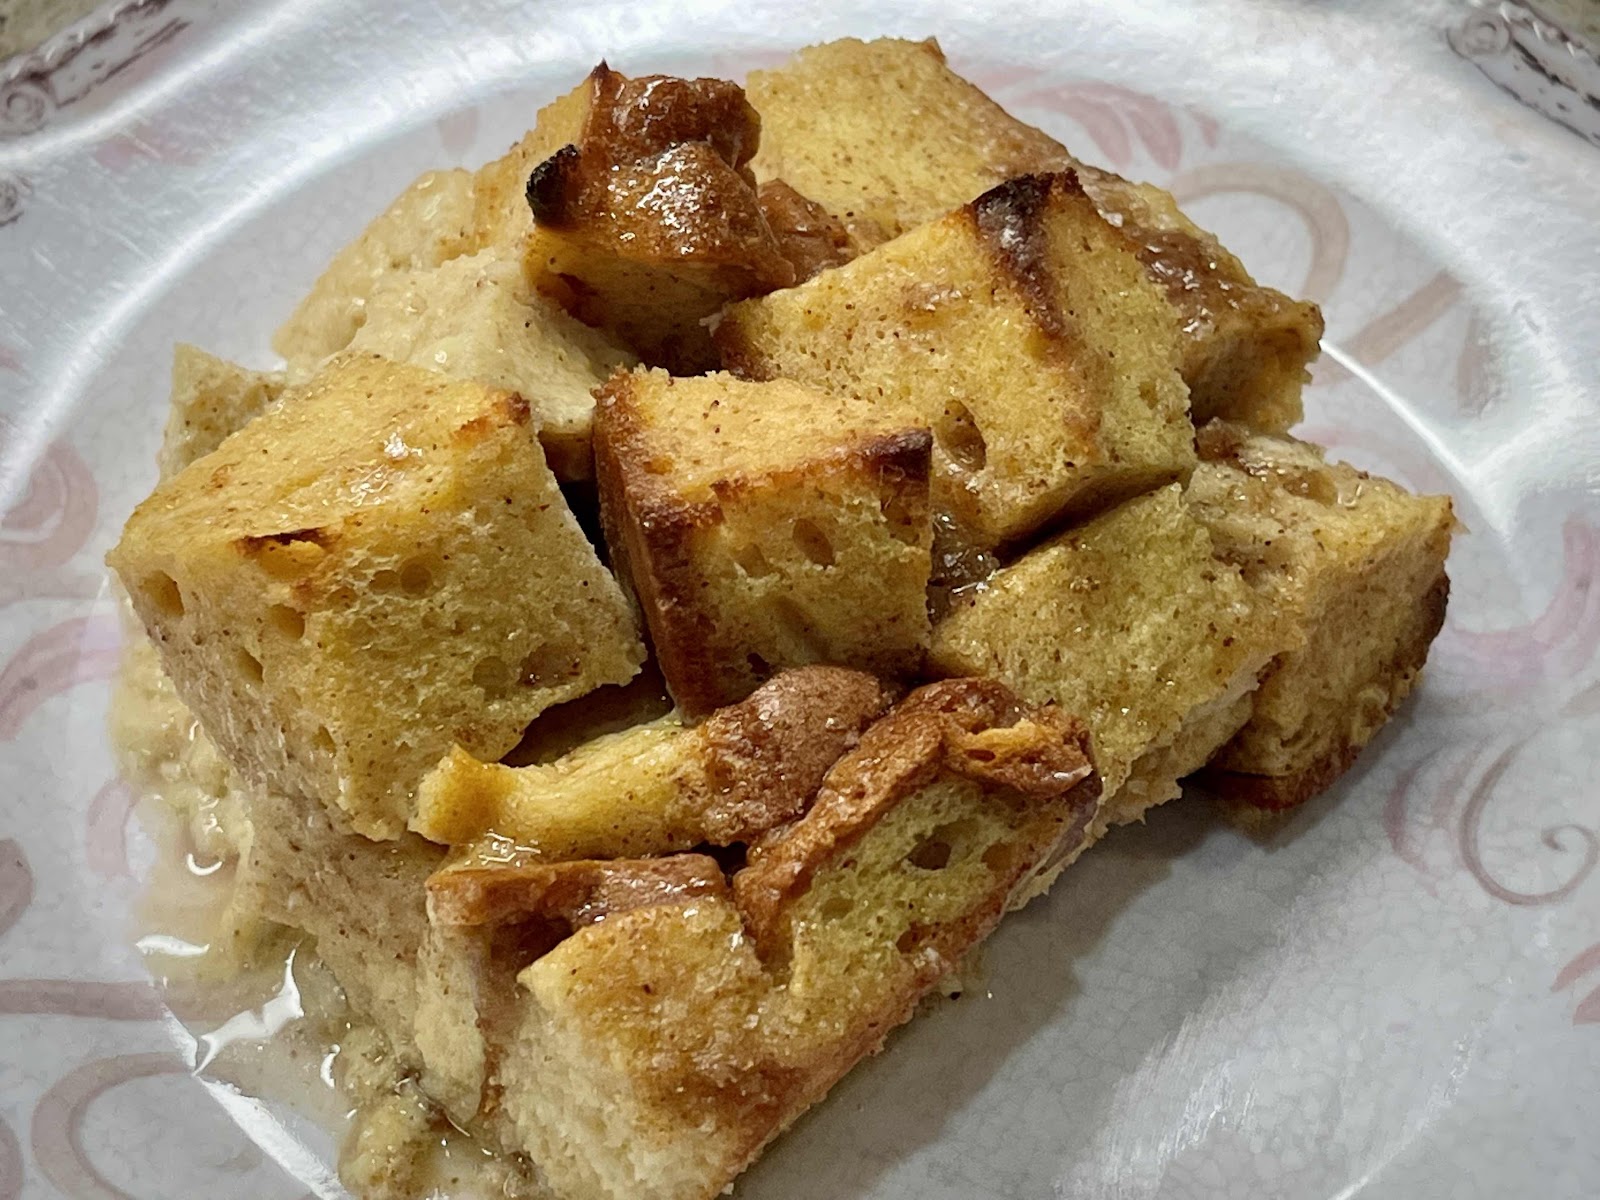
Simple Keto Bread Pudding

Simple Keto Bread Pudding
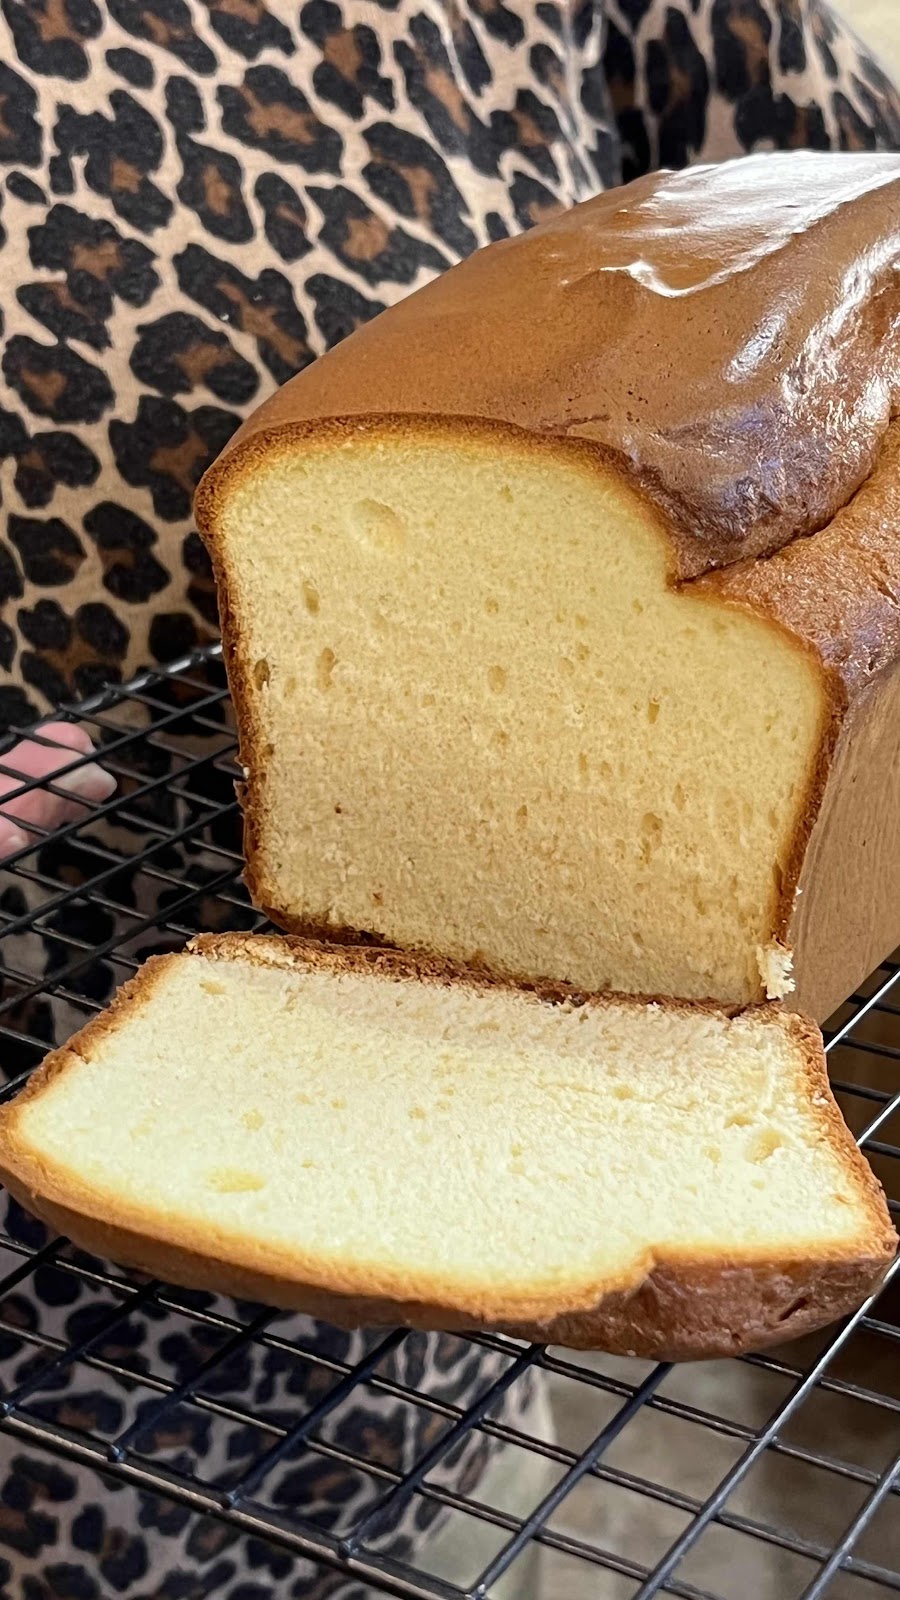
I have recently found a bread recipe that has changed my life! It’s wonderful to have bread—a really good gluten free, keto bread—to make sandwiches, French toast or to use in recipes, such as this excellent Bread Pudding. Here is a link to the keto bread recipe I highly recommend: https://www.sugarfreemom.com/recipes/keto-dairy-free-cloud-bread/. I have modified the recipe slightly, by reducing the mayonnaise to 1/4 cup instead of 1/2 cup and adding 3/4 teaspoon of yeast and 1 tablespoon hot water to the liquid allulose. The yeast is not for leavening, but for a more authentic bread flavor. You can use any homemade keto bread in this Bread Pudding recipe or use your favorite store-bought brand, although note that the nutritional information provided is based on using the Dairy Free Cloud Bread Loaf.

Dairy Free Cloud Bread Loaf
Bread pudding is one of my all-time favorite, comfort food desserts. It’s soft bread, soaked and baked in an egg custard, that can also double as a nutritious breakfast! The warm and spicy taste of cinnamon really adds a distinctive flavor. The buttery Vanilla Sauce is optional, but I think you’ll really enjoy the added richness it gives to this simple, homey dessert.

Simple Keto Bread Pudding
Makes 6 servings

Bread Pudding:
1-1/2 cups low carb milk of choice, divided
4 cups cubed keto bread, cut into 1-inch cubes
1 tablespoon unsalted butter, plus more for greasing the baking pan
1 teaspoon vanilla extract
6 tablespoons erythritol sweetener (I like LaKanto Monkfruit sweetener), divided
1 teaspoon ground cinnamon
A pinch of salt
2 large eggs, beaten

Vanilla Sauce (Optional):
2 tablespoons salted butter (or unsalted is fine too)
1 tablespoon brown sugar substitute (I like LaKanto Golden)
3/4 teaspoon vanilla extract

1. Preheat oven to 350°F. Generously butter a 4 to 6 cup baking dish and fill it with the cubed keto bread.

2. Take 1/2 cup milk and whisk in 1 tablespoon sweetener. Pour over the bread cubes and stir to coat the bread. Let the cubes absorb the milk as you make the custard.

3. In a small sauce pan over low heat, warm the remaining 1 cup milk, 1 tablespoon butter, vanilla, remaining 5 tablespoons of sweetener, cinnamon and salt. Continue cooking and stirring just until the butter melts. Remove from heat and cool.

4. Add the beaten eggs to the cooled milk mixture and whisk. Pour mixture over the bread cubes and stir to coat. Allow to sit for a few minutes, stirring occasionally, until some of the liquid is absorbed by the bread cubes. Bake for 30 minutes or until custard is set but still a little wobbly. Serve warm or at room temperature.

5. To make the optional Vanilla Sauce: In a small sauce pan, melt 2 tablespoons of salted butter over medium-high heat. Once melted, reduce to medium heat and let the butter brown a bit, swirling pan occasionally and watching carefully to prevent burning.

6. Add the tablespoon of brown sugar substitute and vanilla extract to the browned butter. Stir to combine and remove from heat. Let cool about 2 minutes, then use a whisk to stir the brown sugar and butter mixture and spoon the sauce over the top of the cooked bread pudding.

Nutritional Information for 1/6th recipe Bread Pudding (no sauce): 188 calories, 3.1 g carbohydrate (1.2 g dietary fiber, 1.4 g sugars, 2.7 g sugar alcohols), 15.5 g total fat (4.7 g saturated fat, 0 g trans fat), 159 mg cholesterol, 175 mg sodium, 65.9 mg calcium, 93 mg potassium, 1 mg iron, 147 IU Vit A, 11.6 g protein. Net carbs per serving: 1.9 grams

Nutritional Information Vanilla Sauce (1/6th recipe): 35 calories, 1.1 g carbohydrate (0 g dietary fiber, 2 g sugar alcohols), 3.8 g total fat (2.4 g saturated fat), 10 mg cholesterol, 27 mg sodium, 1.2 mg calcium, 2 mg potassium, 35 IU Vit A, 0 g protein. 

Photos and recipe by Kathy Sheehan, copyright 2022
All rights reserved. Please do not duplicate without the author’s permission. 
Wednesday, March 2, 2022

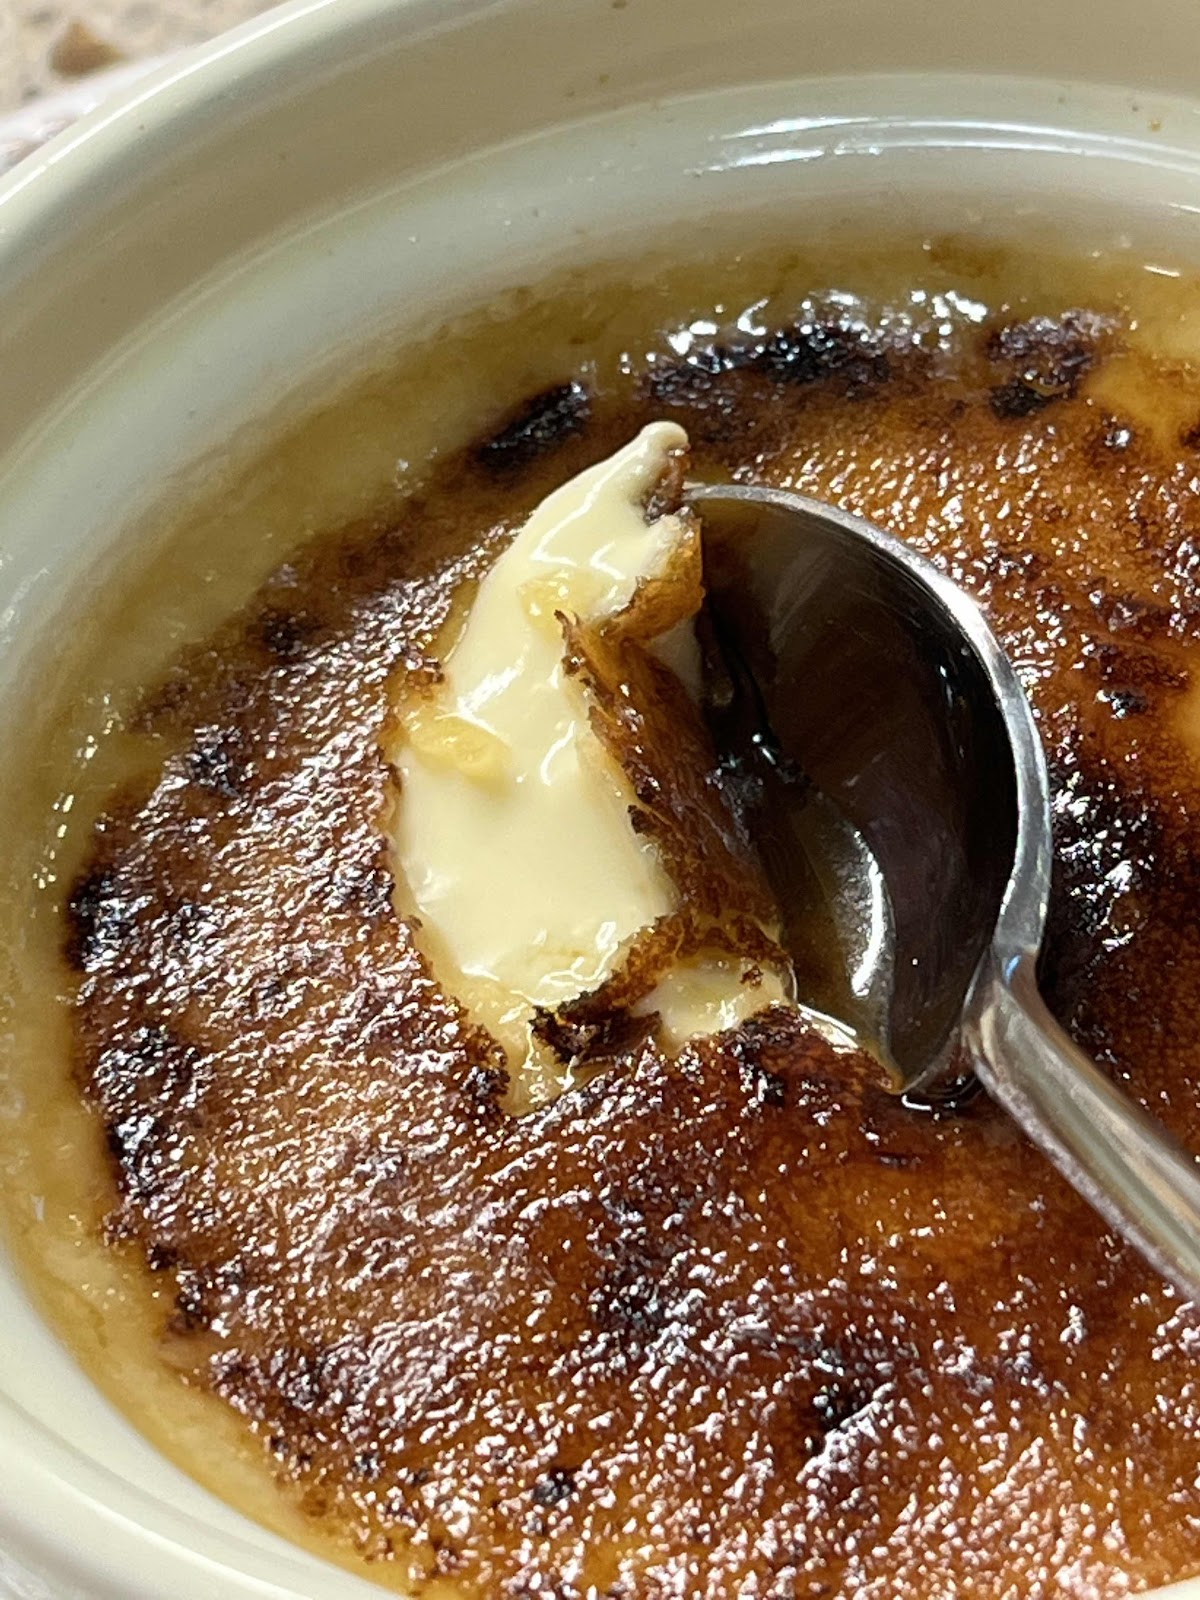
Keto Creme Brûlée

Keto Creme Brûlée
Creme Brûlée is one of my all-time favorite desserts! Before going keto, every time I’d see it on a menu, I just had to order it. I thought it was too complicated to make at home, so I never even tried. I am delighted to tell you that it is very simple, really! This elegant dessert will impress your family and friends. I suggest that if you’re making it for a mixed crowd (some low carbers and some guests that are not), go ahead and make the custards sugar free for everyone. No one will be able to tell the difference, I promise! Then, when it’s time to torch or broil the sugar topping, use LaKanto or another erythritol-based sweetener for your low carb, keto guests and regular sugar for those that do not follow a sugar free diet. Admittedly, the burnt sugar topping made with an erythritol-based sweetener doesn’t have the “hard crack” that is classic. It has a softer crack, but trust me, the burnt sugar flavor combined with the velvety custard is just as delightful and satisfying as a brûlée made in the traditional way. I worked for weeks perfecting this recipe, experimenting and testing. I had to eat a lot of brûlées until I got it just right…but someone had to do it! Enjoy the brûlée of my labors; I think you’ll be pleased.

Keto Creme Brûlée
Makes 6-8 servings (depending on the size of your ramekins)

Custard:
3 cups heavy cream, divided
1/2 cup allulose (*see notes, if you can’t find allulose)
A pinch of salt
4 egg yolks
1 whole large egg
8 drops monkfruit extract or stevia drops
2 teaspoons vanilla bean paste (or 3 teaspoons pure vanilla extract, not imitation)

Sugar topping:
6-8 teaspoons erythritol-based granulated sweetener (do not use allulose for topping, it doesn’t harden)

1. Boil about 1 to 2 quarts of water, depending on the size of your baking pan, and have it ready to use for the water bath.

2. Preheat oven to 300°F. Adjust the rack to the lower middle position.

3. Add half of the heavy cream (1 and 1/2 cups), allulose and a pinch of salt to a heavy saucepan and turn to medium high. Heat, stirring to dissolve the allulose until you see tiny bubbles forming around the edges and just beginning to simmer. While you are heating the cream mixture, place the remaining 1 and 1/2 cups of cream in the refrigerator to stay chilled.

4. As the cream is heating up, place the egg yolks, egg and monkfruit extract or stevia drops to a bowl or large glass measuring cup and whisk vigorously until well combined. (If you do not have vanilla bean paste, add 3 teaspoons of vanilla extract to the eggs and whisk.)

5. Once the cream is heated, remove from the heat and slowly pour into the egg mixture, whisking the eggs the entire time as you add the hot cream. This will temper the eggs so the custards do not “break” or scramble when baked. Add the chilled 1 and 1/2 cups of cream you set aside in the refrigerator and whisk well. Add the vanilla bean paste, if using and, once combined, pour into 6 to 8 ramekins and set inside an oven-safe baking dish. I like to use a 13” x 9” glass Pyrex baking pan but, if you don’t have one, use whatever high-sided baking pan that you have, even a roasting pan will do. Arrange the ramekins so that they are not touching and have a little space between each other.

6. Carefully pour the boiling water in the pan, about halfway up the sides of the ramekins. Place the baking pan in the preheated oven and bake for 25 to 30 minutes, or until the internal temperature reaches between 170 to 175°F. (If you are using shallow ramekins or small ramekins, the baking time should be reduced to 20 to 25 minutes.) The custard will slightly jiggle in the center when shaken. Remove the ramekins from the water bath and place on a wire rack. Leave at room temperature for 15 minutes. Place in the refrigerator for at least four hours or overnight. Once the custards are cooled sufficiently, you may cover them loosely with plastic wrap and return them to the refrigerator, until they are quite chilled and the custard is set.

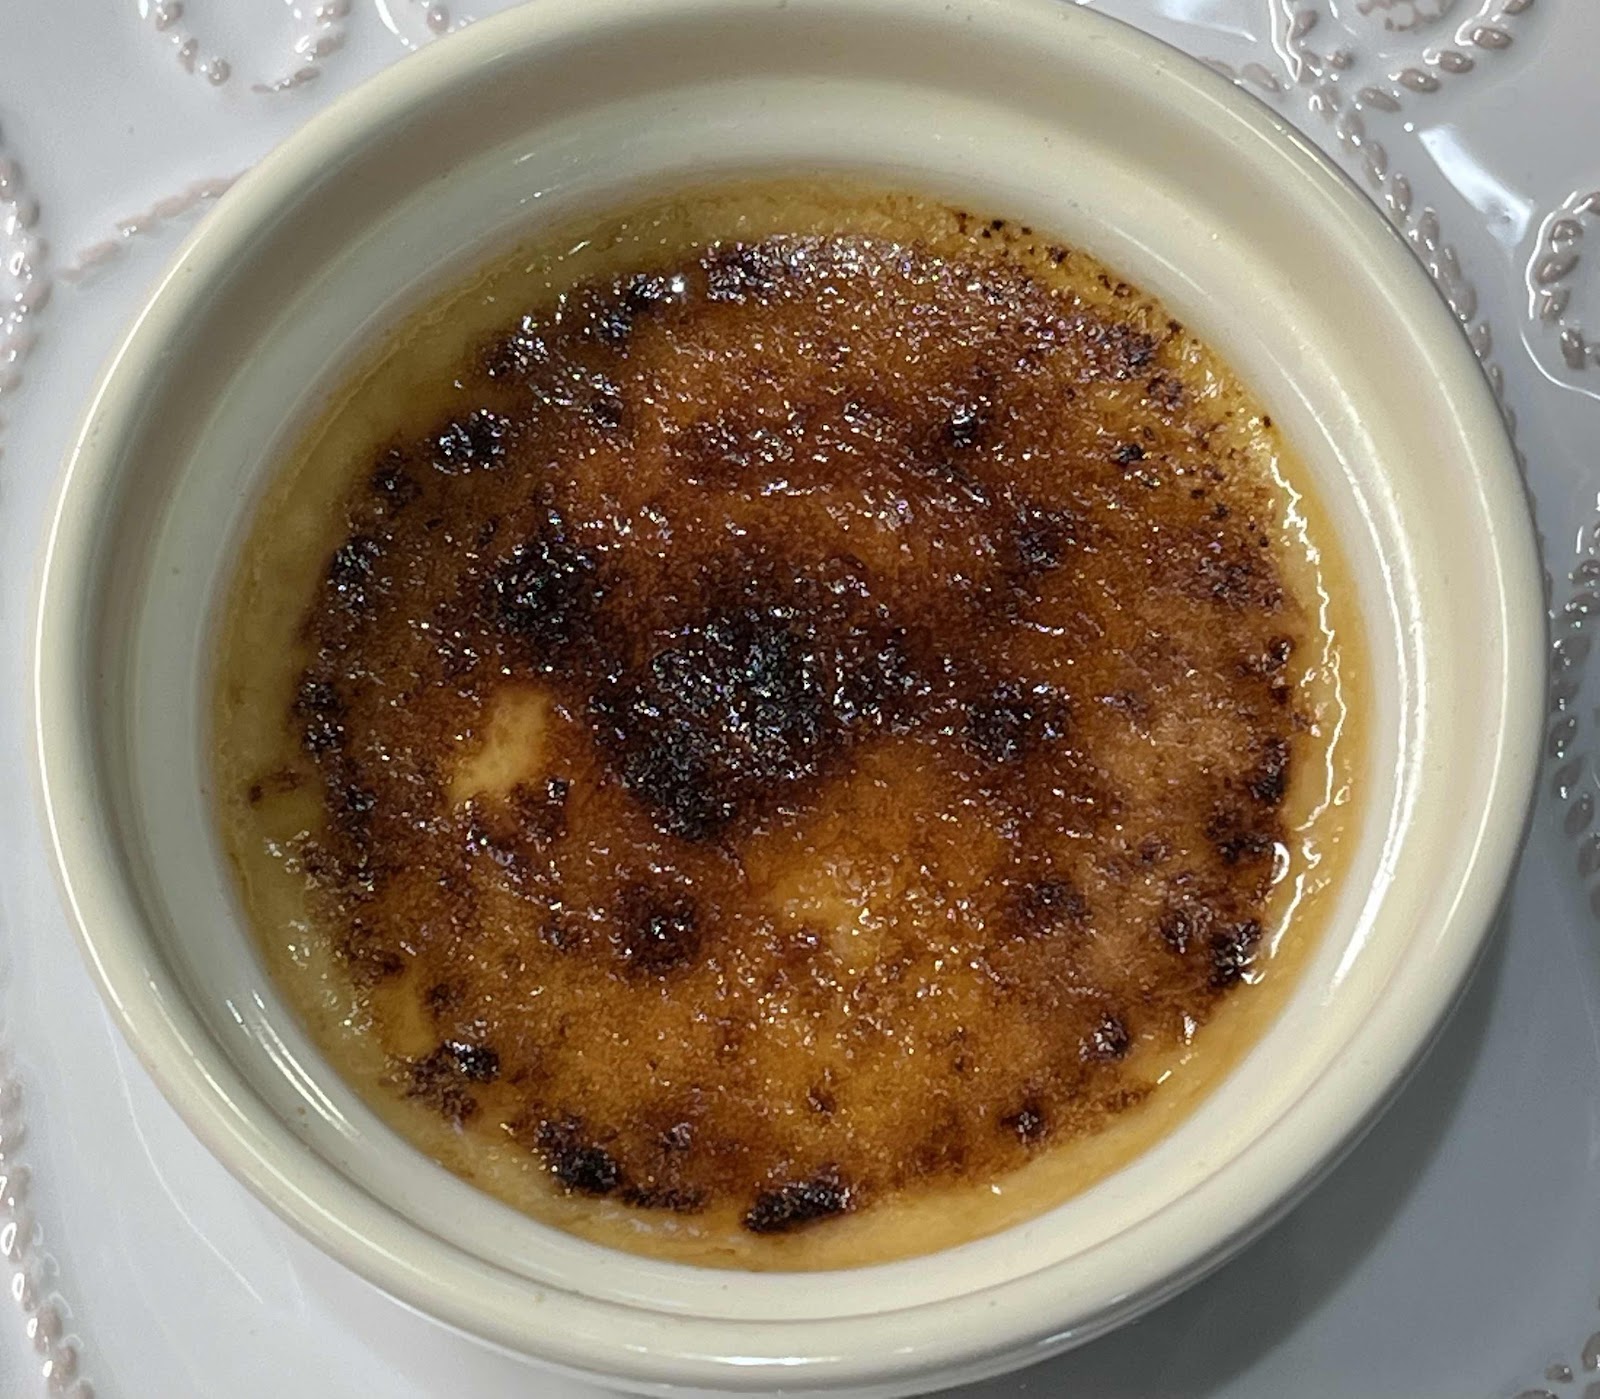
Torched Creme Brûlée
7. Once ready to serve, sprinkle 1 teaspoon of the erythritol-based sweetener evenly over the top of each ramekin, tilting it from side to side, until a thin layer covers the entire surface. Using a kitchen torch, caramelize the erythritol until browned and bubbly. Return the dessert to the refrigerator, uncovered, for 30 minutes until the sweetener has hardened. (If you do not have a kitchen torch, you may broil the brûlées in the oven for a few minutes until the sweetener is browned and caramelized. Because the broiling method heats the entire custard, you may need to cool the ramekins in the refrigerator for longer until the topping hardens and the custard is cool again.)

*Notes: Allulose or Bocha Sweet are the best sweeteners to use in the custard because they do not have the “cooling effect” of erythritol and they will not recrystalize when cooled. If you cannot find either of these products, you may use a powdered erythritol-based sweetener instead, such as Swerve Confectioners or Powdered LaKanto Monkfruit Sweetener. The cooled custard may not be as creamy, but the taste will be similar.

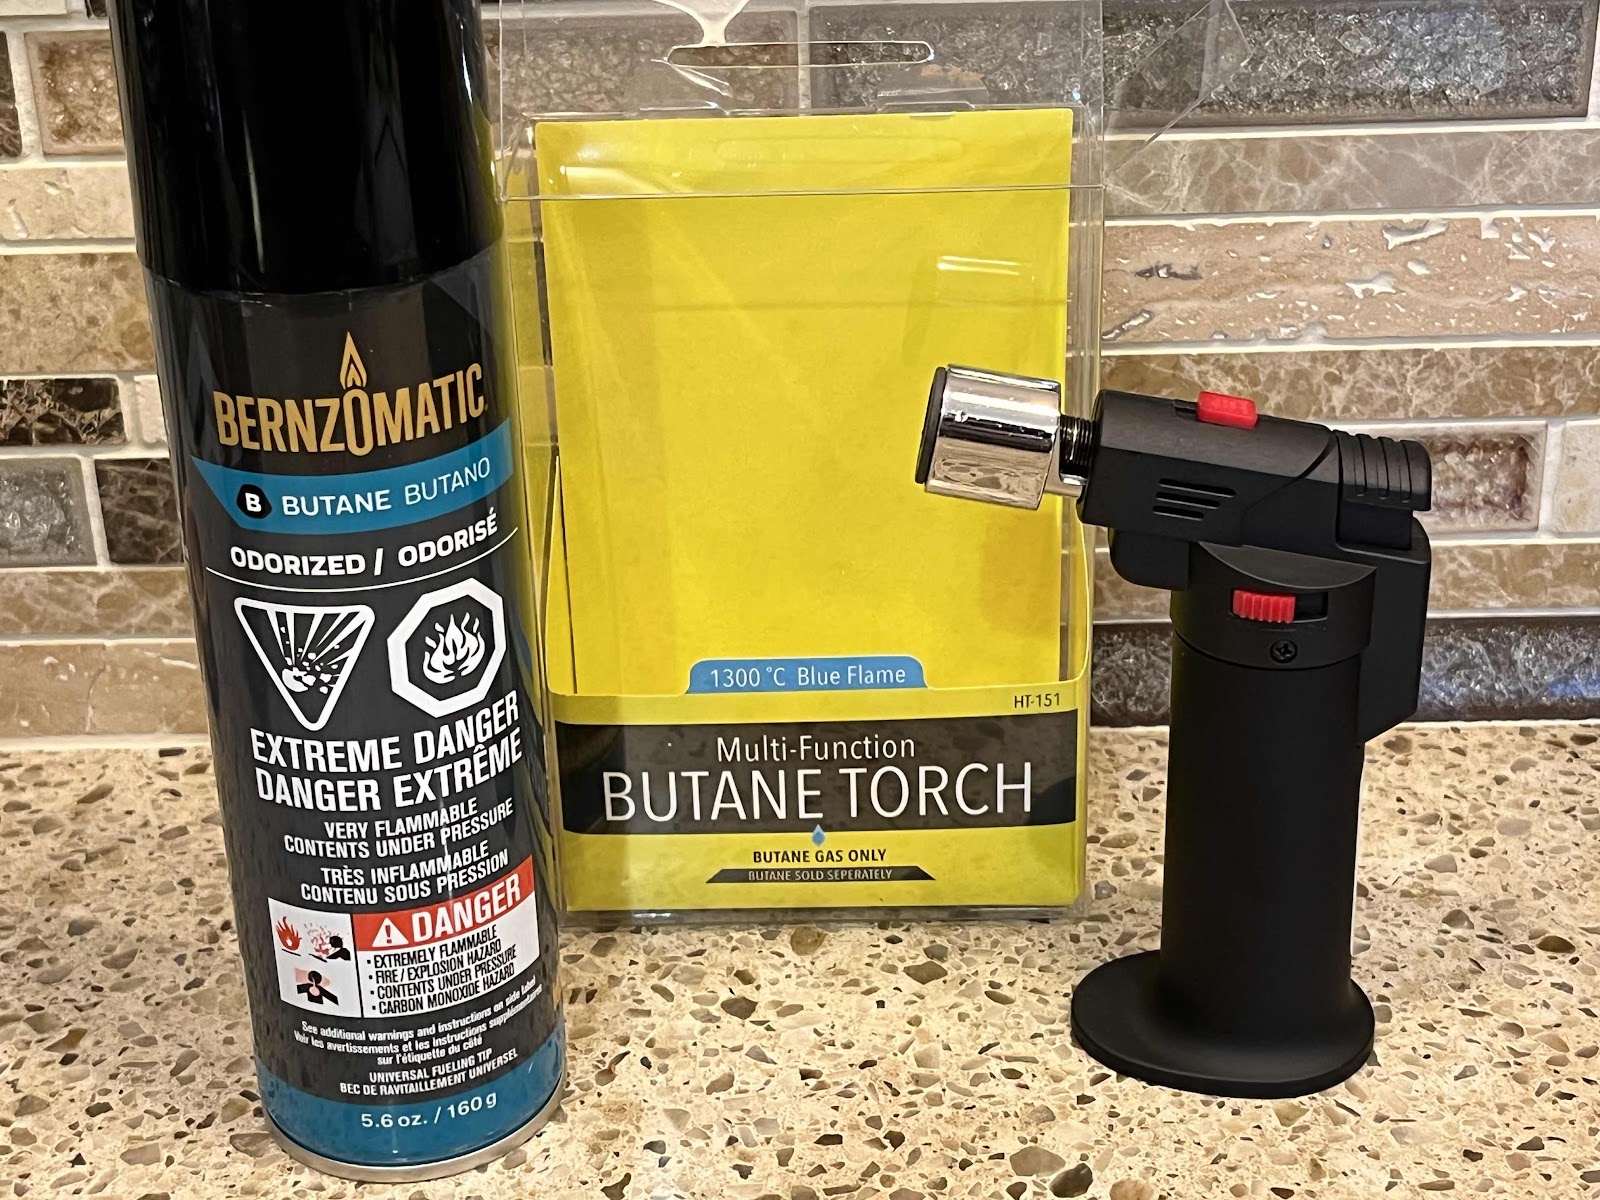
Butane Torch from Hardware store
You can purchase a Butane Torch online or at a hardware store (look in the electrical or plumbing section). Follow the directions that come with your torch to fill with butane, which usually must be purchased separately. I bought a small torch at the hardware store (see photo above). It works just as well as a larger Kitchen Torch, although I have to refill it more often if I plan to caramelize more than 3-4 desserts at a time. If you have a large family or guest list, you might be happier with a larger torch. But, since it’s just me and my husband most of the time, the small torch works fine.

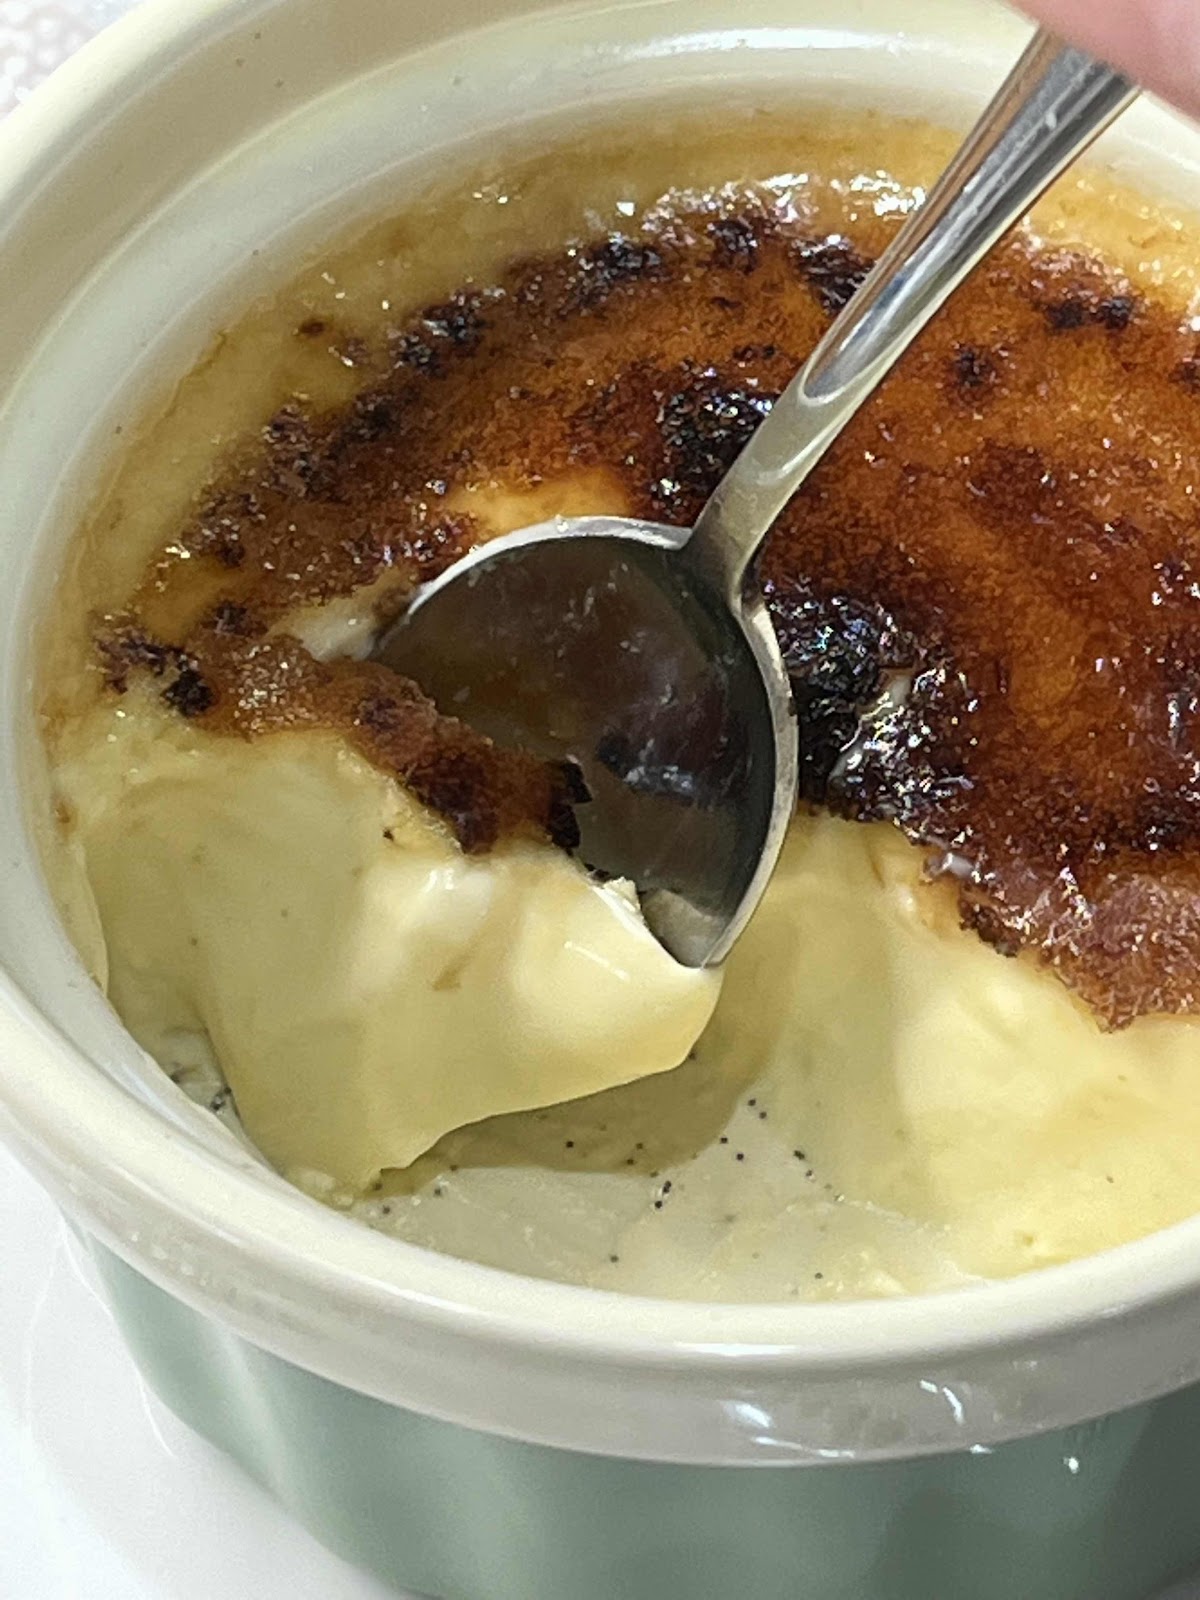
Creamy Custard of the Creme Brûlée
Nutritional Information per serving (based on recipe making 6 servings): 446 calories, 4.6g carbohydrate (0 g fiber, 0.3 g sugars, 4 g sugar alcohols), 51 g total fat (29 g saturated fat, 0 g trans fat), 329 mg cholesterol, 76 mg sodium, 19.4 mg calcium, 26 mg potassium, 536 IU Vit A, 2.8 g protein. Net carbs per serving: 0.6 grams

Photos and recipe by Kathy Sheehan, copyright 2022
All rights reserved. Please do not duplicate without the author’s permission. 
Friday, August 13, 2021

Scrambled Egg Creamy Lemon Pudding

Scrambled Egg Creamy Lemon Pudding
Another simple keto pudding recipe using the fool-proof scrambled egg method! Lemon is the perfect flavor for a warm day; it’s so refreshing and light.

Scrambled Egg Creamy Lemon Pudding
Makes 3 generous servings (or 4 slightly smaller servings)

3 eggs, scrambled in 1 tablespoon of unsalted butter
1/4 cup powdered erythritol-based sweetener (I like LaKanto Monkfruit sweetener)
1/2 cup heavy cream
1/4 cup lemon juice (fresh or bottled)
1/4 cup sour cream
2 tablespoons unsweetened almond or coconut milk
A pinch of salt
1 teaspoon lemon zest (or 2 drops lemon essential oil for low oxalate)
1/2 teaspoon liquid stevia or monkfruit extract
1/4 teaspoon lemon extract (or to taste)
3/4 teaspoon unflavored gelatin powder
3/4 teaspoon xanthan gum

1. In a skillet, melt the 1 tablespoon of butter and add your whisked eggs to scramble. Stir and cook until the eggs no longer look wet and glossy. Spoon the scrambled eggs into a blender.

2. Add the remaining ingredients and blend on high, scraping the sides of the blender occasionally, until the mixture is completely smooth. It may look like the mixture is curdling at the beginning, but keep blending and it will smooth out. Taste and adjust sweetening and lemon flavoring, if needed to suit your taste. (I like mine tart!)

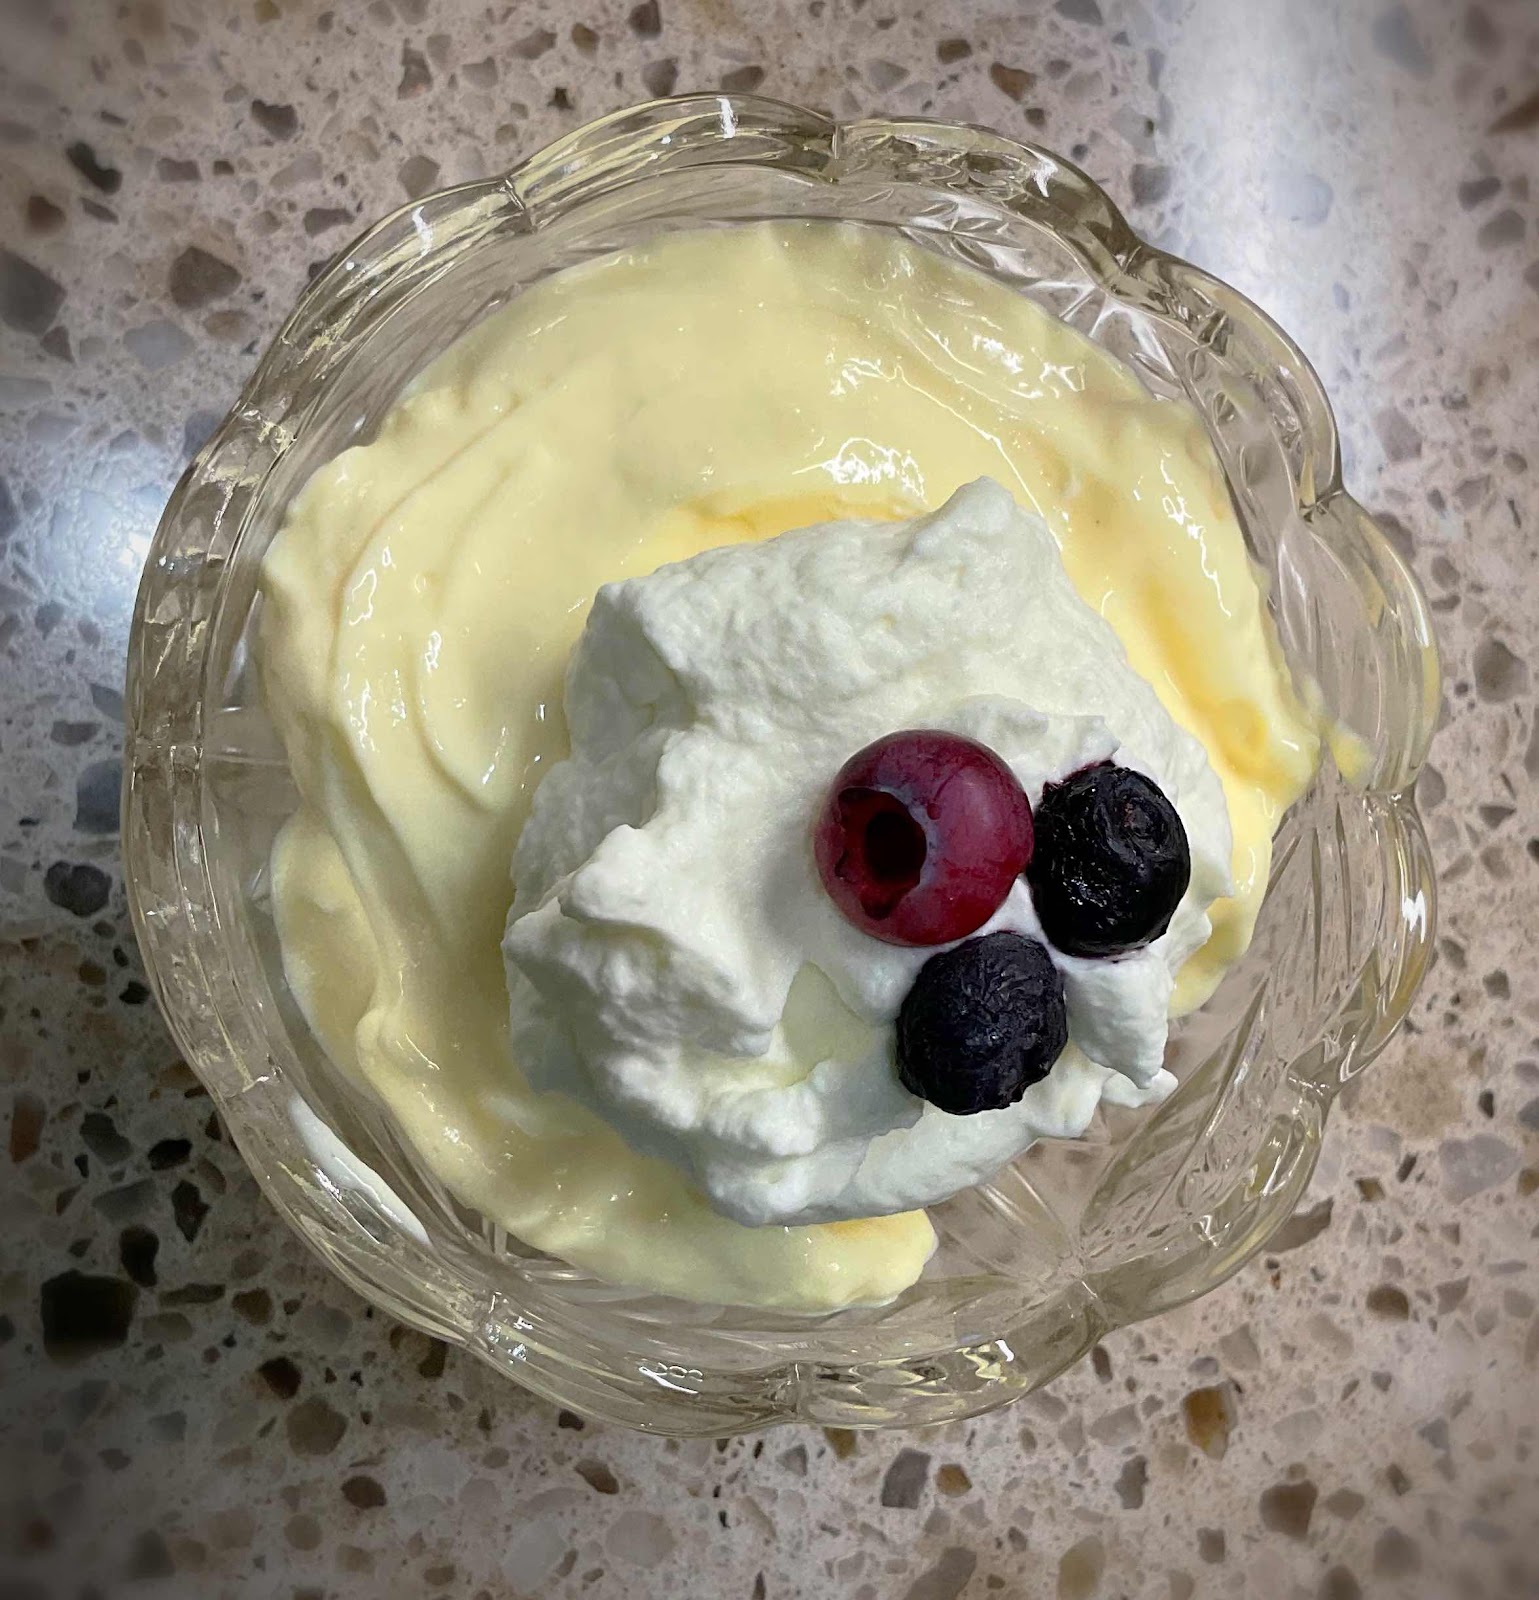
3. Pour into three ramekins or serving dishes and refrigerate for at least 3 hours, or overnight is even better. The longer it sets, the thicker your pudding will be. Enjoy with a dollop of whipped cream and berries (optional). This pudding can be stored in the refrigerator for up to 5 days.

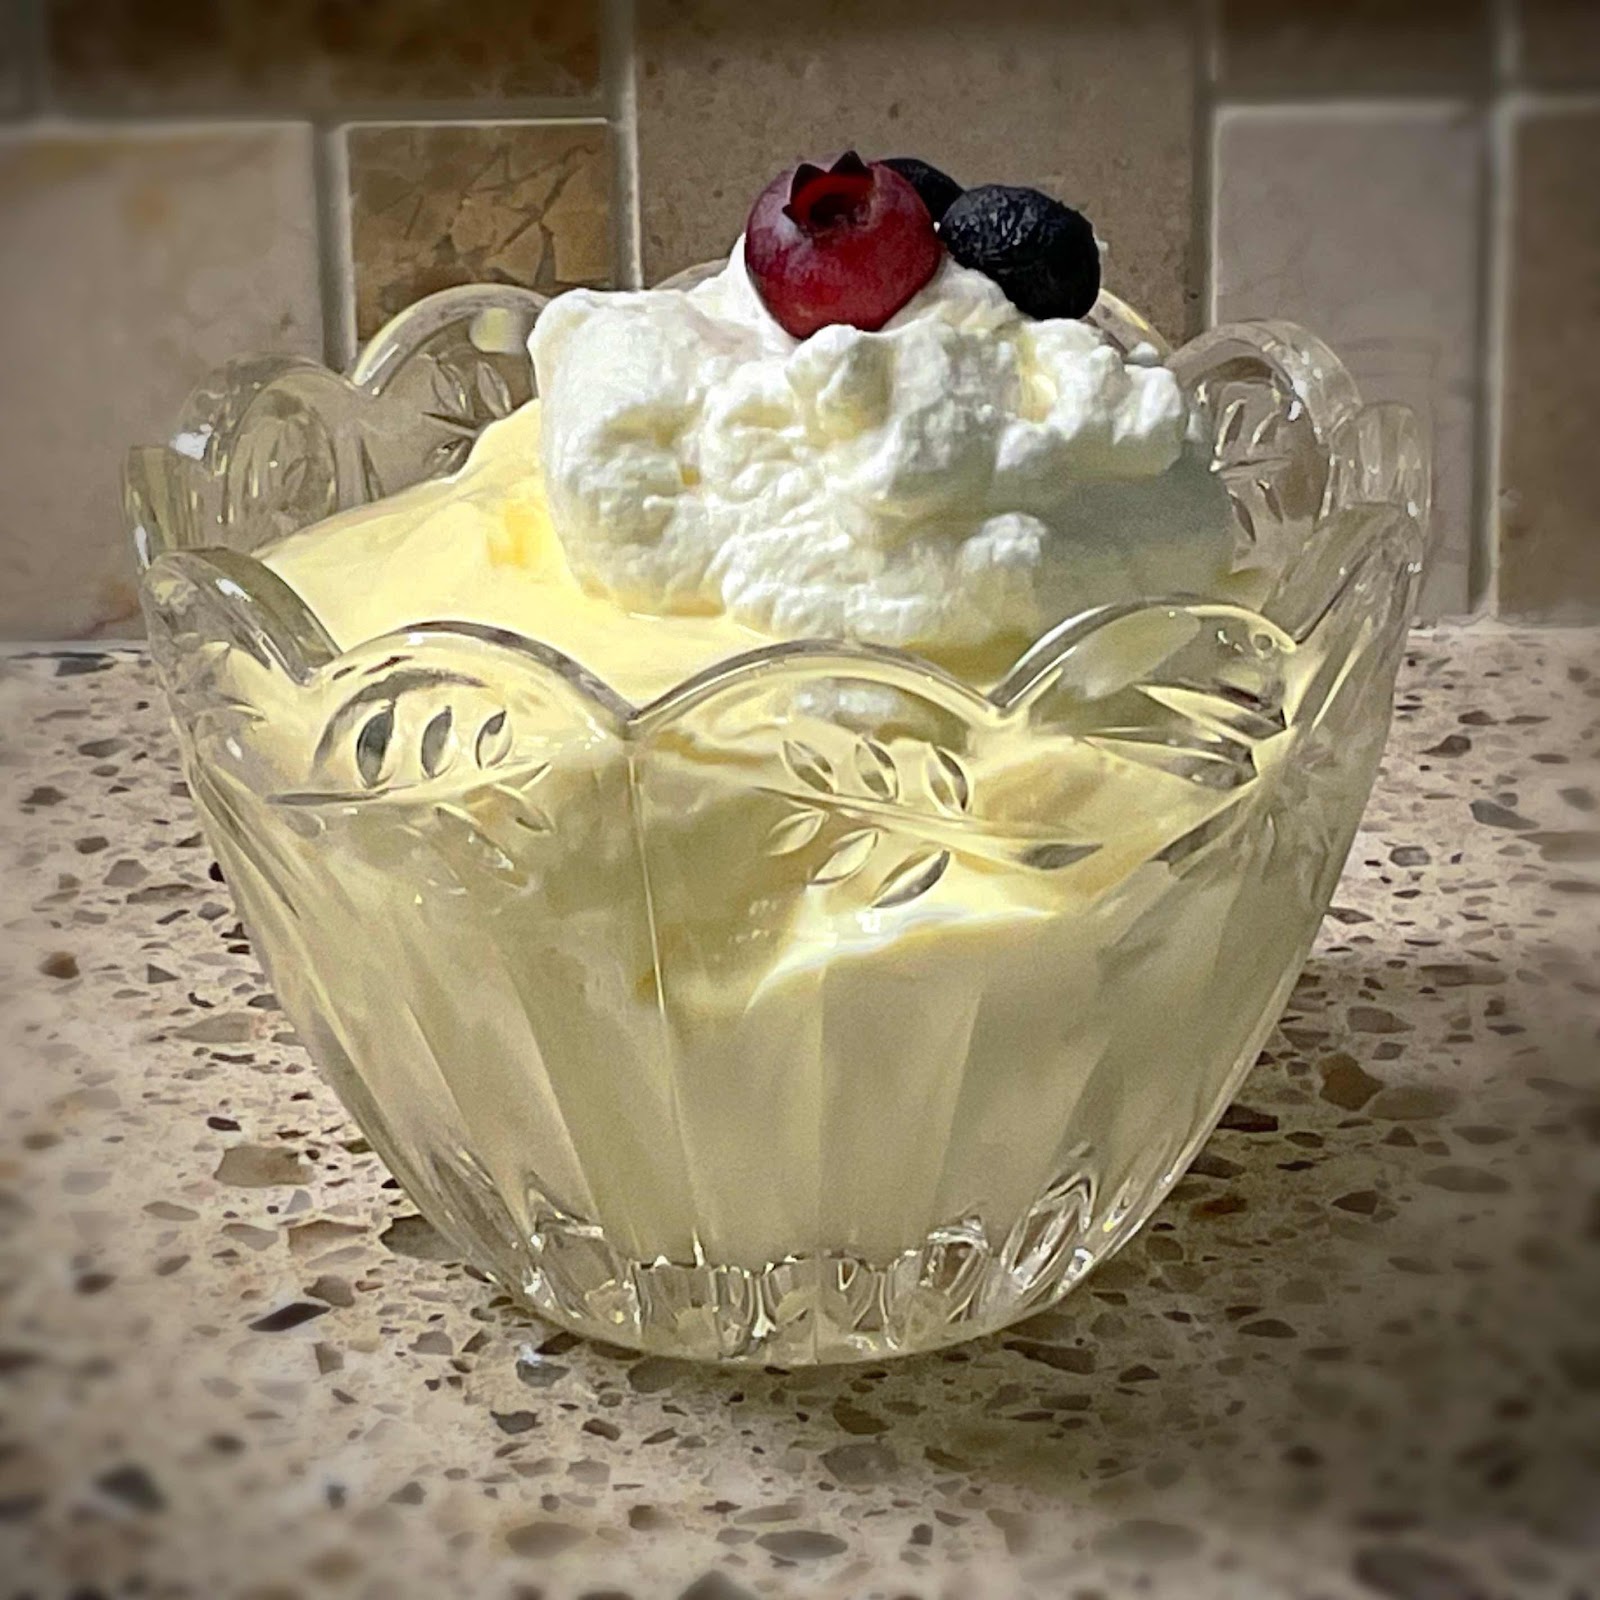
Top View of Cream Lemon Pudding
Nutritional Information per serving (based on 3 servings): 210 calories, 3.8 g carbohydrate (0.3 g dietary fiber, 0.6 g sugars, 1 g sugar alcohols), 23.2 g total fat (13.9 g saturated fat, 0 g trans fat), 70 mg cholesterol, 60 mg sodium, 26.1 mg calcium, 52 mg potassium, 10 mg Vit C, 232 IU Vit A, 1.1 g protein. Net carbs per serving: 2.5 grams

Photos and recipe by Kathy Sheehan, copyright 2021
All rights reserved. Please do not duplicate without the author’s permission. 
Saturday, July 3, 2021

Scrambled Egg Coconut Cream Pudding

Scrambled Egg Coconut Cream Pudding
A new flavor of Keto Scrambled Egg Pudding! Coconut Cream…and you won’t miss the crust. If you haven’t tried scrambled egg pudding yet, because the idea of scrambling eggs to make pudding sounds strange, don’t be skeptical. All the ingredients in this pudding, and the final thick and creamy dessert, is exactly the same as if you were to make homemade pudding in a saucepan on the stovetop. The only difference is the technique is so much easier! Don’t forget that this delightful pudding makes an excellent breakfast, too. I like to keep some in my refrigerator for a quick, grab-and-go meal on a busy morning.

Scrambled Egg Coconut Cream Pudding
Makes 6 generous servings

8 eggs, scrambled in 2 tablespoons of unsalted butter
1 cup heavy cream
1 cup unsweetened coconut milk
1/2 cup powdered erythritol sweetener 
1/2 teaspoon liquid coconut-flavored stevia (or 1/2 teaspoon stevia or monkfruit extract + 1/4 teaspoon coconut extract)
1/2 teaspoon coconut extract (or to taste)
1/2 teaspoon vanilla extract
A pinch of salt
1 1/2 teaspoons unflavored gelatin powder
1 1/2 teaspoons xanthan gum
1/2 cup unsweetened shredded coconut

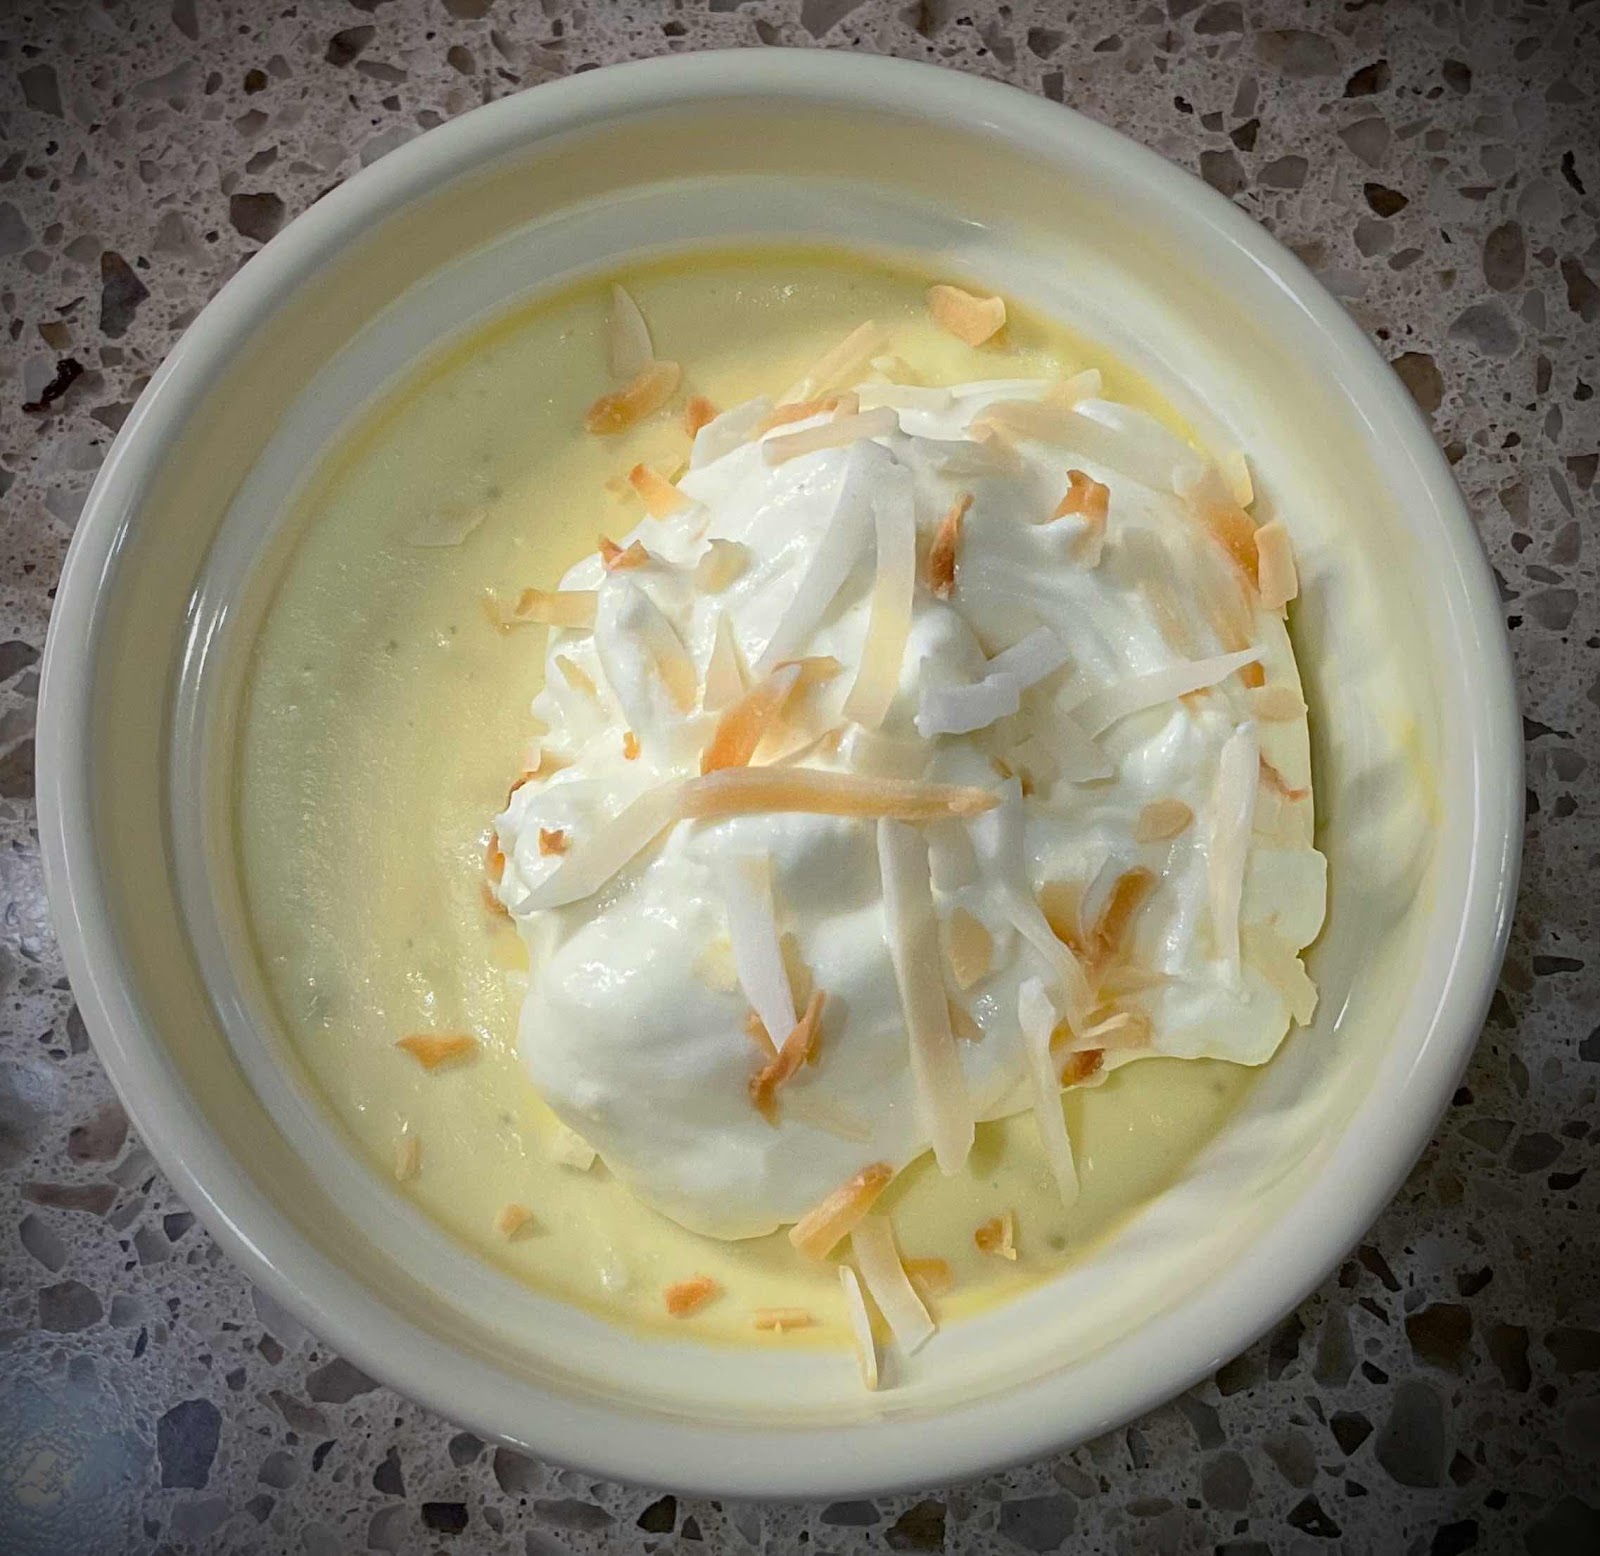
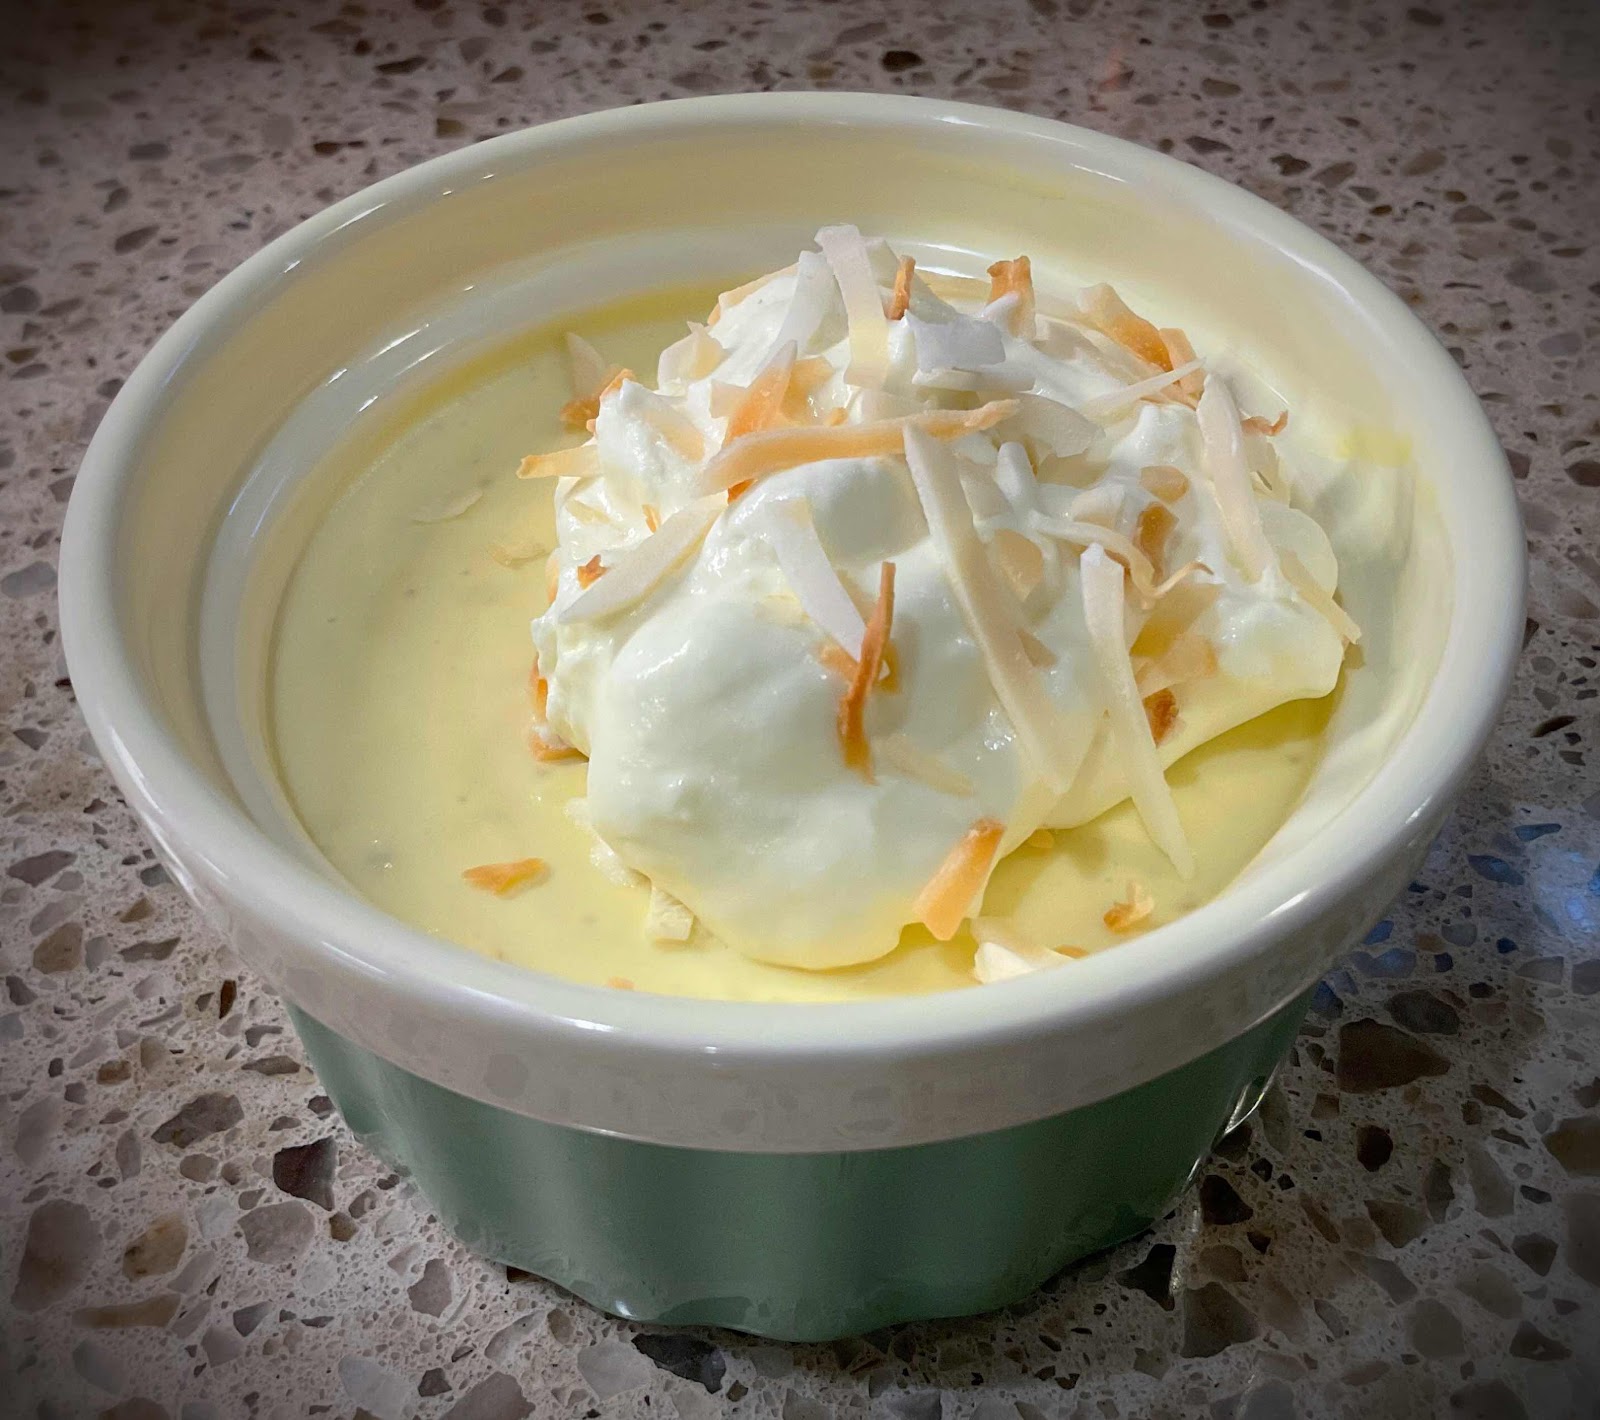
Optional toppings: whipped cream and toasted coconut

1. In a large skillet, melt the unsalted butter and scrambled the eggs until no longer wet and glossy. Spoon into a blender.

2. Add the remaining ingredients, except the shredded coconut, and blend on high until completely smooth, scraping down the sides occasionally. Taste and adjust sweetness and coconut flavor, if needed.

3. Scrape down the sides and add the coconut. Pulse or blend on low just long enough to break up the coconut into smaller pieces and distribute evenly throughout the pudding. Pour into 6 serving dishes or ramekins and refrigerate for at least 3 hours, but overnight is even better. The longer the pudding is allowed to set, the thicker it will be. Can be stored in the refrigerator for up to 5 days.

Keto Scrambled Egg Coconut Cream Pudding (alternate view)
Nutritional Information per serving (no toppings): 310 calories, 3 g carbohydrate (0.9 g dietary fiber, 0.5 g sugars, 0.7 g sugar alcohols), 30.1 g total fat (17.5 g saturated fat, 0 g trans fat), 311 mg cholesterol, 163 mg sodium, 55.2 mg calcium, 95 mg potassium, 1 mg iron, 326 IU Vit A, 9.2 g protein. Net carbs per serving: 2.1 grams

Photos and recipe by Kathy Sheehan, copyright 2021
All rights reserved. Please do not duplicate without the author’s permission.
Wednesday, June 2, 2021

Keto Scrambled Egg Pudding (using fewer eggs)

Scrambled Egg Milk Chocolate Pudding
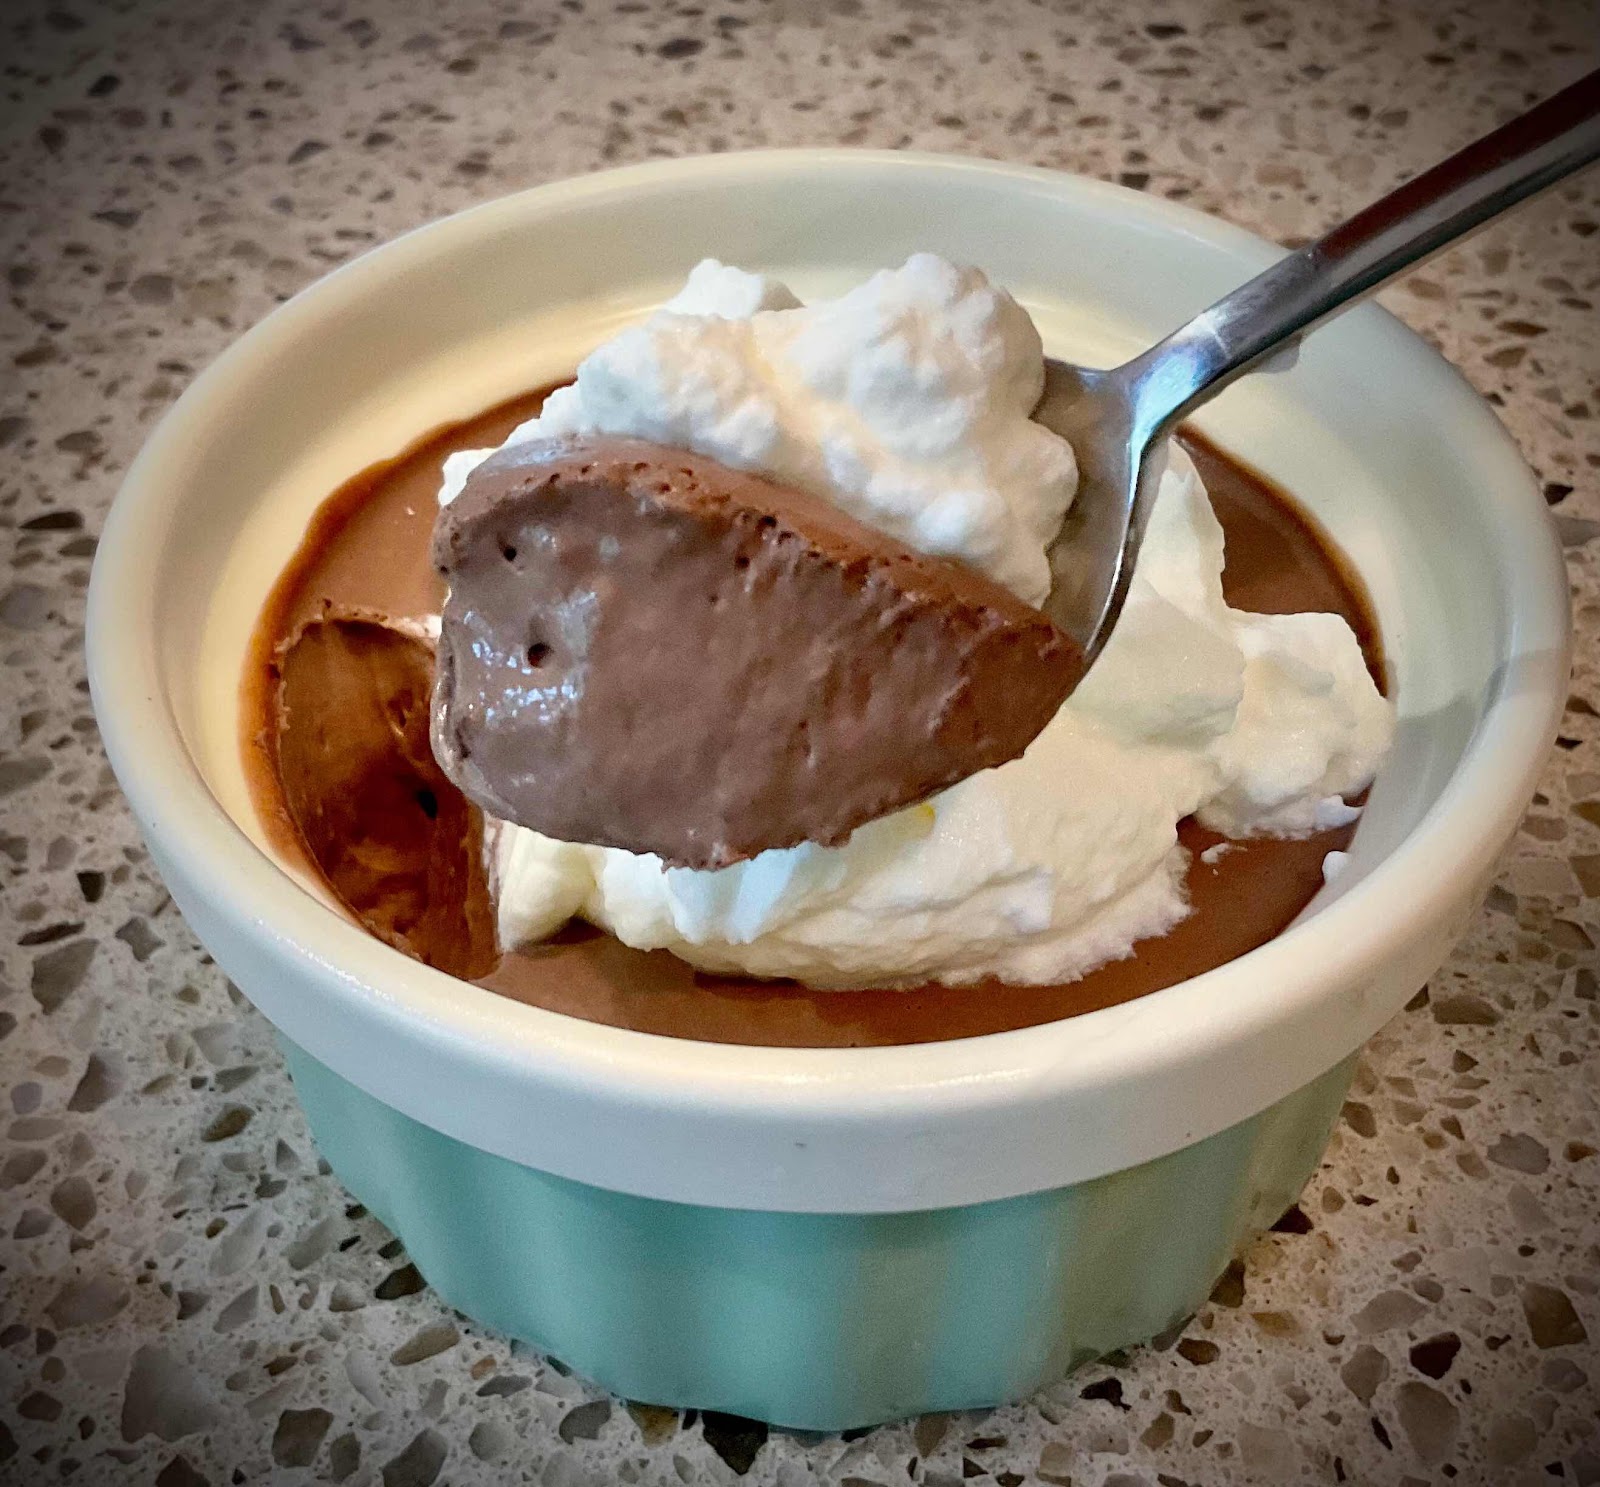
Pudding for breakfast? YES! This is Scrambled Egg Pudding and makes a delicious, low carb breakfast or dessert. I make mine using fewer eggs, but it thickens up just as well as recipes using many more. By scrambling the eggs beforehand and using a blender, this method is so much easier than the traditional way of making pudding. No more standing at the stove carefully stirring (and stirring)… just put all of the ingredients in the blender and blitz until smooth!

Keto Scrambled Egg Milk Chocolate Pudding
Makes 6 generous servings

8 eggs, scrambled in 2 tablespoons unsalted butter
1 cup heavy cream
1 cup coconut milk (or other low carb nut milk of choice)
1/4 cup unsweetened cocoa powder
1/2 cup powdered erythritol sweetener
1/4 teaspoon stevia powder (or more erythritol to taste)
1/2 teaspoon liquid chocolate monkfruit or stevia extract (or 1/2 tsp monkfruit or stevia + an additional 1/4 tsp chocolate extract)
1/2 teaspoon chocolate extract
1/2 teaspoon vanilla extract
A pinch of salt
1-1/2 teaspoons unflavored gelatin powder
1-1/2 teaspoons xanthan gum

1. Place your scrambled eggs into a blender. Add the remaining ingredients and blend on high until smooth in texture. If needed, scrape down sides of blender until all of the ingredients are blended and completely smooth. Taste and adjust the sweetness as desired.

2. Divide the pudding evenly between six ramekins or dessert dishes. Refrigerate until set, at least 3 hours, but overnight is even better. The longer the pudding sets, the thicker it will be. Store uncovered in the refrigerator for up to 4 days.

Nutritional Information per serving (about 3/4 cup): 280 calories, 4.7 g carbohydrate (1.7 g dietary fiber, 0.6 g sugars, 1.3 g sugar alcohols), 26.9 g total fat (14 g saturated fat, 0 g trans fat), 311 mg cholesterol, 193 mg sodium, 118 mg calcium, 152 mg potassium, 2 mg iron, 311 IU Vit A, 9.7 g protein. Net carbs per serving: 3 grams

Scrambled Egg French Vanilla Pudding
Keto Scrambled Egg French Vanilla Pudding
Makes 6 servings

8 eggs, scrambled in 2 tablespoons unsalted butter
1 cup heavy cream
3/4 cup coconut milk (or other low carb nut milk of choice)
1/2 cup powdered erythritol sweetener
1/4 teaspoon stevia powder (or more erythritol to taste)
1/2 teaspoon liquid monkfruit or stevia extract
2 teaspoons vanilla extract
1/4 teaspoon caramel extract (optional)
A pinch of salt
1-1/2 teaspoons unflavored gelatin powder
1-1/2 teaspoons xanthan gum
1/4 teaspoon vanilla powder or the seeds scraped from one vanilla bean (optional)

1. Follow the directions as described in the Milk Chocolate Pudding recipe above, but stirring in the vanilla powder or seeds from a vanilla bean at the end, after blending until smooth. Pour into ramekins or dishes and refrigerate until set.

Nutritional Information per serving: 270 calories, 2.2 g carbohydrate (0.2 g dietary fiber, 0.4 g sugars, 1.3 g sugar alcohols), 26.4 g total fat (14 g saturated fat, 0 g trans fat), 311 mg cholesterol, 156 mg sodium, 47 mg calcium, 96 mg potassium, 1 mg iron, 311 IU Vit A, 8.8 g protein. Net carbs per serving: 2 grams

Photos and recipes by Kathy Sheehan, copyright 2021
All rights reserved. Please do not duplicate without the author’s permission.
Wednesday, May 26, 2021

Keto Baked Fudge (adapted from The Garden’s recipe, Tulsa OK)

Keto Baked Fudge
The Garden Tea Room in Tulsa, Oklahoma has long been closed (it was located in Utica Square until 1995). The Garden was quite the social hub. It was the site of daily afternoon tea, wedding showers, bridesmaid luncheons (including my own) and fashion shows. But no one who has ever been there will forget their famous Baked Fudge! The gooey, seriously fudgy custard-like cake that had a wafer-thin, crunchy layer on top was so rich and decadent that even after all these years I still dream about it! While rummaging through old papers, I happened upon their Baked Fudge recipe from a newspaper article I had tucked away and forgotten. The traditional recipe called for 2 cups of sugar and flour for a total of over 70 carbs and 700 calories a serving! (Definitely a no-no!) So I experimented in my kitchen to come up with this “ketofied” version that tastes almost exactly and has the same crunchy top/creamy bottom texture, just like the original! If you know what I’m talking about and miss this amazing dessert, or if you’re trying it for the first time, this revamped keto recipe will make your chocolate dreams come true!

Keto Baked Fudge
Adapted from The Garden Tea Room’s recipe
Makes 6 servings

4 large eggs
3/4 cup erythritol sweetener (Must be erythritol-based to achieve a crunchy top. Xylitol, stevia or allulose will not work. I used LaKanto Monkfruit sweetener.)
6-8 drops of monkfruit extract or stevia, or to taste
1 cup unsalted butter, melted and cooled (2 sticks)
A pinch of salt
4 tablespoons unsweetened cocoa powder
2 tablespoons coconut flour
2 teaspoons vanilla extract
3/4 cup pecans, broken into large pieces* (optional, see notes)

1. Preheat oven to 325 degrees Fahrenheit. In a small bowl, whisk together the cocoa powder, coconut flour and salt; set aside.

2. In a large bowl with an electric mixer, beat the eggs until light and fluffy. Add the sweeteners and beat to incorporate. Slowly pour the melted butter and vanilla extract into the bowl while the mixer is on low until combined. Add the cocoa powder and coconut flour mixture to the batter and mix briefly until the dry ingredients are incorporated.

3. Fold in the pecans and divide the batter equally between 6 ramekins. Place the ramekins into a larger baking dish and pour hot water into the pan (enough to come 1/2 inch to 1 inch up the sides of the ramekins. Carefully slide the baking pan into the preheated oven.

4. Bake for 40-50 minutes until the top is just slightly firm to the touch and the custard isn’t quite fully set. Do not overbake. The fudge will have the consistency of firm custard and the top will crisp up as it cools. Serve warm with a dollop of whipped cream, if desired. This is best served on the day it’s made, but it can be stored at room temperature for 1 day or refrigerate for longer. To reheat, microwave on high for about 8-10 seconds before serving, just until slightly warmed.

*Note: To reduce the calories, carbs and fat a bit, you can omit the pecans, but they are traditional to the original recipe.

Keto Baked Fudge (top view)
Nutritional Information per serving (with pecans): 435 calories, 6.7 g carbohydrate (3.3 g dietary fiber, 0.6 g sugars, 2 g sugar alcohols), 44.5 g total fat (21.9 g saturated fat, 0 g trans fat), 205 mg cholesterol, 67 mg sodium, 42 mg calcium, 168 mg potassium, 1 mg iron, 340 IU Vit A, 6.8 g protein. Net carbs per serving: 3.4 grams

Nutritional Information per serving (no pecans): 341 calories, 4.9 g carbohydrate (2 g dietary fiber, 1.1 g sugars, 2 g sugar alcohols), 34.7 g total fat (21.1 g saturated fat, 0 g trans fat), 205 mg cholesterol, 67 mg sodium, 32.5 mg calcium, 112 mg potassium, 1 mg iron, 338 IU Vit A, 5.5 g protein. Net carbs per serving: 2.9 grams

Photos and recipe by Kathy Sheehan, copyright 2021
All rights reserved. Please do not duplicate without the author’s permission. 
Monday, August 31, 2020

Low Carb Banana Pudding Donuts with Whipped Cream Topping

Low Carb Banana Pudding Donuts with Whipped Cream Topping
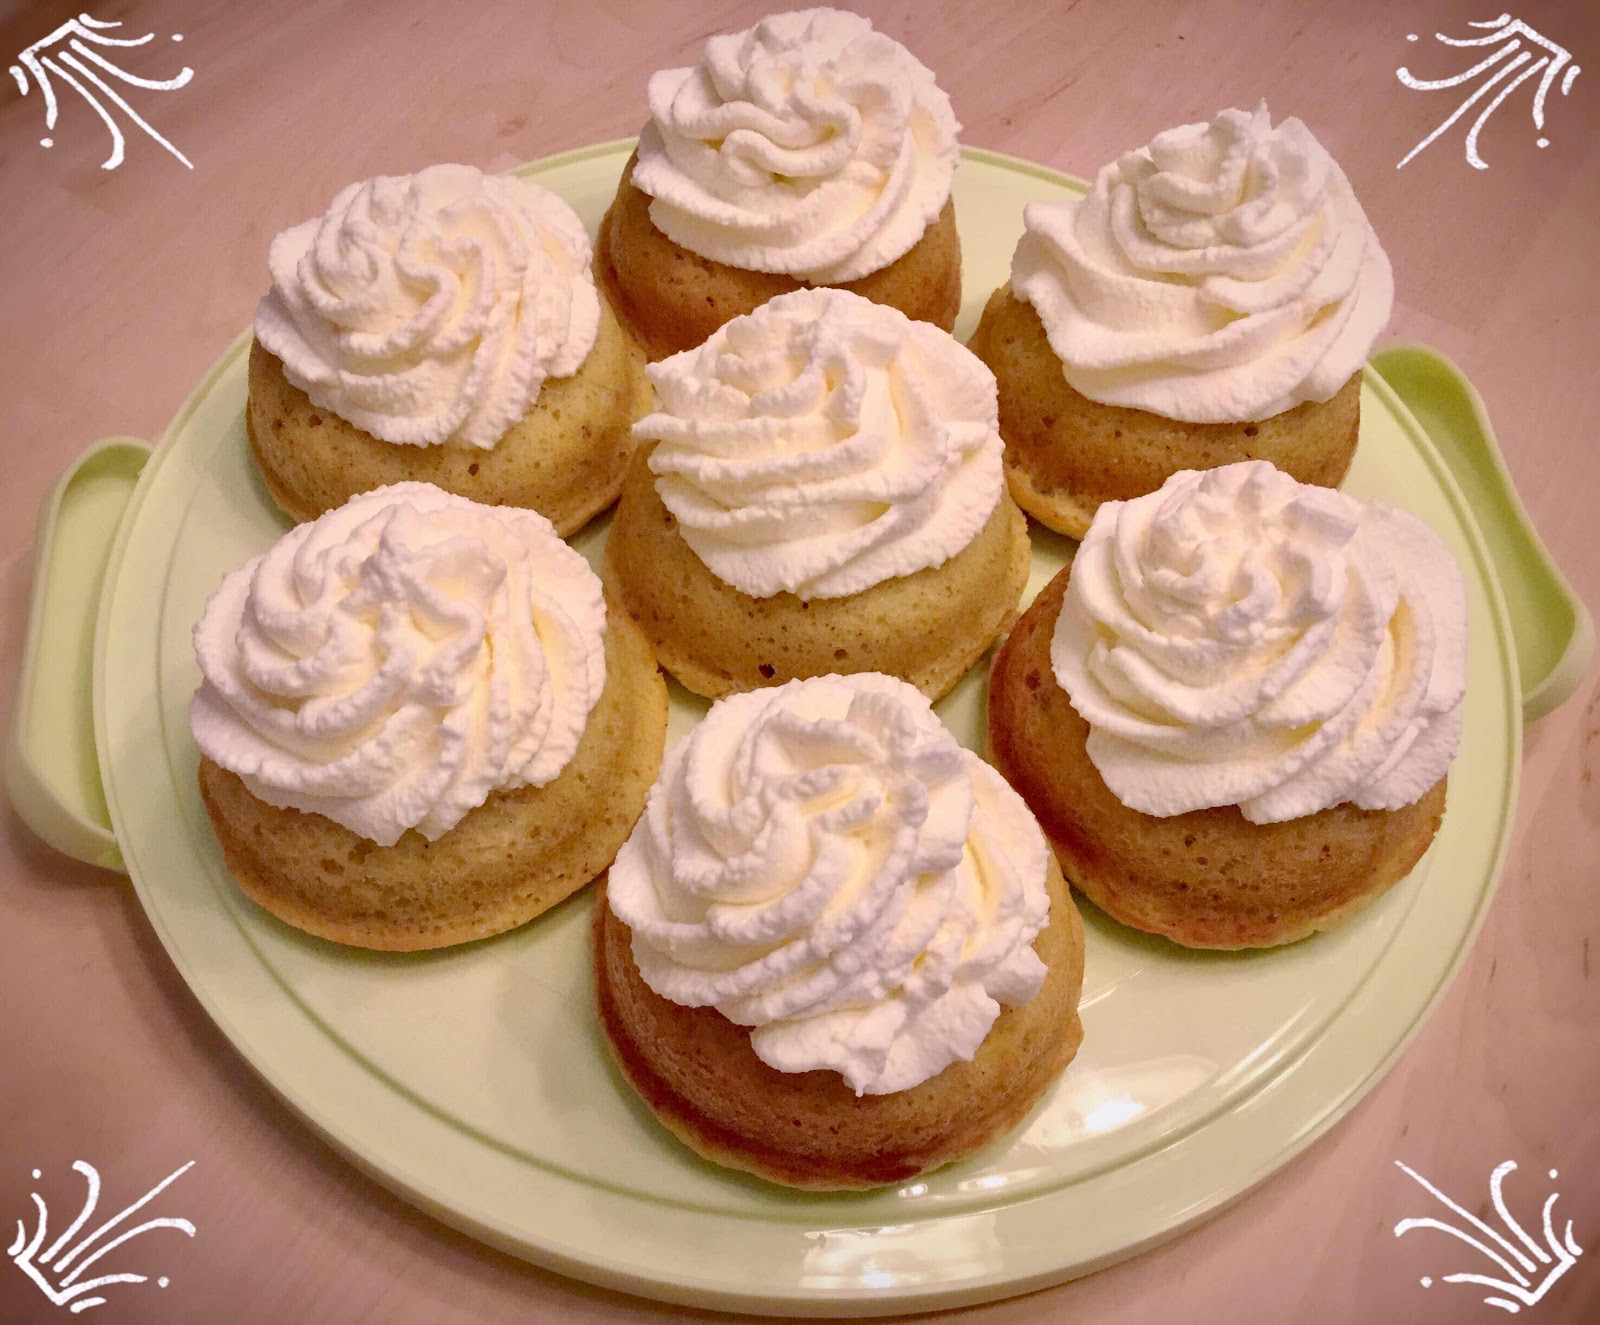
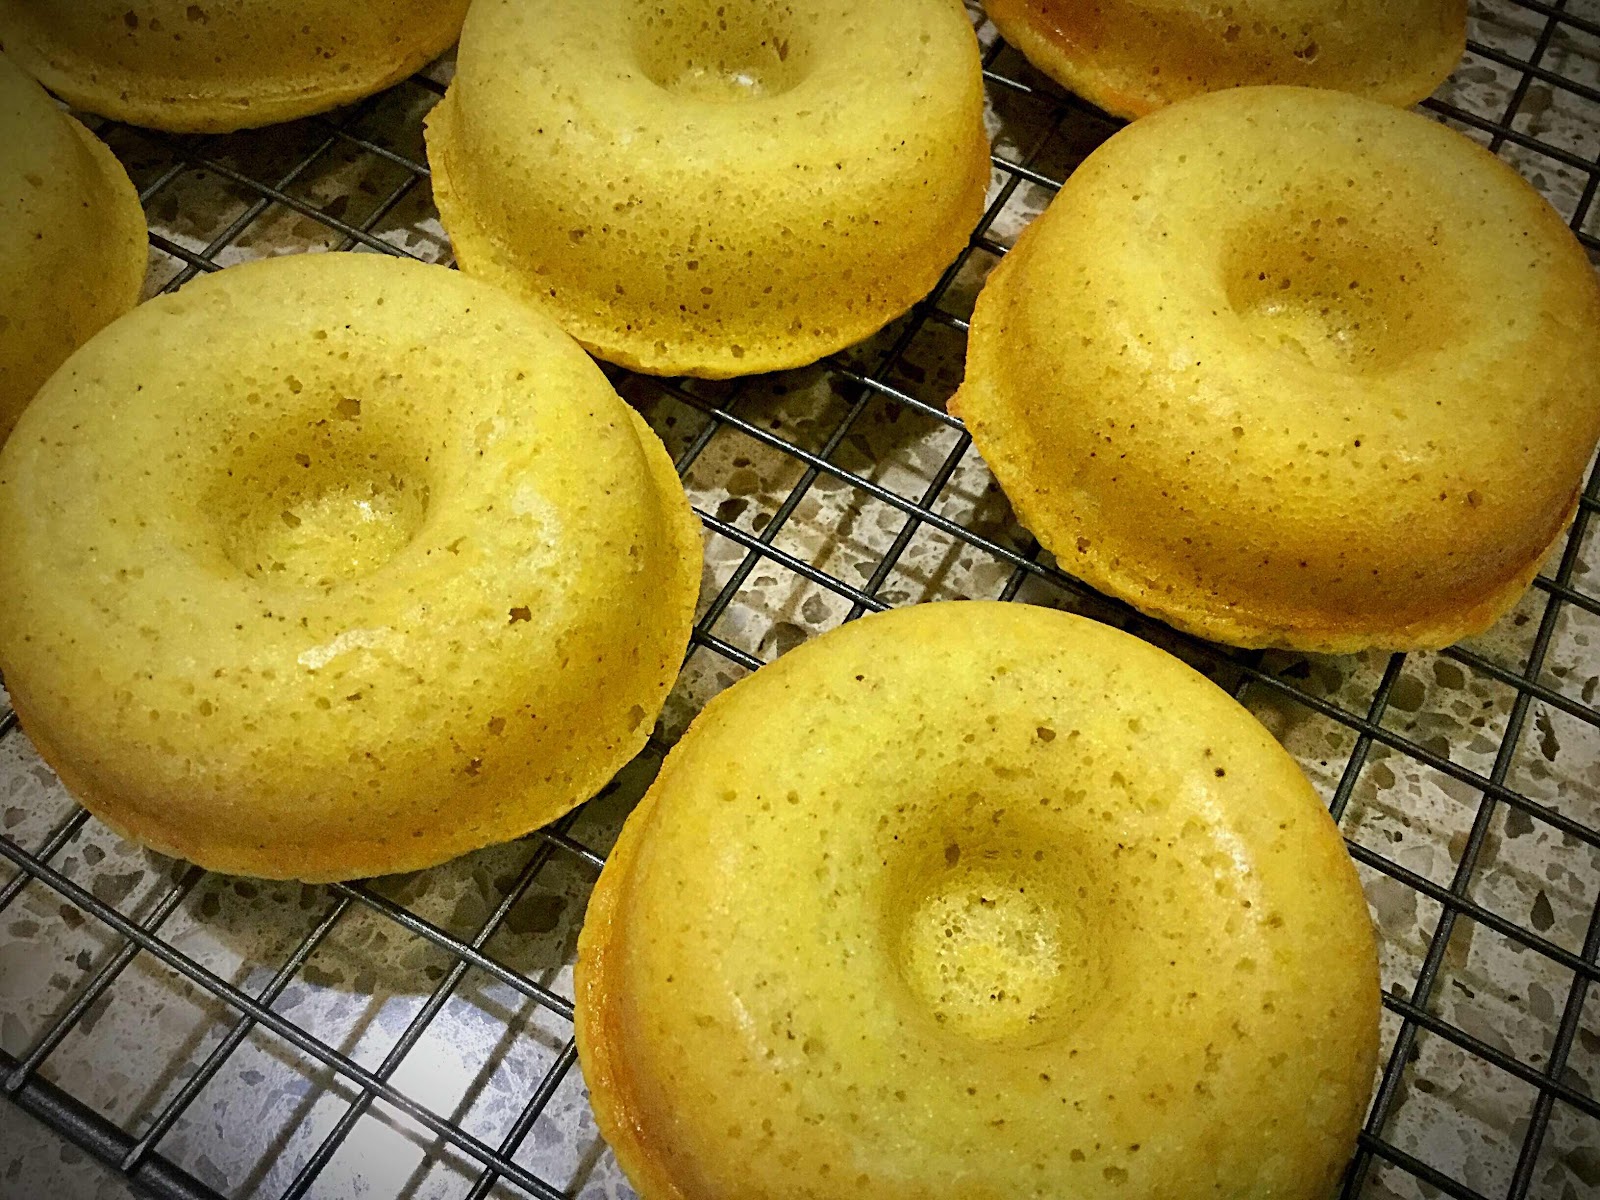
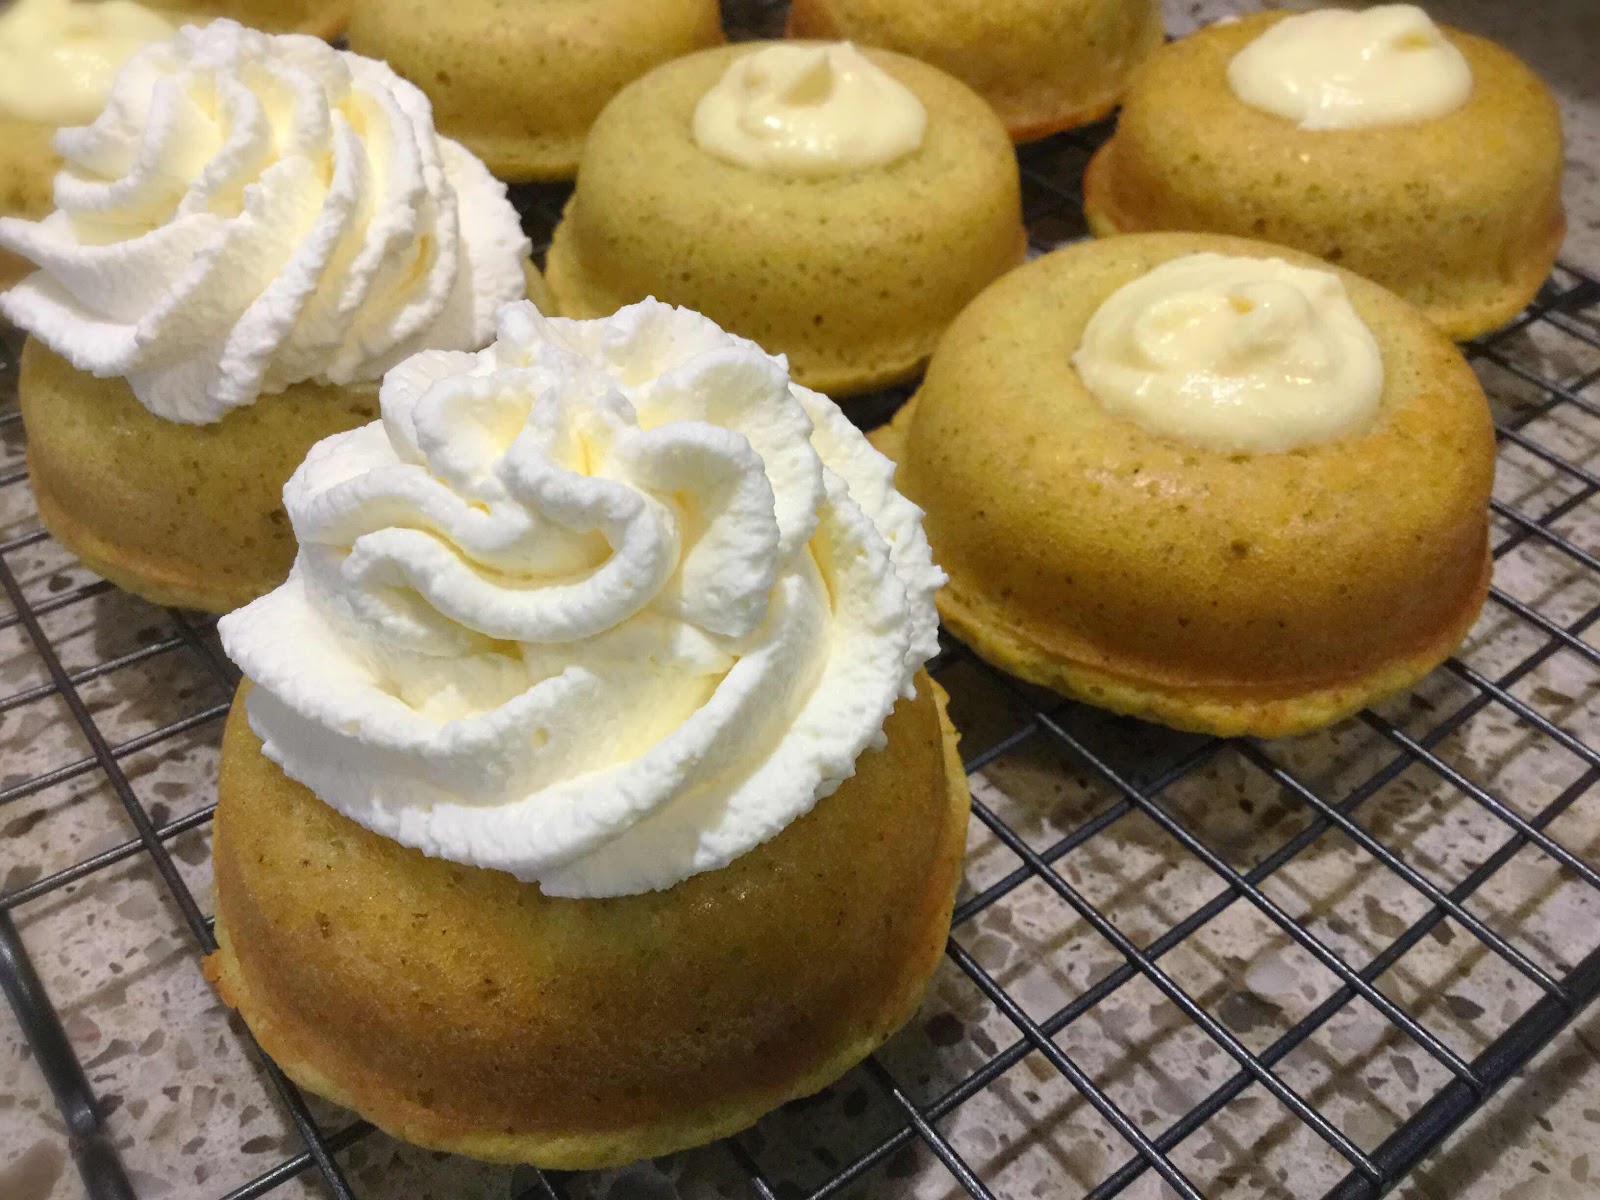
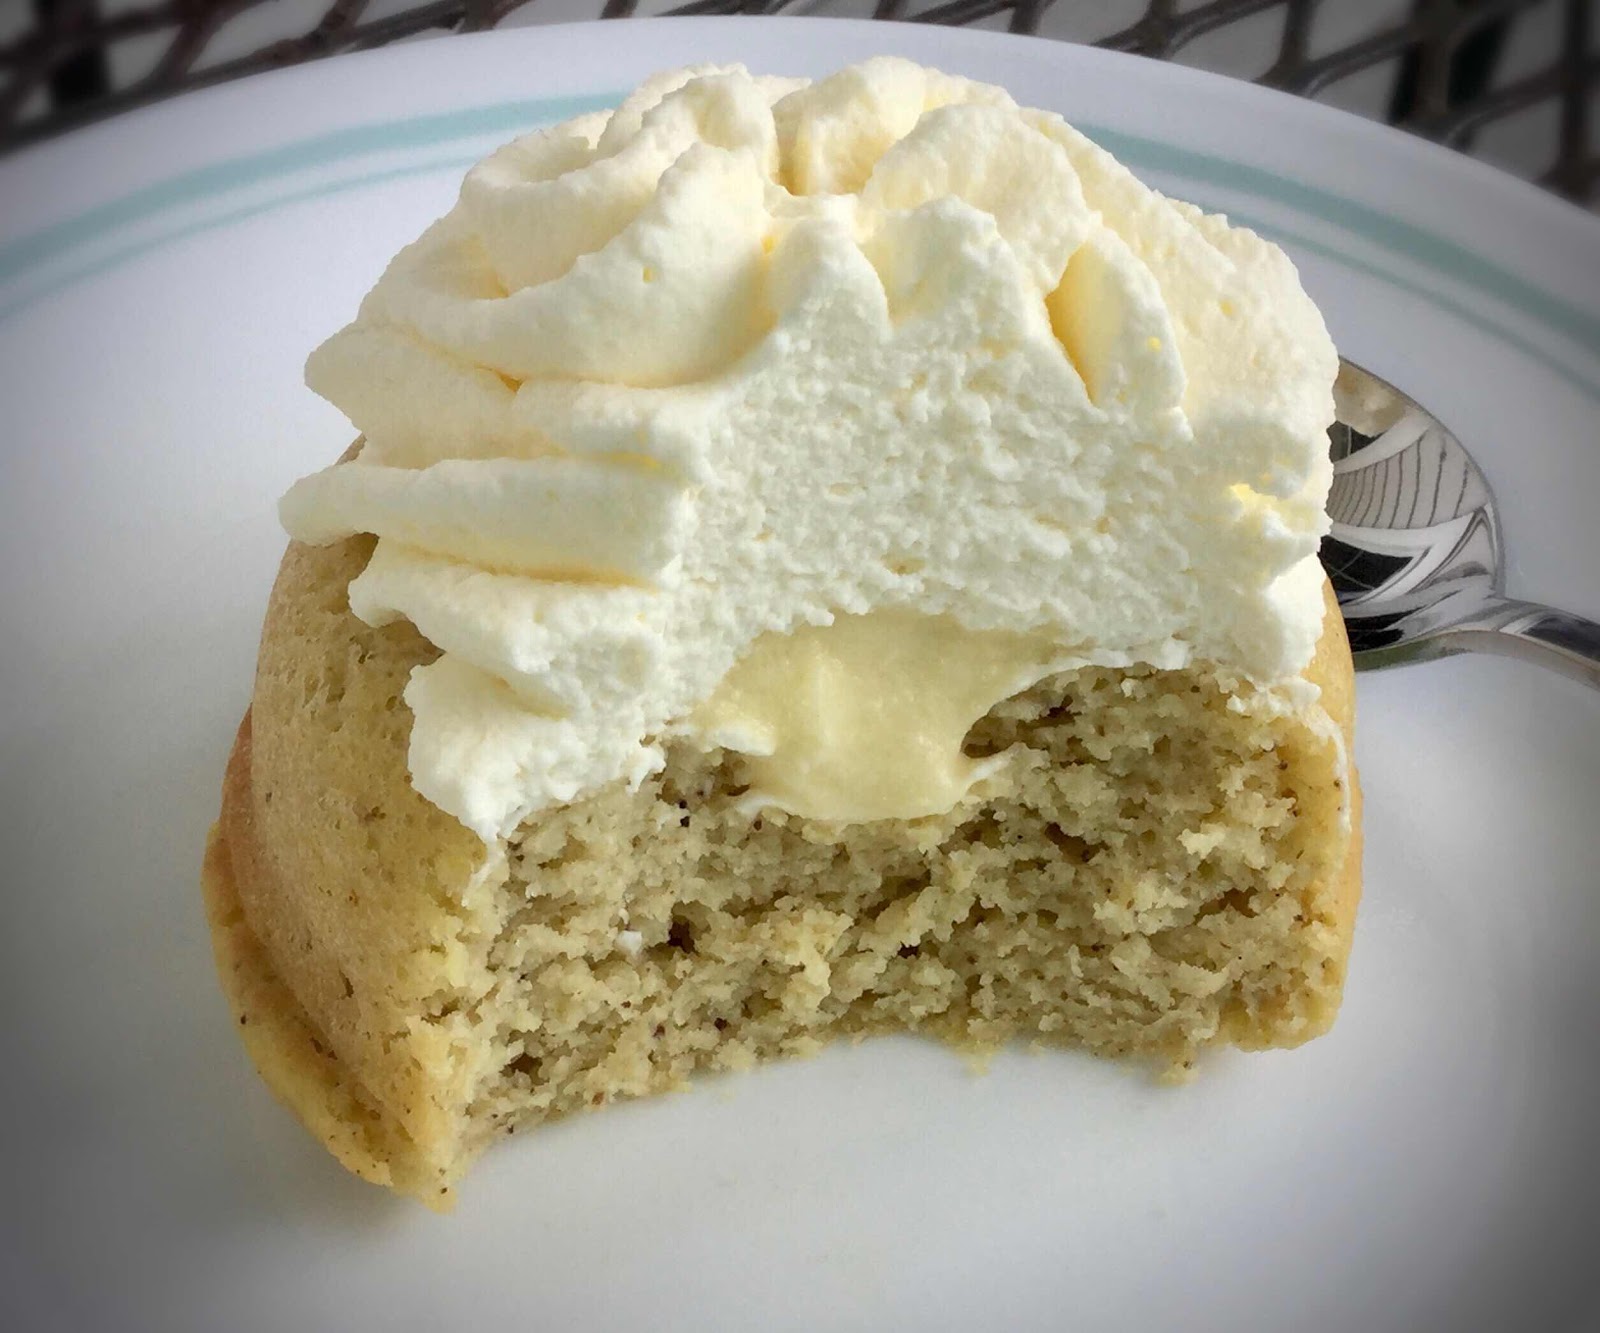
The versatility of a donut baking pan is that it can be used to make more than donuts. In this case, these donuts are really more like cupcakes. (As a matter of fact, you can make these in a cupcake or muffin tin instead.) The reason I like using a donut pan is that when I deliberately overfill each cavity, so that the cake rises and fills in the center hole, it leaves the ideal space to spoon the filling! The result are dainty little cakes perfectly proportioned into individual servings. If you like banana pudding, you’ll love these pudding-filled cakes!

Note: If you don’t want to make homemade pudding, you could certainly use a sugar free boxed mix. The most popular brand has some questionable ingredients, namely modified cornstarch and maltodextrin, both of which will raise blood sugar as high or higher than regular sugar! That’s why I prefer to make my own. You can make the pudding several days ahead and store it in the refrigerator.  That way it’s set and ready to go when it’s time to fill the cakes. The best part is that the pudding part of this recipe will make much more than you’ll need...so you’ll have plenty leftover for snacking!

Low Carb Banana Donuts with Whipped Cream Topping
Makes 10 servings (depending on the size of your donut pan)

Pudding Ingredients:
3/4 cup heavy cream
1/2 cup almond or coconut milk
3 large egg yolks
3 tablespoons powdered erythritol sweetener
A pinch of salt
1-1/2 tablespoons unsalted butter, cut into pieces
1-1/2 teaspoons banana extract
1/2 teaspoon vanilla extract
8 drops monkfruit extract or stevia, to taste
1/2 to 3/4 teaspoon xanthan gum (as needed for thickening)

Donut Ingredients:
1/2 cup + 2 tablespoons coconut flour
6 tablespoons granulated erythritol sweetener 
1-1/2 teaspoons baking powder
1/2 teaspoon vanilla powder (Optional, but adds nice vanilla flecks to the batter. If not using, increase vanilla extract to 1/2 teaspoon.)
1/4 teaspoon salt
5 large eggs
1/2 cup unsweetened almond or coconut milk
1-1/4 teaspoons banana extract
1/4 teaspoon vanilla extract

Whipped Cream Topping Ingredients:
2 tablespoons cold water 
1 teaspoon dry unflavored gelatin powder
1 cup heavy whipping cream
2 tablespoons powdered erythritol sweetener (or 6-8 drops monkfruit extract or stevia)
1/2 teaspoon vanilla extract

1. Pudding Directions (can be made several days ahead): In a medium saucepan over medium heat, combine the heavy cream and almond or coconut milk. Heat until hot and bubbles can be seen around the edges. Meanwhile, whisk together the egg yolks, sweetener and salt in a heat-proof bowl or glass measuring cup until light and thoroughly combined. 

2. Slowly ladle about 1/2 cup of the hot mixture into the egg yolks, whisking continuously, to temper them. Then slowly whisk the tempered egg/milk mixture back onto the saucepan, whisking continuously. Continue to stir and heat until the pudding thickens and will coat the back of a spoon. If the mixture starts to simmer, remove it from the heat and continue whisking (you don’t want scrambled eggs!). Once it has thickened, remove from heat and add the butter, extracts and monkfruit or stevia. Stir until the butter has melted. Sprinkle the xanthan gum over the surface of the pudding while whisking vigorously until it has incorporated and there are no lumps. Pour into a glass bowl or storage container and place in the refrigerator to set up and cool completely.

3. To make the Donuts: Preheat oven to 325 degrees F and grease your donut baking pan well; set aside.

4. In a medium bowl, whisk together the coconut flour, sweetener, baking powder, vanilla powder and salt until no lumps remain (you may sift this mixture, if desired). In a large bowl, whisk the eggs, almond or coconut milk and extracts. Add the dry ingredients to the wet ingredients and whisk vigorously until well incorporated, no lumps are visible and the batter is smooth.

5. Fill each donut cavity until nearly full. Bake for about 15 minutes or until firm to the touch and the edges are golden brown. (You want the center of the donut to puff up and cover the center hole once the donuts are baked to create a well for the pudding filling, see photo below.) Remove from oven and allow the donuts to cool in the pan for 5-10 minutes. Turn them out onto a wire rack to cool completely before filling.

Baked donuts showing well for filling
6. To make the stabilized whipped cream topping: Pour the cold water into a small bowl and sprinkle the dry gelatin powder over the top and allow to sit for a few minutes to “bloom.” Heat in the microwave for about 5 seconds on high, then stir until the gelatin is dissolved; set aside to cool for 5 minutes while you whip the cream.

7. Place the heavy whipping cream, sweetener and vanilla extract into a large bowl. With an electric mixer, beat on high until the cream forms soft peaks. Slowly add the gelatin/water mixture and continue whipping until moderate to firm peaks are achieved. 

Photo showing filled donuts and finished donuts
8. To assemble: Spoon a tablespoon or so of the banana pudding into the center well of each donut, mounding it slightly. Spoon or pipe the whipped cream over the top, making sure to cover the pudding completely. Because the whipped cream has been stabilized by the gelatin, these donuts will store well in the refrigerator for 2-3 days. When it’s time to serve, allow the donuts to sit out at room temperature for about 15 minutes. Enjoy!

Banana Pudding Donut showing filled center
Nutritional Information per donut with pudding and topping: 228 calories, 4.8 g carbohydrates (2.5 g dietary fiber, 0.8 g sugars), 21.6 g total fat (12.5 g saturated fat, 0 g trans fat), 172 mg cholesterol, 188 mg sodium, 91.5 mg calcium, 95 mg potassium, 1 mg iron, 220 IU Vit A, 4.7 g protein. Net carbs per serving: 2.3 grams

Photos and recipe by Kathy Sheehan, copyright 2020
All rights reserved. Please do not duplicate without the author’s permission. 
Thursday, February 6, 2020

Low Carb Dark Chocolate Pudding

Low Carb Dark Chocolate Pudding
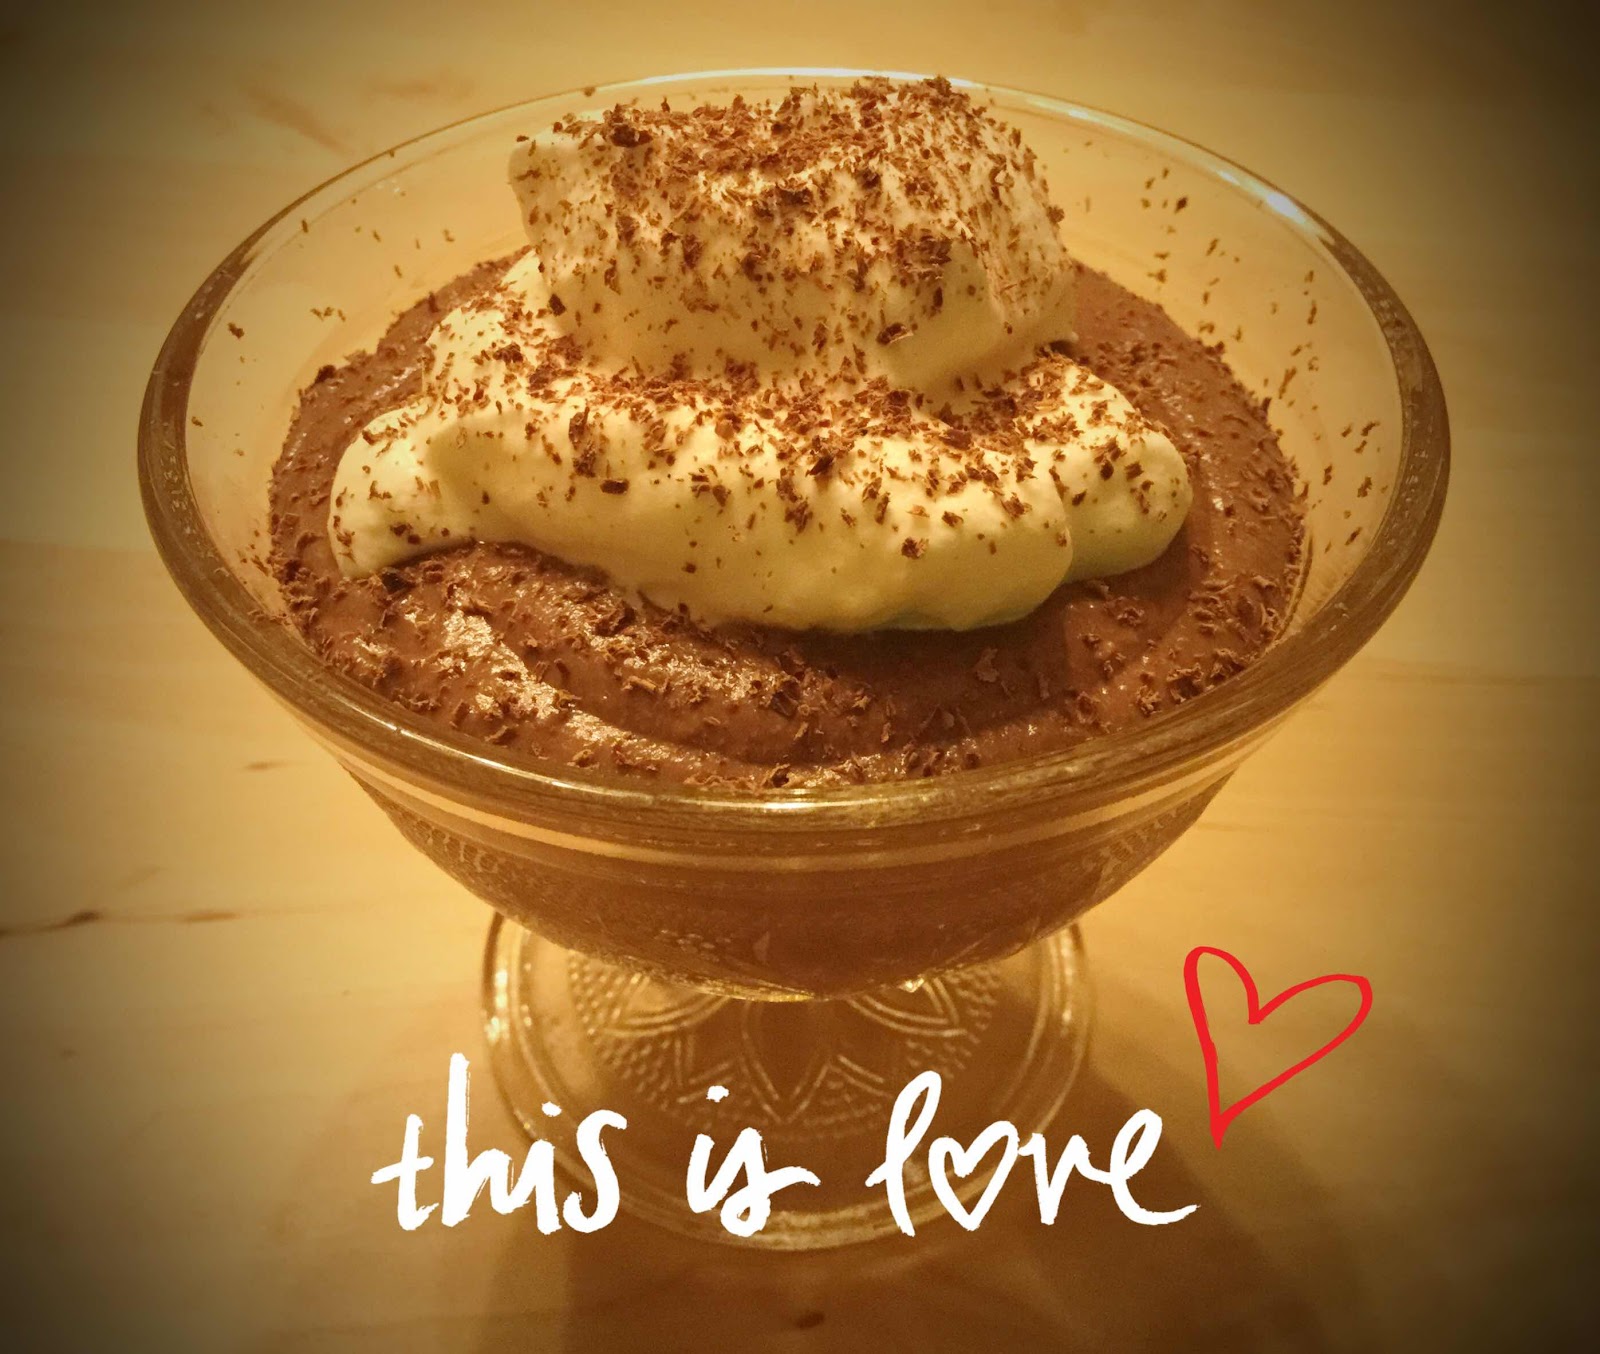
The other day I made a recipe that called for only egg whites...so what to do with the yolks? Make homemade pudding! This chocolate pudding is smooth, creamy and comfort food at its most delicious. The addition of both cocoa powder and chopped chocolate makes it extra rich and dark, just the way I like it. It keeps well in the refrigerator for many days, so I can spoon up a chocolate hug anytime!

Low Carb Dark Chocolate Pudding
Makes 6 servings

1 cup heavy cream
1 cup almond or coconut milk, unsweetened
A pinch of salt
1/8 teaspoon instant coffee granules or powder
3 egg yolks
1/3 cup powdered erythritol sweetener (confectioners)
2 tablespoons dark cocoa powder, unsweetened 
2 ounces sugar free chocolate, chopped (a bar or chocolate chips)
2 tablespoons butter
3/4 teaspoon chocolate extract (omit if you don’t have any)
1/2 teaspoon vanilla extract
1/2 teaspoon monkfruit extract or stevia glycerite, or to taste
1/4 + 1/8 teaspoon xanthan gum

1. Put the heavy cream and almond or coconut milk into a medium saucepan. Add the salt and coffee granules and whisk. Place over medium heat until the mixture begins to simmer and you see bubbles around the edges. Reduce heat to medium-low or low.

2. Meanwhile, while the cream mixture is heating, whisk together the egg yolks and powdered sweetener in a glass measuring cup or heat-proof bowl until well combined and light in color.

3. Slowly whisk in about 2/3 cup of the hot cream mixture into the eggs, whisking constantly, until well combined. Slowly whisk the tempered egg back into the hot cream mixture, whisking constantly. Continue to cook and stir the custard over low to medium-low heat until the pudding thickens and coats the back of a spoon, but do not boil.

4. Remove pudding from the heat and add the cocoa powder and chopped chocolate, stir until chocolate is melted and pudding is smooth. Add the butter, extracts and monkfruit or stevia sweetener. Stir until well combined. While whisking vigorously, sprinkle the xanthan gum onto the hot pudding and whisk until smooth and thickened (the pudding will thicken further in the refrigerator). Taste and adjust sweetening, if desired.

5. Allow the pudding to cool in the saucepan for 20-30 minutes, stirring occasionally. Spoon the pudding into individual serving dishes (or pour into a medium bowl) and refrigerate until set, for several hours. To prevent a skin from forming on the top of the pudding, place plastic wrap directly on the surface of the pudding while it’s cooling.) Serve with whipped cream and chocolate shavings, if desired.

Nutritional Information per 1/2 cup: 216 calories, 4 g carbohydrates (1.1 g dietary fiber, 0.2 g sugars), 23 g total fat (12.6 g saturated fat, 0 g trans fat), 160 mg cholesterol, 95 mg sodium, 91.5 mg calcium, 57 mg potassium, 232 mg Vit A, 3.2 g protein. Net carbs per serving: 2.9 grams

Photo and recipe by Kathy Sheehan, copyright 2020
All rights reserved. Please do not duplicate without the author’s permission.
Monday, January 13, 2020

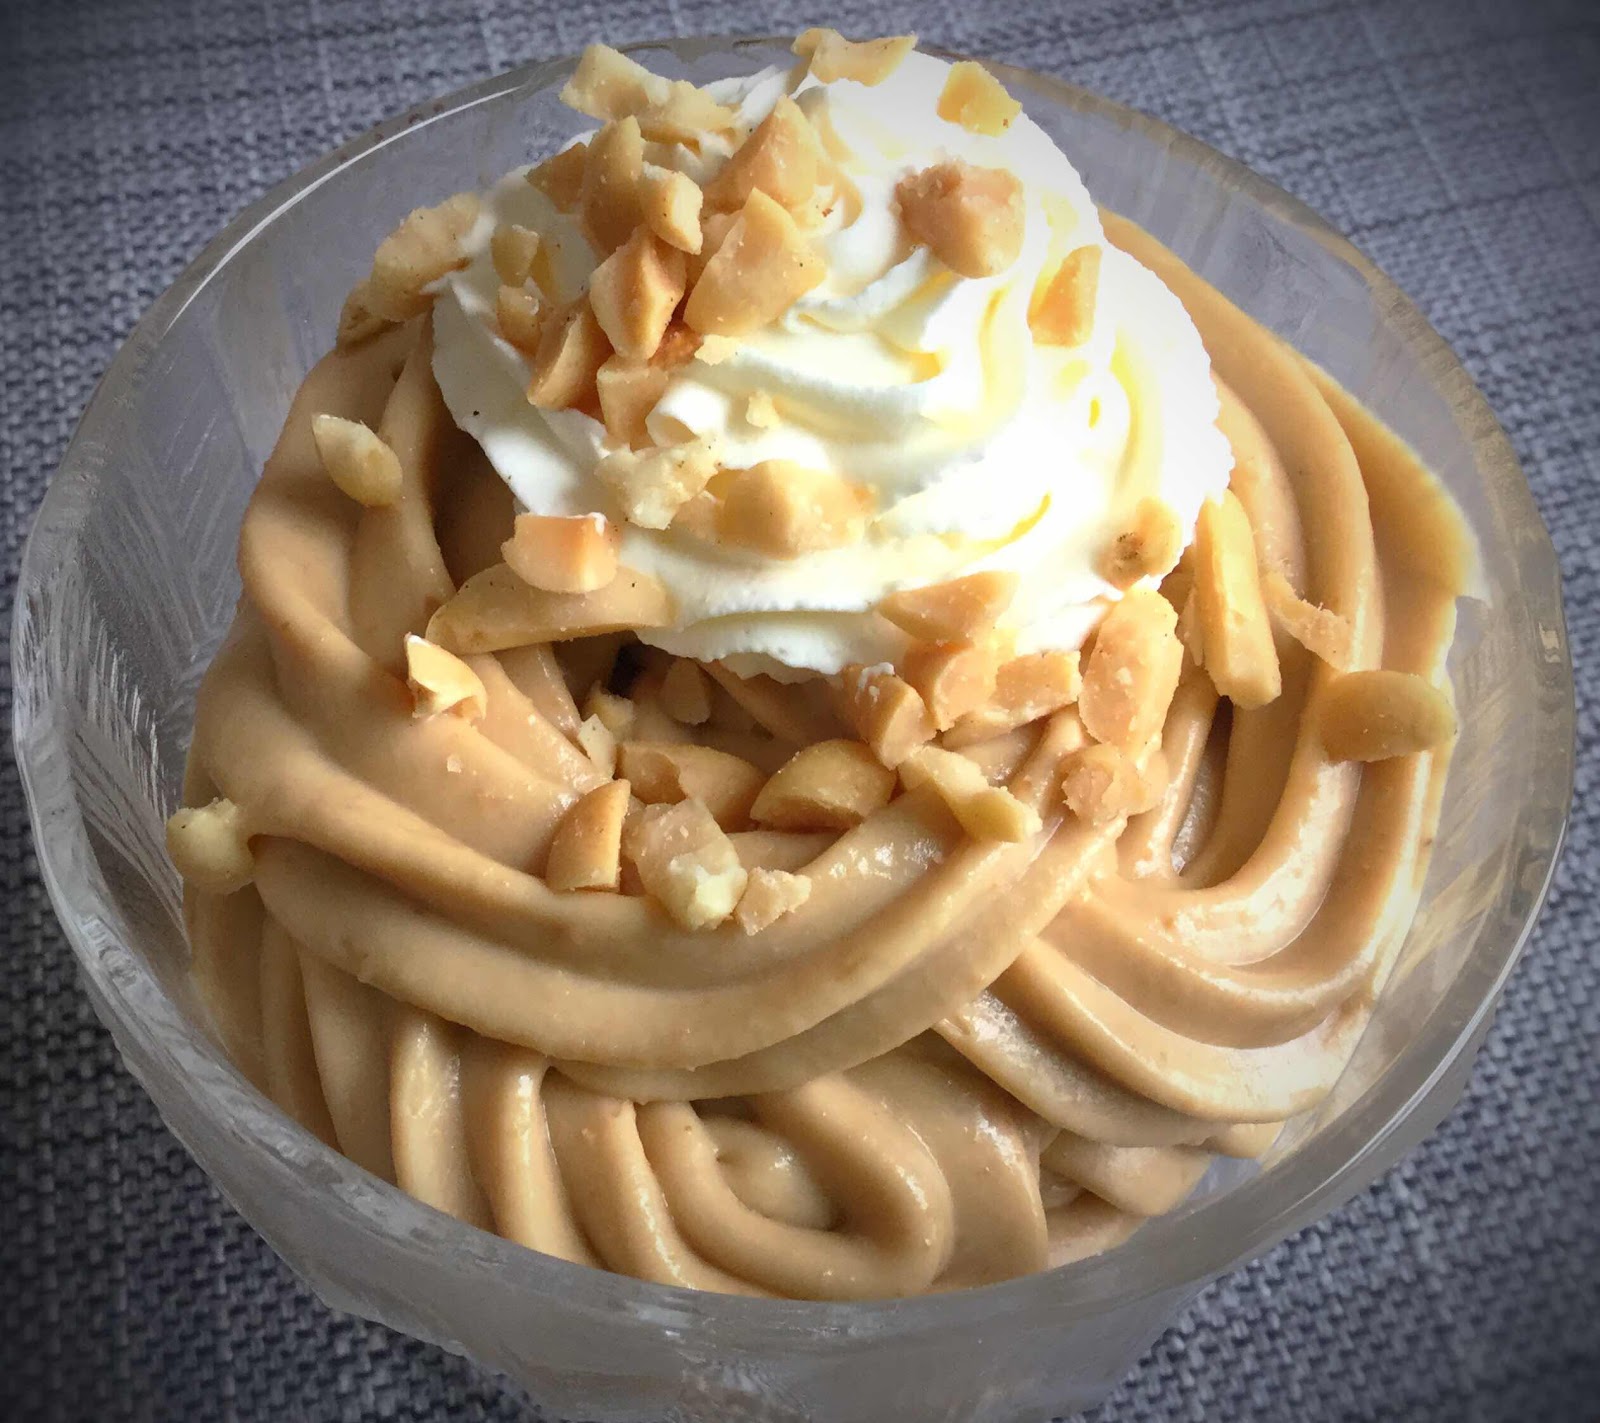
Low Carb Peanut Butter Pudding

Low Carb Peanut Butter Pudding
When my daughter was little, she was known as “The Peanut Butter Girl.” One of her favorite desserts was homemade peanut butter pudding. She is celebrating her 31st birthday today and, instead of a cake, she requested peanut butter pudding for her special treat. So, I went to work and created this low carb, sugar free recipe that exactly matches the taste and texture she remembers. It would also be an excellent filling for a Peanut Butter Cream Pie. If you’re a peanut butter lover too, you can enjoy this creamy, delicious pudding without guilt while sticking to your low carb/keto diet!

Low Carb Peanut Butter Pudding
Makes 6 servings

1/2 cup heavy whipping cream
1 1/4 cup unsweetened almond milk
3 large egg yolks
1/2 cup powdered erythritol sweetener 
A pinch of salt
1/2 cup natural, creamy peanut butter, no sugar added
1 teaspoon vanilla extract
1/4 teaspoon xanthan gum
3-4 drops monkfruit extract or liquid stevia, if additional sweetness is needed
4-6 drops peanut butter flavoring (optional)

1. In a medium saucepan over medium heat, combine whipping cream and almond milk. Bring just to a simmer (you’ll see bubbles around the edges). In a medium bowl or glass measuring cup, whisk the egg yolks, sweetener and salt until well combined.

2. Using a ladle or gently pour about 3/4 cup of the hot cream mixture into the egg mixture, whisking continuously. Then slowly pour the tempered egg mixture back into the saucepan while whisking. Cook, while stirring, for 4-5 minutes until thickened and the pudding coats the back of a spoon.

3. Remove from heat and add the peanut butter and vanilla extract; whisk until the peanut butter melts and the mixture is smooth. While whisking vigorously, sprinkle the pudding with the xanthan gum until well distributed. Taste and, if additional sweetness is desired, add the monkfruit or stevia and stir to incorporate. Let the pudding sit in the pan to cool for 10-15 minutes, stirring occasionally to prevent a skin forming on the top.

4. Divide the pudding among six dessert dishes or put into a glass container. If you don’t want a skin to form, place plastic wrap directly on the surface of the pudding while cooling. Refrigerate until completely chilled, about 2 hours.

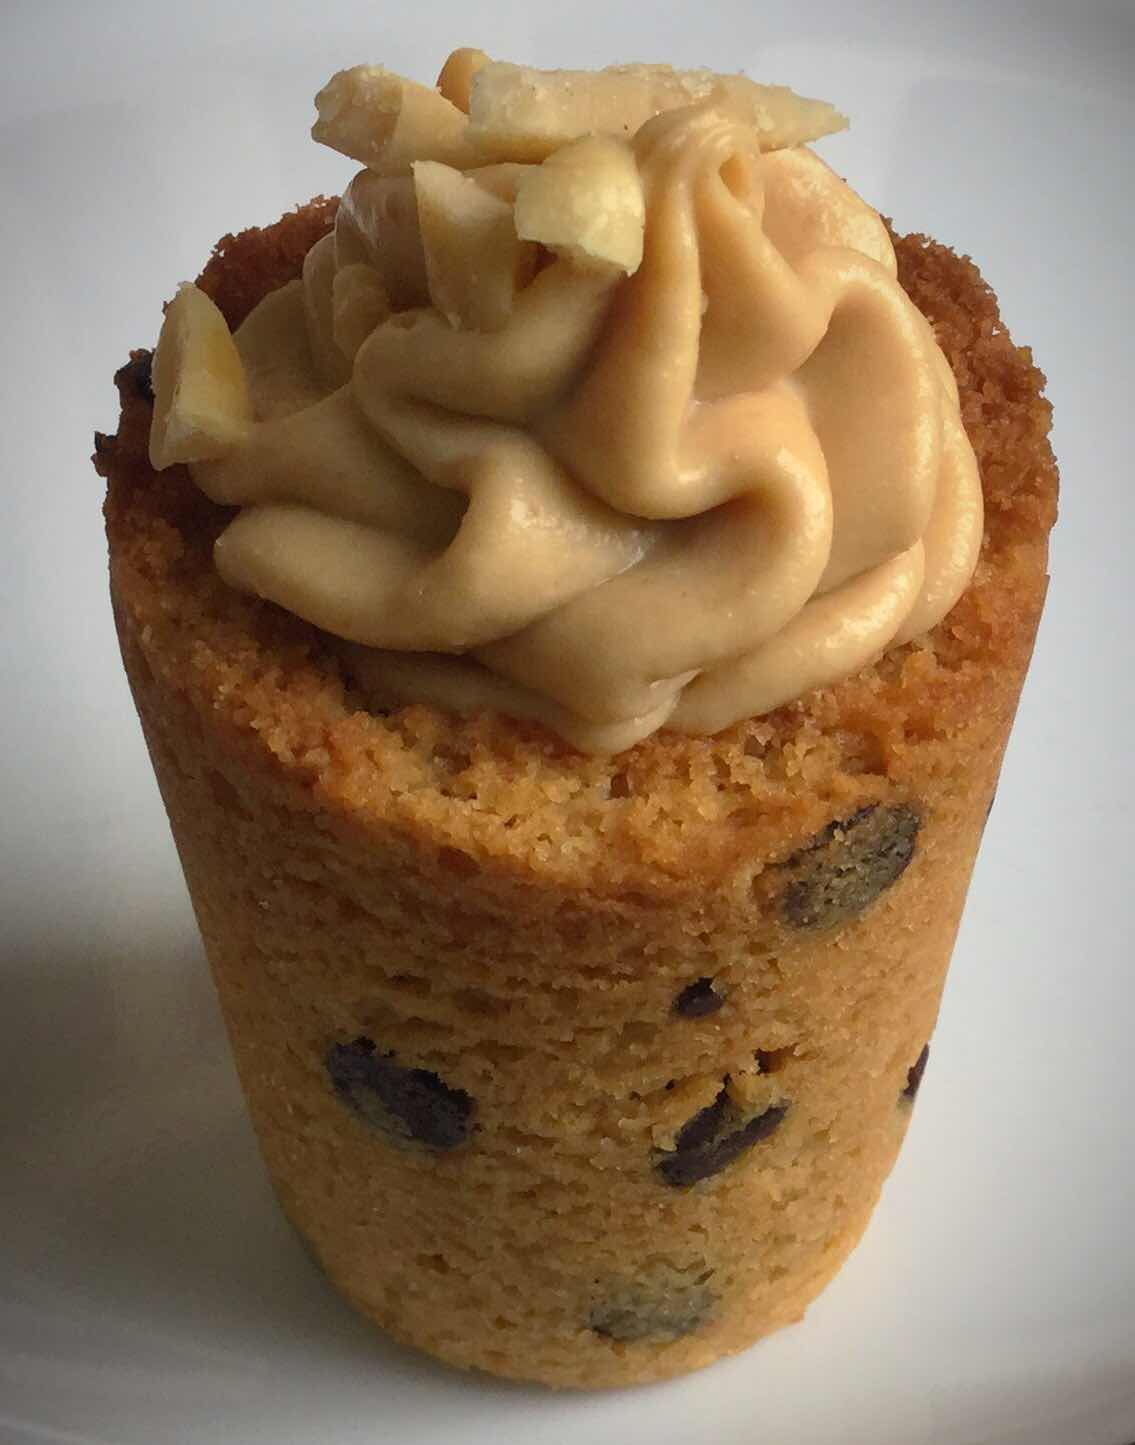
Low Carb Peanut Butter Pudding served in a shot glass keto cookie
Nutritional Information per 1/2 cup serving: 240 calories, 5.3 g carbohydrate (1.4 g dietary fiber, 0.8 g sugars), 21.9 g total fat (7.1 g saturated fat, 0 g trans fat), 131 mg cholesterol, 93 mg sodium, 86 mg calcium, 11 mg potassium, 116 mg Vit A, 6.2 g protein. Net carb per serving: 3.9 grams

Photos and recipe by Kathy Sheehan, copyright 2020
All rights reserved. Please do not duplicate without the author’s permission. 
Saturday, July 20, 2019

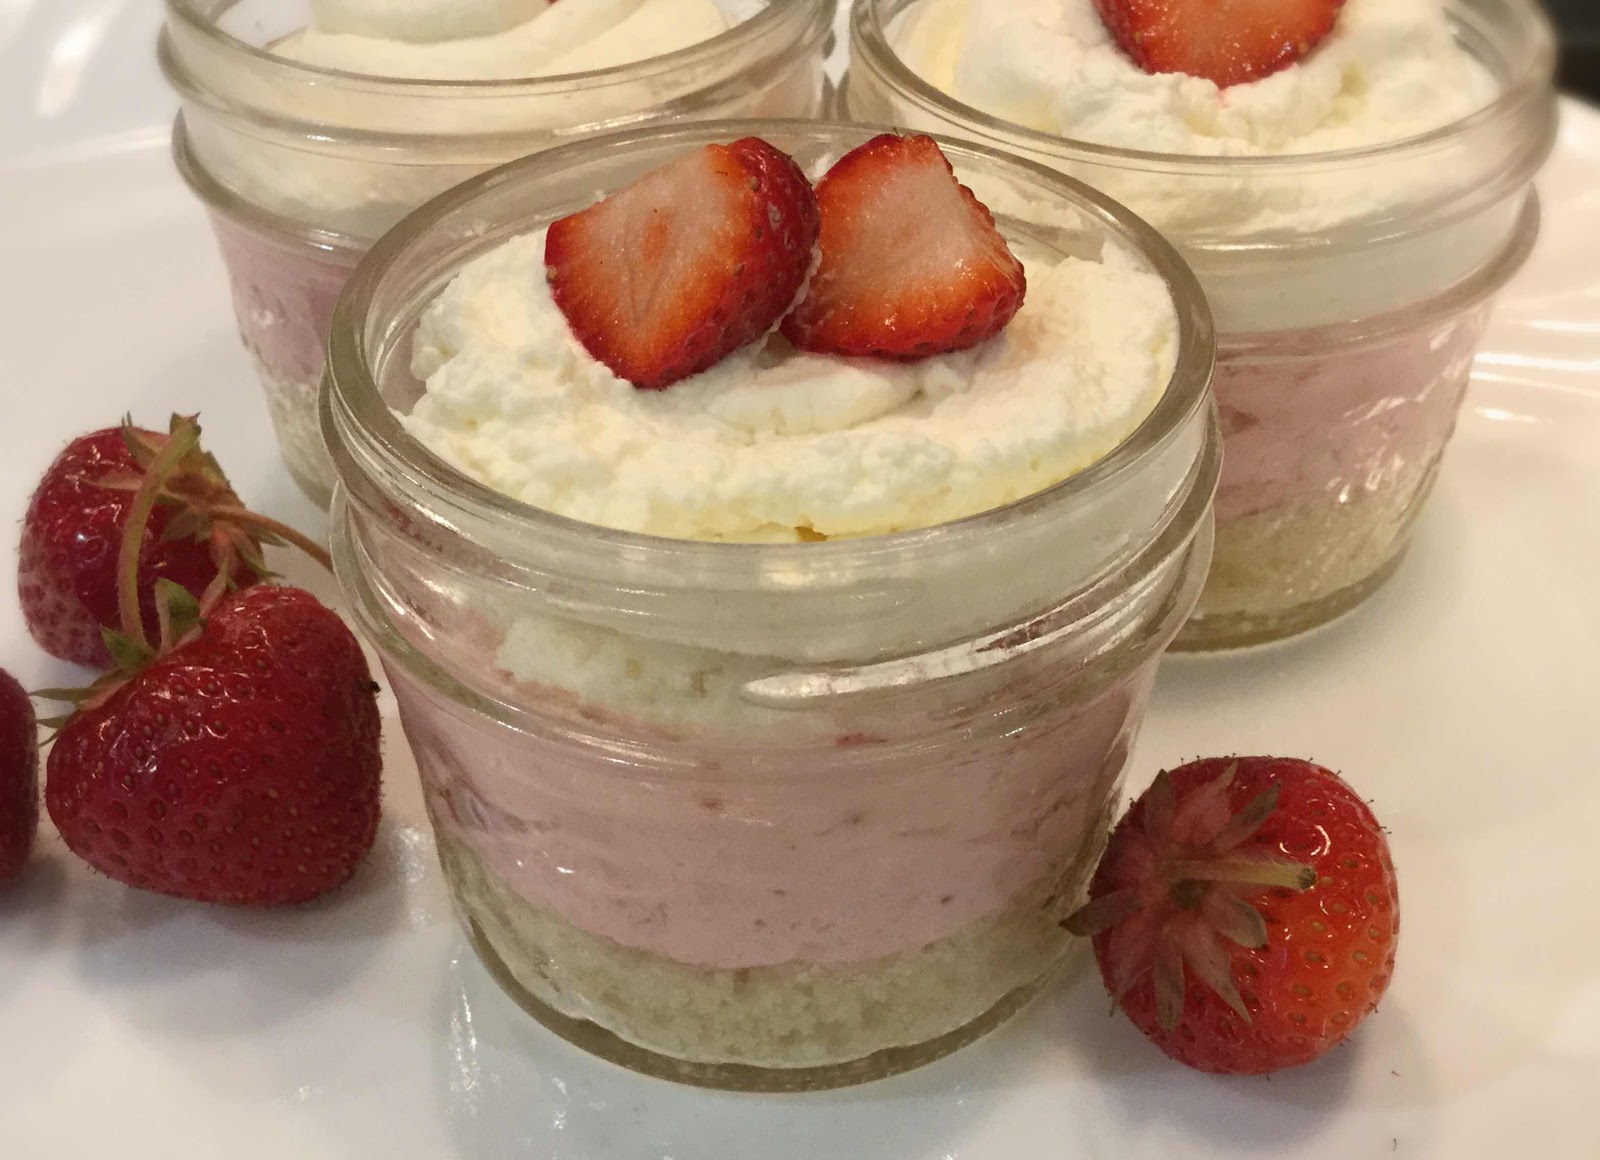
Low Carb Strawberry Mousse Shortcake Cups

Low Carb Strawberry Mousse Shortcake Cups
The strawberry harvest is coming to an end in Maine. I created these very special dessert cups, with the sweet and creamy flavors of strawberry shortcake, as a last hurrah! They store well and will last for many days covered in the refrigerator, so I can extend the enjoyment of one of my favorite fruits for a bit longer. Since I only eat fruit when it is local and in season (I don’t eat fruit during the winter), I’m savoring the last strawberries of the season and these individual dessert cups are a great way to do it!

Low Carb Strawberry Mousse Shortcake Cups
Makes 8 servings

Crust Ingredients:
3/4 cup almond flour
2 tablespoons butter, chilled and cubed
2 tablespoons granulated or powdered erythritol 
1/4 teaspoon xanthan gum
1/8 teaspoon salt
1/4 teaspoon lemon extract

Strawberry Mousse Filling:
4 ounces cream cheese, softened
15 small to medium strawberries, sliced
3 tablespoons powdered erythritol 
1/2 cup heavy whipping cream
10 drops of monkfruit extract or liquid stevia if needed for additional sweetness (optional)
1/8 teaspoon xanthan gum (optional and only if needed)

Whipped Cream Topping:
1/2 teaspoon dry gelatin powder
2 teaspoons water
1/2 cup heavy whipping cream
1/2 teaspoon vanilla extract
8-10 drops of monkfruit extract or stevia to taste

1. For the crust, preheat the oven to 350 degrees Fahrenheit. Lightly spray the bottom of eight 4 ounce glass jelly jars or oven-proof dessert cups with non-stick coconut oil spray and place on a baking sheet: set aside.

2. Combine the almond flour, chilled butter cubes, 2 tablespoons erythritol, xanthan gum, salt and lemon extract in a food processor. Pulse until mixture resembles fine crumbs. Divide the mixture evenly between the eight jars and gently tamp down to create an even layer. Bake for 10 minutes in the preheated oven. Remove from the oven and cool completely.

3. After the crust has cooled, prepare the strawberry mousse by first mashing the strawberries with a potato masher or the tines of a fork until you have small pieces and the strawberries and their liquid measures about 2/3 cup (do not use more than 2/3 cup). Set aside.

4. In a large mixing bowl, beat the softened cream cheese and 3 tablespoons powdered erythritol with an electric mixer until light and fluffy. Add the strawberries and their liquid and 1/2 cup heavy cream and beat vigorously until the mixture increases in volume and is thick with the consistency of whipped frosting. Taste and add additional sweetening if needed (this is optional and will depend on the natural sweetness of the strawberries).

5. Optional and only if additional thickening is needed, sprinkle 1/8 teaspoon xanthan gum over the mousse and beat vigorously to incorporate. You will notice an immediate slight thickening of the mixture, but do not add more because once refrigerated the mousse with thicken further. Divide the mousse equally between the eight jars and refrigerate for at least 30 minutes to firm up.

6. To make the cream topping, first sprinkle the 1/2 teaspoon dry gelatin powder over 2 teaspoons of cool or room temperature water and then heating in the microwave for about 5 seconds, stir until dissolved: set aside.

7. Pour 1/2 cup heavy cream into a large mixing bowl. Add the vanilla extract and monkfruit or stevia drops. Beat until soft peaks form. While mixing on low, slowly drizzle in the dissolved gelatin and increase the speed of the mixer and beat on high until thick peaks have formed. Spoon or pipe the whipped cream over the mousse and refrigerate the dessert cups until ready to serve.

8. These desserts can be covered and stored in the refrigerator for up for 4 days. If desired, top each dessert with a small strawberry as garnish before serving.

Nutritional Information per serving: 223 calories, 4.4 g carbohydrate (1.4 g dietary fiber, 1.3 g sugars), 22.5 g total fat (10.9 g saturated fat, 0 g trans fat), 59 mg cholesterol, 105 mg sodium, 35 mg calcium, 98 mg potassium, 574 mg Vit A, 3.5 g protein. Net carbs per serving: 3 grams.

Photo and recipe by Kathy Sheehan, copyright 2019
All rights reserved. Please do not duplicate without the author’s permission. 
Saturday, September 22, 2018

Low Carb Pumpkin Cheesecake Pudding

Low Carb Pumpkin Cheesecake Pudding
Autumn is here!! As soon as the weather cools down in Maine, I start craving pumpkin spice goodies. I’ve made these Pumpkin Cheesecake Pudding Cups several times already. The warm spices in this dessert are so welcome at this time of year. The method of baking your puddings at 350 degrees, then reducing the temperature negates the need of using a water bath. The final result is creamy cheesecake deliciousness!

Low Carb Pumpkin Cheesecake Pudding
Makes 6 servings

8 ounces cream cheese, softened
1/4 cup sour cream
1/4 cup puréed pumpkin
1 tablespoon pumpkin pie spice
1 tablespoon almond flour
1 teaspoon vanilla extract
1/4 cup granulated erythritol (I used Golden LaKanto Monkfruit sweetener)
1/4 teaspoon stevia powder (I used Sweet Leaf brand)
2 eggs

1. Preheat the oven to 350 degrees. Place 6 custard cups or ramekins on a baking sheet; set aside.

2. Allow all of the ingredients to come to room temperature and place them into a large mixing bowl. Use a handheld or standing mixer to thoroughly beat the ingredients until a smooth batter forms. It may take a few minutes for the cream cheese to become smooth and well incorporated. Evenly divide the batter between the 6 custard cups or ramekins.

3. Bake the pudding at 350 degrees for 12 minutes, then turn the oven down to 250 degrees and continue baking for 20 minutes. Turn off the oven and crack the door open slightly. Allow the pudding to cool for about 15-20 minutes before removing them from the oven and placing the cups on a wire rack to cool completely. Once cooled to room temperature, chill the pudding cups in the refrigerator for at least 1 hour or until ready to serve. Top with whipped cream, if desired.

Nutritional Information per serving: 195 calories, 7.2 g carbohydrate (0.8 g dietary fiber, 1.3 g sugars, 4 g sugar alcohols), 16.4 g total fat (9.9 g saturated fat, 0 g trans fat), 113 mg cholesterol, 171 mg sodium, 59.6 mg calcium, 53 mg potassium, 2142 mg Vit A, 1 mg iron, 5.5 g protein. Net carbs per serving: 6.4 grams.

Photo and recipe by Kathy Sheehan, copyright 2018
All rights reserved. Please do not duplicate without the author’s permission.
Thursday, March 1, 2018

Raspberry Yogurt Fluff

Raspberry Yogurt Fluff
This is a very quick and easy dessert or it makes a delicious breakfast, too. It’s best made with fresh raspberries (not frozen) so it sets up nicely. The pale pink color and hint of sweet raspberries are delightful, making this a perfect spring dessert!

Raspberry Yogurt Fluff
Makes 4 servings

1/2 cup heavy whipping cream
1/2 teaspoon vanilla extract
3/4 teaspoon stevia powder, divided and to taste (I used Sweet Leaf brand)
3 ounces cream cheese, cubed and softened
3/4 cup plain, unsweetened whole milk yogurt
10 fresh raspberries, mashed with a fork
4 fresh raspberries for garnish

1. Whip the heavy cream with a handheld or standing mixture on high until soft peaks form. Add the vanilla extract and 1/4 teaspoon stevia powder. Continue whipping until fully whipped. Remove 3/4 of the whipped cream to a separate bowl and set aside.

2. Into the remaining 1/4 whipped cream in the mixing bowl, add the softened cream cheese and yogurt. Whip on high until completely smooth. Add the remaining 1/2 teaspoon stevia powder and the 10 mashed raspberries. Whip until well combined.

3. Gently fold in the reserved whipped cream until well combined and no streaks remain. Spoon into 4 individual serving dishes and garnish each with one fresh raspberry. Chill in the refrigerator until ready to serve, at least 1 hour or up to 1 day.

Nutritional Information per serving: 214 calories, 4.7 g carbohydrate (0.4 g dietary fiber, 3 g sugars), 19.3 g total fat (11.3 g saturated fat, 0 g trans fat), 73 mg cholesterol, 110 mg sodium, 36 mg calcium, 131 mg potassium, 654 mg Vit A, 4 mg Vit C, 4.6 g protein. Net carbs per serving: 4.2 grams

Photo and recipe by Kathy Sheehan, copyright 2018
All rights reserved. Please do not duplicate without the author’s permission. 
Wednesday, August 23, 2017

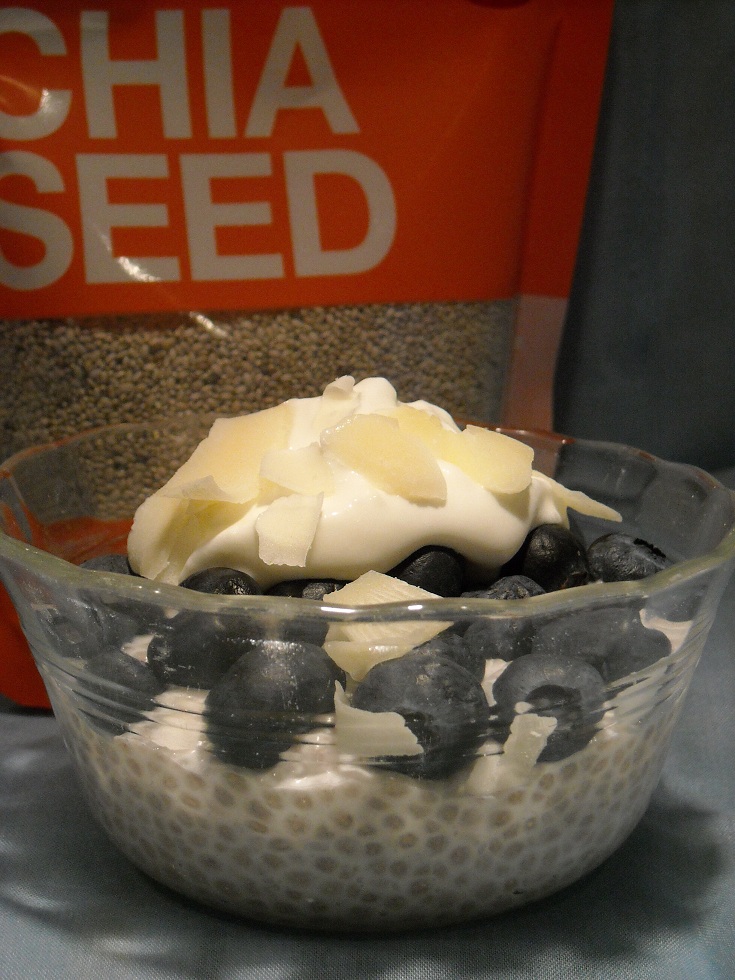
Mini Banana Pie Chia Pudding Parfait

Parfait
You usually don't think of a banana as being low carb because it's such a high-sugar fruit. But you can enjoy them in a very small amount, such as in this parfait, without overdoing your carb limit for the day. Chia pudding resembles tapioca in texture, but it's easier to prepare and has more nutrition, plus it's an excellent source of healthy Omega 3 fat and fiber. I love banana pudding and pie, so I set out to recreate the flavors in this recipe! It requires a couple of steps, but each is very simple and can be made ahead, if needed. The "pie crust" crumbles really give this parfait it's banana pie texture and flavor, so don't skip this step. You have the choice of topping with plain, unsweetened yogurt laced with vanilla or whipped cream, depending on the total amount of carbs in your eating plan. I like the yogurt version for breakfast! So, whether you start your day with this mini parfait or enjoy it for dessert, you can feel good about giving your family this special treat!

Mini Banana Pie Chia Pudding Parfait
Makes 8 small servings

Chia Pudding Layer:

1/4 cup whole chia seeds
1/4 teaspoon ground cinnamon
1/4 teaspoon vanilla extract
1/4 teaspoon banana extract
1 cup full-fat coconut milk (I used A-Roy D brand)
6-8 drops liquid Stevia, or to taste (I used Sweetleaf brand)

Pie Crust Layer:

1/3 cup almond flour
1 teaspoon erythritol sweetener or 1/4 tsp stevia powder
A pinch of salt
2 teaspoons butter or coconut oil, melted

1/2 of a very small banana, cut into eight slices (a 3-inch length)

Yogurt or Cream Layer:

1-1/2 cups plain, unsweetened whole milk yogurt or 3/4 cup heavy cream, whipped (or whipped coconut cream for dairy free)
1/2 teaspoon vanilla extract
6-8 drops liquid Stevia, or to taste

1. Make the chia seed pudding: In a small bowl, mix the chia seeds and cinnamon. In a measuring cup or separate bowl, mix together the coconut milk, extracts and stevia drops. Pour the coconut milk mixture over the chia seed mixture and stir vigorously with a fork, making sure all the chia seeds are incorporated and submerged in the coconut milk. Set aside to allow the pudding to absorb the liquid and thicken, about 30 minutes.

2. Meanwhile, make the pie crust layer: Preheat the oven to 325 degrees Fahrenheit. In a medium bowl, whisk together the almond flour, sweetener and salt. Stir in the melted butter until the dough comes together and resembles coarse crumbs. Turn out onto a baking sheet lined with parchment paper or a silicone baking mat. Press down with your fingers to flatten into a 1/8-inch thick circle or oval (the shape doesn't matter). Bake in the preheated oven until the edges are golden brown, about 13-15 minutes. Watch carefully because the edges can burn quickly! Allow crust to cool on the baking sheet for 5 minutes, then remove parchment paper or silicone mat to a wire rack to cool completely (keep crust on the paper or mat to prevent crumbling). When cooled, break the crust into small, bite-size pieces; set aside.

Pie Crust Layer
3. Make the yogurt or whipped cream layer: Mix together the plain, unsweetened yogurt with the vanilla extract and stevia drops to taste; set aside. (Or whip the heavy cream until semi-stiff. Add the vanilla and stevia and gently fold until well combined; set aside.)

4. Assemble the parfaits: Use a spoon to divide the chia pudding mixture between eight small jars or dessert shot glasses (about 2 TB each). Place one slice of banana on top of the chia layer. Sprinkle 1 teaspoon of the pie crust crumbles on top of the banana (reserve some crumbs for garnish). Divide the yogurt (or whipped cream) evenly among the dessert cups. Sprinkle with the remaining pie crust crumbs. Eat immediately or cover and place in the refrigerator for up to 2 days.

Place banana on chia layer
Nutritional Information per serving (made with yogurt): 128 calories, 7.3 g carbohydrate (2.1 g dietary fiber, 3.7 g sugars, 0.5 g sugar alcohols), 9.6 g total fat (4.7 g saturated fat, 0 g trans fat), 10 mg cholesterol, 39 mg sodium, 90.2 mg calcium, 106 mg potassium, 79 mg Vit A, 1 mg Vit C, 3.7 g protein. Net carbs per serving: 5.1 grams

Nutritional Information per serving (made with whipped cream): 201 calories, 5.7 g carbohydrate (2.1 g dietary fiber, 1.5 g sugars, 0.5 g sugar alcohols), 19 g total fat (10.7 g saturated fat, 0 g trans fat), 44 mg cholesterol, 27 mg sodium, 53.4 mg calcium, 52 mg potassium, 444 mg Vit A, 1 mg Vit C, 2.6 g protein. Net carbs per serving: 3.6 grams


Recipe and photos by Kathy Sheehan, copyright 2017
All rights reserved. Please do not duplicate without the author's permission.
Wednesday, April 27, 2016

Cinnamon Kefir Chia Pudding and Yogurt Parfait


For breakfast or dessert, this delicious parfait brings a smile to everyone's face! It looks so elegant and complicated, but it really isn't. It takes some prior planning to have all the ingredients ready, but once that is done, it's quick and easy to put together.

1. Make a batch of my Spiced Grain-Free Baked Granola.  Click here for the recipe. I always have this granola on hand in my pantry because it is a breakfast staple in my house. If you don't want to make your own granola, purchase a gluten-free variety.

2. Take plain, unsweetened Greek yogurt (or a mixture of kefir cheese and plain yogurt) and mix it with vanilla powder (or vanilla extract) and stevia powder to taste; set aside.

3. Then make the Cinnamon Kefir Chia Seed Pudding (see recipe below). I like making my chia seed pudding in a blender, rather than other methods that mix the whole seed in liquid, because I like mine smooth.  The pudding needs to set up for a couple of hours or overnight, so plan for this.  In the morning, assemble your parfaits and dazzle your family! This is a attractive breakfast no one can refuse!

Cinnamon Kefir Chia Seed Pudding
Makes 4 servings (1/2 cup each)

1 cup almond or coconut milk
1/2 cup plain, unsweetened kefir (see directions for making kefir at home)
1 teaspoon ground cinnamon
1/2 teaspoon vanilla extract or unsweetened vanilla powder
1/2 teaspoon stevia powder, or to taste (I use Sweet Leaf brand)
1 pitted date (soaked in water, if too dry)
1 teaspoon Golden Lakanto Monkfruit Sweetener (or substitute with another pitted date)
A pinch of salt
1/3 cup chia seeds (I used white chia seeds)

Place all of the ingredients in a blender and blend until thick and smooth. Taste mixture and add more stevia, if desired.  Pour mixture into a glass storage container or jar, cover and place in the refrigerator for at least 2 hours or overnight.

Nutritional Information per 1/2 cup serving: 139 calories, 8.6 g carbohydrate (5.8 g dietary fiber, 1.9 g sugars), 10.2 g total fat (3 g saturated fat, 0 g trans fat), 0 mg cholesterol, 44 mg sodium, 227 mg calcium, 17 mg potassium, 4.5 g protein. Net carbs per serving: 2.8 grams

To Assemble a Parfait: 
Into a small, clear glass spoon in 1/4 cup Cinnamon Kefir Chia Seed Pudding, sprinkle 2 tablespoons of granola over pudding layer, top granola layer with 1/4 cup vanilla Greek yogurt, and top the parfait with another 1 tablespoon of granola, toasted unsweetened coconut flakes, and 1-2 chopped walnuts.

Nutritional Information per serving (1 parfait): 289 calories, 12.7 g carbohydrate (5.8 g dietary fiber, 5.3 g sugars), 24.3 g total fat (6.8 g saturated fat, 0 g trans fat), 11 mg cholesterol, 113 mg sodium, 225.1 mg calcium, 227 mg potassium, 9.1 g protein. Net carbs per serving: 6.9 grams

All recipes by Kathy Sheehan, copyright 2016

Wednesday, February 27, 2013

Bad Numbers & Chia Seeds

A few weeks ago, I returned from my doctor, where he exclaimed, "What happened? Your sugars are through the roof!" I was stunned, but I don't know why I should have been. Since Thanksgiving, I haven't been eating healthy and, soon after Christmas, I took a 3-week vacation and ate my way from Florida to Maine!  I had gained 8 pounds.  I looked my doctor in the eye and told the truth. I didn't make excuses, admitted I'd been off my food plan for several months and hadn't been testing regularly, so I had no clue what my BG trends had been.  He gave me three months to get my A1C below 7 again, or he highly recommends that I go back on insulin.  I was devastated.  I went home, felt sorry for myself for having this horrible disease for the 100th+ time and, yes, I cried. 

Then I made a confession to myself: Perfectionist though I am, I am only human and, just like everyone else that struggles with diabetes, I make mistakes.  It took me a few days, but I have forgiven myself, I've begun to eat healthy consistently and have even begun to regain some enthusiasm for vegetables again.  My progress is slow, but I'm on track with my food plan again and some weight has been lost.  I hope my BG numbers will begin to go down but, so far, they remain high.


Now, what are Chia Seeds?  They are the tiny, edible "Chia Pet" seeds that are incredibly high in fiber, low in carbs, a good source of Omega 3 fatty acids, high in calcium and protein and help me to feel full longer and may aid in my weight loss!  I learned about them from a program I watched on Netflix called, "Hungry for Change."  (BTW, if you can watch this highly motivational documentary yourself, please do!  Try Netflix or check out the DVD from your local library.)  Since learning about this product, I purchased some Chia Seeds from Whole Foods and have begun experimenting.  Today I made two types of Chia Seed pudding using unsweetened Light Coconut Milk as a base and, although they're a bit different looking than traditional pudding, both are delicious!  The chia seeds act as the thickener, so no egg, cornstarch or other thickening ingredient is needed.  Also, both recipes are quick and easy to make because no cooking is necessary!  The pudding thickens and gels in about 30-40 minutes, but letting the mixture sit for about 4 hours or overnight allows the seeds soften and resemble tapioca pudding in texture.  Chia seeds come in black or white varieties.  Both have the same nutritional properties, so choose whatever you can find.  (They are pretty easy to find these days, I even understand WalMart carries them in some stores.  Check the grocery or natural food store in your area.)  Also, Chia Seeds can be tossed on salads, added to yogurt, soups or stews, smoothies and even baked in breads or other baked desserts!  They have no flavor of their own, but take on the flavors of the other ingredients in the recipe.  Note: They do thicken whatever liquid food or drink they are added to, so if you don't want that to happen, create a "chia gel" first by mixing 1/4 cup water and 1 TB. chia seeds.  Allow the mixture to sit for at least 30 minutes (stirring once or twice) or overnight.  If you add the already thickened and jellied chia seeds to liquids, the thickening effect will be greatly reduced or eliminated.

There are a lot of recipes out there, so experiment and enjoy the benefits!

Coconut Chia Seed Pudding
(Makes 3 servings)

1 cup light, unsweetened Coconut Milk
2 teaspoons Agave Nectar
2-3 teaspoons Splenda Granular (or to taste)
2 Tablespoons chia seeds
1/4 teaspoon vanilla extract

Mix together the coconut milk, agave nectar, and Splenda and stir together. (I use a combination of agave nectar and Splenda to reduce the carbs, but use any sweetener of your choice, keeping in mind it may change the nutritional information per serving.)  Add the chia seeds and vanilla extract and stir.  Allow to sit for about 15-20 minutes and stir again (so seeds don't settle on the bottom).  Refrigerate for 4 hours or overnight.  Stir before serving.

Nutritional Information per serving (without added toppings): 122 calories, 14.6 g carbohydrate, 7.8 g total fat, 4.3 g saturated fat, 0 trans fat, 0 cholesterol, 17 mg sodium, 4 g fiber, 4.7 g sugars, 73.4 mg calcium, 3 g protein.


Chocolate Coconut Chia Seed Pudding
(Makes 3 servings)

Add 1 Tablespoon unsweetened cocoa powder to the liquid ingredients in above recipe.  Heat the coconut milk just until the cocoa powder mixes thoroughly.  Add the sweeteners.  Add 2 Tablespoons plus 1/2 teaspoon chia seeds to mixture.  Add 1/8 teaspoon vanilla extract and stir.  Allow to sit for about 15-20 minutes and stir again (so seeds don't settle on the bottom). Refrigerate for 4 hours or overnight. Stir before serving.

Nutritional Information per serving (without added toppings): 135 calories, 11.4 g carbohydrate, 8.6 g total fat, 4.5 g saturated fat, 0 trans fat, 0 cholesterol, 18 mg sodium, 5.2 g fiber, 4.8 g sugars, 86.7 mg calcium, 3.7 g protein.

Recipes by Kathy Sheehan, copyright 2013.

Monday, July 30, 2012

Best Ever Coconut Cream Pie

Moody's Diner in Maine is quite well known and appeals to the locals as much as the summer tourists. This past spring, while there was still snow on the ground, my husband and I took a drive and had lunch at Moody's. Although I couldn't eat a piece of their homemade pie, I did convince my husband to get a slice and share some with me. It was heavenly and a few bites just wasn't enough. I went home and immediately created my own low sugar, reduced carb version that was spectacular! Not long ago, I made this for a church potluck supper and, even though the dessert table was loaded with brownies, cookies and other delicious treats, everyone seemed to have their eye on my pie. As soon as the first few people approached the dessert table and took a slice of pie, onlookers became anxious and, without even finishing their meal, they began to storm the table to secure a piece for themselves. Within a couple of minutes, long before most people had eaten their meal, my pie was gone! The lucky few raved and couldn't believe it was a low sugar pie. It's easy to prepare and can be made ahead. If you don't want pie, try making pudding instead. Either way, I think you'll agree that this is the best ever!

Best Ever Coconut Cream Pie

3/4 cup Splenda granular
1 1/2 cups unsweetened coconut milk (or lite)
1 1/2 cups 2% milk (or 1% for less fat)
1/4 cup cornstarch
4 egg yolks
1/4 teaspoon salt
3/4 cup flaked, unsweetened coconut
2 teaspoons vanilla extract
1 tablespoon butter
1 (9-inch) pie shell, prebaked
1/4 cup toasted coconut
Whipped cream, for garnish (optional)

1. In a 1-quart saucepan, combine 3/4 cup Splenda, coconut milk, and 1 cup milk. Scald mixture.

2. In a small mixing bowl, whisk the remaining 1/2 cup milk and cornstarch together to make a slurry. Whisk egg yolks with salt in medium bowl. Temper yolks by adding 1/2 cup scaled milk mixture to yolks and whisk well. Add yolk mixture and slurry back into milk mixture and whisk vigorously over medium heat until thickened, about 2 minutes. Remove from heat and add coconut, vanilla, and butter. Whisk until uniformly incorporated.

3. Pour the filling into the prepared pie shell. Cover the pie with plastic wrap and place in the refrigerator. Chill the pie completely, about 2 hours.

4. To serve, top with toasted coconut (see directions below) and a dollop of whipped cream.

5. How to toast coconut:  Preheat oven to 350ºF. Spread unsweetened coconut shavings, or sweetened shredded or flaked coconut on a rimmed baking sheet and bake, stirring once or twice, until golden, about 5 to 10 minutes. If toasting sweetened coconut, check and stir more frequently because the added sugar causes irregular browning.

Nutritional Information: Per 1/8 pie made with 1% milk and lite coconut milk:  282 calories, 23.9 g carbohydrates, 18.6 g total fat, 11.8 g sat. Fat, 0.5 g fiber, 168.6 mg sodium, 4.4 g protein.

Just pudding, made with 1% milk and lite coconut milk (1/8 recipe):
175 calories, 15 g carbohydrate, 11.5 g total fat, 8.2 g saturated fat, 0.5 g fiber, 79.6 mg sodium, 4.4 g protein.

Original recipe by Kathy Sheehan, copyright 2012

How does this recipe compare to a traditional Coconut Cream Pie?  My version is significantly lower in calories, fat, carbs, sugars, and sodium.  For comparison, the nutritional information for a restaurant size slice of coconut cream pie is 630 calories, 65 g carbohydrate, 39 g total fat, 24 g saturated fat, 1 g fiber, 370 mg sodium, 43 g sugars, 6 g protein.

Wednesday, June 6, 2012

Peanut Butter Cup Gelatin Dessert

This is not your ordinary Jello! It has the consistency of a mousse and the rich taste of a candy bar. I promise, you won’t believe that it’s made from gelatin. I got the idea from a wonderful, fun cookbook I recently purchased called “Hello, Jello!” by Victoria Belanger. It is filled with the most innovative and creative gelatin desserts you’ll ever see. Unfortunately, her original recipes are not necessarily carb –friendly, but that won’t stop me from making them over using Splenda and lower fat ingredients. My recipe was inspired by her Chocolate Peanut Butter Cups, but I must give Victoria all the credit here because I never would have thought of this one on my own. I used regular custard cups as my mold, but she suggests using foil cupcake liners, which really makes it look like the real thing! This is an economical and easy, make-ahead dessert that you won’t want to miss.

Peanut Butter Cup Gelatin Dessert
Makes 6 servings

1 cup 1% low-fat milk
¼ cup fat-free half and half
2 tablespoons + 2 teaspoons unsweetened cocoa powder
2/3 cup Splenda granular
½ cup creamy peanut butter
1 packet (1 tablespoon) dry, unflavored gelatin powder
¼ cup cold water
½ teaspoon vanilla extract

1. In a medium saucepan, whisk together the milk, fat-free half and half, cocoa powder and Splenda. Heat over medium heat until it comes to a boil, stirring often. When it reaches a boil, add the peanut butter and whisk until smooth.

2. Meanwhile, place the cold water in a medium mixing bowl and sprinkle the gelatin powder over it. Allow it to sit and absorb the water for 2 minutes (important). Whisk the hot chocolate mixture into the gelatin mixture, whisking until the gelatin has dissolved completely into the hot liquid (about 2 minutes). Add vanilla and whisk until incorporated.

3. If using custard cups, divide the gelatin mixture equally between six cups and place in the refrigerator until set, about 2 hours. If you wish to use the foil cupcake liners, allow the mixture to thicken slightly before spooning into the liners. Refrigerate until set.

4. The dessert may be served in the custard cups, but you may wish to unmold and serve on a plate (as pictured). To unmold, run a paring knife around the edge to loosen and turn onto a serving plate. (If needed, you may warm the bottom of the custard cup in very warm water for about 30 seconds to make it easier to unmold.) If using foil liners, dip the bottom of the liner in warm (not hot) water for about 15 seconds before peeling the liner off.

Nutritional Information per serving (not including whipped topping): 173 calories, 14.6 g carbohydrate, 12.5 g total fat, 3.6 g saturated fat, 127.5 mg sodium, 2.3 g fiber, 8.2 g protein.

Recipe make-over by Kathy Sheehan, 2012. Original recipe by Victoria Belanger. If you’d like to see more gelatin recipes by Victoria Belanger, visit her blog at http://jellomoldmistress.com

How does this recipe compare with the original? My make-over recipe is much lower in calories, carbs and fat. For comparison, one serving of the original recipe from the book is 489.4 calories, 56.5 g carbohydrate, 21.2 g total fat, 14.9 g saturated fat, 251 mg sodium, 3.3 g fiber and 17 g protein.