Showing posts with label yogurt. Show all posts

Friday, August 9, 2024

Low Carb Blueberry Pecan Pancake Bread Pudding

Low Carb Blueberry Pecan Pancake Bread Pudding

For brunch with my family, I wanted to make something special that mostly could be made ahead, minimizing last minute preparations. When searching online, I found a recipe that used pancakes in place of bread in a bread pudding, so I adapted it to create this outstanding low carb breakfast casserole. The convenience of using a boxed keto muffin mix as the base of the pancake batter was genius! The breakfast pudding was a huge hit with my family and may have tasted even better the second day! You can substitute raspberries or blackberries for the blueberries, if you prefer. The yogurt sauce is optional, but the hit of lemon in the creamy sauce really brightened the dish.

Low Carb Blueberry Pecan Pancake Bread Pudding
Makes 8 servings

Pancakes:
One (10 oz.) box King Arthur’s All-Purpose Keto Muffin Mix
5 large eggs
1½ cups low carb milk of choice
1/3 cup sour cream
2 tablespoons melted unsalted butter or avocado oil
½ cup chopped pecans
6 oz. organic blueberries

Custard:
3 large eggs
2 cups half and half (or a mixture of low carb milk and heavy cream equaling 2 cups)
1/3 cup low carb sweetener of choice (allulose/erythritol blend works well)
1½ teaspoon vanilla extract
½ teaspoon ground cinnamon
1/4 teaspoon salt

Lemon Yogurt Sauce:
1/3 cup plain greek yogurt
2 tablespoons half and half
2 tablespoons allulose honey (or granulated allulose)
2 teaspoons lemon zest (or 2 drops lemon oil)
A pinch of salt

1. Place the muffin mix into a large mixing bowl. Whisk together the low carb milk, sour cream, butter or avocado oil, and five eggs in a large measuring cup. Add the milk mixture to the muffin mix and whisk with a fork until blended and smooth. Fold in the chopped pecans. (If you can’t find King Arthur’s Keto Muffin Mix, you can substitute your favorite low carb pancake recipe.)

2. Heat a griddle or large nonstick skillet over medium heat. Add a teaspoon of avocado oil to grease the pan. Pour about 1/4 cup batter for each pancake onto the hot griddle. Spread the batter into a 4 inch circle using the back of a small spoon. Cook until the edges look dry and the bottoms are golden brown, about 3 minutes. Carefully flip the pancake and cook on the other side until the pancake springs back when touched in the center, another 2-3 minutes. Remove pancakes to a wire rack to cool and repeat with the remaining batter. You should end up with 18-20 pancakes.
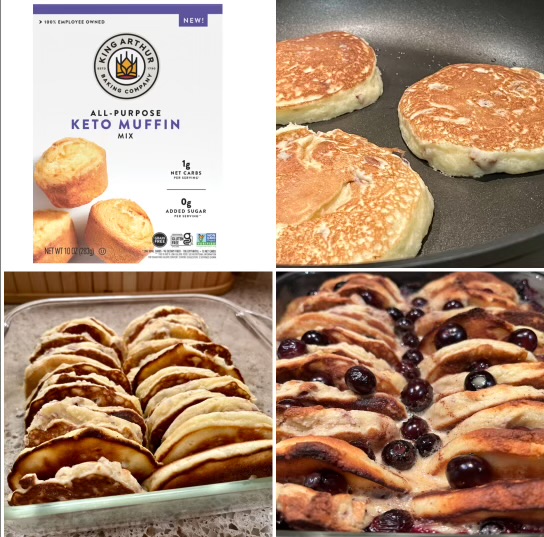
Bread Pudding Steps

3. Slice each pancake in half and arrange with the cut side down into two rows in an 8 x 8“ baking dish that has been sprayed with cooking spray. (You may not need all the pancakes to fill the baking dish. Save any unused pancakes to eat later.) Scatter half of the blueberries over the pancakes, tucking a few between each layer. This can be done 1-2 days ahead and then stored in the refrigerator, covered with plastic wrap, until the night before you plan to serve. 

4. The night before you plan to cook and serve, whisk together 3 eggs, the 2 cups half-and-half, sweetener, vanilla, cinnamon and salt. Pour the custard mixture over the pancakes and blueberries in the baking dish. Chill at least four hours and up to overnight to allow the custard to soak into the pancakes.

Cooked Bread Pudding

5. Preheat oven to 350°F. Bake the casserole until puffed and the custard is set, 45 to 50 minutes. Let stand 10 minutes to cool before serving. To serve, sprinkle with remaining blueberries and drizzle with sugar free syrup or Lemon Yogurt Sauce. Serve warm. Leftovers can be stored in the refrigerator and reheated before serving.

6. Lemon Yogurt Sauce: Whisk together the yogurt, half and half, sweetener, lemon zest and a pinch of salt until smooth and not too thick. Of needed, add more liquid a teaspoon at a time until you achieve the proper consistency. Makes about ½ cup.

Nutritional Information per serving (no yogurt sauce): 319 calories, 20.4 g carbohydrates (2.9 g dietary fiber, 4.8 g sugars, 17 g sugar alcohols), 24.7 g total fat (9.9 g saturated fat, 0 g trans fat), 216 mg cholesterol, 498 mg sodium, 173 mg calcium, 308 mg potassium, 3 mg iron, 184 IU Vit A, 3 mg Vit C, 10.9 g protein. Net carbs per serving: 1.5 grams

Photos and recipe by Kathy Sheehan, copyright 2024
All rights reserved. Please do not duplicate without the author’s permission.

Thursday, August 29, 2019

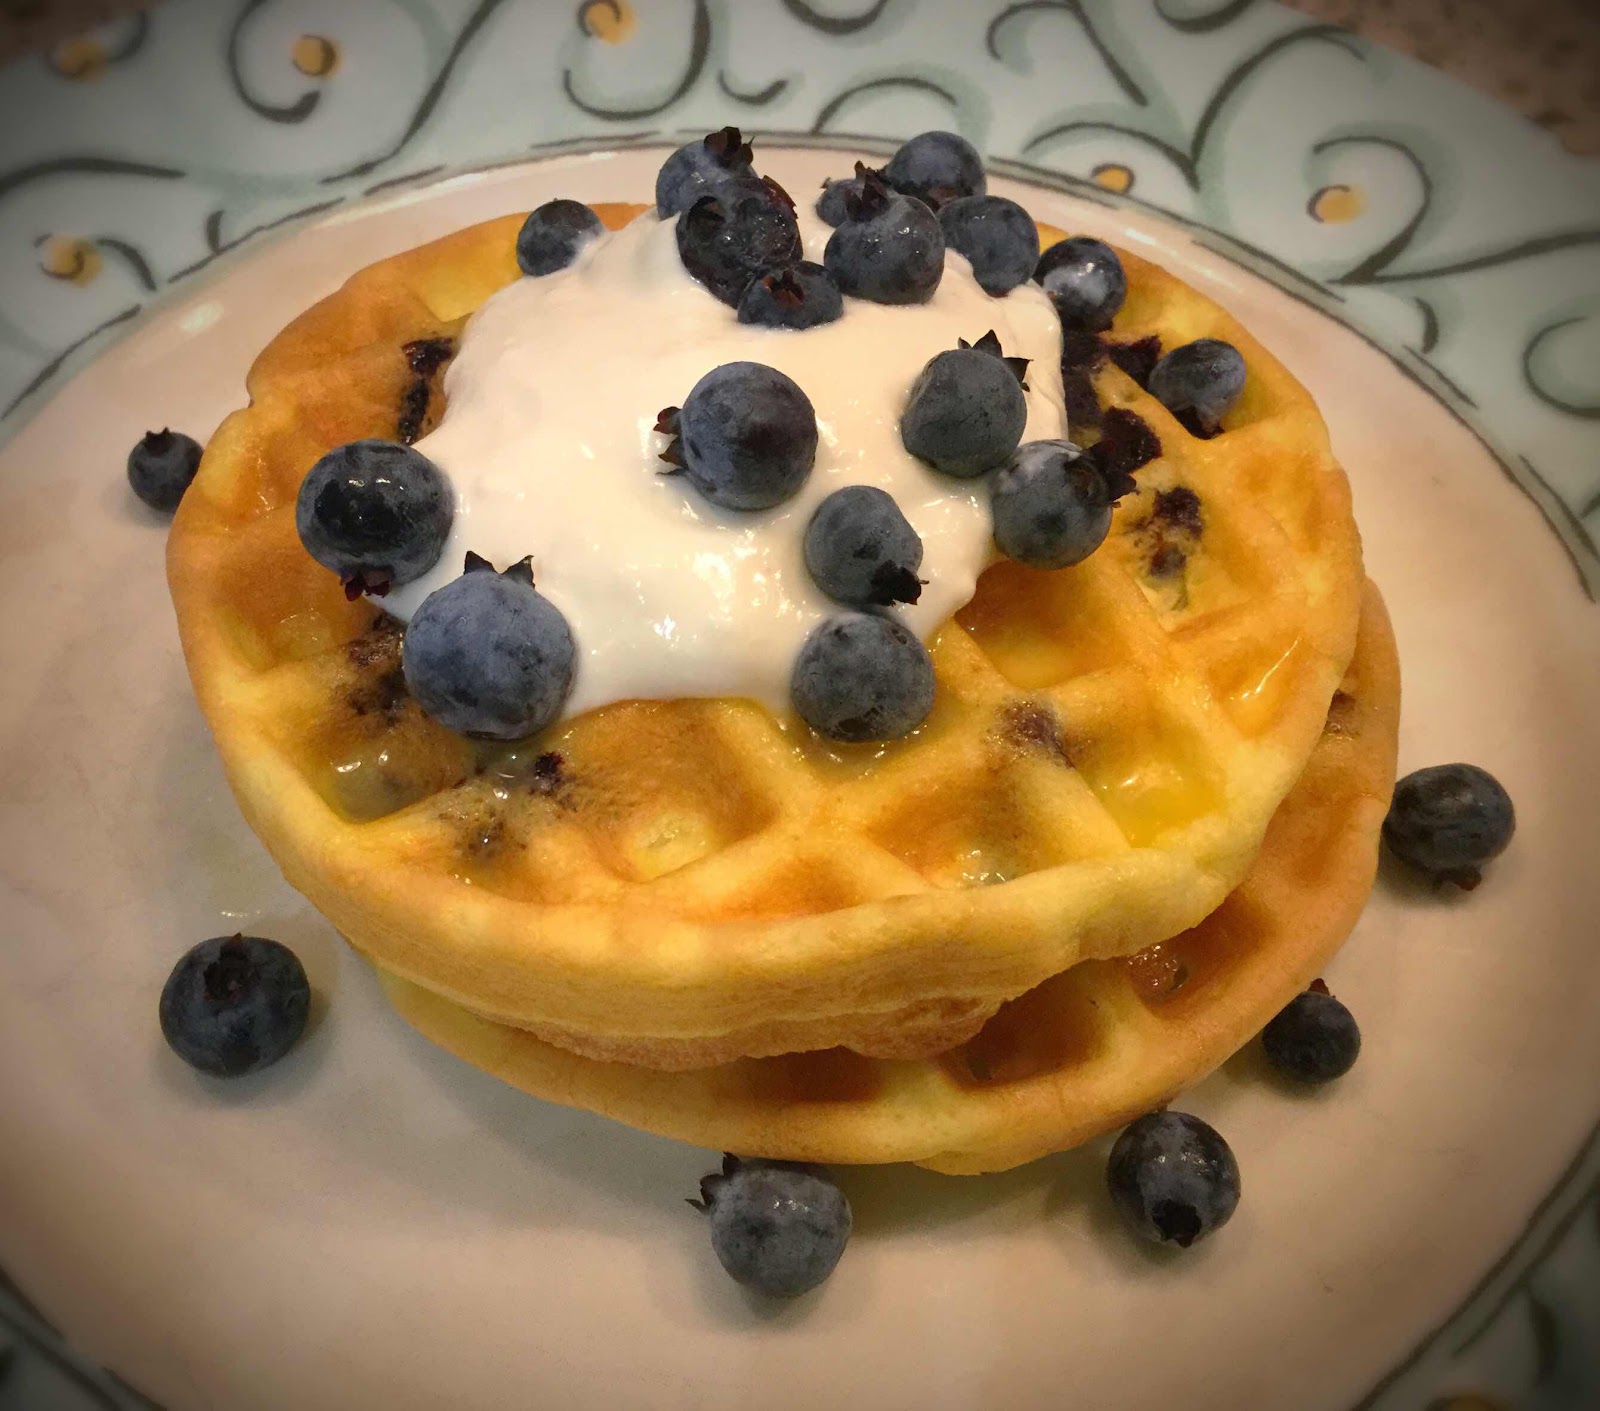
Blueberry Chaffles with Lemon Yogurt Cream

Blueberry Chaffle with Lemon Yogurt Cream
A chaffle wave is sweeping over the low carb world! What is a “chaffle?” It is a very low carb waffle made with a base of egg and cheese. They can be created in any flavor, from pizza to dessert, and are a good bread substitute for sandwiches, burgers and a bun for hotdogs. You can use any waffle maker, but the 4” Mini Dash Waffle Maker is just the right size, especially when making a single serving. This recipe makes two 4” chaffles. (If you’re using a larger waffle maker, you may need to double or triple this recipe.) The carb count is a very low 3.4g net carbs for two delicious chaffles bursting with fresh Maine blueberries! Of course, you can top them with your favorite sugar free syrup, but I enjoy mine with a dollop of Lemon Yogurt Cream. This is a quick and delicious breakfast and, because these mini waffles are so adorable, everyone in the family will want to join the chaffle craze! 

Blueberry Chaffles with Lemon Yogurt Cream
Makes 1 serving (two 4’ chaffles)

Chaffle Ingredients:
1 large egg, beaten
1 tablespoon cream cheese, softened (or substitute sour cream or ricotta)
1 tablespoon almond flour (or 1/2 tbsp coconut flour)
2-3 drops lemon extract, or to taste (can substitute 1/4 tsp vanilla extract)
5-6 drops Lakanto Monkfruit extract (or 1 tsp granulated erythritol)
1 teaspoon heavy cream
1/8 teaspoon baking powder
1 tablespoon fresh wild Maine blueberries (can use frozen, but choose the smaller, low bush berry, such as Wyman’s)

Lemon Yogurt Cream Ingredients:
1/4 cup plain, Greek yogurt
A few drops of lemon extract (or 1/2 tsp lemon zest)
4 drops of LaKanto Monkfruit extract (or stevia)

1. To make the chaffles, preheat your mini waffle maker. Whisk together all of the chaffle ingredients, except the blueberries, until a smooth batter forms. Add the blueberries and gently stir to incorporate. Spoon about 3-4 tablespoons of batter onto the preheated waffle maker and cook for about 3-4 minutes until golden brown. Remove to a wire rack to cool, meanwhile repeat with the remaining batter to make a second chaffle.

2. Make the Lemon Yogurt Cream by stirring the yogurt, extract (or zest) and sweetener together.

3. To serve, spread a small amount of butter on each chaffle, top with lemon cream and sprinkle with additional fresh blueberries. Enjoy!

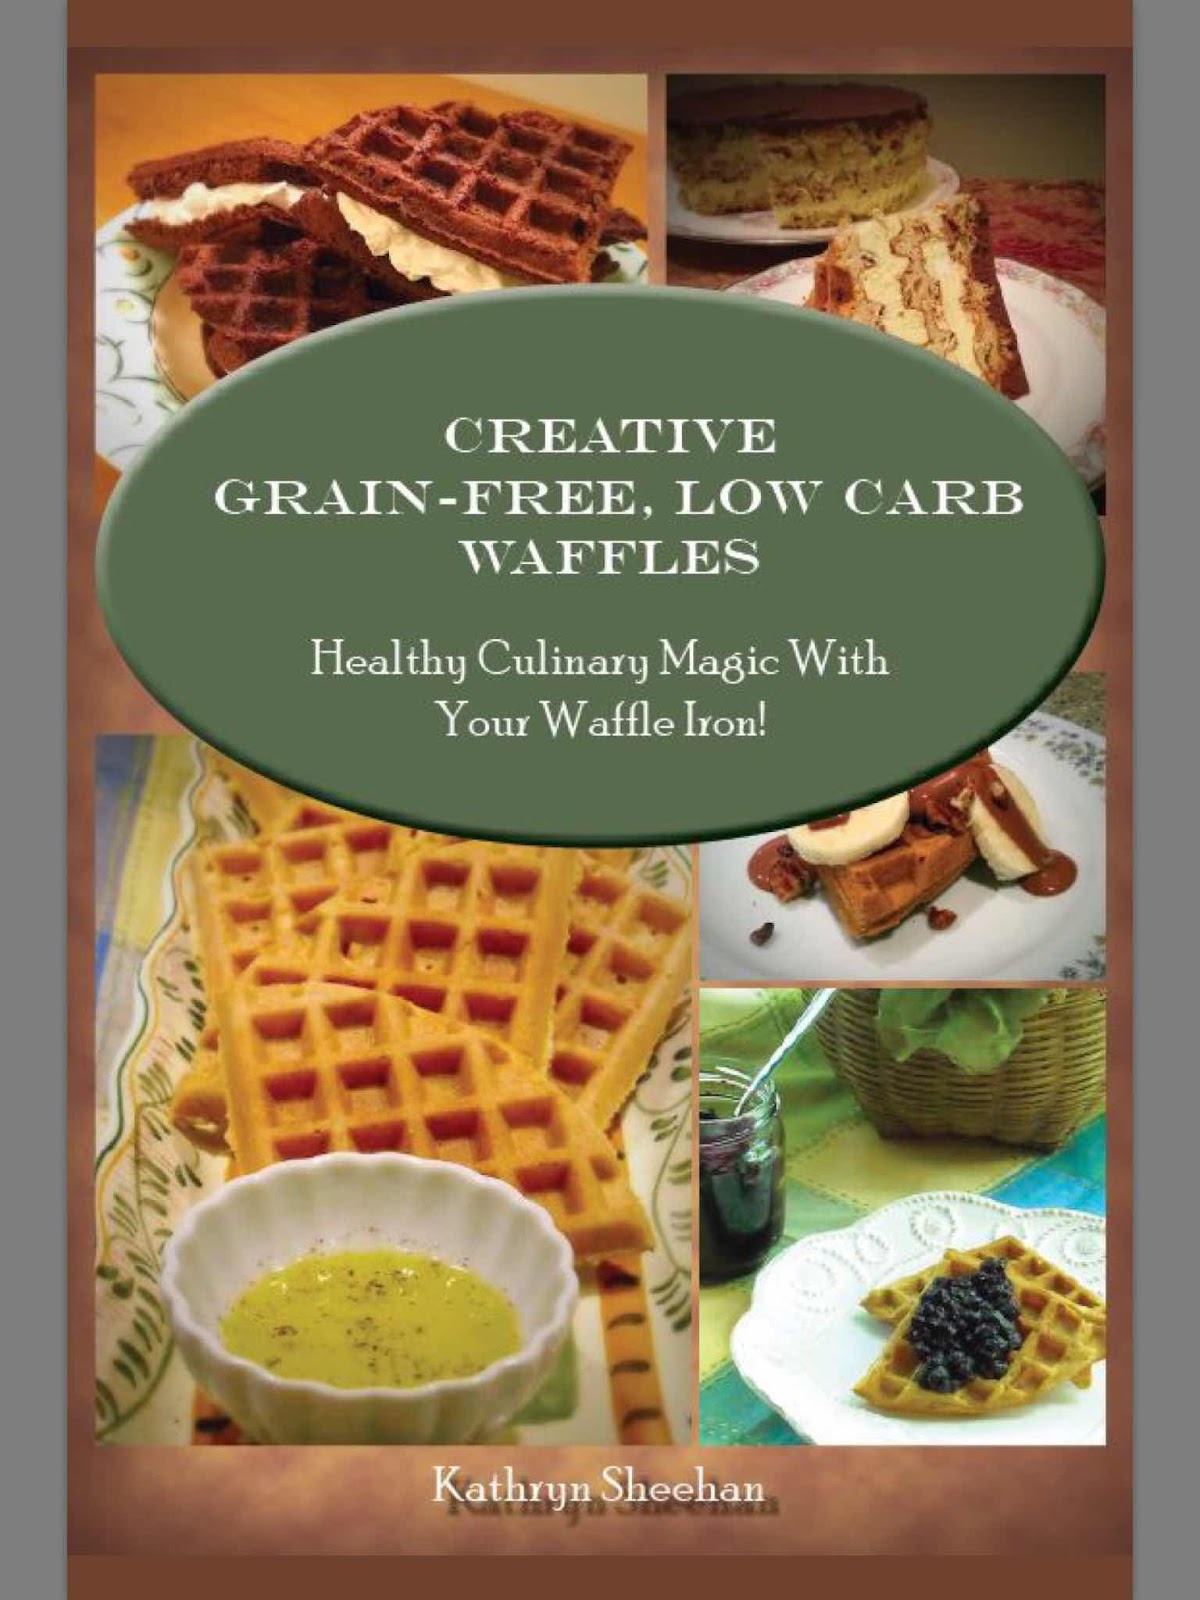
NOTE: If you’re looking for more low carb waffle and chaffle recipes, that can be made in any waffle maker, be sure to check out my book Creative Grain-Free, Low Carb Waffles: Healthy Culinary Magic With Your Waffle Iron available on Amazon Kindle or iBooks for only $2.99!

Creative Grain-Free, Low Carb Waffles
Nutritional Information per 2 chaffles (no topping): 176 calories, 4.4 g carbohydrate (1 g dietary fiber, 1.6 g sugars), 13.7 g total fat (5.4 g saturated fat, 0 g trans fat), 207 mg cholesterol, 171 mg sodium, 94.4 mg calcium, 128 mg potassium, 1 mg iron, 8.9 g protein. Net carbs per serving: 3.4 grams

Nutritional Information for Lemon Yogurt Cream: 56 calories, 2.5 g carbohydrate, 2.8 g total fat, 56.5 mg calcium, 5.1 g protein. 

Blueberry Chaffles
Photos and recipe by Kathy Sheehan, copyright 2019
All rights reserved. Please do not duplicate without the author’s permission. 
Thursday, March 1, 2018

Raspberry Yogurt Fluff

Raspberry Yogurt Fluff
This is a very quick and easy dessert or it makes a delicious breakfast, too. It’s best made with fresh raspberries (not frozen) so it sets up nicely. The pale pink color and hint of sweet raspberries are delightful, making this a perfect spring dessert!

Raspberry Yogurt Fluff
Makes 4 servings

1/2 cup heavy whipping cream
1/2 teaspoon vanilla extract
3/4 teaspoon stevia powder, divided and to taste (I used Sweet Leaf brand)
3 ounces cream cheese, cubed and softened
3/4 cup plain, unsweetened whole milk yogurt
10 fresh raspberries, mashed with a fork
4 fresh raspberries for garnish

1. Whip the heavy cream with a handheld or standing mixture on high until soft peaks form. Add the vanilla extract and 1/4 teaspoon stevia powder. Continue whipping until fully whipped. Remove 3/4 of the whipped cream to a separate bowl and set aside.

2. Into the remaining 1/4 whipped cream in the mixing bowl, add the softened cream cheese and yogurt. Whip on high until completely smooth. Add the remaining 1/2 teaspoon stevia powder and the 10 mashed raspberries. Whip until well combined.

3. Gently fold in the reserved whipped cream until well combined and no streaks remain. Spoon into 4 individual serving dishes and garnish each with one fresh raspberry. Chill in the refrigerator until ready to serve, at least 1 hour or up to 1 day.

Nutritional Information per serving: 214 calories, 4.7 g carbohydrate (0.4 g dietary fiber, 3 g sugars), 19.3 g total fat (11.3 g saturated fat, 0 g trans fat), 73 mg cholesterol, 110 mg sodium, 36 mg calcium, 131 mg potassium, 654 mg Vit A, 4 mg Vit C, 4.6 g protein. Net carbs per serving: 4.2 grams

Photo and recipe by Kathy Sheehan, copyright 2018
All rights reserved. Please do not duplicate without the author’s permission. 

Wednesday, August 23, 2017

Mini Banana Pie Chia Pudding Parfait

Parfait
You usually don't think of a banana as being low carb because it's such a high-sugar fruit. But you can enjoy them in a very small amount, such as in this parfait, without overdoing your carb limit for the day. Chia pudding resembles tapioca in texture, but it's easier to prepare and has more nutrition, plus it's an excellent source of healthy Omega 3 fat and fiber. I love banana pudding and pie, so I set out to recreate the flavors in this recipe! It requires a couple of steps, but each is very simple and can be made ahead, if needed. The "pie crust" crumbles really give this parfait it's banana pie texture and flavor, so don't skip this step. You have the choice of topping with plain, unsweetened yogurt laced with vanilla or whipped cream, depending on the total amount of carbs in your eating plan. I like the yogurt version for breakfast! So, whether you start your day with this mini parfait or enjoy it for dessert, you can feel good about giving your family this special treat!

Mini Banana Pie Chia Pudding Parfait
Makes 8 small servings

Chia Pudding Layer:

1/4 cup whole chia seeds
1/4 teaspoon ground cinnamon
1/4 teaspoon vanilla extract
1/4 teaspoon banana extract
1 cup full-fat coconut milk (I used A-Roy D brand)
6-8 drops liquid Stevia, or to taste (I used Sweetleaf brand)

Pie Crust Layer:

1/3 cup almond flour
1 teaspoon erythritol sweetener or 1/4 tsp stevia powder
A pinch of salt
2 teaspoons butter or coconut oil, melted

1/2 of a very small banana, cut into eight slices (a 3-inch length)

Yogurt or Cream Layer:

1-1/2 cups plain, unsweetened whole milk yogurt or 3/4 cup heavy cream, whipped (or whipped coconut cream for dairy free)
1/2 teaspoon vanilla extract
6-8 drops liquid Stevia, or to taste

1. Make the chia seed pudding: In a small bowl, mix the chia seeds and cinnamon. In a measuring cup or separate bowl, mix together the coconut milk, extracts and stevia drops. Pour the coconut milk mixture over the chia seed mixture and stir vigorously with a fork, making sure all the chia seeds are incorporated and submerged in the coconut milk. Set aside to allow the pudding to absorb the liquid and thicken, about 30 minutes.

2. Meanwhile, make the pie crust layer: Preheat the oven to 325 degrees Fahrenheit. In a medium bowl, whisk together the almond flour, sweetener and salt. Stir in the melted butter until the dough comes together and resembles coarse crumbs. Turn out onto a baking sheet lined with parchment paper or a silicone baking mat. Press down with your fingers to flatten into a 1/8-inch thick circle or oval (the shape doesn't matter). Bake in the preheated oven until the edges are golden brown, about 13-15 minutes. Watch carefully because the edges can burn quickly! Allow crust to cool on the baking sheet for 5 minutes, then remove parchment paper or silicone mat to a wire rack to cool completely (keep crust on the paper or mat to prevent crumbling). When cooled, break the crust into small, bite-size pieces; set aside.

Pie Crust Layer
3. Make the yogurt or whipped cream layer: Mix together the plain, unsweetened yogurt with the vanilla extract and stevia drops to taste; set aside. (Or whip the heavy cream until semi-stiff. Add the vanilla and stevia and gently fold until well combined; set aside.)

4. Assemble the parfaits: Use a spoon to divide the chia pudding mixture between eight small jars or dessert shot glasses (about 2 TB each). Place one slice of banana on top of the chia layer. Sprinkle 1 teaspoon of the pie crust crumbles on top of the banana (reserve some crumbs for garnish). Divide the yogurt (or whipped cream) evenly among the dessert cups. Sprinkle with the remaining pie crust crumbs. Eat immediately or cover and place in the refrigerator for up to 2 days.

Place banana on chia layer
Nutritional Information per serving (made with yogurt): 128 calories, 7.3 g carbohydrate (2.1 g dietary fiber, 3.7 g sugars, 0.5 g sugar alcohols), 9.6 g total fat (4.7 g saturated fat, 0 g trans fat), 10 mg cholesterol, 39 mg sodium, 90.2 mg calcium, 106 mg potassium, 79 mg Vit A, 1 mg Vit C, 3.7 g protein. Net carbs per serving: 5.1 grams

Nutritional Information per serving (made with whipped cream): 201 calories, 5.7 g carbohydrate (2.1 g dietary fiber, 1.5 g sugars, 0.5 g sugar alcohols), 19 g total fat (10.7 g saturated fat, 0 g trans fat), 44 mg cholesterol, 27 mg sodium, 53.4 mg calcium, 52 mg potassium, 444 mg Vit A, 1 mg Vit C, 2.6 g protein. Net carbs per serving: 3.6 grams


Recipe and photos by Kathy Sheehan, copyright 2017
All rights reserved. Please do not duplicate without the author's permission.

Monday, December 5, 2016

Old Fashioned Gluten Free, Low Carb Cornbread


Before I found out I had celiac disease (an intolerance to gluten), I often would bake lower carb goodies by substituting almond flour for most of the wheat flour in a recipe and that worked out well. For the most part, I now avoid all grains (GF or not) to keep my blood glucose steady. Tonight though, I wanted to serve cornbread with a Navy Bean and Bacon Soup because the flavor combination is so perfect together. This amazing, low carb recipe is the result of my kitchen experimentation and it turned out great!  I couldn't be more pleased; it tastes like the real thing to me! Traditionally prepared cornbread is about 29 grams of carbohydrate per serving, which is far beyond my limit.  My recipe clocks in at a low 7.3 net carbs per slice and has all the flavor and texture of the original. I know you'll be as pleased as I am when you taste my delicious bread.  Try it with this creamy Navy Bean Soup and stay happy and warm this winter, no matter the weather outside: http://www.skinnytaste.com/navy-bean-bacon-and-spinach-soup-pressure-cooker-slow-cooker-or-stove-top/

Old Fashioned Gluten Free, Low Carb Cornbread
Makes 8 servings

1/2 cup coarsely ground certified gluten free cornmeal (non-GMO or organic is best)
1/2 cup blanched almond flour, finely ground
1/4 teaspoon kosher salt
1/2 teaspoon baking soda
1 teaspoon baking powder
1 tablespoon LaKanto Golden Monkfruit sweetener (or other erythritol sweetener)
1 egg at room temperature, beaten
2 tablespoons butter, melted
3/4 cup plain milk kefir, at room temperature (can substitute sour cream, plain yogurt or buttermilk)

1. Preheat oven to 400 degrees Fahrenheit. Grease an 8-inch cast iron skillet (preferred) or an 8-inch round pan and set aside.

2. In a large bowl, place the cornmeal, almond flour, salt, baking soda, baking powder, and LaKanto Monkfruit sweetener and whisk to combine and break up any lumps. In a separate bowl or measuring cup, mix the egg, melted butter and kefir (or sour cream, yogurt or buttermilk) and whisk vigorously to combine.  Create a well in the center of the dry ingredients and add the wet ingredients. With a whisk or fork, combine ingredients until just combined. Pour batter into the greased pan.  Bake for 20-30 minutes (about 20-25 minutes if using a cast iron skillet) or until lightly browned, the edges are brown and crispy and a toothpick inserted into the center comes out clean.

3. This bread is best when sliced and served warm.  (If allowed to cool, I suggest reheating in a 350 degree oven for about 10 minutes to crisp up the top.)

Nutritional Information per serving (1/8 of recipe): 120 calories, 8.7 g carbohydrate (1.4 g dietary fiber, 0.9 g sugars, 1.5 g sugar alcohols), 7.7 g total fat (2.4 g saturated fat, 0 g trans fat), 36 mg cholesterol, 211 mg sodium, 59.8 mg calcium, 98 mg potassium, 3.9 g protein. Net carbs per serving: 7.3 grams

Recipe by Kathy Sheehan, copyright 2016
All rights reserved. Please do not duplicate without permission from the author.

Monday, September 26, 2016

Apple Pie Kefir Smoothie


It's apple season in Maine! This is the time of year I get a serious craving for apples, maybe because they're everywhere--in the Farmer's Markets and grocery stores. When my daughter was young, apple picking was a yearly activity that was followed up with a lot of cooking with apples in every conceivable way. This delicious smoothie has that apple-cinnamon flavor that is reminiscent of the all-American favorite, apple pie.  To keep the carbs down, I only use 1/4 of a tart apple but, combined with the warm spices, it's enough to give it the apple flavor I desire.  This smoothie is a great way to get a crisp, cool autumn morning off to a good and healthy start!

Apple Pie Kefir Smoothie
Makes 1 serving

1/2 cup plain, unsweetened kefir (or yogurt)
1/4 organic Granny Smith apple with skin, cut into chunks
1 tablespoon coconut or flaxseed oil
1/2 cup coconut or almond milk (I used full-fat coconut milk)
1 teaspoon apple pie spice
1 tablespoon chia seed
1/4 teaspoon stevia powder, or to taste (I use Sweet Leaf brand)
A pinch of salt
2 kale leaves or a handful of spinach (if you want it green)
1 teaspoon collagen hydrolysate (or your favorite protein powder)
1/4 teaspoon vanilla extract
4-5 ice cubes
Enough water to reach desired consistency

Place all of the ingredients in a blender and blend until smooth. Enjoy immediately.

Nutritional Information per serving: 421 calories, 13.4 g carbohydrate (3.5 g dietary fiber, 9.6 g sugars), 35.3 g total fat (24.8 g saturated fat, 0 g trans fat), 12 mg cholesterol, 77 mg sodium, 161.4 mg calcium, 286 mg potassium, 8.3 g protein.  Net carbs per serving: 9.9 grams

Recipe by Kathy Sheehan, copyright 2016
All rights reserved. Please do not duplicate without author's permission.

Tuesday, August 23, 2016

Snickerdoodle Smoothie


If I could choose only one food item that has had the biggest impact on my improved health, it would be my morning smoothie. For the past eight years, most of my days start with a smoothie. Some are green with a little low-glycemic fruit and others are made from a base of nut butter, but the thing they all have in common is that they're nutritious, delicious and keep me feeling satisfied for many hours, sometimes all the way to dinner! The trick about making smoothies for a diabetic is that they need to be very low carb, plus contain enough healthy fat and protein to keep the blood glucose steady. It's the blood sugar spike of a high carb breakfast and then rapid crash a couple of hours later that causes hunger and cravings by mid-morning, requiring an "elevenzees" snack just to make it to lunch! When you start your morning on a blood sugar roller coaster ride, it will effect your eating pattern for the rest of the day and may lead to the over-consumption of carbs. This delicious and creamy smoothie has the sweet vanilla and cinnamon flavor of the popular Snickerdoodle cookie. Cinnamon is well-known and documented as a blood sugar stabilizing spice and this is a great way to get more of it into my diet.

Snickerdoodle Smoothie
Makes 1 serving

1/2 cup plain, unsweetened kefir (or yogurt)
1/2 cup coconut milk (or almond milk)
1 tablespoon macadamia nut butter (or 2 tablespoons macadamia nuts)
1 teaspoon ground cinnamon
1/8 teaspoon ground nutmeg
A pinch of sea salt
1/4 teaspoon stevia powder, or to taste (I used Sweet Leaf brand)
1/2 tablespoon collagen hydrolysate powder (or your favorite protein powder)
1 tablespoon chia seeds
1/2 tablespoon coconut oil, ghee or flax oil
4 drops of Vanilla Creme stevia
1/2 cup water (or enough to create desired consistency)
4-5 ice cubes
1 scoop of prebiotic powder, optional (I used Prebio Plus)

Put all of the ingredients in a blender and blend until completely smooth. Taste and adjust sweetening, if desired. Pour into a tall glass and enjoy!

Nutritional Information: 304 calories, 8 g carbohydrate (7.4 g dietary fiber, 4.4 g sugars), 24.7 g total fat (9 g saturated fat, o g trans fat), 12 mg cholesterol, 132 mg sodium, 379.9 mg calcium, 150 mg potassium, 9.4 g protein.  Net carbs per serving: 0.6 grams

Recipe by Kathy Sheehan, copyright 2016
All rights reserved. Please do not duplicate without author's permission.

Tuesday, August 16, 2016

Brownie Chocolate Chip Kefir Ice Cream


Wowza!! That's the only word to describe this rich and creamy frozen treat. Prior to my diagnosis of Celiacs disease, one of my favorite flavors of ice cream was Cookies and Cream. I was sad thinking I might never have it again. But instead of feeling sorry for myself or living without, I took it as a personal challenge and went to work in my kitchen. The result of my creative effort has me smiling again! The base for this ice cream is a rich vanilla egg custard, which is delicious by itself. But when I added chunks of my Chocolate Fudge Brownies and chopped dark chocolate bits to the custard, the vanilla deliciousness reached to near perfection! Of course, as I always do, I added probiotic-rich kefir to the mix to make it even more healthy. You will never believe this ice cream is low carb, sugar free and grain free. It tastes like the real thing to me!

Brownie Chocolate Chip Kefir Ice Cream
Makes eight (1/2 cup) servings

Vanilla Custard Ice Cream Base:

1 cup full-fat coconut milk
1/2 cup heavy cream (or use all coconut milk**)
4 egg yolks
1/4 cup LaKanto Monkfruit sweetener (or other erythritol sweetener), divided
1-1/2 teaspoons vanilla extract
The seeds scraped from one vanilla bean (or 1/4 teaspoon vanilla powder)
A pinch of salt
1 cup plain, unsweetened kefir or plain yogurt** (to make your own kefir, click here)
1/2 to 3/4 teaspoon stevia powder, to taste (I used Sweet Leaf brand)
8-10 drops Vanilla Creme stevia (I used Sweet Leaf brand)

Stir Ins:
1 serving of Chocolate Fudge Brownie Cups (recipe here), cut into small squares and frozen
4 squares of dark chocolate 70% or higher bar (I used 85% Green and Black bar), chopped

1. In a medium heavy saucepan, stir together the coconut milk, heavy cream, 2 tablespoons LaKanto Monkfruit sweetener, vanilla extract, vanilla seeds (or powder) and salt. Heat on medium-low heat until steam begins to rise from the mixture and small bubbles form on the edges of the pan, stirring occasionally to dissolve sweetener.

2. Meanwhile, in a 2-cup glass measuring cup or bowl, whisk the egg yolks and 2 tablespoons of remaining LaKanto Monkfruit sweetener vigorously until light and pale yellow in color, about 2 minutes.

3.  When the milk mixture is heated, use a ladle to slowly add about 1/4 cup of the hot liquid to the egg yolks while whisking continuously, until incorporated. Slowly add another 1/4 cup of the hot milk mixture into the egg yolks while whisking. Then pour the tempered egg yolks into the saucepan with the rest of the milk mixture, stirring continuously until the mixture has thickened slightly and coats the back of a spoon. Remove from heat and pour the custard through a strainer to remove any lumps. Cool completely, eventually moving to the refrigerator to chill.

4. While the custard is chilling, bake the Chocolate Fudge Brownie Cups until firmly set, about 20 minutes baking time (click here for the recipe). Once cooled to room temperature, cut one serving (1/3 of recipe) into small squares and freeze. Chop dark chocolate and set aside.

5. Once the custard is cold, pour it into a blender with the kefir, stevia powder and stevia drops. Blend briefly until combined. Taste and adjust sweetening, if desired. Cool mixture in the refrigerator for at least 1 hour before proceeding.

6. Follow the manufacturer's instructions for your ice cream maker to churn the ice cream base. When it has thickened sufficiently, add the stir in ingredients (add the frozen brownie squares toward the end of the churning process to prevent them from pulverizing). Serve immediately as a soft-serve ice cream or pour into a container and freeze for about 40 minutes before scooping. (See Notes* regarding leftovers.)

*Notes: Sugar free ice cream is best served at the soft-serve stage or soon after freezing briefly. Once it has frozen completely, it will be too hard to scoop. Spoon any leftovers into ice pop molds and freeze to be enjoyed later.

**This ice cream can be made dairy free by using all coconut milk and substituting either coconut milk kefir or a dairy-free yogurt.

Nutritional Information per 1/2 cup serving: 175 calories, 6.4 g carbohydrate (0.6 g dietary fiber, 1.7 g sugars, 6.5 g sugar alcohols), 15.9 g total fat (8.8 g saturated fat, 0 g trans fat), 140 mg cholesterol, 64 mg sodium, 74.6 mg calcium, 78 mg potassium, 3.9 g protein.  Net carbs per serving: 5.8 grams

Recipes by Kathy Sheehan, copyright 2016
All rights reserved. Do not duplicate without author's permission.

Sunday, July 3, 2016

Cherry Chocolate Chip Kefir Ice Cream with Macadamia


Summer just isn't summer without ice cream! For a long time, I only would allow myself a single dip of ice cream once a year as a treat. (How sad and un-American is that?) I felt deprived and certainly left out of the whole social experience of eating ice cream with family and friends. I wanted more freedom to enjoy the short, warm season in Maine like everyone else...and that means having plenty of ice cream. The only difference now is that I make it myself. For my birthday last year, I received an ice cream maker and have been having a grand time creating healthy, sugar free ice cream in every season. My imagination has been the only limit to the variety of flavors I've enjoyed! The one ingredient I add to all my recipes is plain milk kefir because it's a delicious way to consume more probiotics. My ice cream is similar to frozen yogurt, but it contains many more beneficial microorganisms to boost digestive health, which is very important for a person with diabetes. This recipe highlights fresh cherries that are in season and at the lowest price right now. Combined with chocolate chips, cacao nibs and chopped macadamia nuts, it is bursting with real summertime flavor! If you don't have an ice cream maker, you can make this mixture into ice pops instead, but I highly recommend you consider getting one for all the ice cream you'll want to make in the future after you taste this!  To browse my other low carb, delicious and healthy ice cream recipes, click here.

Cherry Chocolate Chip Kefir Ice Cream with Macadamia
Makes eight (1/2 cup) servings

Ice cream base:

1 cup plain milk kefir (to learn how to make your own, click here) or use plain yogurt
2 cups full-fat coconut milk (I used A-Roy D brand)
1 tablespoon Lakanto Monkfruit sweetener (or other erythirtol sweetener)
3/4 teaspoon stevia powder, or to taste (I use Sweet Leaf brand)
1 heaping tablespoon raw cacao powder (or unsweetened cocoa powder)
5-8 drops of Cherry flavored liquid stevia (or regular)
1 tablespoon macadamia nut butter (or cashew butter)
12 fresh red sweet cherries, pitted (divided)

Stir-Ins:

2 tablespoons 70% or higher dark chocolate, chopped (I used 5 squares of Green and Black's 85% Organic Chocolate bar)
1 tablespoon raw cacao nibs
1/4 cup chopped macadamia nuts

1. In a blender, blend together the kefir, coconut milk, sweeteners, cacao powder, macadamia nut butter and 8 of the pitted cherries. Blend until well combined and smooth. Taste and adjust sweetening, if desired. Lastly, add the remaining 4 cherries and pulse blender only until cherries are roughly chopped (you want some chopped cherry pieces visible in the mixture). Pour into a glass jar and refrigerate for at least 1 hour.

2. Meanwhile, prepare stir-in ingredients and put them in a small bowl; set aside. (I like using cacao nibs with the chopped dark chocolate because it adds a nice crunchy texture to the finished ice cream but, if you don't have them, you can leave them out and add another 1 tablespoon of chopped chocolate instead.)

3. According to the manufacturer's instructions for your ice cream maker, churn the ice cream base until beginning to solidify.  Add the stir-ins and continue churning until a soft serve consistency is reached. At this point, you can serve immediately or, if you wish to scoop the ice cream, pour into a container and place in the freezer for about 15 minutes, but do not allow it to freeze completely (see note below). 

NOTE: This ice cream is best served right away because, if it is completely frozen, it will be too hard to scoop. Fill ice pop molds with any leftover ice cream and freeze to be eaten as popsicles later.

Nutritional Information per 1/2 cup: 202 calories, 6.8 g carbohydrate (1.3 g dietary fiber, 3.7 g sugars, 1.5 g sugar alcohol), 19 g total fat (10.9 g saturated fat, 0 g trans fat) 0 mg cholesterol, 13 mg sodium, 21.7 mg calcium, 51 mg potassium, 1.8 g protein. Net carbs per serving: 5.5 grams

Recipe by Kathy Sheehan, copyright 2016

Wednesday, May 11, 2016

Cacao Almond Chocolate Chip Kefir Ice Cream


Eating low carb, high fat doesn't have to be boring! Also, if you know a few good low carb substitutions, you can enjoy a healthy, delicious, creamy dessert like this one. The ingredient that makes this ice cream especially beneficial for health is the kefir. Kefir is a cultured dairy beverage, with a taste similar to yogurt, that is filled with probiotic microorganisms that promote healing in all parts of the body, including it's ability to stabilize blood sugar. Research shows that the microbiome of a person with diabetes is different from a healthy person without diabetes. The National Institute of Health is conducting a study to show the benefits of probiotic therapy for T2 diabetics (1). This and other studies from around the world have already demonstrated that rebuilding and maintaining a healthy microbiome by consuming kefir and other fermented foods help to improve or reverse the condition of T2 diabetes (2). That's why I eat probiotic-rich foods daily and include cultured dairy or fermented vegetables with every meal. For me, this kefir ice cream is not only an amazing, guilt-free treat, it's medicine! I follow Hippocrates advice, "Let food be thy medicine and medicine be thy food." Now, this is REAL FOOD medicine that is easy to swallow!

Cacao Almond Chocolate Chip Kefir Ice Cream
Makes 8 servings (1/2 cup each)

Ice Cream Base:
1 cup plain, unsweetened kefir (can be purchased or to make at home, click here)
1/2 cup kefir cheese (kefir with the whey separated out, see here for directions) or Greek yogurt
1 cup full-fat coconut milk
1/2 cup almond butter (no sugar added)
1/2 teaspoon kosher or sea salt (omit or reduce if almond butter contains salt)
1/2 teaspoon instant coffee granules or espresso powder (I used decaf)
1 tablespoon Lakanto Golden Monkfruit Sweetener (or other erythritol sweetener)
1/2 + 1/8 teaspoon stevia powder (I used Sweet Leaf brand)
2 tablespoons unsweetened raw cacao or cocoa powder
1/2 teaspoon vanilla extract

Stir-in Ingredients:
2-1/2 tablespoons chopped dark chocolate (85% or higher, I used 5 squares of a Green and Black bar)
1 tablespoon raw cacao nibs
1/4 cup roasted chopped almonds

1. Place all of the Ice Cream Base ingredients in a blender and blend until smooth.  Refrigerate for at least 1 hour before proceeding.  Meanwhile, prepare the Stir-in ingredients and set aside.

2. Following the manufacturer's instructions for your ice cream maker, churn the ice cream and, when the mixture begins to solidify, add the Stir-in ingredients and continue to churn until desired consistency is reached.

3.  Serve immediately as a soft-serve ice cream or transfer to a container and place in the freezer for about 20 minutes to firm up a bit before scooping. Spoon any leftovers into ice pop molds and freeze until solid. This ice cream makes wonderful fudgesicles!  (Because this ice cream is sugar free, once the ice cream is completely frozen, it will be too firm to scoop. I recommend making ice pops out of any ice cream not eaten immediately.)

Nutritional Information per 1/2 cup serving: 249 calories, 8.1 g carbohydrate (3.1 g dietary fiber, 2.8 g sugars, 1.5 g sugar alcohol), 21.4 g total fat (8.5 g saturated fat, 0 g trans fat), 5 mg cholesterol, 51 mg sodium, 69.6 mg calcium, 51 mg potassium, 5.9 g protein.  Net carbs per serving: 5 grams

Recipe by Kathy Sheehan, copyright 2016

References:


Wednesday, April 27, 2016

Cinnamon Kefir Chia Pudding and Yogurt Parfait


For breakfast or dessert, this delicious parfait brings a smile to everyone's face! It looks so elegant and complicated, but it really isn't. It takes some prior planning to have all the ingredients ready, but once that is done, it's quick and easy to put together.

1. Make a batch of my Spiced Grain-Free Baked Granola.  Click here for the recipe. I always have this granola on hand in my pantry because it is a breakfast staple in my house. If you don't want to make your own granola, purchase a gluten-free variety.

2. Take plain, unsweetened Greek yogurt (or a mixture of kefir cheese and plain yogurt) and mix it with vanilla powder (or vanilla extract) and stevia powder to taste; set aside.

3. Then make the Cinnamon Kefir Chia Seed Pudding (see recipe below). I like making my chia seed pudding in a blender, rather than other methods that mix the whole seed in liquid, because I like mine smooth.  The pudding needs to set up for a couple of hours or overnight, so plan for this.  In the morning, assemble your parfaits and dazzle your family! This is a attractive breakfast no one can refuse!

Cinnamon Kefir Chia Seed Pudding
Makes 4 servings (1/2 cup each)

1 cup almond or coconut milk
1/2 cup plain, unsweetened kefir (see directions for making kefir at home)
1 teaspoon ground cinnamon
1/2 teaspoon vanilla extract or unsweetened vanilla powder
1/2 teaspoon stevia powder, or to taste (I use Sweet Leaf brand)
1 pitted date (soaked in water, if too dry)
1 teaspoon Golden Lakanto Monkfruit Sweetener (or substitute with another pitted date)
A pinch of salt
1/3 cup chia seeds (I used white chia seeds)

Place all of the ingredients in a blender and blend until thick and smooth. Taste mixture and add more stevia, if desired.  Pour mixture into a glass storage container or jar, cover and place in the refrigerator for at least 2 hours or overnight.

Nutritional Information per 1/2 cup serving: 139 calories, 8.6 g carbohydrate (5.8 g dietary fiber, 1.9 g sugars), 10.2 g total fat (3 g saturated fat, 0 g trans fat), 0 mg cholesterol, 44 mg sodium, 227 mg calcium, 17 mg potassium, 4.5 g protein. Net carbs per serving: 2.8 grams

To Assemble a Parfait: 
Into a small, clear glass spoon in 1/4 cup Cinnamon Kefir Chia Seed Pudding, sprinkle 2 tablespoons of granola over pudding layer, top granola layer with 1/4 cup vanilla Greek yogurt, and top the parfait with another 1 tablespoon of granola, toasted unsweetened coconut flakes, and 1-2 chopped walnuts.

Nutritional Information per serving (1 parfait): 289 calories, 12.7 g carbohydrate (5.8 g dietary fiber, 5.3 g sugars), 24.3 g total fat (6.8 g saturated fat, 0 g trans fat), 11 mg cholesterol, 113 mg sodium, 225.1 mg calcium, 227 mg potassium, 9.1 g protein. Net carbs per serving: 6.9 grams

All recipes by Kathy Sheehan, copyright 2016

Tuesday, December 22, 2015

Raspberry Chocolate Chip Kefir Ice Cream or Pops


This creamy low carb dessert is such a treat and another great way to incorporate more natural, probiotic-rich food into your diet. It's made with frozen organic raspberries (or fresh) that are both low on the glycemic scale and high in antioxidants. To make it extra creamy, I drained the whey out of my homemade kefir, or you can use store bought, to create kefir cheese. (Recipe for making kefir at home can be found here.) To make kefir or yogurt cheese, simply line a strainer with two unbleached coffee filters, set it over a bowl, fill the strainer with plain kefir (or plain unsweetened yogurt, but not Greek) and allow to drain in the refrigerator overnight.  When the thickened, cream cheese-like kefir cheese is added to the kefir with the full-fat coconut milk, the result is a super luscious and decadent frozen treat.  If you want to have a festive ice cream for the holidays, simply add some peppermint extract or a few drops of dietary-grade peppermint essential oil to the mix.  I've had it both ways and it is delightful!

Raspberry Chocolate Chip Kefir Ice Cream
Makes 6 servings (1/2 cup each)

3/4 cup fresh or frozen raspberries
1/2 cup kefir cheese (or yogurt cheese)
1/2 cup plain unsweetened kefir
1 cup full-fat coconut milk
1 teaspoon vanilla extract
1 tablespoon Lakanto Monkfruit Sweetener (or erythritol sweetener)
1/2 teaspoon stevia powder (I used Sweetleaf brand) or to taste
3 tablespoons chopped dark chocolate (85% cacao or higher)
For optional peppermint flavor, add 1/4 teaspoon peppermint extract or 2-3 drops dietary grade peppermint essential oil, or to taste

1. In a blender, blend together the raspberries, kefir cheese, kefir, coconut milk, vanilla, sweeteners and peppermint extract or oil, if using, until smooth.  Taste mixture and add more sweetener, if desired. If you used fresh raspberries, refrigerate mixture for at least one hour before proceeding. Chop the dark chocolate and set aside.

2. Churn the ice cream according to the manufacturer's instructions for your ice cream maker, adding the chopped chocolate at the appropriate time.  Serve immediately or freeze for a few minutes until it reaches a soft-serve consistency. Put any leftovers into ice pop molds and freeze to serve later. (This is best served as soft-serve ice cream.  If allowed to freeze completely, it will be too firm to scoop, so making ice pops is the best way to use leftover ice cream.)

Nutritional Information per 1/2 cup serving: 193 calories, 7.6 g carbohydrate (1.3 g dietary fiber, 4.8 g sugars, 2 g sugar alcohols), 18.1 g total fat (11.6 g saturated fat, 0 g trans fat), 20 mg cholesterol, 36 mg sodium, 71.1 mg calcium, 24 mg potassium, 2.3 g protein.  Net carbs per serving: 6.3 grams

Recipe by Kathy Sheehan, copyright 2015

Friday, December 11, 2015

Berry Blue Kefir Smoothie


More and more research is coming out that having dysbiosis (an imbalance of good and bad bacteria in the gut) is associated with obesity and most chronic illness, such as diabetes, neurological disorders, depression, anxiety, IBS, Crohn's disease and even cancer. It is important to include probiotic rich, cultured and fermented foods (such as yogurt, kefir, sauerkraut and fermented vegetables) in the diet and I have personally experienced fewer food sensitivities, more stable blood glucose levels and lower blood pressure since consuming these foods daily.  Making kefir at home is easy! (see my previous post here)  I include it as an ingredient in every morning smoothie I make.  It's creamy and delicious.  Another ingredient in this smoothie is Camu powder, made from a tropical berry.  Because it has one of the highest vitamin C content of any fruit, much more than an orange, I like to add it my smoothies especially at this time of year when colds and the flu are going around.  This smoothie is bright and refreshing and will give you a power boost of energy in the morning.  I like to add 1 tablespoon of melted coconut oil to this smoothie for added brain boosting and gut healing benefit.  When I have this kefir smoothie for breakfast, I'm not hungry again for many hours!

Berry Blue Kefir Smoothie
Makes 1 serving

1/2 cup plain, unsweetened coconut milk kefir (or dairy kefir, if you can tolerate dairy)
1 cup unsweetened non-dairy milk (I used flax milk, but almond would work well)
1/3 cup frozen blueberries
1/2 teaspoon camu powder
1/8 teaspoon stevia powder or to taste (I used Sweet Leaf brand)
1/4 teaspoon lemon extract or 2 drops dietary-grade lemon essential oil (optional)
3 ice cubes
1/4 cup water

Place all of the ingredients in a blender and blend until smooth and creamy.  Pour into a tall glass and serve immediately.

Nutritional Information per serving (made with coconut milk kefir): 311 calories, 11.4 g carbohydrate (0.9 g dietary fiber, 6.7 g sugar), 28.1 g total fat (18 g saturated fat from the coconut, 0 g trans fat), 0 mg cholesterol, 103 mg sodium, 302.2 mg calcium, 50 mg potassium, 1.8 g protein.  Net carbs per serving: 10.6 grams

Recipe by Kathy Sheehan, copyright 2015

Sunday, November 8, 2015

Carrot and Pumpkin Spice Beta-Carotene Shots


Carrots, pumpkins and sweet potatoes are the best sources of beta-carotene.  The name beta-carotene comes from the Greek beta and Latin carota (carrot). It is the deep orange-yellow pigment that gives these fall vegetables their beautiful color. The human body converts beta-carotene into vitamin A (retinol), which means it is a precurser of vitamin A. One cup of fresh carrot juice provides an astounding 2, 256 micrograms of beta-carotene! This amount is 2-3 times more than the RDA daily requirement, but don't worry. It is nearly impossible to eat too much beta-carotene because any excess of dietary beta-carotene is simply eliminated from the body (although you need to be careful with over-the-counter supplements because they are often synthetic and metabolized differently, especially if you are a smoker). We've all heard that vitamin A is good for eye health, but did you know it is a powerful antioxidant and can help prevent cancer and lower your risk of heart disease? The downside is that carrots are sweet and 1 cup of carrot juice contains about 2 teaspoons of natural sugar and about 15 carbohydrates. Even so, I love my fresh carrot juice and I wanted to find a way to include it in my diet. This recipe comes to the rescue!  I've added a bit of puréed pumpkin, plain kefir, coconut oil and the warm spices that we associate with this season. This juice blend has a lot going for it: probiotics from the kefir or yogurt, coconut oil to slow the absorption of the sugars and assist in the uptake of fat-soluble vitamin A, plus it includes other important vitamins and minerals. A shot or two of this delicious elixir each day is all I need to provide a healthy, healing dose of beta-carotene that my body craves.

Carrot and Pumpkin Spice Beta-Carotene Shots
Makes 12 servings (of 2 TB each)

1 cup fresh carrot juice (if purchased, look for unpasteurized juice for the healthiest option)
2 tablespoons puréed pumpkin
1/4 cup plain, unsweetened kefir or yogurt (substitute non-dairy, if desired)
1 teaspoon orange zest (or 2 drops of dietary-grade orange or tangerine essential oil)
1 tablespoon coconut oil, melted
10 drops of liquid stevia (orange flavored is nice), or to taste
3/4 teaspoon pumpkin pie spice
A tiny pinch of sea salt

Place all of the ingredients into a blender and blend until well combined. Store in a glass bottle or jar in the refrigerator. Shake before serving. Plan to drink it within a week.

Nutritional Information per 2 TB serving: 19 calories, 1.7 g carbohydrate (0.1 g dietary fiber, 1.4 g sugars), 1.3 g total fat (1.1 g saturated fat, 0 g trans fat), 1 mg cholesterol, 16 mg sodium, 11.4 mg calcium, 3 mg potassium, 0.4 g protein.  Net carbs per serving: 1.6 grams

Recipe by Kathy Sheehan, copyright 2015

Thursday, July 9, 2015

Milk and Non-Dairy Kefir


Kefir is a fermented milk beverage often described as a drinkable yogurt.  It is similar to yogurt, although kefir has more of the beneficial live organisms that many people hope to receive from yogurt to improve their health.  By consuming fermented and cultured foods, it helps to reduce inflammation which is a hallmark of T2 diabetes, and balance your gut microbiome.  It's extremely easy to make, requiring only milk or non-dairy milk (I use 100% coconut milk) and a culture starter known as kefir grains (not really a grain like wheat, but that's what they're called).  Kefir grains are a colony of the beneficial bacteria that will turn ordinary milk into kefir.  Lately. I've been having a wonderful time making batch after batch of delicious coconut milk kefir and flavoring it with chocolate, strawberries and, as pictured here, fresh cherries!  I am feeding my microbiome and seeing the positive results on my blood glucose monitor!  I highly encourage you to start making your own kefir and experimenting with different flavorings.  Below is the basic plain recipe, which can be made with any dairy milk from cow to goat, or full-fat coconut milk for non-dairy kefir.  Enjoy!

Milk or Non-Dairy Plain Milk Kefir
Makes 6-8 servings (1/2 cup)

3-4 cups milk of choice (If using coconut milk, choose full-fat and not coconut milk beverage)
2 tablespoons kefir grains (or use one packet of powdered starter)*

Place the milk and kefir grains (or powdered starter) into a clean, glass quart-size Mason jar.  Cover with cheese cloth and secure with a rubber band or cover loosely with the jar lid.  As the milk ferments the organisms will release gas, so it needs a way to escape.  Place at room temperature on your kitchen counter for 8-24 hours until it is slightly sour and tangy to your liking.  It's difficult to tell you an exact amount of time because fermentation happens at different rates depending on the vitality of the kefir grains, the temperature in your kitchen and your personal taste.  Check after 8 hours by tasting and continue checking at regular intervals until it reaches the level of tang that you like.  The longer it ferments, the more sour and tangy it will become.  It should taste similar to yogurt.

Pour through a fine mesh strainer to remove the lumpy kefir grains and store the strained kefir in the refrigerator.  (Do not refrigerate with grains still in the kefir; you must strain them out and save them to start your next batch.  If using powdered starter, strain and keep any small lumpy grains for your next batch.  If using powdered starter, you'll also need to hold back about 1/4-1/2 cup of the plain cultured kefir to add to your next batch.)  Kefir will keep in the refrigerator for about a week, although it may continue to thicken and ferment, becoming more tangy with time.  If it becomes too thick, either eat it with a spoon or add more milk and blend to reach desired consistency.

You can immediately start a new batch with your kefir grains or add them to 1-2 cups of milk and store them in the refrigerator for a few days before making more kefir.  When making non-dairy kefir, it's advisable to store your kefir grains between batches in dairy milk to keep them alive and in good condition.  The preferred food for kefir grains is lactose (milk sugar), so you'll need to revitalize them every few batches by storing them in milk.  Before making another batch of non-dairy kefir, strain and rinse the kefir grains in cool water, which will remove nearly all of the dairy residue.  If you are extremely sensitive to dairy, your best choice would be to use the powdered starter (instead of grains).  Body Ecology brand powdered kefir starter will make about 7 batches before you need to begin again with a new packet of powdered starter.

*Resources: The website Cultures for Health (www.culturesforhealth.com) sells both kefir grains and Body Ecology brand powdered kefir starter.  Also, the website offers many step-by-step, how-to videos for making a wide variety of cultured foods.  I highly recommend you check them out!

How to flavor your kefir:

Strawberry or Cherry Kefir:  Take 3/4 to 1 cup of fresh, sliced strawberries or cherries and gently heat them in a saucepan to release their juices.  Allow the heated fruit to come to room temperature.  Add the cooled fruit and 3 cups strained, plain kefir to a blender and blend until smooth.  Add 5-10 drops of liquid stevia to taste.  You might also wish to add vanilla extract.  If kefir becomes too thick after refrigeration, simply add additional milk and blend until desired consistency.  Try this variation with other berries!

Chocolate Kefir:  Heat 1/2 cup milk, 3 tablespoons unsweetened cocoa powder and 1/2 teaspoon stevia powder in a saucepan.  Stir constantly until cocoa powder dissolves and no lumps remain.  Remove from heat and allow to cool.  Stir again and add this mixture and 3 cups plain kefir to a blender.  Add 1/2 teaspoon vanilla extract and blend until smooth.  Taste and add additional sweetening as desired.  Store in the refrigerator.

Other uses for kefir:  Create your own flavored kefir by trying different fruits!  Use kefir in your smoothies or to make kefir ice cream (see my Pumpkin Pecan Kefir Ice Cream recipe here).  You can make kefir cheese (similar to cream cheese) from thick, dairy kefir by allowing the whey to drain from the kefir overnight through a fine-mesh strainer lined with several layers of cheese cloth.  Note: Non-dairy kefir usually isn't as thick as dairy kefir and may not work for making kefir cheese.

Cherry Chocolate Chip Kefir Ice Cream
 Nutritional Information per 1/2 cup serving will vary depending on type of milk used and other flavor additions.  Plain kefir will have approximately the same nutritional information as the milk used to make it.  Check the packaging label on the milk carton.

Recipe by Kathy Sheehan, copyright 2015.

Sunday, February 1, 2015

Lemon-Blueberry Dream Green Smoothie


This green smoothie is a delicious combination of lemon and blueberries. I can't even taste the greens, but knowing they are there makes me feel good!  This is alkalizing from the lemon and packed with healthy antioxidants and phytonutrients from the greens and blueberries and is one of my favorite breakfast smoothies.  I'm eating a very low carb, high fat diet, which is very successfully controlling my diabetes.  If I put too much fruit in my smoothie, it can upset my blood sugars and ruin my whole day!  This recipe easily fits into my daily allotment.  The addition of both healthy coconut and flax seed oil suppresses my hunger and prevents cravings by keeping my blood sugar steady throughout the morning.  (If desired, you can use half the amount of these oils, but both are healthy sources.  Healthy sources of fat play many important roles in the body and should not be feared or avoided.  Coconut oil contains medium-chain fatty acids and is fuel for the brain.  Flax seed oil is an excellent source of Omega 3's.)  If you're looking for a refreshing and energizing way to start your morning, look no further.  This smoothie will satisfy!

Lemon-Blueberry Dream Green Smoothie
Makes 1 serving

3/4 cup unsweetened flax or almond milk (or your favorite milk)*
1/4 cup full-fat plain coconut yogurt (or your favorite plain yogurt or kefir)*
2 tablespoons frozen wild blueberries
1-1/2 cups baby kale, spinach or swiss chard (I use an organic blend)
2 slices of lemon with peel, each slice 1/4" wide (organic is preferred)
1 teaspoon chia seeds
1 tablespoon flax seed oil
1 tablespoon coconut oil
10-15 drops of Lemon Drop flavored liquid stevia (I use Sweetleaf brand)
1/2 cup water
4-5 ice cubes

Place all of the ingredients in a blender and blend on high until smooth.  Pour into a tall glass and enjoy!

Nutritional Information per serving: 412 calories, 10 g carbohydrate (4 g dietary fiber, 3.1 g sugars), 40 g total fat (19.3 g healthy source of saturated fat, 0 g trans fat), 0 mg cholesterol, 141 mg sodium, 356 mg calcium, 26 mg potassium, 4.2 g protein.  Net carbs per serving: 6 grams

* For those with food allergies: To make a dairy free smoothie, use a non-dairy milk, yogurt or kefir.

Recipe by Kathy Sheehan, copyright 2015

Saturday, October 25, 2014

The Creamiest Homemade Dairy Free Yogurt


Since learning that I am highly sensitive to casein, the protein in milk products, I've had to find substitutions for my favorite dairy foods.  There are alternative, dairy free yogurts on the market, but either they are too high in carbohydrate and added sugar or they just taste strange!  Most are low or fat free, making their texture more like a sweet panna cotta or jello than what you'd expect from a tangy, creamy yogurt.  I've created a superior DF yogurt that is creamy, so delicious, very low carb and with that distinctive yogurt zip.  It is 1000 times better than the dairy free yogurt you can buy in the store and it's incredibly easy to make.  

First, you need to know that making yogurt from a non-milk base requires some kind of thickener.  I use high-quality, unflavored gelatin powder (Great Lakes brand) because it gives consistent, successful results.  I've experimented with a variety of dairy free milks and have never had a failure.  Secondly, if you want your yogurt to be a good source of calcium, you will need to use a mixture of milks, in which at least one contains plenty of calcium per cup.  In this recipe, I've used a mixture of 100% high-fat coconut milk for creaminess and Silk brand unsweetened cashew milk because it contains 450 mg of calcium per cup.  (You can use any calcium-fortified nut milk, such as almond, coconut, flax, soy or hazelnut.  Choose your favorite.)  Also, you can experiment with the ratio of full fat coconut milk to nut milk.  The creaminess comes from the coconut milk, so I don't think I'd go lower than 50:50, but if having a lower fat and less creamy yogurt is desirable, then experiment until you find a combination that's right for you.  Finally, I have cultured my yogurt in a yogurt maker, which is a fairly inexpensive piece of kitchen equipment.  I got mine for less than $30 on Amazon and I love it!  If you don't have a yogurt maker, you can "cook" your yogurt on a heating pad or in the oven (search online for how to do it).  Culturing takes 15-20 hours to get the right flavor, so I usually prepare the yogurt base in the evening and let it "cook" all night.  This recipe explains how to make plain, unsweetened yogurt, to which you can add your favorite fruits and flavorings before serving.  If you use your creativity, every jar in a batch can be different!  Below I describe several of my favorite additions to make a variety of yogurt flavors.  Once you make your own dairy free yogurt, you'll never buy it in a store again!

The Creamiest Homemade Dairy Free Yogurt
Makes 7 servings (about 3/4 cup each)

3 cups full-fat coconut milk, canned (I use Aroy-D brand)
2 cups calcium-fortified nut milk (I use Silk Unsweetened Cashew Milk, look for 1g carb per serving)
4 level teaspoons unflavored gelatin powder (I use Great Lakes brand)
1 tablespoon raw honey
1-1/2 packets non-dairy yogurt starter (I recommend Belle + Bella Yogo)*

Equipment needed: large very clean saucepan, very clean whisk, candy thermometer, measuring spoons, small jars with lids, yogurt maker (or search online for alternate method for culturing using a heating pad or oven), glass measuring cup with spout (optional).

1.  Measure coconut milk and 1 cup of nut milk into the large saucepan.  Heat over medium heat, stirring occasionally, until mixture reaches a temperature of 180-degrees Fahrenheit.  

2. In a glass measuring cup, measure remaining 1 cup nut milk and sprinkle the gelatin over the top of the milk.  Allow to sit for a few minutes, then whisk the gelatin into the milk.  Add the gelatin mixture into the hot coconut milk mixture and allow the temperature to return to 180-degrees.  (Gelatin mixture can be added prior to the milk mixture reaching 180-degrees.). Whisk until gelatin is completely dissolved.  Remove saucepan from heat.

3.  Add honey and whisk.  The honey is necessary to feed the culture, so do not use a sugar-free sweetener for this step.  Allow the hot milk mixture to cool until it reaches 110-degrees.  (You can hasten the cooling process by placing the saucepan into a sink of cool water, just make sure water doesn't spill into the milk.)

4.  When the milk mixture cools to 110-degrees, pour about 2 cups into the glass measuring cup.  While whisking, add the yogurt starter.  Whisk until completed dissolved.  Return the milk with starter to the saucepan and whisk to combine.  

5.  Using the glass measuring cup, pour milk mixture into individual serving jars and place into the yogurt maker (or follow your machine's instructions).  Do not place lids on the jars.  Culture (or "cook") the yogurt for 15-20 hours.  (The less time allowed for culturing results in a sweeter yogurt. You can increase time for a tangier yogurt, but I wouldn't exceed 24 hours.)  While "cooking," the mixture will be thin and separate into white milk on top and a clear liquid on the bottom, but don't worry, it is normal.

6.  After 15-20 hours, place a lid securely on each jar and shake gently to fully blend the two layers.  Refrigerate for at least 8 hours or overnight to set.

* You can substitute 1/2 cup coconut yogurt with live cultures for the starter or use the powder from probiotic capsules equaling about 35 billion.  I have tried the probiotic method, but was not pleased with the result.  Either the probiotic I used was no longer alive, or it didn't culture well.  For me, the distinctive yogurt tang just wasn't there.  From my experience, the starter powder works very well.  

Nutritional Information per serving (3/4 cup), plain yogurt: 196 calories, 4 g carbohydrate (0 g dietary fiber, 3.7 g sugar), 18.6 g total fat (12.9 g saturated fat, 0 g trans fat), 0 mg cholesterol, 70 mg sodium, 141.5 mg calcium, 2.6 g protein.  Net carbs per serving: 4 grams

Some of my favorite low-carb flavors (be sure to add these additional carbs to the yogurt for the full count):

Raspberry with a Hint of Chocolate: With a fork, mash 2 tablespoons of raspberries in a bowl.  Add a serving of plain yogurt and 2-3 drops of Chocolate Raspberry flavored liquid stevia.  If you want more chocolate flavor, add 1 teaspoon unsweetened cocoa powder and 2-3 more drops of stevia or to taste.  Stir to combine.  (Substitute finely chopped cherries for the raspberries, if desired.)

Pumpkin Spice: Place 1 heaping tablespoon of unsweetened cooked pumpkin in a bowl (canned is fine).  Add 1/2 teaspoon pumpkin pie spice and 1/4 teaspoon vanilla extract and stir.  Add one serving of plain yogurt and 4 drops of plain or Vanilla Creme liquid stevia, or to taste.  Stir to combine.

Strawberry Vanilla: With a fork, mash 2-3 ripe strawberries in a bowl.  Add one serving of plain yogurt, 1/4 teaspoon vanilla extract and 3-4 drops of plain or Vanilla Creme liquid stevia or to taste.  Stir to combine.  (Substitute blueberries for strawberries, if desired, or a combination of berries.)

Maple Vanilla Walnut: Place 3-4 walnuts into a plastic bag and hit with the handle of a butter knife to break into small pieces, or chop with a knife.  Mix together the plain yogurt, walnuts, 1/4 teaspoon vanilla extract, 1/2 teaspoon maple syrup (or sugar free maple syrup) and 2 drops of plain or Vanilla Creme liquid stevia or to taste.  Stir to combine.  Sprinkle with nutmeg and serve.  (Substitute pecans for the walnuts and 2 drops of black strap molasses for the syrup, if desired.)

Recipes by Kathy Sheehan, copyright 2014

