Showing posts with label cheese. Show all posts

Thursday, February 5, 2026

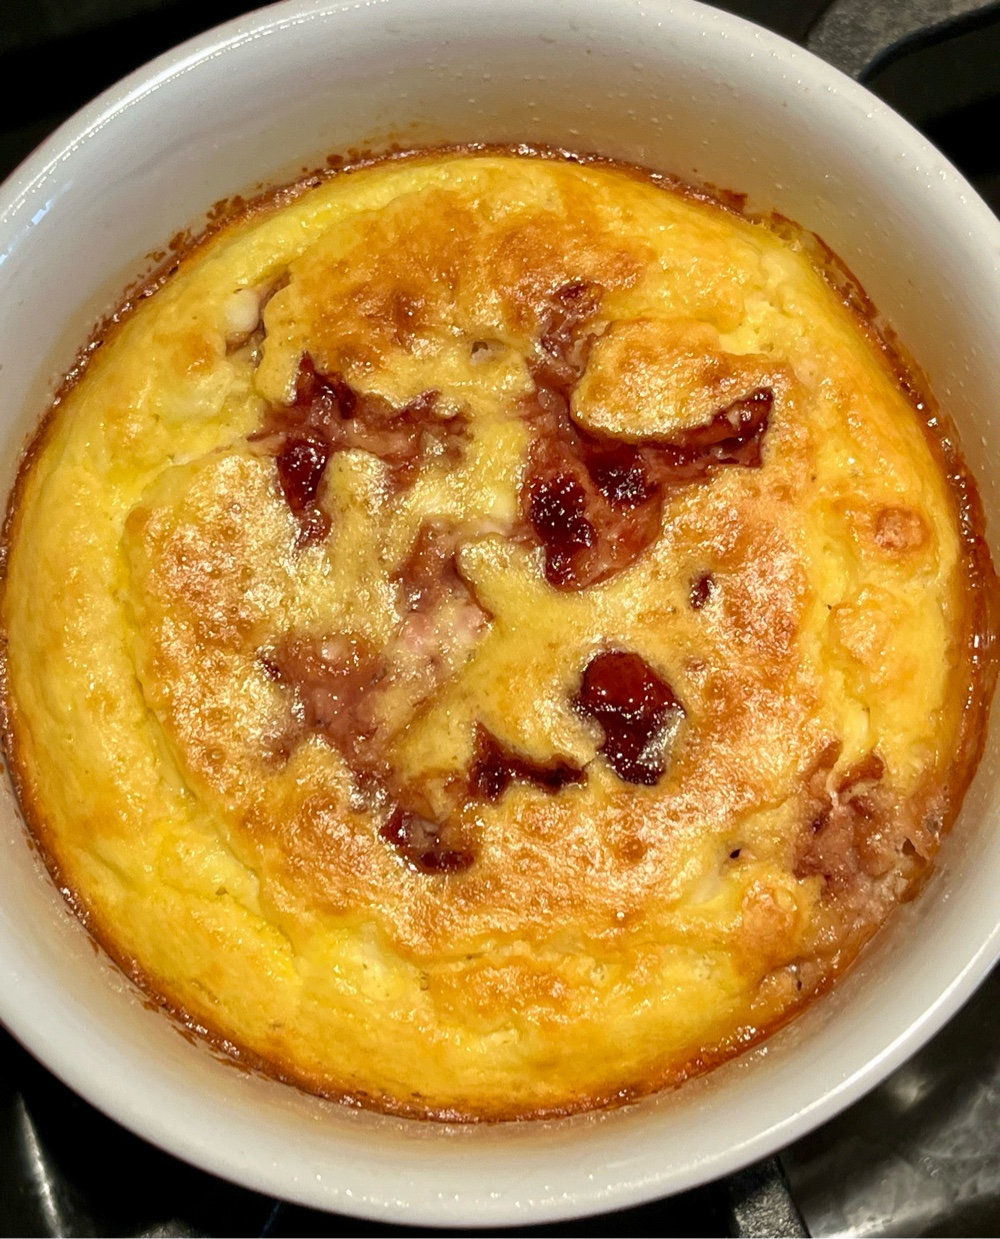
Baked Cottage Cheese Breakfast Bowl

Baked Cottage Cheese Breakfast Bowl
This high protein breakfast pudding can be made either sweet or savory! It makes one generous serving that leaves your body nourished and satisfied for hours.

Baked Cottage Cheese Breakfast Bowl
Makes 1 serving

Base Mixture:
½ cup cottage cheese (4% fat)
1 large egg
1/4 cup almond flour
1/4 teaspoon baking powder
A pinch of salt

Sweet Additions:
½ teaspoon vanilla extract
1-2 tablespoons allulose honey or sugar free maple syrup (or 6 drops monkfruit extract)
1/4 cup strawberries (chopped), or blueberries, fresh or frozen

Savory Additions:
1/4 cup ham, or cooked sausage, bacon or broccoli (chopped)
2 tablespoons shredded cheese
Freshly ground black pepper to taste
½ teaspoon chopped herbs

Preheat the oven to 350°F. Lightly grease one large oven-safe ramekin or small baking dish; set aside.

In a bowl, whisk together the base mixture of cottage cheese, egg, almond flour, baking powder, and salt until smooth.

If making sweet, whisk in your sweetener of choice and vanilla. Then gently fold in the fruit.

If making savory, add the meat or chopped broccoli, cheese, pepper and herbs to the base mixture and stir to combine.

Pour the mixture into the greased ramekin and bake for 25-30 minutes until set and lightly golden on top. Cool for about 10 minutes before serving.

Nutritional Information per serving: Varies, depending on additions to base mixture. Base mixture is 330 calories, 9.7 g carbohydrate (2 g dietary fiber, 5.2 g sugars), 22.8 g total fat (5.6 g saturated fat, 0 g trans fat), 201 mg cholesterol, 607 mg sodium, 255.6 mg calcium, 229 mg potassium, 2 mg iron, 141 IU Vit A, 24.3 g protein. Net carbs per serving: 7.7 grams.

Photo and recipe by Kathy Sheehan, copyright 2026
All rights reserved. Please do not duplicate without the author’s permission.

Thursday, March 21, 2024

Keto Cake Boats

Keto Cake Boats

This cake was baked in a top-split, New England style hot dog bun baking pan! (Although you could use a 13” x 9” baking pan and cut into buns.) I made two flavors of Whipped Mascarpone Cream and laid out an array of toppings and my family had a blast making custom Cake Boats at a recent party. Whether you prefill these cakes or allow your guests to create their own, this dessert will be a BIG HIT with everyone! (I bought the hot dog bun baking pan on the King Arthur’s Baking Company website.)

Keto Cake Boats
Makes 10 bun-size cakes or 20 smaller cakes

Keto Cake Mix (I recommend King Arthur’s Keto Yellow or Chocolate Cake Mix)*
Ingredients called for on the box (eggs, milk, oil, etc)

Whipped Mascarpone Cream 
Makes about 3 cups of frosting

1 1/4 cups heavy whipping cream, cold
½ cup low carb powdered sweetener (I used LaKanto Monkfruit Confectioners sweetener)
1 teaspoon vanilla extract
8 ounces plain mascarpone cheese (not sweetened), softened but still chilled

Whipped Chocolate Mascarpone Cream
Makes 3 cups

1 1/4 cups heavy whipping cream, cold
½ cup low carb powdered sweetener (I used LaKanto Monkfruit Confectioners sweetener)
1/4 cup unsweetened cocoa powder
1 teaspoon vanilla extract
8 ounces plain mascarpone cheese (not sweetened), softened but still chilled

Garnishes: berries or other low carb fruit, sugar free sprinkles, chopped nuts, my sugar free Keto Chocolate Fudge Sauce (click here to see recipe)

King Arthur’s Keto Yellow Cake Mix

1. Make the cake according to the package directions and bake in the New England style hot dog bun pan or a 13” x 9” pan that has been sprayed with nonstick cooking spray. *NOTE: The King Arthur’s Cake Mix I used wasn’t enough to fill the hot dog pan or a 13” x 9” baking pan. I used two cake mixes and made a double batch of batter, which was more than I needed, so I made cupcakes out of the excess batter and froze them for another time. Fill whichever baking pan you use to about ½” below the rim and then bake according to directions or until a toothpick inserted in the center comes out clean. After 10 minutes, remove cake to a wire rack to cool completely.

New England Hot Dog Bun Baking Pan

2. Make the Whipped Mascarpone Cream: Add the heavy whipping cream, powdered sweetener and vanilla extract to a large mixer bowl and whip on high speed until soft peaks form. If making the chocolate version, also add the cocoa powder.

3. Add the mascarpone cheese to the whipped cream and whip until stiff peaks form. It will happen fairly quickly. (I prefer to use the mascarpone cheese when still chilled, but softened a bit, so that it will incorporate well without chunks. The warmer the mascarpone cheese is, the more likely it is to soften to the point that it won’t firm up well again, and can make too soft of a frosting. I suggest taking it out of the refrigerator about 15 minutes before using so that it softens a bit, but is still cool.)

4. Cut the cooled cake into buns and cut a V-shape along the top of each bun. Fill with mascarpone cream and garnish with berries or other toppings. Drizzle with sugar free chocolate sauce and serve.

Keto Cake Boat with toppings

Nutritional Information will vary, depending on the fruit and other toppings used. One full-size cake boat made from King Arthur’s Keto Yellow Cake Mix according to package directions is 168 calories, 15.6 g carbs (12 g dietary fiber, 2 g sugars), 14.4 g total fat (2.4 g saturated fat, 0 g trans fat), 92 mg cholesterol, 272 mg sodium, 10 mg calcium, 139.2 mg potassium, 1 mg iron, 4.8 g protein. Net carbs per cake (without toppings): 3.6 grams

Recipe and photos by Kathy Sheehan, copyright 2024
All rights reserved. Please do not duplicate without the author’s permission.

Tuesday, November 7, 2023

Keto Crispy Cheese Egg In a Nest


Keto Crispy Cheese Egg in a Nest

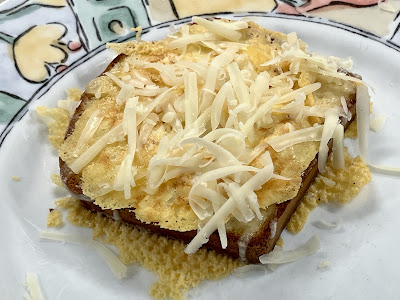
Cheese is a familiar addition to a traditional Egg in a Nest, but what about super crispy, crunchy cheese? This method of cooking allows the cheese in the pan to sizzle and crisp up, adding an unforgettable texture and flavor to this favorite breakfast food. For best results, use a nonstick skillet. You can use any aged cheese. My favorite is sharp cheddar.

Keto Crispy Cheese Egg In a Nest
Makes 1 serving

1 slice of low carb bread, with a hole cut out of the center
1 large egg
1½ ounces cheddar, shredded
Salt and pepper

Step by step Process

1. Preheat a nonstick skillet to medium to medium-high. Sprinkle a bit more than 1/3 of the shredded cheese onto the preheated skillet.

2. When it starts to sizzle, place a piece of low carb bread on top.

3. Crack an egg into the hole and sprinkle with salt and pepper.

4. Sprinkle more cheese on top of the bread and egg, reserving some for serving. Cover the skillet to allow the cheese over the top to melt a bit.

Flip when cheese is crispy

5. Once the cheese on the bottom is golden brown and crispy, flip and continue cooking until the cheese on the flip side is crispy and the egg is done to your liking. To serve, sprinkle reserved cheese over the top to melt. Enjoy!

Crispy Cheese Egg in a Nest (cooked)

Nutritional Information (may vary, depending on the low carb bread used): 349 Calories, 1.4 g carbohydrate (1 g dietary fiber, 1.2 g sugars), 27.3 g total fat (11.6 g saturated fat, 0 g trans fat), 310 mg cholesterol, 448 mg sodium, 345.6 mg calcium, 129 mg potassium, 2 mg iron, 318 IU Vit A, 24.8 g protein. Net carbs per serving: 0.4 grams

Photos and recipe by Kathy Sheehan, copyright 2023
All rights reserved. Please do not duplicate without the author’s permission. 

Thursday, November 2, 2023

Keto Tater Tots


You won’t believe these “tater tots” are potato-free! Their taste and texture is spot on! Crunchy on the outside and tender on the inside. Dip them in sugar free ketchup and relive a taste from your childhood. There are a lot of faux-tato tot recipes out there, and I’ve made quite a few, but this recipe is my favorite, by far. So simple and requiring only a few ingredients, plus some spices you already have in your cabinet. Make dinner fun tonight!!

Keto Tater Tots
Makes 2 servings

6 ounces frozen riced cauliflower (about 2 cups)
½ cup whole milk cottage cheese (4%)
1/4 teaspoon salt
Ground pepper to taste
1/8 teaspoon garlic powder
1/8 teaspoon onion powder
1/8 teaspoon paprika (I used sweet paprika, but smoked paprika would be good too)
2 tablespoons + 1/3 cup pork rind panko

1. Cook riced cauliflower in a skillet over medium heat until thawed and beginning to be tender. Remove to a plate, covered with a paper towel, and allow the excess liquid to wick away.

2. Meanwhile, blitz the cottage cheese in a food processor or blender until smooth. Transfer to a bowl and add the salt, pepper, garlic powder, onion powder, paprika and 2 tablespoons pork rind panko. Stir to combine.

3. Add the cooled cauliflower and stir to combine. Form mixture into tots, roll them in the remaining 1/3 cup pork rind panko that has been spread in a layer on a plate and place them on a baking sheet that has been greased well. Spray the top of each tot with cooking spray or brush lightly with avocado oil.

4. Bake in a 450°F oven for about 20 minutes (in a convection oven or air fryer, cook at 425°F), turning each tot over halfway through cooking. Continue baking until lightly browned. Remove from oven and allow the tots to cool on the baking pan for a few minutes to firm up a bit. Serve with sugar-free ketchup, if desired. Enjoy! 

5. Storage: These are best served immediately, but leftovers can be stored in a covered container in the refrigerator and reheated on a baking sheet in a 375°F oven for 10 to 12 minutes, or until heated through and the pork rind panko coating crisps up.


Nutritional Information per serving (½ recipe): 121 calories, 6.8 g carbohydrates (2.1 g dietary fiber, 3.6 g sugars), 5 g total fat (2.5 g saturated fat, 0 g trans fat), 25 mg cholesterol, 675 mg sodium, 60.9 mg calcium, 6 mg potassium, 65 IU Vit A, 42 mg Vit C, 13.6 g protein. Net carbs per serving: 4.7 grams

Photos and recipe by Kathy Sheehan, copyright 2023
All rights reserved. Please do not duplicate without the authors permission. 

Saturday, July 1, 2023

Keto Bacon and Cheese Dutch Baby Pancake

Keto Bacon and Cheese Dutch Baby Pancakes

This fluffy, puffy egg pancake is baked in the oven in a preheated, hot skillet. When it comes out of the oven, it is impressive! I use a 6-inch cast iron skillet, which imparts a higher rise and nice crust. Similar to a puffy omelet, but so much easier to make.

Keto Bacon and Cheese Dutch Baby Pancake
Makes 1 serving

1 tablespoon unsalted butter
6 inch heatproof skillet
2 large eggs
2 tablespoons heavy cream
2 tablespoons water
2 tablespoons almond flour (or 1 tablespoon coconut flour for nut free)
Salt and pepper to taste
2 slices cooked bacon, chopped
1 ounce cheddar cheese, shredded
Sugar free maple syrup (optional)

1. Placed the 1 tablespoon of unsalted butter into your skillet. Place the skillet into the oven and preheat to 400°F.

2. Meanwhile, whisk together the eggs, cream, water, almond flour, salt, and pepper. You can do this in a blender or food processor for an extra fluffy pancake.

3. When the oven and pan are preheated, swirl the melted butter all around the bottom and sides of the skillet. Pour the egg mixture into the hot skillet. Sprinkle the chopped bacon and cheese on top. Return the skillet to the oven and bake for 14 minutes until puffy and golden.

4. Remove the skillet from the oven and use a sharp knife to loosen the pancake from the sides of the pan. Transfer the pancake to a serving plate and drizzle sugar-free maple syrup on top, if desired. Eat it immediately. The pancake will deflate as it cools.

Cooked Keto Dutch Baby Pancake

Nutritional Information per serving (entire recipe): 618 calories, 2.5 g carbohydrate (0.9 g dietary fiber, 0.4 g sugars), 56.7 g total fat (27 g saturated fat, 0 g trans fat), 491 mg cholesterol, 723 mg sodium, 270.4 mg calcium, 276 mg potassium, 2 mg iron, 480 IU Vit A, 26.8 g protein. Net carbs per serving: 1.6 grams

Recipe and photos by Kathy Sheehan, copyright 2023
All rights reserved. Please do not duplicate without the author’s permission. 

Saturday, June 24, 2023

Summer Vegetable Stir Fry

Summer Vegetable Stir Fry

This is a dish we make often in the summer, utilizing the myriad of local summer vegetables available in the Farmer’s Markets. It’s a quick and easy stir fry that is fresh and delicious!

Summer Vegetable Stir Fry
Makes 2-3 servings

Cooked bratwurst, kielbasa or other cooked sausage 
1 small yellow zucchini or yellow summer squash
1 small green zucchini
½ onion
1 small Roma tomato
2 ounces cheese (cheddar, Parmesan or whatever is on hand)
Salt and pepper to taste

Optional Additions:
1-2 tablespoons tomato paste
1/4 cup heavy cream

1. Cut up the cooked sausage into cubes. Cube the yellow and green zucchini, onion, and tomato. Shred the cheese. Set aside.

2. Sauté the onions and sausage in a nonstick skillet over medium heat until the sausage begins to color and the onion is translucent and beginning to brown.

3. Add the zucchini and sauté, stirring occasionally, until it begins to soften and pick up some color. Add some salt and pepper to season the vegetables.

4. At the very end of cooking, add the chopped tomatoes and shredded cheese. When you stir in the tomatoes, they released their juices, which mixes with melted cheese to make a light sauce. If you want a saucier dish, add the optional tomato paste and heavy cream; stir to incorporate.

5. Taste and adjust seasoning if needed. Serve immediately.

Nutritional Information per serving (1/3 of recipe, not including optional additions): 351 calories, 8.9 g carbohydrate (1.8 g dietary fiber, 4.1 g sugars), 27.9 g total fat (12.2 g saturated fat, 0 g trans fat), 67 mg cholesterol, 1156 mg sodium, 151.2 mg calcium, 235 mg potassium, 107 IU Vit A, 15 mg Vit C, 15.3 g protein. Net carbs per serving: 7.1 grams.

Recipe and Photo by Kathy Sheehan, copyright 2023
All rights reserved. Please do not duplicate without the author’s permission. 

Tuesday, March 14, 2023

Low Carb Peanut Butter and Chocolate Mousse Pie in a Jar

Low Carb Peanut Butter and Chocolate Mousse Pie in a Jar
These grab-and-go dessert cups are the perfect size! They may look small, but they deliver BIG FLAVOR and are rich and decadent! And who doesn’t love the combination of peanut butter and chocolate?

Low Carb Peanut Butter and Chocolate Mousse Pie in a Jar
Makes 6 servings

Peanut Butter Crumb Crust (Bottom Layer):
¾ cup almond flour (or sunflower seed flour for lower oxalate)
2 tablespoons unsweetened peanut butter powder
1 tablespoon powdered erythritol sweetener (Confectioners sweetener)
A pinch of salt
1 teaspoon vanilla extract
2 tablespoons refined coconut oil, melted (or unsalted butter)

Chocolate Cream Cheese Mousse (Middle Layer):
4 ounces cream cheese, room temperature 
2 tablespoons butter, room temperature (use unsalted or salted, your preference)
1/4 cup creamy peanut butter, no sugar added
2 tablespoons unsweetened cocoa powder
2 tablespoons powdered erythritol sweetener 
15 drops Monkfruit Extract (or ½ teaspoon liquid stevia), or to taste
1½ teaspoons vanilla extract 
½ cup heavy cream
3 tablespoons sugar free chocolate chips, chopped (Such as Lily’s brand)

White Chocolate Peanut Butter Ganache (Top Layer):
1/3 cup heavy cream
1/3 cup sugar free white chocolate chips 
1/4 cup creamy peanut butter, no sugar added
4 drops Monkfruit Extract or stevia
½ teaspoon vanilla extract 

1. To make the Peanut Butter Crumb Crust: With a fork, mix together the almond flour, peanut butter powder, erythritol sweetener and salt in a medium bowl until no lumps remain (you may sift the mixture to easily remove lumps). Add the vanilla extract and melted coconut oil and stir with a fork until the mixture is coated and resembles coarse crumbs. Divide equally between six small jelly jars (4 oz) or serving dishes (about 2 generous tablespoons in each jar). Gently press down to create an even layer; set aside.

2. To make the Chocolate Cream Cheese Mousse: Add the room temperature cream cheese, butter, and peanut butter to a mixing bowl. With a hand-held or standing mixer, whip on high until the mixture is well combined and smooth. Add the cocoa powder, powdered sweetener, Monkfruit extract drops or stevia, vanilla extract, and heavy cream. Beat until the mousse is quite fluffy and smooth. Taste and adjust sweetening, if needed. Fold in the chopped, sugar-free chocolate chips. Divide the mousse equally between the six jars or serving dishes. 

Layers of dessert cup
3. To make the White Chocolate Peanut Butter Ganache: Microwave the heavy cream in a heat-proof measuring cup or bowl until hot and bubbly around the edges (about 20-30 seconds on high) or heat in a small saucepan over medium heat, if not using a microwave. Pour the hot cream over the white chocolate chips in a bowl and allow to stand for several minutes. Whisk until smooth. Add the 1/4 cup peanut butter, Monkfruit extract or stevia drops, and vanilla. Whisk until the peanut butter is melted and the ganache is smooth.

4. While warm, pour the ganache over the chocolate mousse layer, dividing the ganache evenly among the six containers. Place the dessert cups into the refrigerator to set for two hours before serving.

5. To serve, you may garnish with optional whip cream, chopped chocolate, or chopped peanuts. Enjoy!

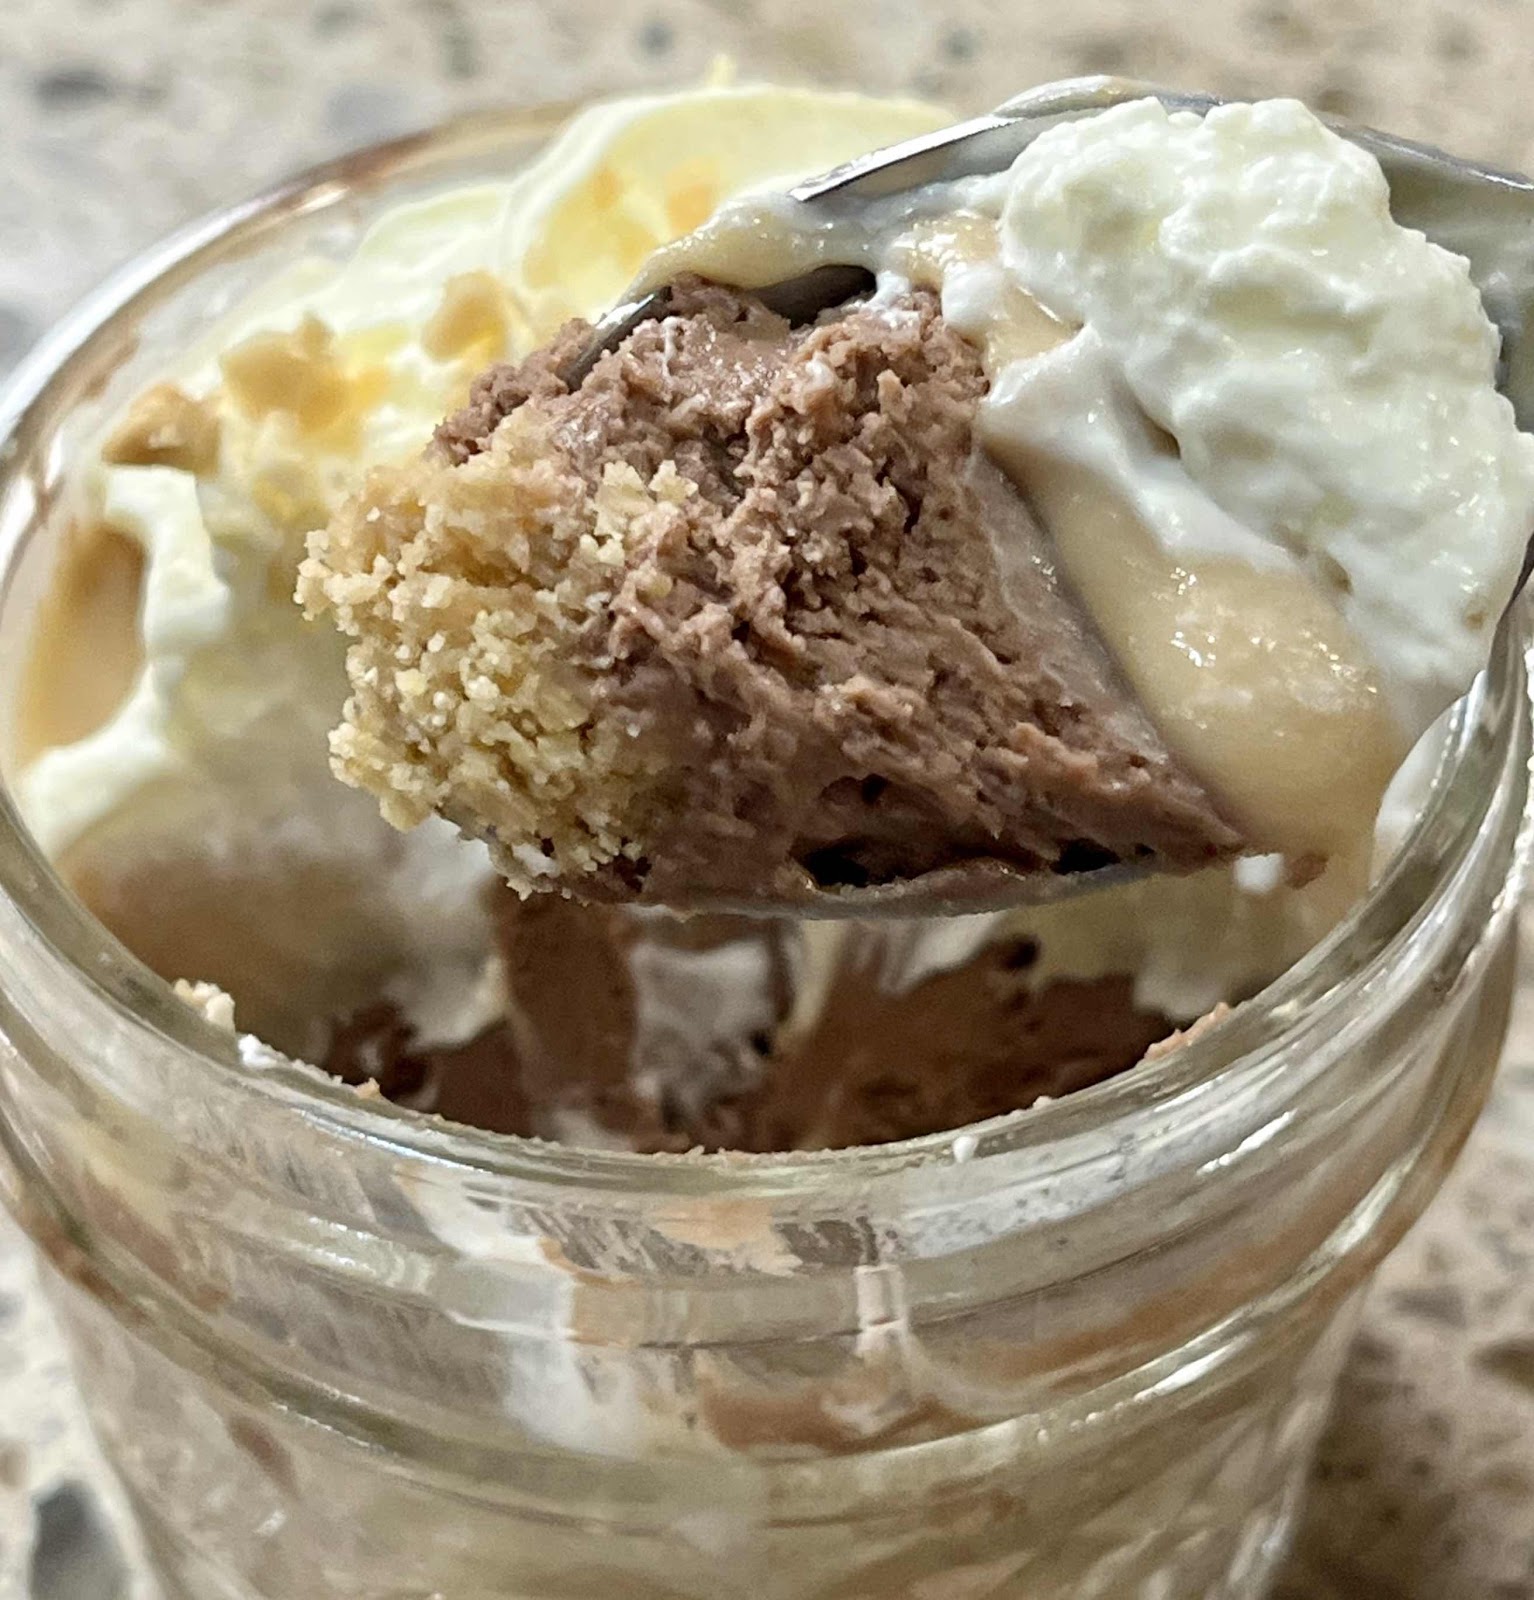
See pie layers in a spoonful
Nutritional Information per serving: 457 calories, 9.7 g carbohydrate (4 g dietary fiber, 1.7 g sugars, 2 g sugar alcohols), 44.2 g total fat (21.1 g saturated fat, 0 g trans fat), 79 mg cholesterol, 119 mg sodium, 24.8 mg calcium, 56 mg potassium, 228 IU Vit A, 1 mg iron, 8 g protein. Net carbs per serving: 5.7 grams

Recipe and photos by Kathy Sheehan, copyright 2023
All rights reserved. Please do not duplicate without the author’s permission.
Sunday, July 24, 2022

Keto Lemon Curd and Goat Cheese Spread

Keto Lemon Curd and Goat Cheese Spread
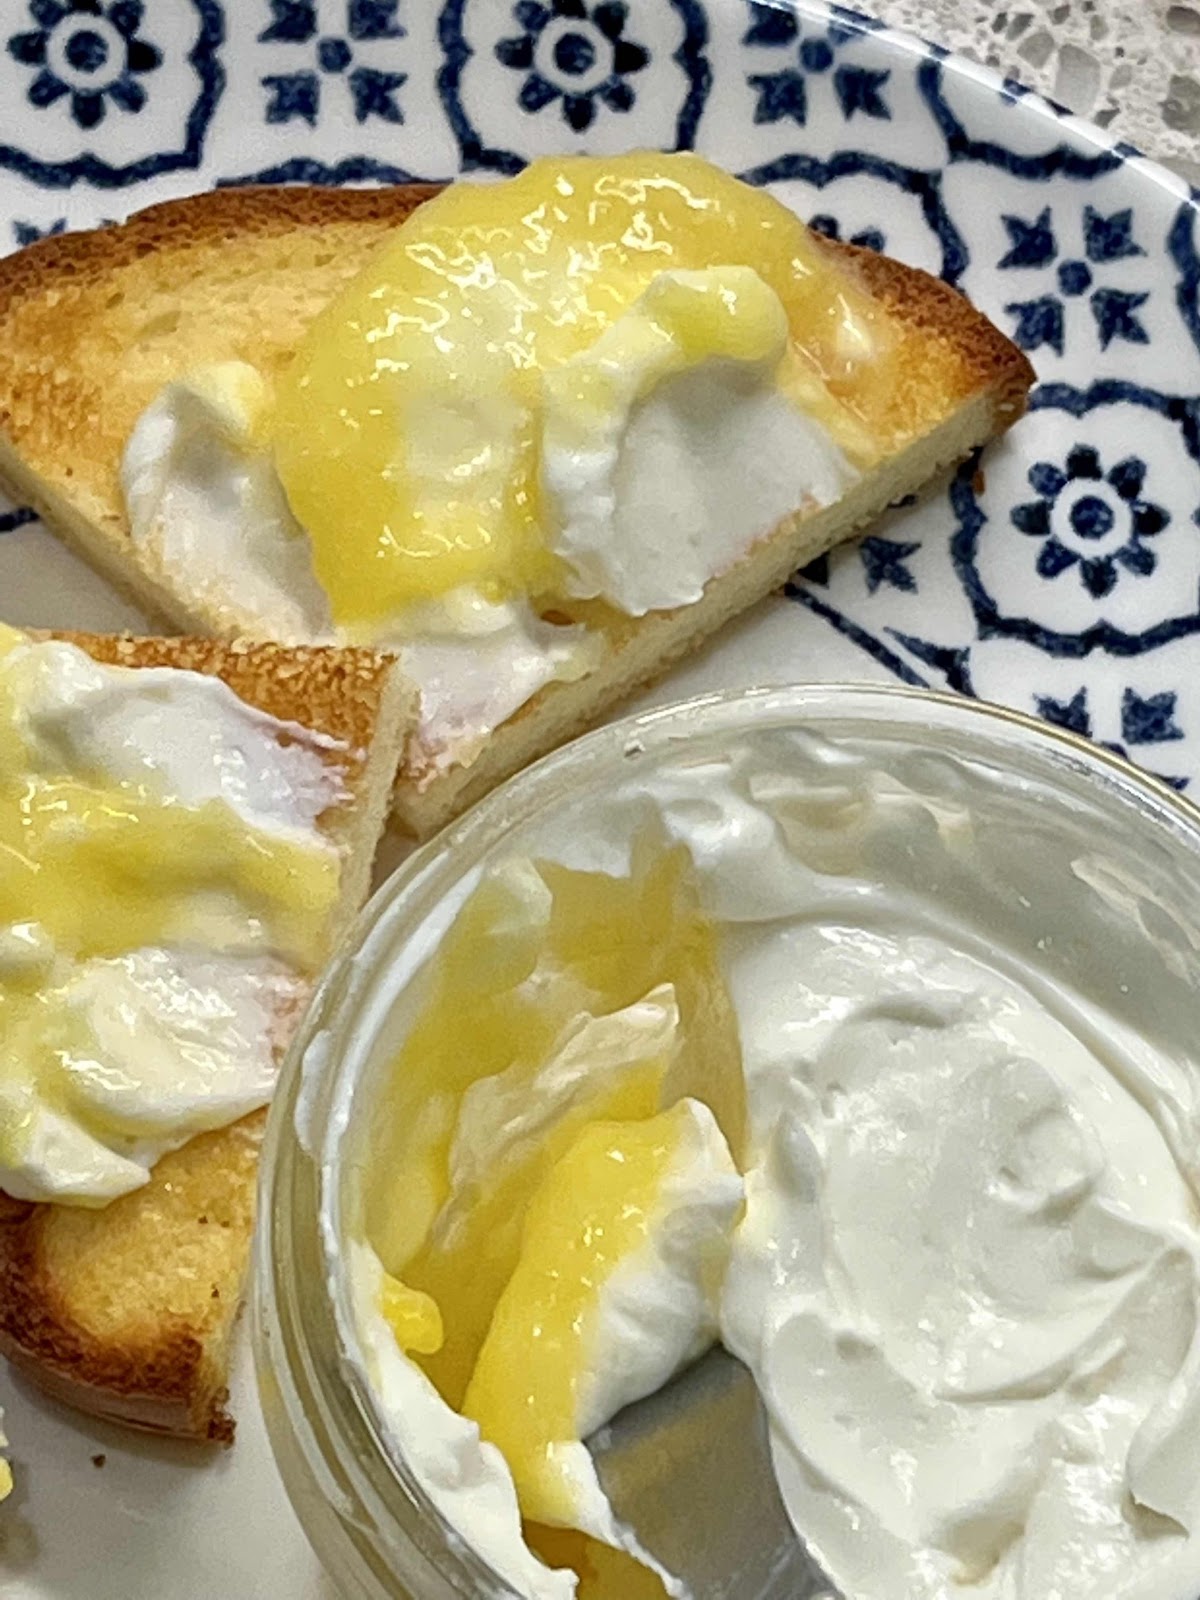
The other day I went to a party and the hostess served a delicious spread that was lemon curd topped with goat cheese that she had picked up at the Farmer’s Market. It was really good! Traditional lemon curd is mostly sugar, so I couldn’t do more than sample it at the party. I came home and, the very next day, made myself some sugar-free lemon curd using my easy, microwave method and topped it with plain, soft goat cheese. If you are not a fan of goat cheese, like my husband, you can blend together a combination of cream cheese and ricotta to replace the goat cheese. The taste is very similar, but it is even creamier and more spreadable. This makes a wonderful appetizer served with low carb crackers or spread it on your keto toast or pancakes for breakfast.

Keto Lemon Curd and Goat Cheese Spread
Makes 1 1/2 cups

1/2 cup (or more) sugar free Microwave Keto Lemon Curd (click here for the recipe)

Topping:
8 oz. plain, soft goat cheese

OR

Process in a food processor until smooth:

4 oz. cream cheese, softened
1/2 cup whole milk ricotta cheese
A pinch of salt
2 drops monkfruit extract or stevia (optional)
1/8 teaspoon vanilla extract (optional)

1. Allow the lemon curd to set up and cool completely in the refrigerator. To prevent a skin forming on the top, place plastic wrap directly on the lemon curd as it cools.

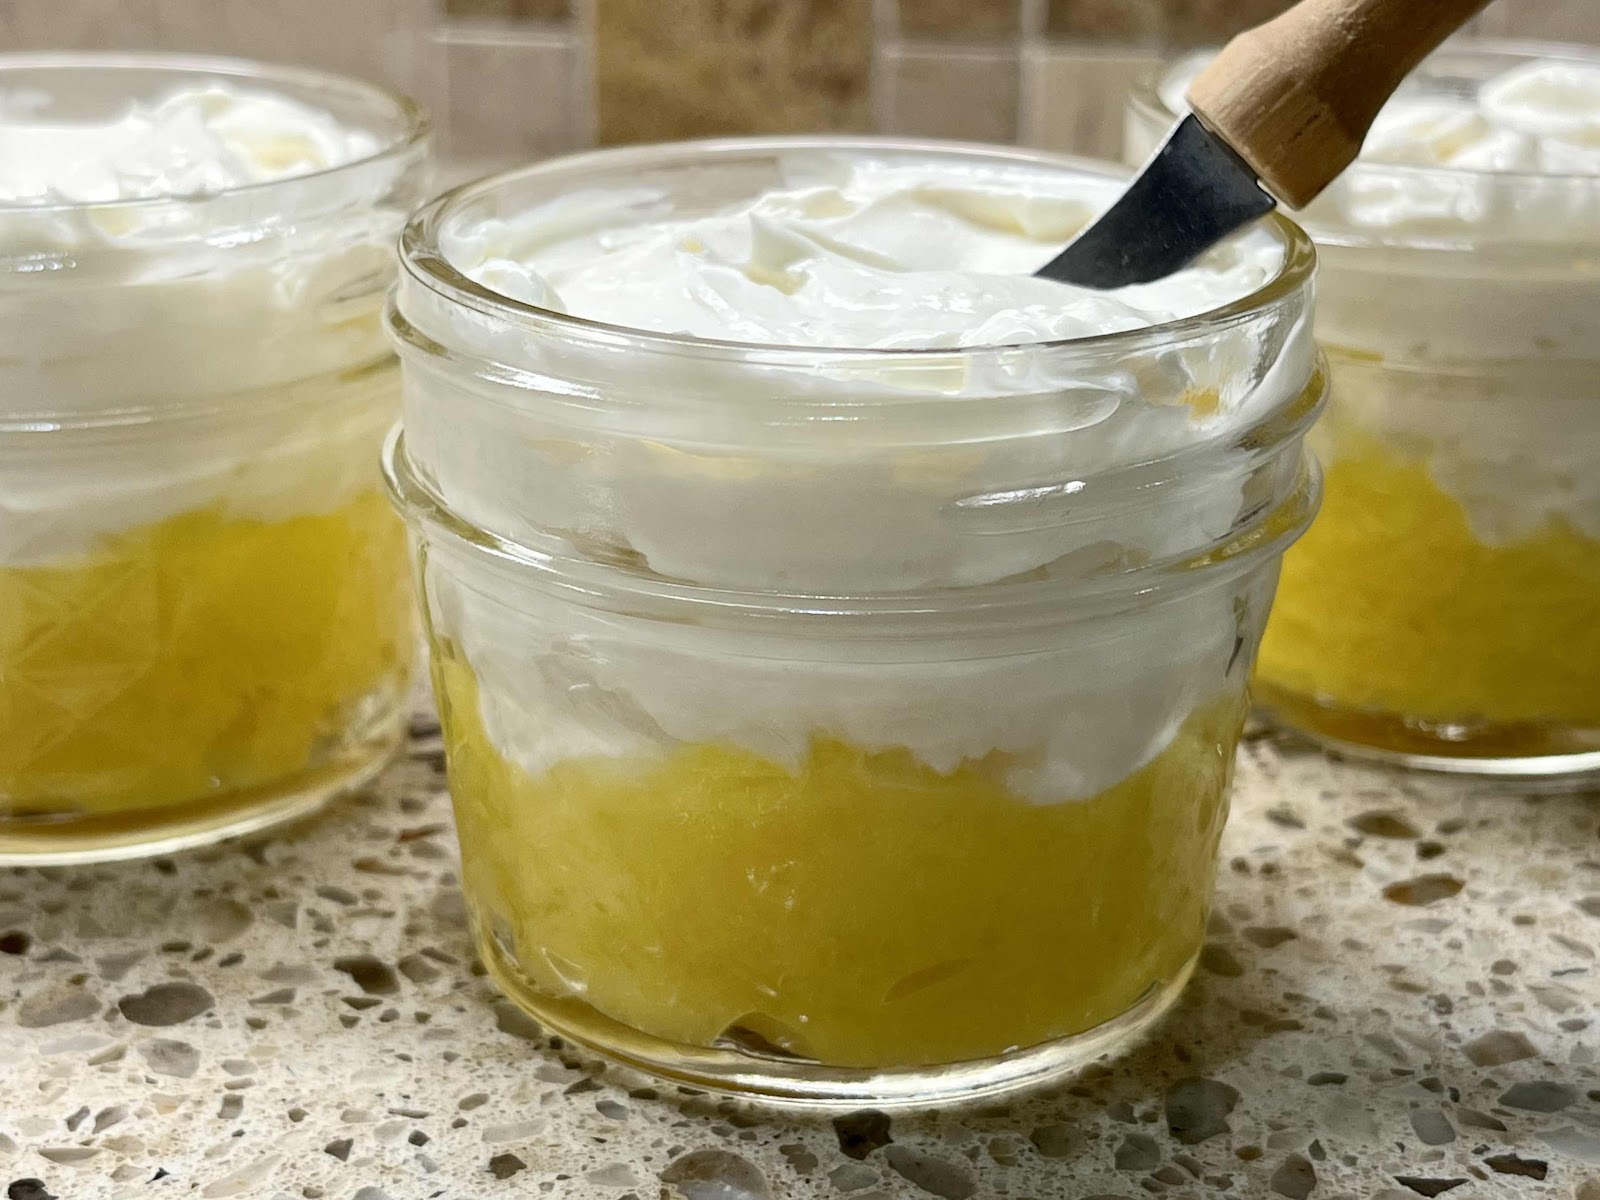
2. In a small glass serving bowl, spread the cooled lemon curd on the bottom of the bowl. Depending on the size of your bowl, you will use 1/2 cup or more. You want the lemon curd to come up the side of the bowl about 1/4th of the way. (I put mine into three 4 oz. Mason jars because I didn’t plan to serve it all at once, see photo below.)

Place lemon curd on the bottom and top with the goat cheese
3. Carefully, spoon in the goat cheese or the cream cheese/ricotta mixture and smooth the top with the back of a spoon or an offset spatula. Cover and store in the refrigerator until ready to serve.

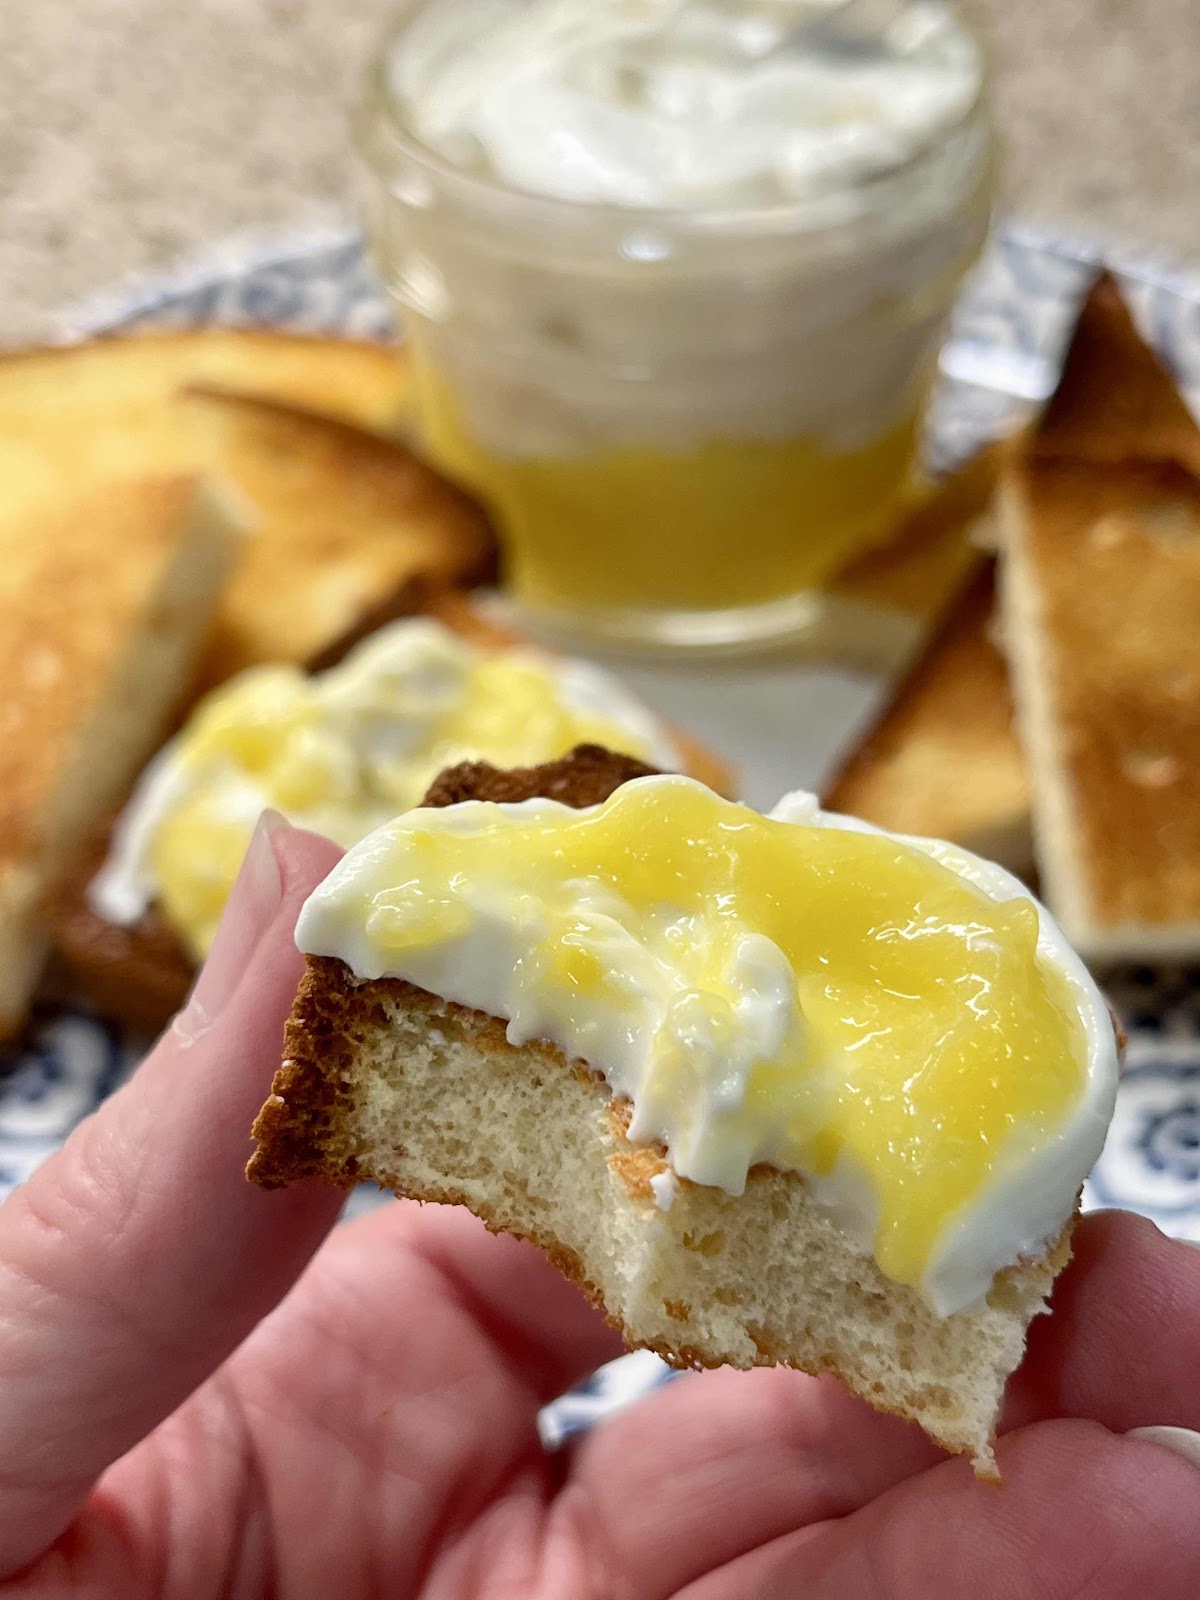
Lemon Curd Spread on keto toast
Nutritional Information per 2 tablespoons: 102 calories, 1.9 g carbohydrate (0 g dietary fiber, 0.4 g sugars, 0.4 g sugar alcohols), 9.7 g total fat (6.2 g saturated fat, 0 g trans fat), 41 mg cholesterol, 50 mg sodium, 31.6 mg calcium, 25 mg potassium, 96 IU Vit A, 2.3 g protein. Net carbs per serving: 1.5 grams

Photos and recipe by Kathy Sheehan, copyright 2022
All rights reserved. Please do not duplicate without the author’s permission. 

Saturday, March 26, 2022

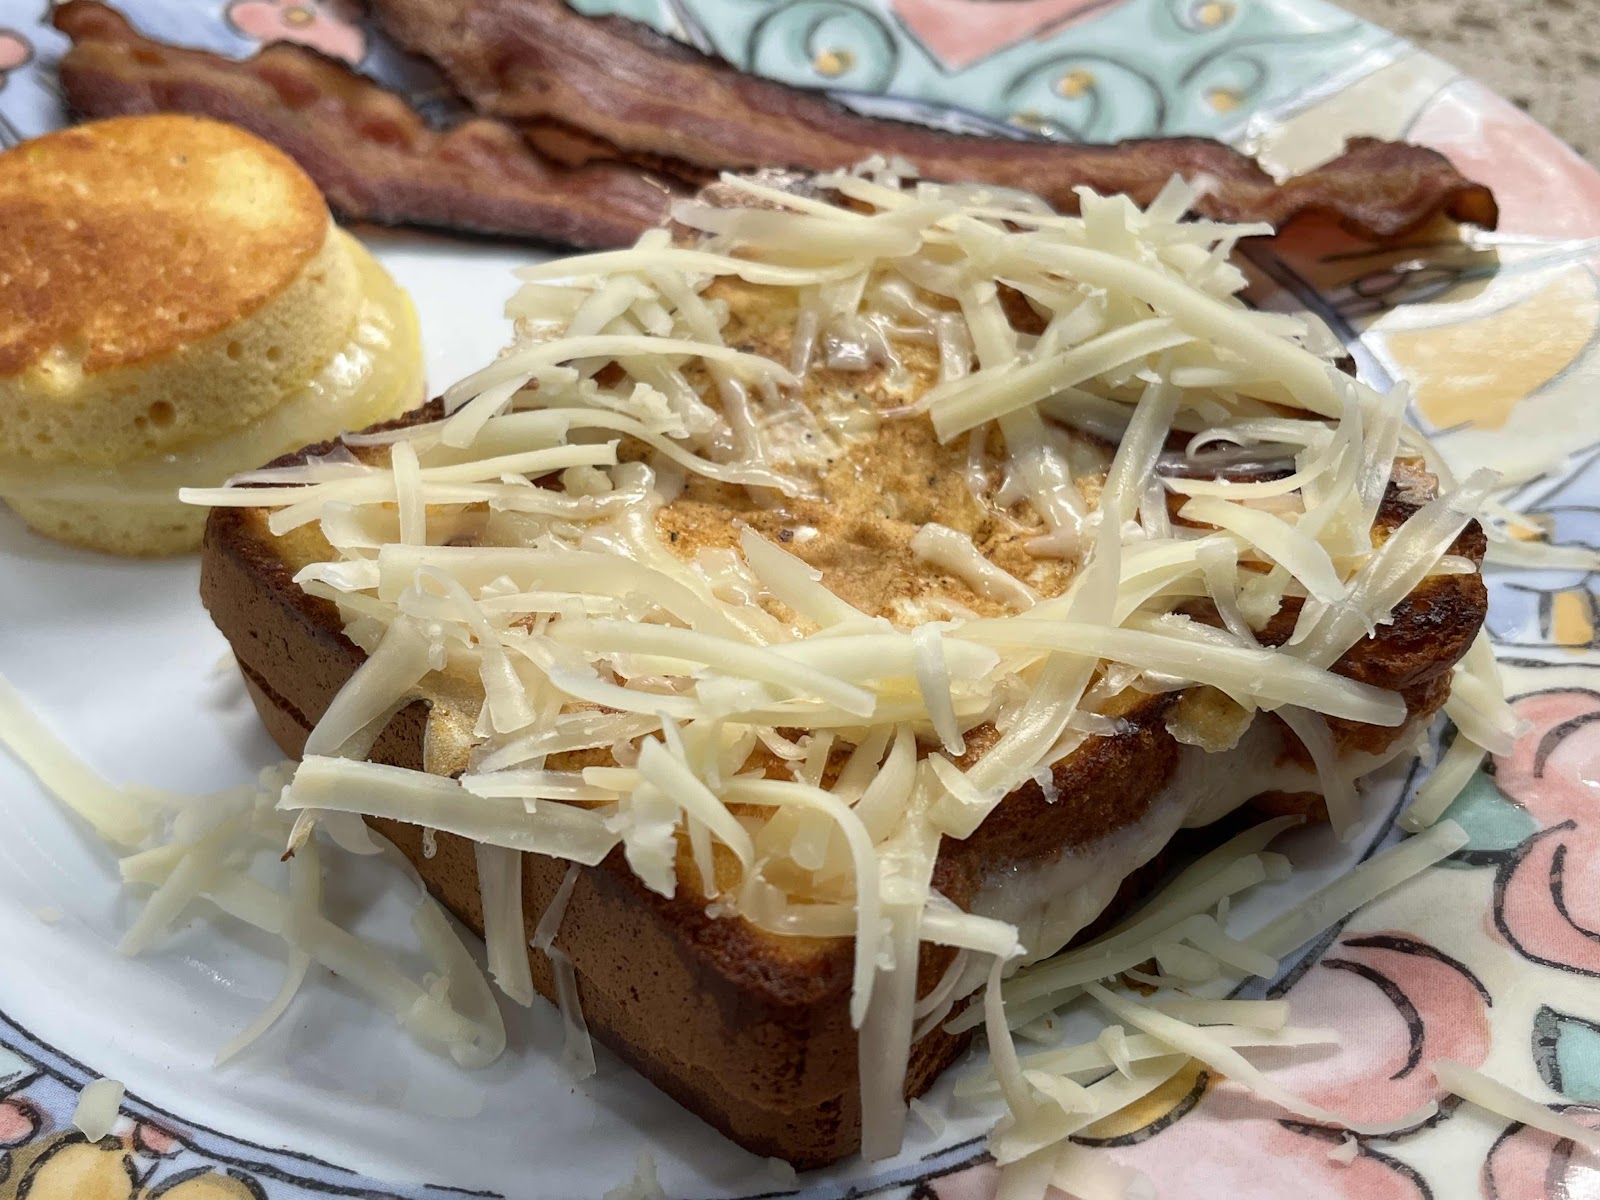
The Ultimate Keto Grilled Cheese Egg in a Nest

Ultimate Keto Grilled Cheese Egg In a Nest
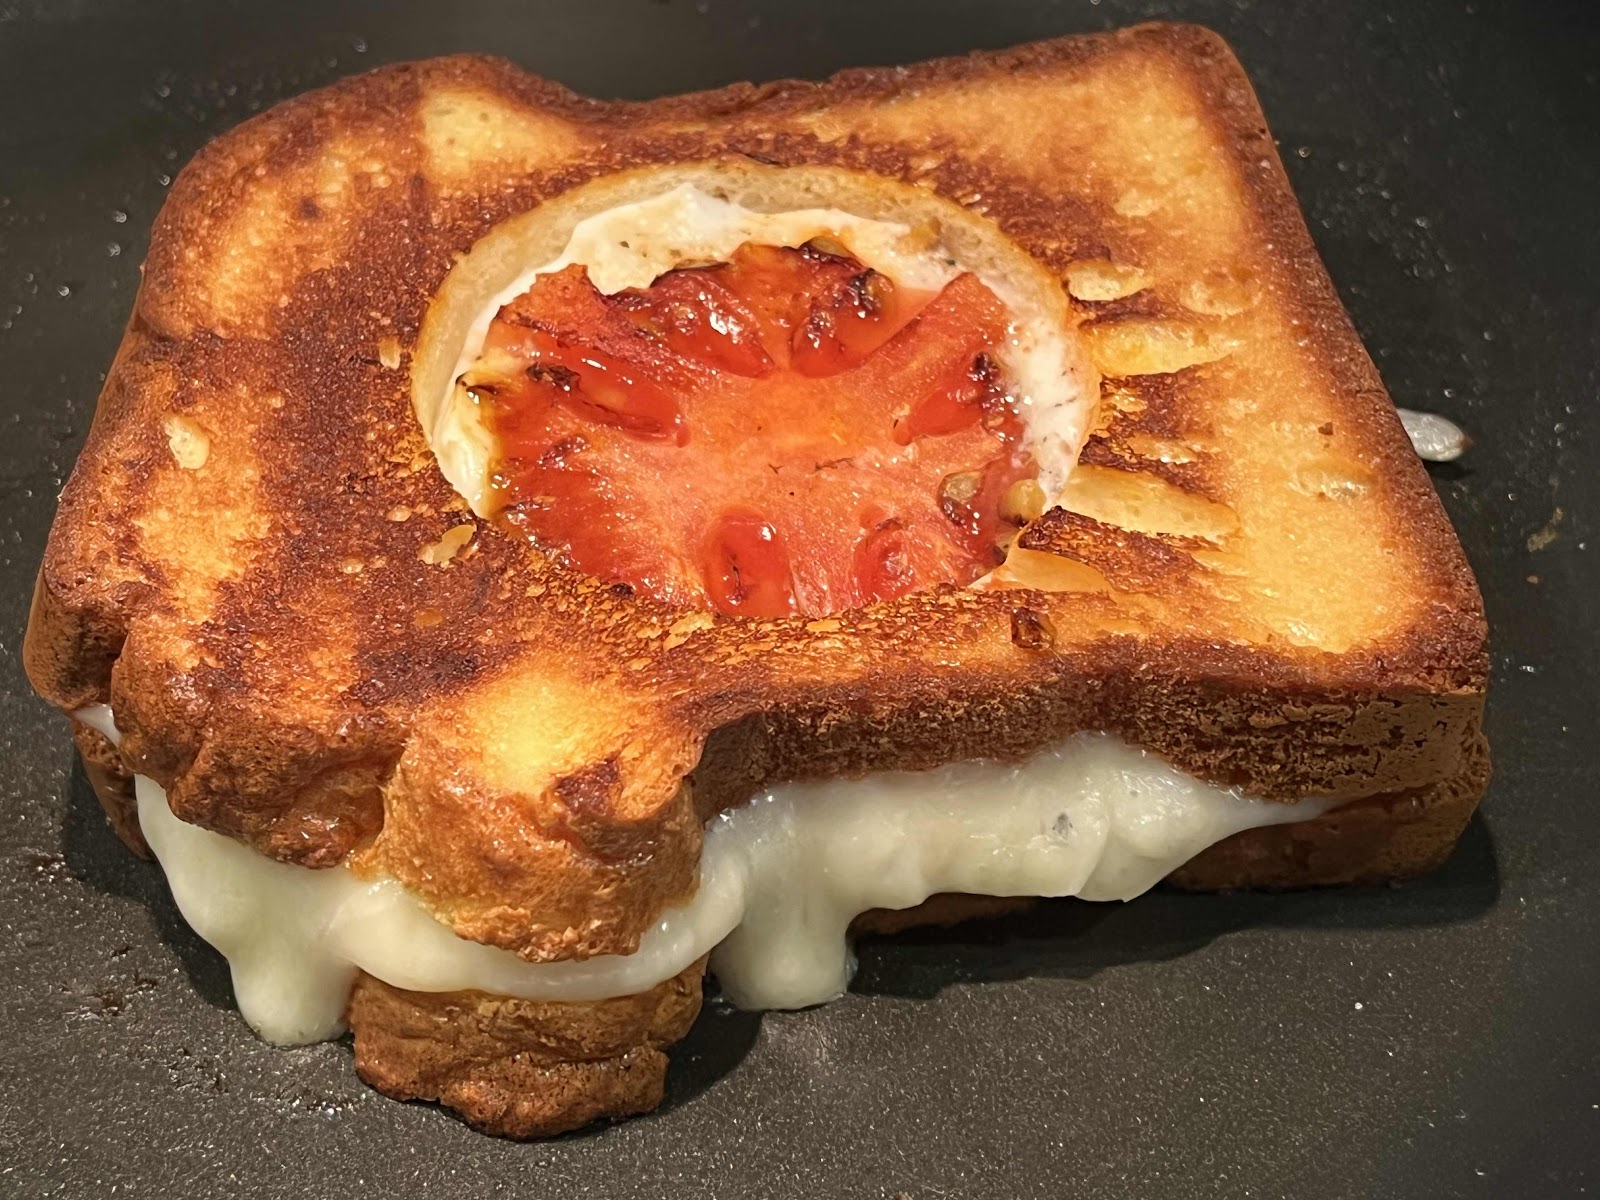
I have recently discovered the best keto bread recipe I’ve ever tried! (Click here for the recipe.) Now, I have real bread that I can use in a variety of ways in my meals. I have always loved Egg In a Nest, but this recipe takes it a step further. It has all the best flavors of a grilled cheese and tomato sandwich with Egg In a Nest! By itself, it makes a great quick and easy meal. Of course, you can use any keto bread that you like in place of homemade, but be aware the nutritional information may change depending on the bread you use.

The Ultimate Keto Grilled Cheese Egg In a Nest
Makes 1 serving

2 slices of keto bread (I used this recipe for Cloud Bread Loaf)
1 teaspoon yellow mustard
2 teaspoons butter, softened (I prefer salted butter)
1 slice tomato
1 ounce sliced cheese (I prefer sharp cheddar)
1/2 teaspoon olive or avocado oil
1 egg
Salt and pepper to taste
1 ounce shredded cheddar cheese

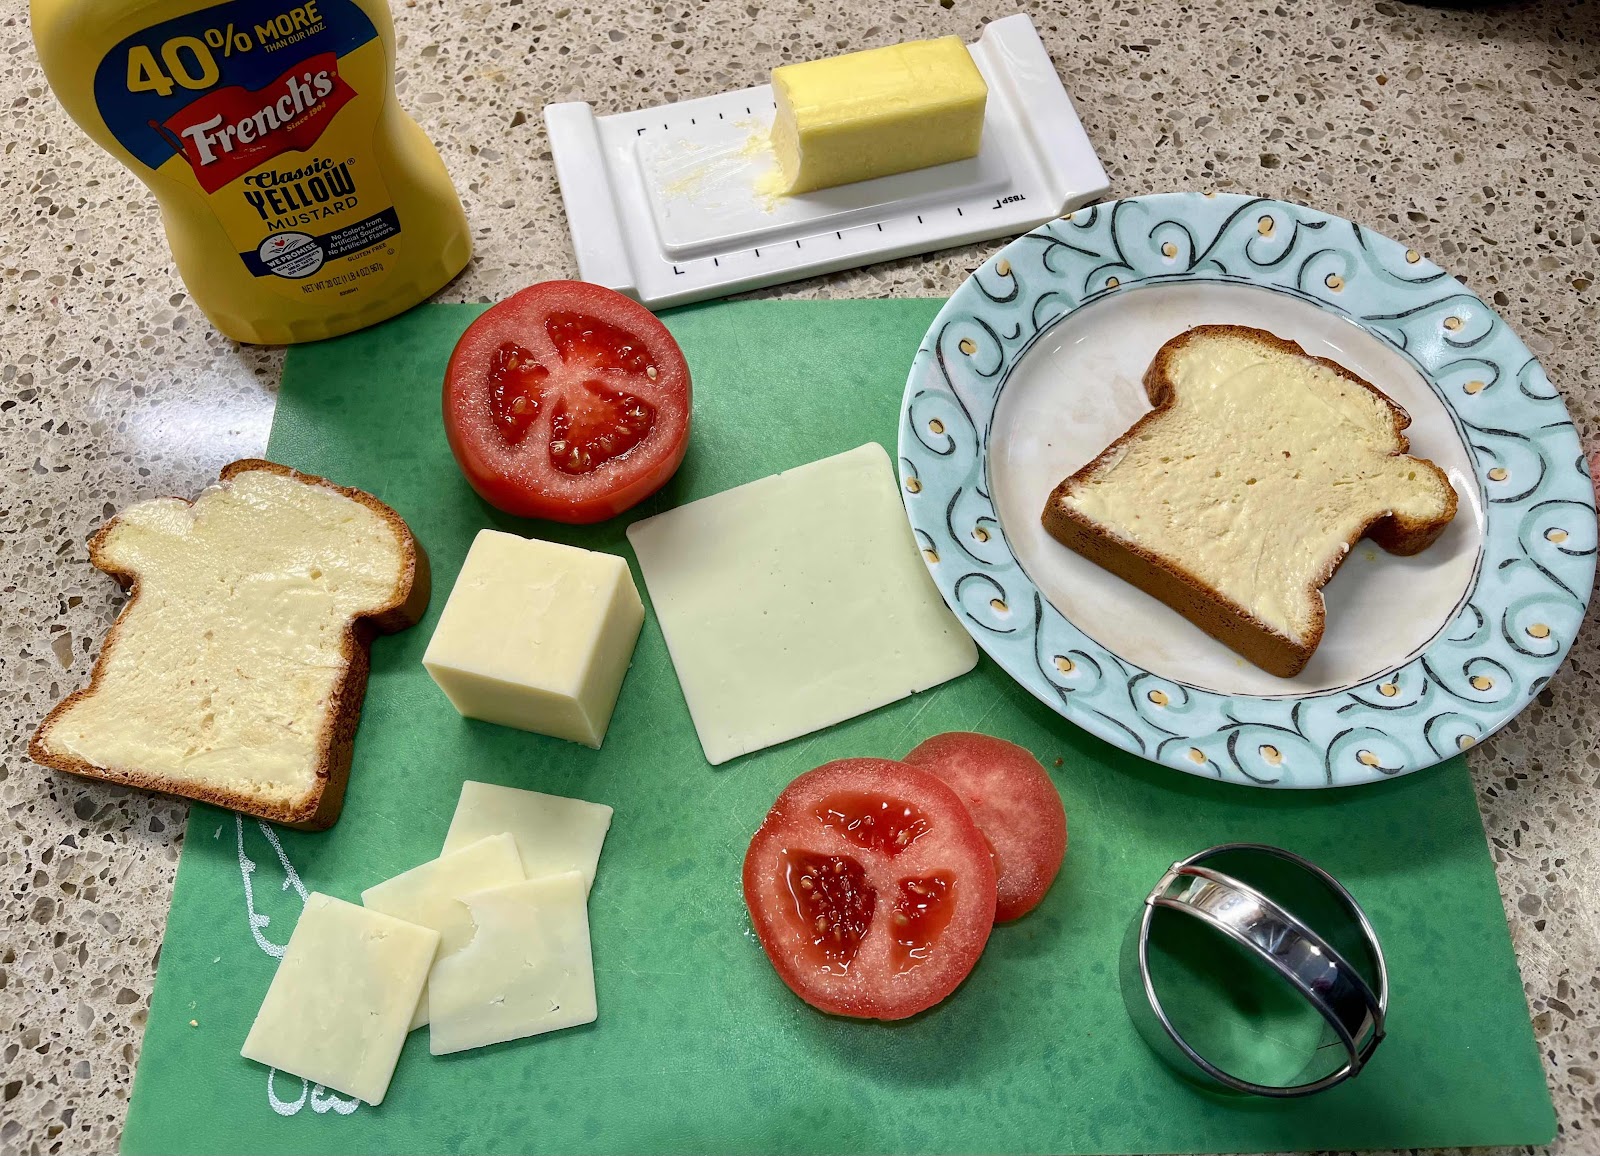
Equipment Needed: small biscuit cutter

Ingredients needed
1. Spread the mustard on both slices of the bread, on the side that will become the inside of the grilled cheese sandwich. Spread the softened butter on both sides of the bread, on the sides that will become the outside of the grilled cheese sandwich.

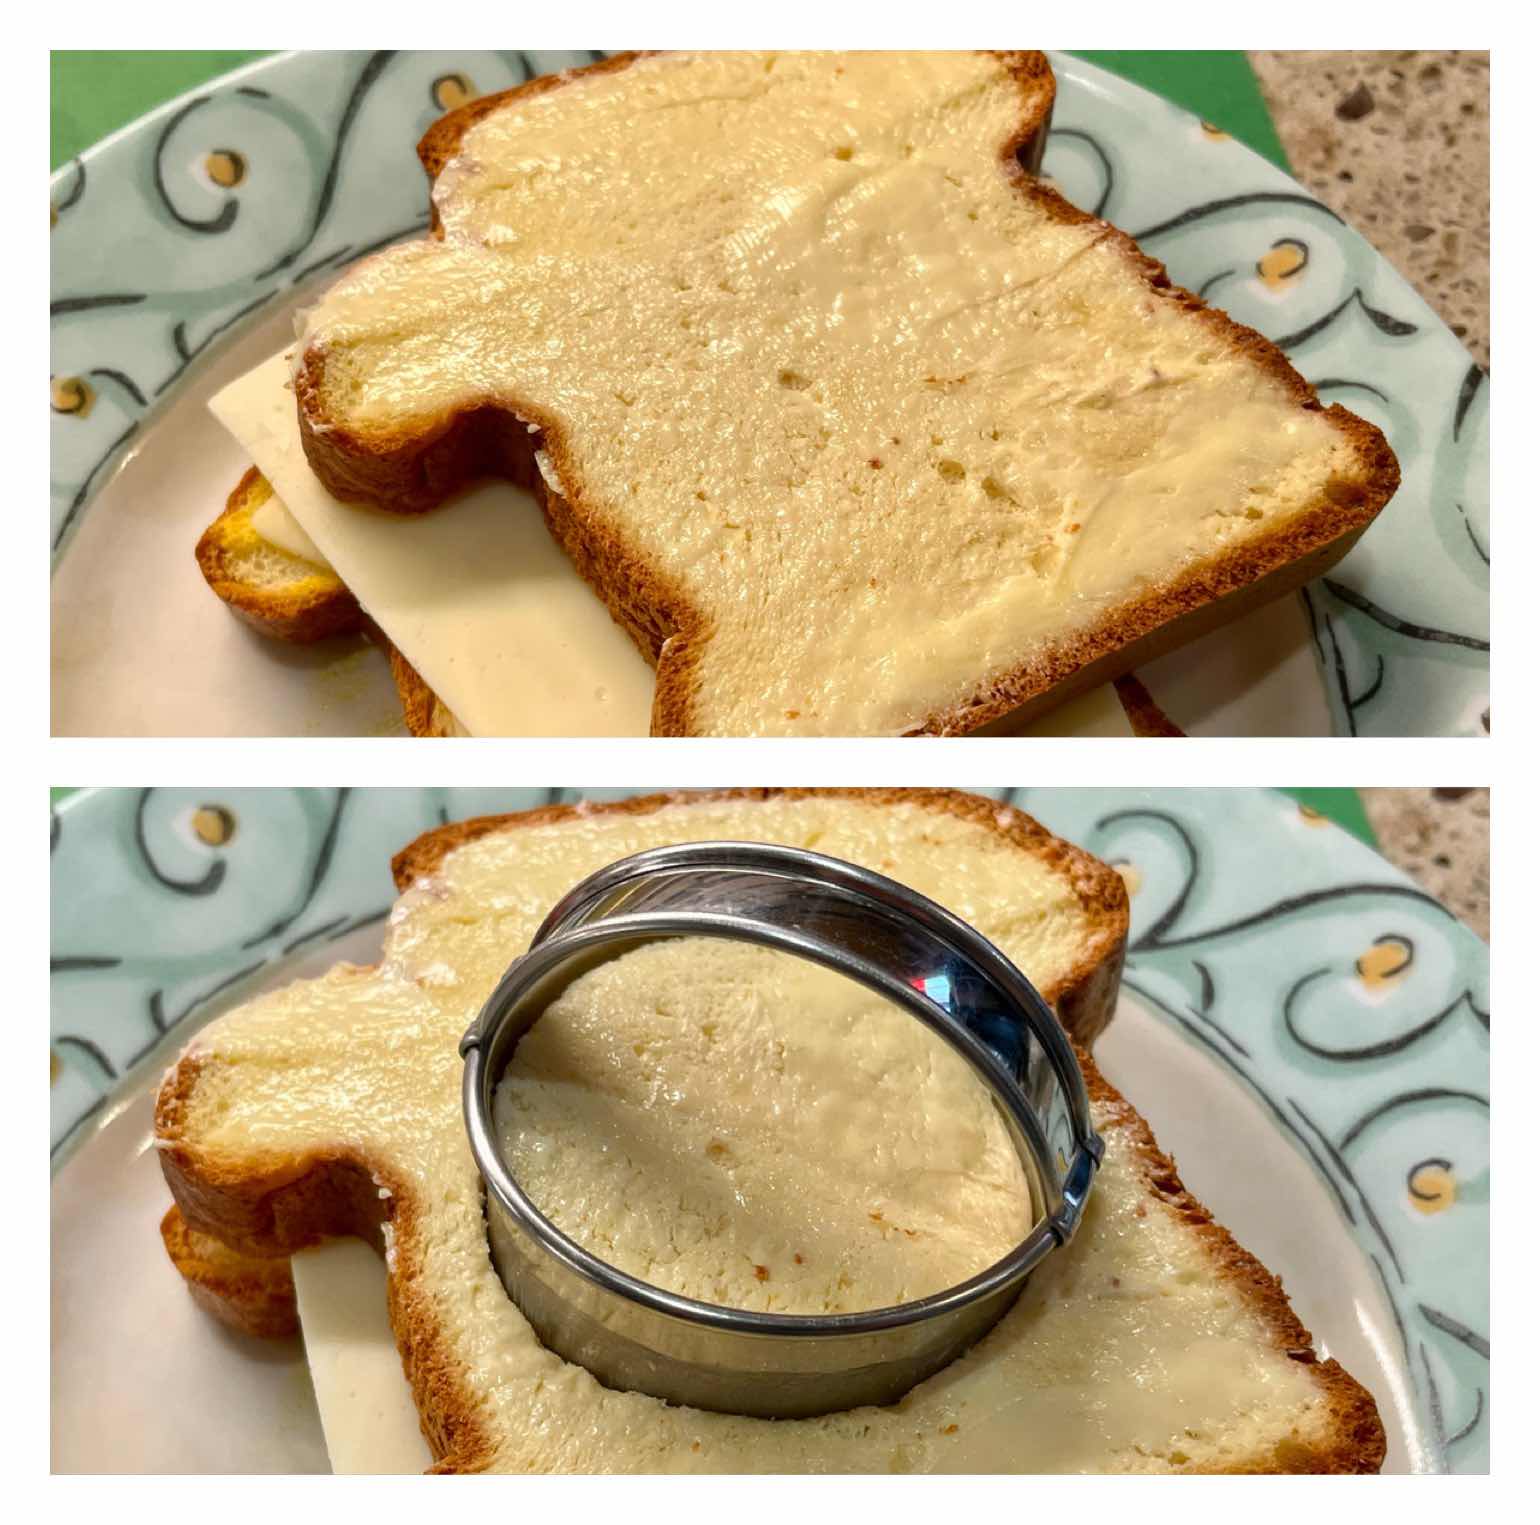
Make cheese sandwich
2. Place one slice of bread, butter side down, on a small plate or cutting board. Top with cheese and place the remaining slice of bread, butter side up, onto the cheese. Use the small biscuit cutter to cut a hole in the center of the cheese sandwich. Save the center circle to be grilled along side the Egg in a Nest.

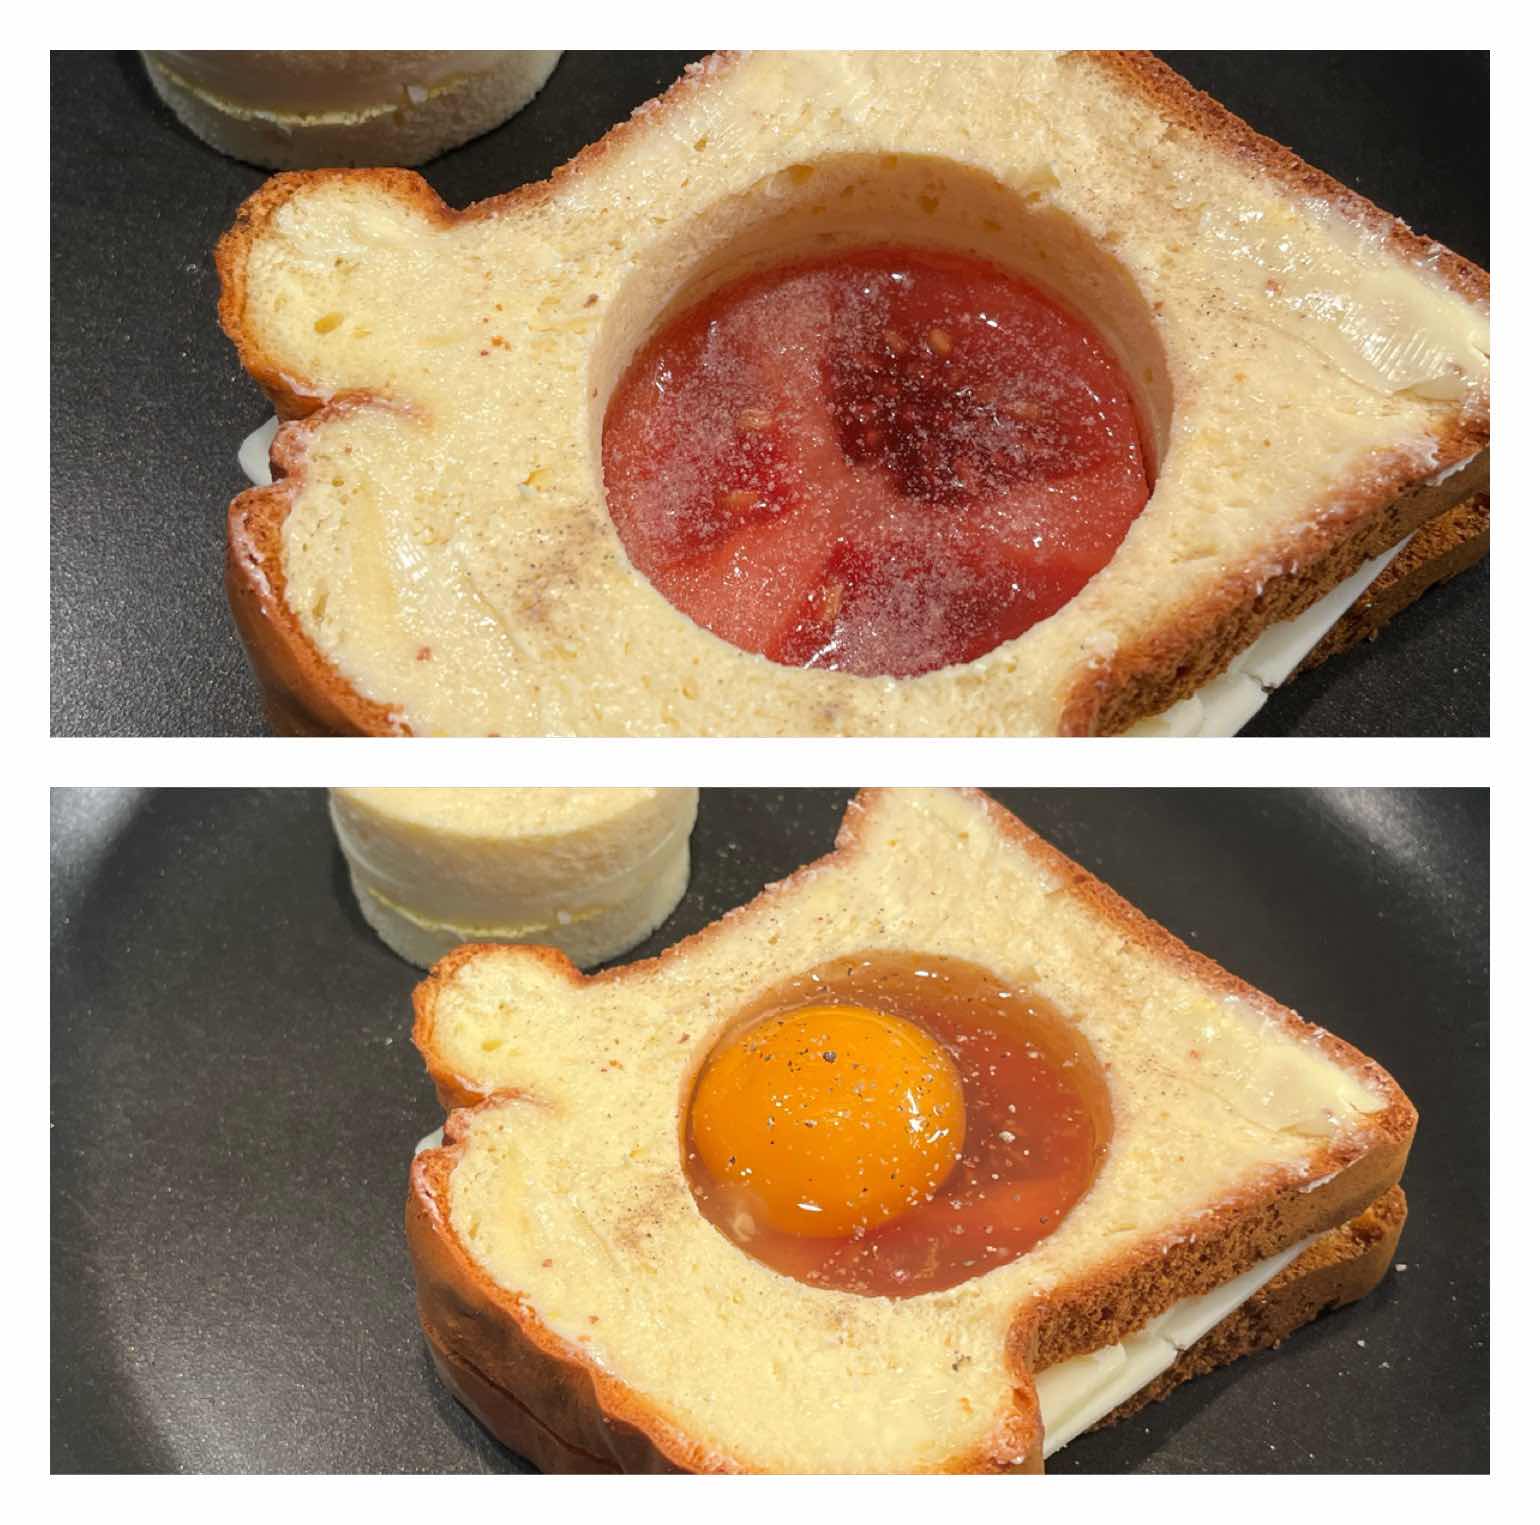
Cut tomato to fit hole
3. If your tomato slice is larger than the hole you created, use the biscuit cutter to make it the correct size. You want it to fit inside the circle.

Place tomato in hole and top with egg
4. Place the cheese sandwich, with the hole in it, into a non-stick skillet (I start with a cold skillet). Drizzle 1/2 teaspoon of oil into the hole, then insert the tomato slice into the hole. Season with salt and pepper to taste. Crack an egg over the tomato slice and again season the egg with salt and pepper. Turn the heat to low (or medium-low). Cover the skillet with a lid to trap the heat and help melt the cheese. Grill until the bread has browned nicely. At the same time, grill the round cheese sandwich that you cut from the center.

Flip Egg In a Nest
5. With a spatula, carefully flip the sandwich and continue grilling on the second side until the bread has browned and the egg is done to your liking. (Again, I like to cover the skillet to trap the heat.) Flip the small round cheese sandwich and brown the second side, as well.

Grilled Cheese Egg In a Nest
6. Remove the Egg In a Nest and the round grilled cheese sandwich to a serving plate. Sprinkle the shredded cheese over the Egg In a Nest and serve! YUM!

Nutritional Information per serving (made with 2 slices Cloud Bread Loaf): 603 calories, 3.6 g carbohydrate (2.4 g dietary fiber, 2.9 g sugars), 49.8 g total fat (20 g saturated fat, 0 g trans fat), 428 mg cholesterol, 690 mg sodium, 466.9 mg calcium, 254 mg potassium, 533 IU Vit A, 3 mg Vit C, 3 mg iron, 36.7 g protein. Net carbs per serving: 1.2 grams

Photos and recipe by Kathy Sheehan, copyright 2022
All rights reserved. Please do not duplicate without the author’s permission.

Saturday, March 19, 2022

Strawberry and Mascarpone Cream Cake

Strawberry Mascarpone Cream Cake
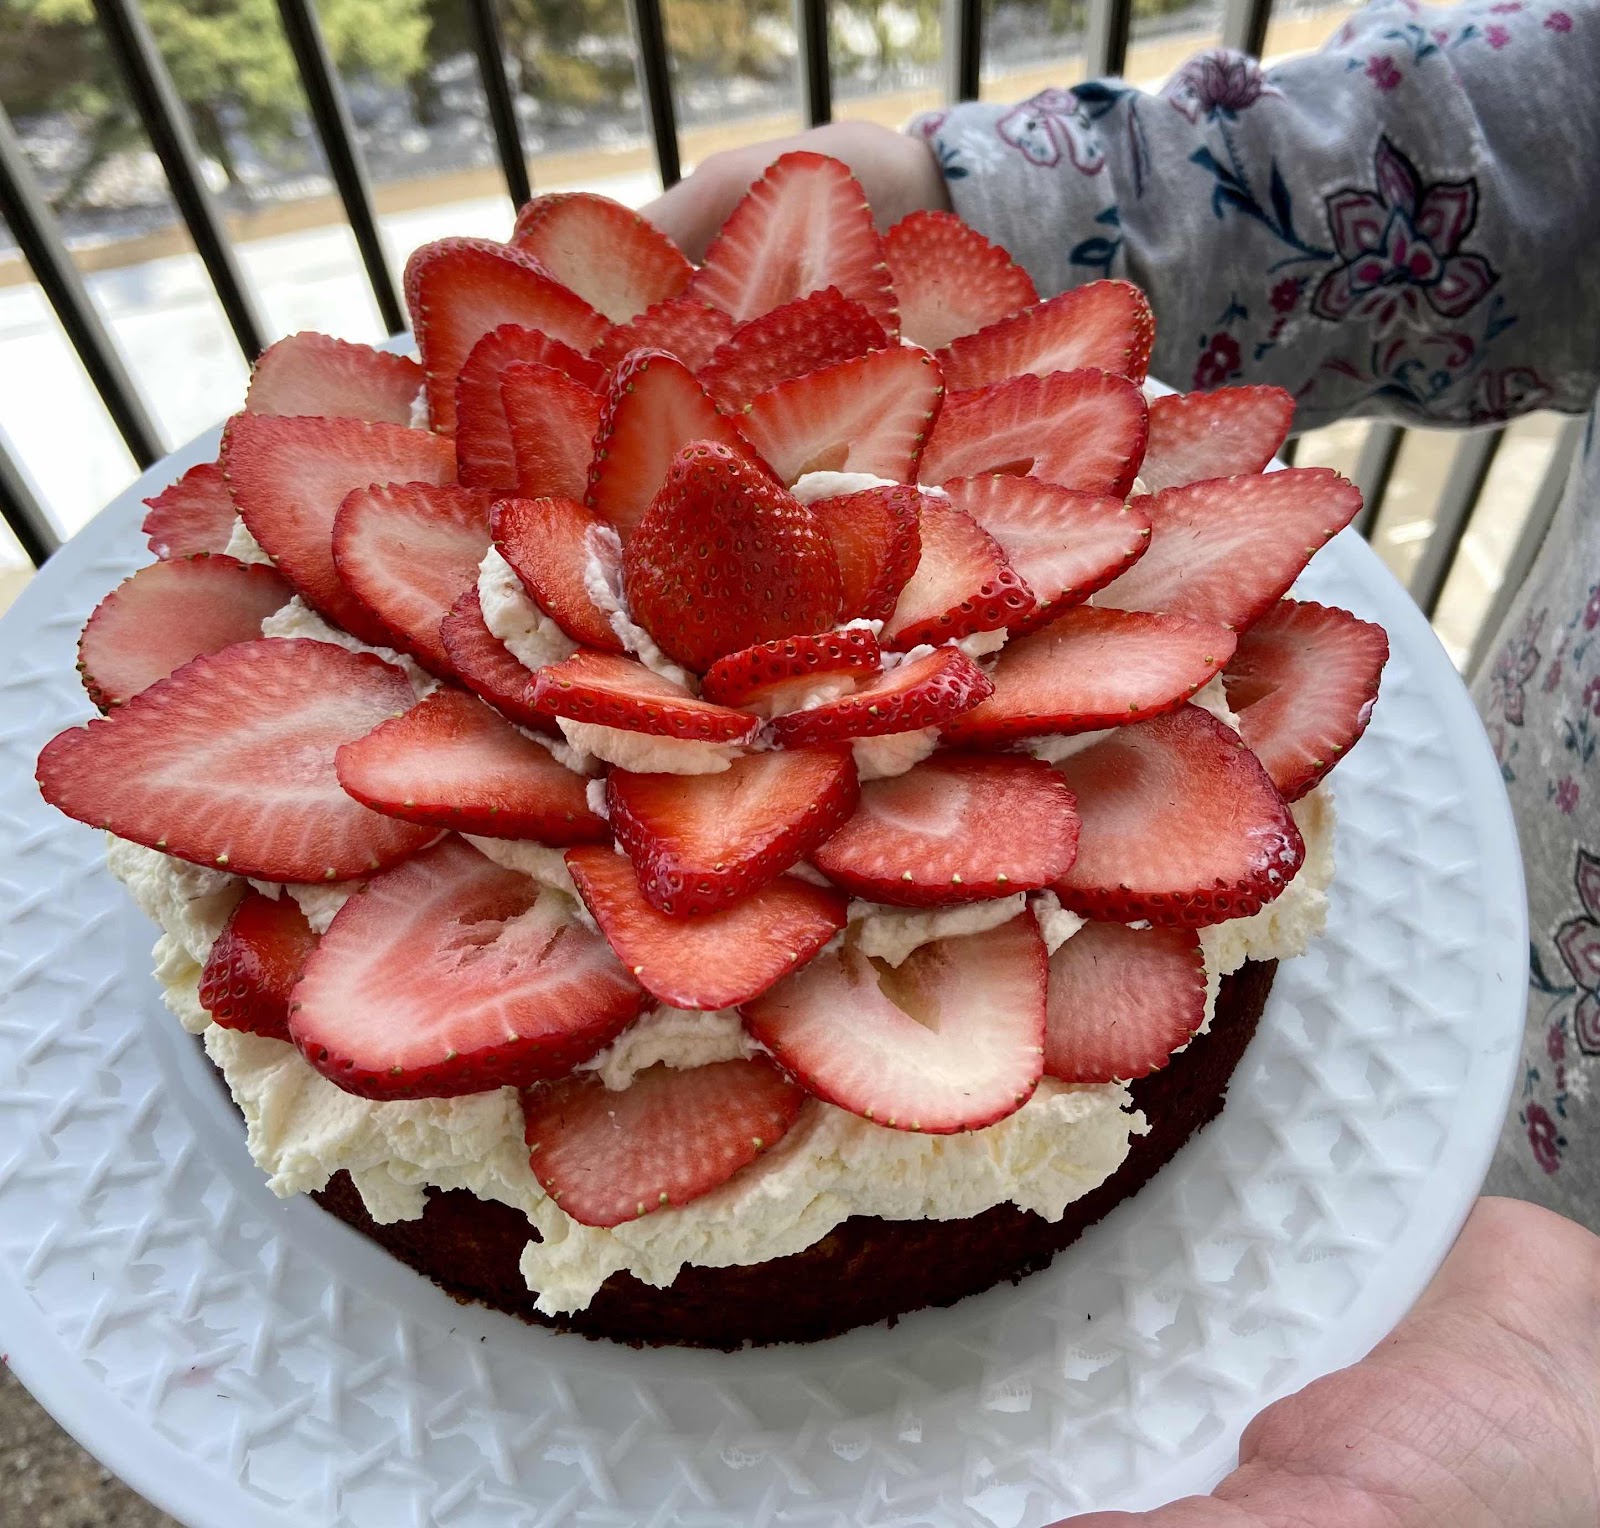
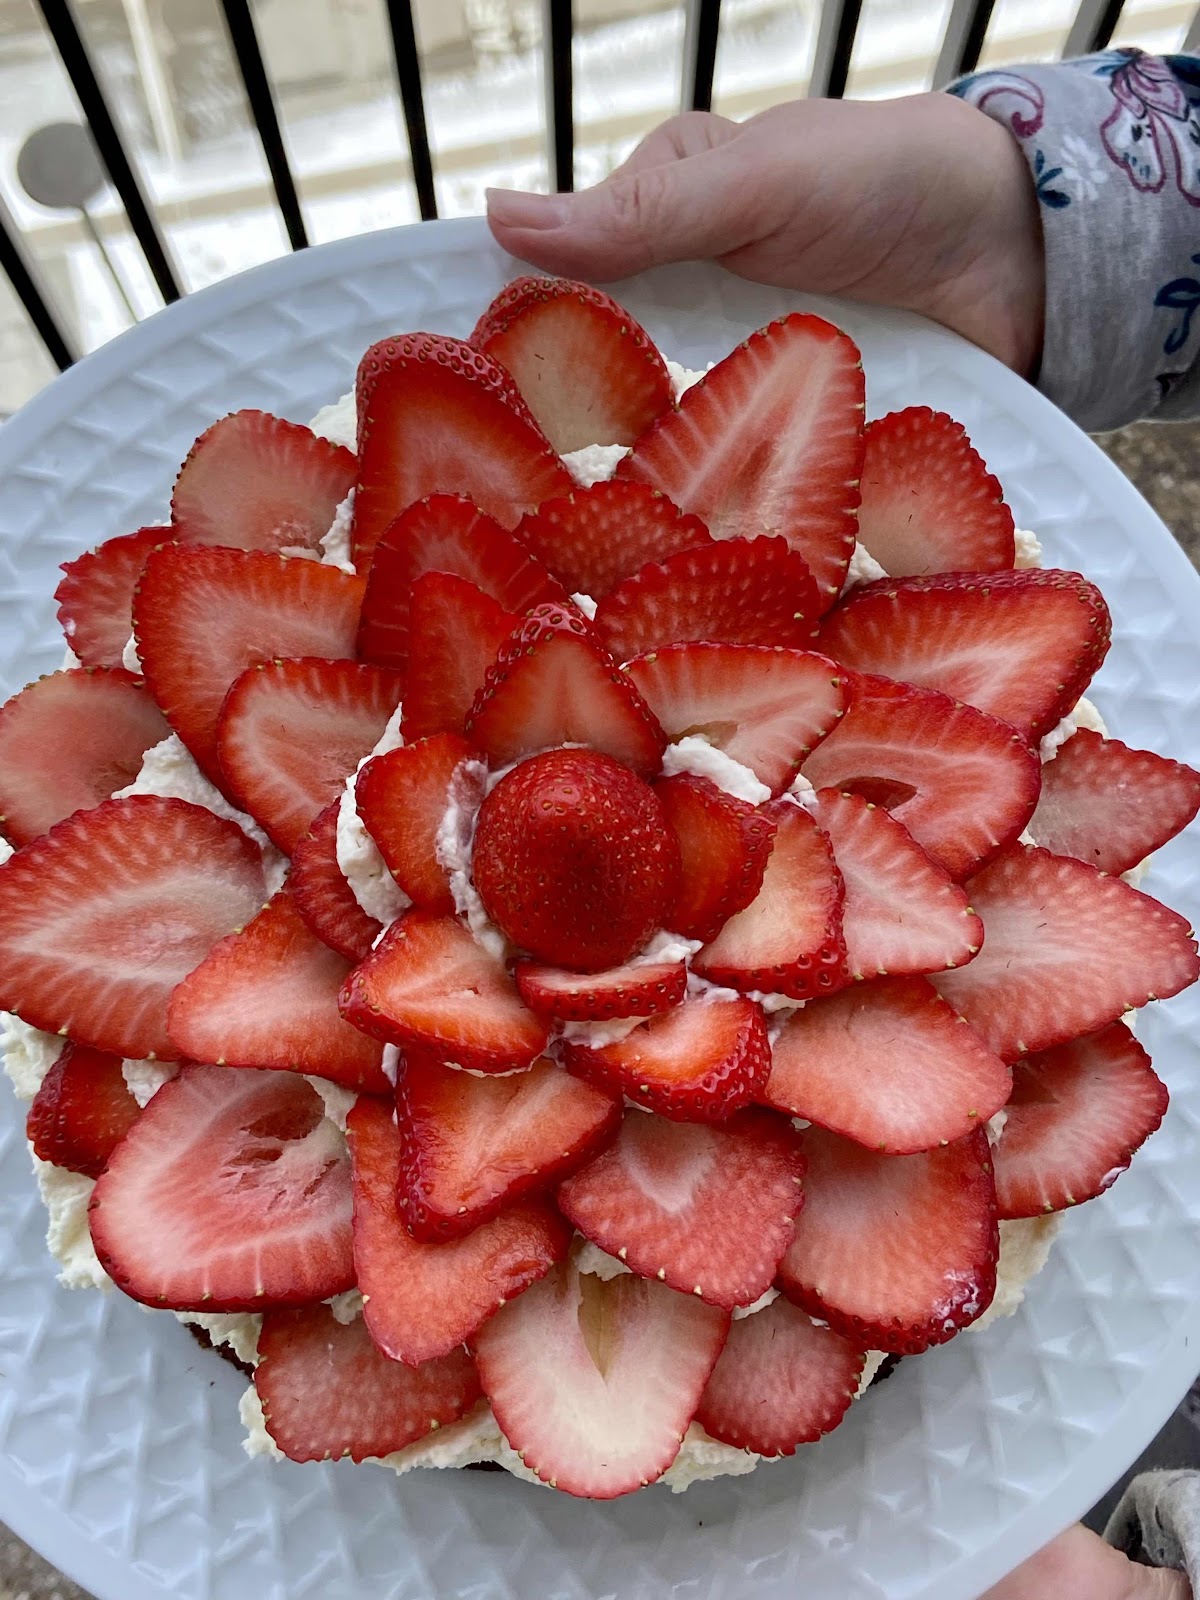
Last month, my mother celebrated her 86th birthday! It was my privilege to make her birthday cake so, of course, I wanted it to be extra special. This cake is not only delicious, it is extraordinarily beautiful being topped with sliced strawberries arranged in a flower design. I know you will WOW your family and guests whenever you serve this spectacular dessert! Mascarpone cream makes a wonderful frosting for any cake but, paired with strawberries, it is especially bright and refreshing. Perfect for a spring occasion!

Strawberry and Mascarpone Cream Cake
Makes one 8” cake (8 servings)

Cake:
48 grams coconut flour (about 7 tablespoons, lightly scooped and leveled)
6 tablespoons granulated erythritol sweetener (I like LaKanto Monkfruit Classic)
2-1/2 tablespoons unflavored whey protein powder 
1-1/2 teaspoons baking powder
1/8 teaspoon salt
3 large eggs
1/4 cup unsalted butter, melted and cooled
1/4 cup unsweetened coconut or almond milk
1 teaspoon vanilla extract

Mascarpone Cream Filling:
1-1/4 cups heavy whipping cream, cold
1/2 cup powdered erythritol sweetener 
1 teaspoon vanilla extract
8 oz. Plain, unsweetened mascarpone cheese, softened but still chilled

Topping:
About 1 quart fresh strawberries, leaves removed and sliced thinly lengthwise

1. Make the Cake: Preheat the oven to 325°F. Grease an 8 inch* cake pan well. Line the bottom with parchment paper and grease the paper.

2. In a medium bowl, sift together the coconut flour, sweetener, whey protein powder, baking powder and salt or whisk until no lumps remain. In a large bowl and using an electric mixer, beat the eggs, melted butter, coconut milk and vanilla extract until well combined. Add the dry ingredients and beat just until there are no lumps and the batter is smooth.

3. Pour the batter into the prepared pan and spread to the edges. Smooth the top. Bake about 30 minutes or until lightly browned around the edges, the top is slightly firm to the touch and a toothpick comes out clean. Do not over bake.

4. Remove from the oven and let cool in the pan for 10 minutes, then run a sharp knife around the inside of the pan and flip the cake out onto a wire rack to cool completely before frosting.

5. Make the Mascarpone Cream: Add the heavy whipping cream, powdered sweetener and vanilla extract to a large mixer bowl and whip on high speed until soft peaks form. Add the mascarpone cheese to the whipped cream and whip until stiff peaks form. It will happen fairly quickly.

6. Assemble the Cake: Spread or pipe the mascarpone cream thickly onto the cake. Arrange the strawberry slices on top of the mascarpone cream, starting from the outside edge and working to the center, overlapping slightly to create a flower pattern.

Flower Design with strawberries
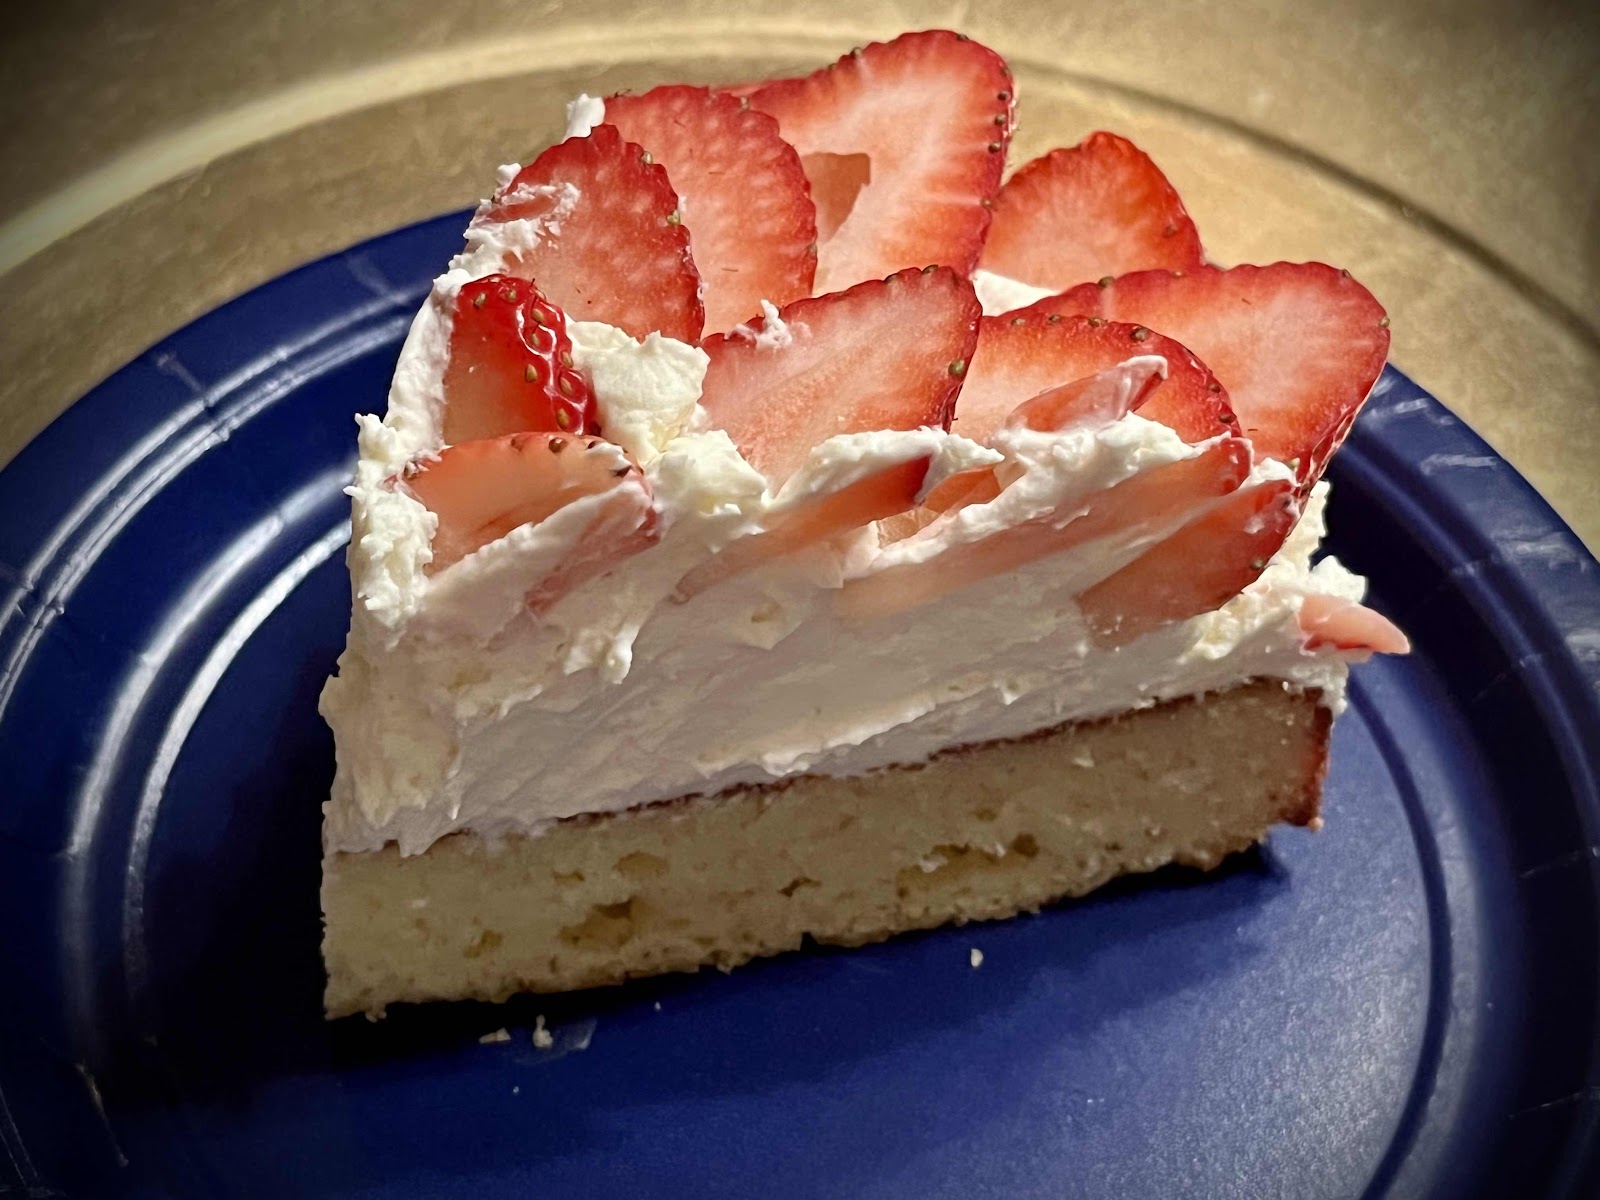
7. Cover loosely with plastic wrap and refrigerate. About 30 to 40 minutes before you plan to serve, remove the cake from the refrigerator and allow to sit at room temperature. Slice with a large, sharp knife. For a clean, pretty slices, wipe your knife between each cut.

Slice of Strawberry Mascarpone Cream Cake
*Notes: It’s important to use an 8 inch cake pan to achieve the proper height to your cake layer. If you use a 9 inch pan, bake for a shorter period of time. The result will be a thinner cake, resembling a tart more than a cake.

Nutritional Information per serving (1/8th cake): 376 calories, 10.7 g carbohydrates (3 g dietary fiber, 2 g sugars, 3.5 g sugar alcohols), 36.3 g total fat (21.8 g saturated fat, 0 g trans fat), 163 mg cholesterol, 174 mg sodium, 91.2 mg calcium, 97 mg potassium, 237 IU Vit A, 1 mg iron, 6.4 g protein. Net carbs per serving: 5.2 grams

Photos and recipe by Kathy Sheehan, copyright 2022
All rights reserved. Please do not duplicate without the author’s permission. 

Thursday, March 10, 2022

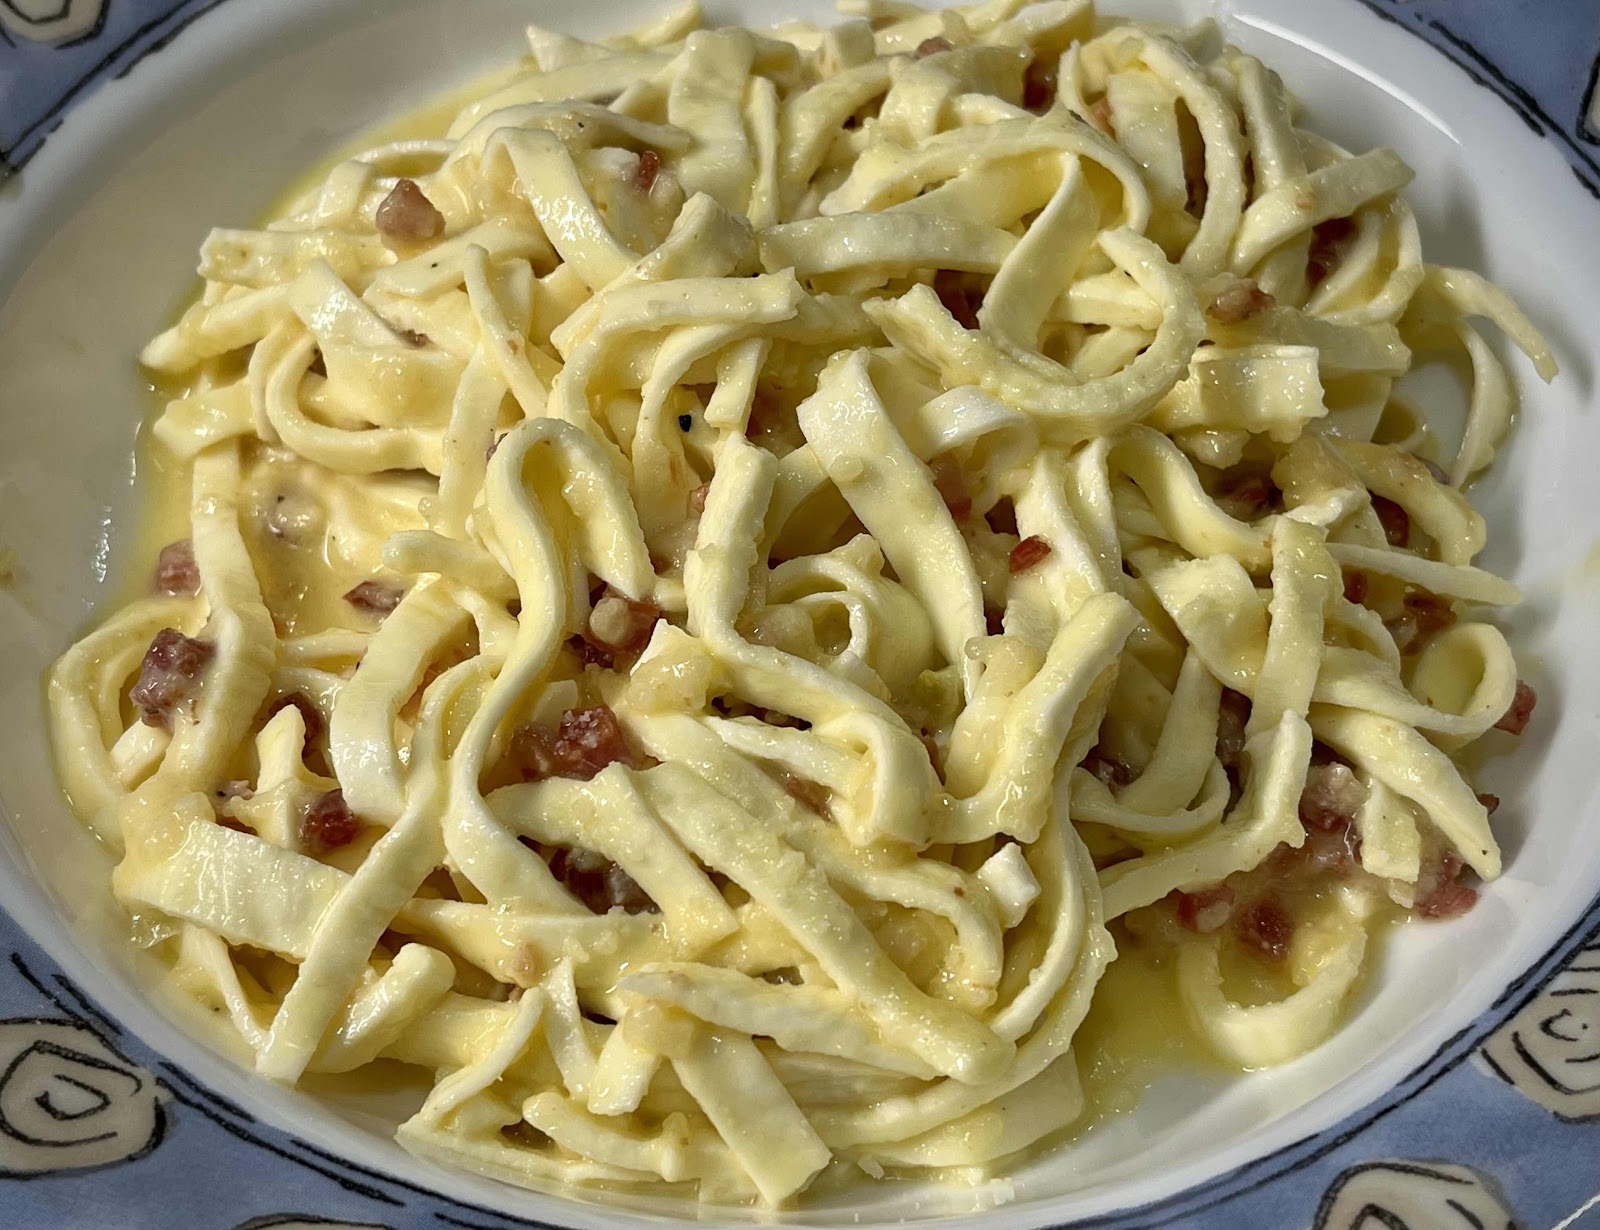
Keto Carbonara (Made with Egglife Wrap Noodles)

Keto Carbonara (Made with Egglife Wrap Noodles)
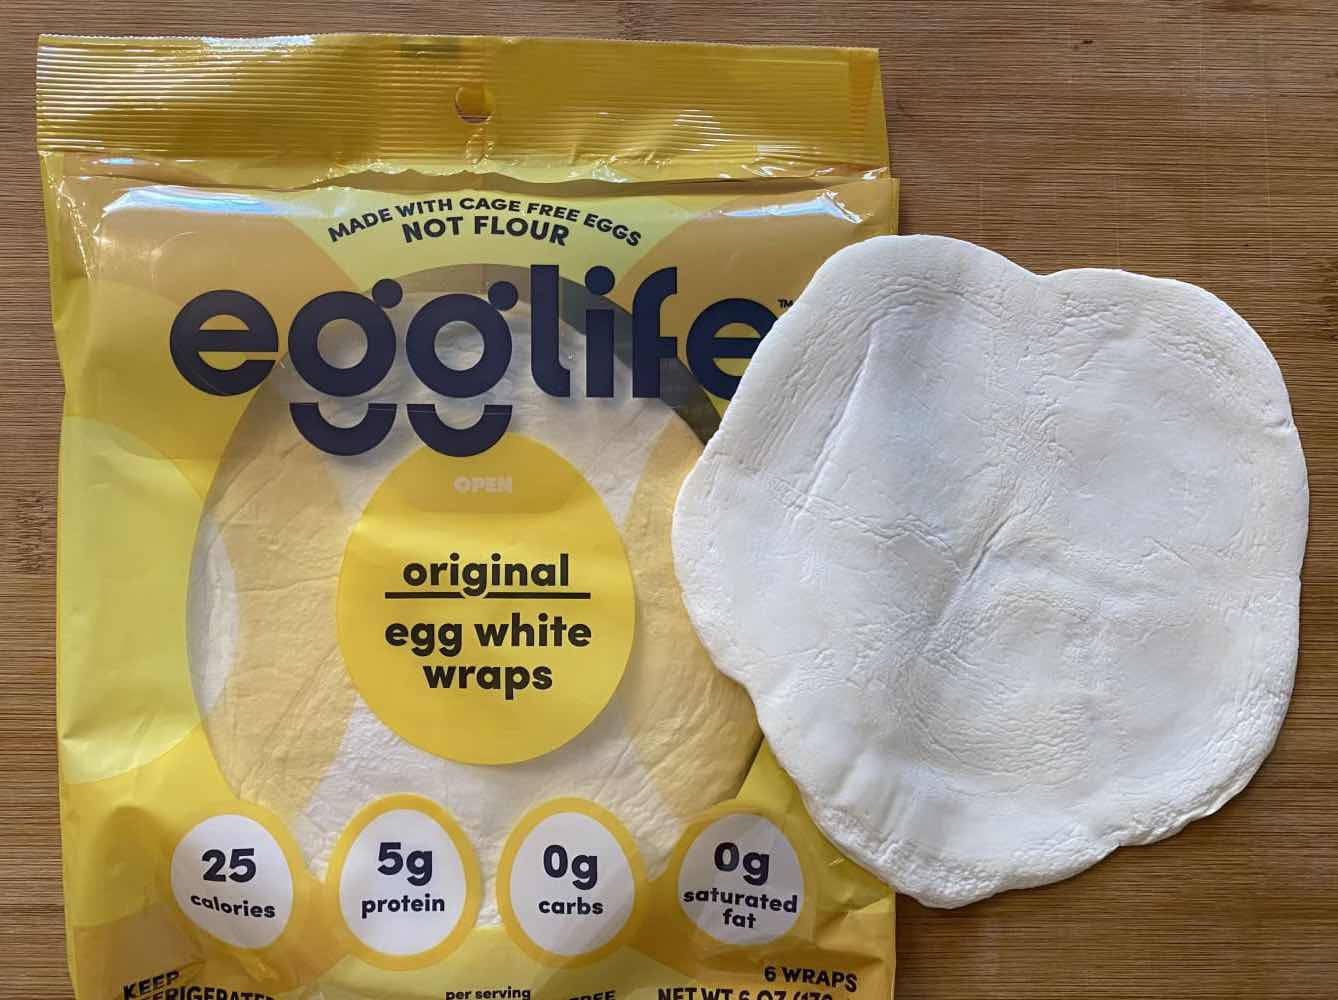
I recently made Carbonara using three Egglife wraps that I cut into thin strips using a pizza cutter. The result was very good! I have to admit that this idea of using Egglife wraps as noodles is not my own. I saw a post on Facebook that inspired me. I thought it was ingenious! So, I tried it with my homemade carbonara recipe and I like the way it turned out. The Egglife wraps, by themselves, are pretty plain. They do not impart much flavor, so using them as a wrap in anything other than a breakfast burrito is not appealing to me. But when cut into thin strips, I think they make a pretty good egg noodle substitute. I will definitely be trying this again in other recipes that call for egg noodles, such as stroganoff. This recipe is convenient and quick to throw together anytime you need a “fast food” dinner. (To find out where you can buy Egglife Wraps in your area, check out the Store Locator on their website here.)

Keto Carbonara (Made with Egglife Wrap “Noodles”)
Makes 1 generous serving (or two side dish servings)

3 plain Egglife Wraps, cut into thin strips
2 ounces pancetta, cut into small cubes (or bacon)
2 cloves garlic, minced
1 egg
6 tablespoons grated Parmesan cheese
Ground black pepper to taste

1. In a small, heavy saucepan, boil some water. Cut three plain Egglife wraps into thin strips using a pizza cutter or sharp knife, about the width of fettuccine noodles; set aside. In a small bowl, whisk together one egg and 6 tablespoons of grated Parmesan cheese. Add pepper to taste; set aside.

Egglife Wraps
2. In a skillet, sauté 2 ounces of cubed pancetta until it has rendered its fat and is beginning to brown. Add two finely chopped or minced cloves of garlic and stir until fragrant. Remove from heat.

3. Once the water has boiled, drop the Egglife ”noodles” into the water for 15 seconds. Reserve about 1/4 cup of the boiling water. Drain the noodles and set aside.

4. To the now empty, but still hot saucepan, add the sautéed pancetta, including any rendered fat. Add the egg/Parmesan mixture and a little bit of the reserved hot water and whisk into a sauce. (Only add enough water to create a smooth, but still slightly thick sauce.) Add the drained Egglife noodles and toss until the noodles are well coated. Serve immediately.

Nutritional Information per entire recipe (1 generous serving): 521 calories, 3.5 g carbohydrate (0.2 g dietary fiber, 0.2 g sugars), 35 g total fat (14.8 g saturated fat, 0 g trans fat), 258 mg cholesterol, 1761 mg sodium, 446 mg calcium, 336 mg potassium, 1 mg iron, 139. IU Vit A, 43 g protein. Net carbs per serving: 3.3 grams

Photo and recipe by Kathy Sheehan, copyright 2022
All rights reserved. Please do not duplicate without the author’s permission. 

Wednesday, February 9, 2022

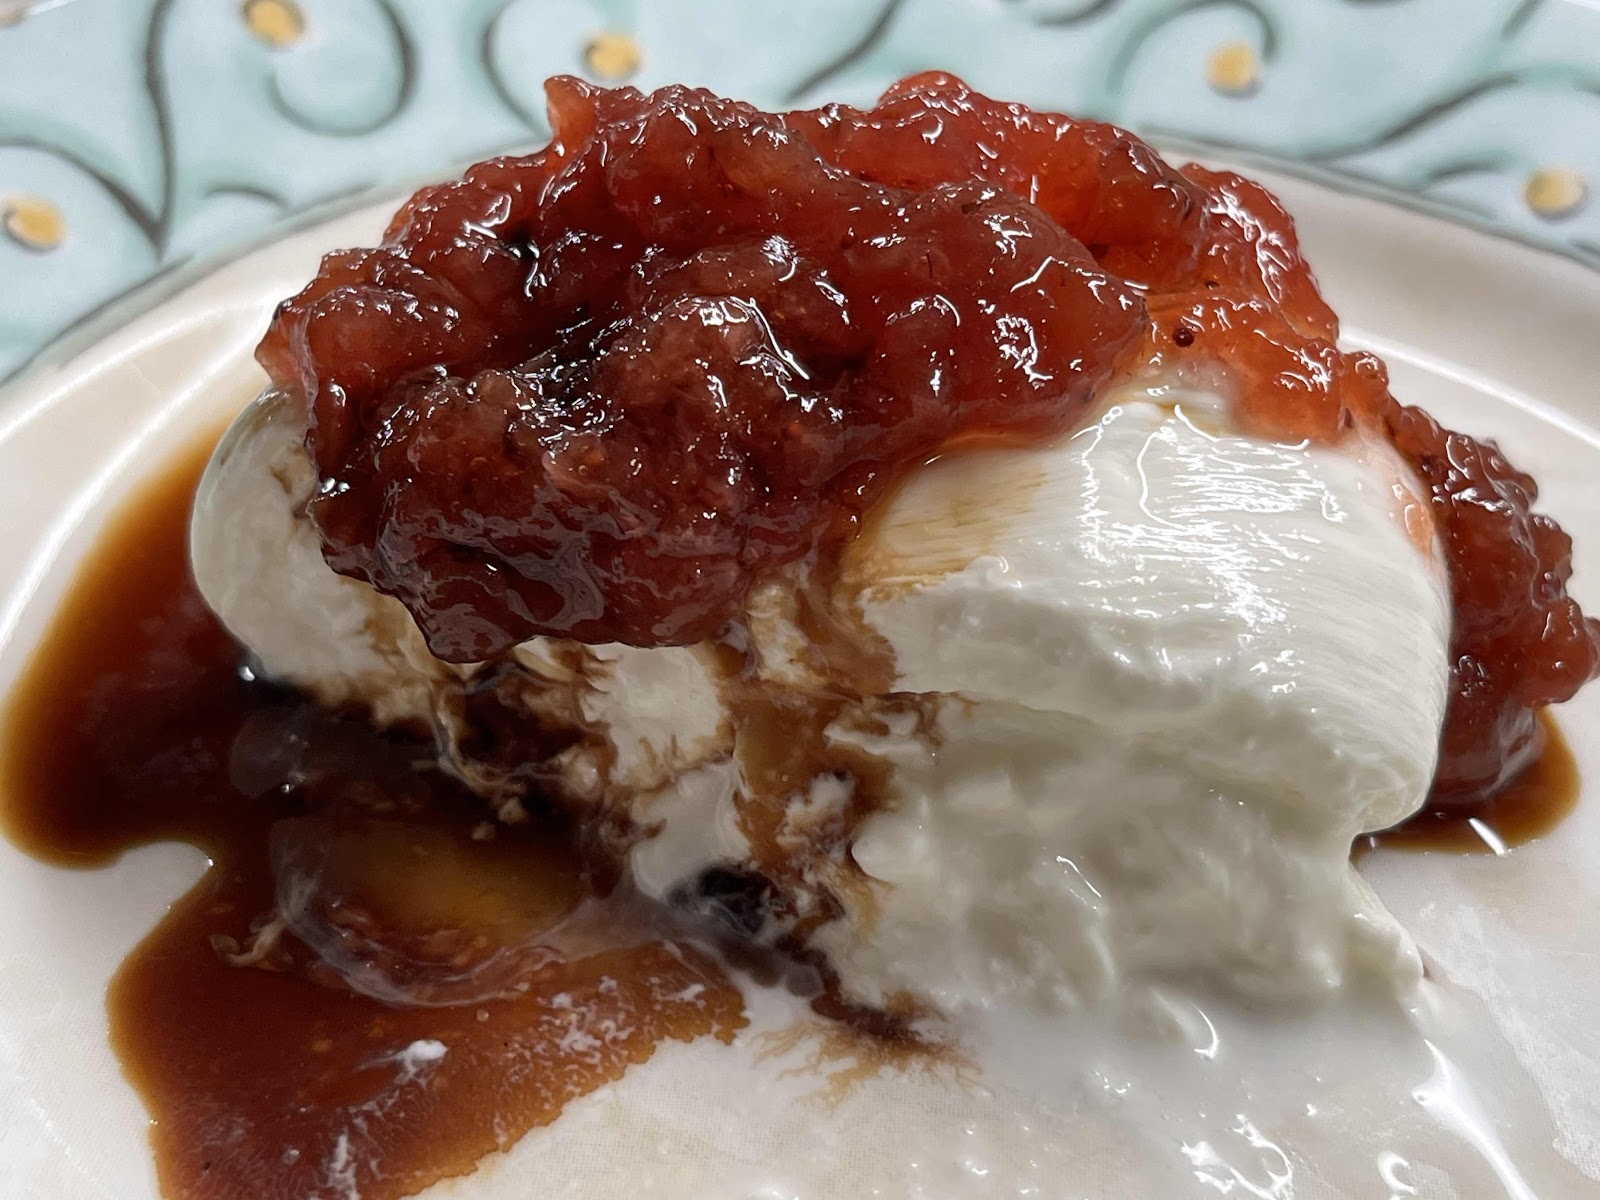
Burrata with Strawberry and Balsamic

Burrata with Strawberry and Balsamic
With Valentine’s Day coming soon, you might find this easy recipe perfect to serve as a special appetizer, breakfast or dessert. Only three ingredients needed! Burrata cheese is a thin layer of fresh mozzarella wrapped around a creamy center. It’s perfect served with savory ingredients, but is also excellent with this combination of sweet strawberries and tangy balsamic vinegar. Choose a sugar-free strawberry jam that has no more than four carbs per tablespoon. My favorite is No Sugar Added Strawberry Jam made by Good Good. Stir it up and use it like a sauce. Then drizzle balsamic over all. You can serve this with low carb crackers or it’s excellent eaten directly from a spoon!

Burrata with Strawberry and Balsamic
Makes 2 servings

1 (4 oz.) Burrata Cheese Ball (can be purchased in the cheese section)
1 tablespoon No Sugar Added Strawberry Jam
1 teaspoon balsamic vinegar

Burrata Cheese
1. Place the Burrata cheese ball on a serving plate and allow it to sit at room temperature for at least 15-20 minutes. 

2. Stir the sugar free jam to loosen it up and spoon over the top of the cheese ball. Drizzle 1 teaspoon of balsamic vinegar over all. Enjoy!

No Sugar Added Strawberry Jam by Good Good
Nutritional Information per serving (1/2 cheese ball with toppings): 145 calories, 4.4 g carbohydrate (0 g fiber, 0.9 g sugars), 12 g total fat (8 g saturated fat, 0 g trans fat), 40 mg cholesterol, 121 mg sodium, 0.6 mg calcium, 3 mg potassium, 6 g protein. 

Recipe by Kathy Sheehan, copyright 2022
All rights reserved. Please do not duplicate without the author’s permission.
Saturday, December 4, 2021

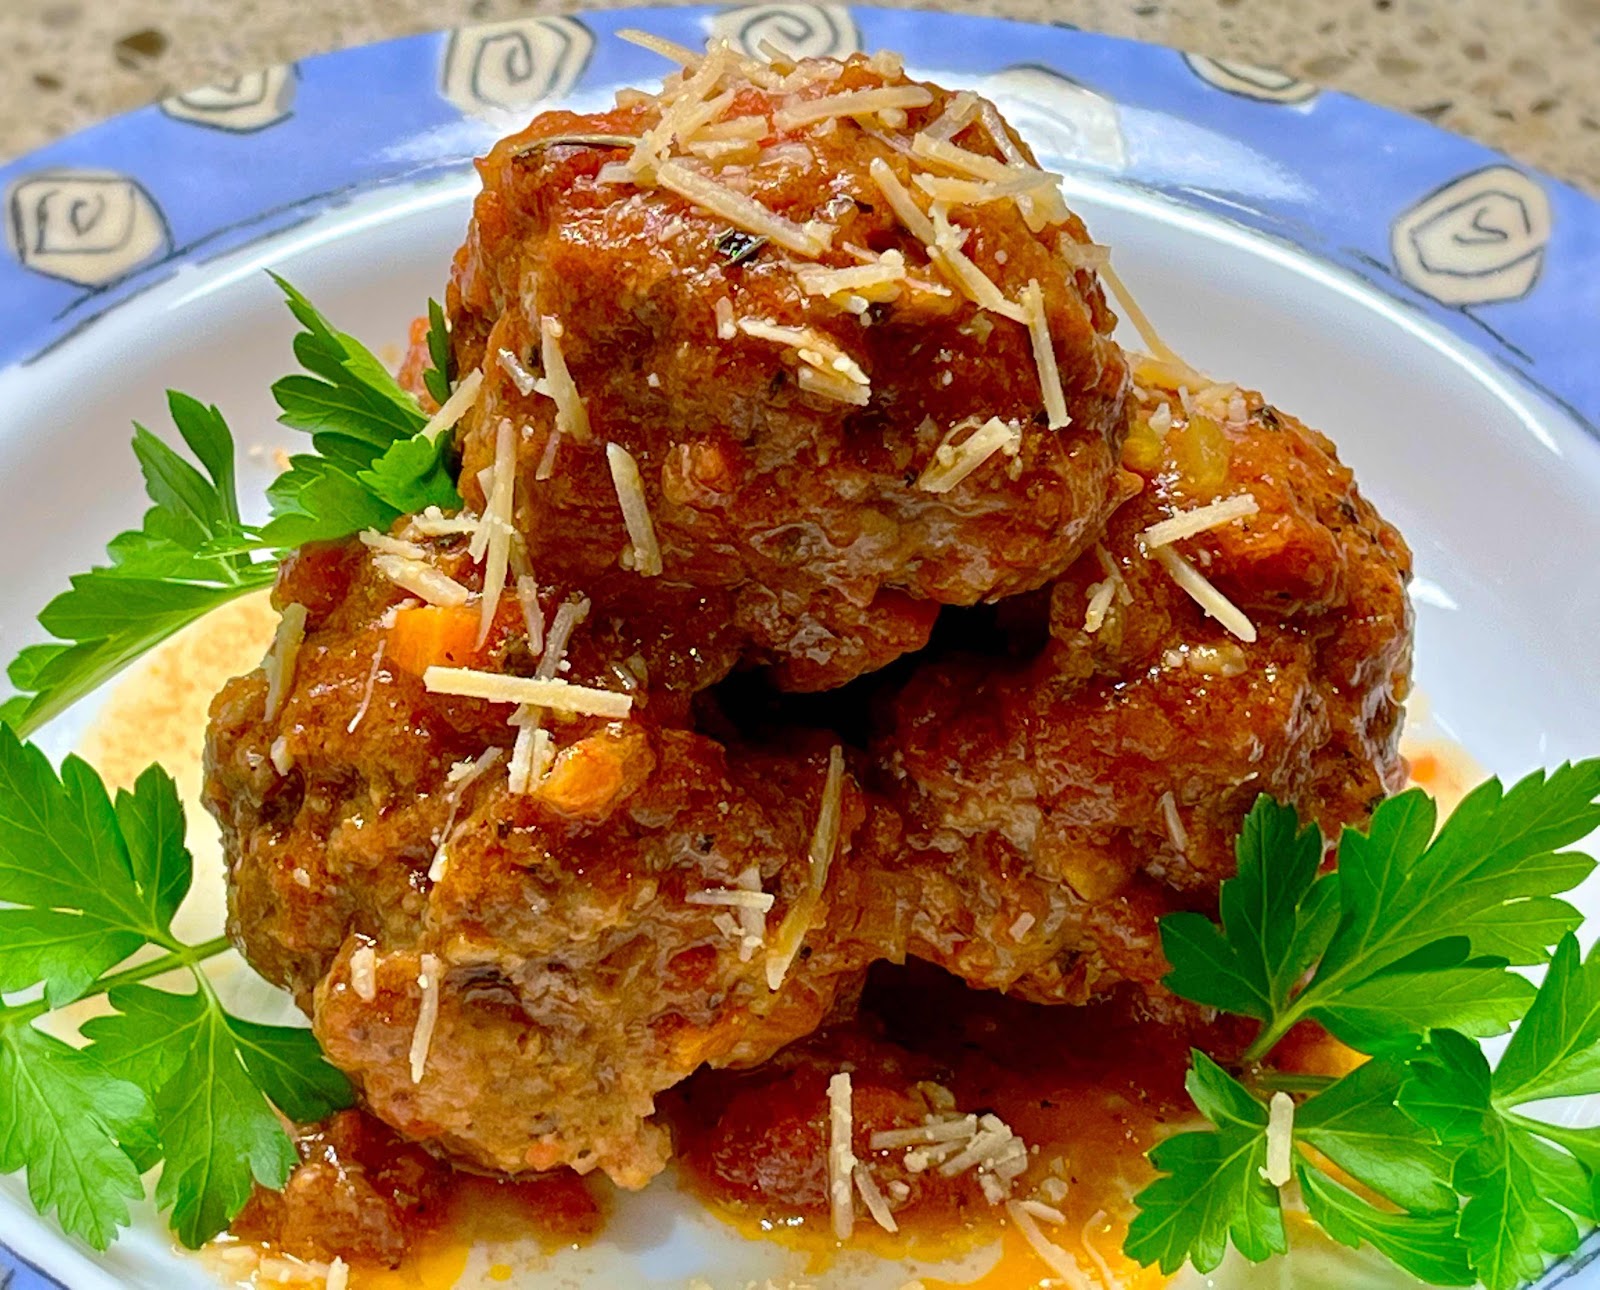
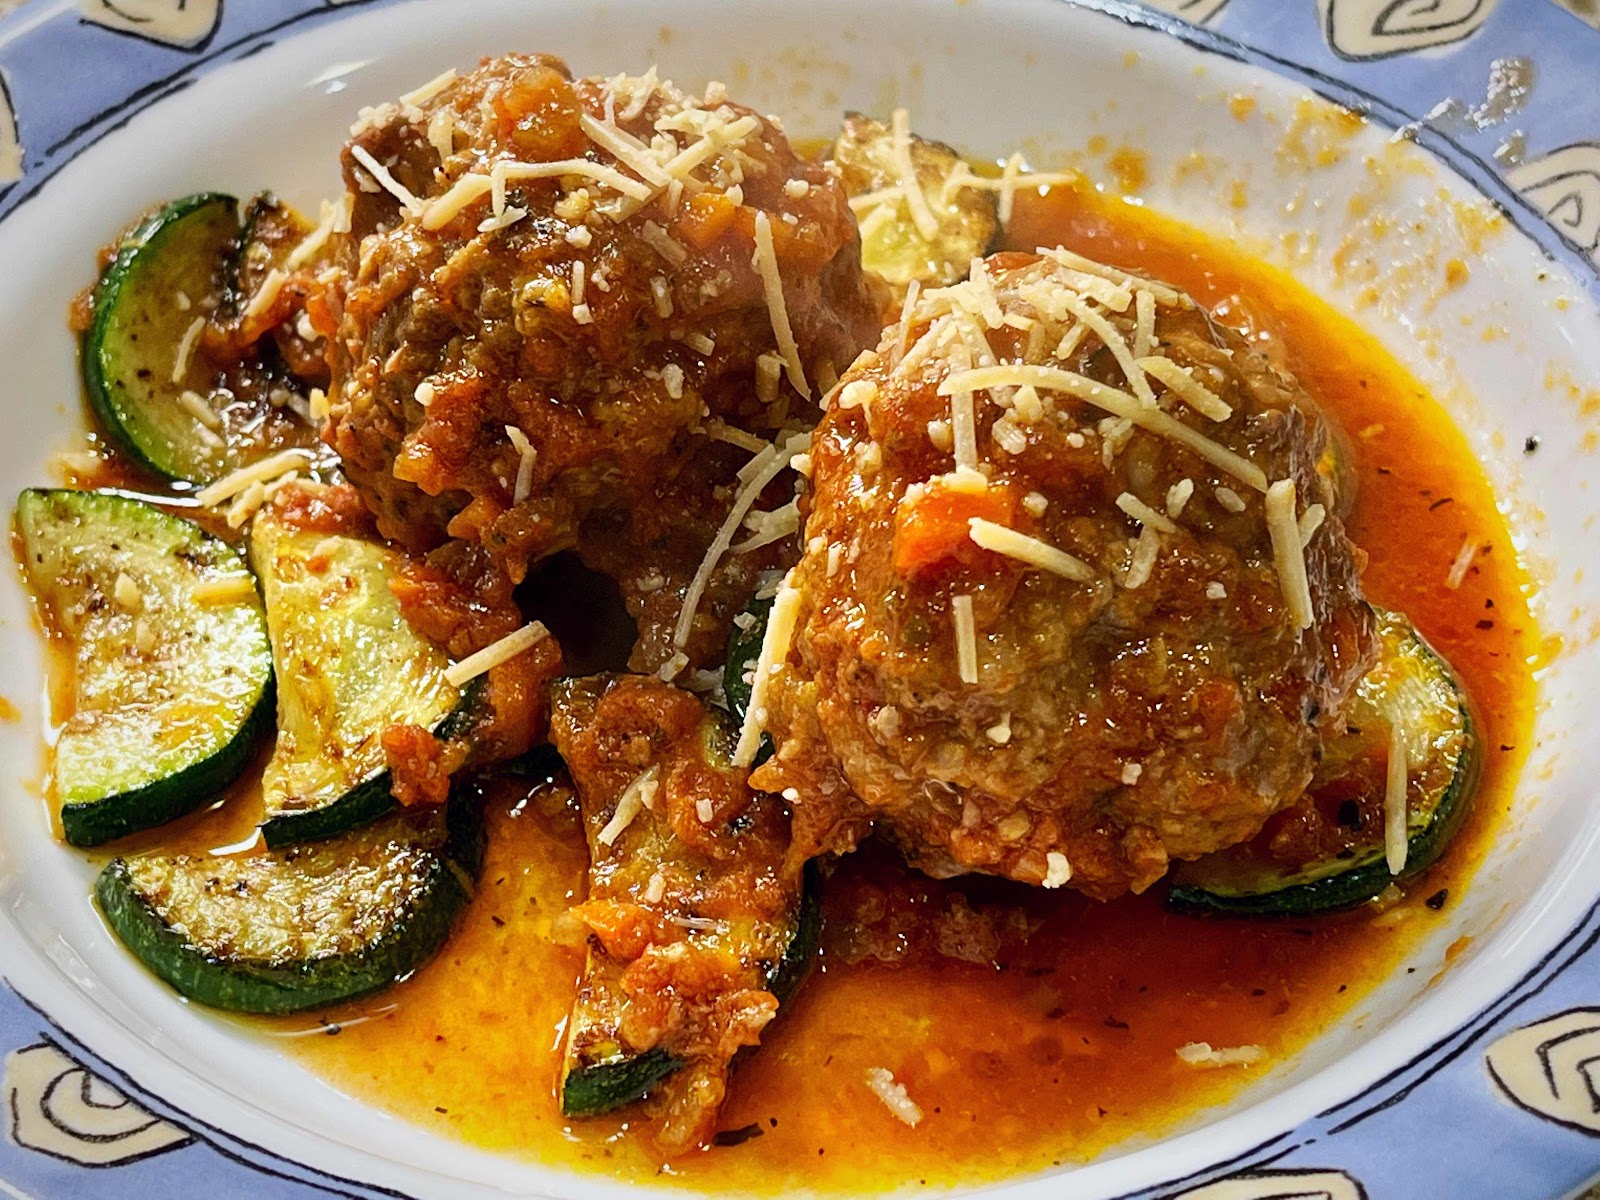
Keto Braised Italian Meatballs

Braised Italian Meatballs
One year, when I vacationed in Italy, I found a restaurant that served the best meatballs I had ever tasted. They were tender and so flavorful! Since then, I discovered that braising meatballs, instead of baking or browning them in a skillet, is the best method for cooking them. Braising is a method of cooking in which the meat is simmered in a cooking liquid or, in this case, a delicious sauce. It is safe to add raw meat to the braising liquid as long as it continues simmering until the meatballs are cooked through. These are hearty, good-sized meatballs so, for me, two are plenty! The sauce is a light tomato-based sauce that also has wine and beef broth. As the meatballs cook in the sauce, a twofold exchange is going on: First, the meatballs become more flavorful by absorbing the sauce as they cook. Secondly, the sauce reduces and deepens in flavor as the meat releases its juices. I think you’ll agree with me that these tender and delicious meatballs are some of the best you’ve ever had!

Keto Braised Italian Meatballs
Makes 6 servings

Meatballs:
1/2 pound ground pork
1 pound ground beef
2 slices of low carb bread (or 2 chaffles), lightly toasted or dried out
1/2 cup riced cauliflower, thawed and excess liquid removed
1 egg
1 cup parmesan cheese, grated
1 teaspoon dried Italian herb seasoning
3/4 teaspoon fennel seeds

Sauce:
1 can (14.5 or 15 oz) diced tomatoes (with liquid), blitzed in a food processor to make a smooth sauce (or 1-1/2 cups tomato sauce)
1 tablespoon tomato paste
2 tablespoons olive oil
1/4 cup carrots, finely chopped
1/4 cup onions, finely chopped
1 stalk celery, finely chopped
2 cloves garlic, minced
1/4 teaspoon salt
1/2 teaspoon black pepper
1/2 teaspoon zero-carb brown sugar substitute, such as Swerve Brown
1 tablespoon fresh sage leaves, chopped (if using dried herbs, use 1/2 the amount called for)
1 tablespoon fresh thyme, chopped
1 tablespoon fresh parsley, chopped 
1/2 cup dry white wine
1 cup beef stock

1. Tear the dried low carb bread (or chaffles) into pieces and place in a food processor. Add the drained riced cauliflower and pulse together until crumbs; set aside.

2. Placed the ground pork and beef into a large bowl and mix well. Mix in the bread or chaffle crumbs, the egg and mix. Add the grated cheese, herbs and fennel seeds and mix well with your hands until all the ingredients are well distributed.

3. Using your hands, shape into meatballs about 2-1/2 inches in diameter or use slightly less than 1/3 cup measuring cup to form 12 equal-sized meatballs. Set aside. (This step can be done one day ahead and refrigerated. Allow the meatballs to sit at room temperature for at least 30 minutes before cooking.)

4. To make the sauce: Pour the diced tomatoes and tomato paste into the food processor and blitz until it forms a smooth sauce. Measure to make sure you have at least 1-1/2 cups of tomato sauce (a little more is fine); set aside.

5. Add the olive oil to a wide, deep, heavy sauce pan and warm over medium heat. Add the carrots, celery and onion. Stir and cook for 2 minutes. Add the garlic and stir briefly until fragrant.

6. Add the salt, pepper, brown sugar substitute, sage, thyme and parsley. Stir well and cook for 2 minutes. Stir in the wine and cook for 2 minutes. Add the tomato sauce mixture and beef stock; stir to combine. Increase heat to medium-high and bring to a boil. After reaching a boil, add the meatballs and return to a boil. Reduce the heat to medium-low or low and simmer, uncovered, for 35 minutes.

7. Carefully, remove the meatballs to a serving plate or bowl with a slotted spoon. If necessary, continue to boil and reduce the sauce until it reaches the desired consistency. For extra flavor and color, you may garnish with chopped chives or parsley.

Braised Meatballs with Zucchini
Nutritional Information per 2 meatballs with 1/2 cup sauce: 548 calories, 6 g carbohydrate (1.5 g dietary fiber, 2.8 g sugars), 33.1 g total fat (11.8 g saturated fat, 0 g trans fat), 191 mg cholesterol, 754 mg sodium, 235.5 mg calcium, 456 mg potassium, 11 mg iron, 416 IU Vit A, 12 mg Vit C, 53.8 g protein. Net carbs per serving: 4.5 grams

Photo and recipe by Kathy Sheehan, copyright 2021
All rights reserved. Please do not duplicate without the author’s permission.

Monday, November 8, 2021

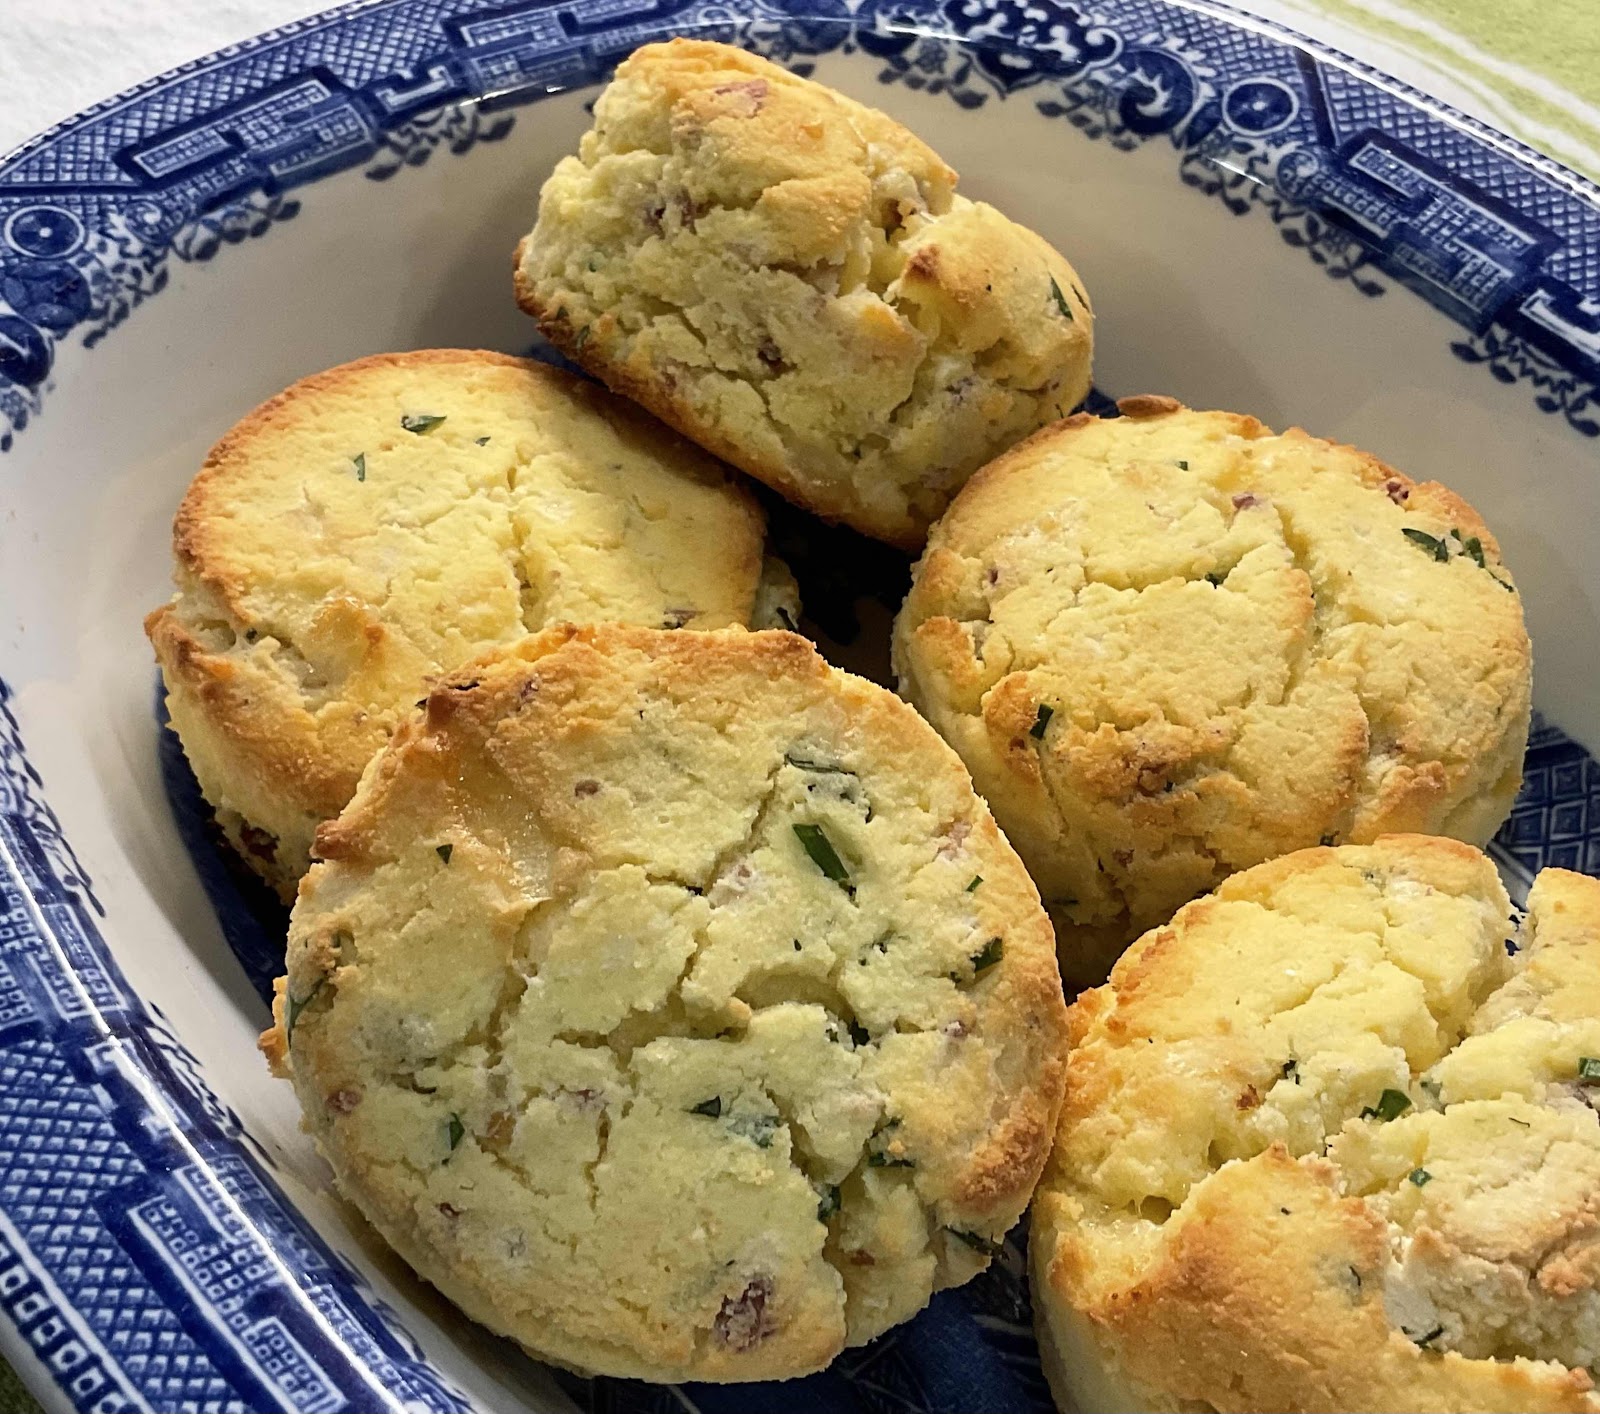
Keto Loaded Potato Biscuits

Keto Loaded Potato Biscuits
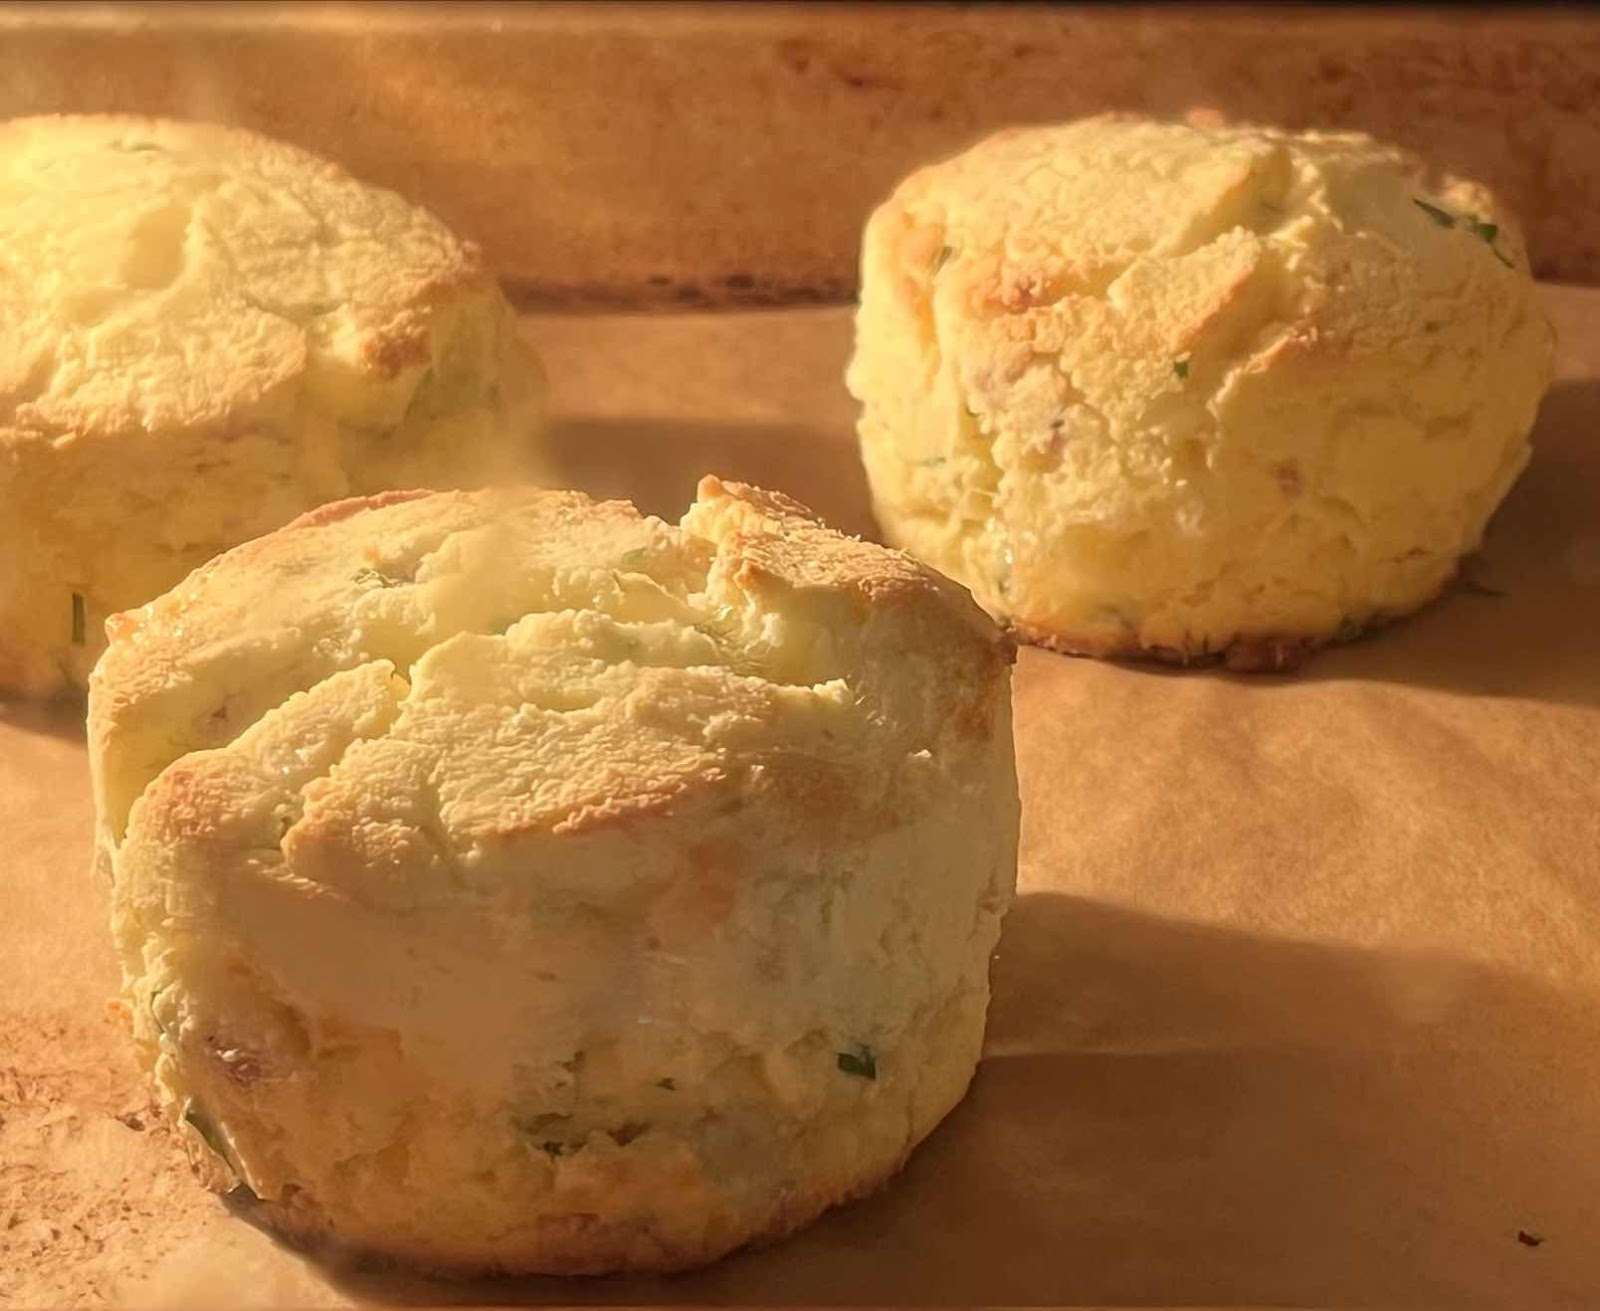
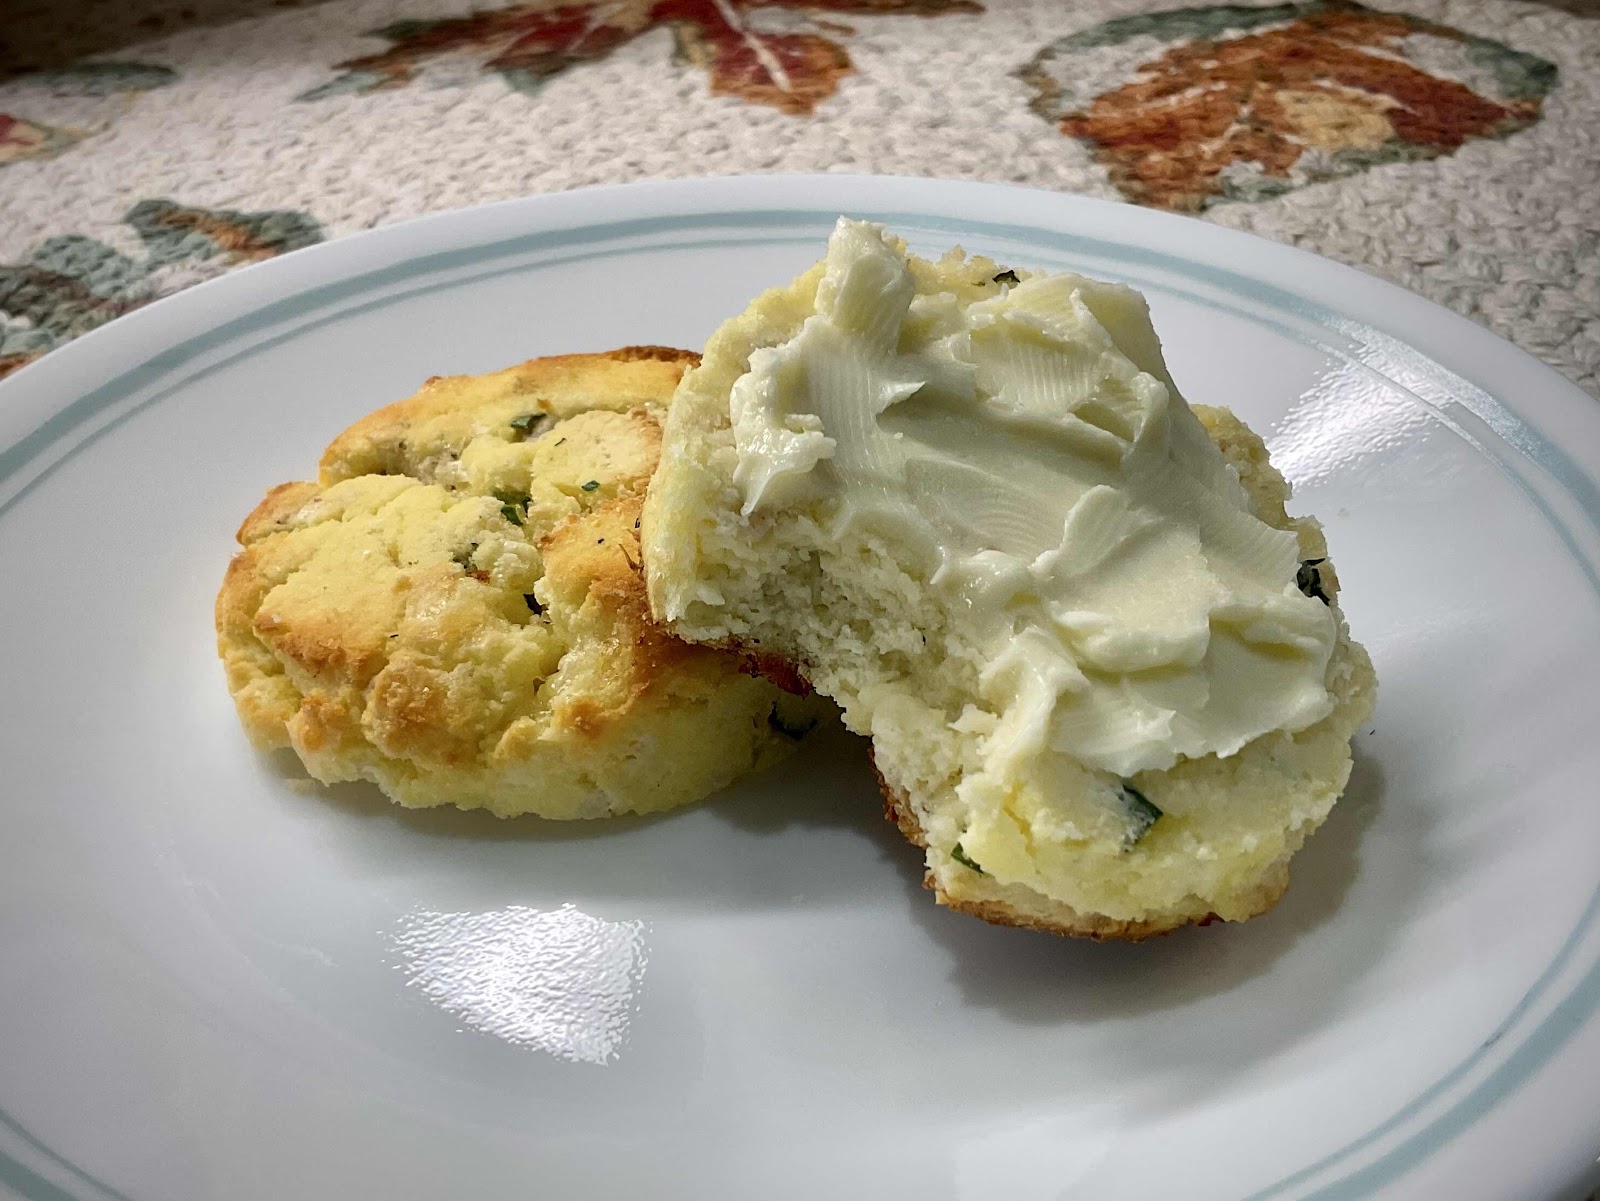
These nut free, coconut flour biscuits taste like a loaded baked potato, with the addition of sour cream, bacon, cheese and herbs…without a potato in sight! They can be made ahead and stored in the refrigerator or freezer. They are a delicious breakfast biscuit topped with poached eggs and hollandaise sauce or as an accompaniment to any meal.

Keto Loaded ‘Potato’ Biscuits
Makes 10 biscuits

1/2 cup mayonnaise 
1/4 cup sour cream
6 large eggs
1/4 teaspoon salt
1/8 teaspoon pepper
5 slices cooked bacon, finely chopped
3 tablespoons chives or green onions, finely chopped
1/2 tablespoon parsley, finely chopped (half that amount if using dried)
1 cup coconut flour
1-1/2 teaspoons baking powder
1/2 cup shredded extra sharp cheddar cheese

1. Preheat oven to 375 degrees F. Line a baking sheet with parchment paper or a silicone mat.

2. Place the mayonnaise, sour cream, eggs, salt, pepper, bacon, chives and parsley in a medium mixing bowl and whisk to combine.

3. Place the coconut flour and baking powder in a small bowl and whisk with a fork until combined, breaking up any lumps. Add the dry ingredients and shredded cheese to the mayonnaise mixture and stir quickly with a fork to fully incorporate the ingredients. Allow the batter to sit for a few minutes until the coconut flour absorbs most of the liquid and the mixture thickens into a soft dough. 

4. Turn out the dough onto the counter and form into a large ball. Pat down gently on the dough ball until it is 1-inch in thickness. Use a small biscuit cutter to make biscuits, reforming scraps into a ball and patting down again as needed until you have created ten 1-inch high biscuits. (Alternatively, you can divide the dough into 10 pieces, roll each piece into a ball, place them on the prepared baking sheet and gently pat down with your fingers until the biscuits are 1-inch thick.)

Keto Potato Biscuits
5. Bake for 18-20 minutes or until the bottom of the biscuits have browned and the tops take on a bit of golden color. Remove from the oven and allow the biscuits to remain on the baking sheet for 5 minutes. Serve warm.

6. The biscuits can be stored in the refrigerator for up to 3 days or, once cooled completely, wrapped well with plastic wrap and stored in the freezer for up to a month. To reheat: If frozen, thaw biscuits at room temperature for 1 hour. Place on a baking sheet and warm in a preheated 300 degree F oven until heated through, about 8-10 minutes.

Potato Biscuits made Low Carb
Nutritional Information per biscuit: 219 calories, 7.3 g carbohydrate (4 g dietary fiber, 0.9 g sugars), 17 g total fat (5.9 g saturated fat, 0 g trans fat), 128 mg cholesterol, 319 mg sodium, 114.7 mg calcium, 76 mg potassium, 1 mg iron, 93 IU Vit A, 8.5 g protein. Net carbs per biscuit: 3.3 grams

Photos and recipe by Kathy Sheehan, copyright 2021
All rights reserved. Please do not duplicate without the author’s permission. 

Thursday, November 4, 2021

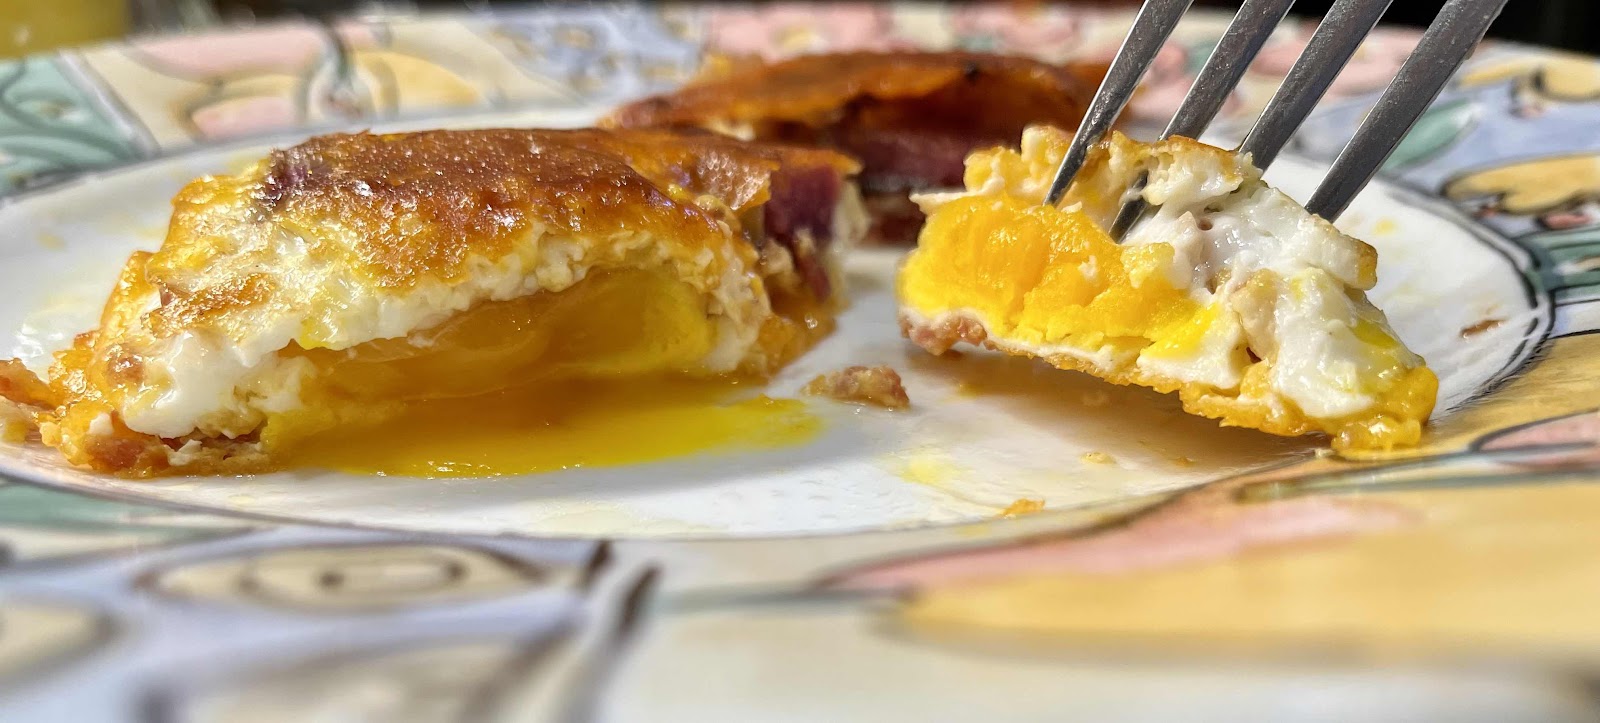
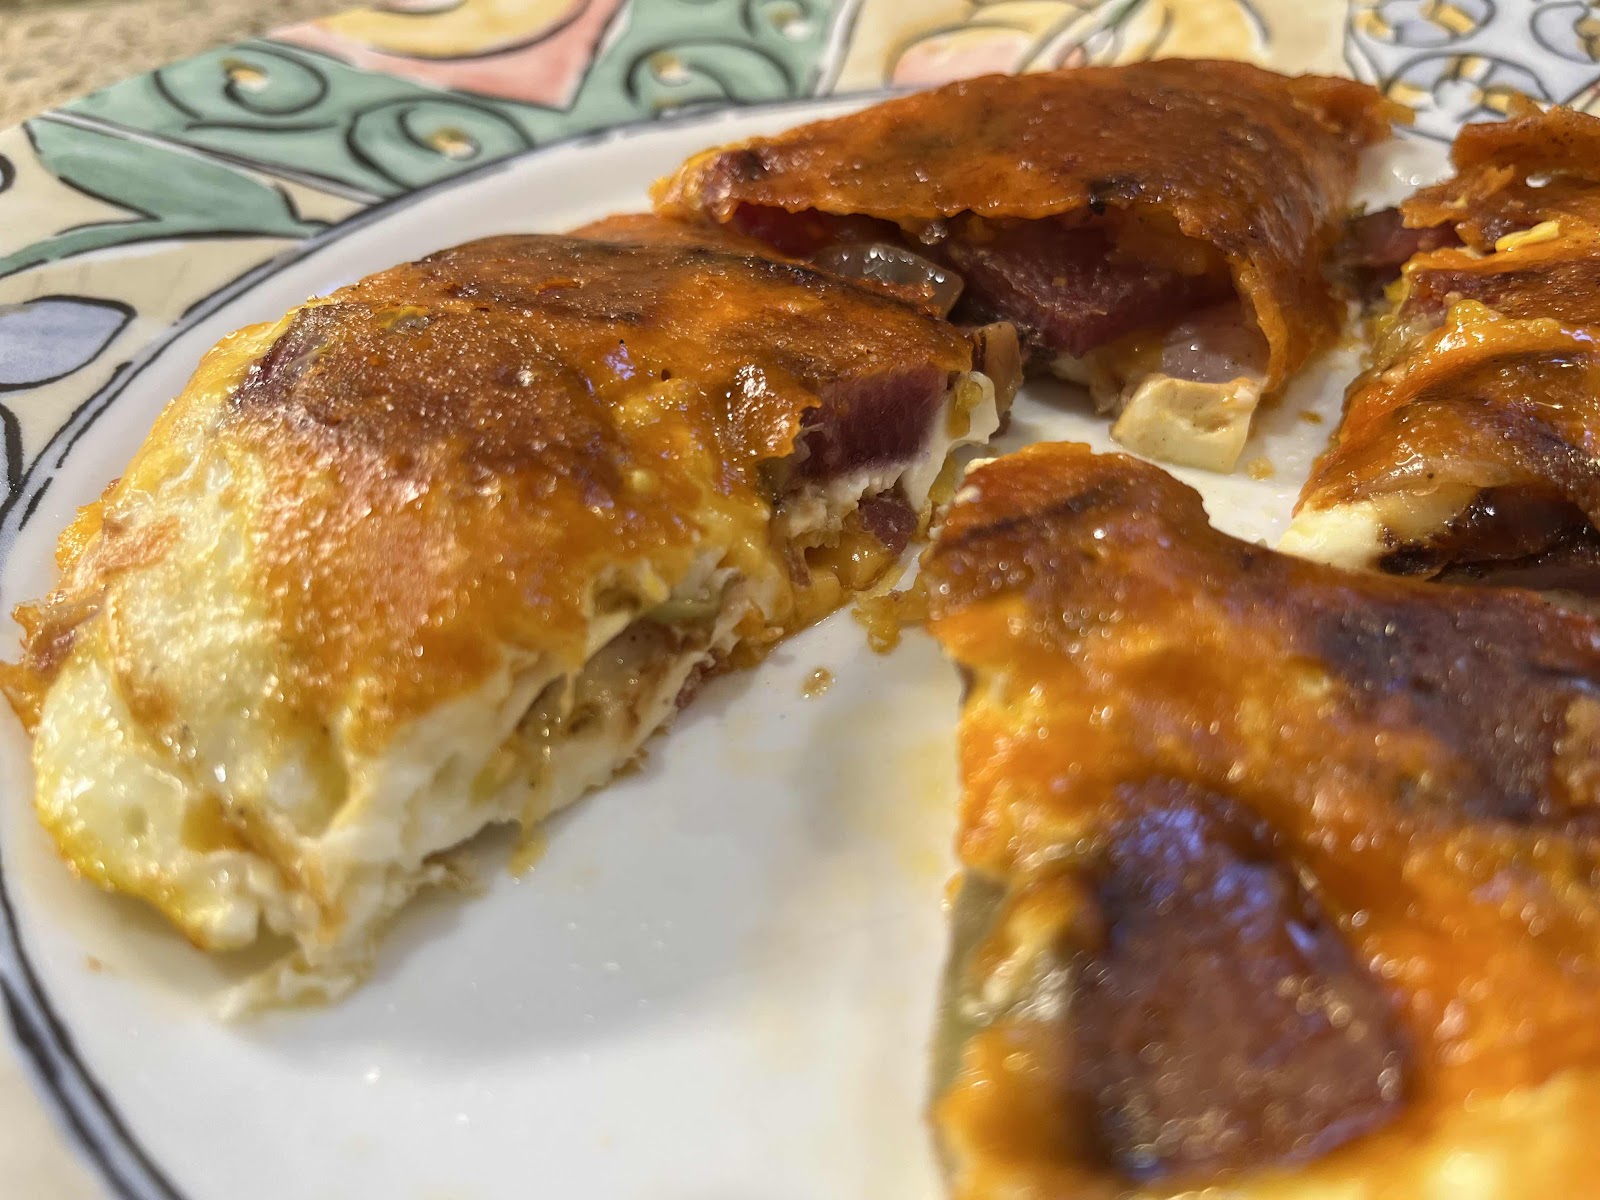
Keto Radish and Egg Frico

Radish and Egg Frico
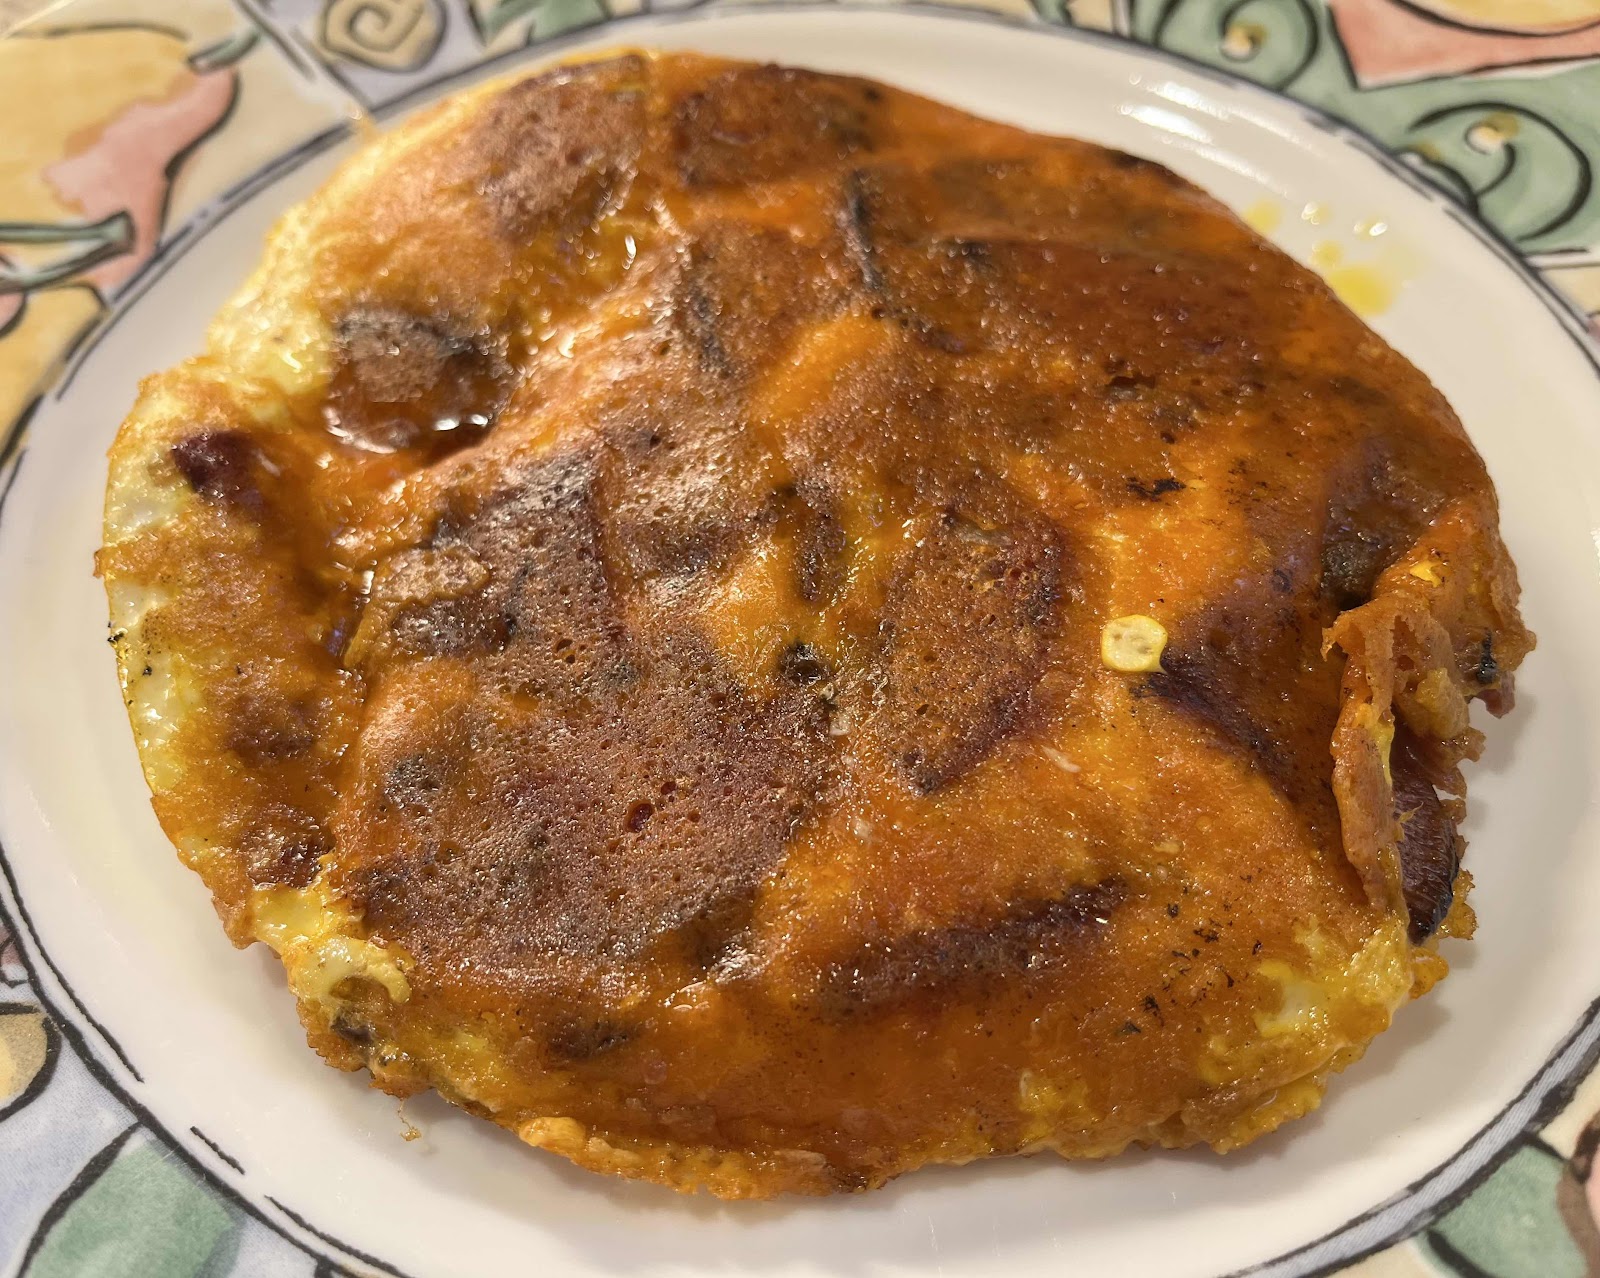
Frico is a traditional dish from north eastern Italy usually made with potatoes. I modified the recipe to make it keto by replacing the potatoes with radishes. This quick meal for any time of day is basically a crispy, double-crusted cheese pie filled with vegetables and made in a skillet. It is rustic comfort food that is filling and SO DELICIOUS!

Radish and Egg Frico, cut into quarters
Keto Radish and Egg Frico
Makes 2 servings

1/2 tablespoon avocado oil or bacon grease
3/4 cup sliced radishes
1/2 small onion, sliced
4 ounces shredded cheese, about 1-1/2 cup (Cheddar, Asiago and Gruyere are good choices)
2 eggs
2 slices cooked bacon, chopped
Salt and pepper to taste

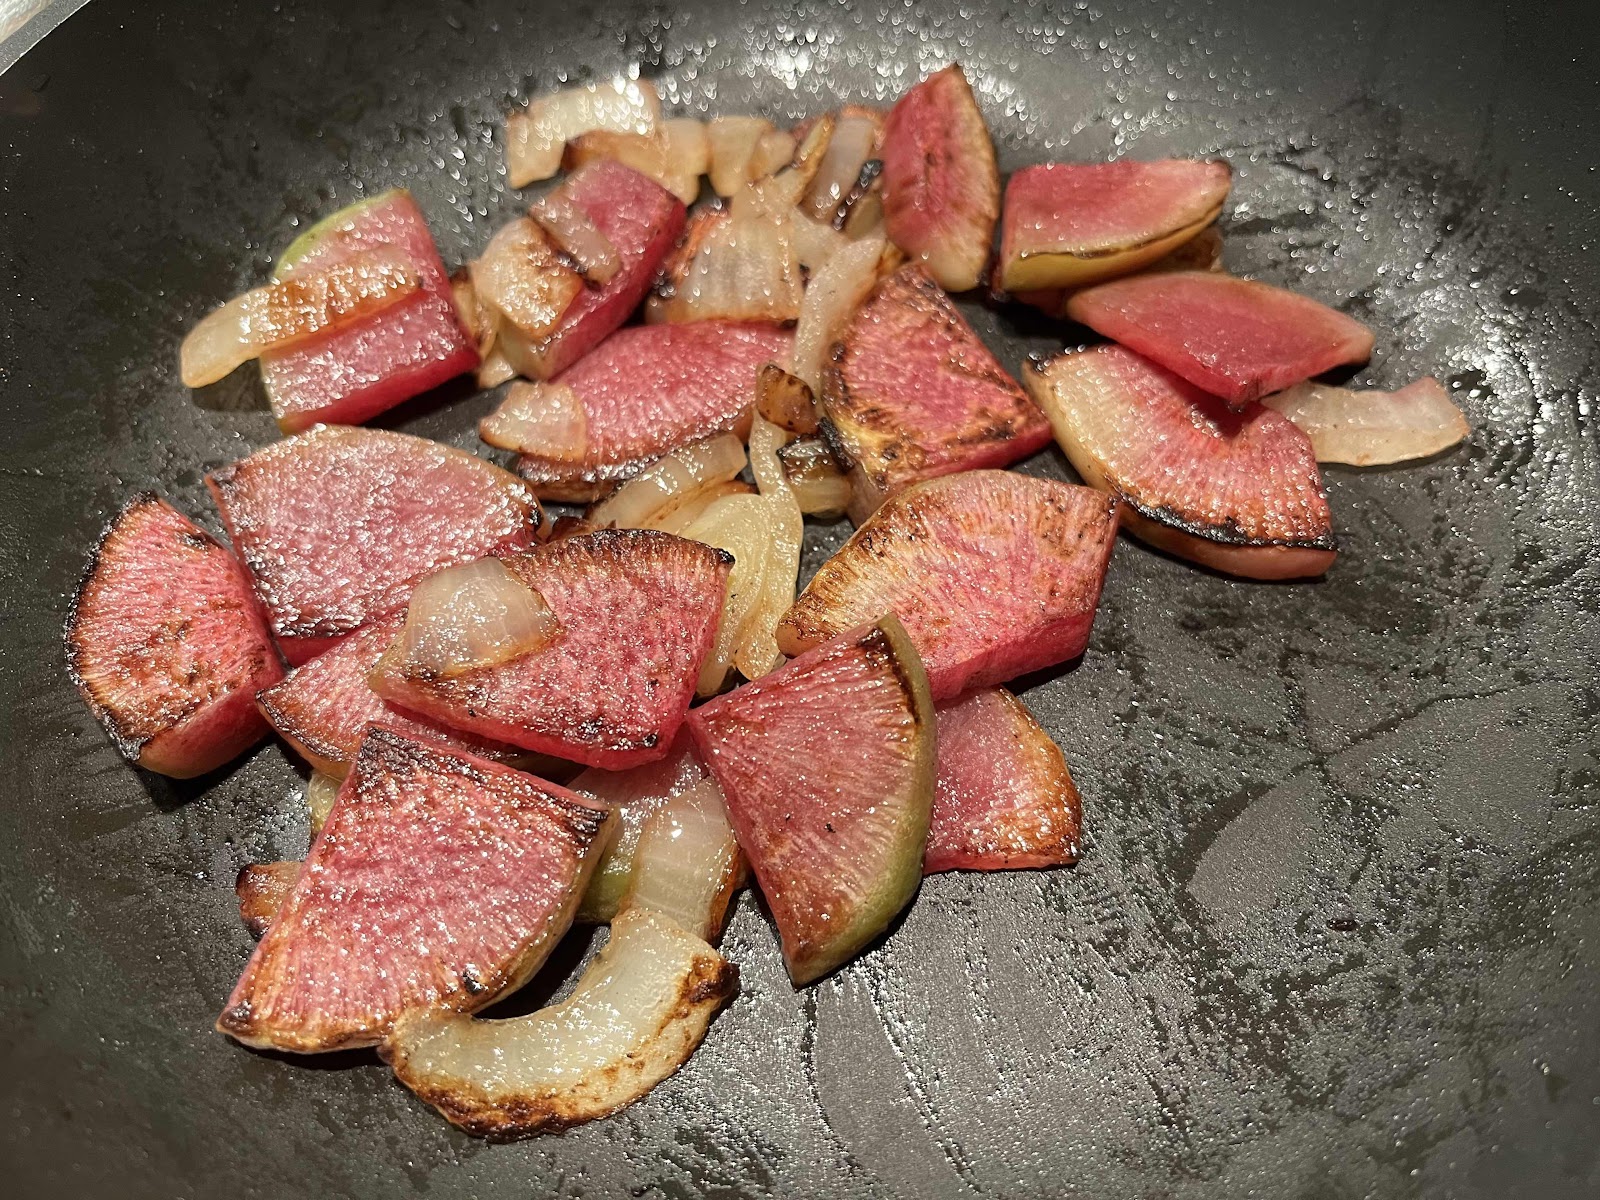
1. Melt the oil in an 8-inch, non-stick skillet over medium heat. Add the sliced onions and radishes and cover, stirring occasionally, until the vegetables are browned and tender. 

Sauteed radishes and onions
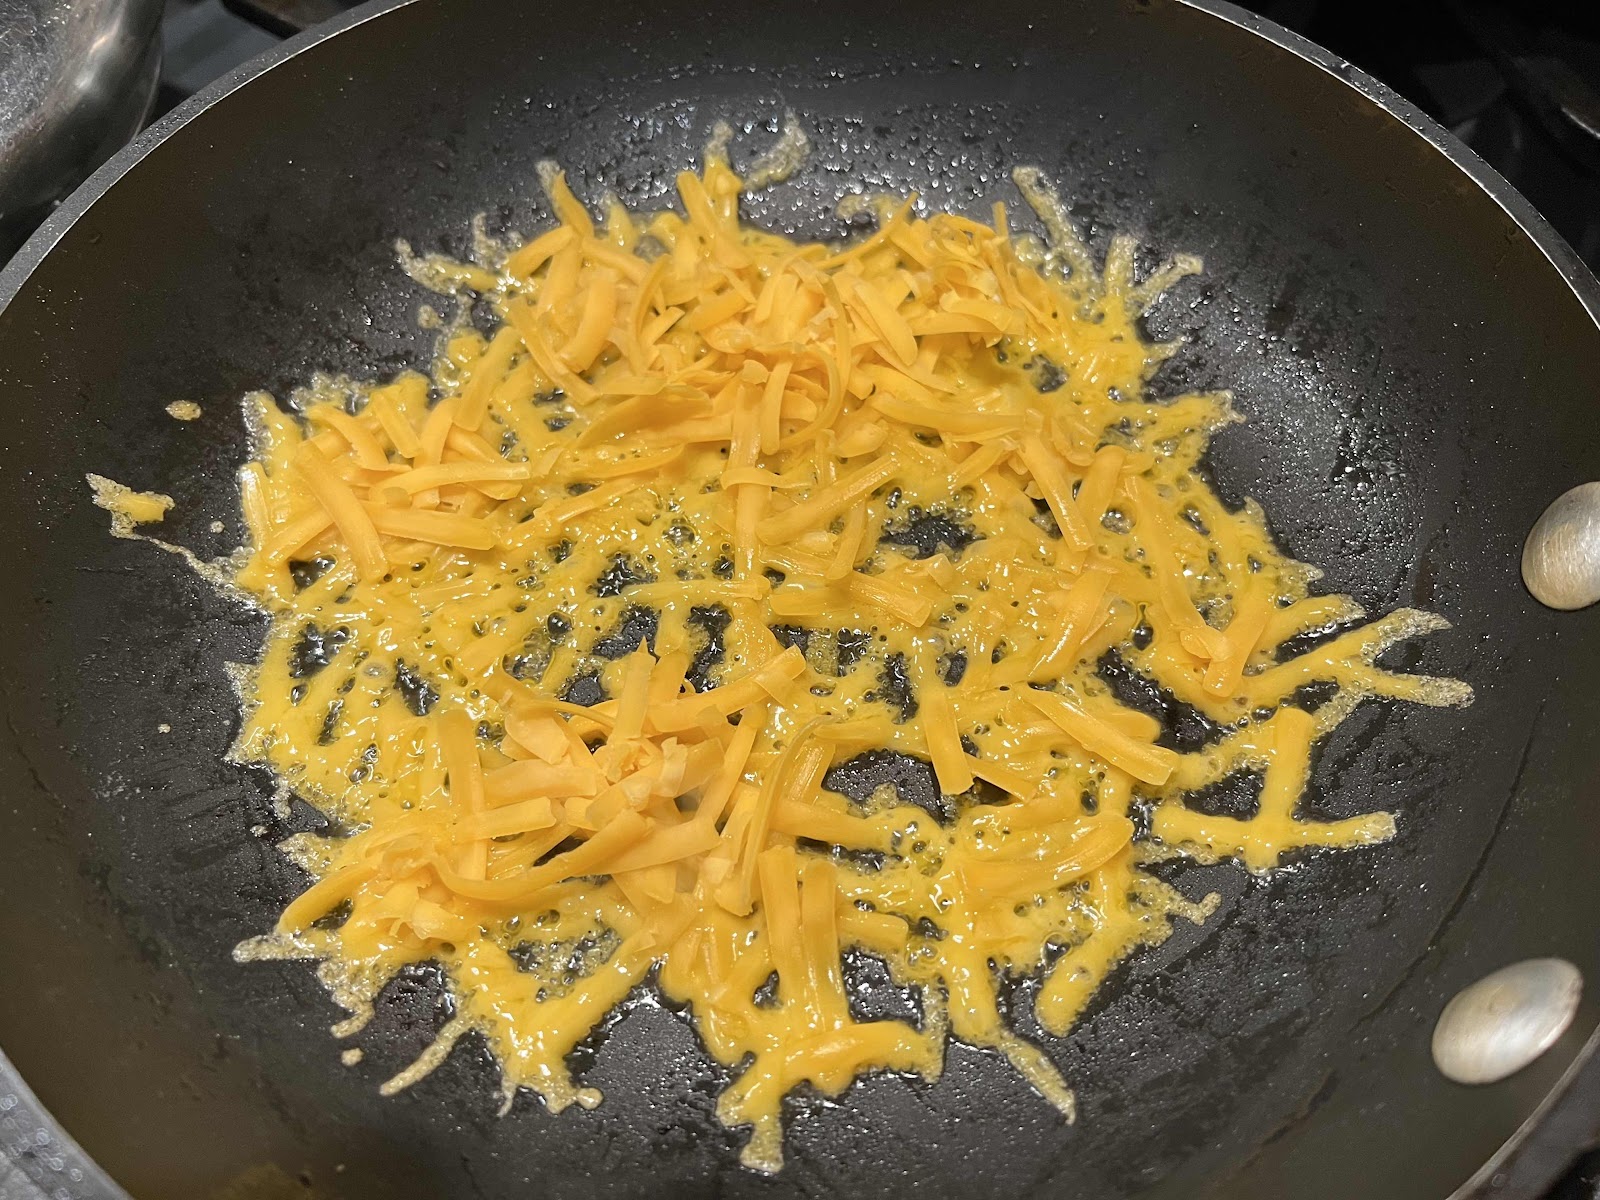
2. Remove lid and reduce heat to low. Remove the cooked vegetables to a plate and, into the hot skillet, sprinkle 1/2 of the shredded cheese.

Sprinkle skillet with cheese
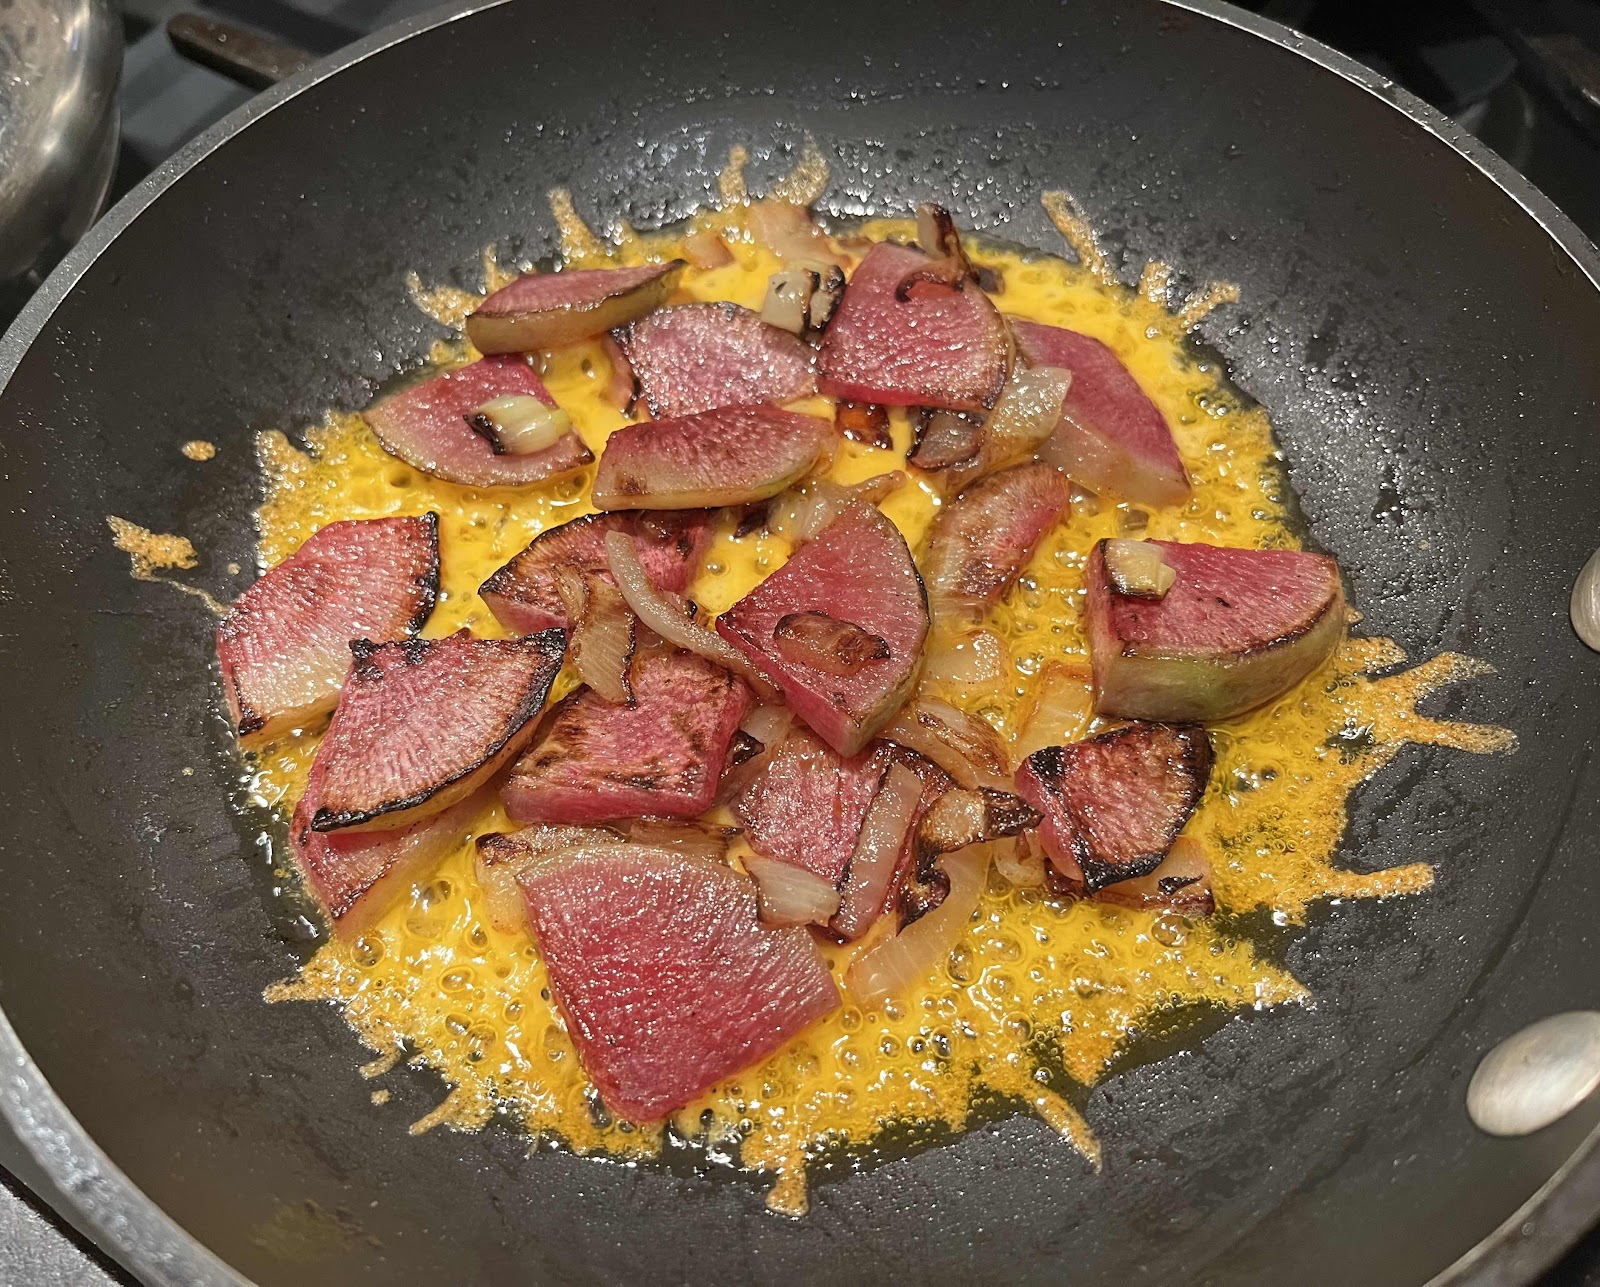
3. Return the sautéed vegetable to the skillet, carefully arranging the vegetables on top of the shredded cheese.

Return vegetables to skillet
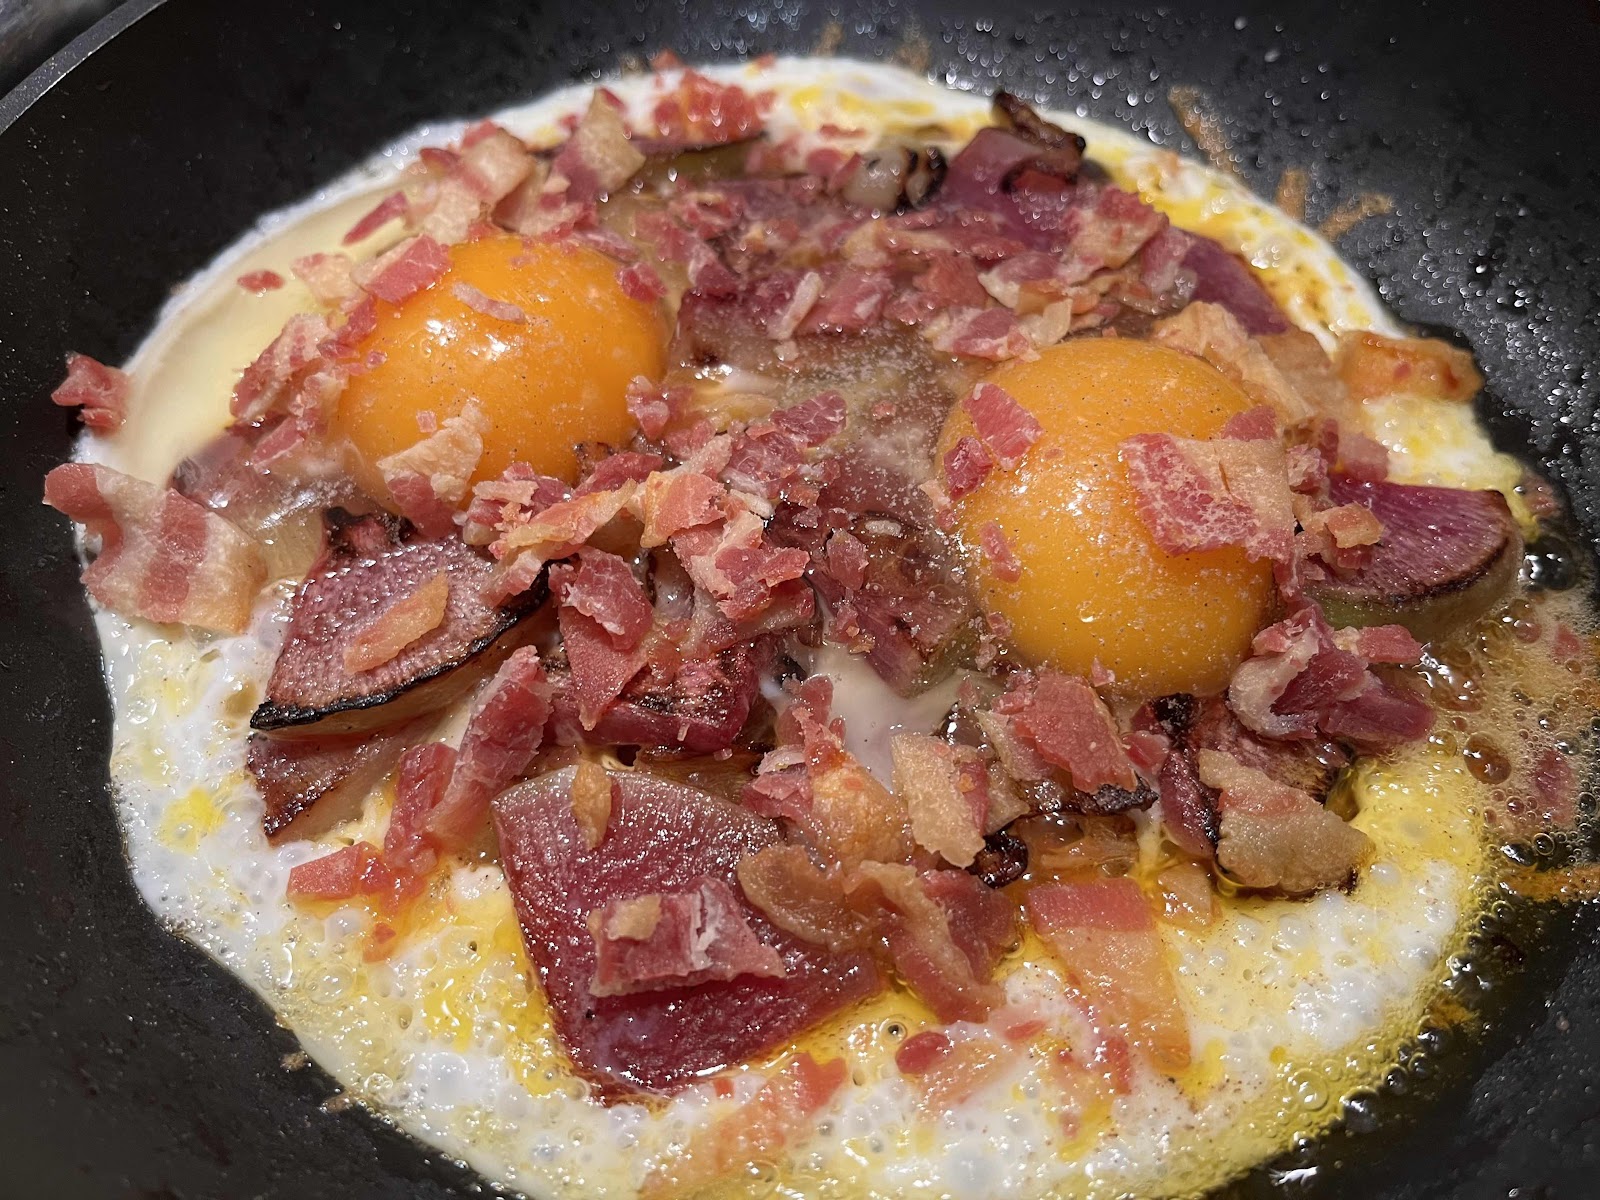
4. Crack two eggs on top of the vegetables. Season the eggs with salt and pepper. Add the chopped bacon on top of the eggs.

Add eggs and bacon
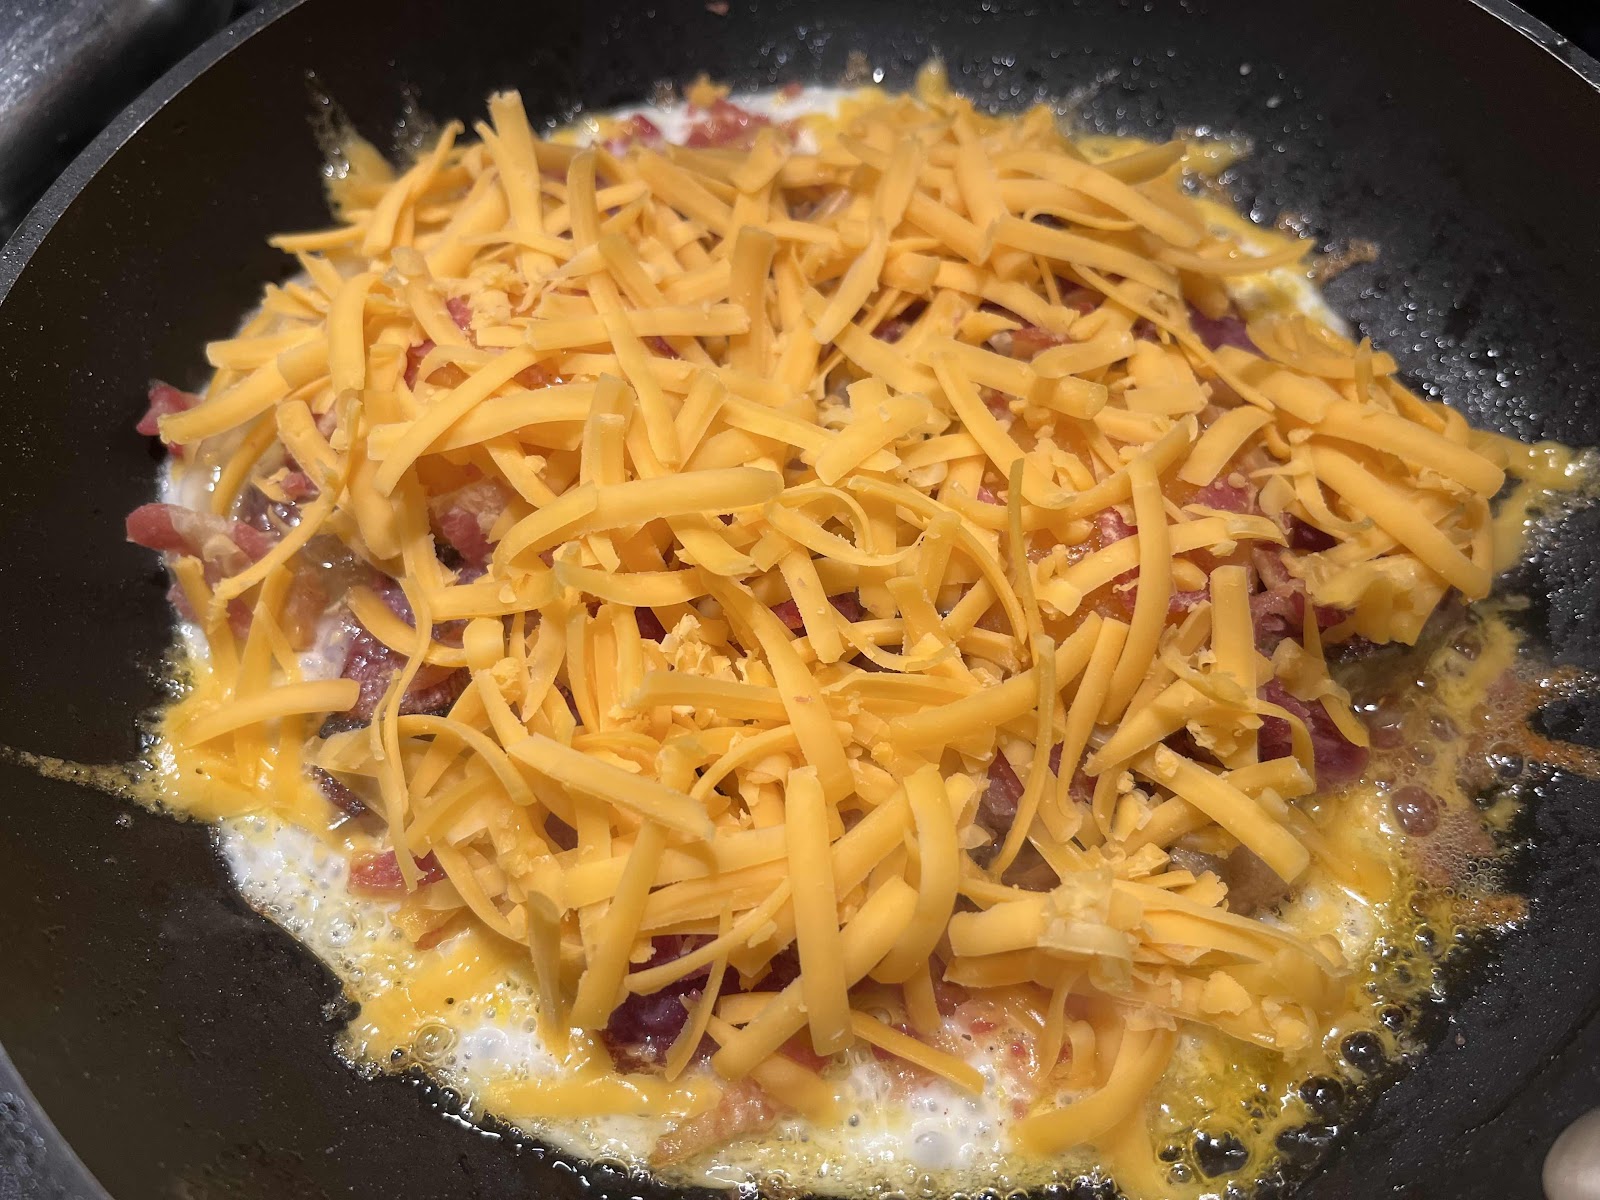
5. Finally, sprinkle the remaining shredded cheese over the top. Continue cooking until the bottom layer of cheese is firm and crispy.

Top with remaining cheese
6. Very carefully, flip the frico with a spatula. Cook on the second side until the cheese is firm and crispy. Remove to a serving plate, cut in half or quarters and enjoy!

Whole Radish and Egg Frico
Nutritional Information per serving (1/2 recipe): 357 calories, 5.1 g carbohydrate (1.1 g dietary fiber, 2.3 g sugars), 26.4 g total fat (14.8 g saturated fat, 0 g trans fat), 255 mg cholesterol, 655 mg sodium, 446.7 mg calcium, 262 mg potassium, 1 mg iron, 263 IU Vit A, 8 mg Vit C, 24 g protein. Net carbs per serving: 4 grams

Photos and recipe by Kathy Sheehan, copyright 2021
All rights reserved. Please do not duplicate without the author’s permission. 

Saturday, September 19, 2020

Low Carb Parmesan Radish Gratin

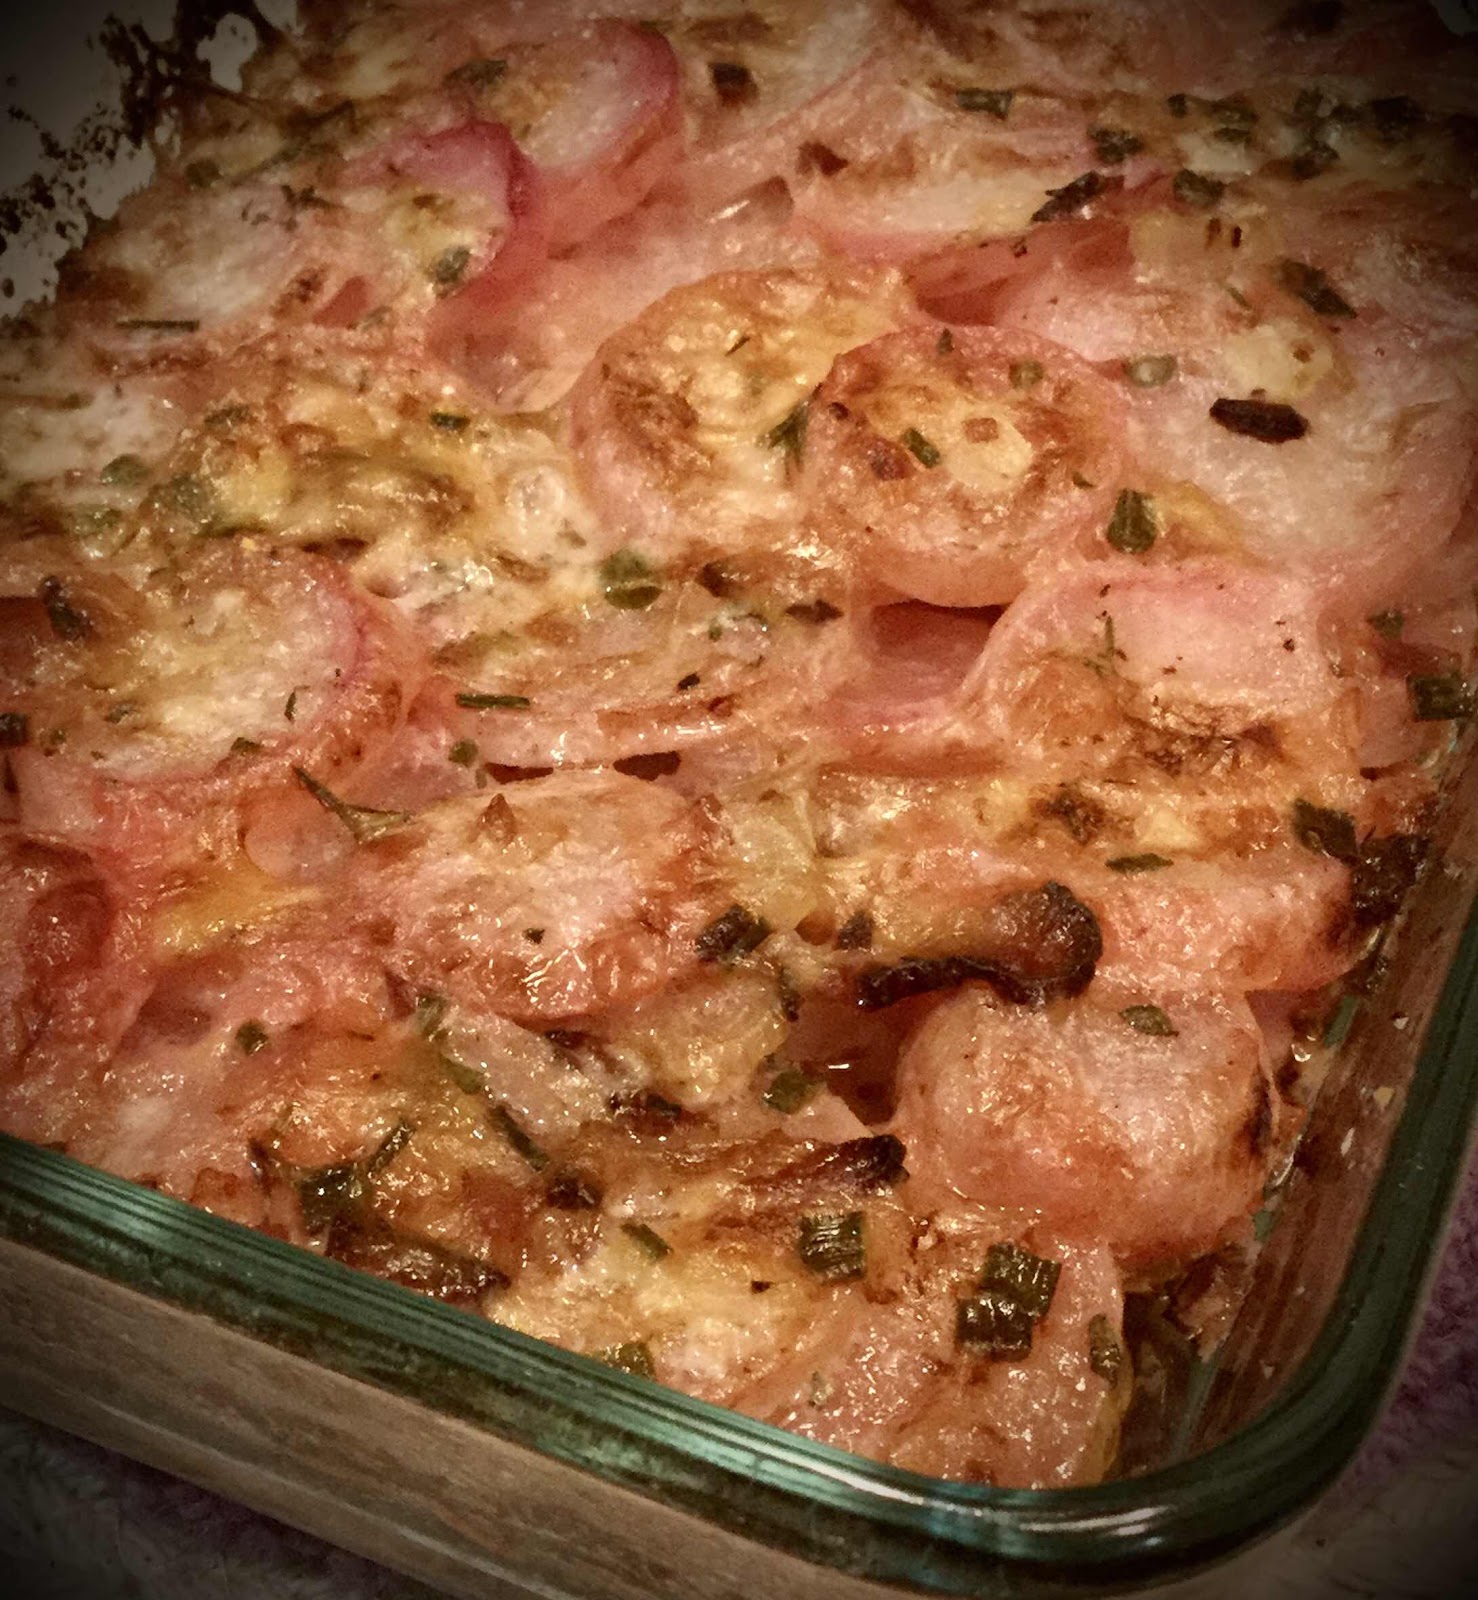
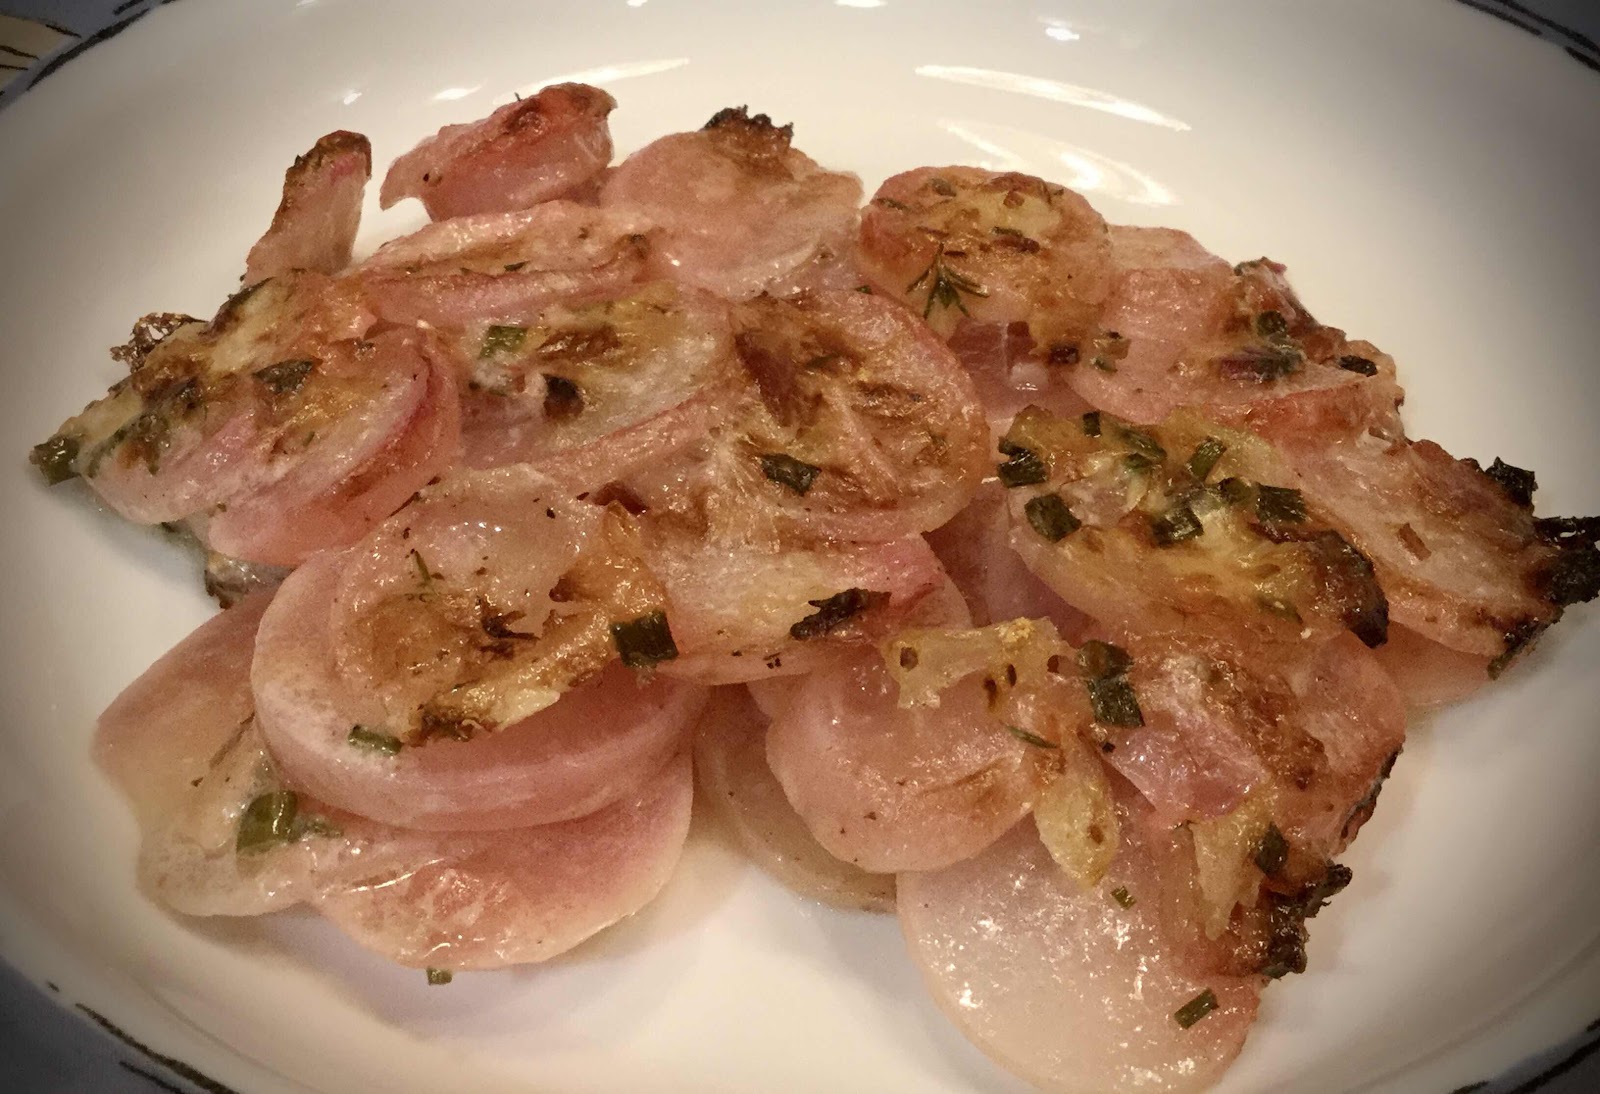
Low Carb Parmesan Radish Gratin
I dislike raw radishes, but LOVE roasted and cooked radishes! In the keto world, radishes and turnips make great substitutes for potatoes in soups and other recipes. The first time I saw a casserole recipe similar to this, it was created for potatoes and contained several high carb ingredients, such as flour and whole milk. I thought it would be worth a try to make a few ingredient substitutions and make it low carb—the result was wonderful! You can make this delicious side dish with red or daikon radishes (or maybe even turnips) and I think you’ll be quite pleased too.

Low Carb Parmesan Radish Gratin
Makes twelve 1/2 cup servings

8 oz. Parmesan cheese
2 slices cooked bacon, crumbled
1 green onion, thinly sliced
1 tablespoon snipped fresh chives
1/2 tablespoon fresh chopped thyme (or use 1 teaspoon dried)
1/2 tablespoon fresh chopped rosemary (or use 1 teaspoon dried)
2 tablespoons unsalted butter, cut into small cubes
6 cups thinly sliced radishes (about 2 lbs, leaves removed)
Salt and pepper
6 tablespoons coconut or almond milk
6 tablespoons heavy cream
1/2 teaspoon xanthan gum
Snipped fresh rosemary and thyme for garnish (optional)

1. Preheat the oven to 325 degrees F and grease a 1.5 quart casserole dish; set aside. Using a wide vegetable peeler, shave the Parmesan cheese (about 2 cups) or use pre-shaved Parmesan; set aside.

2. In a small bowl, combine the crumbled bacon, green onion and chives. Stir to combine. In the prepared baking dish, arrange 1/2 of the radishes to cover the bottom of the dish. Sprinkle with 1/2 teaspoon salt and pepper, half of the bacon mixture and half of the herbs. Top with 1/2 of the Parmesan and dot with half of the butter cubes. Repeat layers.

3. In a medium bowl, whisk together the coconut or almond milk, heavy cream and xanthan gum until the xanthan gum is incorporated and dissolved (you can use a stick blender to make this easier). Pour the cream mixture evenly over the radishes.

4. Bake, covered for 1.5 hours. (If using foil to cover, spray the underside with non-stick cooking spray.) Increase oven temperature to 400 degrees F. Bake, uncovered for 15-20 minutes more or until the radishes are tender and the top is golden brown.
Parmesan Radish Gratin
Nutritional Information per 1/2 cup: 168 calories, 3.7 g carbohydrates (1.3 g dietary fiber, 1.7 g sugars), 14 g total fat (8.5 g saturated fat, 0 g trans fat), 40 mg cholesterol, 400 mg sodium,  264 mg calcium, 206 mg potassium, 1 mg iron, 131 IU Vit A, 12 mg Vit C, 8.3 g protein. Net carbs per serving: 2.4 grams
Photos and recipe by Kathy Sheehan, copyright 2020
All rights reserved. Please do not duplicate without the author’s permission.