Showing posts with label carrots. Show all posts

Sunday, March 29, 2026

Sugar Free Carrot Relish (Hart’s Turkey Farm Copycat Recipe)


If you have ever been to Hart’s Turkey Farm Restaurant in Meredith, New Hampshire, then you will know of their delicious carrot relish that is served with saltine crackers as an appetizer. Traditionally, carrot relish is overloaded with sugar! This recipe uses allulose/monkfruit as its sweetener, which slashes the carb count significantly. I think you will find this sugar-free version just as delightful as the carrot relish that is so acclaimed at one of my favorite restaurants.

Sugar Free Carrot Relish
Makes 1 pint (32 servings)

3 cups shredded carrots, shredded on the big holes of a box grater
½ onion, chopped
A pinch of ground cayenne (or a dash or two of hot sauce)
1 teaspoon celery seed
½ teaspoon sea salt
1/3 cup allulose Monkfruit sweetener, or to taste
9 tablespoons apple cider vinegar 
1/4 cup water
Low carb crackers to serve

1. Add all the ingredients (except the crackers) to a heavy medium sauce pan. Bring to a boil and simmer for about 30 minutes on medium low heat, stirring occasionally. Simmer until the liquid is absorbed and the vegetables are tender. Spoon into a pint-size glass jar and cool completely before serving.

2. Serve with low carb crackers. Also, this relish is a very nice addition to a cheese platter. Spoon it directly onto a slice of cheddar cheese and enjoy!

Nutritional Information per tablespoon: 7 calories, 1.8 g carbohydrate (0.3 g dietary fiber, 0.6 g sugars), 0 g total fat, 0 mg cholesterol, 15 mg sodium, 5 mg calcium, 37 mg potassium, 520 IU Vit A, 1 mg Vit C, 0 g protein. Net carbs per serving: 1.5 grams

Photo and recipe by Kathy Sheehan, copyright 2026
All rights reserved. Please do not duplicate without the author’s permission.

Monday, January 17, 2022

Keto Chicken and Cauliflower Rice Soup

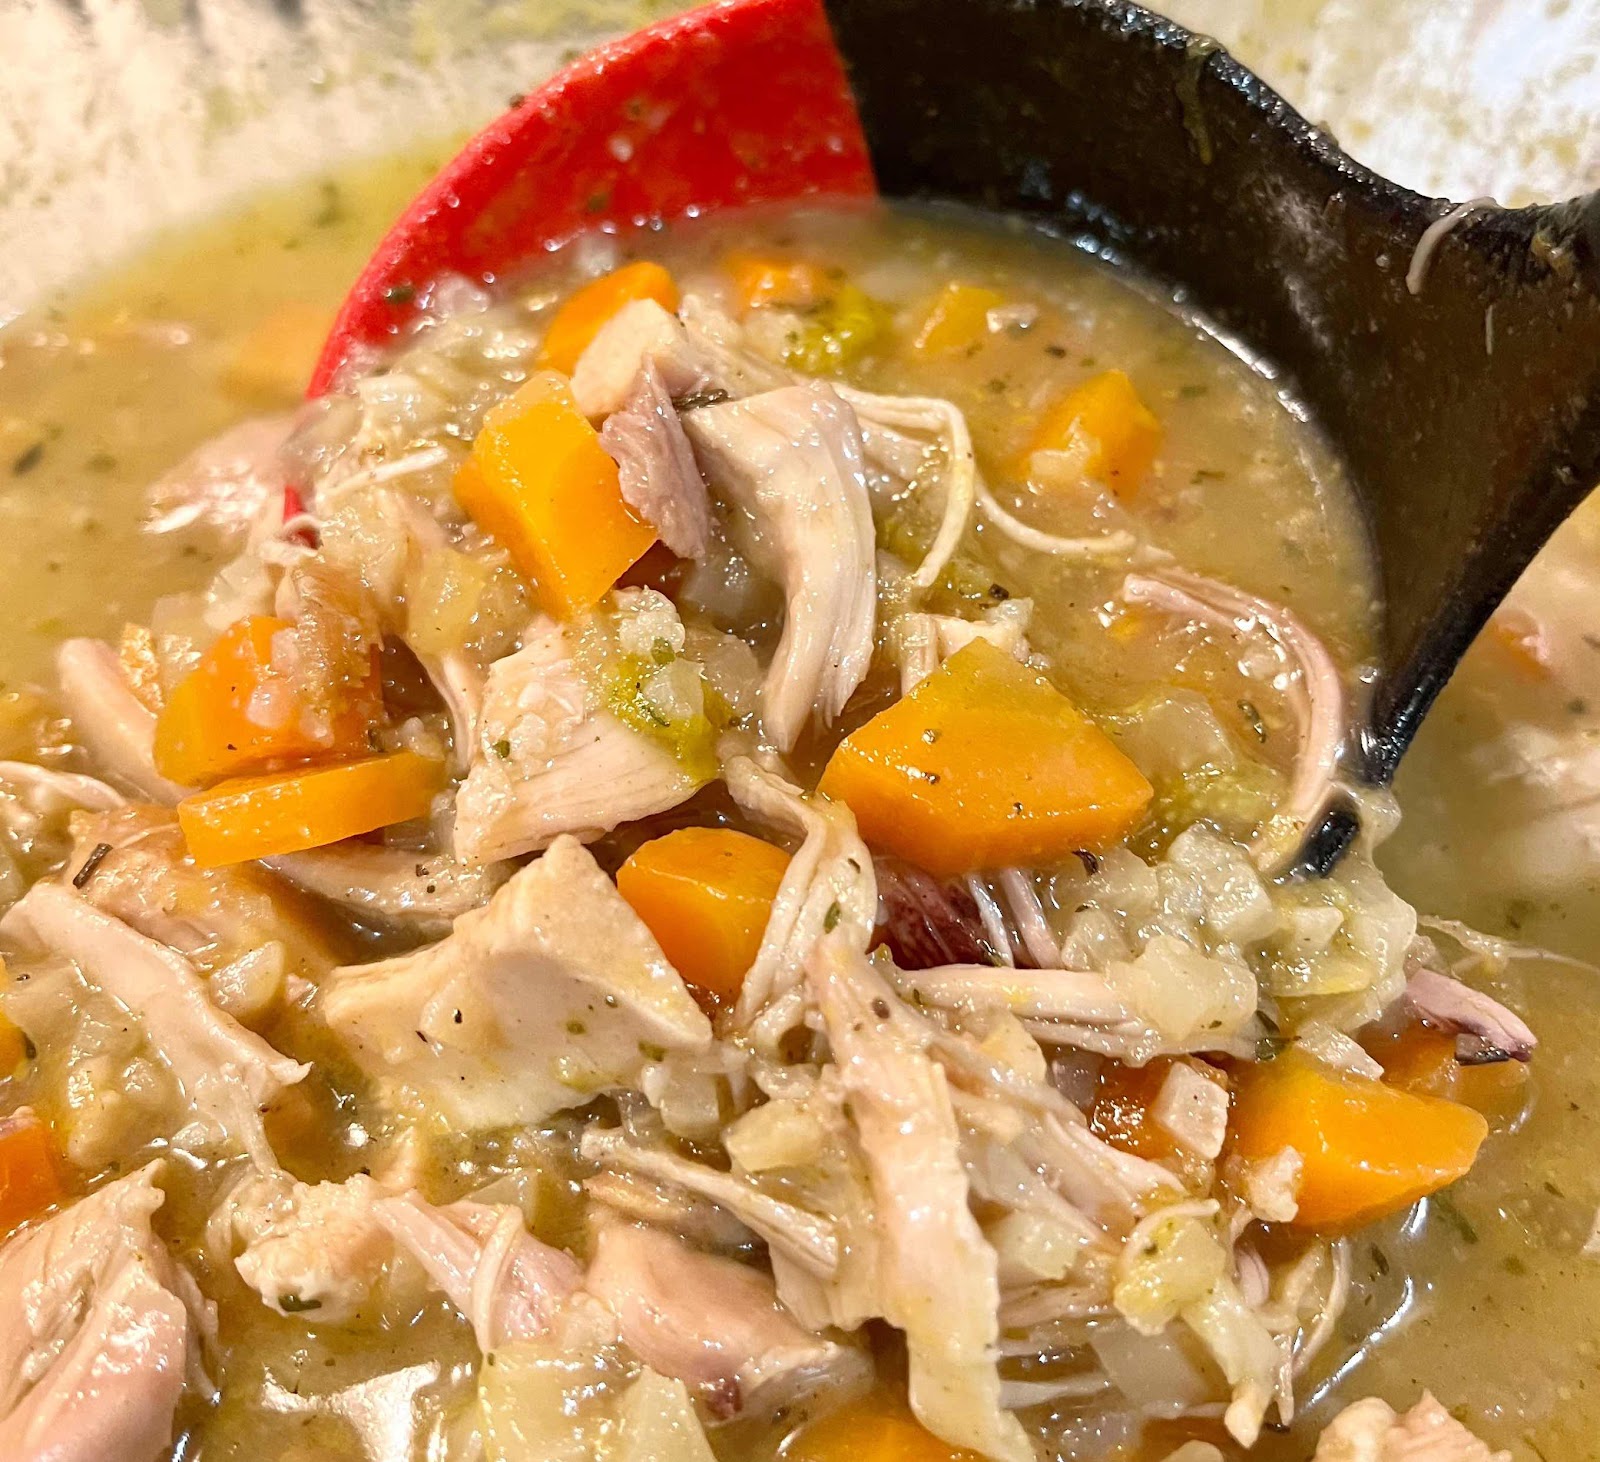
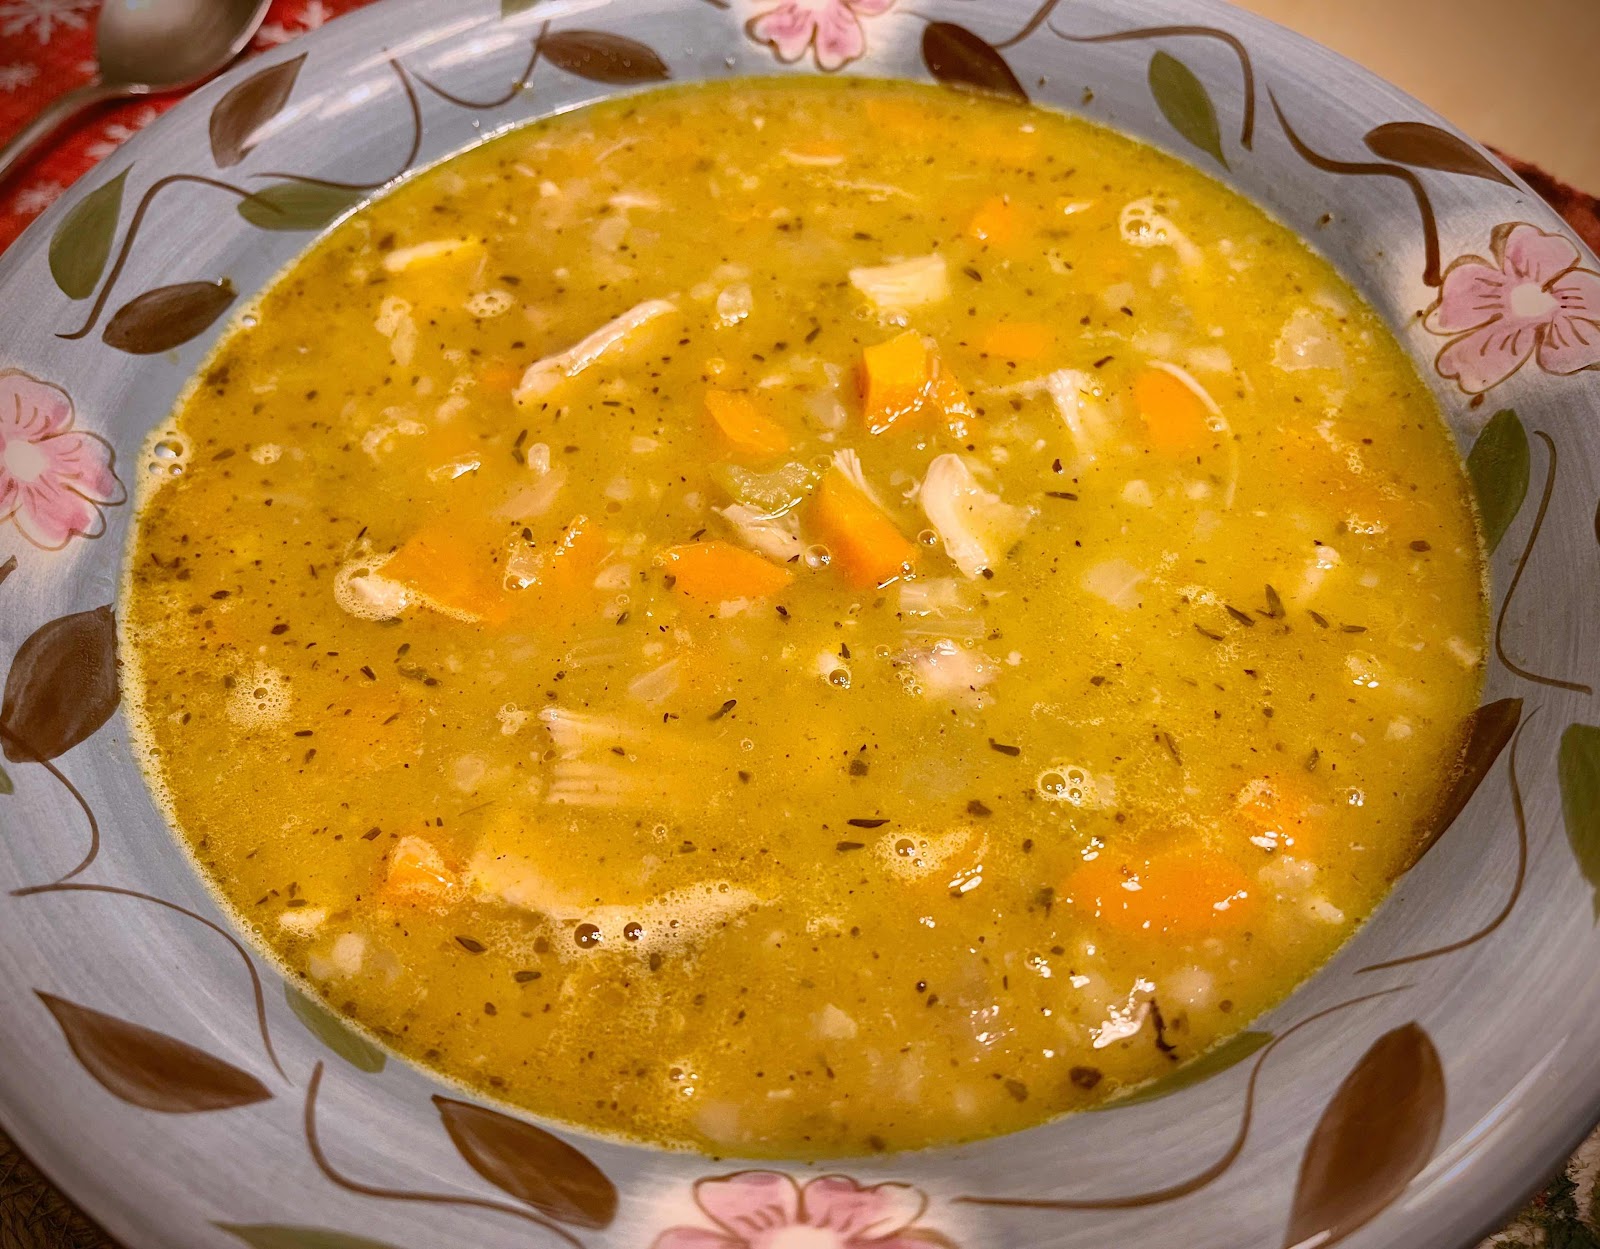
Keto Chicken and Cauliflower Rice Soup
Sometimes when you’re sick, the only thing that sounds good is a warm bowl of soup. When I was recently ill, that’s the only thing I was craving! I looked through my cupboard to try and find the lowest carb soup in a can. I found a chicken rice soup with 12 g per cup and, because I was in no shape to make a homemade pot of soup that day, I ate it…and was very disappointed. There was very little chicken, lots of rice and even more potatoes! My blood sugar soared through the roof, much more than a serving of 12 carbs should have caused. The next day I was determined to make my own soup! And it turned out so delicious, very comforting and I ate it over the next several days as I recovered. Cauliflower rice in this recipe tastes and has the same texture as real rice! The broth was richer and more flavorful than anything you’ll find in a can. The real trick to this recipe is to brown the chicken, skin side down, in the Dutch oven or saucepan until crispy and a fond collects in the bottom of the sauce pan. Then, once you add the rest of the ingredients and broth, the fond is incorporated into the soup adding exceptional flavor. I hope you find this recipe as comforting as I did, especially on a sick day.

Keto Chicken and Cauliflower Rice Soup
Makes about 6 servings

12 ounces bone-in chicken thighs with skin (2 large thighs or 3-4 smaller)
2 carrots, diced
1/2 onion, diced
1 large rib celery, diced
1/4 teaspoon salt
1 clove garlic, minced
3/4 teaspoon dried thyme
1/2 teaspoon poultry seasoning
4 cups chicken stock or bone broth
2 cups frozen cauliflower rice, thawed
Salt and pepper, to taste

1. In a large Dutch oven or large, heavy saucepan, place the bone-in chicken thighs skin side down and heat over medium heat for eight minutes or until the skin has rendered its fat and is crispy. Turn the chicken over and continue cooking for another five minutes. Remove the chicken to a plate to rest while you continue making the soup.

2. Add the carrots, onion and celery to the saucepan, along with about 1/4 teaspoon of salt, and sauté until the vegetables are tender crisp and the onion is translucent. Add the garlic, thyme and poultry seasoning and stir for 30 seconds. Add the chicken stock and, with a wooden spoon, scrape the bottom of the pan until the accumulated fond is incorporated into the broth.

3. Add the chicken back into the pan and bring to a simmer. Cover and gently simmer the soup for 45 minutes. Test the temperature of the chicken with a probe thermometer. It should be at least 175°F. Remove the chicken from the pan and onto a plate to cool. Add the cauliflower rice to the soup and stir. Turn off the heat and allow the soup to sit, covered, while the chicken cools.

4. Once the chicken is cool enough to handle, remove the skin and bones from the chicken and discard. Cut the chicken into bite-size pieces and return the chicken to the pot. Reheat the soup, adding salt and pepper to taste. Simmer gently for 10 minutes before serving. Enjoy and get well! (This soup can be stored in an airtight container in the refrigerator for up to four days.)

Bowl of Chicken and Cauliflower Rice Soup
Nutritional Information per serving (1 cup): 150 calories, 4.7 g carbohydrate (1.5 g dietary fiber, 2.5 g sugars), 6.2 g total fat (1.7 g saturated fat, 0 g trans fat), 54 mg cholesterol, 414 mg sodium, 27.9 mg calcium, 214 mg potassium, 1 mg iron, 819 IU Vit A, 16 mg Vit C, 18.3 g protein. Net carbs per serving: 3.2 grams

Photos and recipe by Kathy Sheehan, copyright 2022
All rights reserved. Please do not duplicate without the author’s permission.

Tuesday, October 3, 2017

Low Carb Broccoli Cheddar Soup

Broccoli Cheddar Soup
I was browsing through some broccoli soup recipes and landed on a good one asserting to be a Panera copycat recipe but it was too high in carbs and called for flour, which are both no-nos for me. So I adapted this recipe to be low carb and ketogenic with a few minor adjustments. This is the creamiest and, by far, the BEST Broccoli Cheddar soup I’ve ever made and will definitely be my go-to recipe from now on! Perfect for a cool fall evening or anytime.

Low Carb Broccoli Cheddar Soup
Makes about 6 cups

2 tablespoons unsalted butter
1/2 small onion, finely chopped
1 clove garlic, minced
2 cups chicken broth
1 cup organic heavy cream
1/2 teaspoon salt, or to taste
1/2 teaspoon ground black pepper, or to taste
1/2 teaspoon paprika
1/2 teaspoon dry mustard powder
A small pinch of cayenne
3 cups broccoli florets and stems, diced into small pieces
1 small carrot, sliced into thin rounds
8 ounces high-quality cheddar cheese, grated
1/2 teaspoon Thick-It-Up low carb thickener (or xanthan gum), if needed

1. In a large heavy saucepan or Dutch oven, melt butter over medium-low heat. Add chopped onion and sauté for about 4 minutes, stirring occasionally, until translucent and just starting to turn golden in color. Add garlic and sauté for another minute or so until fragrant. Add the chicken stock and heavy cream and whisk to combine. Add the salt, pepper, paprika, dry mustard powder and cayenne and stir to combine. Bring to a simmer and add the broccoli and carrots and allow the mixture to gently simmer on low heat uncovered, stirring occasionally, for about 20 minutes, or until the vegetables have softened and the broth has thickened slightly.

2. Meanwhile, grate the cheese and set aside a portion to use as a garnish later. After the soup has simmered and the vegetables have softened, add the cheese and stir continuously until it has melted and is fully incorporated into the soup. Taste and adjust seasonings. If needed, sprinkle the Thick-It-Up (or xanthan gum) into the soup while whisking continuously until the desired thickness is reached.

3. Ladle the soup into serving bowls, garnish with the reserved grated cheese and serve immediately. Any leftovers can be stored in an airtight container in the refrigerator for up to 5 days. It is best reheated in the microwave or heated very gently in a heavy saucepan over low heat while stirring often. Do not freeze.

Nutritional Information per cup: 305 calories, 7.3 g carbohydrate (1.8 g dietary fiber, 1.9 g sugars), 30.9 g total fat (19.7 g saturated fat, 0 g trans fat), 105 mg cholesterol, 651 mg sodium, 323.9 mg calcium, 217 mg potassium, 1 mg iron, 2888 mg Vit A, 41 mg Vit C, 13.1 g protein. Net carbs per cup: 5.5 grams

Photo and recipe by Kathy Sheehan, copyright 2017
Adapted from a recipe on averiecooks.com
All Rights Reserved. Please do not duplicate without the author’s permission.

Saturday, August 12, 2017

Low Carb Creamy Coleslaw


Sometimes I forget about coleslaw, but it's really the perfect side dish for a cookout, family gathering, picnic or potluck. It's so quick and easy to throw together, it's a shame that I don't make it often. With the help of a food processor, I can shred my own cabbage and carrot in minutes, but you can use a bag of prepackaged coleslaw mix, if you prefer. This recipe is super creamy with just the right amount of tang from the apple cider vinegar. Replace the sugar in a traditional recipe with erythritol or stevia and you have a delicious, low carb coleslaw the whole family will love.

Low Carb Creamy Coleslaw
Makes about 8 servings

1 small head green cabbage, shredded
1 small carrot, finely shredded

Dressing Ingredients:

2/3 cup mayonnaise 
2 tablespoons sour cream
2 tablespoons minced onion
1-2 tablespoons powdered erythritol, to taste (I used Swerve Confectioners)
1.5 tablespoons apple cider vinegar
1/2 teaspoon celery salt
Salt and freshly ground pepper to taste

Combine the shredded cabbage and carrot in a large bowl. In a separate bowl, whisk together the dressing ingredients. Add to the cabbage mixture and stir to coat the cabbage. (Use only the amount of dressing needed to coat the slaw mix. You may have some leftover dressing, which can be stored in the refrigerator for up to 2 weeks.) Mix well to combine. Taste and adjust seasoning, adding more salt, pepper or sweetener if desired. Refrigerate for 45 minutes or more to allow the flavors to blend.

Nutritional Information per serving (about 1/2 cup): 155 calories, 6.4 g carbohydrate (2 g dietary fiber, 3.5 g sugars, 1.9 g sugar alcohols), 14.5 g total fat (2.5 g saturated fat, 0 g trans fat), 8 mg cholesterol, 236 mg sodium, 48 mg calcium, 246 mg potassium, 1230 mg Vit A, 1 mg iron, 1.5 g protein. Net carbs per serving: 4.4 grams

Recipe by Kathy Sheehan, copyright 2017
All rights reserved. Do not duplicate without the author's permission.

Wednesday, October 5, 2016

Rainbow Chili


 A cool, autumn day calls for a comforting meal that is warming, all the way to my toes! This spicy meat chili has the added health benefit of assorted vegetables to nourish the body, but don't overlook the fact that their bright colors are appealing to the eye, as well. The purple of red cabbage, the bright orange of carrots, the bold red of tomatoes, the white of onion, the spring green of celery and the summer yellow of squash all come together in a rainbow of flavor! Mix them up and use whatever vegetables you have on hand or choose your family's favorites. I enjoy this hearty chili with a sprinkling of shredded cheese or topped with guacamole and sour cream.

I'm often asked how I fulfill the various tastes and dietary requirements of different family members at mealtime, since not everyone chooses to eat low carb. This meal is a great example! My carb-loving husband (who is not diabetic) loves his chili over boiled potatoes. We usually keep some starchy side dish in the fridge to add to his meals, such as boiled potatoes, pasta or rice.  This arrangement works well for us. It's easy for me to stay on my low-carb diet, while still satisfying his desire for a starch...that way we're both happy!

Rainbow Chili
Makes about 10 cups

2 teaspoons coconut oil
1 pound grass-fed, organic ground beef
1 medium onion, chopped
2 celery stalks, chopped
2 carrots, chopped
1 cup chopped red cabbage
1 cup chopped yellow summer squash
2 cloves garlic, minced
1 can diced tomatoes (14.5 oz.)
1 can organic black soy beans (15 oz.), drained and rinsed
1/2 teaspoon beef concentrate (optional)
1 teaspoon dried oregano
1 teaspoon sea salt, or to taste
1/2 teaspoons ground black pepper, or to taste
1-1/2 teaspoons chili powder, or to taste
1 to 1-1/2 teaspoons ground cumin, or to taste
1/16 teaspoon cayenne pepper, to more if you like it hot
1-1/2 cups to 2 cups beef broth (until desired consistency is reached)

Heat the coconut oil in a heavy Dutch oven. Brown the ground beef. Add the onions, celery and carrots and sauté, stirring occasionally, until the onion becomes translucent. Add the remaining chopped vegetables, garlic, tomatoes, beans, beef concentrate (if using), salt, pepper, herbs and spices. Stir to combine and sauté briefly. Add enough beef broth to reach the desired consistency. Taste and adjust seasonings to taste.  (I'm a wimp and like my chili mild, but if you like yours hot, you may need to add more chili powder, cumin and cayenne.) Cover and simmer for at least 30 minutes, stirring occasionally, before serving.

Nutritional Information per cup: 166 calories, 7.3 g carbohydrate (3.5 g dietary fiber, 2.6 g sugars), 9.6 g total fat (3.7 g saturated fat, 0 g trans fat), 28 mg cholesterol, 478 mg sodium, 48.6 mg calcium, 273 mg potassium, 13.3 g protein.  Net carbs per serving: 3.8 grams

Recipe by Kathy Sheehan, copyright 2016
All rights reserved. Please do not duplicate without author's permission.

Wednesday, August 10, 2016

Slow Cooker Pork Chops with Carrots and Apples


I love my Crock Pot and use it often. Even if I'm at home for the day, I love the aroma wafting though the house and knowing that all I have to do is lift the lid from the slow cooker and dinner is ready. This recipe in particular smells wonderful while it's cooking and it's so easy to throw together. The combination of pork and apples is a classic and by cooking them in a crock pot, the pork chops turn out moist and tender. To reduce some carbs, I recommend using a green Granny Smith apple, instead of a higher sugar variety. With a side of probiotic-rich homemade sauerkraut, this is a comforting and healing meal.

Slow Cooker Pork Chops with Carrots and Apples
Makes 2-4 servings, depending on the size of your pork chops

1 tablespoon coconut oil
2 large, thick, center cut, boneless pork chops (organic or antibiotic free)
1 large onion, sliced
2 cups carrots, thickly sliced (I use multi-colored carrots)
1 Granny Smith apple, cut into slices and sprinkled with lemon juice
2 teaspoons fresh thyme (or 1 teas dried)
1-1/2 tablespoons fresh rosemary, chopped (or 2 teas dried)
Salt and pepper

1. In a heavy skillet, heat the oil on medium-high. Season the chops with salt and pepper and brown on both sides.

2. In the crock pot, add the sliced onion and carrots and season with a little salt and pepper. Place the pork chops on top of the vegetables and sprinkle with the chopped herbs.

Top vegetables with browned pork chops.

3.  Spread the sliced apples on top of the pork and put the lid on the Crock Pot. Set the slow cooker to high (or 350-degrees Fahrenheit) and cook for 3 hours. Test meat and, if it's tender and the internal temperature is at least 165-degrees, turn off slow cooker.  If additional cooking is needed, continue cooking covered for another 30 minutes.  Serve pork with vegetables and spoon any sauce over the chops for added flavor.

Scatter apple slices over all before cooking.

Nutritional Information per serving (with 1/2 cup vegetables): 341 calories, 24 g carbohydrate (4 g dietary fiber, 16.2 g sugars), 16.2 g total fat (6.1 g saturated fat, 0 g trans fat), 70 mg cholesterol, 174 mg sodium, 31.7 mg calcium, 228 mg potassium, 24.2 g protein. Net carbs per serving: 20 grams

Recipe by Kathy Sheehan, copyright 2016
All rights reserved. Do not replicate without written permission.

Sunday, November 8, 2015

Carrot and Pumpkin Spice Beta-Carotene Shots


Carrots, pumpkins and sweet potatoes are the best sources of beta-carotene.  The name beta-carotene comes from the Greek beta and Latin carota (carrot). It is the deep orange-yellow pigment that gives these fall vegetables their beautiful color. The human body converts beta-carotene into vitamin A (retinol), which means it is a precurser of vitamin A. One cup of fresh carrot juice provides an astounding 2, 256 micrograms of beta-carotene! This amount is 2-3 times more than the RDA daily requirement, but don't worry. It is nearly impossible to eat too much beta-carotene because any excess of dietary beta-carotene is simply eliminated from the body (although you need to be careful with over-the-counter supplements because they are often synthetic and metabolized differently, especially if you are a smoker). We've all heard that vitamin A is good for eye health, but did you know it is a powerful antioxidant and can help prevent cancer and lower your risk of heart disease? The downside is that carrots are sweet and 1 cup of carrot juice contains about 2 teaspoons of natural sugar and about 15 carbohydrates. Even so, I love my fresh carrot juice and I wanted to find a way to include it in my diet. This recipe comes to the rescue!  I've added a bit of puréed pumpkin, plain kefir, coconut oil and the warm spices that we associate with this season. This juice blend has a lot going for it: probiotics from the kefir or yogurt, coconut oil to slow the absorption of the sugars and assist in the uptake of fat-soluble vitamin A, plus it includes other important vitamins and minerals. A shot or two of this delicious elixir each day is all I need to provide a healthy, healing dose of beta-carotene that my body craves.

Carrot and Pumpkin Spice Beta-Carotene Shots
Makes 12 servings (of 2 TB each)

1 cup fresh carrot juice (if purchased, look for unpasteurized juice for the healthiest option)
2 tablespoons puréed pumpkin
1/4 cup plain, unsweetened kefir or yogurt (substitute non-dairy, if desired)
1 teaspoon orange zest (or 2 drops of dietary-grade orange or tangerine essential oil)
1 tablespoon coconut oil, melted
10 drops of liquid stevia (orange flavored is nice), or to taste
3/4 teaspoon pumpkin pie spice
A tiny pinch of sea salt

Place all of the ingredients into a blender and blend until well combined. Store in a glass bottle or jar in the refrigerator. Shake before serving. Plan to drink it within a week.

Nutritional Information per 2 TB serving: 19 calories, 1.7 g carbohydrate (0.1 g dietary fiber, 1.4 g sugars), 1.3 g total fat (1.1 g saturated fat, 0 g trans fat), 1 mg cholesterol, 16 mg sodium, 11.4 mg calcium, 3 mg potassium, 0.4 g protein.  Net carbs per serving: 1.6 grams

Recipe by Kathy Sheehan, copyright 2015

Friday, October 17, 2014

Easy Vegetarian Chili


I made a new discovery (I love it when that happens)!  I finally found a bean that fits into my very low carb lifestyle: Black Soy Beans!  For the past year, I've been avoiding beans because most beans are too high in carbs, usually around 23 g carbs per 1/2 cup serving.  Even if you subtract the fiber, they weigh in at about 17 net carbs...still too high.  Recently, while browsing a low carb cookbook from the library, I saw the ingredient "black soy beans" multiple times, so I just had to investigate.  To my surprise, I learned that black soy beans are an extremely low 7 g total carbs per 1/2 cup serving, with 6 g fiber.  That's an amazing 1 net carb per serving!  I tried them, tested my blood sugar to see how my BG reacted and I knew immediately that this is a bean I can work with. My blood sugar didn't rise at all.  So, into my kitchen I went and started cooking. This extremely easy vegetarian chili is a complete meal-in-a-bowl and was a huge hit at a recent church supper.  The black soy beans provide all the essential amino acids (so they are a complete protein source) and they taste exactly like regular black beans without the carbs.  This recipe is dedicated to my little sister -- enjoy!

Easy Vegetarian Chili
Makes about 10 servings

2 tablespoons coconut oil
1 medium zucchini, cubed
3 small carrots, cut into small chunks
1 small onion, chopped
1 cup frozen chopped spinach or kale
1 jalapeno pepper, chopped
1 green or yellow pepper, chopped
2 cloves garlic, minced
2 teaspoons chili powder, or to taste
1 teaspoon ground cumin, or to taste
2 teaspoons dried oregano
28 oz. Marinara Sauce, no sugar added
28 oz. crushed tomatoes, no sugar added (no sodium, if desired)
2 cans (15 oz each) organic black soy beans, drained and rinsed (I buy Eden's brand)
1 cup plain tomato sauce, no sugar added  (no sodium, if desired)
1 cup water (or more to achieve desired consistency)
Salt and pepper to taste
Dash or two of hot sauce, optional
Shredded cheese for topping, optional (omit for dairy free)

1. Heat coconut oil in a dutch oven or heavy pot, add chopped vegetables and saute until beginning to soften.  Add herbs and spices and saute for another minute.  Add beans, marinara sauce, crushed tomatoes, plain tomato sauce, and water.  Allow to simmer, covered for about 40-45 minutes or until carrots are cooked through.  Season with salt, pepper and hot sauce (optional) before serving.  Top with shredded cheese, if desired (omit for dairy free).

NOTE:  This makes an excellent crock pot recipe!  Just saute the vegetables in a skillet, add them to the crock pot with the remaining ingredients and cook on low for 4-6 hours (or high for 2-3 hours), until carrots are cooked through.

Nutritional Information per serving (optional ingredients not included): 212 calories, 22 g total carbohydrate (9 g dietary fiber, 9.6 g sugar), 9.3 g total fat (3.1 g saturated fat, 0 g trans fat), 0 mg cholesterol, 793 mg sodium, 109.3 mg calcium, 603 mg potassium, 11.3 g protein.  Net carbs per serving: 13 grams

Recipe by Kathy Sheehan, copyright 2014


Monday, March 31, 2014

Healthy Free Stuff!

I've had a lot of questions about how to use the Spiral Slicer I spoke of in my earlier post to make veggie noodles, so I made this video to demonstrate:  https://www.youtube.com/watch?v=pMBhRKW9FjI


RECIPE IDEA:  To cook the Vegetable Noodles, either simmer them in your favorite marinara sauce for 8-10 minutes until they reach the desired consistency or heat 1 TB. ghee (clarified butter) in a large saucepan on medium heat, add vegetable noodles and stir to coat with the butter.  Add salt and pepper to taste.  Add 1/4 cup chicken or vegetable broth to pot and cover.  Steam until vegetable noodles are softened to desired consistency.  Remove cover and simmer over medium until liquid has evaporated.  Eat as a side dish or top with your favorite sauce, as you would with any pasta.

FREE COOKBOOK EXCERPT:  Also, I want to tell you about the excellent Daniel Plan Cookbook by Rick Warren.  Below is a FREE PDF download with a sampling of recipes!  I've been using this cookbook a lot lately in the three Daniel Plan support groups that I facilitate in my community.  My favorite recipes are the Caramelized Onion Burgers and the Fish Tacos with Creamy Chipotle Lime Dressing - YUM!  I recently orgaznized a Taco Bar for a healthy potluck luncheon at my church and used some of these recipes.  This cookbook includes many excellent recipes that real people would eat!  I highly recommend!  Check the book out from your local library or it can be purchased online or in any bookstore.

http://files.faithgateway.com.s3.amazonaws.com/freemiums/The-Daniel-Plan-Cookbook-Sampler.pdf

Have a great day!  Enjoy!   ~ Kathy

Saturday, January 25, 2014

Drink Your Vegetables!


This is a continuation of the "Love Your Vegetables" post from last week and the theme this week is juicing.  What's all the hype about?  Many doctors recommend it as an additional way to get the micro-nutrients in fruits and vegetables.  Those micro-nutrients are easier to absorb without the bulk of fiber that accompanies the fresh produce.  But is it a healthy idea, especially for someone who has problems metabolizing carbohydrates?  Making fresh juice appealed to me, so I talked to my doctor about it and this is what he said:  Yes, juicing vegetables is an excellent idea but, because of the high sugar content of fruit, it should be limited, preferably to lower glycemic fruit that includes green apples, berries, cherries, grapefruit, lemons and limes.  Fresh vegetable juices can be tolerated and beneficial, if a person's blood sugar is fairly well managed.  For someone whose blood glucose isn't stable, drinking green smoothies might be a better choice.

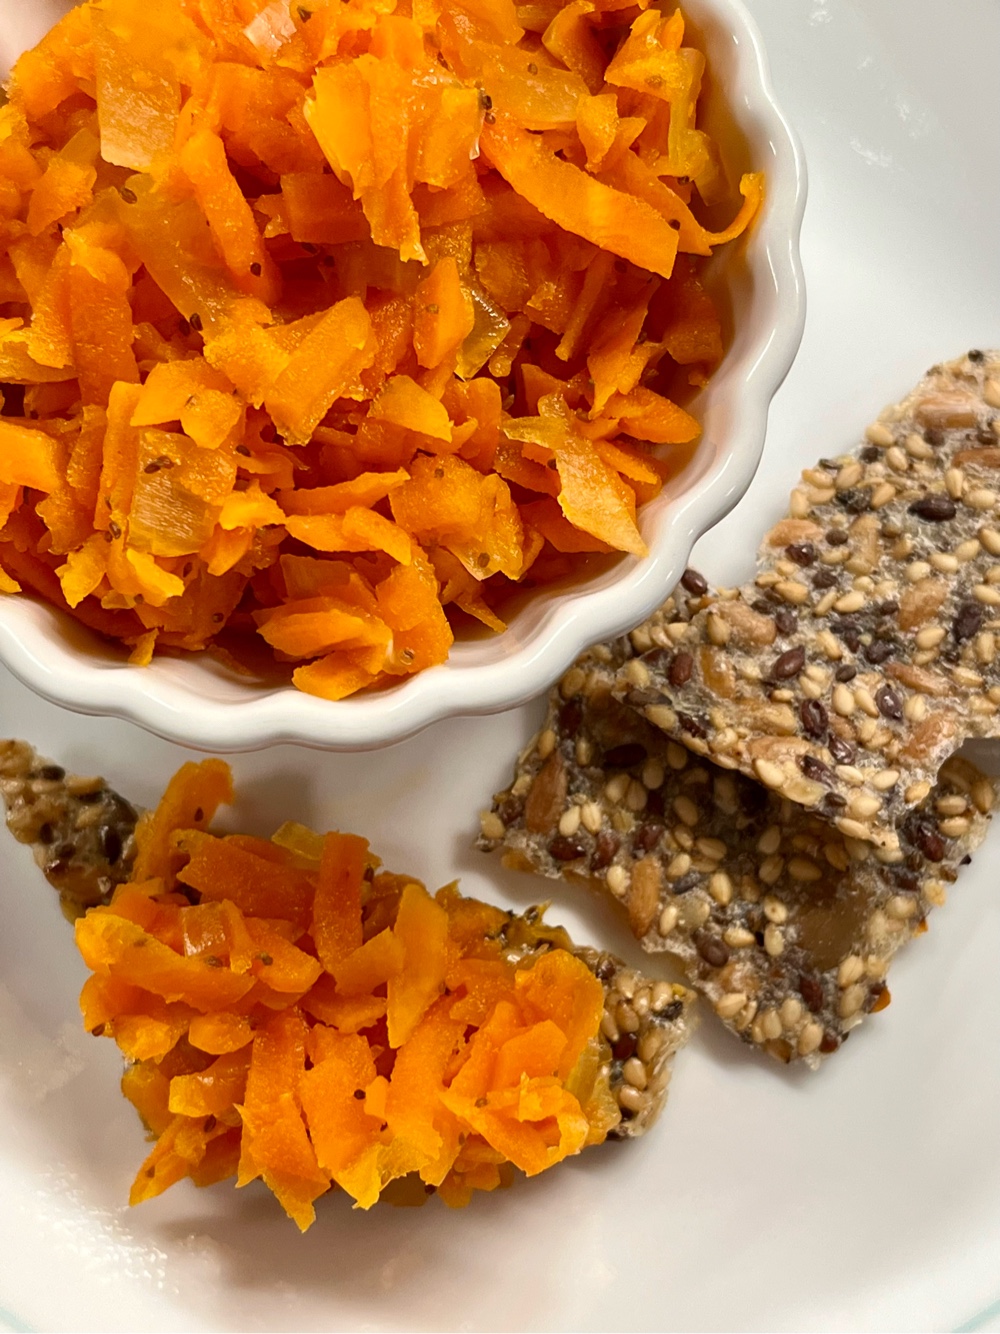
I've been vegetable juicing now for several months and I've seen a reduction in my high blood pressure and I have more energy throughout the day.  My blood glucose readings have remained in the normal range and I enjoy making fresh juice!  I love that I can drink the nutrients from an entire, heaping plate of vegetables (see photo above). From my experience, the more vegetables I can consume, the better my health and well-being!

Before you run out to buy a juicer, here are some tips I would suggest:

1.  Do your homework before buying!  There are several types of juicers available that work in different ways and at various prices.  I'm not going to go into a whole lesson here, but I highly recommend that you consider carefully before investing in a juicer.  My #1 Rule: Try vegetable juicing without a juicer first, to see if you like the taste, before buying!  Try this method for several weeks to see if you're really serious or if the idea was a passing fancy. (See directions below for how to make juice without a juicing machine.)

2.  Go into it with the knowledge that you'll be juicing mostly vegetables, with maybe a small amount of fruit for sweetness.  If additional sweetness is desired, add drops of liquid Stevia to taste.

3.  To minimize a blood sugar spike, don't drink juice alone or an entire batch at once.  Combine an 8 ounce glass of fresh juice (or less) with a meal or snack that contains some protein and/or fat.  If you've made more than 8 ounces, pour the remainder into a glass water bottle, place it in the refrigerator and have a little with every meal throughout the day with the idea of consuming the entire batch within 24 hours for the most nutritional impact.  For a diabetic, it can be better tolerated to add back some of the fiber removed by juicing.  For example, sometimes I stir a spoonful of fiber powder into my fresh juice before drinking, especially if it contains a higher glycemic fruit.

4.  Test your blood sugar level 1 and 2 hours after consuming juice.  This will tell you how your body reacts to juice and whether it can be tolerated.  After two hours, your blood sugar reading should be below 150 or back to normal.

5.  Finally, vegetable juicing doesn't replace eating vegetables!  Fresh vegetables and fruit contain much needed fiber, that's often lacking from the standard diet.  Juicing is just another way to add more vegetables and their healthy micro-nutrients to your diet in a rather pleasant way.

RECIPE IDEA:  Green Lemonade!


Typically, I juice whatever vegetables I have on hand at the moment and throw in a clementine and lemon or green apple.  I have found that I can juice parts of a vegetable I normally wouldn't eat, such as broccoli stalks or the woody ends of asparagus.  In this recipe, the tart lemon becomes the predominate flavor that hides the more earthy or pungent flavors of the vegetables.  With a few drops of liquid Stevia, lemonade is the result!

Green Lemonade
Makes 2 servings

1 clementine
3 stalks of celery
1/4 savoy cabbage (or 2 cups other leafy greens)
2 carrots
1/2 or 1 small lemon, with peel
1/2 cucumber or zucchini
2 broccoli stalks (about 1-1/2 cups)
4-6 drops of liquid Stevia or to taste (add after juicing)

Wash and cut vegetables to the size that will feed into your juicer.  According to the manufacturer's instructions, juice the vegetables.  Add Stevia and stir.  Pour over ice and serve immediately.

To make juice without a juicing machine:  Cut up all of the vegetables and fruit and place into a blender.  Add enough water to allow the mixture to swirl freely.  Blend on high until mixture is smooth.  Strain through a couple of layers of cheese cloth or a nut milk bag until all the liquid has been extracted.  You may need to gently massage and squeeze the bag to drain thoroughly.  Add Stevia to taste and serve over ice.

Nutritional Information per serving: 71 calories, 21.3 g carbohydrate (1 g dietary fiber, 9 g sugars), 0.7 g total fat (0 g saturated fat), 0 mg cholesterol, 113 mg sodium, 115 mg calcium, 132.3 mg vitamin C, 830 mg potassium, 5 g protein.

Recipe by Kathy Sheehan, copyright 2014.
Sunday, January 19, 2014

Love Your Vegetables!


 It doesn't matter what diet you're on, the mantra is the same: Eat more fresh fruits and vegetables!  When I was first diagnosed with diabetes, that was the single, most difficult change I had to make.  Fruit was easy, although as a diabetic fruit is limited, but vegetables?  Not only did I not eat many vegetables, especially those leafy greens or cruciferous vegetables (like broccoli or cabbage), I struggled to eat more than one serving per day!  My attitude and eating habits have changed dramatically since those days, but not without a struggle, a few setbacks and a lot of creativity.

After winning the war against vegetables, I now admit I have a love affair with them!  I eat them at every meal, including breakfast.  I hide them in everything and sometimes I have fooled myself into believing that I'm not even eating them, when my entire plate is heaping with nothing but vegetables!  I even taught a cooking class in my community where I convinced other skeptics how to love their vegetables.  This blog is FULL of dozens of vegetable recipes, but in this post (and more to come later) I wanted to share some of my favorite toys that make incorporating more vegetables into my diet super fun, easy and delicious.  These tools, tips and recipe ideas just might make a believer out of you, too.


MY NEW TOY!


A Spiral Vegetable Slicer/Cutter: Inexpensive, no electricity needed, easy to use and clean, available online (Amazon or other sites) and as fun as playing with a Playdoh machine!  I use the Paderno brand, but there are others available. Usually several different blades come with it that quickly and easily make vegetable noodles, spiral ribbons of fruit or vegetables and curly vegetables for oven baking (think Sweet Potato Fries!)  One of my favorite ways to use this low-tech kitchen tool is to make vegetable noodles for either a main dish or side dish.  Vegetables I've used and recommend for noodles are: butternut squash, zucchini, parsnips, eggplant and carrots (if they're fat and big).  Quick Tip: Use any leftover vegetable or fruit pieces in your morning green smoothie.

RECIPE IDEA: Make zucchini noodles using a spiral slicer (plan on one per person, or two if they're small).  Cut any long strands into pasta-length; set aside.  Heat your favorite marinara sauce in a large saucepan.  Add the zucchini noodles and heat until noodles are cooked through and begin to soften, about 8-10 minutes.  Serve with grated Parmesan cheese.  (see photo at top of this post)

Carb Cutting Tip for Vegetable Skeptics: If a heaping plate of delicious zucchini noodles sounds too weird for you, try adding a small serving of your favorite spaghetti pasta cooked and drained according to package directions to the recipe.  (If you're watching gluten, choose a gluten free pasta.)  Cut the amount of pasta you'd normally use by at least half (or more) and add to the zucchini noodles and sauce at the end of cooking, stir until well combined and serve.  As you twirl both types of noodle onto your fork and eat, your taste buds will be fooled into thinking you're getting an enormous serving of naughty, carb-ladened pasta, when the truth is really that you're eating mostly healthy vegetables resulting in a minimal spike to your blood sugar!

LOVE YOUR VEGETABLES!

Thursday, October 3, 2013

Roasted Squash with Rice, Spinach and Cranberry Stuffing


This is a fabulous autumn recipe!  This time of year, winter squash is abundant and a wide variety is available in farmer's markets or at the grocery.  To prepare as a side dish, I choose a small squash, such as Delicata.  If I want this to be the main course, I choose the slightly larger Acorn Squash.  The squash is easy to prepare: Simply cut in half lengthwise, scoop out the seeds, season with salt and pepper and roast with cut side down in a 375-degree oven for 30-45 minutes, depending on the size of the squash (until fork tender).  The stuffing can be made ahead of time and keeps well in the refrigerator for several days.  Also, any leftover vegetable-rich, rice stuffing is excellent on its own as a side dish or a quick lunch.  Your taste buds will be tantalized by the tangy flavors in the stuffing combined with the slightly sweet flesh of the squash.  This is a culinary experience of autumn's bounty at its very best!

Roasted Squash with Rice, Spinach and Cranberry Stuffing
Makes 2 servings

1 Delicata or Acorn Squash
2 teaspoons coconut oil or olive oil
3-4 cups fresh spinach, chopped (or 1/2 package of frozen chopped spinach, thawed and drained)
1/2 cup onion, chopped
1 carrot, julienne cut or finely chopped
2 cloves garlic, minced
2 tablespoons sweetened, dried cranberries (or chopped apple can be substituted)
1/2 cup leftover brown rice
1 tablespoon Apple Cider Vinegar
2 teaspoons Stevia in the Raw or Splenda
Salt and Pepper to taste
2 tablespoons gluten-free panko breadcrumbs (I used Ian's)
1 teaspoon melted butter or ghee (clarified butter)

1.  Preheat oven to 375-degrees F.  Cut squash in half lengthwise, scoop out and discard the seeds, season with salt and pepper and place cut-side down on a baking sheet.  Roast for 30-45 minutes until fork tender.  Remove from oven and turn cut-side up.

2.  Meanwhile, in a large heavy skillet with lid, heat the oil over medium-low heat.  Add the onion and carrot to skillet and saute until onion is translucent and carrot is beginning to soften, about 2-3 minutes.  Add the chopped spinach.  If using fresh, place lid on skillet and allow to steam for a few minutes or until wilted.  Add the garlic and saute until fragrant.  Add the cranberries and rice and stir to blend.  Add the apple cider vinegar and Stevia.  Stir to combine.  Add salt and pepper to taste.  Remove skillet from heat and rest until squash is ready to stuff (or cool to room temperature and refrigerate to use later).

3.  To make the crumble topping, combine the gluten-free panko breadcrumbs and melted butter or olive oil in a small bowl.  Stir with a fork until crumbs are moistened; set aside.

4.  Generously fill the scooped-out cavity of each roasted squash with about 1/2 cup rice mixture.  Sprinkle the crumb topping over the top and broil until topping is browned.  Serve warm.

Nutritional Information per serving: 208 calories, 44.3 g carbohydrate (7.5 g dietary fiber, 10.1 g sugars), 3.4 g total fat (1.7 g saturated fat, 0 g trans fat), 4 mg cholesterol, 667 mg sodium, 107.3 mg calcium, 726 mg potassium, 4.4 g protein.

Recipe by Kathy Sheehan, copyright 2013

Tuesday, July 9, 2013

Super Green Summer Soup


With the abundance of vegetables in gardens and available at farmer's markets, it's the right time to make this delicious summer soup.  It is a wonderful first course and can be heated gently or eaten cool.  It is refreshing and nutritious!  If you don't have fresh vegetables available, then substituting frozen vegetables is fine, too.  (I used the frozen California Blend of broccoli, cauliflower and carrots in place of some fresh vegetables called for in the recipe.  Also, frozen broccoli or sliced leeks can be substituted for fresh, if it is more convenient.) It's a very quick and easy to prepare meal and will keep well in the refrigerator for several days, making it easy to grab something nutritious to bag and go for a work day lunch.

Super Green Summer Soup
Makes 4 servings

1 teaspoon organic coconut oil or olive oil
1/2 medium onion, chopped
1 leek, sliced
3 cups broccoli florets
1 cup cauliflower florets
1/2 cup carrot, chopped
1 celery stalk, sliced
1 cup chopped kale leaves
2 cloves garlic, minced
2 and 1/2 cups chicken or vegetable broth
1/2 cup unsweetened coconut milk (or Coconut Almond milk)
salt and pepper, to taste
juice of 1/2 lemon (or dash or two of hot sauce or cayenne pepper, as desired)

1. Melt the coconut oil over medium heat in a large skillet.  Saute the onion, leek, broccoli, cauliflower, carrot, celery and kale until beginning to soften and kale leaves are wilted, about 4-5 minutes.  Add the garlic and cook, stirring often, until fragrant.  Remove from heat.

2.  Into a blender, measure the broth and coconut milk.  Add the vegetables, salt, pepper, lemon juice or hot sauce.  Blend until smooth.  Taste and adjust seasonings, if necessary.  Serve immediately or can be refrigerated for several days.  Serve warm or cool, as desired.

Nutritional Information per serving: 81 calories, 12.6 g carbohydrate (2.6 g dietary fiber, 4.7 g sugars), 1.8 g total fat (1.1 g saturated fat, 0 g trans fat), 0 mg cholesterol, 678 mg sodium, 116 mg calcium, 142 mg potassium, 2 g protein.

Recipe by Kathy Sheehan, copyright 2013

Monday, May 13, 2013

Beef & Vegetable Cottage Pie with Veggie Mash


I adore mashed potatoes!  Ever since I was a little girl, if you asked me to name my top ten favorite foods, mashed potatoes would be high on the list.  So, it's only natural that I would love Cottage Pie, a savory ground beef mixture topped with mashed potatoes.  Sadly, since my diagnosis of Type 2 diabetes, potatoes are rarely on the menu at my house.  In this wonderful recipe, the veggie mash that tops this healthy Cottage Pie can go solo as a side dish, too.  This recipe is an excellent make-ahead meal because it can be assembled and refrigerated the night before, then served the next day.  When I served this dish tonight, it got rave reviews from my family.  As my husband said, "This one is a keeper!"

Beef and Vegetable Cottage Pie with Veggie Mash
Makes 4 servings

2 teaspoons olive oil
1 large onion, chopped
8 oz. baby bella or button mushrooms, chopped
1/2 lb. lean ground beef (90% lean or higher)
8 oz. frozen chopped spinach, thawed
3 cloves garlic, chopped and divided
3 tablespoons tomato paste
1 tablespoon Worcestershire sauce
1 cup hot water
8 oz. yellow Yukon potatoes, large diced
8 oz. carrots, peeled and diced
8 oz. cauliflower florets
2 cups beef or chicken broth
2 tablespoons unsalted butter
salt and pepper to taste

1.  In a large, heavy skillet, heat the oil on medium heat and add the chopped onion.  Saute until translucent, about 5 minutes.  Add the chopped mushrooms and a little salt.  Continue to saute until the moisture is released from the mushrooms and evaporates.  Move the onion mixture to one side and add the beef to the pan.  Break onto small pieces and cook until no longer pink.  Mix together the ground beef and onion mixture, add the chopped spinach and continue cooking until most of the moisture is evaporated from the pan and beef is very well browned.  Add one clove of garlic to the pan and mix together.  Add the tomato paste, Worcestershire sauce and water to the pan and stir to deglaze the brown bits.  Continue cooking and stirring until liquid thickens into a gravy.  Season with salt and pepper to taste.  Remove from heat and set aside.

2. Place the potatoes, carrots and cauliflower into a large pot.  Add the broth and remaining garlic.  Add water until vegetables are covered.  Boil vegetables until soft and fork-tender, about 15 minutes.  Strain the cooked vegetables in a colander and allow them to sit and release steam for 5 minutes until all the excess liquid has evaporated.  Meanwhile, add the butter to the hot pot to melt.  Return the vegetables to the pot and mash well. (I suggest using a handheld mixer for a smoother mash.)  Add salt and pepper to taste.

3.  To assemble the cottage pie, first spread the beef mixture evenly into a 9" square baking pan that has been sprayed with canola oil spray.  Top beef mixture with the veggie mash and spread evenly to cover beef mixture completely. (If desired, you can refrigerate the assembled casserole for up to one day before cooking.)

4.  To cook, bake in a preheated 350-degree oven for 35-40 minutes or until heated through.  Remove from oven and allow to sit for a few minutes before serving.

Nutritional Information per serving: 294 calories, 30.4 g carbohydrates (7 g dietary fiber, 10.1 g sugars), 10.9 g total fat (5.3 g saturated fat, less than 0.1 g trans fat), 50 mg cholesterol, 817 mg sodium, 126.1 mg calcium, 1180 mg potassium, 18.4 g protein.

Recipe by Kathy Sheehan, copyright 2013.

How does this recipe compare with traditional Cottage Pie?  This recipe is considerably less in calories, carbs and fat, plus it contains two servings of vegetables!  For comparison, the nutritional information for the same size serving of traditional Cottage Pie is an astonishing 546 calories, 36 g carbohydrate, 34.5 g total fat, 16.5 g sat. fat, 6 g fiber and 27 g protein.

Friday, April 15, 2011

Spiced Up Carrot Muffins

What bunny wouldn't love these? Made with a pound of sweet carrots, these Southwestern-style muffins are a good source of beta carotene and provide a half serving of vegetables in every muffin! They are partially sweetened with agave nectar, which is similar to a light cactus honey. (It's not as thick as regular honey, but almost as sweet.) You can find agave nectar in health food stores and many regular grocery stores due to its increasing popularity. Another benefit of these muffins is obtained by the tiny amount of cayenne, which is known to increase metabolism. By using almond flour for half of the wheat flour in a traditional muffin recipe, the carbs are cut by over 30%! They're not too sweet and they have a little spicy kick from the cayenne, which makes them an excellent side with grilled meat, chicken or fish. I also enjoy them as a snack in the afternoon. Recently, I served these at a pot luck dinner and they were well received by my guests, each wondering about the unusual combination of flavors. No one could believe they were a "diet" muffin, and neither will you!

Spiced Up Carrot Muffins
Makes 12 muffins

1/3 cup canola oil
1/3 cup light agave nectar
¼ cup Splenda granular
2 large eggs
Zest of 1 lime
Juice of 1 lime (about 2-3 tablespoons)
1 pound grated carrots (about 3 cups)
1 cup all-purpose flour
1 cup almond flour (or finely ground almonds)
2 teaspoons baking soda
¼ teaspoon salt
1 teaspoon ground cinnamon
½ teaspoon ground ginger
1/8 teaspoon ground cayenne (or less, if you don’t like too much heat)
6 tablespoons chopped pecans or pine nuts, divided

1. Preheat oven to 350-degrees F. Spray a 12-cup muffin tin with non-stick vegetable spray or line with paper muffin cups; set aside.

2. In a large bowl, whisk together the all-purpose flour, almond flour, baking soda, salt and spices; set aside.

3. Using an electric handheld or standing mixer on medium-high speed, mix together the canola oil, agave nectar, Splenda, and eggs until well blended. Add the zest and juice of one lime and mix well. Add the grated carrots and mix thoroughly.

4. Make a well in the center of the dry ingredients and add the wet ingredients all at once. With a wooden spoon, stir until just moistened. Add ¼ cup of the nuts and stir. Divide the batter equally among the prepared muffin cups. Sprinkle about ½ teaspoon of the remaining nuts on the top of each muffin.

5. Bake in preheated oven for 22-25 minutes until a toothpick comes out clean. Cool in pan for 5 minutes, and then transfer muffins to a wire rack to cool. Serve warm or at room temperature.

Nutritional Information per muffin: 220.7 calories, 20.9 g carbohydrate, 14 g total fat, 1.2 g saturated fat, 293.5 mg sodium, 2.5 g fiber, 4.7 g protein.

Recipe by Kathy Sheehan, copyright 2011

Saturday, June 5, 2010

Seasoned Lentils with Vegetables

Tonight I found myself alone for dinner, without much motivation to cook. So, I looked in the refrigerator and started pulling out ingredients. The result was this flavorful side dish that can easily be the whole meal. It is complete with protein, vegetables and complex carbs. Lentils are high in fiber and are a good source of iron, vitamin B1 and folate. I simply added a piece of fruit for dessert and the meal was complete. (If you want a meatless meal, omit the bacon.)

The lentils I used were already fully cooked. This cut the preparation time in half! These convenient, prepackaged cooked lentils can sometimes be found in the produce section of your supermarket or at Trader Joe's. If you can't find cooked lentils, you can use canned that have been drained and rinsed or cook your own. They only take about 20 minutes to prepare, so you can still get dinner on the table in under an hour.

Seasoned Lentils with Vegetables
(Makes four ¾-cup servings)

2 cups cooked lentils
1 tablespoon olive oil
½ large onion, chopped
2 cloves garlic, minced
4 slices of ready-cook bacon, diced (or cooked turkey bacon, crumbled)
2 medium carrots, sliced
1 medium zucchini, quartered and sliced
1½ cups frozen broccoli florets, thawed
3 tablespoons fresh herbs, chopped (parsley, sage, rosemary, thyme, chives) or 2 teaspoons dried
1/3 cup beef or vegetable broth
1 tablespoon worcestershire or steak sauce
Salt and pepper to taste

1. Cook lentils according to package directions, except substitute low-sodium beef or vegetable broth in place of water for more flavor; set side.

2. Heat olive oil over medium high heat. Add onion and a pinch of salt. Cook, stirring occasionally, until onion is soft and translucent. Add garlic, bacon and carrots and cook, stirring occasionally, for 3-4 minutes. Add zucchini, broccoli and herbs and continue cooking for another 3 minutes or until vegetables are tender-crisp.

3. Add cooked lentils, broth, worcestershire sauce and season with salt and pepper to taste. Cook only until lentils are heated through. Serve hot.

Nutritional Information per serving: 204.5 calories, 27.5 g carbohydrate, 4.7 g total fat, 0.3 g saturated fat, 9.6 g fiber, 11.7 g protein.

Original recipe by Kathy Sheehan, copyright 2010

Tuesday, June 1, 2010

Peas & Carrots with Mint

It's time again to welcome the vegetables of early summer. Even though it is more convenient to reach for frozen, I can't resist the fun of shelling peas at least once a year. It's an annual ritual that really brings home the fact that summer is finally here! This is a great activity for kids, so get them involved, too. You'll want to cut the carrots into pea-size pieces so they'll cook in the same amount of time. Of course, if you want to get dinner on the table even faster, go ahead and use the frozen pea and carrot combination in your grocer's freezer for this recipe.

The mint in my little herb garden is already taking over (mint will do that, if you let it have it's way), so I had to think of a way to use it. The combined flavors of mint and peas are well known, so I gave it a try. The sprinkle of Splenda is optional, but I discovered that it enhanced and blended the mint with the vegetables even more to my liking. This was a beautiful and tasty side dish that I will be sure to repeat in the coming weeks.

Peas & Carrots with Mint
(Makes four ½-cup servings)

1 cup water, salted
3 medium carrots, quartered and sliced into small pieces
1½ cups fresh peas, shelled (or frozen)
1 teaspoon olive oil
1½ teaspoon zero trans fat buttery spread (I used Smart Balance)
¼ teaspoon lemon pepper (or to taste)
1/8 teaspoon salt
1½ tablespoons fresh mint, chopped (or 2 teaspoons dried)
1½ tablespoons lemon juice
½ packet of Splenda (optional, or to taste)

1. Bring water to boil in a medium saucepan and add salt. Add carrots and boil for 3-4 minutes. Add peas and return to a boil. Cook for an additional 3-4 minutes. Drain vegetables and discard water.

2. Return saucepan to medium heat and add olive oil and buttery spread. Add drained vegetables to pan and saute in oil for 2 minutes. Add lemon pepper, salt, mint, lemon juice and Splenda. Continue cooking until vegetables are cooked through. Serve hot.

Nutritional Information per serving: 84.7 calories, 10.4 g carbohydrate, 2.5 g total fat, 0.6 g saturated fat, 102.5 mg sodium, 2.6 g fiber, 2.9 g protein.

Original recipe by Kathy Sheehan, copyright 2010

Sunday, January 31, 2010

Carrot Cake Whoopie Pies with Cinnamon Cream Filling

It is freezing cold in Maine and, although the calendar still says January, I'm beginning to suffer from cabin fever. That's not good news, because I have many months of winter to endure before the thaw in April. To combat this restlessness, my husband and I took a drive down the coast yesterday to experience the brilliant sunshine, even though the temperature was 12-degrees outside! During our adventure, we stopped in York at the headquarters of Stonewall Kitchen, a gourmet food company that makes a wide range of unique products. This delicious recipe was inspired by one of their baking mixes that happened to catch my eye. Unfortunately, diabetes makes a traditionally prepared carrot cake or whoopie pie out of my reach, so I came up with my own recipe using an alternative flour to bring the carbs down to a reasonable 13 grams per serving and the taste is amazing!

Whoopie Pies are considered a New England phenomenon, although they are increasingly found across the country these days. Normally, they are chocolate cookies filled with a vanilla cream, but creative bakers are coming up with a variety of flavors to rival the traditional chocolate. I wouldn't deem this recipe a serving of vegetables, but it does include sweet, fresh grated carrots in a soft, cake-like cookie. Along with the creamy, cinnamon filling, this whoopie pie tastes like a delicious, light carrot cake. They were fun to make and eat...maybe being stuck inside isn't so bad!

Carrot Cake Whoopie Pies with Cinnamon Cream Filling
(Makes 32 cookies or 16 whoopie pies)

1½ cups almond flour (or finely ground almonds)
¾ cup all purpose flour
1 teaspoon baking soda
1 teaspoon baking powder
¼ teaspoon salt
½ teaspoon pumpkin pie spice
2 eggs
¼ cup sugar
½ cup canola oil
1/3 cup light sour cream
¾ cup Splenda granular
1½ teaspoons vanilla extract
1 teaspoon butter flavor extract
1 cup grated carrot

Filling Ingredients:
½ cup mascarpone cheese
½ cup almond milk (original or unsweetened)
2 tablespoons Splenda granular
1 teaspoon vanilla extract
½ teaspoon ground cinnamon
2 tablespoons fat-free, sugar-free vanilla instant pudding mix (dry powder)

1. Preheat oven to 375-degrees. Place parchment paper on cookie sheet or spray lightly with non-stick cooking spray and set aside.

2. In a small mixing bowl, sift together the flours, baking soda, baking powder, salt and pumpkin pie spice; set aside.

3. In a large mixing bowl and using a handheld or standing mixer, beat the eggs until light in color and increased in volume. Add sugar and continue beating until well combined. Slowly add the canola oil and beat on high for 1 minute. Add the sour cream, Splenda, and extracts and beat until well incorporated, stopping to scrape down sides of bowl at least once. Reduce speed and add the dry ingredients ¼ cup at a time until well combined, scraping down sides of bowl occasionally. Using a wooden spoon or rubber spatula, fold in the grated carrot.

4. Using a small cookie scoop or rounded tablespoon, drop batter onto prepared cookie sheet 2 inches apart (batter will spread during baking). Bake for 10-11 minutes until cookie springs back when lightly touched or when toothpick inserted in center comes out clean. Cookies will not brown much, so watch carefully and do not over bake. Remove from cookie sheet onto a wire rack to cool completely before filling.

5. To make cream filling, place mascarpone cheese in a large mixing bowl and add almond milk. Beat with a handheld or standing mixer on high until well combined and mixture is light and fluffy (it will resemble whipped cream). Add Splenda, vanilla, and cinnamon and continue to beat until incorporated. Add the 2 tablespoons of vanilla instant pudding powder and beat well. Place in refrigerator for 5 minutes to set cream.

6. To assemble whoopie pies, pair two cookies by size and place 1 slightly rounded tablespoon of cinnamon cream filling on the flat side of one cookie, top with second cookie and press gently. Repeat with remaining cookies. If not serving immediately, wrap each whoopie pie in plastic wrap and store in refrigerator.

Nutritional Information per whoopie pie: 209 calories, 13.1 g carbohydrate, 16 g total fat, 3 g saturated fat, 1.3 g fiber, 4.3 g protein.

Nutritional Information per cookie (no filling): 86.2 calories, 5.9 g carbohydrate, 6.4 g total fat, 0.6 g saturated fat, 0.6 g fiber, 2 g protein.

Nutritional Information per 1 tablespoon filling (recipe makes 20 tablespoons): 29.3 calories, 1 g carbohydrate, 2.4 g total fat, 1.4 g saturated fat, 0 g fiber, 0.4 g protein.

Original recipe by Kathy Sheehan, copyright 2010

How does this compare with a whoopie pie made with a traditional recipe? This recipe is considerably less in fat and carbohydrates and has only half the calories! For comparison, the nutritional information for a Pumpkin Whoopie Pie, which is similar in flavor to my carrot recipe, is an alarming 424 calories, 55.6 g carbohydrate, 21.7 g total fat, 8 g saturated fat, 1.5 g fiber, 3.4 g protein.

Saturday, October 3, 2009

Beef Burgundy with Roasted Vegetables

This dish is so satisfying and delicious on a cold or rainy autumn day, when you can feel winter starting to creep in. Normally, Beef Burgundy is served over rice or pasta but, since I avoid white starches, I prefer to eat mine with vegetables like a stew. Oven roasting is one of the easiest and tastiest ways to prepare vegetables, so I hope you'll give these a try. Of course, feel free to substitute and use whatever vegetables you have on hand or your favorites.

Another thing that is different in this recipe is the use of pureed cannellini beans as a thickener. The reason is to introduce more fiber and nutrition. The ingredient most often used to make a gravy is white flour, which really only adds carbs and very little else. Also, by doing this, it makes this recipe gluten-free. (For some people, the gluten in wheat products causes digestive discomfort and inflammation.) Since Beef Burgundy is a long time favorite of my husband's, I worried that he might be able to detect the difference and turn up his nose. I worried needlessly because he loved it!

Beef Burgundy with Roasted Vegetables
(Makes 4 servings)

1¼ pound high-quality stew meat or sirloin tips
1 tablespoon canola oil
1¼ cup very hot or boiling water
½ cup burgundy wine
1 tablespoon Gravy Master (seasoning & browning sauce)
¾ cup canned cannellini beans, drained and rinsed
Salt and pepper to taste

Roasted Vegetables:
2 carrots, peeled and cut into 1-inch pieces
2 parsnips, peeled and cut into ½-inch pieces (or 2 small turnips)
1 medium to large onion, cut into chunks
1 medium zucchini, cut into 1-inch pieces
1½ cup butternut squash, cut into 1-inch pieces
2 plum tomatoes, cut into large chunks
2 fingerling or small new potatoes, quartered (about ½ cup)
2 tablespoons olive oil
Salt and pepper to taste

1. In a heavy Dutch oven, heat ½ tablespoon canola oil on high heat. Add half of the meat and sear on all sides. Remove to plate. Heat remaining oil in pan and sear the remaining beef until well browned on all sides. Return meat to pan and immediately pour in hot water and stir to loosen brown bits from bottom of pan. Add the wine and Gravy Master to pot (liquid should just cover meat). Reduce heat to low, cover and simmer for 1 hour or until beef is tender.

2. After beef has simmered for about 30 minutes, begin preparing roasted vegetables. Preheat oven to 425-degrees. Prepare vegetables and toss with olive oil, salt and pepper until evenly coated. Spread out on a cookie sheet in a single layer. Arrange potatoes and zucchini cut side down. Roast in oven for 30 minutes, stirring once halfway through cooking time.

3. When beef is tender and while vegetables are finishing in the oven, take the cannellini beans and puree in a food processor or blender with several large spoonfuls of cooking liquid until completely smooth. Pour pureed beans into beef mixture and stir to combine. Continue simmering uncovered until liquid has reduced into gravy. (If too thick, add more water until proper consistency has been reached.) Add salt and pepper to taste.

4. Divide roasted vegetables evenly among serving plates. You may spoon beef burgundy over vegetables or on side to serve.

Nutritional Information per serving beef burgundy only, no vegetables: 272 calories, 7.8 g carbohydrate, 5.3 g total fat, 2.25 g fiber, 40 g protein.

Nutritional Information per serving with roasted vegetables and beef: 403 calories, 29.8 g carbohydrate, 10.4 g total fat, 6.6 g fiber, 41.9 g protein.


Original recipe by Kathy Sheehan, copyright 2009