Showing posts with label almond flour. Show all posts

Thursday, February 5, 2026

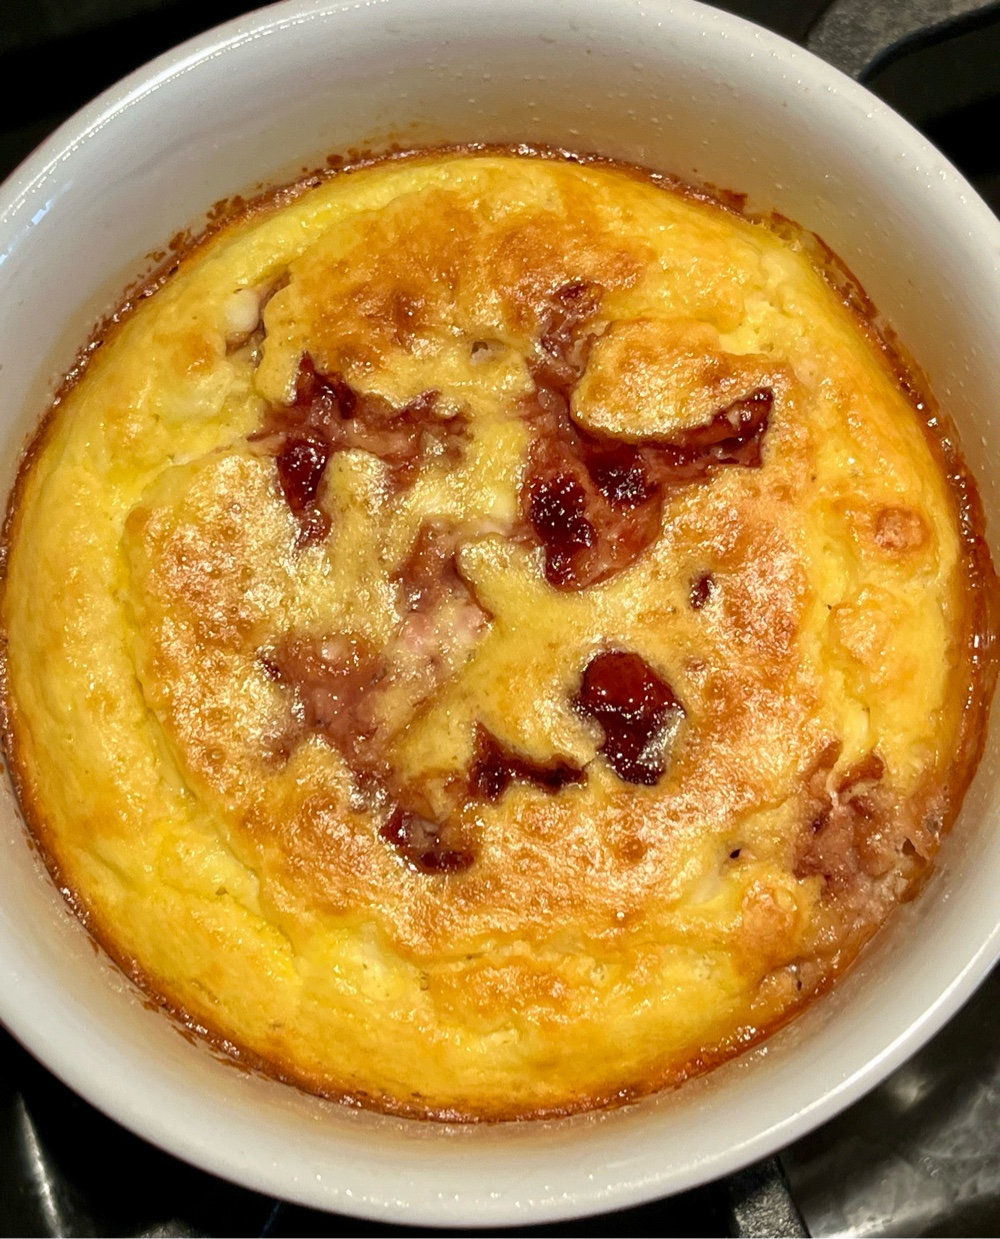
Baked Cottage Cheese Breakfast Bowl

Baked Cottage Cheese Breakfast Bowl
This high protein breakfast pudding can be made either sweet or savory! It makes one generous serving that leaves your body nourished and satisfied for hours.

Baked Cottage Cheese Breakfast Bowl
Makes 1 serving

Base Mixture:
½ cup cottage cheese (4% fat)
1 large egg
1/4 cup almond flour
1/4 teaspoon baking powder
A pinch of salt

Sweet Additions:
½ teaspoon vanilla extract
1-2 tablespoons allulose honey or sugar free maple syrup (or 6 drops monkfruit extract)
1/4 cup strawberries (chopped), or blueberries, fresh or frozen

Savory Additions:
1/4 cup ham, or cooked sausage, bacon or broccoli (chopped)
2 tablespoons shredded cheese
Freshly ground black pepper to taste
½ teaspoon chopped herbs

Preheat the oven to 350°F. Lightly grease one large oven-safe ramekin or small baking dish; set aside.

In a bowl, whisk together the base mixture of cottage cheese, egg, almond flour, baking powder, and salt until smooth.

If making sweet, whisk in your sweetener of choice and vanilla. Then gently fold in the fruit.

If making savory, add the meat or chopped broccoli, cheese, pepper and herbs to the base mixture and stir to combine.

Pour the mixture into the greased ramekin and bake for 25-30 minutes until set and lightly golden on top. Cool for about 10 minutes before serving.

Nutritional Information per serving: Varies, depending on additions to base mixture. Base mixture is 330 calories, 9.7 g carbohydrate (2 g dietary fiber, 5.2 g sugars), 22.8 g total fat (5.6 g saturated fat, 0 g trans fat), 201 mg cholesterol, 607 mg sodium, 255.6 mg calcium, 229 mg potassium, 2 mg iron, 141 IU Vit A, 24.3 g protein. Net carbs per serving: 7.7 grams.

Photo and recipe by Kathy Sheehan, copyright 2026
All rights reserved. Please do not duplicate without the author’s permission.

Monday, October 27, 2025

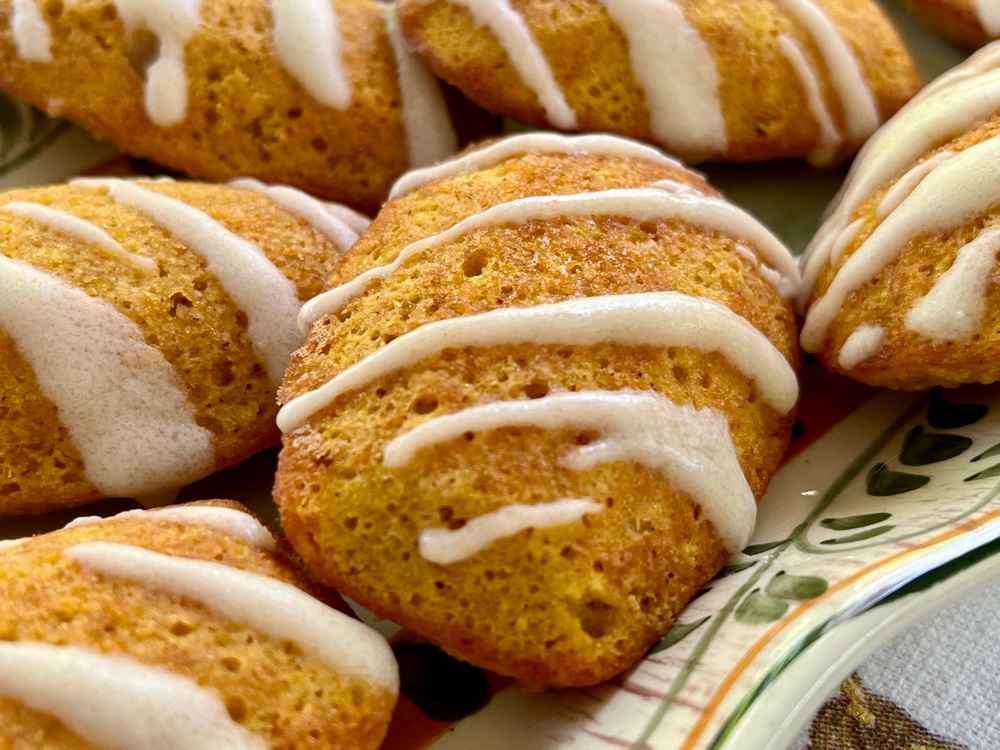
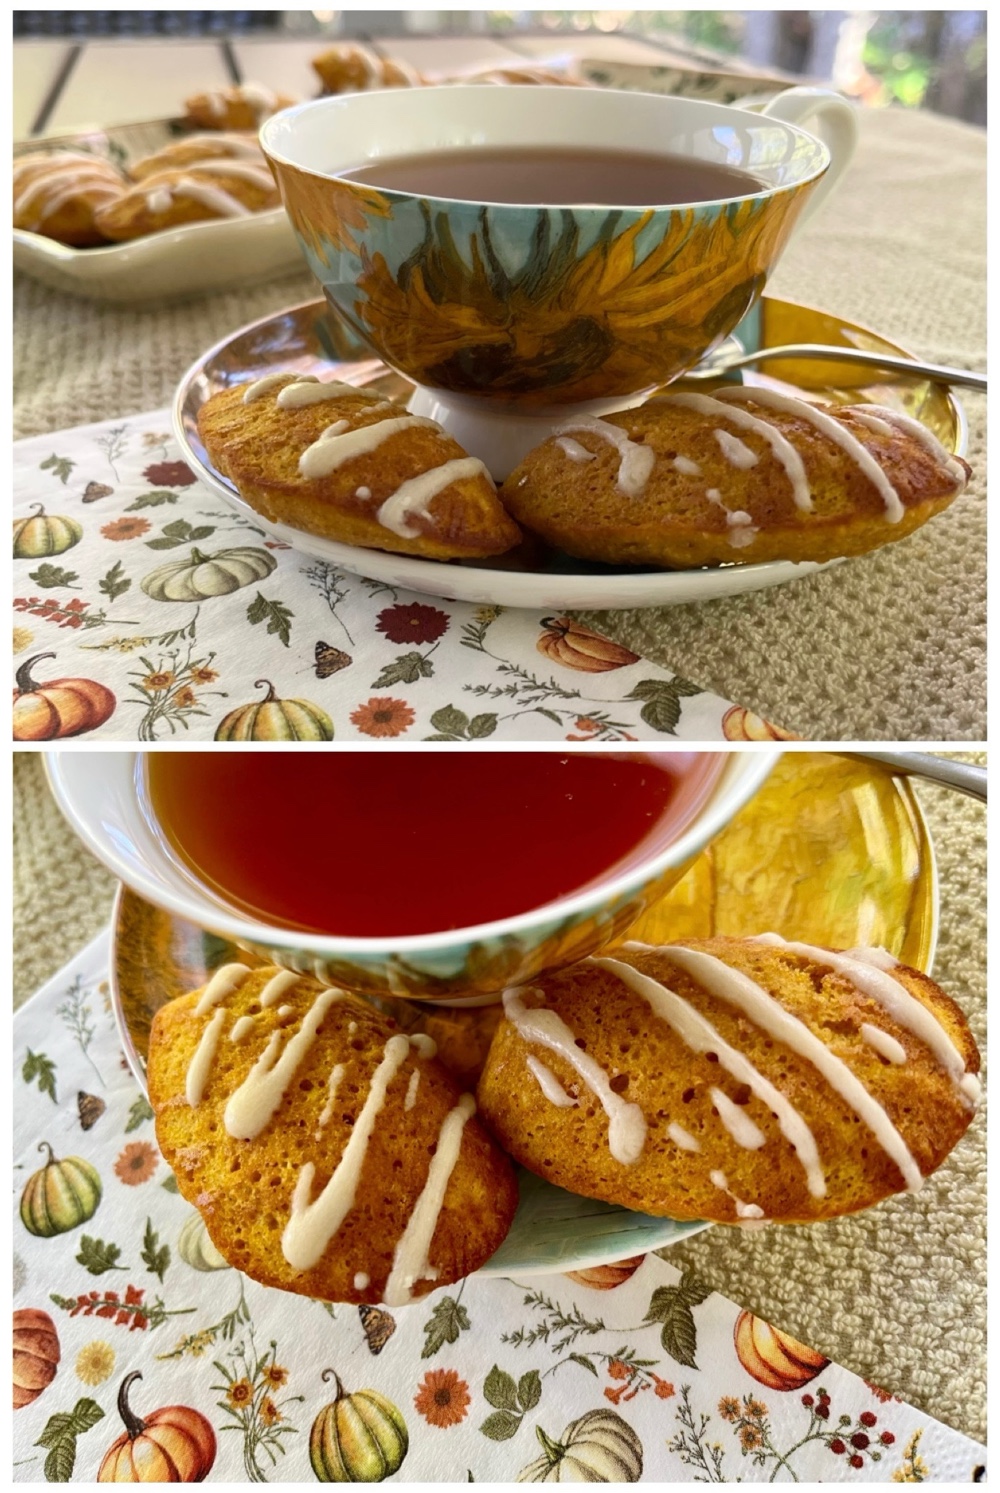
Keto Pumpkin Madeleines with Brown Butter Glaze

Keto Pumpkin Madeleines with Brown Butter Glaze
Madeleines are scallop-shaped, mini French Butter Cakes, often thought of as cookies, that are a delicious snack enjoyed with a cup of tea in the afternoon. This recipe is perfect at this time of year, when pumpkin and warm spices are most popular. You’ll need a madeleine baking pan to create that distinctive scallop shape but, if you don’t have one, a mini muffin pan will work too.

Keto Pumpkin Madeleines with Brown Butter Glaze
Makes 10-12 cookies

Madeleines:
½ cup almond flour
1 tablespoon coconut flour
2 tablespoons chickpea flour (or another 2 tablespoons almond flour)
1 teaspoon baking powder
½ teaspoon pumpkin pie spice
1/4 teaspoon salt
1/4 cup low carb brown sugar substitute sweetener 
2 large eggs, room temperature 
1 teaspoon vanilla bean paste (or extract)
1/4 cup pumpkin puree
2 tablespoons melted unsalted butter (plus 1 tbsp for greasing pan)

Brown Butter Glaze:
2 tablespoons unsalted butter 
2 tablespoons powdered erythritol-based sweetener* (see note)
½ teaspoon vanilla extract
2 teaspoons low carb milk of choice (more or less to reach proper glaze consistency)

1. Preheat your oven to 350°F. Brush the madeleine cookie pan very well with melted butter; set aside.

2. In a small bowl, whisk together the almond flour, chickpea flour, coconut flour, baking powder, pumpkin pie spice and salt; set aside.

3. In a separate bowl, add the eggs, brown sugar substitute sweetener, vanilla, bean paste or extract, pumpkin purée, and whisk vigorously until foamy, about 30 seconds. Add the melted butter and mix until well combined.

4. Add the flour mixture and whisk until while combined and the batter is smooth and creamy.

5. Spoon the batter into the madeleine baking mold just up to the rim so that it can rise and puff up nicely. Do not overfill.

6. Bake for 11 to 12 minutes, just until the sides are slightly browned and the tops are no longer moist to the touch. Do not overbake as they can crisp up like cookies. You want them soft and pillowy. While the cookies are cooling, make the glaze. 

7. These madeleines can be enjoyed immediately out of the oven and are best served freshly baked. They can be kept at room temperature for a few days or they can be refrigerated for up to a week or frozen (without glaze) for months. 

To make the Brown Butter Glaze:

1. Place the 2 tablespoons of unsalted butter into a light colored or stainless sauce pan. Heat over medium low heat until the butter is melted and stops sizzling, swirling the pan occasionally to prevent burning. Continue simmering and swirling the pan until the butter has turned a golden color. Watch carefully as it is too easy to burn the brown butter! Once the butter has browned, pour it into a small bowl

2. Add the powdered sweetener, vanilla extract, and stir until smooth. Add just enough milk, 1/2 teaspoon at a time, until the glaze has reached the proper consistency. If the brown buttered glaze ceases up, heat gently in the microwave for a few seconds and stir briskly until a smooth glaze has formed.

3. Drizzle about 3/4 of a teaspoon of glaze on each cookie in a loose striped pattern. Allow the glaze to set up for a while. The glaze will harden as it sets.

*Notes: An allulose sweetener will remain sticky and not set up properly.

Keto Pumpkin Madeleines with tea
Nutritional Information per cookie: 79 calories, 2.5 g carbohydrates (0.8 g dietary fiber, 0 g sugars), 6.6 g total fat (2.9 g saturated fat), 41 mg cholesterol, 96 mg sodium, 38.8 mg calcium, 22 mg potassium, 49 IU Vit A, 2.6 g protein. Net carbs per serving: 1.7 grams

Photos and recipe by Kathy Sheehan, copyright 2025
All rights reserved. Please do not duplicate without the author’s permission.


Saturday, May 31, 2025

Low Carb Shrewsbury Biscuits (aka Shrewsbury Cakes)

Low Carb Shrewsbury Biscuits

Shrewsbury Biscuits, also known as Shrewsbury Cakes, are a classic English dessert with a history stretching back to at least the 17th century. The first time these cookies were printed in a cookbook was in 1658. This Renaissance-era cookbook called The Compleat Cook included a recipe using sugar, flour, eggs, butter, and lemon zest. Shrewsbury Biscuits are still a popular cookie in the UK, and are especially enjoyed at teatime. In keeping with tradition, I have developed this low carb, sugar-free version that includes lemon zest, which is one of the most common flavorings. They are light, delicate, and buttery! I think you will agree with the British, these delightful and distinctive shortbread cookies are perfect with a cup of tea!

Low Carb Shrewsbury Biscuits
Makes 12-14 cookies

1½ cups almond flour, spooned and leveled
1/4 cup coconut flour, spooned and leveled
1/4 teaspoon sea salt
Zest of 1 lemon (about 2 teaspoons) 
6 tablespoons unsalted butter, softened
1/3 cup granulated erythritol sweetener (erythritol is needed for a crisp cookie)
1 egg yolk
½ teaspoon vanilla extract

1. In a small bowl, whisk together the almond flour, coconut flour, lemon zest, and salt. Set aside.

2. Add the softened butter and sweetener to a large mixing bowl and, using an electric mixer, cream together. Add the vanilla extract and egg yolk and beat on medium until combined.

3. Add the dry ingredients to the bowl. Mix together with the electric mixer until a dough forms. The dough may appear crumbly, but should come together when you press it between your fingers. Form the dough into a ball and wrap with plastic wrap. Place the dough in the refrigerator to chill for about 30 minutes.

4. While the dough is chilling, preheat the oven to 325°F. Line a baking sheet with parchment paper and set aside.

5. Once chilled, lay out a piece of parchment paper or plastic wrap on a working surface. Turn the dough out onto the parchment paper, flatten it, and place another piece of parchment paper or plastic wrap on top. Roll the dough with a rolling pin until it is about 1/4 inch thick.

6. Use a 2 inch round, fluted biscuit or cookie cutter to cut out your cookies. Place each cookie evenly spaced on the prepared baking sheet, leaving about 1 inch of space between each cookie. These cookies do not spread when they are baked. Repeat until all the dough is used. (This recipe yields about 12 to 14 cookies.) Decorate with a crisscross pattern, if desired (see notes below). At any time, if the dough becomes difficult to handle, place it in the refrigerator for 10 minutes. This dough is much easier to handle when slightly chilled.

7. Place the cookies in the preheated oven on the middle rack and bake for 12 to 14 minutes or until the edges turn golden brown. Do not overbake. You want the tops of the cookies to be just firm to the touch, but still light in color. Remove the cookies from the oven and allow to cool completely on the baking sheet before handling. The cookies will be soft and quite delicate when warm from the oven, but will crisp up on the pan and become firmer as they cool. Cookies can be stored in an airtight container at room temperature for a week.

Low Carb Shrewsbury Biscuits with tea

Notes: The crisscross pattern is traditional in this cookie. The interesting story behind this design is that sophisticated ladies sipping tea in a bygone era would never have considered picking up a whole cookie and biting into it, risking crumbs falling on their fine clothing! That would have been extremely lacking in good manners! Instead, the crisscross pattern provided score lines that made it easy to break the cookie into neat, tiny, bite-size pieces. Less mess and definitely more sophisticated. Although it may look complicated, this design can be easily made using a clean fine tooth comb and a toothpick! Here’s how to do it:

1.) Press the comb across the center of the cookie, then again about 3/4 of an inch from each edge, so there are three parallel lines. Don’t press all the way down, but just about halfway.  2.) Turn the comb 90° and repeat. You should end up with a diamond design, or little squares. 3.) Now use the toothpick to poke a hole into the center of each square. It’s okay to push it all the way down.

Crisscross Pattern Steps

Use toothpick to make dots

Nutritional Information per cookie: 121 calories, 3.8 g carbohydrates (1.6 g dietary fiber, 0.6 g sugars), 11 g total fat (4 g saturated fat, 0 g trans fat), 28 mg cholesterol, 41 mg sodium, 29 mg calcium, 72 mg potassium, 0 mg iron, 51 IU Vit A, 3 g protein. Net carbs per cookie: 2.2 grams

Recipe and photos by Kathy Sheehan, copyright 2025
All rights reserved. Please do not duplicate this recipe without the author’s permission.

Wednesday, March 6, 2024

Keto Peanut Butter Thumbprint Cookies

Keto Peanut Butter Thumbprint Cookies

I am not a professional baker, but I do like to create delicious and beautiful desserts. For typical Thumbprint Cookies, you simply roll the dough into balls and press your thumb to make an indentation for the filling. I could have done that with this recipe but, recently on vacation, I visited my favorite cooking/kitchen store and found a set of thumbprint cookie presses that take these simple cookies to a new level of elegance. (I found these cookie presses at Williams Sonoma, but you can find similar presses online, in other stores or on Amazon.) Fill them with either sugar free jam or chocolate ganache. Both pair exceptionally well with the peanut butter cookie base. Peanut butter & jelly? Peanut butter & chocolate? Which will be your favorite?

Keto Peanut Butter Thumbprint Cookies
Makes 20 cookies

Cookies:
1 cup almond flour
1/4 cup peanut butter powder (no sugar added)
1 tablespoon unflavored whey protein powder
2 tablespoons oat fiber powder (not oat flour!)
2 tablespoons coconut flour
1/4 teaspoon salt
8 tablespoons unsalted butter, softened (1 stick)
½ cup erythritol-based granulated sweetener (I used LaKanto Monkfruit Classic)
1 large egg
1 tablespoon low carb milk of choice
½ teaspoon vanilla extract

Jam Filling:
Sugar free jam (any flavor)

Chocolate Ganache Filling:
1 ounce heavy cream
1 ounce sugar free chocolate chips (such as Lily’s brand or Guittard Keto Chips)

1. In a medium bowl, whisk together the almond flour, peanut butter powder, whey protein powder, oat fiber, coconut flour and salt until no lumps remain; set aside. In a large bowl, beat the softened butter and 1/2 cup of erythritol sweetener together until creamy, using an electric mixer with a paddle attachment, if you have one. Beat in the egg, milk, and vanilla extract, and then beat in the dry ingredients until the dough comes together. 

2. Turn dough out onto a silicone mat or parchment paper that has been dusted with coconut flour. Pat dough into a rough circle and then top with a large piece of parchment paper or plastic wrap. Roll out the dough to about 5/8 inch thickness. Place the rolled out dough on a cookie sheet and chill in the refrigerator for about 30 minutes or in the freezer for 10 to 15 minutes. The dough is much easier to handle and will not stick to the cookie presses when cold. 

3. Preheat the oven to 325°F and line one large baking sheet with a silicone baking mat or parchment paper.

4. Using cookie presses with indentations in the center, cut out cookies and lift carefully with a spatula or knife and place on the lined cookie sheet. (Or roll into balls and press into the center with your thumb to create a depression to be filled with jam or chocolate ganache.) These cookies do not spread or puff up during baking.

Williams Sonoma Thumbprint Cookie Presses

5. Re-roll your dough and cut out more cookies. If your dough gets too soft to work with or begins sticking to the cookie cutters, roll it out to the proper thickness and return it to the refrigerator or freezer for a bit to cool and firm up again.

6. If using jam, go ahead and fill the depression with sugar free jam before baking (see photo below). If using chocolate ganache, bake the cookies first and allow them to cool completely before filling the indentation with ganache.

Fill cookies with jam before baking

7. Bake the cookies for 14 to 16 minutes, or until they are golden brown around the edges. Remove from the oven and let the cookies cool on the pan until firm. The cookies will be quite soft when warm from the oven, but they will firm up as they cool. Remove to a wire rack to cool completely.

8. To make the chocolate ganache filling: Heat up the heavy cream until bubbles appear at the edges and the cream is quite hot and steamy. Remove from heat and add the chocolate chips. Allow the mixture to sit for several minutes undisturbed and then whisk until the chocolate is completely melted and the ganache is thick and creamy. Use a small spoon to carefully fill the center of each cookie. Refrigerate the cookies for 15 minutes or allow them to sit at room temperature until the ganache has cooled completely and firmed up. 

Notes: How many cookies you get depends on the size of your cookie cutters. It is best to use an erythritol-based sweetener for this recipe. Allulose can be substituted, or a combination of erythritol and allulose, but the cookies will be softer and more delicate when cooled. 

Keto Thumbprint Cookies

Nutritional information per cookie: 72 calories, 2.7 g carbohydrate (1.5 g dietary fiber, 0.2 g sugars, 1 g sugar alcohols), 7.1 g total fat (3.6 g saturated fat, 0 g trans fat), 23 mg cholesterol, 37 mg sodium, 5.8 mg calcium, 14 mg potassium, 50 IU Vit A, 1 mg Vit C (if using jam filling), 1.3 g protein. Net carbs per cookie: 1.2 grams

Recipe and photos by Kathy Sheehan, copyright 2024
All rights reserved. Please do not duplicate without the author’s permission. 

Saturday, February 3, 2024

Keto Two-Tone Valentine Heart Cookies

Keto Two-Tone Valentine Heart Cookies
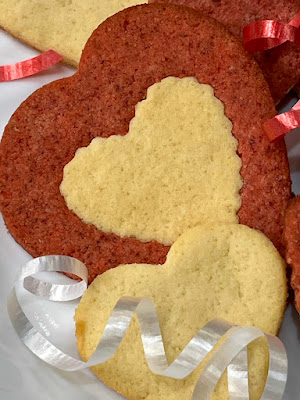
These two-tone Valentine cookies are made with one dough, that is then divided and one half flavored with strawberries! If you use a set of graduated sized cookie cutters, like I did, it’s fun to create small cutouts in the larger cookies and fill them with the same size cutout of a different color. Each heart cookie is a puzzle! Of course, if you don’t have a set of heart cookie cutters, you can make these cookies into any shape using any cookie cutter. These red and white cookies are the perfect Valentine’s Day treat!

Keto Two-Tone Valentine Heart Cookies
Makes approximately 12 servings (depending on the size of your cookie cutters)

1 cup almond flour
5 tablespoons coconut flour
1 tablespoon unflavored protein powder
1/4 teaspoon salt
8 tablespoons unsalted butter, softened (1 stick)
½ cup erythritol sweetener* (see note below)
1 large egg
1 tablespoon low carb milk of choice
½ teaspoon vanilla extract
1 tablespoon unsweetened freeze dried strawberry powder
1/4 teaspoon strawberry extract
1 teaspoon water
2 drops red food coloring
A set of heart cookie cutters in graduated sizes (optional, but that’s what I used. My set is Mrs. Anderson’s brand.)

Mrs. Anderson’s Heart Cookie Cutter Set

1. Before you begin, in a food processor, nut mill, or using a mortar and pestle, grind the unsweetened freeze dried strawberries into a fine powder; set aside.

Freeze Dried Strawberries

2. Prepare two work surfaces, each with a silicone baking mat or a large piece of parchment paper. Dust lightly with coconut flour.

3. In a medium bowl, whisk together the almond flour, coconut flour, protein powder, and salt until no lumps remain. In a large bowl, beat the softened butter and 1/2 cup of erythritol sweetener together until creamy using an electric mixer. Beat in the egg, milk and vanilla extract, and then beat in the dry ingredients until the dough comes together. Remove half of the dough from the bowl and set aside.

4. To the remaining dough, add the 1 tablespoon of strawberry powder, 1/4 teaspoon strawberry extract, 1 teaspoon of water and two drops of red food coloring. Beat until the dough is uniform in color.

5. Turn both doughs out onto the two prepared work surfaces. Pat each into a circle and then top with a large piece of parchment paper. Roll out each ball of dough to about 1/3 inch thickness. Place the rolled out dough and mat on a cookie sheet and chill in the refrigerator for about 30 minutes. (The dough is much easier to handle when cool.) 

6. Preheat the oven to 325°F and line a large baking sheet with a silicone mat or parchment paper. Using heart cookie cutters, cut out cookies and lift carefully with a spatula. For fun and variety, cut a small heart out of the middle of a larger heart, then fill the cut out space with a small heart of a different color, pressing gently to fuse the doughs together.

Keto Valentine Heart Cookies

7. Place cookies on the prepared baking sheet. These cookies do not spread as they bake, so space about 1” apart on the baking sheet. Re-roll your dough when necessary and cut out more cookies. (If your dough gets too soft to work with, you can return it to the refrigerator for a bit to cool and firm up again.)

8. Bake the cookies for about 12 minutes, or until they are just starting to brown around the edges. Remove from the oven and let the cookies cool for 10 minutes on the pan. The cookies will be quite soft right out of the oven, but will firm up as they cool. Remove to a wire rack to cool completely. 

Notes: How many cookies you get depends on the size of your cookie cutters. *I recommend using a sweetener that is erythritol based for a crisper, firmer cookie. Allulose will result in a soft and delicate cookie.

Low Carb Two-Tone Valentine Heart Cookies

Nutritional Information per serving (1/12th of recipe): 117 calories, 3.7 g carbohydrates (1.4 g dietary fiber, 0.9 g sugars, 1 g sugar alcohols), 11.4 g total fat (6.1 g saturated fat, 0 g trans fat), 36 mg cholesterol, 59 mg sodium, 9.1 mg calcium, 22 mg potassium, 78 IU Vit A, 1 mg Vit C, 1.7 g protein. Net carbs per serving: 2.3 grams

Photos and recipe by Kathy Sheehan, copyright 2024
All rights reserved. Please do not duplicate without the author’s permission.

Wednesday, December 20, 2023

Keto Raspberry Almond Mini Breads with Streusel Topping (or Muffins)

Keto Raspberry Almond Mini Breads

Looking for a last minute gift to share with friends or family? These healthier, sugar free mini bread loaves will be enjoyed by anyone, whether they are low carb or not! They’re easy to make because you start with a boxed keto muffin mix!

Raspberry Almond Mini Breads with Streusel Topping (or Muffins)
Makes about 4 mini breads (depending on pan size) or 12 muffins

5 eggs, room temperature 
½ cup neutral oil, such as avocado oil
1 cup low carb milk of choice (non-dairy is fine)
1 teaspoon vanilla extract
½ teaspoon almond extract
8 drops Monkfruit extract (or 2 tablespoons zero carb granulated sweetener)
1 pint fresh raspberries
1 box of King Arthur’s Keto All Purpose Muffin Mix

Streusel Topping:
1/4 cup almond flour
1/4 cup erythritol-based sweetener (I like LaKanto Classic Monkfruit sweetener)
2 tablespoons unsalted butter

King Arthur’s Keto Muffin Mix

1. Using a pastry cutter, mix together the streusel topping ingredients until pea-size crumbles form. Set aside. Spray a muffin tin or mini loaves pan with nonstick spray; set aside. Preheat oven to 350°F.

2. In a standing mixer (using a paddle attachment) or using an electric mixer, mix together the eggs, oil, milk, and extracts. Blend well.

3. Add the muffin mix and mix until combined. Fold in the raspberries and divide the batter evenly between the mini bread pans or muffin cups. Sprinkle streusel topping on top of each loaf or muffin.

4. Bake for about 28 minutes for muffins or 38 to 40 minutes for mini loaves. Bake until the internal temperature reaches 206°F.

Baked Mini Breads

5. Remove from oven and allow the muffins or loaves to cool in the pan for about 15 minutes. Turn out the muffins or loaves onto a wire rack to cool completely before serving. These breads or muffins freeze beautifully. Allow to cool completely, then wrap with plastic wrap and freeze for up to 2 months. Thaw to room temperature before serving.

Slice and enjoy!

Nutritional Information per serving (1/12th of recipe or 1 muffin): 97 calories, 12.5 g total carbohydrates (2.7 g dietary fiber, 2.3 g sugars, 6 g sugar alcohols), 5.5 g total fat (2.9 g saturated fat, 0 g trans fat), 83 mg cholesterol, 99.5 mg calcium, 164 mg potassium, 2 mg iron, 7 mg Vit C, 54 IU Vit A, 4.1 g protein. Net carbs per serving: 3.8 grams

Photos and recipe by Kathy Sheehan, copyright 2023
All rights reserved. Please do not duplicate without the author’s permission.
Thursday, November 30, 2023

Keto Chicken Pot Pie (or Turkey Pot Pie)

Keto Chicken Pot Pie

This classic recipe is a great way to use leftover cooked chicken or turkey, something we often have on hand around the holidays. This low carb version has all the flavor of a traditional pot pie: the vegetables and chicken or turkey in a creamy gravy and topped with a flaky crust. Leftovers just don’t get any better than this!

Keto Chicken Pot Pie (or Turkey Pot Pie)
Makes 6-8 servings

Filling:
1 tablespoon butter
2 cups leftover cooked chicken or turkey, cut into bite-size pieces
½ cup onion, finely chopped
1 small carrot, finely chopped
1 clove garlic, minced
½ teaspoon dried thyme
1 tablespoon white wine vinegar
1 cup chicken broth
1/4 cup peas, fresh or frozen (no need to defrost)
½ cup heavy cream
1/4 teaspoon sea salt
1/4 teaspoon ground black pepper

Crust:
½ cup coconut flour
½ cup almond flour (or pecan flour for lower oxalate)
1/3 cup flaxseed meal
½ teaspoon xanthan gum
5 tablespoons unsalted butter, melted
2-3 eggs, beaten

1. Preheat oven to 375°F. Grease a 9 inch pie pan.

2. Heat a large skillet over medium high heat. Melt 1 tablespoon of butter in the skillet. When butter has melted, add onions and carrots to the skillet. Sprinkle with a little salt and pepper. Turn the heat to medium low. Cook, stirring occasionally, until the onions begin to brown at the edges. Stir in garlic and dried thyme. Cook one minute, stirring constantly.

3. Stir in vinegar, scraping up any brown bits. When vinegar has almost completely evaporated, stir in the chicken broth.

4. Turn the heat to medium high. Simmer broth, stirring occasionally, until it thickens, about 10 minutes. The broth is thick enough when you can draw a line on the bottom of the pan with a spoon and the line does not immediately fill in. While the filling simmers, prepare the crust. 

5. Once the broth has thickened slightly, add the heavy cream, cooked chicken or turkey and peas. Bring to a simmer. Turn the heat to low. Simmer until mixture is thick and gravy-like in consistency. Taste before adding additional salt and pepper. Season to taste with salt and pepper, if necessary.

6. To make the crust, in a medium mixing bowl, whisk together the coconut flour, almond flour, ground flaxseed meal, xanthan gum, and salt.

7. Using a fork, stir in the melted butter, coating all the mixture until it resembles crumbs. Add the beaten egg. Start with two eggs, only adding a third egg if needed.

8. Gather mixture into a ball and place on a piece of plastic wrap. Top with a second piece of plastic wrap and, using a rolling pin, roll into a disk to cover the top of the pie, about 1/4 inch thick.

9. To assemble, pour the filling into the prepared pie pan. Gently place dough over the filling and crimp the edges. Cut a hole in the center to allow steam to escape. Bake in the preheated oven for 20 to 25 minutes, or until crust has browned.

Keto Chicken or Turkey Pot Pie

Nutritional Information per serving (1/8th of recipe): 294 calories, 10 g carbohydrate (6 g dietary fiber, 2.6 g sugars), 23 g total fat (11 g saturated fat, 0 g trans fat), 123 mg cholesterol, 282 mg sodium, 30.7 mg calcium, 160 mg potassium, 1 mg iron, 2 mg Vit C, 525 IU Vit A, 16.8 g protein. Net carbs per serving: 4 grams

Photos and recipe by Kathy Sheehan, copyright 2023
All rights reserved. Please do not duplicate without the author’s permission.
Wednesday, July 12, 2023

Keto Shortcakes

Keto Shortcakes

Strawberry Shortcake is a summer tradition! Some people like theirs on a biscuit but, when I was growing up, we bought the little packaged shortcake cups often displayed near the strawberries in the summer months (see image below). They were light sponge cakes with a hint of lemon that soaked up the juices from the berries. I set out to recreate those iconic snack cakes and have succeeded with this recipe! These lightly sweet mini cakes are soft, have a light and airy texture and, if baked in a shortcake pan (as pictured), are nearly identical to the shortcakes I remember. Of course, if you don’t have a shortcake baking pan, just use a regular muffin pan. Piled high with berries and cream, this is a summer treat everyone will enjoy!

Store bought vs. Homemade Shortcakes

Keto Shortcakes
Makes 6 shortcakes (or muffins)

3 eggs
2 tablespoons lemon juice
1/4 cup heavy cream
½ teaspoon vanilla extract
1/4 teaspoon lemon extract
6 tablespoons Swerve Confectioners or LaKanto Powdered Monkfruit sweetener 
1/4 cup coconut flour
1/4 cup almond flour (or substitute an additional 1 TB coconut flour for nut free)
1 tablespoon unflavored whey protein powder
1½ teaspoons baking powder
1/4 teaspoon baking soda
1/4 teaspoon salt

Suggested Topping:
1 pint fresh strawberries, cut into fourths
1 tablespoon allulose or an erythritol-based powdered sweetener 
Serve with whipped cream


1. Spray a muffin pan with nonstick spray. Preheat overnight to 350 degrees F.

2. Place eggs, lemon juice, cream, vanilla extract, lemon extract and confectioners sweetener into a large bowl. Using an electric mixer, blend until combined or whisk by hand vigorously until well aerated.

3. In a small bowl, whisk together the coconut flour, almond flour, whey protein powder, baking powder, baking soda and salt until no lumps remain. Add the dry ingredients into the wet ingredients all at once and mix on low, then increase to medium speed. Scrap down the sides of the bowl and blend again. Once well combined, evenly pour the batter into the prepared baking pan or into each muffin cup  (¾ full).

4. Bake for 20 to 24 minutes, or until a toothpick in the center comes out clean. Allow to cool in the pan for 10 minutes before removing the cakes or muffins to a wire rack to cool completely.

5. Meanwhile, sprinkle allulose or your sweetener of choice over the strawberries, stir to coat the berries and allow to sit at room temperature for about 30 minutes. To serve, top the cake with strawberries and whipped cream. Enjoy!

6. Storage: These cakes can be stored at room temperature for 2 days, or refrigerate for longer. They can also be well wrapped and frozen up to 3 months. They are best served at room temperature.

Custard Filled Shortcake

Nutritional Information per mini cake (no topping): 106 calories, 4.6 g carbohydrate (1.8 g dietary fiber, 0.6 g sugars, 1 g sugar alcohols), 8.3 g total fat (4 g saturated fat, 0 g trans fat), 106 mg cholesterol, 208 mg sodium, 103 mg calcium, 249 mg potassium, 1 mg iron, 81 IU Vit A, 2 mg Vit C, 4.4 g protein. Net carbs per serving: 1.8 grams

Photos and recipe by Kathy Sheehan, copyright 2023
All rights reserved. Please do not duplicate without the author’s permission. 
Saturday, July 1, 2023

Keto Bacon and Cheese Dutch Baby Pancake

Keto Bacon and Cheese Dutch Baby Pancakes

This fluffy, puffy egg pancake is baked in the oven in a preheated, hot skillet. When it comes out of the oven, it is impressive! I use a 6-inch cast iron skillet, which imparts a higher rise and nice crust. Similar to a puffy omelet, but so much easier to make.

Keto Bacon and Cheese Dutch Baby Pancake
Makes 1 serving

1 tablespoon unsalted butter
6 inch heatproof skillet
2 large eggs
2 tablespoons heavy cream
2 tablespoons water
2 tablespoons almond flour (or 1 tablespoon coconut flour for nut free)
Salt and pepper to taste
2 slices cooked bacon, chopped
1 ounce cheddar cheese, shredded
Sugar free maple syrup (optional)

1. Placed the 1 tablespoon of unsalted butter into your skillet. Place the skillet into the oven and preheat to 400°F.

2. Meanwhile, whisk together the eggs, cream, water, almond flour, salt, and pepper. You can do this in a blender or food processor for an extra fluffy pancake.

3. When the oven and pan are preheated, swirl the melted butter all around the bottom and sides of the skillet. Pour the egg mixture into the hot skillet. Sprinkle the chopped bacon and cheese on top. Return the skillet to the oven and bake for 14 minutes until puffy and golden.

4. Remove the skillet from the oven and use a sharp knife to loosen the pancake from the sides of the pan. Transfer the pancake to a serving plate and drizzle sugar-free maple syrup on top, if desired. Eat it immediately. The pancake will deflate as it cools.

Cooked Keto Dutch Baby Pancake

Nutritional Information per serving (entire recipe): 618 calories, 2.5 g carbohydrate (0.9 g dietary fiber, 0.4 g sugars), 56.7 g total fat (27 g saturated fat, 0 g trans fat), 491 mg cholesterol, 723 mg sodium, 270.4 mg calcium, 276 mg potassium, 2 mg iron, 480 IU Vit A, 26.8 g protein. Net carbs per serving: 1.6 grams

Recipe and photos by Kathy Sheehan, copyright 2023
All rights reserved. Please do not duplicate without the author’s permission. 

Monday, June 12, 2023

Keto Black and White Cookies

Keto Black and White Cookies

I’ve been trying for years to create an authentic, sugar free, Black and White cookie. Well, this is it! In this recipe, I start with raw macadamia nuts and process them in a food processor (or blender) to make smooth and creamy macadamia nut butter. This is the key to making these light, puffy, tender and cake-like cookies, which are the base of this iconic cookie. I chose macadamia nuts for the base of my cookie batter because they are the lowest carb and highest fat of all the nuts, mild in flavor, plus they’re much lower in oxalates, minimizing the need for almond flour. This cookie is a dream come true!

Keto Black and White Cookies
Makes 18 cookies

Cookies:
1½ cups raw macadamia nuts
2 large eggs
1 tablespoon unsalted butter, very soft or melted
1 teaspoon lemon juice
1½ teaspoons vanilla extract 
¾ cup powdered low carb sweetener (I used Confectioners LaKanto Monkfruit sweetener)
1/4 cup almond flour
1½ tablespoons oat fiber powder (not oat flour!)
2 tablespoons coconut flour
1 tablespoon unflavored whey protein powder
1 teaspoon baking powder
1/4 teaspoon baking soda
A pinch of salt
1-2 tablespoons water, only if needed!

Glaze:
1½ cups powdered low carb sweetener* (see note)
1 tablespoon vegetable glycerin or liquid allulose (it adds shine to the glaze, omit if you don’t have any)
¾ teaspoon lemon juice
½ teaspoon vanilla extract 
2-3 tablespoons water (or more, if needed)
1/4 cup unsweetened Dutch-process cocoa powder
More water for chocolate glaze, as needed

1. Preheat oven to 350°F. Line a rimmed baking sheet with a silicone baking mat or parchment paper.

2. In a food processor or powerful blender, process the macadamia nuts until a smooth nut butter forms, scraping down the sides occasionally. Add the eggs, softened butter, lemon juice and vanilla extract. Process until the mixture is completely smooth and no lumps remain.

3. Transfer the nut mixture to a large mixing bowl. Add the powdered sweetener and, using an electric mixer with the paddle attachment (if you have one), mix until the sweetener is completely incorporated.

4. In a small bowl, combine the almond flour, oat fiber powder, coconut flour, whey protein powder, baking powder, baking soda and salt. All at once, add the dry ingredients to the nut mixture and mix until the ingredients are well combined. Let the batter rest for a few minutes to allow the coconut flour to absorb the liquid, then mix again. What you’re looking for is a thick, but cohesive batter that is like a thick cake batter, slightly looser than a dough. (Only if needed, add water 1 teaspoon at a time until the proper consistency is reached.)

5. Using a 1½ tablespoon cookie scoop (size 40), drop the cookie batter onto the lined cookie sheet about 1½ inches apart. The cookies will spread a bit as they bake.

6. Bake for 12 to 14 minutes (begin checking them at 12 minutes). Bake until they’re lightly golden and the tops are just firm and spring back slightly when touched in the center. Remove the baking sheet from the oven and allow the cookies to remain on the baking sheet for a few minutes. Remove the cookies to a wire rack to cool completely before glazing.

7. To make the glaze, add the powdered sugar substitute, vegetable glycerin or liquid allulose, lemon juice, vanilla, and 2-3 tablespoons of water in a small bowl, and stir until smooth and easily spreadable. Then divide the glaze equally into two bowls. Add the cocoa powder to one and add just enough water until the consistency is the same as the vanilla glaze (adding 1 teaspoon of water at a time; it may take 3-6 teaspoons or more, judge by its consistency).

8. To ice the cookies, use the flat side (bottom) of the cookie and spread each half of the cookie with one of the icings, starting with the vanilla icing. Spread the vanilla on one half of all the cookies first, then coming back later after the vanilla has hardened, and adding chocolate icing to them on the remaining half, so you avoid the colors mixing.

9. Cookies can be stored at room temperature for 2-3 days, or refrigerate for longer periods, but allow the cookies to come to room temperature before enjoying. If stacking cookies in a cookie jar or storage container, place parchment paper between layers to prevent the icing from sticking.

Spread vanilla frosting first, then spread chocolate frosting last

*Notes: You can use an erythritol-based powdered sweetener (best option), such as Confectioners LaKanto Monkfruit sweetener. But because of the slight cooling effect, some people put off by that sensation might wish to use powdered allulose for the glaze. Allulose doesn’t have a cooling affect or aftertaste. If you can’t find powdered allulose, you can powder it yourself in a food processor. But NOTE: Allulose doesn’t absorb liquid in the same way as erythritol. Use less liquid, if using allulose. Also, icing made with allulose really doesn’t set up. It remains soft and sticky. Tastes delicious, but if you want to store them on top of each other in a cookie jar, don’t use allulose. 

Nutritional Information per cookie (with glaze): 106 calories, 6.1 g carbohydrate (1.8 g dietary fiber, 0.6 g sugars, 2.4 g sugar alcohols), 10.2 g total fat (2.1 g saturated fat, 0 g trans fat), 22 mg cholesterol, 87 mg sodium, 15.8 mg calcium, 71 mg potassium, 1 mg iron, 15 IU Vit A, 2 g protein. Net carbs per serving: 1.9 grams

Photos and recipe by Kathy Sheehan, copyright 2023
All rights reserved. Please do not duplicate without the author’s permission. 

Tuesday, March 14, 2023

Low Carb Peanut Butter and Chocolate Mousse Pie in a Jar

Low Carb Peanut Butter and Chocolate Mousse Pie in a Jar
These grab-and-go dessert cups are the perfect size! They may look small, but they deliver BIG FLAVOR and are rich and decadent! And who doesn’t love the combination of peanut butter and chocolate?

Low Carb Peanut Butter and Chocolate Mousse Pie in a Jar
Makes 6 servings

Peanut Butter Crumb Crust (Bottom Layer):
¾ cup almond flour (or sunflower seed flour for lower oxalate)
2 tablespoons unsweetened peanut butter powder
1 tablespoon powdered erythritol sweetener (Confectioners sweetener)
A pinch of salt
1 teaspoon vanilla extract
2 tablespoons refined coconut oil, melted (or unsalted butter)

Chocolate Cream Cheese Mousse (Middle Layer):
4 ounces cream cheese, room temperature 
2 tablespoons butter, room temperature (use unsalted or salted, your preference)
1/4 cup creamy peanut butter, no sugar added
2 tablespoons unsweetened cocoa powder
2 tablespoons powdered erythritol sweetener 
15 drops Monkfruit Extract (or ½ teaspoon liquid stevia), or to taste
1½ teaspoons vanilla extract 
½ cup heavy cream
3 tablespoons sugar free chocolate chips, chopped (Such as Lily’s brand)

White Chocolate Peanut Butter Ganache (Top Layer):
1/3 cup heavy cream
1/3 cup sugar free white chocolate chips 
1/4 cup creamy peanut butter, no sugar added
4 drops Monkfruit Extract or stevia
½ teaspoon vanilla extract 

1. To make the Peanut Butter Crumb Crust: With a fork, mix together the almond flour, peanut butter powder, erythritol sweetener and salt in a medium bowl until no lumps remain (you may sift the mixture to easily remove lumps). Add the vanilla extract and melted coconut oil and stir with a fork until the mixture is coated and resembles coarse crumbs. Divide equally between six small jelly jars (4 oz) or serving dishes (about 2 generous tablespoons in each jar). Gently press down to create an even layer; set aside.

2. To make the Chocolate Cream Cheese Mousse: Add the room temperature cream cheese, butter, and peanut butter to a mixing bowl. With a hand-held or standing mixer, whip on high until the mixture is well combined and smooth. Add the cocoa powder, powdered sweetener, Monkfruit extract drops or stevia, vanilla extract, and heavy cream. Beat until the mousse is quite fluffy and smooth. Taste and adjust sweetening, if needed. Fold in the chopped, sugar-free chocolate chips. Divide the mousse equally between the six jars or serving dishes. 

Layers of dessert cup
3. To make the White Chocolate Peanut Butter Ganache: Microwave the heavy cream in a heat-proof measuring cup or bowl until hot and bubbly around the edges (about 20-30 seconds on high) or heat in a small saucepan over medium heat, if not using a microwave. Pour the hot cream over the white chocolate chips in a bowl and allow to stand for several minutes. Whisk until smooth. Add the 1/4 cup peanut butter, Monkfruit extract or stevia drops, and vanilla. Whisk until the peanut butter is melted and the ganache is smooth.

4. While warm, pour the ganache over the chocolate mousse layer, dividing the ganache evenly among the six containers. Place the dessert cups into the refrigerator to set for two hours before serving.

5. To serve, you may garnish with optional whip cream, chopped chocolate, or chopped peanuts. Enjoy!

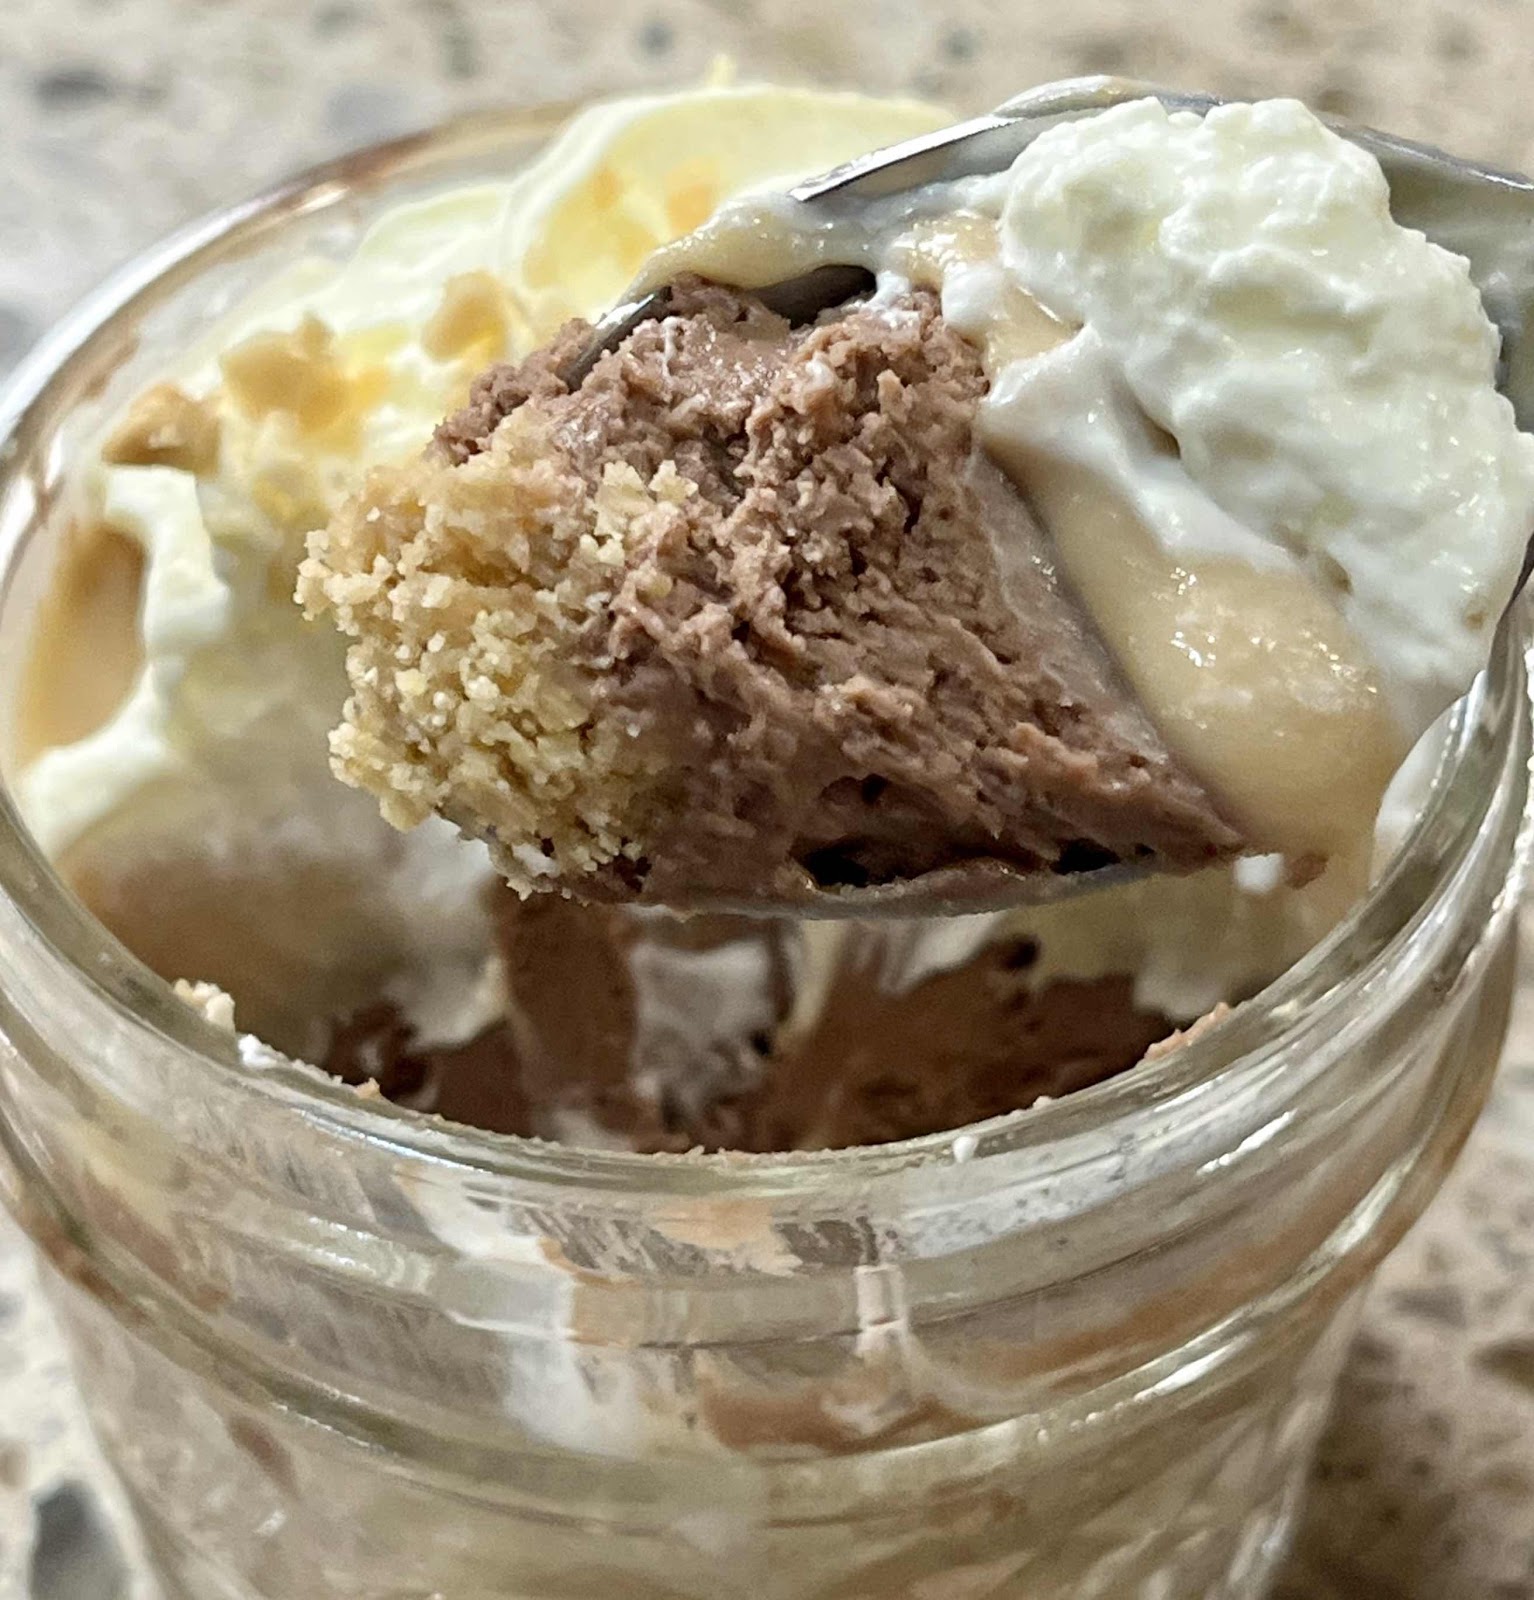
See pie layers in a spoonful
Nutritional Information per serving: 457 calories, 9.7 g carbohydrate (4 g dietary fiber, 1.7 g sugars, 2 g sugar alcohols), 44.2 g total fat (21.1 g saturated fat, 0 g trans fat), 79 mg cholesterol, 119 mg sodium, 24.8 mg calcium, 56 mg potassium, 228 IU Vit A, 1 mg iron, 8 g protein. Net carbs per serving: 5.7 grams

Recipe and photos by Kathy Sheehan, copyright 2023
All rights reserved. Please do not duplicate without the author’s permission.

Tuesday, December 8, 2020

Low Carb White Chocolate Peppermint Cookies

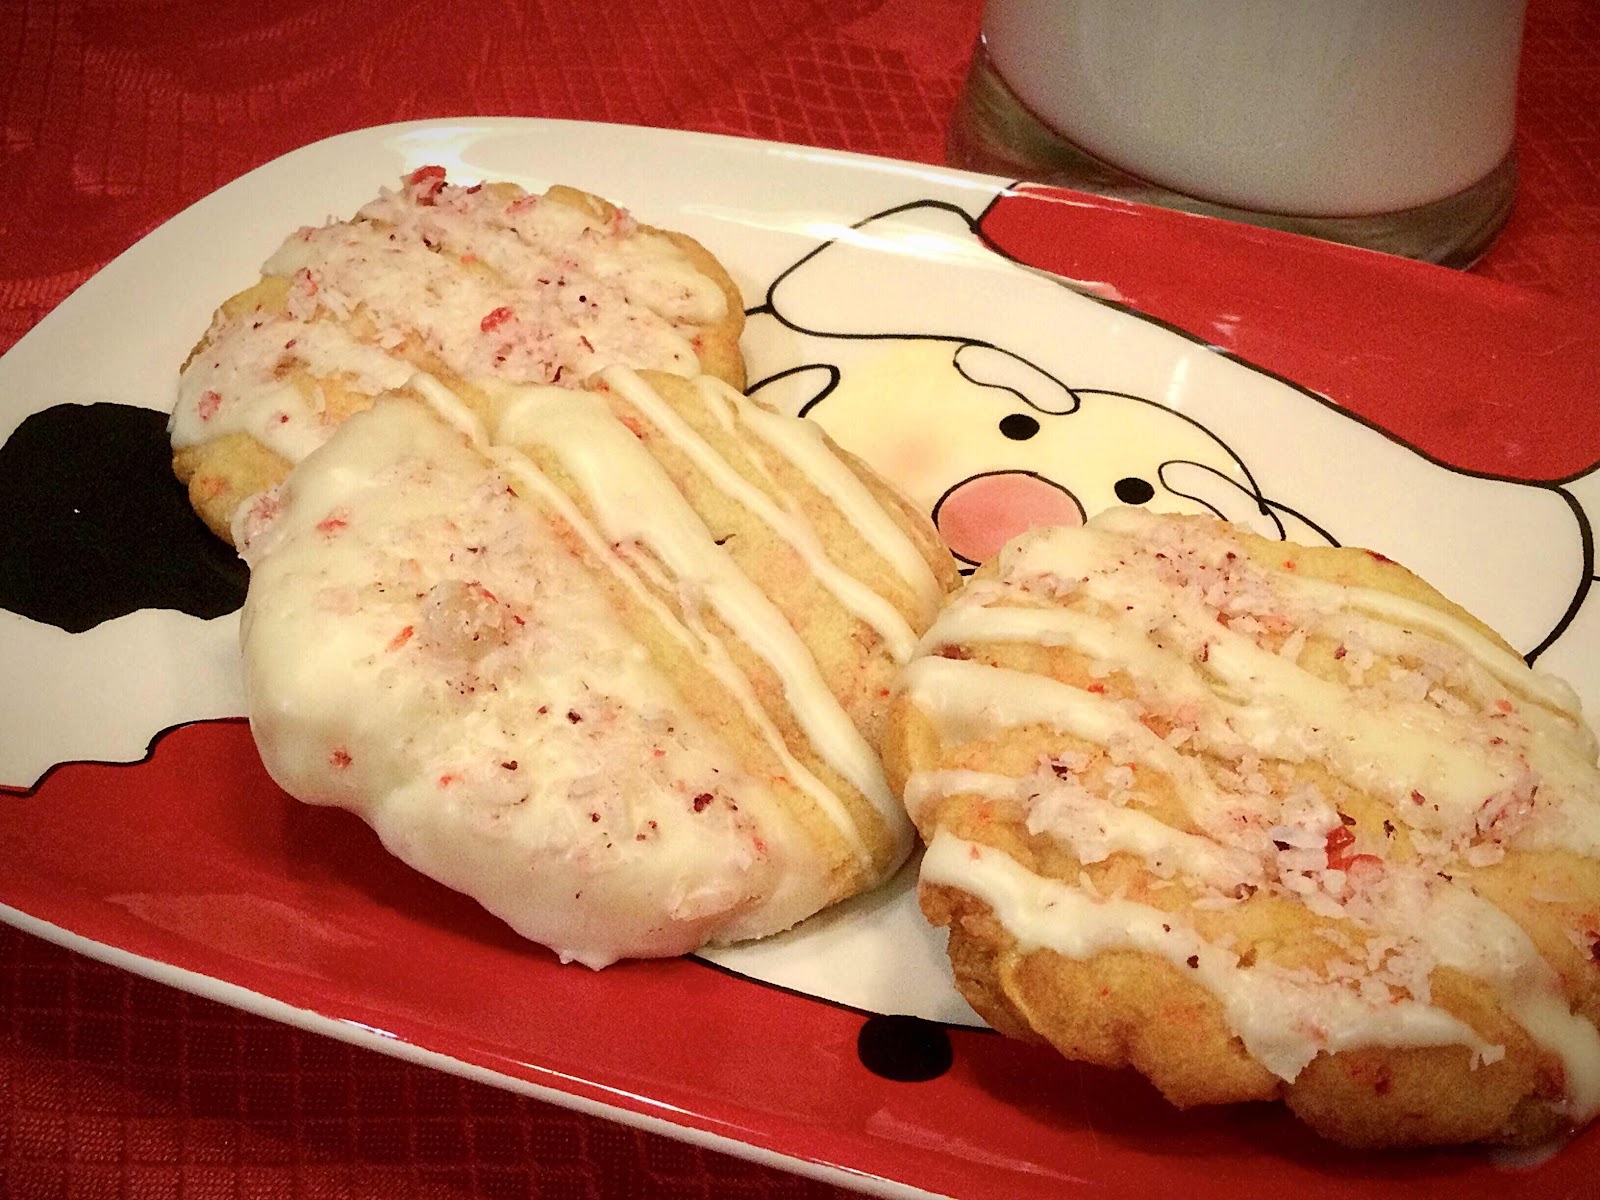
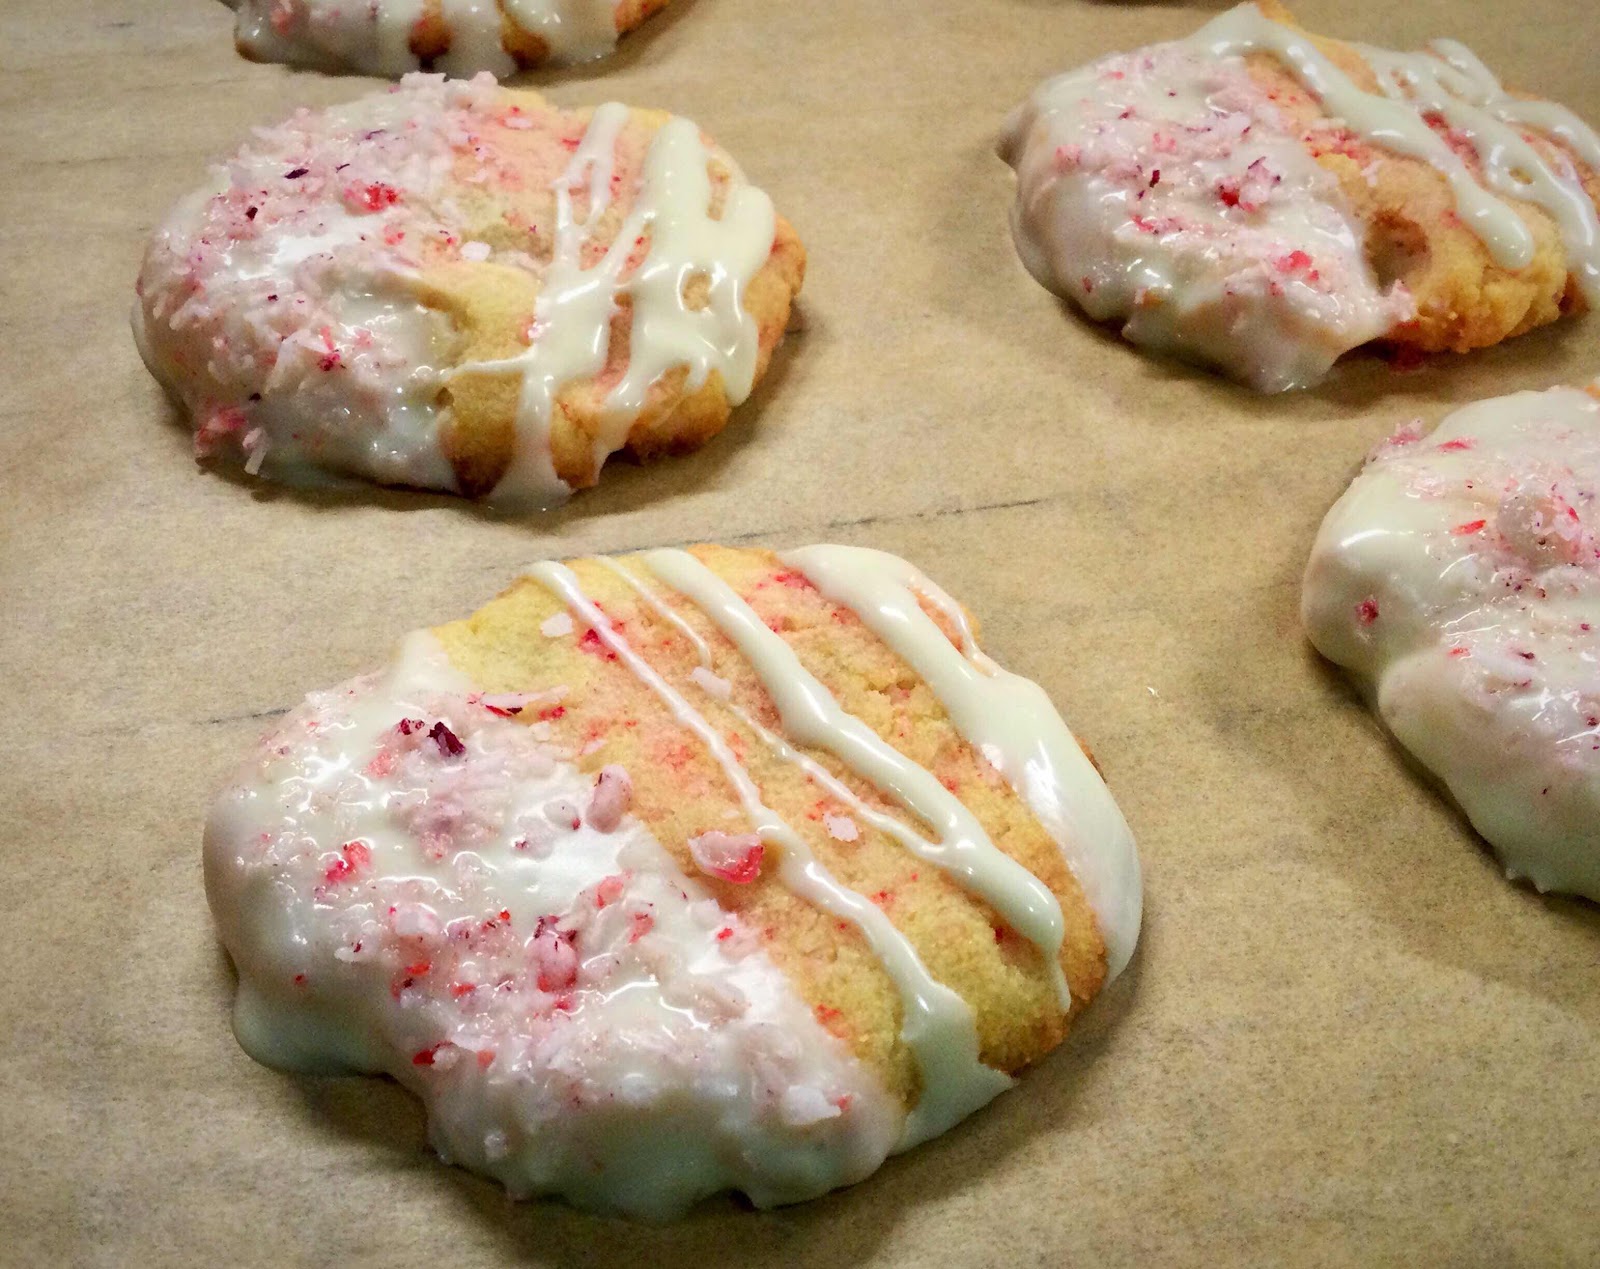
Low carb White Chocolate Peppermint Cookies on Santa Plate
This holiday season, I’m having so much fun creating recipes that highlight my favorite white chocolate peppermint flavor! These cookies are so light, elegant and delicious. My low carb peppermint candy sprinkles (see recipe here) make them festive and fun, adding beautiful color and the distinctive taste of candy canes!

Low Carb White Chocolate Peppermint Cookies
Makes 24 cookies

1-1/2 cups finely ground almond flour (substitute sunflower seed flour or finely ground macadamia nut flour for low oxalate)
1/4 cup coconut flour
1/2 teaspoon baking powder
1/2 teaspoon xanthan gum powder
1/8 teaspoon salt
1/2 cup unsalted butter, softened (1 stick)
2/3 cup powdered erythritol sweetener
1 large egg, room temperature 
1 tablespoon coconut milk, room temperature 
1 teaspoon vanilla extract
1/2 teaspoon peppermint extract (add an additional 1/4 tsp if not using peppermint baking chips)
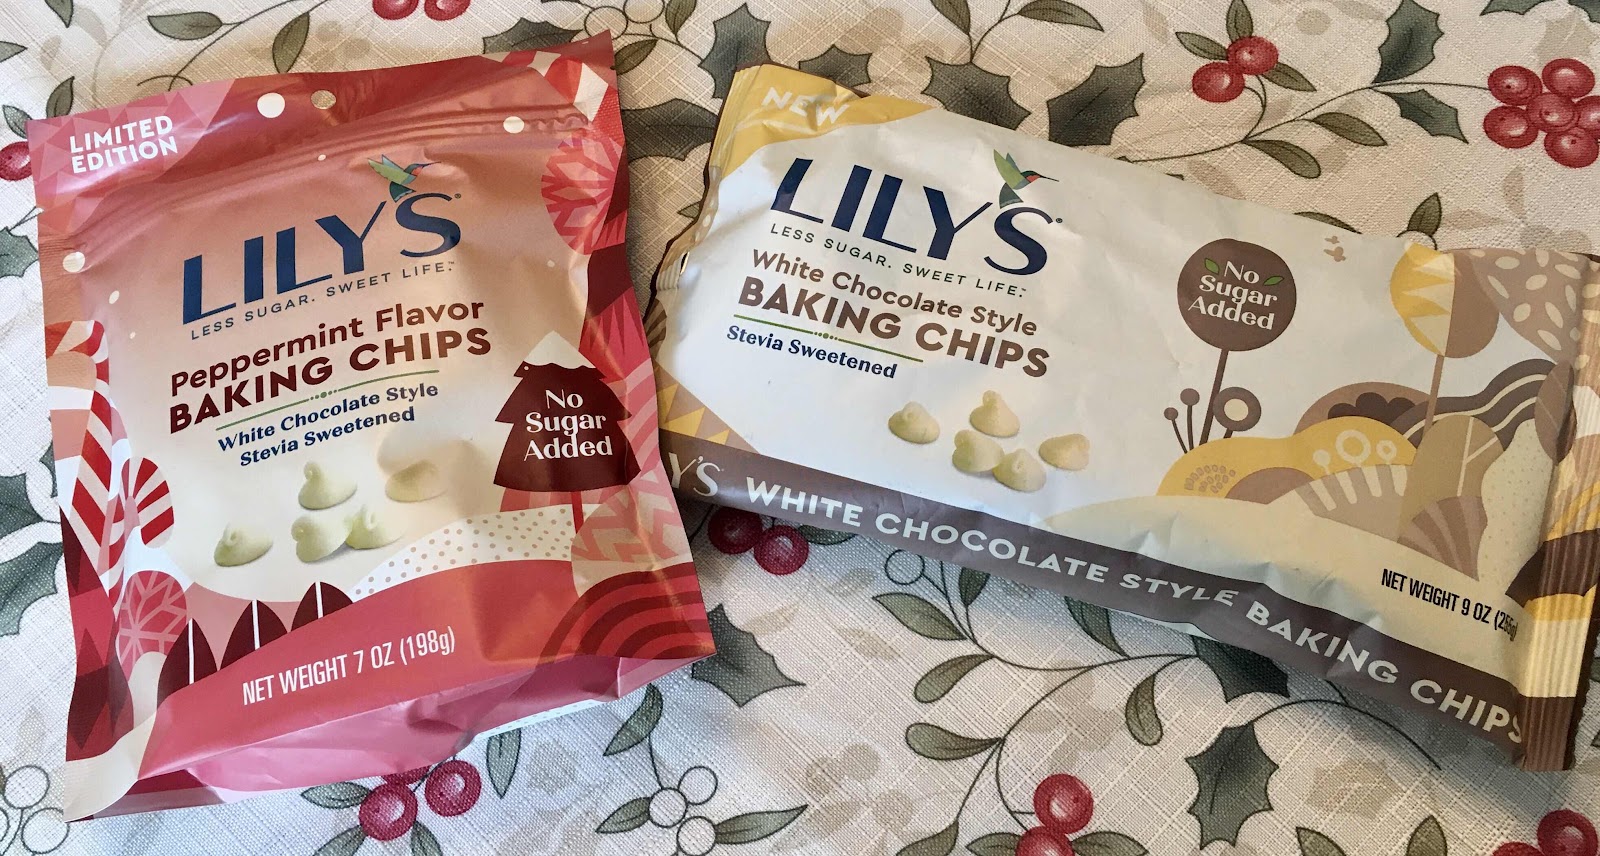
2/3 cup sugar free white chocolate baking chips (if you have Lily’s peppermint flavor, that’s even better, see photo below)
1/2 cup Low Carb Peppermint Candy Sprinkles (see separate recipe here), divided

White Chocolate Glaze:
1 cup sugar free white chocolate baking chips
2 teaspoons refined coconut oil
1/8 teaspoon peppermint extract (omit if using peppermint flavored chips)

Lily’s sugar free white chocolate baking chips
1. Before making the cookie dough, make a batch of Low Carb Peppermint Candy Sprinkles (recipe here); set aside. Preheat oven to 325 degrees F and position the racks in the center of the oven. Line two cookie sheets with parchment paper or silicone baking mats.

2. In a medium bowl, whisk together the almond flour (or low oxalate flour substitute of your choice), coconut flour, baking powder, xanthan gum powder and salt; set aside.

3. Using an electric mixer, cream together the softened butter and powdered sweetener until light and fluffy. Add the egg, coconut milk and extracts and continue mixing until well combined.

4. Add the flour mixture and continue mixing until the dry ingredients are incorporated. Fold in the sugar free white chocolate chips and 1/4 cup + 2 tablespoons of the Low Carb Peppermint Candy Sprinkles until evenly distributed. (Save the remaining sprinkles to decorate the cookies later.)

5. Using a small cookie scoop, create 24 balls of dough and space them at least 2 inches apart on your prepared cookie sheets. Press down and flatten each ball with your hand until about 1/4 inch in thickness. (The cookies will not spread during baking.)

6. Bake in the preheated oven for 12-13 minutes, turning and switching the position of each cookie sheet in the middle of baking time. Bake until the edges are golden. Remove from the oven and allow the cookies to cool on the cookie sheets for at least 10-15 minutes before transferring them to wire racks to cool completely.

7. To make the glaze, place the baking chips and coconut oil in a microwave safe bowl and microwave for 15 seconds on high. Allow the chips to sit for a few minutes and then stir. If additional melting is needed, microwave in 6 second intervals. (You may also melt the baking chips in a double boiler over barely simmering water.)

8. Dip 1/2 of each cookie into the glaze and/or drizzle the glaze over the cookies. While the glaze is still wet, sprinkle with the remaining Low Carb Peppermint Candy Sprinkles. Allow the glaze to set before serving. (To hasten the process, you may refrigerate the cookies for 10 minutes.) Store cookies at room temperature for up to a week.

Low Carb White Chocolate Peppermint Cookies with Glaze
Note: This recipe, without the sprinkles and chips folded in, makes an excellent dough for rolling out and cutting with cookie cutters!

Nutritional Information per cookie: 120 calories, 3.8 g carbohydrate (1.7 g dietary fiber, 0.9 g sugars), 11.9 g total fat (4 g saturated fat, 0 g trans fat), 18 mg cholesterol, 55 mg sodium, 12.2 mg calcium, 40 mg potassium, 38 IU Vit A, 1.2 g protein. Net carbs per cookie: 2.1 grams

Photos and recipe by Kathy Sheehan, copyright 2020
All rights reserved. Please do not duplicate without the author’s permission. 

Tuesday, August 18, 2020

40 Second Keto Dark Chocolate Cupcakes

40 second Dark Chocolate Cupcakes
Here’s another quick and easy cupcake recipe that you “bake” in the microwave for 40 seconds! This recipe is a favorite of my chocolate-loving husband. He freely admits that these cupcakes are as rich, decadent and fudgy as a traditional cupcake. He doesn’t miss the sugar at all and neither will you! This recipe yields three cupcakes, so it’s perfect when you want to satisfy a chocolate craving, but don’t want too many extras hanging around to tempt you.

40 Second Keto Dark Chocolate Cupcakes
Makes 3 cupcakes

Cupcakes:
2 tablespoons almond or pecan flour
2 teaspoons coconut flour
1 tablespoon unsweetened dark cocoa powder 
1/4 teaspoon instant coffee powder (optional, but enhances chocolate flavor)
1-1/2 tablespoons granulated erythritol sweetener 
A pinch of salt
1/2 teaspoon baking powder
1 tablespoon butter, melted
1 large egg
5 drops dark chocolate stevia or monkfruit extract, or to taste
1/4 teaspoon vanilla extract
1 tablespoon unsweetened almond or coconut milk (or strong brewed coffee for a mocha flavor)

Dark Chocolate Frosting:
1 oz. unsweetened baker’s chocolate, chopped
3/4 teaspoon refined coconut oil
1 tablespoon unsalted butter, room temperature 
2 oz. cream cheese, room temperature 
4 oz. mascarpone cheese, room temperature 
1/3 cup powdered erythritol sweetener 
1 tablespoon unsweetened cocoa powder 
1/4 teaspoon vanilla extract
1-2 tablespoons heavy cream (or as needed to reach the desired consistency)

1. In a small bowl, combine the almond or pecan flour, coconut flour, cocoa powder, instant coffee powder, granulated sweetener, salt and baking powder. Whisk to combine and remove any lumps.

2. Add the melted butter, egg, stevia or monkfruit drops, vanilla extract and milk or coffee; whisk until well combined.

3. Evenly divide the batter between three silicone muffin cups and microwave on high for 40 seconds or until the cakes have risen, look dry and spring back when touched near the center. (The time needed for cooking may vary, depending on the wattage of your microwave.) Alternatively, you can bake them in a 325 degree Fahrenheit oven for 15-18 minutes. Move to a wire rack and cool completely.

4. To make the frosting, in a medium, microwave-safe bowl, combine the chopped baker’s chocolate and coconut oil. Microwave on high in 15 second intervals to melt the chocolate. Let it sit for a minute or two and then stir until smooth. (If you would prefer, you can melt the chocolate and coconut oil in a heat proof bowl over barely simmering water.) Set melted chocolate aside to cool to lukewarm. 

5. In a large bowl, using an electric mixer, whip the butter, cream cheese and mascarpone cheese together until smooth. Beat in the powdered sweetener and cocoa powder, scraping the sides of the bowl as needed.

6. Add the melted chocolate and vanilla extract and beat until combined. Add the heavy cream, one tablespoon at a time, until a spreadable consistency is achieved. (Note: This icing recipe makes enough to frost 6 cupcakes, so more than you will need. Store any leftovers in an airtight container in the refrigerator for up to a week.)

Microwave Keto Dark Chocolate Cupcake
Nutritional Information per one cupcake with 3 Tbsp frosting: 234 calories, 6.5 g carbohydrate (2.2 g dietary fiber, 0.7 g sugars, 2.1 g sugar alcohols), 21.5 g total fat (12.1 g saturated fat, 0 g trans fat), 102 mg cholesterol, 127 mg sodium, 93.8 mg calcium, 95 mg potassium, 1 mg iron, 106 ug Vit A, 5.9 g protein. Net carbs per serving: 4.3 grams

Photos and recipe by Kathy Sheehan, copyright 2020
All rights reserved. Please do not duplicate without the author’s permission. 

Friday, July 17, 2020

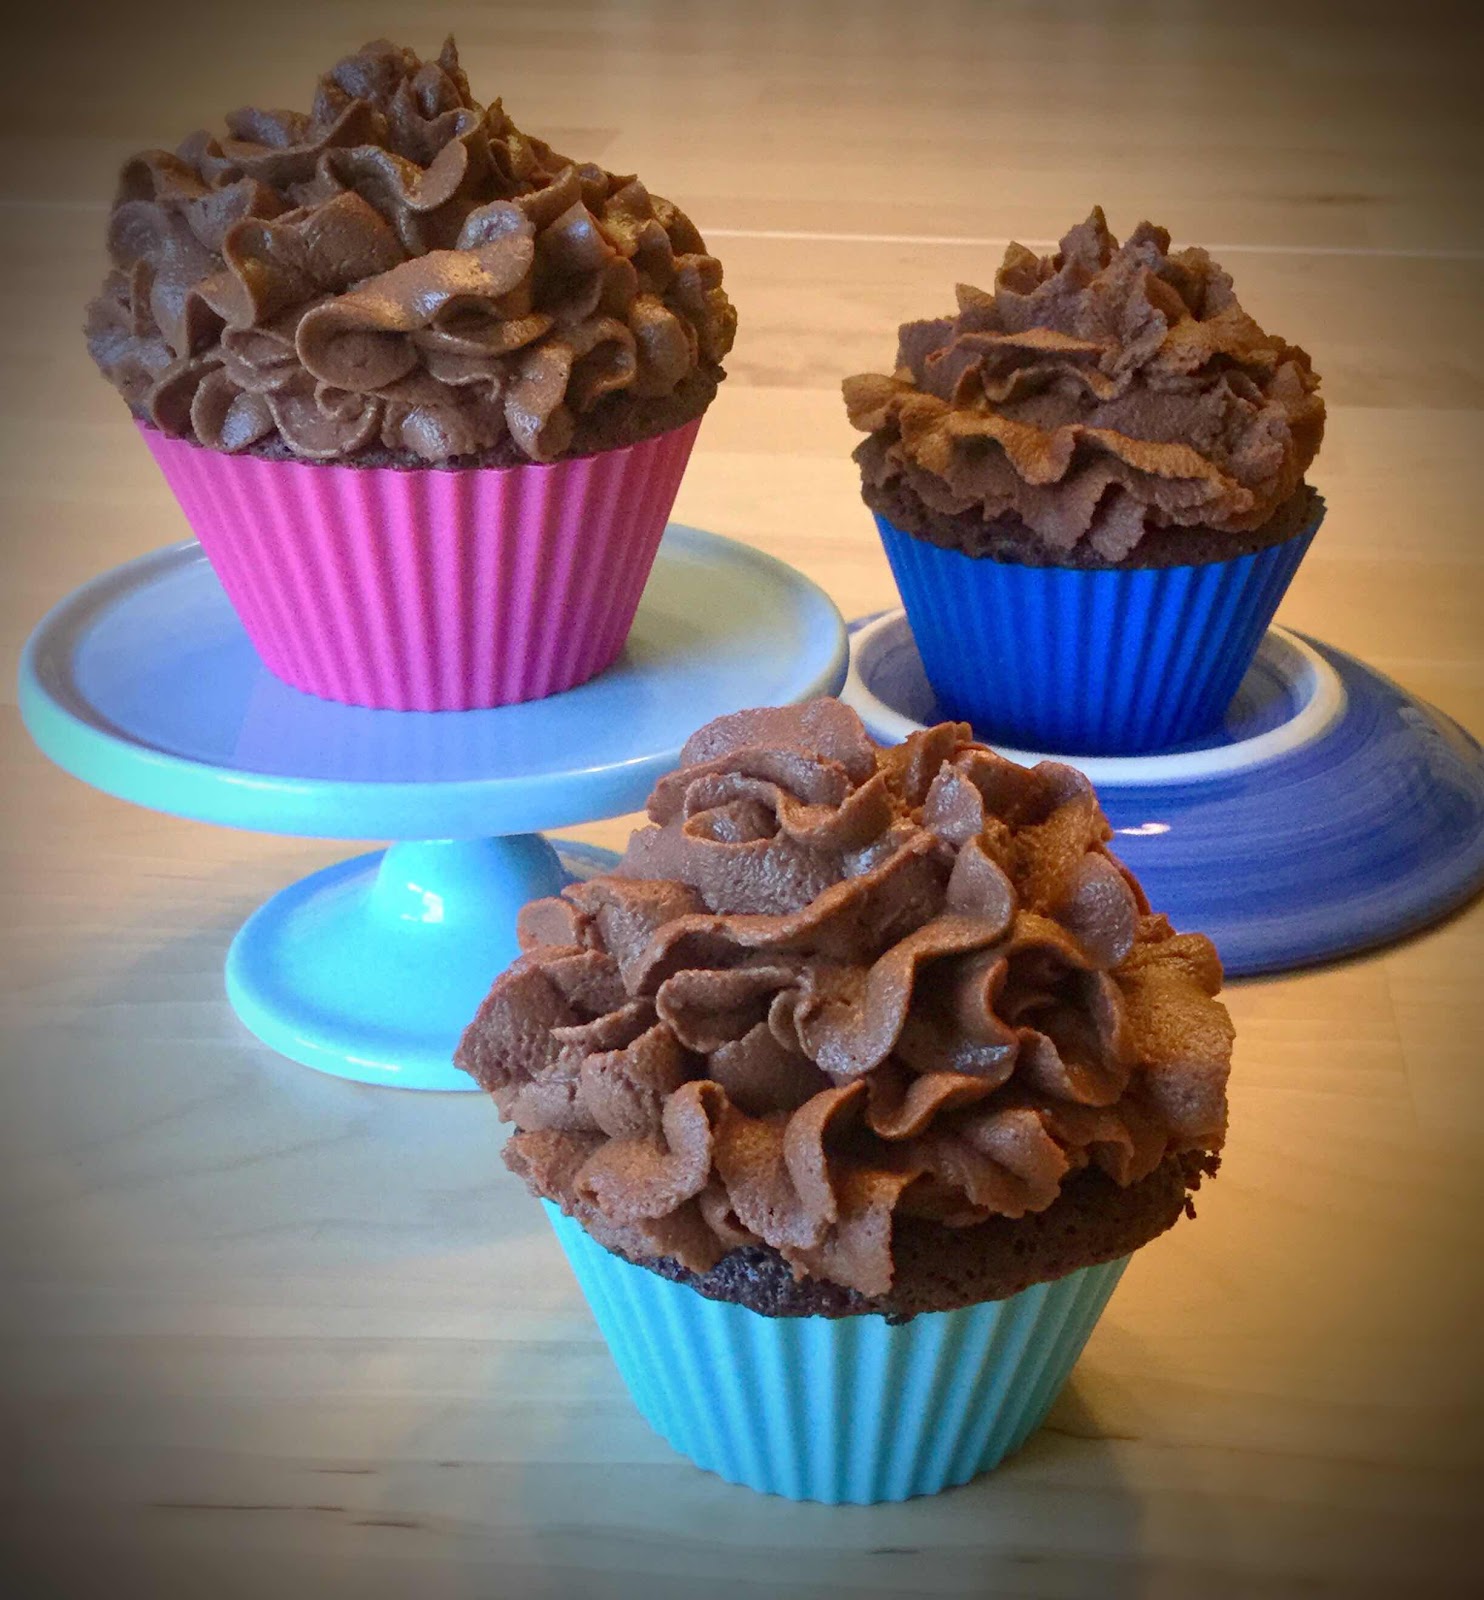
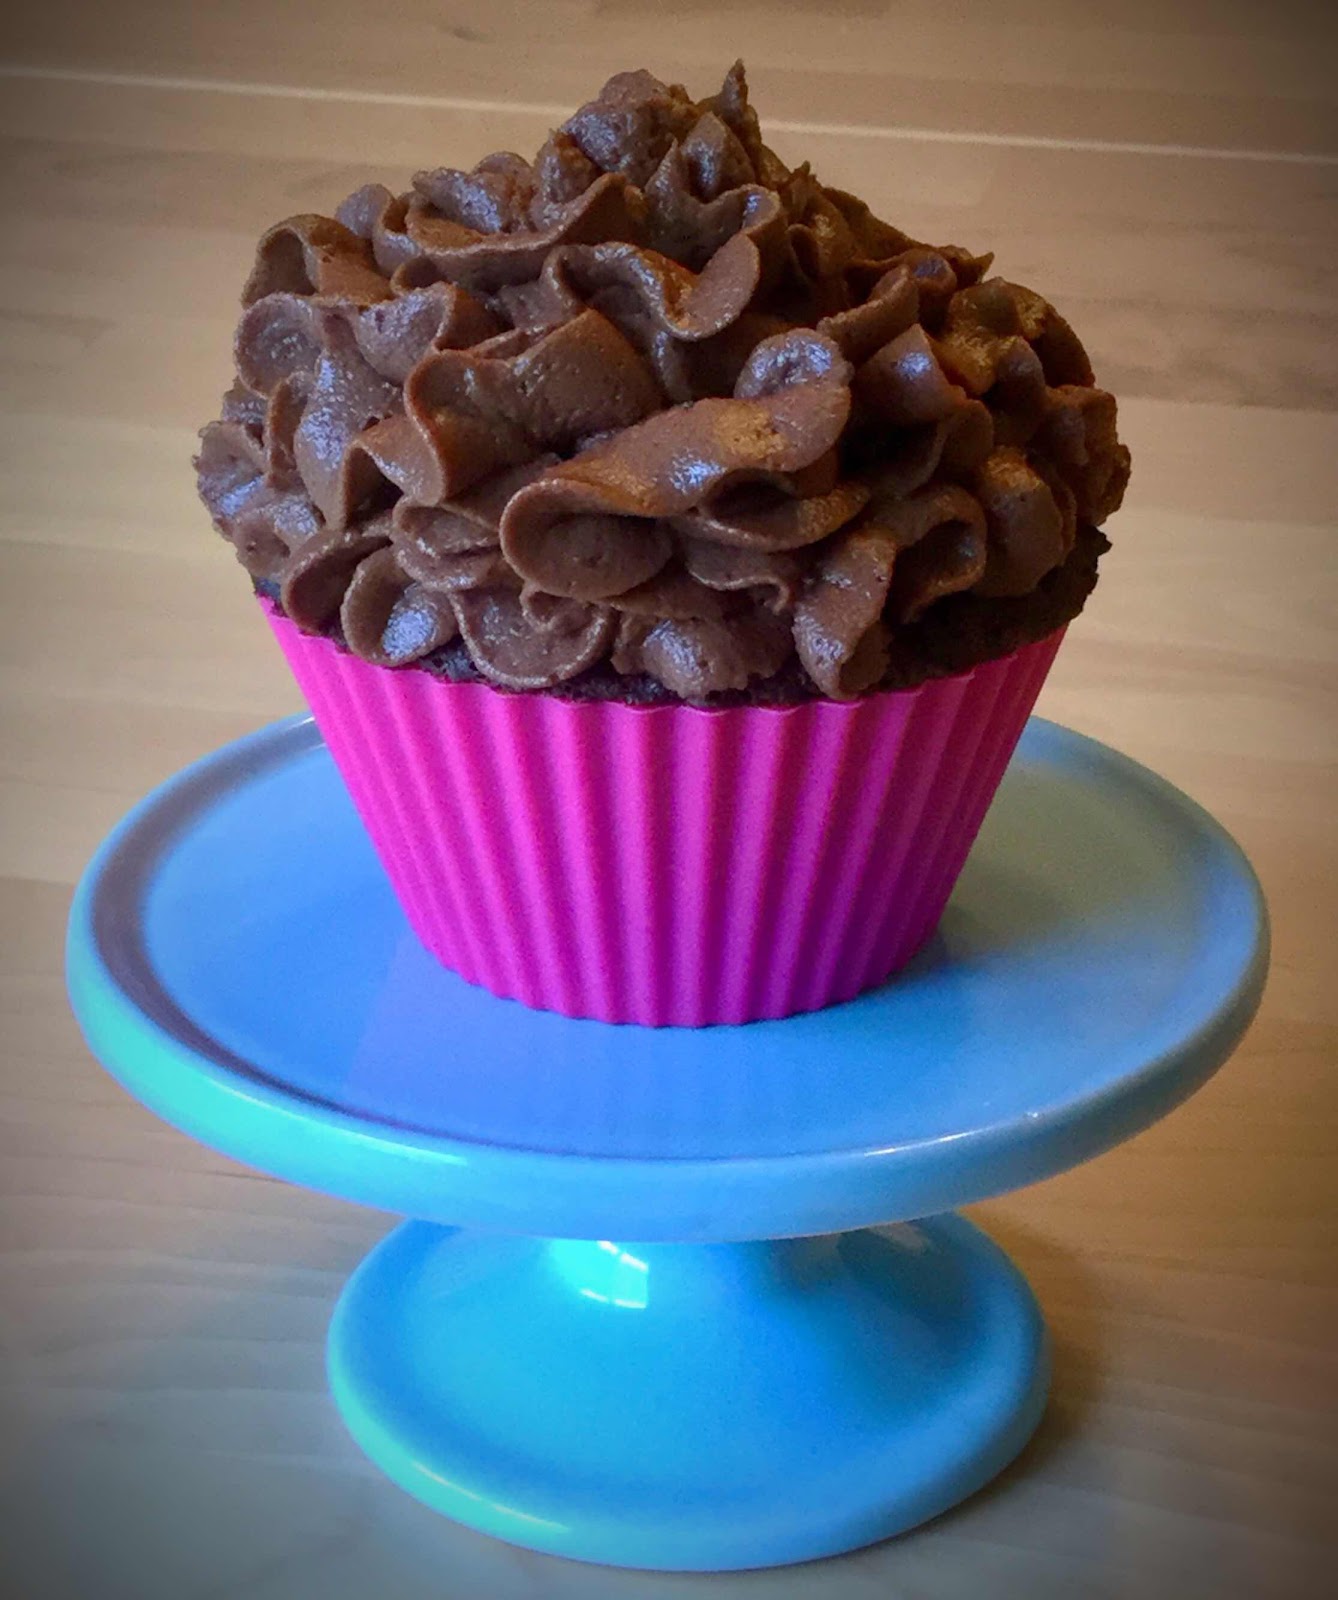
40 Second Keto Lemon Cupcakes

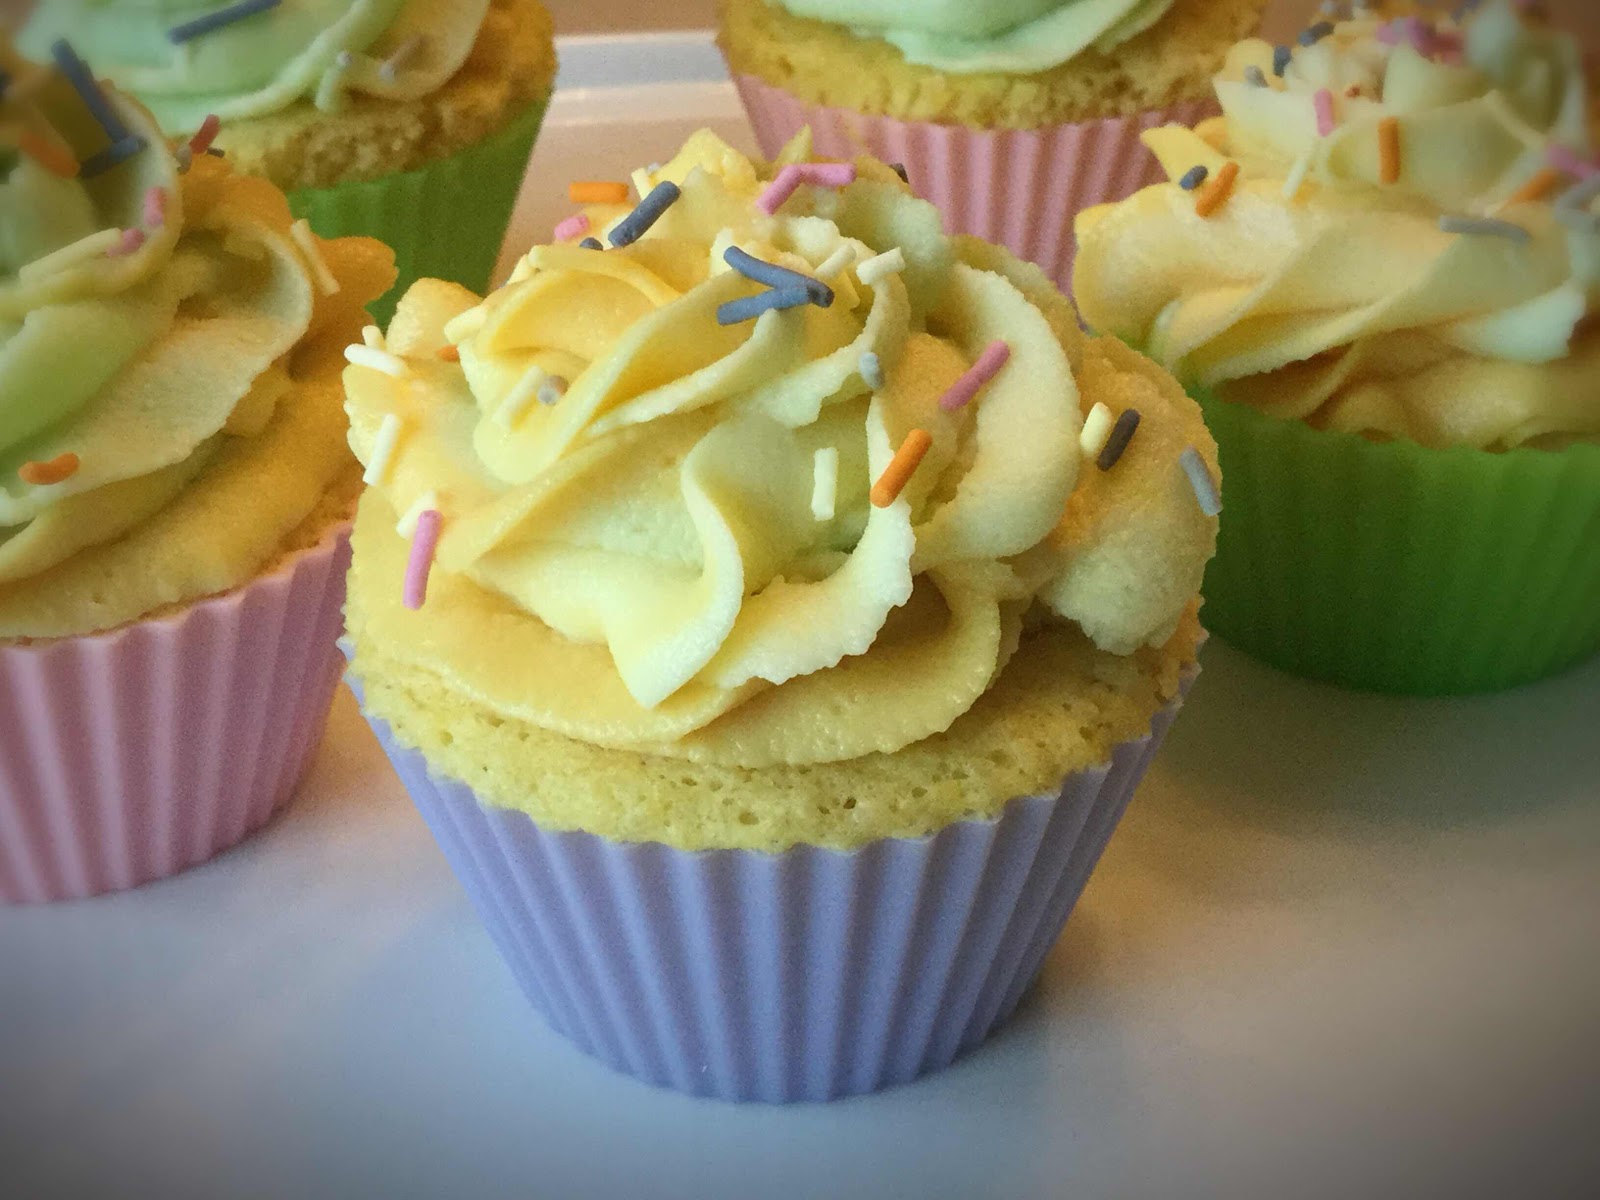
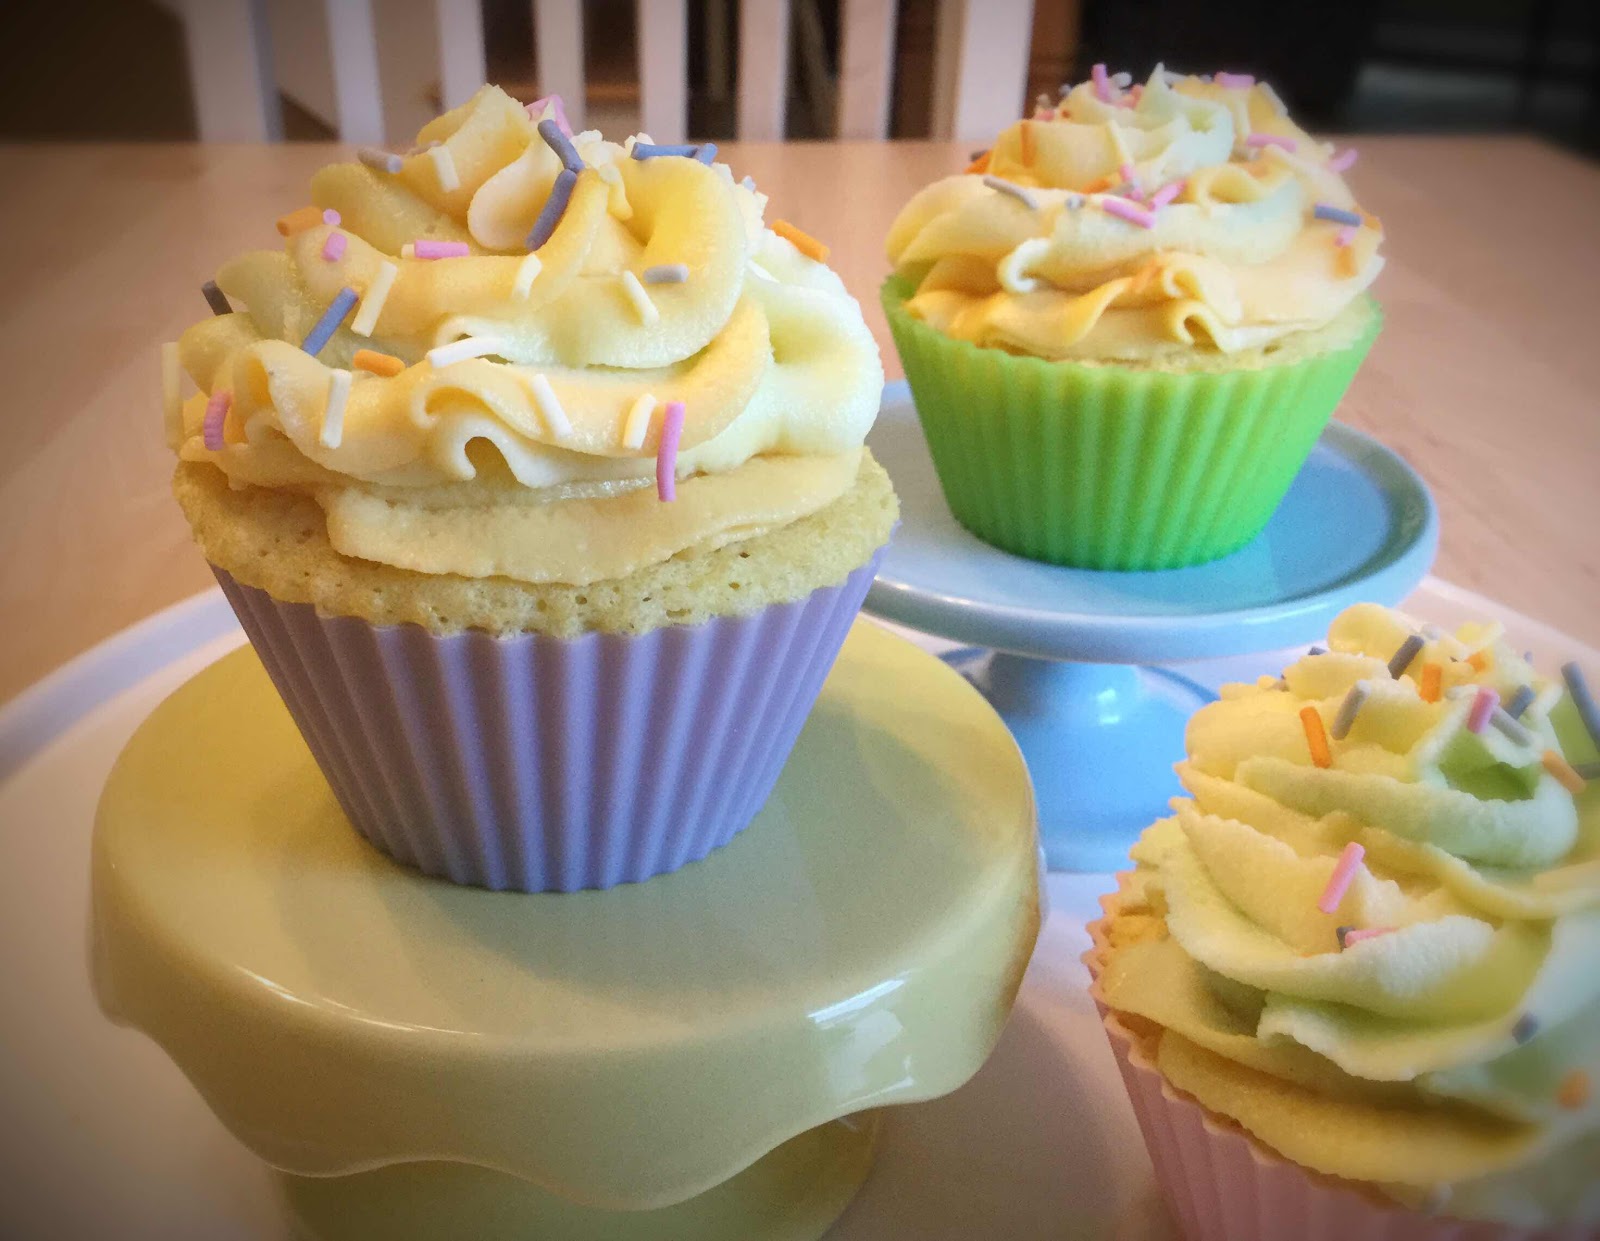
40 Second Keto Lemon Cupcakes
You don’t have to wait for a special occasion or dirty the entire kitchen to enjoy a few cupcakes! These light and delicious cupcakes bake in the microwave in about 40 seconds. Normally, I don’t think about the microwave when I want to bake a cake, but I have found that keto mug cakes made in a microwave rise beautifully and have a light, tender crumb. Just be sure you don’t overcook them or they can become tough. Silicone cupcake liners are microwave-safe, come in a variety of fun colors, are non-stick and hold their shape during cooking, so that’s what I use. (You can use paper liners, but you’ll need to support them in a microwave-safe cup so the cupcakes retain their shape during the cooking process. If you decide to use paper liners, make sure there is no metal in the liner or its printed design.) This quick recipe makes only three cupcakes, which is just enough to share with one or two friends. There’s no reason not to have a little party tonight!

40 Second Keto Lemon Cupcakes
Makes 3 cupcakes

Cupcake Ingredients:
1/4 cup almond flour
2 teaspoons coconut flour
1 tablespoon granulated erythritol sweetener
1/2 teaspoon baking powder
A pinch of salt
1 large egg
1 teaspoon lemon juice (or almond milk)
1/2 teaspoon lemon zest (or 1-2 drops of food grade lemon essential oil)
1/2 teaspoon vanilla extract
5 drops monkfruit extract (or liquid stevia)
1 teaspoon melted butter or ghee

Lemon Cream Frosting:
2 ounces cream cheese, room temperature 
2 tablespoons unsalted butter, softened
4 ounces plain mascarpone cheese, room temperature
1/4 cup powdered erythritol sweetener 
1 teaspoon vanilla extract
1/4 to 1/2 teaspoon lemon extract, to taste
1-2 tablespoons heavy cream

Sugar free sprinkles (optional)

1. In a small bowl, combine the first five dry ingredients (almond flour through salt) with a fork until thoroughly mixed; set aside.

2. In a separate bowl, whisk together the egg, lemon juice or almond milk, lemon zest, vanilla extract, monkfruit extract or stevia and melted butter.

3. Add the dry ingredients to the wet ingredients and whisk until just combined. Divide the batter equally among three silicone cupcake liners (or small greased ramekins). Microwave on high for 35-40 seconds or until the cakes have risen, look dry and the tops spring back when lightly touched in the center. Do not overcook! (Note: Cooking time may vary depending on the wattage of your microwave. Instructions for baking in the oven are provided below.*) Remove the cupcakes from the microwave and cool on a wire rack completely while you make the frosting.

4. To make the frosting: Whip together the room temperature cream cheese, butter and mascarpone cheese with an electric mixer until light and fluffy. Add the powdered sweetener, extracts and beat until combined. Add the heavy cream, one tablespoon at a time, until your frosting reaches the desired consistency. Taste and adjust sweetness to your liking. If desired, spoon the frosting into a piping bag with a decorating tip and frost your cupcakes or spread about 3 tablespoons of frosting onto each cupcake.

5. This frosting recipe yields more than you will need for 3 cupcakes, which allows for dividing into batches and coloring each differently using gel food colors (as shown). Store any leftover frosting in an airtight container in the refrigerator and save for another use. It will keep well for 4-5 days. Bring to room temperature and rewhip if needed to restore spreading consistency. 

*To bake the cupcakes in the oven, bake in a preheated 325 degree F oven for 16-18 minutes or until a toothpick comes out clean when tested and the tops spring back when lightly touched near the center.

40 Second Keto Cupcakes
Nutritional Information per 1 cupcake with 3 TB frosting: 210 calories, 5 g total carbohydrates (1 g dietary fiber, 0.4 g sugars, 2.7 g sugar alcohols), 20.3 g total fat (.8 g saturated fat, 0 g trans fat), 77 mg cholesterol, 278 mg sodium, 217.8 mg calcium, 19 mg potassium, 97 ug Vit A, 2 mg Vit C, 3.6 g protein. Net carbs per serving: 2 grams

Recipe and photos by Kathy Sheehan, copyright 2020
All rights reserved. Please do not duplicate without the author’s permission.

Tuesday, May 12, 2020

Low Carb Deep Dish, Chicago-Style Sausage Pizza

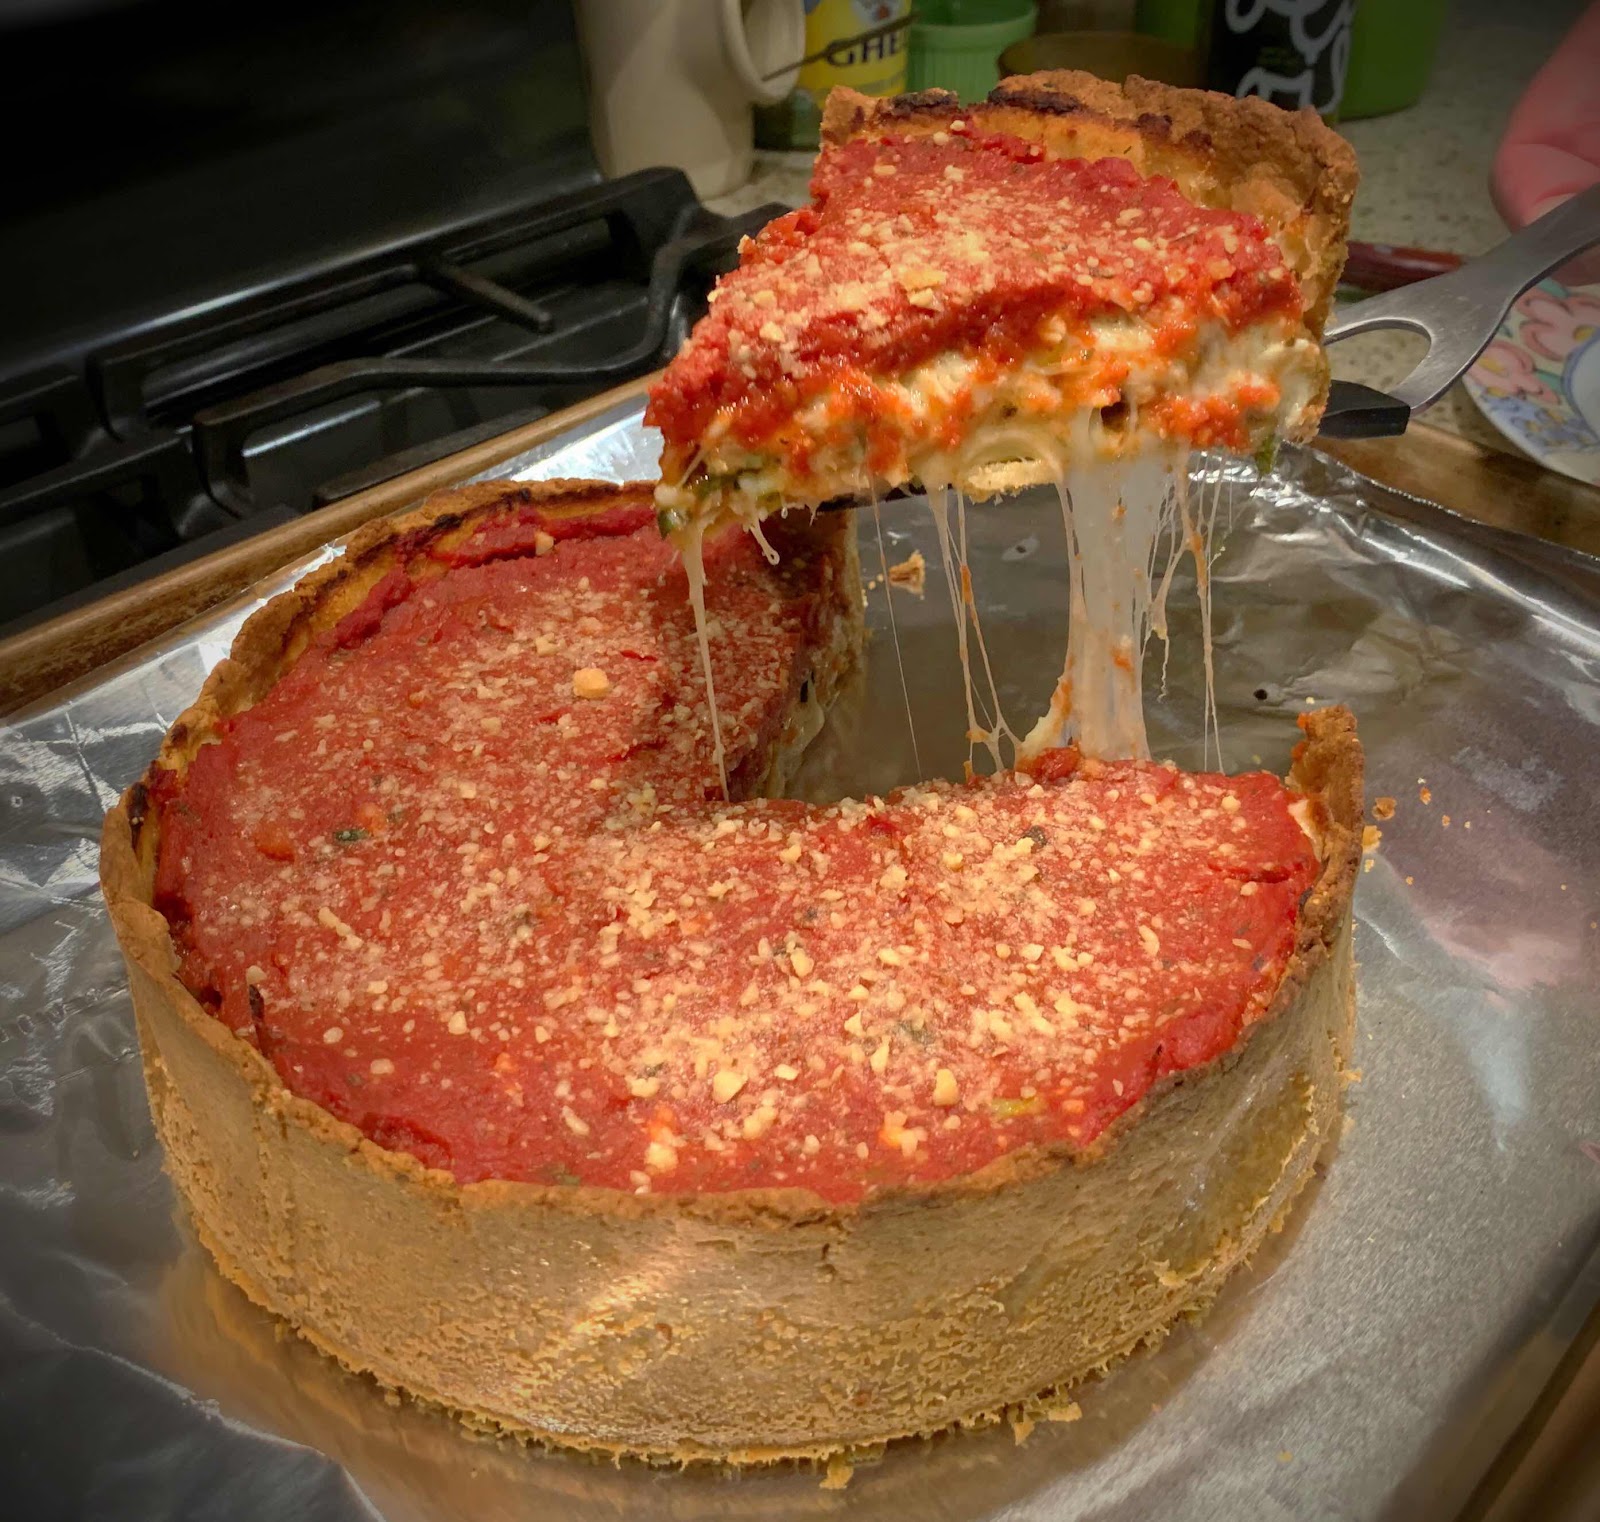
Low Carb Deep Dish, Chicago-style Pizza
This is one of the most outstanding recipes I’ve ever made and tastes so much like the real thing, no one will be able to tell it’s low carb and gluten free. The dough comes together quickly in a food processor and really holds up during the baking process. The result is a crisp crust overflowing with gooey, melted cheese, savory Italian sausage and tangy tomato sauce in every bite. Believe me, if you like Uno’s Pizza, you and your family will be delighted with this copy-cat recipe. Fill the pizza with any fillings you desire to make it your own.

Low Carb Deep Dish, Chicago-Style Sausage Pizza
Makes 6 servings

Sauce:
26 oz. box of Pomi chopped tomatoes, drained of excess liquid (yields about 1 1/4 cup)
3 cloves garlic, minced
3/4 teaspoon dried oregano
1/4 teaspoon salt (or to taste)

Pizza Crust:
3/4 cup almond flour
3 tablespoons Keto Birch Benders Pancake Mix (or more almond flour)
1/4 cup coconut flour
1 tablespoon psyllium husk powder (I use this Terrasoul brand)
1 teaspoon baking powder
1/4 teaspoon salt
3/4 teaspoon dried Italian herb seasoning
3 tablespoons olive oil (or avocado oil)
1 large egg
3 tablespoons cold water
2 tablespoons grated Parmesan cheese (for dusting inside of pan)

Filling:
6 ounces provolone cheese, sliced
1 pound Italian pork sausage
Sliced black olives (optional)
Sliced mushrooms, heated in skillet until they release their moisture (optional)
6 ounces mozzarella, shredded (whole milk cheese melts better!)

Topping:
3/4 cup grated Parmesan cheese

1. Preheat the oven to 350 degrees Fahrenheit. Grease a 9-inch springform pan very well and sprinkle with 2 tablespoons of finely grated Parmesan cheese, moving the pan around until the bottom and sides are coated; set aside.

2. If using mushrooms, heat over medium heat in a dry skillet until the mushrooms have released their moisture; remove to a bowl and set aside. Remove the sausage from their casings and sauté in the same skillet, breaking up into crumbles, until just cooked through. Drain on a plate that has been lined with several layers of paper towels to remove excess fat; set aside. 

3. Pour the chopped tomatoes into a fine-mesh strainer that has been placed over a bowl to catch excess liquid. Drain, stirring occasionally with a spoon, until most of the liquid has been removed. You want a thick, chunky sauce. Place the tomato sauce into a bowl and add the garlic, oregano and salt; stir to combine and set aside. (Discard or store the drained liquid in the refrigerator for another use.) 

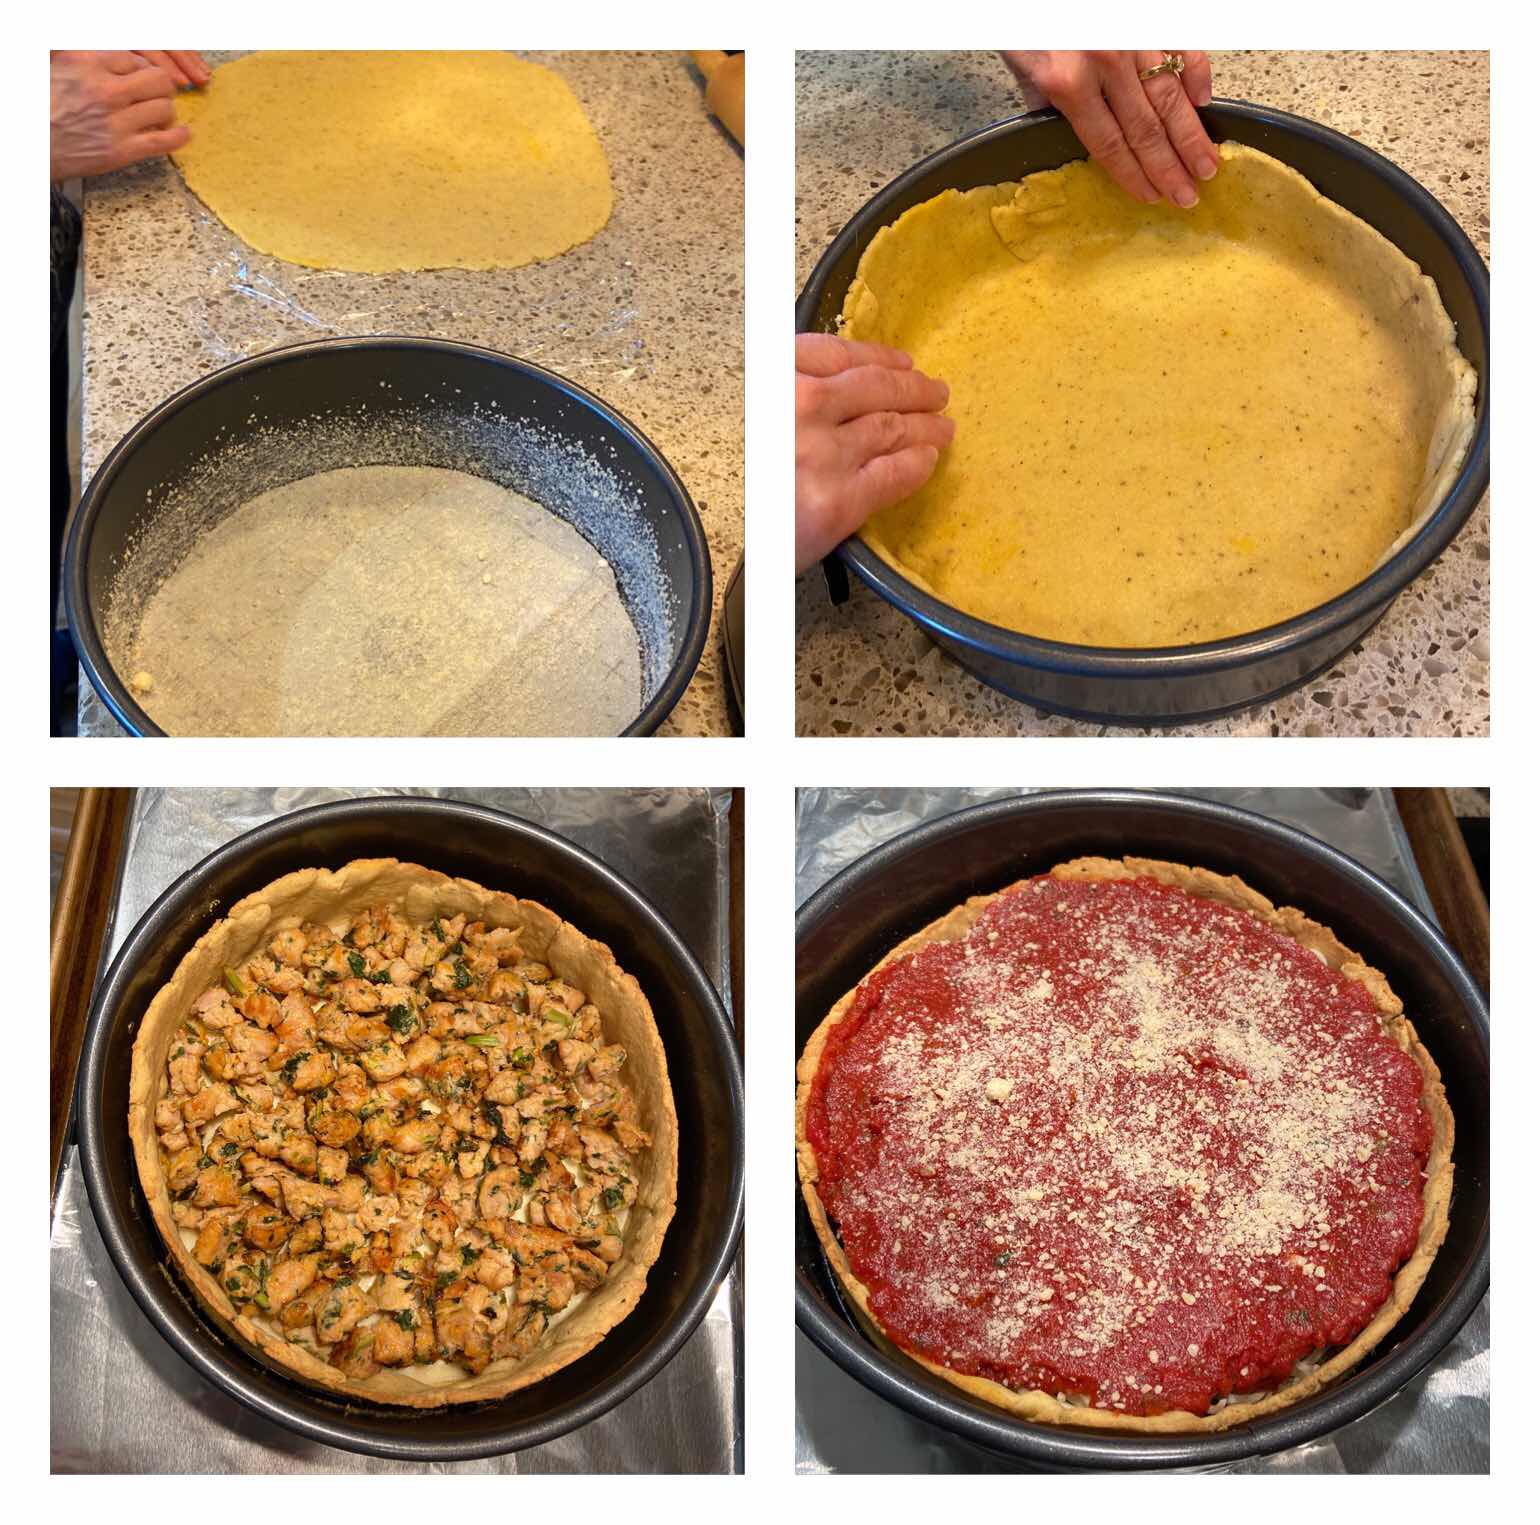
4. Place the dry ingredients for the crust into the food processor and pulse to combine. Add the olive oil, egg and water and process on low until the dough comes together and forms into a ball. Roll the dough out between two pieces of plastic wrap (or parchment paper) into a 12-inch circle. Remove the top piece of plastic wrap and turn the dough into your prepared springform pan, dough side down. Remove the remaining layer of plastic wrap and then, with your fingers, gently press the dough into the pan. “Cut and paste” the dough evenly in the pan and part way up the sides (just tear and press where needed). Once the dough is pressed into the pan, prick the bottom with a fork.

5. Pre-bake the crust in the preheated 350 degree oven for 15 minutes. Remove the crust from the oven and allow to cool for a few minutes before filling. Meanwhile, increase the oven temperature to 410 degrees.

6. Into the pre-baked crust, put down a layer of sliced provolone cheese to cover the entire bottom of the crust. Spread the cooked sausage and any other optional fillings you desire on top of the provolone cheese in an even layer. Next, add a layer of shredded mozzarella over the fillings. Top the layer of shredded cheese with the drained and seasoned chunky tomato sauce, spreading with the back of a spoon to cover the cheese layer entirely. Finally, sprinkle the sauce with 3/4 cup grated Parmesan cheese.

Pizza crust and layering fillings7. Place the pan on a baking sheet (in case the filling leaks). Bake for 30-35 minutes or until the Parmesan cheese has turned a golden color and the melted mozzarella cheese you can see below the sauce is bubbly.

8. Remove the pizza from the oven and allow to cool for at least 10 minutes before slicing. Enjoy!

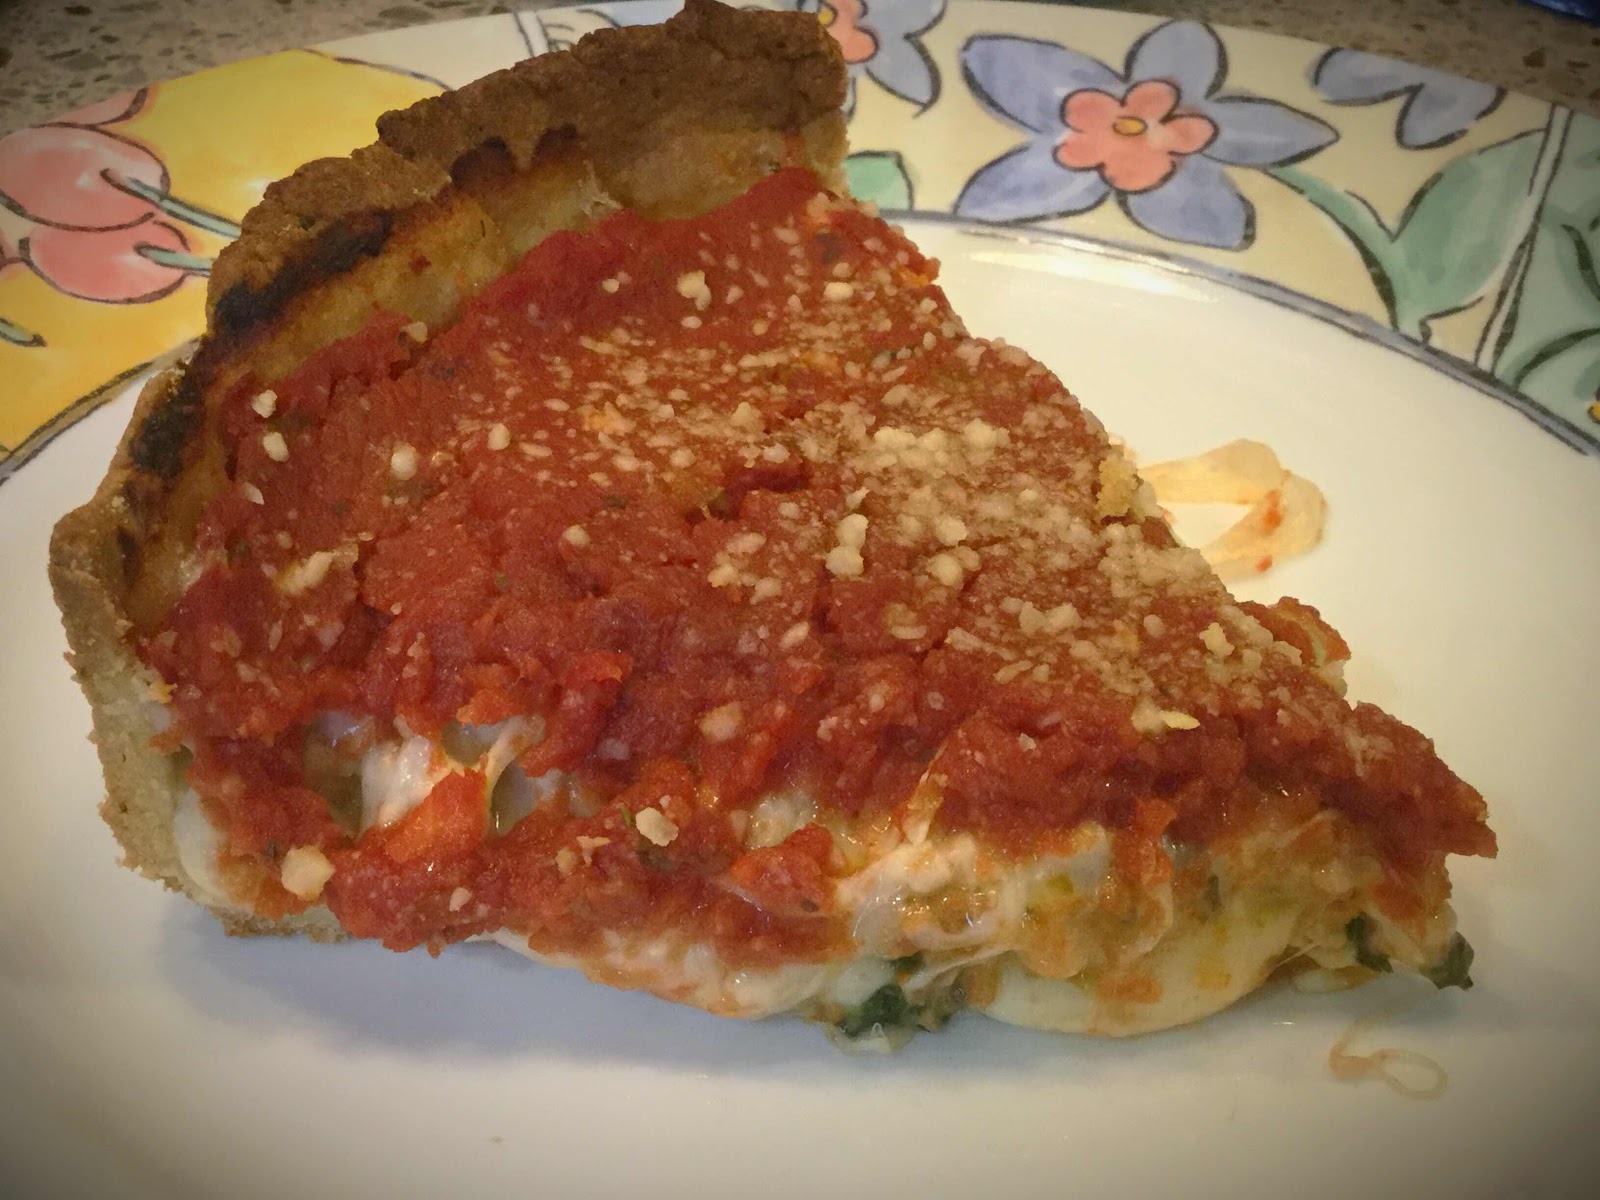
Slice of Deep Dish Pizza
Nutritional Information per 1/6th of pizza: 588 calories, 13.5 g carbohydrates (5.1 g dietary fiber, 3.2 g sugars), 41.8 g total fat (15.6 g saturated fat, 0 g trans fat), 123 mg cholesterol, 1292 mg sodium,  651.4 mg calcium, 169 mg potassium, 2 mg iron, 169 ug Vit A, 38.9 g protein. Net carbs per serving: 8.4 grams

Photos and recipe by Kathy Sheehan, copyright 2020
All rights reserved. Please do not duplicate without the author’s permission. 

Sunday, February 16, 2020

Keto French Toast Chaffle Breakfast Sandwich (or Monte Cristo!)

Keto French Toast Chaffle Breakfast Sandwich
As I do often, I woke up in the middle of the night but, instead of turning over and going right back to sleep, I started thinking. I had seen a video going around on Facebook using this cooking technique for making a french toast sandwich, so I thought “Why can’t I do that with chaffles?” The excitement of this idea took over my mind and I didn’t go back to sleep for hours! When morning arrived, I leapt out of bed and ran down to the kitchen to try out this recipe. It was worth the poor night’s sleep!! This breakfast sandwich is SO GOOD and, when drizzled with a little sugar free syrup, it tastes like a Monte Cristo! For greater convenience, it’s a good idea to make your White Bread Chaffles ahead of time. (I triple or quadruple the recipe and make a batch of 6-8 at a time; they keep well in the refrigerator and are always available as a bread or hamburger bun substitute whenever you need them.)

Click on the YouTube video to see how to make this amazing breakfast sandwich:


Keto French Toast Chaffle Breakfast Sandwich (or Monte Cristo!)
Makes 1 sandwich

White Bread Chaffle Ingredients:
1 egg (or two egg whites)
1 tablespoon mayonnaise, sour cream or ricotta cheese
1 tablespoon almond flour (or coconut flour)
1/8 teaspoon baking powder
1 teaspoon water

Other Ingredients for Sandwich:
2 eggs, beaten
A pinch of salt and pepper to taste
1 teaspoon almond milk
1 ounce cheese of choice, sliced
2 pieces of bacon, cooked and halved
Sugar free syrup (optional)

1. First, make the chaffles by whisking the chaffle ingredients together. Divide the batter and spoon 3-4 tablespoons onto a hot, preheated mini waffle maker, close the lid and cook for at least 4 minutes. Remove to a wire rack and repeat with the remaining batter. This recipe makes 2 chaffles.

2. Meanwhile, whisk together the 2 eggs, salt, pepper and teaspoon of almond milk; set aside. Have the sliced cheese and bacon ready to go.

3. Melt some coconut oil or butter in a 10” non-stick skillet. Place over medium-low heat and add the whisked eggs. Dip the smooth side of one chaffle into the egg, turn over and place the egg-covered chaffle on one side of the skillet in the egg mixture (if your chaffle has a rough side, make sure it is up). Repeat with second chaffle and place in the egg mixture next to the first chaffle. You want the two chaffles in a line, in the center of the egg mixture. While on medium-low, cover and cook for a couple of minutes until the egg is just set.

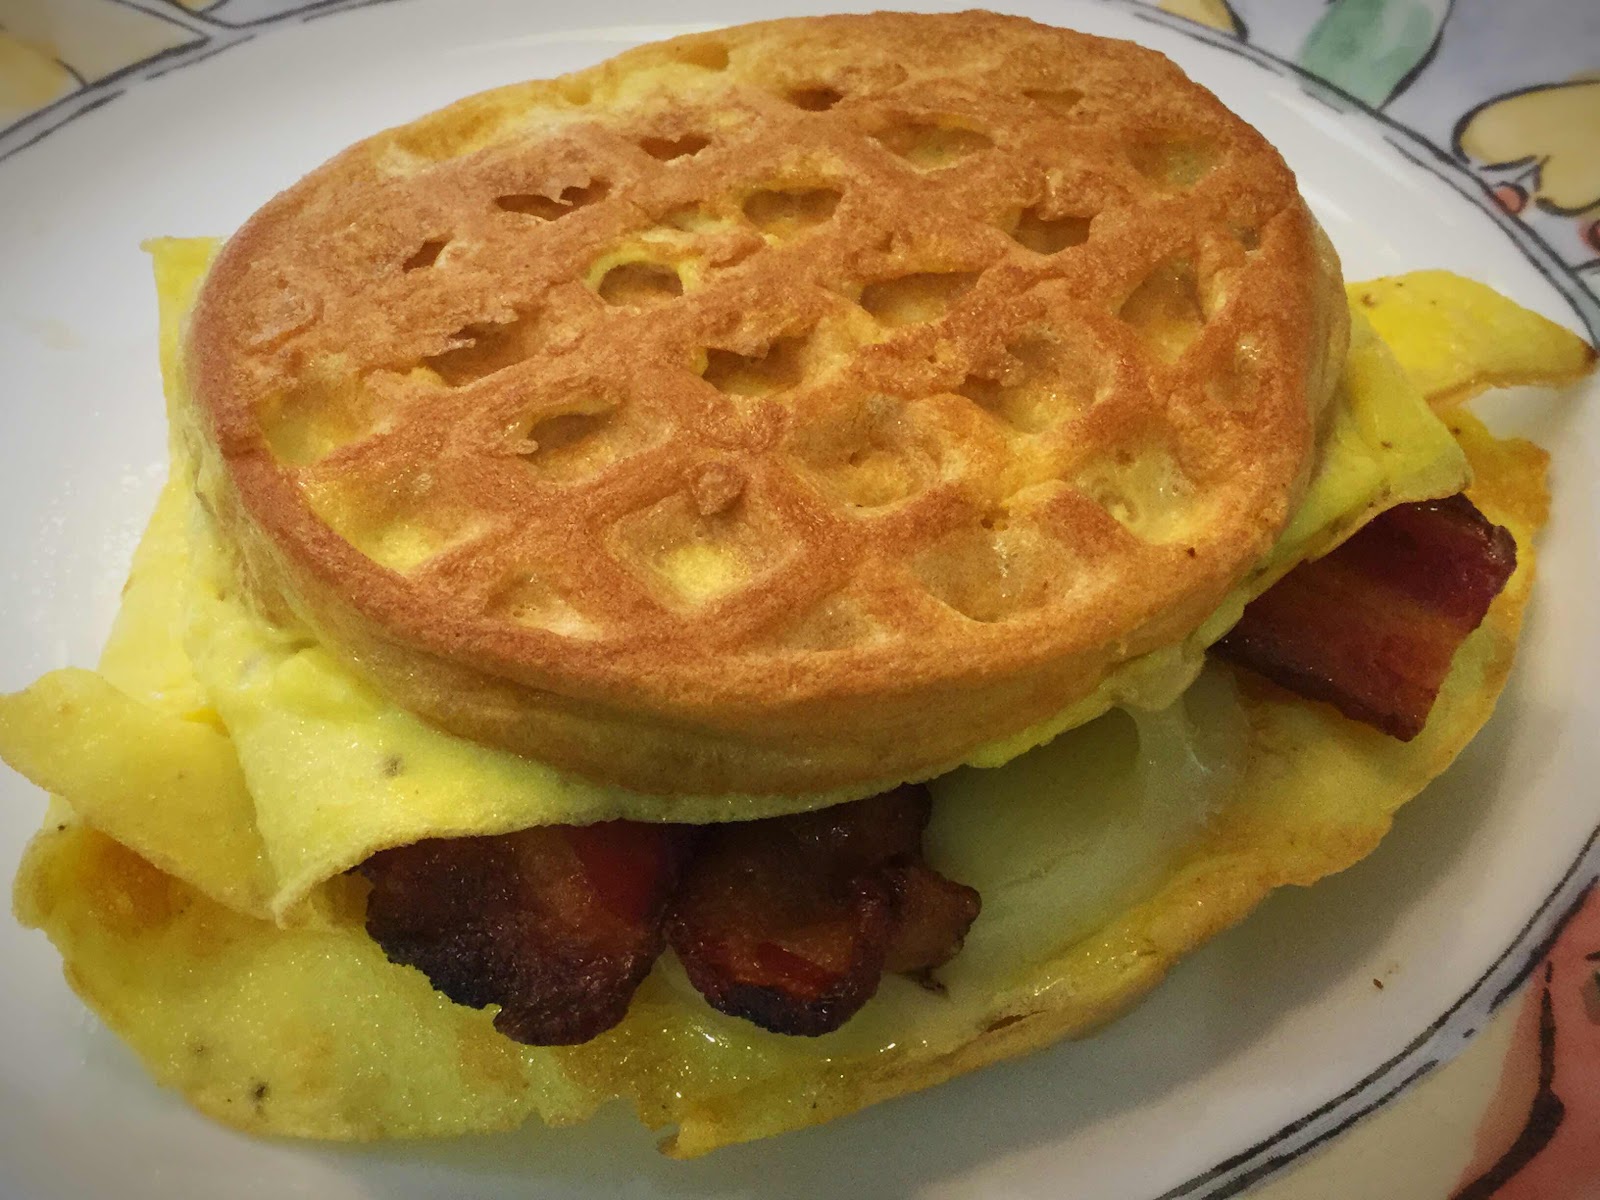
4. As a whole unit, turn the chaffles and egg circle over to cook the second side. Top chaffles with slices of cheese and bacon. Fold the egg “wings” into the center over the chaffles and filling. Carefully, fold one chaffle to rest on top of the other chaffle (like a book with filling). Allow the chaffle on the bottom to continue cooking until nicely browned. Flip over to the second side to brown.

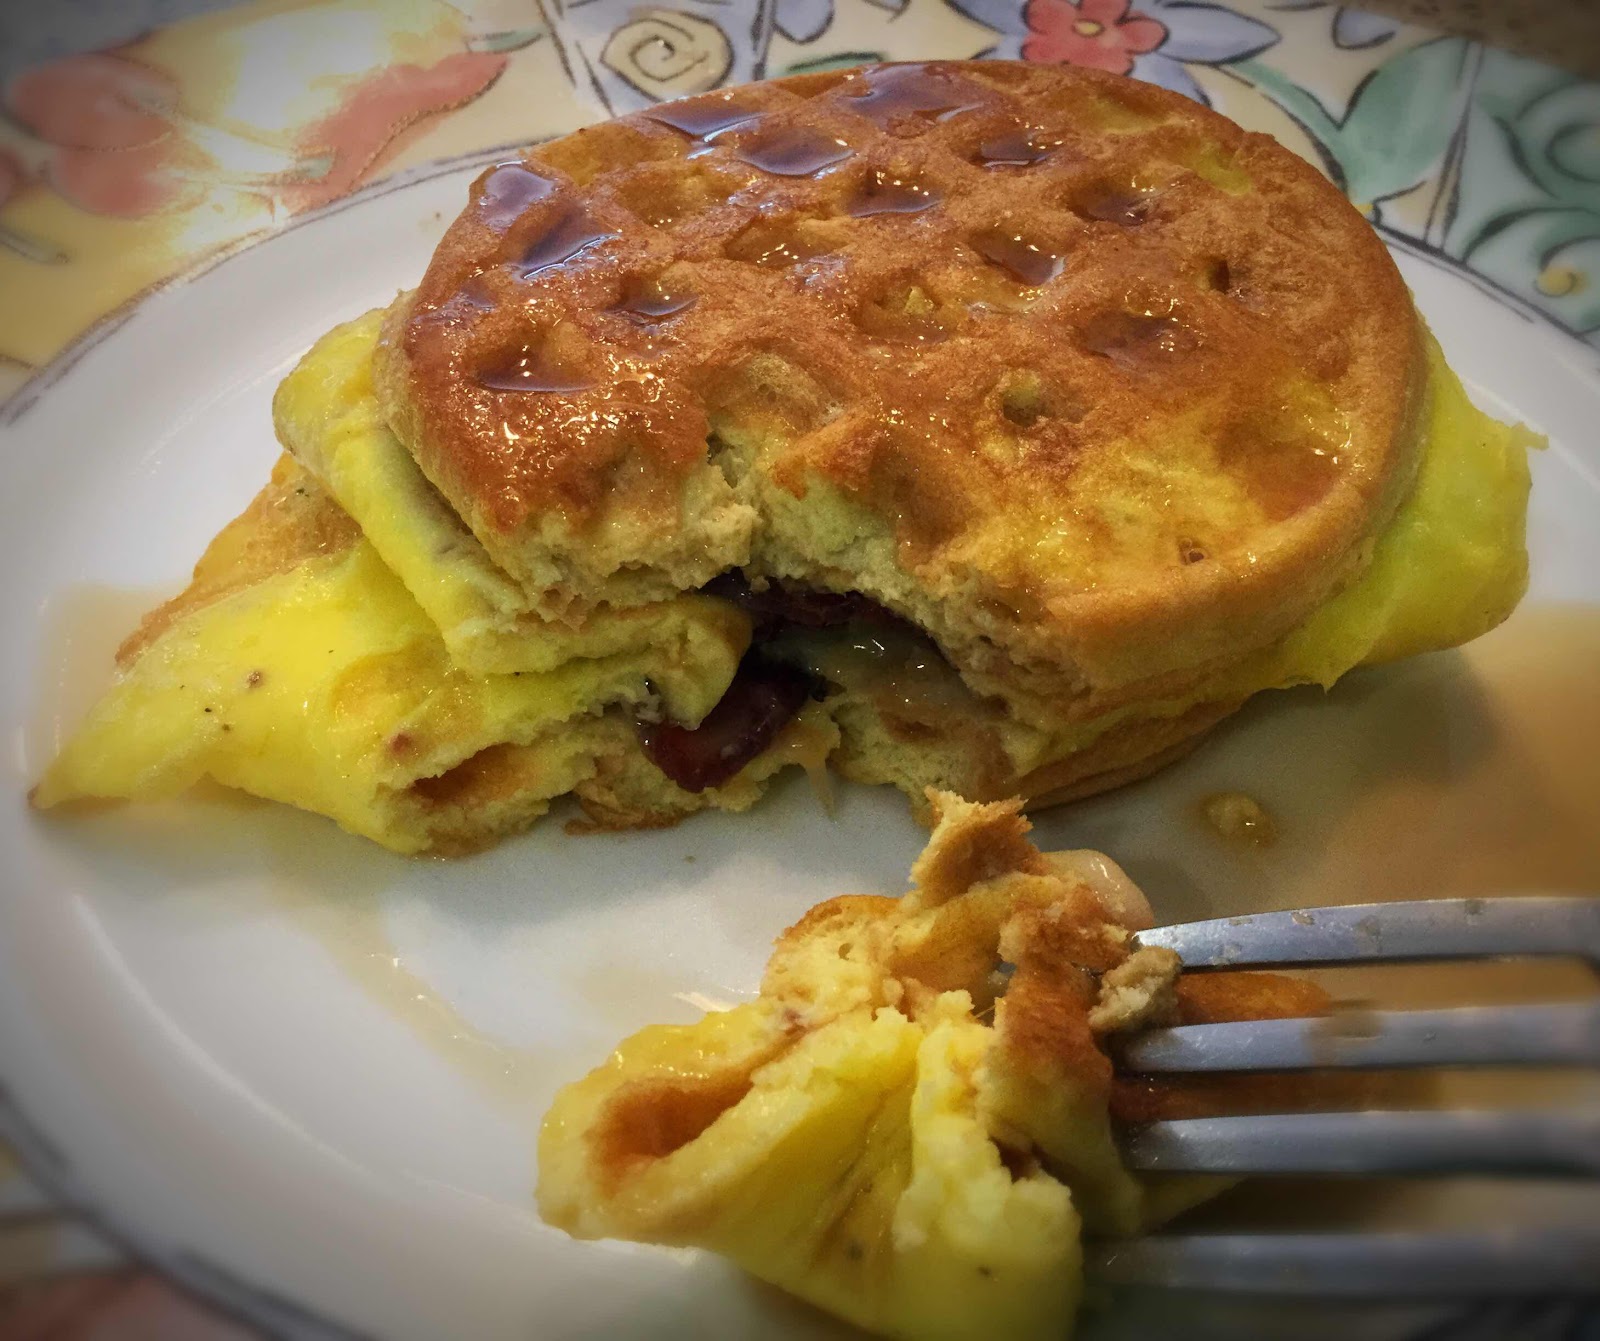
5. Remove sandwich to a serving plate and drizzle with sugar free syrup, if desired. Eat with a fork and enjoy!

Keto Monte Cristo Breakfast Sandwich
Nutritional Information: 546 calories, 3 g carbohydrates (0.8 g dietary fiber, 0.8 g sugars), 43.9 g total fat (14.8 g saturated fat, 0 g trans fat), 612 mg cholesterol, 912 mg sodium, 341 mg calcium, 354 mg potassium, 3 mg iron, 335 mg Vit A, 33.6 g protein. Net carbs per serving: 2.2 grams

Photos, video and recipe by Kathy Sheehan, copyright 2020
All rights reserved. Please do not duplicate without the author’s permission. 

Tuesday, February 11, 2020

Keto Apple Fritter Chaffles

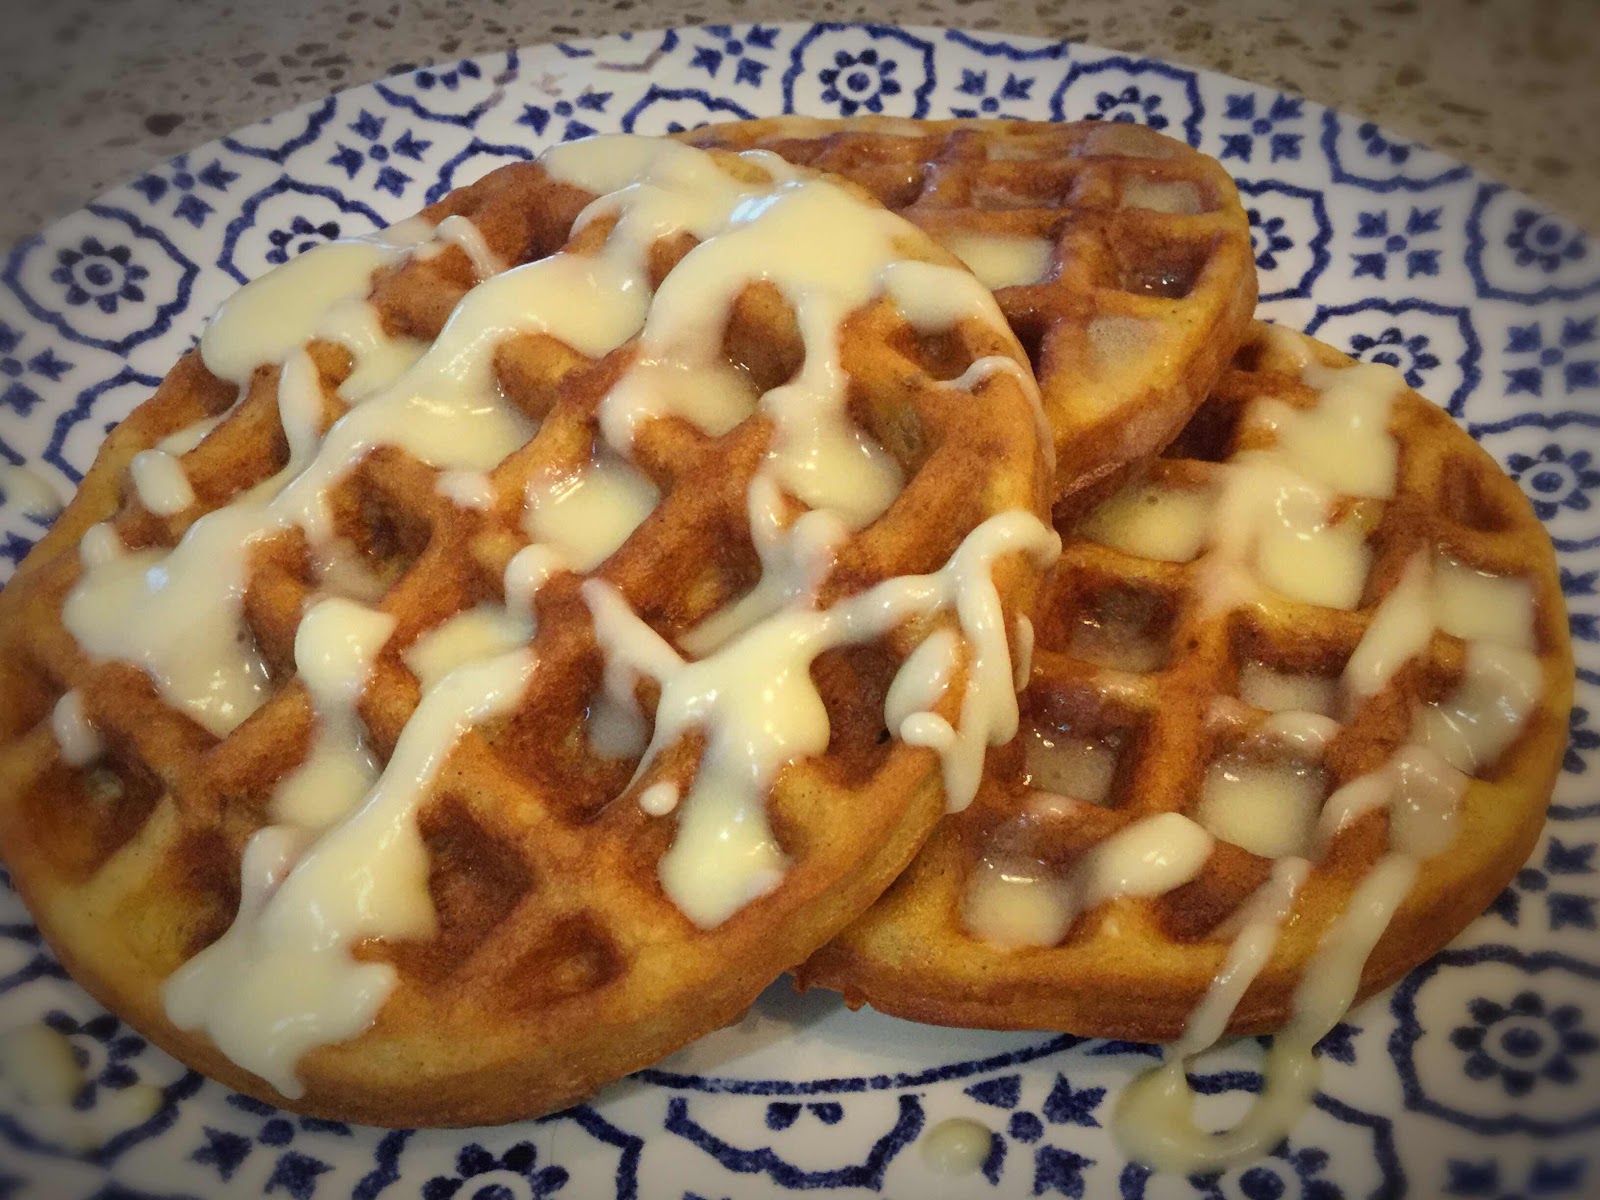
Keto Apple Fritter Chaffles
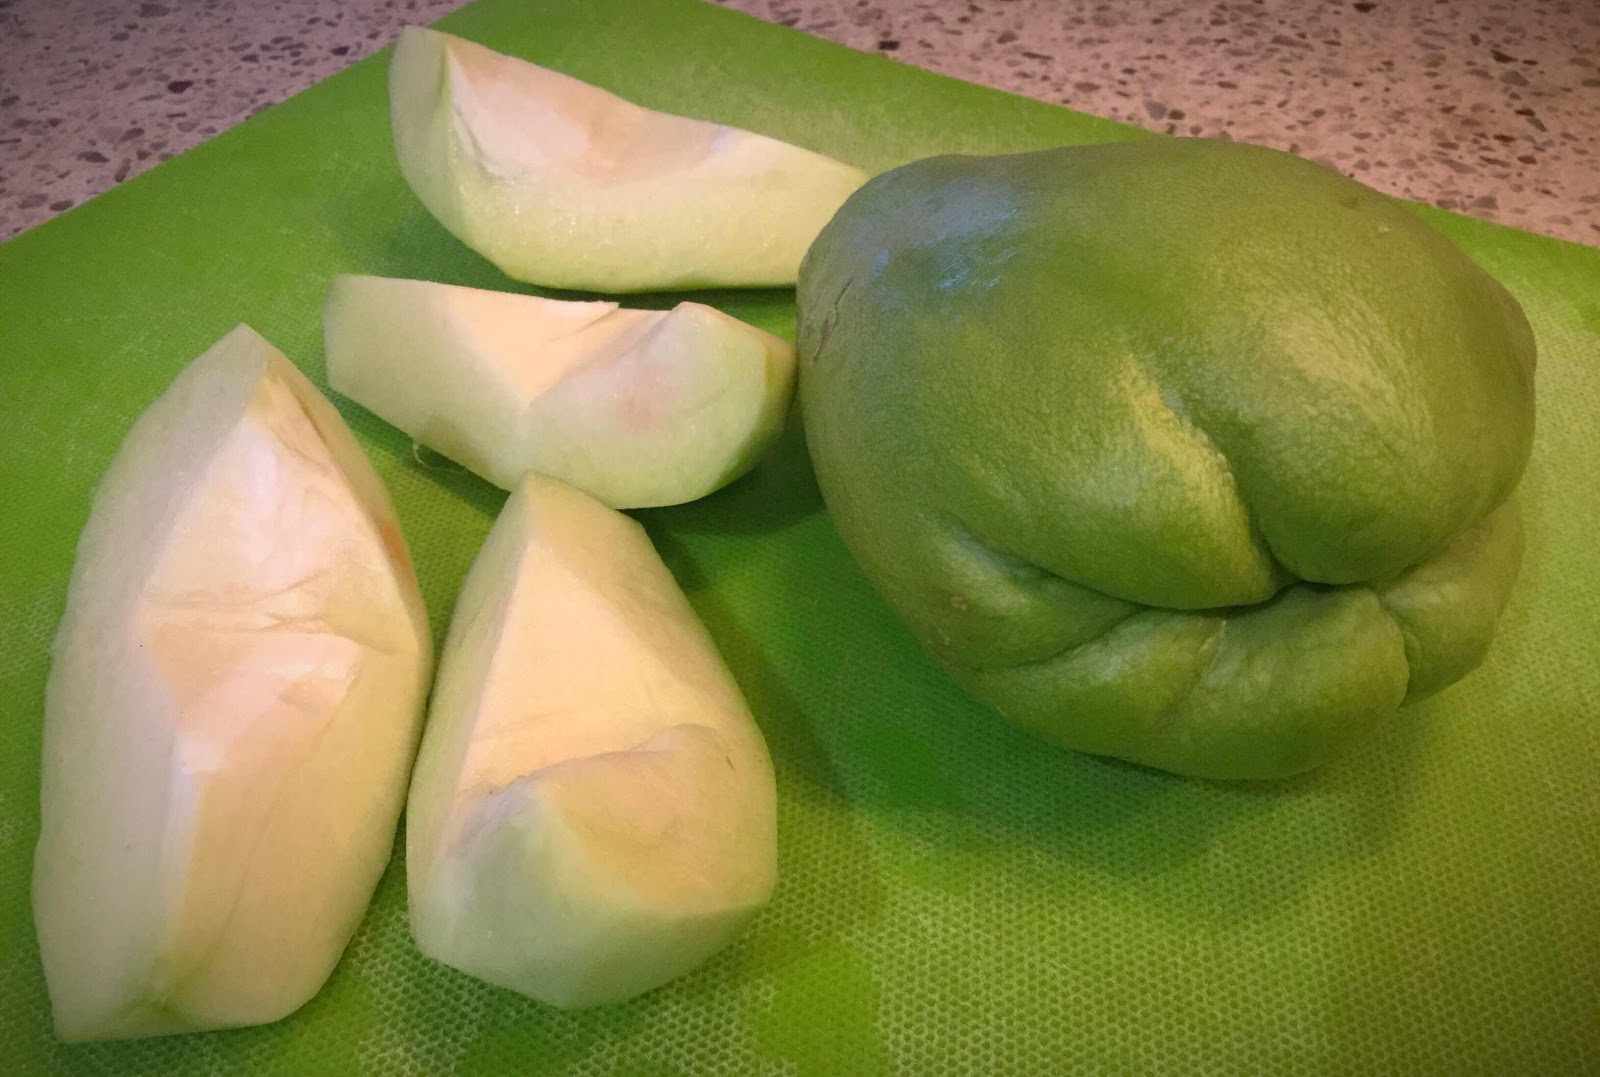
I love apples, but avoid eating them because of their high carbohydrate and sugar content. I have discovered the PERFECT apple substitute: Chayote Squash! Chayote squash is bland, it has almost no flavor on its own, but its texture and the way it softens as it cooks makes it an excellent, low carb replacement for apples in recipes. I promise, you will not be able to guess that these “apple” fritters are not made from real apples! The trick is giving the squash the flavor of apples by cooking them in apple pie spices, adding lemon juice for tartness and, most importantly, adding apple extract for flavoring. I use Capella Double Apple flavoring, which I purchased online (click here to view). Only a few drops is needed to give the squash their realistic apple taste. The other thing I love about this recipe is its generous portion size! Enjoy these “apple” fritters for breakfast or dessert. I guarantee you’ll want to have them often and, with such a low carb count per serving, you can!!

Keto “Apple” Fritter Chaffles with Glaze
Makes one serving (3 chaffles)

“Apple” Fritter Filling (make first):
2 tablespoons butter
2 cups chayote squash, peeled and diced into small pieces (2 squashes)
2 tablespoons lemon juice
2 tablespoons golden (brown) erythritol (I used LaKanto Golden Monkfruit Sweetener)
8 drops monkfruit extract or stevia, or to taste
1 1/2 teaspoons apple pie spice blend
1/4 teaspoon apple flavoring or extract, or to taste

Chaffle Ingredients:
1 large egg
1 tablespoon mayonnaise or sour cream
1 tablespoon almond flour
1 teaspoon coconut flour
1 teaspoon golden (brown) erythritol sweetener
1/4 teaspoon baking powder
1/8 teaspoon vanilla extract (or cake batter extract)
1/3 cup prepared “apple” fritter filling (see directions below), finely diced

Glaze Ingredients:
1 tablespoon melted butter
1 tablespoon heavy whipping cream
1/4 teaspoon vanilla extract
2 tablespoons powdered erythritol sweetener

1. Prepare the “apple” fritter filling first, before mixing the chaffle ingredients. Peel, de-seed and dice the chayote squash into small pieces, as you would an apple. In a medium skillet over medium-low heat, melt 2 tablespoons butter and add the diced squash, lemon juice, golden erythritol sweetener, monkfruit extract or stevia, apple pie spice and apple flavoring. Cover and simmer gently over low to medium heat for about 20 minutes, until tender and soft. Stir occasionally and, if needed, add a tablespoon of water so the mixture doesn’t dry out or burn. When soft, taste and adjust sweetening and spices to your liking. It should taste like cooked apples! Note: This recipe will make more than you need for one serving. Set aside 1/3 cup for chaffles and, when cooled, store the remainder of the filling in an airtight container in the refrigerator for another time or serve over keto vanilla ice cream.
chayote squash
2. To make the chaffles, preheat a 4” mini waffle maker. In a medium bowl, whisk together the chaffle ingredients, except the filling. If needed, use a potato masher to finely dice the 1/3 cup “apple” fritter filling before adding it to the batter; for even cooking, you don’t want the “apple” pieces to be too big. Whisk the filling into the batter until well combined.

3. Divide the batter into thirds. Spoon 3-4 tablespoons of the batter onto the preheated waffle maker and spread around so the “apples” are evenly distributed. Close the lid and cook for at least 4 minutes or until the fritter is nicely browned. Remove to a wire rack and repeat with remaining batter to make two more chaffles (this recipe makes 3 chaffles).

4. While the chaffles are cooking, make the glaze. Whisk together the melted butter, heavy cream and vanilla extract. Add the powdered erythritol and whisk until smooth.

5. Drizzle glaze over chaffles before serving. Enjoy!

Nutritional Information per 3 chaffles with glaze: 407 calories, 6.7 g carbohydrates (3 g dietary fiber, 2 g sugars, 0.7 g sugar alcohols), 40 g total fat (16.9 g saturated fat, 0 g trans fat), 252 mg cholesterol, 325 mg sodium, 103.2 mg calcium, 190 mg potassium, 2 mg iron, 291 mg Vit A, 6 mg Vit C, 8.9 g protein. Net carbs per serving: 3.7 grams

Photos and recipe by Kathy Sheehan, copyright 2020
All rights reserved. Please do not duplicate without the author’s permission.