Wednesday, February 9, 2022

Burrata with Strawberry and Balsamic

Burrata with Strawberry and Balsamic
With Valentine’s Day coming soon, you might find this easy recipe perfect to serve as a special appetizer, breakfast or dessert. Only three ingredients needed! Burrata cheese is a thin layer of fresh mozzarella wrapped around a creamy center. It’s perfect served with savory ingredients, but is also excellent with this combination of sweet strawberries and tangy balsamic vinegar. Choose a sugar-free strawberry jam that has no more than four carbs per tablespoon. My favorite is No Sugar Added Strawberry Jam made by Good Good. Stir it up and use it like a sauce. Then drizzle balsamic over all. You can serve this with low carb crackers or it’s excellent eaten directly from a spoon!

Burrata with Strawberry and Balsamic
Makes 2 servings

1 (4 oz.) Burrata Cheese Ball (can be purchased in the cheese section)
1 tablespoon No Sugar Added Strawberry Jam
1 teaspoon balsamic vinegar

Burrata Cheese
1. Place the Burrata cheese ball on a serving plate and allow it to sit at room temperature for at least 15-20 minutes. 

2. Stir the sugar free jam to loosen it up and spoon over the top of the cheese ball. Drizzle 1 teaspoon of balsamic vinegar over all. Enjoy!

No Sugar Added Strawberry Jam by Good Good
Nutritional Information per serving (1/2 cheese ball with toppings): 145 calories, 4.4 g carbohydrate (0 g fiber, 0.9 g sugars), 12 g total fat (8 g saturated fat, 0 g trans fat), 40 mg cholesterol, 121 mg sodium, 0.6 mg calcium, 3 mg potassium, 6 g protein. 

Recipe by Kathy Sheehan, copyright 2022
All rights reserved. Please do not duplicate without the author’s permission.

Sunday, February 6, 2022

Grilled Sauerkraut

Grilled Sauerkraut
Many years ago, my husband and I had a wonderful meal at Morse’s Sauerkraut, a restaurant in Waldoboro, Maine. Along side the excellent bratwurst and schnitzel, we were served the most unbelievable grilled sauerkraut! This was new to us and it is a dish we have never forgotten, although the restaurant has been closed for several years. This recipe was inspired by this delicious side dish. It’s very quick and simple to make using fresh sauerkraut that you can purchase at the grocery store in the refrigerated section. The result is flavorful, with a touch of sweetness from the caramelized onion. It is one of my favorite side dishes to serve with brats, sausages and kielbasa. 

Grilled Sauerkraut
Makes 2 servings

1/2 onion, thinly sliced
2 slices precooked bacon, chopped
2 tablespoons avocado oil or refined coconut oil
1/2 pound fresh sauerkraut (found in the refrigerated section), drain well and pat dry with paper towels
1 tablespoon unsalted butter
Ground pepper to taste
A pinch of salt, only if needed

1. Heat your pan on medium-high heat. You may use a nonstick or cast iron pan. When it is hot, add the oil and onion, stirring often until softened and starting to brown.

Saute the ingredients until browned and crispy
2. Add the bacon and sauté until beginning to crisp. Stir in the drained sauerkraut, making sure to stir often to prevent burning. When the sauerkraut starts to brown and becomes slightly crisp, add the butter and stir until melted. Continue to cook until the sauerkraut reaches the desired level of browning. Season with pepper and salt to taste. Serve warm.

Nutritional Information per serving: 188 calories, 7 g carbohydrate (4.3 g dietary fiber, 1.2 g sugars), 16.1 g total fat (5.6 g saturated fat, 0 g trans fat), 25 mg cholesterol, 1030 mg sodium, 10.2 g calcium, 95 mg potassium, 54 IU Vit A, 16 mg Vit C, 3.5 g protein. Net carbs per serving: 2.7 grams

Photos and recipe by Kathy Sheehan, copyright 2022
All rights reserved. Please do not duplicate without the authors permission.

Monday, January 17, 2022

Keto Chicken and Cauliflower Rice Soup

Keto Chicken and Cauliflower Rice Soup
Sometimes when you’re sick, the only thing that sounds good is a warm bowl of soup. When I was recently ill, that’s the only thing I was craving! I looked through my cupboard to try and find the lowest carb soup in a can. I found a chicken rice soup with 12 g per cup and, because I was in no shape to make a homemade pot of soup that day, I ate it…and was very disappointed. There was very little chicken, lots of rice and even more potatoes! My blood sugar soared through the roof, much more than a serving of 12 carbs should have caused. The next day I was determined to make my own soup! And it turned out so delicious, very comforting and I ate it over the next several days as I recovered. Cauliflower rice in this recipe tastes and has the same texture as real rice! The broth was richer and more flavorful than anything you’ll find in a can. The real trick to this recipe is to brown the chicken, skin side down, in the Dutch oven or saucepan until crispy and a fond collects in the bottom of the sauce pan. Then, once you add the rest of the ingredients and broth, the fond is incorporated into the soup adding exceptional flavor. I hope you find this recipe as comforting as I did, especially on a sick day.

Keto Chicken and Cauliflower Rice Soup
Makes about 6 servings

12 ounces bone-in chicken thighs with skin (2 large thighs or 3-4 smaller)
2 carrots, diced
1/2 onion, diced
1 large rib celery, diced
1/4 teaspoon salt
1 clove garlic, minced
3/4 teaspoon dried thyme
1/2 teaspoon poultry seasoning
4 cups chicken stock or bone broth
2 cups frozen cauliflower rice, thawed
Salt and pepper, to taste

1. In a large Dutch oven or large, heavy saucepan, place the bone-in chicken thighs skin side down and heat over medium heat for eight minutes or until the skin has rendered its fat and is crispy. Turn the chicken over and continue cooking for another five minutes. Remove the chicken to a plate to rest while you continue making the soup.

2. Add the carrots, onion and celery to the saucepan, along with about 1/4 teaspoon of salt, and sauté until the vegetables are tender crisp and the onion is translucent. Add the garlic, thyme and poultry seasoning and stir for 30 seconds. Add the chicken stock and, with a wooden spoon, scrape the bottom of the pan until the accumulated fond is incorporated into the broth.

3. Add the chicken back into the pan and bring to a simmer. Cover and gently simmer the soup for 45 minutes. Test the temperature of the chicken with a probe thermometer. It should be at least 175°F. Remove the chicken from the pan and onto a plate to cool. Add the cauliflower rice to the soup and stir. Turn off the heat and allow the soup to sit, covered, while the chicken cools.

4. Once the chicken is cool enough to handle, remove the skin and bones from the chicken and discard. Cut the chicken into bite-size pieces and return the chicken to the pot. Reheat the soup, adding salt and pepper to taste. Simmer gently for 10 minutes before serving. Enjoy and get well! (This soup can be stored in an airtight container in the refrigerator for up to four days.)

Bowl of Chicken and Cauliflower Rice Soup
Nutritional Information per serving (1 cup): 150 calories, 4.7 g carbohydrate (1.5 g dietary fiber, 2.5 g sugars), 6.2 g total fat (1.7 g saturated fat, 0 g trans fat), 54 mg cholesterol, 414 mg sodium, 27.9 mg calcium, 214 mg potassium, 1 mg iron, 819 IU Vit A, 16 mg Vit C, 18.3 g protein. Net carbs per serving: 3.2 grams

Photos and recipe by Kathy Sheehan, copyright 2022
All rights reserved. Please do not duplicate without the author’s permission.

Monday, December 20, 2021

Keto Peppermint Stick Ice Cream

Keto Peppermint Stick Ice Cream
Since I was a little girl, my absolute favorite flavor of ice cream has always been Peppermint Stick. I have tried for many years to perfect a peppermint ice cream and, I’m happy to announce, I’ve finally done it! This is exactly like the peppermint stick ice cream I remember from Braum’s in Tulsa, Oklahoma, where I grew up. Crunchy candies throughout in a creamy peppermint ice cream base that is both sugar-free and so low in carbs you won’t believe it! I don’t have to only dream about having my favorite ice cream ever again!

Keto Peppermint Stick Ice Cream
Makes 8 servings

Ice Cream Base:
1 cup whole milk (I suggest Fairlife or Maple Hill Zero Sugar Whole milk, see note*)
3 tablespoons powdered erythritol sweetener (I used LaKanto Monkfruit Powdered sweetener)
6 tablespoons allulose
A pinch of salt
2 cups heavy cream
3/4 teaspoon peppermint extract, or to taste
1 drop red gel food coloring (optional)

Candy Cane Mix-Ins:
2 real mini peppermint candy canes, crushed (about 1 tablespoon or a serving size of candy equaling 8 g carb, see note**)
2 tablespoons Sugar Free Peppermint Hard Candy, crushed into tiny pieces (1/2 of my peppermint hard candy, click here for recipe)

1. In a medium bowl, use a whisk to combine the milk, sweeteners and salt until the sweeteners are dissolved. Stir in the heavy cream, peppermint extract and a drop of food coloring, if using. Taste and adjust the level of peppermint flavor to your liking. Cover and refrigerate a minimum of two hours, preferably overnight. Whisk mixture together again before continuing.

2. Meanwhile, make a batch of my Sugar-Free Peppermint Hard Candy (see separate recipe here). You may also use commercially available sugar free peppermint candy, but be aware that the sweeteners they use (isomalt, sorbitol and mannitol) cause digestive upset, gas, bloating and loose stools in many people. I am one of those sensitive people, so I make my own peppermint candy using erythritol.)

3. Crush the two mini real candy canes and 1/2 recipe of the sugar-free peppermint hard candy and set aside until needed in the churning process.

Crushed sugar free peppermint candies
4. Follow the directions for your ice cream maker. Pour the chilled ice cream base into the ice cream maker and churn until thickened and beginning to set. Add the crushed peppermint candies, a teaspoon at a time, and continue to churn until quite thick. Spoon the ice cream into an airtight container and place in the freezer for six hours or more to set up before serving.

Notes:
* I suggest the brand Fairlife whole milk, which has less sugar, is lactose free and is half the carbs of regular whole milk. If using regular whole milk, add 1 1/2 carbs per serving.

Fairlife Whole Milk

** You can use sugar-free peppermint candies in place of the mini candy canes, but be aware that sugar-free candies contain isomalt, sorbitol or mannitol, all of which can cause digestive upset. Personally, I am so sensitive to those offending sugar alcohols that I prefer using a small amount of regular peppermint candy to avoid any risk of digestive upset, also you can choose to omit the peppermint candy altogether and reduce the carbs per serving by 1 gram. 

Keto Peppermint and Hot Fudge Sundae
Nutritional Information per 1/2 cup serving (made with Fairlife whole milk): 225 calories, 2.9 g carbohydrate (0 g fiber, 1.7 g sugars, 0.5 g sugar alcohols), 24.7 g total fat (14.4 g saturated fat, 0 g trans fat), 83 mg cholesterol, 49 mg sodium, 50.2 mg calcium, 3 mg potassium, 255 IU Vit A, 1.6 g protein. Net carbs per serving: 2.4 grams

Photos and recipe by Kathy Sheehan, copyright 2021
All rights reserved. Please do not duplicate without the authors permission.

Saturday, December 18, 2021

Sugar Free Peppermint Hard Candy

Sugar Free Peppermint Hard Candy
I love the taste of candy cane at this time of year. But, unfortunately, the sugar-free peppermint candies available in the stores are sweetened with the offending sugar alcohols isomalt, sorbitol or mannitol, all of which can cause embarrassing gas, bloating and loose stools… not the fun side effect you hope to experience from eating candy! I made these candies, not only for eating, but for sprinkling on my holiday baked goods or adding to my favorite ice cream flavor: Peppermint Stick Ice Cream! It is necessary to have a candy thermometer or probe thermometer to achieve correct hard-crack stage this candy requires. Also, erythritol-based sugar substitute is a must.  I’ve tried making this candy with allulose, but it turned out softer and chewy, like taffy, instead of a hard candy. Not bad, but not exactly what I was looking for. If you would like an alternative to the sugar-free candies available commercially, to crush and add to your ice cream or sprinkle on top of your keto baked goods, this is the recipe for you!

Sugar Free Peppermint Hard Candy
Number of servings varies (Yields 1/2 cup crushed candies)

1/2 cup erythritol-based powdered sweetener (I prefer Lakanto Monkfruit Powdered Sweetener)
1/16 teaspoon cream of tartar
1/3 cup water
1/2 teaspoon peppermint extract, or to taste
1 drop of gel food coloring (optional)

Equipment Needed:
Candy thermometer or Digital Probe thermometer*

1. In a small, heavy saucepan, very gently stir together the sweetener, cream of tartar and water over medium high heat just until the dry ingredients are dissolved. Stop stirring and allow to come to a boil. Continue to boil, without stirring, until the mixture reaches between 300 - 310°F. The mixture will remain clear and not thicken into a syrup. Temperature is the only way to determine if it has reached the hard crack stage. (Do not overcook or the mixture will begin to take on a bitter, burnt flavor.) Remove from heat.

Boil until mixture reaches between 300 to 310 degrees
2. While the mixture is boiling, line a small heatproof bowl with foil and set aside. You may also use silicone candy molds to create individual, bite-sized candies.

3. When the mixture stops bubbling, add the extract and food coloring (if using) and stir to combine. Pour the mixture into the foil-lined bowl and allow to cool for about 15 minutes. (Or pour into a silicone candy mold to make individual candies.) Refrigerate the mixture several hours until completely set and hardened.

4. Remove the foil or pop out the individual candies from the silicone mold. To make peppermint candy sprinkles, place the harden candy disc in a plastic bag and gently break apart by lightly pounding with the handle of a butter knife. (This candy has a more delicate structure than hard candy made from real sugar, so don’t pound too aggressively.) The broken, gently crush candy makes an excellent mix-in for my Keto Peppermint Stick Ice Cream or as a topping on keto baked goods.

Crushed Sugar Free Peppermint Candies
*Note: To achieve a hard candy, you need to use an erythritol-based sweetener. Allulose or Bocha Sweet will not firm up properly. (These two sweeteners make great taffy or chewy caramel, but not hard candies.) Also, you really need a candy thermometer or digital thermometer to make sure the boiling mixture reaches the right temperature, between 300-310°F, so it will set up correctly. Erythritol-based sweetener will not act like real sugar. It doesn’t thicken up into a syrup and will not ball up when added to cold water, so temperature is the only way to determine when you’ve reached the hard crack stage.

Keto Peppermint Hard Candy

Nutritional Information per 1 tablespoon of crushed candy: 1 calorie, 6 g carbohydrate (0 g fiber, 0 g sugars, 12 g sugar alcohols), 0 g fat, 0 mg sodium, 10 mg potassium, 0 g protein. Net carbs per serving: 0 grams

Photos and recipe by Kathy Sheehan, copyright 2021
All rights reserved. Please do not duplicate without the author’s permission.

Thursday, December 9, 2021

Keto Graham Cracker Pie Crust

Keto Graham Cracker Pie Crust
There are a lot of great keto pie crust recipes out there. But I haven’t found one that has a true graham cracker crust taste and texture, until now! By substituting keto cinnamon toast cereal for the graham crackers, you will be amazed how this recipe has the same flavor as one made with real graham crackers. Don’t forget this game-changing tip next time you need a graham cracker crust for a pie or cheesecake!

Keto “Graham Cracker” Pie Crust
Makes one 9” pie crust

2 cups crushed Catalina Crunch Cinnamon Toast Keto Cereal (or substitute their chocolate cereal for a chocolate crust)*
6 tablespoons unsalted butter, melted

Catalina Crunch Keto Cereal
1. Preheat the oven to 350°F.

2. Pulse the cereal in a food processor until very fine crumbs, almost a powder. Measure crumbs. You want to have 2 cups of crumbs; transfer to a medium bowl. Mix cereal crumbs and melted butter in the bowl until the mixture looks like wet sand.

3. Pour crumb mixture into a 9-inch pie pan and use the back of a measuring cup or large spoon to press it firmly in the bottom of the pan and a little bit up the sides.

4. Bake for 10 minutes. Remove from oven and allow to cool. The crust will be delicate while still hot from the oven. It will set up as it cools.

*Notes: You can use any flavor or brand of keto cereal to make a pie crust. 

Make ahead instructions: This crust is a great make ahead recipe. You can prep the crust 1 to 2 days ahead of time and store it in the refrigerator until ready to use. 

Freezing instructions: Prepare the crust and do not bake it. Cover it well and freeze for 2 to 3 months. Allow to thaw completely before baking and filling.

Sugar Free Pumpkin Pie with Keto Graham Cracker Crust
Nutritional Information per serving made with Catalina Crunch Keto Cereal (1/12th of recipe): 88 calories, 4.7 g carbohydrate (3 g fiber, 0.1 g sugars), 7.4 g total fat (3.8 g saturated fat, 0 g trans fat), 15 mg cholesterol, 37 mg sodium, 18.4 mg calcium, 12 mg potassium, 1 mg iron, 53 IU Vit A, 3.7 g protein. Net carbs per serving: 1.7 grams

Photos and recipe by Kathy Sheehan, copyright 2021
All rights reserved. Please do not duplicate without the author’s permission. 

Saturday, December 4, 2021

Keto Braised Italian Meatballs

Braised Italian Meatballs
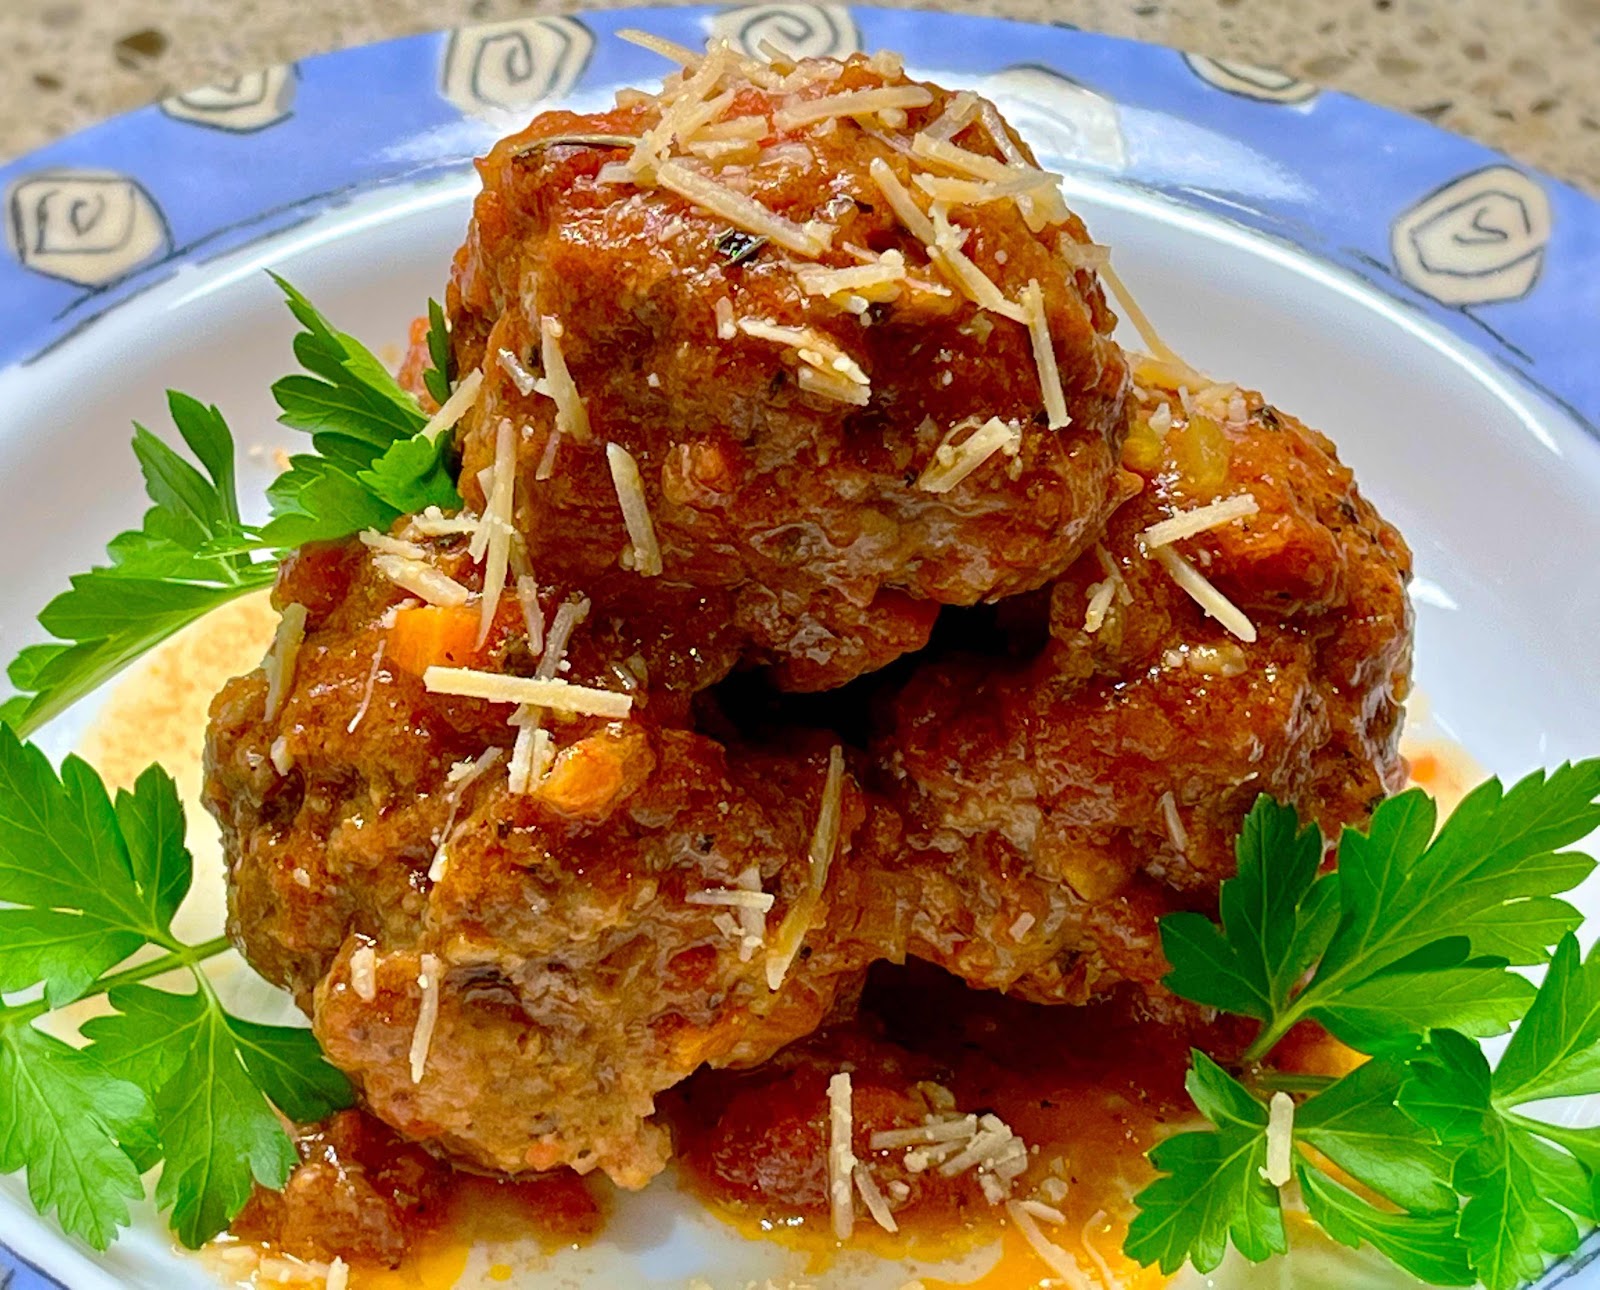
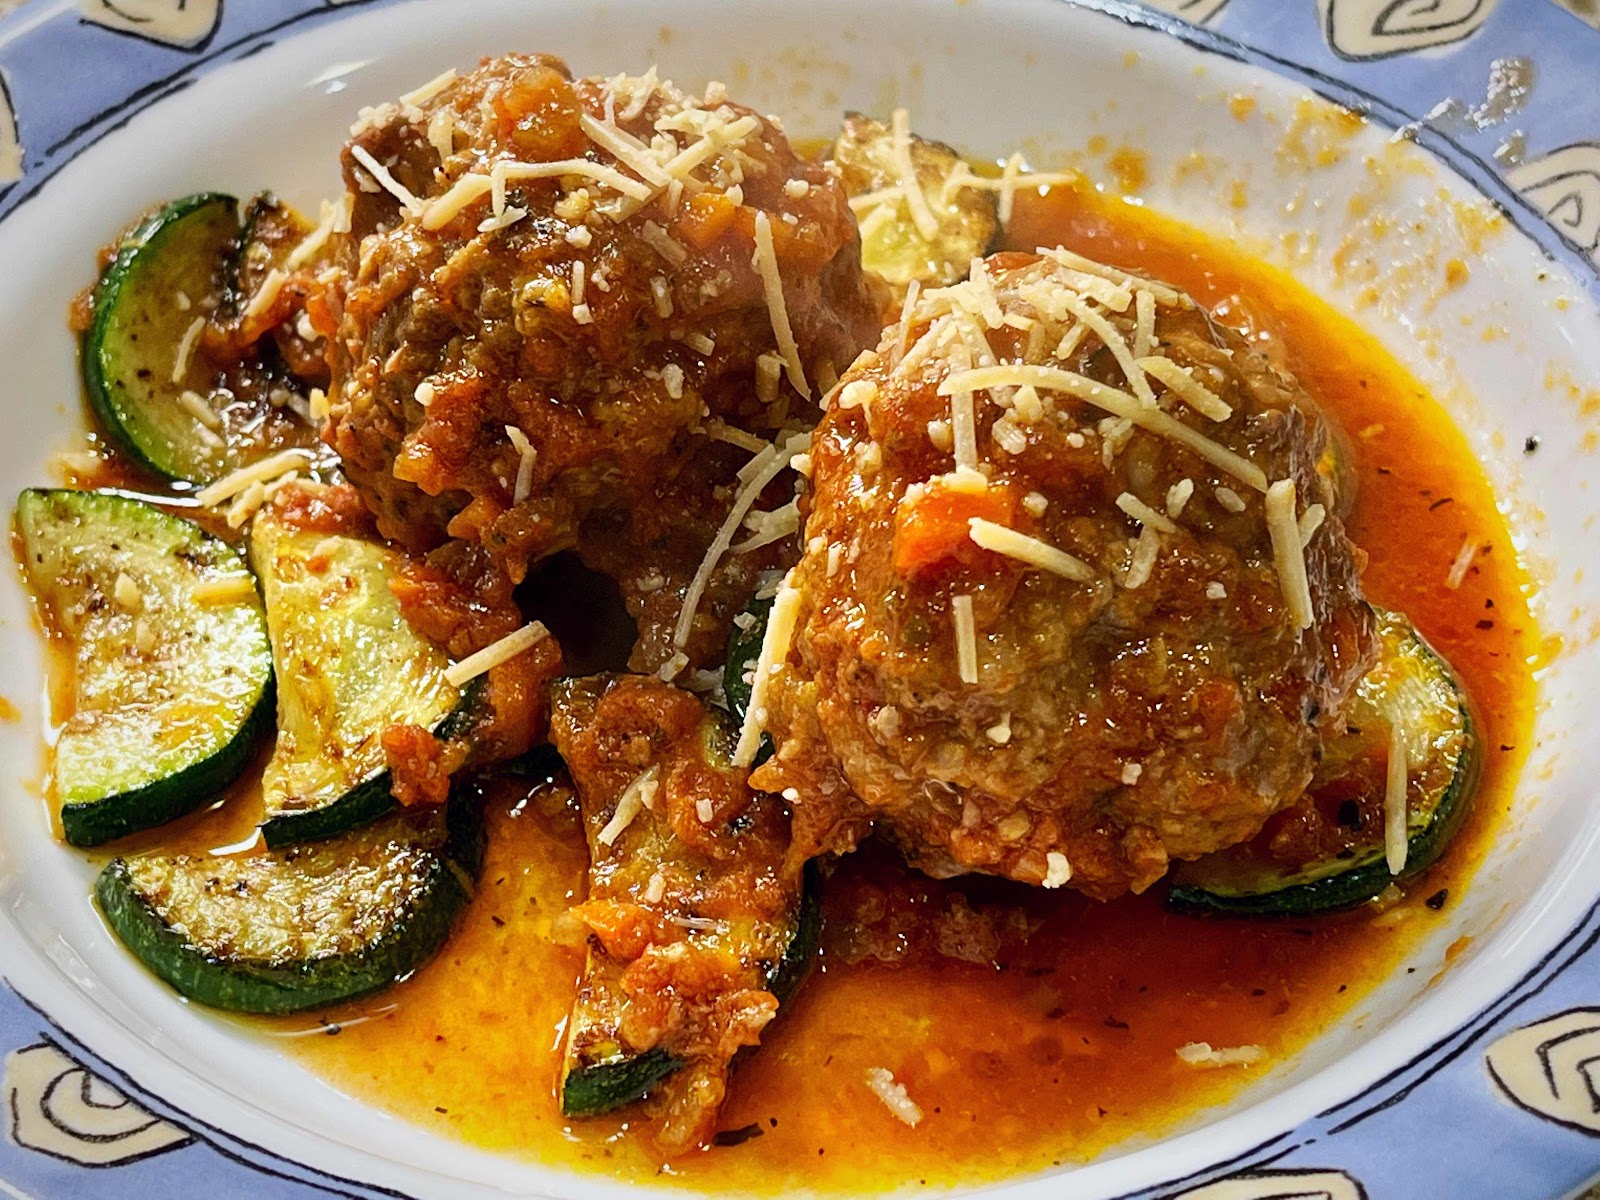
One year, when I vacationed in Italy, I found a restaurant that served the best meatballs I had ever tasted. They were tender and so flavorful! Since then, I discovered that braising meatballs, instead of baking or browning them in a skillet, is the best method for cooking them. Braising is a method of cooking in which the meat is simmered in a cooking liquid or, in this case, a delicious sauce. It is safe to add raw meat to the braising liquid as long as it continues simmering until the meatballs are cooked through. These are hearty, good-sized meatballs so, for me, two are plenty! The sauce is a light tomato-based sauce that also has wine and beef broth. As the meatballs cook in the sauce, a twofold exchange is going on: First, the meatballs become more flavorful by absorbing the sauce as they cook. Secondly, the sauce reduces and deepens in flavor as the meat releases its juices. I think you’ll agree with me that these tender and delicious meatballs are some of the best you’ve ever had!

Keto Braised Italian Meatballs
Makes 6 servings

Meatballs:
1/2 pound ground pork
1 pound ground beef
2 slices of low carb bread (or 2 chaffles), lightly toasted or dried out
1/2 cup riced cauliflower, thawed and excess liquid removed
1 egg
1 cup parmesan cheese, grated
1 teaspoon dried Italian herb seasoning
3/4 teaspoon fennel seeds

Sauce:
1 can (14.5 or 15 oz) diced tomatoes (with liquid), blitzed in a food processor to make a smooth sauce (or 1-1/2 cups tomato sauce)
1 tablespoon tomato paste
2 tablespoons olive oil
1/4 cup carrots, finely chopped
1/4 cup onions, finely chopped
1 stalk celery, finely chopped
2 cloves garlic, minced
1/4 teaspoon salt
1/2 teaspoon black pepper
1/2 teaspoon zero-carb brown sugar substitute, such as Swerve Brown
1 tablespoon fresh sage leaves, chopped (if using dried herbs, use 1/2 the amount called for)
1 tablespoon fresh thyme, chopped
1 tablespoon fresh parsley, chopped 
1/2 cup dry white wine
1 cup beef stock

1. Tear the dried low carb bread (or chaffles) into pieces and place in a food processor. Add the drained riced cauliflower and pulse together until crumbs; set aside.

2. Placed the ground pork and beef into a large bowl and mix well. Mix in the bread or chaffle crumbs, the egg and mix. Add the grated cheese, herbs and fennel seeds and mix well with your hands until all the ingredients are well distributed.

3. Using your hands, shape into meatballs about 2-1/2 inches in diameter or use slightly less than 1/3 cup measuring cup to form 12 equal-sized meatballs. Set aside. (This step can be done one day ahead and refrigerated. Allow the meatballs to sit at room temperature for at least 30 minutes before cooking.)

4. To make the sauce: Pour the diced tomatoes and tomato paste into the food processor and blitz until it forms a smooth sauce. Measure to make sure you have at least 1-1/2 cups of tomato sauce (a little more is fine); set aside.

5. Add the olive oil to a wide, deep, heavy sauce pan and warm over medium heat. Add the carrots, celery and onion. Stir and cook for 2 minutes. Add the garlic and stir briefly until fragrant.

6. Add the salt, pepper, brown sugar substitute, sage, thyme and parsley. Stir well and cook for 2 minutes. Stir in the wine and cook for 2 minutes. Add the tomato sauce mixture and beef stock; stir to combine. Increase heat to medium-high and bring to a boil. After reaching a boil, add the meatballs and return to a boil. Reduce the heat to medium-low or low and simmer, uncovered, for 35 minutes.

7. Carefully, remove the meatballs to a serving plate or bowl with a slotted spoon. If necessary, continue to boil and reduce the sauce until it reaches the desired consistency. For extra flavor and color, you may garnish with chopped chives or parsley.

Braised Meatballs with Zucchini
Nutritional Information per 2 meatballs with 1/2 cup sauce: 548 calories, 6 g carbohydrate (1.5 g dietary fiber, 2.8 g sugars), 33.1 g total fat (11.8 g saturated fat, 0 g trans fat), 191 mg cholesterol, 754 mg sodium, 235.5 mg calcium, 456 mg potassium, 11 mg iron, 416 IU Vit A, 12 mg Vit C, 53.8 g protein. Net carbs per serving: 4.5 grams

Photo and recipe by Kathy Sheehan, copyright 2021
All rights reserved. Please do not duplicate without the author’s permission.