Sunday, January 24, 2021

Low Carb Strawberry Mousse Chaffle Cake

Low Carb Strawberry Mousse Chaffle Cake
My daughter likes to joke and say, “You eat more cake than any diabetic I know!” When they’re gluten free, low carb/keto and sugar free, why not? I especially enjoy making tiny cakes because I don’t have a large crowd to feed, it’s just me and my husband, so a mini cake will provide a serving or two and then we’re done. No leftovers to get stale or tempt me for a week! Chaffle cakes are so quick and easy, they’re even lower carb than my other cakes, and they’re fun! This recipe is bright and refreshing on a winter’s day. To give it an extra strawberry boost, I crushed unsweetened, dried strawberries into a powder and added it to both the batter and the frosting. It lends a pretty pink color, too. The mousse frosting can be made by itself and served in a dish or the strawberry chaffles are excellent eaten as they are, but the combination is truly a special Valentine’s Day treat!

Low Carb Strawberry Mousse Chaffle Cake
The cake makes 3 servings, plus extra chaffles for snacking

Strawberry Chaffle Ingredients:
2 eggs, room temperature 
2 ounces cream cheese, softened
1 tablespoon coconut flour
1/2 teaspoon baking powder
2 tablespoons granulated erythritol sweetener 
1 teaspoon vanilla extract
1/2 teaspoon strawberry extract (I used McCormick brand)
1/8 teaspoon cake batter extract, optional (but gives a nice flavor. I used McCormick brand)
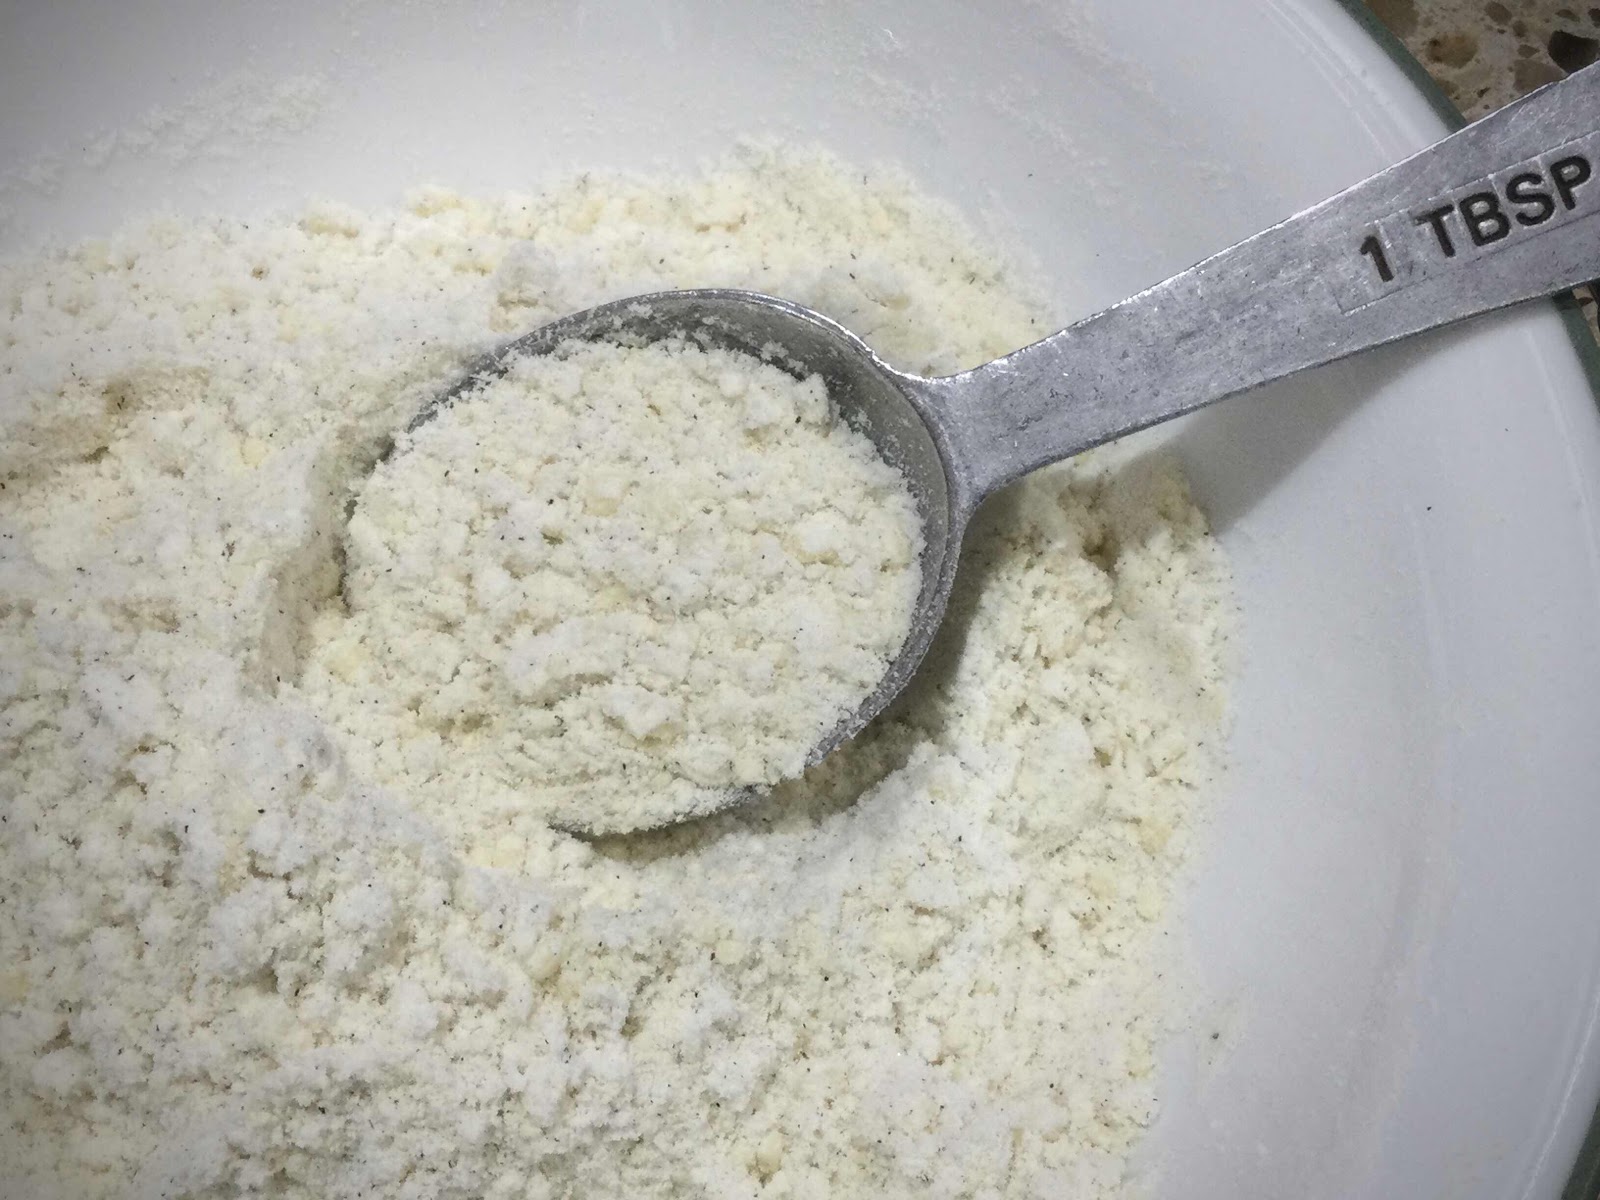
2 teaspoons unsweetened, dried strawberries, crushed into a powder (I used Trader Joe’s, see photo below)
1 tablespoon water
2 drops red food coloring, optional

Strawberry Mousse Frosting:
1/4 cup cold heavy cream
2 tablespoons cream cheese, softened
2 tablespoons unsalted butter, softened
2 tablespoons powdered erythritol sweetener 
1/4 teaspoon strawberry extract 
1 teaspoon unsweetened, dried strawberries, crushed into a powder
1-2 drops light pink food coloring, optional

Decorative Toppings (optional):
Sliced strawberries
Sugar free sprinkles
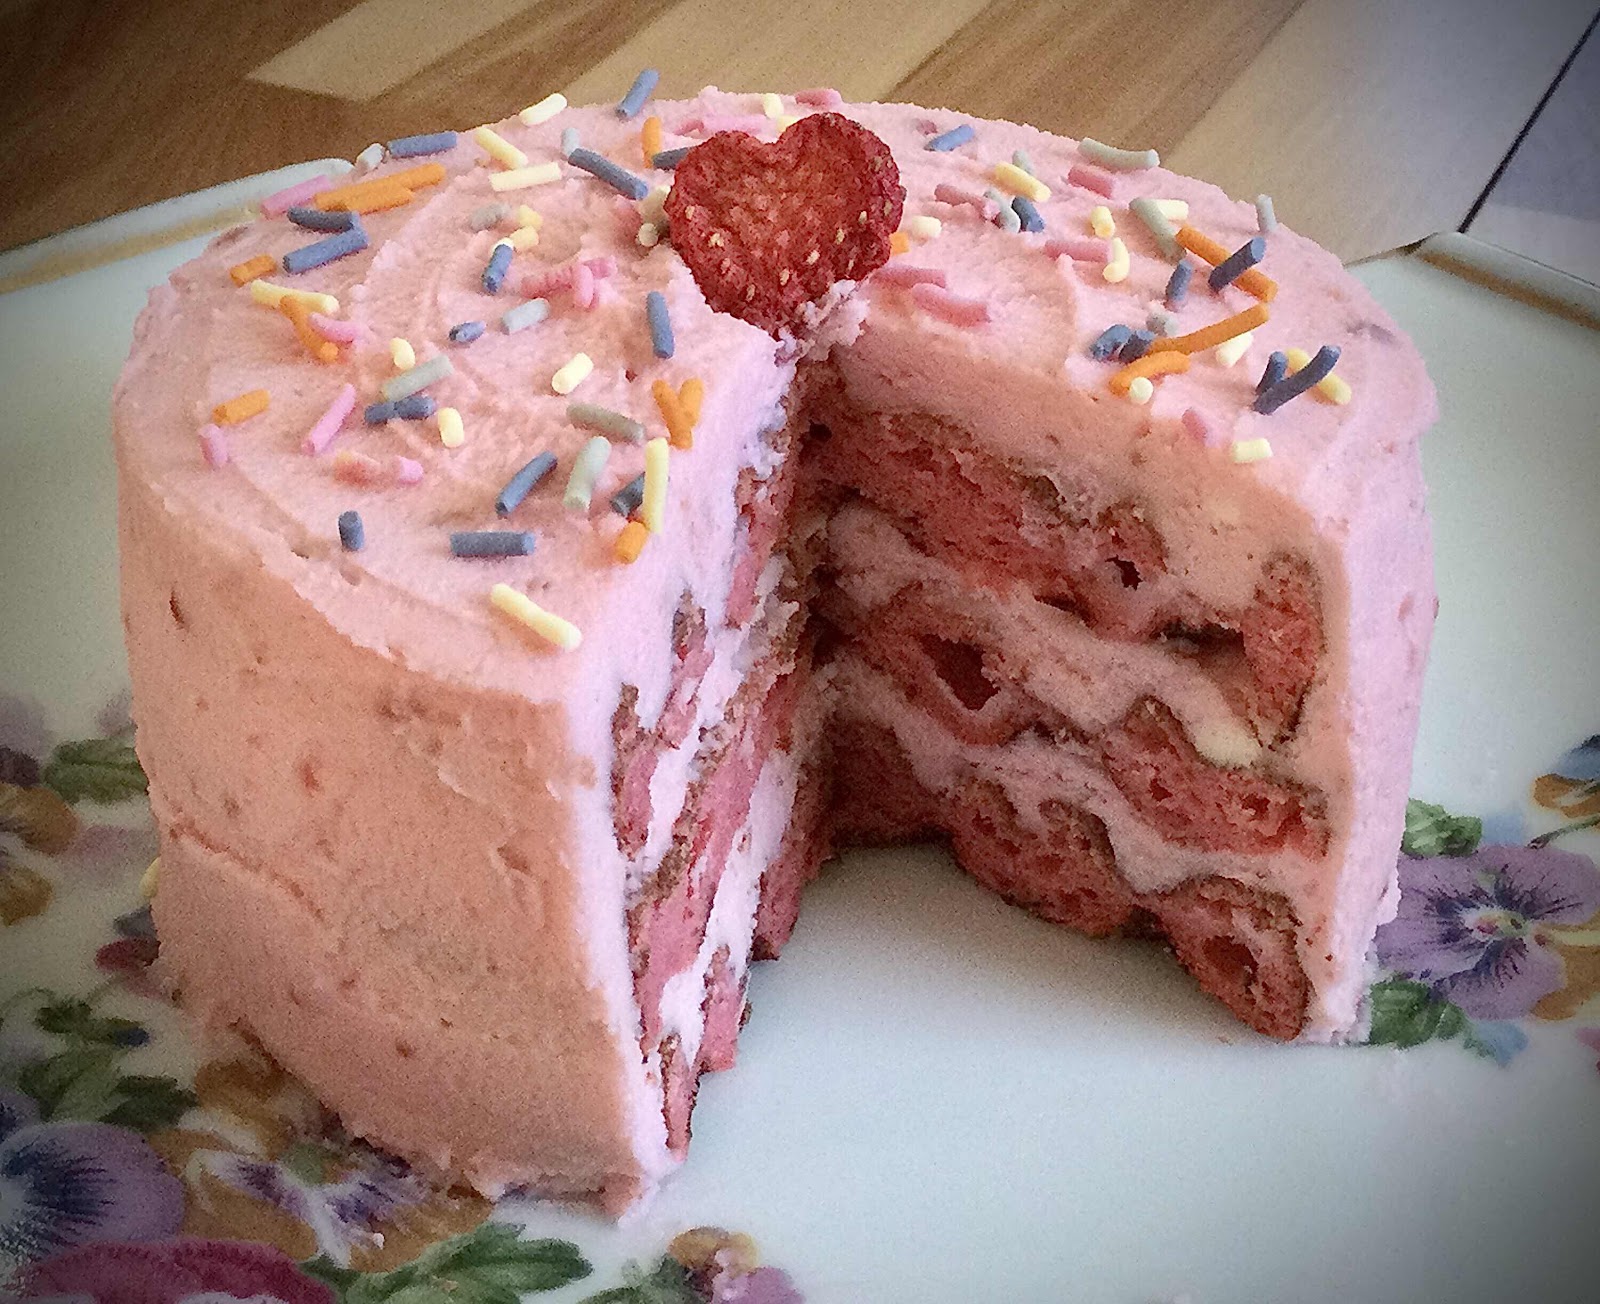
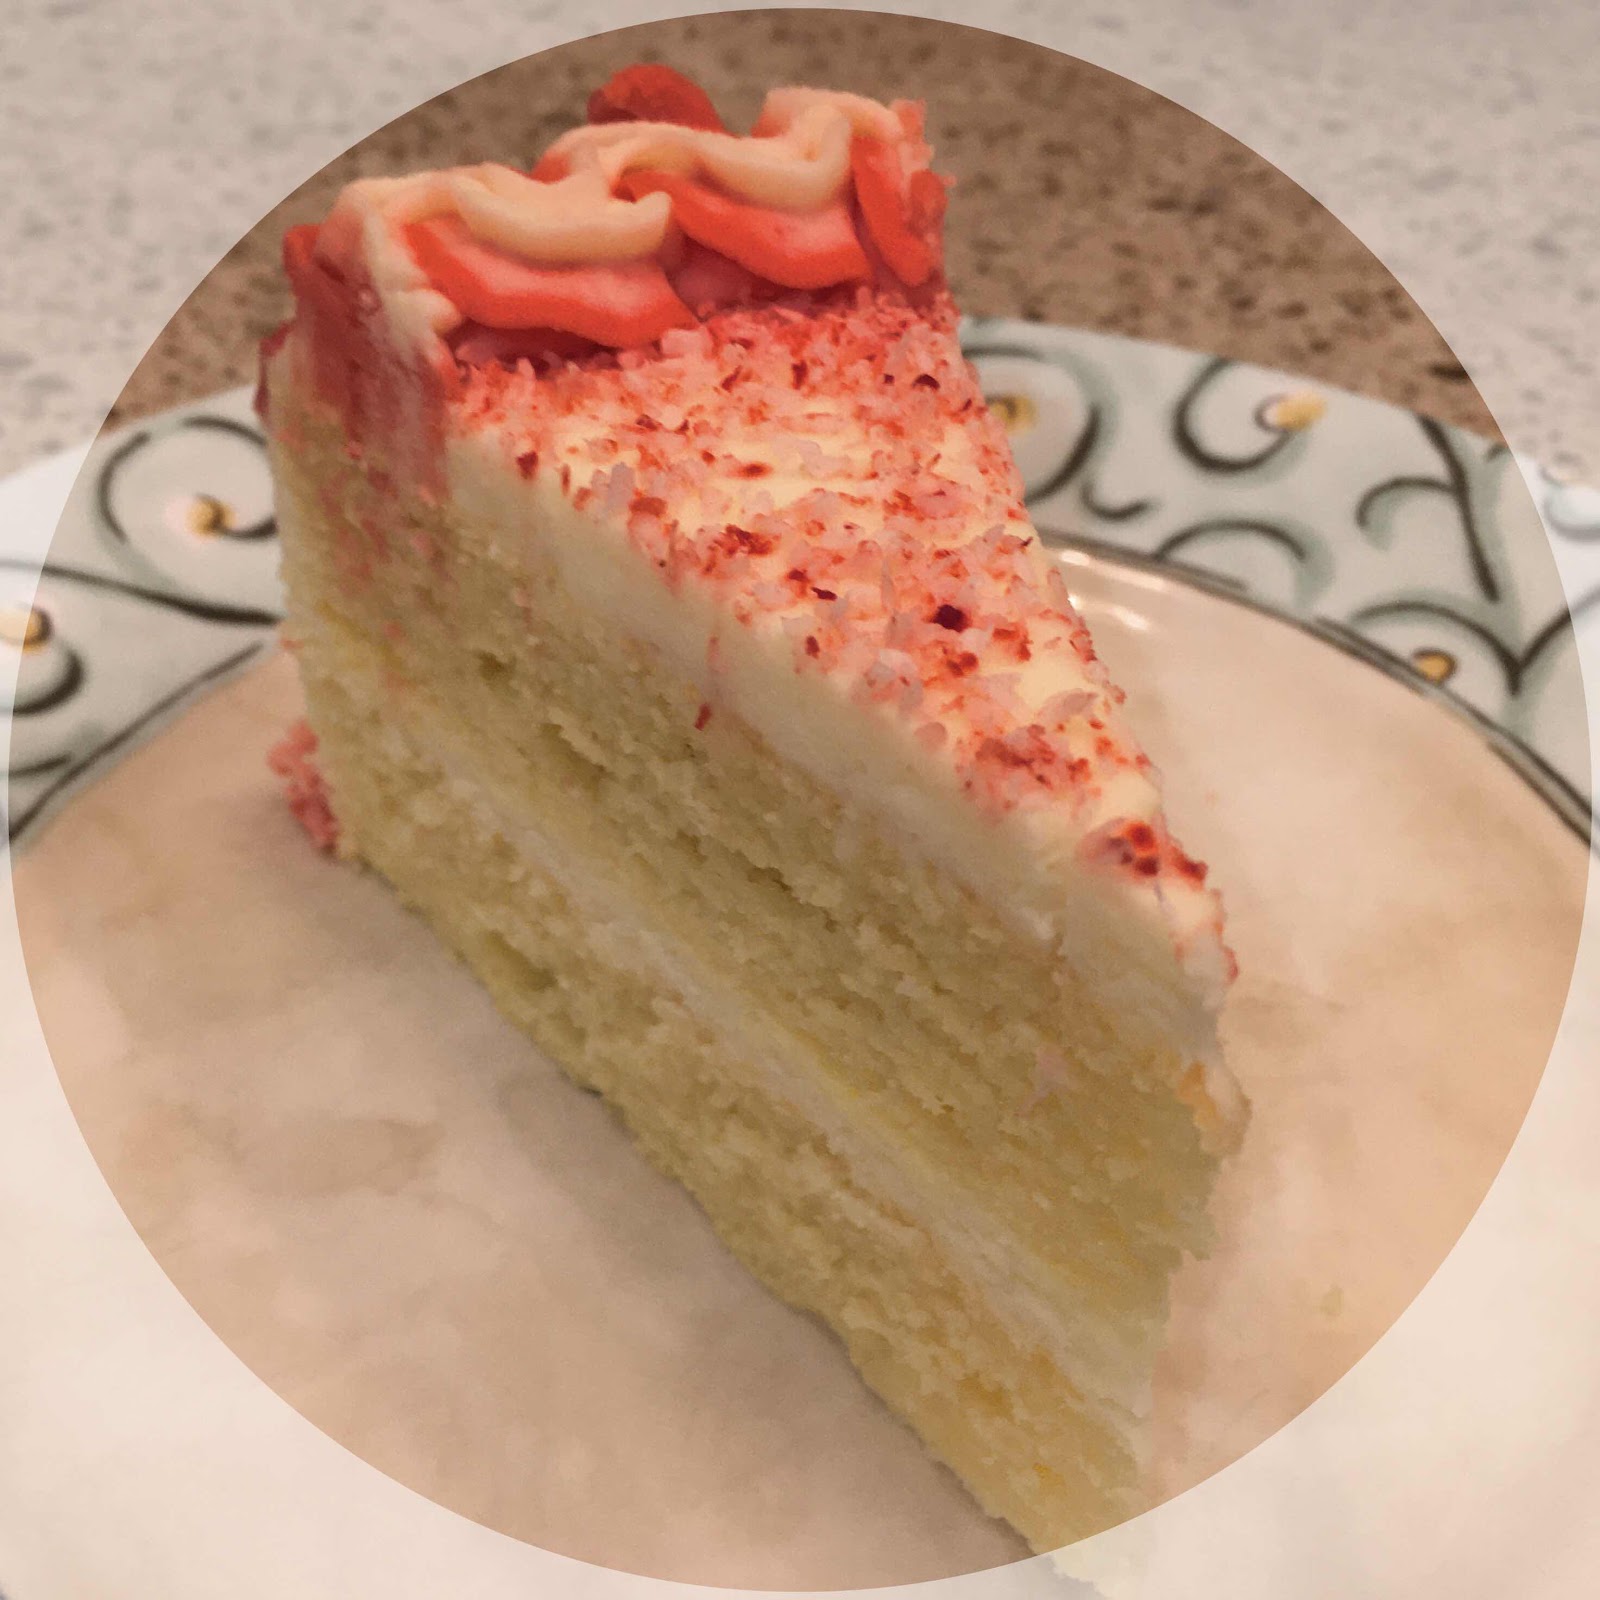
Inside of Strawberry Mousse Chaffle Cake
To make the chaffles:
1. Preheat a mini 4-inch waffle maker (I used a Dash Mini). In a mixing bowl or a 2-cup glass measuring cup (or a straight-sided pint mason jar), add all of the chaffle ingredients and whisk thoroughly to combine. I find it easier to do this with an immersion blender in a tall measuring cup or mason jar, but a hand whisk will do fine. Just be sure to whisk until no lumps remain and the batter is smooth. (Below is a picture of the dried strawberries I used to make the strawberry powder.)
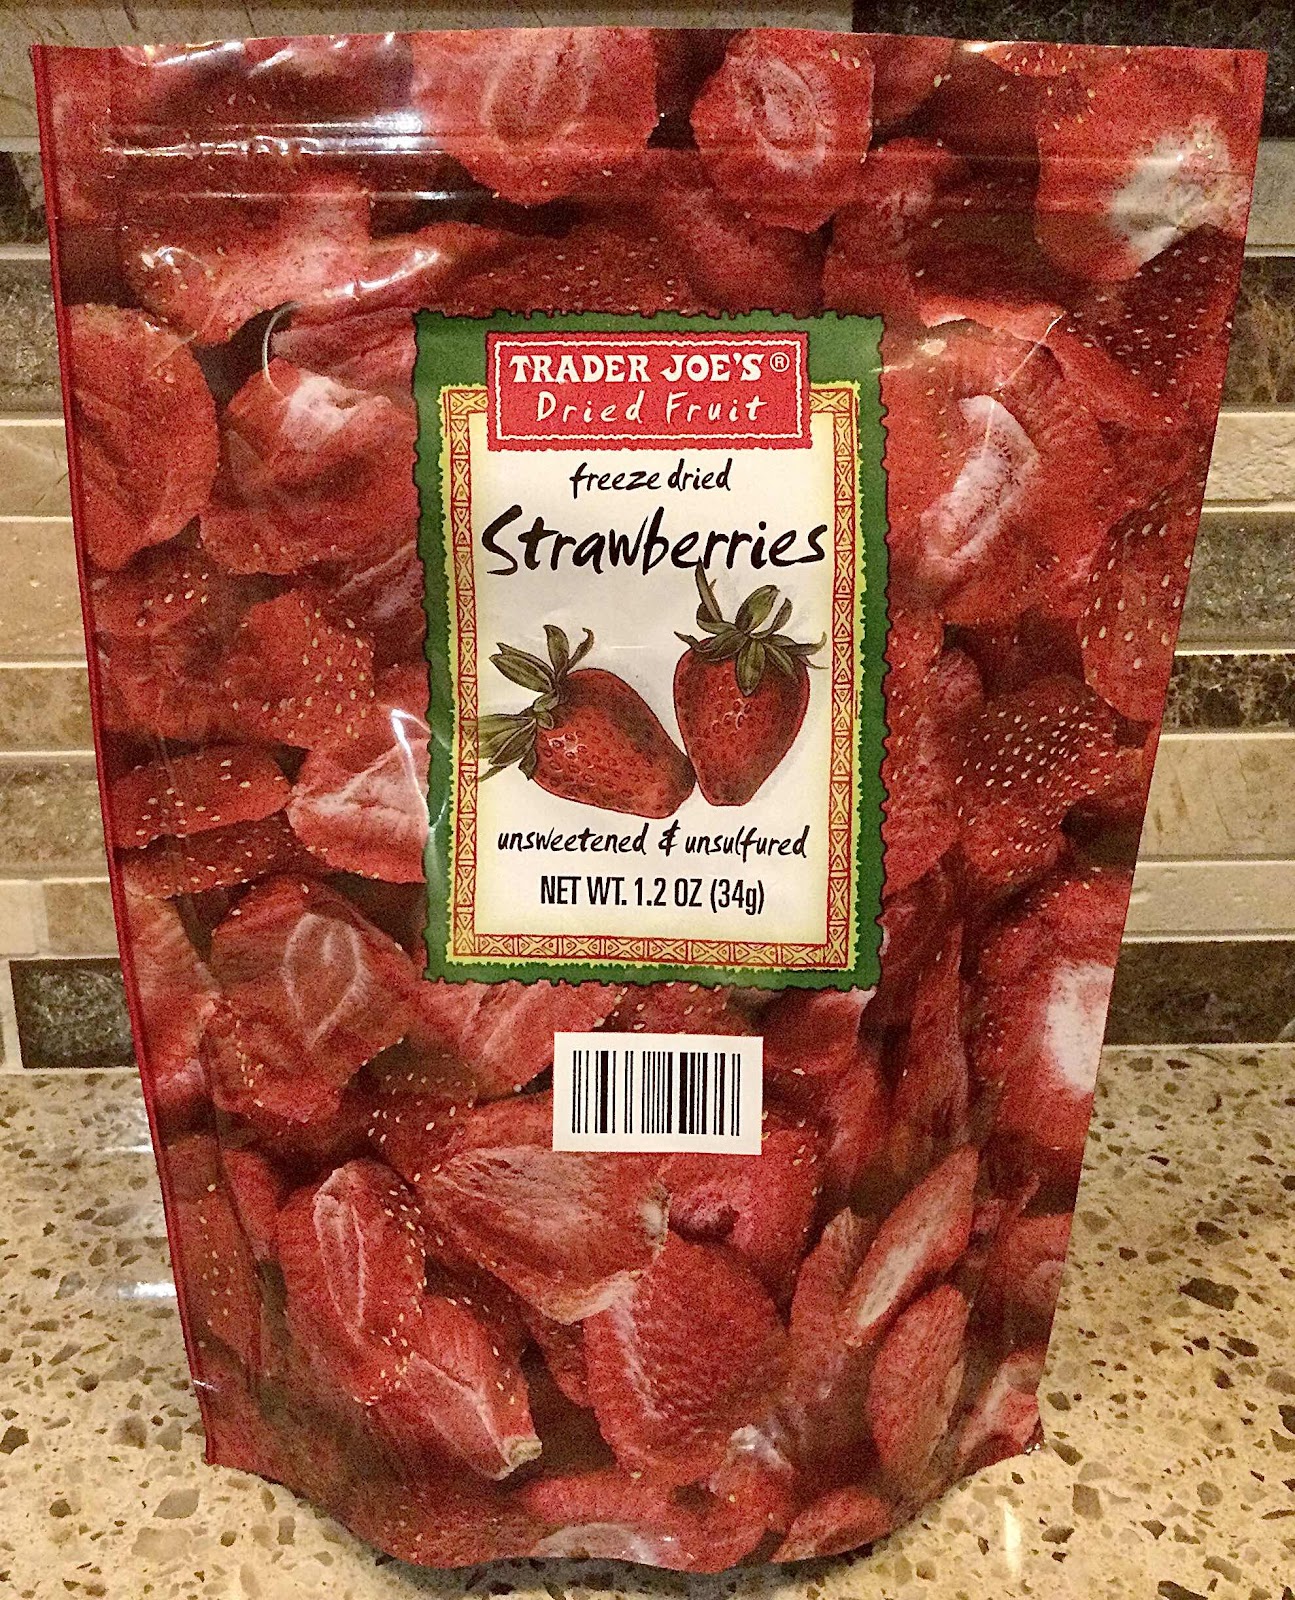
Trader Joe’s Unsweetened Dried Strawberries
2. Spoon 3-4 tablespoons of the batter into your preheated mini waffle maker. Close the lid and cook for about 3 minutes and 15 seconds or until cooked through. You don’t want to cook your waffle until crispy or too brown because it will make your cake tough and dry. The chaffle will be soft when it is removed from the waffle maker, but will firm up a bit upon cooling. Place the chaffle on a wire rack to cool.

3. Repeat to make another 3-4 strawberry chaffles (I made 5 chaffles). Allow the cooked chaffles to cool completely before assembling your cake.

Make the Strawberry Mousse Frosting. This recipe makes enough to frost a 3-layer mini cake (between the layers, top and sides), as pictured. Or will frost a 4-5 layer cake (between the layers and top), if the sides are left bare. Double the recipe if you like a lot of frosting or want to cover a taller cake completely.

4. In a small and deep bowl, whip the cold heavy cream using an electric mixer on high until stiff peaks are formed; set aside.

5. In a separate medium bowl, beat the cream cheese and butter with an electric mixer until fluffy and no lumps remain. Add the powdered sweetener, strawberry extract, strawberry powder and food coloring (if using) and beat until well combined and the mixture is smooth and fluffy.

6. Add 1/3 of the whipped cream to the cream cheese mixture and beat briefly with an electric mixer on low until well incorporated and the cream cheese mixture is creamier and not as stiff.

7. Switch to a rubber spatula and gently fold the remaining whipped cream into the cream cheese mixture until no streaks remain and a spreadable consistency is reached.

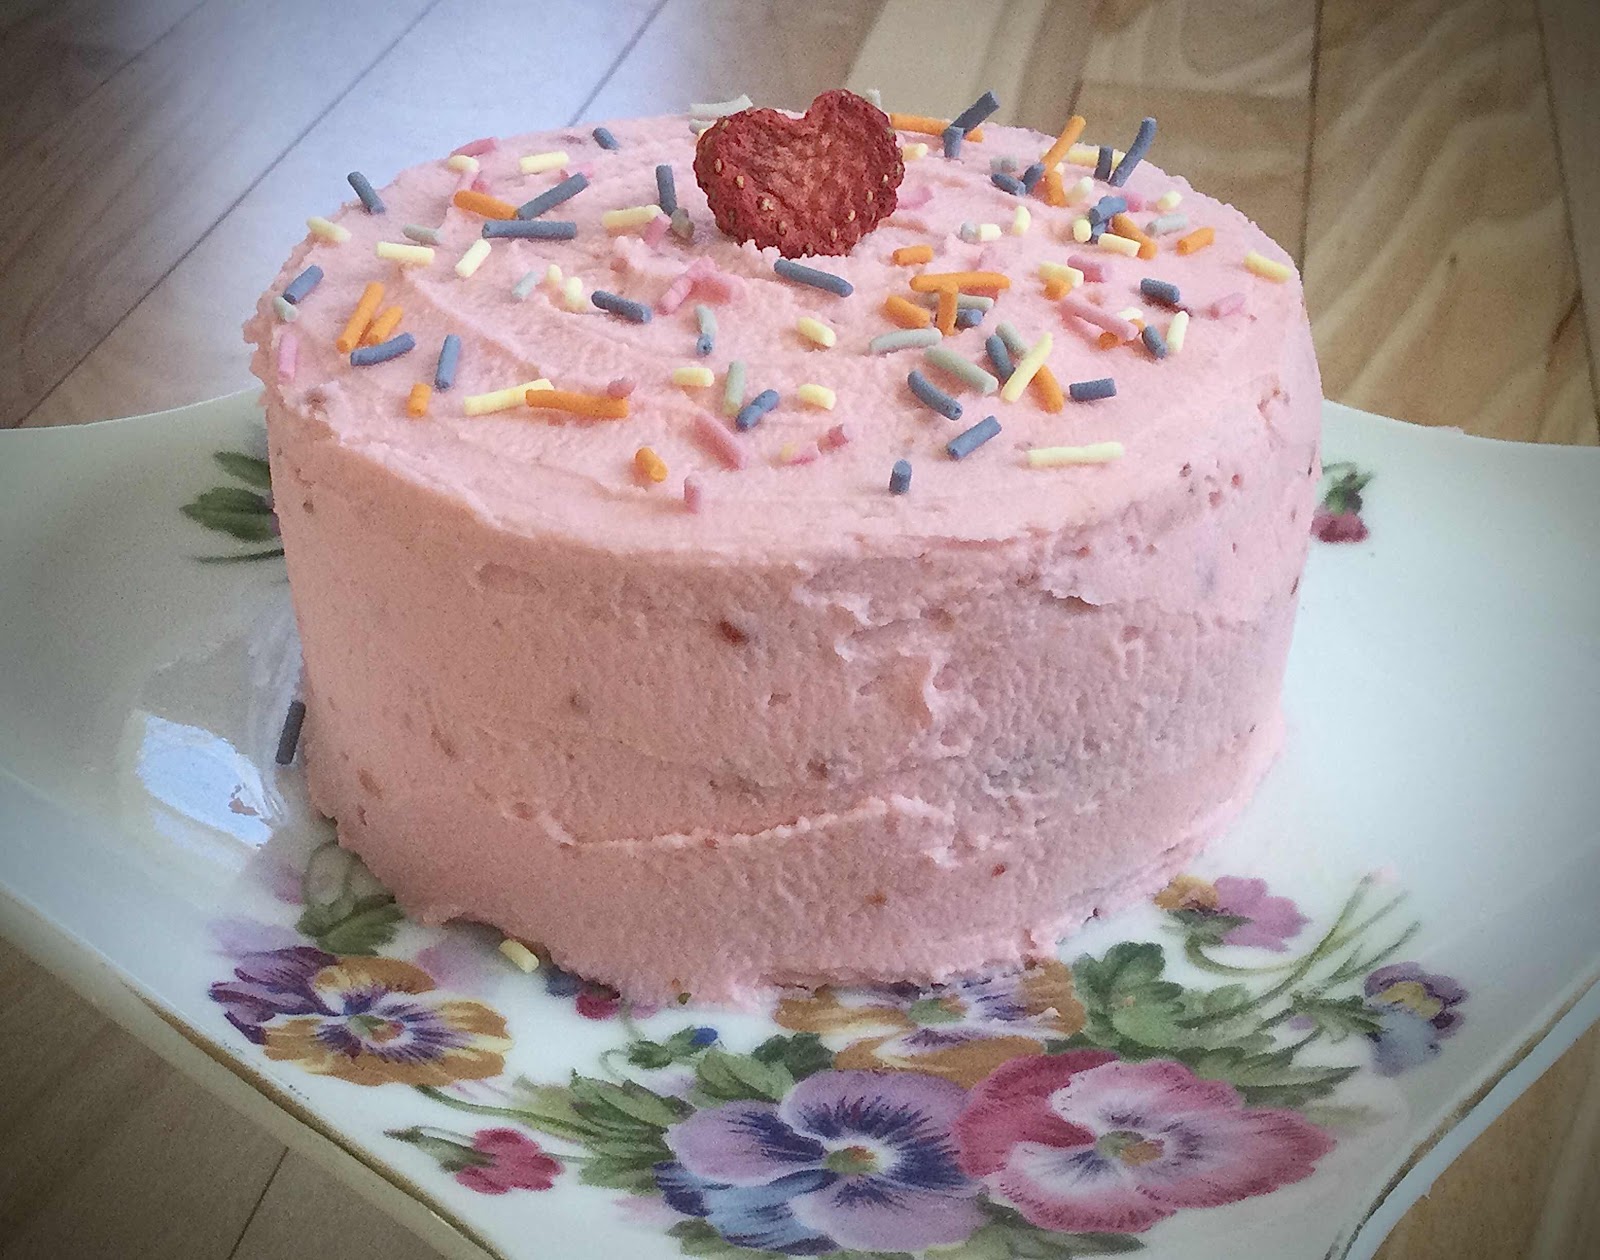
8. Frost your cake and decorate with sliced strawberries or sugar free sprinkles, as desired.
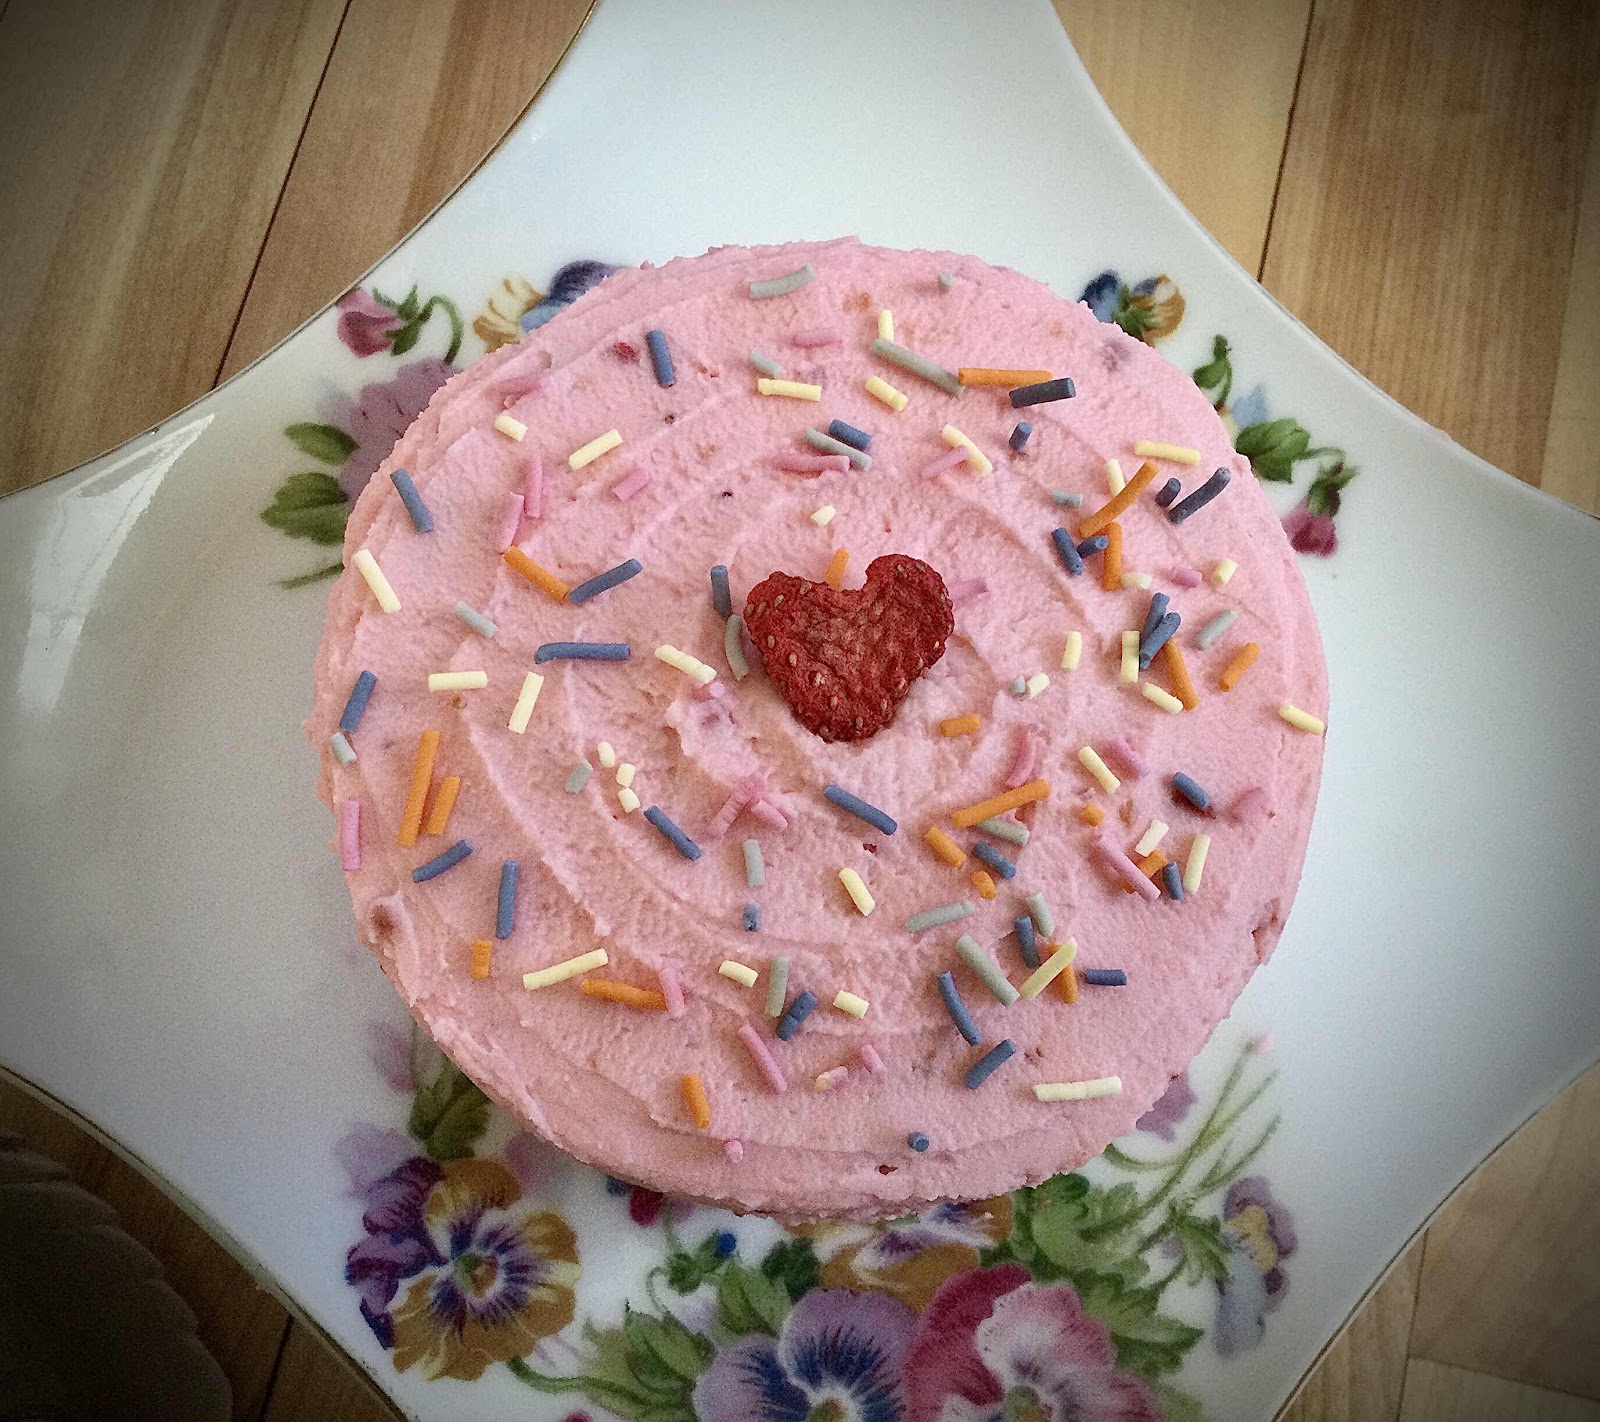
Top of Mini Cake
Nutritional Information per serving (1/3 of a 3-layer cake with frosting): 284 calories, 5.8 g carbohydrate (0.6 g dietary fiber, 1.1 g sugars, 2.9 g sugar alcohols), 27.5 g total fat (16.8 g saturated fat, 0 g trans fat), 159 mg cholesterol, 189 mg sodium, 69.4 mg calcium, 33 mg potassium, 281 IU Vit A, 1 mg Vit C, 5 g protein. Net carbs per serving: 2.3 grams

Nutritional Information per 1 chaffle (no frosting): 80 calories, 3 g carbohydrate (0.5 g fiber, 0.6 g sugars, 1.6 g sugar alcohols), 5.7 g total fat (3.3 g saturated fat), 3.5 g protein. Net carbs per 1 chaffle: 0.9 grams

Nutritional Information for Strawberry Mousse Frosting only (1/3 recipe): 204 calories, 2.9 g carbohydrate (0 g fiber, 0.5 g sugars, 1.6 g sugar alcohols), 28.8 g total fat (13.6 g saturated fat), 1.4 g protein. Net carbs per serving of frosting only: 1.6 grams

Photos and recipe by Kathy Sheehan, copyright 2021
All rights reserved. Please do not duplicate without the author’s permission.

Saturday, January 16, 2021

Low Carb Hot Cocoa Cake

Low Carb Hot Cocoa Cake
My grown daughter had a birthday last week and I quickly volunteered to make her a birthday cake. I had seen a similar cake online (see the inspiration for this recipe here), but it is made with flour and lots of sugar, and I couldn’t resist making it over using low carb, sugar free and gluten free ingredients. The results were absolutely spectacular! My family has declared that this cake may be the very best to come out of my keto/low carb kitchen, so far! 

The puffs of marshmallow fluff on the top calls for a different sugar alternative called allulose  As much as I dislike purchasing another product to try and fit into my already overstuffed keto baking drawer, in this case, allulose is the best sugar alternative for the job. It won’t recrystalize upon cooling, like erythritol can, leaving the marshmallow puffs soft and pillowy. You can leave them off and still make the best low carb chocolate cake ever!

Low Carb Hot Cocoa Cake
Makes 12 servings

Cake Ingredients:
96 grams coconut flour (about 3/4 cups + 2 tablespoons)
3/4 cup granulated erythritol sweetener 
1/3 cup unsweetened dark cocoa powder
1 tablespoon baking powder
1/2 teaspoon xanthan gum
1/4 teaspoon salt
6 large eggs, room temperature 
1/2 cup unsalted butter, melted and cooled
1/2 cup brewed coffee, cooled to room temperature (regular or decaf is fine)
2 teaspoons vanilla extract (or 1 tsp vanilla and 1 tsp chocolate extract)

Chocolate Frosting:
3 ounces unsweetened 100% cacao baker’s chocolate, chopped
3/4 tablespoon coconut oil (I used refined)
3 tablespoons unsalted butter, room temperature 
6 ounces cream cheese, room temperature 
12 ounces mascarpone cheese, room temperature 
1 cup powdered erythritol sweetener 
3 tablespoons unsweetened cocoa powder 
3/4 teaspoon vanilla extract 
3-4 tablespoons heavy cream, room temperature (or enough to reach desired spreading consistency)

Whipped Marshmallow Topping:
3/4 cup allulose sweetener 
1/3 cup water
1 large egg white
1/2 teaspoon vanilla extract 
A tiny pinch of salt

To Make the Cake:

1. Preheat your oven to 325 degrees Fahrenheit. Prepare two 8” or three 6” baking pans by spraying with non-stick cooking spray and line the bottoms with parchment paper. Spray the parchment paper; set aside.

2. Whisk together the first six ingredients (coconut flour through salt) in a medium bowl. (If you’re not able to weight the coconut flour, use a very light scooping and leveling method to measure.) Set aside.

3. In a large bowl and with an electric mixer, beat the eggs until light, lemon yellow in color and the volume has increased, about 3-5 minutes. Try to beat as much air as possible into the eggs. (If you have standing mixer, you can use a whisk attachment to make this easier, but remove it and replace with your paddle attachment before adding the remaining ingredients, so as not to deflate the eggs too much.) Add the melted and cooled butter, coffee and extract, mixing on low only to combine.

4. Add the dry ingredients all at once and mix on low to medium just until the dry ingredients are incorporated. Divide the batter evenly between the prepared baking pans and spread to the edges and level the batter using an offset spatula or back of a spoon. Bake for 30 minutes or until the tops are just firm to the touch and a toothpick in the center comes out clean. (If using 6-inch pans, check after 25 minutes.)

5. Remove from the oven and allow the cake to cool in their pans for about 10-15 minutes before turning them out on a wire rack to cool completely.

To Make the Chocolate Frosting:

6. In a medium microwave-safe bowl, combine the chopped baking chocolate and coconut oil. Microwave in 15 second intervals to melt the chocolate. Allow to sit for a few minutes before stirring until smooth. (You may also place the chocolate in a heat-proof bowl over barely simmering water to melt.) Set aside to cool to lukewarm.

7. In a large bowl with an electric mixer, beat the butter, cream cheese and mascarpone cheese together until well combined and no lumps remain. (I used my paddle attachment to do this.) Beat in the powdered erythritol and cocoa powder until blended. Add the melted chocolate and extract and beat until smooth. Add 1 tablespoon of the heavy cream at a time until the desired spreading consistency is reached.

To Make the Marshmallow Topping: (This can be made a day ahead and refrigerated. Bring to room temperature before decorating the cake.)

8. To a medium saucepan, add the allulose and water and very gently stir to combine. (The allulose will not dissolve at this point.) If any allulose has gotten on the sides of the pan, use a wet pastry brush to wipe down the sides.

9. Over medium-low heat, bring the allulose and water mixture up to 260 degrees Fahrenheit. DO NOT STIR. Bring the mixture up to temperature slowly, it may take 15 minutes or so. If you see it starting to turn brown, reduce the temperature, you don’t want the allulose to burn. 

10. Using an electric or standing mixer, whip the egg white with a tiny pinch of salt until foamy and soft peaks form. Slowly, and very carefully, while the mixer is on low, pour the hot allulose mixture into the egg white. (This mixture is VERY HOT, so use a potholder and stand away from the mixing bowl as you pour so the hot liquid doesn’t splash on you.) 

11. Turn the mixer to high, add the vanilla extract and whip for 5-6 minutes or until the marshmallow fluff is glossy and holds a stiff peak.

Dollop Marshmallow on top
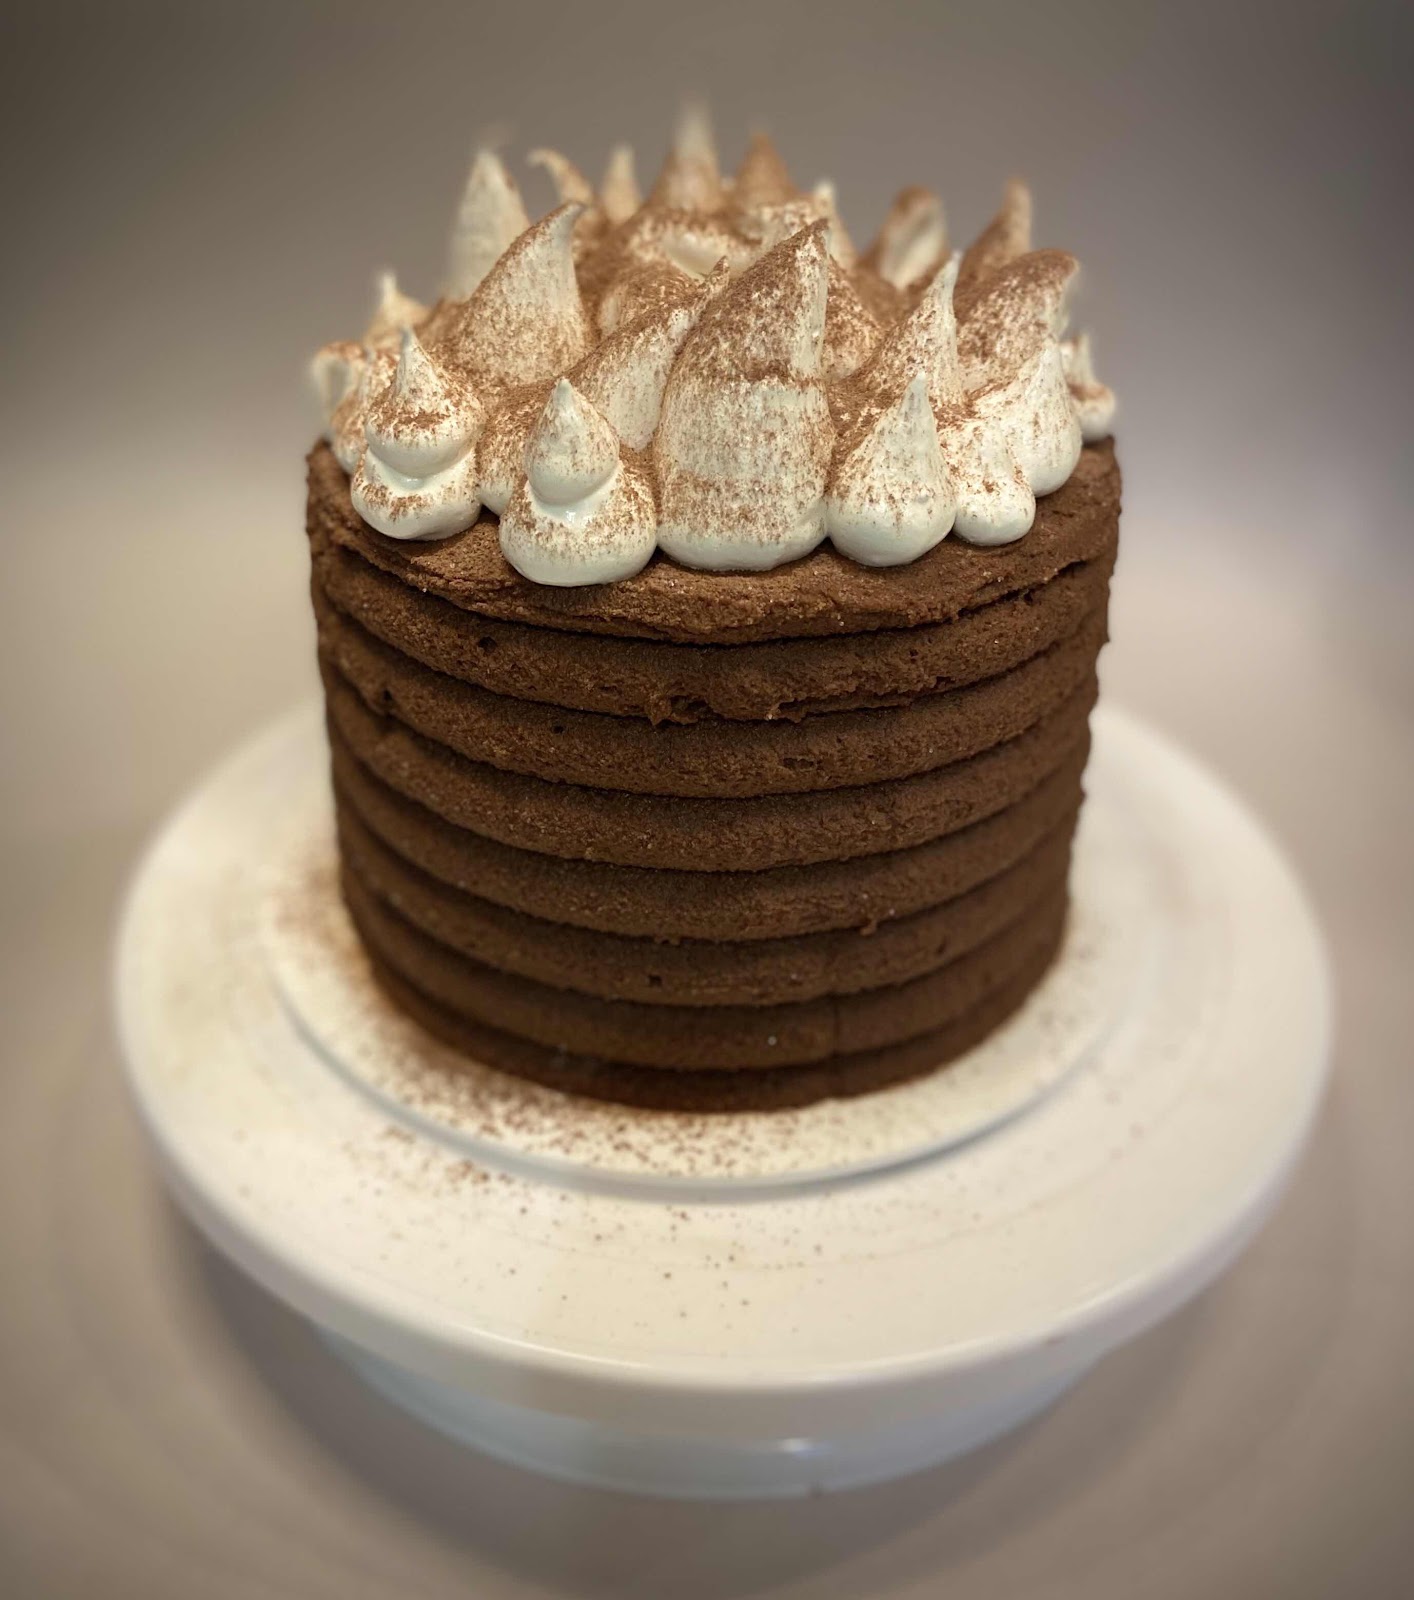
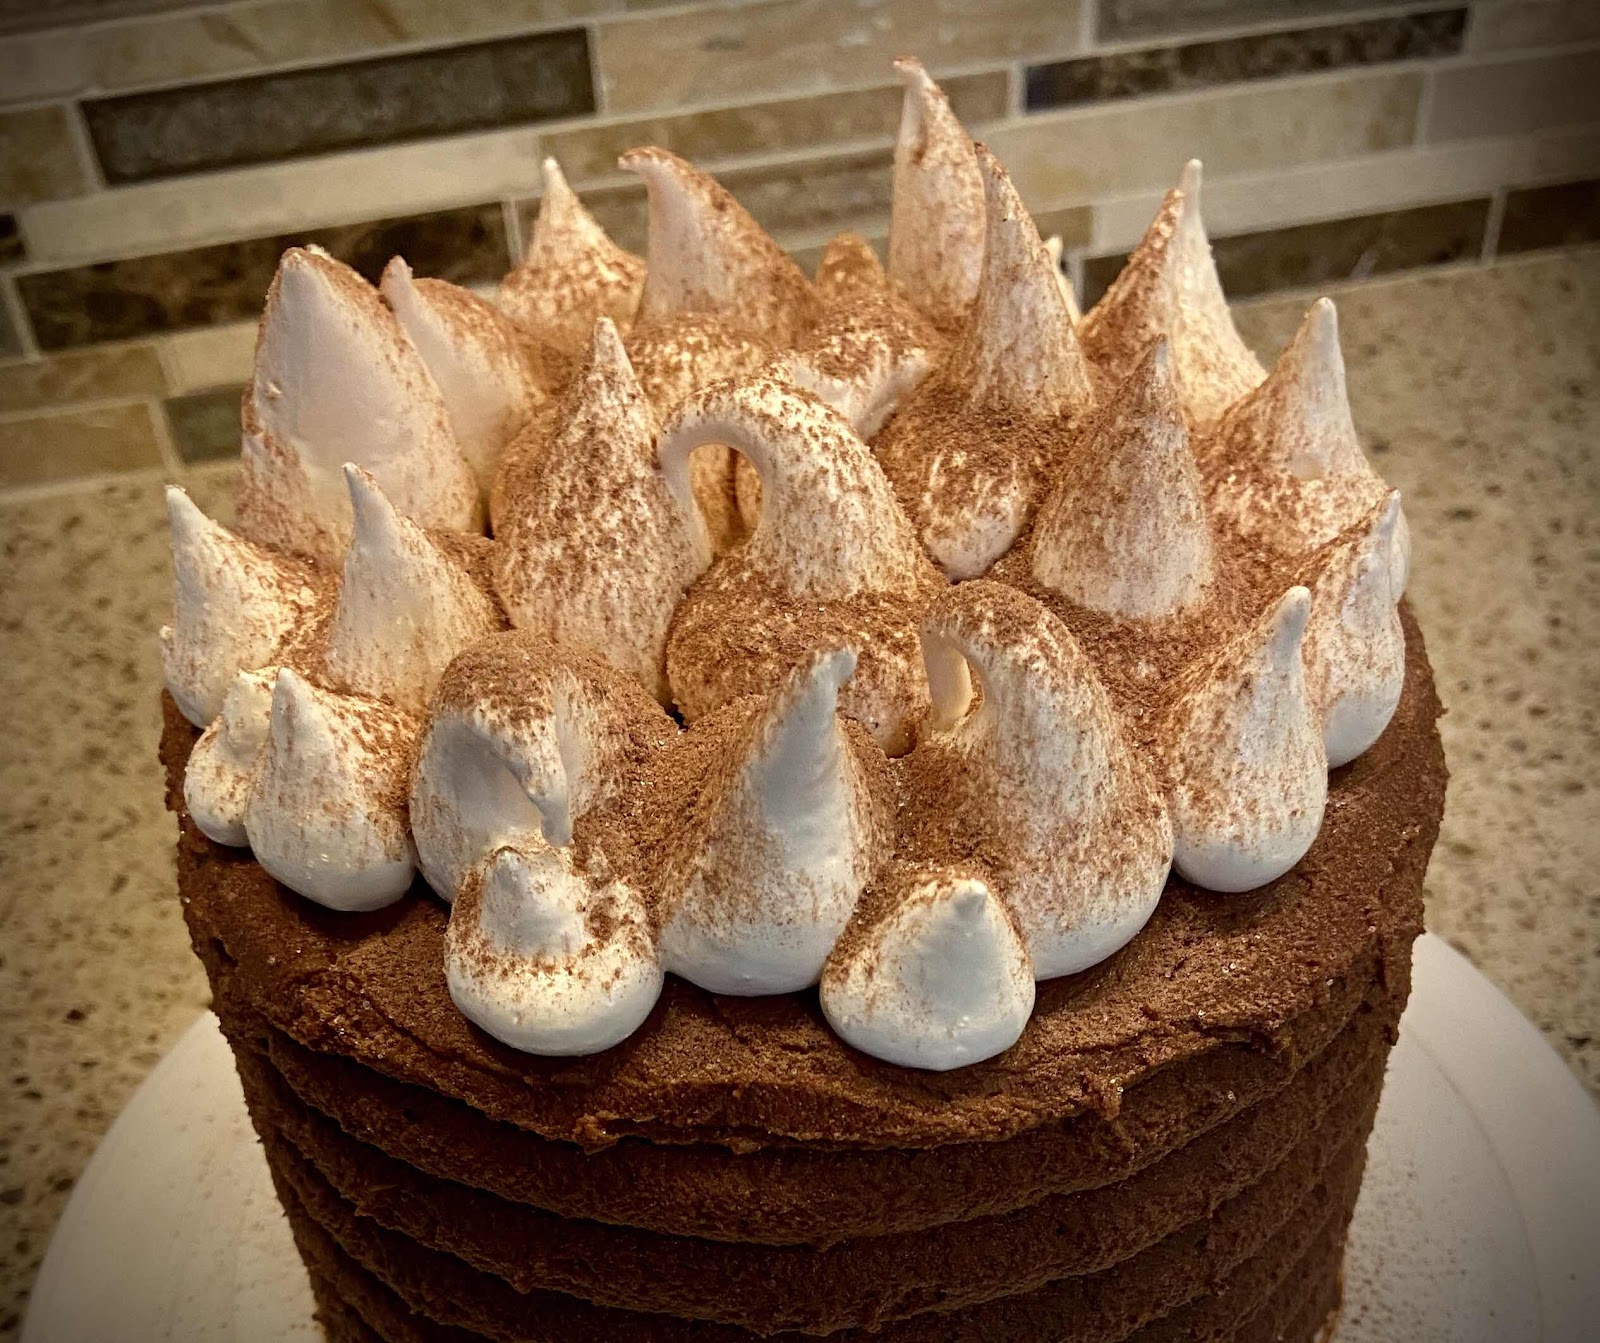
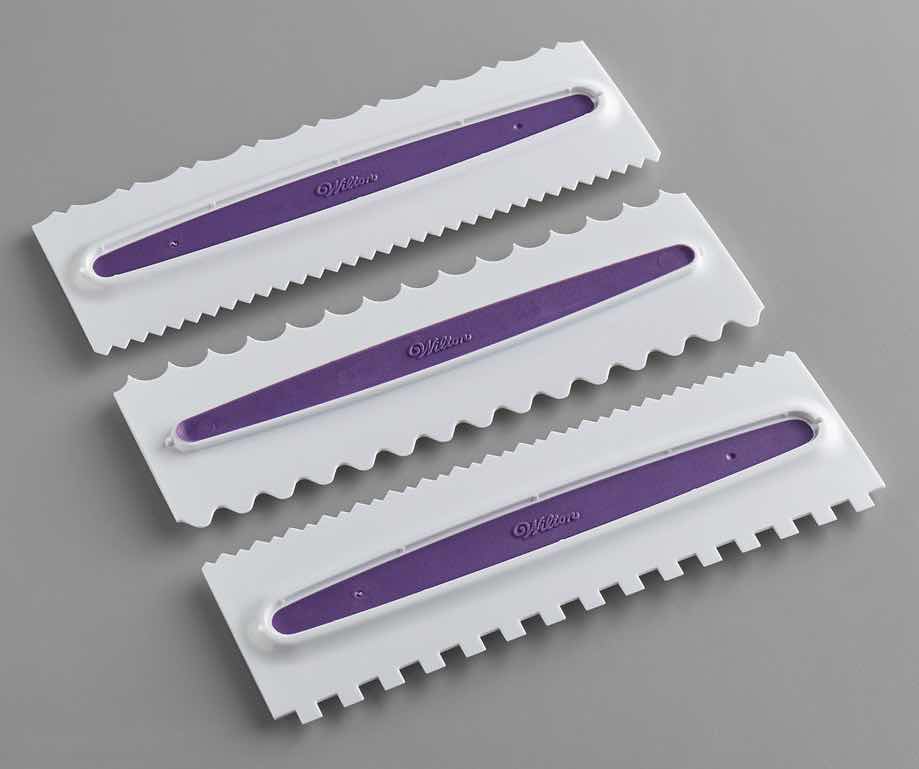
12. Assemble your cake by placing one layer of your cooled cake on a plate, spread with a generous amount of chocolate frosting, top with the second layer and then spread frosting on the top and sides. (To achieve the banded look in the photo, I used a design scraping tool to create a scalloped edge, but this is optional. See photo below of the tool set by Wilton for adding texture to cakes.) Finally, dollop mounds of the marshmallow on the top, creating puffs. You can do this with a large spoon or place the fluff into a piping or gallon plastic bag and snip off the end and pipe the marshmallow. Dust with cocoa powder.

Wilton Design Tools
13. This cake should be stored in the refrigerator. Remove and allow the cake to sit at room temperature for 30-45 minutes before slicing and serving.

Nutritional Information per serving (1/12th of cake): 333 calories, 9.3 g carbohydrate (4.6 g dietary fiber, 1.2 g sugars), 29.3 g total fat (18.4 g saturated fat, 0 g trans fat), 152 mg cholesterol, 249 mg sodium, 111.4 mg calcium, 78 mg potassium, 2 mg iron, 170 IU Vit A, 8.4 g protein. Net carbs per serving: 4.7 grams

Cake photos and recipe by Kathy Sheehan, copyright 2021
All rights reserved. Please do not duplicate without the author’s permission. 
Monday, December 28, 2020

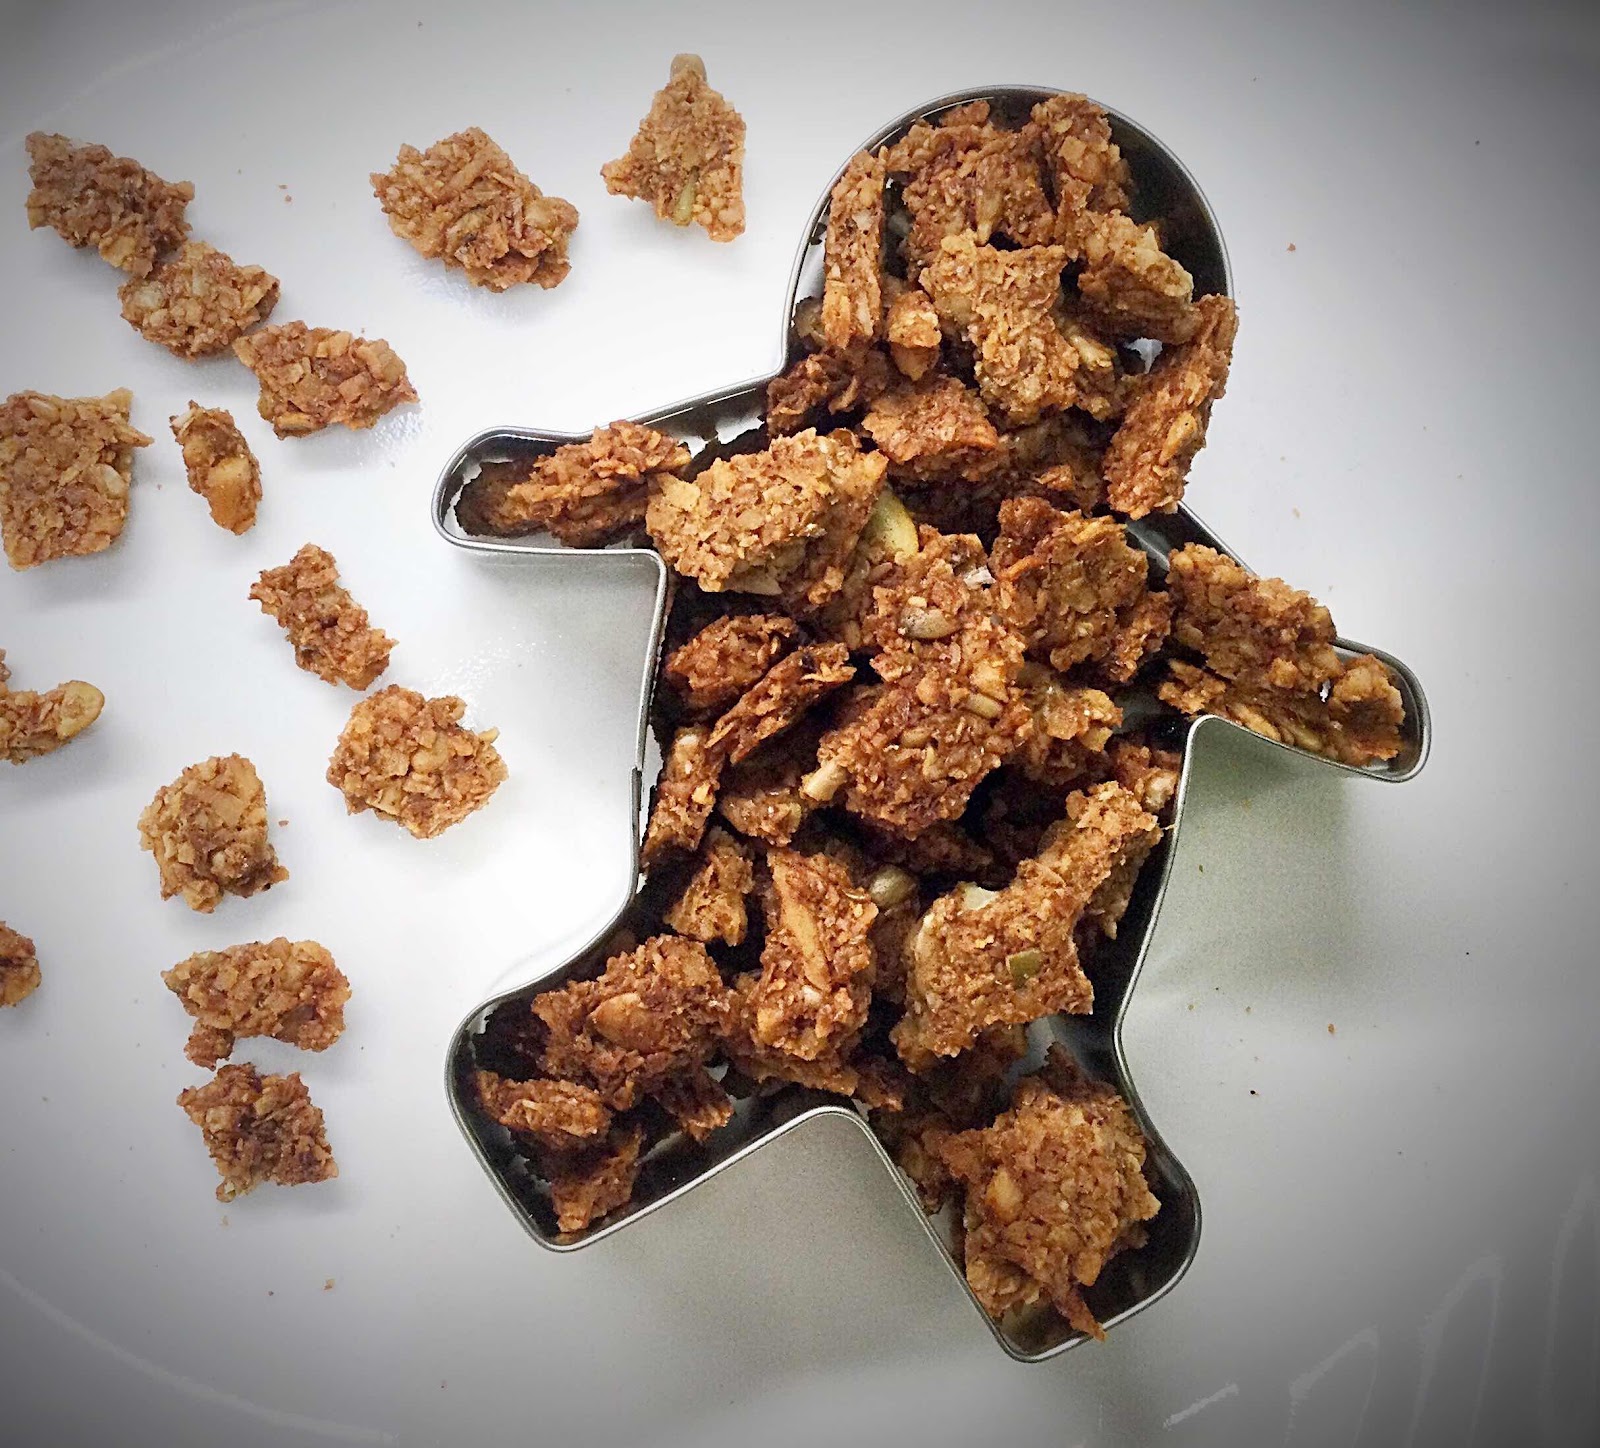
Low Carb Gingerbread Spice Granola

Low Carb Gingerbread Spice Granola
Spice up your low carb granola with the traditional flavor of gingerbread! Like all granola, this recipe is very easy to make and will fill your house with the irresistible aroma of holiday baking. 

Note: To make this granola truly low oxalate, substitute 1/2 teaspoon of both ginger and cinnamon extracts with a few drops of clove oil for the dried ground gingerbread spice mix (which is shockingly very high in oxalates!). If you need to be nut free, simply omit the macadamia nuts and substitute with more sunflower seeds and pepitas in their place (this will lower the oxalates further, too). That’s the best part about making homemade granola, you can customize it to your own personal taste and preferences!

Low Carb Gingerbread Spice Granola
Makes about 14 servings (1/4 cup each)

1-1/2 cup unsweetened shredded coconut 
1/3 cup sunflower seeds
1/3 cup pepitas (pumpkin seeds)
1/2 cup macadamia nuts or pecans
1/2 cup golden flaxseed meal
1/2 cup Golden LaKanto Monkfruit sweetener (or Swerve Brown)
1 teaspoon gingerbread spice (or substitute extracts for low oxalate and add to liquid ingredients, see note in description above)
1/2 teaspoon salt
2 egg whites (1/4 cup)
2 teaspoons finely minced ginger (fresh or from a jar)
2 tablespoons melted butter
2 tablespoons sugar free simple syrup (or SF maple syrup)
3/4 teaspoon molasses extract (or substitute 2 teaspoons molasses, but will add some carb)
24 drops OOO Gingerbread Cookie flavoring (or more gingerbread spice, if not concerned about oxalates)
1/2 teaspoon vanilla extract
1/2 teaspoon cinnamon extract (or ground cinnamon, if not concerned about oxalates)

1. Preheat the oven to 250 degrees Fahrenheit. Prepare a large cookie sheet by lining with parchment paper; set aside.

2. Place the coconut, sunflower seeds, pepitas and macadamia nuts in a food processor and pulse until the mixture resembles rough-cut oatmeal. Pour into a large mixing bowl and add the flaxseed meal, sweetener, gingerbread spice and salt. Stir to combine.

3. Whisk together the egg whites and minced ginger until frothy. In another small bowl, whisk together the melted butter, sugar free simple syrup, extracts and OOO Gingerbread Cookie flavoring. Pour the egg white mixture and the butter/syrup mixture into the dry ingredients and stir until well distributed and all of the dry ingredients are well coated.

4. Pour the granola onto your parchment-lined cookie sheet and spread out and press down into a thin layer. (I put my hand into a plastic sandwich bag to prevent my hands turning into a sticky mess. Another suggestion is to cover the granola with plastic wrap and use a rolling pin.) You want the granola in a thin layer, about 1/4” to 1/2” thick.

5. Place the baking sheet into the preheated oven and bake for 1 hour. Then use a spatula to break up and turn over the granola. Return to the oven and continue baking for 15-30 minutes or until deep golden brown in color. Remove from the oven and allow to cool completely on the baking sheet. The granola will crisp up as it cools.

6. Once it has cooled completely, break into bite-size pieces and store in an airtight container at room temperature for up to 3 weeks. This granola can be served as a breakfast cereal, sprinkled over yogurt for a bit of crunch or eaten plain as a snack or dessert.

Nutritional Information per 1/4 cup: 171 calories, 6.1 g carbohydrate (3 g dietary fiber, 0.9 g sugars, 0.9 g sugar alcohols), 15.1 g total fat (7.4 g saturated fat, 0 g trans fat), 4 mg cholesterol, 139 mg sodium, 8 mg calcium, 29 mg potassium, 1 mg iron, 18 IU Vit A, 3.8 g protein. Net carbs per serving: 3.1 grams

Total Oxalate per serving (made with dried spices): 6.1 mg; Soluble Oxalate: 3.1 mg. (Made with dried spices, this is a Medium Oxalate food.)

Total Oxalate (if made with extracts only, no dried spices): 3.9 mg; Soluble Oxalate: 2.4 mg

Recipe and Photo by Kathy Sheehan, copyright 2020
All rights reserved. Please do not duplicate without the author’s permission. 
Wednesday, December 23, 2020

Low Carb Hot Chocolate Bombs

Low Carb Hot Chocolate Bombs
Hot Chocolate Bombs are all the rage and will be found in many stockings of my family and friends this year! They are a lot of fun, easy to make with the right supplies and can be made sugar free and keto too. When you place one in a mug and add hot milk, the outer coating of chocolate melts and the cocoa mix and marshmallows burst forth to make the most delectable, rich hot cocoa ever! 

Supplies needed:
2.5” to 2.75” round silicone candy mold
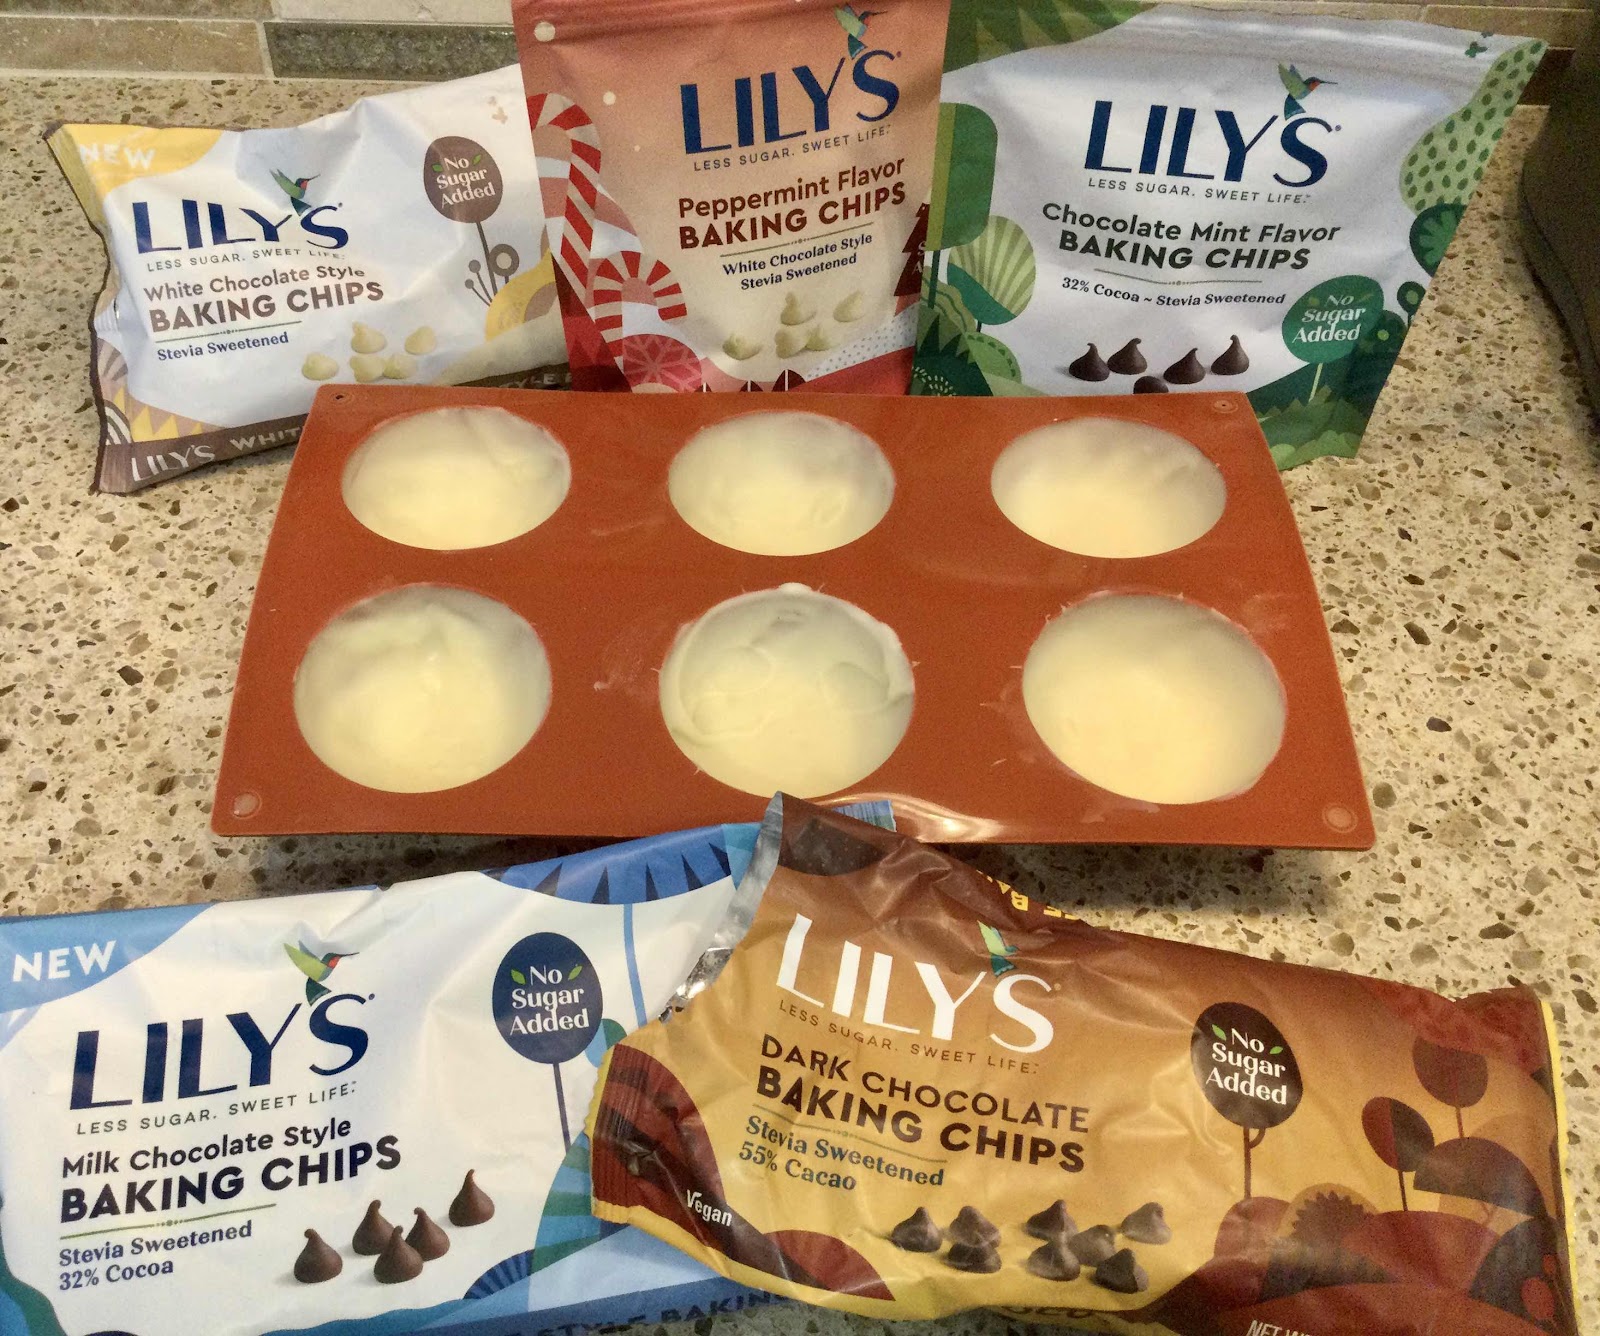
A variety of sugar free baking chips (I used Lily’s)

Low Carb Hot Cocoa Mix:
Yields about 1 cup (8-9 servings of 2 tablespoons each)

1/2 cup unsweetened cocoa powder
1/4 cup heavy cream powder (or powdered milk, but will add some carbs)
6 tablespoons granulated erythritol sweetener 
1 teaspoon stevia powder (I used SweetLeaf brand)
1/4 teaspoon salt
1/2 teaspoon vanilla powder (optional)

1. Mix all of the Low Carb Hot Cocoa Mix ingredients together. Stir until well combined and no lumps remain; set aside.

2. Melt sugar free baking chips by microwaving in a microwave-safe bowl for 15 seconds. Allow the chips to sit for a few minutes and stir. If additional melting is needed, microwave for 6 second intervals.

Spread melted chocolate in the mold
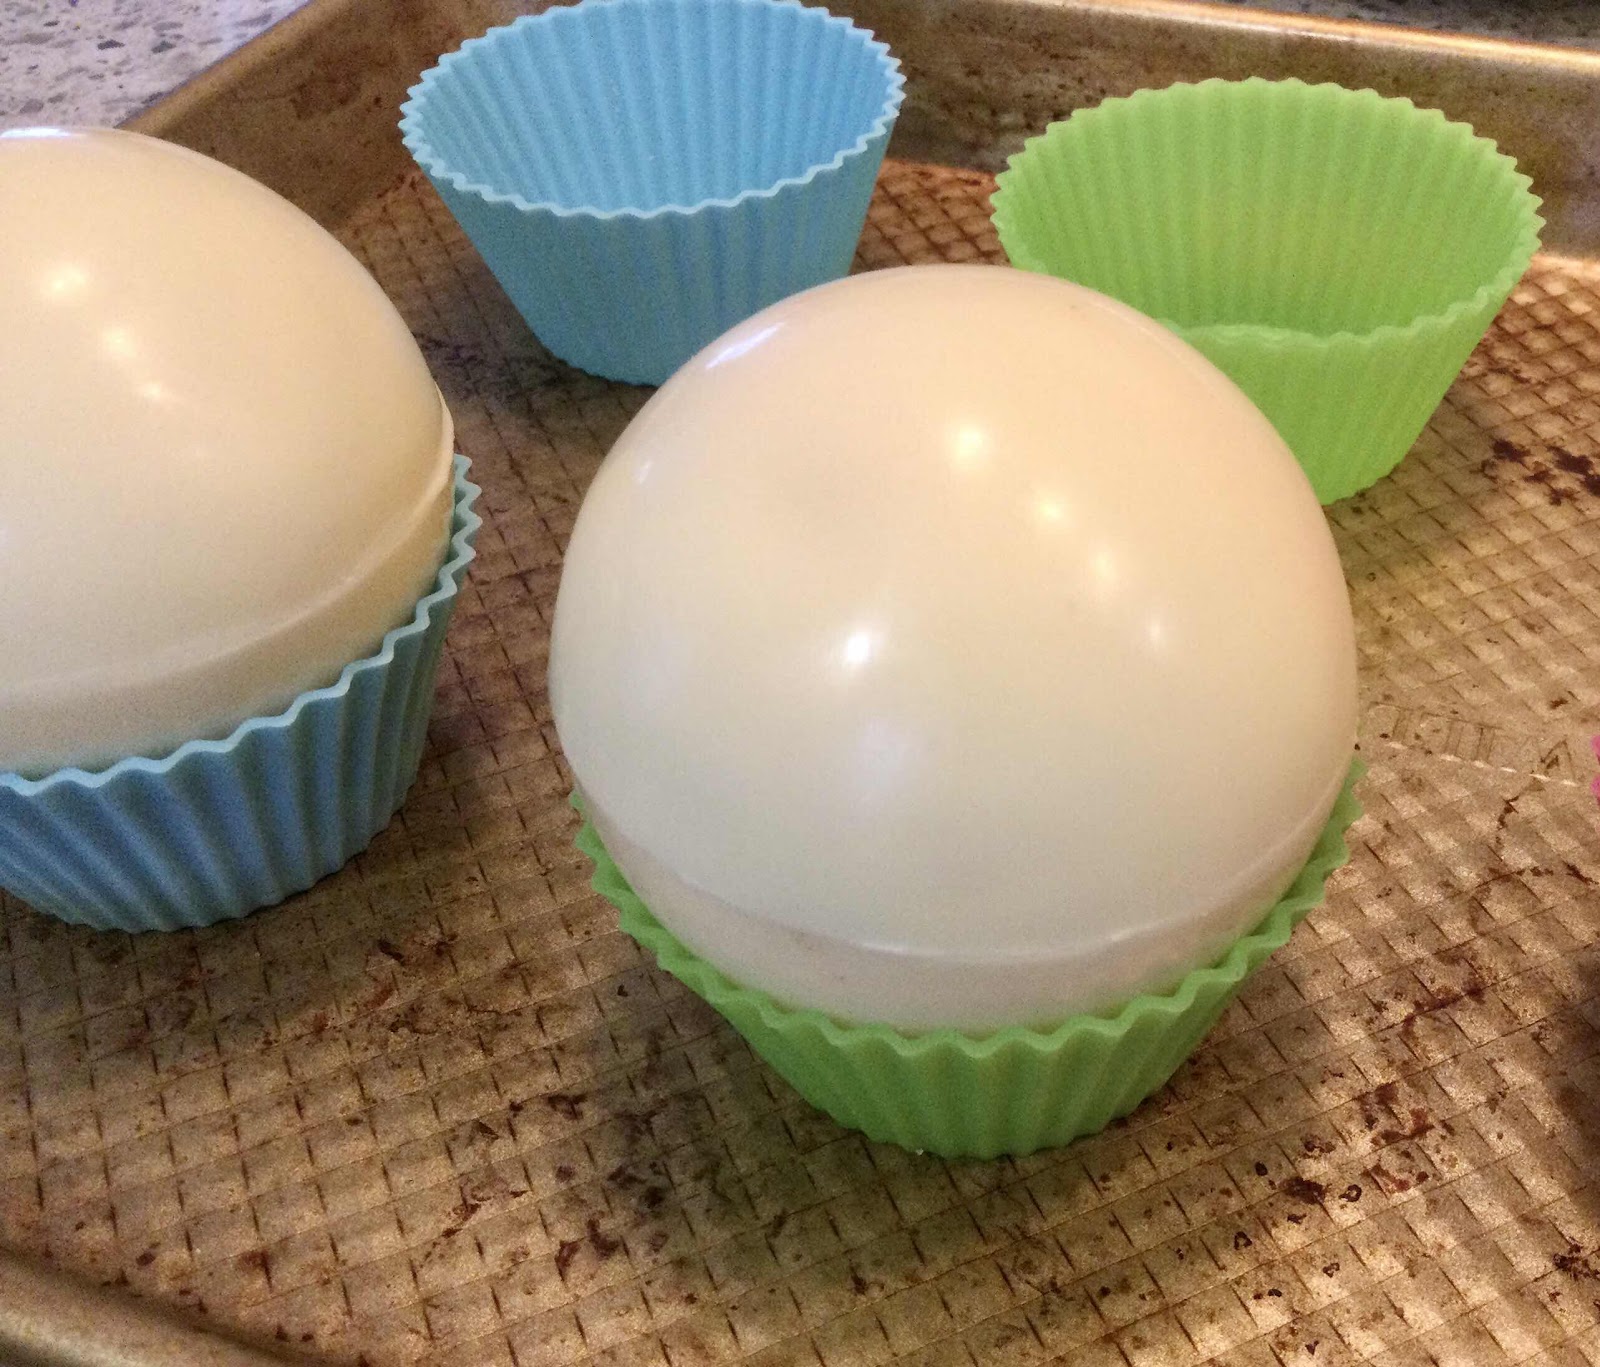
3. Spoon about 1 tablespoon or so of melted chocolate into each cavity of the round mold. Using the back of a spoon, spread the chocolate around and up the sides of the mold. Refrigerate until set. (I put mine in the freezer for 5-10 minutes.) Using the back of a spoon or pastry brush, add a bit more of the melted chocolate around the top edge and any weak spots that were not adequately coated previously. Refrigerate again until set. Carefully remove the half spheres from the mold. (If you want a demonstration of how to make the chocolate spheres, I suggest you check out YouTube. There are many videos showing how this is done. Just search for Hot Chocolate Bombs.)

4. Heat a ceramic or heat-safe plate in a low oven (about 160 degrees F). Very carefully invert a chocolate half sphere onto the warm plate and twist briefly, just long enough to smooth out the edge.

Fill one half sphere with cocoa mix
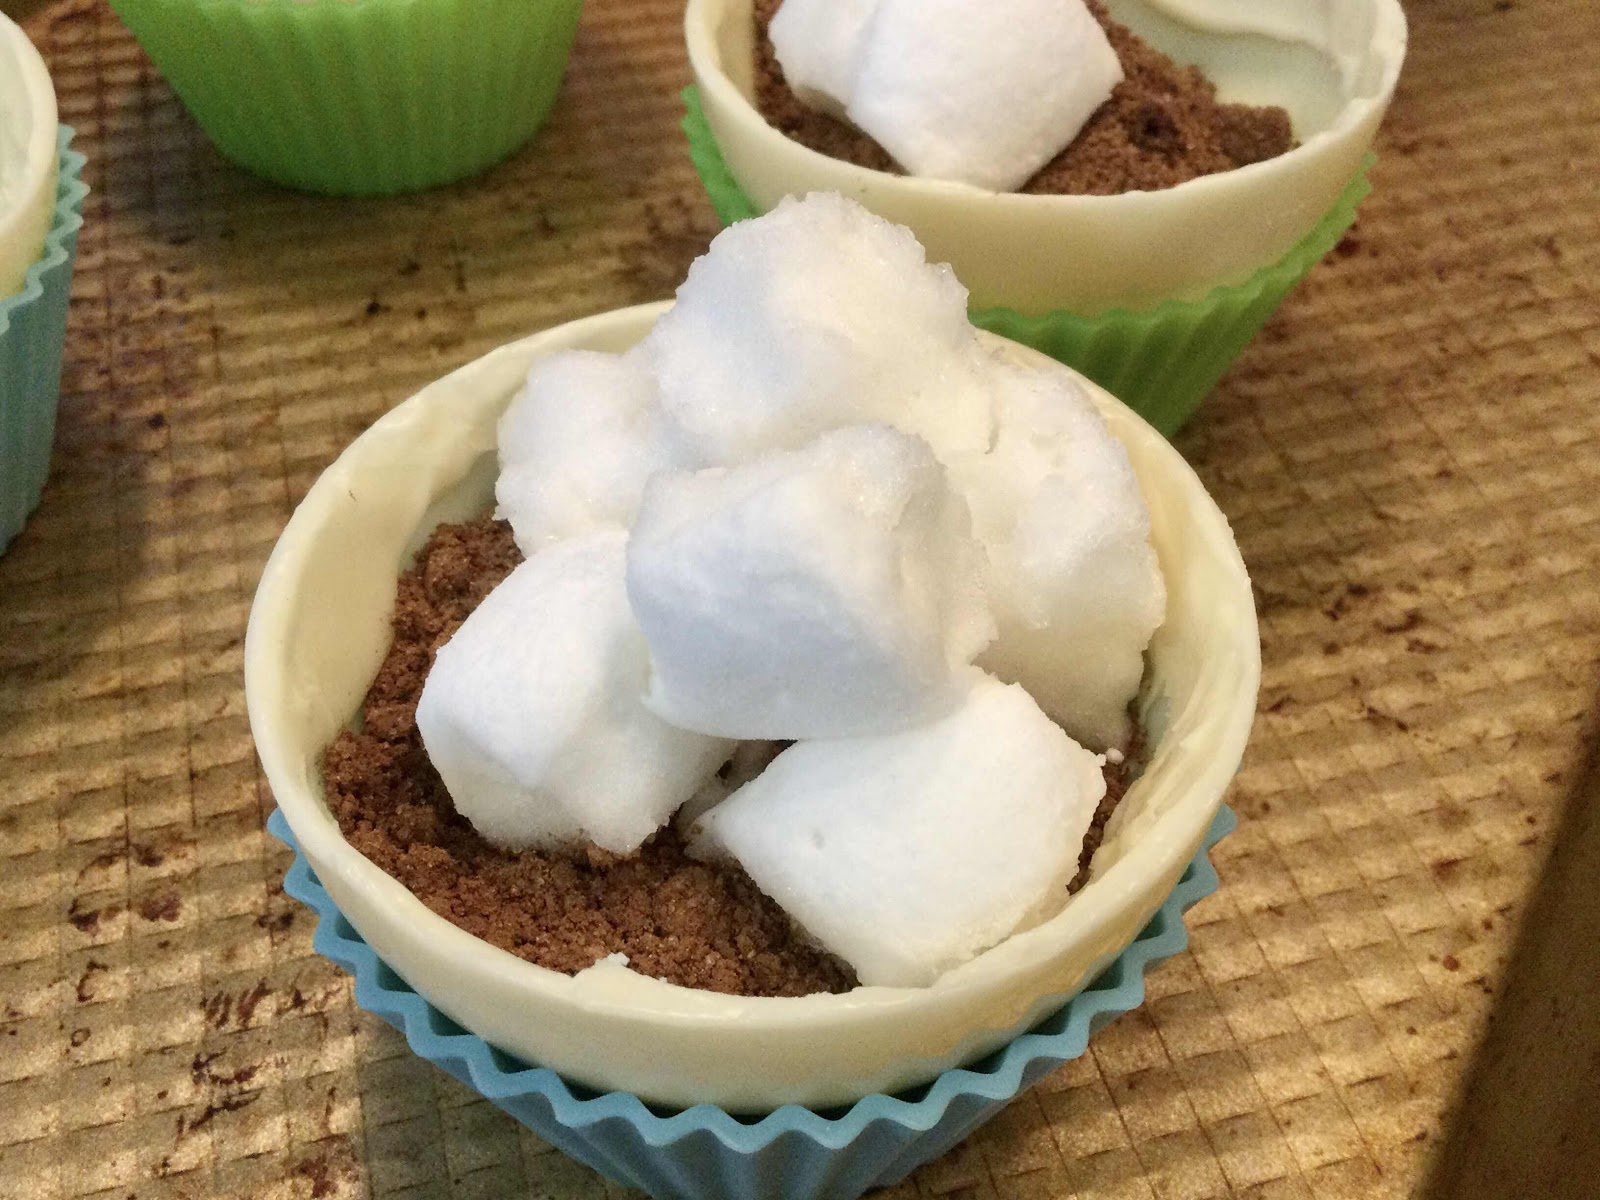
5. Fill the half sphere with 2 tablespoons of the hot cocoa mix and, if desired, add sugar free mini marshmallows and any other ingredients to create unique flavors (see list below).

6. Take the remaining empty half sphere, hold the edge to the warm plate to begin melting the chocolate and quickly place on top of the filled half sphere to create a ball. Refrigerate until the seam has set.

Place an empty chocolate sphere on top to make a ball

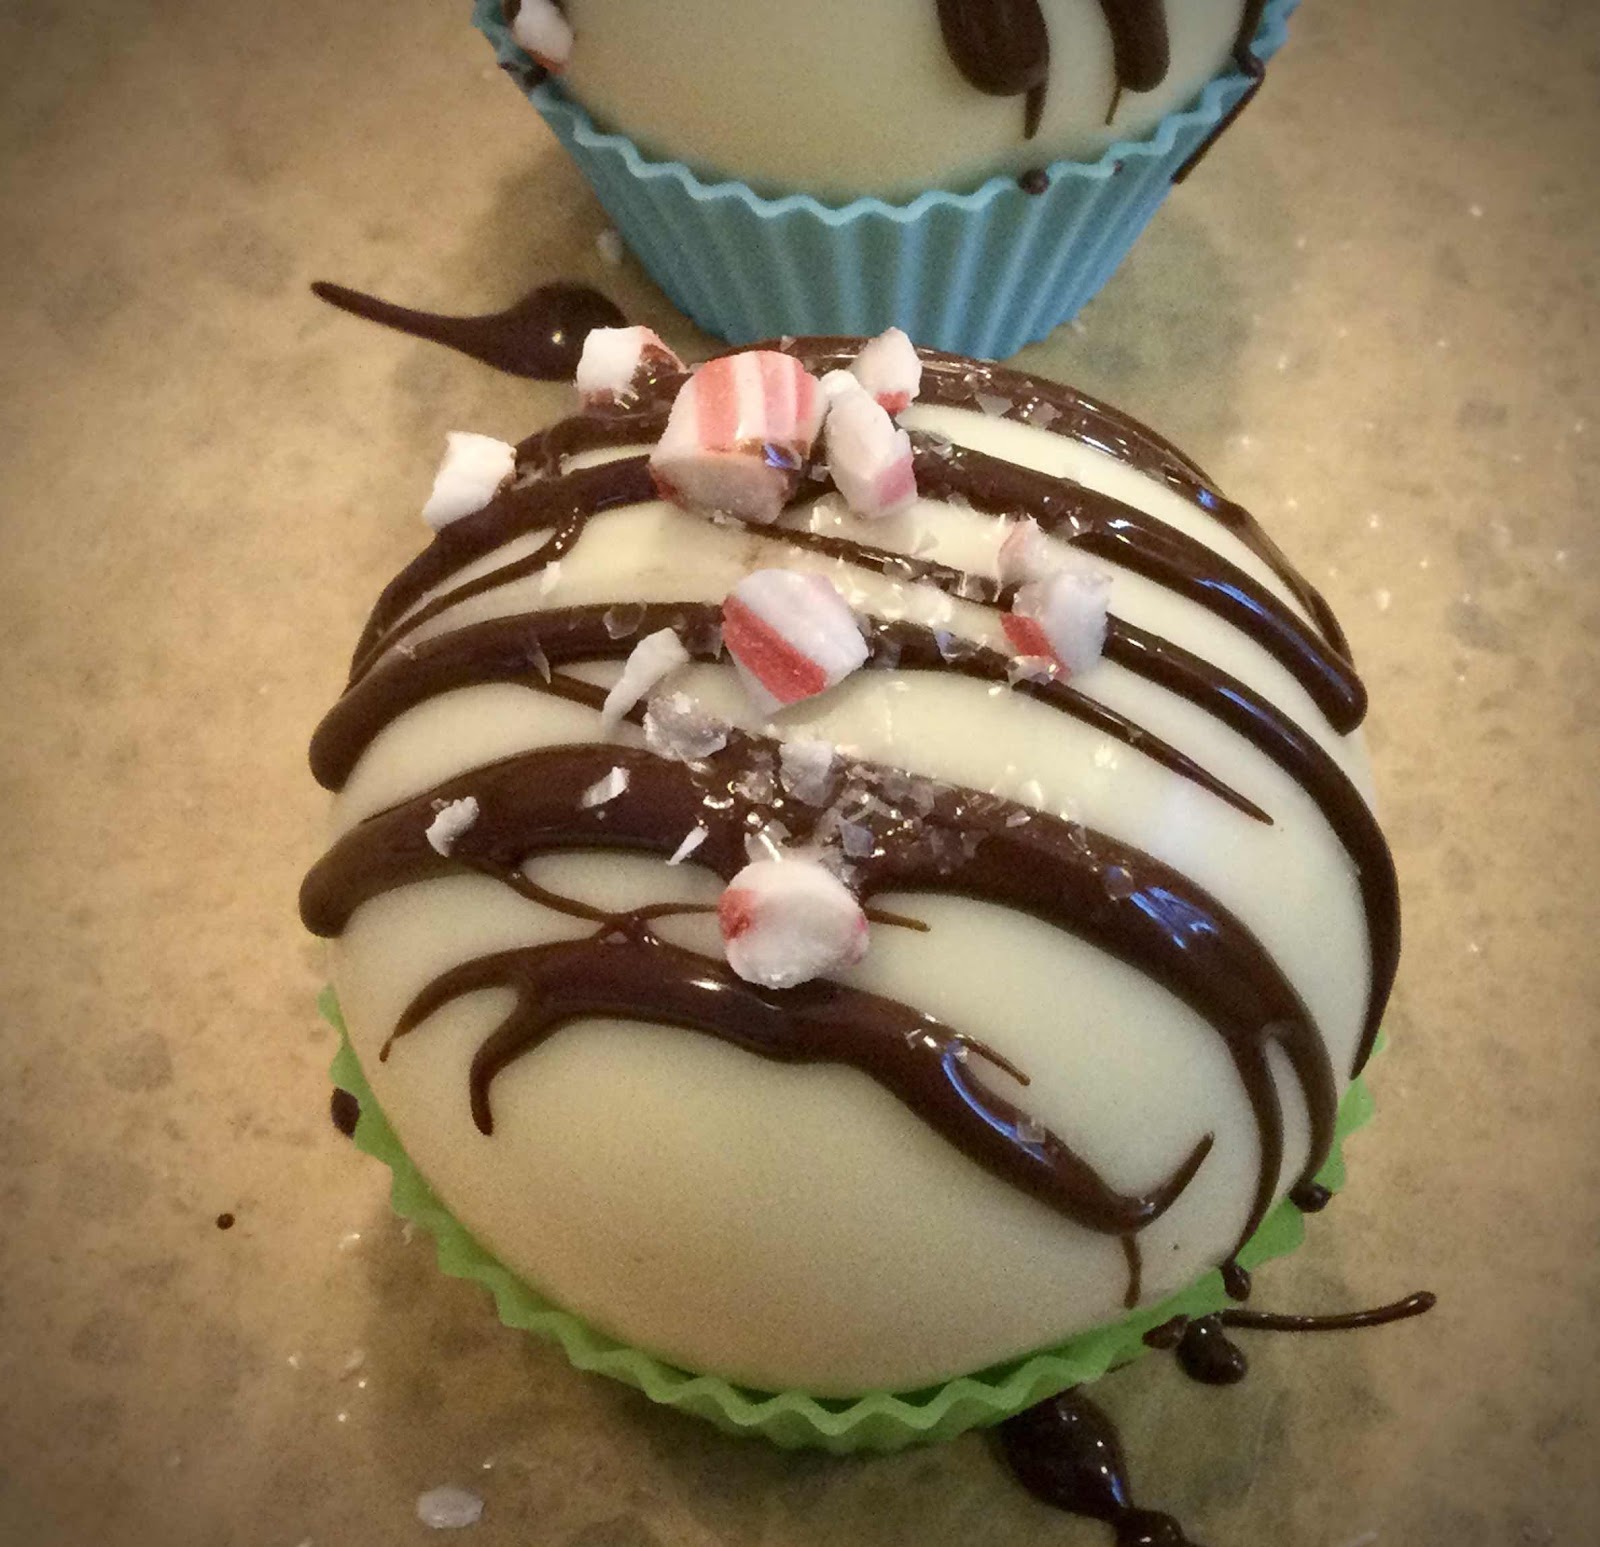
7. Decorate the Hot Chocolate Bomb as desired. (When I drizzled chocolate on the top to decorate, I turned the chocolate bomb so the seam was up and drizzled the chocolate over the seam to strengthen it.)

Drizzle melted chocolate over the top and add sprinkles to decorate
8. To make hot chocolate using a Hot Chocolate Bomb, place the bomb into a mug and carefully pour very hot milk of your choice over the bomb (try to concentrate the hot liquid in one spot, if you can, to hasten the melting of the outer shell). Stir until the melted chocolate and hot cocoa mix is thoroughly incorporated and enjoy! (Check out my YouTube video below to see the bomb in action!)


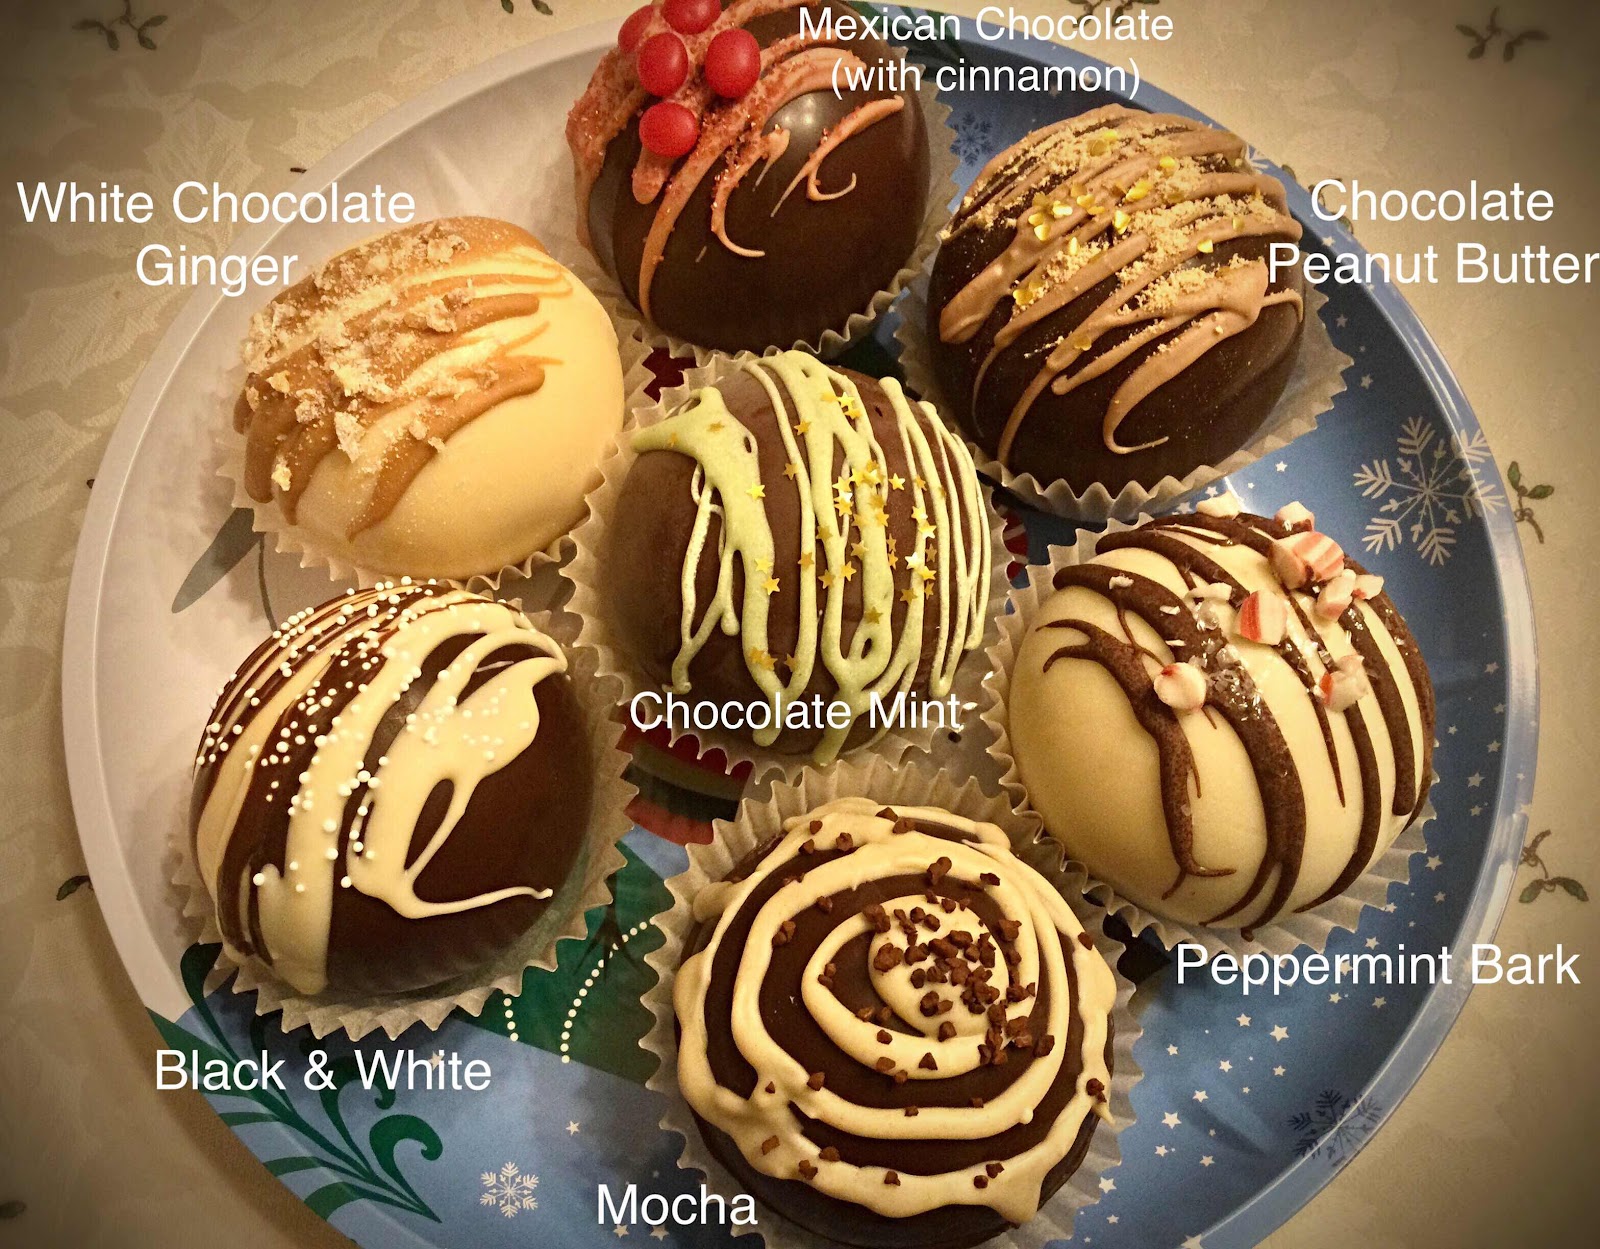
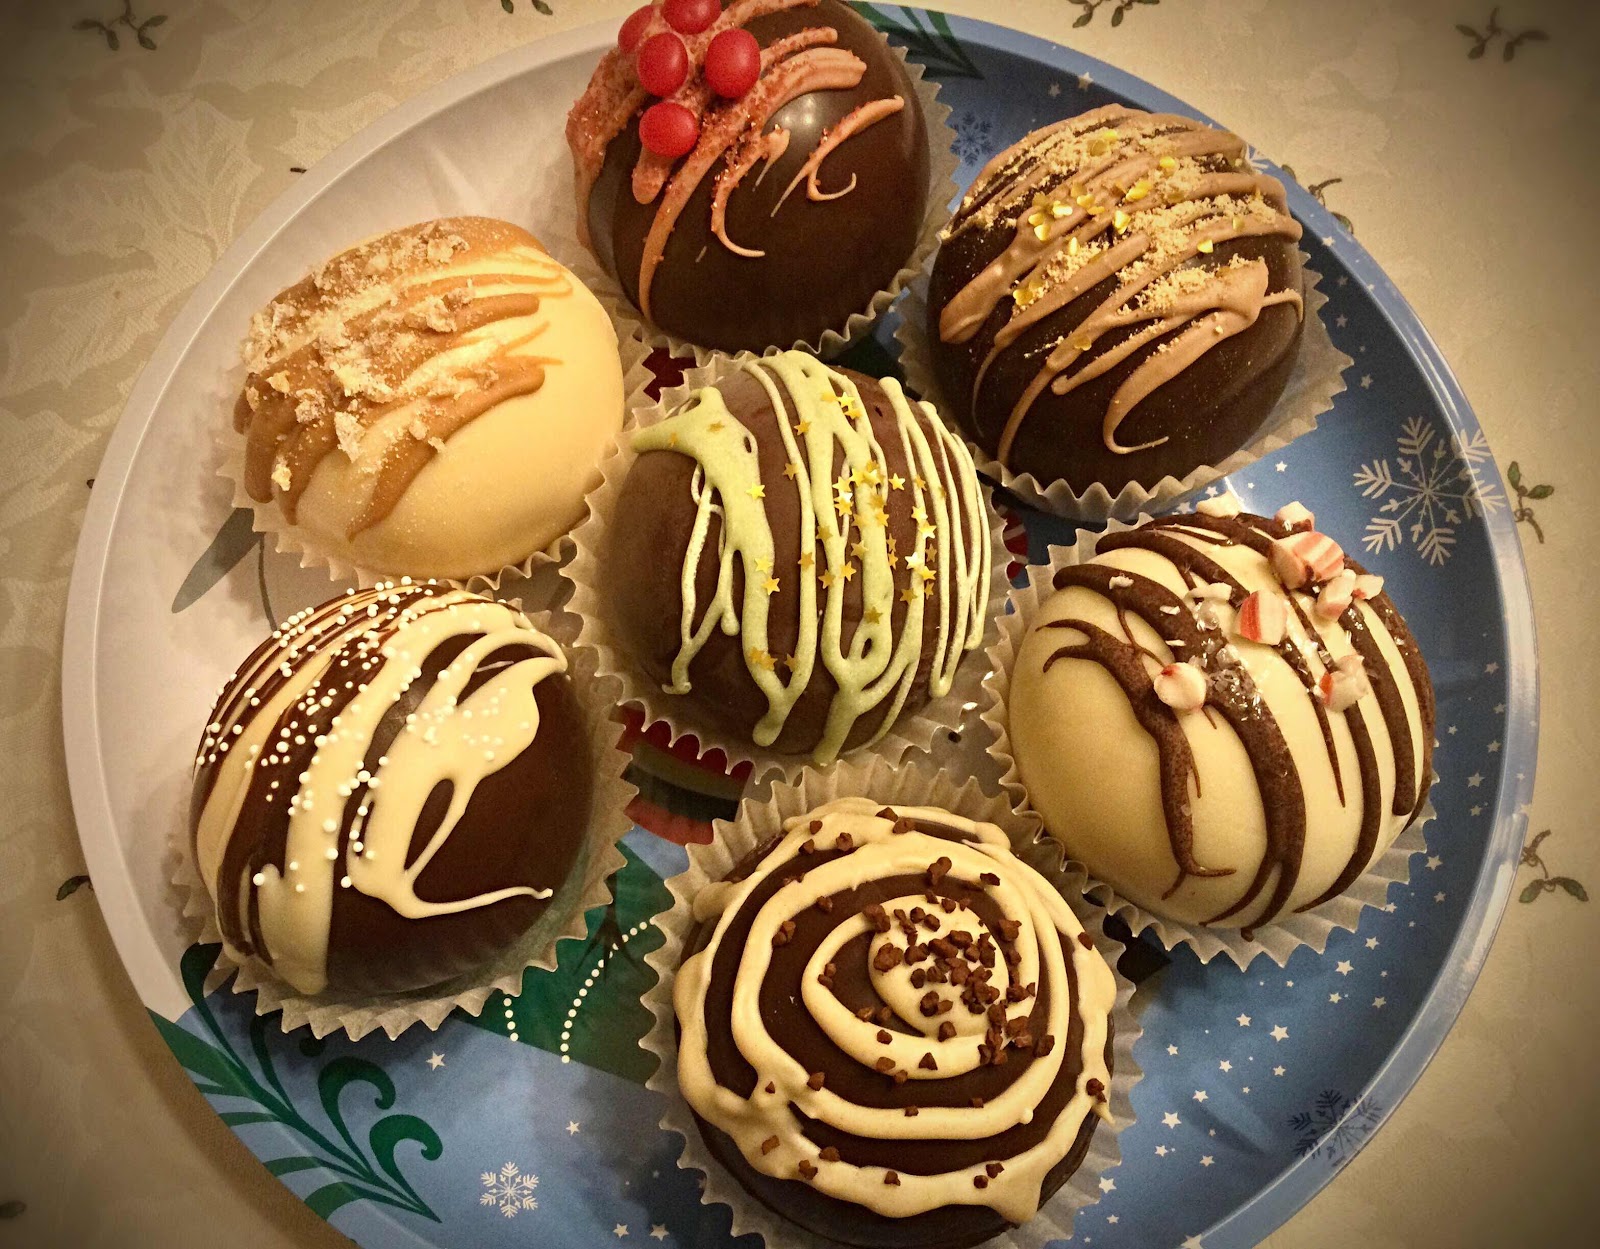
Seven different keto flavors

7 Different Keto Flavor Ideas:

Peppermint Bark: I used Lily’s White Chocolate Peppermint baking chips to make the outer shell. I filled it with 2 tablespoons of hot cocoa mix, 3 drops of peppermint extract and some crushed sugar free peppermint candies.

Chocolate Peanut Butter: I used Lily’s milk chocolate baking chips for the outer shell. I filled it with 1 tablespoon + 1 teaspoon of hot chocolate mix and 2 teaspoons peanut butter powder (no sugar added).

Mexican Chocolate: Milk or dark chocolate outer shell. Fill with 2 tablespoons hot cocoa mix, 1/4 teaspoon ground cinnamon and 3 drops of cinnamon extract.

White Chocolate Ginger: Use Lily’s white chocolate baking chips to make the outer shell. Fill with 2 tablespoons of my white chocolate powder (click here for the recipe), ground ginger and a few drops of pumpkin spice extract or gingerbread candy flavoring drops.

Black and White: I made the outer shell with 1/2 white chocolate sphere and 1/2 dark chocolate sphere. Fill with 1 tablespoon hot cocoa mix and 1 tablespoon white chocolate powder.

Mocha: Chocolate outer shell. Fill with 2 tablespoons hot cocoa mix and 1 teaspoon instant coffee.

Chocolate Mint: I used Lily’s Chocolate Mint baking chips to make the outer shell. Fill with 2 tablespoons hot cocoa mix and a couple of drops of mint extract.

Nutritional information will vary, depending on the ingredients you use.

Photos and video by Kathy Sheehan, copyright 2020
All rights reserved. Please do not duplicate without the author’s permission.
Friday, December 18, 2020

Keto White Chocolate Powder

Keto White Chocolate Powder
I’ve been on the lookout for white chocolate powder online. The one gourmet brand I found was full of sugar and included maltodextrin, soy and other questionable ingredients. I knew I could do better and started experimenting in my kitchen. I am so pleased with how this mix turned out! It makes the best, creamiest Hot White Chocolate drink, but it also can be used to flavor coffee, smoothies or protein shakes and in any recipe where you want a rich, complex white chocolate flavor that is unforgettable!

Keto White Chocolate Powder
Yields 3/4 cup (12 servings)

1-1/2 ounces of cocoa butter (wafers or chopped)
1/4 cup heavy cream powder (I used Anthony’s brand)
2-3 tablespoons powdered erythritol sweetener, or to taste
A tiny pinch of salt
1 teaspoon vanilla powder

1. Place all of the ingredients into a food processor at the same time and process in pulses until the cocoa butter is finely chopped into minuscule bits and all of the ingredients are well combined. Store in an airtight container or glass jar at room temperature. (Note: Take your time while processing and pulse the mixture. The heat of the food processor blades could begin to melt the cocoa butter, if you process too vigorously. If you see this happening, stop the food processor and stir. Allow the mixture to cool off for a while before you continue pulsing.)

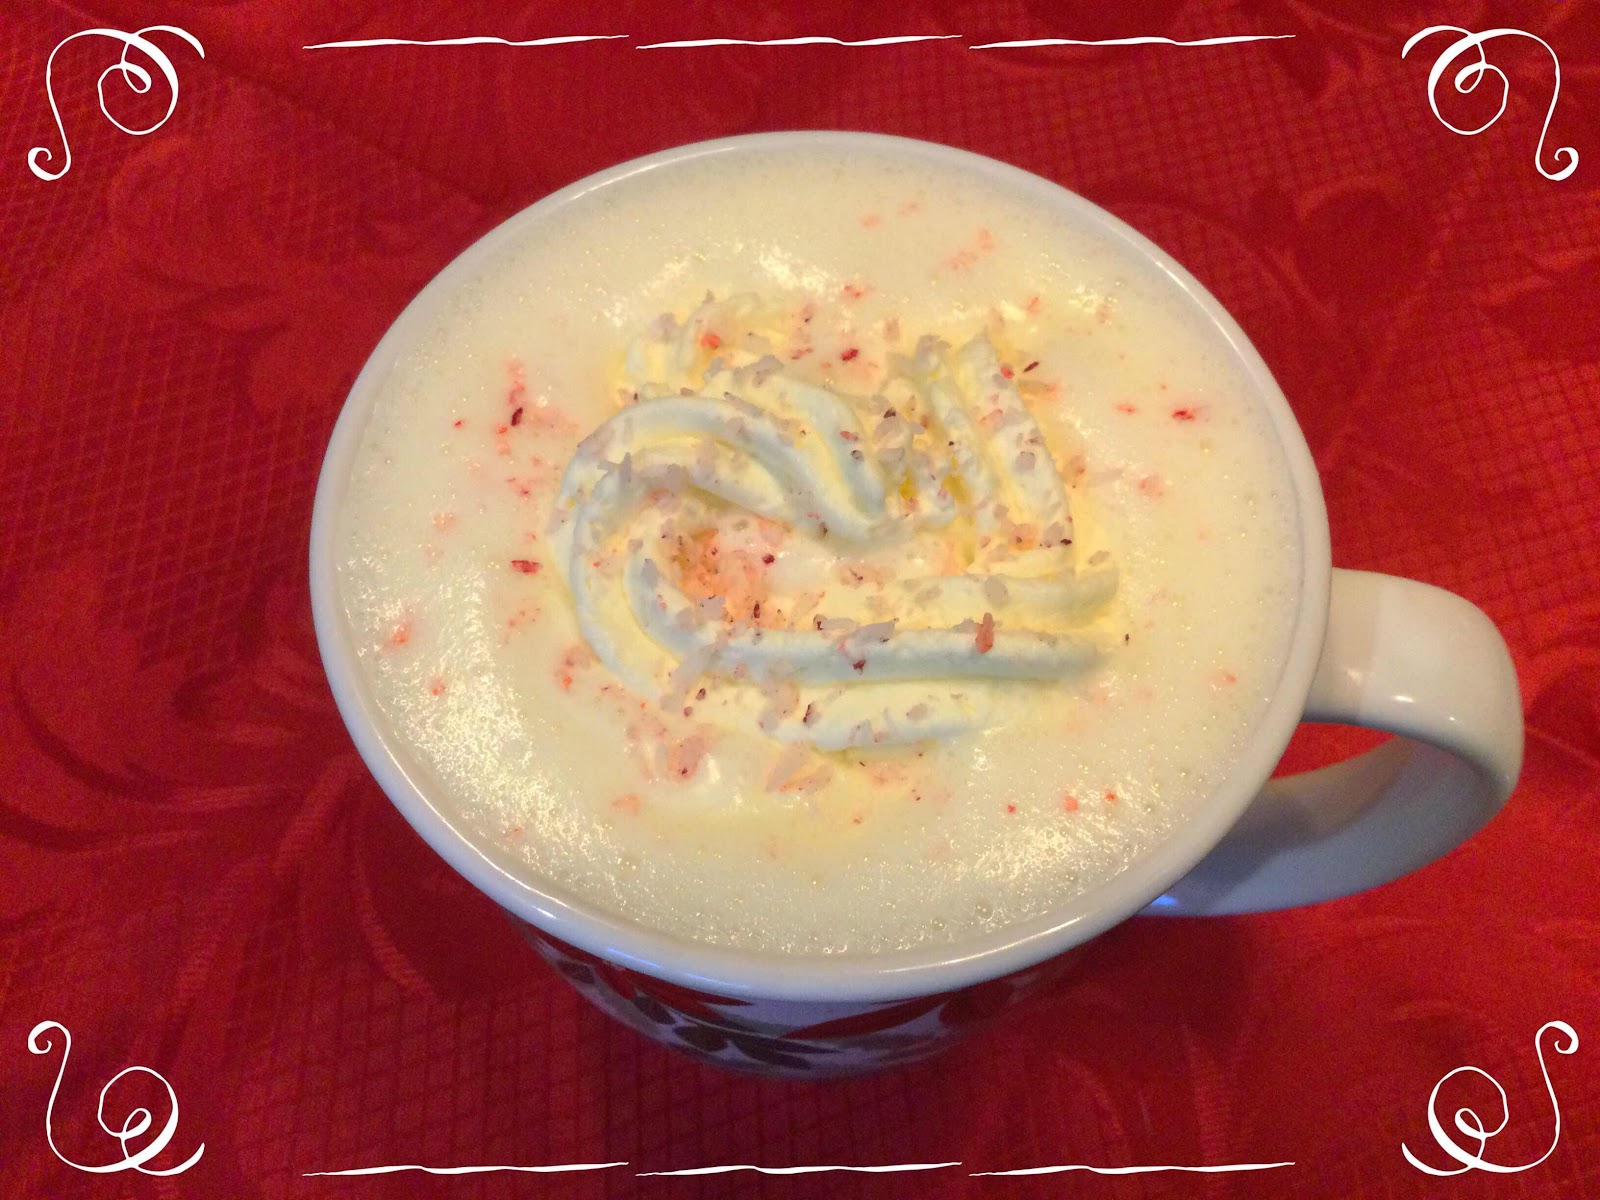
2. To make hot white chocolate, place a tablespoon of the mix into a mug and add 3/4 cup hot, low carb milk of your choice. (For low oxalate, choose coconut milk.) Stir until the mixture has incorporated and the hot cocoa is smooth.

3. You can jazz up the flavor your hot white chocolate by adding a drop or two of peppermint extract, strawberry extract, chocolate extract or orange extract.

4. Other uses: Stir into coffee, a smoothie or protein shake. Use as the powdered cocoa mix when making sugar free Hot Chocolate Bombs. Add to low carb cake or cupcake batter for a richer flavor. It’s also delicious when added to pancake batter!

Hot White Chocolate made with powder
Nutritional Information per 1 tablespoon: 46 calories, 1 g carbohydrate (0 g dietary fiber, 0.3 g sugars, 0.7 g sugar alcohol), 5 g total fat (2.5 g saturated fat, 0 g trans fat), 4 mg cholesterol, 3 mg sodium, 6 mg calcium, 8 mg potassium, 0 g protein. Net carbs per serving: 0.3 grams

Photos and recipe by Kathy Sheehan, copyright 2020
All rights reserved. Please do not duplicate without the author’s permission.
Saturday, December 12, 2020

Low Carb White Chocolate Peppermint Cake

Low Carb White Chocolate Peppermint Cake
It is official. This is one of the best sugar free, low carb cakes I’ve ever made! Upon tasting it, my daughter declared, “It tastes like peppermint ice cream but in cake form!” Every year, I make a special dessert to go with our simple dinner of Christmas Eve Soup...the votes have been counted and this cake is the winner!

Low Carb White Chocolate Peppermint Cake
Makes 12 servings

Cake Ingredients:
96 grams coconut flour (about 3/4 cup + 2 tablespoons)
2/3 cup granulated erythritol sweetener 
1/3 cup unflavored whey protein powder
1 tablespoon baking powder
1/4 teaspoon salt
4 large eggs, room temperature 
4 egg whites, room temperature
1/4 cup unsalted butter, melted and cooled
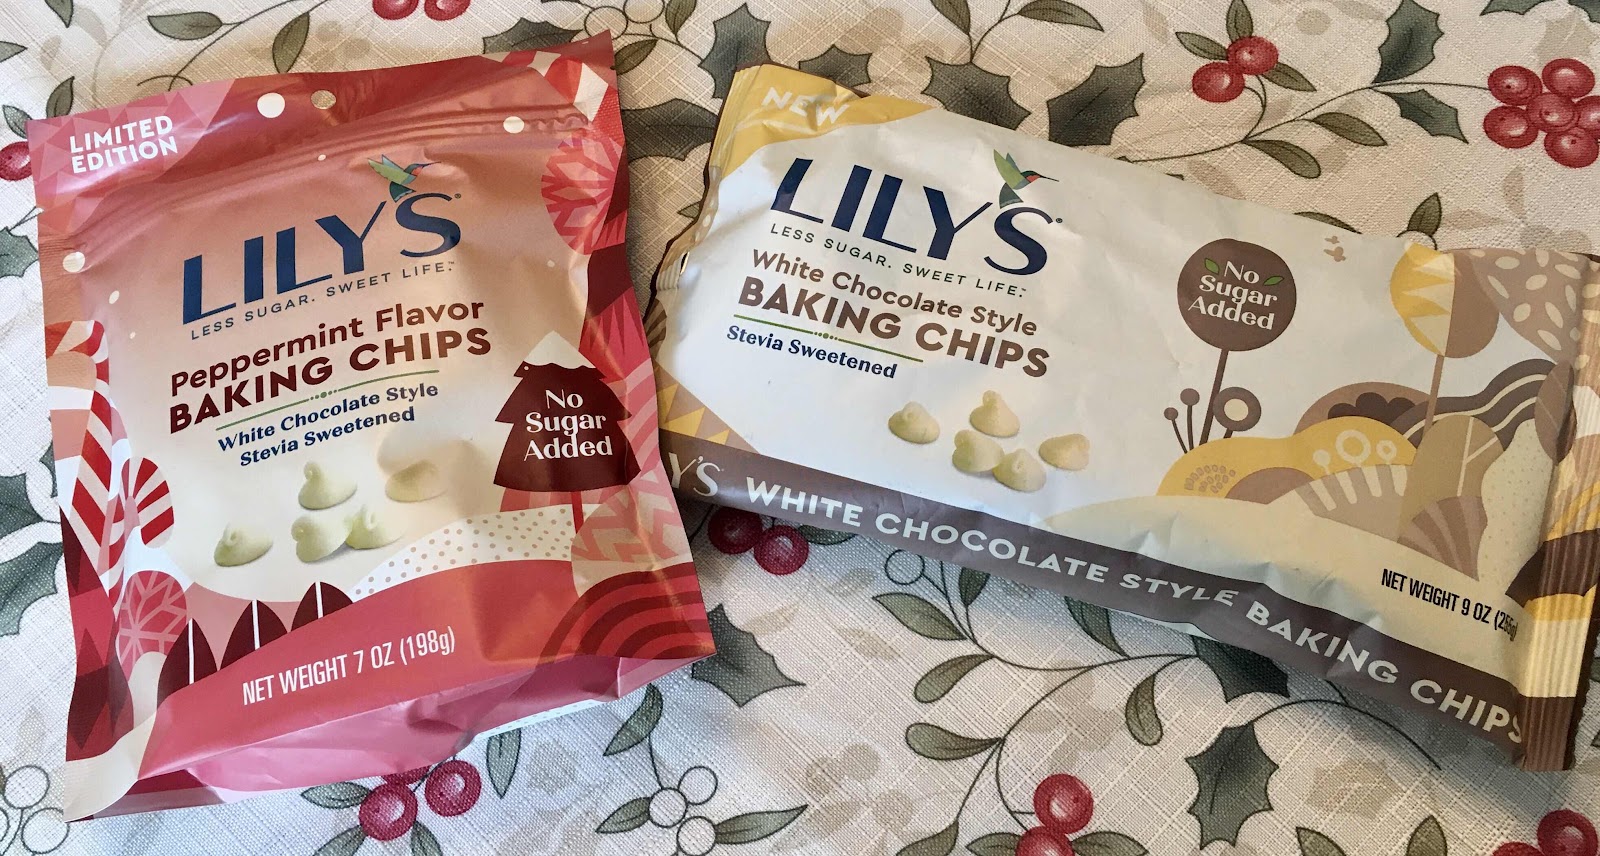
4 ounces sugar free white chocolate baking chips (use Lily’s peppermint flavor, if possible)
1/4 cup heavy cream
1/4 cup coconut milk, room temperature 
1 teaspoon vanilla extract 
1/2 teaspoon peppermint extract (add 1/4 tsp if not using peppermint chips)

Peppermint Frosting Ingredients:
8 ounces cream cheese, room temperature 
3/4 cup unsalted butter, room temperature (1-1/2 sticks)
8 ounces plain mascarpone cheese, room temperature 
1 cup powdered erythritol sweetener (confectioner’s)
1 teaspoon vanilla extract 
1 teaspoon peppermint extract 
2-4 tablespoons heavy cream (only if needed)

1. Preheat the oven to 325 degrees Fahrenheit. Grease two 8” round cake pans (or three 6” round cake pans). Line with parchment paper and grease the parchment paper. (Optional, but for best results, wrap the outside of the pans with homemade cake bands made from wet newspaper strips wrapped in foil or use commercially available cake pan bands. Using cake pan bands are not necessary, but will keep the edges from browning too much and results in a softer, more tender cake. To learn more about using cake pan bands, click here.)

2. In a small saucepan, heat the heavy cream until simmering. Remove from heat and add the 4 ounces white chocolate baking chips. Allow to sit for a few minutes, then stir until smooth. Set aside to cool a bit while you make the cake batter.

3. In a medium bowl, whisk together the coconut flour, sweetener, whey protein powder, baking powder and salt until no lumps remain. In a large bowl and using an electric mixer, beat the eggs, egg whites, melted butter, white chocolate mixture, coconut milk and extracts until well combined. Add the dry ingredients and beat just until there are no lumps and the batter is smooth.

4. Divide the batter evenly between the prepared cake pans and smooth to the edges with an offset spatula or back of a spoon. Bake for 30-35 minutes until lightly browned around the edges, the tops are slightly firm to the touch and a toothpick in the center comes out clean. (If using 6-inch pans, check the cakes after 20-25 minutes.)

5. Remove from the oven and allow the cakes to cool in their pans for 10-15 minutes before running a sharp knife around the edges and turning out onto wire racks to cool completely before frosting. (Note that coconut flour cakes are very delicate when warm, so cooling in the pans for a while makes them easier to handle.)

6. To make the frosting, beat together the softened cream cheese, butter and mascarpone cheese until fluffy. Add the powdered erythritol sweetener and extracts and continue beating. If your frosting is too stiff, add one tablespoon of heavy cream at a time until the desired consistency is reached. Frost your cake and decorate as desired. Store your cake in the refrigerator, but the taste is best if allowed to sit at room temperature for at least 20 minutes before cutting and serving.

Keto White Chocolate Peppermint Cake
Nutritional Information per serving (1/12th of cake, no frosting): 130 calories, 6.9 g carbohydrate (3.2 g dietary fiber, 1 g sugars, 2 g sugar alcohols), 9.3 g total fat (5.7 f saturated fat, 0 g trans fat), 79 mg cholesterol, 203 mg sodium, 108 mg calcium, 53 mg potassium, 86 IU Vit A, 1 mg iron, 5.6 g protein. Net carbs per serving, without frosting: 3.7 grams

Nutritional Information per serving (1/12th of cake with frosting): 394 calories, 10.1 g carbohydrate (3.2 g dietary fiber, 1.6 g sugars, 2.7 g sugar alcohols), 35.6 g total fat (22.5 g saturated fat, 0 g trans fat), 157 mg cholesterol, 321 mg sodium, 130.6 mg calcium, 56 mg potassium, 258 IU Vit A, 1 mg iron, 9 g protein. Net carbs per serving, with frosting: 6.9 grams

Photos and recipe by Kathy Sheehan, copyright 2020
All rights reserved. Please do not duplicate without the author’s permission. 
Tuesday, December 8, 2020

Low Carb White Chocolate Peppermint Cookies

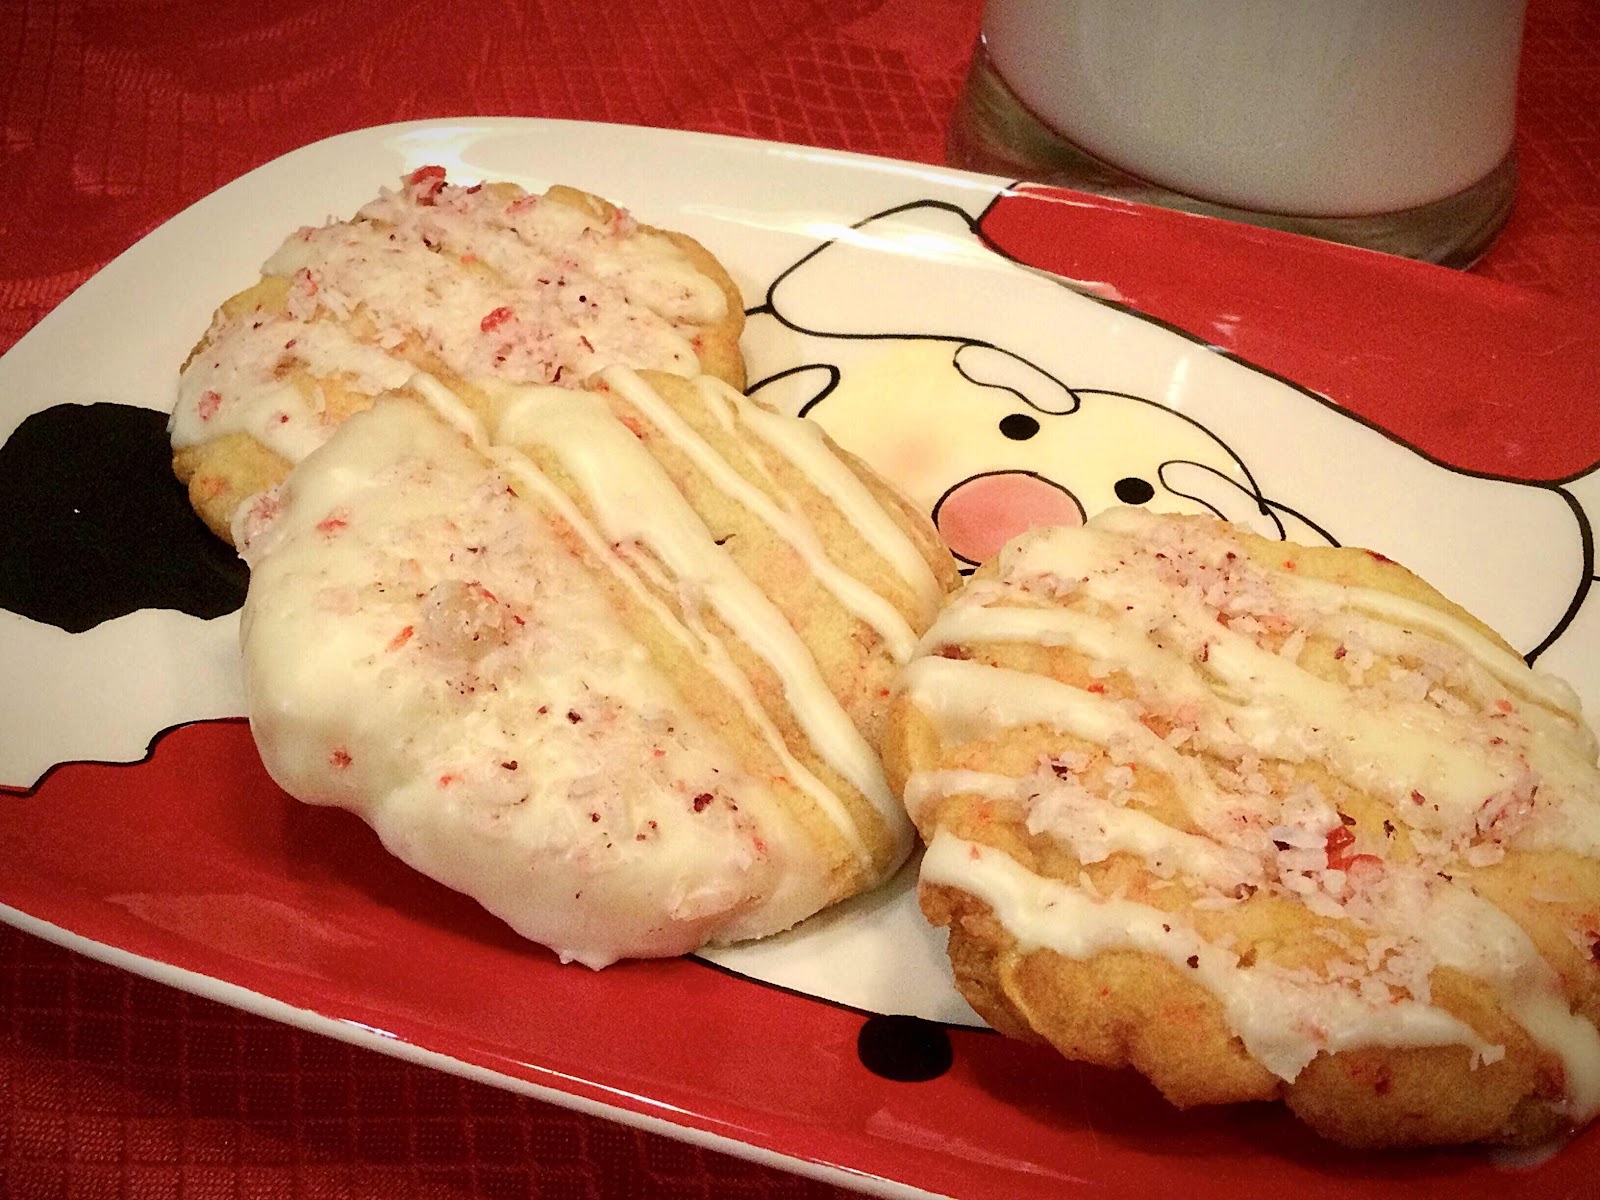
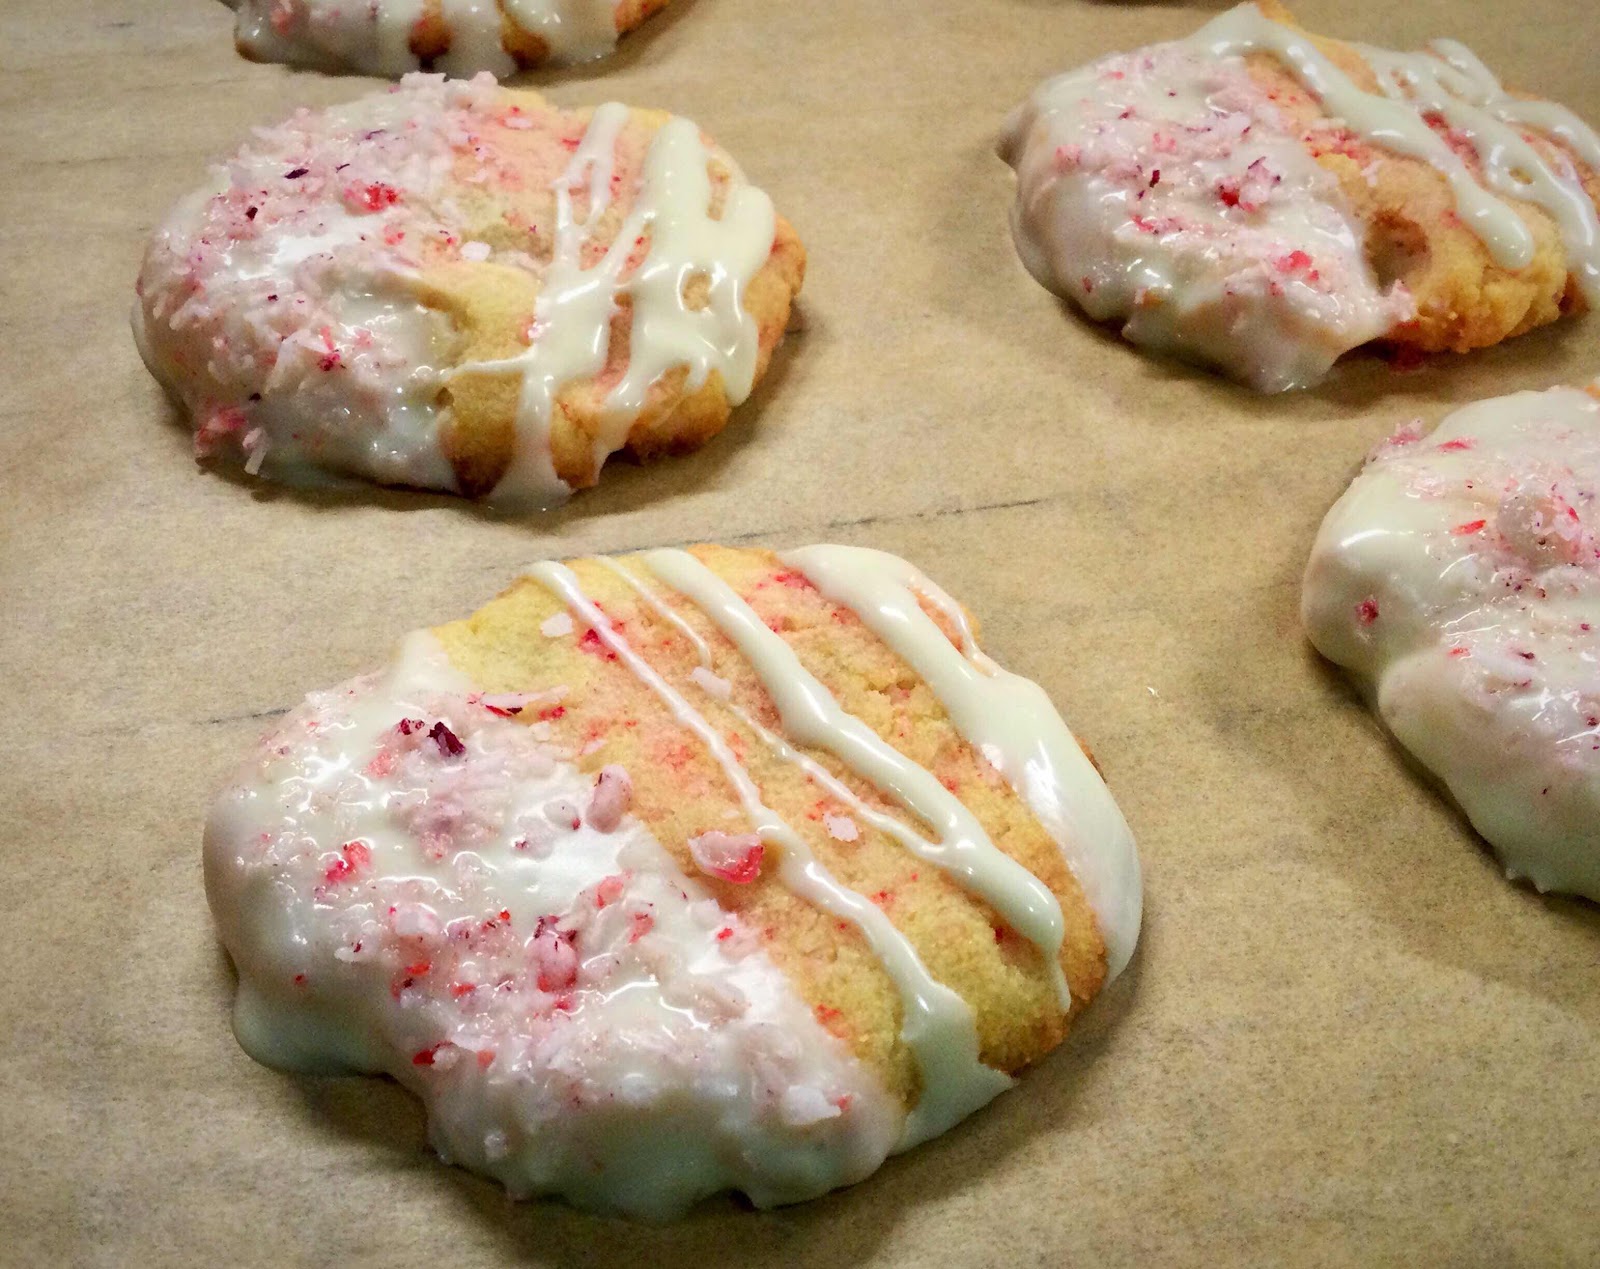
Low carb White Chocolate Peppermint Cookies on Santa Plate
This holiday season, I’m having so much fun creating recipes that highlight my favorite white chocolate peppermint flavor! These cookies are so light, elegant and delicious. My low carb peppermint candy sprinkles (see recipe here) make them festive and fun, adding beautiful color and the distinctive taste of candy canes!

Low Carb White Chocolate Peppermint Cookies
Makes 24 cookies

1-1/2 cups finely ground almond flour (substitute sunflower seed flour or finely ground macadamia nut flour for low oxalate)
1/4 cup coconut flour
1/2 teaspoon baking powder
1/2 teaspoon xanthan gum powder
1/8 teaspoon salt
1/2 cup unsalted butter, softened (1 stick)
2/3 cup powdered erythritol sweetener
1 large egg, room temperature 
1 tablespoon coconut milk, room temperature 
1 teaspoon vanilla extract
1/2 teaspoon peppermint extract (add an additional 1/4 tsp if not using peppermint baking chips)
2/3 cup sugar free white chocolate baking chips (if you have Lily’s peppermint flavor, that’s even better, see photo below)
1/2 cup Low Carb Peppermint Candy Sprinkles (see separate recipe here), divided

White Chocolate Glaze:
1 cup sugar free white chocolate baking chips
2 teaspoons refined coconut oil
1/8 teaspoon peppermint extract (omit if using peppermint flavored chips)

Lily’s sugar free white chocolate baking chips
1. Before making the cookie dough, make a batch of Low Carb Peppermint Candy Sprinkles (recipe here); set aside. Preheat oven to 325 degrees F and position the racks in the center of the oven. Line two cookie sheets with parchment paper or silicone baking mats.

2. In a medium bowl, whisk together the almond flour (or low oxalate flour substitute of your choice), coconut flour, baking powder, xanthan gum powder and salt; set aside.

3. Using an electric mixer, cream together the softened butter and powdered sweetener until light and fluffy. Add the egg, coconut milk and extracts and continue mixing until well combined.

4. Add the flour mixture and continue mixing until the dry ingredients are incorporated. Fold in the sugar free white chocolate chips and 1/4 cup + 2 tablespoons of the Low Carb Peppermint Candy Sprinkles until evenly distributed. (Save the remaining sprinkles to decorate the cookies later.)

5. Using a small cookie scoop, create 24 balls of dough and space them at least 2 inches apart on your prepared cookie sheets. Press down and flatten each ball with your hand until about 1/4 inch in thickness. (The cookies will not spread during baking.)

6. Bake in the preheated oven for 12-13 minutes, turning and switching the position of each cookie sheet in the middle of baking time. Bake until the edges are golden. Remove from the oven and allow the cookies to cool on the cookie sheets for at least 10-15 minutes before transferring them to wire racks to cool completely.

7. To make the glaze, place the baking chips and coconut oil in a microwave safe bowl and microwave for 15 seconds on high. Allow the chips to sit for a few minutes and then stir. If additional melting is needed, microwave in 6 second intervals. (You may also melt the baking chips in a double boiler over barely simmering water.)

8. Dip 1/2 of each cookie into the glaze and/or drizzle the glaze over the cookies. While the glaze is still wet, sprinkle with the remaining Low Carb Peppermint Candy Sprinkles. Allow the glaze to set before serving. (To hasten the process, you may refrigerate the cookies for 10 minutes.) Store cookies at room temperature for up to a week.

Low Carb White Chocolate Peppermint Cookies with Glaze
Note: This recipe, without the sprinkles and chips folded in, makes an excellent dough for rolling out and cutting with cookie cutters!

Nutritional Information per cookie: 120 calories, 3.8 g carbohydrate (1.7 g dietary fiber, 0.9 g sugars), 11.9 g total fat (4 g saturated fat, 0 g trans fat), 18 mg cholesterol, 55 mg sodium, 12.2 mg calcium, 40 mg potassium, 38 IU Vit A, 1.2 g protein. Net carbs per cookie: 2.1 grams

Photos and recipe by Kathy Sheehan, copyright 2020
All rights reserved. Please do not duplicate without the author’s permission.