Monday, December 26, 2022

Old Fashioned Low Carb Hot Chocolate (based on Tasha Tudor’s recipe)

Old Fashioned Low Carb Hot Chocolate
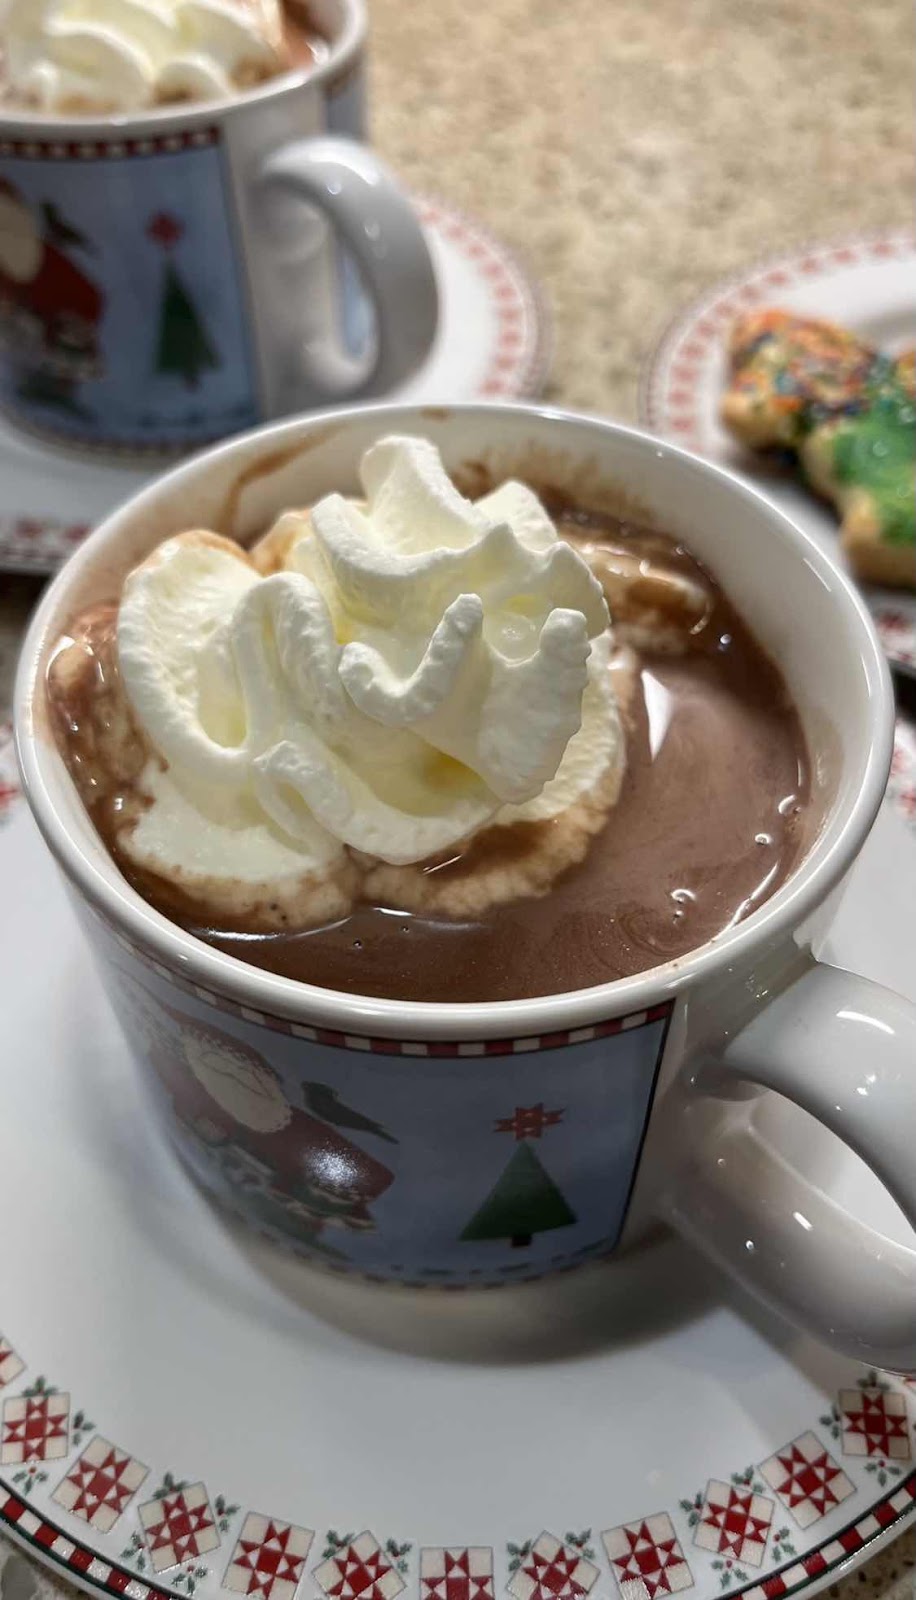
Before the invention of processed hot cocoa powder mix in a box, when you wanted hot chocolate, you got out your saucepan! Sadly, hardly anyone makes real hot chocolate from scratch anymore, which is too bad because the powdered mix is a pale comparison to the real thing! Recently, I was reading my first edition copy of Take Joy! by Tasha Tudor, one of my favorite holiday books since childhood, and her book The Tasha Tudor Cookbook. Her recipe for hot chocolate, made the old fashioned way, inspired this sugar free, low carb version. This hot chocolate is so rich, creamy and decadent, you’ll never guess it is sugar free and only 3g net carbs per serving. (I prefer using a combination of sweeteners in this recipe, but feel free to use whatever zero carb sweetener you like and have on hand equivalent to 6-8 tablespoons, or to taste.) Add some of this hot chocolate to your coffee for a mocha that is out of this world!

Old Fashioned Low Carb Hot Chocolate
Makes 4 servings

2½ cups low carb milk of choice
½ cup heavy cream
1/4 teaspoon xanthan gum
2 ounces unsweetened baker’s chocolate, chopped
2 tablespoons allulose
2 tablespoons powdered erythritol sweetener 
½ teaspoon stevia powder (or add an additional tablespoon erythritol)
A pinch of salt
1 cup boiling water
1½ tablespoons unsweetened cocoa powder
1 teaspoon vanilla extract
10 drops monkfruit extract or stevia drops, to taste

1. Place the milk and cream into a sauce pan and scald over medium low heat. Add the xanthan gum and whisk until combined. Set aside and keep warm.

2. Meanwhile, pour 1 cup of water into a sauce pan and bring to a boil, then remove from heat. Place the chopped chocolate in a heat proof bowl and set it over the hot water until the chocolate has melted. (You can use a double boiler for this step, if you have one.)

3. Stir the sweeteners, salt and cocoa powder into the melted chocolate. Slowly whisk in the boiling water until the sweeteners and cocoa powder have dissolved. Pour the chocolate mixture back into the sauce pan. Boil the chocolate mixture for five minutes over low heat, stirring frequently.

4. Add the chocolate mixture to the hot milk and whisk until combined. Add the vanilla and monkfruit extract (or stevia drops). Whisk again until frothy and taste. Adjust sweetness to your liking. Serve warm topped with whip cream, if desired. (If you have any leftover, it can be stored in the refrigerator for up to 4 days. Reheat to serve.)

Tasha Tudor’s Hot Chocolate illustration
Nutritional Information per 1 cup serving: 212 calories, 8 g carbohydrate (2.8 g dietary fiber, 0.2 g sugars, 2 g sugar alcohols), 18.7 g total fat (11.8 g saturated fat, 0 g trans fat), 39 mg cholesterol, 163 mg sodium, 284 mg calcium, 33 mg potassium, 2 mg iron, 118 IU Vit A, 5 mg caffeine, 3 g protein. Net carbs per serving: 3.2 grams

Recipe and photo by Kathy Sheehan, copyright 2022
All rights reserved. Please do not duplicate without the author’s permission.

Monday, December 19, 2022

Keto Decorative Snack Cakes with Ganache Topping

Keto Decorative Snack Cakes with Ganache Topping
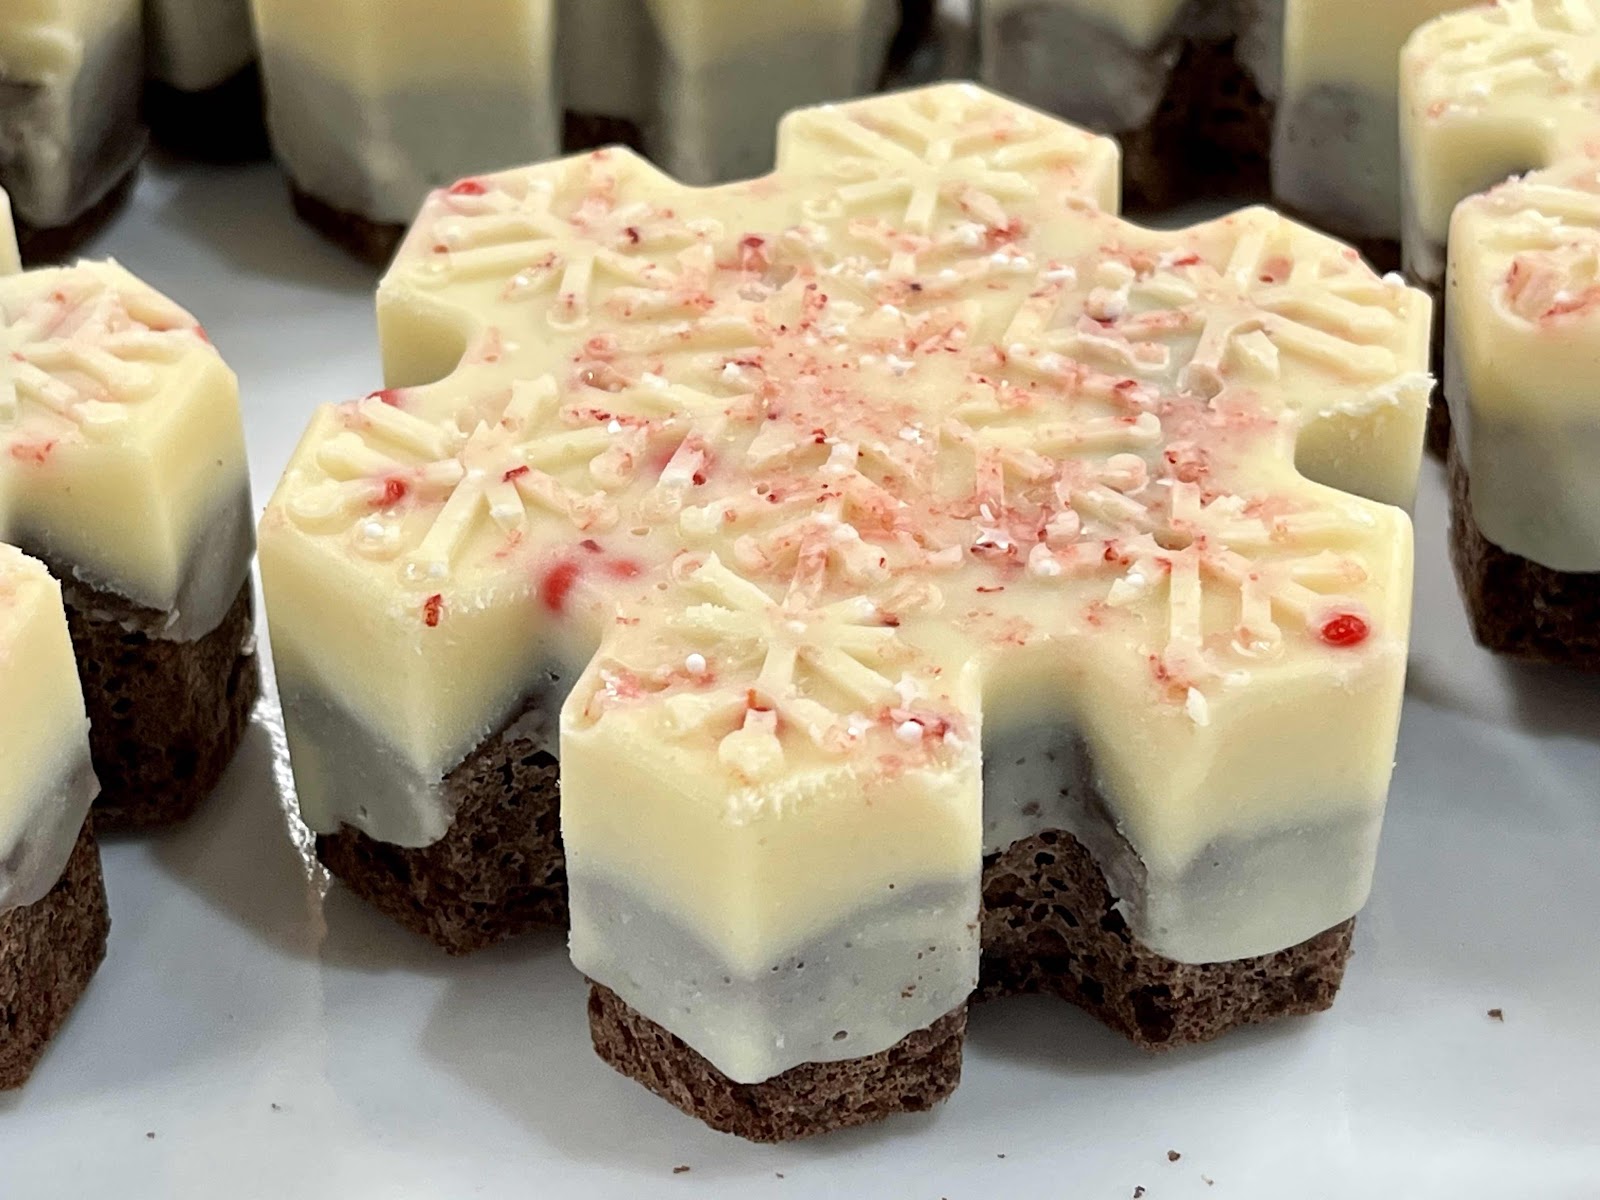
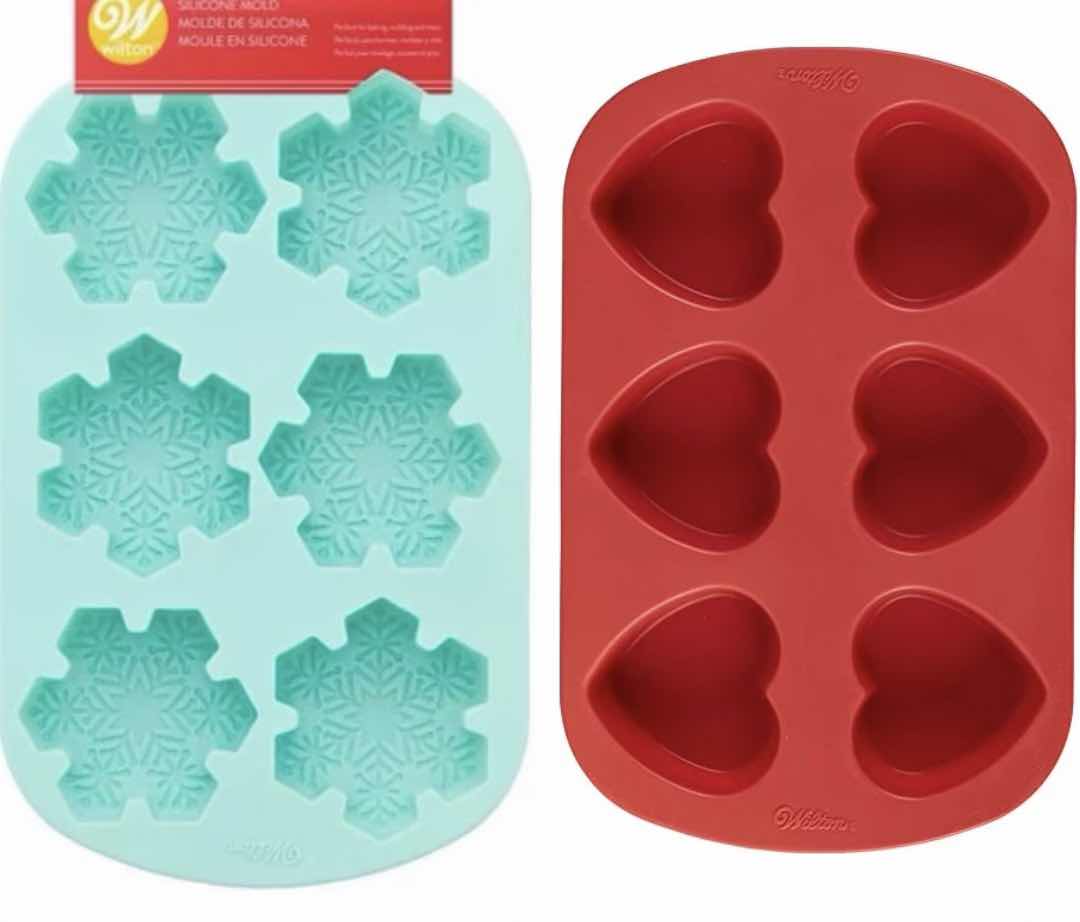
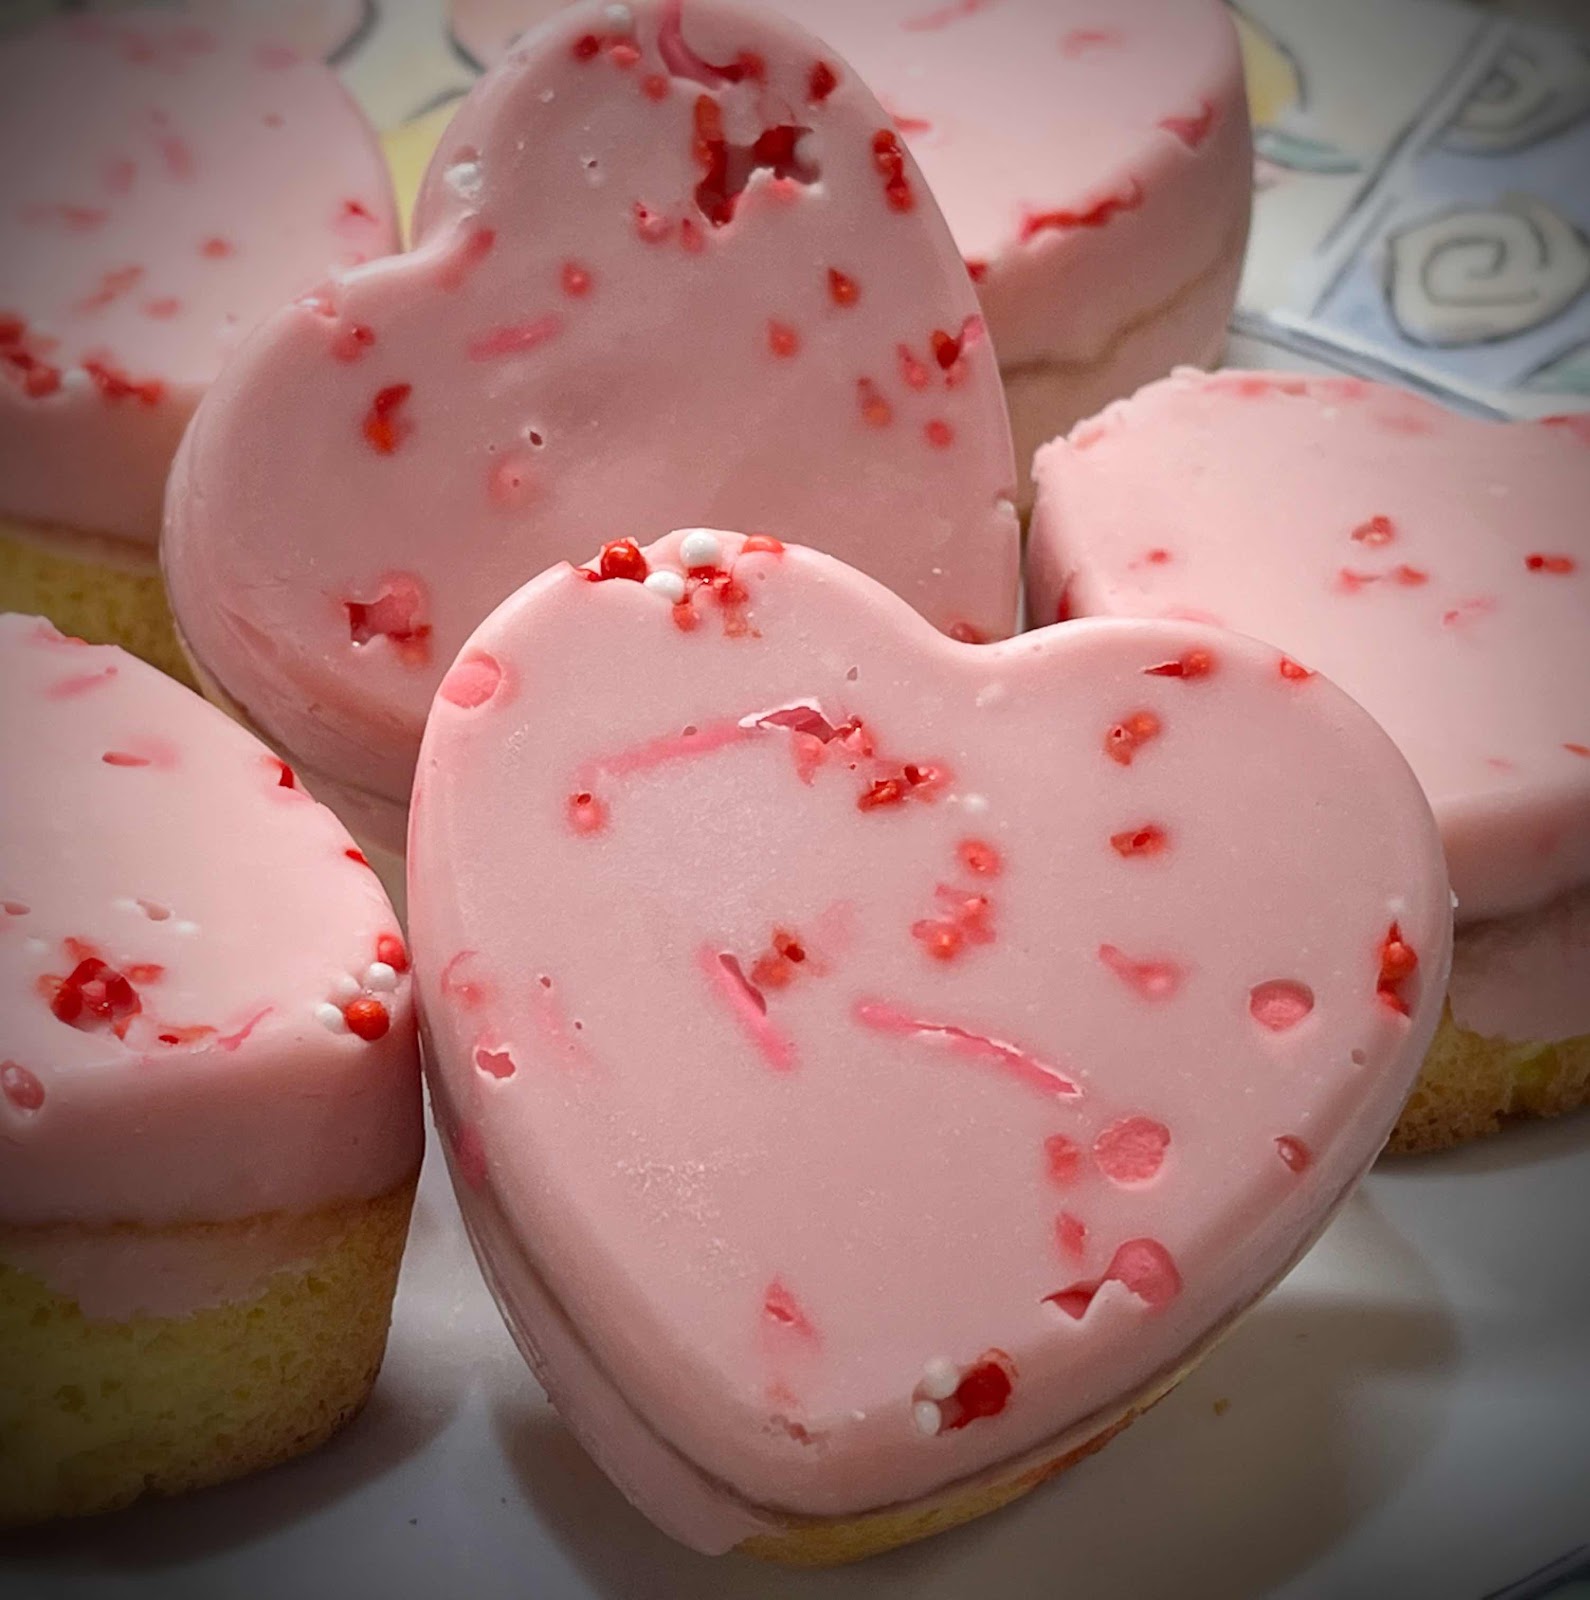
This post describes a technique for making adorable, miniature snack cakes using a decorative, silicone baking mold. You can use any low carb, sugar free cupcake recipe or boxed cake mix. I recently bought the Wilton Winter Snowflake Baking and Candy Mold and Heart Mold and, as you can see, the results are impressive! The warm ganache icing is poured into the mold, topped with a previously baked and cooled cake and then placed in the freezer to set. Later, when the cake is unmolded, the ganache topping is beautifully embossed!! These snack cakes may look fancy, but they’re really quite easy to make. Try this same technique with any silicone baking mold for a healthy, sugar free, low carb dessert that can be customized for any occasion!

Silicone Baking Molds
Keto Decorative Snack Cakes with Ganache Topping
Number of servings depends on your baking mold

Directions:

1. Use any low carb, sugar free cupcake or cake recipe or boxed cake mix to make the mini cakes. Depending on the number of cakes in your mold, the recipe may need to be halved. Since my molds have six snowflakes or hearts, I halved my recipe to make six cakes. Follow the recipe, but be aware the baking time may need to be shortened. Bake until the top springs back when touched and a toothpick comes out clean. Do not make the frosting, if included in the recipe, because it’s not needed. Here are a few links to my favorite recipes I’ve tried in the past and can recommend:


Other Ingredients:
Decorative sprinkles
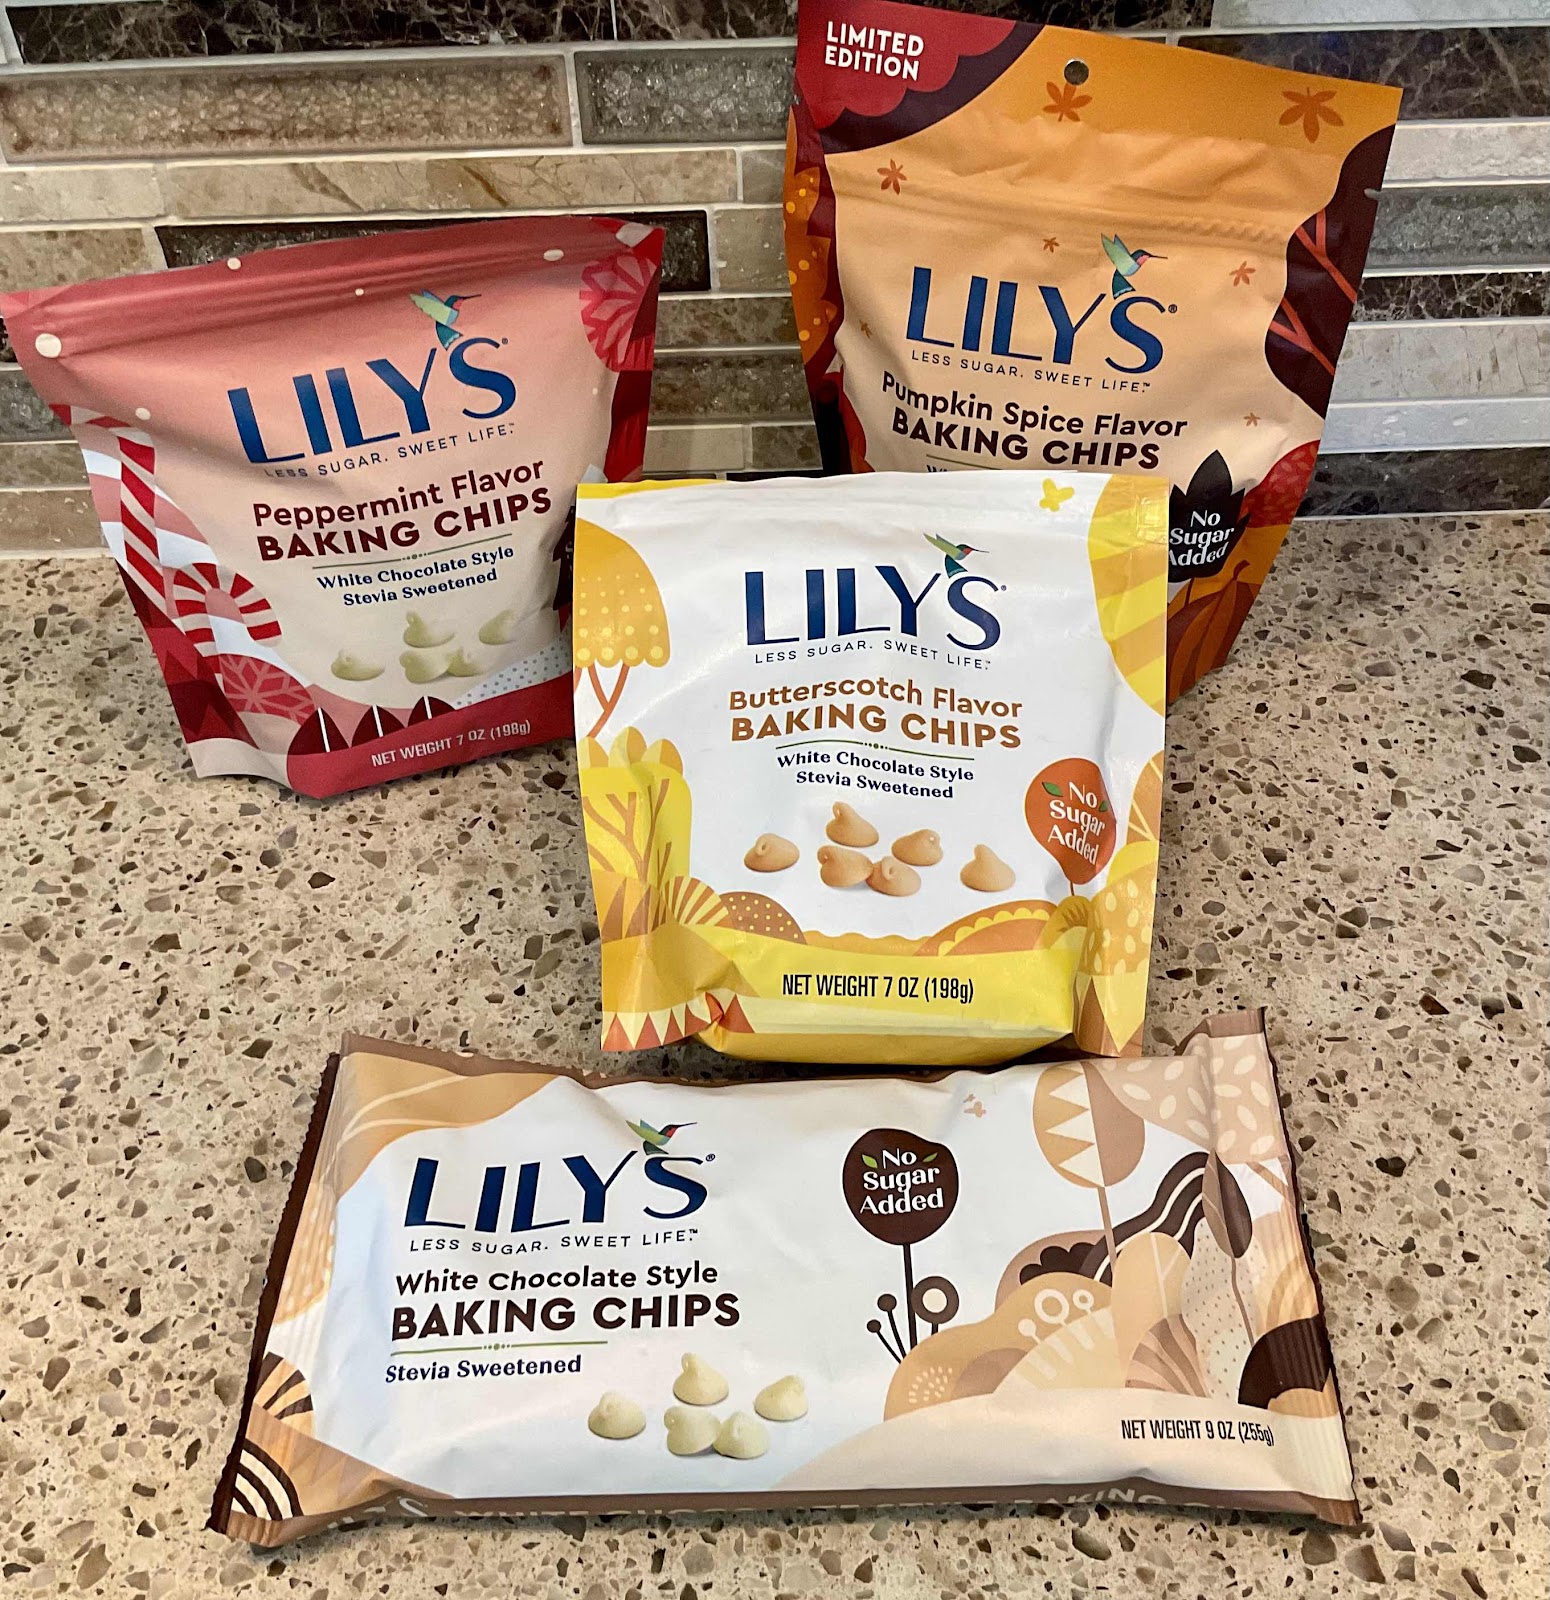
1 cup Lily’s sugar free baking chips (any flavor)
2½ ounces heavy cream (6 tablespoons)

Bake the cakes in your baking mold
2. Spray the silicone baking mold with non-sticking baking spray. Follow the directions in your recipe or on the box to make the cake batter. Spoon batter into each cavity until 3/4 full. Tap the mold on the counter to level out the batter and remove any air bubbles. Bake according to recipe or package directions, until the tops spring back when lightly touched in the center and a toothpick comes out clean. After the cupcakes are baked, take them out of the baking mold and cool completely on a wire rack before proceeding. 

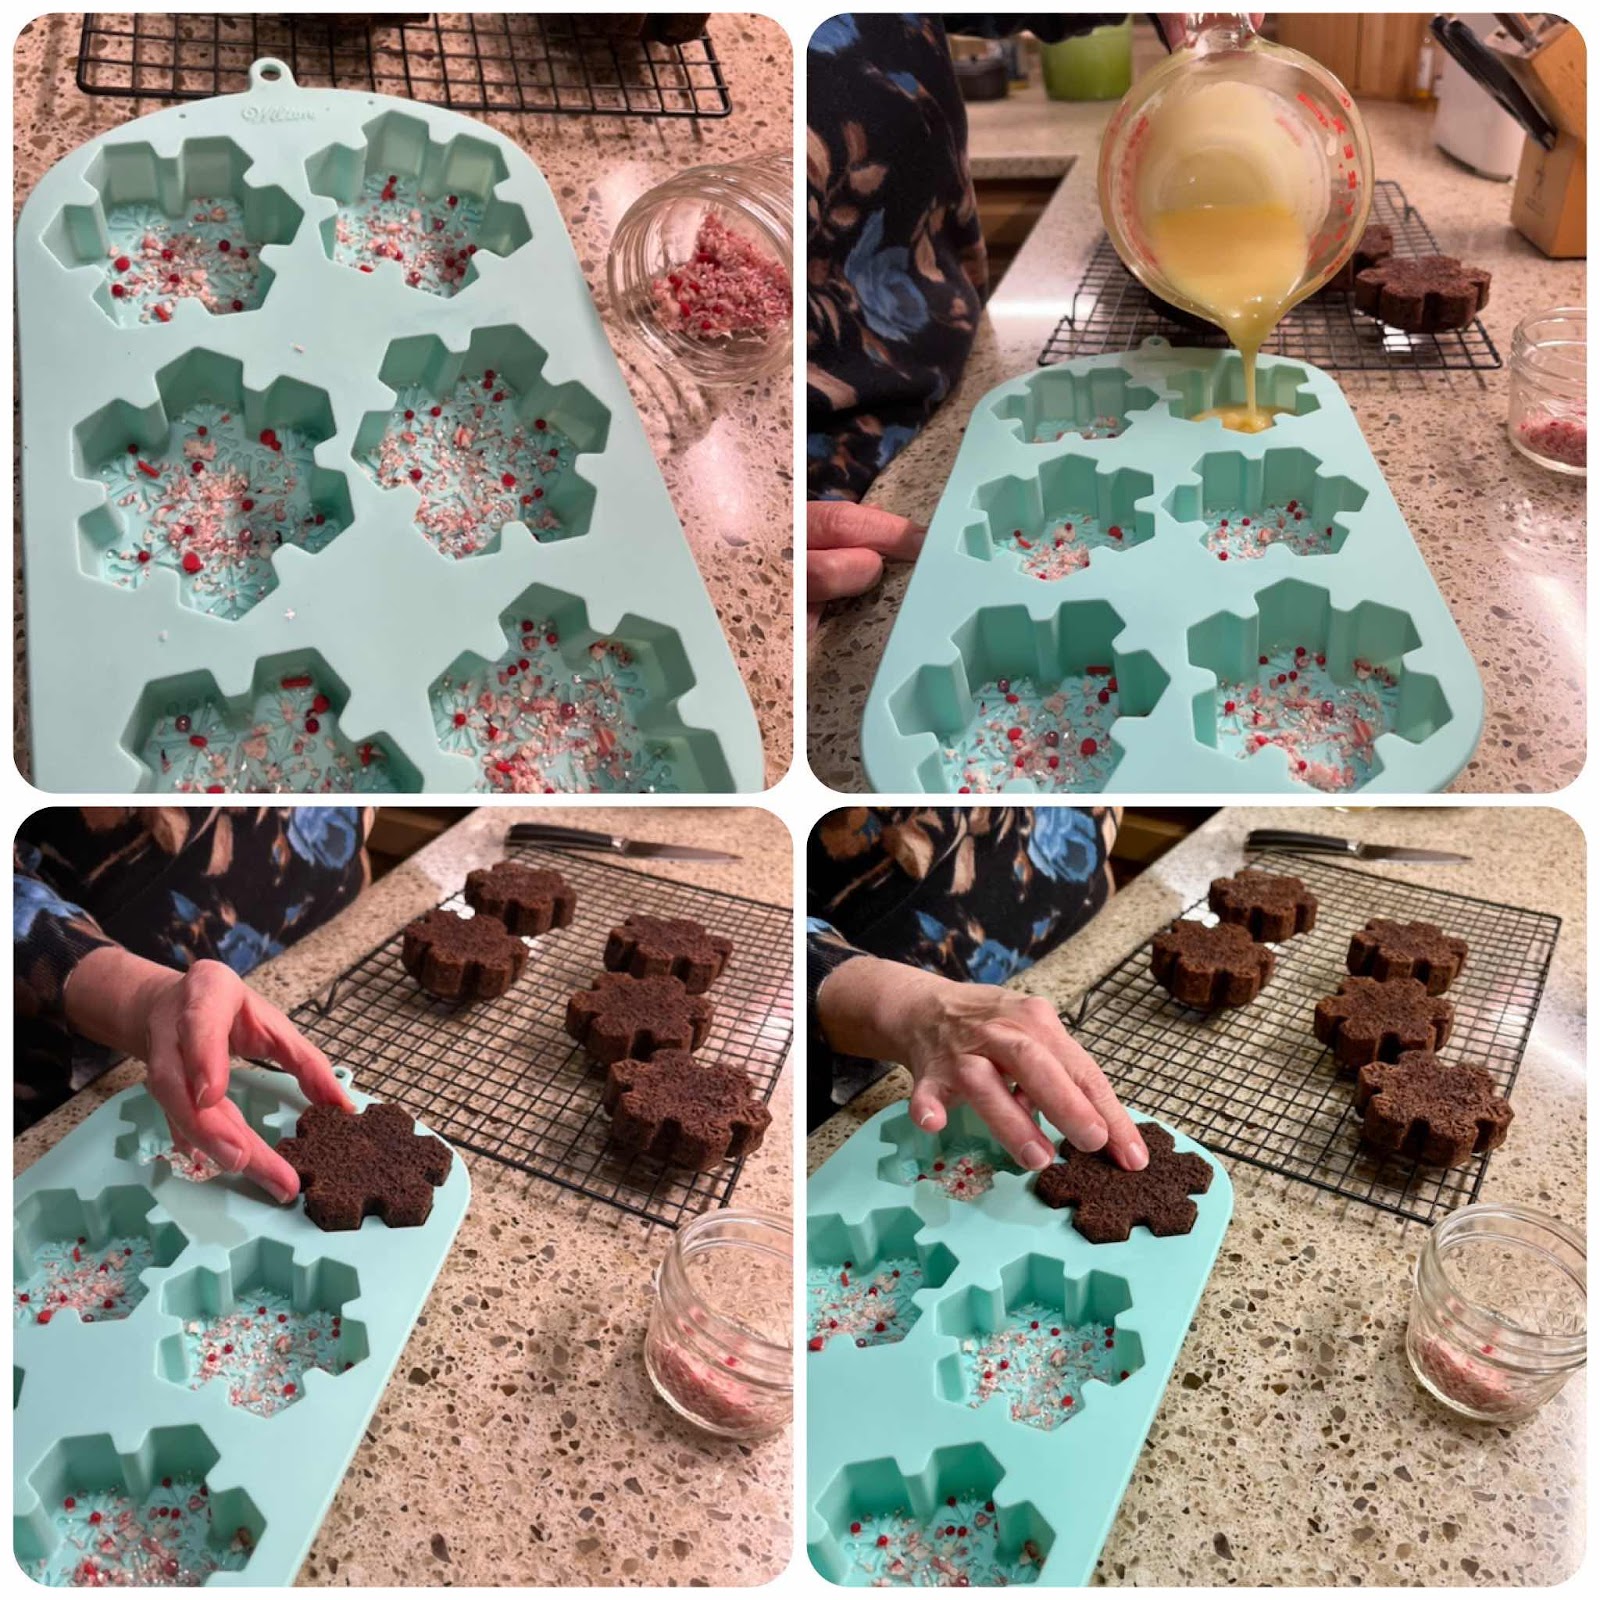
3. Once the cakes are cooled, wash the baking mold to remove any crumbs or oil and dry thoroughly. Spoon 1/8 to 1/4 teaspoon sprinkles into each cavity and set aside. 

Add sprinkles, pour in ganache and top with a cooled cake
4. Make the Chocolate Ganache: In a small saucepan, heat the heavy cream until beginning to simmer. Stir to make sure all of the cream is heated through and bring to a gentle simmer again. Meanwhile, place the sugar free baking chips into a heat-proof bowl. Once the cream is hot, pour over the chocolate chips and allow to sit for 5 minutes. Whisk until smooth. (Note: Lily’s Sugar Free Baking Chips come in a variety of flavors. If you use plain white chocolate, you can add ½ teaspoon of any flavor extract to the ganache to create your own flavor. For example, add caramel extract to make a caramel flavored white chocolate ganache! Also, you can color the ganache with a drop or two of gel food coloring.)

Lily’s Sugar Free Chocolate Baking Chips
5. Carefully, pour the chocolate ganache into the baking mold, covering the sprinkles, until about 1/4 - ½ inch deep (see photo above). Take one of the cooled cakes and insert it into the mold (like a puzzle), on top of the warm ganache, and press down gently. Repeat with the remaining cakes. Place the baking mold on a flat tray or baking sheet and tap on the counter to help settle the warm ganache into the grooves and lines of the mold’s design.

6. Place the mold into the freezer and allow to set for a minimum of 3 hours, and 4 hours is even better. (This is important! You want the chocolate ganache to be completely frozen to make unmolding the cakes easier.)

Heart Cakes
7. Remove from freezer and, while the cakes are frozen, unmold them and place them, cake side down, on a platter. The cakes can be stored in the refrigerator for up to a week. For the best flavor and texture, remove from the refrigerator and allow the cakes to come to room temperature before serving.

Easter Egg Shaped Snack Cake


Flower Shaped Snack Cake

Nutritional Information per cake varies, depending on the recipe used.

Photos and recipe by Kathy Sheehan, copyright 2022
All rights reserved. Please do not duplicate without the author’s permission. 

Saturday, November 19, 2022

Keto Chocolate Drop Cookies

Keto Chocolate Drop Cookies
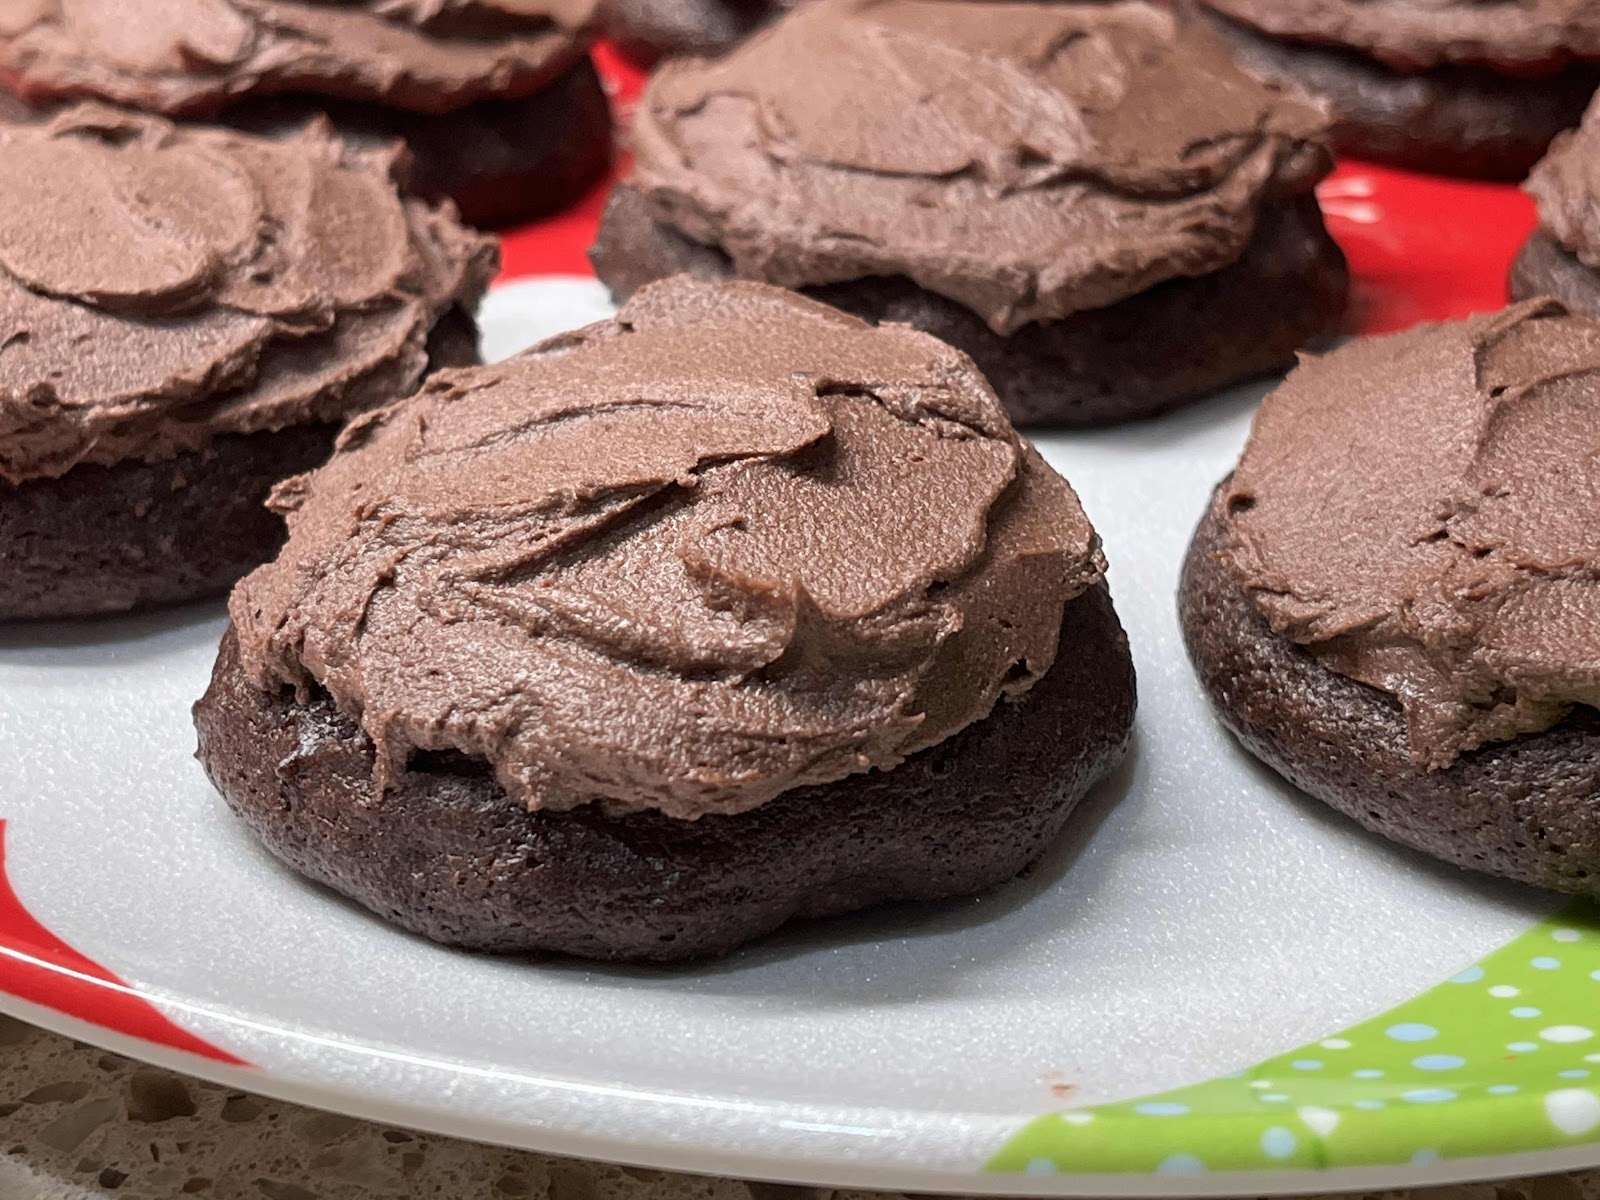
When I was growing up in Tulsa, Oklahoma, there was a wonderful store in Utica Square called Petty‘s Fine Foods. They had an in-store bakery that made the best cookies in town! One of my favorites was their Frosted Chocolate Drop Cookies. They only made them once a week, so you had to make sure you got there early enough in the day to grab a bag. Sadly, Petty’s is no longer in business, but the memory of those cookies have stayed with me all these years. Recently, I was experimenting with a cookie recipe, trying to make it lower in oxalates by not using almond flour. Macadamia nuts are much lower in oxalates than almonds, but finely ground macadamia nut flour is not available commercially. Instead, I took raw macadamia nuts and quickly processed them in my blender to make macadamia nut butter, which I then used as a base for my cookie dough. If you don’t want to go to the trouble of making your own macadamia nut butter, you can purchase it or substitute cashew butter in it’s place (although be aware that cashew butter is higher in oxalate). The result was spectacular! The cookies were light, soft and cake-like, just like the Chocolate Drop Cookies I remember!

Keto Chocolate Drop Cookies
Makes 20 cookies

Cookie Ingredients:
1 cup macadamia nut butter (homemade, store bought or substitute cashew butter)
¾ cup powdered erythritol-based sweetener (such as LaKanto Monkfruit sweetener or Swerve)
2½ tablespoons unsweetened cocoa powder
2 tablespoons unsweetened peanut butter powder
1½ tablespoons oat fiber powder (not oat flour!)
1 tablespoon coconut flour
1 tablespoon unflavored whey protein powder
1 teaspoon baking soda
2 large eggs
1 tablespoon salted butter, melted and cooled a bit
1½ teaspoons vanilla extract
1 - 2 tablespoons water, as needed
½ cup pecans, chopped

Chocolate Frosting:
½ recipe of my Best Low Carb Chocolate Fudge Frosting (see separate recipe here)
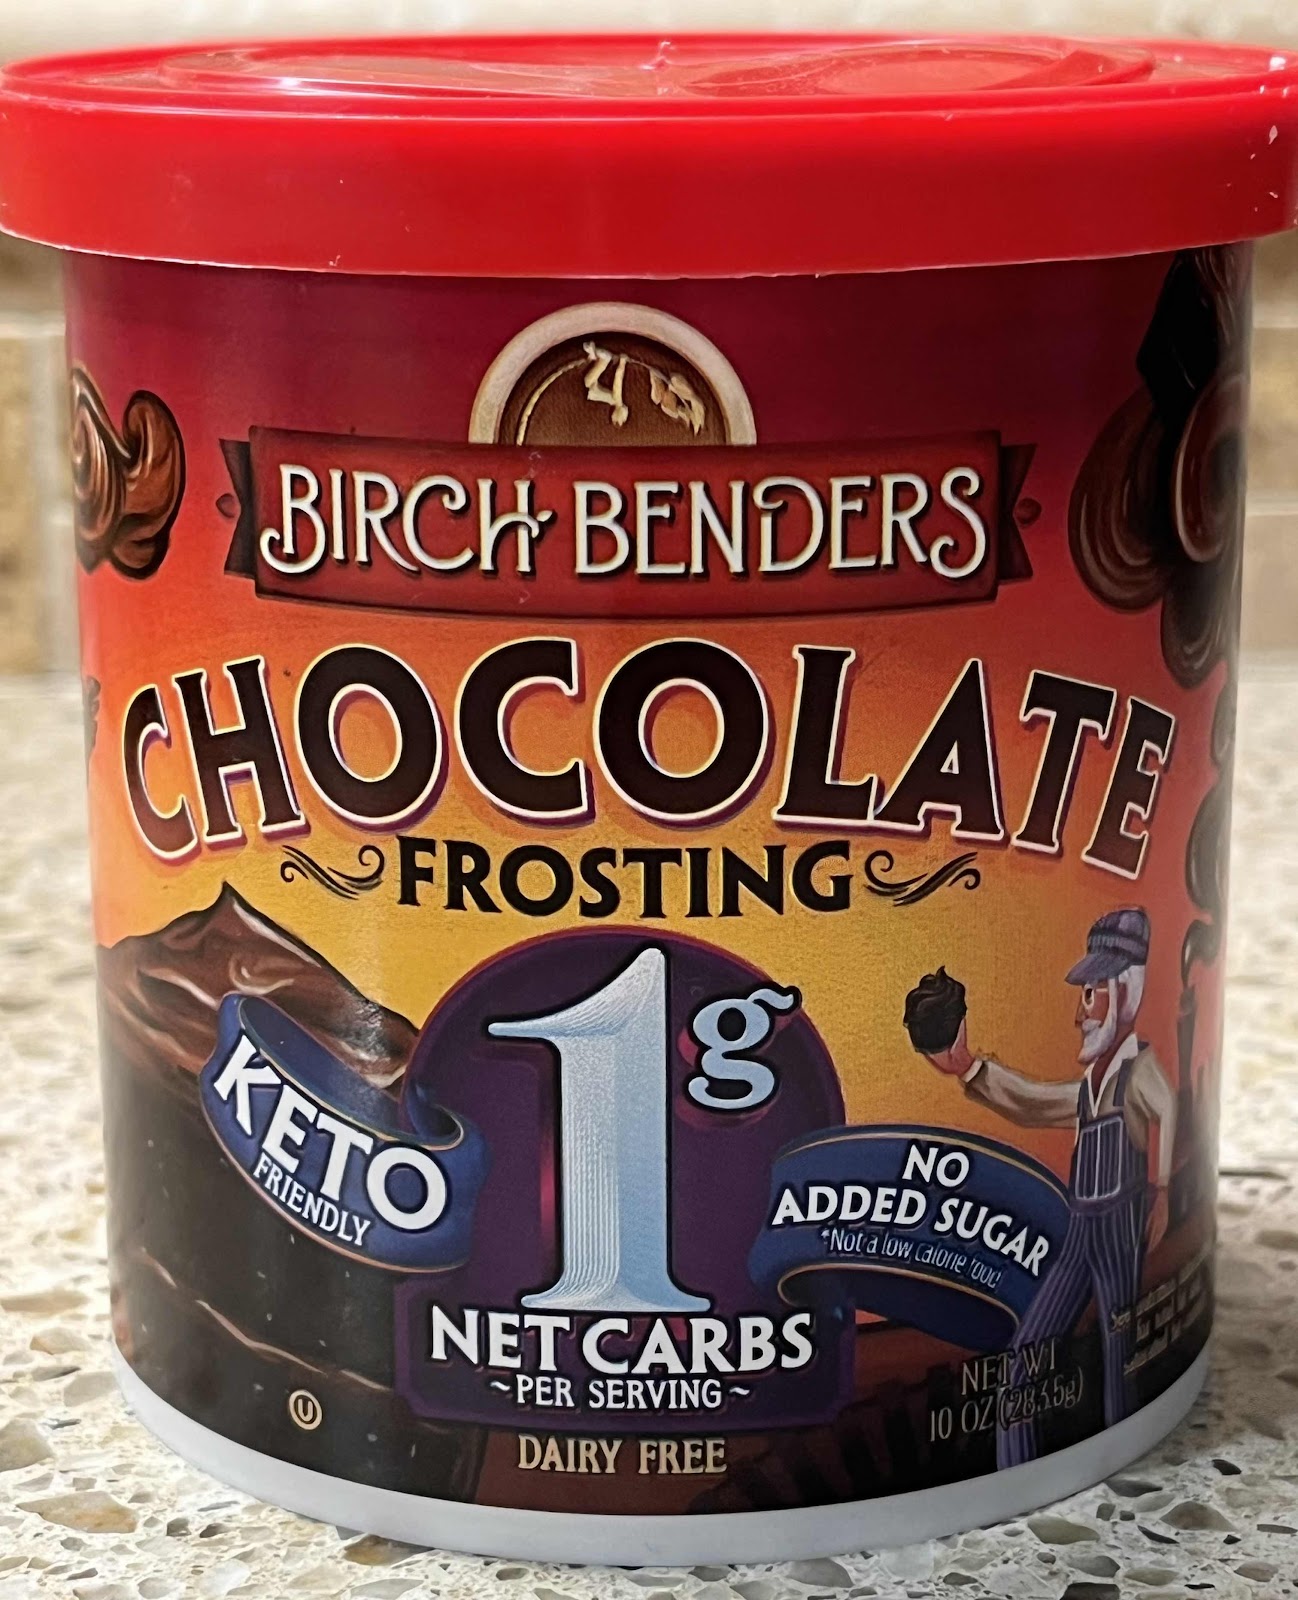
OR use your favorite store-bought sugar free chocolate frosting (I recommend Birch Benders, see below)

1. Preheat oven to 350°F. Line a rimmed baking sheet with a silicone baking mat or parchment paper.

2. In a large mixing bowl, combine all of the cookie ingredients, except the water and chopped nuts. Using an electric mixer, mix until the ingredients are well combined and a thick, sticky, but cohesive batter is formed (what you are looking for is a thick cake batter, slightly looser than a dough). If needed, add water 1 teaspoon at a time until the proper consistency is reached. The amount of water necessary will depend on the nut butter that you have chosen to use. Homemade macadamia nut butter is very runny, but commercially available macadamia nut butter is often mixed with cashew butter to make it thicker and spreadable. If you are using store-bought macadamia nut or cashew butter, you may need to use the full 2 tablespoons of water suggested in the recipe, or maybe even a little bit more, to achieve the proper consistency. The dough should not be stiff. It should be like a thick, gooey cake batter.

3. Fold in the chopped pecans. Using a 1½ tablespoon cookie scoop (size 40), drop the thick cookie batter onto the lined cookie sheet, about 1½ inches apart. The cookies really do not spread much as they bake.

Baked cookies, no frosting
4. Bake in the preheated oven for 9 to 11 minutes, begin checking on them at 9 minutes. Bake until they are slightly cracked and the tops are just firm and bounces back slightly when touched. Remove the baking sheet from the oven and allow the cookies to remain on the baking sheet for a few minutes. Remove the cookies to a wire rack to cool completely before frosting.

5. You can make your own low carb, sugar free chocolate frosting following this link (click here), or you can substitute your favorite store-bought chocolate, sugar free frosting. Store-bought, sugar-free frosting is convenient, but they are not all created equal! Please be sure to look at the list of ingredients and, if it includes maltitol, sorbitol or mannitol, put it back on the shelf! These offending sugar alcohols can cause uncomfortable digestive problems for many people. I recommend Birch Benders brand. It does not include any unfavorable sugar alcohols and I find the taste and consistency is very good. Stir to restore creaminess before spreading on the cooled cookies.

Birch Benders Keto Chocolate Frosting
Nutritional Information per cookie (no frosting): 111 calories, 4.1 g carbohydrate (2 g dietary fiber, 0.8 g sugars, 1 g sugar alcohols), 11 g total fat (2.1 g saturated fat, 0 g trans fat), 20 mg cholesterol, 75 mg sodium, 15.4 mg calcium, 67 mg potassium, 1 mg iron, 14 IU Vit A, 2.3 g protein. Net carbs (not counting frosting): 2.1 grams

Photos and recipe by Kathy Sheehan, copyright 2022
All rights reserved. Please do not duplicate without the author’s permission. 

Sunday, November 6, 2022

Sugar Free Cranberry Sauce (Jellied or Whole Berry)

Sugar Free Cranberry Sauce
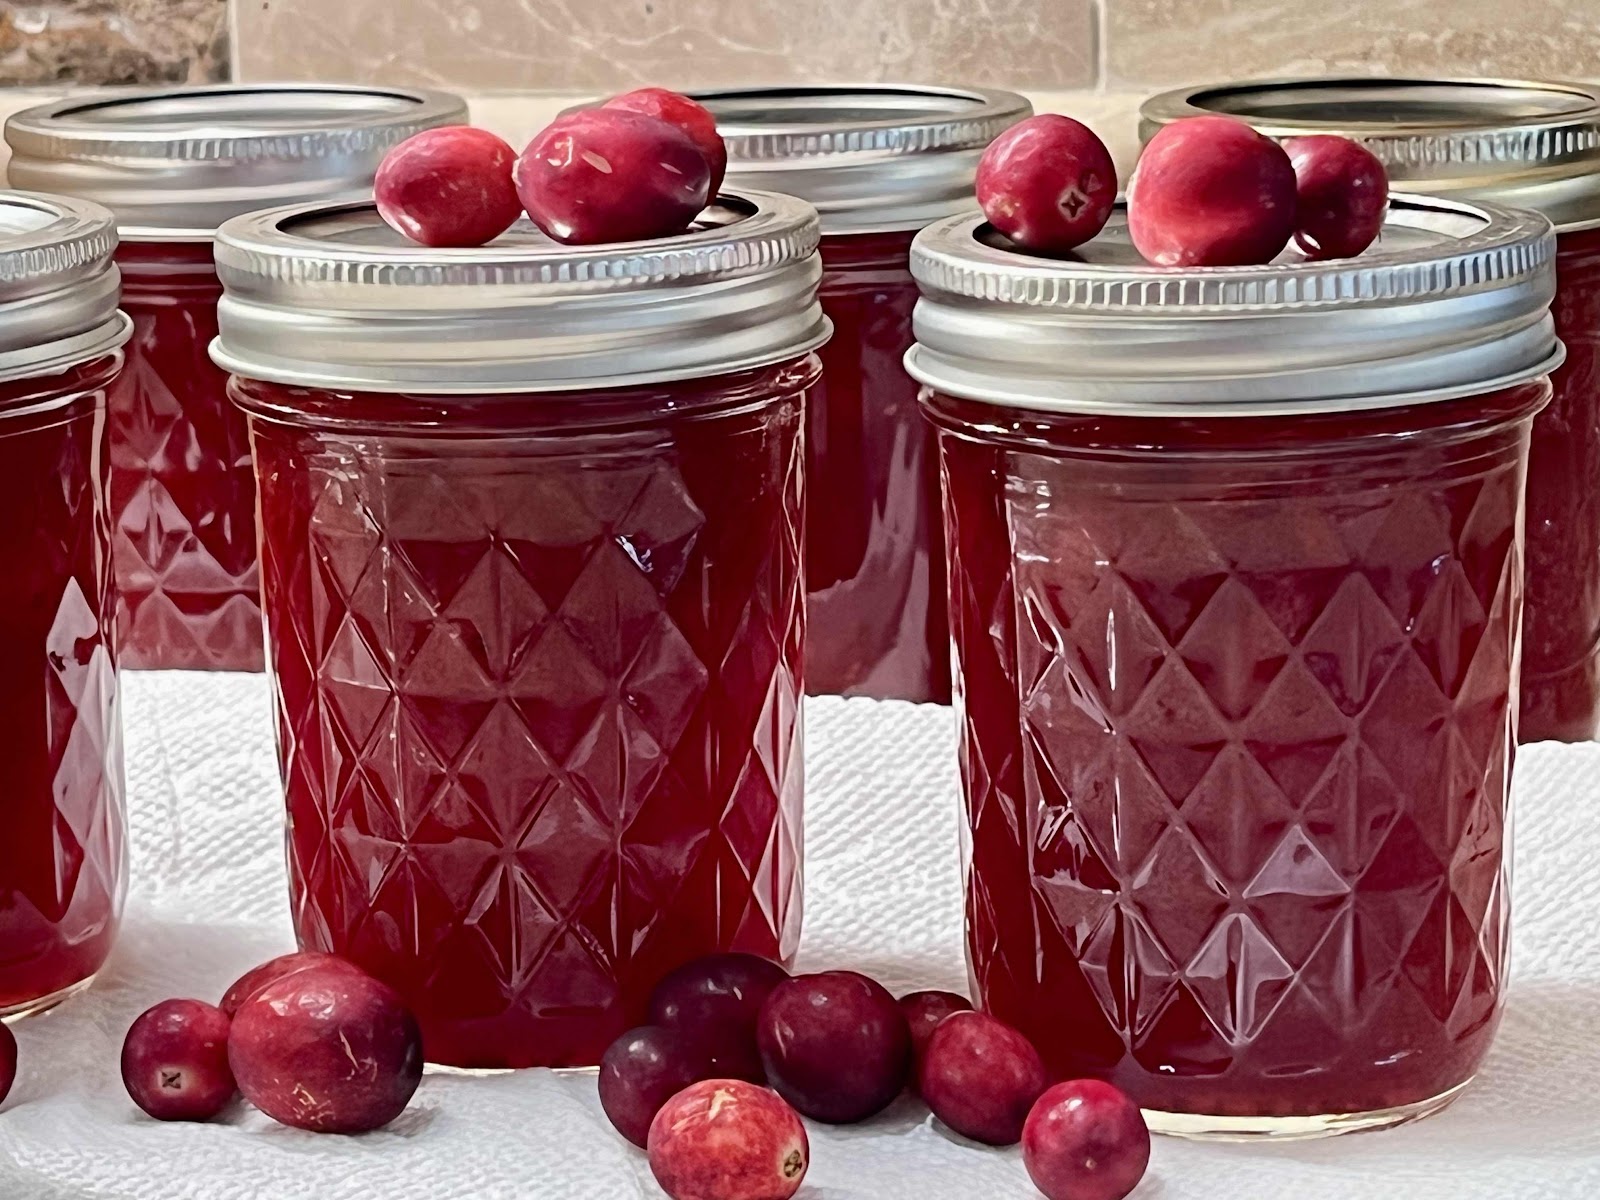
Thanksgiving is approaching! I really like the taste combination of turkey with tart cranberry sauce. But, have you looked at the nutritional information on the back of a can of cranberry sauce? One-fourth cup contains an astonishing 28 grams of carbohydrate, mostly sugar!! Even a spoonful will derail your low carb plans and send your blood sugar skyrocketing. This recipe tastes just like traditional cranberry sauce, but only has 3.6g net carbs per serving. You can make it ahead, process it in a boiling water bath to seal your jars (which makes them shelf stable for a year), or simply refrigerate or freeze. Great idea for gift-giving to your low carb or diabetic friends and family, too!

Sugar Free Cranberry Sauce (Jellied or Whole Berry)
Makes three (8 oz) jars or 12 servings

Pulpy Cranberry Juice Ingredients:
12 ounce bag of fresh cranberries (or frozen), washed
1½ cups water

Cranberry Sauce Ingredients:
2 cups pulpy cranberry juice (see Step #3)
1 teaspoon calcium water (see Step #1)
2 tablespoons bottled lemon juice
1/4 cup liquid allulose or allulose honey (if not using, increase granulated allulose by an additional 1/4 cup)
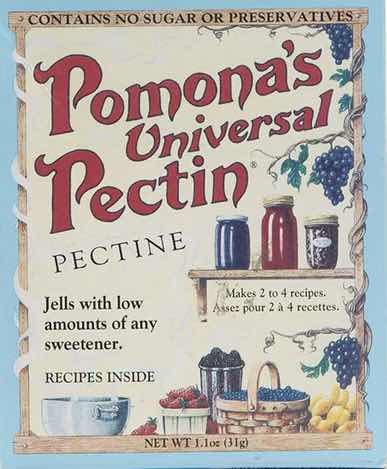
1 teaspoon Pomona’s Universal Pectin
¾ cup granulated allulose sweetener 

1. Before you begin, prepare the calcium water. To do this, combine ½ teaspoon calcium powder (in the small packet in the box of Pomona’s Universal Pectin) with ½ cup water in a small jar with a lid.  Shake well. (Extra calcium water can be stored in the refrigerator indefinitely for future use.)

Pomona’s Universal Pectin
2. Wash your canning jars, lids and bands. Placed jars in a stock pot or canner, fill with water about 2/3 full, and bring to a boil. Boil for 10 minutes to sterilize your jars. Turn off the heat, cover, and keep jars in hot canner water until ready to use. Place lids and bands in water in a small sauce pan, cover and heat to simmer. Turn off heat and keep lids in the hot water until ready to use.

3. To make the pulpy cranberry juice that you will use as a base for your sauce, bring a package of cranberries and water to a boil and simmer, covered, on low until the berries burst and soften. Put the mixture through a food mill or strainer to remove all or most of the skins to create pulpy cranberry juice. (Optional, depending how chunky you want your sauce, see notes.*)

4. Measure and place the pulpy cranberry juice from the previous step into a sauce pan. Add 1 teaspoon calcium water and 2 tablespoons bottled lemon juice; mix well.

5. Measure the granulated allulose into a bowl. Thoroughly stir in the pectin powder until no lumps remain. Set aside.

6. Bring cranberry mixture to a full boil. Add the liquid allulose (or allulose honey) and granulated pectin-allulose mixture, stirring vigorously for 1 to 2 minutes to thoroughly dissolve the pectin.

7. Stir while the sauce comes back up to a boil. Once the sauce returns to a full boil that cannot be stirred down, boil for one minute and remove it from the heat. (If needed, skim any foam and discard.)

8. Fill hot jars to 1/4” from top. Wipe rims clean. Place a lid on each jar and then screw on a rim just until finger-tight. Put the filled jars into boiling water to cover. Boil for 10 minutes (add 1 more minute for every 1000 feet above sea level). Turn off heat and allow the jars to rest in the hot water for 5 minutes. (Note: If you don’t want to process the cranberry sauce in a boiling water bath, you can put it in the refrigerator once it is cooled and it will keep for three weeks. You can also freeze the sauce instead of canning it. For freezing, fill jars to 1/2 inch from top. To prevent cracking, freeze glass jars without a lid to allow for expansion, then screw on a lid once frozen. Defrost in the refrigerator before eating.)

9. Remove jars from hot water using a jar lifter tool and place them on a kitchen towel. Let the jars cool undisturbed for 12 to 24 hours. Check seals; lids should be sucked down and not move or click when pressed. Properly sealed jars can be stored at room temperature for one year. Once opened, refrigerate and consume within three weeks.

*Notes: If you want whole berry or chunky cranberry sauce, do not run all of the cooked cranberries through the food mill or strainer.

Nutritional Information for 1/4 cup: 14 calories, 4.9 g carbohydrate (1.3 g dietary fiber, 1.2 g sugars), 0 g fat, 1 mg sodium, 2.5 mg calcium, 5 IU Vit A, 5 mg Vit C, 0.1 g protein. Net carbs per serving: 3.6 grams

Photo and recipe by Kathy Sheehan, copyright 2022
All rights reserved. Please do not duplicate without the author’s permission. 
Saturday, September 17, 2022

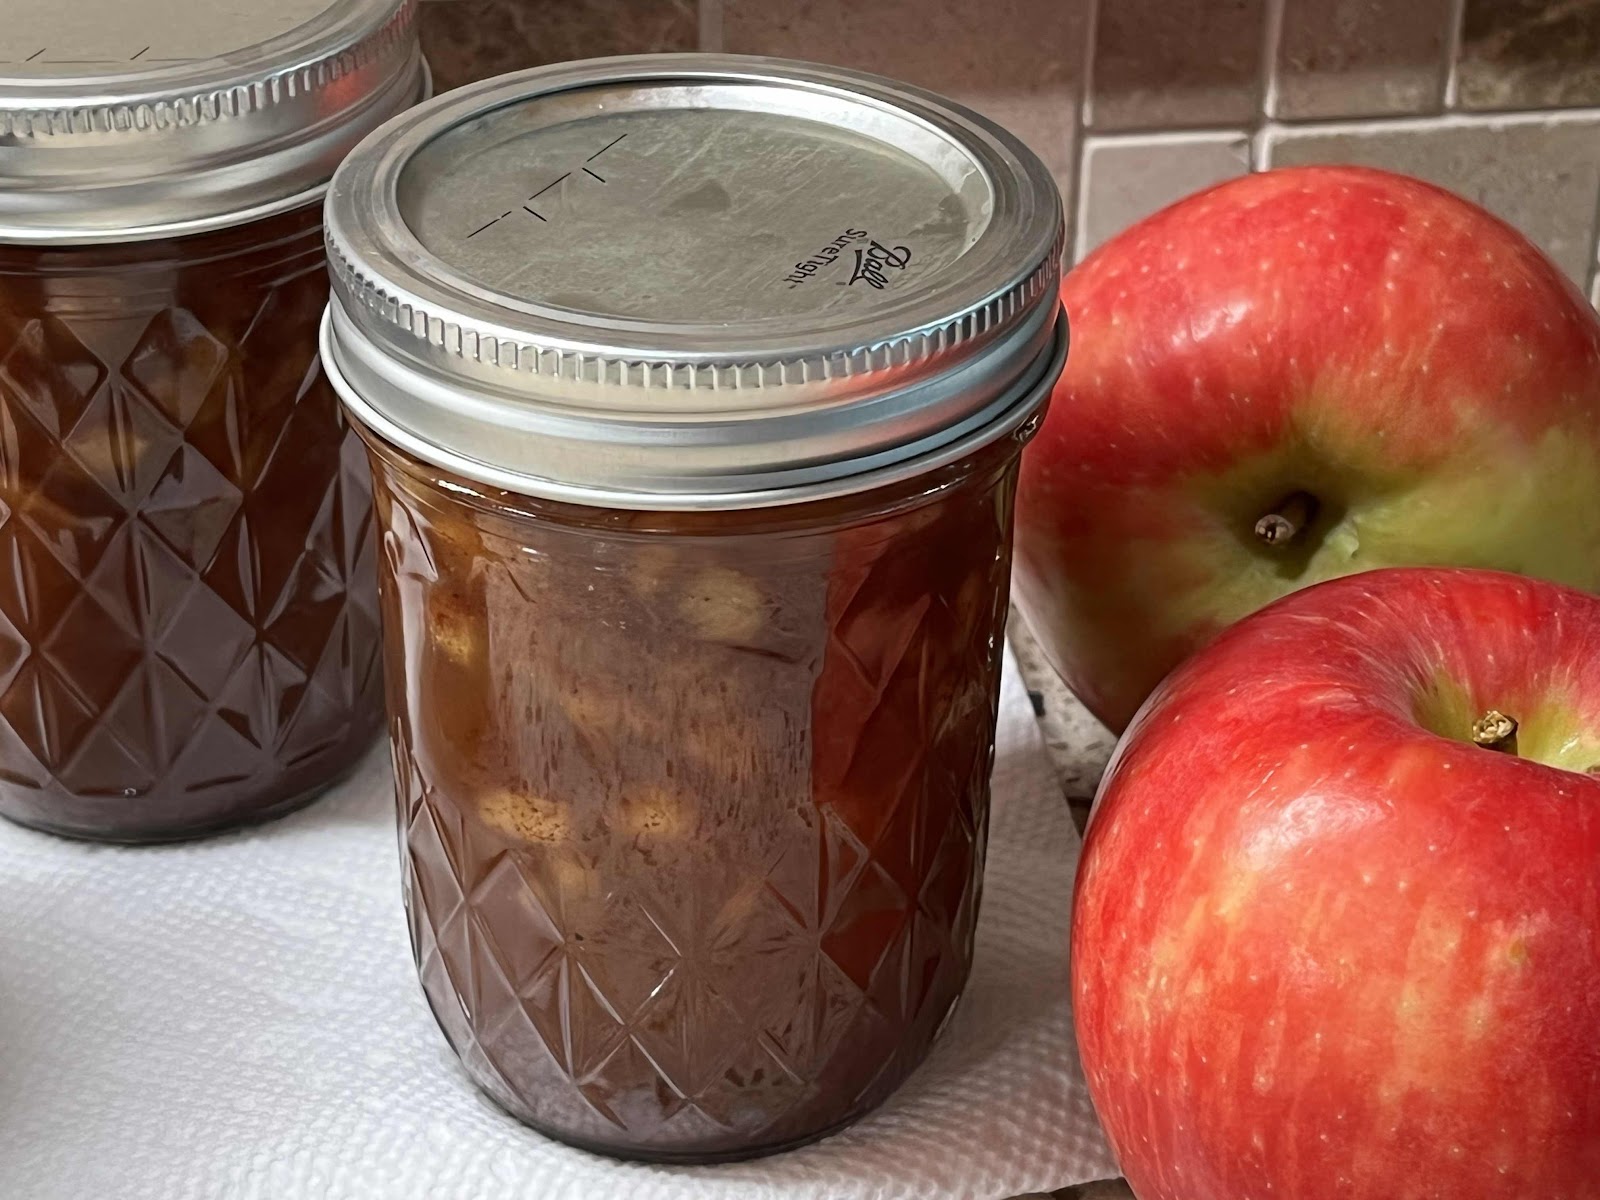
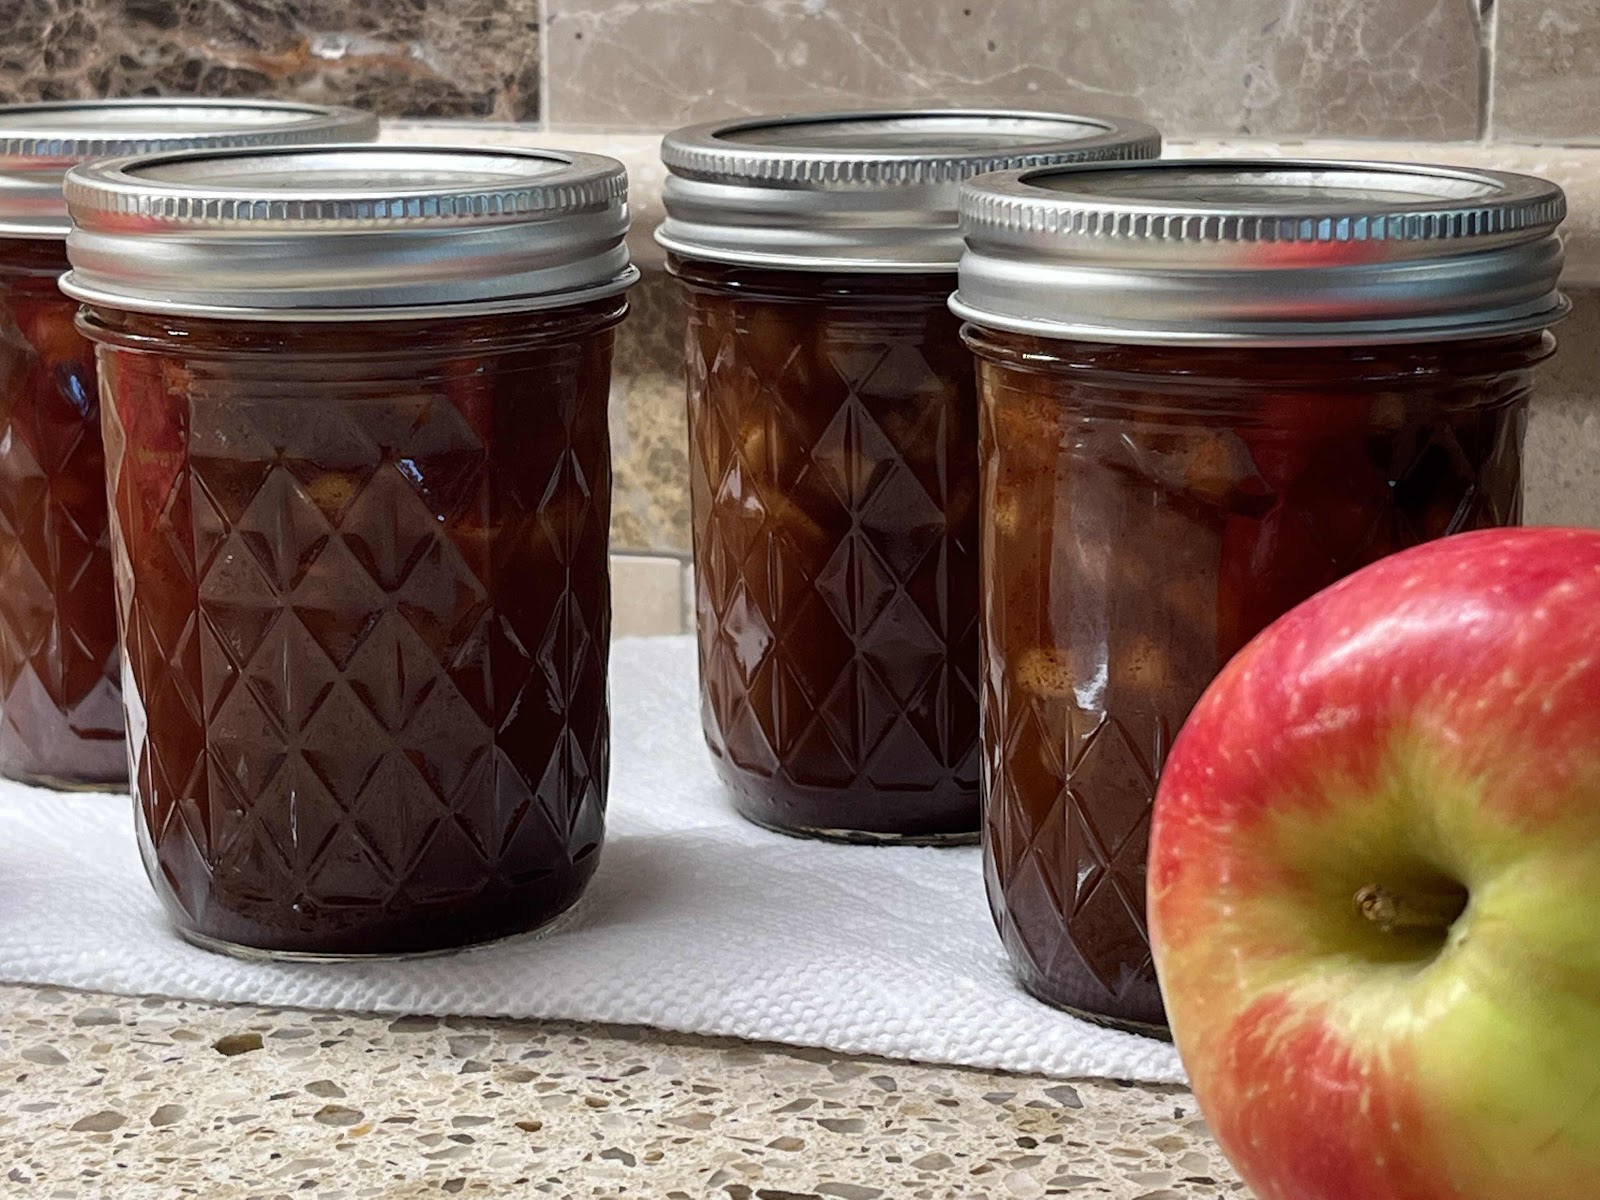
Keto Spiced Dutch Apple Jam

Keto Spiced Dutch Apple Jam
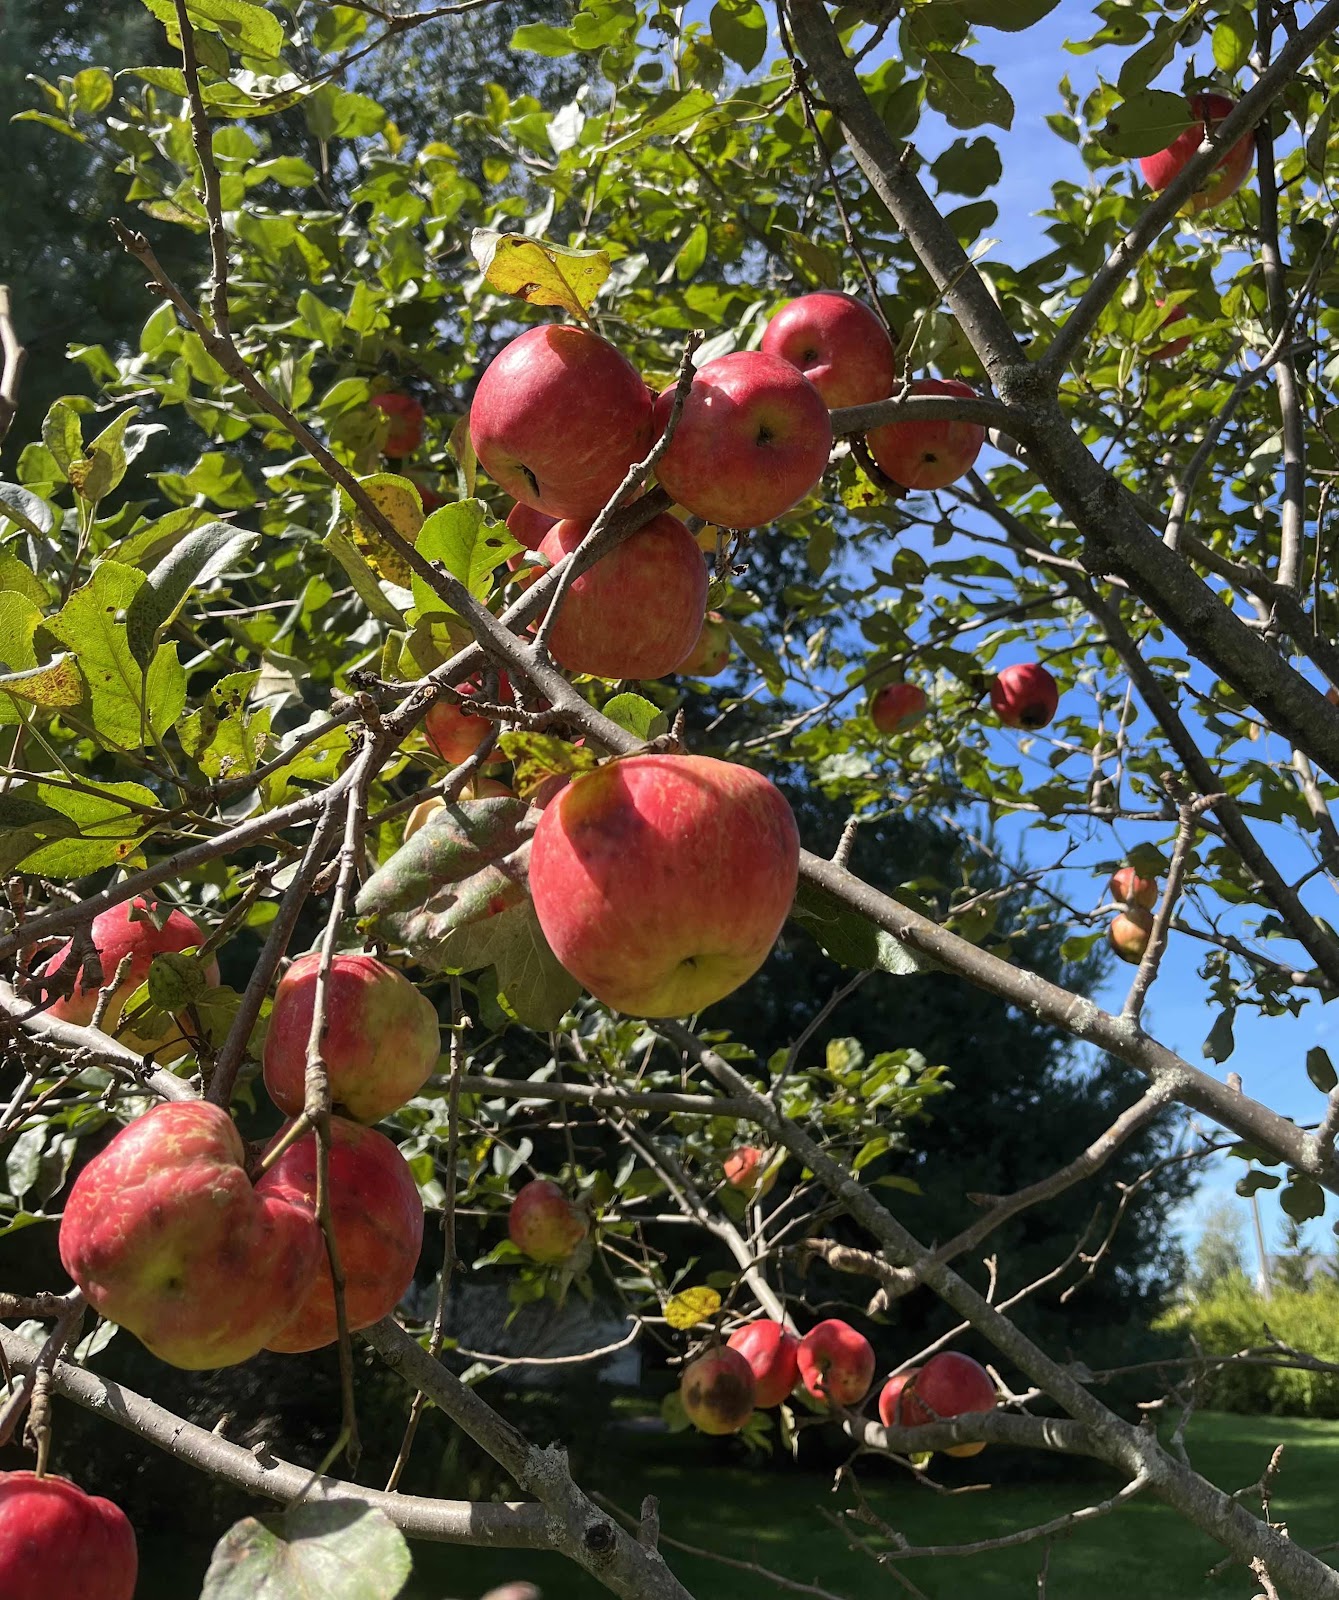
The weather is turning cooler and it’s apple picking season in Maine! Recently, I took a class at my Cooperative Extension Office where we learned to make Spiced Dutch Apple Jam. I had a wonderful time and learned a lot more about safe canning practices. But the recipe they used called for 7 cups of sugar! I came home and figured out that the amount of carbs per tablespoon was 16 grams! (That is equivalent to 4 teaspoons of sugar per tablespoon!!) With their recipe in hand, I went about making the necessary adjustments to make a batch that was sugar free. The final result is every bit as good as their recipe, but my recipe only has 2 grams of carb per tablespoon. This incredible jam tastes just like apple pie and is excellent on your low carb toast or spooned over low carb yogurt or ice cream. Also, share some with your keto friends! This makes an excellent gift for the holidays.

Keto Spiced Dutch Apple Jam
Makes four (8 oz) jars, 64 servings

4 cups apples, peeled, cored and diced small (about 5 medium apples)
1-1/4 cups allulose (or to taste)
2-1/2 teaspoons Pomona’s Universal Pectin (made especially for low sugar jams)
2 cups water
1/4 cup bottled lemon juice
3 teaspoons calcium water (see directions in Pomona’s Universal Pectin box)
1 teaspoon allspice
2 tablespoons + 2 teaspoons ground cinnamon
1 teaspoon ground nutmeg

Apple Picking in Maine
1. Prepare the boiling water canner. Put the canning rack on the bottom of a large pot, then heat the jars in simmering water until ready to use, or for at least 10 minutes to sterilize the jars. Wash the lids in warm soapy water and set aside with the bands until you are ready to use them. (If you don’t want to process your jars in a water bath, your jam can be stored in the refrigerator for several months.)

2. In a bowl, combine the allulose and pectin; set aside. Place 1-2 small plates into your freezer to get cold. (These will be used for the “cold plate” test later.)

3. Place the diced apples into a large stainless steel saucepan or non-reactive cooking pot (not aluminum). Add the lemon juice, water and calcium water to the pot with the apples. Add the allspice, cinnamon and nutmeg. Stir to combine. Bring to a rolling boil over medium to high heat stirring often. (A rolling boil is a vigorous boil that cannot be stirred down, but continues to boil even as you stir.)

4. Once the apple mixture has reached a rolling boil, gradually stir in the allulose/pectin mixture and continue to stir until the sweetener and pectin dissolves.

5. Bring the mixture back to a full rolling boil that cannot be stirred down. Set a timer and boil hard for one minute, stirring constantly. Remove from the heat and check the jam using a cold plate from your freezer to be sure it will gel properly when set. Spoon a small amount onto a cold plate and allow to sit for a few minutes. Run your finger through the mixture and if a skin has formed and the jam is starting to set up, you have reached the proper temperature.

6. Using a jar lifter, lift one jar out of the simmering water and place it on a towel or wooden cutting board. Ladle the hot jam into a hot jar using a canning funnel. Leave 1/4 inch of headspace at the top. Remove any air bubbles and wipe the top of the jar rim clean. Center a lid on the jar and apply the band, adjusting to fingertip tight. Place the filled jar into the boiling water canner, then repeat the process until all of the jars are filled.

7. Process the jars in boiling water for 10 minutes, adjusting for altitude (search online for an altitude adjustment chart). Turn off the heat and let the jars sit in the canner, uncovered, for five minutes.

8. Very carefully remove the jars with a jar lifter, lifting them straight up (do not tilt jar!) and place them on a clean towel. Don’t worry about any water on the lid, that will evaporate quickly. Let the jam cool for 12 to 24 hours. Check the lids for a seal, they should not flex when the center is pressed.

9. A properly processed and sealed jar of jam is shelf stable for 12 to 18 months. Refrigerate after opening.

Recipe makes four jars
Nutritional Information per tablespoon: 6 calories, 2.3 g carbohydrate (0.2 g dietary fiber, 1.1 g sugars), 0.1 g total fat (0 g saturated fat, 0 g trans fat), 0 mg cholesterol, 0 mg sodium, 2 mg calcium, 11 mg potassium, 1 mg Vit C, 1 IU Vit A, 0 g protein. Net carbs per tablespoon: 2.1 grams

Photos and recipe by Kathy Sheehan, copyright 2022
All rights reserved. Please do not duplicate without the author’s permission. 
Monday, September 5, 2022

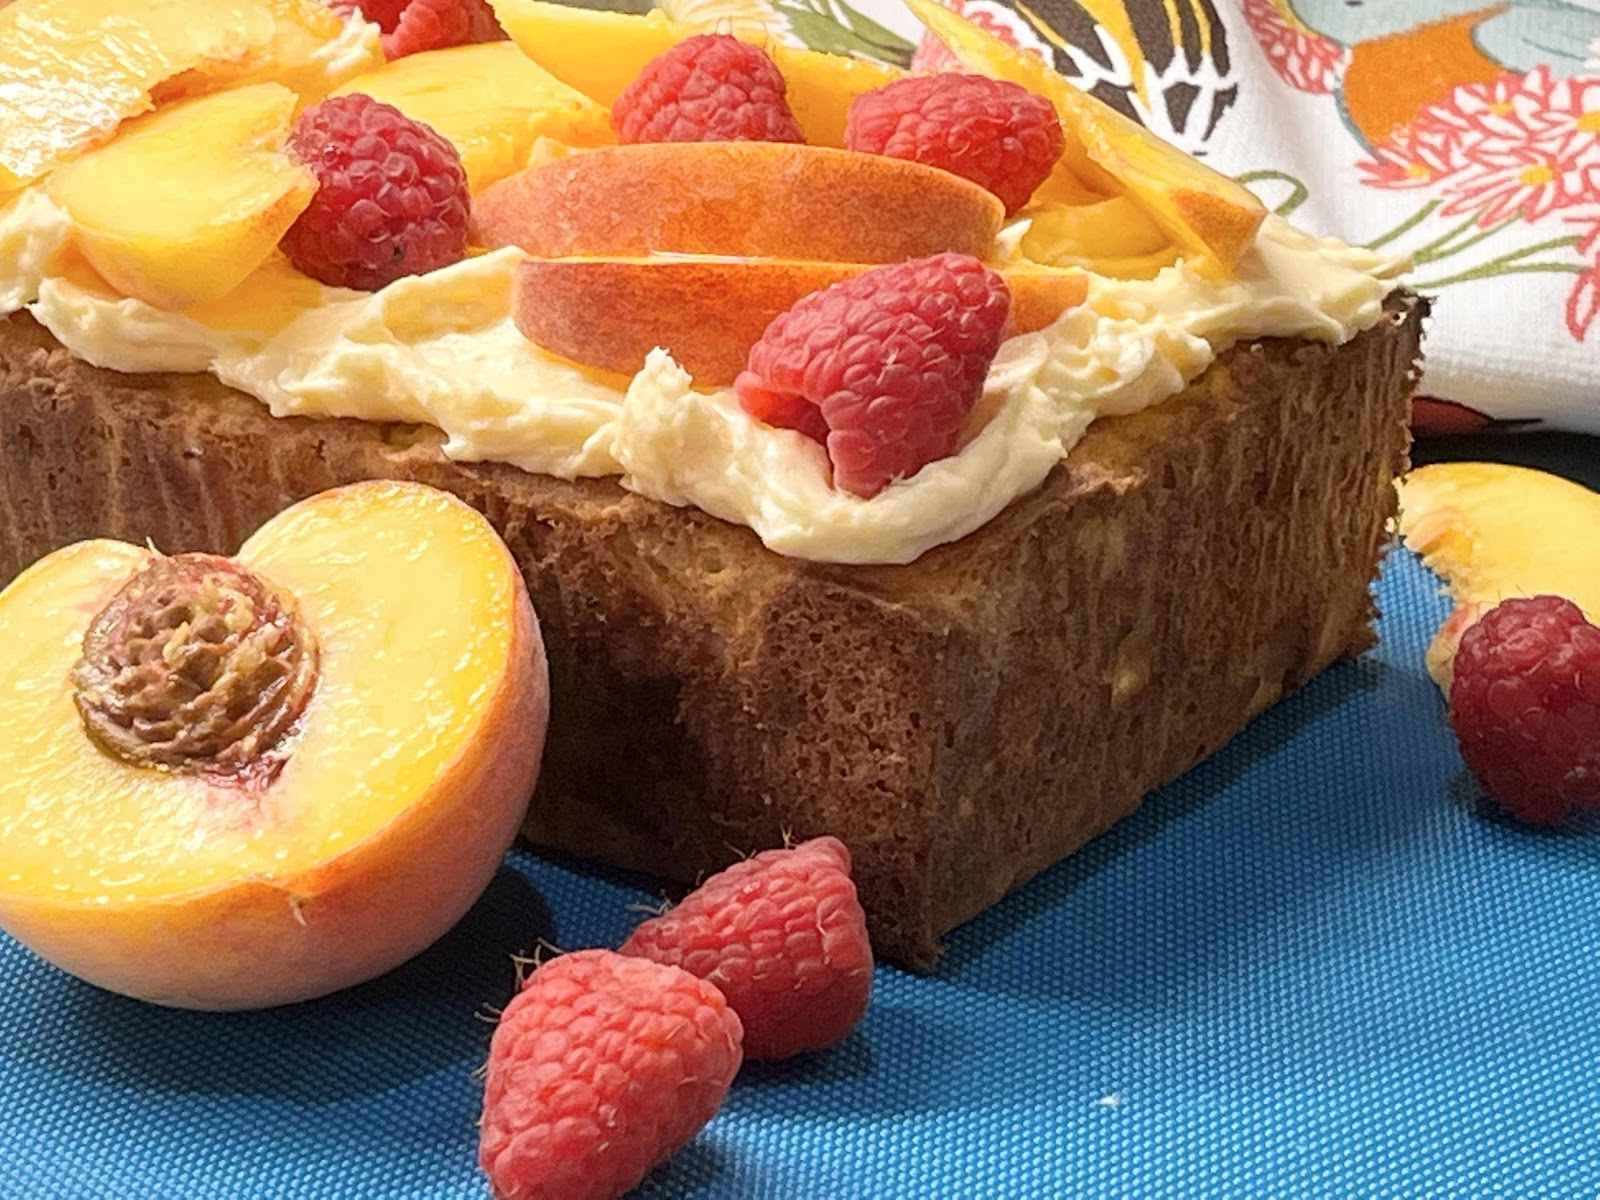
Keto Peach Melba Loaf Cake

Keto Peach Melba Loaf Cake
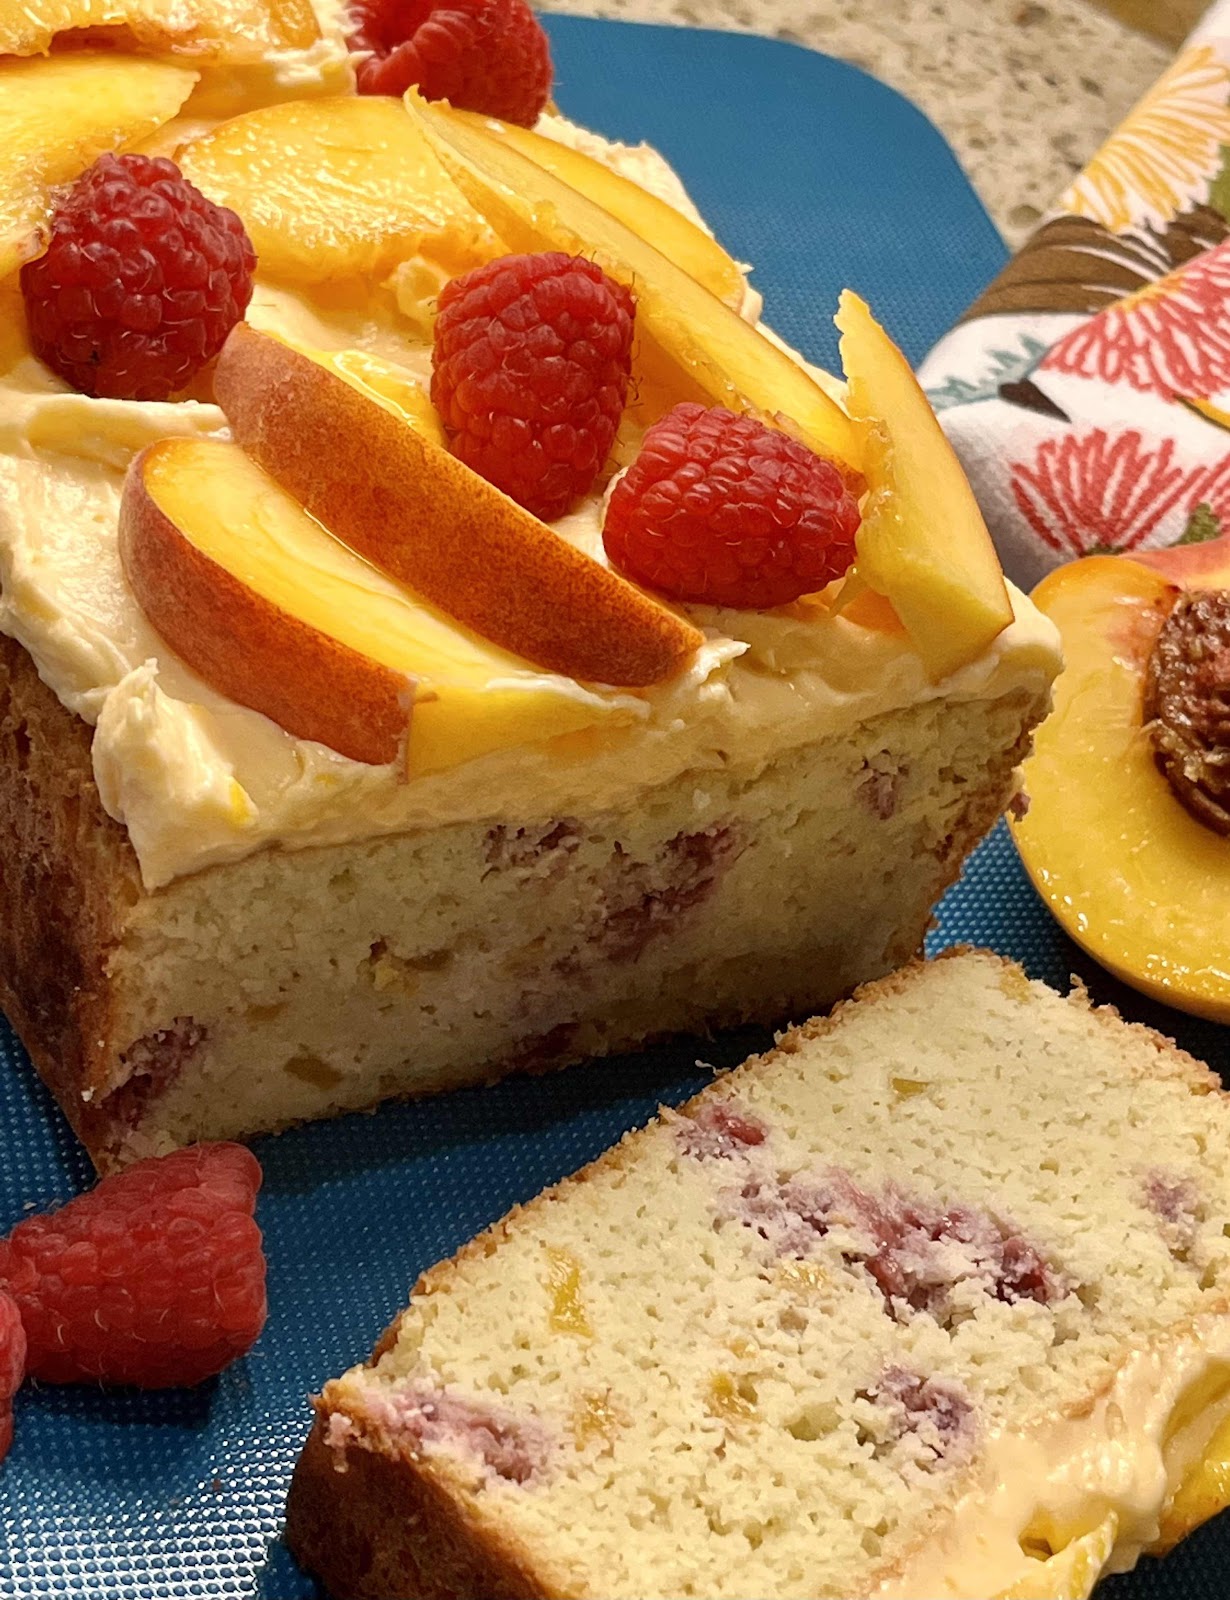
With my birthday coming up, I wanted to create a cake that highlighted my favorite seasonal fruits: peaches and raspberries! This cake is so easy to make and decorate. No need to fuss with layers. It is baked in a loaf pan, topped with a delicious peach buttercream frosting and then decorated with fresh fruit. What a beautiful and delicious way to end the summer!

Keto Peach Melba Loaf Cake
Makes 12 servings

Cake Ingredients:
3/4 cup + 2 tablespoons coconut flour (96 grams)
3/4 cup erythritol-based sweetener (I used LaKanto Monkfruit sweetener)
1/3 cup unflavored whey protein powder 
1 tablespoon baking powder
1/4 teaspoon salt
4 large eggs, room temperature 
4 large egg whites, room temperature 
1/2 cup unsalted butter, melted and cooled a bit
1/4 cup unsweetened coconut milk (or low carb milk of choice)
1 teaspoon vanilla extract
1 teaspoon almond extract
3/4 cup fresh peaches, skins removed and diced
1/3 cup fresh raspberries, cut into small pieces

Peach Buttercream Frosting:
4 tablespoons unsalted butter, room temperature 
1/2 cup erythritol-based confectioners sugar (either LaKanto Powdered or Swerve Confectioners)
4 ounces full-fat cream cheese, softened
2 tablespoons sugar free peach preserves (or apricot, if you can’t find peach)
1-2 drops yellow or orange food coloring (optional)

Garnish:
Raspberries and peach slices to decorate

Directions:

1. Preheat the oven to 325°F. Line the bottom and sides of a large loaf pan with parchment paper and grease the corners or any place not lined with the parchment paper sling.

2. In a medium bowl, whisk or sift together the coconut flour, sweetener, whey protein powder, baking powder and salt. Set aside.

3. In a large bowl with an electric mixer, beat the eggs, egg whites and extracts until light and fluffy. Add the melted butter, coconut milk and beat on medium-low until just incorporated. All at once, add the dry ingredients and beat until well blended. Fold in the chopped peaches and raspberries. The batter will thicken up as the coconut flour absorbs much of the liquid, which is normal.

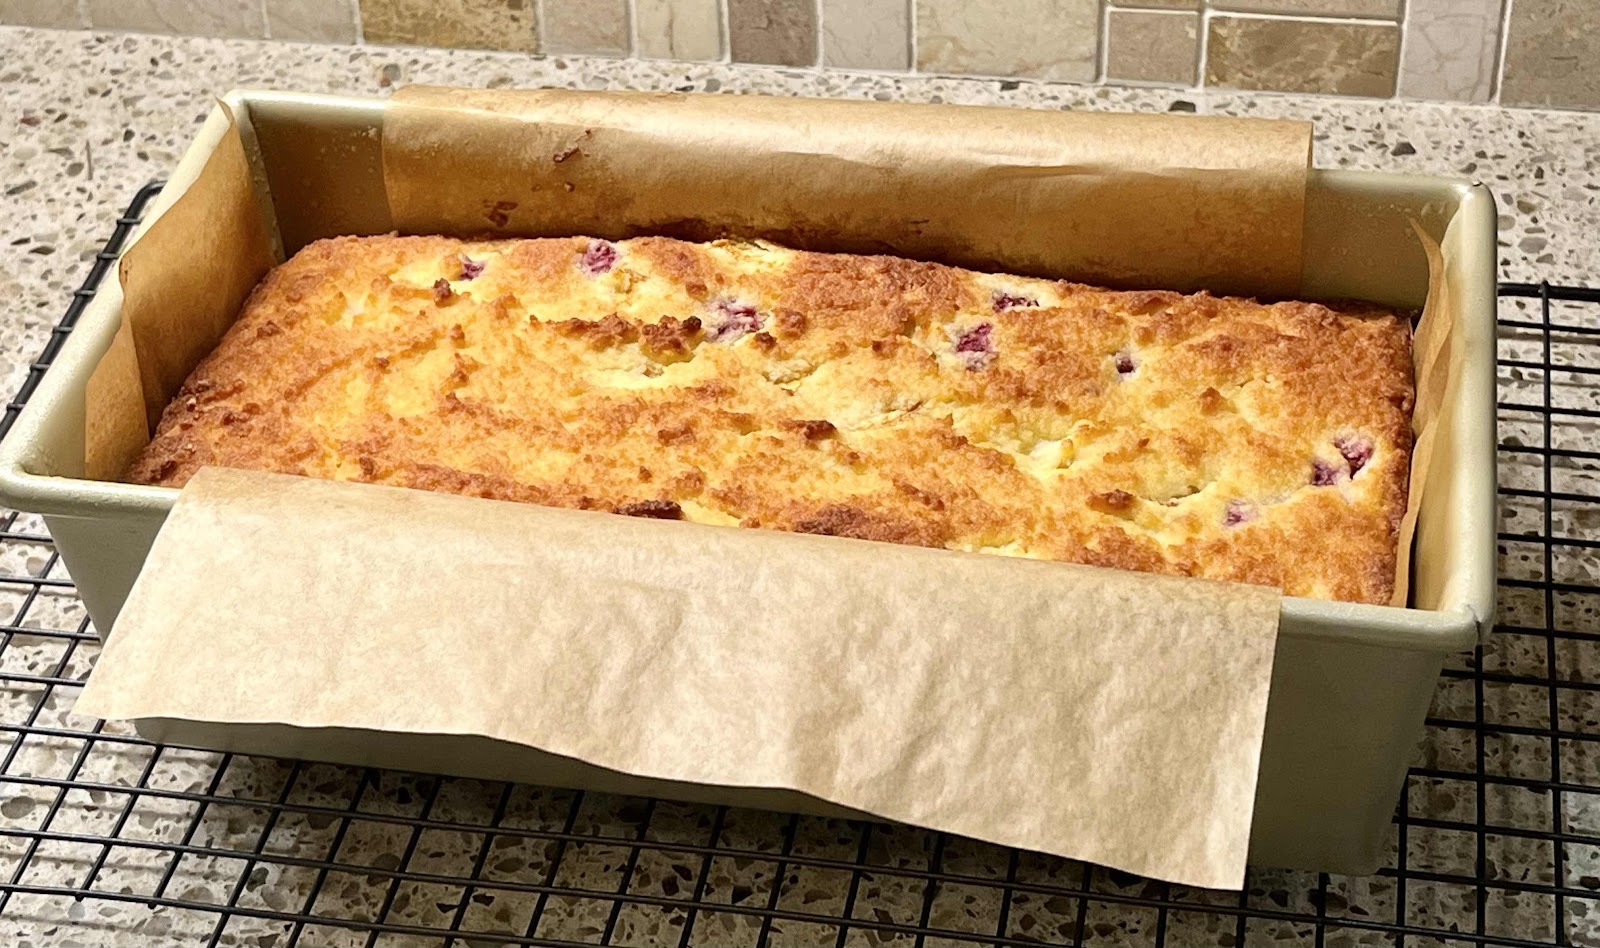
4. Spoon the batter into the prepared loaf pan and spread to the edges and level the top with the back of a spoon or small offset spatula. Bake for 50 to 55 minutes in the preheated oven until top is golden brown and firm to the touch. It’s always a good idea to test the internal temperature of keto cakes and breads to better determine doneness. It should read between 206 to 210°F.

Loaf Cake in pan with parchment paper sling
5. Remove from the oven and let cool for 25 minutes in the pan. If needed, run a sharp knife around the insides of the pan and lift the loaf out using the parchment paper sling. Remove and discard parchment paper. Cool cake completely before frosting.

6. For the icing, put the softened butter in a bowl with the confectioners sugar and beat with an electric mixer until very soft and smooth. Add the softened cream cheese and beat again until thick and pale. Add the peach or apricot preserves for a fruity flavor, if you like, and add a drop or two of yellow or orange food coloring if you want to turn it a pretty peachy color. This frosting can be kept at room temperature for about an hour, or you may chill the icing until it has firmed up a bit or for longer storage. Return to room temperature and stir before spreading over the top of the cake. Decorate the cake with extra fresh raspberries and peach slices. (It’s best to do this just before serving because the peach slices can discolor if added too far in advance.)

Decorate top with fresh fruit
Tips: Ripe peaches work best in this recipe. If your fruit is under ripe, try keeping it in a brown paper bag with a banana to speed up the ripening process. The unfrosted cake keeps for a couple of days in an airtight container. Use a serrated bread knife to slice.

Nutritional Information per serving (1/12 of cake), with frosting, but not counting fruit garnish: 200 calories, 10g carbohydrates (3.9 g dietary fiber, 3.9 g sugars, 3 g sugar alcohols), 17.3 g total fat (10.8 g saturated fat, 0 g trans fat), 104 mg cholesterol, 231 mg sodium, 123 mg calcium, 73 mg potassium, 1 mg iron, 178 IU Vit A, 1 mg Vit C, 7 g protein. Net carbs per serving: 3.1 grams

Photos and recipe by Kathy Sheehan, copyright 2022
All rights reserved. Please do not duplicate without the author’s permission.
Monday, August 8, 2022

Creamed Kale and Eggs with Pesto

Creamed Kale and Eggs with Pesto
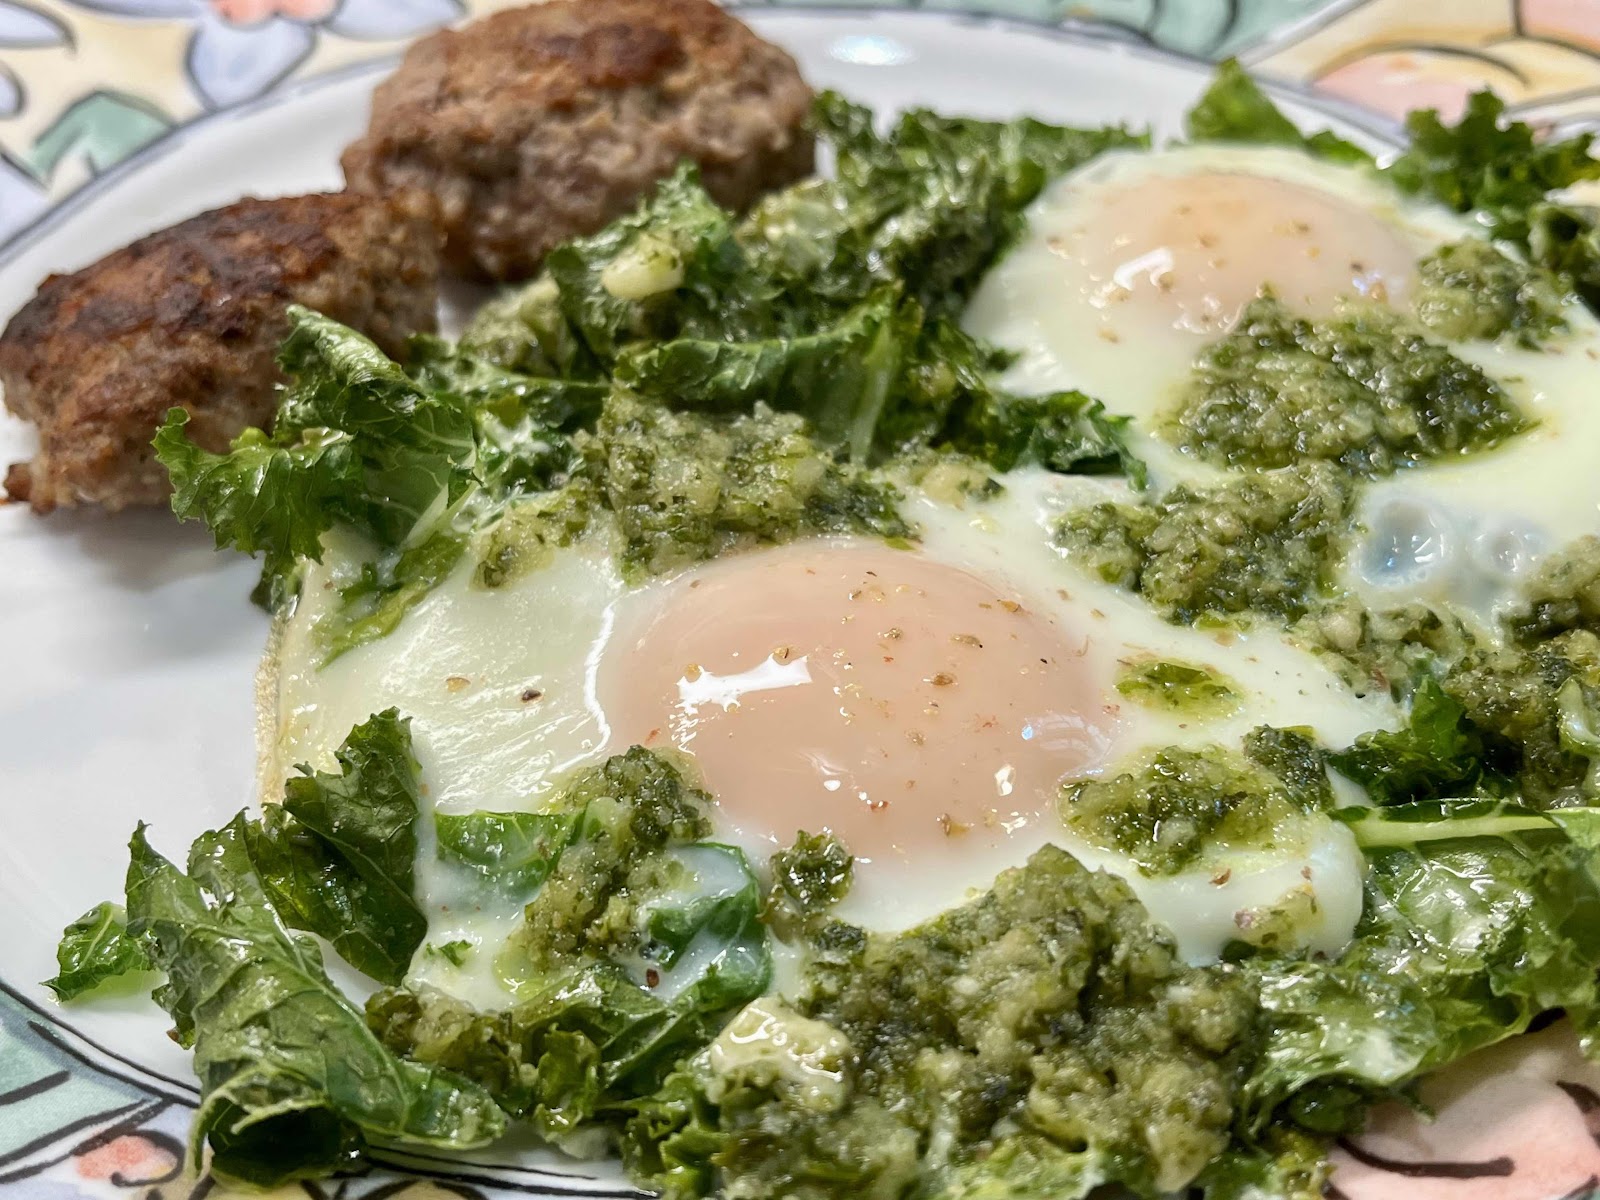
In the summertime, I have a small, backyard garden and kale is one of the most robust and easiest vegetables to grow! This baked egg dish is one of my very favorites and shows up on my breakfast table often while my kale is in season. As the kale bakes, it becomes crispy around the edges, similar to kale chips! The combination of flavors and textures makes this a deeply satisfying way to start the day.

Creamed Kale and Eggs with Pesto
Makes 1 serving

2 teaspoons olive or avocado oil
A large handful of fresh kale, washed and torn into pieces (you can substitute spinach or any leafy green)
2-3 tablespoons of heavy cream (or full fat coconut milk for dairy free)
Salt and pepper
2 eggs
2 tablespoons pesto (homemade or store bought)

1. Preheat the oven to 350°F.

2. In an 8 inch, oven proof skillet over medium heat, heat the oil and add the kale. As the kale wilts, toss it in the oil and season with salt and pepper.

3. Add heavy cream and stir to coat the kale. Create two wells and crack one egg into each well. Season the eggs with salt and pepper. Drizzle the pesto onto the top of the eggs and kale mixture.

4. Remove the skillet from the heat and bake in a 350° oven for seven minutes or until the eggs are done to your liking.

Nutritional Information per serving: 503 calories, 5.8 g carbohydrate (1.4 g dietary fiber, 0.6 g sugars), 48 g total fat (14.3 g saturated fat, 0 g trans fat), 414 mg cholesterol, 595 mg sodium, 156.5 mg calcium, 347 mg potassium, 3 mg iron, 42 mg Vit C, 1928 IU Vit A, 15.5 g protein. Net carbs per serving: 4.4 grams

Photo and recipe by Kathy Sheehan, copyright 2022
All rights reserved. Please do not duplicate without the author’s permission.